Embed Size (px)
Citation preview

January 2019
Thunderbird Owners of New York Web-page
http://clubs.hemmings.com/tony/index.html
Member, Classic Thunderbird Club International – Chap. 49
1955 1956 1957
Page 1

Newsletter Message
OFFICERS:
PresidentStan Matusewicz – 631-231-
3156c [email protected]
Vice PresidentDennis Benfante– 631-447-
3847 [email protected]
SecretaryJohn Cattonar - 631-269-
TreasurerPete Cochrane - 631-363-
CTCI Advisory Council Rep.Bob Ceraso - [email protected]
Tech Advisor: 1955’sBob Ceraso - [email protected]
Tech Advisor: 1956’sStan Matusewicz -631-231-
Tech Advisor: 1957’s Lou Realmuto - 631-226-
Computer Advisor
Next Thunderbird Meeting The Annual Holiday Party
Sunday January 6th 2019 at 3:00 PM Madison Steak House
70 Motor Pkwy, Hauppauge, New York
Page 2

Sal Perrotta
The last few weeks have been a busy time for many of our club member . I am sure you are all busy making your holiday plans and getting ready for the celebration.
Looking back to November we celebrated Thanksgiving and a wonderful party at Dennis and Mary's home and the Patchogue Holiday Parade.
On the club front you are all aware that the Patchogue Parade was delayed a week due to weather however, we did get together for a wonderful party at the home of Dennis and Mary Benfante. The party was well attended with about 30 members from our club on hand to enjoy a wonderful array of food, drinks and great company. I could not think of a better way to kick off the holiday season.
Dennis & Mary on behalf of our club please know how much we enjoyed being at your home and appreciated the warm welcome you both extended to all of us.
The planning for the club Holiday party January 6th at Madison’s is moving forward. The attendance started out a little slow however I understand that the goal to have 50 people attend has been met and the party will go forward as planned. Please be sure to send the checks to Pete so he can take care of the bill.
I will be in Florida before the party happens so please send lot of pictures for our newsletter.
I have been told that Pete has not received 2019 dues from some of our members. Please take care of that as soon as possible. The club needs your support to fund our activities.
In the last newsletter I thanked our club leadership for their commitment to TONY. We should all be grateful for their dedication to us and the activities we shared.
2019 is another year and more to the point an opportunity for all of us to participate in new events and share in the enjoyment of wonderful friendships. If you have not lead an event or would like to team up with other members to lead an outing for the club your participation would be greatly appreciated. Please suggest a local event and help bring us together for another day in the sun.
” Wishing you a holiday filled with peace & love… and a New Year rich with blessings.”Respectfully
Sal
Page 3

SECRETARIES REPORT
Meeting Recap November 2018
JOHN CATTONAR, Thunderbird Owners of New York Secretary
THUNDERBIRD OWNERS OF NEW YORK—December 2018 MEETING NOTES
Even though it was a cold December night, our monthly meeting still had 26 people turn out. The meeting began at 7:20 with a moment of silence in respect for the passing of former President George Bush. This of course was followed by our Pledge of Allegiance.
Pete Cochrane gave the treasurer's report, $2,291.24 in the "Bank" but that also included deposits for our upcoming Christmas Party in January 2019. He also stated that so far, we only have 35 people signed up. The club needs to pay for 50 people as a minimum, since Madison’s is opening up on a Sunday just for our club.
HEY! IF YOU'RE READING THIS NEWSLETTER YOU SHOULD BE SIGNING UP FOR THIS GET TOGETHER.
IT'S ONCE A YEAR THAT WE ASK YOU TO SPLURGE AND MEET YOUR FELLOW MEMBERS. WE'RE NOT GETTING ANY YOUNGER.
I brought up the fact that Sal Perrotta is doing a fine job with the newsletter. Never thought we'd have someone that could replace Arlene Swenson, but we do now.
Dennis Benfante spoke about the Patchogue Parade that was held on a Friday (11/30) which was the rain date for the parade which is normally held annually on the Saturday after Thanksgiving. Dennis drove his beautiful 1957 Red Thunderbird as he has done in the past and had the King and Queen seated on the rear deck of his car. The bad news was the make-up date was a bit rainy too but Dennis hung in there and to the delight of the on lookers had hosted what he described as two of the greatest kids from the Patchogue community.
It can be said without question that most of 2018, "The grey year", but that did not deter Dennis and Mary from hosting a wonderful party. All the members at the meeting thanked Dennis and his wife Mary for having the club at their home Saturday (11/24). There were close to 30 members there, the food and the company was wonderful.
Next up we discussed the annual cruise to the Veterans Home in Yaphank on Sunday December 16th
Page 4

In the past our club has brought clothing, linens, toiletries etc, for the Veterans staying at the Shelter.
As you know it is a old converted motel and certainly not optional for the residents. The level of support for so many of our veterans simply fails to meet the needs of these brave and patriotic people. As we all know politics and special interests get funded with our tax dollars in ways that do not align with what so many of us deem as a priority.
Our last topic of discussion was about the car auctions and how the prices seem to be all over the place . It seems prices for the 1970’s muscle cars have leveled off but there are many exceptions. I guess if there are people bidding on a car they ready want the bidding drives the pricing above market value. I guess that is the nature of the auction environment.
The meeting wrapped up at 7:50 with our 50/50 raffle which was won by Mark Grodinsky, $46.00
As everyone in our club knows the 2018 All Ford Car Show held last July was a tremendous success.
The number of cars and the unbelievable attendance set a new standard for car show excellence for the participating car clubs.
We have publicly thanked our primary sponsor Steve Siben of the Siben and Siben Law offices. The event could not have taken place without the funding Steve provided and we are all so grateful to him.
2019 is fast approaching it is time to move the discussion forward and think about the next show and share some wonderful news. Steve has committed to fund the 2019 show.
Steve, on behalf of our club the Thunderbird Owners of New York we want to thank you for your generous sponsorship of the annual All Ford Car Show.
Our 2018 show raised needed money for an important organization “Building Homes for Heroes”. Our club has embraced this organization based on the commitment our service men and woman have made to serve our country.
We were able to contribute to Building Home for Heroes organization because of the generous support of so many in our community.
We are looking forward to another great show in 2019.
Respectfully,
Your friends at TONY
Page 5

From: Sal Perrotta (Gils Garage, CTCI Authenticity Chairman)
Disc Brake ConversionArticle and photos submitted by John Sailors
Converting to disc brakes on your Thunderbird will provide you with significantly improved braking, and is not a hard conversion to make. The photos included, and description provided, are related to the disc conversion kit available from Thunderbirds One in Gastonia, NC.
On all of the installations I have performed, I have removed the hydraulic brake light switch and installed a mechanical switch from CASCO. On the conversion shown here, the brass block for the brake light switch has been completely removed to clean up the installation, and reduce the number of joints. All conversions have included switching to DOT5 silicone brake fluid.
A dual master cylinder is installed to separate the front brakes from the rear. The original push rod should be replaced with an adjustable push rod which can be adjusted to take up slack between the push rod end and the master cylinder piston. The new push rod is installed lower on the brake pedal so it will increase the master cylinder piston travel. The rod has a swivel (Heim) joint on the end that attaches to the brake pedal. The adjustable rod is available from several of the Thunderbird parts dealers.
Disc brake calipers are designed to operate at higher hydraulic line pressure than original drum brakes, as a result it is very beneficial to have a power brake booster. These steps are written presuming you have a power booster on your car. If not, the brake fluid lines would be slightly different. A booster is highly recommended. Even with a booster these brakes will not give you the feel of the disc brakes on your new vehicle, it still takes a bit of pedal pressure. The biggest advantage is the straight, true stopping, and the resistance to fade.
It is recommended to leave all hydraulic fittings loose until everything is in place and all clearances are checked.
New rear wheel cylinders are provided with the kit. The different diameter in them eliminates the need for a proportioning valve.
Page 6

Please read these steps completely prior to beginning your work.
1. Securely place the car on jack stands.
2. Remove the front and rear wheels.
3. Remove the master cylinder and the brake fluid line to the brass block.
4. Remove the front brake drums, brakes, and backing plates.
5. Remove the brake flex hoses from the frame to the wheel cylinders.
6. Flush the front brake cross over line with an aerosol brake cleaner.
7. Thoroughly clean the spindle and all related parts.
8. Temporarily install the new backing plate provided using the original bolts.
9. Dry fit the two caliper mounting bolts and spacers into the plate.
Make sure that both bolts and spacers (one with a side ground flat) clear the edge of the spindle and will thread into the new backing plate.
Grind the rear edge of the spindle slightly to make room for the rear mounting bolt and spacer (with flat side) if needed. The picture shows a shiny area where this grinding was done.
Install the new backing plate using the original bolts, tighten the bolts to proper torque, cotter pin the lower ones in place.
Page 7

10. Install the seal spacer on the spindle, beveled side in, shown in the picture.)
Press spacer all the way on the spindle using a brass drift or similar tool (a little grease makes it go on easier).
11. Properly grease the bearings and install in the rotor along with the grease seal.
12. Install the rotor on the spindle; properly adjust the spindle nut.
13. Install the caliper on the backing plate.
Page 8

14. Install the caliper brake fluid line cross over.
15. Bench bleed the new master cylinder per standard procedures with DOT 5 fluid.
16. Install the new master cylinder using two of the original four mounting bolts.
See step 27 below before mounting master cylinder.
17. Using the new flex steel lines install the longest of the lines from the rear of the master cylinder to the inlet (closest to the diaphragm) of the brake booster.
18. Install a second flex steel line from the output of the booster to the junction block on the frame above the left front wheel. Closer view in lower picture.
Page 9

19. Install the shortest flex lines from the frame blocks to the calipers.
20. Remove rear brake drums and wheel cylinders.
21. Flush the brake line from the brass block on the frame to the rear of the vehicle.
Place a rubber hose on one side in rear to a jar, have an assistant plug the other side while you flush with an aerosol brake cleaner.
Flush both sides.
22. Install the new rear wheel cylinders and attach the brake fluid line to them.
23. Install new rear shoes and drums if needed (not part of kit).
Page 10

24. Install last flex steel tubing from front of master cylinder to junction block on frame.
25. Use brass plugs to plug holes in block where front tubing used to attach and where the brake light switch mounted.
For a cleaner installation remove the block and obtain the proper brass fitting to attach the flex line directly to the line that goes to the rear of the vehicle.
Fabricate a mounting clip and attach to frame using the original bolt from the brass block.
26. Most of the flex line installation is shown in picture.
Page 11

27. Follow the instructions provided with the new adjustable push rod (not part of disc brake kit).
It will be necessary to drill a hole in the pedal arm for this installation. The dash was out of this car making it easy.
Install the provided plug into the master cylinder. Install the rod.
28. Following instructions provided install the mechanical brake light switch on the brake pedal (same pictures as step 27) (not part of disc kit).
29. Verify that all hydraulic lines are free from moving parts that may rub them (A-Arms, etc).
30. Tighten all hydraulic fittings.
31. Bleed entire brake system.
32. Install all four wheels.
33. Verify mechanical brake light switch is working by having an assistant check brake lights.
34. Lower car to ground and road test.
Note. If the conversion is not made by a certified brake technician it is highly recommended that a brake inspection be performed by a certified brake inspection station.
Page 12

From: Sal Perrotta
How to Remove a Car Battery
An auto battery helps power car electrical systems. To remove a car battery, you will need work gloves, safety goggles, and basic hand tools.
Your car battery is a crucial part of your vehicle's operation, despite the fact that it is not actually used once your car is running and moving down the road. It kick starts all of your car's processes into motion when you turn the key, and also powers electrical components when your vehicle is off and parked. For the most part, it isn't necessary to give your car battery much thought, but there are times when you must remove it. Fortunately, this is usually a simple task that can be done on your own with basic tools you likely have on hand.
There are two primary reasons you may need to remove your car battery: to replace it, or have it checked for efficacy. In either case, the basic process is the same. Although batteries have assorted degrees of power output, the only thing that can vary in the removal steps relates to the type of terminals a particular battery possesses.
With five chief battery terminal types, it can be confusing about which tools to use, although the actual removal process is essentially the same for all batteries. These types are SAE post, GM side, combination, L, and stud terminals. American-made cars typically use either SAE post, GM side, or a combination-style terminal, while European cars favor the L variety, and electric car models often have stud terminals. To
Page 13

remove most of these types of batteries, you will use two pairs of pliers or two pairs of adjustable wrenches. In removing GM side varieties, however, you will require a socket and socket wrench, or ratchet.
Part 1 of 3: Preparation and safety tips
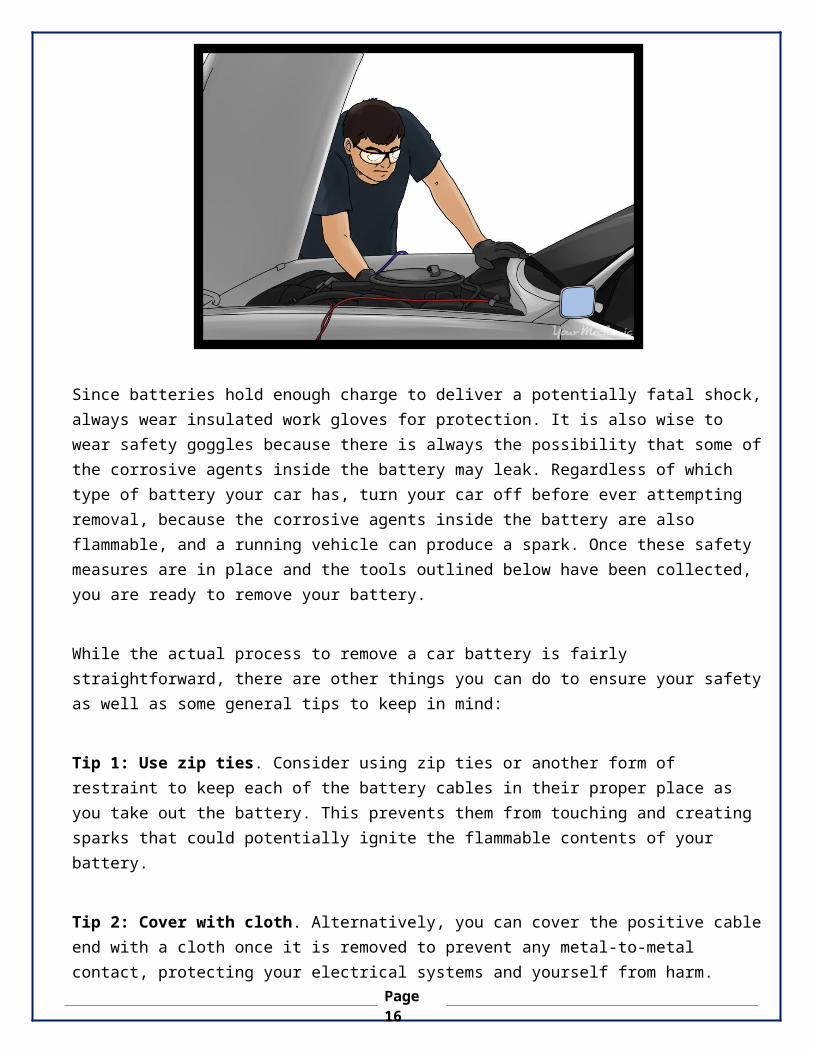
Since batteries hold enough charge to deliver a potentially fatal shock, always wear insulated work gloves for protection. It is also wise to wear safety goggles because there is always the possibility that some of the corrosive agents inside the battery may leak. Regardless of which type of battery your car has, turn your car off before ever attempting removal, because the corrosive agents inside the battery are also flammable, and a running vehicle can produce a spark. Once these safety measures are in place and the tools outlined below have been collected, you are ready to remove your battery.
While the actual process to remove a car battery is fairly straightforward, there are other things you can do to ensure your safety as well as some general tips to keep in mind:
Tip 1: Use zip ties. Consider using zip ties or another form of restraint to keep each of the battery cables in their proper place as you take out the battery. This prevents them from touching and creating sparks that could potentially ignite the flammable contents of your battery.
Tip 2: Cover with cloth. Alternatively, you can cover the positive cable end with a cloth once it is removed to prevent any metal-to-metal contact, protecting your electrical systems and yourself from harm.
Tip 3: Remove jewelry. Remove any jewelry before attempting battery removal. Metal jewelry like necklaces, watches, or bracelets could accidentally come in contact with the battery and deliver a dangerous shock.
Page 14

Tip 4: Work in well ventilated area. Work in an outdoor environment or a well-ventilated garage to prevent exposure to harmful gases.
Tip 5: If terminal is fused, use special tool. In the case that a cable seems to be fused with the terminal, you may have to use a special battery cable removal tool, which is available at most auto parts stores.
Part 2 of 3: Standard post removal (all types, excluding GM side)
Materials Needed
Insulated work gloves Safety goggles Two pliers or two adjustable wrenches
Step 1: Find negative terminal. Determine which of the terminals is the negative one. It often has a black plastic cover; otherwise, a minus sign will be located either on the post or in close proximity.
Step 2: Fixate bolt head. Take hold of the bolt head of the negative terminal with one wrench or pliers and hold it still.
Step 3: Remove the nut, and cable. Use the other pliers or wrench to remove the nut. Pull the negative cable off and secure away from the battery.
Page 15
Step 4: Repeat for positive cable. Repeat this process on the positive terminal, taking care that the two battery cables do not touch. You must also prevent the positive cable from touching any metal because it carries a residual current that can affect the electrical components of your car.
Step 5: Remove securing bracket. If the battery is held in place with a bracket, use the pliers or wrench to take out the screws or bolts holding it into place. A socket with an extension may be added to remove the battery.
Step 6: Lift out battery. Lift the battery straight out of the bracket, bearing in mind that it may weigh up to 40 lbs.
Page 16

Part 3 of 3: GM post removal
Materials Needed
Insulated work gloves Ratchet extender (if needed) Pliers or adjustable wrench (if necessary to remove a bracket holding the battery in place) Safety goggles Socket set, including sockets and ratchet
Step 1: Identify terminals. Identify which terminal is negative and which is positive, either by the color of the terminal color (black for negative and red for positive) or locating a plus or minus sign near each terminal post.
Step 2: Find correctly sized socket. Although most GM post terminals require a 3/8-inch socket, verify this is the case by fitting the socket over the nut head. If it fits snugly, it is the correct size. Otherwise, test other sizes from your socket set until finding the correct fit.
Page 17

Step 3: Attach the appropriate socket to the ratchet. If the terminals are in a tight spot, you may also need to use a ratchet extender.
Step 4: Remove nut heads. With the socket and ratchet connected, put the socket over the nut head and remove it with a counterclockwise rotation. Repeat on the positive terminal, and make sure the positive cable does not come into contact with any metal.
Step 5: Remove bracket and battery. If necessary, remove the bracket holding the battery in its tray, and lift the battery out.
If you run into any trouble while attempting to remove your car battery or simply feel uncomfortable doing the job on your own, don't hesitate to enlist the help of an certified mobile mechanic from Your Mechanic.
From: Dennis Benfante & Sal Perrotta
Holiday PartyDennis & Mary’s House
Page 18

Page 19

Page 20

Page 21

Page 22

2018 Patchogue Christmas ParadeThis year was the 56th year of the parade, which is the largest parade in Suffolk County.
For the 17th consecutive year the parade organizers asked me to carry the Homecoming King and Queen of the Patchogue / Medford (local) High School.
This year I had the privilege of having our Queen and her King Maria Cliffe and Joe Guido ride in my car along the parade route.
Page 23

Page 24

Page 25

From: Sal Perrotta
Nice Advertising Cut Sheet for the 1957 Thunderbird
From: Al Continelli: Can you guess who are the members of our club in this wedding picture?
Page 26

From: Sal Perrotta
1. This 1955 vehicle from Chevrolet was named after which famous Californian neighborhood?
A.
A…... Haight Ashbury
B……Bel Air
C……La Brea Avenue
D…..The French Quarter
2. This 1956 Belvedere was made by a now-defunct American automobile brand. What was that brand’s name?
Page 27

A……Roanoke
B……Plymouth
C……Virginia
D……Antigish
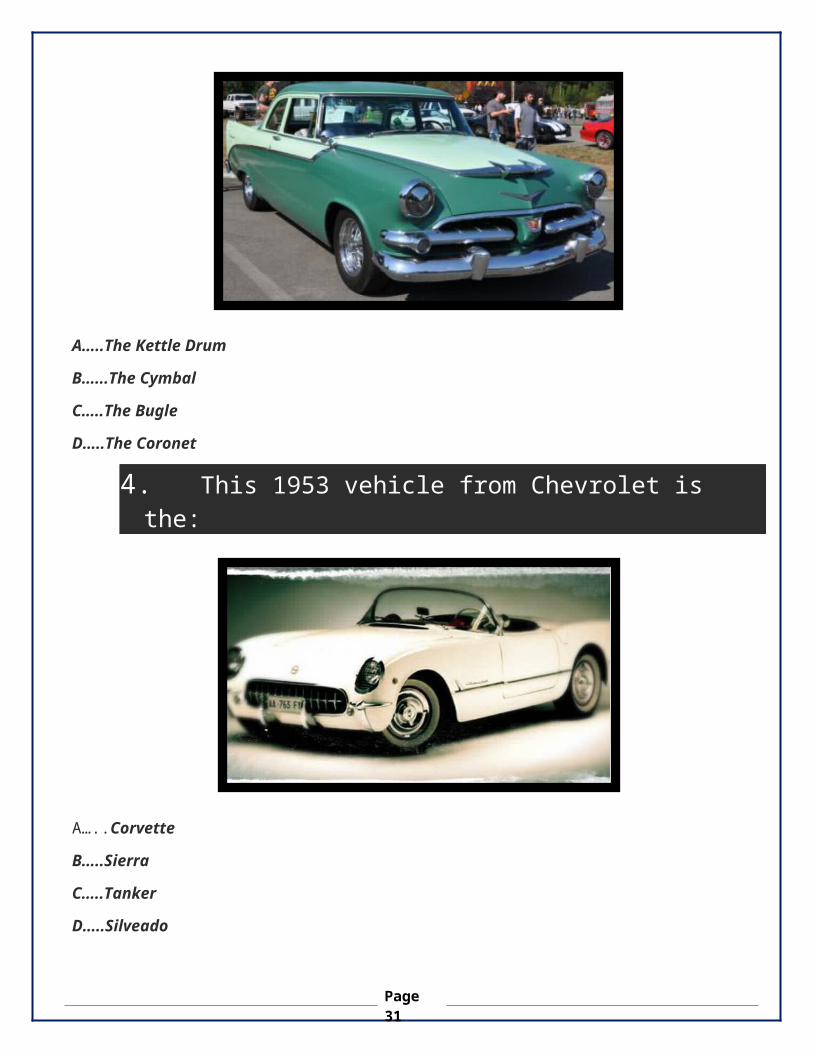
3. This 1956 vehicle from Dodge was named after which musical instrument?
A…..The Kettle Drum
B…...The Cymbal
C…..The Bugle
D…..The Coronet
4. This 1953 vehicle from Chevrolet is the:
Page 28

A…..Corvette
B…..Sierra
C…..Tanker
D…..Silveado
5. Designed as an alternative to the Corvette, this Ford was called the ?
A…..Lincoln
B…..Fairlane
C…..Alpine
D…..Thunderbird
6. This Type 300 Limo, produced in 1951, was manufactured by which major automaker:
Page 29

A…..Mercedes-Benz
B…..BMW
C…..,Fiat
D…..Ford
7. Named after a legendary land of prosperity, this 1954 vehicle is the:
A….. Lamborghini Countach
B…..Cadillac Eldorado
C…..Bentley Continental
D…..Oldsmobile Utopia
Page 30
8. First released in 1950, this sleek brown beauty is the:
A…..Ferrari Farfalle
B…..Cadillas DeVille
C…..Jaguar XK120
D…..Buick Skylark
9. Known as the R Type Continental, this 1952 vehicle was created by:
A….. Jaguar
B…..Bentley
C…..MGPage 31

D…..Aston Martin
10. The 1954 New Yorker was produced by which company?
A…..Chrysler
B…..Ford
C…..Chevrolet
D…..Oldsmobile
Quiz Answers
Question Number Answer1 B2 B3 D4 A5 D6 A7 B8 C
Page 32

9 B10 A
From: Bob Ceraso Car For Sale 1955 Custom Thunderbird
This T-bird is For Sale from a CTCI Member Bob Baker's.
The car has won many awards over the years.
Note: The 1955 Fairlane side trim and the Custom Port Hole Windows in the Hard top.
Contact: ROBERT BAKER
Email: [email protected]
Price $ 45,500.000
Engine/ Trans 312 with 3 Speed Trans & OD
Page 33

From: Sal Perrotta
I saw this great picture on Face book that I wanted to share with the club.
"Santa Helpers from St. Joseph the Worker Knights of Columbus Council 12993. They cooked for the Youth Group Breakfast with Santa.
Page 34

This is the eighth installment of a 12 part series that reviews the history of the Ford Thunderbird from the first series to the last. 12 Generations of Thunderbirds in all.Eighth Generation (1980-1982): "Fairmont Birds"
Ford's Fox platform was introduced during the '78 model year on the Fairmont compact replacement for the Maverick and a cleaved-down version of the Fox would underpin the Mustang all the way from '79 to 2004. But the first application of the Fox structure to the T-Bird was thoroughly disappointing.
All Fox platform vehicles were unibody structures with modified MacPherson strut front suspension and a solid rear axle on coil springs. While the Fox was a flexible platform, it was significantly smaller than the '79 T-Bird so the 1980 T-Bird would be smaller, too. That meant a 108.4-inch wheelbase and an overall length of 200.4 cubic inches — bigger than the Fairmont but down 5.6 inches in wheelbase, 14.6 inches in overall length from before. The new Thunderbird was also about 900 pounds lighter and rated to carry only four people instead of the previous six.
Unfortunately Ford retained most of the big-car styling elements for the new T-Bird and the formal upright grille, massive taillights and thick roof all looked awkward on the smaller car. Beyond that the standard power plant was now a 255-cubic-inch version of the Ford small-block V8 that made a pokey 115 hp. The only optional engine was the formerly standard 302 V8 carrying a two-barrel carb and rated at 131 hp. The 255 was quite simply the worst V8 Ford had ever built and rightly shunned by most buyers. The 302 was better, and it was helped along by the four-speed automatic to which it was lashed, but not great. The new smaller T-Bird was simply boring to drive.
Despite the presence of such options as Recaro front seats and a suspension tuned around Michelin's TRX tires, the new boxy Bird was soundly rejected by the marketplace. Sales crashed down to just 156,803 units — less than half what Ford had sold just two years previously.
So Ford compounded the problem in 1981 by offering a six-cylinder engine in the Thunderbird that year — the first time in the car's history something other than a V8 was available. Offered as a credit option (the price was dropped down from the standard T-Bird if the six was ordered), the 200-cubic-inch inline six was a version of Ford's ancient design and made just 88 hp. Obviously the six-cylinder '81 T-Bird was a simply awful package.
Recognizing mediocrity when it saw it, buyers continued to flee from the Thunderbird during this model year and sales collapsed to 86,693 cars.
Unbelievably the car got even worse for 1982 as the six became the standard engine, a new 3.8-liter OHV V6 making 112 hp was offered as an option and the only available V8 was the lousy 255. There were also some trim changes, but the public stayed away in droves and sales plummeted to just 45,152 units.
Something had to be done. But no one was expecting what Ford would do.
Page 35

Member Date
Ellen Bruckner 1/4
Lou Realmuto 1/5
Sonni Paci 1/5
Betty Pickios 1/6
Joe Nolan 1/9
Robert Groen 1/17
Benjamin Volpicello 1/18
John Fink 1/20
Jim Mezey 1/26
Linda Faust 1/26
Page 36

Have a wonderful
Holiday!
Page 37

Page 38