Embed Size (px)
Citation preview

2020 - 2021
Clinical Policy and Procedure Manual

CLINICAL POLICY AND PROCEDURE MANUAL TABLE OF CONTENTS
Section Title Page Number
1. Therapy Screenings ………………………………………………………………………. 1 - 4 2. Therapy Evaluation/Treatment ……………………………………………………… 5 - 6 3. Dysphagia Evaluation/Treatment …………………………………………………… 7 - 11 4. Restraint Reduction ………………………………………………………………………… 12 - 16 5. Facility State Survey Process …………………………………………………………… 17 - 18 6. Exposure Control Plan – Infection Control ……………………………………… 19 A. General Policies …………………………………………………………………… 20 B. Contact with Blood/Body Fluid/Body Tissue ………………………… 21 - 24 C. Handling/Disposal of Bio-Medical Waste ……………………………… 25 D. Proper Hand Washing Techniques ……………………………………….. 26 E. Use of Gloves ………………………………………………………………………. 27 F. Use of Goggles ……………………………………………………………………… 28 G. Use of Masks ………………………………………………………………………… 29 H. Use of Gowns ………………………………………………………………………… 30 - 31 I. Handling/Disposal of Bio-Hazardous Waste …………………………… 32 J. Occupational Exposure ………………………………………………………… 33 - 34 K. Hepatitis B Vaccination ………………………………………………………… 35 L. Hydrocollator ………………………………………………………………………… 36 - 38 M. Cold Pack ……………………………………………………………………………… 39 - 41 N. Paraffin Bath ………………………………………………………………………… 42 - 44 O. Therapy Gym Equipment ……………………………………………………… 45 - 46
7. Clinical Competency Checklist ………………………………………………………… 47 A. Speech Language Pathologist ………………………………………………… 48 B. Physical Therapist ………………………………………………………………… 49 C. Physical Therapy Assistant …………………………………………………… 50 D. Occupational Therapist ………………………………………………………… 51 E. Certified Occupational Therapy Assistant ……………………………… 52
8. Terminology and Degrees of Assistance ………………………………………… 53 A. Terminology to Determine Degrees of Assistance ………………… 54 B. Muscle Grades ……………………………………………………………………… 55 C. Grading Definitions for Balance …………………………………………… 56 - 57 D. Measurement Scales …………………………………………………………… 58 - 59 E. Approved Abbreviations ……………………………………………………… 60 - 70
9. Documentation ……………………………………………………………………………. 71 A. General Procedures ……………………………………………………………. 72 - 74 B. Evaluations/Plans of Care ……………………………………………………… 75 - 76 C. Recertifications/Updated Plans of Care ………………………………… 77 D. Treatment Encounter Note …………………………………………………… 78 E. Progress Note/Discharge Summary ……………………………………… 79
Section Title Page Number
10. Clinical Policies and Procedures ……………………………………………………… 80
A. Aquatic Therapy ……………………………………………………………………. 81 General Therapy Rules ……………………………………………………… 81 Transfers ………………………………………………………………………….. 82 Staff Training and Operation …………………………………………….. 83 Proper Attire for Therapy Pool …………………………………………. 84 Participation Criteria ………………………………………………………… 85 - 88 Infection Control ………………………………………………………………. 89 Maintenance ……………………………………………………………………. 90 Pool Life Operations …………………………………………………………. 91 B. Aspiration and Swallowing Precautions ………………………………… 92 - 93 C. Biofreeze Policy …………………………………………………………………….. 94 - 95 D. Cardiac Rehabilitation Program …………………………………………….. 96 E. Commercial Cold Pack Treatment …………………………………………. 97 - 98 F. Electrical Stimulation (E-Stim) ……………………………………………….. 99 - 101 G. Fall Interventions ………………………………………………………………….. 102 - 103 H. Gait Belt ……………………………………………………………………………….. 104 - 105 I. Fire Safety …………………………………………………………………………….. 106 J. Hazard Communication and MSDS ……………………………………….. 107 - 108 K. Commercial Hot Pack Treatment ………………………………………….. 109 - 112 L. Iontophoresis ……………………………………………………………………….. 113 M. Paraffin Treatment ……………………………………………………………….. 114 N. Safety, Body Mechanics and Transfers ………………………………….. 116 - 121 O. Skilled Interventions – Occupational Therapy ……………………….. 122 - 123 P. Skilled Interventions – Physical Therapy ……………………………….. 124 Q. Soft File Records Maintenance ……………………………………………… 125 R. State Professional License Display ………………………………………… 126 S. Students and Supervision in Therapy Treatment …………………… 127 T. Therapeutic Ultrasound ………………………………………………………… 128 - 129 U. Therapist Evaluation and Treatment Availability …………………… 130 V. Transition Room ……………………………………………………………………. 131 W. VitalStim Therapy ………………………………………………………………….. 132 X. Whirlpool and Proper Cleaning ……………………………………………… 133 - 135

Clinical Policy and Procedure Manual
Section 1: Therapy Screenings
1

Therapy Screenings Procedures
Purpose: To provide a brief, hands-off patient assessment which consists of a review of the medical chart and patient observation. An interview with nursing staff may also be appropriate.
Procedure:
1. Residents who are new admissions and readmissions to the facility will be screened after entering the facility.
2. Residents who have areas of deficit identified via the screen will be recommended for PT/OT/ST skilled evaluation and treatment as indicated and/or restorative mobility/ADL programs.
3. Residents identified as having a “significant change” by the facility will be screened by therapy and recommended for skilled or restorative intervention.
4. After screen is completed, if therapy recommended, orders will be requested from facility. 5. Facility to request orders from physician. 6. Upon telephone order confirmation from physician, by nursing, therapy evaluation to be initiated. 7. The Interdisciplinary Data Collection Form and an Interdisciplinary Resident Screen Form can be found on the
following pages. Use one of these forms or use a facility specific form.
2
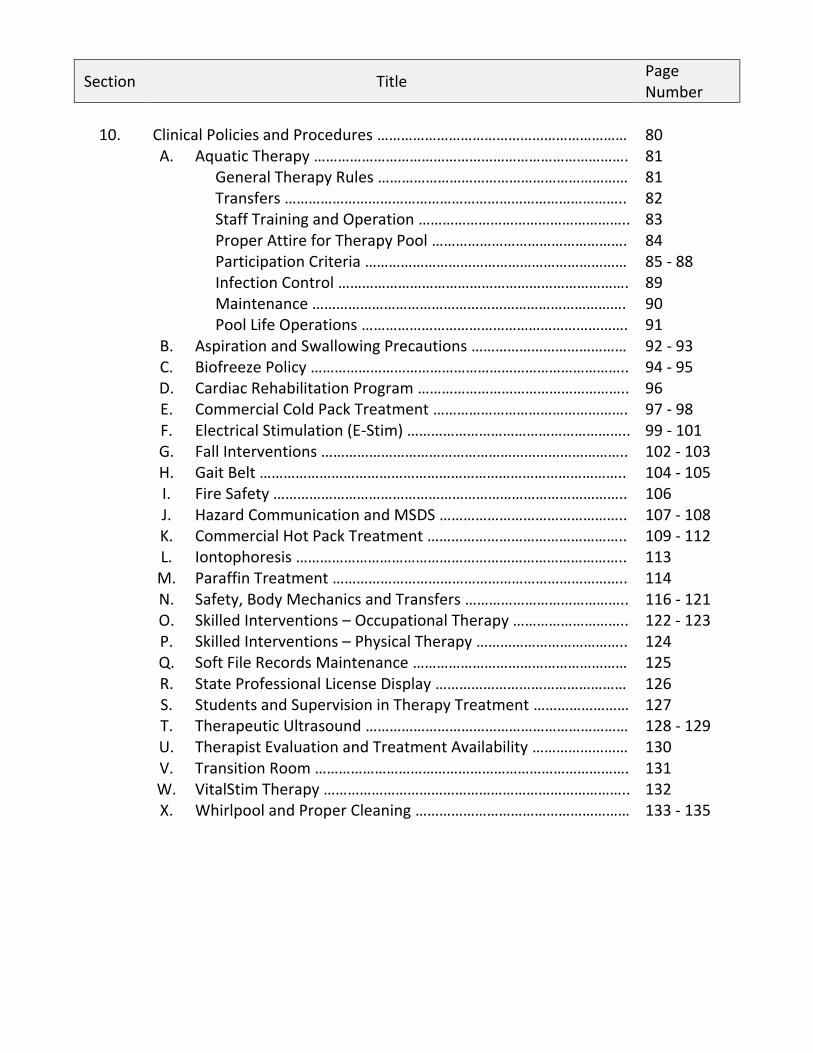
INTERDISCIPLINARY THERAPY DATA COLLECTION FORM Check all Appropriate Patient Name: Room #
Physical Therapy Decreased No Change WFL
Bed Mobility Transfers Gait Skin Pain Comments:
Evaluation Recommended □ Yes □ No
Occupational Therapy Decreased No Change WFL
ADL’s Self Feeding Positioning Contractures Cognition Pain Comments:`
Evaluation Recommended □ Yes □ No
Speech Therapy Decreased No Change WFL
Swallowing Communication Weight Loss Cognition Comments:
Evaluation Recommended □ Yes □ No
□ Rehab Dining □ Balance/Falls Management □ Restraint Reduction
□ ADL □ Dementia Management □ Cognitive Training
□ Communication □ Wound Management □ Low Vision
□ Positioning/Contracture Mgmt. □ Activities Programming
□ Gait/Transfer Training □ Dysphagia
□ Continence Improvement □ Pain Management
Signature: Date:
Signature: Date:
3
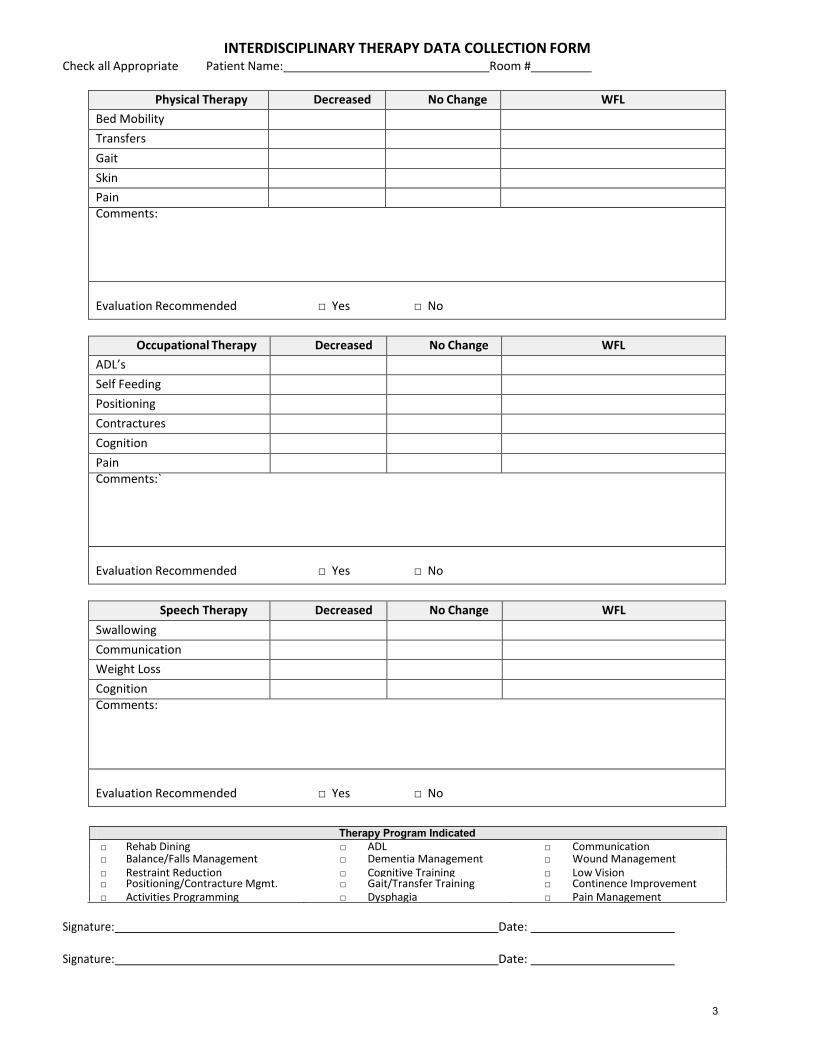
INTERDISCIPLINARY RESIDENT SCREEN
Instructions: Place a check () in the appropriate box to indicate changes in resident condition. Comment as needed on change.
Change From Last Screen
PHYSICAL FUNCTION/ROM Yes No N/A Comments Change in Positioning Change in Tone Change in Head/Neck Strength Change in Posture Change in Hygiene Change in Transfers Change in Eating UE ROM L R LE ROM L R Change in ADL Function Pain
Change From Last Screen
MOBILITY Yes No N/A Comments
Mode of Locomotion Change in Balance Recent Fall Mode of Transfer Change Change in Contracture Status Restraint Use Status Change Change in WB Status
Change From Last Screen
NUTRITION/SWALLOWING Yes No N/A Comments
Change in Swallowing Change in Weight Feeding Problem
Change From Last Screen
SKIN CONDITION Yes No N/A Comments
Pressure Ulcer Stasis Ulcer Change to Support Surface
Change From Last Screen
COMMUNICTION/COGNITION Yes No N/A Comments
Change in Ability to be Understood Change in Vocal Intensity Change in Speech Intelligibility Change in Behavioral Symptom
Therapist Signature:
Date:
Resident Name:
Physician:
Room #:
Med Record #:
Results of Interdisciplinary Rehab Screen: Skilled therapy evaluation recommended for: PT _____ OT _____ ST _____ _____ Evaluation orders requested by screening therapist _____ Evaluating therapist notified _____ Nursing Staff notified of change _____ Current restorative program reviewed _____ Nursing staff notified of any other suggested changes
4
Clinical Policy and Procedure Manual
Section 2: Therapy Evaluation/Treatment
5

Therapy Evaluation/Treatment Procedures
Purpose: An initial evaluation of a patient’s past and current medical and functional status is required prior to the initiation of treatment. Information regarding a patient’s level of function must be documented.
Procedures:
1. All new admissions and readmissions will be screened by PT/OT/ST to determine if need for therapy intervention exists.
2. If the need for skilled PT/OT/ST services is identified, an evaluation order will be requested from the physician. 3. Upon receipt of the order, the evaluation will be completed by the therapist with the report and
recommendations placed in the medical chart and submitted to the physician for signature. 4. If treatment is recommended, a clarification order will be submitted by the therapist to the physician
specifying frequency, duration and type of treatment. 5. Progress notes will be completed by the therapist every 7 -10 days after the evaluation and placed in the
medical chart depending on payer source requirements. 6. Recertification will be completed by the therapist every 30-90 days, based on clinical indication and third
party payer guidelines and placed in the medical chart after submitted to the physician for signature. 7. At discharge, a discharge summary will be completed by the therapist and placed in the medical chart. 8. At discharge, a discharge order is requested from the physician. 9. At discharge, recommendations for restorative programs, nursing approaches, and carry over of techniques
will be placed in the medical chart.
Note: Therapy will include evaluation, development of an appropriate treatment plan, required documentation and family/caregiver training and education.
6

Clinical Policy and Procedure Manual
Section 3: Dysphagia Evaluation/Treatment
7
Dysphagia – Screening and Evaluation
I. Dysphagia Screening
A. Screening Procedure 1. New admissions will be screened by the speech language pathologist for Dysphagia within 48
hours of admission to the facility.
2. Residents of the facility who are identified as having a significant change in swallowing function will be screened for Dysphagia by the speech pathologist.
B. Dysphagia screenings will include the following information: 1. Brief review of medical chart.
2. Brief observation of resident during oral intake (if P.O. feeding is appropriate).
3. Completion of the screening form.
C. The presence of one or more of the following symptoms may indicate the need for a complete Dysphagia evaluation: 1. Modified Diet Consistency 2. Modified Liquid Consistency 3. Weight Loss greater than 5% 4. Dehydration/malnutrition 5. H/O Aspiration Pneumonia 6. Refusal to eat/fear of eating 7. Choking on food/liquid 8. Reports by resident/caregivers of Dysphagia 9. Presence of alternative non-oral feeding devices (i.e., NGT, G tube, etc.) 10. Reduced alertness during meals indicating a possible risk of aspiration 11. Reduced cognitive linguistic skills indicating a possible risk of aspiration 12. Presence of tracheotomy with or without ventilator dependency, indicating possible
compromised airway protection and a risk of aspiration 13. Other observable symptoms of Dysphagia including, but not limited to:
Labial loss of food/liquid Oral stasis of food (pocketing) Reduced mastication skills
Delayed pharyngeal response (delayed swallow reflex) Reduced oral transit skills (reduced ability to move food/liquid to the posterior oral
cavity)
Reduced bolus control/propulsion skills (reduced ability to form food into a cohesive mass and transfer it to the posterior oral cavity)
Coughing/gurgly vocal quality Drooling
II. Dysphagia Evaluation. Upon completion of the screening by the speech pathologist or after direct referral by nursing, the physician, resident’s caregivers, or the resident, a Dysphagia evaluation (if deemed appropriate by the SLP) will be initiated as follows:
A. Obtain physician’s order for Dysphagia evaluation.
B. (1) Once a physician’s order is obtained, the bedside Dysphagia evaluation will be completed and
will include the following areas for residents without tracheotomy and/or ventilator dependency.
Review of medical record
8
Interview of resident/caregivers Oral Motor Examination
Oral Stage Evaluation:
Oral Transit Skills Mastication/Dentition Oral Pocketing/Stasis Bolus Control/Propulsion
Pharyngeal Stage Evaluation:
Timing of pharyngeal response Laryngeal evaluation Reports of stasis Coughing/Choking Risk of aspiration
Esophageal Stage:
Reports of reflux
Reports of emesis Reports of burning, indigestion, etc.
Note: A video fluoroscopy may be recommended by the SLP at any time prior to, during, or after the bedside evaluation. If, at any time, the SLP observes the patient to be unsafe, at risk or aspiration and/or choking with oral presentations of food/liquids, the SLP will discontinue oral presentations immediately.
C. (2) Once a physician’s order is obtained, the bedside Dysphagia evaluation will be completed and will include the following areas for residents with tracheotomy and/or ventilator dependency:
Review of medical record
Interview of resident/caregiver Oral; Motor Examination Review of respiratory status via medical chart and consultation with respiratory therapist
Evaluation Procedure:
1. Respiratory therapy will suction resident and deflate tracheotomy cuff if medical condition allows for deflation.
2. Assess phonation of single vowels, short words, and phrases with speaking valve if present. (Respiratory therapy will place and remove all speaking valves per facility policy.) If no speaking valve is present, assess phonation with finger occlusion of tracheotomy using sterile gauze and gloved hands if clearance to occlude airway is obtained from respiratory therapy.
3. Assess voluntary and reflexive coughs. 4. Assess vocal quality. 5. Assess quality of respiration during phonation attempts. 6. Assess dry swallow with tracheotomy occluded or speaking valve in place if possible.
Otherwise assess dry swallow with open tracheotomy. 7. Present ¼ teaspoon amounts of the following 4 consistencies tinted with blue food coloring:
pureed, thick liquid, thin liquid, and solids. 8. Respiratory therapy will suction resident after each presentation to determine the presence
of blue coloring in the airway, indicating aspiration. 9. If, at any time during the procedure, aspiration is noted, the SLP will stop the presentation of
foods/liquids and will not continue to the next presentation level. 10. If the resident tolerates the presentations without observable signs of aspiration, the SLP will
increase the size of the presentations to ½ teaspoon amounts and retest all consistencies.
9

11. If resident tolerates one or all consistencies presented, therapeutic feedings will be initiated by the speech language pathologist to include all safe test consistencies.
12. Respiratory therapist suctions resident at completion of evaluation. 13. Nursing and respiratory therapy are notified to observe the resident for blue secretions
during suctioning for the next 12 hours. Observations of blue coloring will be reported to the SLP.
14. If the patient is medically able to endure a video fluoroscopy, the SLP may recommend the video to further assess pharyngeal skills and definitively R/O aspiration.
D. Upon completion of the bedside dysphagia evaluation, recommendations will be made and may include,
but are not limited to, the following:
P.O. vs. N.P.O. status
Diet Level – Puréed, Mechanical Soft, General
Liquid Level – Thin, Nectar/Honey Thick
Compensatory Techniques Positioning
Chin tuck
Cues for mastication
Control rate/amount
Alternate liquid/solid
Liquid wash
Multiple swallows
Throat clears
Supra-glottic swallow
Direct Treatment Techniques
Oral Motor Exercises
Bolus Control/Propulsion Exercises
Breath Control/Support Exercises
Video Fluoroscopy
Calorie Count
I/O
GI Consult
Therapeutic Feedings by SLP only
Family/Staff/Caregiver Education
Note: If a video fluoroscopy is recommended to R/O aspiration, determine optimal safe diet/liquid level, or to determine appropriateness of P.O. feeding, a separate order will be submitted by the SLP to the physician.
E. If swallowing treatment is recommended by the SLP, clarification orders will be obtained from the physician indicating frequency and type of treatment.
F. A copy of the swallowing evaluation form will be placed in the resident’s medical chart, and the
original will be sent to the physician for signature. Once physician signature if obtained, the original signed form will be placed in the medical chart.
(When diet change is appropriated, the SLP will submit the recommendation to the physician via nursing.)
G. Progress will be documented on a weekly basis or every 10th visit or sooner per payer source
requirements and will reflect objective, measurable goals, subjective observations, and any updated
10

goals.
H. Recertification by the physician will be obtained every 30 -90 days. The recertification form will be sent to the physician for signature and the signed form will be placed in the resident’s medical chart.
I. Upon discharge from treatment, a discharge summary will be completed. Also included will be documentation of family/caregiver/staff education, appropriate compensatory techniques to be carried out after discharge, swallowing precautions, etc. The discharge summary will be placed in the resident’s medical chart. Discharge orders will be submitted to the physician upon discharge.
11
Clinical Policy and Procedure Manual
Section 4: Restraint Reduction
12

Restraint Reduction Procedures
Purpose: Therapists will actively participate in the appropriate positioning of residents to promote maximum functional ability while maintaining the highest level of resident safety. Therapists may evaluate, after obtaining a physician’s order, all residents clinically appropriate for positioning and restraint reduction.
1. Therapists must obtain a physician’s order prior to evaluating residents. 2. Therapists cannot make recommendations for repositioning, positioning or restraint devices, or restraint
reduction/modification without a physician’s order and subsequent therapy evaluation. 3. Therapists will follow all state and facility policies and procedures regarding positioning and restraint
reduction. 4. Therapists will at no time independently determine or recommend a restraint without written approval
from the facility nursing department. 5. Restraints include, but are not limited to, the following:
a. Bed side-rails b. Vest posey c. Waist posey/lap belt d. Seat belt e. Wedge cushion f. Pummel cushion g. Lap tray h. Lap buddies i. Inability of resident to reach wheelchair rims for propulsion j. Inability of resident feet to touch ground, including with footrests for propulsion
Procedures:
1. Obtain either PT or OT evaluation orders. 2. Perform evaluation. 3. Determine and document patient’s risk and limiting factors that contribute to the need for the restraint. 4. Establish a treatment plan to improve the limiting and risk factors for the resident, such as trunk/upper
extremity/lower extremity strengthening, sitting balance training, and transfer training. 5. Obtain clarification orders. 6. Initiate treatment. 7. Reduce restraint to the next, least restrictive restraint during treatment sessions only. 8. After treatment session, reapply current ordered restraint. 9. Prior to discharge from skilled therapy, coordinate with nursing the most appropriate restraint. 10. Train facility staff on proper application of new restraint. 11. Obtain written sign off from facility staff that training was completed. 12. Verify that the nursing department has documented training and type of new restraint. 13. Verify that the nursing department obtained physician’s order and family approval for new restraint. 14. Discharge from therapy caseload.
13
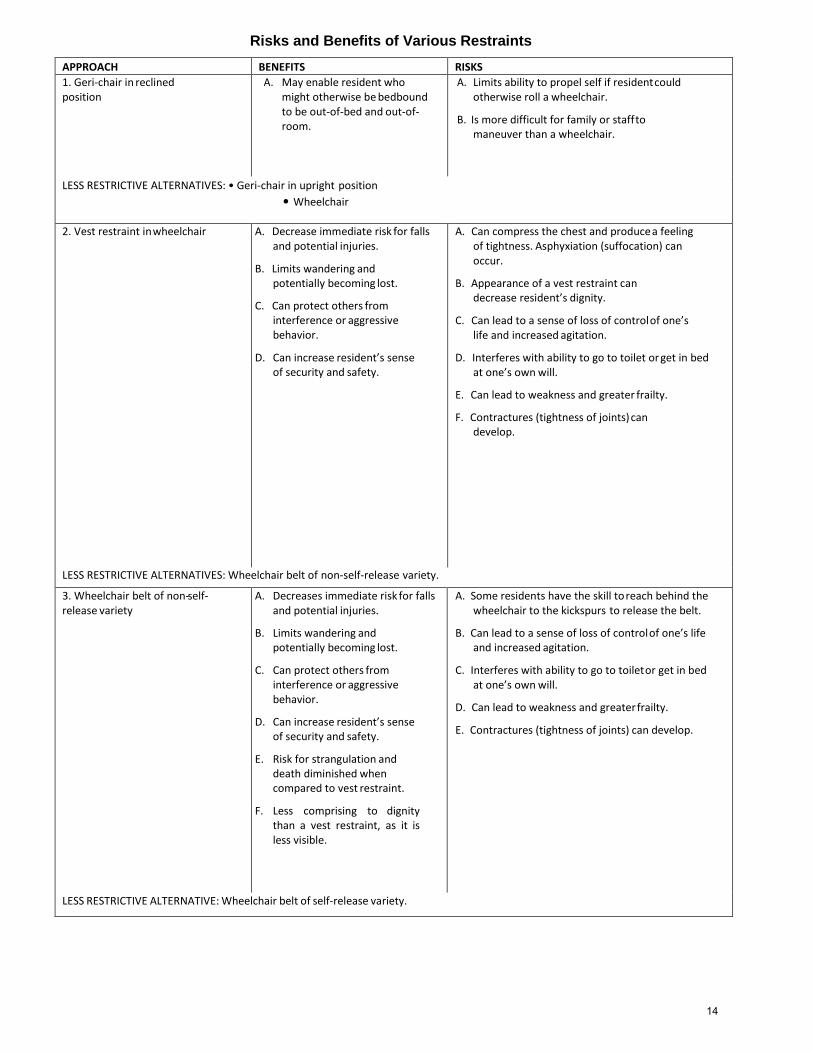
Risks and Benefits of Various Restraints
APPROACH BENEFITS RISKS
1. Geri-chair in reclined position
A. May enable resident who might otherwise be bedbound to be out-of-bed and out-of- room.
A. Limits ability to propel self if resident could otherwise roll a wheelchair.
B. Is more difficult for family or staff to maneuver than a wheelchair.
LESS RESTRICTIVE ALTERNATIVES: • Geri-chair in upright position
• Wheelchair
2. Vest restraint in wheelchair A. Decrease immediate risk for falls and potential injuries.
B. Limits wandering and potentially becoming lost.
C. Can protect others from interference or aggressive behavior.
D. Can increase resident’s sense of security and safety.
A. Can compress the chest and produce a feeling of tightness. Asphyxiation (suffocation) can occur.
B. Appearance of a vest restraint can decrease resident’s dignity.
C. Can lead to a sense of loss of control of one’s life and increased agitation.
D. Interferes with ability to go to toilet or get in bed at one’s own will.
E. Can lead to weakness and greater frailty.
F. Contractures (tightness of joints) can develop.
LESS RESTRICTIVE ALTERNATIVES: Wheelchair belt of non-self-release variety.
3. Wheelchair belt of non-self- release variety
A. Decreases immediate risk for falls and potential injuries.
B. Limits wandering and potentially becoming lost.
C. Can protect others from interference or aggressive behavior.
D. Can increase resident’s sense of security and safety.
E. Risk for strangulation and death diminished when compared to vest restraint.
F. Less comprising to dignity than a vest restraint, as it is less visible.
A. Some residents have the skill to reach behind the wheelchair to the kickspurs to release the belt.
B. Can lead to a sense of loss of control of one’s life and increased agitation.
C. Interferes with ability to go to toilet or get in bed at one’s own will.
D. Can lead to weakness and greater frailty.
E. Contractures (tightness of joints) can develop.
LESS RESTRICTIVE ALTERNATIVE: Wheelchair belt of self-release variety.
14
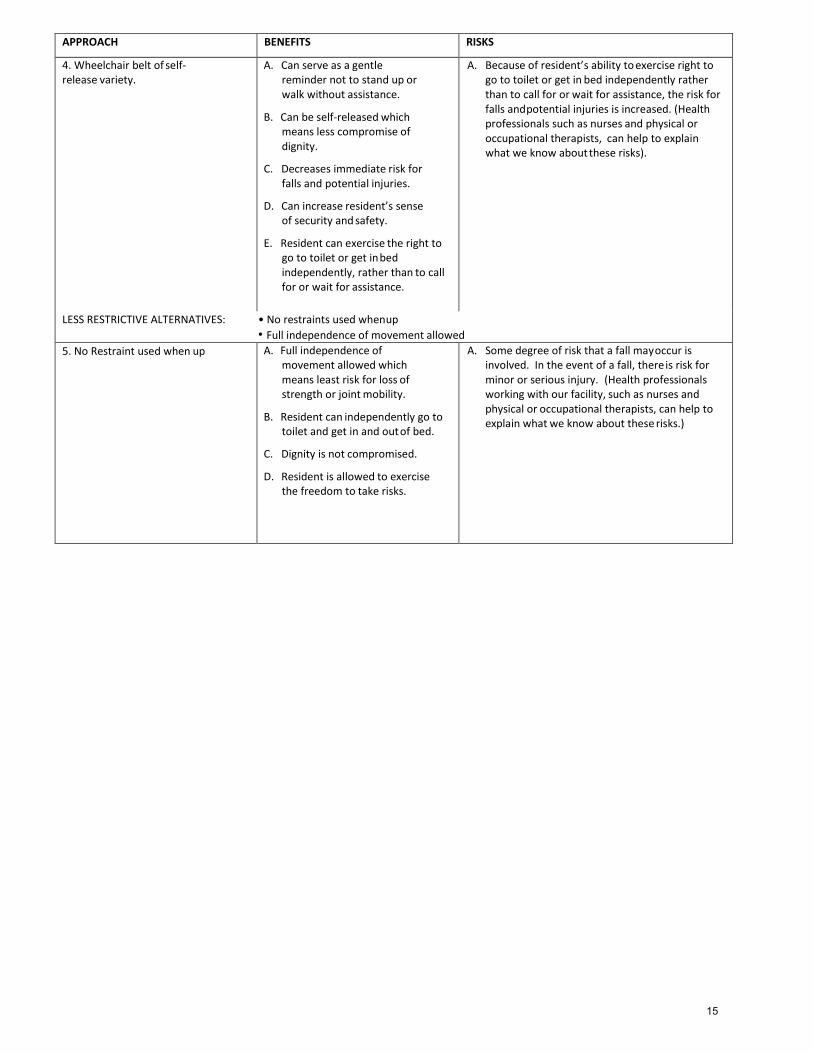
APPROACH BENEFITS RISKS
4. Wheelchair belt of self- release variety.
A. Can serve as a gentle reminder not to stand up or walk without assistance.
B. Can be self-released which means less compromise of dignity.
C. Decreases immediate risk for falls and potential injuries.
D. Can increase resident’s sense of security and safety.
E. Resident can exercise the right to go to toilet or get in bed independently, rather than to call for or wait for assistance.
A. Because of resident’s ability to exercise right to go to toilet or get in bed independently rather than to call for or wait for assistance, the risk for falls and potential injuries is increased. (Health professionals such as nurses and physical or occupational therapists, can help to explain what we know about these risks).
LESS RESTRICTIVE ALTERNATIVES: • No restraints used when up
• Full independence of movement allowed
5. No Restraint used when up A. Full independence of movement allowed which means least risk for loss of strength or joint mobility.
B. Resident can independently go to toilet and get in and out of bed.
C. Dignity is not compromised.
D. Resident is allowed to exercise the freedom to take risks.
A. Some degree of risk that a fall may occur is involved. In the event of a fall, there is risk for minor or serious injury. (Health professionals working with our facility, such as nurses and physical or occupational therapists, can help to explain what we know about these risks.)
15
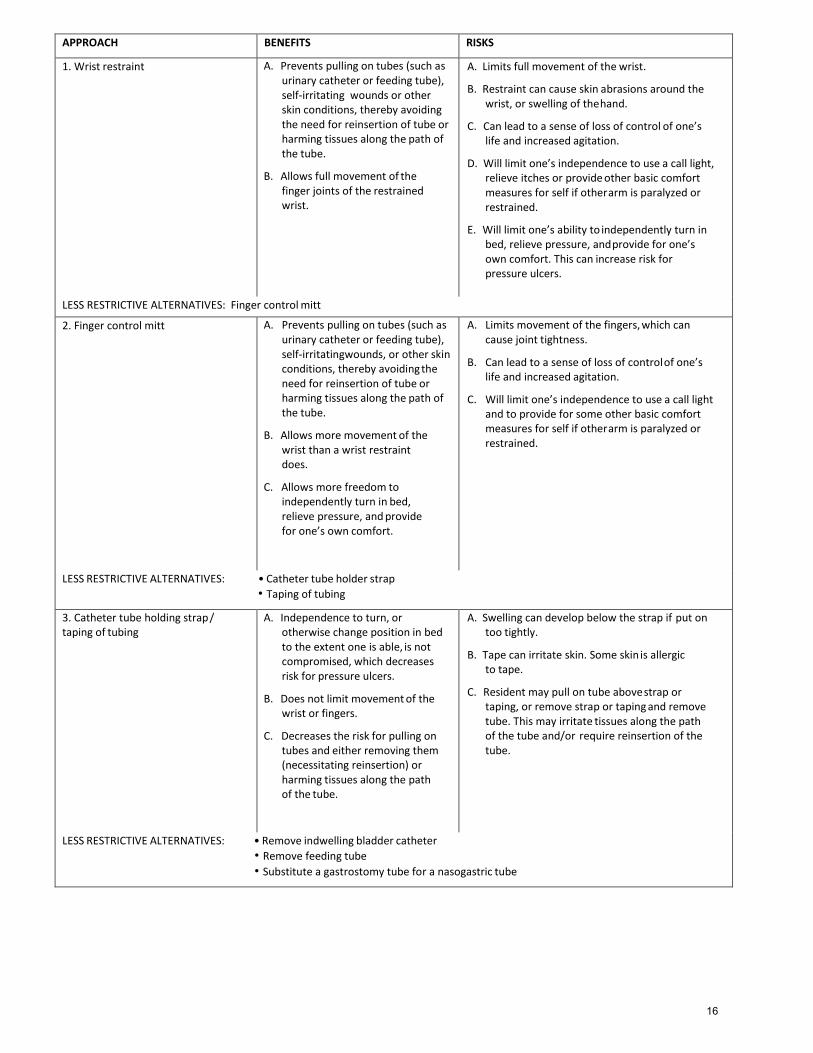
APPROACH BENEFITS RISKS
1. Wrist restraint A. Prevents pulling on tubes (such as urinary catheter or feeding tube), self-irritating wounds or other skin conditions, thereby avoiding the need for reinsertion of tube or harming tissues along the path of the tube.
B. Allows full movement of the finger joints of the restrained wrist.
A. Limits full movement of the wrist.
B. Restraint can cause skin abrasions around the wrist, or swelling of the hand.
C. Can lead to a sense of loss of control of one’s life and increased agitation.
D. Will limit one’s independence to use a call light, relieve itches or provide other basic comfort measures for self if other arm is paralyzed or restrained.
E. Will limit one’s ability to independently turn in bed, relieve pressure, and provide for one’s own comfort. This can increase risk for pressure ulcers.
LESS RESTRICTIVE ALTERNATIVES: Finger control mitt
2. Finger control mitt A. Prevents pulling on tubes (such as urinary catheter or feeding tube), self-irritating wounds, or other skin conditions, thereby avoiding the need for reinsertion of tube or harming tissues along the path of the tube.
B. Allows more movement of the wrist than a wrist restraint does.
C. Allows more freedom to independently turn in bed, relieve pressure, and provide for one’s own comfort.
A. Limits movement of the fingers, which can cause joint tightness.
B. Can lead to a sense of loss of control of one’s life and increased agitation.
C. Will limit one’s independence to use a call light and to provide for some other basic comfort measures for self if other arm is paralyzed or restrained.
LESS RESTRICTIVE ALTERNATIVES: • Catheter tube holder strap
• Taping of tubing
3. Catheter tube holding strap / taping of tubing
A. Independence to turn, or otherwise change position in bed to the extent one is able, is not compromised, which decreases risk for pressure ulcers.
B. Does not limit movement of the wrist or fingers.
C. Decreases the risk for pulling on tubes and either removing them (necessitating reinsertion) or harming tissues along the path of the tube.
A. Swelling can develop below the strap if put on too tightly.
B. Tape can irritate skin. Some skin is allergic to tape.
C. Resident may pull on tube above strap or taping, or remove strap or taping and remove tube. This may irritate tissues along the path of the tube and/or require reinsertion of the tube.
LESS RESTRICTIVE ALTERNATIVES: • Remove indwelling bladder catheter
• Remove feeding tube
• Substitute a gastrostomy tube for a nasogastric tube
16
Clinical Policy and Procedure Manual
Section 5: Facility State Survey Process
17
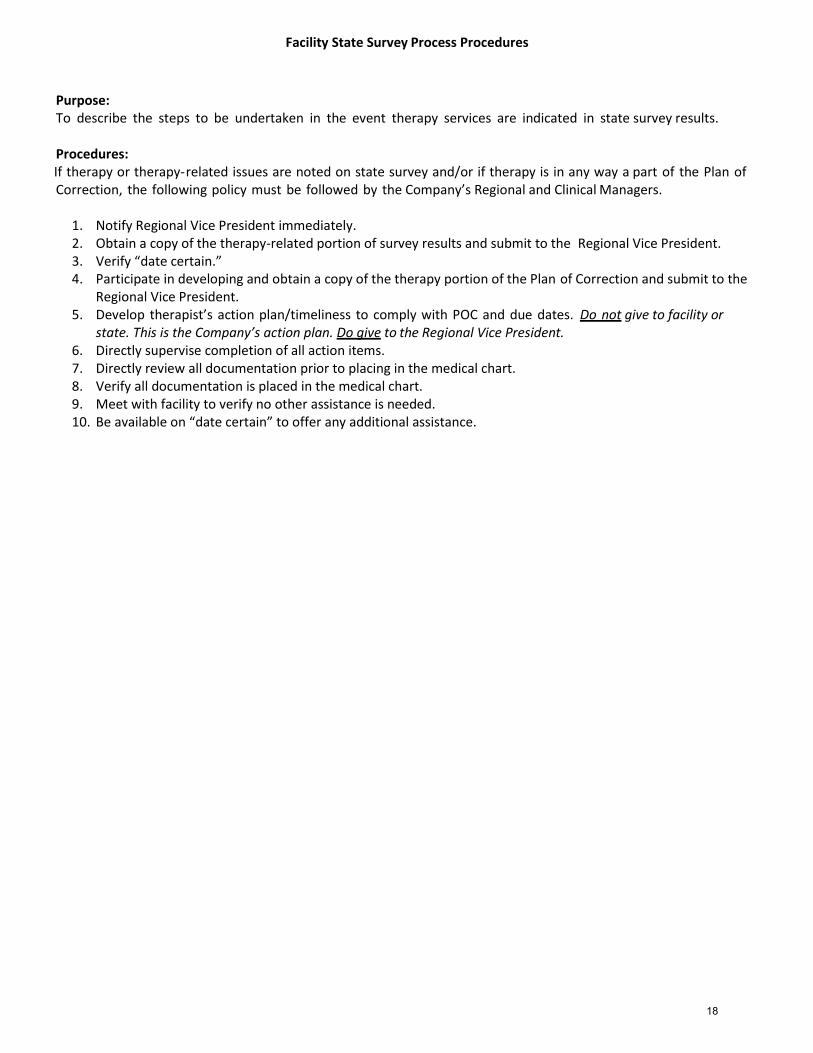
Facility State Survey Process Procedures
Purpose: To describe the steps to be undertaken in the event therapy services are indicated in state survey results.
Procedures: If therapy or therapy-related issues are noted on state survey and/or if therapy is in any way a part of the Plan of Correction, the following policy must be followed by the Company’s Regional and Clinical Managers.
1. Notify Regional Vice President immediately. 2. Obtain a copy of the therapy-related portion of survey results and submit to the Regional Vice President. 3. Verify “date certain.” 4. Participate in developing and obtain a copy of the therapy portion of the Plan of Correction and submit to the
Regional Vice President. 5. Develop therapist’s action plan/timeliness to comply with POC and due dates. Do not give to facility or
state. This is the Company’s action plan. Do give to the Regional Vice President. 6. Directly supervise completion of all action items. 7. Directly review all documentation prior to placing in the medical chart. 8. Verify all documentation is placed in the medical chart. 9. Meet with facility to verify no other assistance is needed. 10. Be available on “date certain” to offer any additional assistance.
18

Clinical Policy and Procedure Manual
Section 6:
Exposure Control Plan
19
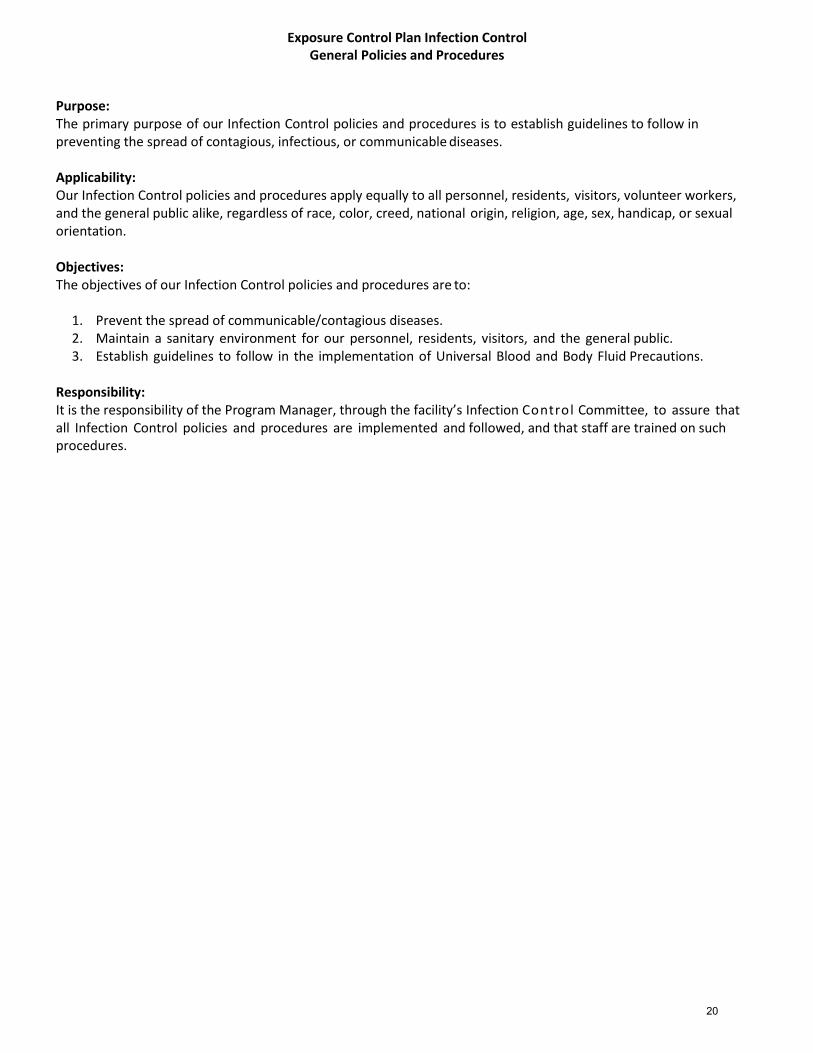
Exposure Control Plan Infection Control General Policies and Procedures
Purpose: The primary purpose of our Infection Control policies and procedures is to establish guidelines to follow in preventing the spread of contagious, infectious, or communicable diseases.
Applicability: Our Infection Control policies and procedures apply equally to all personnel, residents, visitors, volunteer workers, and the general public alike, regardless of race, color, creed, national origin, religion, age, sex, handicap, or sexual orientation.
Objectives: The objectives of our Infection Control policies and procedures are to:
1. Prevent the spread of communicable/contagious diseases. 2. Maintain a sanitary environment for our personnel, residents, visitors, and the general public. 3. Establish guidelines to follow in the implementation of Universal Blood and Body Fluid Precautions.
Responsibility: It is the responsibility of the Program Manager, through the facility’s Infection Control Committee, to assure that all Infection Control policies and procedures are implemented and followed, and that staff are trained on such procedures.
20

Exposure Control Plan Contact with Blood/Body Fluid/Body Tissue
Policy and Procedures
Policy: To maintain appropriate contact barrier precautions during all situations which involve potential or actual contact with blood, body fluids, and/or body tissue.
Purpose:
1. To establish procedures that will ensure compliance with the Occupational Safety and Health Administration’s (OSHA) “Bloodborne Pathogens Standard” (29 CFR 1910.1030).
2. To minimize contact with blood/body fluids by healthcare workers. 3. To minimize the likelihood of transmission of specific organisms, such as hepatitis B virus (HBV), human
immunodeficiency virus (HIV), etc. 4. To apply infection control principles and practices consistently.
Definitions: Blood means human blood, human blood components, and products made from human blood.
Bloodborne Pathogens means pathogenic microorganisms that are present in human blood and can cause disease in humans. These pathogens include, but are not limited to, hepatitis B virus (HBV) and human immunodeficiency virus (HIV).
Contaminated means the presence or the reasonably anticipated presence of blood or other potentially infectious materials on an item or surface.
Decontamination means the use of physical or chemical means to remove, inactivate, or destroy bloodborne pathogens on a surface or item to the point where they are no longer capable of transmitting infectious particles and the surface or item is rendered safe for handling, use, or disposal.
Engineering Controls means controls which by design isolate or remove bloodborne pathogens hazards from the workplace.
Exposure Incident means a specific eye, mouth, other mucous membrane, non-intact skin, or parenteral contact with blood or other potentially infectious materials that result from the performance of an employee's duties.
Occupational Exposure means reasonably anticipated skin, eye, mucous membrane, or parenteral contact with blood or other potentially infectious materials that may result from the performance of an employee's duties.
Other Potentially Infectious Materials means: 1. the following human body fluids: semen, vaginal secretions, cerebrospinal fluid, synovial fluid, pleural fluid,
pericardial fluid, peritoneal fluid, amniotic fluid, saliva in dental procedures, any body fluid that is visibly contaminated with blood, and all body fluids in situations where it is difficult or impossible to differentiate between body fluids;
2. any unfixed tissue or organ (other than intact skin) from a human (living or dead); and 3. HIV-containing cell or tissue cultures, organ cultures, and HIV- or HBV-containing culture medium or other
solutions; and blood, organs, or other tissues from experimental animals infected with HIV or HBV.
Personal Protective Equipment is specialized clothing or equipment worn by an employee for protection against a hazard. General work clothes (such as uniforms, pants, shirts or blouses) not intended to function as protection against a hazard are not considered to be personal protective equipment.
21
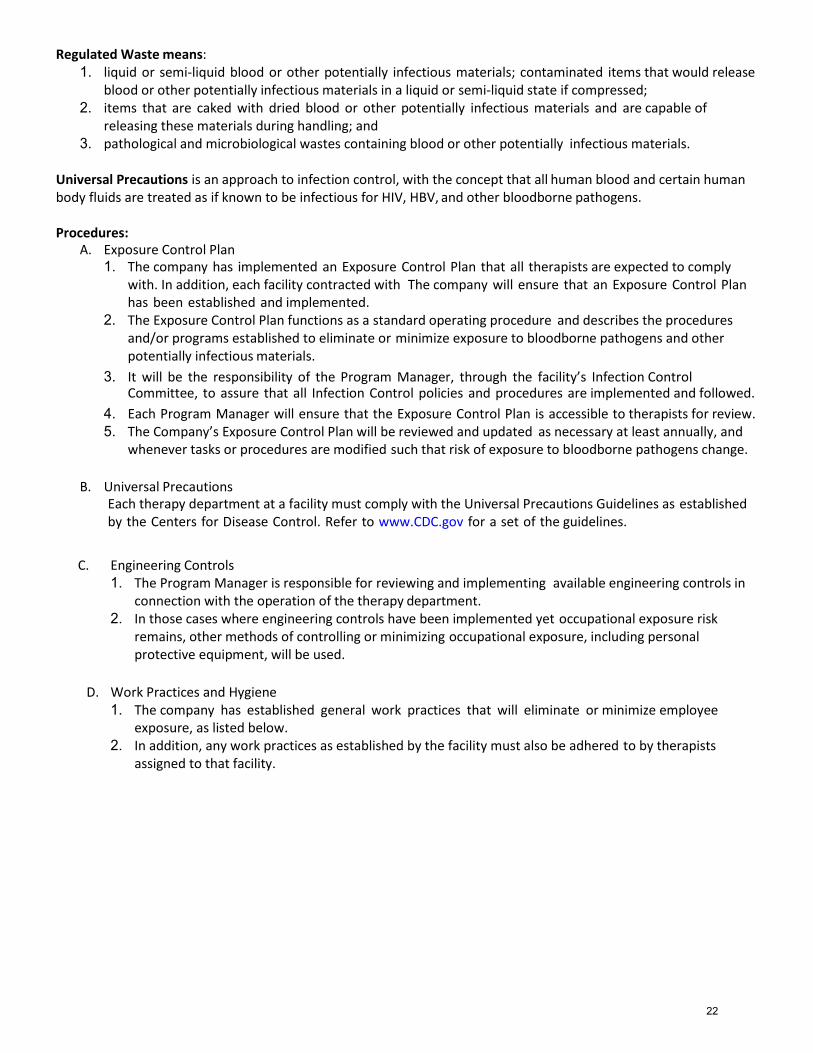
Regulated Waste means:
1. liquid or semi-liquid blood or other potentially infectious materials; contaminated items that would release blood or other potentially infectious materials in a liquid or semi-liquid state if compressed;
2. items that are caked with dried blood or other potentially infectious materials and are capable of releasing these materials during handling; and
3. pathological and microbiological wastes containing blood or other potentially infectious materials.
Universal Precautions is an approach to infection control, with the concept that all human blood and certain human body fluids are treated as if known to be infectious for HIV, HBV, and other bloodborne pathogens.
Procedures:
A. Exposure Control Plan 1. The company has implemented an Exposure Control Plan that all therapists are expected to comply
with. In addition, each facility contracted with The company will ensure that an Exposure Control Plan has been established and implemented.
2. The Exposure Control Plan functions as a standard operating procedure and describes the procedures and/or programs established to eliminate or minimize exposure to bloodborne pathogens and other potentially infectious materials.
3. It will be the responsibility of the Program Manager, through the facility’s Infection Control Committee, to assure that all Infection Control policies and procedures are implemented and followed.
4. Each Program Manager will ensure that the Exposure Control Plan is accessible to therapists for review. 5. The Company’s Exposure Control Plan will be reviewed and updated as necessary at least annually, and
whenever tasks or procedures are modified such that risk of exposure to bloodborne pathogens change.
B. Universal Precautions
Each therapy department at a facility must comply with the Universal Precautions Guidelines as established by the Centers for Disease Control. Refer to www.CDC.gov for a set of the guidelines.
C. Engineering Controls 1. The Program Manager is responsible for reviewing and implementing available engineering controls in
connection with the operation of the therapy department. 2. In those cases where engineering controls have been implemented yet occupational exposure risk
remains, other methods of controlling or minimizing occupational exposure, including personal protective equipment, will be used.
D. Work Practices and Hygiene
1. The company has established general work practices that will eliminate or minimize employee exposure, as listed below.
2. In addition, any work practices as established by the facility must also be adhered to by therapists assigned to that facility.
22
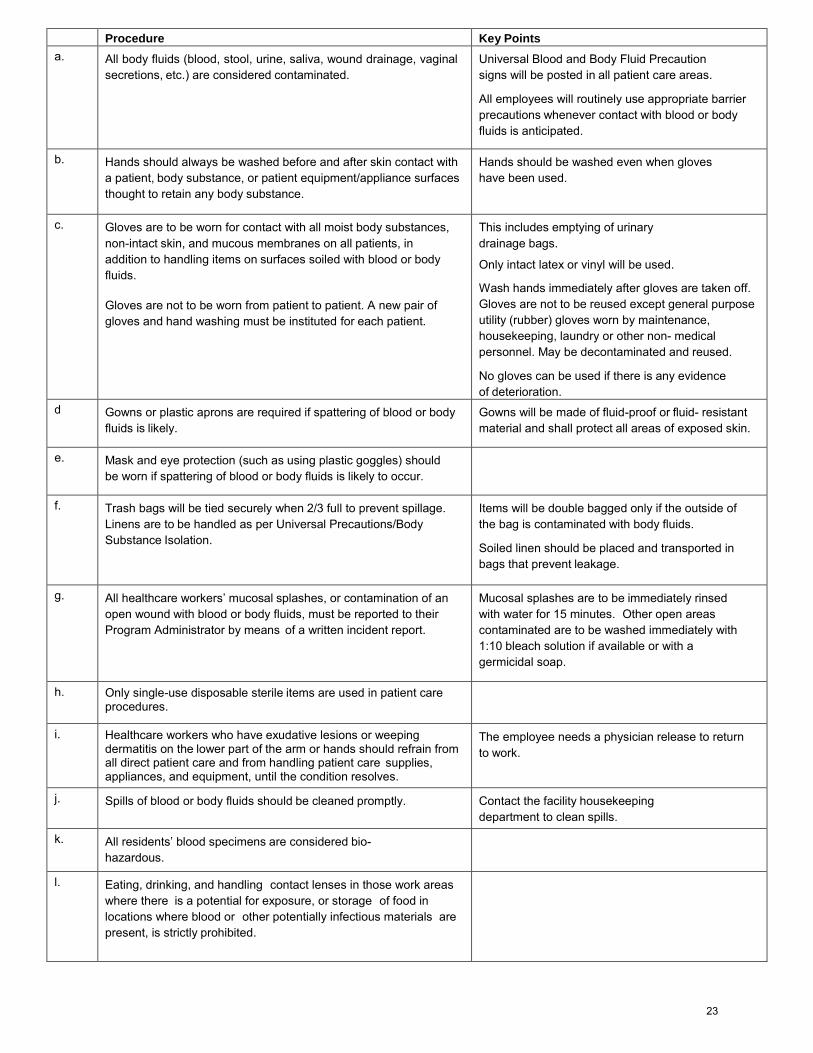
Procedure Key Points a. All body fluids (blood, stool, urine, saliva, wound drainage, vaginal
secretions, etc.) are considered contaminated. Universal Blood and Body Fluid Precaution signs will be posted in all patient care areas.
All employees will routinely use appropriate barrier precautions whenever contact with blood or body fluids is anticipated.
b. Hands should always be washed before and after skin contact with a patient, body substance, or patient equipment/appliance surfaces thought to retain any body substance.
Hands should be washed even when gloves have been used.
c. Gloves are to be worn for contact with all moist body substances, non-intact skin, and mucous membranes on all patients, in addition to handling items on surfaces soiled with blood or body fluids.
Gloves are not to be worn from patient to patient. A new pair of gloves and hand washing must be instituted for each patient.
This includes emptying of urinary drainage bags.
Only intact latex or vinyl will be used.
Wash hands immediately after gloves are taken off. Gloves are not to be reused except general purpose utility (rubber) gloves worn by maintenance, housekeeping, laundry or other non- medical personnel. May be decontaminated and reused.
No gloves can be used if there is any evidence of deterioration.
d Gowns or plastic aprons are required if spattering of blood or body fluids is likely.
Gowns will be made of fluid-proof or fluid- resistant material and shall protect all areas of exposed skin.
e. Mask and eye protection (such as using plastic goggles) should be worn if spattering of blood or body fluids is likely to occur.
f. Trash bags will be tied securely when 2/3 full to prevent spillage. Linens are to be handled as per Universal Precautions/Body Substance Isolation.
Items will be double bagged only if the outside of the bag is contaminated with body fluids.
Soiled linen should be placed and transported in bags that prevent leakage.
g. All healthcare workers’ mucosal splashes, or contamination of an open wound with blood or body fluids, must be reported to their Program Administrator by means of a written incident report.
Mucosal splashes are to be immediately rinsed with water for 15 minutes. Other open areas contaminated are to be washed immediately with 1:10 bleach solution if available or with a germicidal soap.
h. Only single-use disposable sterile items are used in patient care procedures.
i. Healthcare workers who have exudative lesions or weeping dermatitis on the lower part of the arm or hands should refrain from all direct patient care and from handling patient care supplies, appliances, and equipment, until the condition resolves.
The employee needs a physician release to return to work.
j. Spills of blood or body fluids should be cleaned promptly. Contact the facility housekeeping department to clean spills.
k. All residents’ blood specimens are considered bio-hazardous.
l. Eating, drinking, and handling contact lenses in those work areas where there is a potential for exposure, or storage of food in locations where blood or other potentially infectious materials are present, is strictly prohibited.
23
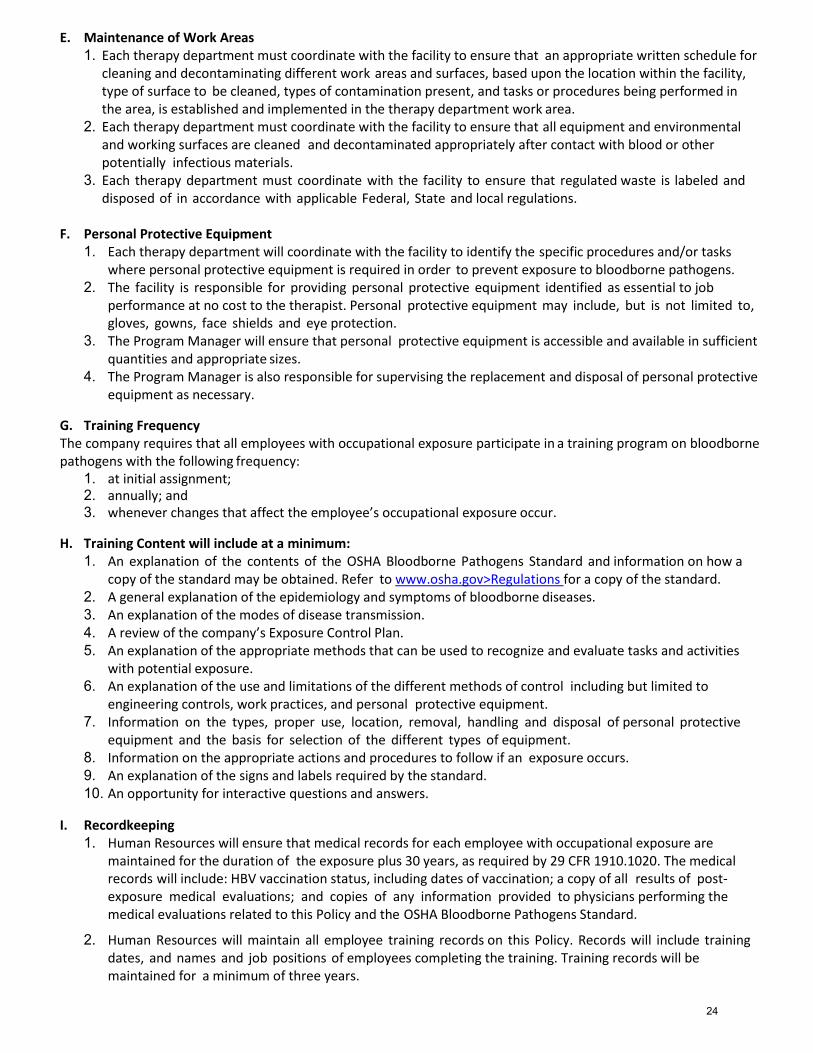
E. Maintenance of Work Areas 1. Each therapy department must coordinate with the facility to ensure that an appropriate written schedule for
cleaning and decontaminating different work areas and surfaces, based upon the location within the facility, type of surface to be cleaned, types of contamination present, and tasks or procedures being performed in the area, is established and implemented in the therapy department work area.
2. Each therapy department must coordinate with the facility to ensure that all equipment and environmental and working surfaces are cleaned and decontaminated appropriately after contact with blood or other potentially infectious materials.
3. Each therapy department must coordinate with the facility to ensure that regulated waste is labeled and disposed of in accordance with applicable Federal, State and local regulations.
F. Personal Protective Equipment 1. Each therapy department will coordinate with the facility to identify the specific procedures and/or tasks
where personal protective equipment is required in order to prevent exposure to bloodborne pathogens. 2. The facility is responsible for providing personal protective equipment identified as essential to job
performance at no cost to the therapist. Personal protective equipment may include, but is not limited to, gloves, gowns, face shields and eye protection.
3. The Program Manager will ensure that personal protective equipment is accessible and available in sufficient quantities and appropriate sizes.
4. The Program Manager is also responsible for supervising the replacement and disposal of personal protective equipment as necessary.
G. Training Frequency The company requires that all employees with occupational exposure participate in a training program on bloodborne pathogens with the following frequency:
1. at initial assignment; 2. annually; and 3. whenever changes that affect the employee’s occupational exposure occur.
H. Training Content will include at a minimum: 1. An explanation of the contents of the OSHA Bloodborne Pathogens Standard and information on how a
copy of the standard may be obtained. Refer to www.osha.gov>Regulations for a copy of the standard. 2. A general explanation of the epidemiology and symptoms of bloodborne diseases. 3. An explanation of the modes of disease transmission. 4. A review of the company’s Exposure Control Plan. 5. An explanation of the appropriate methods that can be used to recognize and evaluate tasks and activities
with potential exposure. 6. An explanation of the use and limitations of the different methods of control including but limited to
engineering controls, work practices, and personal protective equipment. 7. Information on the types, proper use, location, removal, handling and disposal of personal protective
equipment and the basis for selection of the different types of equipment. 8. Information on the appropriate actions and procedures to follow if an exposure occurs. 9. An explanation of the signs and labels required by the standard. 10. An opportunity for interactive questions and answers.
I. Recordkeeping 1. Human Resources will ensure that medical records for each employee with occupational exposure are
maintained for the duration of the exposure plus 30 years, as required by 29 CFR 1910.1020. The medical records will include: HBV vaccination status, including dates of vaccination; a copy of all results of post-exposure medical evaluations; and copies of any information provided to physicians performing the medical evaluations related to this Policy and the OSHA Bloodborne Pathogens Standard.
2. Human Resources will maintain all employee training records on this Policy. Records will include training dates, and names and job positions of employees completing the training. Training records will be maintained for a minimum of three years.
24
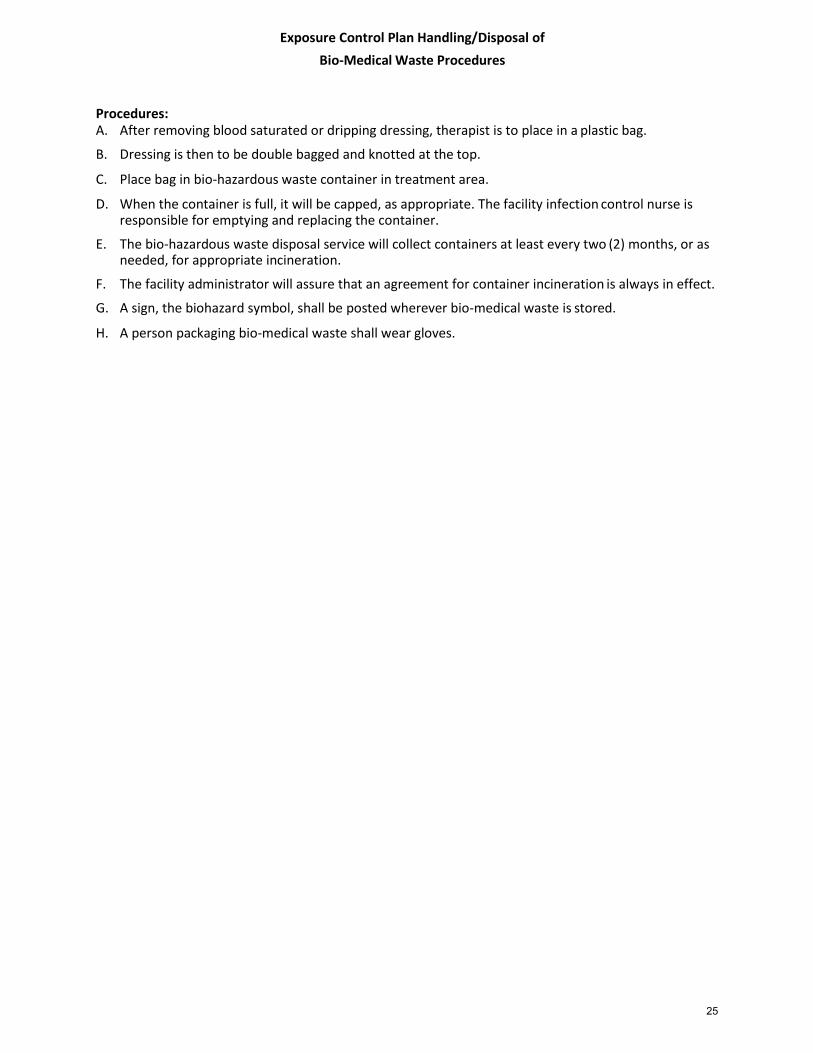
Exposure Control Plan Handling/Disposal of
Bio-Medical Waste Procedures
Procedures: A. After removing blood saturated or dripping dressing, therapist is to place in a plastic bag.
B. Dressing is then to be double bagged and knotted at the top.
C. Place bag in bio-hazardous waste container in treatment area.
D. When the container is full, it will be capped, as appropriate. The facility infection control nurse is responsible for emptying and replacing the container.
E. The bio-hazardous waste disposal service will collect containers at least every two (2) months, or as needed, for appropriate incineration.
F. The facility administrator will assure that an agreement for container incineration is always in effect.
G. A sign, the biohazard symbol, shall be posted wherever bio-medical waste is stored.
H. A person packaging bio-medical waste shall wear gloves.
25
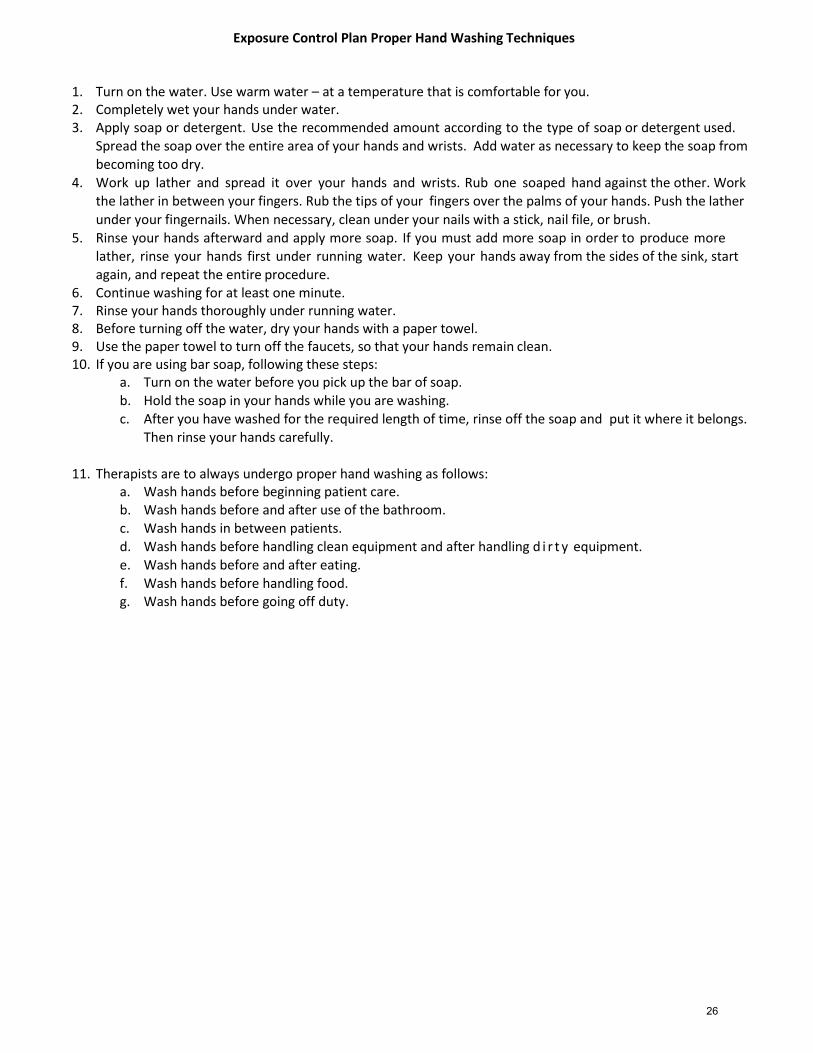
Exposure Control Plan Proper Hand Washing Techniques
1. Turn on the water. Use warm water – at a temperature that is comfortable for you. 2. Completely wet your hands under water. 3. Apply soap or detergent. Use the recommended amount according to the type of soap or detergent used.
Spread the soap over the entire area of your hands and wrists. Add water as necessary to keep the soap from becoming too dry.
4. Work up lather and spread it over your hands and wrists. Rub one soaped hand against the other. Work the lather in between your fingers. Rub the tips of your fingers over the palms of your hands. Push the lather
under your fingernails. When necessary, clean under your nails with a stick, nail file, or brush. 5. Rinse your hands afterward and apply more soap. If you must add more soap in order to produce more
lather, rinse your hands first under running water. Keep your hands away from the sides of the sink, start again, and repeat the entire procedure.
6. Continue washing for at least one minute. 7. Rinse your hands thoroughly under running water. 8. Before turning off the water, dry your hands with a paper towel. 9. Use the paper towel to turn off the faucets, so that your hands remain clean. 10. If you are using bar soap, following these steps:
a. Turn on the water before you pick up the bar of soap. b. Hold the soap in your hands while you are washing. c. After you have washed for the required length of time, rinse off the soap and put it where it belongs.
Then rinse your hands carefully.
11. Therapists are to always undergo proper hand washing as follows:
a. Wash hands before beginning patient care. b. Wash hands before and after use of the bathroom. c. Wash hands in between patients. d. Wash hands before handling clean equipment and after handling d i r t y equipment. e. Wash hands before and after eating.
f. Wash hands before handling food. g. Wash hands before going off duty.
26
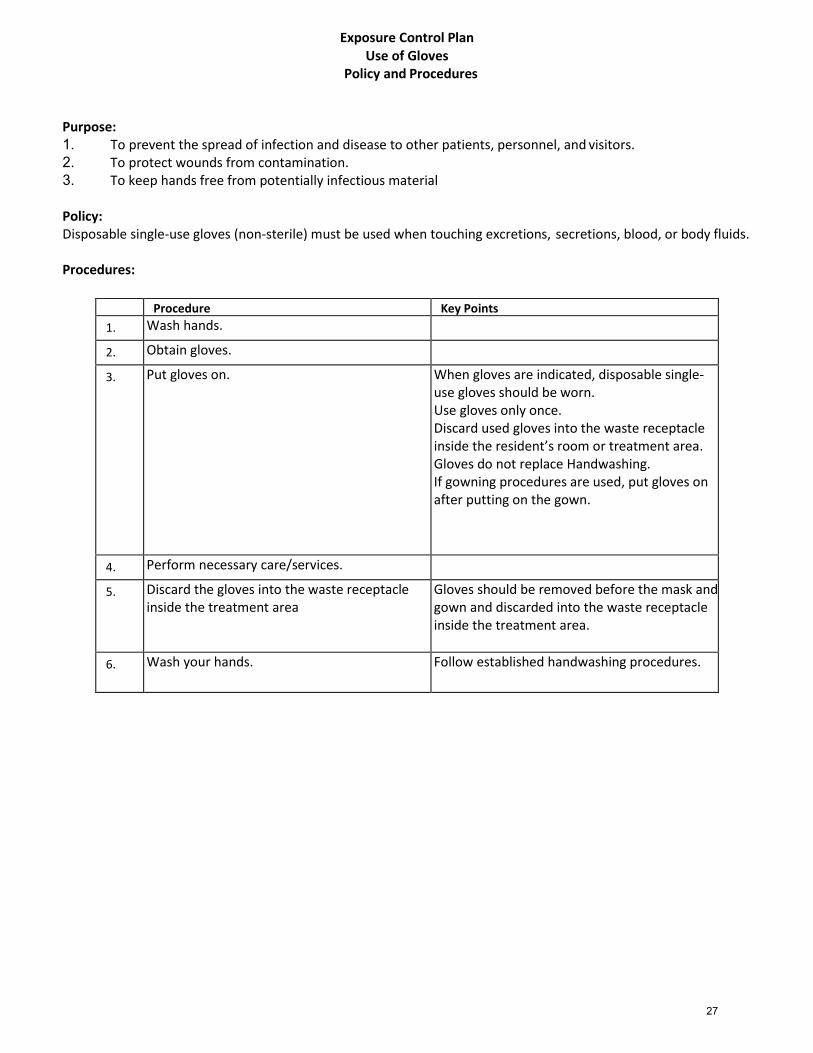
Exposure Control Plan Use of Gloves
Policy and Procedures
Purpose: 1. To prevent the spread of infection and disease to other patients, personnel, and visitors. 2. To protect wounds from contamination. 3. To keep hands free from potentially infectious material
Policy: Disposable single-use gloves (non-sterile) must be used when touching excretions, secretions, blood, or body fluids.
Procedures:
Procedure Key Points
1. Wash hands.
2. Obtain gloves.
3. Put gloves on. When gloves are indicated, disposable single-use gloves should be worn. Use gloves only once. Discard used gloves into the waste receptacle inside the resident’s room or treatment area. Gloves do not replace Handwashing. If gowning procedures are used, put gloves on after putting on the gown.
4. Perform necessary care/services.
5. Discard the gloves into the waste receptacle inside the treatment area
Gloves should be removed before the mask and gown and discarded into the waste receptacle inside the treatment area.
6. Wash your hands. Follow established handwashing procedures.
27

Exposure Control Plan Use of Goggles
Policy and Procedures
Purpose: To prevent exposure of the eyes to splashes of infected materials.
Policy: Goggles are to be used when splashing of excretions, secretions of blood or body fluids to the eyes is likely.
Procedures:
Procedure Key Points
1. Wash hands. Follow established handwashing procedures.
2. Obtain goggles.
3. Put goggles on. May be put on over regular prescription glasses.
4. Perform necessary care/services.
5. Remove soiled goggles. Use only once. Discard used goggles into the waste receptacle in the treatment area.
6. Wash hands. Follow established handwashing procedures.
28

Exposure Control Plan
Use of Masks Policy and Procedures
Purpose: 1. To prevent transmission of infectious agents through the air. 2. To protect the wearer from inhaling:
a. Large-particle aerosols (droplets) that are transmitted by close contact and generally travel only a short distance (about 3 feet).
b. Small-particle aerosols (droplet nuclei) that might remain suspended in the air and then travel for longer distances.
3. To prevent transmission of some infections spread by direct contact with mucous membranes.
Policy: High-efficiency disposable masks must be worn when it is likely that oral/nasal mucous membranes may be splashed with body substances. When masks are indicated, they will be used only once and discarded into the appropriate receptacle.
Procedures:
Procedure Key Points
1. Wash hands. Follow established handwashing procedures.
2. Obtain disposable mask.
3. Place the mask over your nose and mouth. Using a shoelace bow, tie the top strings over your ears and then tie the lower strings.
• Put mask on before entering the treatment area. Make sure hands are clean before putting on a face mask.
• If face mask gets wet, it must be changed. • When changing a face mask, you must wash hands
before and after removing the old mask. • Face masks are effective for 30 minutes only. Make sure
mask covers nose and mouth while performing care/services for the resident.
• Do not remove mask while performing care/ services for the patient.
• If gowning procedures are necessary, put mask on before putting on gown; gloves after putting on gown.
• Do not touch the part of the mask that will cover your face.
4. Knock before entering the resident’s room.
5. Wash hands. Follow established handwashing procedures.
6. Remove mask.
7. Discard used mask into the waste receptacle in the resident’s room or treatment area.
8. Wash hands. Follow established handwashing procedures.
29
Exposure Control Plan Use of Gowns
Policy and Procedures
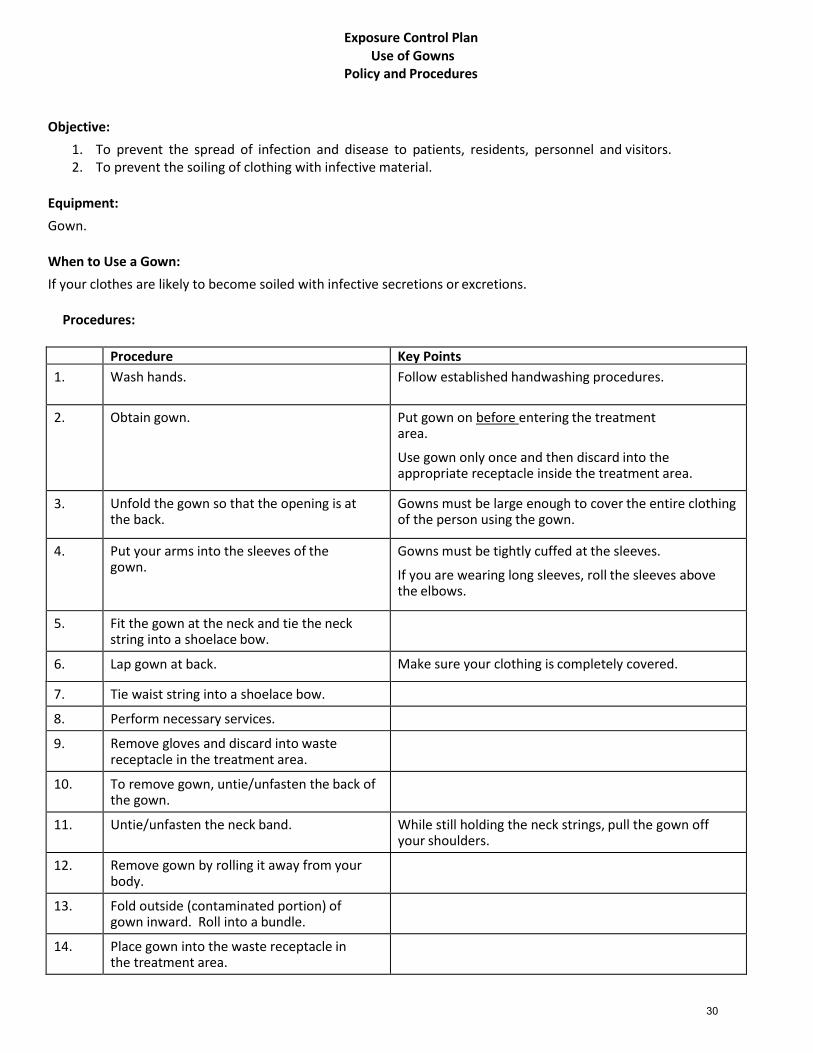
Objective:
1. To prevent the spread of infection and disease to patients, residents, personnel and visitors. 2. To prevent the soiling of clothing with infective material.
Equipment:
Gown. When to Use a Gown:
If your clothes are likely to become soiled with infective secretions or excretions.
Procedures:
Procedure Key Points
1. Wash hands. Follow established handwashing procedures.
2. Obtain gown. Put gown on before entering the treatment area.
Use gown only once and then discard into the appropriate receptacle inside the treatment area.
3. Unfold the gown so that the opening is at the back.
Gowns must be large enough to cover the entire clothing of the person using the gown.
4. Put your arms into the sleeves of the gown.
Gowns must be tightly cuffed at the sleeves.
If you are wearing long sleeves, roll the sleeves above the elbows.
5. Fit the gown at the neck and tie the neck string into a shoelace bow.
6. Lap gown at back. Make sure your clothing is completely covered.
7. Tie waist string into a shoelace bow.
8. Perform necessary services.
9. Remove gloves and discard into waste receptacle in the treatment area.
10. To remove gown, untie/unfasten the back of the gown.
11. Untie/unfasten the neck band. While still holding the neck strings, pull the gown off your shoulders.
12. Remove gown by rolling it away from your body.
13. Fold outside (contaminated portion) of gown inward. Roll into a bundle.
14. Place gown into the waste receptacle in the treatment area.
30
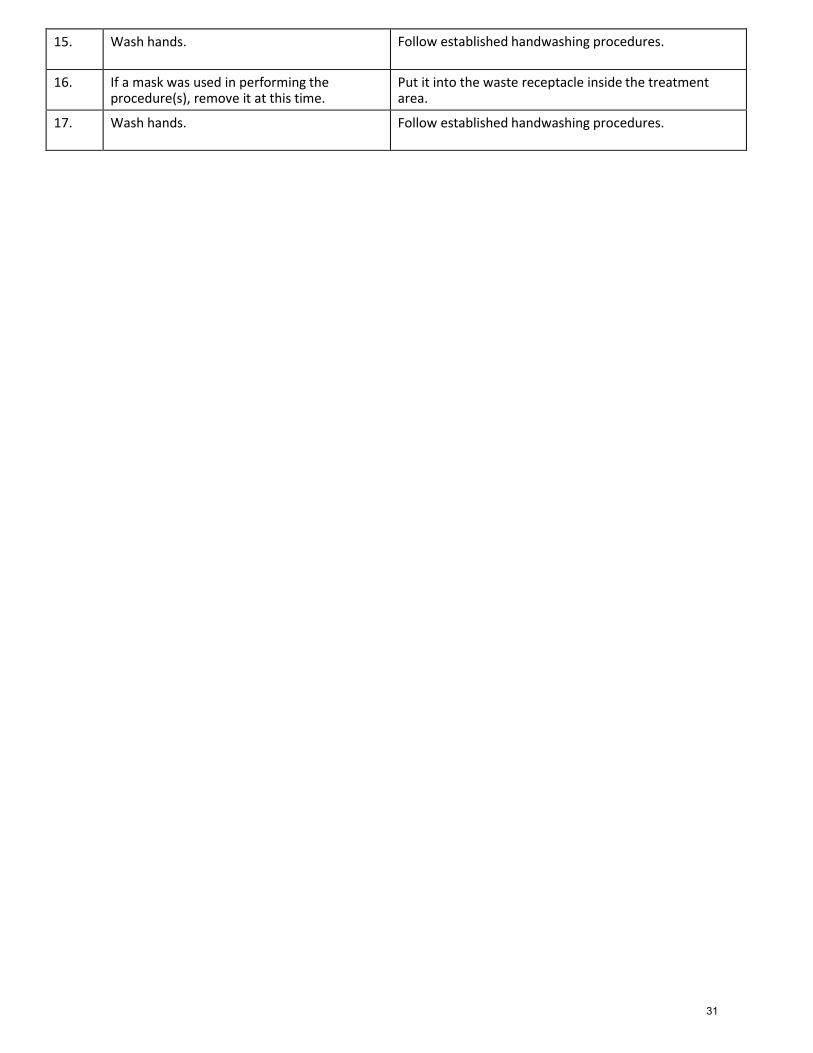
15. Wash hands. Follow established handwashing procedures.
16. If a mask was used in performing the procedure(s), remove it at this time.
Put it into the waste receptacle inside the treatment area.
17. Wash hands. Follow established handwashing procedures.
31
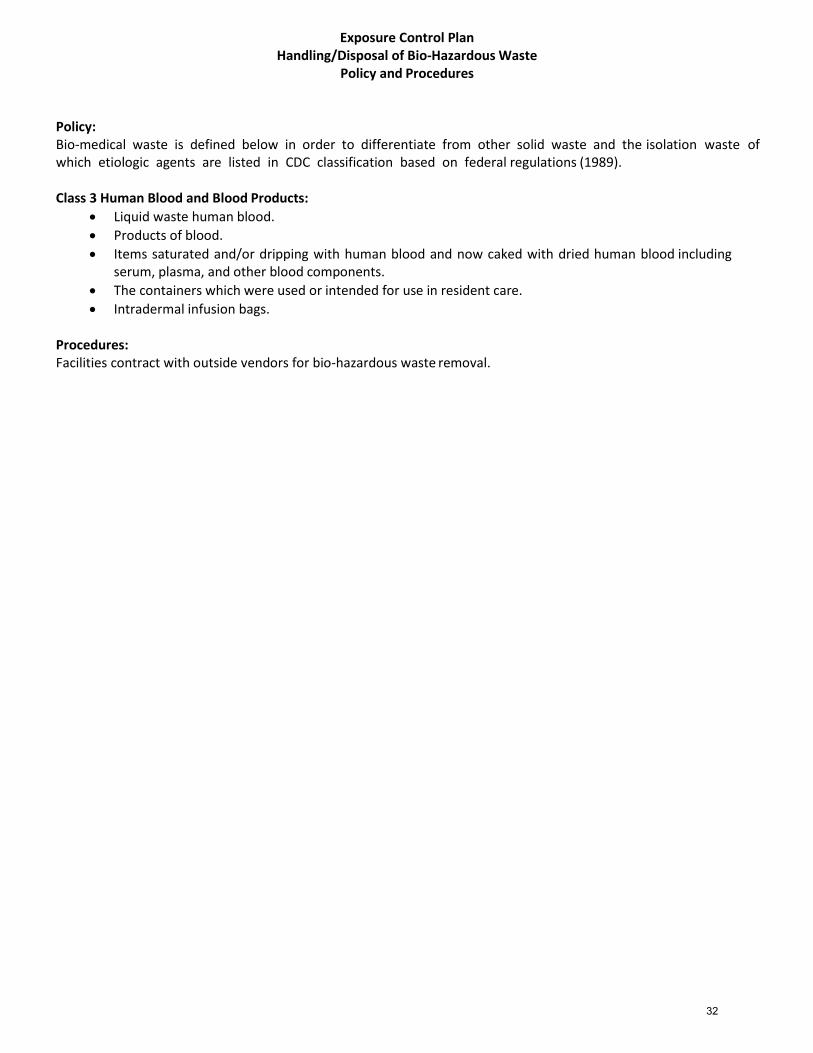
Exposure Control Plan Handling/Disposal of Bio-Hazardous Waste
Policy and Procedures
Policy: Bio-medical waste is defined below in order to differentiate from other solid waste and the isolation waste of which etiologic agents are listed in CDC classification based on federal regulations (1989).
Class 3 Human Blood and Blood Products:
Liquid waste human blood.
Products of blood.
Items saturated and/or dripping with human blood and now caked with dried human blood including serum, plasma, and other blood components.
The containers which were used or intended for use in resident care.
Intradermal infusion bags.
Procedures: Facilities contract with outside vendors for bio-hazardous waste removal.
32

Exposure Control Plan Occupational Exposure Policy and Procedures
Policy: All significant exposure to patient’s blood or other body fluids shall be considered serious and shall be reported for follow up. Significant exposure is defined as:
1. A parenteral exposure such as a needle stick or cut. 2. Mucous membrane exposure such as a splash to eyes or mouth. 3. Cutaneous exposure involving large amounts of blood of body fluids or prolonged contact, especially when skin
is chapped, abraded, or afflicted with dermatitis. 4. Each reported exposure shall be evaluated by the exposure evaluation team for significance. The team
consists of the Infection Control Committee members and others as appropriate. Procedures:
Procedure Key Points
1. Immediately after exposure by needle stick or cut, wash site well with soap and water. After splash to mucous membranes, rinse thoroughly with water.
Those work-related injuries that involve loss of consciousness transfer to another job, restriction of work or motion, or medical treatment are required to be put on the OSHA 200 form. Use of prescription medication (beyond a single dose for minor injury or discomfort) is considered medical treatment.
2. Complete Accident and Incident form. Notify Regional Manager.
3. Follow up procedures will be taken for
exposure to HIV/HBV:
a. Inform source patient of incident and test for HIV/HBV infection after written consent is obtained.
b. In the case that a source person refuses to consent to testing, obtaining a consent to determine the presence of HIV infection can be exempted, providing the following criteria are met:
Complete OSHA 200 form.
33
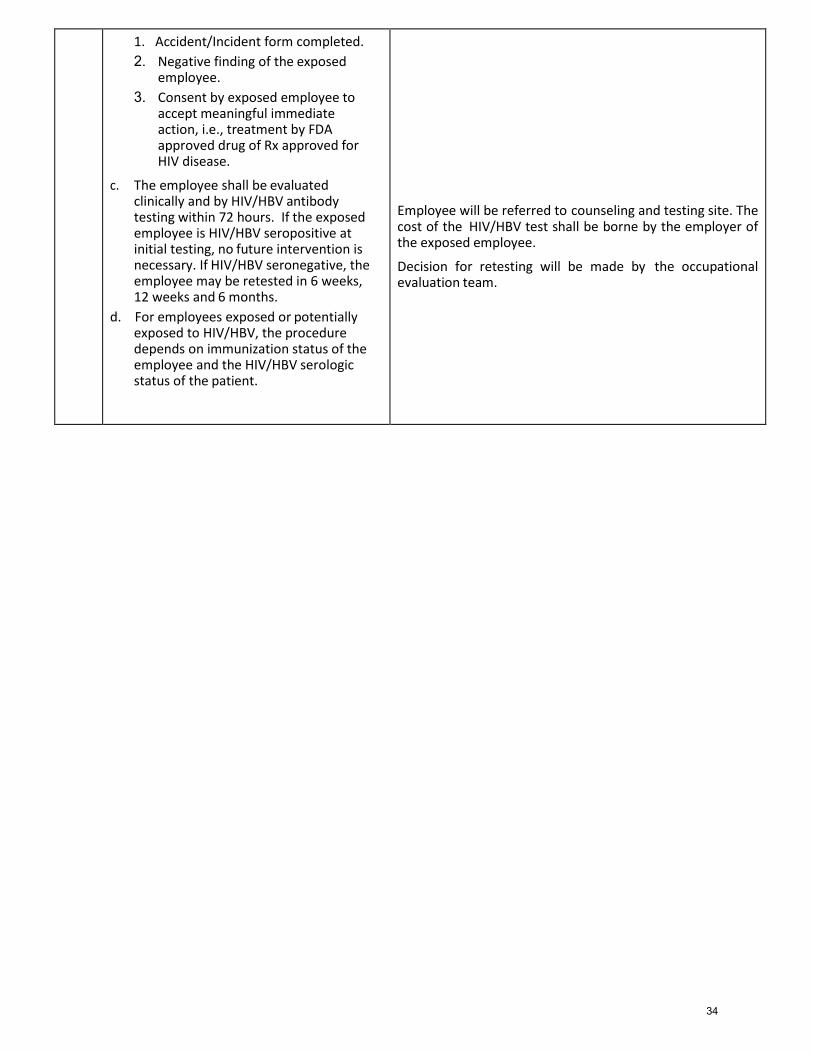
1. Accident/Incident form completed.
2. Negative finding of the exposed employee.
3. Consent by exposed employee to accept meaningful immediate action, i.e., treatment by FDA approved drug of Rx approved for HIV disease.
c. The employee shall be evaluated clinically and by HIV/HBV antibody testing within 72 hours. If the exposed employee is HIV/HBV seropositive at initial testing, no future intervention is necessary. If HIV/HBV seronegative, the employee may be retested in 6 weeks, 12 weeks and 6 months.
d. For employees exposed or potentially exposed to HIV/HBV, the procedure depends on immunization status of the employee and the HIV/HBV serologic status of the patient.
Employee will be referred to counseling and testing site. The cost of the HIV/HBV test shall be borne by the employer of the exposed employee.
Decision for retesting will be made by the occupational evaluation team.
34

Exposure Control Plan
Hepatitis B Vaccination Procedures
Purpose: To describe the process for documenting the employee’s status in connection with obtaining the Hepatitis B Vaccination Procedure:
1. Review and discuss with employee the educational information. This must be done within 10 days of hire. 2. Declaration Statement/Informed Consent Form is signed. If the employee refuses the inoculations, the form
must still be signed. They may want to discuss any concerns with their personal physician. 3. Inoculations may be obtained through employee’s personal physician, or local governmental ambulatory clinic. 4. Proof of Hepatitis B Vaccination is maintained by the Human Resources Department.
35
Exposure Control Plan Hydrocollator Cleaning Procedures
Purpose: To describe the procedures for cleaning of the Hydrocollator unit. A Hydrocollator is a liquid heating device that is used to heat and store hot packs for therapeutic uses. Hydrocollator units are stainless steel and offer a constant supply of temperature- consistent packs. Procedures:
1. Unplug Hydrocollator and turn off unit. Remove hot packs and cover them with some toweling to keep them from drying out. Remove racks from inside the unit.
2. Drain Hydrocollator in soiled utility room or housekeeping closet. Push large, wheeled Hydrocollator into the proper area and use a rubber hose to the floor drain to remove water. Push smaller hydrocollators on a cart and use rubber hose if able, or dump the water into the utility tub. (Use gloves and caution – water will be hot!!!)
3. Clean inside of Hydrocollator using a non-abrasive cleaner and lime remover if necessary. Attempt to eliminate as much of the dirt and built-up as possible. Removable racks (separators) should also be cleaned. Rinse thoroughly.
4. Clean outside of hydrocollator with non-abrasive chrome cleaner to make it shine. 5. Wash packs with plain water 6. Replace inner racks and hot packs. Fill with warm water to cover racks. Plug machine in and turn it on. 7. Check the temperature between 2-3 hours. Regulate temperature between 160°-165°F to maintain
bacteriostatic condition. 8. Keep water level high enough to completely cover hot packs. Refill as necessary. 9. Clean hydrocollators per manufacturer’s recommendations (or at least once per month) and sign the cleaning
schedule. • The hydrocollator machine operates on Alternating Current only. • The heater is thermostatically controlled and maintains water at approximately 150-170 degrees Fahrenheit. • Hot packs contain special silicone gel that slows the pad to absorb many times its own volume of water.
They will give off moist heat for 30-40 minutes cooling gradually. • Water levels should be kept up to or slightly over the tops of packs at all times. • Always return the pack to the hot water of the unit after each treatment. A rotation of most recently used
packs to the back of the machine will provide treatment-ready packs to the front of the machine. It is consistently heated, kept clean and ready for immediate use.
• Since the pack itself does not touch the skin of the patient, the problem of contamination seldom arises. • Temperature should be checked daily prior to initial patient use and recorded. • If an irregular temperature is noted, the thermostat should be adjusted and the intervention noted on the
log. Re-check the temperature after 2-3 hours. If the temperature is still not within range, consult a supervisor for guidance. Do not use the hot packs until temperature is within therapeutic range.
36

Hydrocollator Cleaning Record
Month
Date Cleaned
Signature
Print Name
January
February
March
April
May
June
July
August
September
October
November
December
37
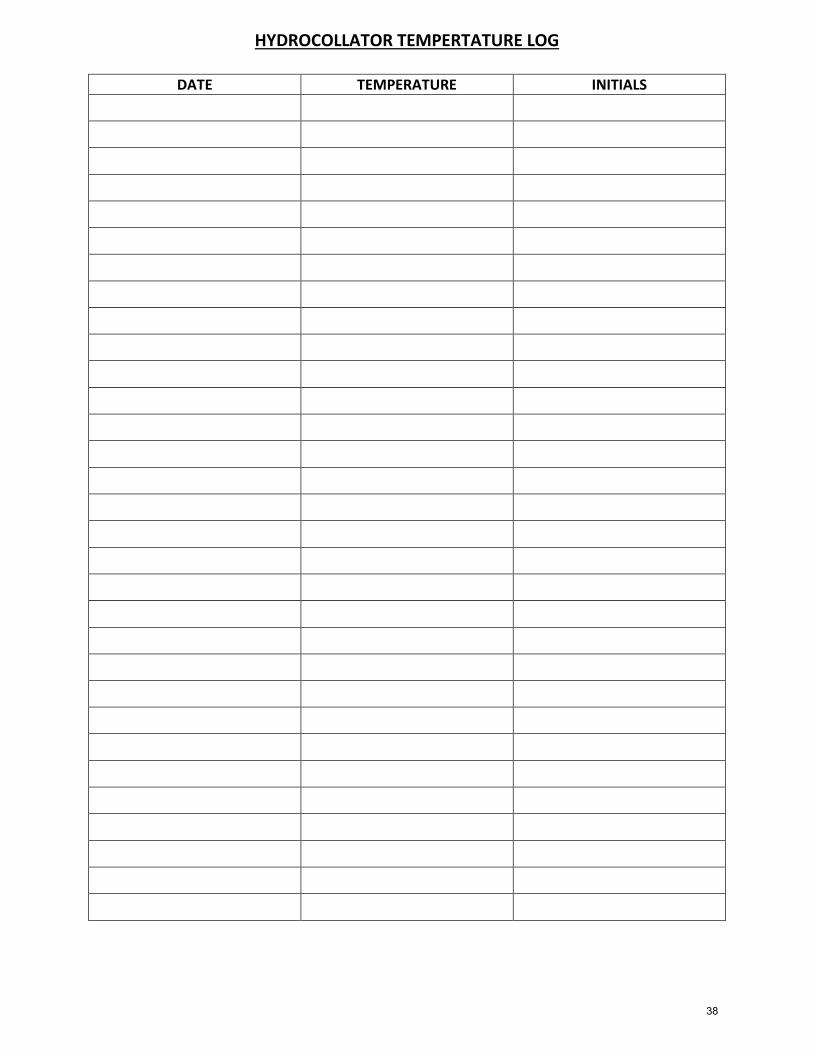
HYDROCOLLATOR TEMPERTATURE LOG
DATE TEMPERATURE INITIALS
38
Exposure Control Plan Cold Pack Unit Cleaning Procedures
Purpose: To describe the procedures for cleaning the Cold Pack unit. The unit is a chilling chamber used to chill and store cold packs for therapeutic uses. The units are stainless steel and offer a constant supply of temperature-consistent cold packs. The unit may be left connected to the electrical outlet, providing a ready supply of chilled cold packs. Check for ice and frost build-up daily. Periodically, the accumulated frost in the chilling chamber will build up to a point where the packs are crowded and insertion or removal of the packs becomes difficult. The units should be defrosted when this occurs and the inside of the tank wiped dry with a clean towel or cloth. Dust and lint will accumulate on the condenser fins of the refrigeration unit. This must be removed periodically to ensure highest efficiency. Procedures:
1. Disconnect the unit from its power source. 2. Raise the chamber lid and remove cold packs. Leave lid open to speed defrosting. 3. Drain the unit in soiled utility room or housekeeping closet. Push large, wheeled unit into the proper area and
use a rubber hose to the floor drain to remove water. Push smaller units on a cart and use rubber hose if able. 4. Attach extension drain hose to the valve on the machine. Open bottom drain valve. 5. Allow unit to defrost completely. All excess water must be removed from the chilling chamber before the unit is
started again. 6. Clean the inside of the unit using a using a non-abrasive cleaner. Attempt to eliminate as much of the dirt and
built-up as possible. Removable racks (separators) should also be cleaned. Rinse thoroughly. 7. Clean the outside of the unit with non-abrasive chrome cleaner to make it shine. 8. Close bottom drain valve and detach extension drain hose. 9. Replace any inner racks. Plug unit back into the power source. 10. Clean and return cold packs to the chilling chamber. 11. Close chamber lid - chilling sequence begins again. Cold pack should chill at least 5 hours before use. 12. Regulate temperature between 10° F - 21°F. Consult the user’s guide for your specific unit for any variations to
this. A temperature log has been provided as a resource. 13. Follow manufacturer’s recommended cleaning schedule and sign the cleaning log.
Care of Cold Packs
• Always return the cold pack to the chilling chamber after each treatment where it is kept chilled, clean and ready for immediate use. This also helps prevent damage.
• Cold packs can be cleaned by scrubbing with soap and water. • It is best not to fold the cold pack for storage. • If the outside plastic cover of the cold pack should become torn or cut, minor repairs may be made with plastic
or vinyl tape. Clean the surface carefully and apply tape at room temperature. • Always replace cold packs when the plastic covering becomes damaged beyond repair or when the pack
becomes firm/hard and not moldable around the area being treated. • Never place a damaged or contaminated pack into the unit – repair it first and/or clean first. Always clean and
sterilize cold packs which are exposed to contamination. Alcohol or similar substance may be used to decontaminate the packs. If any contamination is suspected, discard the cold pack.
39

Cold Pack Unit Cleaning Record
Month
Date Cleaned
Signature
Print Name
January
February
March
April
May
June
July
August
September
October
November
December
40
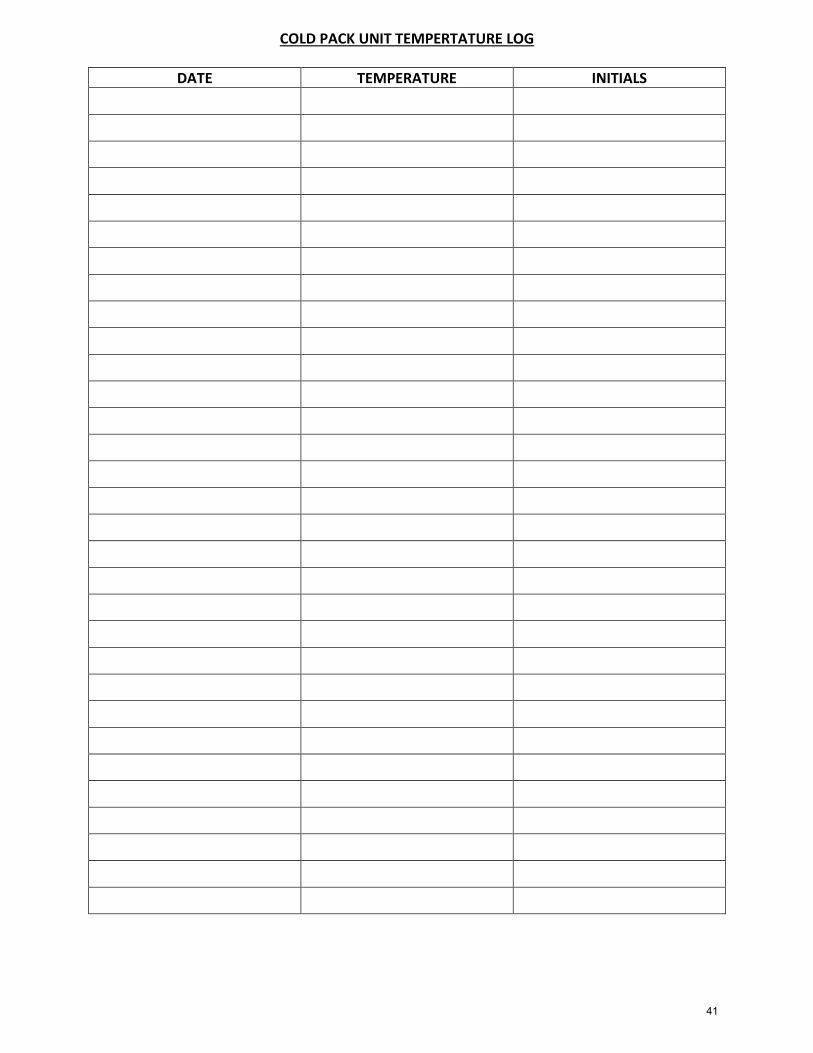
COLD PACK UNIT TEMPERTATURE LOG
DATE TEMPERATURE INITIALS
41
Exposure Control Plan
Paraffin Unit Cleaning Procedures Purpose: To describe the procedures for cleaning the paraffin unit. Procedures:
1. Paraffin bath/unit is cleaned and paraffin is replaced at minimum every 3 months or sooner if use indicates. Follow manufacturer’s recommended cleaning schedule or:
2. Procedure for replacing wax is as follows: a. Disconnect power sources b. Drain old wax from paraffin unit c. Remove grate or cover and clean separately in hot, soapy, water d. Clean all surfaces of inner tank with a soft clean cloth and isopropyl alcohol e. When all traces of film, dirt, and wax are gone, add replacement wax following the directions supplied in the
kit f. Replace cover and clean outside of unit with appropriate cleaner g. Connect to power sources and adjust to melting temperature for 5 hours h. After complete melting, set treatment temperature to approximately 128 degrees Fahrenheit and check the
temperature at least every hour for the duration of the day (check manufacturers guidelines for temperature)
i. Check temperature before use and complete the temperature log j. If an irregular temperature is noted, the paraffin unit should not be utilized until a corrective intervention
occurs k. Once cleaning is complete, sign and date the cleaning log
42

Paraffin Unit Cleaning Record
Month
Date Cleaned
Signature
Print Name
January
February
March
April
May
June
July
August
September
October
November
December
43
PARAFFIN UNIT TEMPERTATURE LOG
DATE TEMPERATURE INITIALS
44
Exposure Control Plan Therapy Gym Equipment Cleaning Procedures
Procedures:
1. Gym equipment may consist of, but not be limited to, walkers, parallel bars, quad and hemi canes, standing box, mat tables, and wall pulleys.
2. Daily. The assigned therapy team member will clean all equipment with Uniquate, or other appropriate
cleaning agent, as directly by the infection control committee, and sign off on a daily cleaning schedule. See attached schedule.
3. For equipment such as weights, physioballs, bolsters, cones, pegs, and pegboards, the assigned therapy team
member will clean weekly, and sign off on a weekly cleaning schedule.
4. If use of common therapy equipment items is unavoidable, following use of that item, such as hand weights, dumb bells, cones, wrap weights, pulleys, etc. during the course of daily treatments the equipment is to be adequately cleaned and disinfected before use for another resident.
45
Therapy Gym Equipment Cleaning Record
Date Cleaned Signature Print Name
Monday
Tuesday
Wednesday
Thursday
Friday
Saturday
Sunday
Date Cleaned Signature Print Name
Monday
Tuesday
Wednesday
Thursday
Friday
Saturday
Sunday
Date Cleaned Signature Print Name
Monday
Tuesday
Wednesday
Thursday
Friday
Saturday
Sunday
Date Cleaned Signature Print Name
Monday
Tuesday
Wednesday
Thursday
Friday
Saturday
Sunday
46
Clinical Policy and Procedure Manual
Section 7: Clinical Competency Checklists
47
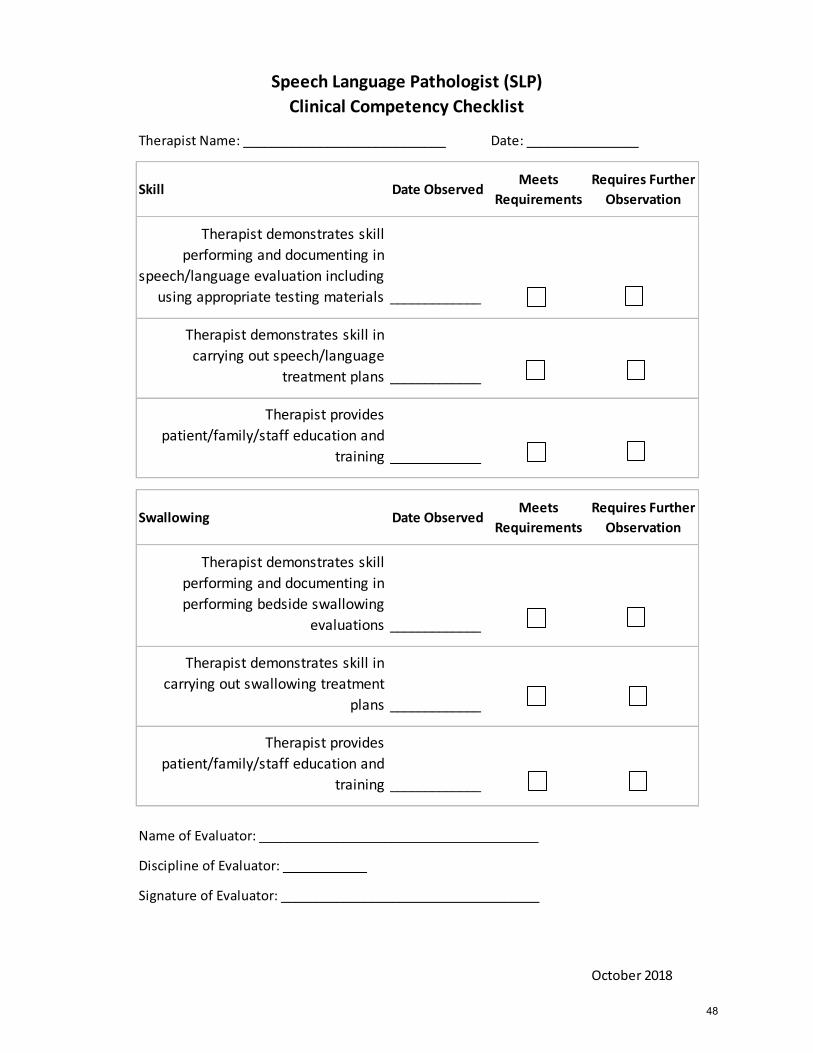
Therapist Name: _____________________________ Date: ________________
Skill Date ObservedMeets
Requirements
Requires Further
Observation
_____________
_____________
_____________
Date ObservedMeets
Requirements
Requires Further
Observation
_____________
_____________
_____________
Name of Evaluator: ________________________________________
Discipline of Evaluator: ____________
Signature of Evaluator: _____________________________________
October 2018
Swallowing
Therapist demonstrates skill
performing and documenting in
performing bedside swallowing
evaluations
Therapist demonstrates skill in
carrying out swallowing treatment
plans
Therapist provides
patient/family/staff education and
training
Speech Language Pathologist (SLP)
Clinical Competency Checklist
Therapist demonstrates skill
performing and documenting in
speech/language evaluation including
using appropriate testing materials
Therapist demonstrates skill in
carrying out speech/language
treatment plans
Therapist provides
patient/family/staff education and
training
48

Therapist Name: _____________________________ Date: ________________
Skill Date ObservedMeets
Requirements
Requires Further
Observation
_____________
_____________
_____________
_____________
_____________
_____________
_____________
_____________
_____________
_____________
_____________
_____________
_____________
_____________
_____________
_____________
_____________
_____________
_____________
_____________
Name of Evaluator: ________________________________________
Discipline of Evaluator: ____________
Signature of Evaluator: _____________________________________
October 2018
Physical Therapist (PT)
Clinical Competency Checklist
Therapist provides appropriate
patient/family/staff education
Therapist provides required supervision of
assistants including reviewing documentation,
approving new
goals,approving updated care plans
Therapist demonstrates skill in developing,
implementing and carrying out treatment plan of
Therapist demonstrates skill in treating patients with the following treatment techniques:
Therapist demonstrates skill in performing and
documenting PT evaluations including appropriate
testing utilizing appropriate methodology
Therapeutic exercise
Gait training
Adaptive equipment
Wheelchair mobility training
Proper gait belt utilization
Balance training
Neuromuscular re-education
Transfer training
ROM measurements
Electrical stimulation (if applicable)
Prosthetics (if applicable)
Manual muscle tests
Positioning
Bed mobility
Wound care (if applicable)
Ultrasound (if applicable)
49
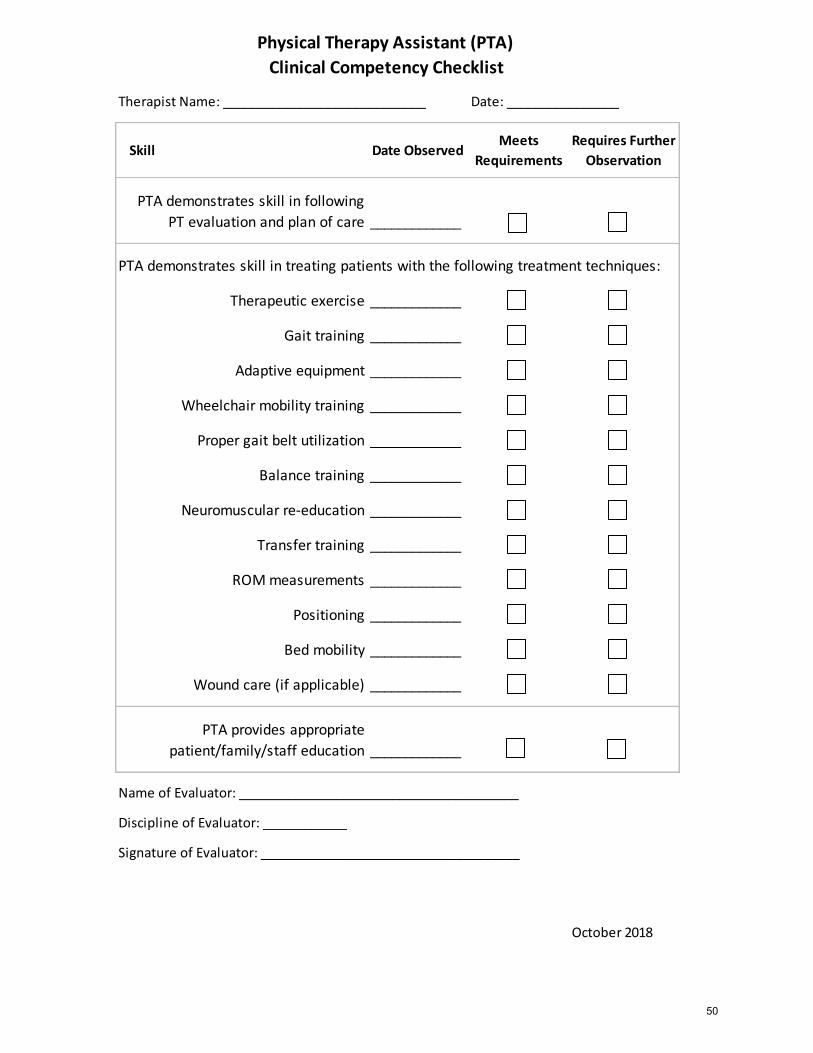
Therapist Name: _____________________________ Date: ________________
Skill Date ObservedMeets
Requirements
Requires Further
Observation
_____________
PTA demonstrates skill in treating patients with the following treatment techniques:
Therapeutic exercise _____________
Gait training _____________
Adaptive equipment _____________
Wheelchair mobility training _____________
Proper gait belt utilization _____________
Balance training _____________
Neuromuscular re-education _____________
Transfer training _____________
ROM measurements _____________
Positioning _____________
Bed mobility _____________
Wound care (if applicable) _____________
_____________
Name of Evaluator: ________________________________________
Discipline of Evaluator: ____________
Signature of Evaluator: _____________________________________
October 2018
PTA provides appropriate
patient/family/staff education
Physical Therapy Assistant (PTA)
Clinical Competency Checklist
PTA demonstrates skill in following
PT evaluation and plan of care
50
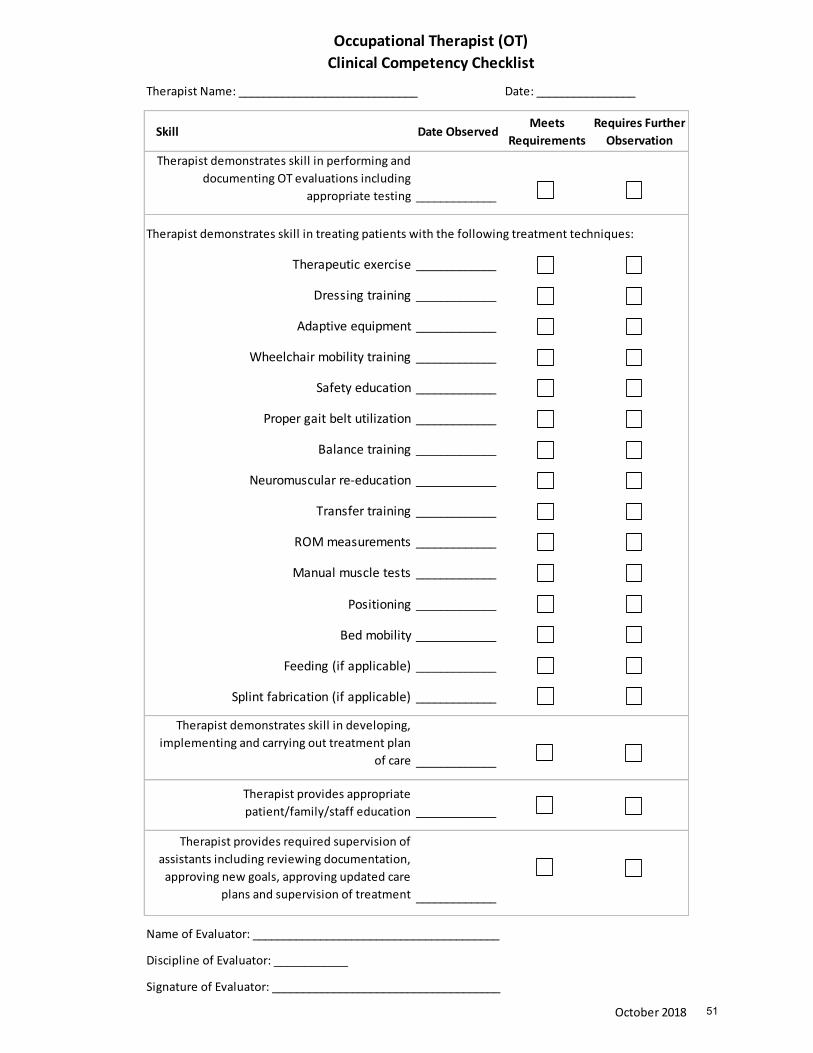
Occupational Therapist (OT)
Therapist Name: _____________________________ Date: ________________
Skill Date ObservedMeets
Requirements
Requires Further
Observation
_____________
Therapeutic exercise _____________
Dressing training _____________
Adaptive equipment _____________
Wheelchair mobility training _____________
Safety education _____________
Proper gait belt utilization _____________
Balance training _____________
Neuromuscular re-education _____________
Transfer training _____________
ROM measurements _____________
Manual muscle tests _____________
Positioning _____________
Bed mobility _____________
Feeding (if applicable) _____________
Splint fabrication (if applicable) _____________
_____________
_____________
_____________
Name of Evaluator: ________________________________________
Discipline of Evaluator: ____________
Signature of Evaluator: _____________________________________
October 2018
Clinical Competency Checklist
Therapist provides appropriate
patient/family/staff education
Therapist provides required supervision of
assistants including reviewing documentation,
approving new goals, approving updated care
plans and supervision of treatment
Therapist demonstrates skill in developing,
implementing and carrying out treatment plan
of care
Therapist demonstrates skill in treating patients with the following treatment techniques:
Therapist demonstrates skill in performing and
documenting OT evaluations including
appropriate testing
51
Therapist Name: _____________________________ Date: ________________
Skill Date ObservedMeets
Requirements
Requires Further
Observation
_____________
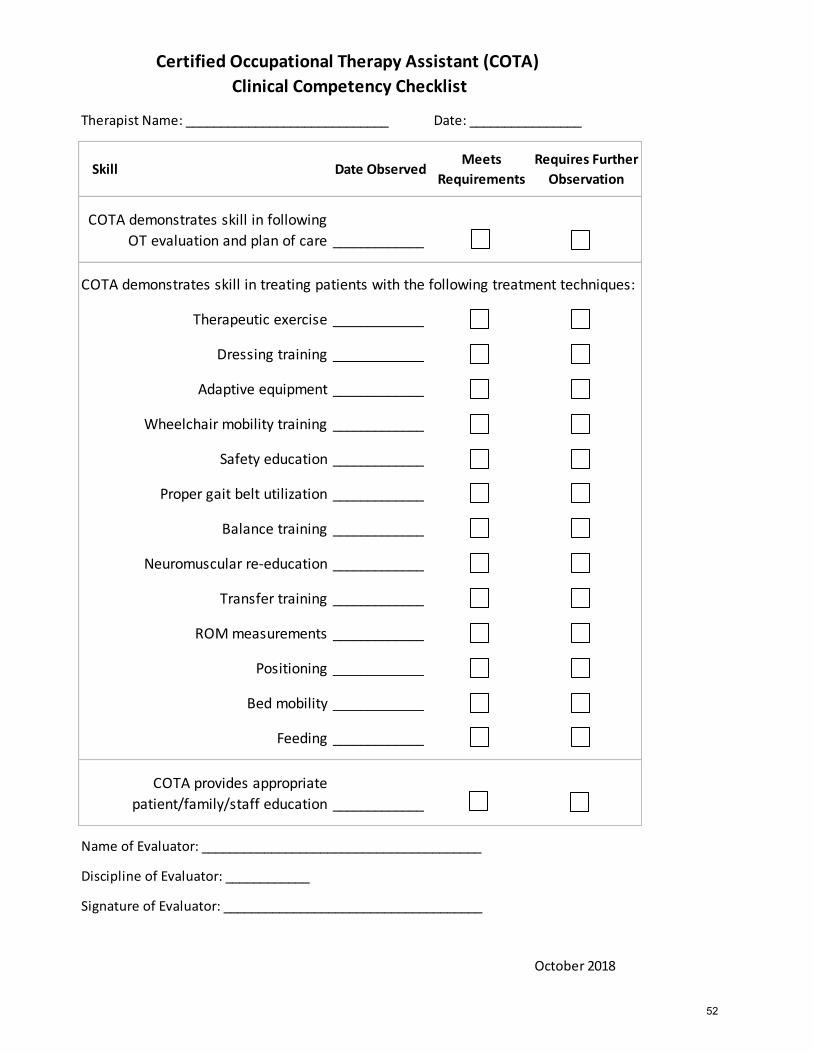
Therapeutic exercise _____________
Dressing training _____________
Adaptive equipment _____________
Wheelchair mobility training _____________
Safety education _____________
Proper gait belt utilization _____________
Balance training _____________
Neuromuscular re-education _____________
Transfer training _____________
ROM measurements _____________
Positioning _____________
Bed mobility _____________
Feeding _____________
_____________
Name of Evaluator: ________________________________________
Discipline of Evaluator: ____________
Signature of Evaluator: _____________________________________
October 2018
COTA provides appropriate
patient/family/staff education
COTA demonstrates skill in treating patients with the following treatment techniques:
Certified Occupational Therapy Assistant (COTA)
Clinical Competency Checklist
COTA demonstrates skill in following
OT evaluation and plan of care
52
Clinical Policy and Procedure Manual
Section 8: Terminology, Degrees of Assistance and
Approved Abbreviations
53
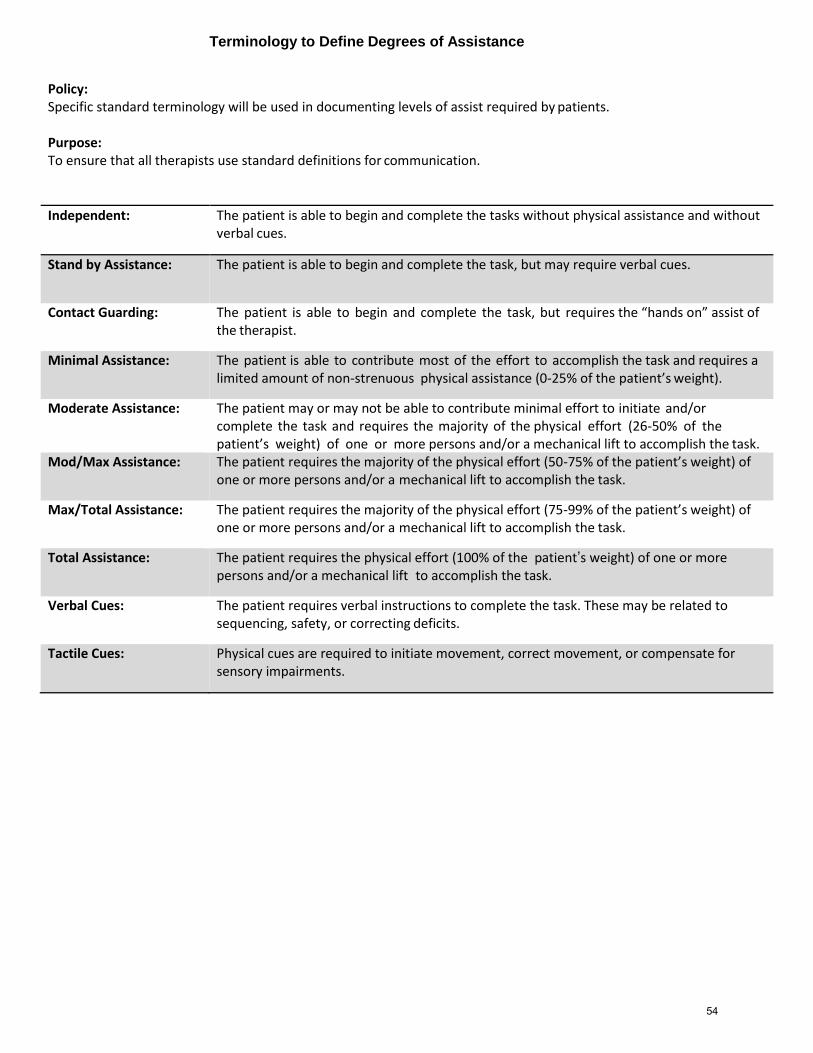
Terminology to Define Degrees of Assistance
Policy: Specific standard terminology will be used in documenting levels of assist required by patients. Purpose: To ensure that all therapists use standard definitions for communication.
Independent: The patient is able to begin and complete the tasks without physical assistance and without verbal cues.
Stand by Assistance: The patient is able to begin and complete the task, but may require verbal cues.
Contact Guarding: The patient is able to begin and complete the task, but requires the “hands on” assist of the therapist.
Minimal Assistance: The patient is able to contribute most of the effort to accomplish the task and requires a limited amount of non-strenuous physical assistance (0-25% of the patient’s weight).
Moderate Assistance: The patient may or may not be able to contribute minimal effort to initiate and/or complete the task and requires the majority of the physical effort (26-50% of the patient’s weight) of one or more persons and/or a mechanical lift to accomplish the task.
Mod/Max Assistance: The patient requires the majority of the physical effort (50-75% of the patient’s weight) of one or more persons and/or a mechanical lift to accomplish the task.
Max/Total Assistance: The patient requires the majority of the physical effort (75-99% of the patient’s weight) of one or more persons and/or a mechanical lift to accomplish the task.
Total Assistance: The patient requires the physical effort (100% of the patient’s weight) of one or more persons and/or a mechanical lift to accomplish the task.
Verbal Cues: The patient requires verbal instructions to complete the task. These may be related to sequencing, safety, or correcting deficits.
Tactile Cues: Physical cues are required to initiate movement, correct movement, or compensate for sensory impairments.
54

Muscle Grades
0 0 Zero
T 1 Trace
T+ 1+ Trace Plus
P- 2- Poor Minus
P 2 Poor
P+ 2+ Poor Plus
F- 3- Fair Minus
F 3 Fair
F+ 3+ Fair Plus
G- 4- Good Minus
G 4 Good
G+ 4+ Good Plus
N 5 Normal
55

OBJECTIVE: Balance Grading Review
Static Sitting Dynamic Sitting
Normal Able to maintain balance against maximal resistance
Normal Able to sit unsupported and weight shift across midline maximally
Good Able to maintain balance against moderate resistance
Good Able to sit unsupported and weight shift across midline moderately
G-/F+ Accepts minimal resistance G-/F+ Able to sit unsupported and weight shift across midline minimally
Fair Able to sit unsupported without balance loss and without UE support
Fair Minimal weight shifting ipsilateral/front, difficulty crossing midline
Poor+ Able to maintain with minimal assistance from individual or chair
Fair - Reach to ipsilateral side and unable to weight shift
Poor Unable to maintain balance – requires mod/max support from individual or chair
Poor+ Able to sit unsupported with minimal assistance and reach to ipsilateral side, unable to weight shift
Poor Able to sit unsupported with moderate assist and reach ipsilateral/front – can’t cross midline
56

OBJECTIVE: Balance Grading Review
Static Standing Dynamic Standing
Normal Able to maintain standing balance against maximal resistance
Normal Able to stand independently unsupported. Able to weight shift and cross midline maximally.
Good Able to maintain standing balance against moderate resistance
Good Able to stand independently unsupported, able to weight shift and cross midline moderately
G-/F+ Able to maintain standing balance against minimal resistance
G-/F+ Stands independently unsupported, able to weight shift across midline minimally
Fair Able to stand unsupported without UE support and without LOB for 1-2 minutes
Fair Able to stand independently unsupported, weight shift, and reach ipsilaterally, LOB when crossing midline
Fair - Requires minimum assist or UE support in order to stand without LOB
Poor + Able to stand with minimum assistance and reach ipsilaterally, unable to weight shift
Poor+ Requires moderate assistance and UE support to maintain standing without balance loss
Poor Able to stand with Mod Assist and minimally reach ipsilaterally, unable to cross midline
Poor Requires maximum assist and UE support to maintain standing balance without loss
57

Functional Range of Motion Measurement
(in degrees)
Normal Range of Motion
Measurement (in degrees)
Hip flexion Gait on level surfaces: 30 Ascending stairs: 47-66 Descending stairs: 45 Sitting in average chair: 112
Squatting: 115 Donning socks: 120 120
Knee flexion Gait on level surfaces: 63 Ascend stairs: 93-105 Descend stairs: 87-107 Rise from chair: 90 Sit in
chair: 93 Tie shoes: 106 Lift object from floor: 117 135
Ankle dorsiflexion Gait on level surfaces: 10 Ascending stairs: 14-27
Descending stairs: 21-36 20 (from neutral)
Ankle plantarflexion
Gait on level surfaces: 15 Ascending stairs: 25-30 Descending stairs: 24-31
50 (from neutral)
Shoulder flexion Reaching into high shelf: 148 180
58
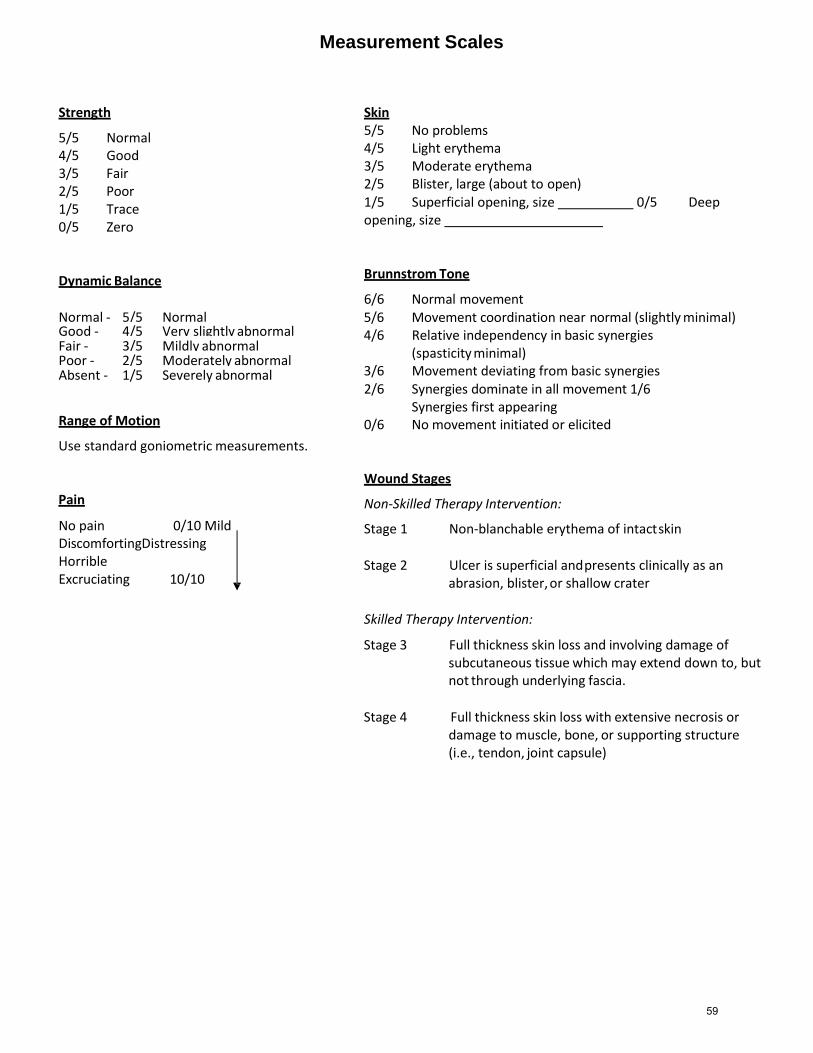
Measurement Scales
Strength
5/5 Normal 4/5 Good 3/5 Fair 2/5 Poor 1/5 Trace 0/5 Zero
Dynamic Balance
Normal - 5/5 Normal Good - 4/5 Very slightly abnormal Fair - 3/5 Mildly abnormal Poor - 2/5 Moderately abnormal Absent - 1/5 Severely abnormal
Range of Motion
Use standard goniometric measurements.
Pain
No pain 0/10 Mild Discomforting Distressing Horrible Excruciating 10/10
Skin 5/5 No problems 4/5 Light erythema 3/5 Moderate erythema 2/5 Blister, large (about to open) 1/5 Superficial opening, size 0/5 Deep opening, size
Brunnstrom Tone
6/6 Normal movement 5/6 Movement coordination near normal (slightly minimal) 4/6 Relative independency in basic synergies
(spasticity minimal) 3/6 Movement deviating from basic synergies 2/6 Synergies dominate in all movement 1/6 Synergies first appearing 0/6 No movement initiated or elicited
Wound Stages
Non-Skilled Therapy Intervention:
Stage 1 Non-blanchable erythema of intact skin
Stage 2 Ulcer is superficial and presents clinically as an
abrasion, blister, or shallow crater
Skilled Therapy Intervention:
Stage 3 Full thickness skin loss and involving damage of subcutaneous tissue which may extend down to, but not through underlying fascia.
Stage 4 Full thickness skin loss with extensive necrosis or
damage to muscle, bone, or supporting structure (i.e., tendon, joint capsule)
59
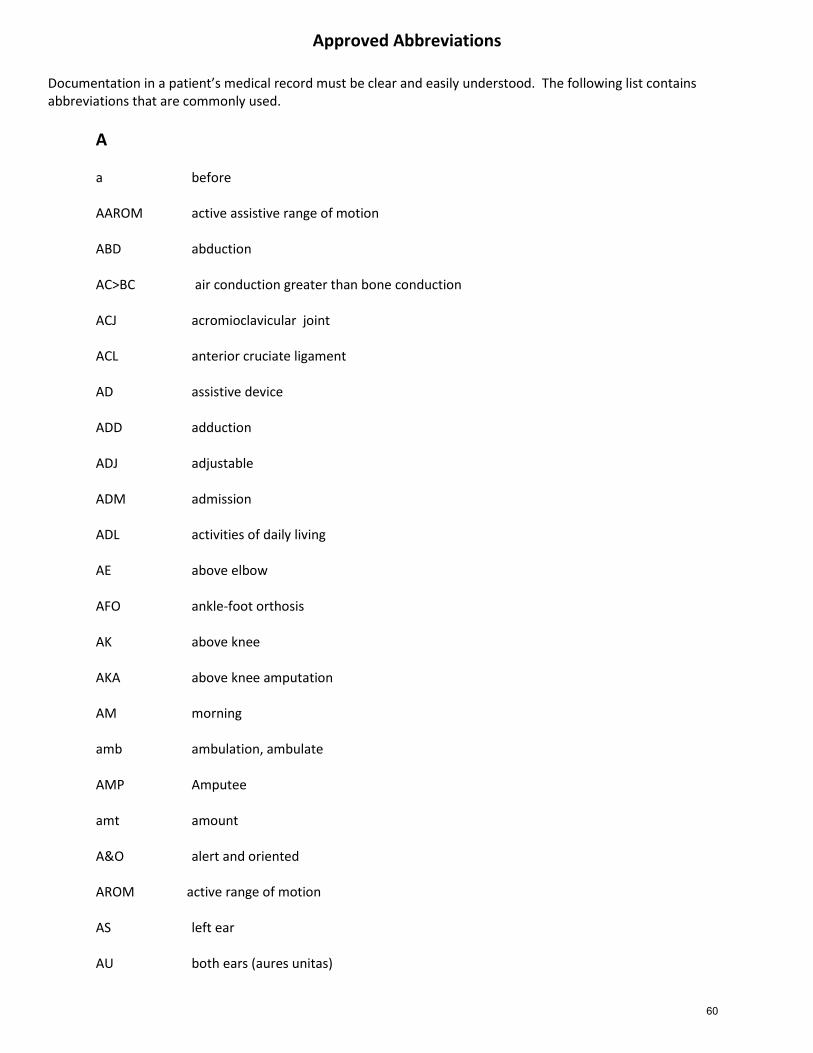
Approved Abbreviations Documentation in a patient’s medical record must be clear and easily understood. The following list contains abbreviations that are commonly used.
A a before AAROM active assistive range of motion ABD abduction AC>BC air conduction greater than bone conduction ACJ acromioclavicular joint ACL anterior cruciate ligament AD assistive device ADD adduction ADJ adjustable ADM admission ADL activities of daily living AE above elbow AFO ankle-foot orthosis AK above knee AKA above knee amputation AM morning amb ambulation, ambulate AMP Amputee amt amount A&O alert and oriented AROM active range of motion AS left ear AU both ears (aures unitas)
60
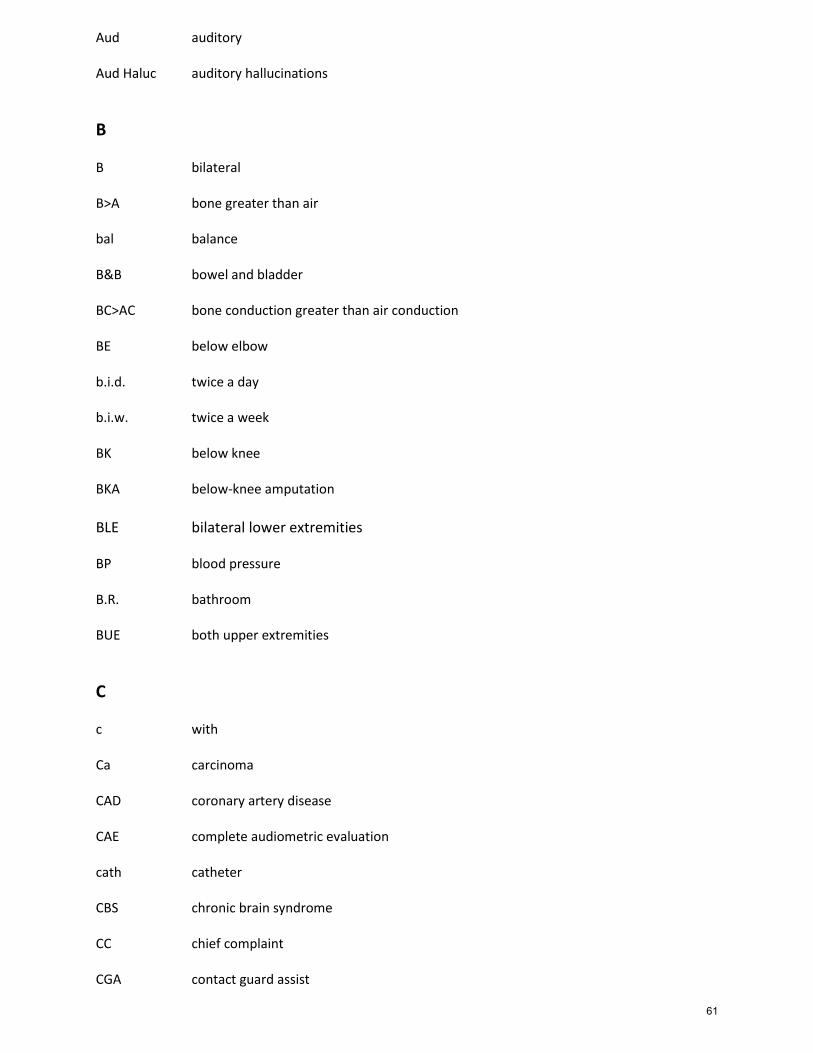
Aud auditory Aud Haluc auditory hallucinations
B B bilateral B>A bone greater than air bal balance B&B bowel and bladder BC>AC bone conduction greater than air conduction BE below elbow b.i.d. twice a day b.i.w. twice a week BK below knee BKA below-knee amputation
BLE bilateral lower extremities BP blood pressure B.R. bathroom BUE both upper extremities
C c with Ca carcinoma CAD coronary artery disease CAE complete audiometric evaluation cath catheter CBS chronic brain syndrome CC chief complaint CGA contact guard assist
61

CHD coronary heart disease CHF congestive heart failure CHI closed head injury CKC closed kinetic chain c/o complains of COPD chronic obstructive pulmonary disease COTA certified occupational therapy assistant CP cold pack CPM continuous passive motion C.P.T. chest physical therapy CTx cervical traction CVA cerebral-vascular accident
D D/C discharge DF dorsiflexion DI diabetes insipidus DJD degenerative joint disease DOB date of birth DOI date of injury DTR deep tendon reflexes Dx diagnosis
E EENT eye, ear, nose, and throat ENT ear, nose, and throat EOB edge of bed
62

E Stim electrical stimulation eval evaluation EWHO elbow wrist hand orthosis ext extension ext rot external rotation
F F female FAM family FI fluid fl. dr. fluid dram fl. oz. fluid ounce flex flexion FO foot orthosis FOB foot of bed Ft. foot FWB full weight-bearing FWW front wheeled walker Fx fracture
G G Good GHJ Glenohumeral Joint GI Gastrointestinal GM Gross Motor
H
63
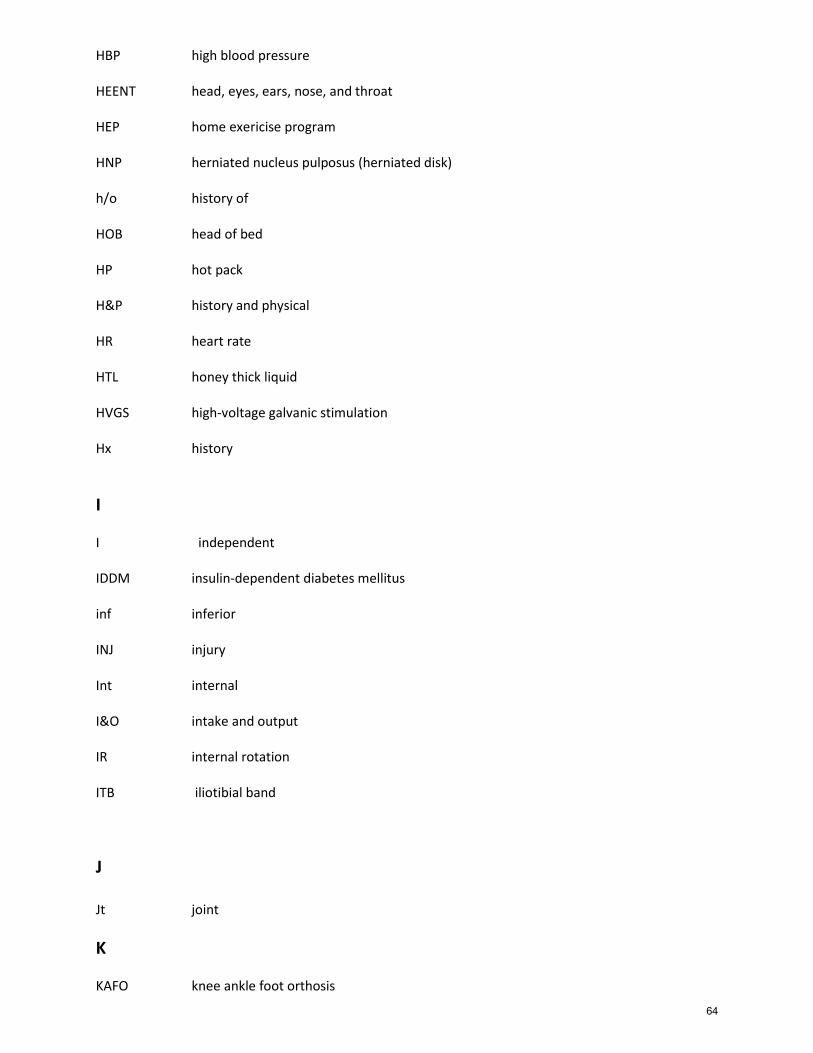
HBP high blood pressure HEENT head, eyes, ears, nose, and throat HEP home exericise program HNP herniated nucleus pulposus (herniated disk) h/o history of HOB head of bed HP hot pack H&P history and physical HR heart rate HTL honey thick liquid HVGS high-voltage galvanic stimulation Hx history
I I independent IDDM insulin-dependent diabetes mellitus inf inferior INJ injury Int internal I&O intake and output IR internal rotation ITB iliotibial band
J Jt joint
K KAFO knee ankle foot orthosis
64
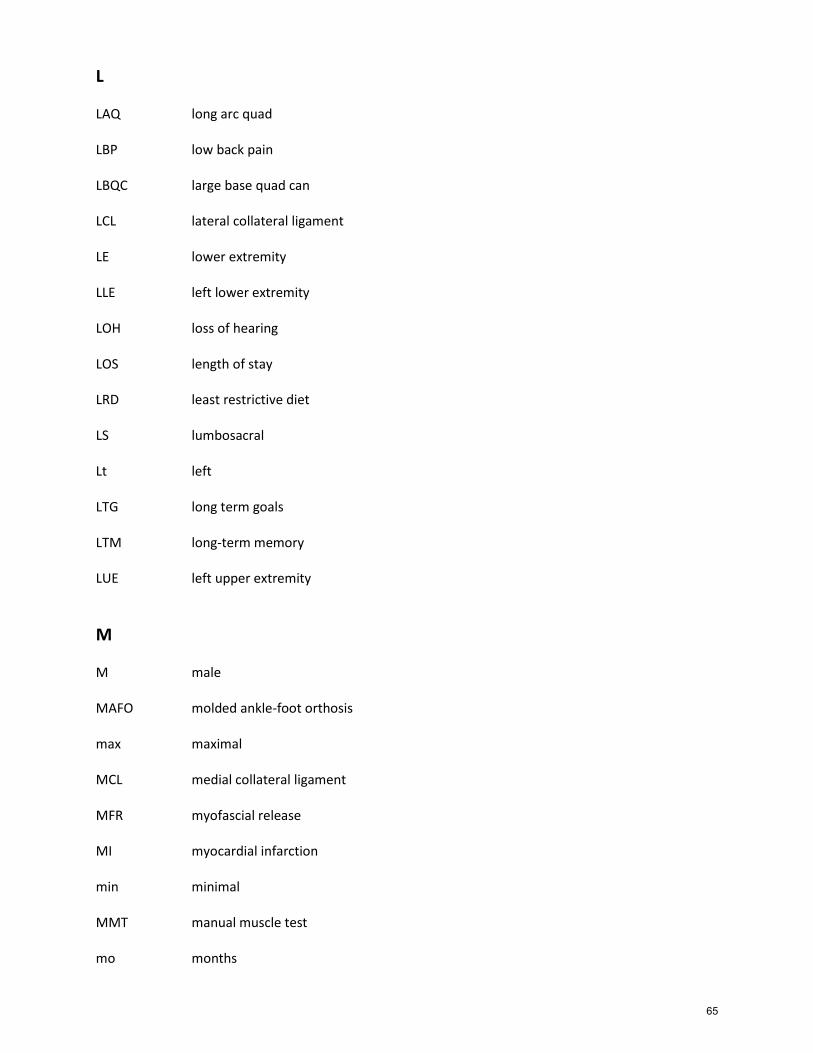
L LAQ long arc quad LBP low back pain LBQC large base quad can LCL lateral collateral ligament LE lower extremity LLE left lower extremity LOH loss of hearing LOS length of stay LRD least restrictive diet LS lumbosacral Lt left LTG long term goals LTM long-term memory LUE left upper extremity
M M male MAFO molded ankle-foot orthosis max maximal MCL medial collateral ligament MFR myofascial release MI myocardial infarction min minimal MMT manual muscle test mo months
65
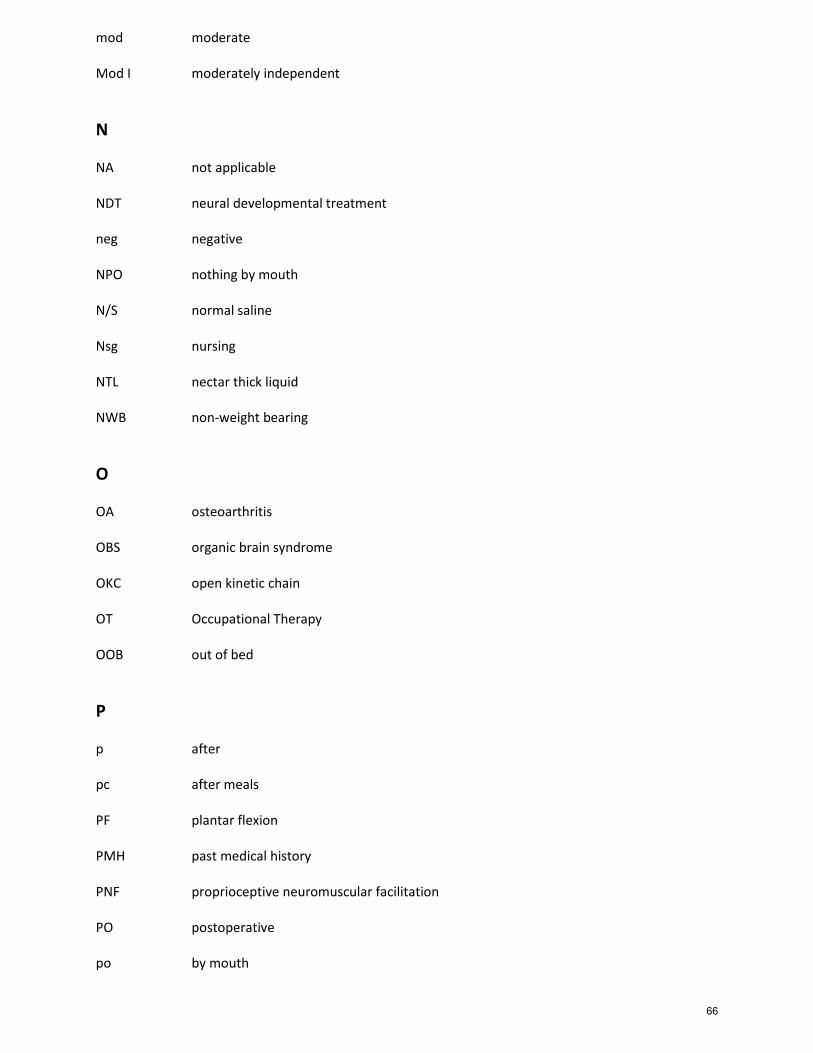
mod moderate Mod I moderately independent
N NA not applicable NDT neural developmental treatment neg negative NPO nothing by mouth N/S normal saline Nsg nursing NTL nectar thick liquid NWB non-weight bearing
O OA osteoarthritis OBS organic brain syndrome OKC open kinetic chain OT Occupational Therapy OOB out of bed
P p after pc after meals PF plantar flexion PMH past medical history PNF proprioceptive neuromuscular facilitation PO postoperative po by mouth
66
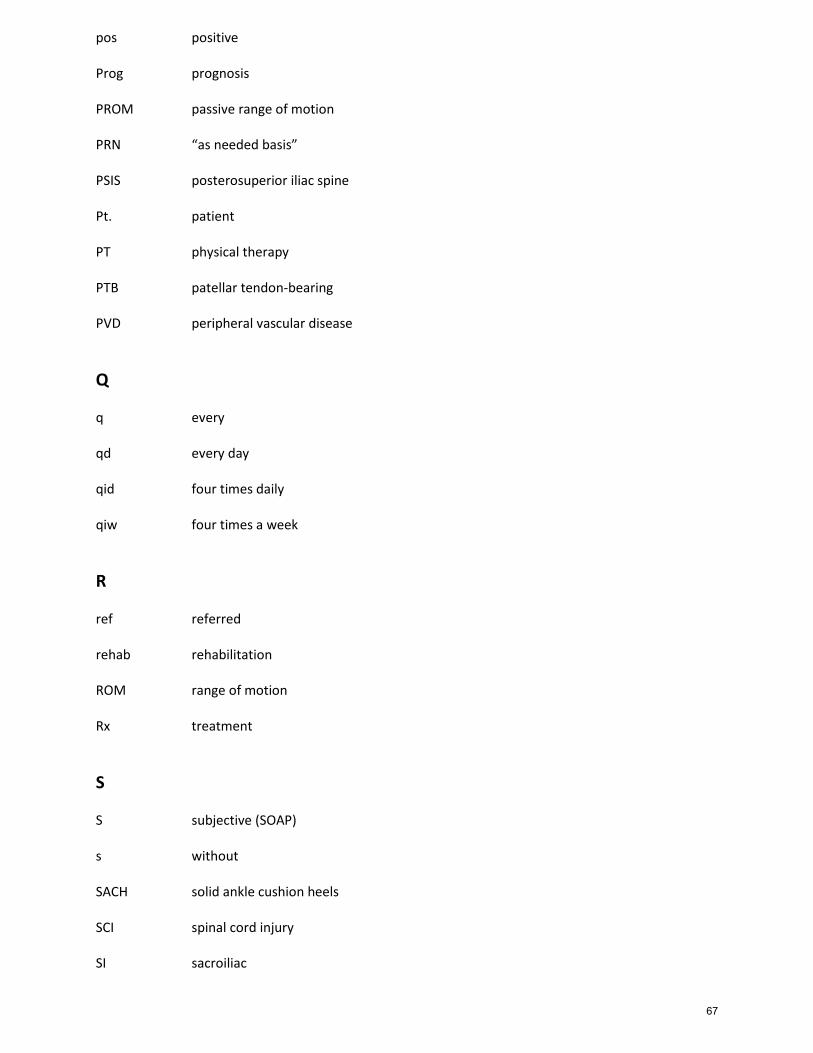
pos positive Prog prognosis PROM passive range of motion PRN “as needed basis” PSIS posterosuperior iliac spine Pt. patient PT physical therapy PTB patellar tendon-bearing PVD peripheral vascular disease
Q q every qd every day qid four times daily qiw four times a week
R ref referred rehab rehabilitation ROM range of motion Rx treatment
S S subjective (SOAP) s without SACH solid ankle cushion heels SCI spinal cord injury SI sacroiliac
67
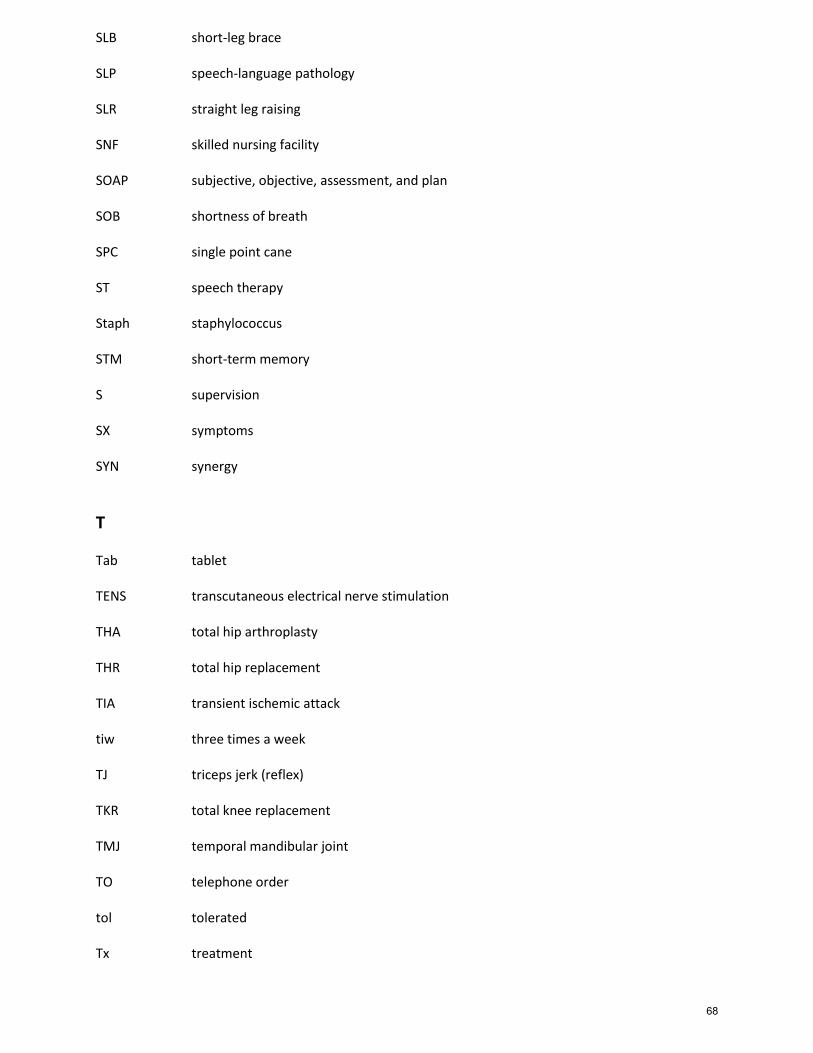
SLB short-leg brace SLP speech-language pathology SLR straight leg raising SNF skilled nursing facility SOAP subjective, objective, assessment, and plan SOB shortness of breath SPC single point cane ST speech therapy Staph staphylococcus STM short-term memory S supervision SX symptoms SYN synergy
T Tab tablet TENS transcutaneous electrical nerve stimulation THA total hip arthroplasty THR total hip replacement TIA transient ischemic attack tiw three times a week TJ triceps jerk (reflex) TKR total knee replacement TMJ temporal mandibular joint TO telephone order tol tolerated Tx treatment
68
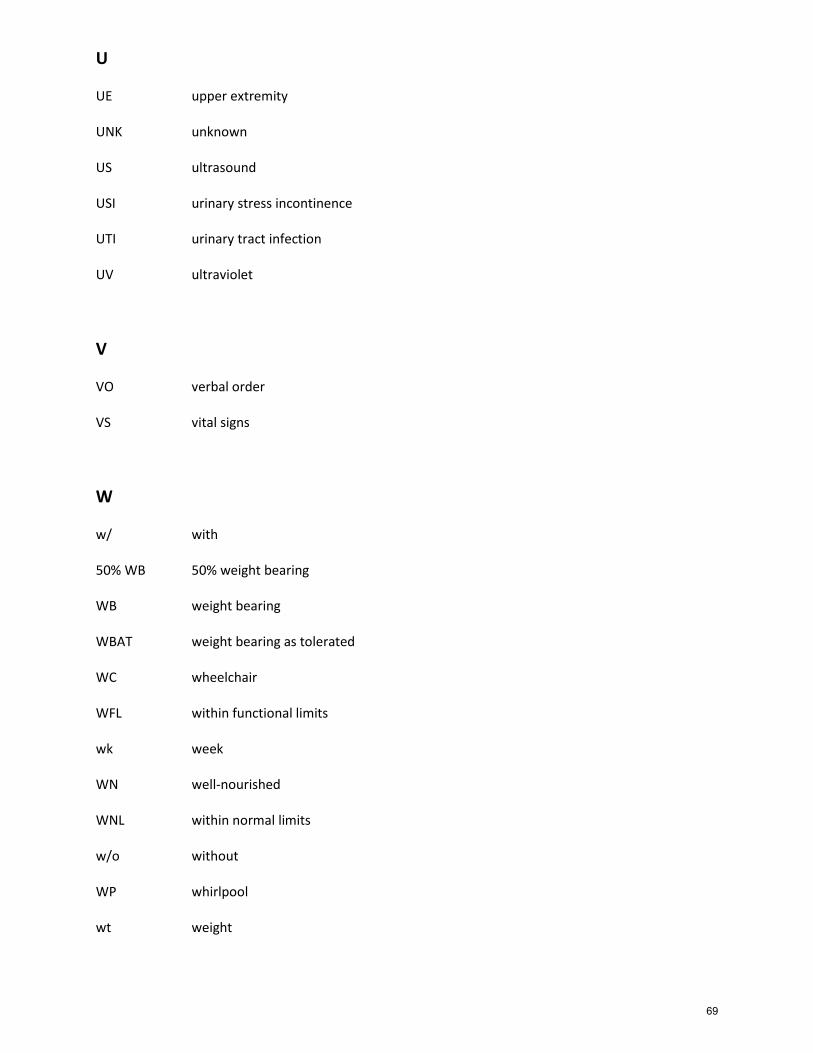
U UE upper extremity UNK unknown US ultrasound USI urinary stress incontinence UTI urinary tract infection UV ultraviolet
V VO verbal order VS vital signs
W w/ with 50% WB 50% weight bearing WB weight bearing WBAT weight bearing as tolerated WC wheelchair WFL within functional limits wk week WN well-nourished WNL within normal limits w/o without WP whirlpool wt weight
69

Y YO years old yr year
70
Clinical Policy and Procedure Manual
Section 9: Documentation
71

Documentation General Procedures
Purpose: To provide an overview of documentation requirements. Documentation requirements vary based on the resident’s specific coverage situation. Certain forms, reports and summaries must be completed when a resident is:
1. Initiated on Medicare Part A 2. Transfers from Medicare Part A to Medicare Part B 3. Initiated on Medicare Part B 4. Transfers from one Payor Source to another Payor Source
The following chart lists the forms and reports required for each of the above situations.
Required Forms and Reports
If the resident is: Provide:
Initiated on Medicare Part A ▪ Initial evaluation and Plan of Care
▪ Physician’s orders (evaluation and clarification)
▪ Recertification every 30 days/ Updated Plan of Care
▪ CPT Log/Service Log
▪ Daily Encounter Notes
▪ Weekly Progress Notes
▪ Discharge order (when therapy is discontinued)
▪ Discharge summary
Transferred from Medicare Part A to Medicare Part B
▪ Discharge order from Part A
▪ Payor source authorization
▪ Initial evaluation and Plan of Care
▪ Physician’s orders (evaluation and clarification)
▪ CPT Log/Service Log
▪ Daily Encounter Notes
▪ Progress Report every 10th visit or sooner
▪ Discharge order (when Part B therapy is discontinued)
▪ Discharge summary
72
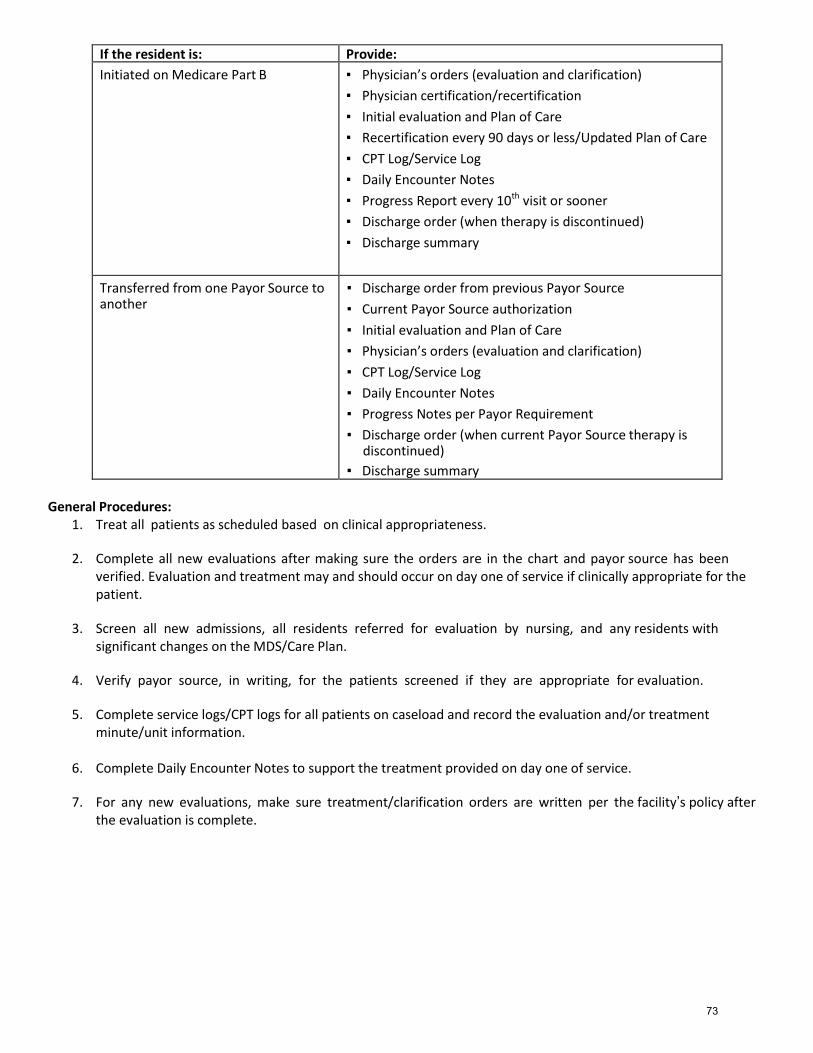
If the resident is: Provide:
Initiated on Medicare Part B ▪ Physician’s orders (evaluation and clarification)
▪ Physician certification/recertification
▪ Initial evaluation and Plan of Care
▪ Recertification every 90 days or less/Updated Plan of Care
▪ CPT Log/Service Log
▪ Daily Encounter Notes
▪ Progress Report every 10th visit or sooner
▪ Discharge order (when therapy is discontinued)
▪ Discharge summary
Transferred from one Payor Source to another
▪ Discharge order from previous Payor Source
▪ Current Payor Source authorization
▪ Initial evaluation and Plan of Care
▪ Physician’s orders (evaluation and clarification)
▪ CPT Log/Service Log
▪ Daily Encounter Notes
▪ Progress Notes per Payor Requirement
▪ Discharge order (when current Payor Source therapy is discontinued)
▪ Discharge summary General Procedures:
1. Treat all patients as scheduled based on clinical appropriateness.
2. Complete all new evaluations after making sure the orders are in the chart and payor source has been verified. Evaluation and treatment may and should occur on day one of service if clinically appropriate for the patient.
3. Screen all new admissions, all residents referred for evaluation by nursing, and any residents with significant changes on the MDS/Care Plan.
4. Verify payor source, in writing, for the patients screened if they are appropriate for evaluation.
5. Complete service logs/CPT logs for all patients on caseload and record the evaluation and/or treatment minute/unit information.
6. Complete Daily Encounter Notes to support the treatment provided on day one of service.
7. For any new evaluations, make sure treatment/clarification orders are written per the facility’s policy after the evaluation is complete.
73
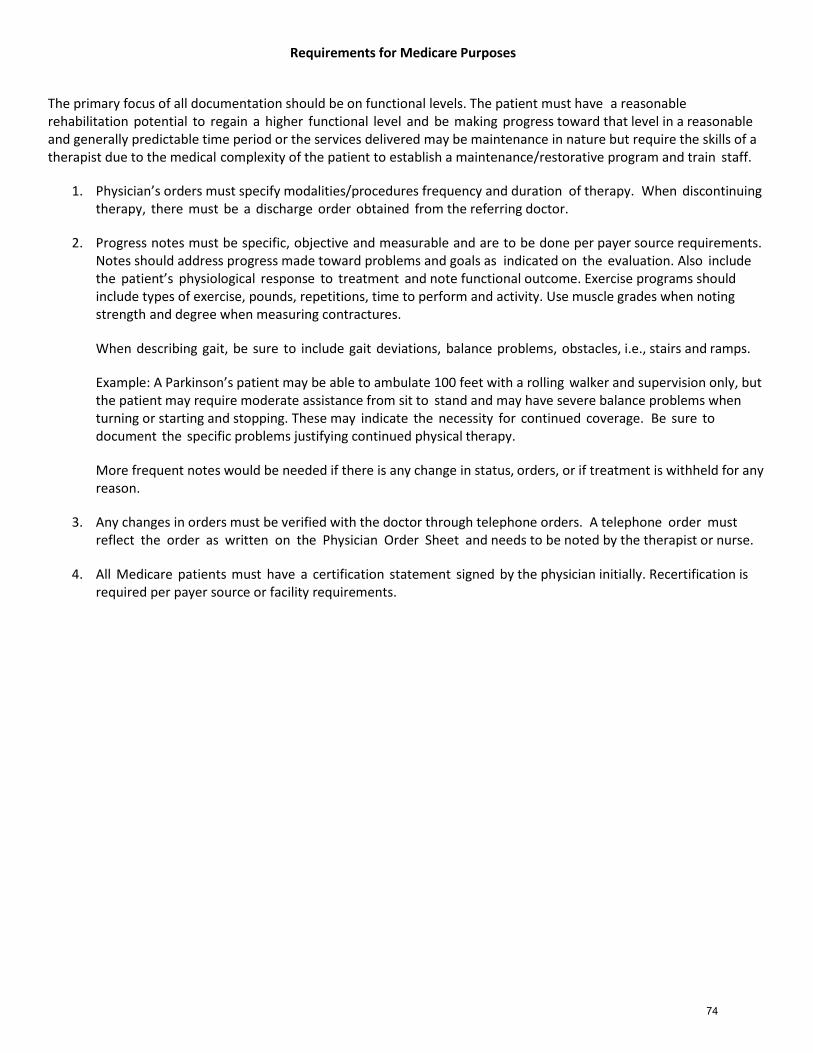
Requirements for Medicare Purposes
The primary focus of all documentation should be on functional levels. The patient must have a reasonable rehabilitation potential to regain a higher functional level and be making progress toward that level in a reasonable and generally predictable time period or the services delivered may be maintenance in nature but require the skills of a therapist due to the medical complexity of the patient to establish a maintenance/restorative program and train staff.
1. Physician’s orders must specify modalities/procedures frequency and duration of therapy. When discontinuing therapy, there must be a discharge order obtained from the referring doctor.
2. Progress notes must be specific, objective and measurable and are to be done per payer source requirements. Notes should address progress made toward problems and goals as indicated on the evaluation. Also include the patient’s physiological response to treatment and note functional outcome. Exercise programs should include types of exercise, pounds, repetitions, time to perform and activity. Use muscle grades when noting strength and degree when measuring contractures.
When describing gait, be sure to include gait deviations, balance problems, obstacles, i.e., stairs and ramps.
Example: A Parkinson’s patient may be able to ambulate 100 feet with a rolling walker and supervision only, but the patient may require moderate assistance from sit to stand and may have severe balance problems when turning or starting and stopping. These may indicate the necessity for continued coverage. Be sure to document the specific problems justifying continued physical therapy.
More frequent notes would be needed if there is any change in status, orders, or if treatment is withheld for any reason.
3. Any changes in orders must be verified with the doctor through telephone orders. A telephone order must reflect the order as written on the Physician Order Sheet and needs to be noted by the therapist or nurse.
4. All Medicare patients must have a certification statement signed by the physician initially. Recertification is required per payer source or facility requirements.
74
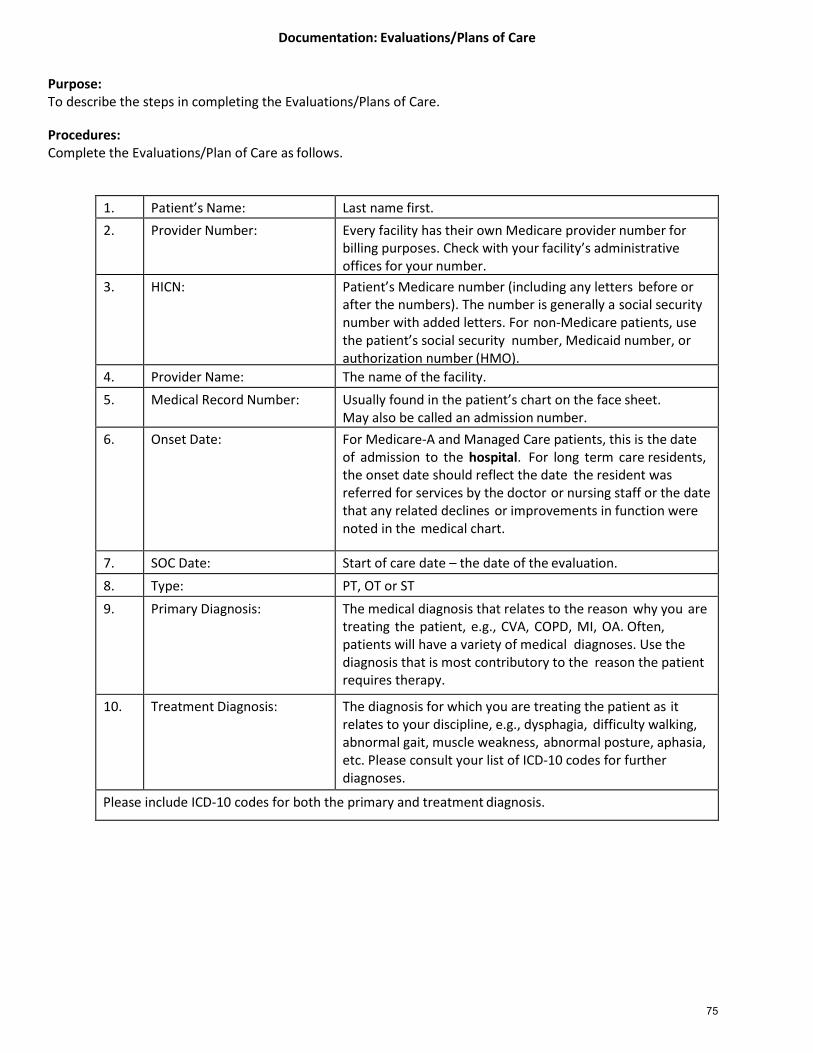
Documentation: Evaluations/Plans of Care
Purpose: To describe the steps in completing the Evaluations/Plans of Care.
Procedures: Complete the Evaluations/Plan of Care as follows.
1. Patient’s Name: Last name first.
2. Provider Number: Every facility has their own Medicare provider number for billing purposes. Check with your facility’s administrative offices for your number.
3. HICN: Patient’s Medicare number (including any letters before or after the numbers). The number is generally a social security number with added letters. For non-Medicare patients, use the patient’s social security number, Medicaid number, or authorization number (HMO).
4. Provider Name: The name of the facility.
5. Medical Record Number: Usually found in the patient’s chart on the face sheet. May also be called an admission number.
6. Onset Date: For Medicare-A and Managed Care patients, this is the date of admission to the hospital. For long term care residents, the onset date should reflect the date the resident was referred for services by the doctor or nursing staff or the date that any related declines or improvements in function were noted in the medical chart.
7. SOC Date: Start of care date – the date of the evaluation.
8. Type: PT, OT or ST
9. Primary Diagnosis: The medical diagnosis that relates to the reason why you are treating the patient, e.g., CVA, COPD, MI, OA. Often, patients will have a variety of medical diagnoses. Use the diagnosis that is most contributory to the reason the patient requires therapy.
10. Treatment Diagnosis: The diagnosis for which you are treating the patient as it relates to your discipline, e.g., dysphagia, difficulty walking, abnormal gait, muscle weakness, abnormal posture, aphasia, etc. Please consult your list of ICD-10 codes for further diagnoses.
Please include ICD-10 codes for both the primary and treatment diagnosis.
75
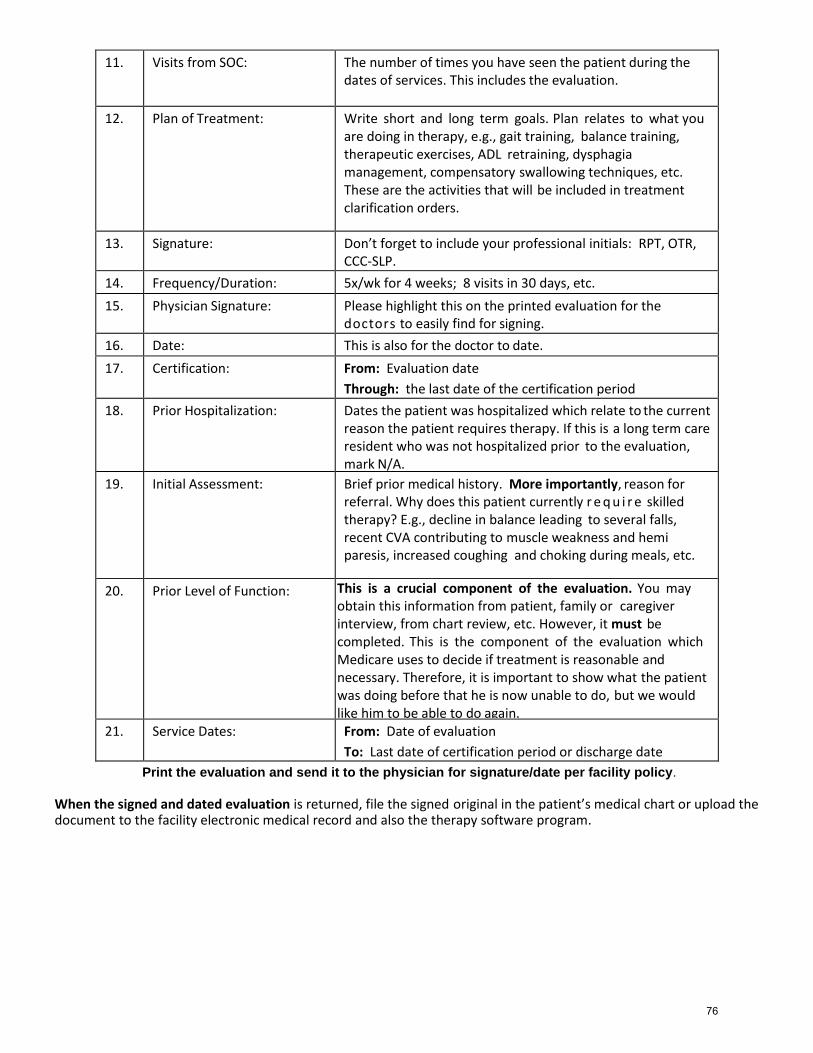
11. Visits from SOC: The number of times you have seen the patient during the dates of services. This includes the evaluation.
12. Plan of Treatment: Write short and long term goals. Plan relates to what you are doing in therapy, e.g., gait training, balance training, therapeutic exercises, ADL retraining, dysphagia management, compensatory swallowing techniques, etc. These are the activities that will be included in treatment clarification orders.
13. Signature: Don’t forget to include your professional initials: RPT, OTR, CCC-SLP.
14. Frequency/Duration: 5x/wk for 4 weeks; 8 visits in 30 days, etc.
15. Physician Signature: Please highlight this on the printed evaluation for the doctors to easily find for signing.
16. Date: This is also for the doctor to date.
17. Certification: From: Evaluation date
Through: the last date of the certification period
18. Prior Hospitalization: Dates the patient was hospitalized which relate to the current reason the patient requires therapy. If this is a long term care resident who was not hospitalized prior to the evaluation, mark N/A.
19. Initial Assessment: Brief prior medical history. More importantly, reason for referral. Why does this patient currently r e q u i r e skilled therapy? E.g., decline in balance leading to several falls, recent CVA contributing to muscle weakness and hemi paresis, increased coughing and choking during meals, etc.
20. Prior Level of Function: This is a crucial component of the evaluation. You may obtain this information from patient, family or caregiver interview, from chart review, etc. However, it must be completed. This is the component of the evaluation which Medicare uses to decide if treatment is reasonable and necessary. Therefore, it is important to show what the patient was doing before that he is now unable to do, but we would like him to be able to do again.
21. Service Dates: From: Date of evaluation
To: Last date of certification period or discharge date
Print the evaluation and send it to the physician for signature/date per facility policy.
When the signed and dated evaluation is returned, file the signed original in the patient’s medical chart or upload the document to the facility electronic medical record and also the therapy software program.
76
Documentation: Recertifications / UPOC Procedures Purpose: To describe the steps in completing the Recertifications / UPOC forms
Procedures:
1. Any patient who receives a continuation of therapy services past the initial certification date will need a re-certification and updated plan of care.
2. Update and modify any short and long term goals on the Plan of Treatment section. Add new goals, if needed.
3. Document progress and the need for continued skilled therapy. Why is it that the patient needs to be seen
by you and not restorative or nursing?
4. Focus on progress toward functional goals and the need for skilled therapy.
5. Print the re-certification and send it to the physician for signature/date per facility policy.
6. When the signed and dated re-certification is returned, file the signed original in the patient’s medical chart or upload to the facility electronic medical record and upload to the therapy software program.
77
Documentation: Treatment Encounter Note Procedures: Every patient seen for an evaluation and/or treatment must have a Treatment Encounter Note (TEN).
1. The Treatment Encounter Note is completed in conjunction with the patient’s logged encounter on the daily input or daily activity log.
2. Follow Optima and/or Casamba instructions for creating the Treatment Encounter Note.
3. Medicare A patient’s evaluations and treatments are generally recorded in minutes. Other payor sources may
require you to record in units. When recording in units, please be aware that some CPT codes are occurrence based, while others are time based.
Any CPT code with the “15 min” listed after the description is a time based code. For example, 30 minutes of gait training = 2 units (record a 2 in the box). If there is not a “15 min” listed beside the description, the code is an occurrence-based charge. Therefore, you may have provided 30 minutes of an OT evaluation, but that is only 1 occurrence. All evaluations, most wound treatments, splinting, and SLP treatments are occurrence based. Only 1 occurrence – whether it took 15 minutes or one hour.
Documentation: Progress Note/Discharge Summary Procedures
78

Purpose: To describe the steps in completing a Progress Note/Discharge Summary. Procedures:
1. For Medicare A and like payers, a progress report is due 7 days after the evaluation and each week thereafter until the patient is discharged. For Medicare B and like payers, a progress report is due every 10th visit or sooner until the patient is discharged.
2. Therapists will need to complete the Discharge Summary to end the therapy track and to end the therapy case.
3. Follow Optima/Casamba instructions for completing the progress report or discharge summary.
79
Clinical Policy and Procedure Manual
Section 10: Clinical Procedures
80
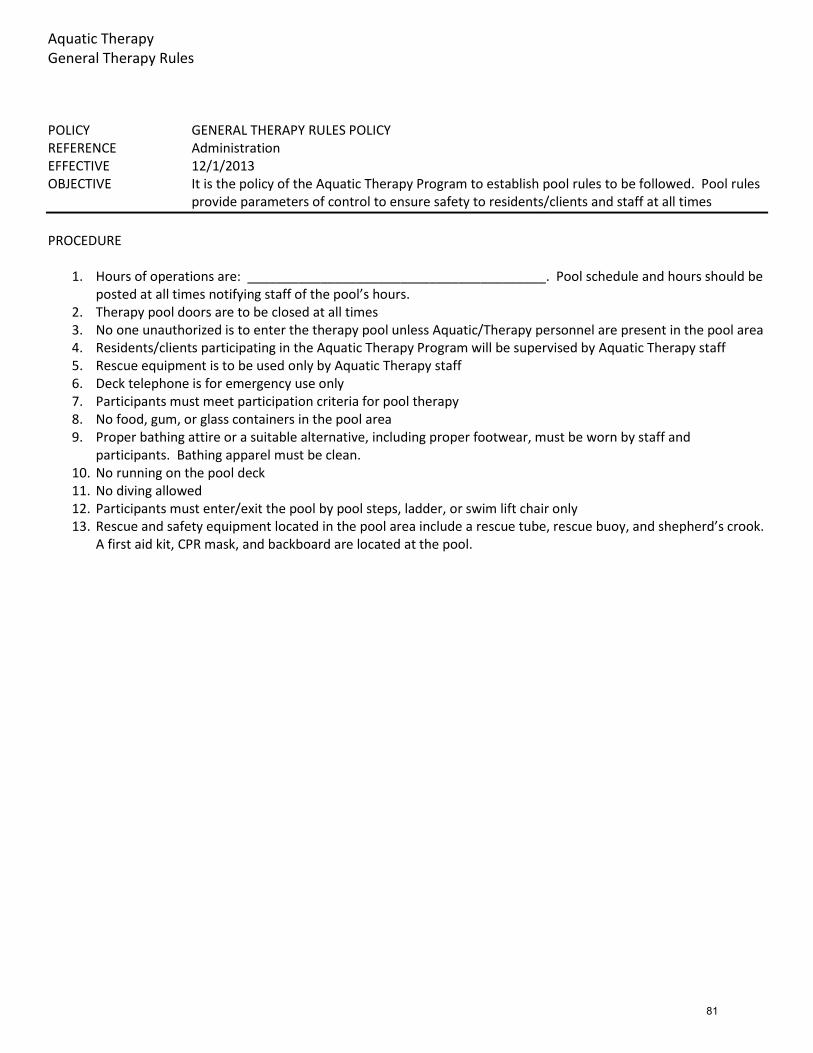
Aquatic Therapy General Therapy Rules POLICY GENERAL THERAPY RULES POLICY REFERENCE Administration EFFECTIVE 12/1/2013 OBJECTIVE It is the policy of the Aquatic Therapy Program to establish pool rules to be followed. Pool rules
provide parameters of control to ensure safety to residents/clients and staff at all times
PROCEDURE
1. Hours of operations are: _________________________________________. Pool schedule and hours should be posted at all times notifying staff of the pool’s hours.
2. Therapy pool doors are to be closed at all times 3. No one unauthorized is to enter the therapy pool unless Aquatic/Therapy personnel are present in the pool area 4. Residents/clients participating in the Aquatic Therapy Program will be supervised by Aquatic Therapy staff 5. Rescue equipment is to be used only by Aquatic Therapy staff 6. Deck telephone is for emergency use only 7. Participants must meet participation criteria for pool therapy 8. No food, gum, or glass containers in the pool area 9. Proper bathing attire or a suitable alternative, including proper footwear, must be worn by staff and
participants. Bathing apparel must be clean. 10. No running on the pool deck 11. No diving allowed 12. Participants must enter/exit the pool by pool steps, ladder, or swim lift chair only 13. Rescue and safety equipment located in the pool area include a rescue tube, rescue buoy, and shepherd’s crook.
A first aid kit, CPR mask, and backboard are located at the pool.
81
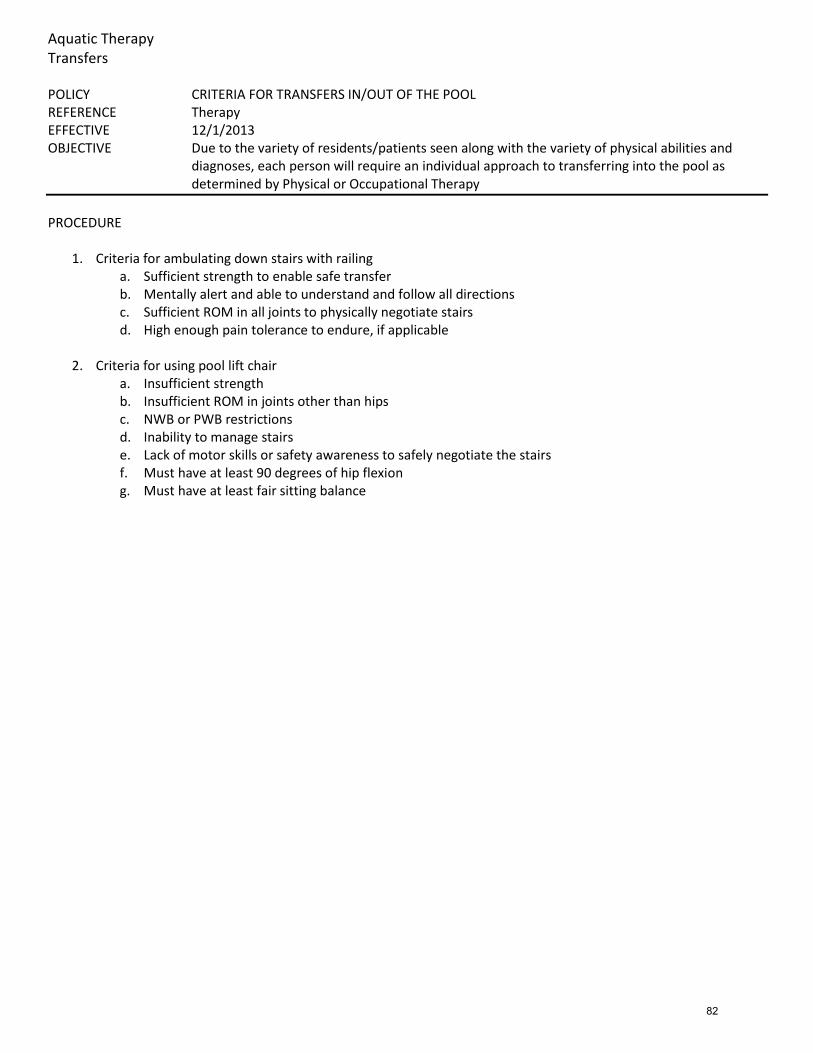
Aquatic Therapy Transfers POLICY CRITERIA FOR TRANSFERS IN/OUT OF THE POOL REFERENCE Therapy EFFECTIVE 12/1/2013 OBJECTIVE Due to the variety of residents/patients seen along with the variety of physical abilities and
diagnoses, each person will require an individual approach to transferring into the pool as determined by Physical or Occupational Therapy
PROCEDURE
1. Criteria for ambulating down stairs with railing
a. Sufficient strength to enable safe transfer b. Mentally alert and able to understand and follow all directions c. Sufficient ROM in all joints to physically negotiate stairs d. High enough pain tolerance to endure, if applicable
2. Criteria for using pool lift chair
a. Insufficient strength b. Insufficient ROM in joints other than hips c. NWB or PWB restrictions d. Inability to manage stairs e. Lack of motor skills or safety awareness to safely negotiate the stairs f. Must have at least 90 degrees of hip flexion g. Must have at least fair sitting balance
82

Aquatic Therapy Staff Training and Operation POLICY STAFF TRAINING AND OPERATION REFERENCE Administration EFFECTIVE 12/1/2013 OBJECTIVE All Aquatic and Therapy staff will have current CPR certification, trained to pool safety
procedures, and will be oriented to the facility Aquatic Therapy Program
PROCEDURE
1. All staff members participating in the Aquatic Therapy Program will receive in-service training in: a. Activating the Facility Emergency Response System b. Water rescue skill and extrication c. CPR skills d. Basic First Aid
2. All Aquatic Therapy Staff will receive orientation in the operation of the swim lift 3. Staff inservice, education, and certification records will be maintained on file
83
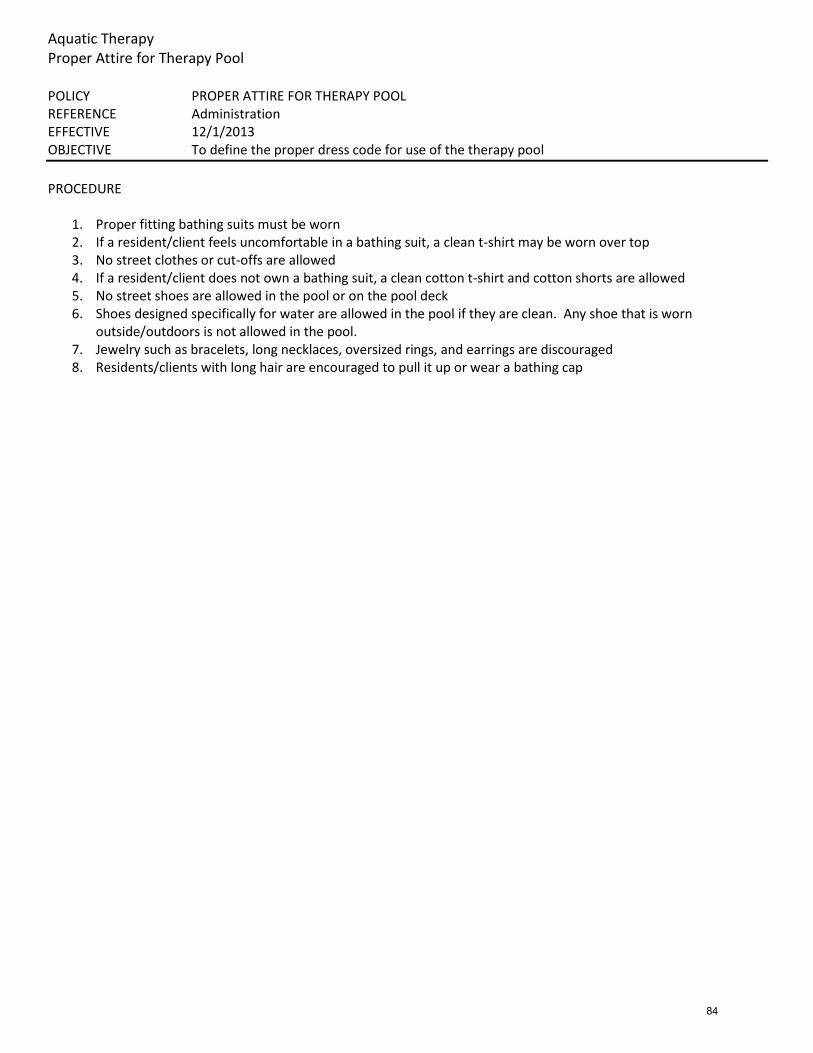
Aquatic Therapy Proper Attire for Therapy Pool POLICY PROPER ATTIRE FOR THERAPY POOL REFERENCE Administration EFFECTIVE 12/1/2013 OBJECTIVE To define the proper dress code for use of the therapy pool
PROCEDURE
1. Proper fitting bathing suits must be worn 2. If a resident/client feels uncomfortable in a bathing suit, a clean t-shirt may be worn over top 3. No street clothes or cut-offs are allowed 4. If a resident/client does not own a bathing suit, a clean cotton t-shirt and cotton shorts are allowed 5. No street shoes are allowed in the pool or on the pool deck 6. Shoes designed specifically for water are allowed in the pool if they are clean. Any shoe that is worn
outside/outdoors is not allowed in the pool. 7. Jewelry such as bracelets, long necklaces, oversized rings, and earrings are discouraged 8. Residents/clients with long hair are encouraged to pull it up or wear a bathing cap
84
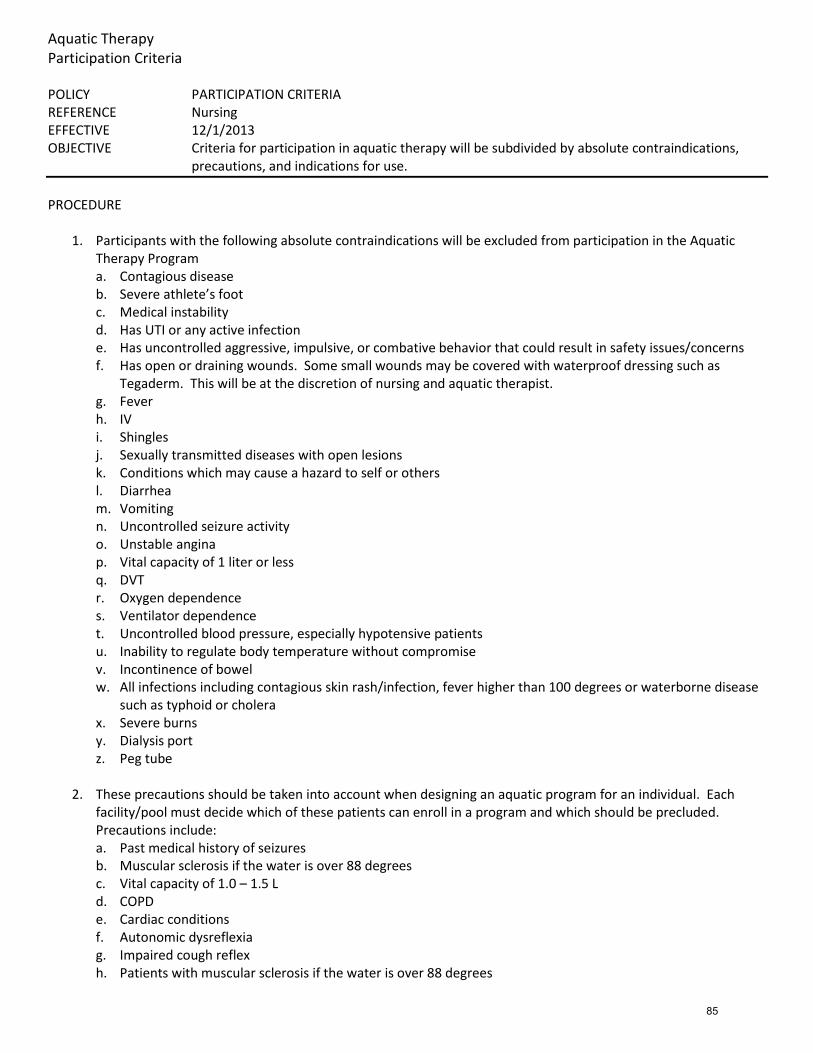
Aquatic Therapy Participation Criteria POLICY PARTICIPATION CRITERIA REFERENCE Nursing EFFECTIVE 12/1/2013 OBJECTIVE Criteria for participation in aquatic therapy will be subdivided by absolute contraindications,
precautions, and indications for use.
PROCEDURE
1. Participants with the following absolute contraindications will be excluded from participation in the Aquatic Therapy Program a. Contagious disease b. Severe athlete’s foot c. Medical instability d. Has UTI or any active infection e. Has uncontrolled aggressive, impulsive, or combative behavior that could result in safety issues/concerns f. Has open or draining wounds. Some small wounds may be covered with waterproof dressing such as
Tegaderm. This will be at the discretion of nursing and aquatic therapist. g. Fever h. IV i. Shingles j. Sexually transmitted diseases with open lesions k. Conditions which may cause a hazard to self or others l. Diarrhea m. Vomiting n. Uncontrolled seizure activity o. Unstable angina p. Vital capacity of 1 liter or less q. DVT r. Oxygen dependence s. Ventilator dependence t. Uncontrolled blood pressure, especially hypotensive patients u. Inability to regulate body temperature without compromise v. Incontinence of bowel w. All infections including contagious skin rash/infection, fever higher than 100 degrees or waterborne disease
such as typhoid or cholera x. Severe burns y. Dialysis port z. Peg tube
2. These precautions should be taken into account when designing an aquatic program for an individual. Each
facility/pool must decide which of these patients can enroll in a program and which should be precluded. Precautions include: a. Past medical history of seizures b. Muscular sclerosis if the water is over 88 degrees c. Vital capacity of 1.0 – 1.5 L d. COPD e. Cardiac conditions f. Autonomic dysreflexia g. Impaired cough reflex h. Patients with muscular sclerosis if the water is over 88 degrees
85
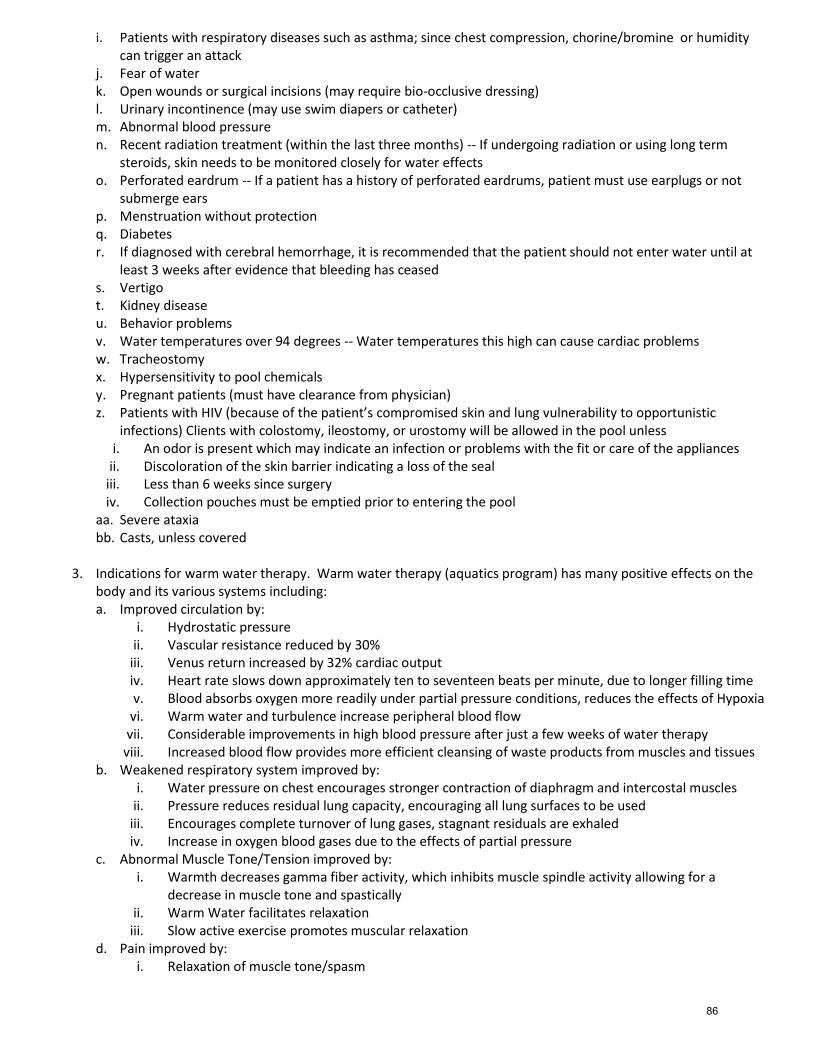
i. Patients with respiratory diseases such as asthma; since chest compression, chorine/bromine or humidity can trigger an attack
j. Fear of water k. Open wounds or surgical incisions (may require bio-occlusive dressing) l. Urinary incontinence (may use swim diapers or catheter) m. Abnormal blood pressure n. Recent radiation treatment (within the last three months) -- If undergoing radiation or using long term
steroids, skin needs to be monitored closely for water effects o. Perforated eardrum -- If a patient has a history of perforated eardrums, patient must use earplugs or not
submerge ears p. Menstruation without protection q. Diabetes r. If diagnosed with cerebral hemorrhage, it is recommended that the patient should not enter water until at
least 3 weeks after evidence that bleeding has ceased s. Vertigo t. Kidney disease u. Behavior problems v. Water temperatures over 94 degrees -- Water temperatures this high can cause cardiac problems w. Tracheostomy x. Hypersensitivity to pool chemicals y. Pregnant patients (must have clearance from physician) z. Patients with HIV (because of the patient’s compromised skin and lung vulnerability to opportunistic
infections) Clients with colostomy, ileostomy, or urostomy will be allowed in the pool unless i. An odor is present which may indicate an infection or problems with the fit or care of the appliances
ii. Discoloration of the skin barrier indicating a loss of the seal iii. Less than 6 weeks since surgery iv. Collection pouches must be emptied prior to entering the pool
aa. Severe ataxia bb. Casts, unless covered
3. Indications for warm water therapy. Warm water therapy (aquatics program) has many positive effects on the
body and its various systems including: a. Improved circulation by:
i. Hydrostatic pressure ii. Vascular resistance reduced by 30%
iii. Venus return increased by 32% cardiac output iv. Heart rate slows down approximately ten to seventeen beats per minute, due to longer filling time v. Blood absorbs oxygen more readily under partial pressure conditions, reduces the effects of Hypoxia
vi. Warm water and turbulence increase peripheral blood flow vii. Considerable improvements in high blood pressure after just a few weeks of water therapy
viii. Increased blood flow provides more efficient cleansing of waste products from muscles and tissues b. Weakened respiratory system improved by:
i. Water pressure on chest encourages stronger contraction of diaphragm and intercostal muscles ii. Pressure reduces residual lung capacity, encouraging all lung surfaces to be used
iii. Encourages complete turnover of lung gases, stagnant residuals are exhaled iv. Increase in oxygen blood gases due to the effects of partial pressure
c. Abnormal Muscle Tone/Tension improved by: i. Warmth decreases gamma fiber activity, which inhibits muscle spindle activity allowing for a
decrease in muscle tone and spastically ii. Warm Water facilitates relaxation
iii. Slow active exercise promotes muscular relaxation d. Pain improved by:
i. Relaxation of muscle tone/spasm
86
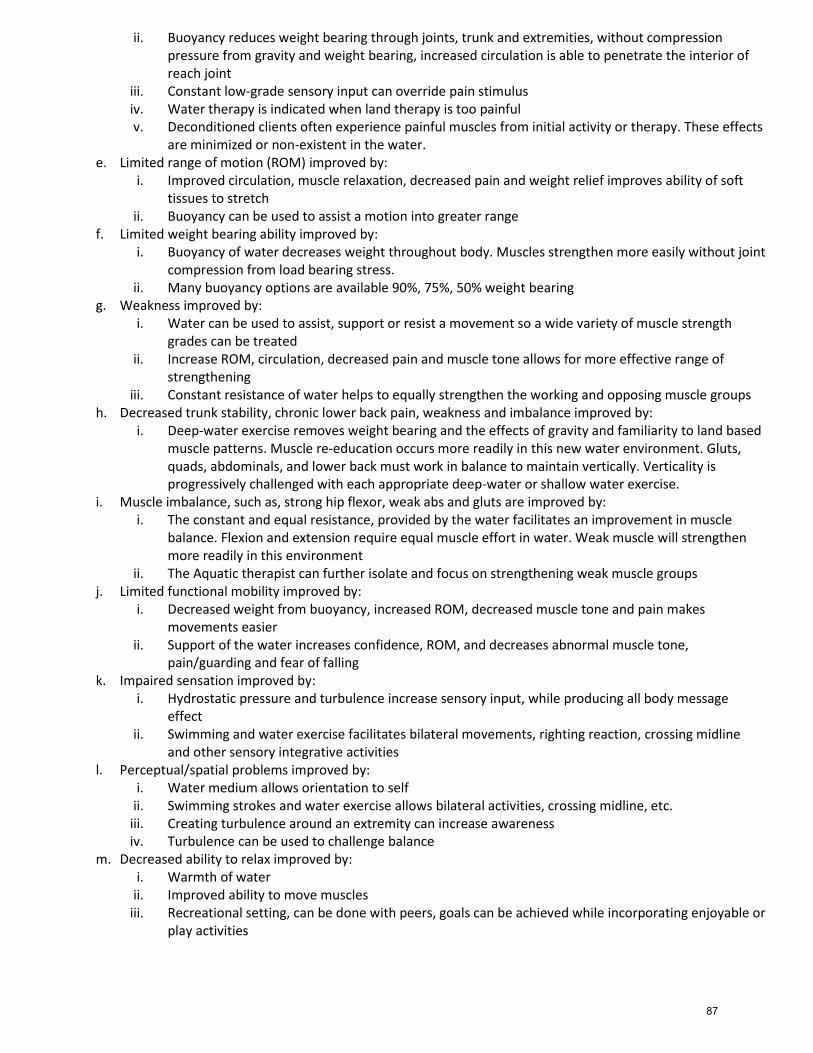
ii. Buoyancy reduces weight bearing through joints, trunk and extremities, without compression pressure from gravity and weight bearing, increased circulation is able to penetrate the interior of reach joint
iii. Constant low-grade sensory input can override pain stimulus iv. Water therapy is indicated when land therapy is too painful v. Deconditioned clients often experience painful muscles from initial activity or therapy. These effects
are minimized or non-existent in the water. e. Limited range of motion (ROM) improved by:
i. Improved circulation, muscle relaxation, decreased pain and weight relief improves ability of soft tissues to stretch
ii. Buoyancy can be used to assist a motion into greater range f. Limited weight bearing ability improved by:
i. Buoyancy of water decreases weight throughout body. Muscles strengthen more easily without joint compression from load bearing stress.
ii. Many buoyancy options are available 90%, 75%, 50% weight bearing g. Weakness improved by:
i. Water can be used to assist, support or resist a movement so a wide variety of muscle strength grades can be treated
ii. Increase ROM, circulation, decreased pain and muscle tone allows for more effective range of strengthening
iii. Constant resistance of water helps to equally strengthen the working and opposing muscle groups h. Decreased trunk stability, chronic lower back pain, weakness and imbalance improved by:
i. Deep-water exercise removes weight bearing and the effects of gravity and familiarity to land based muscle patterns. Muscle re-education occurs more readily in this new water environment. Gluts, quads, abdominals, and lower back must work in balance to maintain vertically. Verticality is progressively challenged with each appropriate deep-water or shallow water exercise.
i. Muscle imbalance, such as, strong hip flexor, weak abs and gluts are improved by: i. The constant and equal resistance, provided by the water facilitates an improvement in muscle
balance. Flexion and extension require equal muscle effort in water. Weak muscle will strengthen more readily in this environment
ii. The Aquatic therapist can further isolate and focus on strengthening weak muscle groups j. Limited functional mobility improved by:
i. Decreased weight from buoyancy, increased ROM, decreased muscle tone and pain makes movements easier
ii. Support of the water increases confidence, ROM, and decreases abnormal muscle tone, pain/guarding and fear of falling
k. Impaired sensation improved by: i. Hydrostatic pressure and turbulence increase sensory input, while producing all body message
effect ii. Swimming and water exercise facilitates bilateral movements, righting reaction, crossing midline
and other sensory integrative activities l. Perceptual/spatial problems improved by:
i. Water medium allows orientation to self ii. Swimming strokes and water exercise allows bilateral activities, crossing midline, etc.
iii. Creating turbulence around an extremity can increase awareness iv. Turbulence can be used to challenge balance
m. Decreased ability to relax improved by: i. Warmth of water
ii. Improved ability to move muscles iii. Recreational setting, can be done with peers, goals can be achieved while incorporating enjoyable or
play activities
87
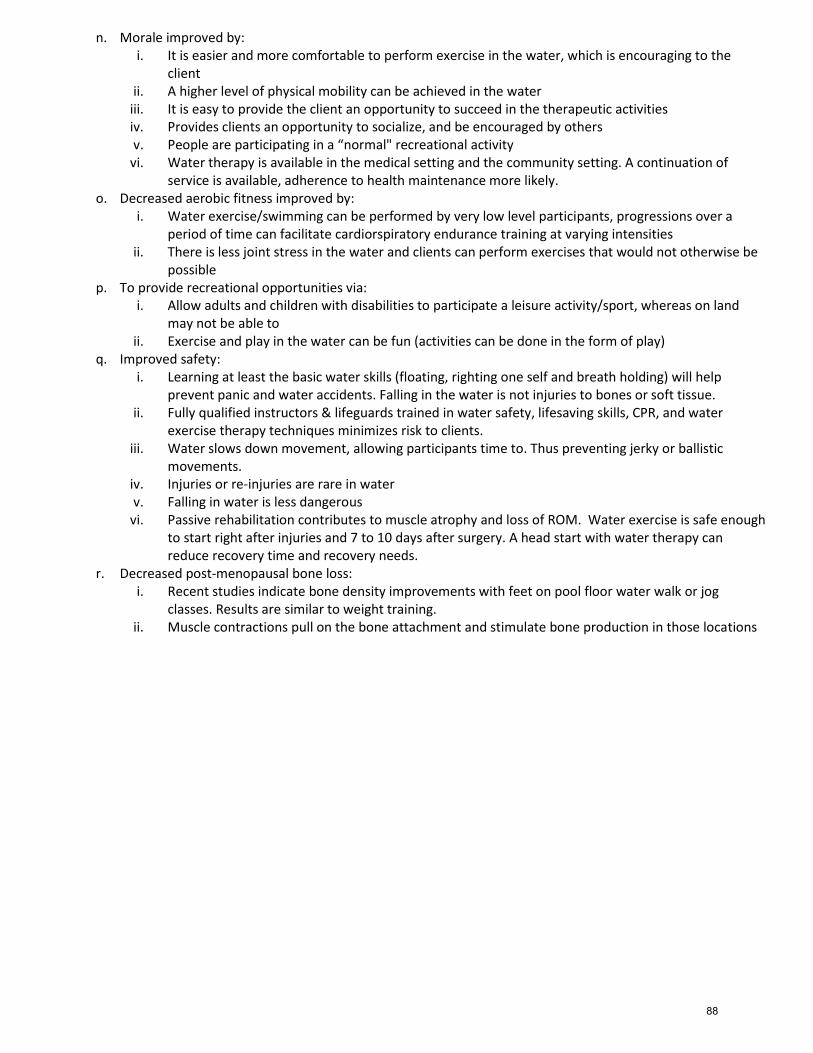
n. Morale improved by: i. It is easier and more comfortable to perform exercise in the water, which is encouraging to the
client ii. A higher level of physical mobility can be achieved in the water
iii. It is easy to provide the client an opportunity to succeed in the therapeutic activities iv. Provides clients an opportunity to socialize, and be encouraged by others v. People are participating in a “normal" recreational activity
vi. Water therapy is available in the medical setting and the community setting. A continuation of service is available, adherence to health maintenance more likely.
o. Decreased aerobic fitness improved by: i. Water exercise/swimming can be performed by very low level participants, progressions over a
period of time can facilitate cardiorspiratory endurance training at varying intensities ii. There is less joint stress in the water and clients can perform exercises that would not otherwise be
possible p. To provide recreational opportunities via:
i. Allow adults and children with disabilities to participate a leisure activity/sport, whereas on land may not be able to
ii. Exercise and play in the water can be fun (activities can be done in the form of play) q. Improved safety:
i. Learning at least the basic water skills (floating, righting one self and breath holding) will help prevent panic and water accidents. Falling in the water is not injuries to bones or soft tissue.
ii. Fully qualified instructors & lifeguards trained in water safety, lifesaving skills, CPR, and water exercise therapy techniques minimizes risk to clients.
iii. Water slows down movement, allowing participants time to. Thus preventing jerky or ballistic movements.
iv. Injuries or re-injuries are rare in water v. Falling in water is less dangerous
vi. Passive rehabilitation contributes to muscle atrophy and loss of ROM. Water exercise is safe enough to start right after injuries and 7 to 10 days after surgery. A head start with water therapy can reduce recovery time and recovery needs.
r. Decreased post-menopausal bone loss: i. Recent studies indicate bone density improvements with feet on pool floor water walk or jog
classes. Results are similar to weight training. ii. Muscle contractions pull on the bone attachment and stimulate bone production in those locations
88
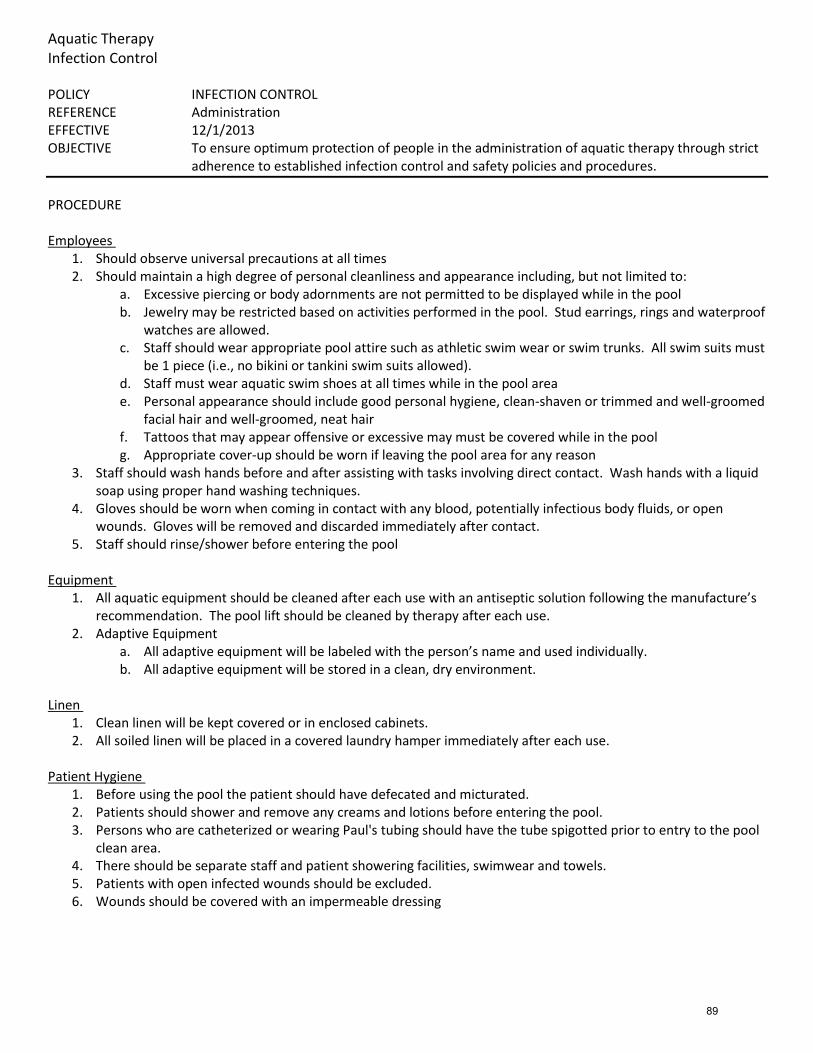
Aquatic Therapy Infection Control POLICY INFECTION CONTROL REFERENCE Administration EFFECTIVE 12/1/2013 OBJECTIVE To ensure optimum protection of people in the administration of aquatic therapy through strict
adherence to established infection control and safety policies and procedures.
PROCEDURE Employees
1. Should observe universal precautions at all times 2. Should maintain a high degree of personal cleanliness and appearance including, but not limited to:
a. Excessive piercing or body adornments are not permitted to be displayed while in the pool b. Jewelry may be restricted based on activities performed in the pool. Stud earrings, rings and waterproof
watches are allowed. c. Staff should wear appropriate pool attire such as athletic swim wear or swim trunks. All swim suits must
be 1 piece (i.e., no bikini or tankini swim suits allowed). d. Staff must wear aquatic swim shoes at all times while in the pool area e. Personal appearance should include good personal hygiene, clean-shaven or trimmed and well-groomed
facial hair and well-groomed, neat hair f. Tattoos that may appear offensive or excessive may must be covered while in the pool g. Appropriate cover-up should be worn if leaving the pool area for any reason
3. Staff should wash hands before and after assisting with tasks involving direct contact. Wash hands with a liquid soap using proper hand washing techniques.
4. Gloves should be worn when coming in contact with any blood, potentially infectious body fluids, or open wounds. Gloves will be removed and discarded immediately after contact.
5. Staff should rinse/shower before entering the pool Equipment
1. All aquatic equipment should be cleaned after each use with an antiseptic solution following the manufacture’s recommendation. The pool lift should be cleaned by therapy after each use.
2. Adaptive Equipment a. All adaptive equipment will be labeled with the person’s name and used individually. b. All adaptive equipment will be stored in a clean, dry environment.
Linen
1. Clean linen will be kept covered or in enclosed cabinets. 2. All soiled linen will be placed in a covered laundry hamper immediately after each use.
Patient Hygiene
1. Before using the pool the patient should have defecated and micturated. 2. Patients should shower and remove any creams and lotions before entering the pool. 3. Persons who are catheterized or wearing Paul's tubing should have the tube spigotted prior to entry to the pool
clean area. 4. There should be separate staff and patient showering facilities, swimwear and towels. 5. Patients with open infected wounds should be excluded. 6. Wounds should be covered with an impermeable dressing
89
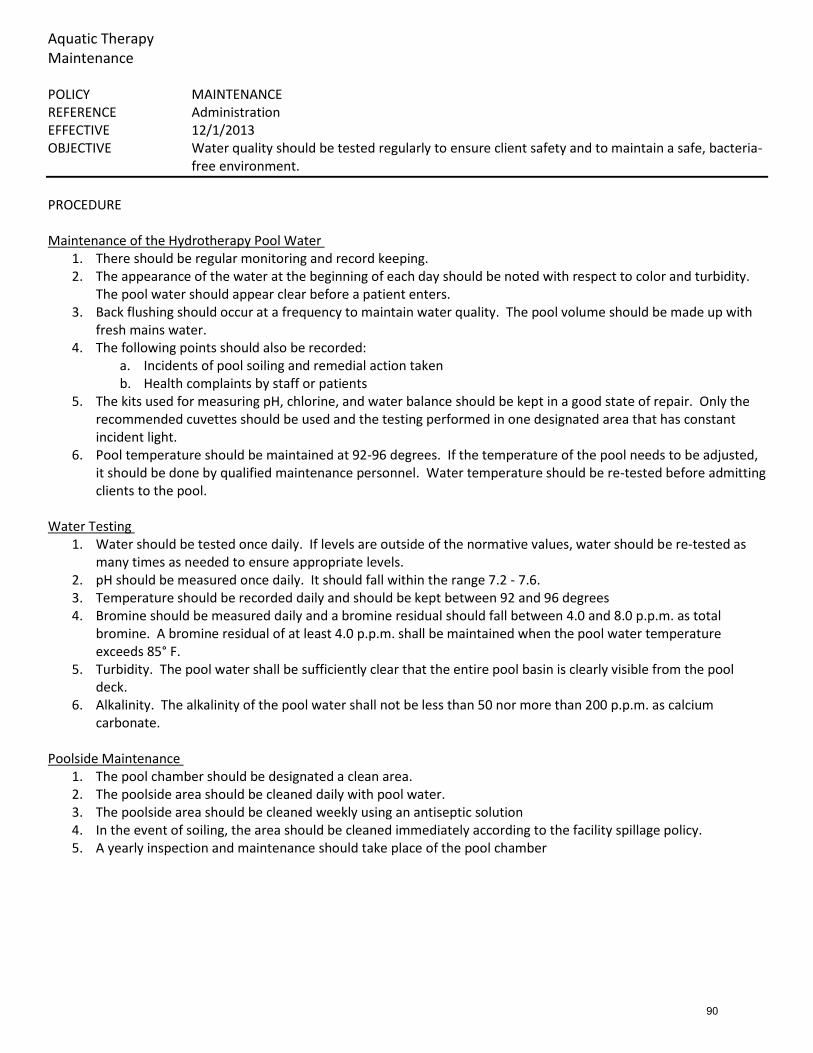
Aquatic Therapy Maintenance POLICY MAINTENANCE REFERENCE Administration EFFECTIVE 12/1/2013 OBJECTIVE Water quality should be tested regularly to ensure client safety and to maintain a safe, bacteria-
free environment.
PROCEDURE Maintenance of the Hydrotherapy Pool Water
1. There should be regular monitoring and record keeping. 2. The appearance of the water at the beginning of each day should be noted with respect to color and turbidity.
The pool water should appear clear before a patient enters. 3. Back flushing should occur at a frequency to maintain water quality. The pool volume should be made up with
fresh mains water. 4. The following points should also be recorded:
a. Incidents of pool soiling and remedial action taken b. Health complaints by staff or patients
5. The kits used for measuring pH, chlorine, and water balance should be kept in a good state of repair. Only the recommended cuvettes should be used and the testing performed in one designated area that has constant incident light.
6. Pool temperature should be maintained at 92-96 degrees. If the temperature of the pool needs to be adjusted, it should be done by qualified maintenance personnel. Water temperature should be re-tested before admitting clients to the pool.
Water Testing
1. Water should be tested once daily. If levels are outside of the normative values, water should be re-tested as many times as needed to ensure appropriate levels.
2. pH should be measured once daily. It should fall within the range 7.2 - 7.6. 3. Temperature should be recorded daily and should be kept between 92 and 96 degrees 4. Bromine should be measured daily and a bromine residual should fall between 4.0 and 8.0 p.p.m. as total
bromine. A bromine residual of at least 4.0 p.p.m. shall be maintained when the pool water temperature exceeds 85° F.
5. Turbidity. The pool water shall be sufficiently clear that the entire pool basin is clearly visible from the pool deck.
6. Alkalinity. The alkalinity of the pool water shall not be less than 50 nor more than 200 p.p.m. as calcium carbonate.
Poolside Maintenance
1. The pool chamber should be designated a clean area. 2. The poolside area should be cleaned daily with pool water. 3. The poolside area should be cleaned weekly using an antiseptic solution 4. In the event of soiling, the area should be cleaned immediately according to the facility spillage policy. 5. A yearly inspection and maintenance should take place of the pool chamber
90

Aquatic Therapy Pool Lift Operations POLICY POOL LIFT OPERATIONS REFERENCE Administration EFFECTIVE 12/1/2013 OBJECTIVE In order to allow individuals with physical limitations access to the therapy pool, a lift is available
for use.
PROCEDURE
1. The water source must be turned on. This is normally kept on at all times. 2. To enter the water, the participant transfers to the chair and fastens the seat belt. 3. Operate the lift to lower the client into the water. Specific operation will depend on the make and model of the
pool lift -- refer to the owner’s manual for specific details regarding operation and weight restriction. 4. The participant removes the seat belt once in the water. 5. The lift should remain in the pool during the therapy session. 6. To exit the pool, the participant transfers onto the chair, fastens the seat belt, and the chair is raised out of the
water. 7. Once the lift is in the starting position on the pool deck and stabilized, the client can remove the seat belt and
transfer from the chair. 8. All staff using the pool lift must demonstrate competency in demonstrating its proper use according to
manufacturer’s guidelines.
Maintenance and Safety In order to maintain safe lift operations, all staff utilizing the lift should be trained to:
1. Inspect lift and cable components/connections daily for damage, loose or missing items 2. Check battery level daily. Charge battery daily. 3. Test control buttons daily for normal operation 4. Keep all electronic components clean and dry 5. Keep battery/console cover installed at all times 6. Ensure non-slip shoes/ flooring for safe transfers 7. Identify obstacles and/or clutter and does not move lift over uneven surfaces 8. Use the lift only for access to the pool and not as a mode of client transportation 9. Understand weight restrictions for lift in use 10. Understand the importance of providing instruction to resident to optimize cooperation and safety of resident 11. Ensure appropriate number of caregivers to assist
Care and Cleaning
1. The seat and seat belt should be rinsed with fresh water between each use 2. Clean seat and seat belt with disinfectant 1:100 dilution daily 3. Rinse with fresh water after disinfectant 4. Dry lift entirely after cleaning 5. Use disinfectant solution to cleanse equipment contaminated with excreta 6. Cover and store the lift after use
91
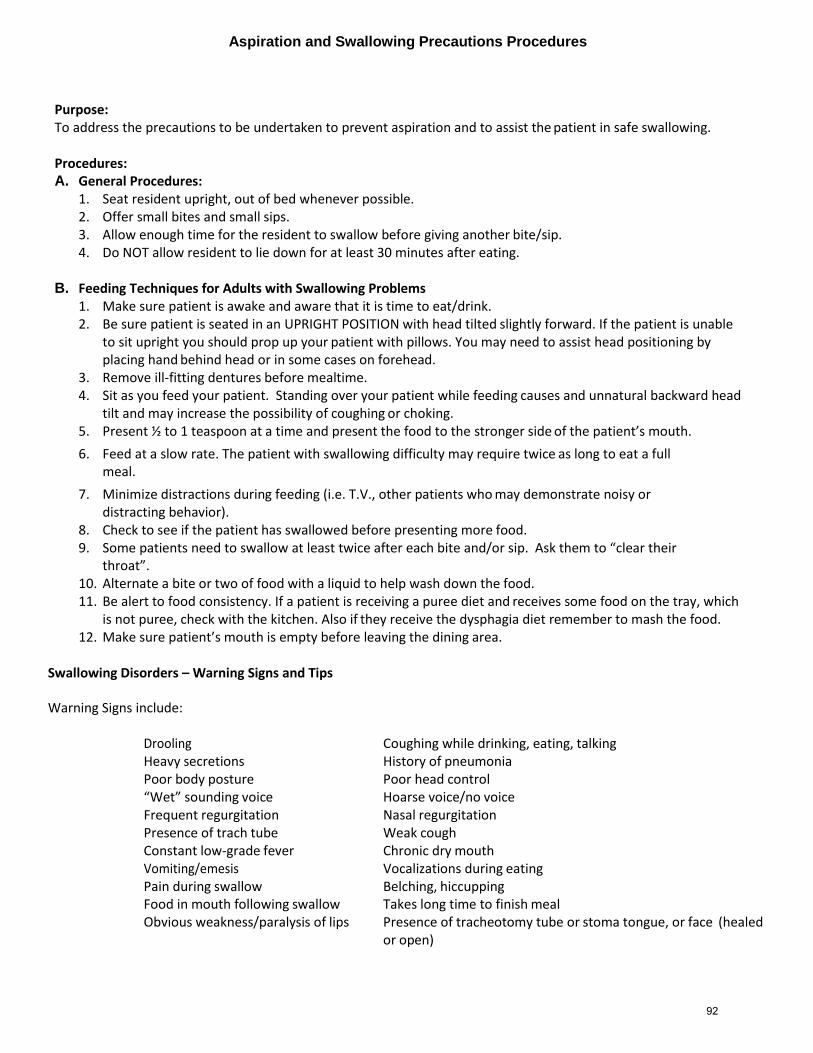
Aspiration and Swallowing Precautions Procedures
Purpose: To address the precautions to be undertaken to prevent aspiration and to assist the patient in safe swallowing.
Procedures: A. General Procedures:
1. Seat resident upright, out of bed whenever possible. 2. Offer small bites and small sips. 3. Allow enough time for the resident to swallow before giving another bite/sip. 4. Do NOT allow resident to lie down for at least 30 minutes after eating.
B. Feeding Techniques for Adults with Swallowing Problems
1. Make sure patient is awake and aware that it is time to eat/drink. 2. Be sure patient is seated in an UPRIGHT POSITION with head tilted slightly forward. If the patient is unable
to sit upright you should prop up your patient with pillows. You may need to assist head positioning by placing hand behind head or in some cases on forehead.
3. Remove ill-fitting dentures before mealtime. 4. Sit as you feed your patient. Standing over your patient while feeding causes and unnatural backward head
tilt and may increase the possibility of coughing or choking. 5. Present ½ to 1 teaspoon at a time and present the food to the stronger side of the patient’s mouth.
6. Feed at a slow rate. The patient with swallowing difficulty may require twice as long to eat a full meal.
7. Minimize distractions during feeding (i.e. T.V., other patients who may demonstrate noisy or distracting behavior).
8. Check to see if the patient has swallowed before presenting more food. 9. Some patients need to swallow at least twice after each bite and/or sip. Ask them to “clear their
throat”. 10. Alternate a bite or two of food with a liquid to help wash down the food. 11. Be alert to food consistency. If a patient is receiving a puree diet and receives some food on the tray, which
is not puree, check with the kitchen. Also if they receive the dysphagia diet remember to mash the food. 12. Make sure patient’s mouth is empty before leaving the dining area.
Swallowing Disorders – Warning Signs and Tips
Warning Signs include:
Drooling Coughing while drinking, eating, talking Heavy secretions History of pneumonia Poor body posture Poor head control “Wet” sounding voice Hoarse voice/no voice Frequent regurgitation Nasal regurgitation Presence of trach tube Weak cough Constant low-grade fever Chronic dry mouth Vomiting/emesis Vocalizations during eating Pain during swallow Belching, hiccupping Food in mouth following swallow Takes long time to finish meal Obvious weakness/paralysis of lips Presence of tracheotomy tube or stoma tongue, or face (healed
or open)
92
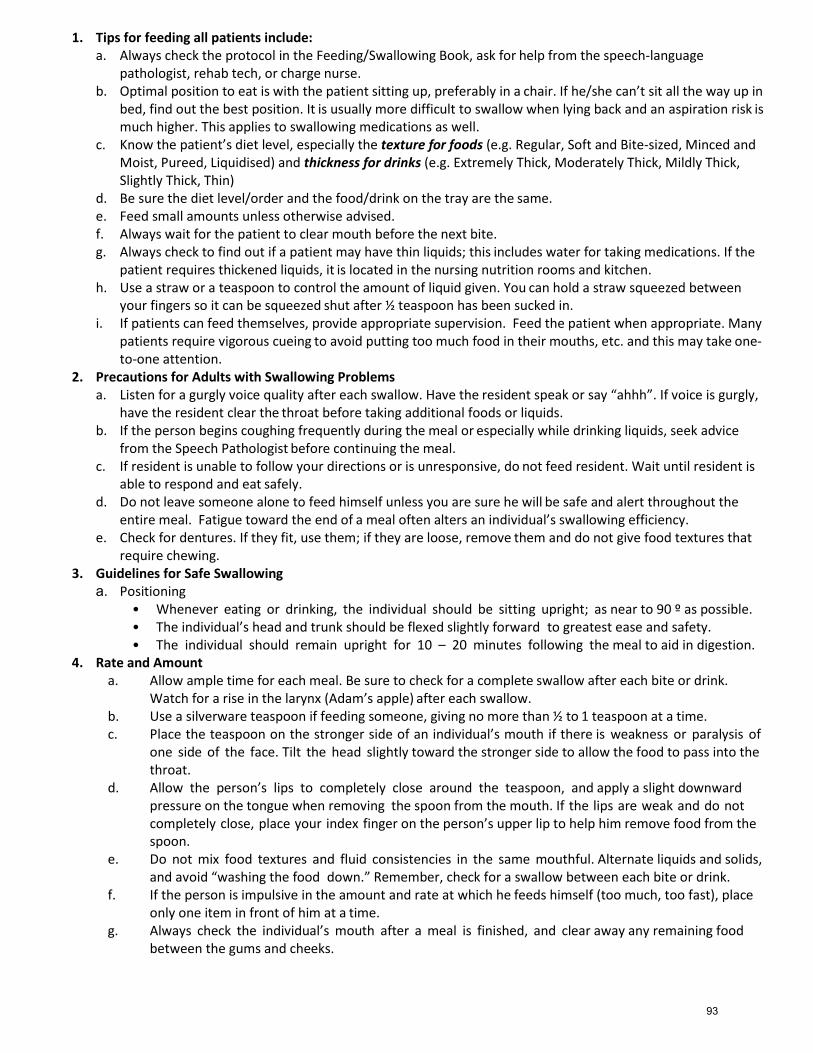
1. Tips for feeding all patients include: a. Always check the protocol in the Feeding/Swallowing Book, ask for help from the speech-language
pathologist, rehab tech, or charge nurse. b. Optimal position to eat is with the patient sitting up, preferably in a chair. If he/she can’t sit all the way up in
bed, find out the best position. It is usually more difficult to swallow when lying back and an aspiration risk is much higher. This applies to swallowing medications as well.
c. Know the patient’s diet level, especially the texture for foods (e.g. Regular, Soft and Bite-sized, Minced and Moist, Pureed, Liquidised) and thickness for drinks (e.g. Extremely Thick, Moderately Thick, Mildly Thick, Slightly Thick, Thin)
d. Be sure the diet level/order and the food/drink on the tray are the same. e. Feed small amounts unless otherwise advised. f. Always wait for the patient to clear mouth before the next bite. g. Always check to find out if a patient may have thin liquids; this includes water for taking medications. If the
patient requires thickened liquids, it is located in the nursing nutrition rooms and kitchen. h. Use a straw or a teaspoon to control the amount of liquid given. You can hold a straw squeezed between
your fingers so it can be squeezed shut after ½ teaspoon has been sucked in. i. If patients can feed themselves, provide appropriate supervision. Feed the patient when appropriate. Many
patients require vigorous cueing to avoid putting too much food in their mouths, etc. and this may take one- to-one attention.
2. Precautions for Adults with Swallowing Problems a. Listen for a gurgly voice quality after each swallow. Have the resident speak or say “ahhh”. If voice is gurgly,
have the resident clear the throat before taking additional foods or liquids. b. If the person begins coughing frequently during the meal or especially while drinking liquids, seek advice
from the Speech Pathologist before continuing the meal. c. If resident is unable to follow your directions or is unresponsive, do not feed resident. Wait until resident is
able to respond and eat safely. d. Do not leave someone alone to feed himself unless you are sure he will be safe and alert throughout the
entire meal. Fatigue toward the end of a meal often alters an individual’s swallowing efficiency. e. Check for dentures. If they fit, use them; if they are loose, remove them and do not give food textures that
require chewing. 3. Guidelines for Safe Swallowing
a. Positioning • Whenever eating or drinking, the individual should be sitting upright; as near to 90 º as possible. • The individual’s head and trunk should be flexed slightly forward to greatest ease and safety. • The individual should remain upright for 10 – 20 minutes following the meal to aid in digestion.
4. Rate and Amount a. Allow ample time for each meal. Be sure to check for a complete swallow after each bite or drink.
Watch for a rise in the larynx (Adam’s apple) after each swallow. b. Use a silverware teaspoon if feeding someone, giving no more than ½ to 1 teaspoon at a time. c. Place the teaspoon on the stronger side of an individual’s mouth if there is weakness or paralysis of
one side of the face. Tilt the head slightly toward the stronger side to allow the food to pass into the throat.
d. Allow the person’s lips to completely close around the teaspoon, and apply a slight downward pressure on the tongue when removing the spoon from the mouth. If the lips are weak and do not completely close, place your index finger on the person’s upper lip to help him remove food from the spoon.
e. Do not mix food textures and fluid consistencies in the same mouthful. Alternate liquids and solids, and avoid “washing the food down.” Remember, check for a swallow between each bite or drink.
f. If the person is impulsive in the amount and rate at which he feeds himself (too much, too fast), place only one item in front of him at a time.
g. Always check the individual’s mouth after a meal is finished, and clear away any remaining food between the gums and cheeks.
93
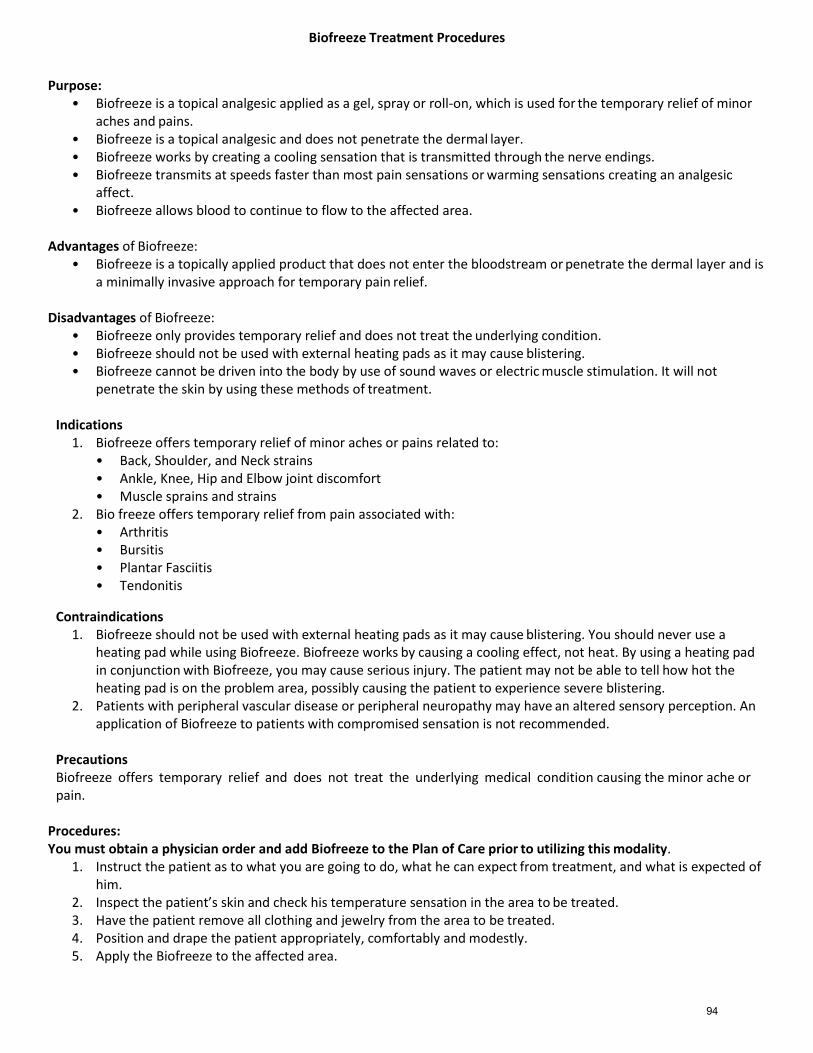
Biofreeze Treatment Procedures
Purpose: • Biofreeze is a topical analgesic applied as a gel, spray or roll-on, which is used for the temporary relief of minor
aches and pains. • Biofreeze is a topical analgesic and does not penetrate the dermal layer. • Biofreeze works by creating a cooling sensation that is transmitted through the nerve endings. • Biofreeze transmits at speeds faster than most pain sensations or warming sensations creating an analgesic
affect. • Biofreeze allows blood to continue to flow to the affected area.
Advantages of Biofreeze:
• Biofreeze is a topically applied product that does not enter the bloodstream or penetrate the dermal layer and is a minimally invasive approach for temporary pain relief.
Disadvantages of Biofreeze:
• Biofreeze only provides temporary relief and does not treat the underlying condition. • Biofreeze should not be used with external heating pads as it may cause blistering. • Biofreeze cannot be driven into the body by use of sound waves or electric muscle stimulation. It will not
penetrate the skin by using these methods of treatment.
Indications 1. Biofreeze offers temporary relief of minor aches or pains related to:
• Back, Shoulder, and Neck strains • Ankle, Knee, Hip and Elbow joint discomfort • Muscle sprains and strains
2. Bio freeze offers temporary relief from pain associated with: • Arthritis • Bursitis • Plantar Fasciitis • Tendonitis
Contraindications 1. Biofreeze should not be used with external heating pads as it may cause blistering. You should never use a
heating pad while using Biofreeze. Biofreeze works by causing a cooling effect, not heat. By using a heating pad in conjunction with Biofreeze, you may cause serious injury. The patient may not be able to tell how hot the heating pad is on the problem area, possibly causing the patient to experience severe blistering.
2. Patients with peripheral vascular disease or peripheral neuropathy may have an altered sensory perception. An application of Biofreeze to patients with compromised sensation is not recommended.
Precautions Biofreeze offers temporary relief and does not treat the underlying medical condition causing the minor ache or pain.
Procedures: You must obtain a physician order and add Biofreeze to the Plan of Care prior to utilizing this modality.
1. Instruct the patient as to what you are going to do, what he can expect from treatment, and what is expected of him.
2. Inspect the patient’s skin and check his temperature sensation in the area to be treated. 3. Have the patient remove all clothing and jewelry from the area to be treated. 4. Position and drape the patient appropriately, comfortably and modestly. 5. Apply the Biofreeze to the affected area.
94
6. At the conclusion of the treatment the patient should feel a cooling sensation resulting in decreased pain in the
treatment area. 7. Perform any other post-treatment evaluation procedures as indicated. 8. In subacute problems, Biofreeze may be given daily or more often. Frequency may be decreased as the patient
improves.
95
Cardiac Rehabilitation Program
Purpose: To provide an inpatient exercise program lasting 7-10 days which usually begins within 2-4 days for the MI patient, and 1-2 days for the post surgical patient.
Objectives include:* 1. Minimize deconditioning effects of bed rest and relative inactivity. 2. Minimize time required to return to optimal activity and work levels. 3. Prepare patient for self care (i.e. dressing, bathing, hygiene). 4. Begin patient education for exercise program, home program and pulse taking.
Procedures: Exercise Limitations * 1. Intensity: Target Heart Rate (HR) = Rest HR + 20-25 bpm for post MI
= Rest HR + 30 bmp for post surgical BP = Rest systolic +30 for post MI
= Rest systolic + 40 post surgery 2. Frequency: usually 2x day but varies on patient tolerance 3. Duration:
a. 5-20 min post MI b. 5-30 min post surgery
4. Exercise: a. Active, non resistive exercise/ROM b. ADL c. Walking (precaution of UE weight bearing on post surgical patients) d. Exercise bike
*Must continuously take HR, BP and respiration measurements during and after activity.
Absolute Contraindications to Exercise 1. Resting diastolic BP >115 2. Unstable angina 3. Fever
96
Commercial Cold Pack Treatment Procedures Purpose: To address the proper techniques when applying commercial cold packs as a treatment modality. The commercial cold pack is a conductive means of cold therapy to the patient. The cold pack is filled with silica gel and encased in vinyl. They are available in a variety of sizes and shapes to contour to the area to be treated. The packs are stored in a refrigeration unit. Storage temperature is generally between 10° F - 21°F (refer to specific manufacturer parameters for recommended operating temperature). The pack is capable of retaining a cold temperature for about one-half hour. Temperature of the refrigeration unit should be checked daily. Cold Pack Use Cold packs are superficial, though their effects can reach subcutaneous tissues by tissue conduction. The local and systemic effects of cold application are vasoconstriction, increased rate of cell metabolism resulting in a decreased need for oxygen, decreased production of cellular waste, reduced inflammation, decreased pain, decreased muscle spasm, decreased respiratory rate, decreased heart rate, increased muscle tone, and decreased temperature. The effects of cold include:
Decreased edema o Decreases blood flow via vasoconstriction and therefore decreases circulation
Decreased muscle spasm o Decreases muscle spindle activity and metabolism
Pain reduction o Decreases nerve conduction velocity and firing rate of pain nerve fibers
Indications
Acute or chronic pain
Chronic and acute musculoskeletal disorders
Acute or chronic muscle spasm
Issues with tone
Acute inflammation/edema
Chronic inflammation/edema
Post-surgical pain and edema
Use in conjunction with rehab exercises
Neuralgia Contraindications
Raynaud’s Disease
Buerger’s Disease
Previous frostbite in the area being treated
Rebound phenomenon – autonomic response causing nausea, lightheadedness, and decreased blood pressure occasionally resulting from icing the head and neck areas or when cooling a large body area
Peripheral vascular disease
Undiagnosed or contagious skin rash
Open wound in the area to be treated
Advanced diabetes
Lupus Precautions
Sensory impairment (e.g., diabetes, CVA, neuropathies, nerve root impairment)
Circulatory impairment (e.g., arteriosclerosis, venous insufficiency, phlebitis)
Colder hypersensitivity
Very young/very old patient
Paralyzed or in coma
Performing exercises after cold that may mask pain
97
Coronary artery disease
Hypertensive disorders
Major cardiac disorders
Decreases wound healing Procedures 1. Establish that there are no contraindications. 2. Instruct the patient as to what you are going to do, what he/she can expect from treatment, and what is expected of
him/her. Therapist communicates the approximate length of the treatment, goals of the treatment, any adverse symptoms about which to notify therapist.
3. Inspect the patient’s skin and check his temperature sensation in the area to be treated. 4. Have the patient remove all clothing and jewelry from the area to be treated. 5. Position and drape the patient appropriately, comfortably and modestly. Cover the area to be treated with a clean
terry cloth towel (this can be warm to the cold pack is more easily tolerated). 6. Remove a cold pack of an appropriate size from the refrigeration unit. Place it on top of the towel. Cover with a
sheet or blanket as cold may cause shivering if the patient is not adequately covered. 7. Inform the patient to expect tingling, burning, possible numbness. The patient is instructed to notify therapist if skin
becomes too cold or to the point where it is irritating. Provide the patient with a call system. The therapy practitioner should remain nearby to make necessary adjustments and to check the skin periodically during treatment.
8. Dosage is governed by patient tolerance. Duration of treatment is generally 15 to 30 minutes. Do not leave ice pack on longer than 30 minutes.
9. At the conclusion of the treatment, remove the pack and dry the patient. Check the skin condition and general physiological response to treatment and allow the patient to rest for a few minutes.
10. Clean the cold pack if needed and return the pack to the refrigeration unit.
98
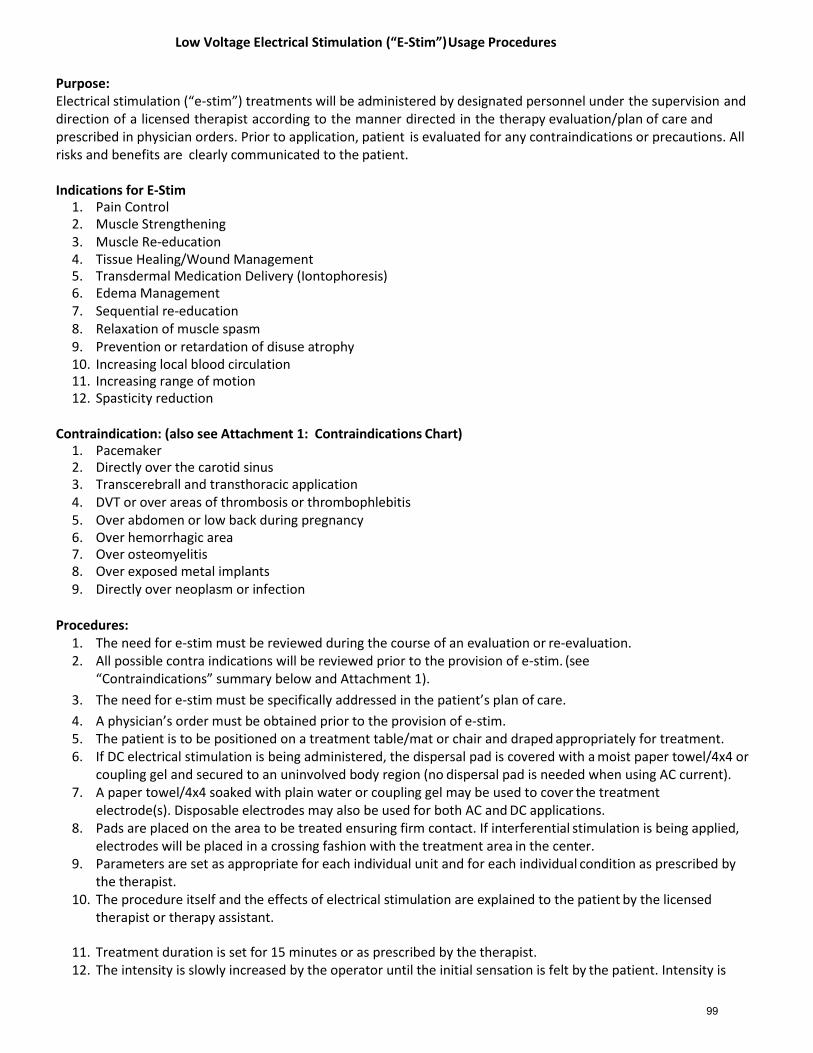
Low Voltage Electrical Stimulation (“E-Stim”) Usage Procedures
Purpose: Electrical stimulation (“e-stim”) treatments will be administered by designated personnel under the supervision and direction of a licensed therapist according to the manner directed in the therapy evaluation/plan of care and prescribed in physician orders. Prior to application, patient is evaluated for any contraindications or precautions. All risks and benefits are clearly communicated to the patient.
Indications for E-Stim
1. Pain Control 2. Muscle Strengthening 3. Muscle Re-education 4. Tissue Healing/Wound Management 5. Transdermal Medication Delivery (Iontophoresis) 6. Edema Management 7. Sequential re-education 8. Relaxation of muscle spasm 9. Prevention or retardation of disuse atrophy 10. Increasing local blood circulation 11. Increasing range of motion 12. Spasticity reduction
Contraindication: (also see Attachment 1: Contraindications Chart)
1. Pacemaker 2. Directly over the carotid sinus 3. Transcerebrall and transthoracic application 4. DVT or over areas of thrombosis or thrombophlebitis 5. Over abdomen or low back during pregnancy 6. Over hemorrhagic area 7. Over osteomyelitis 8. Over exposed metal implants 9. Directly over neoplasm or infection
Procedures:
1. The need for e-stim must be reviewed during the course of an evaluation or re-evaluation. 2. All possible contra indications will be reviewed prior to the provision of e-stim. (see
“Contraindications” summary below and Attachment 1).
3. The need for e-stim must be specifically addressed in the patient’s plan of care.
4. A physician’s order must be obtained prior to the provision of e-stim. 5. The patient is to be positioned on a treatment table/mat or chair and draped appropriately for treatment. 6. If DC electrical stimulation is being administered, the dispersal pad is covered with a moist paper towel/4x4 or
coupling gel and secured to an uninvolved body region (no dispersal pad is needed when using AC current). 7. A paper towel/4x4 soaked with plain water or coupling gel may be used to cover the treatment
electrode(s). Disposable electrodes may also be used for both AC and DC applications. 8. Pads are placed on the area to be treated ensuring firm contact. If interferential stimulation is being applied,
electrodes will be placed in a crossing fashion with the treatment area in the center. 9. Parameters are set as appropriate for each individual unit and for each individual condition as prescribed by
the therapist. 10. The procedure itself and the effects of electrical stimulation are explained to the patient by the licensed
therapist or therapy assistant.
11. Treatment duration is set for 15 minutes or as prescribed by the therapist. 12. The intensity is slowly increased by the operator until the initial sensation is felt by the patient. Intensity is
99
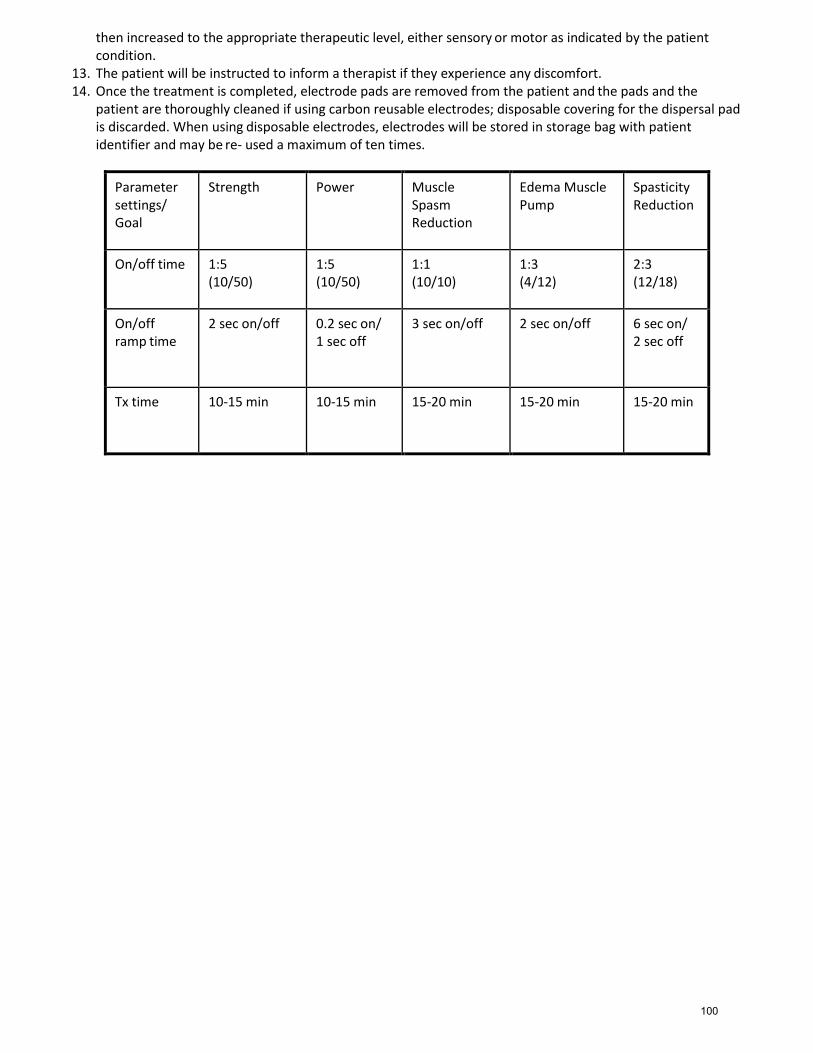
then increased to the appropriate therapeutic level, either sensory or motor as indicated by the patient condition.
13. The patient will be instructed to inform a therapist if they experience any discomfort. 14. Once the treatment is completed, electrode pads are removed from the patient and the pads and the
patient are thoroughly cleaned if using carbon reusable electrodes; disposable covering for the dispersal pad is discarded. When using disposable electrodes, electrodes will be stored in storage bag with patient identifier and may be re- used a maximum of ten times.
Parameter settings/ Goal
Strength Power Muscle Spasm Reduction
Edema Muscle Pump
Spasticity Reduction
On/off time 1:5 (10/50)
1:5 (10/50)
1:1 (10/10)
1:3 (4/12)
2:3 (12/18)
On/off ramp time
2 sec on/off 0.2 sec on/ 1 sec off
3 sec on/off 2 sec on/off 6 sec on/ 2 sec off
Tx time 10-15 min 10-15 min 15-20 min 15-20 min 15-20 min
100
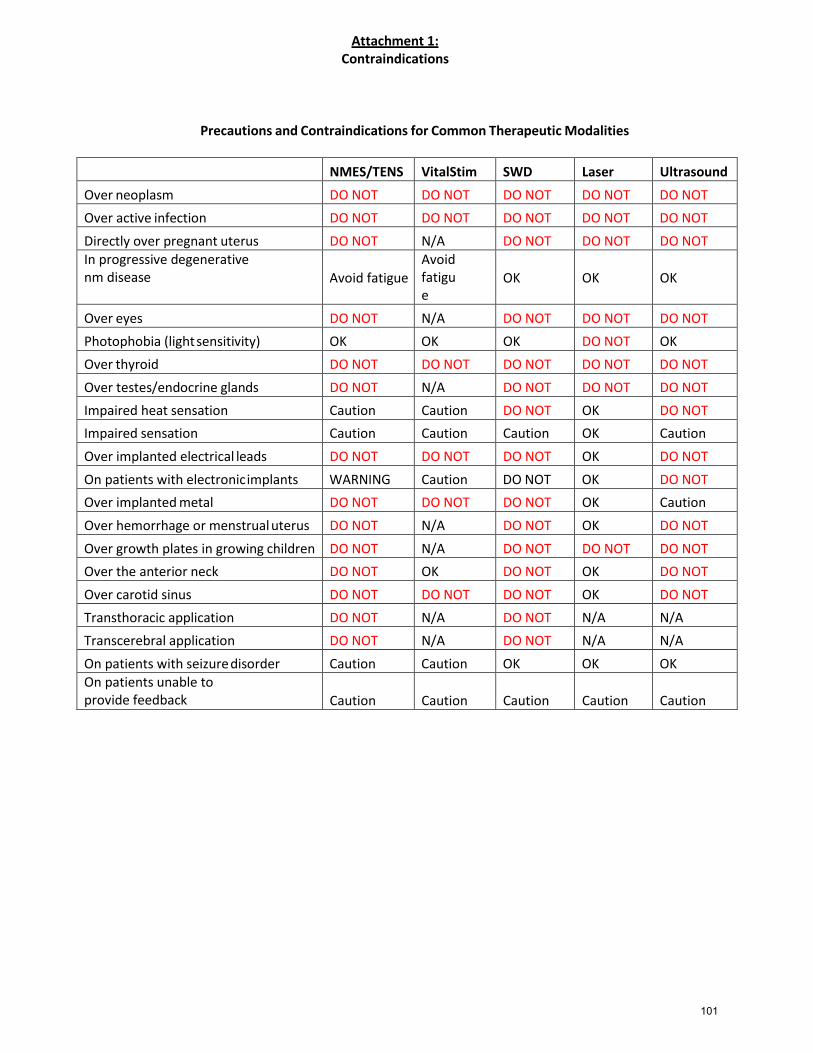
Attachment 1: Contraindications
Precautions and Contraindications for Common Therapeutic Modalities
NMES/TENS VitalStim SWD Laser Ultrasound
Over neoplasm DO NOT DO NOT DO NOT DO NOT DO NOT
Over active infection DO NOT DO NOT DO NOT DO NOT DO NOT
Directly over pregnant uterus DO NOT N/A DO NOT DO NOT DO NOT In progressive degenerative nm disease
Avoid fatigue
Avoid fatigue
OK
OK
OK
Over eyes DO NOT N/A DO NOT DO NOT DO NOT
Photophobia (light sensitivity) OK OK OK DO NOT OK
Over thyroid DO NOT DO NOT DO NOT DO NOT DO NOT
Over testes/endocrine glands DO NOT N/A DO NOT DO NOT DO NOT
Impaired heat sensation Caution Caution DO NOT OK DO NOT
Impaired sensation Caution Caution Caution OK Caution
Over implanted electrical leads DO NOT DO NOT DO NOT OK DO NOT
On patients with electronic implants WARNING Caution DO NOT OK DO NOT
Over implanted metal DO NOT DO NOT DO NOT OK Caution
Over hemorrhage or menstrual uterus DO NOT N/A DO NOT OK DO NOT
Over growth plates in growing children DO NOT N/A DO NOT DO NOT DO NOT
Over the anterior neck DO NOT OK DO NOT OK DO NOT
Over carotid sinus DO NOT DO NOT DO NOT OK DO NOT
Transthoracic application DO NOT N/A DO NOT N/A N/A
Transcerebral application DO NOT N/A DO NOT N/A N/A
On patients with seizure disorder Caution Caution OK OK OK On patients unable to provide feedback
Caution
Caution
Caution
Caution
Caution
101
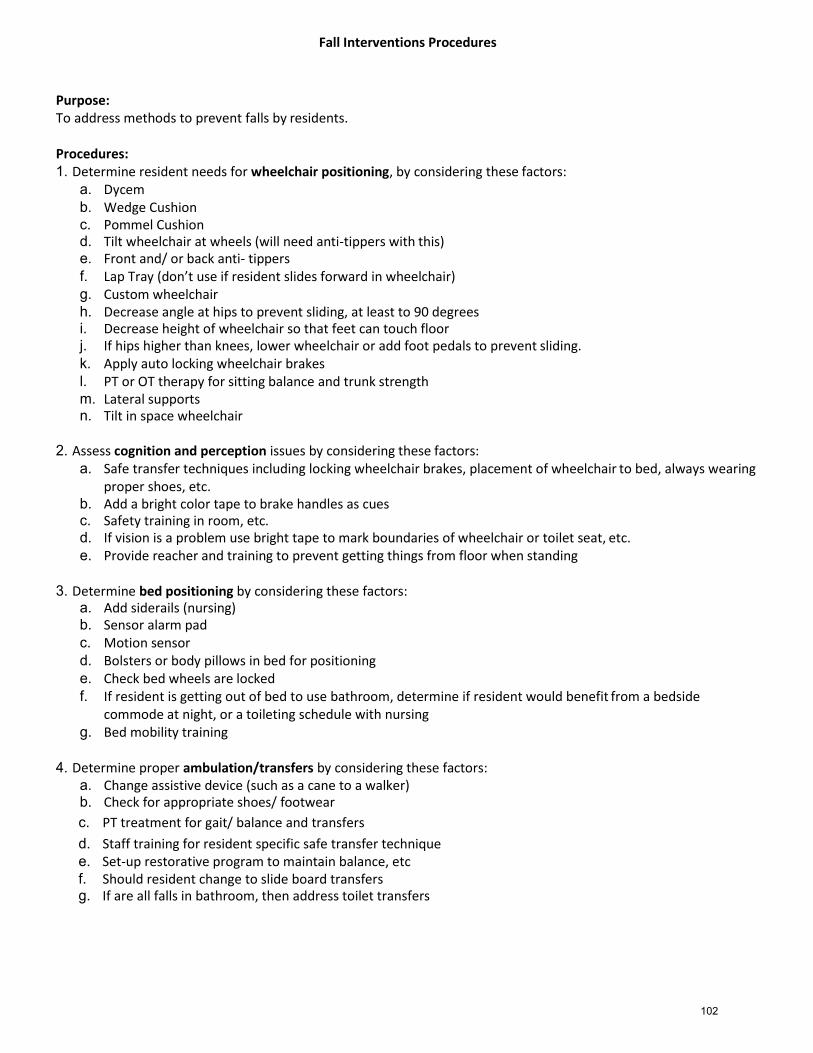
Fall Interventions Procedures
Purpose: To address methods to prevent falls by residents.
Procedures: 1. Determine resident needs for wheelchair positioning, by considering these factors:
a. Dycem b. Wedge Cushion c. Pommel Cushion d. Tilt wheelchair at wheels (will need anti-tippers with this) e. Front and/ or back anti- tippers f. Lap Tray (don’t use if resident slides forward in wheelchair) g. Custom wheelchair h. Decrease angle at hips to prevent sliding, at least to 90 degrees i. Decrease height of wheelchair so that feet can touch floor j. If hips higher than knees, lower wheelchair or add foot pedals to prevent sliding. k. Apply auto locking wheelchair brakes l. PT or OT therapy for sitting balance and trunk strength m. Lateral supports n. Tilt in space wheelchair
2. Assess cognition and perception issues by considering these factors:
a. Safe transfer techniques including locking wheelchair brakes, placement of wheelchair to bed, always wearing proper shoes, etc.
b. Add a bright color tape to brake handles as cues c. Safety training in room, etc. d. If vision is a problem use bright tape to mark boundaries of wheelchair or toilet seat, etc. e. Provide reacher and training to prevent getting things from floor when standing
3. Determine bed positioning by considering these factors:
a. Add siderails (nursing) b. Sensor alarm pad c. Motion sensor d. Bolsters or body pillows in bed for positioning e. Check bed wheels are locked f. If resident is getting out of bed to use bathroom, determine if resident would benefit from a bedside
commode at night, or a toileting schedule with nursing g. Bed mobility training
4. Determine proper ambulation/transfers by considering these factors:
a. Change assistive device (such as a cane to a walker) b. Check for appropriate shoes/ footwear
c. PT treatment for gait/ balance and transfers
d. Staff training for resident specific safe transfer technique e. Set-up restorative program to maintain balance, etc f. Should resident change to slide board transfers g. If are all falls in bathroom, then address toilet transfers
102
5. Determine environmental adaptations by considering these factors: a. Grab bars on bed or in bathroom b. Non-skid tape c. Bright tape d. Re-arrangement of bedroom to improve pathways e. Add bedside commode
103
Gait Belt Procedures Policy: Patient care providers will use gait belts when ambulating or transferring patients who are unsafe to ambulate/transfer independently. Purpose: To make transferring and walking a client easier and safer for the client and for the care taker. Support at the waist allows the client to use his arms to help himself to the extent possible while walking or transferring. Additional Information: 1. Care providers will use gait belts on the following patients: a. Any patient on Fall Prevention b. Diagnosis that may relate to unsafe ambulation, i.e. orthopedic, stroke (CVA), MS c. Any patient unsafe to ambulate/transfer independently 2. Patient or family refusal to use a gait belt will be documented. Procedure: 1. Assemble equipment and supplies:
a. crutch, walker or other assistive device as needed, b. gait belt, c. well fitted, flat heeled shoes/slippers
2. Explain procedure to the patient. 3. Assist patient to sitting position on side of the bed. 4. Have patient remain seated until sure of stability. 5. Safety gait belt
a. Always apply the belt over the patient’s clothing. b. Place the belt around the patient’s waist and buckle in the front. With female patients ensure that the
breast is not under the belt. c. Thread the belt through the teeth side first. Place the end of the belt through both openings so that it is
double locked. d. The belt should fit snugly, but you should check it by slipping your fingers comfortably underneath to be
sure it is not too tight. 6. Assist patient to put on shoes/slippers and place feet flat on the floor. 7. Stand in front of the patient and slide him to the edge of the bed or chair. 8. If the patient is not using an assistive device, such as a walker, cane, or crutches, stand in front of the patient and
slide them to the edge of the bed or chair: a. position your knees on either side of the patient b. bend your knees c. grasp gait belt firmly on the back with your thumbs and fingers pointing up d. instruct patient to push up from the bed or chair with their arms e. straighten your knees, pulling the patient to an erect position
9. If the patient is using an assistive device, stand in front of the patient and slide them to the edge of the bed or chair:
a. stand on the patients affected side b. bend your knees c. grasp gait belt firmly on the back with your thumbs and fingers pointing up d. instruct patient to push up from the bed or chair with their arms e. straighten your knees, pulling the patient to an erect position f. instruct the patient to grasp the assistive device.
104
10. For a patient unsafe to ambulate/transfer independently a. walk with the patient and hold the belt firmly b. if the patient becomes faint he/she can be pulled against you and eased to the floor c. walk beside and slightly behind when walking up stairs d. walk beside and slightly in front when descending stairs
11. Loosen belt while patient is sitting in chair. Remove belt when patient returns to bed. 12. Follow manufacturer and/or facility guidelines for cleaning gait belts.
105

Fire Safety Procedures
Purpose:
To address fire prevention measures and steps to be undertaken in the event of a fire. Therapists must also adhere to the applicable fire safety and disaster preparedness policies as established by the facility.
Procedures:
1. Prevent outbreaks of fires through fire prevention practices such as proper disposal of waste, restriction of smoking, and inspection and testing of electrical installations and appliances. Do not overload electrical sockets.
2. In case of a fire, use the acronym “RACE”: Rescue the resident. This may require a team effort. Alert the facility staff of the fire as per the fire policy in the facility. Confine the fire by closing all doors. Evacuate the portion of the facility involved, and if necessary, the entire facility.
3. On discovering a fire, follow the facility’s pre-determined procedures and arrangements, to include assessment of the situation, operation of the alarm system, calling the fire department, initiation of evacuation, closing all doors as areas are vacated, checking that nobody is left behind, and assembling at the designated assembly point.
4. On hearing an alarm or being alerted to a fire, implement the appropriate actions (see above), report to the designated persons or locations, and carry out any specific assigned tasks or other instructions.
5. Become familiar with facility fire safety signs and exits, and layout of the facility. Fire safety signs will indicate the direction of escape and the location of exit doors.
6. The facility emergency procedures include evacuation plans for the building. Become familiar with the details of these plans.
7. When evacuating, the first priority is to move any residents who are in immediate danger to a safe area. Special care will be needed in the evacuation of non- ambulant residents. Various items of equipment may be employed to assist with evacuation, such as wheelchairs, and wheeled trolleys, blankets, carry sheets, and stretchers.
8. Participate in the fire and evacuation drills conducted by the facility to become familiar with your role in the event of a fire.
9. Every nursing home and hospital must have fire extinguishers. Know where the fire extinguishers are located, and for what types of fires the facility’s fire extinguishers are to be used. “A” fire extinguishers can only be used to put out fires on some common items such as paper, wood and cloth. They cannot be used on grease, oil or electrical fires. “B” fire extinguishers can be used to put out fires on liquids and gases like gas, oil and grease. They cannot be used on electrical fires. “C” fire extinguishers can be used to put out electrical fires.
10. Memorize the acronym for using an extinguisher: "PASS". P- Pull the pin. A- Aim at the base, or the bottom, of the fire or flame. S- Squeeze the trigger while holding the extinguisher up straight. S- Sweep, or move the spray, from side to side to completely cover the fire.
106

Hazard Communication and Material Safety Data Sheet (MSDS) Procedures
Purpose: The Occupational Safety and Health Administration (OSHA) requires that a Material Safety Data Sheet be available to employees for potentially harmful substances handled in the workplace. This requirement is addressed under OSHA’s Hazard Communication Standard.
A Material Safety Data Sheet, or MSDS, is designed to provide industrial purchasers and users of hazardous chemicals, including workers and emergency personnel, with the proper procedures for handling or working with a particular substance. Most materials packaged for consumer use are exempt from the requirements of the Hazard Communication Standard.
1. The MSDS includes information such as physical data (melting point, boiling point, flash point etc.),
toxicity, health effects, first aid, reactivity, storage, disposal, protective equipment, and spill/leak procedures. These are of particular use if a spill or other accident occurs.
2. The MSDS varies in length depending on their format, content, and type size. The sheets may often range from 1 to 10 pages, with most being 2 to 4 pages.
A Material Safety Data Sheet includes the following information:
Chemical Identity The identity of the substance as it appears on the label.
Section I. Manufacturer’s Name and Contact Information Manufacturer’s name, address, telephone number and emergency telephone number. Also, the date the MSDS was prepared and, optionally, the signature of the preparer.
Section II. Hazardous Ingredients/Identify Information Lists the hazardous components by chemical identity and other common names. Includes OSHA PEL (Permissible Exposure Limit), TLV (Threshold Level Value) and other recommended exposure limits. Percentage listings of the hazardous components is optional.
Section III. Physical/Chemical Characteristics These include: Boiling point, vapor pressure, vapor density, specific gravity, melting point, evaporation rate, solubility in water, physical appearance and odor. Section IV. Fire and Explosion Hazard Data These include: Flash point (and method used to determine it), flammability limits, extinguishing media, special firefighting procedures, unusual fire and explosion hazards.
Section V. Reactivity Data Stability, conditions to avoid, incompatibility (materials to avoid), hazardous decomposition or byproducts, hazardous polymerization (and conditions to avoid).
VI. Health Hazard Data Routes of entry (inhalation, skin, ingestion), health hazards (acute = immediate and chronic = build up over time), carcinogenicity (as per National Toxicology Program, International Agency for Research on Carcinogens m o n o g r a p h s , OSHA regulations), signs and symptoms of exposure, medical conditions generally aggravated by exposure, emergency and first aid procedures.
107

VII. Precautions for Safe Handling and Use Steps to be taken in case material is released or spilled or leaked, waste disposal method, precautions to be taken in handling or storage, and other precautions.
VIII. Special Protection Information Respiratory protection (specify type), ventilation (local, mechanical, exhaust, special or other), protective gloves, eye protection, other protective clothing or equipment, work/hygienic practices.
IX. Special Precautions Special precautions to be taken in handling and storage.
Procedures: 1. Training. For those employees that work with hazardous chemical materials, the facility will arrange for
training in the following areas: detecting the presence or release of hazardous chemicals in the workplace; physical and health hazards of all chemicals used; work practices and emergency procedures; and understanding MSDS sheets and the chemical labeling system.
2. Monitoring and Enforcement. A facility manager or designated person should monitor and enforce the
policy and procedures by ensuring the proper use of MSDSs and chemical labeling.
3. Record Keeping. The facility manager or designated person shall maintain all records including MSDSs and employee exposure and training records.
108
Commercial Hot Packs/Thermal Agent Treatment Procedures Purpose: To address the proper techniques when applying commercial hot packs as a treatment modality. The hydrocollator moist heating pack usually consists of a canvas case filled with bentonite, a hydrophilic silicate or some other hydrophilic substance. The packs are stored in a thermostatically controlled cabinet in water at a temperature of 150-170 degrees Fahrenheit (refer to the specific manufacturer parameters for recommended operating temperature). The heat does not penetrate deeply. This is a superficial heat modality. The area to be treated must be close enough to the surface of the body to obtain benefits of the heat. Hot Pack Use Hot packs are superficial. The local and systemic effects of heat application include:
Increased circulation-vasodilation in local area
Increased local oxygen supply to area
Increased nutrient supply to area
Increased sweating
Increased local metabolism
Increased connective tissue extensibility
Production of a mild inflammatory reaction o Causes release of histamine and prostaglandins which increase vascular permeability and vasodilation
Indications
Pain
Muscle spasm
Subacute and chronic inflammation
Soft tissue contractures
Pre-heating prior to electrical stimulation
Use in conjunction with rehab exercises Contraindications
Open wounds
Acute inflammation – not to be used as a treatment modality in the first 48 hours after onset of injury
Hemophilia
Volkman’s Ischemic Reaction
Skin infection
Neoplasms in area of treatment Precautions
Sensory impairment (e.g., diabetes, CVA, neuropathies, nerve root impairment)
Circulatory impairment (e.g., arteriosclerosis, venous insufficiency, phlebitis)
Cancer
Very young/very old patient
Skin rashes
109
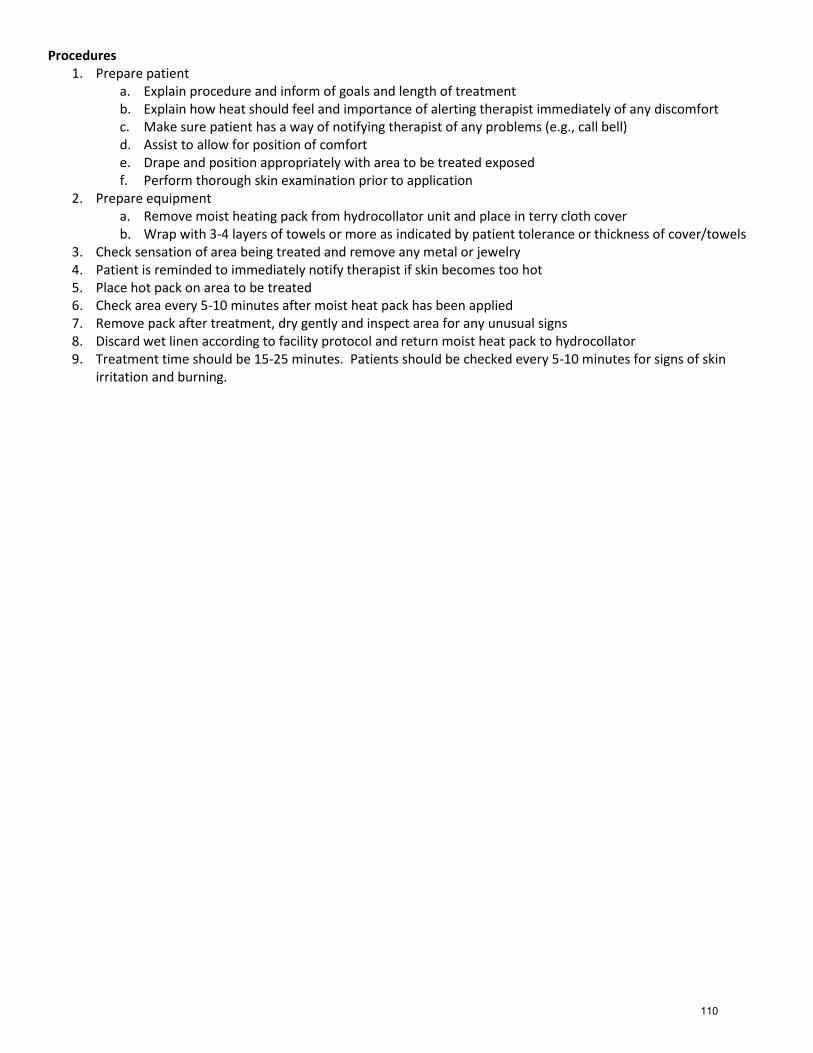
Procedures
1. Prepare patient a. Explain procedure and inform of goals and length of treatment b. Explain how heat should feel and importance of alerting therapist immediately of any discomfort c. Make sure patient has a way of notifying therapist of any problems (e.g., call bell) d. Assist to allow for position of comfort e. Drape and position appropriately with area to be treated exposed f. Perform thorough skin examination prior to application
2. Prepare equipment a. Remove moist heating pack from hydrocollator unit and place in terry cloth cover b. Wrap with 3-4 layers of towels or more as indicated by patient tolerance or thickness of cover/towels
3. Check sensation of area being treated and remove any metal or jewelry 4. Patient is reminded to immediately notify therapist if skin becomes too hot 5. Place hot pack on area to be treated 6. Check area every 5-10 minutes after moist heat pack has been applied 7. Remove pack after treatment, dry gently and inspect area for any unusual signs 8. Discard wet linen according to facility protocol and return moist heat pack to hydrocollator 9. Treatment time should be 15-25 minutes. Patients should be checked every 5-10 minutes for signs of skin
irritation and burning.
110
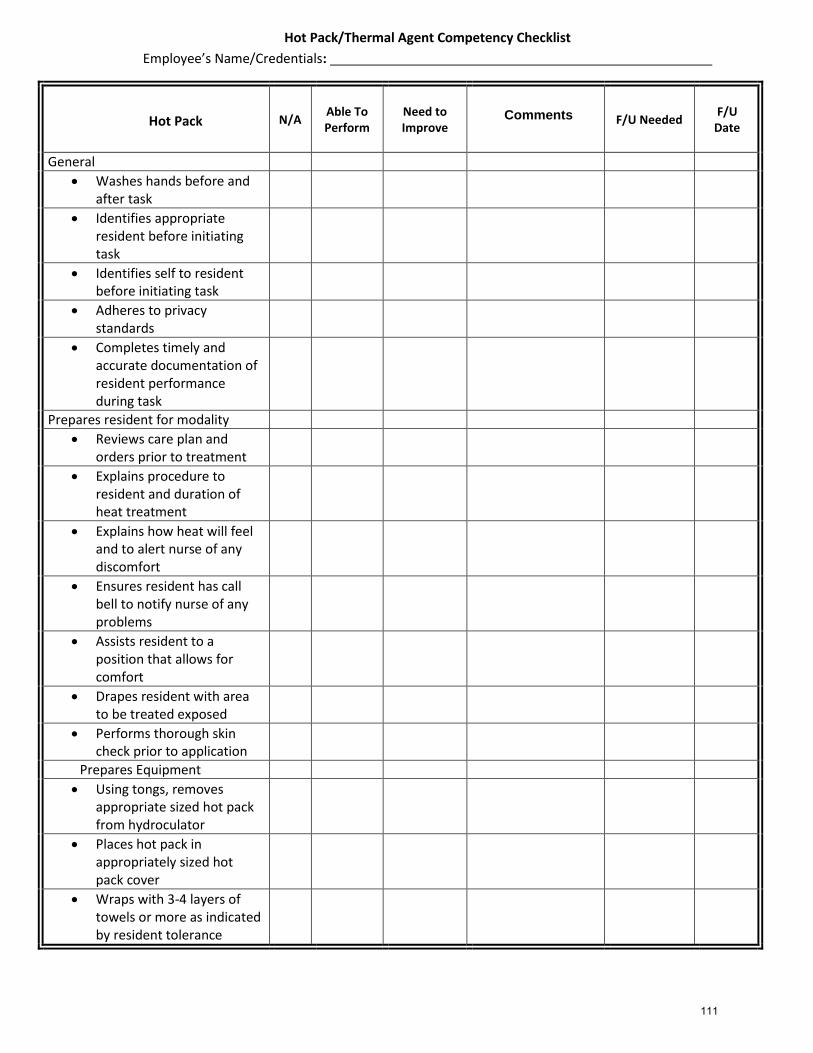
Hot Pack/Thermal Agent Competency Checklist
Employee’s Name/Credentials:
Hot Pack N/A Able To Perform
Need to Improve
Comments
F/U Needed F/U
Date
General
Washes hands before and after task
Identifies appropriate resident before initiating task
Identifies self to resident before initiating task
Adheres to privacy standards
Completes timely and accurate documentation of resident performance during task
Prepares resident for modality
Reviews care plan and orders prior to treatment
Explains procedure to resident and duration of heat treatment
Explains how heat will feel and to alert nurse of any discomfort
Ensures resident has call bell to notify nurse of any problems
Assists resident to a position that allows for comfort
Drapes resident with area to be treated exposed
Performs thorough skin check prior to application
Prepares Equipment
Using tongs, removes appropriate sized hot pack from hydroculator
Places hot pack in appropriately sized hot pack cover
Wraps with 3-4 layers of towels or more as indicated by resident tolerance
Comments
111
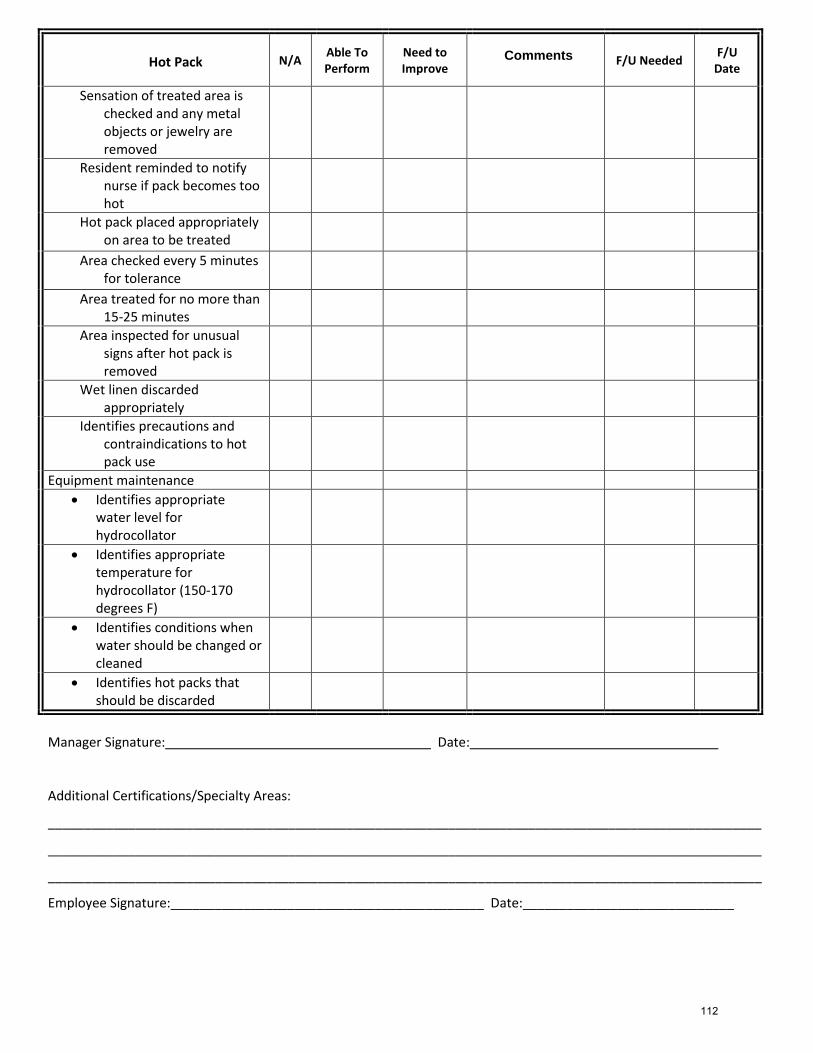
Hot Pack N/A Able To Perform
Need to Improve
Comments
F/U Needed F/U
Date
Sensation of treated area is checked and any metal objects or jewelry are removed
Resident reminded to notify nurse if pack becomes too hot
Hot pack placed appropriately on area to be treated
Area checked every 5 minutes for tolerance
Area treated for no more than 15-25 minutes
Area inspected for unusual signs after hot pack is removed
Wet linen discarded appropriately
Identifies precautions and contraindications to hot pack use
Equipment maintenance
Identifies appropriate water level for hydrocollator
Identifies appropriate temperature for hydrocollator (150-170 degrees F)
Identifies conditions when water should be changed or cleaned
Identifies hot packs that should be discarded
Manager Signature: Date:
Additional Certifications/Specialty Areas:
__________________________________________________________________________________________________
__________________________________________________________________________________________________
__________________________________________________________________________________________________
Employee Signature:___________________________________________ Date:_____________________________
Comments
112
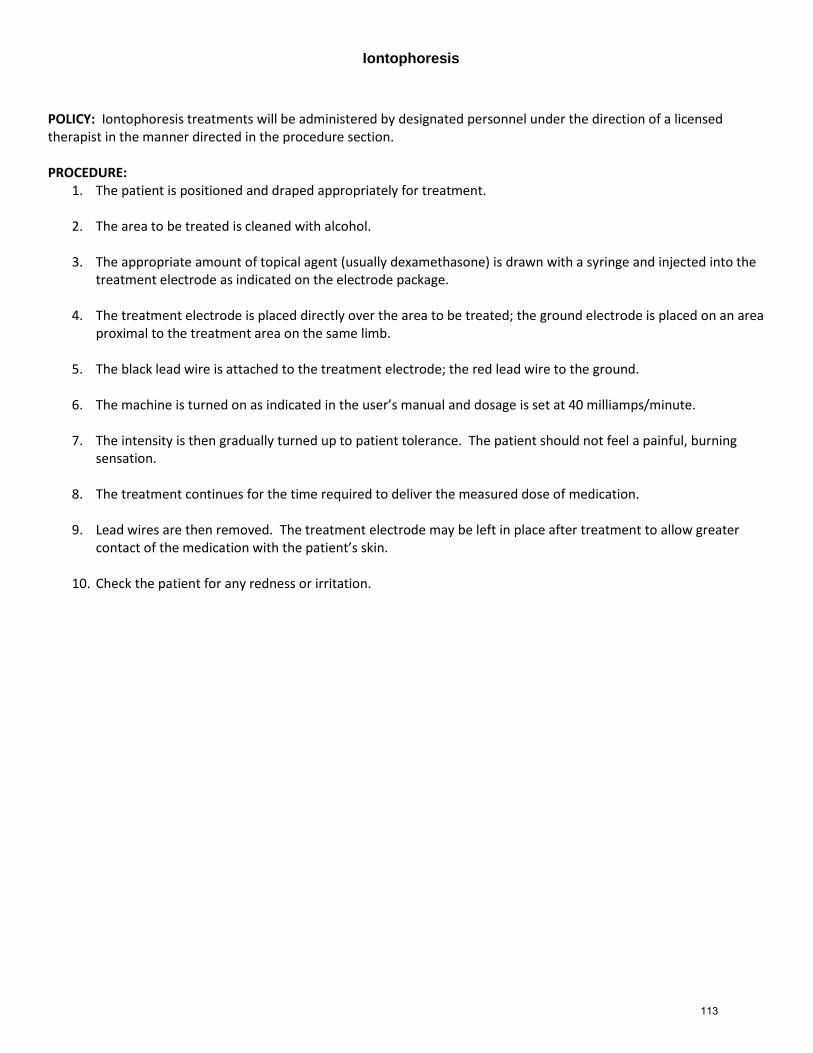
Iontophoresis
POLICY: Iontophoresis treatments will be administered by designated personnel under the direction of a licensed therapist in the manner directed in the procedure section. PROCEDURE:
1. The patient is positioned and draped appropriately for treatment. 2. The area to be treated is cleaned with alcohol. 3. The appropriate amount of topical agent (usually dexamethasone) is drawn with a syringe and injected into the
treatment electrode as indicated on the electrode package. 4. The treatment electrode is placed directly over the area to be treated; the ground electrode is placed on an area
proximal to the treatment area on the same limb. 5. The black lead wire is attached to the treatment electrode; the red lead wire to the ground. 6. The machine is turned on as indicated in the user’s manual and dosage is set at 40 milliamps/minute. 7. The intensity is then gradually turned up to patient tolerance. The patient should not feel a painful, burning
sensation. 8. The treatment continues for the time required to deliver the measured dose of medication. 9. Lead wires are then removed. The treatment electrode may be left in place after treatment to allow greater
contact of the medication with the patient’s skin. 10. Check the patient for any redness or irritation.
113
Paraffin Treatment Procedures
Purpose: To address the proper techniques when applying paraffin as a treatment modality. Paraffin is a commonly used superficial heating agent that transfers heat energy by conduction. Thermal energy is lost from the agent and gained by the tissue. A paraffin bath is a tank containing a mixture of paraffin and mineral oil. Temperature is maintained at 126-130 degrees Fahrenheit (refer to the specific manufacturer parameters for recommended operating temperature). It is commonly used for heat to the distal extremities. Due to its low specific heat, paraffin feels cooler than water at the same temperature. Paraffin Use Paraffin is a superficial agent. The local and systemic effects of application include:
Delivers heat to areas difficult to heat with anything other than a liquid medium
Increases temperature of subcutaneous tissues by heat conduction from superficial tissues
Increases perspiration
Softens skin
Increases circulation-vasodilation in local area
Relieves pain Indications
Subacute and chronic traumatic and inflammatory conditions
Post-immobilization limitation of motion
Soft tissue contractures
Degenerative joint disease
Scleroderma
Pain
Use in conjunction with rehab exercises Contraindications
Open wounds
Skin infection
Acute inflammation – not to be used as a treatment modality in the first 48 hours after onset of injury
Volkman’s Ischemic Reaction
Hemophilia
Recent skin grafts
Neoplasms in area of treatment Precautions
Sensory impairment (e.g., diabetes, CVA, neuropathies, nerve root impairment)
Circulatory impairment (e.g., arteriosclerosis, venous insufficiency, phlebitis)
Cancer
Very young/very old patient
Skin rashes Procedures Operation of paraffin bath
1. The unit contains a mixture of paraffin and mineral oil and is calibrated to operate continuously at 128 degrees Fahrenheit (refer to specific manufacturer parameters and recommended operating temperature). The bath is not allowed to operate with paraffin level lower than 5 inches from the top of the rim. Lid is kept on unit when not in use.
114

2. Preparing bath for use: a. Turn power switch to “on” position. b. Turn upper most switch to start position – red indicator light will glow. Paraffin will become completely
molten in about 4 hours reaching a temperature of about 145 degrees Fahrenheit. c. When paraffin is molten, turn uppermost switch to “operate” position. Amber indicator light will glow.
Paraffin will reach operational temperature of 126-130 degrees Fahrenheit in about 3 hours. d. Verify temperature of paraffin using a thermometer prior to beginning each treatment session.
Treatment
1. Prior to beginning initial treatment, therapist instructs patient in treatment procedures, treatment length, and goals of treatment. The patient is also instructed to notify therapist if symptoms of discomfort occur. Explain how heat should feel and importance of alerting therapist of any discomfort.
2. Inspect body part to be treated. Clean thoroughly with soap and water and towel dry. Remove or cover jewelry with several thicknesses of gauze to avoid skin burns.
3. Application of paraffin: In both techniques, the patient is cautioned not to touch the bottom or sides of the unit. a. “Dip and Wrap” Technique: The body part is dipped 10-12 times into the wax, placed in plastic wrap or
waxed paper, then wrapped in a hot pack cover or several layers of toweling. No succeeding wax layer should extend beyond the first layer and body part should be kept immobile with excess wax allowed to drip into the bath between the dips.
b. “Dip and Re-Immerse” Technique: The part is dipped 10-12 times and then left in the wax for the entire treatment.
4. Patient is instructed to notify therapist if skin becomes too hot. 5. When treatment time is complete, wax is removed and discarded. 6. Recommendations for frequency and duration of treatment will be determined by diagnosis, impairments,
prognostic indicators, and rehabilitation potential for achieving short- and long-term goals.
115
Safety, Body Mechanics and Transfers Procedures
Purpose: 1. To enable therapy staff to be able to apply safety, body mechanics, transfers and gait belt techniques
appropriately. 2. To Increase use of the most therapeutic weight-bearing transfer technique to promote the greatest
functional independence for residents. 3. To eliminate two-person “side by side” and “under the arm” transfers. 4. To educate staff in appropriate transfer methods to ensure compliance with individual resident care plans.
If the techniques demonstrated are followed, residents will be more comfortable and safe, risk of staff injury will be greatly reduced and work will be performed more efficiently.
Procedures:
A. Safety 1. Primary concern is the safety and health of the residents. Residents who are properly transferred by staff help
prevent common injuries such as fractures, skin tears, bruises, etc. Resident safety can be accomplished by doing the following: a. Be aware of the resident’s capabilities as well as your own, by assessing the situation. b. Ask for assistance if necessary. c. Have stability of equipment. d. Remove barriers. e. Use a gait belt to assure firm grip on resident. f. Get in a position so that you are in control. g. Always transfer the resident towards his or her strongest side.
2. Another area of concern is the safety and health of the staff. Staff members who perform improper transfers suffer common injuries to areas such as low back, wrist, shoulder, etc. Staff safety can be accomplished by doing the following: a. Know your own limitations; ask for assistance if necessary. b. Use good body mechanics; use arms and legs not back muscles. c. Get good leverage. d. Try to avoid twisting and turning – let your legs do the work. e. Allow the resident to do as much as possible.
3. The three biggest reasons for resident or staff injury are: a. Not enough time. b. Resident behavior. c. Poor teamwork.
B. Body Mechanics 1. Purpose
a. Save energy. b. Prevent back injury.
2. Habit – most poor body mechanics are the result of bad habits and/or poor training. 3. Keys to good body mechanics.
a. Flex the knees when bending, lifting. b. Never twist when lifting or bending. Do not twist the back when standing upright and holding a load. c. Keep the back straight when bending or lifting. Do not bend or arch the back.
116
4. Body mechanics in lifting, carrying, lowering, and moving objects a. Lifting – plan the job, face the load, lower your body by bending at the knees, lift by straightening the knees. b. Carrying – hold the load close to you. c. Lowering – bend your knees to lower the load. d. Moving objects – use a weight shift. Move in close to the objects, flex your hips and knees slightly and then
just shift your weight forward or backward. 5. Body mechanics when working with residents
a. Know what the resident can do. This is best for both you and the resident. b. Get assistance whenever necessary and synchronize your movement. c. Work as close to waist level as possible.
6. General rules for Body Mechanics a. Whenever you are lifting residents, be sure that they know: a) they are going to be lifted, b) how you plan
to do it, and c) where you are going to lift them to. b. Size up the load to be lifted; do not attempt to lift alone if you have any doubt about your ability to do
so. c. Check your footing; your feet should be apart to give you a broad base of support (good balance). d. Get close to whatever is being lifted instead of reaching for it. Move in and hold close. Bring weight within
your base of support. e. Get yourself “lined up” and keep your back straight, bend at the knees and hips. f. Straighten your legs to lift. g. Lift smoothly to avoid strain produced by jerky movements and get together with the person helping you (it’s
a good idea to count 1, 2, 3). h. Shift the position of your feet to turn, never twist your body. Come up straight and then move feet
around. i. Push or pull an object (rather than lifting it) whenever you can. j. Spread this knowledge to others.
C. Preparation for Transfers The following techniques are to be utilized prior to performing any of the transfers: 1. Establish what the resident’s level of function is and if there are any precautions i.e.:
a. Check the chart for any documentation related to the resident’s ability to transfer and/or ambulate (Hospital records, therapy notes, care plan, etc.).
b. Weight bearing status (Very important for all staff to be aware of any weight bearing limitations of any extremity).
c. Number of staff required. d. Incisions, catheters, skin tears, G-tubes (Anything that would make the transfer more difficult should be
known prior to attempting). 2. Prepare the area:
a. Confidentiality must be maintained at all times (Door closed, shades drawn, etc.). b. Area must be free of objects that might get in the way (Side rails, leg rests, shoes, etc.).
3. Approach the resident: a. Always approach the resident from the front. b. Explain to them what you are going to do.
D. Types of transfers Below is a list of the general types of transfers: 1. Scooting up in bed 2. Rolling
3. Supine Sitting 4. Sitting Standing 5. Pivot 6. Scooting up while in a chair
117
E. Transfers 1. Scooting up in bed: General rules a. Make sure that you have fully lowered the head of the bed. b. Make sure that the entire bed is raised or lowered so that the resident is at waist level. c. Make sure that the side rails are down to minimize your reach and that all obstacles are removed. d. Keep your shoulders and hips in line throughout the entire movement. e. Do not lead with your shoulders. f. Keep your lower back in its normal curved position and hold your head up. 2. Scooting up in bed: One person a. Instruct the resident to bend his or her knees and then push off on your signal. b. Place one arm under the resident’s shoulders and the other under the hips. c. Provide your assistance from the resident’s weaker side. d. On your signal, sidestep to the head of the bed. Push off with your legs for power. e. Lift only enough to reduce the friction of the bed. 3. Scooting up in bed: Two people a. When a resident is unable to assist with moving up in the bed then a pad should be used with one person on
each side of the bed. This enables you to control the move with minimal forward bending. b. Both people are to grab onto the pad at the shoulders and the hips. c. One person should do the instruction. d. On your signal, move in unison with a side step, keeping your bodies straight. e. Remind the resident to lift his or her head prior to initiating the movement.
4. Rolling: General rules a. Make sure that you have fully lowered the head of the bed. b. Make sure that the entire bed is raised or lowered so that the resident is at waist level. c. When performing the roll, one foot should be as close to the bed as possible with the other slightly behind to
use your body weight and momentum. d. Make sure that you bend only at the hips, keeping your back fixed in the normal curved position and
that you pull and push by pivoting on your back foot. Do not push or pull by moving your back. e. Many people place one knee up on the bed to keep from having to reach too far when rolling the
resident. If you are going to use this technique, place a towel under your leg to maintain sanitary conditions. 5. Rolling: One person a. Lower the side rail on the resident’s strong side. b. Provide your assistance from the resident’s strong side. c. Instruct the resident to bend up both knees if possible, assist as necessary. d. Place your hands underneath the resident’s knees and shoulders or grab onto the pad. e. Slide the resident toward you. f. Tuck the resident’s weaker extremity under their body prior to rolling. g. Instruct the resident to reach over and grab the side rail and to pull on your signal.
6. Rolling: Two people a. When two people are required then the second person stands on the resident’s weaker side. b. Make sure that both side rails are lowered. c. Assist the resident with bending up both knees. d. The first person will place their hands under the resident’s hips and knees and then on their signal, they will
push the resident to the weak side. e. The second person will place their hands over the resident’s body on the shoulder and knees and then on
the signal, they will gently pull the resident to the weak side assisting with control and steadiness of the roll.
118

7. Supine Sitting: General rules a. Make sure that the resident is close to the edge of the bed. b. Utilize the techniques mentioned on the previous page to get the resident rolled over onto the side they will be
sitting up on. c. As the resident rolls, his or her legs can come over the edge of the bed on their own or with your assistance. d. As with all other transfers, keep your lower back arched, bend from the hips and knees rather than the
waist, hold your head and shoulders upright and keep a wide balanced stance. e. Remove all obstacles. f. Never leave a resident sitting at the edge of the bed unattended.
8. Supine Sitting: One person a. Instruct the resident that on your signal they can assist by pushing the elbow of the underneath arm into the
mattress and reach across their body with the upper most arm, pushing themselves up into the sitting position. b. Assist the resident by balancing and lifting with one hand under the shoulder. The other hand should guide the
lower legs.
c. Take advantage of the weight of the resident’s lower legs to assist with the lift. d. Once in sitting, allow the resident to stay in this position for a few moments before attempting any further
movements. e. Moving the resident from the sitting position back into supine is the exact reversal of this procedure.
9. Supine Sitting: Two people a. When two people are required the first person stands in front of the resident and the second person on the
other side of the bed. b. Make sure that both side rails are lowered. c. The first person performs the transfer as listed above. d. The second person places a towel on the bed near the resident’s upper body and then one knee on the
towel. e. On the signal, the second person assists by lifting under the resident’s shoulders guiding the resident into
the sitting position. f. Once sitting, the second person keeps the resident from falling backwards in bed until the first person is
ready to perform the next task.
10. Sit/Stand: General rules a. Make sure that the floor is not wet and that all obstacles are removed. b. Make sure the resident has a good stance and is wearing footwear that will not slip on the floor surface. c. Make sure the resident is sitting close to the edge of the bed or chair. d. If in a wheelchair, lock the brakes and remove the leg rests (Have the resident perform this if he or she is
able). e. Apply the gait belt with the buckle on the resident’s weak side. f. As with all other transfers, keep your low back arched, bend from the hips and knees rather than the waist, hold
your head and shoulders upright, keep a wide balanced stance and the resident close to your body. g. Instruct the resident to push from the surface they are transferring from. h. If the surface they are transferring from can be raised (i.e. bed or lift chair), raise it up to a level that will allow
the resident to go a shorter distance between sitting and standing.
11. Sit/Stand: One person a. Have the resident’s assistive device (if any) in front of them. b. Stand on the resident’s strong side. c. On your signal, have the resident push up from the surface they are sitting on and then grab the assistive
device once in standing. d. Assist the resident by holding onto the gait belt with one hand and the assistive device with the other
hand. e. Once in standing, allow the resident to stay in this position for a few moments before attempting any further
movements.
119

12. Sit/Stand: Two people a. When two people are required the first person stands in front of the resident and the second person stands on
the resident’s strong side. b. The first person will place both hands on the gait belt with one hand blocking the buckle of the gait belt
from the resident’s body. c. The second person will place one hand on the gait belt behind the resident and one on the assistive device to be
used.
d. On your signal, instruct the resident to push off of the surface that they are sitting on and both people will lift the resident into the standing position with the first person doing the majority of the work.
e. Once in standing, the first person will shift over to the weak side while the second person places the assistive device in front of the resident.
13. Pivot Transfer: General rules a. Included in this is all pivot transfers from bed to wheelchair, regular chair or commode. b. In order to get residents into the standing position utilize the techniques listed on the previous page. c. Position the chair at the resident’s strongest side at a slight angle to the bed. d. Make sure that the floor is not wet and that all obstacles are removed. e. Make sure the resident is sitting at the edge of the bed or chair, that he or she has a good wide stance and are
wearing footwear that will not slip on the floor surface. f. If in the wheelchair, lock the brakes and remove the leg rests (Have the resident perform this if he or she is
able). g. Apply the gait belt with the buckle on the resident’s weak side. h. As with all other transfers, keep your low back arched, bend from the hips and knees rather than the waist, hold
your head and shoulders upright, keep a wide balanced stance and the resident close to your body. i. If the surface they are transferring from can be raised (i.e. bed or lift chair), raise it up to a level that is higher
than the surface they are going to. It is easier to transfer from a higher surface to a lower surface.
14. Pivot Transfer: One person (Resident Assisted) a. Instruct the resident to lean forward and reach across the chair to the far armrest. b. Stand on the resident’s weak side with your hand on the buckle of the gait belt to protect the resident’s
skin. c. Provide assistance by lifting on the gait belt as needed. d. If going to or from the commode, provide assistance with clothing as needed. e. Once in standing, instruct the resident to pivot on the foot nearest the chair. f. Also, instruct them to slowly lower themselves into the chair by bending at the knees while keeping their
shoulders positioned forward over their feet.
15. Pivot Transfer: One person (Max Assistance) a. Position the resident, gait belt and chair as previously explained. b. Position yourself in front of the resident in such a way that you can block the resident’s foot and knee nearest to
the chair with your foot and knee. c. Place both hands on the gait belt with one hand guarding the buckle from the resident’s skin. d. You may allow the resident to hold on to your forearms if they are unable to push from the surface they are
transferring from. Do not allow the resident to hold on to your neck or shoulders. e. Lean the resident forward to the point that their shoulders are over their feet and then on your signal, instruct
the resident to push with their legs while you assist them into standing by lifting with your legs. f. Once standing, keep the resident close to your body and keep your leg braced against their knee. g. Pivot the resident until the back of their knee is touching the chair. h. Slowly lower the resident by bending your knees and allowing their knees to bend.
i. Keep the resident’s shoulders over his or her feet as you are lowering them into the chair.
16. Pivot Transfer: Two person a. When two people are required to perform the transfer, the first person stands in front and the second in the
120

small area between the two chairs (Or between the bed and the chair). b. The first person will perform the transfer exactly as listed above. c. On your signal, you will instruct the resident to assist as much as possible by pushing off of the surface that they
are sitting on while you and your partner pivot the resident. d. The second person will hold on to the gait belt and assist by lifting and guiding the resident into the chair or
bed.
17. Scooting up while in a Chair: General rules a. Make sure that the wheelchair brakes are locked. b. Instruct the resident to cross their arms in front of them. c. Maintain a wide base of support and have your feet slightly staggered. d. Arch your low back and keep close to the resident.
18. Scooting up while in a Chair: One Person a. Make sure that the resident’s feet are firmly on the leg rests of the chair or on the floor. b. Once the resident’s arms are crossed in front of them, go around to the back of the chair and slide your arms
under their axillary region and your hands over their forearms. c. On your signal, instruct the resident to push their feet into the foot rests or into the floor while your shift
your weight onto your back foot and scoot the person back in their chair.
19. Scooting up while in a Chair: Two person a. When two people are required, the first person stands behind the resident and the second in front of the
resident. b. The first person performs the same technique listed above. c. The second person is responsible for making sure the wheelchair leg rests are out of the way and that the
procedure has been explained to the resident. d. The second person will place their hands underneath the resident’s knees and on the first person’s signal, will lift
the resident’s legs up as the first person pulls the resident back in the chair.
121

Addressing Skilled Intervention: Occupational Therapy Procedures
Purpose: To provide examples of the appropriate terminology to describe the various skilled interventions utilized by occupational therapists.
Procedures: 1. When documenting the skilled interventions utilized, occupational therapists should refer to the following
terminology. a. Provide manual cues to increase proprioceptive awareness
b. Activities to improve motor planning or sequencing
c. Doing end range stretching/ soft tissue mobilization to increase ROM to permit the donning of shirt
d. Balance re-ed with proprioceptive input
e. Dressing skills using overlearning technique
f. UE muscle re-education
g. Balance re-education through swill ball activities
h. Sensory integration with proprioceptive input
i. Weight shifting and gross motor activities
j. Cognitive re-education to improve ability to initiate, attend and complete tasks
k. ADL retraining incorporating hemi dressing techniques
l. ADL retraining utilizing adaptive equipment for “X” – “sock aid to don stockings to compensate for impaired trunk stability/ hip flexion
m. Transfer training using joint protection/ energy conservation techniques
n. FMC training to improve abilities in clothing fastener manipulation
o. PRE to facilitate abilities in LB dressing
p. End chaining techniques to complete hand to mouth pattern for self feeding or grooming tasks
q. NDT strategies for tone inhibition utilizing weight bearing with closed chain exercises for improved UE control for UE dressing
r. NDT facilitation of trunk to facilitate improved postural control for self feeding task
s. Assessment of adaptive equipment for self feeding (to decrease tremors/ decrease spillage)
t. Environmental adaptation to compensate for decreased trunk mobility (or for w/c accessibility/ or for cognitive deficits)
u. Community reintegration with safety assessment
v. Neuromuscular reeducation with e-stim or tapping to facilitate a muscle contraction
w. Tactile cues to facilitate co-contraction of back extensors and abdominals for trunk stabilization
x. Open chain exercises with progressive resistive strengthening
y. Retrograde massage for edema management
z. Splint fabrication for contracture management and joint integrity preservation
aa. Myofascial release followed with AAROM to improve UE ROM for dressing
bb. Fluidotherapy for sensory integration (or edema management)
cc. Paraffin bath for pain management/ increased ROM
dd. Progressive resistive strengthening exercises
ee. Development of functional maintenance program/ home exercise program
122

ff. Instruction in application of energy conservation techniques
gg. Instruction in application of joint preservation techniques
hh. Seating and positioning assessment for functional posture and pressure relief
ii. Adaptive equipment training with ADLs to increase independence
jj. Midline orientation for improved posture
kk. Functional transfer training employing arm-hand placement and foot-hand placement to enhance safety
ll. Bobath technique
mm. Dexterity and manipulation tasks to enhance grasping/ holding for self feeding
2. Transfer training, bed mobility, and ADL retraining alone are not skilled statements.
123
Addressing Skilled Intervention: Physical Therapy Procedures
Purpose: To provide examples of the appropriate terminology to describe the various skilled interventions utilized by physical therapists.
Procedures: 1. When documenting the skilled interventions utilized, physical therapists should refer to the following
terminology
a. Challenged static standing activities to elicit righting reactions b. Weight shifting activities to initiate sit to stand for gait preparation c. Tone facilitation/relaxation techniques during a particular phase of gait d. Trunk relaxation to promote rotation e. Discuss the phase of gait:
Stance phase: heel strike, foot flat, midstance, heel off, toe off Swing phase: acceleration, midswing, deceleration
f. NDT techniques with developmental sequencing to improve transitional movement patterns g. Provide stabilization of trunk and pelvis to decrease tone h. PNF techniques for increased trunk rotation during bed mobility i. Gait training to increase pelvic stability, reduce tone and decrease gait deviations j. Tactile cueing provided for proper weight shift k. Weight shifting to facilitate improved heel strike during gait l. LE strengthening to improve hip flex to facilitate lengthened swing phase during gait m. Facilitation of abdominals to elicit forward weight shift n. Co-concentric contraction of quads to stand o. Closed kinetic chain exercises p. Tinetti balance assessment q. Wound care – utilize assessment vs. observation when documenting r. Stair climbing technique for safety and energy conservation s. Resistive bridging to increase pelvic musculature control for transitional movements t. Bobath hemiplegic techniques u. Brunnstrom scales v. Borg scale w. Progressive resistance during gait with approximation at pelvis to increase timing and pelvic rotation to
enhance pattern x. Alternating isometrics with approximation to bilateral shoulders and pelvis to increase upright standing
posture and stability
y. Hydrotherapy providing AAROM to increase ROM
z. Hydrotherapy to increase circulation / decrease edema
aa. ES to elicit dorsiflexion upon heel strike during gait bb. Rhythmic initiation technique while in hook line position to increase movement awareness and facilitate
rolling cc. Slow reversal hold secondary to cognitive status and muscle weakness to promote movement
2. Transfer training and bed mobility retraining alone are not skilled statements.
124

Soft File Records Maintenance Procedures
Purpose: To address the proper procedures for maintenance of soft files.
Procedures:
1. Soft files are not required but may be used and will be stored in a locked room at the end of the therapy day.
2. Soft file information will not be shared with any person that is not directly involved in treating the patient. The standards in the HIPAA Privacy and Security Rules will be adhered to.
3. Any medical record inquiry and request for copies will be referred to the facility administrator. 4. Soft files will not contain any original therapy documentation. 5. Soft files will be destroyed after four (4) years.
125
State Professional License Display Procedures
Purpose: To address the requirements under many state practice laws that the current license of the therapist or assistant be displayed in the workplace.
Procedures:
1. All therapists and assistants must display their current state license in a prominent area in the treatment gym.
2. Depending on State requirements, a wall certificate, which is not the actual license or registration issued by the State licensing agency, may be displayed in lieu of the actual license.
3. The therapist or assistant may make photocopies of the professional license to display in multiple work sites.
4. The therapist or assistant is responsible for providing a current copy of the license to be displayed, upon expiration of the license now on display.
126

Students and Supervision in Therapy Treatment Procedures
Purpose:
To address the role of students in therapy treatment, in compliance with Medicare requirements.
Procedures:
1. Treatment of Patients under Medicare Part A a. “Line of Sight” supervision IS NOT required. b. The time that the student spends with a Medicare Part A patient will be recorded as if it were the supervising
therapist alone providing the therapy. Note: cannot record for both the student’s treatment minutes and the therapist’s treatment minutes during the same time period.
c. Therapists may complete documentation or other non-billable tasks while the student is treating Medicare Part A patients.
Based on the judgment of the supervising therapist. Per CMS, SNF PPS Final Rule for FY 2012: “Each skilled nursing facility would determine for itself the appropriate manner of supervision of therapy students, consistent with applicable State and local laws and practice standards.”
Treatment of Patients under Medicare Part B Students cannot treat Medicare Part B patients unless the therapist is in constant attendance .
127

Therapeutic Ultrasound
Purpose: Therapeutic Ultrasound is a procedure that uses sound waves to stimulate the soft tissue beneath the surface of the skin to produce therapeutic benefits to injured tissue. Ultrasound treatments will be administered by designated personnel under the supervision and direction of a licensed therapist according to the manner directed in the therapy evaluation/plan of care and prescribed in physician orders. Prior to application, the patient is evaluated for any contraindications or precautions. All benefits and risks are clearly communicated with the patient. Indications for Ultrasound:
1. Tendonitis 2. Pain Management 3. Tissue Healing/Wound Management 4. Adhesive Capsulitis 5. Increasing Range of Motion 6. Scar Tissue Adhesions 7. Inflammation 8. Soft Tissue Injuries 9. Calcific Bursitis
Contraindications: (also see Attachment 1: Contraindications Chart) 1. On or Near Cancerous lesions or malignancy 2. Over Epiphyseal Plates in Children 3. Over Pregnant Uterus 4. Over Heart 5. Acute Infections 6. Pacemaker: Avoid treatment in thoracic region of the body 7. Thrombophlebitis 8. Vascular Disease 9. Impaired Circulation 10. Over Cemented Prosthetic Joint
Procedures:
1. A physician's order must be obtained prior to the provision of ultrasound. 2. The need for Ultrasound must be reviewed during the course of an evaluation or re-
evaluation. 2. All possible Contra-indications will be reviewed prior to the provision of ultrasound.
(see Contra-indications summary above and Attachment 1. 3. The need for ultrasound must be specifically addressed in the patient's plan of care. 4. The patient is to be positioned on a treatment table/mat or chair and draped appropriately
for treatment. 5. The procedure itself and the effects of ultrasound are explained to the patient by the
licensed therapist or therapist assistant. 6. Parameters are set as appropriate for each individual condition as prescribed by the
therapist. 7. Treatment duration is set by the therapist and is determined by each individual condition. 8. Ultrasound gel is directly placed on the treatment area or transducer at the beginning of ultrasound treatment
and the transducer head is kept in constant motion during entire treatment session. 9. The patient will be instructed to inform the therapist if they experience any discomfort. 10. The therapist will assess the patient's response to treatment and assess for any adverse reactions.
128

Ultrasound Parameters
Frequency 1 or 3 MHz
Frequency 1 or 3 MHz
Duty Cycle 100% Frequency 20%
Intensity 0.5-1.5 W/cm² Duty Cycle 0.5 W/cm²
Duration 8 – 12 minutes Intensity 5 – 10 minutes
3x/week Daily
129
Therapist Evaluation and Treatment Availability Procedures
Purpose: To address the requirements for availability of therapy services to the facility, as provided by therapy staff.
Procedures:
1. Therapy staff will provide comprehensive PT, OT, and SLP services to all patients that need therapy services. 2. Therapy staff will make available evaluation coverage up to seven (7) days per week as needed based on
medical necessity and physician order for PT, OT and SLP services. 3. Therapy staff will make available treatment coverage up to seven (7) days per week, as needed, based on
medical necessity and physician order for PT, OT and SLP services.
130

Transition Room Usage Procedures
Purpose: The purpose of these procedures is to address the criterion for usage of a transition room
Procedures: 1. The physical plant for a transition room involves a small studio apartment furnished as follows:
a. Kitchenette b. Washer / Dryer c. Full Bathroom (toilet, tub, shower, sink) d. Living Room Area e. Bedroom
2. Therapists will utilize the following general patient criterion in assessing transition room usage.
a. Patient must have been independent prior level of function and resided either in a home environment such as house or apartment (independent living facility or assisted living facility).
b. Patient must be expected to return to an independent living environment. c. Patient CANNOT be at risk of falls. d. Patient MUST demonstrate intact cognitive skills. e. Patient CANNOT require any form of nursing or attendant supervision.
3. Therapists, in conjunction with facility nursing related staff, will utilize these specific patient criterion in
assessing transition room usage. a. Patient must be independent and deemed safe with transfers, ambulation, and ADL’s. b. Patient must demonstrate intact cognitive skills. c. Nursing may be in the process of working with the patient on carry over training including, but not
limited to: medication management, sliding scales, oxygen. d. Therapy goals may include, but are not limited to: meal preparation, laundry, basic housekeeping,
and gait training, while engaged in household duties such as carrying a grocery bag or laundry basket. e. Patients who participate in the transition room are discussed in the Medicare Meeting and
participation is determined by both nursing and therapy. A physician’s order must be obtained prior to participation.
f. Length of time in the transition room varies based on patient need, but may range from three (3) days. Therapy provides the therapy sessions per day for those three (3) days to complete high-level therapy tasks.
g. Nursing is responsible for patient’s supervision during the patient’s stay in the transition room.
131
VitalStim Therapy Procedures
Purpose:
These procedures address the appropriate techniques in using VitalStim therapy.
VitalStim therapy is an innovative therapy for patients diagnosed with dysphagia. This non- invasive, painless treatment uses controlled neuromuscular electrical stimulation to strengthen the muscles used in swallowing with one-quarter the amount of voltage provided by OT and PT E-Stim therapy.
Indications
1. Patients to be served by this modality will most likely fall in one of the following categories: Previous CVA/TIA,
2. Neurodegenerative diseases 3. History of intubation 4. Head/neck/lung cancer 5. Atrial fibrillation 6. Pneumonia 7. COPD 8. Diabetes 9. Muscular disorders
Precautions
1. Patients with pacemakers or implanted electrodes 2. Over areas of excess adipose tissue, when treatment is applied over anesthetic skin; 3. In patients unable to give clear and reliable feedback 4. In patients with seizure disorders 5. Over open wounds 6. Over the carotid sinus
Contraindications
1. Patients who are severely demented and exhibit non-stop verbalization (which could result in aspiration during trials of oral intake).
2. Patients with significant reflux due to use of a feeding tube. Such patients are prone to repeated cases of aspiration pneumonia, and the device has not been studied in this population.
3. Patients with dysphagia due to drug toxicity (they could aspirate during trials of oral intake).
Procedures 1. The VitalStim device is pre-set and gives continual stimulation, with a small break every 60 seconds. 2. During the session, the therapist should encourage the patient to take small sips or chews, to swallow
hard, and to remember to clear the throat, if needed. 3. The electrical stimulation allows the patient to take tiny swallows, slowly re-educating the throat muscles how
to handle more advanced textures. Improvement of swallowing difficulties can be expected to be seen anywhere from 6 to 20 daily sessions. Research shows that success appears to be higher in individuals who exhibit dysphagia without cricopharyngeal involvement.
132

Whirlpool Usage and Proper Cleaning Procedures
Purpose: To address the proper techniques when using hydrotherapy in the whirlpool as a treatment modality, and to address proper cleaning measures.
“Hydrotherapy” is the external application of water for healing purposes. “Whirlpools” utilize water application combined with mechanical stimulation.
Effects or purposes of whirlpool:
1. Stimulates circulation. 2. Sedation effect. 3. Clean and stimulate wound healing. 4. Softens and/or relaxes various tissues in preparation for massage, stretching, exercise.
General contraindications:
1. Any acute infectious process. 2. Any acute inflammatory process. 3. Cardiac conditions. 4. Convulsive disorders. 5. Febrile diseases.
Procedures:
1. Therapists must utilize the following safety precautions when treating with the whirlpool. a. Ensure that electric motors are grounded. b. Keep water away from housing mechanism and tell patient not to reach up for such and turn it off
themselves. c. Keep area free of excess water. d. Use extensive caution in transferring patients. e. Secure patient if necessary. f. Warn patient to keep feet, hands away from water intake part of turbine. g. Do NOT turn turbine on until patient is safely into tank. h. Turn turbines OFF when moving them so as not to make contact with patient.
i. CHECK WATER TEMPERATURE ON TANK THERMOMETER BEFORE PUTTING PATIENT IN. Temperature never to exceed 104oF.
j. TURN agitator ON when adding water to tank to obtain correct temperature readings.
2. Therapists will apply lower temperature ranges in the following cases: a. Acute injuries to decrease edema (cool to neutral). b. Patients with impaired circulation or sensation. c. If main purpose is active exercise or muscle re-education (90o -92 o).
2. Therapists will apply higher temperature ranges especially if want muscle relaxation, sedation or
stretching.
3. Therapists will prepare the whirlpool for use as follows. a. Determine the procedure to be used:
Select the proper size whirlpool if available. Select the patient’s position. Be careful of possible problems associated with dependent
positioning.
133
b. Fill the clean whirlpool approximately two thirds full of water:
Close the whirlpool drain. The water temperature is usually 96 o to 104 o F. Agitator intakes should be well covered. Do not over the tank.
c. Check the whirlpool:
The whirlpool MUST be grounded. The line cord plug should be secure. Check the operation of the turbine. Turn on the turbine and adjust the water pressure and bubbles
to a soft flow. NEVER turn on the turbine unless the intakes are well covered with water. NEVER cover the air intakes on the motor.
d. NEVER leave patient unattended. e. Explain the procedure to the patient. f. Remove all braces and splints unless contraindicated. g. Recheck the water temperature. h. Position the patient as necessary. i. Position the turbine. j. Turn on the turbine. k. Treatment time is usually twenty to thirty minutes.
4. Therapists will arrange to terminate treatment as follows.
a. Terminate the treatment if the patent becomes dizzy, tired, nauseated, or overheated. b. Turn off the turbine and move it to one side. c. Remove the patient from the water and dry him thoroughly. (Be careful of water on floor when getting
in/out of tank – very dangerous)
5. After treatment has concluded, therapist will inspect the skin of the patient.
6. The therapist will then empty and clean the tank per manufacturer’s recommendations or as follows: a. Drain whirlpool completely. b. Rinse sides and bottom of any visual debris. c. Close tank drain. d. Fill tank so water level is above agitator and water intake hole. e. Add antibacterial or any other facility approved cleaning agent to water. f. Turn on agitator for 5 minutes. g. Turn off agitator. h. Drain. i. Rinse all internal surfaces thoroughly. j. Complete the Whirlpool Cleaning Record (attached form.)
134
Whirlpool Cleaning Record
Date Cleaned Signature Print Name
135