Embed Size (px)
Citation preview
www.csoresearch.com | toll free: 1.866.705.4201 | [email protected]
Copyright © 2012 CSO Research, Inc. All Rights Reserved
Client Instructions - ID Tech Configuration Instructions
Please follow the steps below to get started with the configuration process for your ID Tech reader. A student ID card will be necessary for the setup. You may contact your Client Relations Manager at any time if you have any questions.
STEP ONE: If you have not downloaded the software used to configure this card reader, please do so now using this link.
http://www.idtechproducts.com/component/downloadmanager/?c=driver&task=view&cid=354
STEP TWO: Open Notepad by going to the Windows Start button -> All Programs -> Accessories -> Notepad. Swipe in the card in Notepad (to see if it’s perfect). This scans what’s on card on all tracks. Make sure to keep Notepad open – you will need it to test with during the configuration process.
STEP THREE: Define which track the Student ID is on. (Trial and Error)
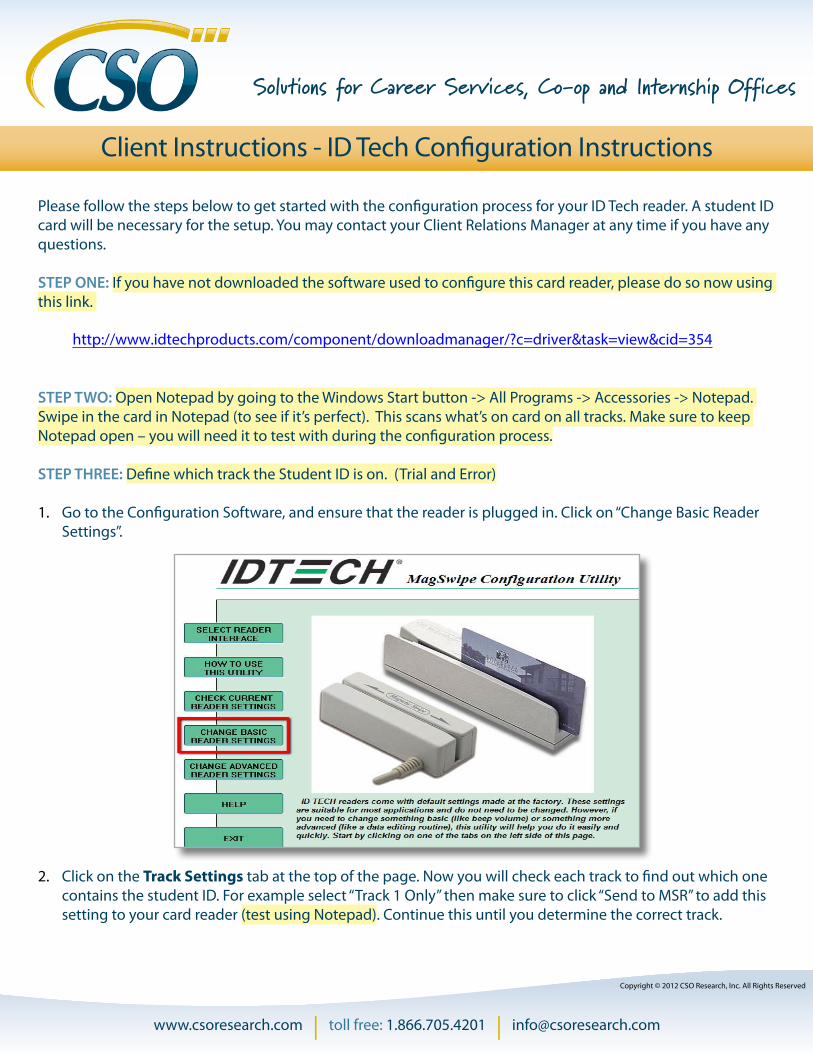
1. Go to the Configuration Software, and ensure that the reader is plugged in. Click on “Change Basic ReaderSettings”.
2. Click on the Track Settings tab at the top of the page. Now you will check each track to find out which onecontains the student ID. For example select “Track 1 Only” then make sure to click “Send to MSR” to add thissetting to your card reader (test using Notepad). Continue this until you determine the correct track.

www.csoresearch.com | toll free: 1.866.705.4201 | [email protected]
Copyright © 2012 CSO Research, Inc. All Rights Reserved
STEP FOUR: Define Formula
1. Once the track is determined, then figure out if it is pulling more info than needed and where the Student ID is:a. Example: ;000089000753614325b. Formula will be 4 offset characters, starting with a semicolon (;) and going for 9 characters
2. Click “Change Advanced Reader Settings” button and select the Data Editing tab.

www.csoresearch.com | toll free: 1.866.705.4201 | [email protected]
Copyright © 2012 CSO Research, Inc. All Rights Reserved
3. Select “Enable” under the Data Edit.
4. Select the “Custom” option from Data Format.
5. Click “Add Formula”

www.csoresearch.com | toll free: 1.866.705.4201 | [email protected]
Copyright © 2012 CSO Research, Inc. All Rights Reserved
A new box will open, click “New Custom Field”
Select your track number, and click the radio button for “After String”

www.csoresearch.com | toll free: 1.866.705.4201 | [email protected]
Copyright © 2012 CSO Research, Inc. All Rights Reserved
Next you will be adding in the actual formula. Here is a breakdown of what each field in this section means:
1. Times: This is the number of times you want the string to repeat – you will enter 12. String: This is identifying the character that begins your string3. Offset: This is the number of characters after (and not including) the character entered into the String
field, that your ID number beginsa. NOTE: Do not count either the character in the string field OR the first character of your ID number
when getting this number4. Length: This is just the number of characters in your ID number
Example: The entries in the screenshot below will turn this: ;000089000753612634 into this: 890007536.
Click Add then click Ok

www.csoresearch.com | toll free: 1.866.705.4201 | [email protected]
Copyright © 2012 CSO Research, Inc. All Rights Reserved
Now you will see your formula in the Customized Fields box – double click on it and it will move down into the Sent Sequences box below.
Next click “New Added Fields”

www.csoresearch.com | toll free: 1.866.705.4201 | [email protected]
Copyright © 2012 CSO Research, Inc. All Rights Reserved
Select “\cr” in the Non-Printable drop-down.
Click Add then click Ok
Now you will see your formula in the Added Fields box - double click on it and it will move down into the Sent Sequences box below.
Click Ok and click “Send to MSR”.
Test in notepad to ensure that it appears correctly!
www.csoresearch.com | toll free: 1.866.705.4201 | [email protected]
Copyright © 2012 CSO Research, Inc. All Rights Reserved
Troubleshooting Tips!
• If at any point the card reader stops reading anything go to “Change Basic Reader Settings” and click “Default All”. This will return to default settings and then just start over.Don’t forget to download settings again!
STEP FIVE: If setting up multiple readers, follow these steps.
1. Follow the steps above to setup the first reader2. Click on the “Save to File” button. 3. Plug in the second reader and click Send to MSR. Repeat for each reader.4. If you come back at a later date open the configuration manager and click “Load From File” and search
for the file you saved!
If you are sending the configuration file to another colleague, then they need to:
1. Install the reader software 2. Save this file to their computer to the same location yours is saved3. Make sure the swipe reader (USB) is plugged in 4. Click on the OPEN file icon tab to select the formula file (the configuration file you sent them)5. Click DOWNLOAD (Red Arrow pointing down) to upload the configuration settings to the new swipe
reader
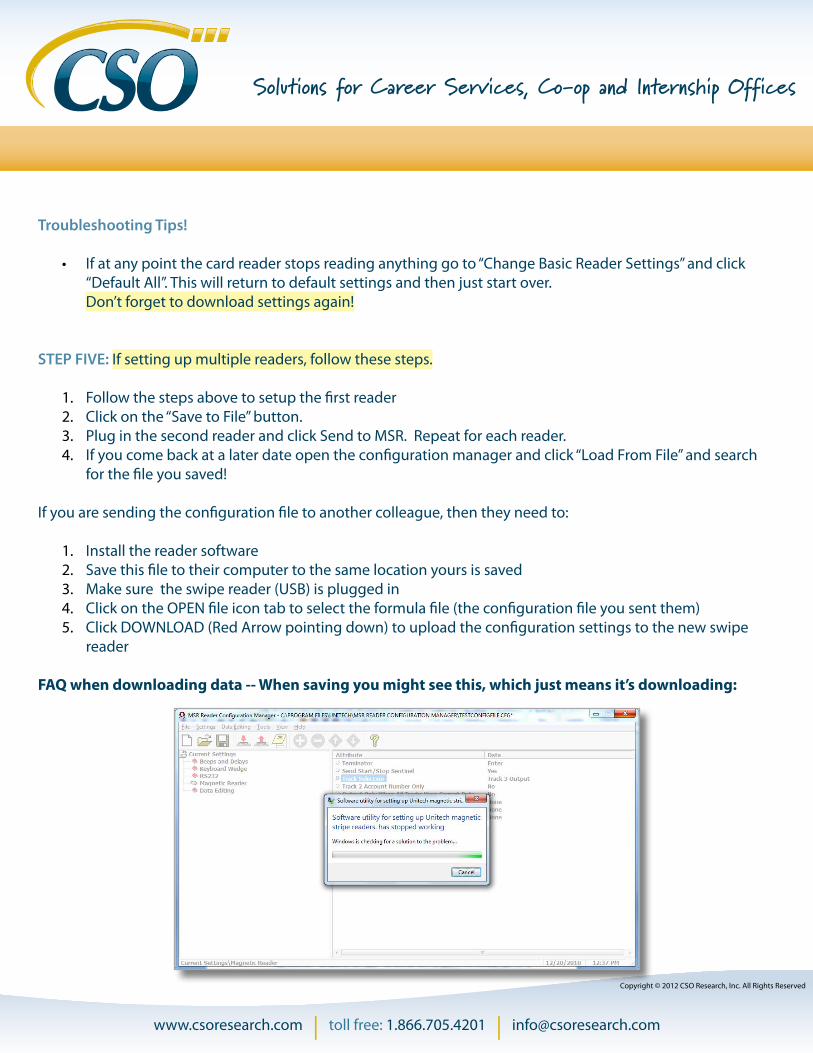
FAQ when downloading data -- When saving you might see this, which just means it’s downloading:

www.csoresearch.com | toll free: 1.866.705.4201 | [email protected]
Copyright © 2012 CSO Research, Inc. All Rights Reserved
FAQ when you don’t know where the formula is and you are setting up additional readers:
1. Install Configuration software2. Plug in a configured reader (to pull the formula)3. Click Upload Settings4. Unplug configured reader; Plug in unconfigured reader5. Click Download Settings
a. Note: You can save the configuration text file to this computer, but it’s not necessary.