Embed Size (px)
Citation preview

Page 1
Class 456
Electric Multiple Unit
Contents
How to install .......................................................................................................................................... 2 Technical information ............................................................................................................................. 3 Liveries .................................................................................................................................................... 4 Cab guide ................................................................................................................................................ 9 Keyboard controls ................................................................................................................................. 11 Features ................................................................................................................................................ 12
Driver only/guard operation ............................................................................................................. 13 Driver only operation (DOO) ......................................................................................................... 13 Guard operation ............................................................................................................................ 13 How to change operation ............................................................................................................. 13
Destination display ............................................................................................................................ 14 Manual blind ................................................................................................................................. 14 Electronic dot matrix display ........................................................................................................ 14
AWS/DSD visual aids ......................................................................................................................... 16 Class 455 compatibility ..................................................................................................................... 16
Setting up the driver’s cab .................................................................................................................... 16 Driving guide ......................................................................................................................................... 17
Power controller ............................................................................................................................... 17 How to use in the scenario editor ......................................................................................................... 18
How to place ..................................................................................................................................... 18 Formation .......................................................................................................................................... 18 Numbering ........................................................................................................................................ 18
Scenarios ............................................................................................................................................... 19 Credits ................................................................................................................................................... 19

Page 2
How to install
1) Locate where you have downloaded this pack and unzip it. Information on
how to do this can be found here.
2) Go to the location where you have extracted the files from the .zip file.
3) Now find the .exe file called ‘Class 456 EMU Pack’. Double-click this file.
4) Follow the steps and by the end of the process, the main part of this pack will
have installed.
5) If you intend to use any of the included scenarios, make sure you have the
freely available extra stock pack and relevant payware add-on packs listed on
the product page installed so the scenarios function as intended.

Page 3
Technical information
Manufacturer BREL (British Rail Engineering Limited) York
Years built 1990 - 1991
Number built 24 (456001 - 456024)
Traction motors x2 GEC507-20J / 250hp (186kw) each
Maximum speed 75mph (121km/h)
Coupling type Tightlock
Length 20.18m per car
Height 3.77m
Width 2.82m
Weight 72.5 tonnes per 2 car unit
Page 4
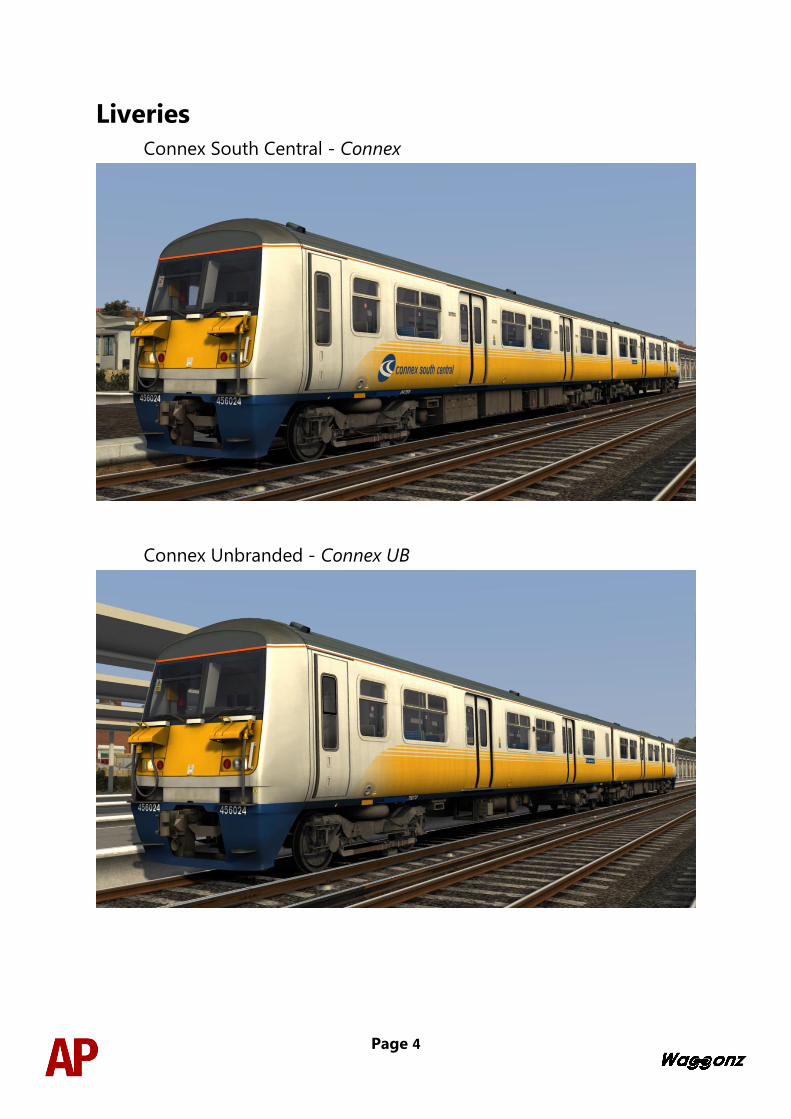
Liveries
Connex South Central - Connex
Connex Unbranded - Connex UB

Page 5
Network SouthEast - NSE
Network SouthEast Faded & Unbranded - NSE Faded

Page 6
Southern
Southern Unbranded - Southern UB

Page 7
Southern CCTV - CCTV
Southern White
Page 8
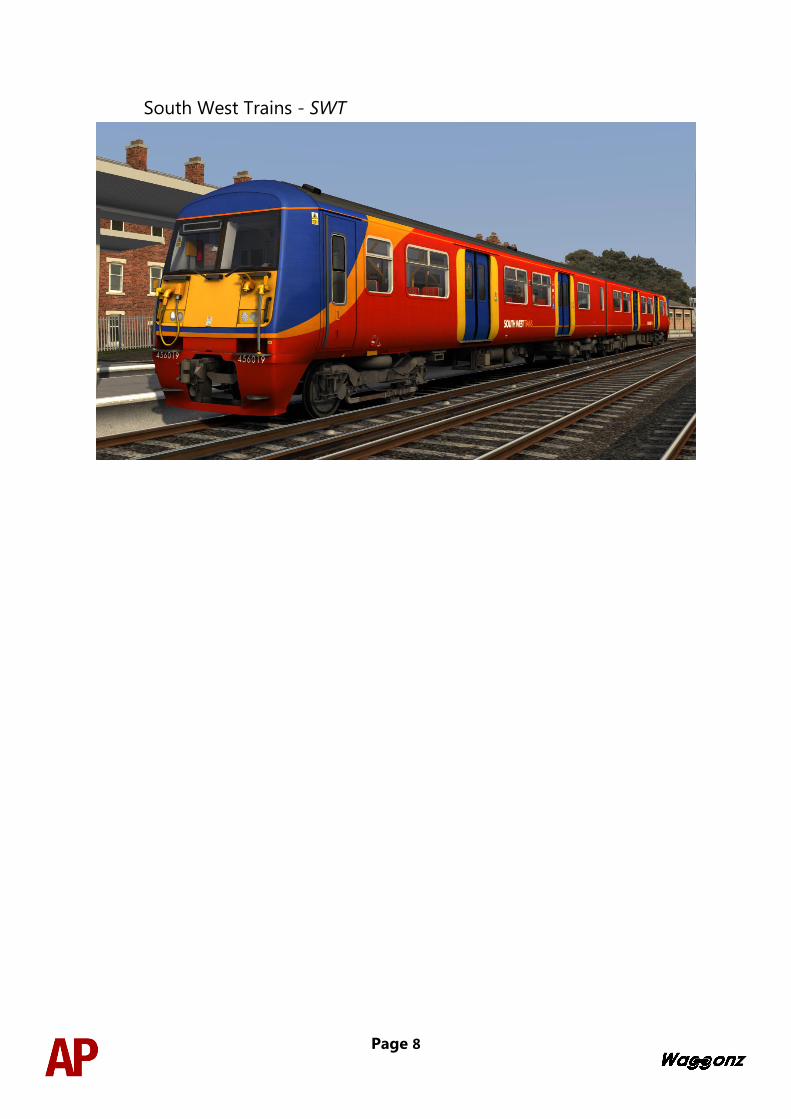
South West Trains - SWT

Page 9
Cab guide
Desk
1 - Brake handle
2 - Driver’s windscreen wiper switch (fast/park/slow)
3 - Tail light switch (off/on)
4 - Headlight switch (off/day/marker/night)
5 - Demister switch
6 - Cab lights switch (off/on)
7 - Instrument dimmer switch
8 - AWS reset button
9 - Driver to guard bell button
10 - Door close button
11 - Door interlock light
12 - DRA (Driver Reminder Appliance)
13 - Sander
14 - Brake gauge
15 - Horn (high/low)
16 - Speedometer
17 - Door interlock light
18 - Line light

Page 10
19 - Reverser (off/forward/neutral/reverse)
20 - Power controller (0/1/2/3/4)
21 - AWS sunflower
22 - Fan (fast/off/slow)
23 - Second man’s windscreen wiper switch (fast/park/slow)
24 - Door key switch (off/on)
Back wall
25 - Heater switch driver side (off/vent only/half/full)
26 - Heater switch non-driver side (off/on/off/on)
27 - Saloon lighting on button
28 - Saloon lighting off button
Back wall door control panel
29 - Door close button
30 - Driver to guard bell button

Page 11
Keyboard controls Non-standard keyboard controls are listed below:
L - Cab light ON/OFF
E - Deadman’s pedal (DSD vigilance reset)
F7 - Destination (manual) blind DOWN
F8 - Destination (manual) blind UP
R - Door close button
F - DRA (Driver Reminder Appliance) ON/OFF
C - Driver to guard bell
Ctrl+shift+E - DSD viligance ON/OFF
Space - Horn (low tone)
B - Horn (high tone)
O - Passenger saloon lighting ON
Shift+O - Passenger saloon lighting OFF
K - Tail lights ON/OFF
Ctrl+Numpad Enter - Visual aids ON/OFF
V - Wiper (driver) RIGHT
Shift+V - Wiper (driver) LEFT
Ctrl+V - Wiper (guard) RIGHT
Ctrl+Shift+V - Wiper (guard) LEFT

Page 12
Features
• High definition textures
• Detailed internal & external audio
• Accurate, driver-approved acceleration & braking physics
• Driver only/guard operation option
• Manual and electronic destination displays
• Prototypical 3 step brake and power controller
• Accurate reverser function
• Traction interlock - power can’t be applied with doors open
• Fully functioning AWS with accurate delay between passing over the magnet
and hearing the warning sound
• AWS & TPWS self-test
• DRA (Driver Reminder Appliance)
• DVD (Driver Vigilance Device) (optional)
• AWS/DSD visual aids (optional)
• Guard/driver signal button
• Independent driver and guard wipers
• Opening cab windows
• Cab instrument lighting
• Cab light
• User-operable passenger saloon lights
• Prototypical day and night headlights with AI functionality
• TSX headlight and rain effects
• Class 455 compatibility
Page 13
Driver only/guard operation Before being taken over by South West Trains, class 456s operated on routes where
there was no guard on board the train and as a result, the driver had to close the
doors himself. Please see below on what the relevant procedure is and how to
change the type of operation whilst in-game:
Driver only operation (DOO)
1) Open doors by pressing ‘T’ on the keyboard.
2) Wait for passengers to finish boarding/alighting and when ready, press ‘R’ on
the keyboard, or the ‘Door Close’ button on the cab desk, to close the doors.
Please note that you can not close the doors when passengers are still
boarding/alighting.
3) Once the door interlock light illuminates, you may depart.
Guard operation
1) Open doors by pressing ‘T’ on the keyboard
2) Doors will be closed by the guard once passengers have finished
boarding/alighting.
3) Once the door interlock light illuminates, the guard will give you two bells
which you must then acknowledge by also giving two bells. This can be carried
out by either pressing ‘C’ on the keyboard or the green ‘Signal Bell’ button on
either the cab desk or the back wall door control panel.
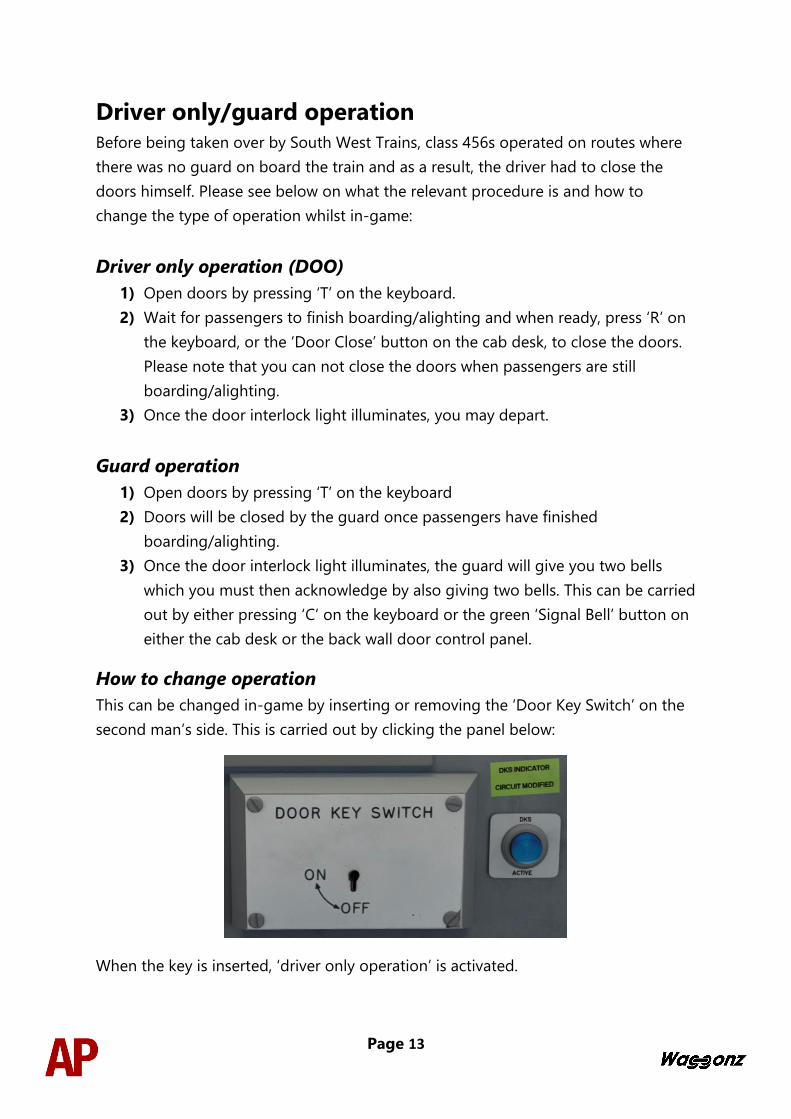
How to change operation
This can be changed in-game by inserting or removing the ‘Door Key Switch’ on the
second man’s side. This is carried out by clicking the panel below:
When the key is inserted, ‘driver only operation’ is activated.

Page 14
Destination display
Manual blind
Network South East, Connex South Central & Southern White liveries all feature a
manual destination blind which can be changed in-game by using the ‘F7’ & ‘F8’
keys. Please see below for a list of the available destinations and their relevant code
if you wish to use them via the unit’s number on an AI service:
01 Not in Service
12 Dorking 23 Preston Park 34 Sutton
02 Depot
13 East Croydon 24 Purley 35 Tattenham Corner
03 Balham
14 Epsom 25 Purley Oaks 36 Thornton Heath
04 Battersea Park
15 Epsom Downs 26 Redhill 37 Three Bridges
05 Beckenham Junction
16 Gatwick Airport 27 Reedham 38 Tonbridge
06 Brighton
17 Haywards Heath 28 Reigate 39 Victoria
07 Cannon Street 18 Horsham 29 Selhurst 40 Victoria
via Crystal Palace
08 Caterham 19 Kensington Olympia 30 Smitham 41 Victoria
via Peckham Rye
09 Charing Cross 20 London Bridge
via Crystal Palace
31 South Croydon 42 Wandsworth Common
10 Clapham Junction 21 London Bridge
via Peckham Rye
32 Streatham Common 43 West Croydon
11 Coulsdon Town
22 London Bridge 33 Streatham Hill 44 Wimbledon
Electronic dot matrix display
A fully functioning electronic dot matrix destination display is provided with the
Southern, Southern Unbranded, Southern CCTV & South West Trains liveries. This
display is operated via the internal computer found to the left of the driver on the
Southern liveries and on the second man’s side for the South West Trains livery.
To display a destination, simply input the relevant code and click
‘SEND’ on the Southern version or ‘OK’ on the South West Trains
one. To remove a destination from the display, click ‘CANC’ on the
Southern version or ‘ESC’ on the South West Trains one.
Please see the next page for a
list of destination codes.
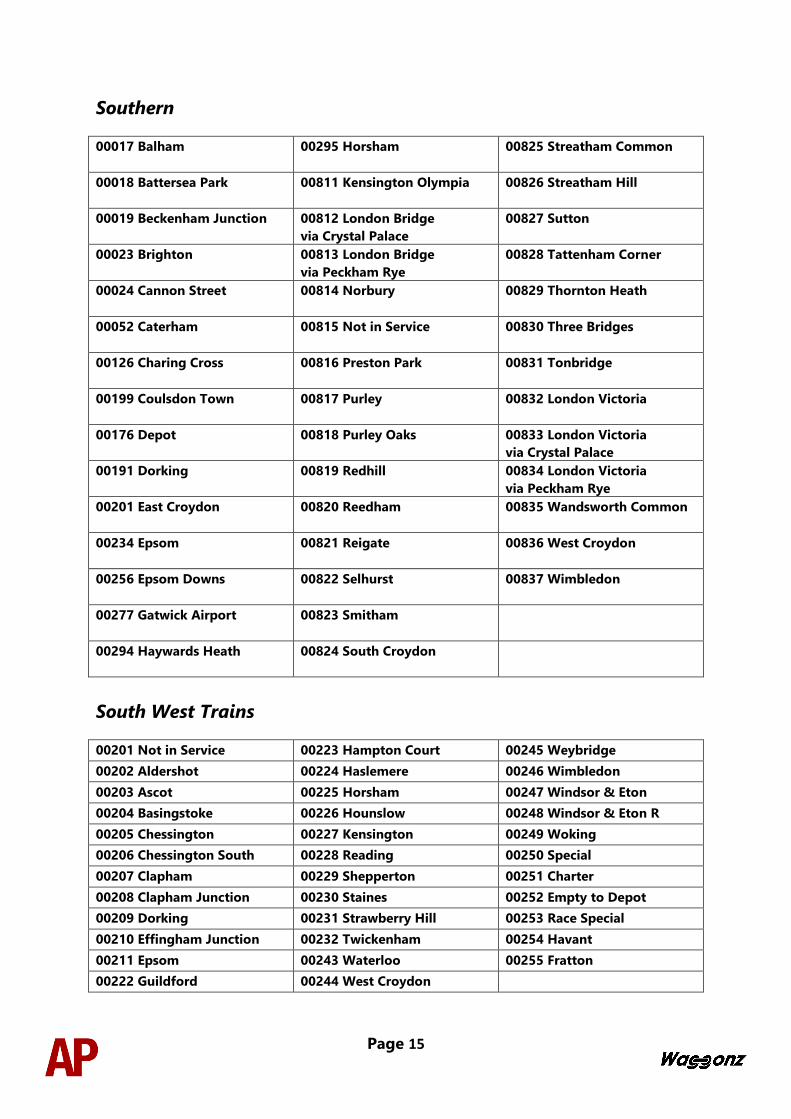
Page 15
Southern
00017 Balham
00295 Horsham 00825 Streatham Common
00018 Battersea Park
00811 Kensington Olympia 00826 Streatham Hill
00019 Beckenham Junction 00812 London Bridge
via Crystal Palace
00827 Sutton
00023 Brighton 00813 London Bridge
via Peckham Rye
00828 Tattenham Corner
00024 Cannon Street
00814 Norbury 00829 Thornton Heath
00052 Caterham
00815 Not in Service 00830 Three Bridges
00126 Charing Cross
00816 Preston Park 00831 Tonbridge
00199 Coulsdon Town
00817 Purley 00832 London Victoria
00176 Depot 00818 Purley Oaks 00833 London Victoria
via Crystal Palace
00191 Dorking 00819 Redhill 00834 London Victoria
via Peckham Rye
00201 East Croydon
00820 Reedham 00835 Wandsworth Common
00234 Epsom
00821 Reigate 00836 West Croydon
00256 Epsom Downs
00822 Selhurst 00837 Wimbledon
00277 Gatwick Airport
00823 Smitham
00294 Haywards Heath
00824 South Croydon
South West Trains
00201 Not in Service 00223 Hampton Court 00245 Weybridge
00202 Aldershot 00224 Haslemere 00246 Wimbledon
00203 Ascot 00225 Horsham 00247 Windsor & Eton
00204 Basingstoke 00226 Hounslow 00248 Windsor & Eton R
00205 Chessington 00227 Kensington 00249 Woking
00206 Chessington South 00228 Reading 00250 Special
00207 Clapham 00229 Shepperton 00251 Charter
00208 Clapham Junction 00230 Staines 00252 Empty to Depot
00209 Dorking 00231 Strawberry Hill 00253 Race Special
00210 Effingham Junction 00232 Twickenham 00254 Havant
00211 Epsom 00243 Waterloo 00255 Fratton
00222 Guildford 00244 West Croydon
Page 16
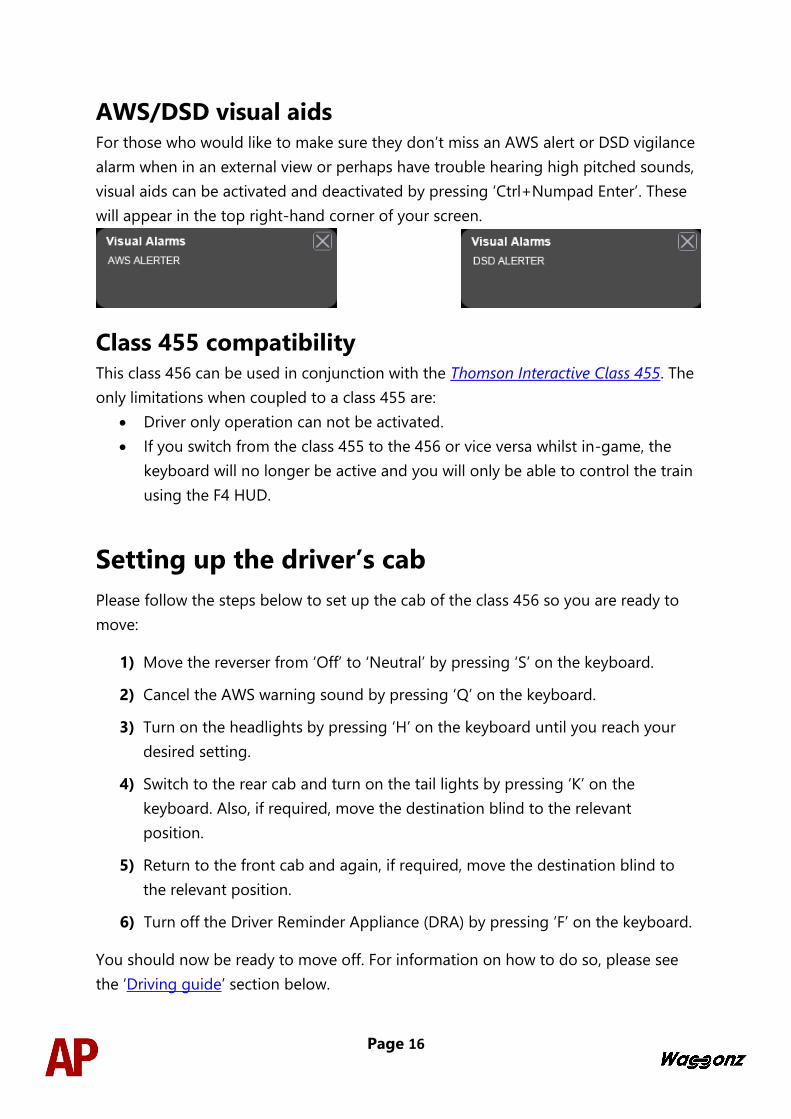
AWS/DSD visual aids For those who would like to make sure they don’t miss an AWS alert or DSD vigilance
alarm when in an external view or perhaps have trouble hearing high pitched sounds,
visual aids can be activated and deactivated by pressing ‘Ctrl+Numpad Enter’. These
will appear in the top right-hand corner of your screen.
Class 455 compatibility This class 456 can be used in conjunction with the Thomson Interactive Class 455. The
only limitations when coupled to a class 455 are:
• Driver only operation can not be activated.
• If you switch from the class 455 to the 456 or vice versa whilst in-game, the
keyboard will no longer be active and you will only be able to control the train
using the F4 HUD.
Setting up the driver’s cab
Please follow the steps below to set up the cab of the class 456 so you are ready to
move:
1) Move the reverser from ‘Off’ to ‘Neutral’ by pressing ‘S’ on the keyboard.
2) Cancel the AWS warning sound by pressing ‘Q’ on the keyboard.
3) Turn on the headlights by pressing ‘H’ on the keyboard until you reach your
desired setting.
4) Switch to the rear cab and turn on the tail lights by pressing ‘K’ on the
keyboard. Also, if required, move the destination blind to the relevant
position.
5) Return to the front cab and again, if required, move the destination blind to
the relevant position.
6) Turn off the Driver Reminder Appliance (DRA) by pressing ‘F’ on the keyboard.
You should now be ready to move off. For information on how to do so, please see
the ‘Driving guide’ section below.
Page 17
Driving guide
The following steps should allow you to drive the class 456 in a realistic and safe
manner:
1) Move the reverser to your desired direction of travel by pressing either ‘W’ on
the keyboard for forward or ‘S’ for reverse.
2) Move the train brake handle to step 1 by pressing the ‘;’ key.
3) Move the power handle to notch 2 by pressing the ‘A’ key on the keyboard. At
the same time, move the train brake handle to the ‘release’ position which will
ensure you depart without rolling back.
4) From then on, apply further power as you see fit. Please see the ‘Power
controller’ section below for further detail on the performance of each power
notch.
5) To brake the train, you may make applications and releases by moving the
handle between step 1 and full service. It is recommended you only use full
service as a last resort so as to ensure you always have more brake force
available if required.
6) Just before coming to a stop, aim to have the brakes in step 1 so as to provide
a smooth stop.
7) In the event of an emergency brake application, you will need to wait for your
train to come to a stop. You must then place the reverser in neutral, power
handle in off, make sure the brake handle is in emergency and then release.
Power controller
0 - Traction power is OFF
Notch 1 - 25% power
Notch 2 - 50% power
Notch 3 - 75% power
Notch 4 - 100% power
Please note that when accelerating at 28mph, power briefly cuts out as the motors
switch from series to parallel.
Page 18
How to use in the scenario editor
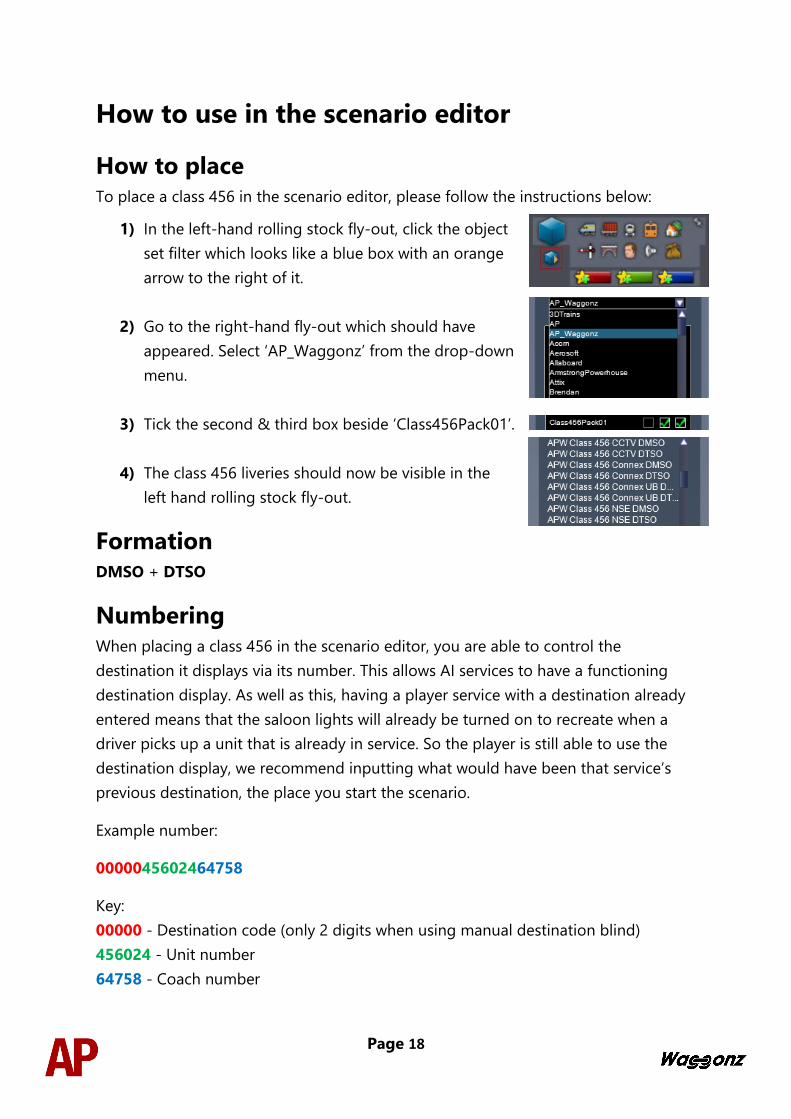
How to place
To place a class 456 in the scenario editor, please follow the instructions below:
1) In the left-hand rolling stock fly-out, click the object
set filter which looks like a blue box with an orange
arrow to the right of it.
2) Go to the right-hand fly-out which should have
appeared. Select ‘AP_Waggonz’ from the drop-down
menu.
3) Tick the second & third box beside ‘Class456Pack01’.
4) The class 456 liveries should now be visible in the
left hand rolling stock fly-out.
Formation
DMSO + DTSO
Numbering
When placing a class 456 in the scenario editor, you are able to control the
destination it displays via its number. This allows AI services to have a functioning
destination display. As well as this, having a player service with a destination already
entered means that the saloon lights will already be turned on to recreate when a
driver picks up a unit that is already in service. So the player is still able to use the
destination display, we recommend inputting what would have been that service’s
previous destination, the place you start the scenario.
Example number:
0000045602464758
Key:
00000 - Destination code (only 2 digits when using manual destination blind)
456024 - Unit number
64758 - Coach number
Page 19
Scenarios
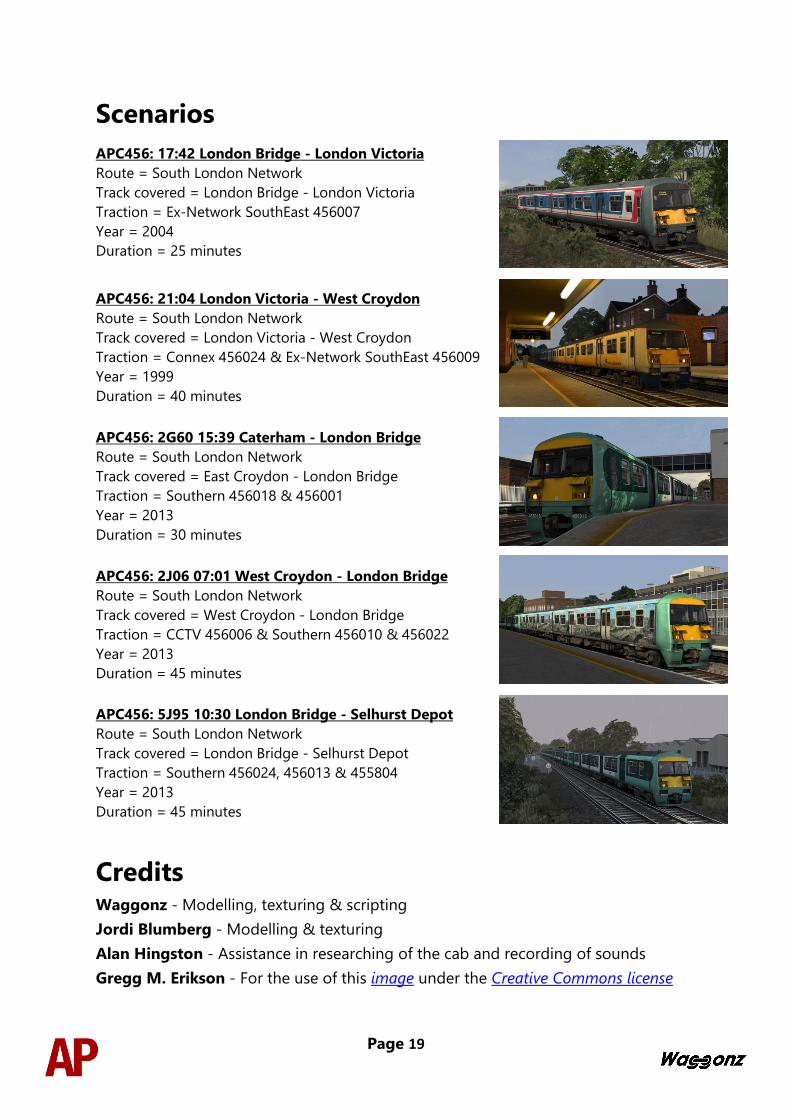
APC456: 17:42 London Bridge - London Victoria
Route = South London Network
Track covered = London Bridge - London Victoria
Traction = Ex-Network SouthEast 456007
Year = 2004
Duration = 25 minutes
APC456: 21:04 London Victoria - West Croydon
Route = South London Network
Track covered = London Victoria - West Croydon
Traction = Connex 456024 & Ex-Network SouthEast 456009
Year = 1999
Duration = 40 minutes
APC456: 2G60 15:39 Caterham - London Bridge
Route = South London Network
Track covered = East Croydon - London Bridge
Traction = Southern 456018 & 456001
Year = 2013
Duration = 30 minutes
APC456: 2J06 07:01 West Croydon - London Bridge
Route = South London Network
Track covered = West Croydon - London Bridge
Traction = CCTV 456006 & Southern 456010 & 456022
Year = 2013
Duration = 45 minutes
APC456: 5J95 10:30 London Bridge - Selhurst Depot
Route = South London Network
Track covered = London Bridge - Selhurst Depot
Traction = Southern 456024, 456013 & 455804
Year = 2013
Duration = 45 minutes
Credits Waggonz - Modelling, texturing & scripting
Jordi Blumberg - Modelling & texturing
Alan Hingston - Assistance in researching of the cab and recording of sounds
Gregg M. Erikson - For the use of this image under the Creative Commons license


![Untitled 2 [] · /01-!." *23-!." 456-!." *+,-!7" /01-!7" *23-!7" 456-!7" *+,-#!" /01-#!" *23-#!" 456-#!" *+,-##" /01-##" *23-##" 456-##" *+,-#$" /01-#$" *23-#$" 456-#$" *+,-#%" /01](https://img.pdfslide.us/doc/110x75/5f2f2b6ad0823628e27434f2/untitled-2-01-23-456-7-01-7.jpg)