Embed Size (px)
Citation preview
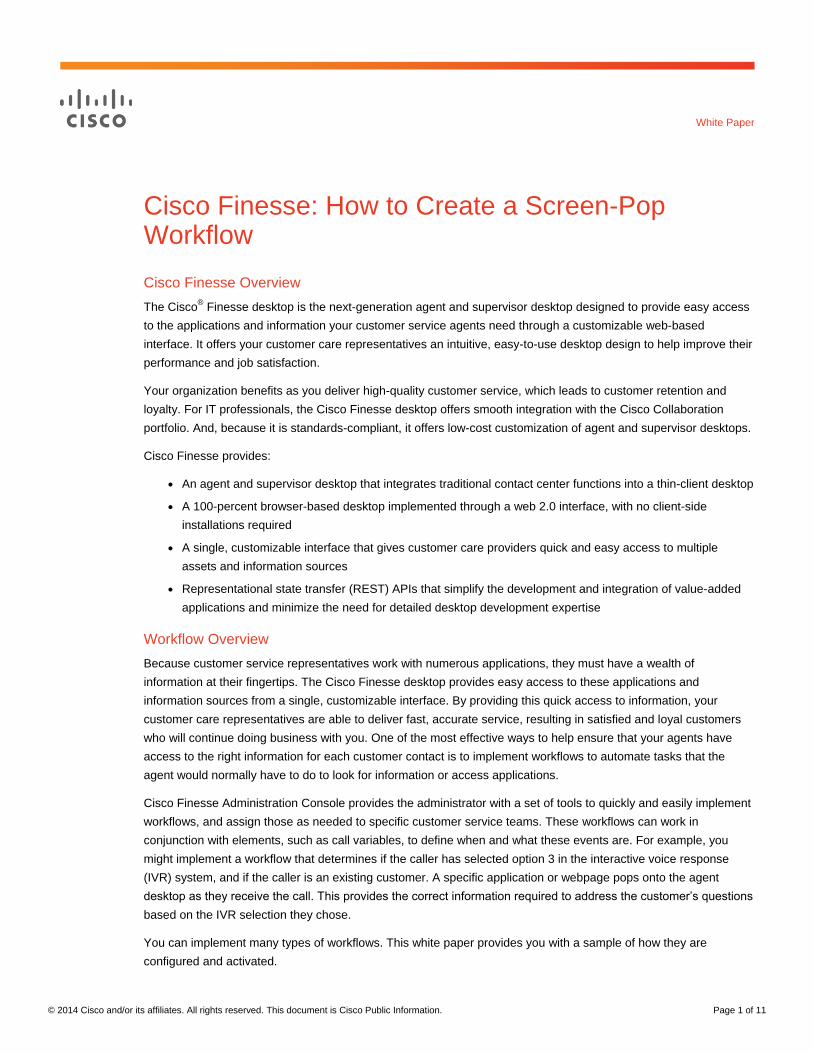
© 2014 Cisco and/or its affiliates. All rights reserved. This document is Cisco Public Information. Page 1 of 11
White Paper
Cisco Finesse: How to Create a Screen-Pop Workflow
Cisco Finesse Overview
The Cisco® Finesse desktop is the next-generation agent and supervisor desktop designed to provide easy access
to the applications and information your customer service agents need through a customizable web-based
interface. It offers your customer care representatives an intuitive, easy-to-use desktop design to help improve their
performance and job satisfaction.
Your organization benefits as you deliver high-quality customer service, which leads to customer retention and
loyalty. For IT professionals, the Cisco Finesse desktop offers smooth integration with the Cisco Collaboration
portfolio. And, because it is standards-compliant, it offers low-cost customization of agent and supervisor desktops.
Cisco Finesse provides:
● An agent and supervisor desktop that integrates traditional contact center functions into a thin-client desktop
● A 100-percent browser-based desktop implemented through a web 2.0 interface, with no client-side
installations required
● A single, customizable interface that gives customer care providers quick and easy access to multiple
assets and information sources
● Representational state transfer (REST) APIs that simplify the development and integration of value-added
applications and minimize the need for detailed desktop development expertise
Workflow Overview
Because customer service representatives work with numerous applications, they must have a wealth of
information at their fingertips. The Cisco Finesse desktop provides easy access to these applications and
information sources from a single, customizable interface. By providing this quick access to information, your
customer care representatives are able to deliver fast, accurate service, resulting in satisfied and loyal customers
who will continue doing business with you. One of the most effective ways to help ensure that your agents have
access to the right information for each customer contact is to implement workflows to automate tasks that the
agent would normally have to do to look for information or access applications.
Cisco Finesse Administration Console provides the administrator with a set of tools to quickly and easily implement
workflows, and assign those as needed to specific customer service teams. These workflows can work in
conjunction with elements, such as call variables, to define when and what these events are. For example, you
might implement a workflow that determines if the caller has selected option 3 in the interactive voice response
(IVR) system, and if the caller is an existing customer. A specific application or webpage pops onto the agent
desktop as they receive the call. This provides the correct information required to address the customer’s questions
based on the IVR selection they chose.
You can implement many types of workflows. This white paper provides you with a sample of how they are
configured and activated.
© 2014 Cisco and/or its affiliates. All rights reserved. This document is Cisco Public Information. Page 2 of 11
Workflow Creation: Easy as 1, 2, 3
Creating a workflow involves three steps:
1. Define actions, which are the events, such as the screen pop of a specific website address (with or without
call variables included to provide the agent specific information on the webpage).
2. Create workflows that will use the actions created above, based on specific call criteria such as:
a. Inbound or outbound calls, http actions, etc.
b. Call variables that must be met for this workflow to be a match for the contact.
3. Assign the workflows to the customer service teams that will need the workflows.
Sample Workflow Setup
For example, if an incoming caller is presented with multiple options in the IVR, and they select option 3 (defined
as Call Variable 10 in the contact center configuration), and if the caller is not identified as an existing customer
(defined as Call Variable 5), the workflow delivers a webpage screen pop to a specific agent with the proper
information they need to support the customer. The following section shows how this is setup in the browser-based
Cisco Finesse Administrator application.
Procedure
Step 1. In your supported browser, open the Finesse web administration tool and enter the proper Finesse
administrator credentials (http://<ip-of-UCCX-server>:8082>/cfadmin) to access the application.
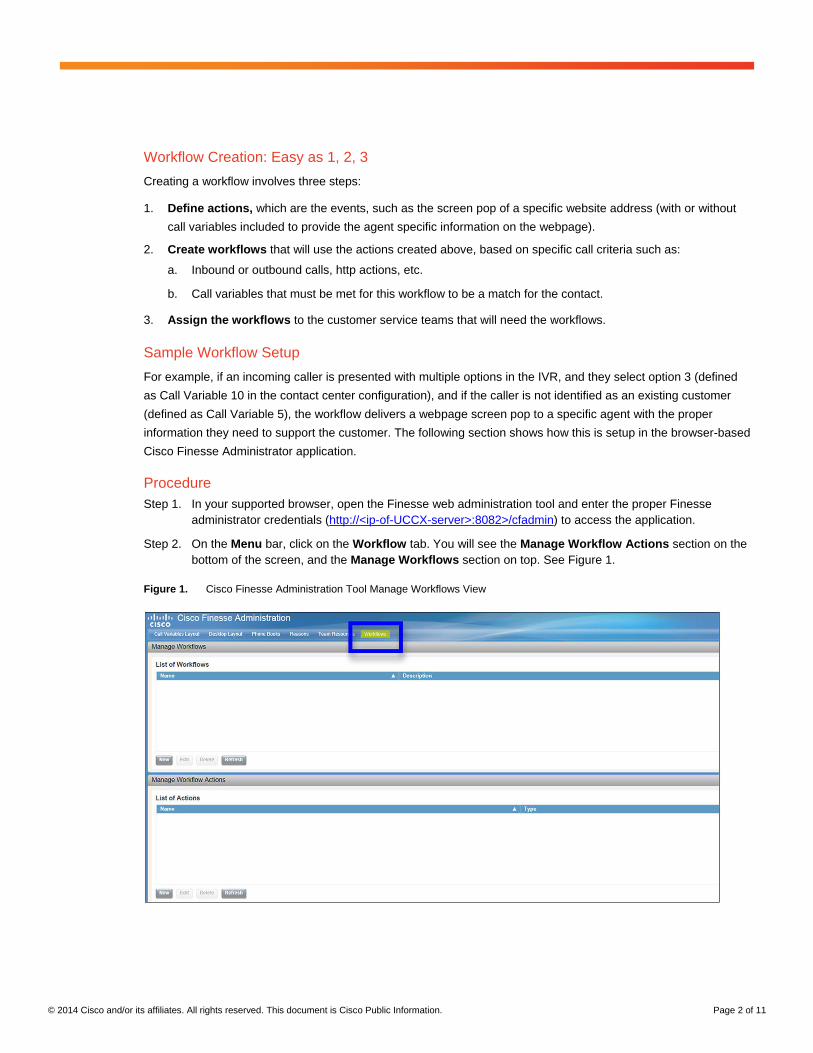
Step 2. On the Menu bar, click on the Workflow tab. You will see the Manage Workflow Actions section on the
bottom of the screen, and the Manage Workflows section on top. See Figure 1.
Figure 1. Cisco Finesse Administration Tool Manage Workflows View

© 2014 Cisco and/or its affiliates. All rights reserved. This document is Cisco Public Information. Page 3 of 11
As a reminder, the workflow creation and assignment process involves these three steps:
● Define an action
● Create workflow event and assign the action you just created to the event
● Assign the workflow to the appropriate team
Define the Action(s)
Step 3. Scroll to the bottom of the screen. In the Manage Workflow Actions area, click New.
Step 4. Under New Action:
a. Enter a name for the action.
● If you plan to screen pop a company webpage, you might name it something that identifies this
specific page.
b. Select Browser Pop.
c. Make the Window Name the same name as the webpage you are accessing for consistency.
● This Window Name is what will show on the browser window displayed on the Finesse agent’s
screen.
d. Enter a full browser webpage address or URL (includes http://) that will be displayed in the screen
pop.
◦ Note: The icon that looks like a tag at the right side of the URL input area allows you to define
variables that could be posted on the page, such as the customer’s home address, etc.
◦ Refer to the Admin Guide for further details on implementing variables into the screen pop.
Step 5. Under Preview, click the Open button on the right side to preview the screen pop page on the agent
desktop. If the preview is correct, then click the Save button and your new action is complete. See Figures
2 and 3. The next step is to apply this to a workflow.
Figure 2. Define an Action in Cisco Finesse Administration Tool

© 2014 Cisco and/or its affiliates. All rights reserved. This document is Cisco Public Information. Page 4 of 11
Figure 3. Previewing an Action
Create the Workflow(s)
Step 6. At the top of the screen where it shows Manage Workflows, click New.
Step 7. Under List of Workflows, click New to start a new workflow definition using the action you created:
a. Name your workflow.
b. Provide a Description related to the content of the webpage screen pop.
c. Under When to perform Actions, select When a Call Arrives from the pull-down list.
● Other options, which may be more applicable to your action, are:
◦ When a call is answered
◦ When a call ends
◦ When making a call
d. Under How to Apply Conditions, select If all Conditions are Met.
● The other option, which may be more applicable to your action, is:
◦ If any conditions are met
e. Select callVariable10 (this is the call variable used during the IVR process that defines which option
the customer selected within the IVR).
f. Select the option from the pull down list that is relevant to your statement.
● In this case, select Is Equal To.

© 2014 Cisco and/or its affiliates. All rights reserved. This document is Cisco Public Information. Page 5 of 11
g. Input the number 3 in the data field.
h. Click the Add Condition button to add another variable to verify if this is a match for the workflow
request.
i. Select callVariable5 (this is the call variable that shows if it has been determined that the caller is not
an existing customer).
j. Select the option from the pull-down list that is relevant to your statement.
● In this case, select Is Equal To.
k. Input New Customer in the data field.
● Note: This combination satisfies the condition to allow for the proper screen pop to occur when a
customer selects the option 3 from the IVR and the caller is not identified as an existing customer.
You will assign this workflow to a team or multiple teams in Step 8 below.
l. Under Ordered List of Actions, click Add to see the list of actions, including the action you created
in Step 4. See Figure 4.
m. Click on the action you created for this team.
n. After the action has moved into the Ordered List of Actions, click Save to save the workflow(s) for
your team.
Figure 4. Move an Action to the Ordered List of Actions

© 2014 Cisco and/or its affiliates. All rights reserved. This document is Cisco Public Information. Page 6 of 11
Assign the Workflow(s)
Step 8. Apply this to the customer contact teams that require this workflow:
a. From the Menu bar, select Team Resources.
b. Click on the team name that will use the workflow.
c. Under Resources for this team, click on Workflows.
d. Click Add to bring up the list of workflows that have been created.
Figure 5. Assign an Action to a Team

© 2014 Cisco and/or its affiliates. All rights reserved. This document is Cisco Public Information. Page 7 of 11
Step 9. Click on the workflow you created for this team and click Save. See Figure 6.
Figure 6. Move Workflow to List of Workflows
Your workflow is complete. The next time a customer selects option 3 in the IVR and the caller is not identified as
an existing customer, the agents on this team will receive the proper screen pop to assist them with addressing the
customer’s specific needs.
Adding an HTTP Request Workflow Action
The HTTP Request workflow action makes an HTTP request to an API on behalf of the desktop user.
Procedure
Step 1. In the Manage Workflow Actions area, click New.
Step 2. In the Name box, enter a name for the action.
Step 3. From the Type drop-down list, select HTTP Request.
Step 4. From the Handled By drop-down list, select what will execute the action, the Finesse desktop or Other (a
third-party gadget).
Step 5. From the Method drop-down list, select PUT.
Step 6. From the Location drop-down list, select the location. If you are making the HTTP request to a Finesse
API, select Finesse. If you are making a request to any other API, select Other.
Step 7. In the Content Type box, enter the content type. The default content type is application/xml, which is the
content type for Finesse APIs. If you are using a different API, enter the content types for that API (for
example, application/JSON).
Step 8. In the URL box, enter the full webpage address to which to make the request.

© 2014 Cisco and/or its affiliates. All rights reserved. This document is Cisco Public Information. Page 8 of 11
Example:
/finesse/api/User/[dialogId]
Note: The preceding example is the URL for a Finesse API. If you want to make a request to another API, you
must enter the entire URL (for example, http://googleapis.com).
You can click the tag icon at the right of the box and select one or more variables from the drop-down list to add
tags to the URL. In the preceding example, to add the dialogId, click the tag icon and select dialogId from the list.
Step 9. In the Body box, enter the text for the request. The body must match the content type (for example, if the
content type is application/xml, the body must contain XML). To add variables to the body, click the tag
icon at the right of the box and select one or more variables from the drop-down list.
Example: To make an HTTP request to the dialog, “Start a recording API,” enter the content in Figure 7 into the
Body box.
Figure 7. Sample HTTP Request
To add the extension, click the tag icon and select extension. For every variable you add, you can enter test data
in the Sample Data box.
Step 10. Click Save.
Troubleshooting
Issue 1: The screen pop is not displaying the URL after the workflow has been applied and saved via the Finesse
administration tool.
● Check that the Finesse server can reach the URL by testing it within the Action creation section. With the
URL inserted, click the Open button to the right of the URL to display it in another browser tab.
● Check that you have selected the correct behavior within the When to perform Actions and the How to
Apply Conditions configuration options.
● Check to confirm you have assigned and saved the proper workflow(s) to a team or multiple teams.
Issue 2: The variables selected for display within the URL are not showing.
● Check that you have identified the proper variables requested and that there is content within the variables
to display. To test sample output within the variables, you can again run the URL test as above and put in
Sample Data to see how it will be presented within the screen pop.
Issue 3: You are trying to configure Finesse workflows in a high-availability model, and you are getting an error
message when trying to configure the workflow.
● In the Cisco Finesse Administration, navigate to the Team Resources tab. This is where workflows are
assigned to various teams.
© 2014 Cisco and/or its affiliates. All rights reserved. This document is Cisco Public Information. Page 9 of 11
● Depending on the Engine Mastership, the message in Figure 8 may be displayed.
Figure 8. Sample Error Message
● Configuration changes can only be made on Cisco Finesse Publisher node. However, if the Publisher node
is not the active Engine Master, Cisco Finesse is OUT_OF_SERVICE on the Publisher, and the Manage
Team Resources gadget is unavailable. To correct this, failover the Cisco Unified Contact Center Express
(CCX) Engine to the Publisher node, and then reload the page.
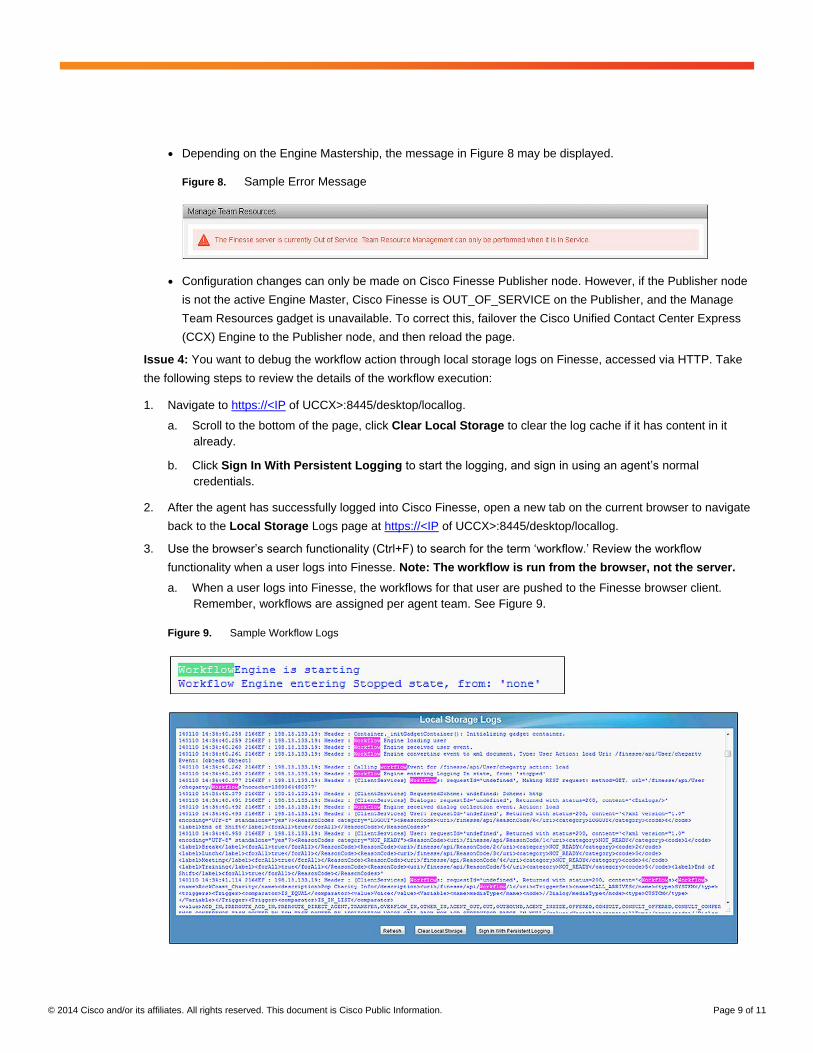
Issue 4: You want to debug the workflow action through local storage logs on Finesse, accessed via HTTP. Take
the following steps to review the details of the workflow execution:
1. Navigate to https://<IP of UCCX>:8445/desktop/locallog.
a. Scroll to the bottom of the page, click Clear Local Storage to clear the log cache if it has content in it
already.
b. Click Sign In With Persistent Logging to start the logging, and sign in using an agent’s normal
credentials.
2. After the agent has successfully logged into Cisco Finesse, open a new tab on the current browser to navigate
back to the Local Storage Logs page at https://<IP of UCCX>:8445/desktop/locallog.
3. Use the browser’s search functionality (Ctrl+F) to search for the term ‘workflow.’ Review the workflow
functionality when a user logs into Finesse. Note: The workflow is run from the browser, not the server.
a. When a user logs into Finesse, the workflows for that user are pushed to the Finesse browser client.
Remember, workflows are assigned per agent team. See Figure 9.
Figure 9. Sample Workflow Logs
© 2014 Cisco and/or its affiliates. All rights reserved. This document is Cisco Public Information. Page 10 of 11
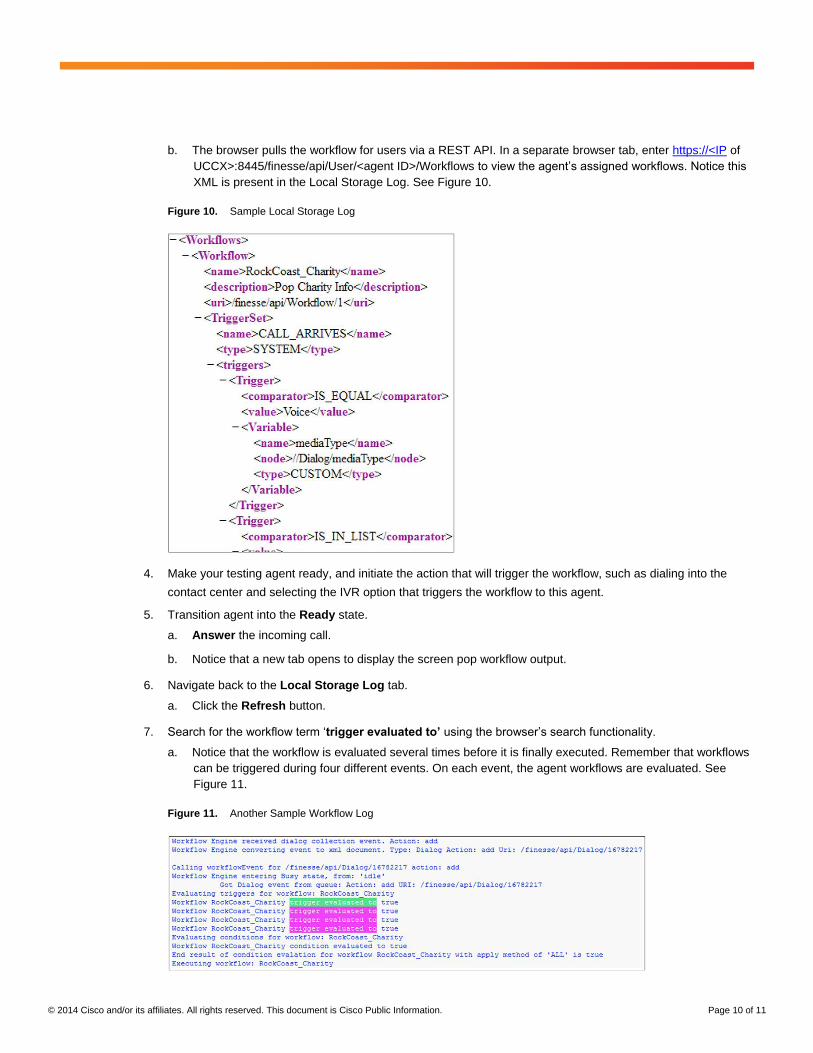
b. The browser pulls the workflow for users via a REST API. In a separate browser tab, enter https://<IP of
UCCX>:8445/finesse/api/User/<agent ID>/Workflows to view the agent’s assigned workflows. Notice this
XML is present in the Local Storage Log. See Figure 10.
Figure 10. Sample Local Storage Log
4. Make your testing agent ready, and initiate the action that will trigger the workflow, such as dialing into the
contact center and selecting the IVR option that triggers the workflow to this agent.
5. Transition agent into the Ready state.
a. Answer the incoming call.
b. Notice that a new tab opens to display the screen pop workflow output.
6. Navigate back to the Local Storage Log tab.
a. Click the Refresh button.
7. Search for the workflow term ‘trigger evaluated to’ using the browser’s search functionality.
a. Notice that the workflow is evaluated several times before it is finally executed. Remember that workflows
can be triggered during four different events. On each event, the agent workflows are evaluated. See
Figure 11.
Figure 11. Another Sample Workflow Log
© 2014 Cisco and/or its affiliates. All rights reserved. This document is Cisco Public Information. Page 11 of 11
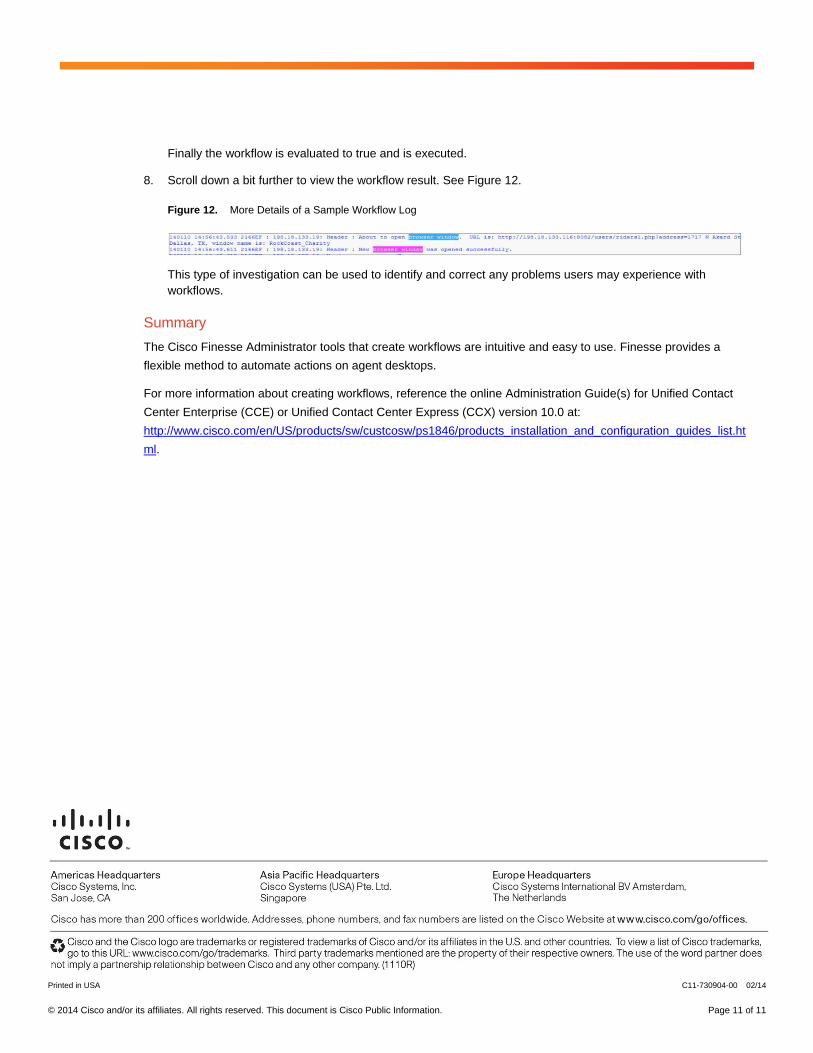
Finally the workflow is evaluated to true and is executed.
8. Scroll down a bit further to view the workflow result. See Figure 12.
Figure 12. More Details of a Sample Workflow Log
This type of investigation can be used to identify and correct any problems users may experience with
workflows.
Summary
The Cisco Finesse Administrator tools that create workflows are intuitive and easy to use. Finesse provides a
flexible method to automate actions on agent desktops.
For more information about creating workflows, reference the online Administration Guide(s) for Unified Contact
Center Enterprise (CCE) or Unified Contact Center Express (CCX) version 10.0 at:
http://www.cisco.com/en/US/products/sw/custcosw/ps1846/products_installation_and_configuration_guides_list.ht
ml.
Printed in USA C11-730904-00 02/14