Embed Size (px)
Citation preview
YOU WILL NEED (for each stocking):Fabric: 45” to 60” 3/4 YardNon-Fusible Fleece: 45” 3/4 YardContrast Fabric: 45” 1/2 Yard or 60” 1/4 yardContrast Lining: 45” 3/4 Yard
NOTIONS: Braid-Trimmed Stocking: 1 3/4 Yds. of 1/2” Wide Cord with Lip and 3/8” Yd. of 1/4” Wide Decorative Cord, 1 1/4 Yds. of 1” Wide Flexible Braid, 2 yards of 3/8” Flexible Braid and Fabric Glue. Gathered-Cuff Stocking: 1 3/4 Yds. of 1/2” Wide Cord with Lip and 3/8 Yd. of 1/4” Wide Decorative Cord, One 2” Beaded Tassel, 1 3/4” Yds. of Bead Garland and One 3/4” Bead.
SUGGESTED FABRICS: Velvet, Novelty Metallic, Brocade, Home Decorating Fabrics; Lining: Cotton.
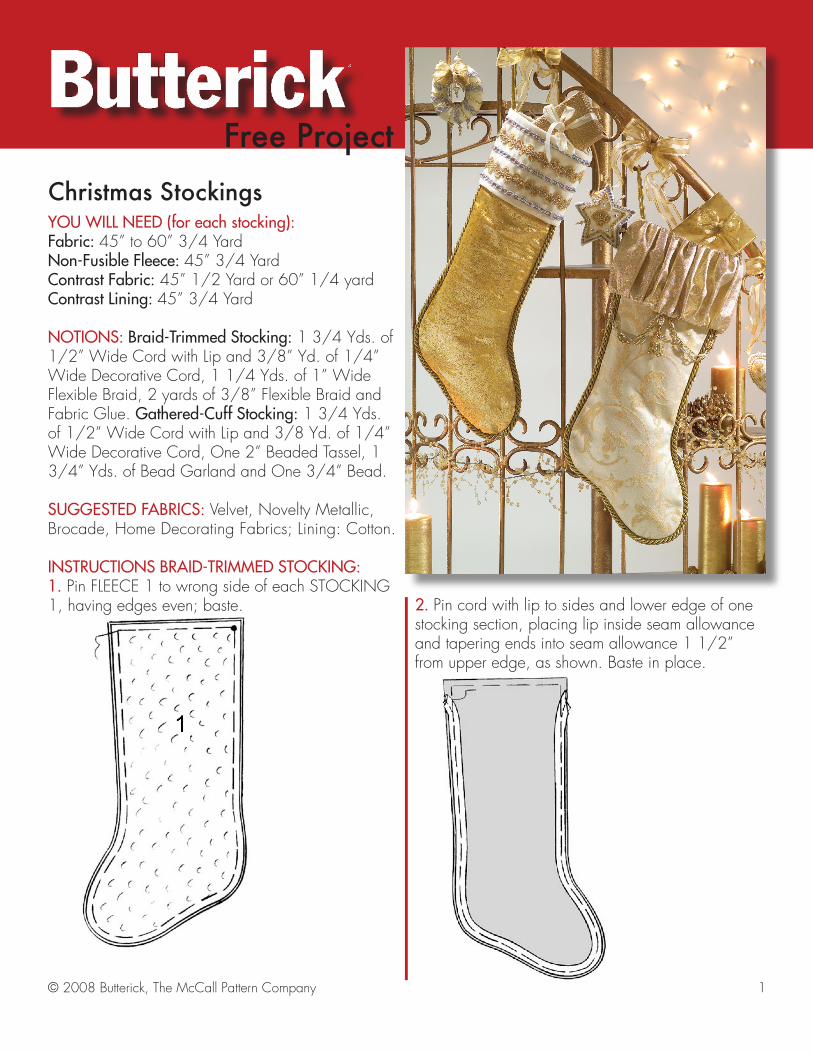
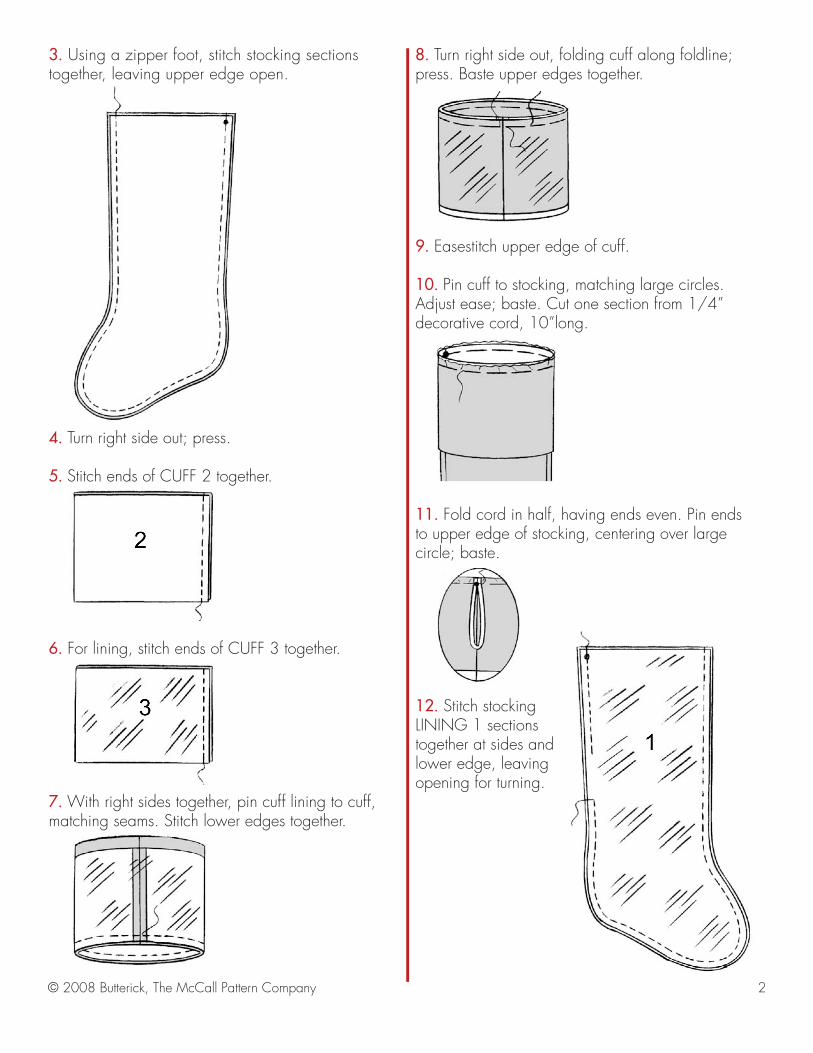
INSTRUCTIONS BRAID-TRIMMED STOCKING:1. Pin FLEECE 1 to wrong side of each STOCKING 1, having edges even; baste. 2. Pin cord with lip to sides and lower edge of one
stocking section, placing lip inside seam allowance and tapering ends into seam allowance 1 1/2” from upper edge, as shown. Baste in place.
Free ProjectChristmas Stockings
© 2008 Butterick, The McCall Pattern Company 1
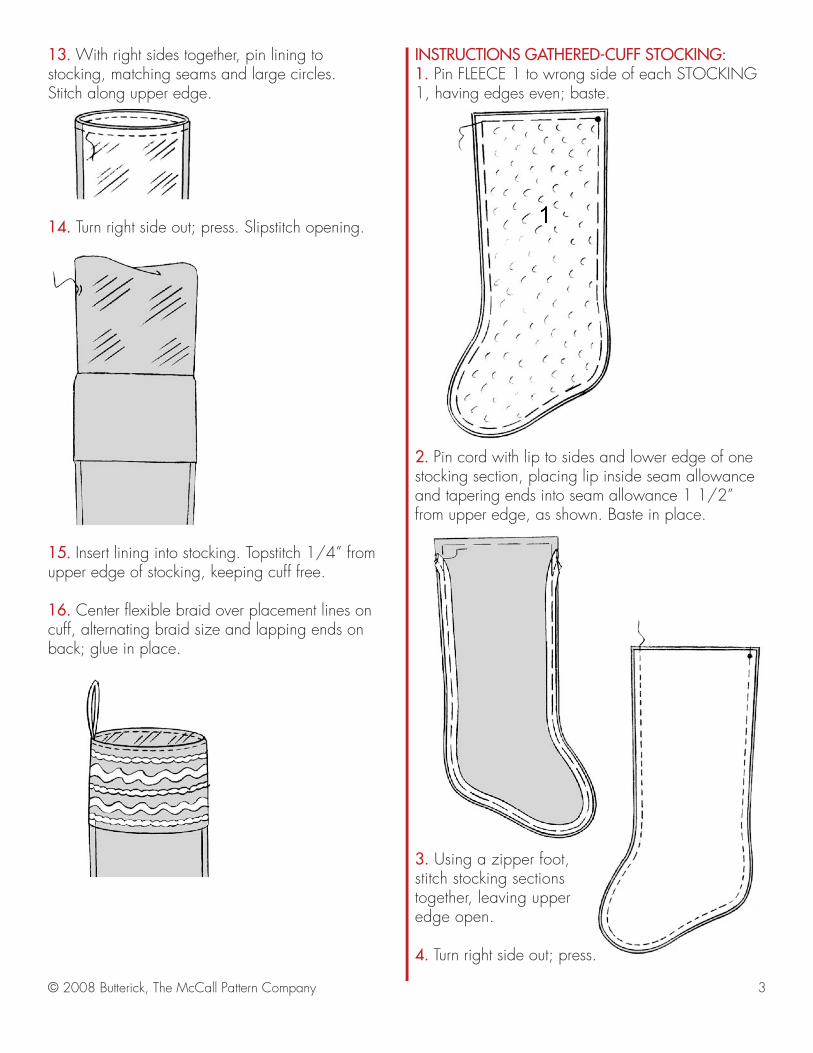
3. Using a zipper foot, stitch stocking sections together, leaving upper edge open.
4. Turn right side out; press.
5. Stitch ends of CUFF 2 together.
6. For lining, stitch ends of CUFF 3 together.
7. With right sides together, pin cuff lining to cuff, matching seams. Stitch lower edges together.
8. Turn right side out, folding cuff along foldline; press. Baste upper edges together.
9. Easestitch upper edge of cuff.
10. Pin cuff to stocking, matching large circles.Adjust ease; baste. Cut one section from 1/4” decorative cord, 10”long.
11. Fold cord in half, having ends even. Pin endsto upper edge of stocking, centering over largecircle; baste.
12. Stitch stockingLINING 1 sectionstogether at sides andlower edge, leavingopening for turning.
© 2008 Butterick, The McCall Pattern Company 2
13. With right sides together, pin lining tostocking, matching seams and large circles.Stitch along upper edge.
14. Turn right side out; press. Slipstitch opening.
15. Insert lining into stocking. Topstitch 1/4” from upper edge of stocking, keeping cuff free.
16. Center flexible braid over placement lines on cuff, alternating braid size and lapping ends on back; glue in place.
INSTRUCTIONS GATHERED-CUFF STOCKING:1. Pin FLEECE 1 to wrong side of each STOCKING 1, having edges even; baste.
2. Pin cord with lip to sides and lower edge of one stocking section, placing lip inside seam allowance and tapering ends into seam allowance 1 1/2” from upper edge, as shown. Baste in place.
3. Using a zipper foot,stitch stocking sectionstogether, leaving upperedge open.
4. Turn right side out; press.
© 2008 Butterick, The McCall Pattern Company 3
© 2008 Butterick, The McCall Pattern Company 4
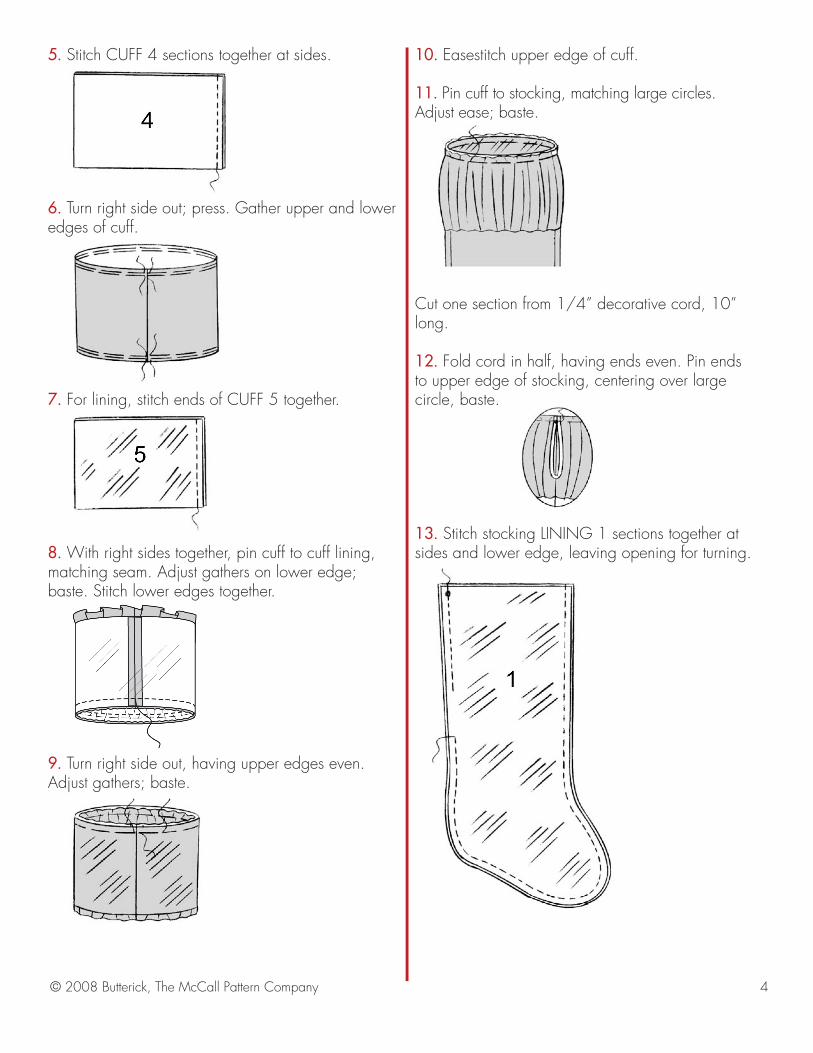
5. Stitch CUFF 4 sections together at sides.
6. Turn right side out; press. Gather upper and lower edges of cuff.
7. For lining, stitch ends of CUFF 5 together.
8. With right sides together, pin cuff to cuff lining, matching seam. Adjust gathers on lower edge; baste. Stitch lower edges together.
9. Turn right side out, having upper edges even. Adjust gathers; baste.
10. Easestitch upper edge of cuff.
11. Pin cuff to stocking, matching large circles.Adjust ease; baste.
Cut one section from 1/4” decorative cord, 10” long.
12. Fold cord in half, having ends even. Pin endsto upper edge of stocking, centering over large circle, baste.
13. Stitch stocking LINING 1 sections together at sides and lower edge, leaving opening for turning.
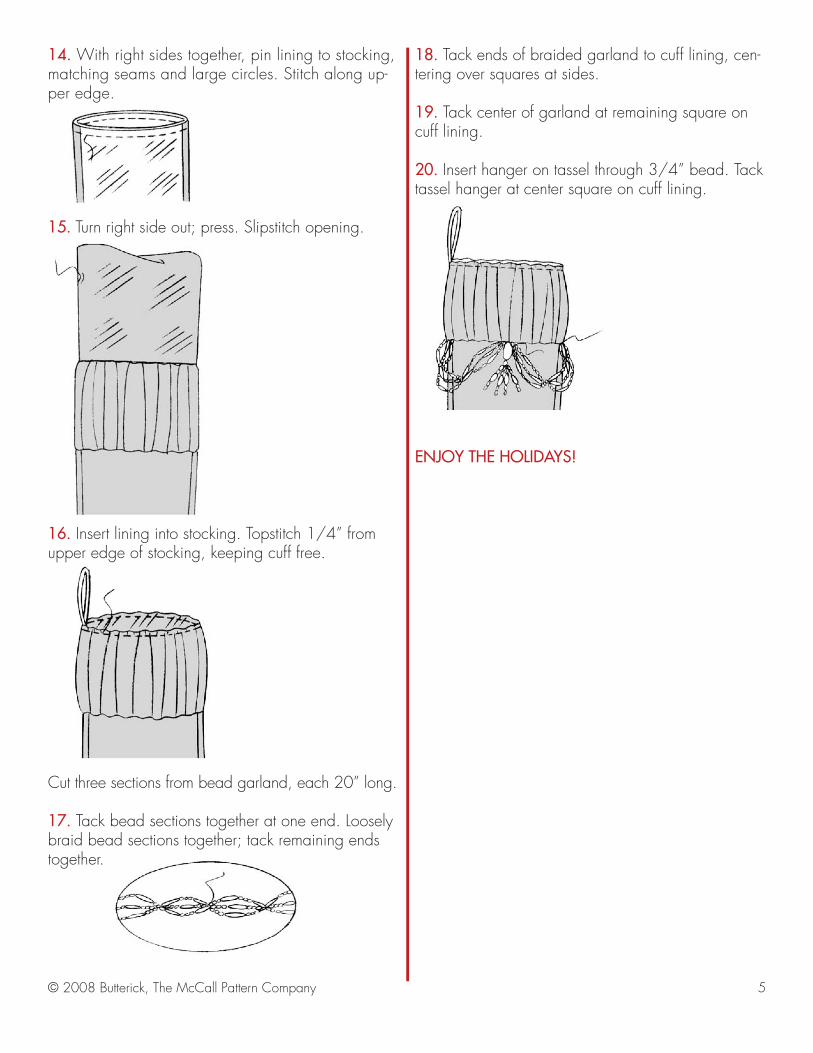
14. With right sides together, pin lining to stocking, matching seams and large circles. Stitch along up-per edge.
15. Turn right side out; press. Slipstitch opening.
16. Insert lining into stocking. Topstitch 1/4” from upper edge of stocking, keeping cuff free.
Cut three sections from bead garland, each 20” long.
17. Tack bead sections together at one end. Loosely braid bead sections together; tack remaining ends together.
18. Tack ends of braided garland to cuff lining, cen-tering over squares at sides.
19. Tack center of garland at remaining square on cuff lining.
20. Insert hanger on tassel through 3/4” bead. Tack tassel hanger at center square on cuff lining.
ENJOY THE HOLIDAYS!
© 2008 Butterick, The McCall Pattern Company 5
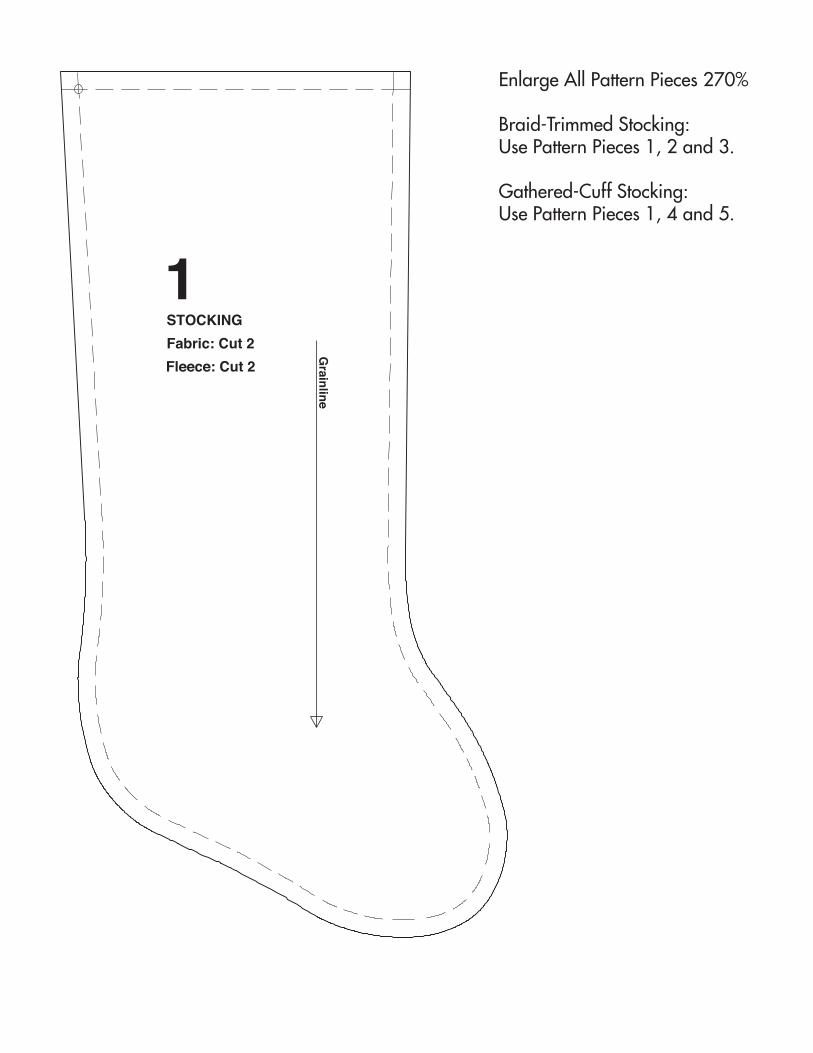
STOCKING Fabric: Cut 2Fleece: Cut 2
Grainline
1
Enlarge All Pattern Pieces 270%
Braid-Trimmed Stocking:Use Pattern Pieces 1, 2 and 3.
Gathered-Cuff Stocking:Use Pattern Pieces 1, 4 and 5.
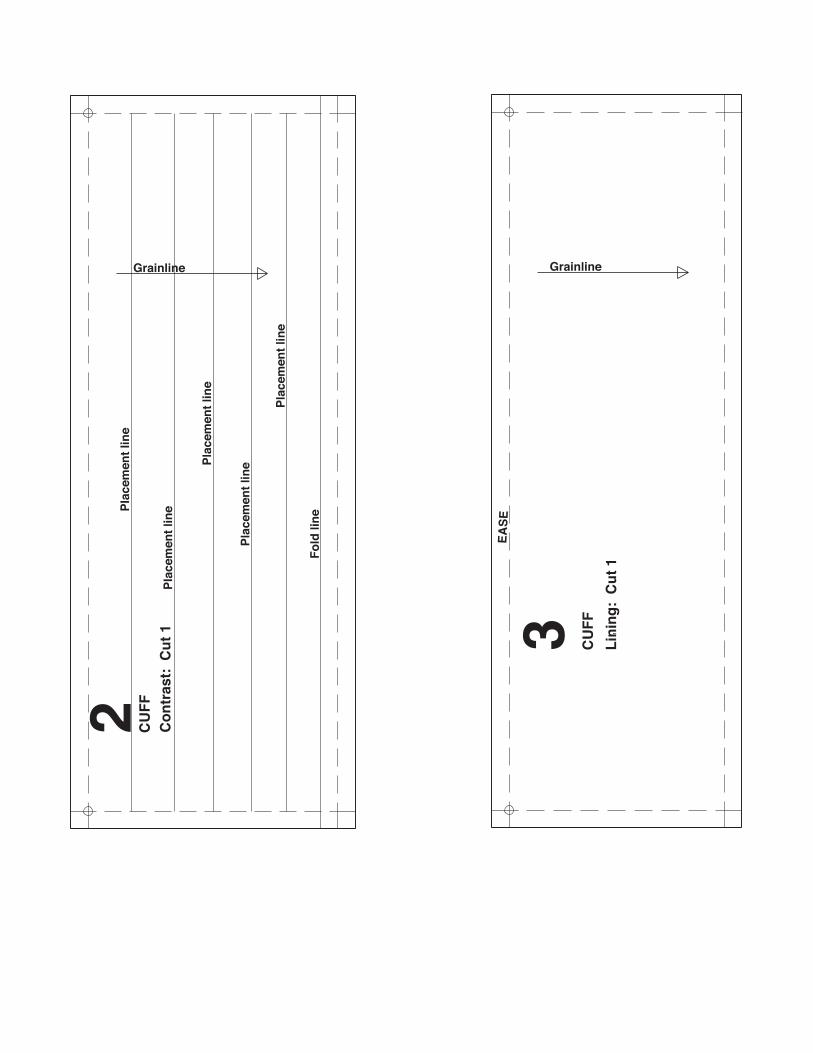
Plac
emen
t lin
e
Fold
line
Grainline
CU
FF
Con
tras
t: C
ut 1
2Pl
acem
ent l
ine
Plac
emen
t lin
e
Plac
emen
t lin
e
Plac
emen
t lin
e
EASE
CU
FF
Lini
ng:
Cut
11
Grainline
3
CU
FFC
ontr
ast:
Cut
2
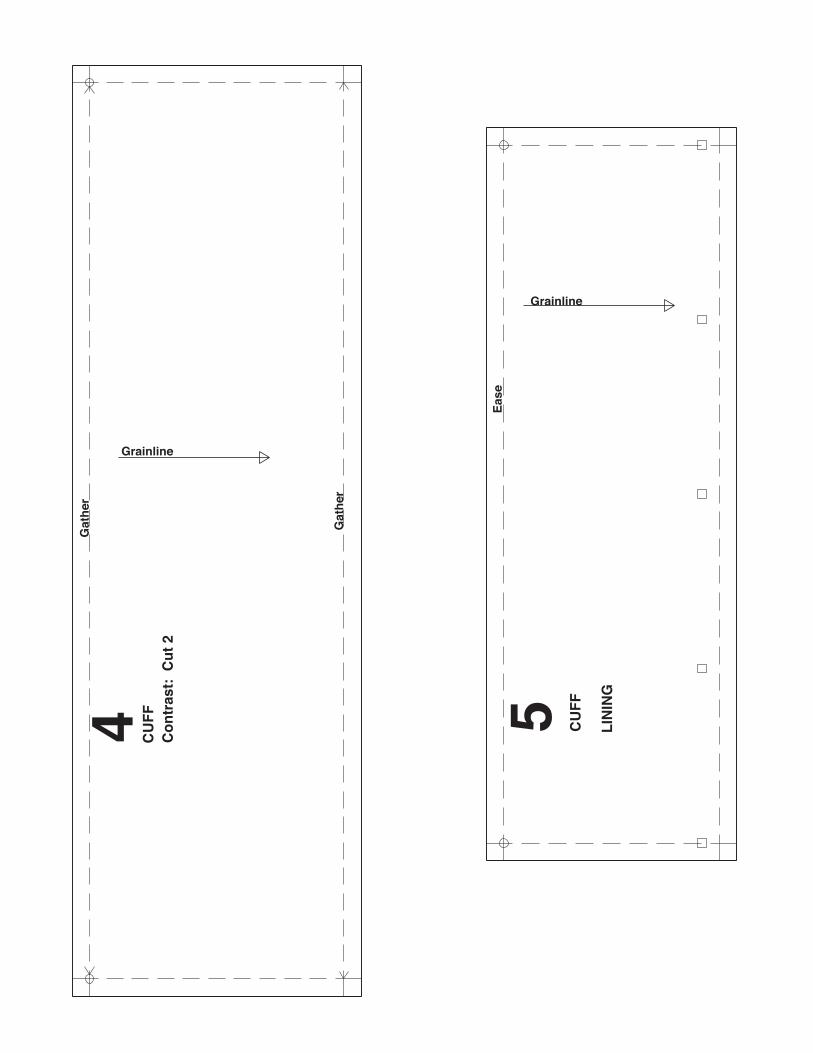
Grainline
Gat
her
Gat
her
4
Grainline
CU
FF
LIN
ING
5Ea
se