Embed Size (px)
Citation preview
Practice your ICDL skills
For ICDL Syllabus 4: Based on Windows 2000 / XP & Microsoft Office XP / 2003.Over 1800 practice questions: Over 140 handout pages.
Ó 1995-2008 Cheltenham Courseware Pty. Ltd. www.cheltenhamcourseware.com.au.This is not an actual ICDL test. It is to be used as practice exercises, prior to taking an official ICDL test.
Success with these exercises does not guarantee success when taking the actual ICDL test. E&OEBased on ICDL syllabus 4.0. May not be used for ICDL 5.0 Page 1
Practice your ICDL skills
© 1995-2008 Cheltenham Courseware Pty. Ltd.
All trademarks acknowledged. E&OE.
No part of this document may be copied without written permission from Cheltenham Courseware unless produced under the terms of a courseware site license agreement with Cheltenham Courseware.
All reasonable precautions have been taken in the preparation of this document, including both technical and non-technical proofing. Cheltenham Courseware and all staff assume no responsibility for any errors or omissions. No warranties are made, expressed or implied with regard to these notes. Cheltenham Courseware shall not be responsible for any direct, incidental or consequential damages arising from the use of any material contained in this document. If you find any errors in these training modules, please inform Cheltenham Courseware. Whilst every effort is made to eradicate typing or technical mistakes, we apologise for any errors you may detect. All courses are updated on a regular basis, so your feedback is both valued by us and will help us to maintain the highest possible standards.
Sample versions of courseware from Cheltenham Courseware(Normally supplied in Adobe Acrobat format): If the version of courseware that you are viewing is marked as NOT FOR TRAINING, SAMPLE, or similar, then it cannot be used as part of a training course, and is made available purely for content and style review. This is to give you the opportunity to preview our courseware, prior to making a purchasing decision. Sample versions may not be re-sold to a third party.
For current license informationThis document may only be used under the terms of the license agreement from Cheltenham Courseware. Cheltenham Courseware reserves the right to alter the licensing conditions at any time, without prior notice. Please see the site license agreement available at: www.cheltenhamcourseware.com.au/agreement
Contact Information
Australia / Asia Pacific / Europe (ex. UK/Ireland) / Rest of the WorldEmail: [email protected]: www.cheltenhamcourseware.com.au
USA / CanadaEmail: [email protected]: www.cheltenhamcourseware.com
UK / IrelandEmail: [email protected]: www.cctglobal.com
Ó 1995-2008 Cheltenham Courseware Pty. Ltd. www.cheltenhamcourseware.com.au.This is not an actual ICDL test. It is to be used as practice exercises, prior to taking an official ICDL test.
Success with these exercises does not guarantee success when taking the actual ICDL test. E&OEBased on ICDL syllabus 4.0. May not be used for ICDL 5.0 Page 2
Practice your ICDL skills
ICDL Practice Sessions:APPROVED COURSEWARE.......................................................................................................................7UNDERSTANDING THE FORMATTING USED WITHIN THIS DOCUMENT.....................................................8COMPARE THE PRACTICE SESSIONS WITH THE OFFICIAL ICDL SYLLABUS.............................................9THE PURPOSE OF THESE PRACTICE SESSIONS........................................................................................10
ICDL MODULE ONE - USING THE COMPUTER & MANAGING FILES................................11
SYLLABUS SECTION 1.1A - GENERAL CONCEPTS - MULTIPLE CHOICE................................................12SYLLABUS SECTION 1.1B - GENERAL CONCEPTS - MULTIPLE CHOICE................................................13SYLLABUS SECTION 1.2A - HARDWARE - MULTIPLE CHOICE..............................................................14SYLLABUS SECTION 1.2B - HARDWARE - THEORY...............................................................................15SYLLABUS SECTION 1.3A - SOFTWARE - MULTIPLE CHOICE...............................................................16SYLLABUS SECTION 1.3B - SOFTWARE - PRACTICE SESSION...............................................................17SYLLABUS SECTION 1.4A - INFORMATION NETWORKS - MULTIPLE CHOICE.......................................18SYLLABUS SECTION 1.4B - INFORMATION NETWORKS - QUICK QUIZ.................................................19SYLLABUS SECTION 1.5A - IT IN EVERYDAY LIFE - QUICK QUIZ........................................................20SYLLABUS SECTION 1.6A - HEALTH, SAFETY & THE ENVIRONMENT - QUICK QUIZ...........................21SYLLABUS SECTION 1.7A - SECURITY - QUICK QUIZ...........................................................................22SYLLABUS SECTION 1.8A - COPYRIGHT & THE LAW - QUICK QUIZ....................................................23
ICDL MODULE ONE - COMPLETE QUIZZES..............................................................................25
ICDL MODULE ONE: COMPLETE MODULE QUIZ (1)...........................................................................26ICDL MODULE ONE: COMPLETE MODULE QUIZ (2)...........................................................................27ICDL MODULE ONE: COMPLETE MODULE QUIZ (3)...........................................................................28ICDL MODULE ONE: COMPLETE MODULE CROSSWORD QUIZ...........................................................29ICDL MODULE ONE: COMPLETE MODULE CROSSWORD SOLUTION...................................................30
ICDL MODULE TWO - CONCEPTS OF INFORMATION TECHNOLOGY.............................31
SYLLABUS SECTION 2.1A - COMPUTER ENVIRONMENT - MULTIPLE CHOICE......................................32SYLLABUS SECTION 2.1B - COMPUTER ENVIRONMENT - PRACTICE SESSION......................................33SYLLABUS SECTION 2.2A - THE DESKTOP - MULTIPLE CHOICE..........................................................34SYLLABUS SECTION 2.2B - THE DESKTOP - PRACTICE SESSION..........................................................35SYLLABUS SECTION 2.3A - MANAGING FILES - MULTIPLE CHOICE.....................................................36SYLLABUS SECTION 2.3B - MANAGING FILES - PRACTICE SESSION....................................................37SYLLABUS SECTION 2.3C - MANAGING FILES - PRACTICE SESSION....................................................38SYLLABUS SECTION 2.4A - VIRUSES - QUICK QUIZ.............................................................................39SYLLABUS SECTION 2.5A - PRINT MANAGEMENT - PRACTICE SESSION..............................................40
ICDL MODULE TWO - COMPLETE QUIZZES.............................................................................41
ICDL MODULE TWO: COMPLETE MODULE QUIZ (1)...........................................................................42ICDL MODULE TWO: COMPLETE MODULE QUIZ (2)...........................................................................43ICDL MODULE TWO: COMPLETE MODULE CROSSWORD QUIZ...........................................................44ICDL MODULE TWO: COMPLETE MODULE CROSSWORD SOLUTION...................................................45
ICDL MODULE THREE - WORD PROCESSING..........................................................................47
SYLLABUS SECTION 3.1A - USING MICROSOFT WORD - TOOLBAR BUTTONS.....................................48SYLLABUS SECTION 3.1B - USING MICROSOFT WORD - SHORTCUTS..................................................49SYLLABUS SECTION 3.1C - USING MICROSOFT WORD - PRACTICE SESSION.......................................50SYLLABUS SECTION 3.1D - USING MICROSOFT WORD - PRACTICE SESSION.......................................51SYLLABUS SECTION 3.2A - MAIN OPERATIONS - SHORTCUTS & TOOLBAR BUTTONS........................52SYLLABUS SECTION 3.2B - MAIN OPERATIONS - PRACTICE SESSION..................................................53SYLLABUS SECTION 3.2C - MAIN OPERATIONS - PRACTICE SESSION..................................................54SYLLABUS SECTION 3.3A - FORMATTING - TOOLBAR BUTTONS..........................................................55SYLLABUS SECTION 3.3B - FORMATTING - SHORTCUTS.......................................................................56SYLLABUS SECTION 3.3C - FORMATTING - MULTIPLE CHOICE............................................................57
Ó 1995-2008 Cheltenham Courseware Pty. Ltd. www.cheltenhamcourseware.com.au.This is not an actual ICDL test. It is to be used as practice exercises, prior to taking an official ICDL test.
Success with these exercises does not guarantee success when taking the actual ICDL test. E&OEBased on ICDL syllabus 4.0. May not be used for ICDL 5.0 Page 3
Practice your ICDL skills
SYLLABUS SECTION 3.3D - FORMATTING - PRACTICE SESSION...........................................................58SYLLABUS SECTION 3.3E - FORMATTING - PRACTICE SESSION............................................................59SYLLABUS SECTION 3.3F - FORMATTING - PRACTICE SESSION............................................................60SYLLABUS SECTION 3.3G - FORMATTING - PRACTICE SESSION...........................................................61SYLLABUS SECTION 3.3H - FORMATTING - PRACTICE SESSION...........................................................62SYLLABUS SECTION 3.4A - OBJECTS - TOOLBAR BUTTONS.................................................................63SYLLABUS SECTION 3.4B - OBJECTS - SHORTCUTS..............................................................................64SYLLABUS SECTION 3.4C - OBJECTS - PRACTICE SESSION...................................................................65SYLLABUS SECTION 3.4D - OBJECTS - PRACTICE SESSION...................................................................66SYLLABUS SECTION 3.5A - MAIL MERGE - TOOLBAR BUTTONS.........................................................67SYLLABUS SECTION 3.5B - MAIL MERGE - SHORTCUTS......................................................................68SYLLABUS SECTION 3.5C - MAIL MERGE - PRACTICE SESSION...........................................................69SYLLABUS SECTION 3.6A - PRINTING ISSUES - SHORTCUTS & TOOLBAR BUTTONS............................70SYLLABUS SECTION 3.6B - PRINTING ISSUES - PRACTICE SESSION......................................................71
ICDL MODULE THREE - COMPLETE QUIZZES.........................................................................73
ICDL MODULE THREE: COMPLETE MODULE QUIZ (1)........................................................................74ICDL MODULE THREE: COMPLETE MODULE QUIZ (2)........................................................................75ICDL MODULE THREE: COMPLETE MODULE CROSSWORD QUIZ........................................................76ICDL MODULE THREE: COMPLETE MODULE CROSSWORD SOLUTION................................................77
ICDL MODULE FOUR - SPREADSHEETS.....................................................................................79
SYLLABUS SECTION 4.1A - USING MICROSOFT EXCEL - TOOLBAR BUTTONS.....................................80SYLLABUS SECTION 4.1B - USING MICROSOFT EXCEL - SHORTCUTS..................................................81SYLLABUS SECTION 4.1C - USING MICROSOFT EXCEL - PRACTICE SESSION.......................................82SYLLABUS SECTION 4.1D - USING MICROSOFT EXCEL - PRACTICE SESSION.......................................83SYLLABUS SECTION 4.2A - CELLS - SHORTCUTS & TOOLBAR BUTTONS.............................................84SYLLABUS SECTION 4.2B - CELLS - PRACTICE SESSION.......................................................................85SYLLABUS SECTION 4.2C - CELLS - PRACTICE SESSION.......................................................................86SYLLABUS SECTION 4.2D - CELLS - PRACTICE SESSION......................................................................87SYLLABUS SECTION 4.3A - WORKSHEETS - SHORTCUTS......................................................................88SYLLABUS SECTION 4.3B - WORKSHEETS - PRACTICE SESSION...........................................................89SYLLABUS SECTION 4.4A - FORMULAS & FUNCTIONS - SHORTCUTS & TOOLBAR BUTTONS..............90SYLLABUS SECTION 4.4B - FORMULAS & FUNCTIONS - PRACTICE SESSION........................................91SYLLABUS SECTION 4.4C - FORMULAS & FUNCTIONS - PRACTICE SESSION........................................92SYLLABUS SECTION 4.5A - FORMATTING - TOOLBAR BUTTONS..........................................................93SYLLABUS SECTION 4.5B - FORMATTING - SHORTCUTS.......................................................................94SYLLABUS SECTION 4.5C - FORMATTING - PRACTICE SESSION...........................................................95SYLLABUS SECTION 4.5D - FORMATTING - PRACTICE SESSION...........................................................96SYLLABUS SECTION 4.5E - FORMATTING - PRACTICE SESSION............................................................97SYLLABUS SECTION 4.6A - CHARTS - SHORTCUTS & TOOLBAR BUTTONS..........................................98SYLLABUS SECTION 4.6B - CHARTS - PRACTICE SESSION....................................................................99SYLLABUS SECTION 4.6B - CHARTS - PRACTICE SESSION..................................................................100SYLLABUS SECTION 4.7A - PREPARING OUTPUTS - SHORTCUTS & TOOLBAR BUTTONS...................101SYLLABUS SECTION 4.7B - PREPARING OUTPUTS - PRACTICE SESSION.............................................102
ICDL MODULE FOUR - COMPLETE QUIZZES.........................................................................103
ICDL MODULE FOUR: COMPLETE MODULE QUIZ (1).......................................................................104ICDL MODULE FOUR: COMPLETE MODULE QUIZ (2).......................................................................105ICDL MODULE FOUR: COMPLETE MODULE QUIZ (3).......................................................................106ICDL MODULE FOUR: COMPLETE MODULE CROSSWORD QUIZ........................................................107ICDL MODULE FOUR: COMPLETE MODULE CROSSWORD SOLUTION...............................................108
ICDL MODULE FIVE - DATABASE...............................................................................................109
SYLLABUS SECTION 5.1A - USING MICROSOFT ACCESS - SHORTCUTS & TOOLBAR BUTTONS.........110SYLLABUS SECTION 5.1B - USING MICROSOFT ACCESS - QUICK QUIZ.............................................111SYLLABUS SECTION 5.1C - USING MICROSOFT ACCESS - PRACTICE SESSION...................................112
Ó 1995-2008 Cheltenham Courseware Pty. Ltd. www.cheltenhamcourseware.com.au.This is not an actual ICDL test. It is to be used as practice exercises, prior to taking an official ICDL test.
Success with these exercises does not guarantee success when taking the actual ICDL test. E&OEBased on ICDL syllabus 4.0. May not be used for ICDL 5.0 Page 4
Practice your ICDL skills
SYLLABUS SECTION 5.2A - TABLES - PRACTICE SESSION..................................................................113SYLLABUS SECTION 5.2B - TABLES - PRACTICE SESSION..................................................................114SYLLABUS SECTION 5.2C - TABLES - PRACTICE SESSION..................................................................115SYLLABUS SECTION 5.3A - FORMS - PRACTICE SESSION...................................................................116SYLLABUS SECTION 5.4A - RETRIEVING INFORMATION - PRACTICE SESSION...................................117SYLLABUS SECTION 5.4B - RETRIEVING INFORMATION - PRACTICE SESSION....................................118SYLLABUS SECTION 5.4C - RETRIEVING INFORMATION - PRACTICE SESSION....................................119SYLLABUS SECTION 5.5A - REPORTS - PRACTICE SESSION................................................................120SYLLABUS SECTION 5.5B - REPORTS - PRACTICE SESSION................................................................121SYLLABUS SECTION 5.6A - PRINTING ISSUES - PRACTICE SESSION...................................................122
ICDL MODULE FIVE - COMPLETE QUIZZES...........................................................................123
ICDL MODULE FIVE: COMPLETE MODULE QUIZ (1).........................................................................124ICDL MODULE FIVE: COMPLETE MODULE QUIZ (2).........................................................................125ICDL MODULE FIVE: COMPLETE MODULE CROSSWORD QUIZ.........................................................126ICDL MODULE FIVE: COMPLETE MODULE CROSSWORD SOLUTION.................................................127
ICDL MODULE SIX PRESENTATION..........................................................................................129
SYLLABUS SECTION 6.1A - USING POWERPOINT - SHORTCUTS & TOOLBAR BUTTONS....................130SYLLABUS SECTION 6.1B - USING POWERPOINT - PRACTICE SESSION..............................................131SYLLABUS SECTION 6.1C - USING POWERPOINT - PRACTICE SESSION..............................................132SYLLABUS SECTION 6.2A - DEVELOPING PRESENTATIONS - SHORTCUTS & TOOLBAR BUTTONS.....133SYLLABUS SECTION 6.2B - DEVELOPING PRESENTATIONS - PRACTICE SESSION...............................134SYLLABUS SECTION 6.2C - DEVELOPING PRESENTATIONS - PRACTICE SESSION...............................135SYLLABUS SECTION 6.3A - TEXT & IMAGES - TOOLBAR BUTTONS...................................................136SYLLABUS SECTION 6.3B - TEXT & IMAGES - SHORTCUTS................................................................137SYLLABUS SECTION 6.3C - TEXT & IMAGES - PRACTICE SESSION.....................................................138SYLLABUS SECTION 6.3D - TEXT & IMAGES - PRACTICE SESSION....................................................139SYLLABUS SECTION 6.4A - OBJECTS - TOOLBAR BUTTONS...............................................................140SYLLABUS SECTION 6.4B - OBJECTS - PRACTICE SESSION.................................................................141SYLLABUS SECTION 6.4C - OBJECTS - PRACTICE SESSION.................................................................142SYLLABUS SECTION 6.4D - OBJECTS - PRACTICE SESSION.................................................................143SYLLABUS SECTION 6.4E - OBJECTS - PRACTICE SESSION.................................................................144SYLLABUS SECTION 6.4F - OBJECTS - PRACTICE SESSION.................................................................145SYLLABUS SECTION 6.5A - SLIDE SHOW EFFECTS - PRACTICE SESSION............................................146SYLLABUS SECTION 6.6A - OUTPUT - SHORTCUTS & TOOLBAR BUTTONS........................................147SYLLABUS SECTION 6.6B - OUTPUT - PRACTICE SESSION..................................................................148
ICDL MODULE SIX - COMPLETE QUIZZES..............................................................................149
ICDL MODULE SIX: COMPLETE MODULE QUIZ (1)...........................................................................150ICDL MODULE SIX: COMPLETE MODULE QUIZ (2)...........................................................................151ICDL MODULE SIX: COMPLETE MODULE QUIZ (3)...........................................................................152ICDL MODULE SIX: COMPLETE MODULE CROSSWORD QUIZ...........................................................153ICDL MODULE SIX: COMPLETE MODULE CROSSWORD SOLUTION...................................................154
ICDL / ICDL MODULE SEVEN - INFORMATION AND COMMUNICATION......................155
SYLLABUS SECTION 7.1A - THE INTERNET - SHORTCUTS & BUTTONS..............................................156SYLLABUS SECTION 7.1B - THE INTERNET - MULTIPLE CHOICE........................................................157SYLLABUS SECTION 7.1C - THE INTERNET - PRACTICE SESSION.......................................................158SYLLABUS SECTION 7.1D - THE INTERNET - QUICK QUIZ..................................................................159SYLLABUS SECTION 7.2A - WEB NAVIGATION - SHORTCUTS & BUTTONS........................................160SYLLABUS SECTION 7.2B - WEB NAVIGATION - PRACTICE SESSION.................................................161SYLLABUS SECTION 7.3A - WEB SEARCHING - PRACTICE SESSION...................................................162SYLLABUS SECTION 7.3B - WEB SEARCHING - PRACTICE SESSION...................................................163SYLLABUS SECTION 7.4A - ELECTRONIC MAIL - QUICK QUIZ...........................................................164SYLLABUS SECTION 7.4B - ELECTRONIC MAIL - PRACTICE SESSION.................................................165SYLLABUS SECTION 7.5A - MESSAGING - QUICK QUIZ......................................................................166
Ó 1995-2008 Cheltenham Courseware Pty. Ltd. www.cheltenhamcourseware.com.au.This is not an actual ICDL test. It is to be used as practice exercises, prior to taking an official ICDL test.
Success with these exercises does not guarantee success when taking the actual ICDL test. E&OEBased on ICDL syllabus 4.0. May not be used for ICDL 5.0 Page 5

Practice your ICDL skills
SYLLABUS SECTION 7.5B - MESSAGING - PRACTICE SESSION............................................................167SYLLABUS SECTION 7.6A - MAIL MANAGEMENT – QUICK QUIZ.......................................................168SYLLABUS SECTION 7.6B - MAIL MANAGEMENT – PRACTICE SESSION.............................................169SYLLABUS SECTION 7.6C - MAIL MANAGEMENT – PRACTICE SESSION.............................................170
ICDL MODULE SEVEN - COMPLETE QUIZZES.......................................................................171
ICDL MODULE SEVEN: COMPLETE MODULE PRACTICE QUIZ - (1)..................................................172ICDL MODULE SEVEN: COMPLETE MODULE PRACTICE QUIZ - (2)..................................................173ICDL MODULE SEVEN: COMPLETE MODULE PRACTICE QUIZ - (3)..................................................174ICDL MODULE SEVEN: COMPLETE MODULE CROSSWORD QUIZ......................................................175ICDL Module Seven: Complete Module Crossword Solution..........................................................176
Ó 1995-2008 Cheltenham Courseware Pty. Ltd. www.cheltenhamcourseware.com.au.This is not an actual ICDL test. It is to be used as practice exercises, prior to taking an official ICDL test.
Success with these exercises does not guarantee success when taking the actual ICDL test. E&OEBased on ICDL syllabus 4.0. May not be used for ICDL 5.0 Page 6
Practice your ICDL skills
Approved Courseware
The ECDL Foundation has approved these training materials and requires that the following statement appears in all ECDL Foundation approved courseware.
European Computer Driving Licence, ICDL, International Computer Driving Licence, ICDL, e-Citizen and related logos are trade marks of The European Computer Driving Licence Foundation Limited (“ECDL-F”) in Ireland and other countries.
Cheltenham Courseware is an entity independent of ECDL-F and is not associated with ECDL-F in any manner. This courseware publication may be used to assist candidates to prepare for ICDL tests. Neither ECDL-F nor Cheltenham Courseware warrants that the use of this courseware publication will ensure passing of ICDL tests. This courseware publication has been independently reviewed and approved by ECDL-F as complying with the following standard:
Technical compliance with the learning objectives of ICDL syllabus 4.
Confirmation of this approval can be obtained by reviewing the Courseware Section of the website www.ecdl.com
The material contained in this courseware publication has not been reviewed for technical accuracy and does not guarantee that candidates will pass ICDL tests. Any and all assessment items and/or performance-based exercises contained in this courseware publication relate solely to this publication and do not constitute or imply certification by ECDL-F in respect of ICDL tests or any other ECDL-F test.
For details on sitting ICDL tests and other ECDL-F tests in your country, please contact your country's National ICDL/ICDL designated Licensee or visit ECDL-F’s web site at www.ecdl.com.
Candidates using this courseware publication must be registered with the National Licensee, before undertaking ICDL tests. Without a valid registration, ICDL tests cannot be undertaken and no ICDL test certificate, nor any other form of recognition, can be given to a candidate. Registration should be undertaken with your country's National ICDL/ICDL designated Licensee at any Approved ICDL test certificate Test Centre.
Syllabus 4 is the official syllabus of the ICDL certification programme at the date of approval of this courseware publication.
Ó 1995-2008 Cheltenham Courseware Pty. Ltd. www.cheltenhamcourseware.com.au.This is not an actual ICDL test. It is to be used as practice exercises, prior to taking an official ICDL test.
Success with these exercises does not guarantee success when taking the actual ICDL test. E&OEBased on ICDL syllabus 4.0. May not be used for ICDL 5.0 Page 7
Practice your ICDL skills
Understanding the formatting used within this document
This document uses 'section formatting' to force each new chapter to start on an odd numbered page. This is great for printing the manual on a printer that prints on both sides of the paper. It gives a professional impression, and where necessary blank pages are inserted to force each new chapter to start on an odd page.
If you are printing to a printer that only prints singled sided, or if you are using a duplex printer, set to single sided operation, than you will find that blank pages are printed, prior to some of the new chapters. If these blank pages are a problem, go through the document and change 'odd page' section breaks, to 'continuous', section breaks.
Text marked with 'Header 1' and 'Header 2' styles may automatically insert a page break, as the styles may have this information embedded within the style. If this is an issue, modify the style to prevent the automatic page break insertion.
Step-by-step instructions for preventing blank page insertion, resulting from odd section breaks that are inserted before each new chapter.
NOTE: Only do this if you are printing the manual single sided. If you are printing the entire manual, on both sides of the paper, you should not do this.
First make a copy of the document and rename it ICDL Questions - No blank pages.
Click on the File drop down menu and select the Page Setup command. Select the Layout tab, at the top of the dialog box. Within the Headers and footers section of the dialog box, remove the
tick next to the Different Odd and Even check box. Within the Preview section of the dialog box, click on the down arrow
under the Apply to command. From the drop down menu displayed select Whole Document. Click on the OK button.
Ó 1995-2008 Cheltenham Courseware Pty. Ltd. www.cheltenhamcourseware.com.au.This is not an actual ICDL test. It is to be used as practice exercises, prior to taking an official ICDL test.
Success with these exercises does not guarantee success when taking the actual ICDL test. E&OEBased on ICDL syllabus 4.0. May not be used for ICDL 5.0 Page 8
Practice your ICDL skills
Compare the practice sessions with the official ICDL syllabus
You can download the official ICDL syllabus from the ECDL Foundation web site. The ECDL Foundation is the world-wide governing body for the ICDL certification program.
If you compare the 'table of contents' of this document, with the official ICDL syllabus, you will see that these practice sessions have been specifically developed for the ICDL certification program, and allow you to practice each section of the syllabus.
You can download the ICDL syllabus from: www.ecdl.com
Ó 1995-2008 Cheltenham Courseware Pty. Ltd. www.cheltenhamcourseware.com.au.This is not an actual ICDL test. It is to be used as practice exercises, prior to taking an official ICDL test.
Success with these exercises does not guarantee success when taking the actual ICDL test. E&OEBased on ICDL syllabus 4.0. May not be used for ICDL 5.0 Page 9
Practice your ICDL skills
The purpose of these practice sessions
NOTE: NOT AN OFFICIAL ICDL EXAMINATION:
The first thing to note is that these ICDL practice questions are not official ICDL examinations. You can only take an official ICDL examination at an approved ICDL testing centre, or via an approved, secure, on-line ICDL testing system.
These practice sessions have been officially approved by the ECDL Foundation, the world-wide governing body that regulates the ICDL certification scheme.
These ECDL Foundation approved practice sessions have been designed for use in conjunction with ECDL Foundation approved courseware, such as the courseware provided by Cheltenham Courseware.
These practice sessions aim to allow you to practice ICDL related skills.
You can check our official certification status on the ECDL Foundation web site. Go to:www.ecdl.comthen click on the 'Partners' button.
THESE PRACTICE SESSIONS ARE OFFICIALLY APPROVED FOR USE WITH ICDL APPROVED COURSEWARE. THEY SHOULD NOT BE USED AS A REPLACEMENT FOR OFFICIALLY APPROVED COURSEWARE MANUALS
PLEASE NOTE: You may not edit the syllabus related content of this document, as it has been approved in its present form by the ECDL Foundation. You may not use these practice session questions to develop an ICDL 5 version. These practice sessions are specific to ICDL version 4 only.
ICDL Courseware Library: A complete library of ICDL training materials:If you are not currently using ICDL courseware materials from Cheltenham Courseware, you can view details, and download complete samples from our web sites:
- UK / Ireland www.cctglobal.com- Australia / International www.cheltenhamcourseware.com.au- USA www.cheltenhamcourseware.com
NOTE: These practice sessions have been written based on Windows XP and Microsoft Office XP / 2003.
Setting up the sample fileso Copy the contents of the 'Practice Question Sample Files' folder to the 'My
Documents' or 'Documents' folder. o You will need to do this every time a different student uses the computer.o Some options, such as customisation options, may require resetting after a course.
Ó 1995-2008 Cheltenham Courseware Pty. Ltd. www.cheltenhamcourseware.com.au.This is not an actual ICDL test. It is to be used as practice exercises, prior to taking an official ICDL test.
Success with these exercises does not guarantee success when taking the actual ICDL test. E&OEBased on ICDL syllabus 4.0. May not be used for ICDL 5.0 Page 10
ICDL Module 1Practice your ICDL skills
ICDL Module One - Using the Computer & Managing Files
Ó 1995-2008 Cheltenham Courseware Pty. Ltd. www.cheltenhamcourseware.com.au.This is not an actual ICDL test. It is to be used as practice exercises, prior to taking an official ICDL test.
Success with these exercises does not guarantee success when taking the actual ICDL test. E&OEBased on ICDL syllabus 4.0. May not be used for ICDL 5.0 Page 11
Sheet001ICDL Module 1
Practice your ICDL skills
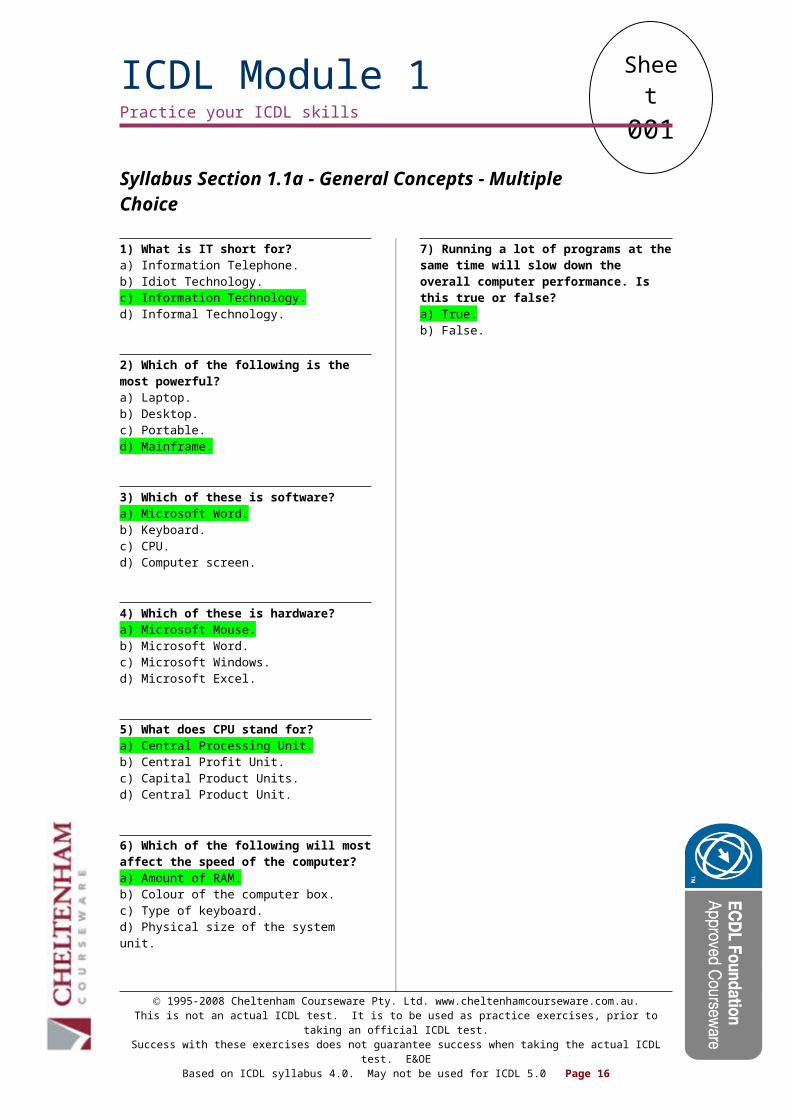
Syllabus Section 1.1a - General Concepts - Multiple Choice
1) What is IT short for?a) Information Telephone.b) Idiot Technology.c) Information Technology.d) Informal Technology.
2) Which of the following is the most powerful?a) Laptop.b) Desktop.c) Portable.d) Mainframe.
3) Which of these is software?a) Microsoft Word.b) Keyboard.c) CPU.d) Computer screen.
4) Which of these is hardware?a) Microsoft Mouse.b) Microsoft Word.c) Microsoft Windows.d) Microsoft Excel.
5) What does CPU stand for?a) Central Processing Unit.b) Central Profit Unit.c) Capital Product Units.d) Central Product Unit.
6) Which of the following will most affect the speed of the computer?a) Amount of RAM.b) Colour of the computer box.c) Type of keyboard.d) Physical size of the system unit.
7) Running a lot of programs at the same time will slow down the overall computer performance. Is this true or false?a) True.b) False.
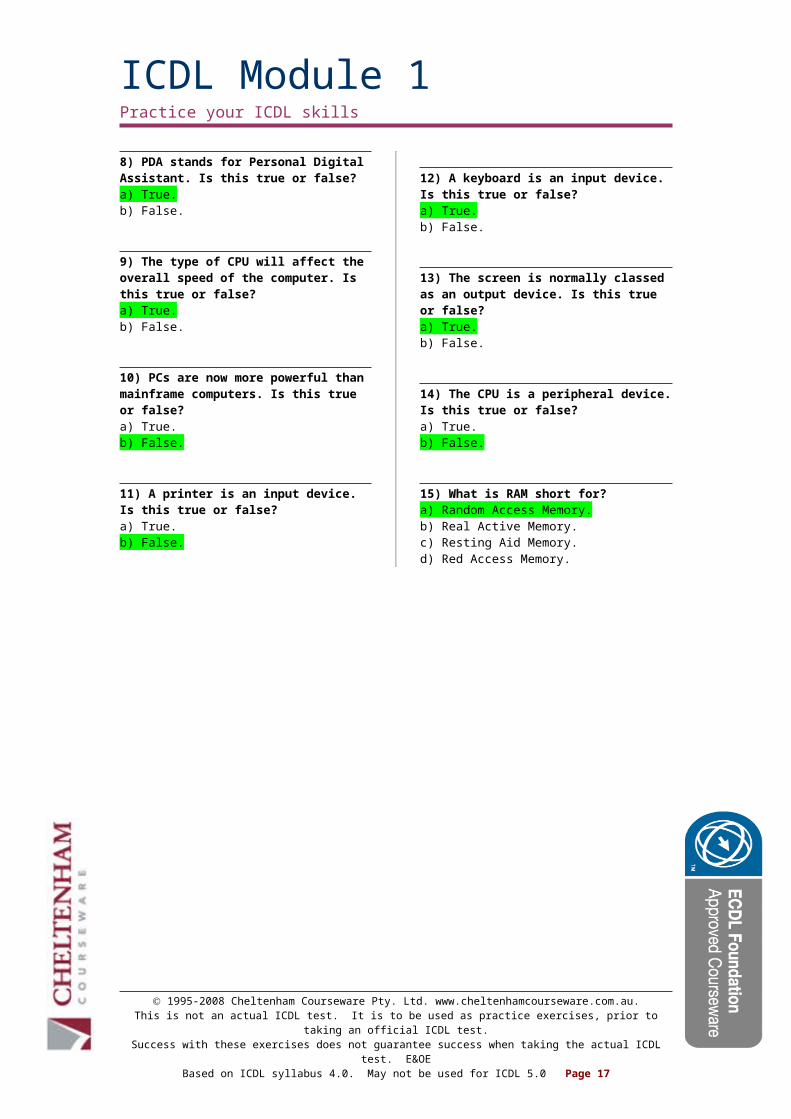
8) PDA stands for Personal Digital Assistant. Is this true or false?a) True.b) False.
9) The type of CPU will affect the overall speed of the computer. Is this true or false?a) True.b) False.
10) PCs are now more powerful than mainframe computers. Is this true or false?a) True.b) False.
11) A printer is an input device. Is this true or false?a) True.b) False.
12) A keyboard is an input device. Is this true or false?a) True.b) False.
13) The screen is normally classed as an output device. Is this true or false?a) True.b) False.
14) The CPU is a peripheral device. Is this true or false?a) True.b) False.
15) What is RAM short for?a) Random Access Memory.b) Real Active Memory.c) Resting Aid Memory.d) Red Access Memory.
Ó 1995-2008 Cheltenham Courseware Pty. Ltd. www.cheltenhamcourseware.com.au.This is not an actual ICDL test. It is to be used as practice exercises, prior to taking an official ICDL test.
Success with these exercises does not guarantee success when taking the actual ICDL test. E&OEBased on ICDL syllabus 4.0. May not be used for ICDL 5.0 Page 12

Sheet002
ICDL Module 1Practice your ICDL skills
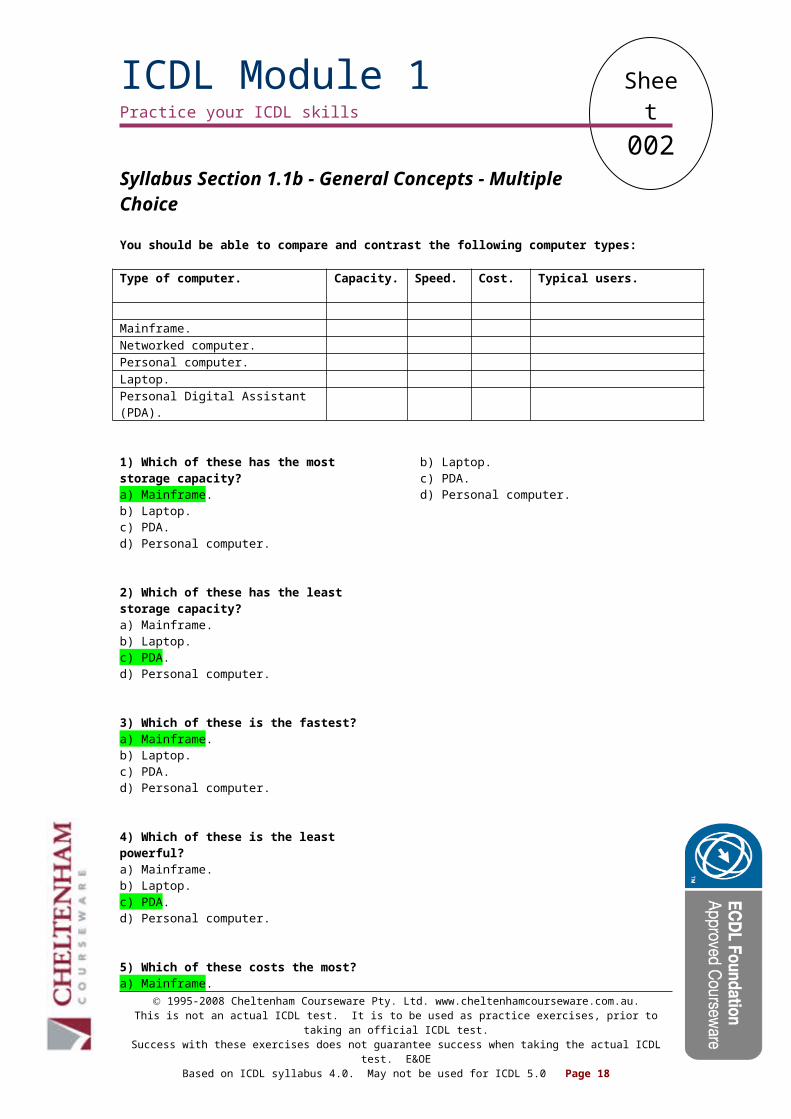
Syllabus Section 1.1b - General Concepts - Multiple Choice
You should be able to compare and contrast the following computer types:
Type of computer. Capacity. Speed. Cost. Typical users.
Mainframe.Networked computer.Personal computer.Laptop.Personal Digital Assistant (PDA).
1) Which of these has the most storage capacity?a) Mainframe.b) Laptop.c) PDA.d) Personal computer.
2) Which of these has the least storage capacity?a) Mainframe.b) Laptop.c) PDA.d) Personal computer.
3) Which of these is the fastest?a) Mainframe.b) Laptop.c) PDA.d) Personal computer.
4) Which of these is the least powerful?a) Mainframe.b) Laptop.c) PDA.d) Personal computer.
5) Which of these costs the most?a) Mainframe.b) Laptop.c) PDA.d) Personal computer.
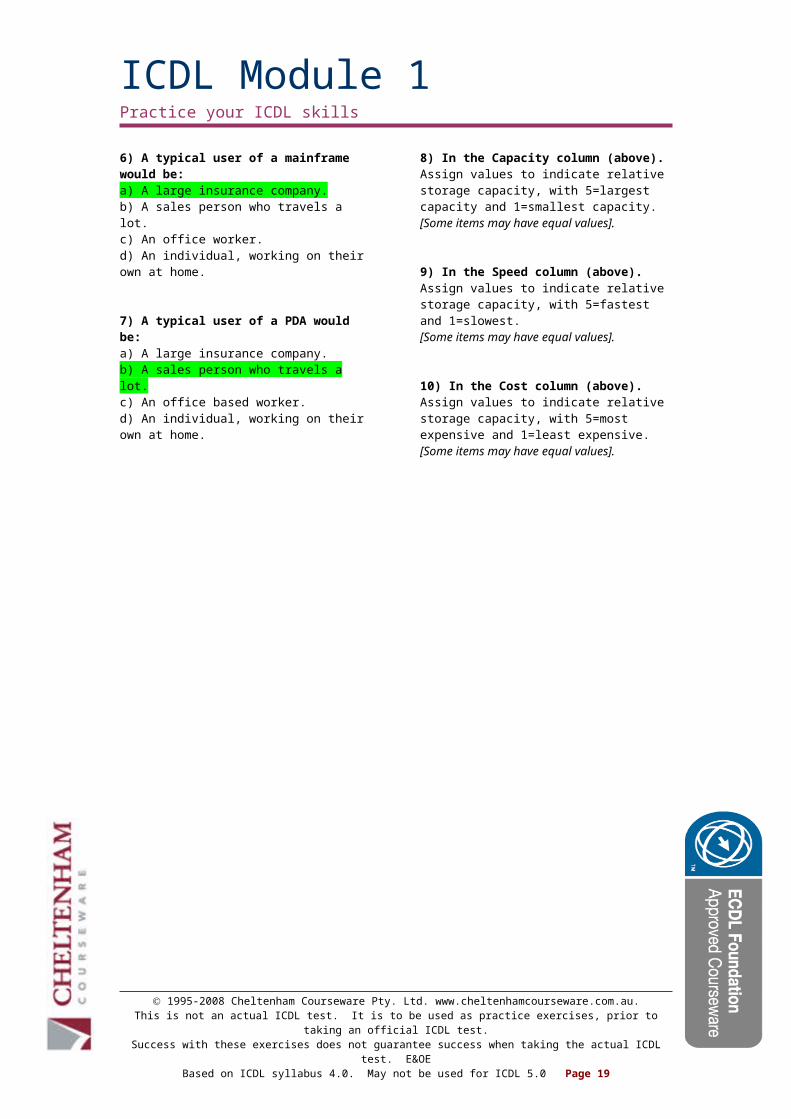
6) A typical user of a mainframe would be:a) A large insurance company.b) A sales person who travels a lot.c) An office worker.d) An individual, working on their own at home.
7) A typical user of a PDA would be:a) A large insurance company.b) A sales person who travels a lot.c) An office based worker.d) An individual, working on their own at home.
8) In the Capacity column (above).Assign values to indicate relative storage capacity, with 5=largest capacity and 1=smallest capacity. [Some items may have equal values].
9) In the Speed column (above).Assign values to indicate relative storage capacity, with 5=fastest and 1=slowest.[Some items may have equal values].
10) In the Cost column (above).Assign values to indicate relative storage capacity, with 5=most expensive and 1=least expensive.[Some items may have equal values].
Ó 1995-2008 Cheltenham Courseware Pty. Ltd. www.cheltenhamcourseware.com.au.This is not an actual ICDL test. It is to be used as practice exercises, prior to taking an official ICDL test.
Success with these exercises does not guarantee success when taking the actual ICDL test. E&OEBased on ICDL syllabus 4.0. May not be used for ICDL 5.0 Page 13
Sheet003
ICDL Module 1Practice your ICDL skills
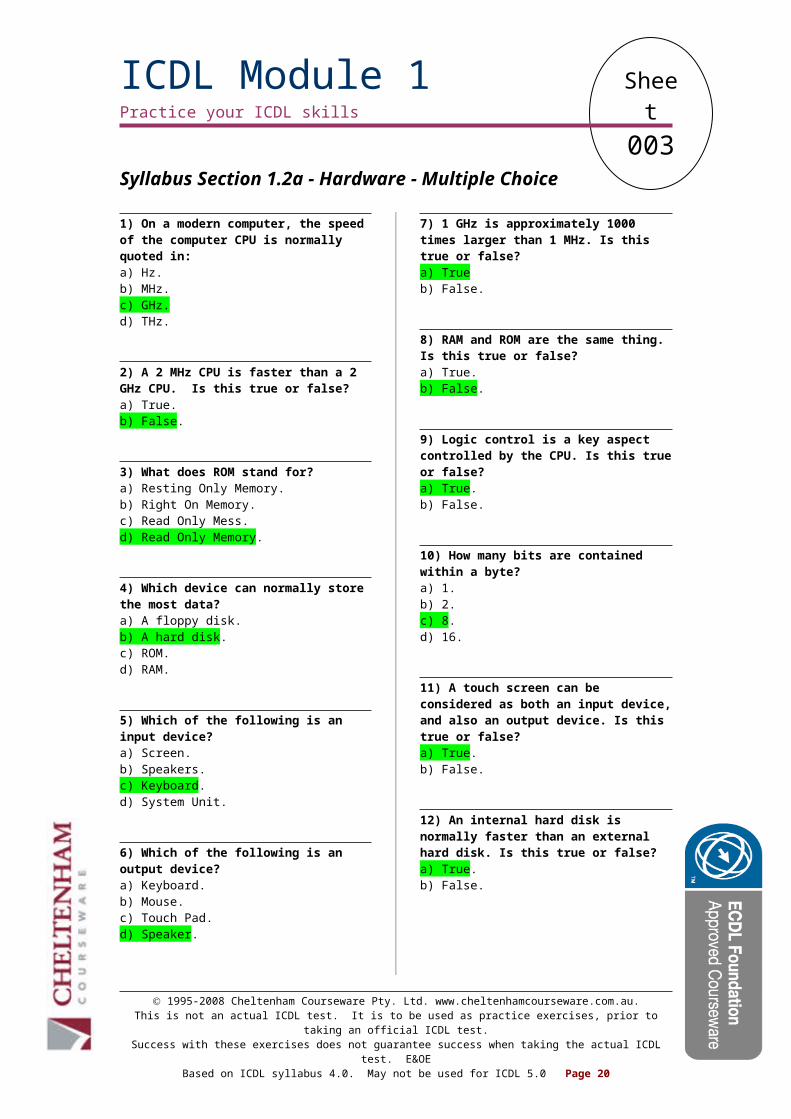
Syllabus Section 1.2a - Hardware - Multiple Choice
1) On a modern computer, the speed of the computer CPU is normally quoted in:a) Hz.b) MHz.c) GHz.d) THz.
2) A 2 MHz CPU is faster than a 2 GHz CPU. Is this true or false?a) True.b) False.
3) What does ROM stand for?a) Resting Only Memory.b) Right On Memory.c) Read Only Mess.d) Read Only Memory.
4) Which device can normally store the most data?a) A floppy disk.b) A hard disk.c) ROM.d) RAM.
5) Which of the following is an input device?a) Screen.b) Speakers.c) Keyboard.d) System Unit.
6) Which of the following is an output device?a) Keyboard.b) Mouse.c) Touch Pad.d) Speaker.
7) 1 GHz is approximately 1000 times larger than 1 MHz. Is this true or false?a) Trueb) False.
8) RAM and ROM are the same thing. Is this true or false?a) True.b) False.
9) Logic control is a key aspect controlled by the CPU. Is this true or false?a) True.b) False.
10) How many bits are contained within a byte?a) 1.b) 2.c) 8.d) 16.
11) A touch screen can be considered as both an input device, and also an output device. Is this true or false?a) True.b) False.
12) An internal hard disk is normally faster than an external hard disk. Is this true or false?a) True.b) False.
Ó 1995-2008 Cheltenham Courseware Pty. Ltd. www.cheltenhamcourseware.com.au.This is not an actual ICDL test. It is to be used as practice exercises, prior to taking an official ICDL test.
Success with these exercises does not guarantee success when taking the actual ICDL test. E&OEBased on ICDL syllabus 4.0. May not be used for ICDL 5.0 Page 14
Sheet004
Syllabus Section 1.2b - Hardware - Theory
1) List three items that are hardware.
2) Explain the difference between hardware and software.
3) List the following in order of computer processing power (most powerful at the top). - Mainframe computer - Digital watch - PC
4) List as many input devices as you can.
5) List as many output devices as you can.
6) List as many devices as you can, that can act as both input devices and output devices.
7) List as many peripheral devices as you can.
8) List some of the factors that affect the overall speed of a computer.
9) List some of the functions of the CPU.
10) List the following in order of storage capacity, with the smallest at the top, and the largest at the bottom.- Floppy disk (diskette).- Hard disk.- DVD.- CD.
Sheet005
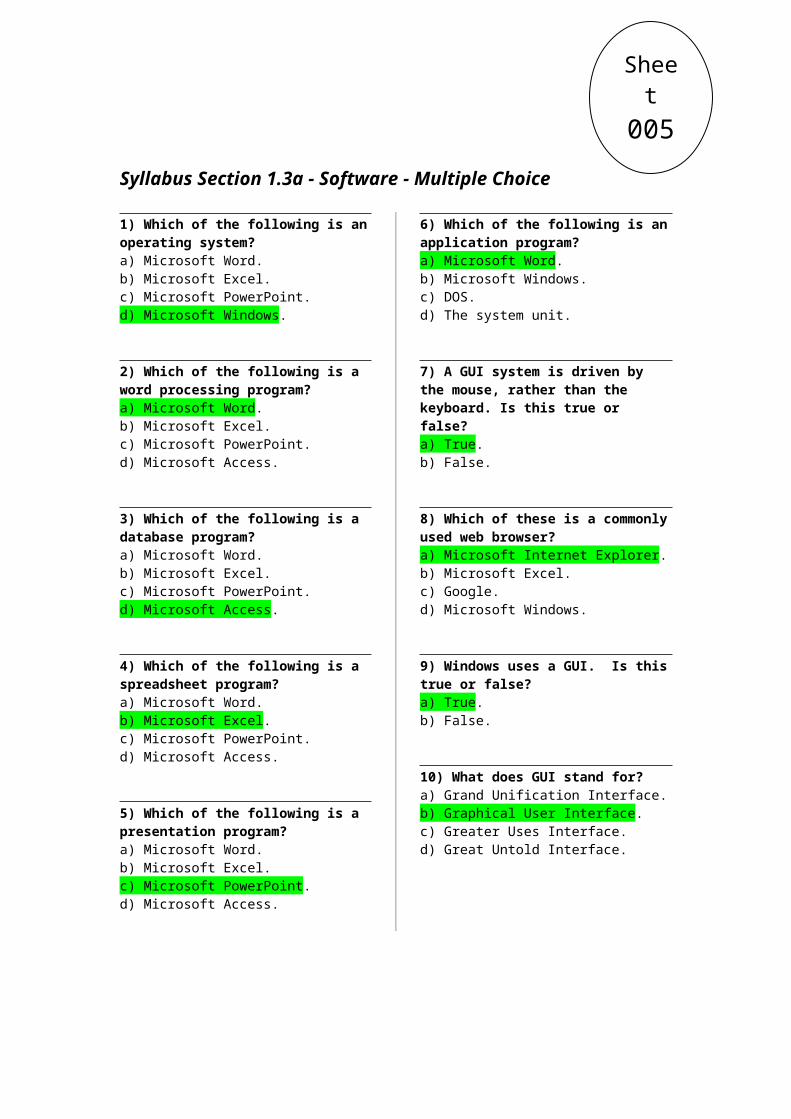
Syllabus Section 1.3a - Software - Multiple Choice
1) Which of the following is an operating system?a) Microsoft Word.b) Microsoft Excel.c) Microsoft PowerPoint.d) Microsoft Windows.
2) Which of the following is a word processing program?a) Microsoft Word.b) Microsoft Excel.c) Microsoft PowerPoint.d) Microsoft Access.
3) Which of the following is a database program?a) Microsoft Word.b) Microsoft Excel.c) Microsoft PowerPoint.d) Microsoft Access.
4) Which of the following is a spreadsheet program?a) Microsoft Word.b) Microsoft Excel.c) Microsoft PowerPoint.d) Microsoft Access.
5) Which of the following is a presentation program?a) Microsoft Word.b) Microsoft Excel.c) Microsoft PowerPoint.d) Microsoft Access.
6) Which of the following is an application program?a) Microsoft Word.b) Microsoft Windows.c) DOS.d) The system unit.
7) A GUI system is driven by the mouse, rather than the keyboard. Is this true or false?a) True.b) False.
8) Which of these is a commonly used web browser?a) Microsoft Internet Explorer.b) Microsoft Excel.c) Google.d) Microsoft Windows.
9) Windows uses a GUI. Is this true or false?a) True.b) False.
10) What does GUI stand for?a) Grand Unification Interface.b) Graphical User Interface.c) Greater Uses Interface.d) Great Untold Interface.
Sheet006
Syllabus Section 1.3b - Software - Practice Session
1) Briefly explain the difference between an application, such as Microsoft Word, and an operating system, such as Microsoft Windows.
2) Briefly explain why software applications and operating system software are periodically updated, by the suppliers.
3) List as many operating system types, and versions, as you can.
4) List 4 common application programs.
5) List some of the functions of an operating system.
6) Briefly describe the process of developing a new computer based system.
7) List some of the advantages of using a GUI based operating system.
8) Give one example of a word processor application program.
9) Give one example of a database application program.
10) Give one example of a presentation application program.
11) Give one example of a spreadsheet application program.
12) Give one example of an application program used to create web sites.
Sheet007
Syllabus Section 1.4a - Information Networks - Multiple Choice
1) What does LAN stand for?a) Lost and Networked.b) Local Area Node.c) Last Area Node.d) Local Area Network.
2) What does WAN stand for?a) Wide Area Network.b) Wide Area Nuisance.c) World Assistance Network.d) World Area Network.
3) What does WWW stand for?a) World Wide Wait.b) World Wide Web.c) What World Wants.d) What World Wastes.
4) The Internet is the same thing as the WWW. Is this true or false?a) True.b) False.
5) An Intranet is just a private version of the Internet. Is this true or false?a) True.b) False.
6) Networking allows you to share a printer amongst several PCs. Is this true or false?a) True.b) False.
7) You can share files across a network. Is this true or false?a) True.b) False.
8) What does BPS stand for?a) Bits per sound.b) Bits per second.c) Best paid soon.d) Boats blown south.
9) A broadband internet connection will be much faster than a dial-up connection. Is this true or false?a) True.b) False.
10) What is PSTN short for?a) Public Switch Telephone Network .b) Public Soft Touch Network.c) Pretty Silly Telephone Network.d) Push Sound TV Network.
11) What is ISDN short for?a) Irritating Service Denials at Night.b) Integrated Services Digital Network.c) International Services Digital Network.d) Instant Service Digital Network.
11) What is ADSL short for?a) Advanced Digital Server Line.b) Advanced Digital Service Line.c) Asymmetric Digital Side Line.d) A Digital Service Line.
12) A PC is an analogue device. Is this true or false?a) True.b) False.
Sheet008
Syllabus Section 1.4b - Information Networks - Quick Quiz
1) Explain the difference between the WWW and the Internet.
2) Explain the difference between the Internet and an Intranet.
3) Explain the difference between an Intranet and an Extranet.
4) List a few of the advantages of using a computer network within an office.
5) Explain the term 'client server'.
6) Explain the difference between a LAN and a WAN.
7) Explain some of the advantages of a broadband Internet connection compared to a dial-up connection.
8) Explain the terms analogue and digital.

Sheet009
Syllabus Section 1.5a - IT in Everyday Life - Quick Quiz
1) List a few circumstances, where using a computer would be better than using a person, to achieve a particular task.
2) List a few instances where using a person would be better, than using a computer, to achieve a particular task.
3) Briefly list some examples of large scale computer use, within business.
4) Briefly list some examples of large scale computer use, within government.
5) Briefly list some examples of large scale computer use, within education.
6) Briefly list some examples of large scale computer use, within the health care industry.
7) Briefly list a few of the advantages, to an individual, of teleworking.
8) Briefly list a few of the advantages, to an organisation, of teleworking.
9) Briefly list a few of the disadvantages, to an individual, of teleworking.
10) Briefly list a few of the disadvantages, to an organisation of teleworking.
11) Briefly list some of the advantages of email, compared to postal mail.
12) List a few of the advantages of e-commerce to a consumer.
13) List a few of the disadvantages of e-commerce to a consumer.
Sheet010
Syllabus Section 1.6a - Health, Safety & the Environment - Quick Quiz
1) List a few items that help to create a better ergonomic environment when using a computer.
2) List a few of the possible health issues associated with the improper use of a computer.
3) List some of the safety precautions that should be observed when installing and using a computer.
4) List a few ways in which the choice of computer equipment, or operation of the computer, can help benefit the environment.
5) Explain, how using electronic documents, rather than printed documents, can help protect the environment.
Sheet011
Syllabus Section 1.7a - Security - Quick Quiz
1) Briefly explain the reason why data should be backed up.
2) List ways of backing up your data.
3) List some of the possible implications of losing a computer holding personal or confidential data.
4) Briefly explain the term 'computer virus'.
5) List ways in which a computer virus might infect your computer.
6) Explain, why a computer virus checker needs to be constantly updated.
7) Explain the difference between the terms computer 'log in' and computer 'password'.
8) Explain the term 'access rights'.
Sheet012
Syllabus Section 1.8a - Copyright & the Law - Quick Quiz
1) Briefly explain the concept of 'copyright'.
2) Explain how you could check the product ID number, of a software program, such as Microsoft Word.
3) Briefly explain the term 'shareware'.
4) Briefly explain the term 'freeware'.
5) Briefly explain the term 'end-user licence'.
6) Briefly list a few key points relating to data protection legislation.
Practice your ICDL skills
ICDL Module One - Complete Quizzes
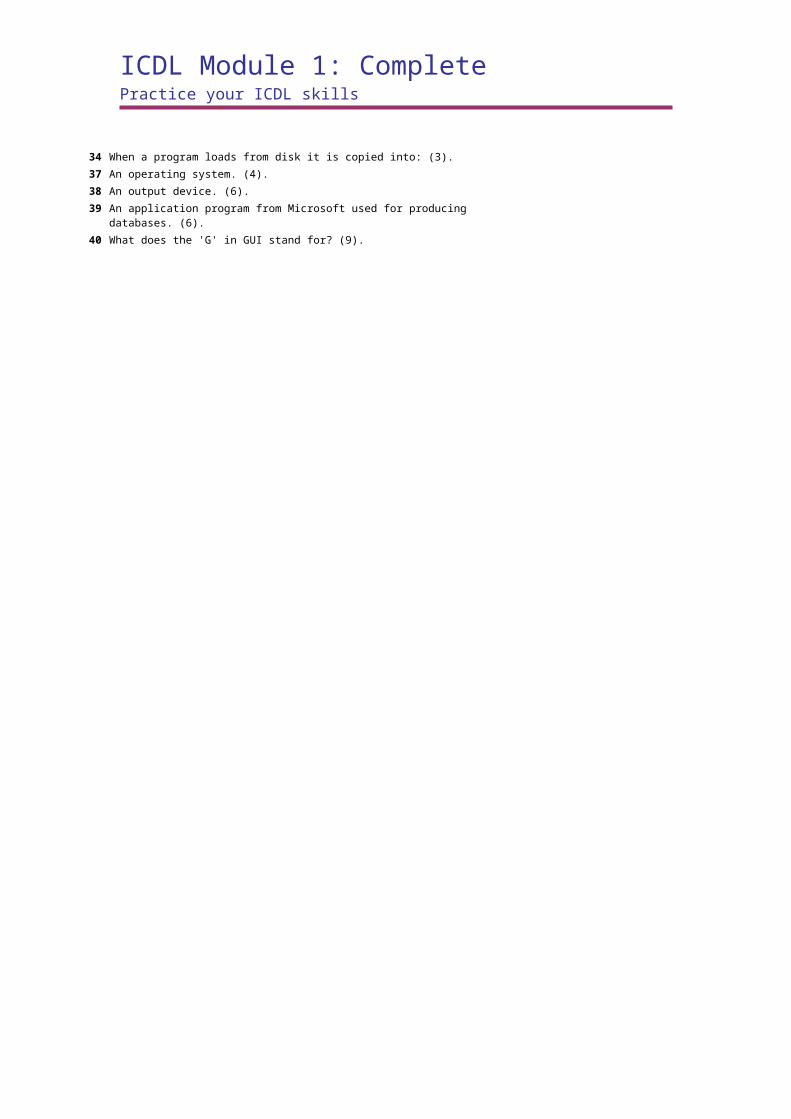
Sheet013ICDL Module 1: Complete
Practice your ICDL skills
ICDL Module One: Complete Module Quiz (1)
1) List 3 items of hardware.
2) What is a 'bit', in relation to computers?
3) List a few basic safety precautions to be observed when installing and using a computer.
4) Explain the term software.
5) List 2 input devices.
6) Explain the difference between the WWW and the Internet.
7) List three examples of software applications.
8) Lists ways in which a computer may become infected by a computer virus.
9) Explain the purpose of formatting a disk.
10) Explain the difference between RAM and ROM.
11) What is the Internet?
12) Explain the difference between a LAN and a WAN.
13) Why should you backup data?
14) What unit of measurement is used to describe the speed of the memory on a modern PC?
15) Explain what an external hard disk is.
16) List a few health problems that can arise from the incorrect use of a computer.
17) List a few items relating to data protection legislation.
18) What is a byte?
19) List the possible implications, if a laptop is stolen from an office.
20) List some items that improve the ergonomic use of a computer.
Sheet014
Practice your ICDL skills
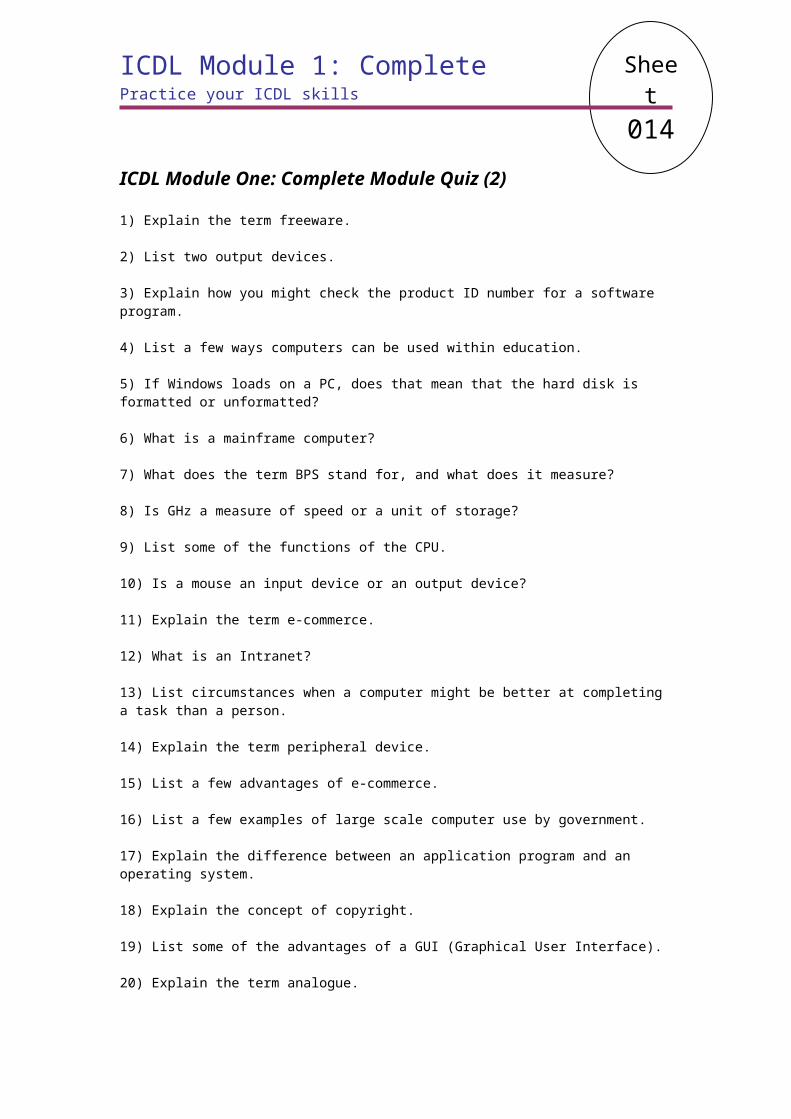
ICDL Module One: Complete Module Quiz (2)
1) Explain the term freeware.
2) List two output devices.
3) Explain how you might check the product ID number for a software program.
4) List a few ways computers can be used within education.
5) If Windows loads on a PC, does that mean that the hard disk is formatted or unformatted?
6) What is a mainframe computer?
7) What does the term BPS stand for, and what does it measure?
8) Is GHz a measure of speed or a unit of storage?
9) List some of the functions of the CPU.
10) Is a mouse an input device or an output device?
11) Explain the term e-commerce.
12) What is an Intranet?
13) List circumstances when a computer might be better at completing a task than a person.
14) Explain the term peripheral device.
15) List a few advantages of e-commerce.
16) List a few examples of large scale computer use by government.
17) Explain the difference between an application program and an operating system.
18) Explain the concept of copyright.
19) List some of the advantages of a GUI (Graphical User Interface).
20) Explain the term analogue.
Sheet015ICDL Module 1: Complete
Practice your ICDL skills
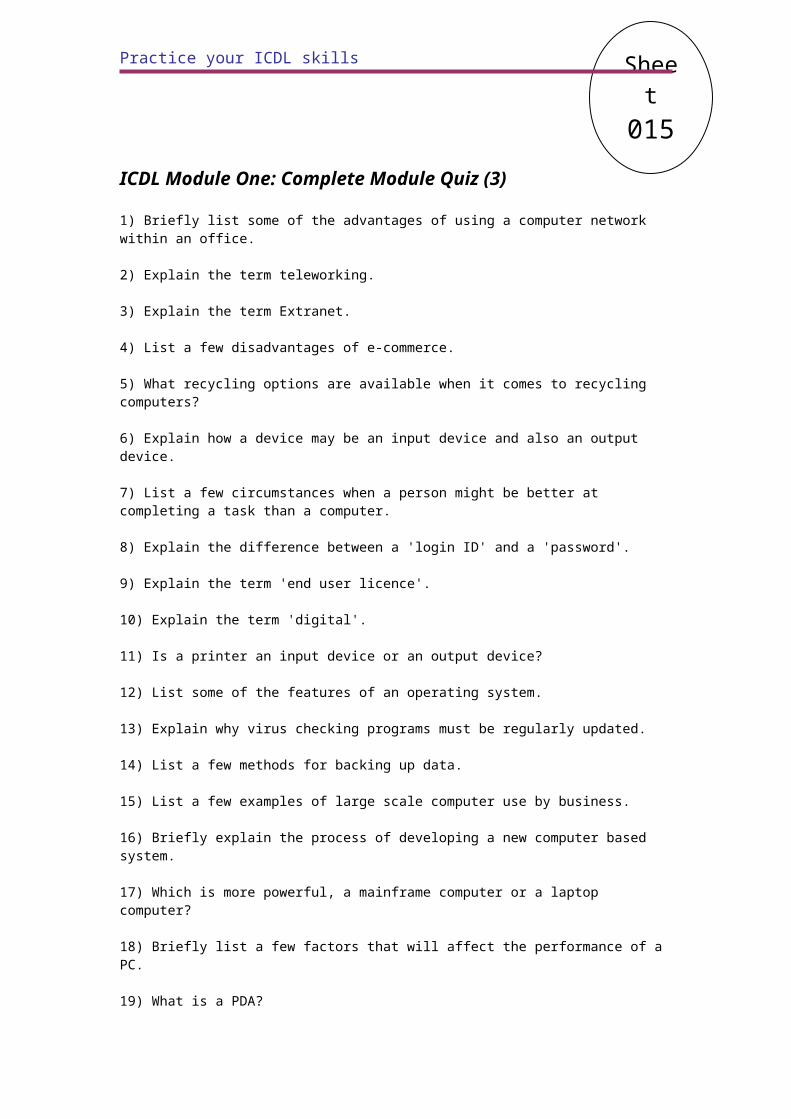
ICDL Module One: Complete Module Quiz (3)
1) Briefly list some of the advantages of using a computer network within an office.
2) Explain the term teleworking.
3) Explain the term Extranet.
4) List a few disadvantages of e-commerce.
5) What recycling options are available when it comes to recycling computers?
6) Explain how a device may be an input device and also an output device.
7) List a few circumstances when a person might be better at completing a task than a computer.
8) Explain the difference between a 'login ID' and a 'password'.
9) Explain the term 'end user licence'.
10) Explain the term 'digital'.
11) Is a printer an input device or an output device?
12) List some of the features of an operating system.
13) Explain why virus checking programs must be regularly updated.
14) List a few methods for backing up data.
15) List a few examples of large scale computer use by business.
16) Briefly explain the process of developing a new computer based system.
17) Which is more powerful, a mainframe computer or a laptop computer?
18) Briefly list a few factors that will affect the performance of a PC.
19) What is a PDA?
Sheet016
Practice your ICDL skills
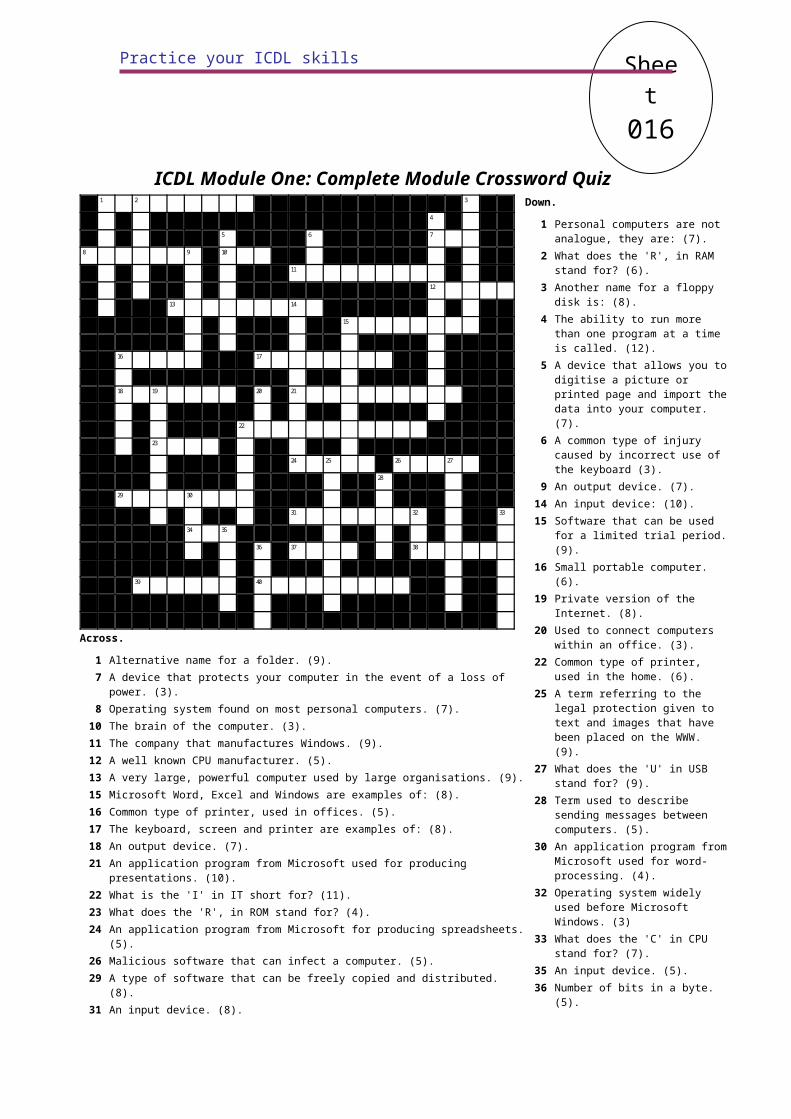
ICDL Module One: Complete Module Crossword Quiz1 2 3
4
5 6 7
8 9 10
11
12
13 14
15
16 17
18 19 20 21
22
23
24 25 26 27
28
29 30
31 32 33
34 35
36 37 38
39 40
Across.
1 Alternative name for a folder. (9).7 A device that protects your computer in the event of a loss of power. (3).8 Operating system found on most personal computers. (7).
10 The brain of the computer. (3).11 The company that manufactures Windows. (9).12 A well known CPU manufacturer. (5).13 A very large, powerful computer used by large organisations. (9).15 Microsoft Word, Excel and Windows are examples of: (8).16 Common type of printer, used in offices. (5).17 The keyboard, screen and printer are examples of: (8).18 An output device. (7).21 An application program from Microsoft used for producing presentations. (10).22 What is the 'I' in IT short for? (11).23 What does the 'R', in ROM stand for? (4).24 An application program from Microsoft for producing spreadsheets. (5).26 Malicious software that can infect a computer. (5).29 A type of software that can be freely copied and distributed. (8).31 An input device. (8).34 When a program loads from disk it is copied into: (3).37 An operating system. (4).38 An output device. (6).39 An application program from Microsoft used for producing databases. (6).40 What does the 'G' in GUI stand for? (9).
Down.
1 Personal computers are not analogue, they are: (7).
2 What does the 'R', in RAM stand for? (6).
3 Another name for a floppy disk is: (8).
4 The ability to run more than one program at a time is called. (12).
5 A device that allows you to digitise a picture or printed page and import the data into your computer. (7).
6 A common type of injury caused by incorrect use of the keyboard (3).
9 An output device. (7).14 An input device: (10).15 Software that can be used for a
limited trial period. (9).16 Small portable computer. (6).19 Private version of the Internet. (8).20 Used to connect computers within an
office. (3).22 Common type of printer, used in the
home. (6).25 A term referring to the legal
protection given to text and images that have been placed on the WWW. (9).
27 What does the 'U' in USB stand for? (9).
28 Term used to describe sending messages between computers. (5).
30 An application program from Microsoft used for word-processing. (4).
32 Operating system widely used before Microsoft Windows. (3)
33 What does the 'C' in CPU stand for? (7).
35 An input device. (5).36 Number of bits in a byte. (5).
ICDL Module 1: CompletePractice your ICDL skills
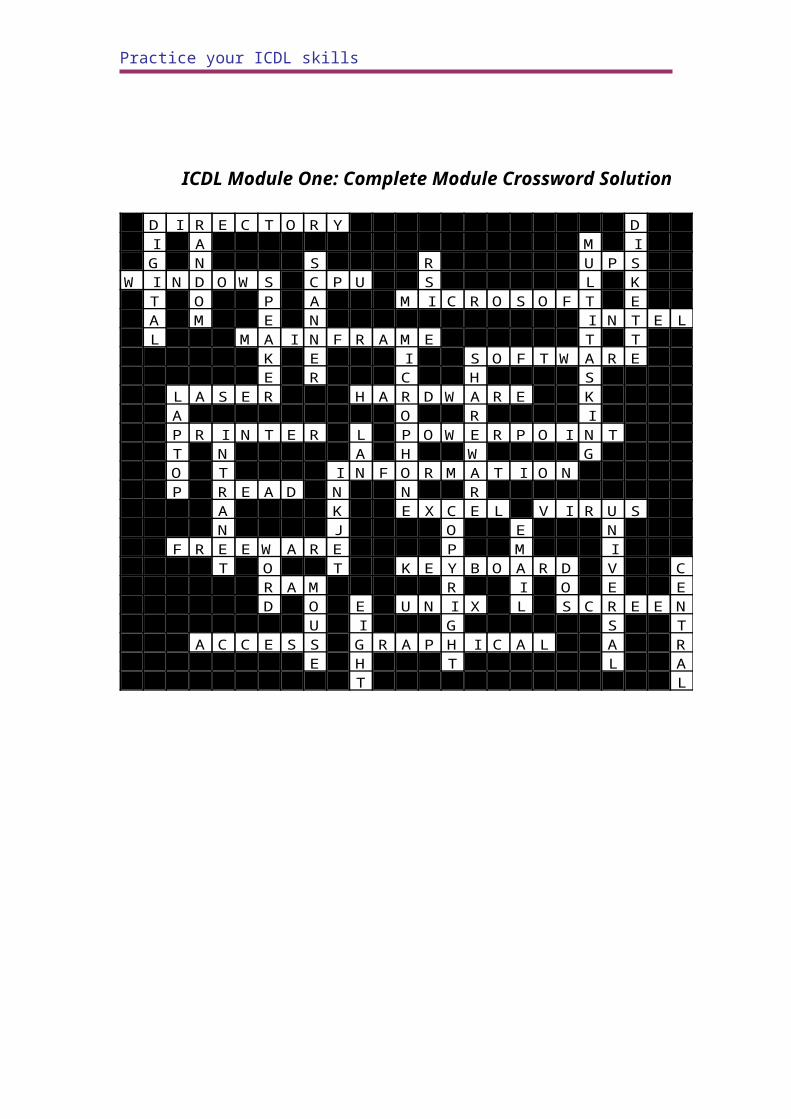
ICDL Module One: Complete Module Crossword Solution
D I R E C T O R Y DI A M IG N S R U P S
W I N D O W S C P U S L KT O P A M I C R O S O F T EA M E N I N T E LL M A I N F R A M E T T
K E I S O F T W A R EE R C H S
L A S E R H A R D W A R E KA O R IP R I N T E R L P O W E R P O I N TT N A H W GO T I N F O R M A T I O NP R E A D N N R
A K E X C E L V I R U SN J O E N
F R E E W A R E P M IT O T K E Y B O A R D V C
R A M R I O E ED O E U N I X L S C R E E N
U I G S TA C C E S S G R A P H I C A L A R
E H T L AT L
ICDL Module 2Practice your ICDL skills
ICDL Module Two - Concepts of Information Technology

Sheet017ICDL Module 2
Practice your ICDL skills
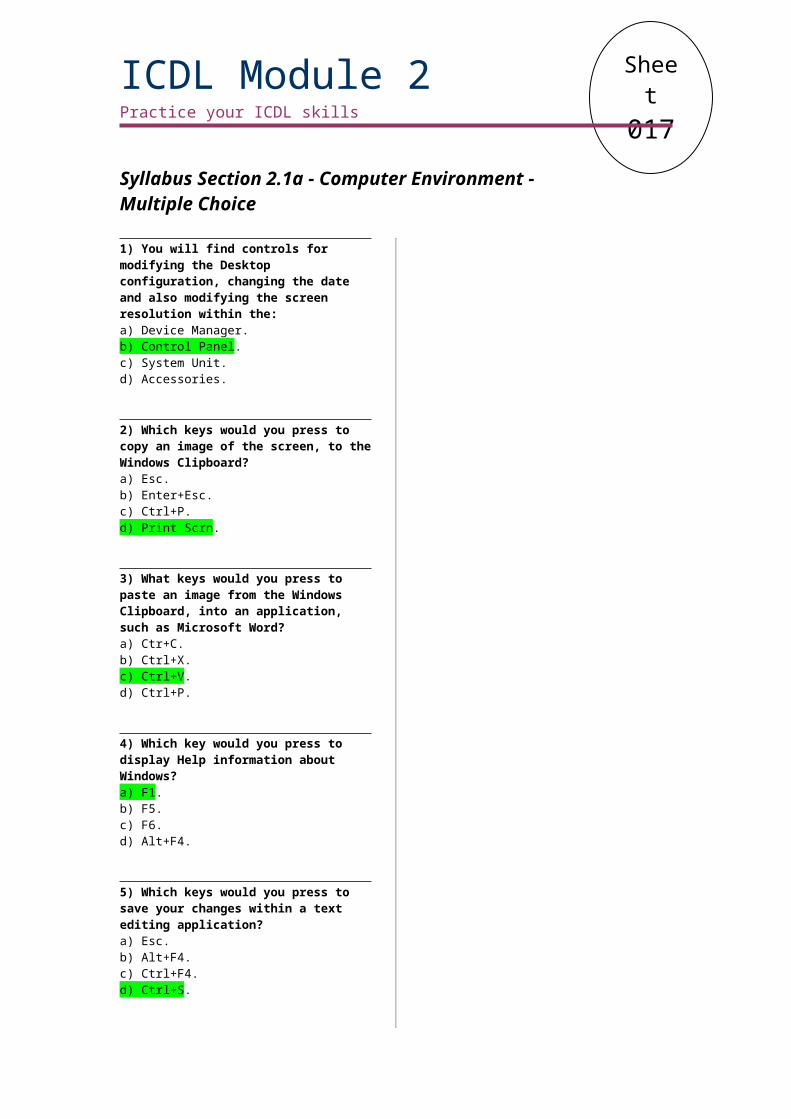
Syllabus Section 2.1a - Computer Environment - Multiple Choice
1) You will find controls for modifying the Desktop configuration, changing the date and also modifying the screen resolution within the:a) Device Manager.b) Control Panel.c) System Unit.d) Accessories.
2) Which keys would you press to copy an image of the screen, to the Windows Clipboard?a) Esc.b) Enter+Esc.c) Ctrl+P.d) Print Scrn.
3) What keys would you press to paste an image from the Windows Clipboard, into an application, such as Microsoft Word?a) Ctr+C.b) Ctrl+X.c) Ctrl+V.d) Ctrl+P.
4) Which key would you press to display Help information about Windows?a) F1.b) F5.c) F6.d) Alt+F4.
5) Which keys would you press to save your changes within a text editing application?a) Esc.b) Alt+F4.c) Ctrl+F4.d) Ctrl+S.
6) Which keys would you press to close a text editing application?a) Esc.b) Ctrl+C.c) Alt+F4.d) Alt+E.
7) Which keys would you press to copy an image of, just the active window, to the Windows Clipboard?a) Home.b) Alt+Print Scrn.c) Alt+Tab.d) Alt+Esc.
8) What is the name of the text editor supplied with Windows?a) Microsoft Word.b) Notepad.c) Calculator.d) Excel.
9) You should shutdown your computer properly, rather than just switching off the power. Is this true or false?a) True.b) False.
10) If a program is not-responding, you should always switch off the power to the computer, and then restart the computer. Is this true or false?a) True.b) False.
11) Once installed, software cannot be uninstalled. Is this true or false?a) True.b) False.

Sheet018
ICDL Module 2Practice your ICDL skills
Syllabus Section 2.1b - Computer Environment - Practice Session
1) Start your Microsoft Windows based computer.
2) Once the computer has finished loading Microsoft Windows, use the correct procedure to close down Microsoft Windows.
3) Restart your Microsoft Windows based computer. Use the correct procedure for restarting Microsoft Windows.
4) Use Microsoft Windows to get information, about the version number, of the type of Windows that is running on your computer.
5) How much RAM is installed on your computer?
6) Adjust the volume setting on your computer.
7) Change the screen saver used by the computer.
8) Change the background colour used by the Desktop on your computer.
9) Check the keyboard language used by your computer.
10) View a list of installed applications. Make sure that you know how you would uninstall an application, but do not actually remove any programs.
11) Display the Help window and see if you can find details of 'what's new' within your version of Microsoft Windows'.
12) Open the Notepad program.
13) Enter your name into the Notepad program.
14) Save the Notepad file, using your full name as the file name.
15) Close the Notepad program.
16) Open the WordPad program.
17) Copy an image of the entire screen to the Clipboard.
18) Paste the image from the Clipboard into the WordPad program.
19) Save the file using just your last name as the file name, and then close the program.
20) If your computer has a floppy disk (diskette), format a disk.
Sheet019
ICDL Module 2Practice your ICDL skills
Syllabus Section 2.2a - The Desktop - Multiple Choice
1) Which keys would you press to switch between open windows?a) Ctrl+C.b) Alt+W.c) Alt+Tab.d) Esc.
2) Which keys would you press to close a window?a) Alt+F4.b) Esc.c) Enter.d) F7.
3) What is the difference between a folder and a directory?a) Macs use directories, while PCs use folders.b) The USA uses the term directories; other countries use the term folders.c) Laptops use folders, desktops use directories.d) They are the same thing.
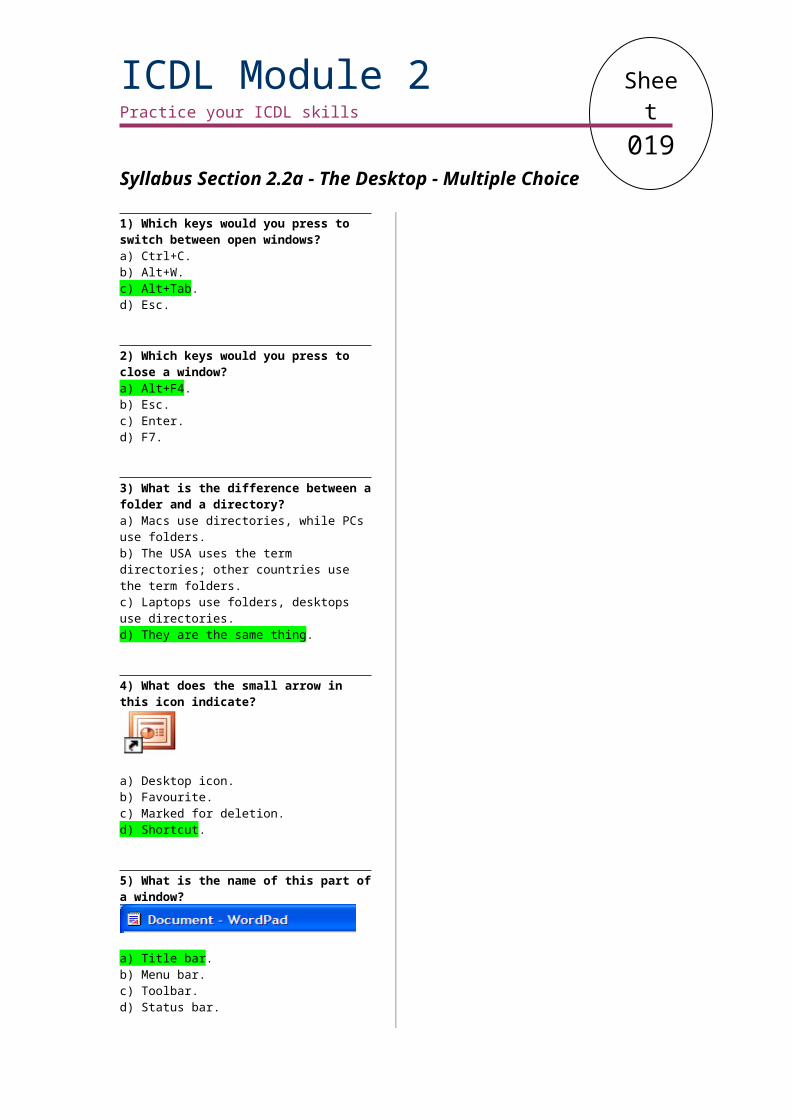
4) What does the small arrow in this icon indicate?
a) Desktop icon.b) Favourite.c) Marked for deletion.d) Shortcut.
5) What is the name of this part of a window?
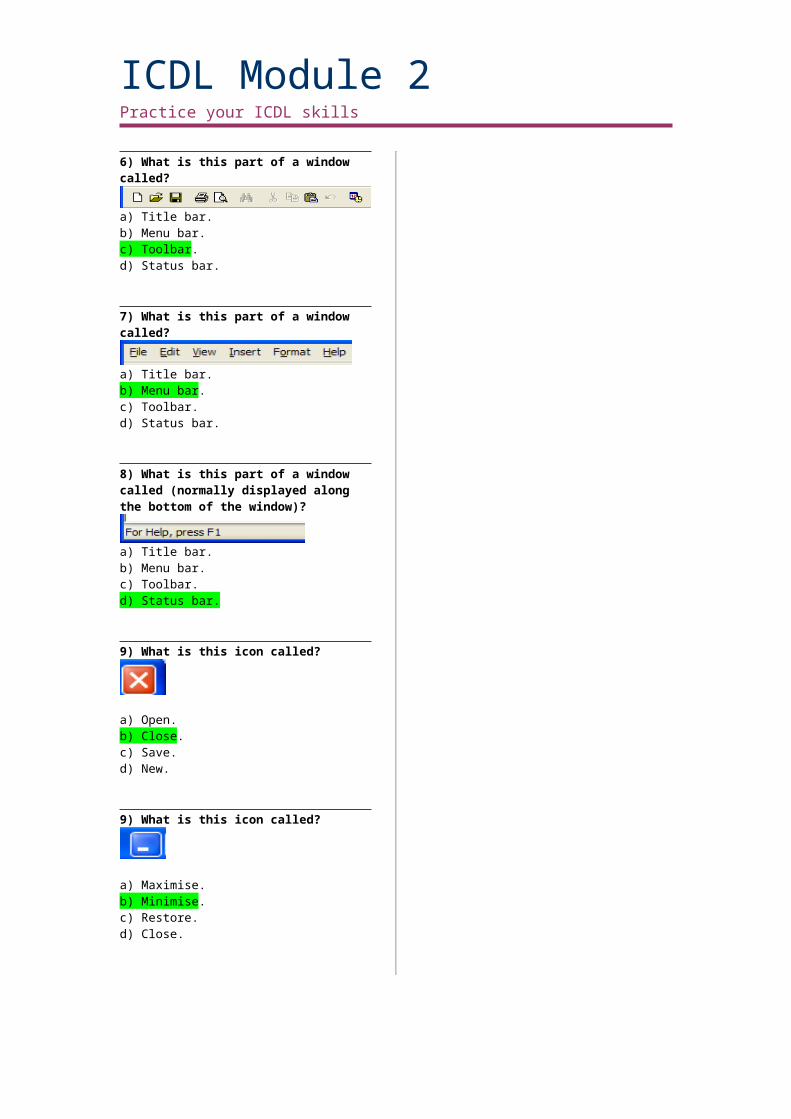
a) Title bar.b) Menu bar.c) Toolbar.d) Status bar.
6) What is this part of a window called?
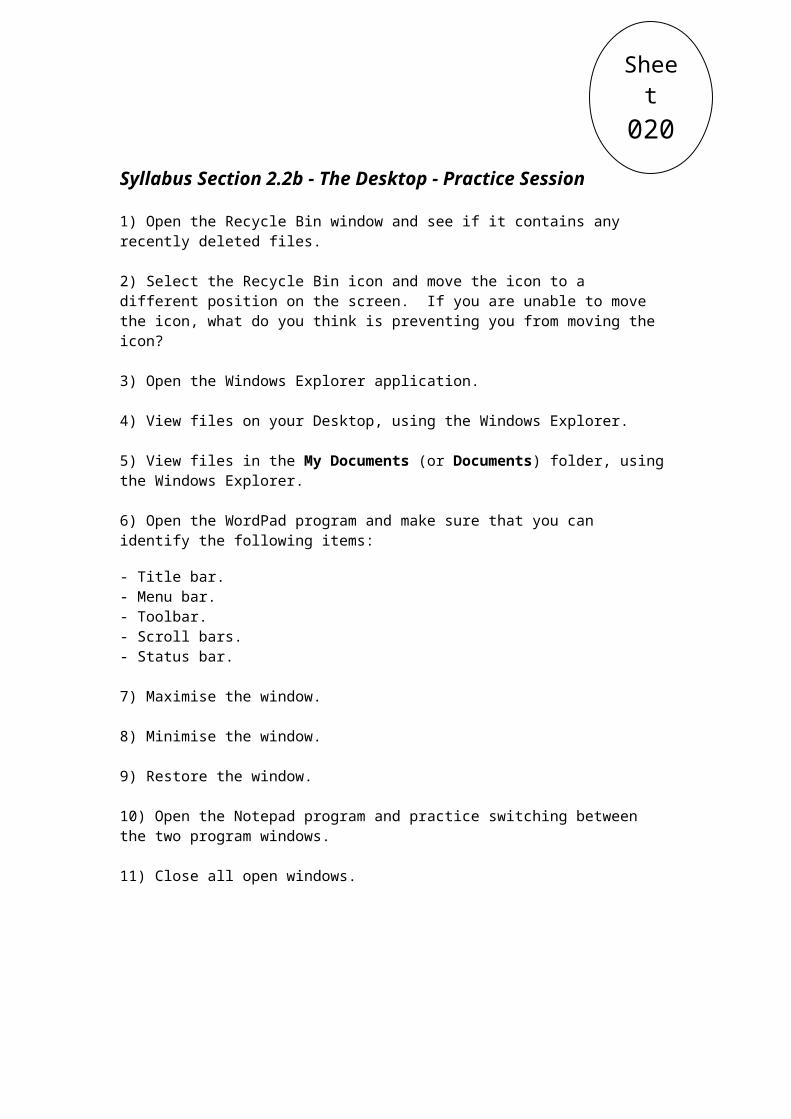
a) Title bar.b) Menu bar.c) Toolbar.d) Status bar.
7) What is this part of a window called?
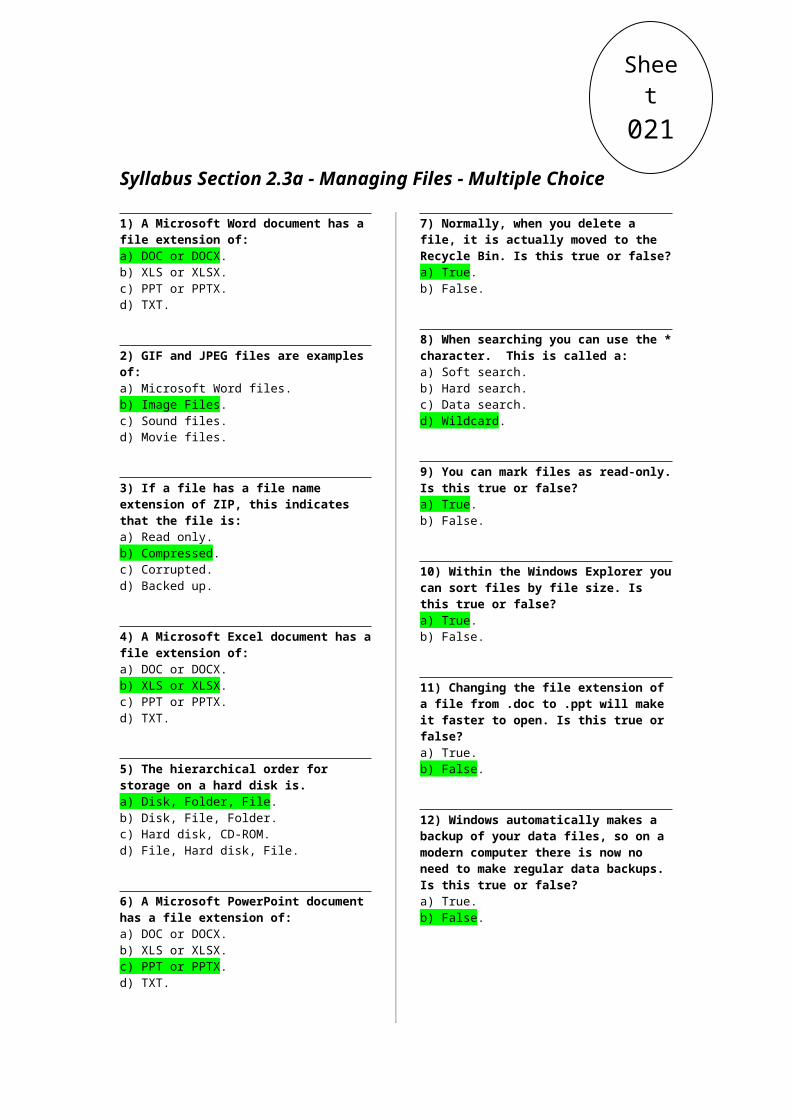
a) Title bar.b) Menu bar.c) Toolbar.d) Status bar.
8) What is this part of a window called (normally displayed along the bottom of the window)?
a) Title bar.b) Menu bar.c) Toolbar.d) Status bar.
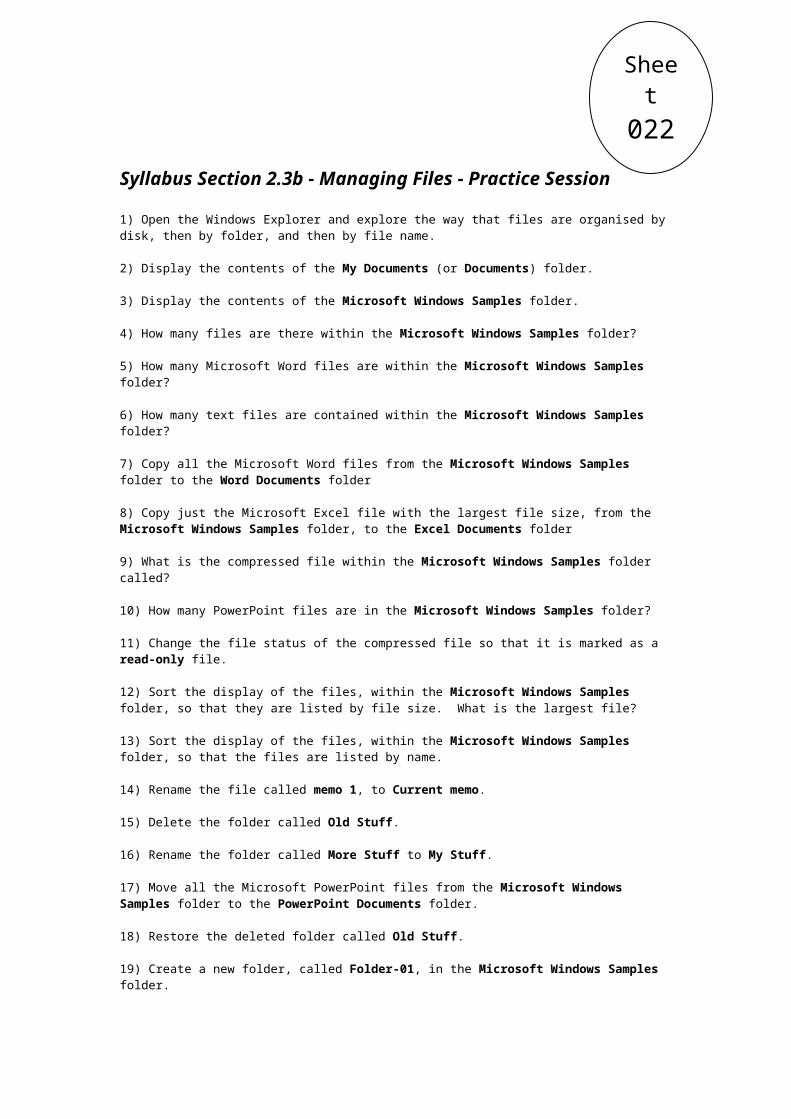
9) What is this icon called?
a) Open.b) Close.c) Save.d) New.
9) What is this icon called?
a) Maximise.b) Minimise.c) Restore.d) Close.
Sheet020
Syllabus Section 2.2b - The Desktop - Practice Session
1) Open the Recycle Bin window and see if it contains any recently deleted files.
2) Select the Recycle Bin icon and move the icon to a different position on the screen. If you are unable to move the icon, what do you think is preventing you from moving the icon?
3) Open the Windows Explorer application.
4) View files on your Desktop, using the Windows Explorer.
5) View files in the My Documents (or Documents) folder, using the Windows Explorer.
6) Open the WordPad program and make sure that you can identify the following items:
- Title bar.- Menu bar.- Toolbar.- Scroll bars.- Status bar.
7) Maximise the window.
8) Minimise the window.
9) Restore the window.
10) Open the Notepad program and practice switching between the two program windows.
11) Close all open windows.

Sheet021
Syllabus Section 2.3a - Managing Files - Multiple Choice
1) A Microsoft Word document has a file extension of:a) DOC or DOCX.b) XLS or XLSX.c) PPT or PPTX.d) TXT.
2) GIF and JPEG files are examples of:a) Microsoft Word files.b) Image Files.c) Sound files.d) Movie files.
3) If a file has a file name extension of ZIP, this indicates that the file is:a) Read only.b) Compressed.c) Corrupted.d) Backed up.
4) A Microsoft Excel document has a file extension of:a) DOC or DOCX.b) XLS or XLSX.c) PPT or PPTX.d) TXT.
5) The hierarchical order for storage on a hard disk is.a) Disk, Folder, File.b) Disk, File, Folder.c) Hard disk, CD-ROM.d) File, Hard disk, File.
6) A Microsoft PowerPoint document has a file extension of:a) DOC or DOCX.b) XLS or XLSX.c) PPT or PPTX.d) TXT.
7) Normally, when you delete a file, it is actually moved to the Recycle Bin. Is this true or false?a) True.b) False.
8) When searching you can use the * character. This is called a:a) Soft search.b) Hard search.c) Data search.d) Wildcard.
9) You can mark files as read-only. Is this true or false?a) True.b) False.
10) Within the Windows Explorer you can sort files by file size. Is this true or false?a) True.b) False.
11) Changing the file extension of a file from .doc to .ppt will make it faster to open. Is this true or false?a) True.b) False.
12) Windows automatically makes a backup of your data files, so on a modern computer there is now no need to make regular data backups. Is this true or false?a) True.b) False.
Sheet022
Syllabus Section 2.3b - Managing Files - Practice Session
1) Open the Windows Explorer and explore the way that files are organised by disk, then by folder, and then by file name.
2) Display the contents of the My Documents (or Documents) folder.
3) Display the contents of the Microsoft Windows Samples folder.
4) How many files are there within the Microsoft Windows Samples folder?
5) How many Microsoft Word files are within the Microsoft Windows Samples folder?
6) How many text files are contained within the Microsoft Windows Samples folder?
7) Copy all the Microsoft Word files from the Microsoft Windows Samples folder to the Word Documents folder
8) Copy just the Microsoft Excel file with the largest file size, from the Microsoft Windows Samples folder, to the Excel Documents folder
9) What is the compressed file within the Microsoft Windows Samples folder called?
10) How many PowerPoint files are in the Microsoft Windows Samples folder?
11) Change the file status of the compressed file so that it is marked as a read-only file.
12) Sort the display of the files, within the Microsoft Windows Samples folder, so that they are listed by file size. What is the largest file?
13) Sort the display of the files, within the Microsoft Windows Samples folder, so that the files are listed by name.
14) Rename the file called memo 1, to Current memo.
15) Delete the folder called Old Stuff.
16) Rename the folder called More Stuff to My Stuff.
17) Move all the Microsoft PowerPoint files from the Microsoft Windows Samples folder to the PowerPoint Documents folder.
18) Restore the deleted folder called Old Stuff.
19) Create a new folder, called Folder-01, in the Microsoft Windows Samples folder.
20) Create a new folder, called Folder-02, in (i.e. under) the Folder-01 folder.
21) Compress all the files within a folder called Presentations, and save the compressed file as Presentation Backup.
22) Copy the compressed file to the Test folder and expand the file, to extract the compressed files, within this folder.
Sheet023
Syllabus Section 2.3c - Managing Files - Practice Session
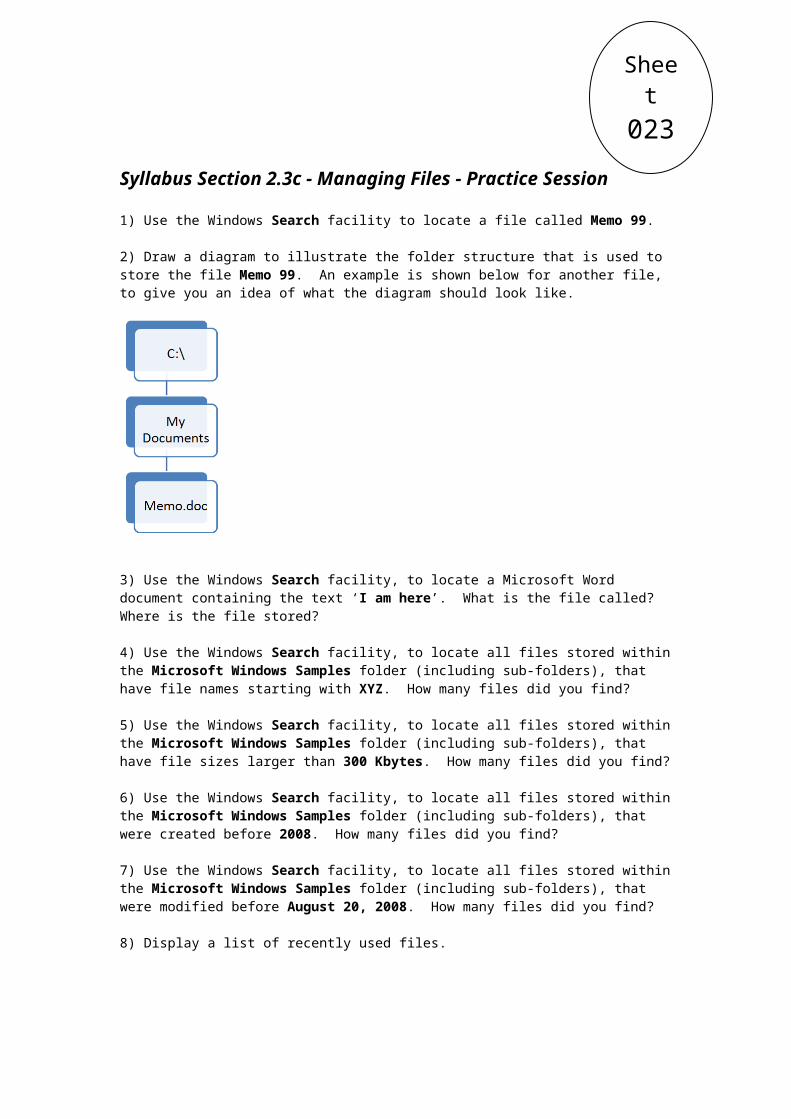
1) Use the Windows Search facility to locate a file called Memo 99.
2) Draw a diagram to illustrate the folder structure that is used to store the file Memo 99. An example is shown below for another file, to give you an idea of what the diagram should look like.
3) Use the Windows Search facility, to locate a Microsoft Word document containing the text ‘I am here’. What is the file called? Where is the file stored?
4) Use the Windows Search facility, to locate all files stored within the Microsoft Windows Samples folder (including sub-folders), that have file names starting with XYZ. How many files did you find?
5) Use the Windows Search facility, to locate all files stored within the Microsoft Windows Samples folder (including sub-folders), that have file sizes larger than 300 Kbytes. How many files did you find?
6) Use the Windows Search facility, to locate all files stored within the Microsoft Windows Samples folder (including sub-folders), that were created before 2008. How many files did you find?
7) Use the Windows Search facility, to locate all files stored within the Microsoft Windows Samples folder (including sub-folders), that were modified before August 20, 2008. How many files did you find?
8) Display a list of recently used files.
Sheet024
Syllabus Section 2.4a - Viruses - Quick Quiz
1) List some of the ways a computer virus could infect a PC.
2) List the reasons for the need to regularly update your virus checking program.
3) Name a virus checking program.
4) If a virus checking program is installed on your PC, try running it to scan your disk. Cancel the scan if it looks like taking a long time.
5) Briefly explain what a virus might do to your computer data.
6) What is meant by the term ‘disinfecting’ a computer?
7) Briefly explain the process of using your particular virus checker, to scan your files, folders and drives.
Sheet025
Syllabus Section 2.5a - Print Management - Practice Session
1) Display a list of printer drivers that are installed on your computer.
2) If more than one printer is installed, which is the active printer, and how can you tell this?
3) If more than one printer is installed, change the active, default printer. Then change it back to the original default printer.
4) Investigate the printer options and make sure that you understand how you would install a new printer driver.
5) Display the Print Manager window for the default printer.
6) Open the WordPad program, type in your name and print the document to the default printer. Close WordPad without saving your document.
7) Print a document and use the Print Manager to pause the print job.
8) Use the Print Manager to restart the paused print job.
9) Print a document and then pause the printing. Delete the print job.
ICDL Module 2: CompletePractice your ICDL skills
ICDL Module Two - Complete Quizzes
Sheet026ICDL Module 2: Complete
Practice your ICDL skills
ICDL Module Two: Complete Module Quiz (1)
1) Explain what is meant by the term file compression.
2) What file name extension is used by Microsoft Excel?
3) Explain the concept of the Windows Clipboard.
4) Describe the relationship between files, folders and disks within the Windows operating system.
5) Explain the concept of the recycle / waste bin.
6) Explain the concept of formatting a disk.
7) What file name extension is used by Microsoft PowerPoint?
8) Explain the concept of a computer virus.
9) What key would you normally press to display Help?
10) Explain the concept of a Desktop shortcut.
11) Explain, why it is important not to change the file name extension.
12) Explain the importance of correctly shutting down a Windows based PC.
13) Explain why regular backing up of your data is a good idea.
14) Why does a virus checker program need to be regularly updated?
15) What is the name of the bar displayed across the top of most Windows based application programs?
16) What is a text editing program?
17) What is the name of the text editing program supplied with Microsoft Windows?
18) List some of the devices used to store data.
19) What file name extension is used by Microsoft Word?
20) Explain the concept of a printer driver.
Sheet027ICDL Module 2: Complete
Practice your ICDL skills
ICDL Module Two: Complete Module Quiz (2)
1) Start your computer and wait for Windows to load. If necessary logon.
2) Display help and print out a help topic.
3) Open the WordPad program. Copy an image of the entire screen to the WordPad document.
4) Save the WordPad document within the Microsoft Windows Samples folder, which in turn, is contained within the My Documents, (or Documents) folder.
5) Use the Windows Explorer to display the contents of the Microsoft Windows Samples folder, which in turn is contained within the My Documents (or Documents) folder.
6) Display the contents of the Microsoft Windows Samples folder.
7) Create a new folder called My Own Folder.
8) Delete a folder called Old Memos.
9) Copy all the files that start with the character 'CCT' to the folder you have just created.
10) Rename a folder called XZY to ABC.
11) Print a file called Meeting.
12) Delete a file called Report, located within the Microsoft Windows Samples folder, which in turn is contained within the My Documents (or Documents) folder.
13) Restore the deleted file from the recycle/waste bin.
14) Create a document using Notepad, enter your name and save the document using the file name My Details in the Microsoft Windows Samples folder, which in turn is contained within the My Documents (or Documents) folder.
15) Create a Desktop icon (of your choice).
16) Change the file status of a file called Current Sales, so that it is marked as 'read only'.
17) How many Excel spreadsheet files are contained within the folder called 'Keep These'?
18) Change the Desktop background to display a picture.
19) Change the volume setting on the computer.
20) Investigate your computer and make a note of how much RAM is installed and also what version of Microsoft Windows is installed.
Sheet028ICDL Module 2: Complete
Practice your ICDL skills
ICDL Module Two: Complete Module Crossword Quiz1 2 3
4
5
6
7
8 9
10 11
12
13 14 15
16 17 18 19
20 21
22 23 24 25
26 27
28
29 30
31 32
33 34 35
36
37
Across 4 Common file name extension used to indicate a temporary file. (3)5 Within the Windows Explorer you can sort files by: (4)7 Name of a bar containing icons or buttons, displayed across the top of an
application. (7)8 What does the 'R' in RTF stand for? (4)
10 Command used to move a selected item to the Clipboard. (3)13 What does the 'R', in ROM stand for? (4)16 What command is the keyboard shortcut, Ctrl+V equivalent to? (5)17 The term used to describe the screen background on a Windows based
computer. (7)19 File extension used by program files. (3)20 The process used to describe copying a Word file from disk into memory. (4)21 What does the 'P' in PDF stand for? (8)22 A special type of Desktop icon that points to an actual program, and is indicated
by a small arrow. (8)24 Computer screen resolution is measured in: (6)26 An alterative name for a floppy disk. (8)28 An operating system from Microsoft. (7)29 Name of the button used to reduce an application down to an icon. (8)31 When you load an application program, it is copied into: (6)33 Common file name extension used to store pictures (4)36 Within the Windows Explorer you can sort files by. (4)37 When using an application program, you store your documents on disk as: (5)
Down 1 A name for software errors. (4)2 Text editing application included with
Windows. (7)3 Common file name extension used by
compressed files. (3)6 Files with a .DOC, or .DOCX file
extensions are created using Microsoft: (4)
7 Common file name extension used to store text. (3)
9 Cross shaped icon at the top-right corner of most program windows. (5)
10 Area of memory that you can 'Copy' or 'Cut' items to. (9)
11 Within the Windows Explorer you can sort files by: (4)
12 Name of the button used to make an application fill the screen. (8)
14 What is normally displayed when you press the F1 key? (4)
15 Files with a .PPT, or .PPTX file extension are created using Microsoft: (10)
17 An alternative word for the word 'folder'. (9)
18 Name of the Desktop button, normally displayed at the bottom-left of the screen. (5)
19 Files with a .XLS, or .XLSX file extension are created using Microsoft: (5)
23 What does the 'R', in RAM stand for? (6)25 You can prevent images being 'burnt'
onto your screen by using a screen: (5)27 To switch between open applications
you can press the Alt key together with which other key? (3)
30 The pictorial representation of programs on the Windows Desktop. (5)
32 To display the Start Menu you would press the Ctrl key and which other key? (3)
34 File name extension used by Adobe Acrobat files. (3)
35 Common file name extension used to store pictures. (3)
ICDL Module 2: CompletePractice your ICDL skills
ICDL Module Two: Complete Module Crossword Solution
B N ZU O IG T M PS I Z E
P WT O O L B A R OX D R I C H
C U T D L TL M O YI R E A D H S P PP A S T E X E D E S K T O P E X EB I L I T W XO P E N M P O R T A B L E CA I E R R ER S H O R T C U T P I X E L SD I S K E T T E A T O A
A W I N D O W S I VB D R M I N I M I S E
M E M O R Y T C RS M J P E G OC D I N A M E
F F I L E S
ICDL Module 3Practice your ICDL skills
ICDL Module Three - Word Processing
Sheet029ICDL Module 3
Practice your ICDL skills
Syllabus Section 3.1a - Using Microsoft Word - Toolbar Buttons
1) What is the function of this icon?
a) Open.b) Close.c) Save.d) New.
2) What is the function of this icon?
a) Open.b) Close.c) Save.d) New.
3) What is the function of this icon?
a) Open.b) Close.c) Save.d) New.
4) What is the function of this icon?
a) Font Size.b) Landscape.c) Zoom level.d) Screen width.
5) What is the function of this icon?
a) New.b) Open.c) Close.d) Save As.
6) What is the function of this icon?
a) Paragraph formatting.b) Change case.c) Open.d) Show / Hide.
7) What is the function of this icon?
a) Zoom.b) Print Preview.c) Increase font size.d) Decrease font size.
8) Which of these is a non-printing character?a) Registered trademark.b) Currency symbol.c) Tab spaces.d) Copyright symbol.
Sheet030
ICDL Module 3Practice your ICDL skills
Syllabus Section 3.1b - Using Microsoft Word - Shortcuts
1) Open a document.a) Alt+O.b) Shift+N.c) Ctrl+O.d) Shift+O.
2) Create a new document.a) Shift+N.b) Ctrl+N.c) Alt+O.d) Ctrl+O.
3) Save a document.a) Ctrl+S.b) Tab+S.c) Alt+S.d) Shift+S.
4) Switch between open documents.a) Alt+Tab.b) F1.c) F9.d) Ctrl+N.
5) Display the help window.a) Alt+O.b) Shift+F9.c) F1.d) F6.
6) Close a document.a) Alt+O.b) Alt+F4.c) Ctrl+F4.d) Shift+F4.
7) Toggle the display of a task pane.a) Alt+O.b) Shift+O.c) Ctrl+F1.d) Shift+F1.
8) Switch to Normal view.a) F1.b) Alt+Ctrl+N.c) Ctrl+N.d) Alt+N.
9) Display the Save As dialog box.a) Shift+F1.b) F1.c) F12.d) F3.
10) Close the Word program.a) Alt+Tab.b) F1.c) Alt+F4.d) Ctrl+F4.
11) Switch to Print Layout view.a) Alt+Ctrl+P.b) F1.c) F2.d) F9.
12) Switch to Outline view.a) Shift+F2.b) Shift+F1.c) Tab.d) Alt+Ctrl+O.
Sheet031
ICDL Module 3Practice your ICDL skills
Syllabus Section 3.1c - Using Microsoft Word - Practice Session
1) Open the Microsoft Word program.
2) Display the Open dialog box.
3) Display the contents of the My Documents (or Documents) folder. Then display the contents of the Microsoft Word Samples folder, which is located under the My Documents (or Documents) folder.
4) Open a Word document called Sales 2006. Open two more Word documents called Sales 2007 and Sales 2008.
5) Practice switching between the three documents.
6) Close the Sales 2006 and Sales 2007 documents.
7) Create a new document, and type you name into the document.
8) Save the document you have just created, into the Microsoft Word Samples folder, using the file name, Names.
9) Close all open documents and then close the Microsoft Word program. Restart the Word program.
10) Open a file called Sales 2008, and then save the file using the Rich Text Format (RTF) (within the Microsoft Word Samples folder).
11) Save the file in a format that is compatible with an earlier version of Word, (within the Microsoft Word Samples folder).
12) Save the file with a web compatible format, (within the Microsoft Word Samples folder).
13) Close the Microsoft Word program, and then reopen the program. Open a file called Font Size. Make a note of the current zoom magnification level.
14) Increase the zoom magnification so that you can read the bottom line of text. Restore the zoom magnification to the original level.
15) Display an additional toolbar, such as the Picture or Outline toolbar. Then hide the toolbar that you have just displayed.
16) Modify the default Word file location, to point to the Microsoft Word Samples folder, located under the My Documents (or Documents) folder.
17) Open a document called Show Hide. Display the tabs set within the document using show/hide. How many tabs can you see? Close the document.

Sheet032
ICDL Module 3Practice your ICDL skills
Syllabus Section 3.1d - Using Microsoft Word - Practice Session
1) Create a new document based on a Fax template. Enter information into the document and save the document using the file name 'My Fax Page', in the Microsoft Word Samples folder, which is located under the My Documents (or Documents) folder.
2) Create a new document based on a Memo template. Enter information into the document and save the document using the file name 'My Memo Page', in the Microsoft Word Samples folder, which is located under the My Documents (or Documents) folder.
3) Display Help relating to 'what's new' in your version of Microsoft Word.
4) Print out a page of Help information.
5) If your computer is connected to the Internet, display an online Help page.
6) Change the Word setup options so that it stores your name as the 'user name'.
7) Set the default opening and saving folder to the Microsoft Word Samples folder, which is located under the My Documents (or Documents) folder.
8) Open a document called Data. Save the file using the name 'Text data', as a text file, within the in the Microsoft Word Samples folder, which is located under the My Documents (or Documents) folder. Close the file.
9) Open a document called 'Annual Sales'. Save the document as a template in the Microsoft Word Samples folder, which is located under the My Documents (or Documents) folder.
10) Open a document called 'Annual Sales'. Save the document using an alternative file format, such as Microsoft Works.
11) View the open document in a range of different views, such as Normal, Print Layout, Outline and Full Screen. Also view the document within the Print Preview layout.
12) Close all open documents and close Word.
Sheet033
ICDL Module 3Practice your ICDL skills
Syllabus Section 3.2a - Main Operations - Shortcuts & Toolbar Buttons
1) Select to the end of a line.a) Home.b) Shift+End.c) Alt+Home.d) Alt+End.
2) Select to the end of a paragraph.a) Alt+End.b) Ctrl+Shift+Down Arrow.c) Alt+Shift.d) Ctrl+End.
3) Select to the start of a line.a) Shift+Home.b) Shift+End.c) Ctrl+Home.d) Ctrl+F9.
4) Select to the start of a documenta) Ctrl+Shift+Home.b) Alt+Shift+Home.c) Alt+Shift+F6.d) Alt+Shift.
5) Select to the end of a documenta) Alt+End.b) Alt+Home.c) Ctrl+Home.d) Ctrl+Shift+End.
6) Select the entire documenta) Ctrl+A.b) Ctrl+S.c) Ctrl+B.d) Ctrl+C.
7) Insert the copyright symbola) Home+C.b) Alt+C.c) Alt+Ctrl+C.d) F10.
8) Insert the registered trademark symbol.a) Alt+Ctrl+R.b) Alt+T.c) Alt+M.d) Shift+T.
9) Insert the trademark symbola) Alt+T.b) Alt+S.c) Alt+Home.d) Alt+Ctrl+T.
10) Undo the last actiona) F8.b) Ctrl+J.c) Ctrl+A.d) Ctrl+Z.
11) Display the Find dialog box within Worda) Ctrl+D.b) Ctrl+H.c) Ctrl+A.d) Ctrl+F.
12) Display the Replace dialog box within Worda) Ctrl+A.b) Ctrl+H.c) Ctrl+M.d) Ctrl+R.
14) Move selected text within Word to the Clipboard.a) Ctrl+C.b) Ctrl+V.c) Ctrl+X.d) Ctrl+A.
Sheet034
Syllabus Section 3.2b - Main Operations - Practice Session
1) Open a document called Manipulating Text, located within the Microsoft Word Samples folder, which in turn is under the My Documents (or Documents) folder.
2) Follow the instructions within the document and move a line of text, to the end of the document.
3) Follow the instructions within the document to insert your name.
4) Insert the trademark symbol, as indicated within the document.
5) Insert the registered trademark symbol, within the document.
6) Insert the copyright symbol, as indicated within the document.
7) As directed within the document, practice selecting a single character.
8) As directed within the document, practice selecting a single word.
9) As directed within the document, practice selecting a line.
10) As directed within the document, practice selecting a sentence.
11) As directed, practice selecting an entire paragraph.
12) As directed within the document, practice selecting all the text.
13) As directed within the document, delete a paragraph above
14) Undo the deletion. Then redo this deletion.
15) As directed, copy a line of text to the start of the document.
16) Use the ‘Find’ facility to find the word 'PowerPoint'.
17) Find the phrase 'start of the document'.
18) Use ‘Replace’ to replace the text 'MS' with the text 'Microsoft'.
19) Use the ‘Replace’ facility to replace the phrase 'the MS Office family of products' with the text 'Microsoft Office'.
20) Save your changes and close Microsoft Word.
Sheet035
Syllabus Section 3.2c - Main Operations - Practice Session
1) Open a document called Editing, located within the Microsoft Word Samples folder, which in turn is under the My Documents (or Documents) folder.
2) Within the first paragraph, insert the letter 'a' to correct the sentence.
3) Within the second paragraph, insert the word 'line' after the word 'This'.
4) Within the third line select the word 'line' and overtype the word 'paragraph'.
5) Open the document called 'One'. Open another document called 'Two'.
6) Copy line 'a' to the bottom of the document.
7) Copy line 'b' to the second document.
8) Move line 'c' to the bottom of this document.
9) Move line'd' to the second document.
10) Open a document called Deletion.
12) Delete a word within the document, as directed within the document.
13) Delete a line within the document, as directed within the document.
14) Save your changes and close Word.
Sheet036
Syllabus Section 3.3a - Formatting - Toolbar Buttons
1) What is the function of this icon?
a) Bold.b) Italic.c) Underline.d) Blue colour.
2) What is the function of this icon?
a) Spell check.b) Increase font size.c) Decrease font size.d) Font colour.
3) What is the function of this icon?
a) Left align.b) Right align.c) Centre.d) Justify.
4) What is the function of this icon?
a) Left Align.b) Right Align.c) Bullets.d) Numbering.
5) What is the function of this icon?
a) Left Align.b) Right Align.c) Bullets.d) Numbering
6) What is the function of this icon?
a) Left Align.b) Right Align.c) Font Size.d) Font Type.
7) What is the function of this icon?
a) Left align.b) Right align.c) Increase Indent.d) Decrease indent.
8) What is the function of this icon?
a) Font size.b) Font colour.c) Foreground colour.d) Background colour.
.
Sheet037
Syllabus Section 3.3b - Formatting - Shortcuts
1) Apply bold formatting.a) Ctrl+A.b) Ctrl+B.c) Shift+B.d) Alt+B.
2) Apply italic formatting.a) Alt+S.b) Ctrl+Spacebar.c) Alt+I.d) Ctrl+I.
3) Apply underline formatting.a) Alt+I.b) Ctrl+U.c) Alt+I.d) Ctrl+U.
4) Justify text.a) Ctrl+A.b) Ctrl+J.c) Ctrl+K.d) Ctrl+D.
5) Increase font size by exactly 1 pt.a) Ctrl+1.b) Ctrl+2.c) Ctrl+3.d) Ctrl+].
6) Decrease font size by exactly 1 pt.a) Ctrl+1.b) Ctrl+[.c) Ctrl+A.d) Ctrl+S.
7) Indent a paragraph from the right.a) Ctrl+L.b) Ctrl+R.c) Ctrl+A.d) Ctrl+S.
8) Indent a paragraph from the left.a) Ctrl+L.b) Ctrl+R.c) Ctrl+A.d) Ctrl+S.
9) Apply subscript formatting.a) Ctrl+Equals sign.b) Ctrl+S.c) Alt+S.d) Shift+S.
10) Apply double underlining.a) Ctrl+T.b) Ctrl+Shift+D.c) Ctrl+D.d) Alt+D.
11). Create a hanging indent.a) Ctrl+T.b) Ctrl+H.c) Ctrl+I.d) Ctrl+A.
12) Remove paragraph formattinga) Ctrl+P.b) Ctrl+Q.c) Ctrl+L.d) Ctrl+S.
13) Remove manual character formatting.a) Ctrl+A.b) Ctrl+Spacebar.c) Ctrl+R.d) Ctrl+C.
Sheet038
ICDL Module 3Practice your ICDL skills
Syllabus Section 3.3c - Formatting - Multiple Choice
1) Horizontal text alignment options include. Left, right, centre and.a) Sideways.b) Up.c) Justify.d) Down.
2) The two types of page orientation are Portrait and:a) Landscape.b) Double sided.c) Up.d) Down.
3) Page breaks and line breaks are the same thing. Is this true or false?a) True.b) False.
4) The 2 in the formula E=MC2 is formatted using:
a) Subscript.b) Superscript.c) Lower case.d) All caps.
5) The 2 in the formula H2O is formatted using.
a) Subscript.b) Superscript.c) Lower case.d) All caps.
6) The space at the top, bottom, left and right of the page is called the.a) Fill section.b) Field.c) Page.d) Margin.
7) To insert a soft carriage return (line break), press the Enter key while depressing which other keya) Alt.b) Ctrl.c) Shift.d) Tab.
8) The default text colour is white. Is this true or false?a) True.b) False.
9) Automatic page numbering involves the use of a Word:a) Formula.b) Table.c) Style.d) Field.
10) Paragraph marks are displayed by default. Is this true or false?a) True.b) False.
11) Adding a line around selected text involves adding a:a) Fill colour.b) Border.c) Field.d) Shadow.
11) To insert a page break, press the Enter key, and which other key?a) Alt.b) Ctrl.c) Shift.d) Tab.
12) Date fields are always updated automatically, to display the current date. Is this true or false?a) True.b) False.
Sheet039
Syllabus Section 3.3d - Formatting - Practice Session
1) Open a file called Formatting-01, located in the Microsoft Word Samples folder, which in turn is contained within the My Documents (or Documents) folder.
2) There are 4 tab spaces within the document. Find them and remove them (use show / hide to see them).
3) Remove indenting from a paragraph, as indicated within the document.
4) Remove the document footer text.
5) Remove numbering formatting from the list within the document.
6) Remove bulleted formatting from the list within the document.
7) Change the colour of the text used by one of the paragraphs within the document.
8) Change the font type used by one of the paragraphs within the document.
9) Change the font size used by one of the paragraphs within the document.
10) Change the capitalisation used by one of the paragraphs, so that it is displayed using only upper case letters.
11) Apply a heading style to one of the paragraphs.
12) Apply double line spacing to the paragraph that you removed the indent from.
13) Apply bullet style formatting to one of the lists, and use one of the alterative bullet styles.
14) Apply numbering style formatting to one of the lists, and use one of the alterative numbering styles.
15) Save your changes and close the document.
Sheet040
ICDL Module 3Practice your ICDL skills
Syllabus Section 3.3e - Formatting - Practice Session
1) Open a file called Formatting-02, located in the Microsoft Word Samples folder, which in turn is contained within the My Documents (or Documents) folder.
2) Create a footer using your name as the footer text.
3) Change the case of the first line, so that it is displayed as all upper case.
4) Format the list of countries so that they are bulleted.
5) Centre the top line.
6) Delete the page break, that has been inserted towards the bottom of the document
7) Justify the text in the last paragraph.
8) Double the size of the top margin.
9) Apply automatic page numbering, so that it is displayed at the top of the document.
10) Indent the second line.
11) Save your changes and close the document.
12) Open a document called Hyphenation. Experiment with enabling and disabling automatic hyphenation.
13) Open a document called Styles. As directed within the document, apply a style to a word, a line and to a whole paragraph
14) Save your changes and close Microsoft Word.
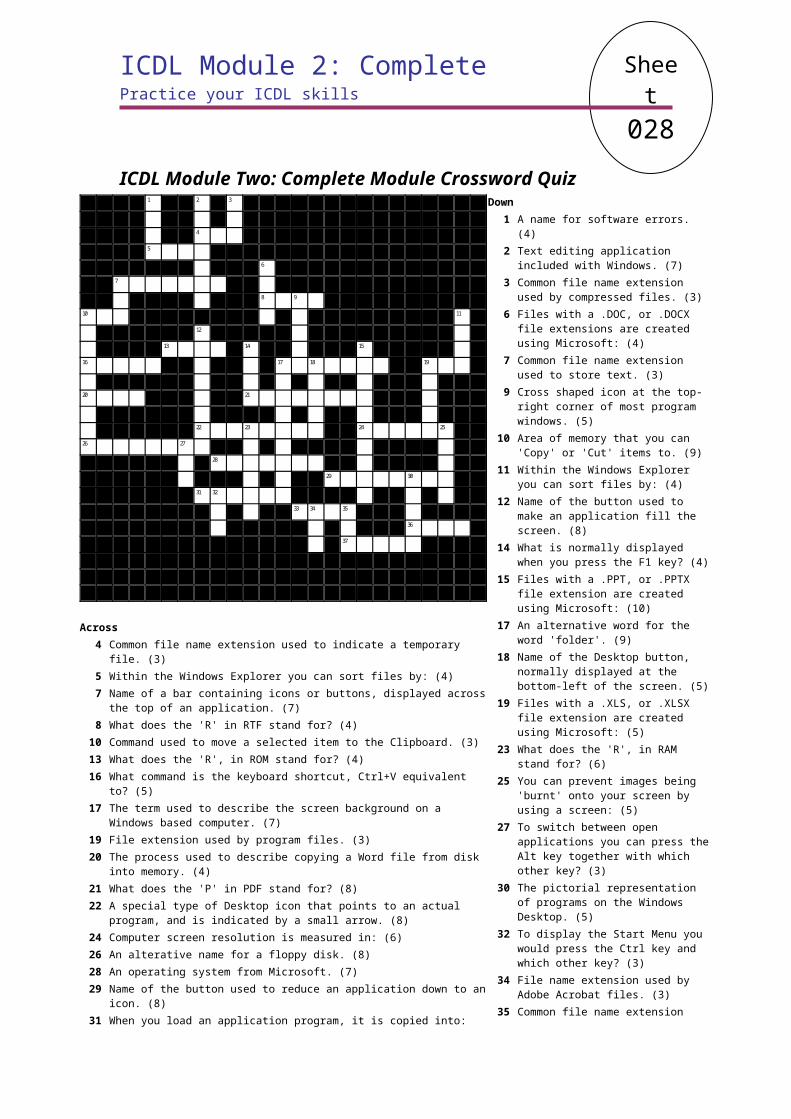
Sheet041
Syllabus Section 3.3f - Formatting - Practice Session
1) Open a file called Formatting-03, located in the Microsoft Word Samples folder, which in turn is contained within the My Documents (or Documents) folder.
2) Align paragraph (a) to the left.
3) Align paragraph (b) to the right.
4) Centre paragraph (c).
5) Apply bold formatting to paragraph (d).
6) Apply italic formatting to paragraph (e).
7) Apply underline formatting to paragraph (f).
8) Apply bold and italic formatting to paragraph (d).
9) Apply italic and underlining formatting to paragraph (e).
10) Apply bold and italic formatting to paragraph (f).
11) Format the formula for water, as illustrated within the document.
12) Format Einstein's formula, as illustrated within the document.
13) Format the text within paragraph (j) so that it uses normal sentence case formatting.
14) Format the text within paragraph (k) so that it uses 'title case' formatting.
15) Remove the line break within paragraph (l).
16) Insert a line break within paragraph (m).
17) Copy the formatting from one paragraph to another, at the bottom of the document.
18) Justify the text within paragraph (n).
19) Save your changes and close Microsoft Word.
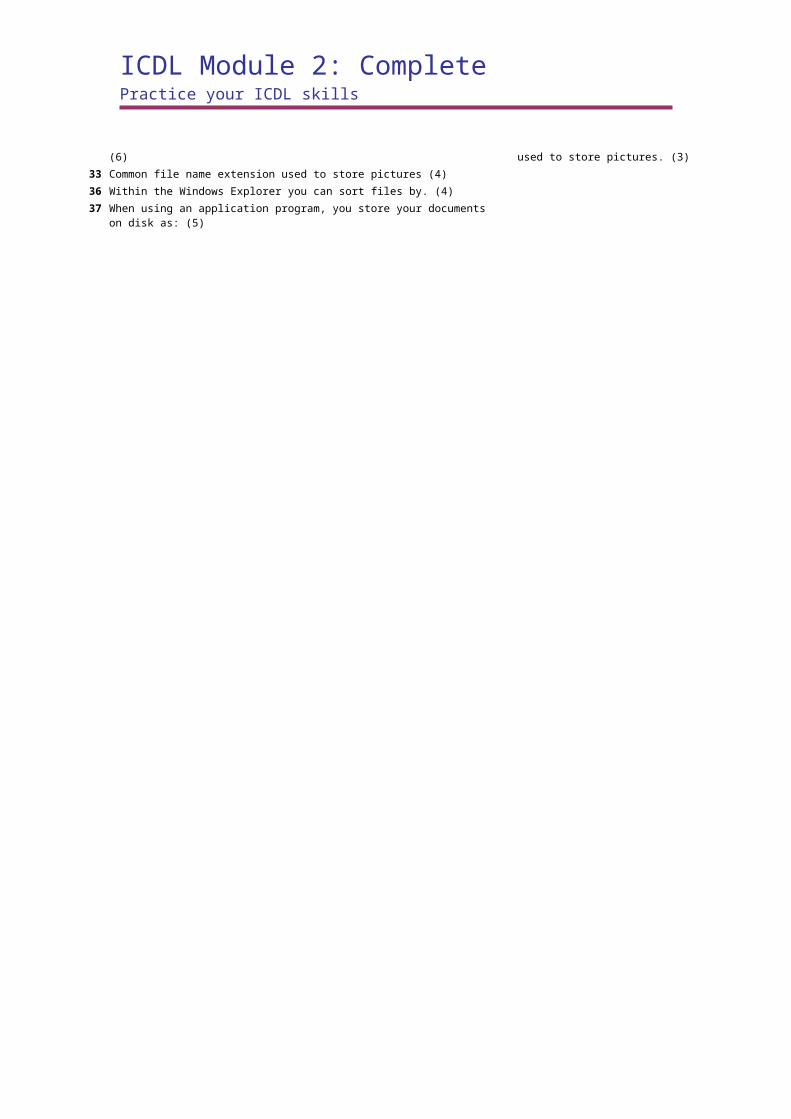
Sheet042
ICDL Module 3Practice your ICDL skills
Syllabus Section 3.3g - Formatting - Practice Session
1) Open a file called Formatting-04, located in the Microsoft Word Samples folder, which in turn is contained within the My Documents (or Documents) folder.
2) Apply a left indent to paragraph (b).
3) Apply a right indent to paragraph (c).
4) Apply a left and right indent to paragraph (d).
5) Apply indenting to just the first line within paragraph (e).
6) Apply a hanging indent to paragraph (f).
7) Apply single underlining to the first sentence within paragraph (g).
8) Apply double underlining to the first sentence within paragraph (h).
9) Open a file called Formatting-05, located in the Microsoft Word Samples folder, which in turn is contained within the My Documents (or Documents) folder.
10) Double the spacing above and below paragraph (b).
11) Apply a top border to paragraph (d).
11) Apply a bottom border to paragraph (e).
11) Apply a box border to paragraph (f).
11) Apply a shading effect to paragraph (g).
12) Insert a manual page break after every paragraph, so that every paragraph is displayed on a separate page.
13) Save your changes and close Microsoft Word.
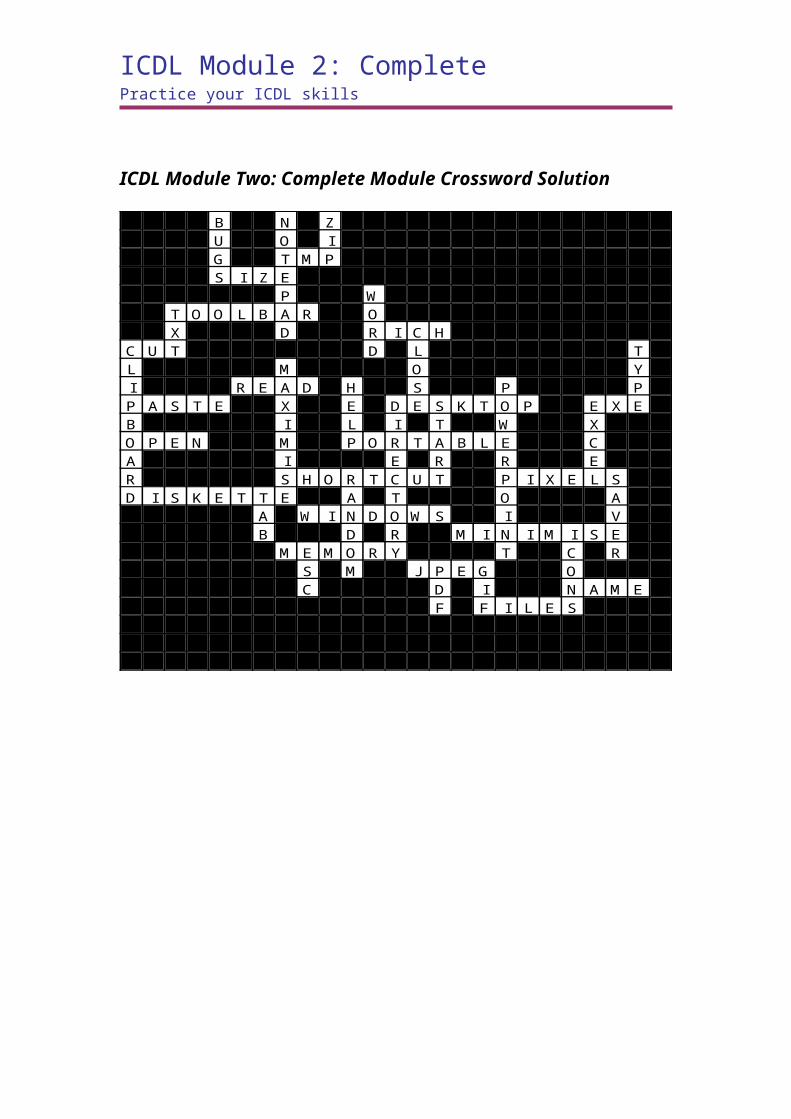
Sheet043
Syllabus Section 3.3h - Formatting - Practice Session
1) Open a file called Formatting-06, located in the Microsoft Word Samples folder, which in turn is contained within the My Documents (or Documents) folder.
2) Change the paper size to the normal page size used within your country. Also change the page orientation.
3) Modify the existing header by inserting a copyright symbol in front of the text.
4) Delete the existing footer.
5) Insert a field within the header, to display the number of pages.
6) Insert a field within the footer, to display the date.
7) Insert a field within the footer, to display file storage name & location.
8) Double the size of the top margin.
9) Double the size of the bottom margin.
10) Half the size of the left margin.
11) Half the size of the right margin.
12) Insert 4 manual page breaks, so that you can see the effect of the page numbering.
13) Save the file using the file name My Fields. Close the document. Reopen the document and you should see that the footer displays the new file name and storage location.
14) Open a file called Formatting-07.
15) Apply bullet formatting to the first list. Apply a different bullet style to the bulleted list.
16) Apply numbering formatting to the second list. Apply a different numbering style to the numbered list.
17) Save your changes and close Microsoft Word.
Sheet044
ICDL Module 3Practice your ICDL skills
Syllabus Section 3.4a - Objects - Toolbar Buttons
1) What is the function of this icon?
a) Insert Word table.b) Insert Excel Table.c) Insert Columns.d) Insert Picture.
2) What is the function of this icon?
a) Insert Word table.b) Insert Excel Table.c) Insert Columns.d) Insert Picture.
3) What is the function of this icon?
a) Converts Word table into an Excel table.b) Insert a table.c) Displays the 'Table & Borders' toolbar.d) Deletes the selected table.
4) What is the function of this icon?
a) Displays the Drawing toolbar.b) Inserts a picture.c) Inserts WordArt.d) Inserts a table.
5) What is the function of this icon?
a) Inserts a table.b) Displays the drawing toolbar.c) Inserts Clip Art.d) Exits Word.
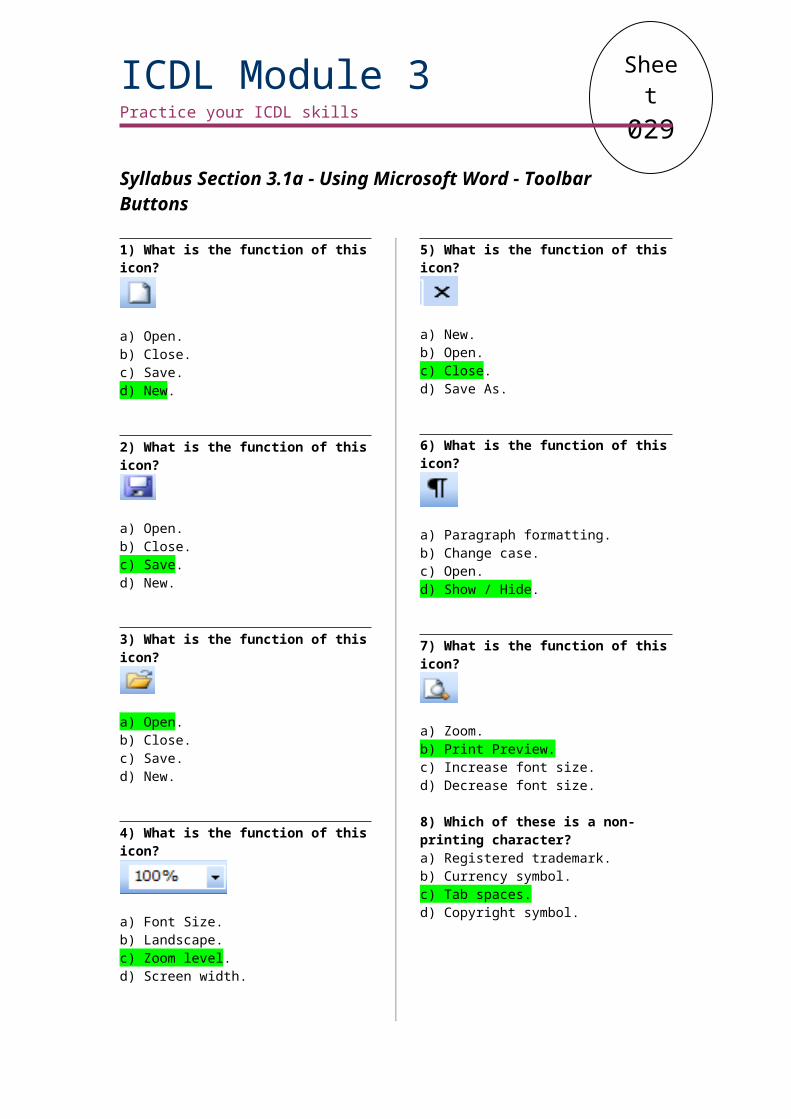
Sheet045
Syllabus Section 3.4b - Objects - Shortcuts
1) Move to the next table cell.a) Alt.b) Ctrl.c) Tab.d) Alt+F9.
2) Go to the last cell in a table row.a) Ctrl+Home.b) Alt+End.c) Alt+C.d) Ctrl+V.
3) Paste a picture from the Clipboard.a) Ctrl+C.b) Ctrl+V.c) Ctrl+S.d) Ctrl+X.
4) Go to the first cells within a table column.a) Alt+Page Up.b) Page Up.c) Page Down.d) Ctrl+Page Up.
5) Go to the previous row.a) Ctrl+P.b) Up Arrow.c) Alt+N.d) Ctrl+Up Arrow.
6) Copy a selected picture to the Clipboard.a) Ctrl+A.b) Ctrl+V.c) Ctrl+C.d) Ctrl+X.
7) Move a selected picture to the Clipboard.a) Ctrl+Xb) Endc) Escd) Ctrl+V
8) Delete a selected picture.a) Alt.b) Ctrl.c) Shift.d) Del.
9) Go to the first cell in a table row.a) Alt+Home.b) Home.c) End.d) Ctrl+Home.
10) Move to the previous table cell.a) Shift+Tab.b) End.c) Alt.d) Alt+Tab.
11) Go to the last cell within a table column.a) End.b) Esc.c) Ctrl+Page Down.d) Alt+Page Down.
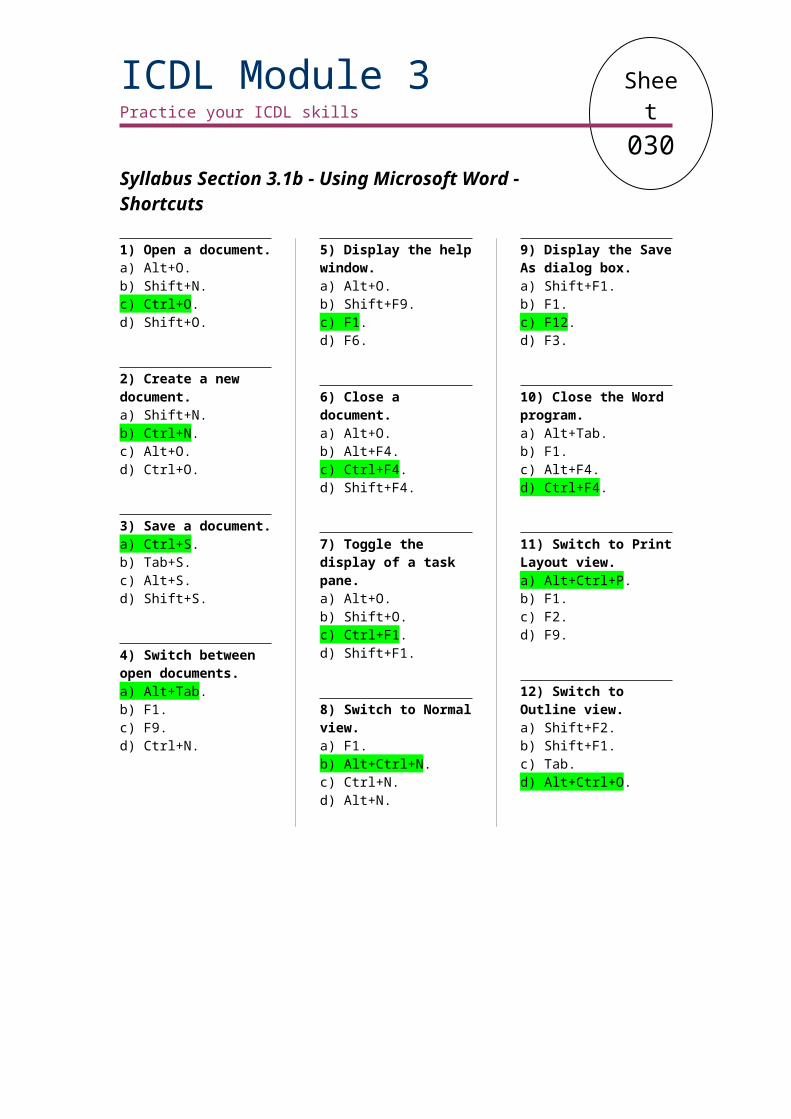
Sheet046
ICDL Module 3Practice your ICDL skills
Syllabus Section 3.4c - Objects - Practice Session
1) Open a document called Tables, located in the Microsoft Word Samples folder, which in turn is contained within the My Documents (or Documents) folder.
2) Insert a table containing 5 rows and 3 columns.
3) Insert the following data into the table.
4) Select the cell relating to northern region sales for 2009 and change the value to 35.
5) Practice selecting the top row.
6) Practice selecting the first column
7) Practice selecting the entire table.
8) Simultaneously select the cells, containing the words 'North', 'South' and 'East'.
9) Practice simultaneously selecting the cells, containing the words 'North' and 'East'.
10) Insert a column before the 'Sales in 2007' column. Enter a column header called 'Sales in 2006'. Enter the following data for each region: - North 18- South 26- East 22- West 31
11) Delete the column and then undo the deletion.
12) Insert a row beneath the first row. Then delete the row.
13) Delete the column containing the data for 'Sales in 2006'.
14) Add shading to the top row, as illustrated.
15) Modify the table border, make it wider, apply a different style and use a different border colour.
16) Double the height of each row.
17) Make the column wider. Save your changes and close the document.
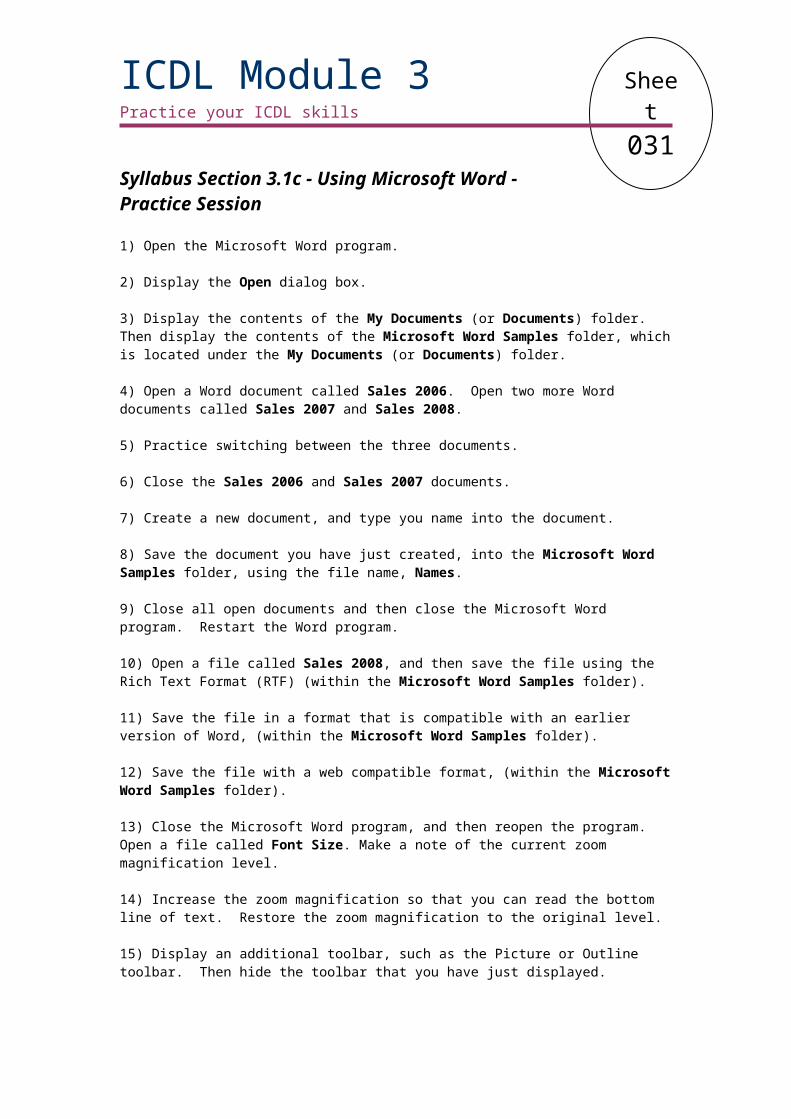
Sheet047
Syllabus Section 3.4d - Objects - Practice Session
1) Open a document called Objects-01, located in the Microsoft Word Samples folder, which in turn is contained within the My Documents (or Documents) folder.
2) As indicated within the document, insert an item of clip art, relating to computers.
3) As indicated within the document, insert a file from your hard disk called Happy, (located in the Microsoft Word Samples folder, which in turn is contained within the My Documents (or Documents) folder).
4) As indicated within the document, insert a chart.
5) As indicated within the document, insert an AutoShape. Insert a Star shape.
6) Practice selecting the objects within the page.
7) Move each object in turn; from page one, to page two.
8) Copy each object in turn, from page two, to page one.
9) Open a second document called Objects-02, located in the Microsoft Word Samples folder, which in turn is contained within the My Documents (or Documents) folder.
10) Move each object in turn, from page one of the first document, to page one of the second document.
11) Copy each object in turn, from page one of the second document, to page one of the first document.
12) Close the second file, and save your changes.
13) Within the first file, resize all the objects to make them bigger.
14) Delete the item of clip art on page one, and also delete the 'happy' object on page two.
15) Save your changes and close the document.
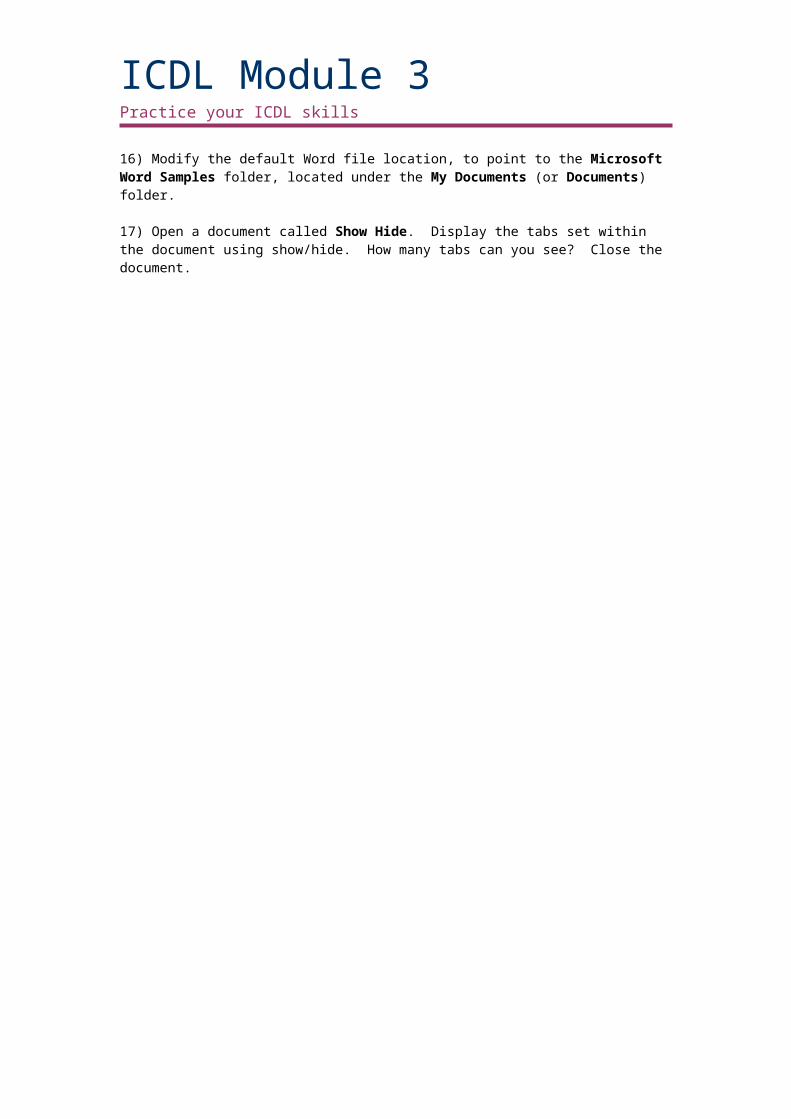
Sheet048
ICDL Module 3Practice your ICDL skills
Syllabus Section 3.5a - Mail Merge - Toolbar ButtonsNOTE. The following assumes that the Mail Merge toolbar is displayed.
1) What is the function of this icon?
a) Cut to data file.b) Merge to new document.c) Main document setup.d) Spell check.
2) What is the function of this icon?
a) Last record.b) Next record.c) New record.d) Previous record.
3) What is the function of this icon?
a) First record.b) Last record.c) Next record.d) Previous record.
4) What is the function of this icon?
a) Previous record.b) Exit mail merge.c) Next record.d) Last record.
5) What is the function of this icon?
a) Open data source.b) Spell check.c) Merge to new document.d) Inserts a table.
6) What is the function of this icon?
a) Inserts a table.b) Spell checking.c) Insert merge field.d) Previous record.
7) What is the function of this icon?
a) Spell check.b) View merged data.c) View database.d) Merge to new document.
8) What is the function of this icon?
a) Cut to Clipboard.b) Merge to new document.c) Copy to Clipboard.d) Previous record.
Sheet049
Syllabus Section 3.5b - Mail Merge - ShortcutsNOTE. These Shortcuts may only work during the actual mail merge process.
1) Preview a mail merge.a) Ctrl+P.b) Ctrl+V.c) Alt+Shift+K.d) Ctrl+Shift+V.
2) Insert a merge field.a) Ctrl+V.b) Alt+Shift+F.c) Ctrl+I.d) Ctrl+M.
3) Merge to a document.a) Alt+Shift+N.b) Ctrl+M.c) Ctrl+Shift+V.d) Shift+M.
4) Edit the mail merge data document.a) Alt+Shift+E.b) Ctrl+C.c) Ctrl+Shift+V.d) Ctrl+E.
5) Print a merged document.a) Ctrl+Shift+V.b) Esc.c) Prnt Scrn.d) Alt+Shift+M.
6) Open a main document for mail merging.a) Ctrl+Shift+V.b) Ctrl+Enterc) Ctrl+O.d) Alt+O.
Sheet050
ICDL Module 3Practice your ICDL skills
Syllabus Section 3.5c - Mail Merge - Practice Session
1) Open a file called Main Letter, located in the Microsoft Word Samples folder, which in turn is contained within the My Documents (or Documents) folder.
2) Start the mail merge process to produce a mail merges letter.
3) Use a data source file called Employees, located in the Microsoft Excel Samples folder, which in turn is contained within the My Documents (or Documents) folder.
4) Insert the necessary mail merge fields, as illustrated below.
5) Finish the mail merge and produce a new, merged document. Save the new document as My Merged Letters, within the Microsoft Excel Samples folder.
6) Repeat the procedure, but this time; produce mailing labels (using a label size of your choice). Save the file as My Merged labels, within the Microsoft Excel Samples folder.
7) Close Word.
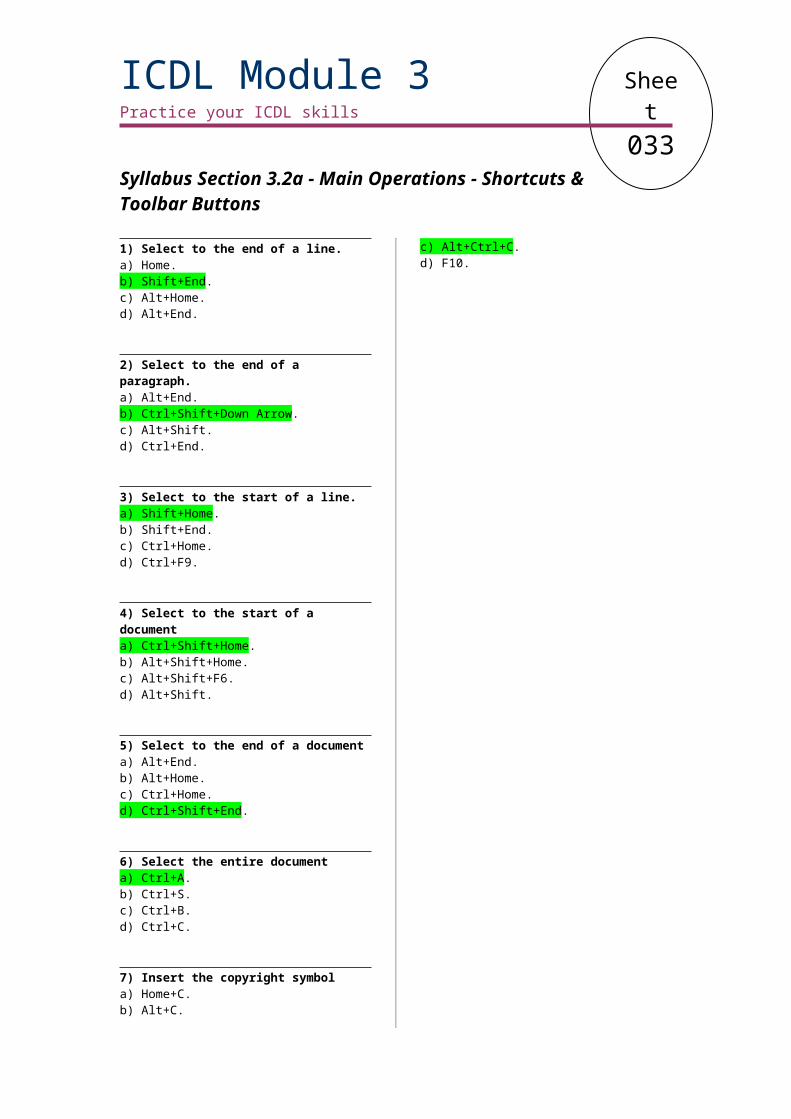
Sheet051
Syllabus Section 3.6a - Printing Issues - Shortcuts & Toolbar Buttons
1) Print a document.a) Alt+P.b) Ctrl+F1.c) Esc.d) Ctrl+P.
2) Move to the first preview page when zoomed out.a) Print Scrn.b) Alt+Print Scrn.c) Ctrl+Home.d) Esc.
3) Toggle between Print Preview.a) Alt+Ctrl+I.b) Ctrl+P.c) F1.d) Ctrl+F4.
4) Start the spell checker.a) F1.b) F5.c) F7.d) F9.
5) Move to the last preview page when zoomed out.a) Ctrl+End.b) End.c) Alt+End.d) Ctrl+E.
7) Display the Print dialog box.a) Ctrl+P.b) Ctrl+O.c) Ctrl+F1.d) Esc.
8) What is the function of this icon?
a) Printing.b) Scans the document.c) Save.d) Open document.
9) What is the function of this icon?
a) Printing.b) Spelling.c) Set language.d) Open.
10) What is the function of this icon?
a) Zoom.b) Save this version.c) Print.d) Print Preview.

Sheet052
ICDL Module 3Practice your ICDL skills
Syllabus Section 3.6b - Printing Issues - Practice Session
1) Open a file called Printing-01, located in the Microsoft Word Samples folder, which in turn is contained within the My Documents (or Documents) folder.
2) Read through the document and look for errors, but do not correct any errors that you may find.
3) Run the spell and grammar checking facility and fix all the errors that you can. Add CCT to the spelling directory.
4) Re-read the document and manually fix any errors that may still be present within the document.
5) Check the paper size and if necessary, change the paper size setting.
6) Check the page layout in Print Preview. Close the Print Preview view.
7) Print the page.
8) Set the system to print two copies at a time.
9) Open a file called Printing-01. Print just page 2 of the document.
10) Print page 2-3 of the document.
11) Close Word and save any changes you have made.
ICDL Module 3: CompletePractice your ICDL skills
ICDL Module Three - Complete Quizzes

Sheet053ICDL Module 3: Complete
Practice your ICDL skills
ICDL Module Three: Complete Module Quiz (1)
1) Open a file called Company Report, located in the Microsoft Word Samples folder, which in turn is contained within the My Documents (or Documents) folder.
2) Spell check the document.
3) Insert an item of clip art relating to sales.
4) Format the text to try and match the illustration below, as closely as possible.
5) Save your changes and close the document.
Sheet054ICDL Module 3: Complete
Practice your ICDL skills
ICDL Module Three: Complete Module Quiz (2)
1) Open a file called National Sales, located in the Microsoft Word Samples folder, which in turn is contained within the My Documents (or Documents) folder.
2) Insert the following table under the main heading. Format the table as illustrated below.
3) At the bottom of the document, insert a picture from your hard disk called National Sales, which is located in the Microsoft Word Samples folder, which in turn is contained within the My Documents (or Documents) folder.
4) Centre the title, use a different font and use a larger font size.
5) Enter your name into the document footer.
6) Remove the bullet formatting from the list and replace it with number formatting.
7) Change the colour of the font used by the title, so that it is displayed in Red.
8) Save the document using the file name My National Sales.
9) Resave the document in RTF format.
10) Close the document.
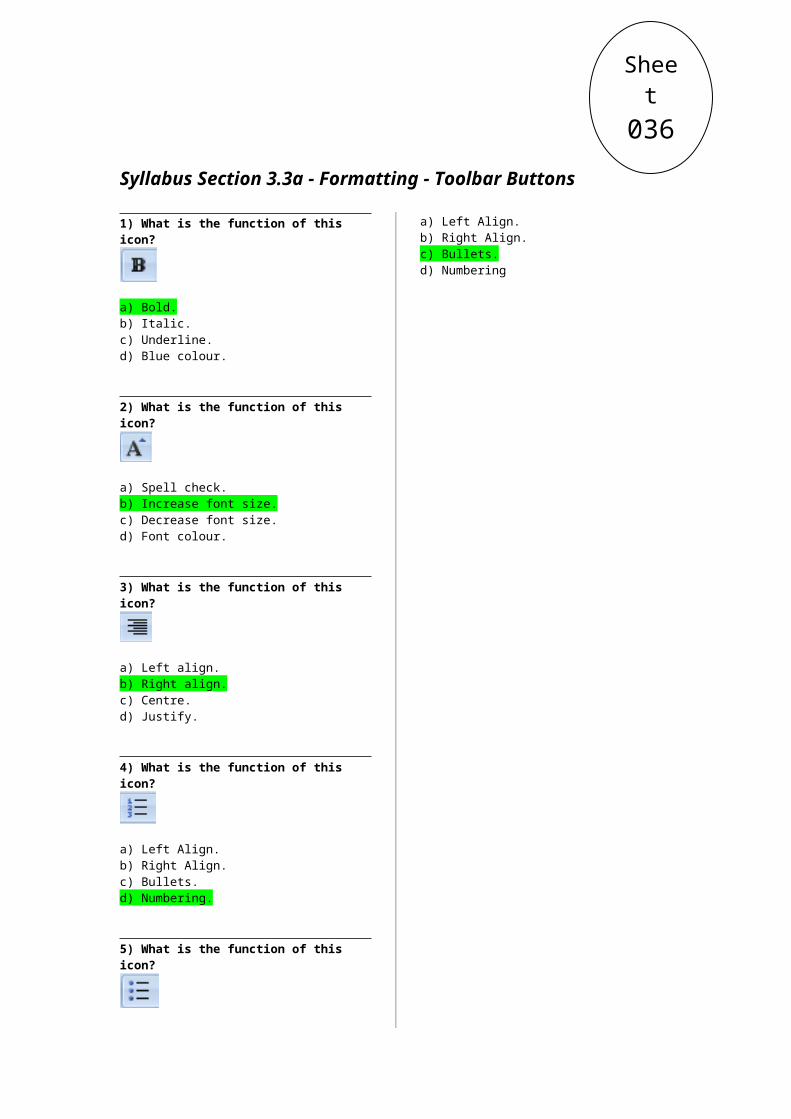
Sheet055ICDL Module 3: Complete
Practice your ICDL skills
ICDL Module Three: Complete Module Crossword Quiz1
2
3
4 5
6 7 8
9 10
11
12
13 14 15 16
17 18 19 20
21
22 23 24 25
26 27 28
Across 2 Area at the top of the page, which can display information on every page. (6)4 Ctrl+Z is equivalent to which command? (4)6 Ctrl+H is equivalent to which command? (7)9 Alt+F4 is equivalent to which command? (5)
10 What will pressing the F7 key check? (8)11 Ctrl+S is equivalent to which command? (4)13 Ctrl+P is equivalent to which command? (5)17 The process of combining letters with addresses to produce mass mailing letters is referred to as
mail: (5)19 Formatting used to display a character above the line. (11)21 Ctrl+O is equivalent to which command? (4)22 Under which drop down menu will you find page formatting options? (4)23 An alternative name for a graph. (5)24 Under which drop down menu, will you find the command to allow you to set the Word
customisation options? (5)25 Under which drop down menu will you find paragraph formatting options? (6)26 Ctrl+X is equivalent to which command? (3)27 Ctrl+U is equivalent to which command? (9)
Down 1 Pages can be formatted as
portrait or: (9)3 Ctrl+B is equivalent to which
command? (4)5 Portrait and landscape are
type of page: (11)7 Ctrl+V is equivalent to which
command? (5)8 Ctrl+F is equivalent to which
command? (4)9 Ctrl+C is equivalent to which
command? (4)11 Formatting used to display a
character below the line. (9)12 To insert a manual page
break, press the Ctrl key and which other key? (5)
13 The tool used to copy formatting from one item of text to another is called the Format: (7)
14 Ctrl+I is equivalent to which command? (6)
15 A special type of Word document, which can be recycled and used to create new documents. (8)
16 Newspaper column formatting is described as: (9)
18 Under which drop down menu will you find the Cut, Copy and Paste commands. (4)
19 A collection of formatting information that has a name and can be applied to text. (5)
20 What does the 'T' stand for in RTF? (4)
21 Microsoft Word is often used within a suite of programs, called Microsoft: (6)
28 Ctrl+N is equivalent to which command? (3)
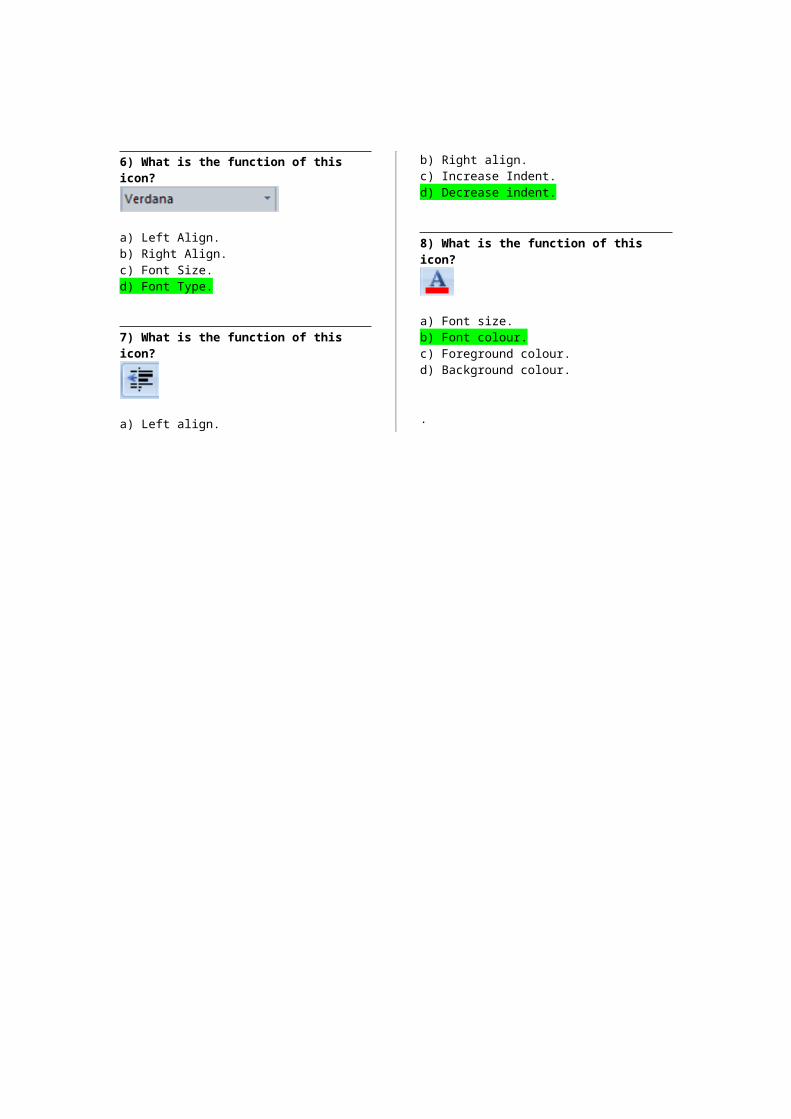
ICDL Module 3: CompletePractice your ICDL skills
ICDL Module Three: Complete Module Crossword Solution
LH E A D E R
B NO DL S
U N D O CR E P L A C E FI A P I
C L O S E S P E L L I N GO N T DP T EY A
T S A V EI UO B E
P R I N T S N JA T E C T UI A M E R G E S U P E R S C R I P T
O P E N L P I D T R T EF T I L P I Y I XF I L E C H A R T T O O L S F O R M A TI R T E IC U T U N D E R L I N E EE E D
W
ICDL Module 4Practice your ICDL skills
ICDL Module Four - Spreadsheets
Sheet056ICDL Module 4
Practice your ICDL skills
Syllabus Section 4.1a - Using Microsoft Excel - Toolbar Buttons
1) What is the function of this icon?
a) New.b) Save.c) Open.d) Print.
2) What is the function of this icon?
a) Open.b) Save.c) Print.d) New.
3) What is the function of this icon?
a) Open.b) Save.c) New.d) Print Preview.
4) What is the function of this icon?
a) Close.b) Open.c) New.d) Print Preview.
5) What is the function of this icon?
a) Open.b) New.c) Save.d) Print Preview.
6) What is the function of this icon?
a) Help.b) Open.c) New.d) Print Preview.
Sheet057
ICDL Module 4Practice your ICDL skills
Syllabus Section 4.1b - Using Microsoft Excel - Shortcuts
1) Open a workbook.a) Ctrl+N.b) Ctrl+S.c) Ctrl+O.d) Shift+O.
2) Create a new workbook.a) Ctrl+N.b) Ctrl+S.c) Ctrl+O.d) Ctrl+V.
3) Save a workbook.a) Ctrl+N.b) Ctrl+S.c) Ctrl+O.d) Ctrl+V.
4) Switch between open workbooks.a) Tab.b) Shift+F10.c) Esc.d) Alt+Tab.
5) Display help.a) F1.b) F3.c) F6.d) F10.
6) Close Excel.a) Ctrl+F4.b) Esc.c) Tab.d) Alt+F4.
7) Move to the start of a row.a) Esc.b) Alt+Home.c) Home.d) Alt+Tab.
8) Move to the start of a worksheet.a) Ctrl+Home.b) Esc.c) Ctrl+F9.d) Home.
9) Close Worksheet.a) Alt+F4.b) Alt+F9.c) Esc.d) Ctrl+F4.
10) Move to the last cell within a worksheet.a) Ctrl+End.b) F6.c) End+Tab.d) Esc.
11) Move one screen to the right.a) F1.b) Alt+Page Down.c) Ctrl+1.d) Alt+2.
12) Move up one screen.a) Esc.b) Home.c) Alt+F6.d) Page Up.
13) Move down one screen.a) Esc.b) Home.c) Page Down.d) Alt+Tab.
14) Move one screen to the left.a) Alt+Tab.b) Home.c) Esc.d) Alt+Page Up.
15) Scroll to display the active cell.a) Tab.b) Home.c) Ctrl+Home.d) Ctrl+Backspace.
Sheet058
ICDL Module 4Practice your ICDL skills
Syllabus Section 4.1c - Using Microsoft Excel - Practice SessionNOTE. The sample files are located in /My Documents/Microsoft Excel Samples
1) Open the Excel program.
2) Open an Excel file called Sales 2006. Then open a file called Sales 2007. Finally open a file called Sales 2008.
3) Practice switching between the workbook files.
4) Create a new workbook.
5) Click on cell A1 within the newly created workbook, and type in your name. Save the workbook using the filename My New Workbook (in the Microsoft Excel Samples folder, located under the My Documents (or Documents) folder.
6) Close all open workbooks and then close Excel.
7) Reopen the Excel program and open a workbook called Font Size located within the Microsoft Excel Samples folder. Make a note of the current zoom level. Experiment with using the zoom level, so that you can read all the text within the worksheet. Reset the zoom level to the original value.
8) Display an extra toolbar, such as the Picture or Word Art toolbars. Then hide the toolbar that you have just displayed.
9) Display the Excel Help window. Experiment and see if you can display information relating to keyboard shortcuts.
10) Save the workbook in a format that would be compatible with earlier versions of the Excel program, (within the Microsoft Excel Samples folder).
11) Save the workbook in a web compatible format, (in the Microsoft Excel Samples folder).
12) Save the workbook in a text format, (within the Microsoft Excel Samples folder).
13) Save the workbook as a template in the Microsoft Excel Samples folder. Close the workbook.
14) Close all open files, saving your changes and then close the Excel program.
Sheet059
ICDL Module 4Practice your ICDL skills
Syllabus Section 4.1d - Using Microsoft Excel - Practice SessionNOTE. The sample files are located in /My Documents/Microsoft Excel Samples
1) Open a workbook called Old Name. Re-save the workbook as New Name.
2) Modify the Excel preferences so that the default folder points to the Microsoft Excel Samples folder.
3) Open a workbook called Product Serial Number, located within the Microsoft Excel Samples folder. Format the worksheet so that when you scroll down the sheet, the column headings remain visible.
4) Open a file called Product ranges. Format the worksheet so that when you scroll to the right, the row titles, to the left, remain displayed on the screen.
5) Open a workbook called Frozen rows. Remove the freezing within this document. Save your changes and close the workbook.
6) Open a workbook called Frozen columns. Remove the freezing within this document. Save your changes and close the workbook.
7) Open a workbook called Old Version. Save the file using a non-Excel format, such as Lotus 123 or other format.
8) Save your name in the 'User Preferences' within Excel.
9) Display a Help page relating to new features, and print out one page of information.
9) Close all open files, saving your changes and then close the Excel program.

Sheet060
ICDL Module 4Practice your ICDL skills
Syllabus Section 4.2a - Cells - Shortcuts & Toolbar Buttons
1) Enter today's date.a) Ctrl+D.b) Ctrl+E.c) Ctrl+T.d) Ctrl+;
2) Select a column.a) Ctrl+Spacebar.b) Ctrl+C.c) Ctrl+Tab.d) Ctrl+Esc.
3) Move to the start of a line.a) Ctrl+Home.b) Home.c) Ctrl+E.d) Ctrl+H.
4) Select entire worksheet.a) Ctrl+A.b) Alt+A.c) Shift+A.d) Tab+F4.
5) Extend selection down one screen.a) Alt+Page Down.b) Ctrl+Page Down.c) Shift+Page Down.d) Alt+D.
6) Edit the active cella) Ctrl+A.b) Ctrl+V.c) F2.d) F7.
7) Enter the current time.a) Ctrl+Shift+.b) Alt+T.c) Ctrl+T.d) Shift+T.
8) Start a new line within a cella) Alt+Enter.b) Enter.c) Alt+Esc.d) Ctrl+N.
9) Extend the selection up one screena) Ctrl+U.b) Shift+Page Up.c) Shift+U.d) Shift+1.
10) Select a rowa) Home.b) Shift+Spacebar.c) Shift+Enter.d) Tab.
11) Fill to the right.a) Shift+Tab.b) Ctrl+R.c) Ctrl+L.d) Shift+R.
12) Extend the selection to the beginning of the rowa) Shift+L.b) Shift+R.c) Ctrl+Home.d) Shift+Home.
13) Move to the start of the worksheeta) End.b) Ctrl+Home.c) Home.d) Shift+Home.
14) Move to the last cell within a workbooka) End.b) Home.c) Ctrl+End.d) Shift+End.
15) Undoa) F1.b) Ctrl+F1.c) Ctrl+Z.d) Shift+Z.
16) What is the function of this icon?
a) Cut.b) Copy.c) Paste.d) Paste Special.
17) What is the function of this icon?
a) Cut.b) Copy.c) Paste.d) Paste Special.
18) What is the function of this icon?
a) Cut.b) Copy.c) Undo.d) Redo.
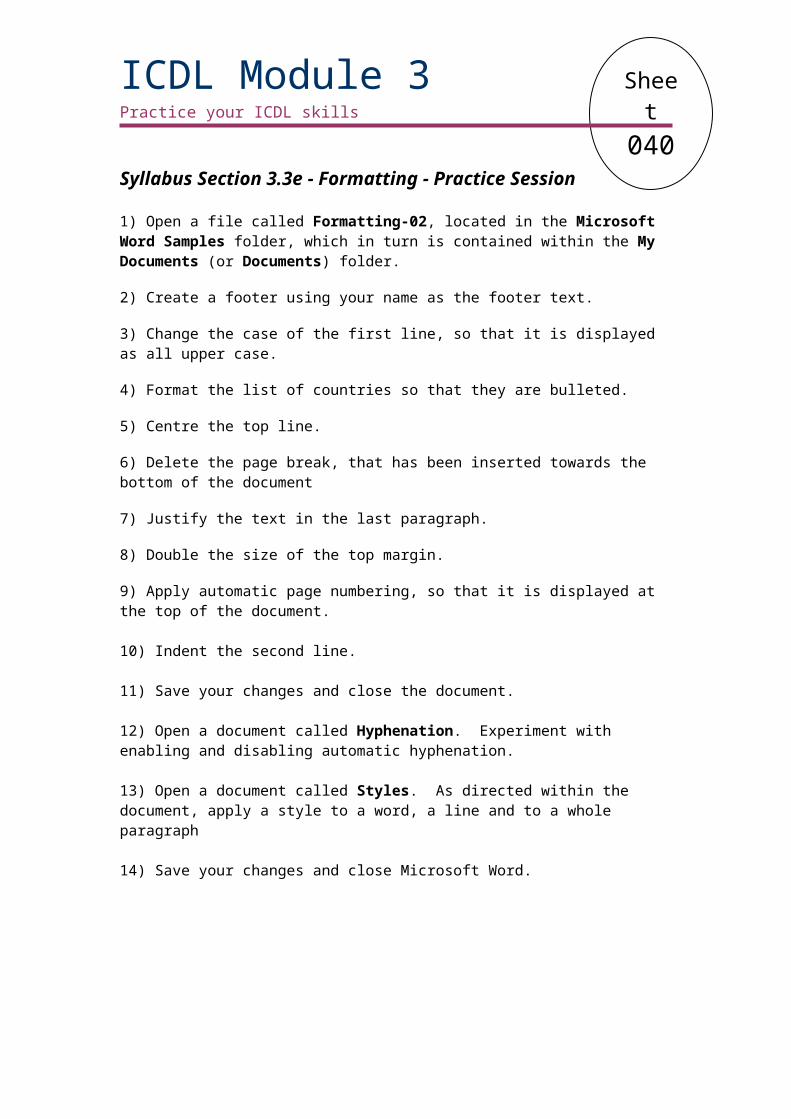
Sheet061
ICDL Module 4Practice your ICDL skills
Syllabus Section 4.2b - Cells - Practice Session
1) Open a file called Cells-01, located within the Microsoft Excel Samples folder, which in turn is contained within the My Documents (or Documents) folder.
2) Within cell B1, enter the version number, which we will call 1.1.
3) Within cell B2, enter your name.
4) Within cell B3, enter today's date.
5) Select cell C7. What does this cell contain?
6) Select the range C8:C11. What is contained within the selected range?
7) Select the range D8:I11. What is contained within the selected range?
8) Select the cell C8. Also select the cell C11, so that a total of two cells are selected.
9) Select row 7.
10) Select column F.
11) Select row 8 and also row 10, so that two rows are selected.
12) Select column E and also column H, so that two columns are selected.
13) Insert a new row, under row 7.
14) Insert a new column, to be displayed to the right of column C.
15) Delete the new row that you just inserted.
16) Delete the new column, which you just inserted.
17) Use the Undo command, so that the new row column, and new row are displayed again
18) Open a workbook called Finding.
19) Find 'Product-028'
20) Find all occurrences of the word 'Pakistan'.
21 Replace all occurrences of the number 1.20 with 1.25.
22) Save your changes and close the Excel program.
Sheet062
ICDL Module 4Practice your ICDL skills
Syllabus Section 4.2c - Cells - Practice Session
1) Open a file called Cells-02, located in the Microsoft Excel Samples folder, which in turn is contained within the My Documents (or Documents) folder.
2) Click on cell A2 and delete the second name.
3) Click on cell A14 and overtype the word CCT with Cheltenham Courseware.
4) Copy the contents of cell C14 to cell G11 (within the displayed worksheet).
5) Copy the contents in the cell range B4:H9 to the cell B20 (within the displayed worksheet)
6) Copy the contents of cell C14 to cell G11 (within the second worksheet (called BACKUP) in the workbook).
7) Copy the contents in the cell range B4:H9 to the cell B20 (within the second worksheet (called BACKUP) in the workbook).
8) Open a workbook called Cells-03, located in the Microsoft Excel Samples folder, which in turn is contained within the My Documents (or Documents) folder.
9) Copy the contents of cell C14 to cell G11 (within the workbook Cells-02) to the worksheet within the Cells-03 workbook.
10) Copy the contents in the cell range B4:H9 to the cell B20 (within the workbook Cells-02) to the worksheet within the Cells-03 workbook.
11) Experiment with moving, rather than copying, a cell or range within a worksheet, between worksheets, and between workbooks. Close all open files when you have finished experimenting.
12) Open a workbook called Cells-04. Use the AutoFill feature, to extend the days of the week range, down to fill the rest of the range C5:C11. Close the workbook and save your changes.
13) Open a workbook called Cells-05. Sort the data within the Sales Regions column so that it is displayed in ascending alphabetic order.
14) Sort the data within the No of Sales column so that it is displayed in ascending numeric order.
15) Use the Excel Find facility to find the text CCT within the document. Scroll back up to the start of the document.
16) Use the Excel 'Replace' facility, to replace the text CCT, with the text Cheltenham Courseware. Close all open files and save your changes.
Sheet063
ICDL Module 4Practice your ICDL skills
Syllabus Section 4.2d - Cells - Practice Session
1) Open a workbook called Cells rows and columns, located in the Microsoft Excel Samples folder, which in turn is contained within the My Documents (or Documents) folder.
2) Insert the word 'Sales' in front of each year number within the first column.
3) Change the sales figure for 2005 to 53.
4) Extend series 1 down the page to fill the grid displayed.
5) Extend series 2 down the page to fill the grid displayed.
6) Extend series 3 down the page to fill the grid displayed.
7) Extend series 4 down the page to fill the grid displayed.
8) Open a workbook called Sorting.
9) Sort the data by 'region' in ascending alphabetic order, as directed within the worksheet.
10) Sort the data by 'region' in descending alphabetic order, as directed within the worksheet.
11) Sort the data by 'sales' in ascending numeric order, as directed within the worksheet.
12) Sort the data by 'sales' in descending numeric order, as directed within the worksheet.
13) Select the entire workbook content.
14) Delete the entire selected content.
15) Undo the deletion.
16) Redo the deletion.
17) Undo the deletion, save your changes and close Microsoft Excel.
Sheet064
ICDL Module 4Practice your ICDL skills
Syllabus Section 4.3a - Worksheets - Shortcuts
1) Insert a new worksheet.a) Ctrl+N.b) Shift+O.c) Shift+F11.d) Ctrl+F4.
2) Move to the next worksheet within a workbooka) Ctrl+Page Down.b) Ctrl+N.c) Ctrl+L.d) Ctrl+W.
3) Move to the previous worksheet within a workbooka) Ctrl+P.b) Ctrl+O.c) Ctrl+Page Up.d) Ctrl+Page Down.
Sheet065
ICDL Module 4Practice your ICDL skills
Syllabus Section 4.3b - Worksheets - Practice Session
1) Open an Excel workbook called Manipulating worksheets 01, located in the Microsoft Excel Samples folder, which in turn is contained within the My Documents (or Documents) folder.
2) Insert a worksheet before the 2003 worksheet and call the worksheet '2002'.
3) Insert a worksheet after the 2008 worksheet and call the worksheet '2009'.
4) Change the worksheet name for the 2002 worksheet from '2002' to '2002 Sales'
5) Change all the other worksheet tab names so that the date is followed by the word Sales.
6) Delete the worksheet called 2002 Sales. Also delete the worksheet called 2008 Sales.
7) Move the worksheet tabs so that the worksheet tabs run in order from 2008-2003, rather than the original order of 2003-2008.
8) Open a second workbook called Manipulating worksheets 02.
9) Copy the worksheets from the first workbook file, to the second workbook file.
10) Experiment with copying worksheets within the first workbook you opened.
11) Open a workbook called Manipulating worksheets 03. Experiment with moving worksheets, from the first workbook, to this workbook.
12) Save all your changes and close Excel.

Sheet066
ICDL Module 4Practice your ICDL skills
Syllabus Section 4.4a - Formulas & Functions - Shortcuts & Toolbar Buttons
1) Display the Function Arguments dialog box within a formula.a) Ctrl+F4.b) Alt+F1.c) Shift+4.d) Shift+F3.
2) Insert the AutoSum function.a) Alt+S.b) Alt+=.c) Ctrl+S.d) Ctrl+=.
3) Recalculates all open worksheetsa) F9.b) F10.c) Alt+F2.d) Shift+F2.
4) Recalculates just the active worksheet.a) Shift+F9.b) Alt+F2.c) Ctrl+F6.d) Ctrl+F7.
5) What is the function of this icon?
a) Insert symbol.b) Find.c) AutoSum.d) Recalculate.
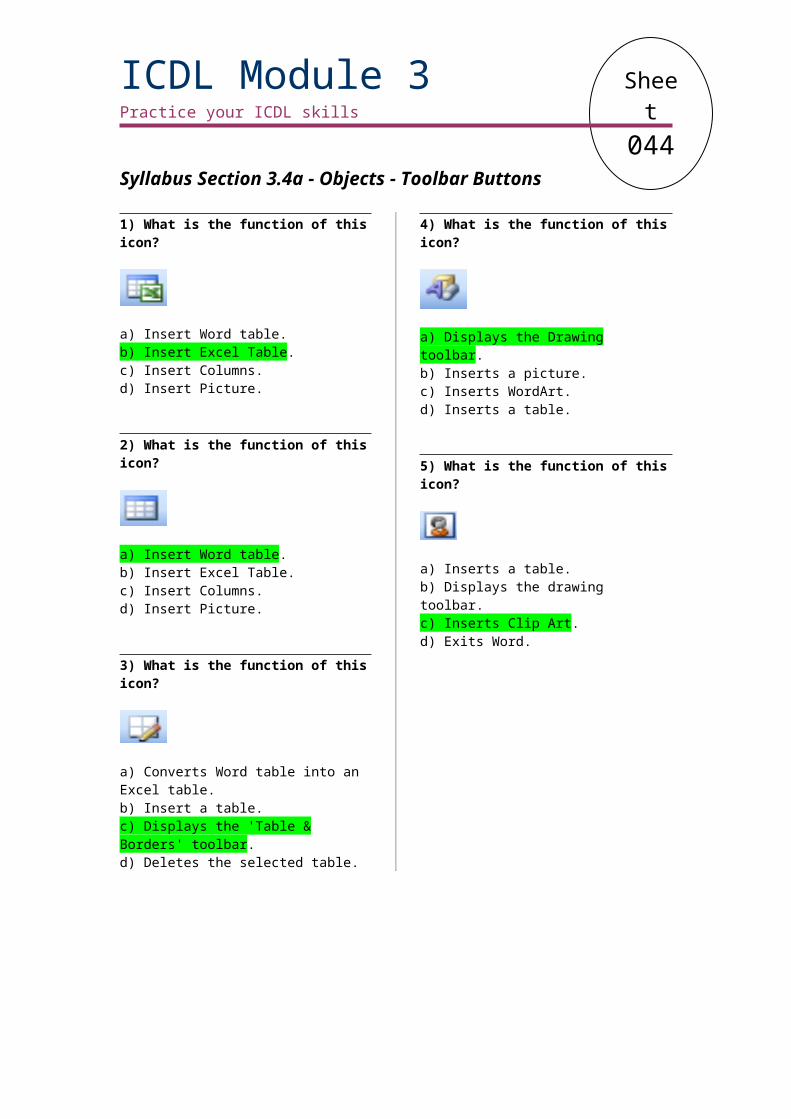
Sheet067
ICDL Module 4Practice your ICDL skills
Syllabus Section 4.4b - Formulas & Functions - Practice Session
1) Open a workbook called Formulas, located in the Microsoft Excel Samples folder, which in turn is contained within the My Documents (or Documents) folder.
2) Within cell F4, enter the formula that will add the number in cell E4, to the number within cell D4.
3) Within cell F5, enter the formula that will subtract the number in cell E5, from the number within cell D5.
4) Within cell F6, enter the formula that will divide the number in cell D6, by the number within cell E6.
5) Within cell F7, enter the formula that will multiply the number in cell D7, by the number within cell E7.
6) Click within cell F22. Why does it display an error message? Fix the problem. Close the workbook and save your changes.
7) Open a workbook called References, located in the Microsoft Excel Samples folder, which in turn is contained within the My Documents (or Documents) folder.
8) Within cell E8, insert a formula that absolutely references the delivery price contained within cell B2.
9) Extend the contents of cell E8, to fill the range E9:E11. You should find that the range contains an absolute reference to the delivery price.
10) Close the workbook and save your changes.
Sheet068
ICDL Module 4Practice your ICDL skills
Syllabus Section 4.4c - Formulas & Functions - Practice Session
1) Open a workbook called Functions, located in the Microsoft Excel Samples folder, which in turn is contained within the My Documents (or Documents) folder.
2) Make sure that the first worksheet tab, called Sum is selected. In cell D13, insert the Sum function to total the amount of items in stock. In cell F13, insert the Sum function to display the total value of the stock.
3) Make sure that the second worksheet tab, called Average is selected. In cell E13, insert a function that will display the average value of each item of stock.
4) Make sure that the third worksheet tab, called Maximum, is selected. In cell D13, insert a function that will display the maximum number of items in stock. In cell E13, insert a function that will display the maximum value of an item of stock.
5) Make sure that the fourth worksheet tab, called Minimum, is selected. In cell D13, insert a function that will display the minimum no of items in stock. In cell E13, insert a function that will display the minimum value of an item of stock.
6) Make sure that the fifth worksheet tab, called Count, is selected. In cell D15, insert a function that will display the number of people present at the meeting. In cell E15, insert a function that will display the number of people absent from the meeting.
7) Make sure that the fifth worksheet tab, called IF is selected. In cells I8:I13, enter the necessary function to display the words Pass or Fail, depending on whether the average is over 55%.
8) Close Excel and save your changes.

Sheet069
ICDL Module 4Practice your ICDL skills
Syllabus Section 4.5a - Formatting - Toolbar Buttons
1) What is the function of this icon?
a) Shadow.b) Currency.c) Clip art.d) Microsoft Upgrade.
2) What is the function of this icon?
a) Clip art.b) Font colour.c) Font Type.d) Percentage.
4) What is the function of this icon?
a) Percentage.b) Indent.c) Comma.d) Font Size.
5) What is the function of this icon?
a) Clip Art.b) Format Painter.c) Italic.d) Bold.
6) What is the function of this icon?
a) Indent left.b) Indent right.c) Centre.d) Justify.
7) What is the function of this icon?
a) Font Type.b) Font Colour.c) Font Size.d) Spell checking.
8) What is the function of this icon?
a) Font type.b) Font colour.c) Font size.d) Border.
9) What is the function of this icon?
a) Format Painter.b) Copy.c) Cut.d) Paste.
10) What is the function of this icon?
a) Font type.b) Font size.c) Bold.d) Italic.
11) What is the function of this icon?
a) Spell checking.b) Centres a title across a range.c) Help.d) Toggles capitalisation
12) What is the function of this icon?
a) Clip art.b) Underline.c) Border.d) Font size.
Sheet070
Syllabus Section 4.5b - Formatting - Shortcuts
1) Apply time formatting.a) [email protected]) Ctrl+T.c) Alt+T.d) Shift+T.
2) Apply percentage formatting.a) Ctrl+P.b) Ctrl+Shift+%.c) Alt+Shift+P.d) Shift+P.
3) Toggle italic formatting.a) Alt+I.b) Shift+I.c) Ctrl+I.d) Tab+I.
4) Apply General number formatting.a) Ctrl+N.b) Alt+Shift+G.c) Tab.d) Ctrl+Shift+~.
5) Toggle underline formatting.a) Alt+U.b) Shift+U.c) Esc.d) Ctrl+U.
6) Display the Format Cells dialog box.a) Ctrl+1.b) Alt+F.c) Ctrl+F.d) Shift+C.
7) Toggle bold formattinga) Alt+B.b) Ctrl+B.c) Shift+B.d) Home+Tab.
8) Apply currency formattinga) Ctrl+C.b) Ctrl+Shift+$.c) Ctrl+M.d) Shift+C.
9) Apply the outline border formattinga) Ctrl+B.b) Shift+B.c) Ctrl+Shift+&.d) Shift+F9.
10) Remove the outline border formattinga) Ctrl+Tab.b) Ctrl+R.c) Ctrl+Shift+_.d) Ctrl+B
11) Apply date formatting.a) Ctrl+Shift+#.b) Ctrl+D.c) Alt+D.d) Shift+D.
Sheet071
ICDL Module 4Practice your ICDL skills
Syllabus Section 4.5c - Formatting - Practice Session
1) Open a workbook called Formatting-01, located in the Microsoft Excel Samples folder, which in turn is contained within the My Documents (or Documents) folder.
2) Modify the number within cell B2, to be displayed as 12%.
3) Insert today's date into cell B4.
4) Format the range E8:H11, to display currency, with 2 decimal places.
5) Within the range G8:G11, enter a formula so that the Delivery Amount is displayed.
6) Format the number in cell B15, to display 4 decimal places. Save your changes and close the workbook.
7) Open a workbook called Formatting-02.
8) Change the size of the font used in the range B5:H10 to use 14 point.
9) Change the font type used in the range B5:H10.
10) Apply bold font formatting to the text within the range B5:H10.
11) Apply underline font formatting to the text within the range C5:H5.
12) Apply italic font formatting to the text in cell B5.
13) Apply double underlining font formatting to the text in cell B5.
14) Format the text within the range B5:B10, so that it is displayed in a dark blue colour.
15) Format the cell background in the range C6:H10 to display in a light blue colour.
16) Centre the text in the cell C4 over the range C4:H4.
17) Save your changes and close the workbook.
Sheet072
Syllabus Section 4.5d - Formatting - Practice Session
1) Open a workbook called Formatting-03, located in the Microsoft Excel Samples folder, which in turn is contained within the My Documents (or Documents) folder.
2) Copy the formatting from the lower table to the upper table.
3) Apply text wrapping formatting to the text in the range B6:B9.
4) Remove all border formatting from the top table. Then apply a Thick Box Border.
5) Format the dates in the range C5:H5, so that they are displayed at a 45 degree angle.
6) Format the text within the range B10:H10 so that it is virtually aligned in the middle of the cell.
7) Align all the text and numbers within the range B5:H10, so that it is aligned to the right.
8) Open a workbook called Formatting-04. Remove the comma formatting within the top table.
9) Within the bottom table, format the range C15:H18 to display comma formatting.
10) Open a workbook called Formatting-05. Within cell B3, insert today's date.
11) Fill the range B3:B12 with today's date.
12) Format each cell displaying the date using a different date formatting type.
13) Format the contents of cell E3 to display the dollar currency symbol.
14) Format the contents of cell E3 to display the UK pound currency symbol.
15) Format the contents of cell E3 to display the Euro currency symbol.
16) Format the contents of cell E3 to display another currency symbol.
17) Format the cell H3 to display numbers as percentages. Then enter the number 75 into the cell.
18) Save your changes and close Excel.
Sheet073
ICDL Module 4Practice your ICDL skills
Syllabus Section 4.5e - Formatting - Practice Session
1) Open a workbook called Formatting-06, located in the Microsoft Excel Samples folder, which in turn is contained within the My Documents (or Documents) folder.
2) Align the cell contents within the range B5:B9 to the right.
3) Centre the contents of the cells within the range C5:H9.
4) Align the cell contents within the range B13:B17 to the left.
6) Align the cell contents within the range B13:H13 to the bottom of the cell.
7) Align the cell contents within the range B14:H17 to the top of the cell.
8) Format the cells with the range C13:H13 to look like the illustration below.
9) Add a 'thick box border' around the range B13:H17.
10) In cell C12, enter the text 'Annual Sales' and then centre this title over the range C12:H12.
11) Save your changes and close Excel.
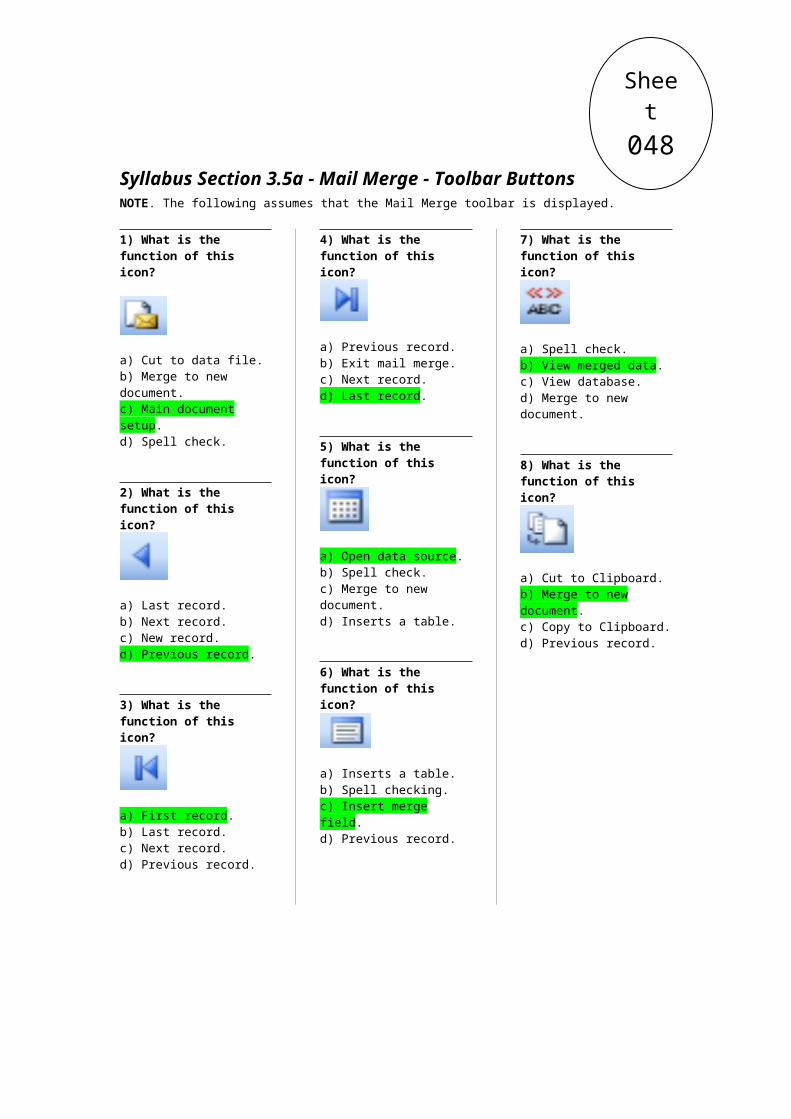
Sheet074
Syllabus Section 4.6a - Charts - Shortcuts & Toolbar ButtonsNOTE. The following may assume that the Chart toolbar is displayed.
1) Create a chart from selected data range.a) F1.b) Ctrl+F1.c) F11.d) Ctrl+C.
2) What is the function of this button?
a) Chart Wizard.b) Spell checking.c) Clip Art.d) Copy.
3) What is the function of this button?
a) Spell check.b) Chart type.c) Create a pie chart.d) Clip Art.
4) What is the function of this button?
a) Clip Art.b) Chart title.c) Legend.d) Bullet text.
5) What is the function of this button?
a) Style.b) Chart Wizard.c) Font type.d) Chart objects.

Sheet075
ICDL Module 4Practice your ICDL skills
Syllabus Section 4.6b - Charts - Practice Session
1) Open a workbook called Charts-01, located in the Microsoft Excel Samples folder, which in turn is contained within the My Documents (or Documents) folder.
2) Click on the Column Chart worksheet tab and create a column chart from the data contained within the worksheet.
3) Click on the Bar Chart worksheet tab and create a bar chart from the data contained within the worksheet.
4) Click on the Line Chart worksheet tab and create a line chart from the data contained within the worksheet.
5) Click on the Pie Chart worksheet tab and create a pie chart from the data contained within the worksheet. Save your changes and close the workbook.
6) Open a workbook called Charts-03. Within the Column Chart worksheet change the colour of both columns.
7) Within the Bar Chart worksheet change the colour of both bars.
8) Within the Line Chart worksheet change the colour of the line.
9) Within the Pie Chart worksheet change the colour of each pie slice.
10) Change the background colour of each chart.
11) Add the chart title 'Sales Results' to each chart.
12) Save all your changes and close Excel.
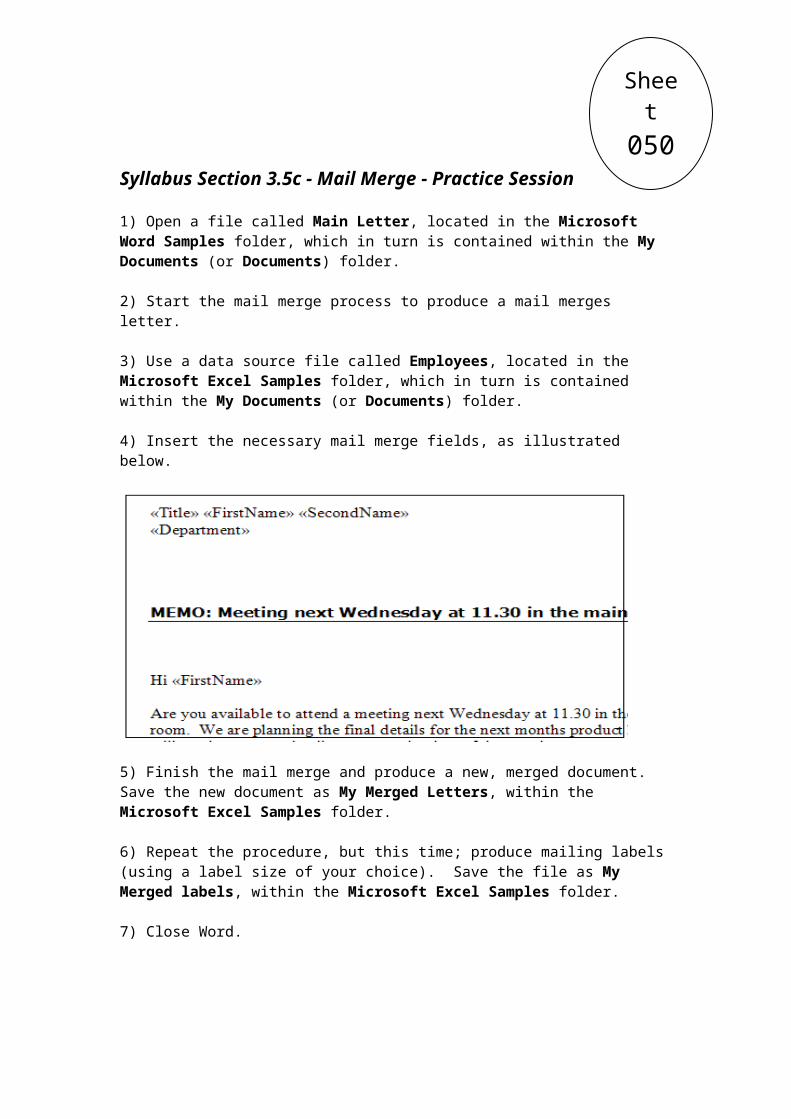
Sheet076
Syllabus Section 4.6b - Charts - Practice Session
1) Open a workbook called Charts-02. Make sure that the first worksheet tab called Chart Formatting is displayed.
2) Remove the title from the chart. Add a new title called TOTAL SALES.
3) Remove the labels from the chart. Create new chart labels.
4) Change the chart background to a light green colour.
5) Change the colour of the columns to Red.
6) Move the position of the chart on the worksheet.
7) Re-size the chart so that it is larger.
8) Display the contents of the second worksheet tab, called Chart Types.
9) Change the chart type from a column chart to a bar chart.
10) Copy the chart and place it on the third worksheet called Copy Chart.
11) Display the contents of the fourth worksheet tab, called Delete. Delete the chart in this worksheet.
13) Open a workbook called First.
14) Move the chart to the bottom of the page.
15) Copy the chart to the top of the page.
16) Move the chart from Worksheet 1 to Worksheet 2.
17) Copy the chart from Worksheet 2 to Worksheet 1.
18) Open a workbook called Second.
19) Copy the chart from Worksheet 1 within the First workbook, to the Second workbook.
20) Move the chart from Worksheet 1 within the First workbook, to the Second workbook.21) Save all your changes and close Excel.
Sheet077
ICDL Module 4Practice your ICDL skills
Syllabus Section 4.7a - Preparing Outputs - Shortcuts & Toolbar Buttons
1) Display the Print dialog box.a) Alt+P.b) Ctrl+P.c) Shift+P.d) Esc.
3) Move to the first page when zoomed out.a) Home.b) End.c) Ctrl+End.d) Ctrl+Up Arrow.
4) Spell check.a) F1.b) F5.c) F7.d) F10.
5) What is the function of this icon?
a) Spell check.b) Open.c) Print.d) New.
6) What is the function of this icon?
a) Print Preview.b) Print.c) Zoom.d) Close.
7) What is the function of this icon?
a) Spell check.b) Chart Wizard.c) Print.d) Zoom.
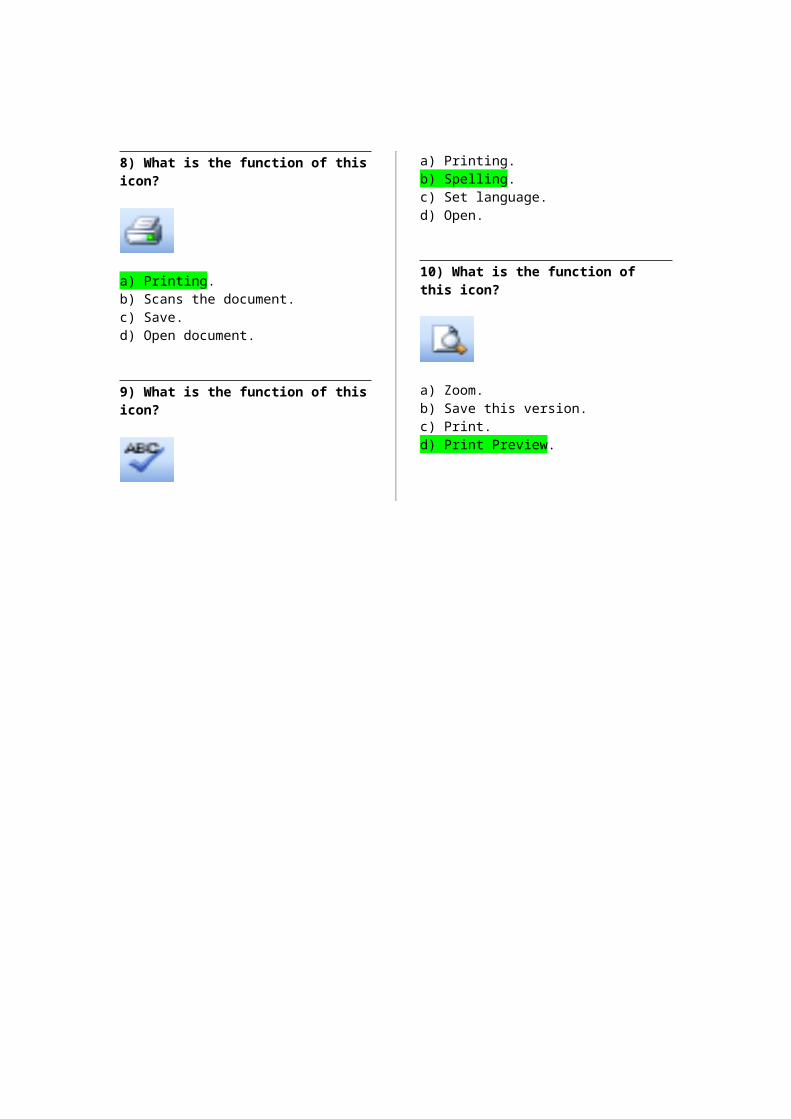
Sheet078
Syllabus Section 4.7b - Preparing Outputs - Practice Session
1) Open a workbook called Printing-01, located in the Microsoft Excel Samples folder, which in turn is contained within the My Documents (or Documents) folder.
2) Change the page orientation to portrait.
3) Change the page size to the normal page size used within your country.
4) Double the size of the top margin.
5) Insert your first name as a page header and also insert page numbering.
6) Within the page header, add your second name, next to your first name.
7) Insert the workbook file name, as a field, within the page footer. Also insert the time and date as fields).
8) Modify the page so that it will print on a single page.
9) Spell check and correct incorrectly spelt words.
10) Widen the columns to display the contents properly.
11) Format the columns so that currency is displayed in your local currency.
12) Set your setting so that Gridlines will be printed.
13) Print Preview your worksheet. Exit the Print Preview view.
14) Print the entire worksheet. Close the workbook and save your changes.
15) Open a workbook called Printing-02, located in the Microsoft Excel Samples folder, which in turn is contained within the My Documents (or Documents) folder.
16) Apply automatic title row printing for every page of the data, and then print the worksheet.
17) Save your changes and close Excel.
ICDL Module 4: CompletePractice your ICDL skills
ICDL Module Four - Complete Quizzes

Sheet079
ICDL Module 4: CompletePractice your ICDL skills
ICDL Module Four: Complete Module Quiz (1)
1) Open a workbook called Sales Report, located in the Microsoft Excel Samples folder, which in turn is contained within the My Documents (or Documents) folder.
2) Change the name of the worksheet to Sales Report.
3) Insert the following data.
4) Make the text within the cells B3:E3 larger.
5) In cell C2, insert the word Year.
6) Centre the word Year across the cells C2:E2.
7) Within cell C8, enter a function that will add up the values within the column.
8) Copy this function to the range D8:E8.
9) In cell F3, enter the text Average Value.
10) In cell F4, enter a function to display the average value for sales within the North region, covering the years 2006-2008.
11) Align text within the cells B3:B7 to the right.
12) Change the colour of the text within cells C3:E3 so that it is displayed in Blue.
13) Format the cells within the range C4:E7, to display using two decimal places.
14) Type you name in cell A1, and apply double underling formatting to it.
15) Insert a column chart using the data within the worksheet.
16) Insert a new worksheet.
17) Copy the chart from the first sheet to the second sheet.
18) Save the workbook using the file name MY New Sales Report.
19) Resave the worksheet using an earlier Excel version file format.
20) Close the workbook.
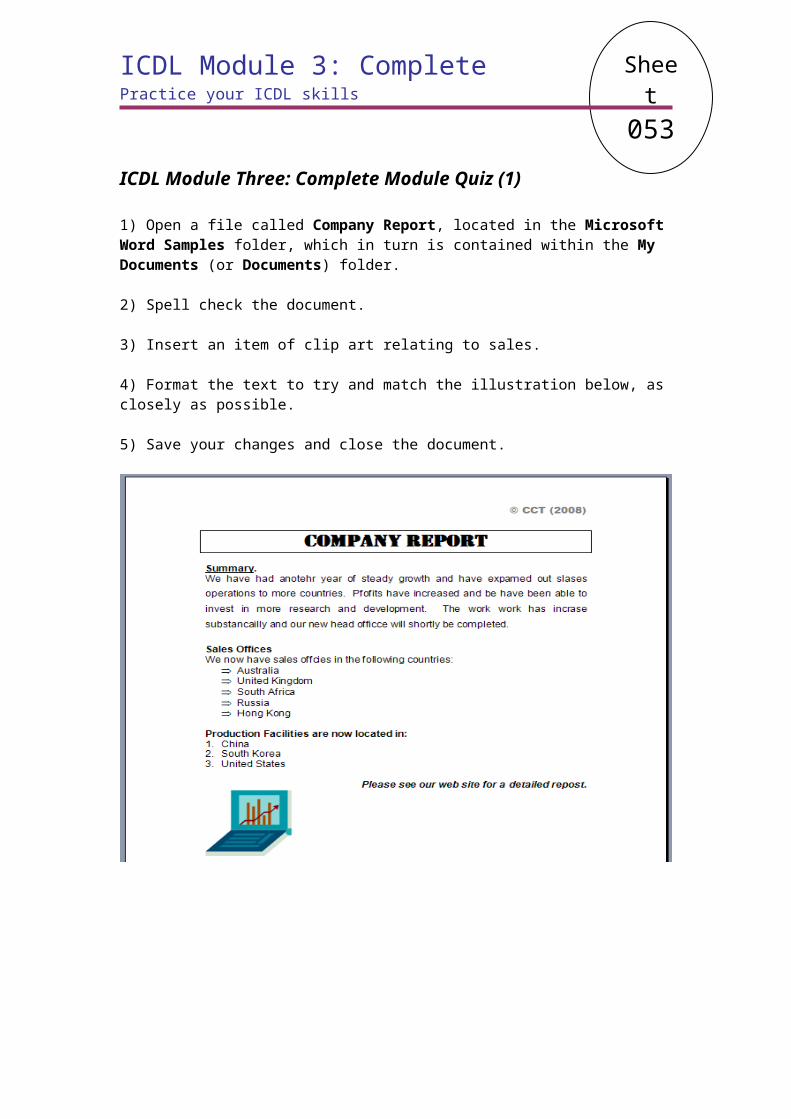
Sheet080ICDL Module 4: Complete
Practice your ICDL skills
ICDL Module Four: Complete Module Quiz (2)
1) Open a file called Regional Sales, located in the Microsoft Excel Samples folder, which in turn is contained within the My Documents (or Documents) folder.
2) Widen column B to correctly display the text within it.
3) Apply a grid type border to the table.
4) Delete row 4.
5) Insert an item of clip art, related to sales or marketing.
6) Resize the clip art item and move it to the top-right of the worksheet.
7) Insert a row chart, based on the table of data.
8) Change the colour of each row to a colour of your choice.
9) Change the colour of the chart background to a colour of your choice.
10) Insert the text Highest Value into cell F3.
11) In cells F5:F8 insert functions to display the highest values in each row.
12) Re-size the chart to make it larger and move it to the bottom-right of the worksheet.
13) Insert a new worksheet and call it Backup version.
14) Copy all the data and objects from the first worksheet to the second worksheet.
15) Within the first worksheet format the contents in the range C3:E3 so that they are displays at a 45 degree angle.
16) In cell B10, enter the text Minimum Sales. Make the text in this cell larger, use a different font type and apply underline formatting.
17) In the cell range C10:E10, enter formula that will display the minimum value within each column of data.
18) Format the cells in the range C5:E8, to display the values using a currency symbol.
19) Save your workbook
20) Close the workbook.
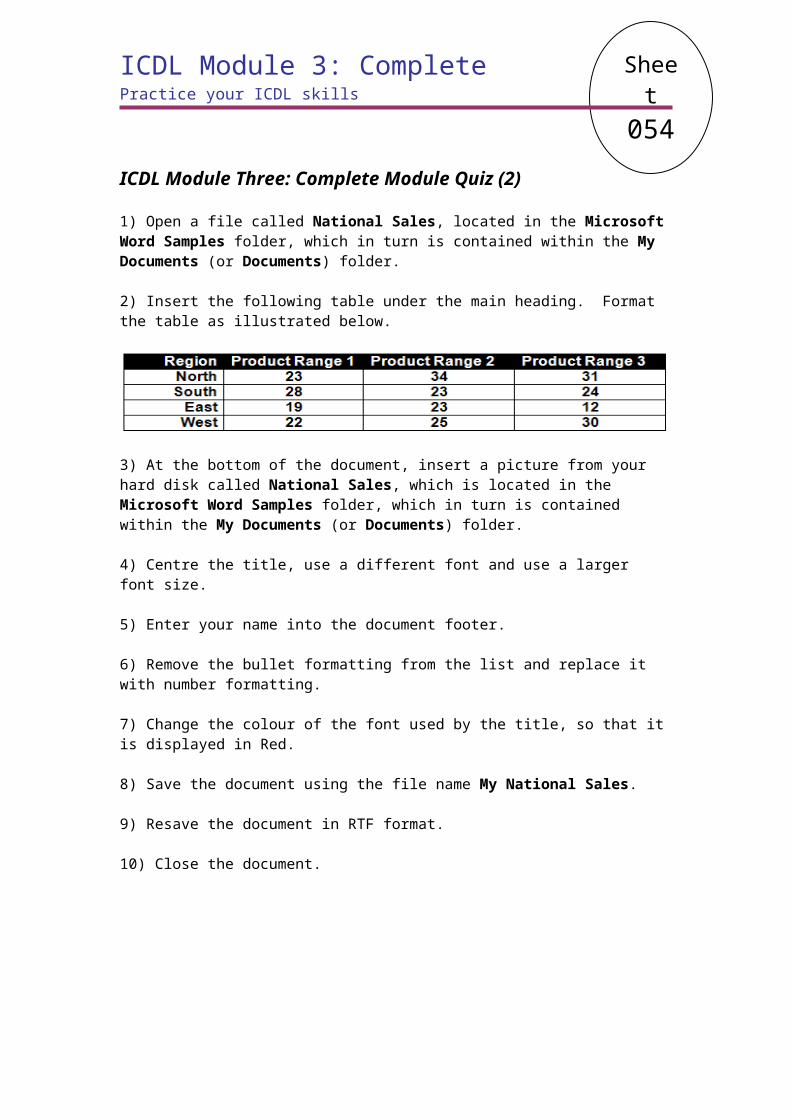
Sheet081ICDL Module 4: Complete
Practice your ICDL skills
ICDL Module Four: Complete Module Quiz (3)
1) Open a file called Complete-03, located within the Microsoft Excel Samples folder, which in turn is contained within the My Documents (or Documents) folder.
2) Enter today's date, in cell C4, and make sure that the date is formatted correctly.
3) Enter a number in cell C5, and format the number to display using 2 decimal places.
4) Enter your name in cell C6, and format the text to be right aligned.
5) Within cell F10, add the contents of cell D10, and the contents of cell E10.
6) Within cell F11, subtract the contents of cell E11, from the contents of cell D11.
7) Within cell F12, multiply the contents of cell D12, by the contents of cell E12.
8) Within cell F13, divide the contents of cell D13, by the contents of cell E13.
9) Switch to the second worksheet called Pie Chart.
10) Create a pie chart using the sales figures within the worksheet.
11) Explode the pie chart, as illustrated.
12) Delete the third worksheet.
13) Insert a new worksheet called Line Chart.
14) Copy the data from the Pie Chart worksheet, to the Line Chart worksheet.
15) Within the Line Chart worksheet, create a line chart from the data.
16) Print the line chart.
17) Print the contents of the second worksheet.
18) Save the file using the file name 'MY Complete Quiz 03', in the Microsoft Excel Samples folder, which in turn is contained within the My Documents (or Documents) folder.
19). Save the file as a template in the Microsoft Excel Samples folder, which in turn is contained within the My Documents (or Documents) folder.
20) Close the workbook and close Excel.
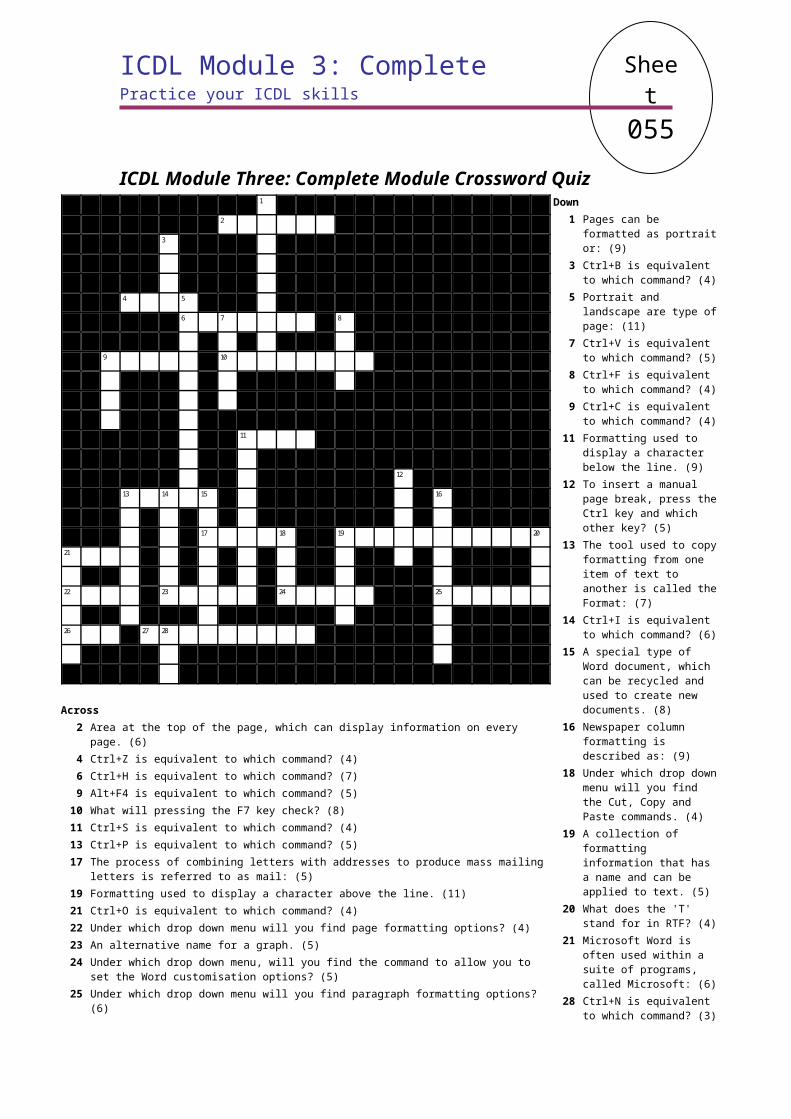
Sheet082ICDL Module 4: Complete
Practice your ICDL skills
ICDL Module Four: Complete Module Crossword Quiz 1 2
3 4 5
6 7 8
9 10
11 12
13
14 15 16
17 18
19
20 21
22 23 24
25
26 27
28 29 30
31 32
33
Across 1 Type of formatting that can be applied to a cell. (8)3 By default text within a cell is aligned to the: (4)7 Name of the function used to calculate the maximum value within a range. (3)9 An Excel file with an extension of XLT is a: (8)
10 Circular chart type, often used to display percentage values. (3)14 Ctrl+U is equivalent to which command? (9)16 By default, numbers within a cell are aligned to the: (5)17 In Excel a spreadsheet file is called a: (8)19 Ctrl+S is equivalent to which command? (4)20 To select non-adjacent cells, click on the required cells with which key pressed? (4)22 What type of referencing is used by this formula? =$A$3 (8)25 Ctrl+O is equivalent to which command? (4)26 Name of the feature that allows you to automatically fill a range. (8)28 Name of the function used to add a range. (3)30 The keyboard shortcut, Ctrl+; will insert the: (4)31 Sum is an example of a: (8)33 What will pressing F1 within Excel display? (4)
Down 1 Ctrl+C is equivalent to which
command? (4)2 Ctrl+H is equivalent to which
command? (7)4 Under which drop down menu
will you find the 'Options' command, allowing you to customise Excel. (5)
5 The keyboard shortcut Ctrl+: will insert the: (4)
6 Area at the top of the sheet that can display text, which can be repeated on every sheet. (6)
8 The Excel default workbook file name extension. (3)
9 Default number of worksheets within a workbook. (5)
10 Ctrl+V is equivalent to which command? (5)
11 Ctrl+F is equivalent to which command? (4)
12 In Excel an individual sheet is called a: (9)
13 Ctrl+N is equivalent to which command? (3)
15 B4+G9 is an example of a: (7)18 Ctrl+X is equivalent to which
command? (3)21 The cells A1:B7 are called a: (5)23 Ctrl+P is equivalent to which
command? (5)24 Ctrl+B is equivalent to which
command? (4)27 Ctrl+Z is equivalent to which
command? (4)29 Name of the function used to
calculate the minimum value within a range. (3)
31 An item that can be automatically updated within Excel is called a: (5)
32 Ctrl+I is equivalent to which command? (6)
ICDL Module 4: CompletePractice your ICDL skills
ICDL Module Four: Complete Module Crossword Solution
C U R R E N C YO EP PY L E F T T
A O IC O H M A X
T E M P L A T E P I E LF H S A W A SI R N D O S
U N D E R L I N E E F R I G H TD E W O R K B O O K E C
R S A V E UM H C T R L
A B S O L U T E P B AL E R O P E NA U T O F I L L G
S U M N N D A T EI D T
F U N C T I O NI TE A
H E L P LD I
C
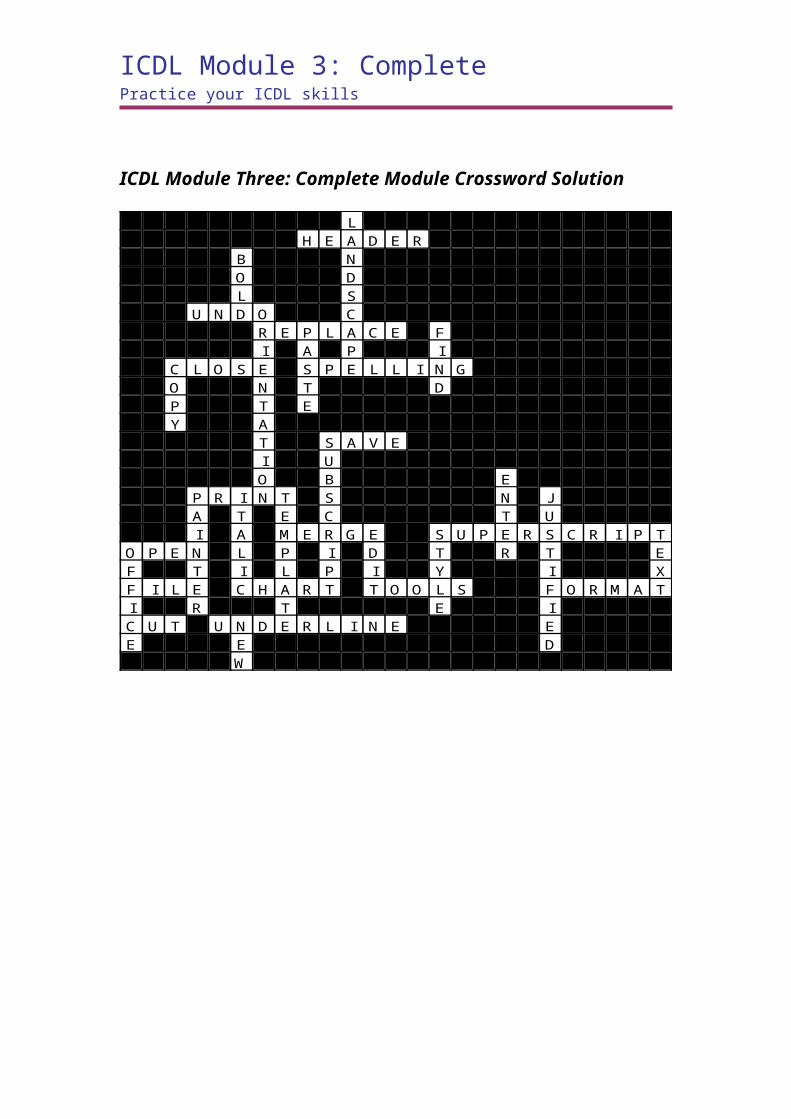
ICDL Module 5Practice your ICDL skills
ICDL Module Five - Database
Sheet083ICDL Module 5
Practice your ICDL skills
Syllabus Section 5.1a - Using Microsoft Access - Shortcuts & Toolbar Buttons
1) What is the function of this icon?
a) Open.b) New.c) Close.d) Save.
2) What is the function of this icon?
a) Open.b) New.c) Close.d) Save.
3) What is the function of this icon?
a) Open.b) New.c) Close.d) Help.
4) What is the function of this icon?
a) Open.b) New.c) Close.d) Save.
5) What is the function of this icon?
a) Design view.b) Datasheet view.c) Pivot Table view.d) Print Preview view.
6) What is the function of this icon?
a) Design view.b) Datasheet view.c) Pivot Table view.d) Print Preview view.
7) What is the function of this icon?
a) Open.b) New.c) Close.d) Save.
8) What is the keyboard shortcut to create a new database?
a) Ctrl+A.b) Ctrl+V.c) Ctrl+N.d) Ctrl+O.
9) What is the keyboard shortcut to display help within the Access program?
a) F1.b) F5.c) F7.d) F10.
10) What is the keyboard shortcut to close the Access program?
a) Alt+F4.b) Alt+F6.c) Ctrl+F4.d) Ctrl+F6.
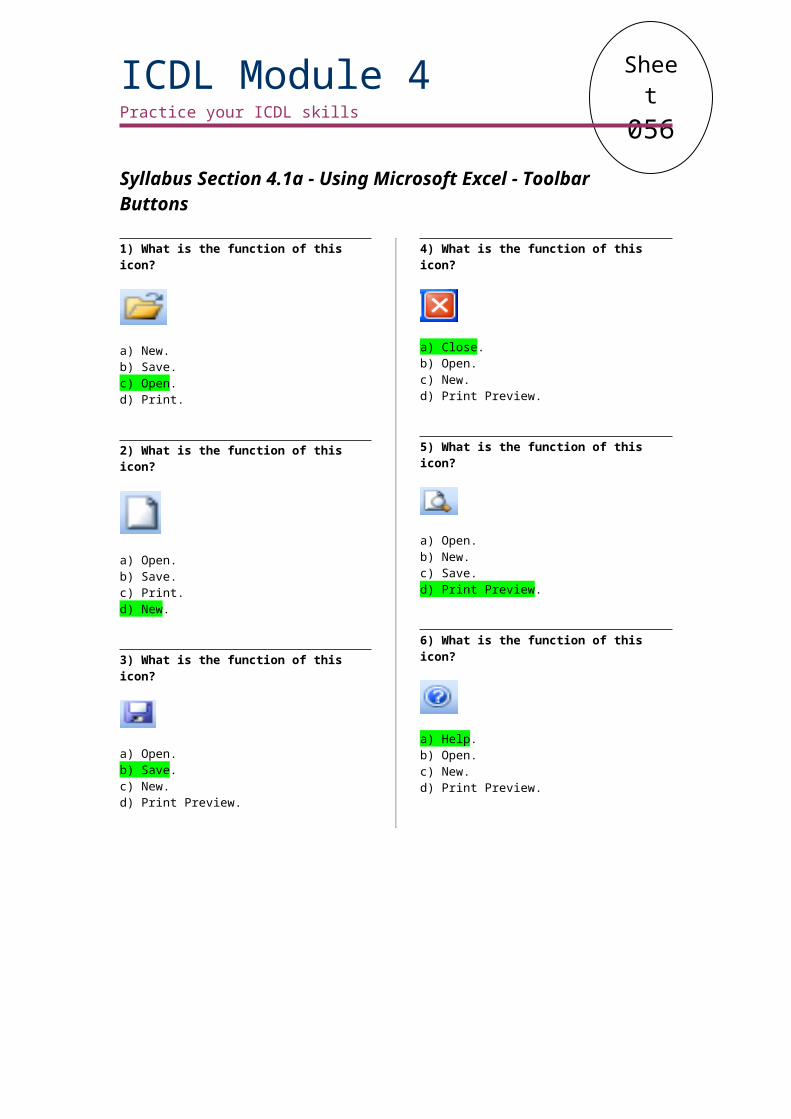
Sheet084
ICDL Module 5Practice your ICDL skills
Syllabus Section 5.1b - Using Microsoft Access - Quick Quiz
1) Briefly explain what a database is.
2) Explain what a table is.
3) Explain what a record is.
4) Explain what a field is.
5) Explain the concept of 'field types'.
6) Explain the concept of 'field properties'.
7) Explain the concept of table relationships.
8) Explain the concept of an index.
9) What is a 'primary key'?
10) Explain the concept of relationship validation.
11) What is the name of the database supplied by Microsoft?
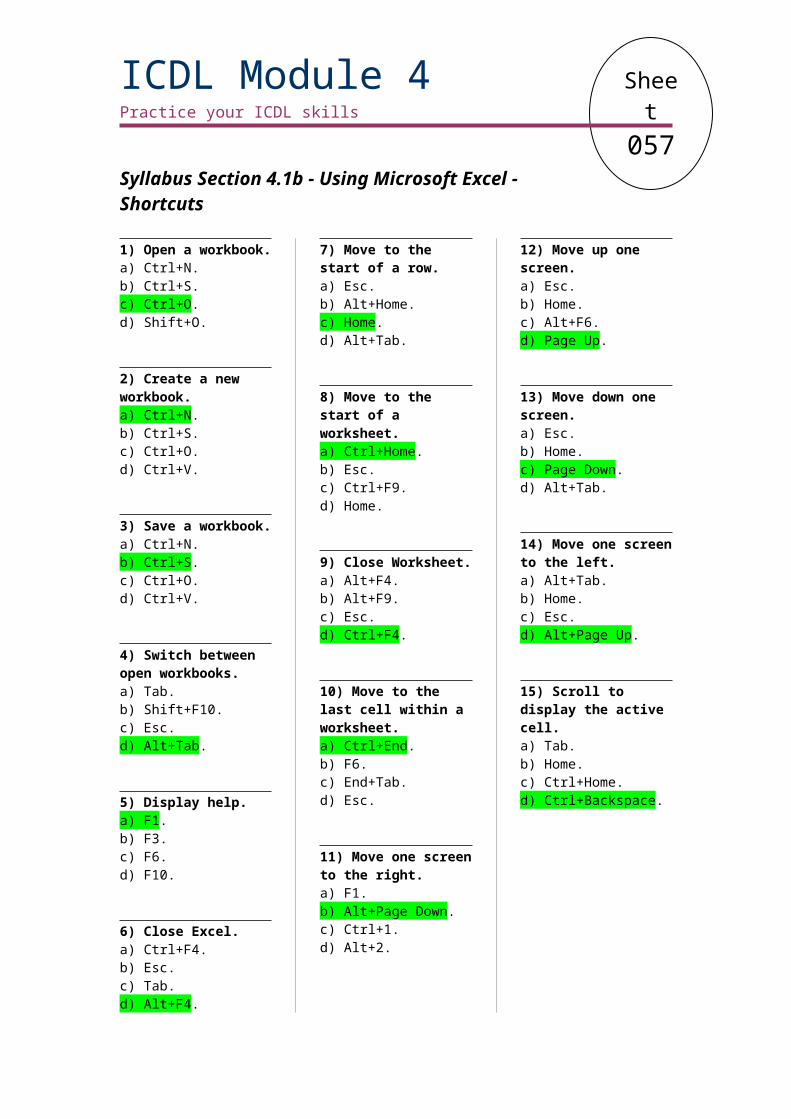
Sheet085
ICDL Module 5Practice your ICDL skills
Syllabus Section 5.1c - Using Microsoft Access - Practice Session
1) Open the Access database program.
2) Open a database called First Look, located within the Microsoft Access Samples folder, which in turn is contained within the My Documents (or Documents) folder. If you see a security warning, continue, to open the file.
3) Close the database file (but leave Access open).
4) Close the Access program. Then re-start the Access program and open the First Look database.
5) Open the Suppliers table.
6) Toggle between the Design view and the Datasheet view.
7) Close the Suppliers table.
8) Open the Suppliers form.
9) Toggle between the Design view and the Datasheet view within the form.
10) Close the Suppliers form.
11) Open the Suppliers report.
12) Toggle between the Design view and the Datasheet view within the report.
13) Close the Suppliers report.
14) See what other toolbars you can display. Display and then hide some of those toolbars.
15) Create a new database. Save it in the Microsoft Access Samples folder, and call it My New Database. Close Access.
Sheet086
ICDL Module 5Practice your ICDL skills
Syllabus Section 5.2a - Tables - Practice Session
1) Start the Access program. Set the default save folder, to the Microsoft Access Samples folder, which in turn is contained within the My Documents (or Documents) folder.
2) Create a new blank database. Save the database as My Contacts.
3) Create a table called Contacts, using the information below.
4) Use the default Primary Key.
5) Assign appropriate data types to the fields.
6) Delete the record relating to Elliot Smith.
7) Change the record for Karin Knapp who has moved from Sales to Marketing.
8) Add a new record for Ms Maria Sharapova, who has joined the Sales department, concentrating on selling Product Code ID '2', to Russia.
9) Add an extra field to the database called 'Head Office based', which will contain yes/no values.
10) Delete the first name David from the appropriate record.
11) Change the last name from Lou Murray to Lou Smith.
12) Undo this change so that the name reverts back to Lou Murray.
13) Experiment with navigating through the data records.
14) Save and then close the table.
15) Close Access.
16) Open an access database called Delete Table which is located within the folder called Microsoft Access Samples folder, which in turn is contained within the My Documents (or Documents) folder.
17) Delete the Suppliers table.
18) Close Access.
Sheet087
ICDL Module 5Practice your ICDL skills
Syllabus Section 5.2b - Tables - Practice Session
1) Open a database called International Contacts, located within the Microsoft Access Samples folder, which in turn is contained within the My Documents (or Documents) folder. If you see a security warning, continue, to open the file.
2) Open a table called International Suppliers.
3) Change the width of all the columns, so that the data is properly displayed within the columns.
4) Insert a new column after the 'Supplier Name' column. Call the column data 'Date Verified'. If necessary make the column wider. Manually insert today's date into each cell within the column. Make sure that the Date Verified field has a validation rule, so that only a date can be inserted into the field.
5) Insert a new field called Credit Limit, at the end of the table. Insert sample values (i.e. just make up some 3 digit numbers). Use a validation rule, so that only currency data can be inserted into the field.
6) Apply validation rules so that only text can be inserted into the other fields.
7) Insert a new field called ID, at the end of the table. Insert sample values (i.e. just make up some 2 digit numbers). Use a validation rule so that only numeric data can be inserted into the field.
8) Move the ID field to the start of the table.
9) If necessary, change the field format attributes of the ID field, so that the data displayed within the column is displayed showing 1 decimal place.
10) Change the field format attributes of the Contact Name field, so that the data displayed within the column is limited to 12 characters.
11) Apply a different date field format attribute to the 'Date Verified' column.
12) Close the database.
13) Open a database called Education.
14) Establish appropriate relationships between the three tables, i.e. 'Course Details', 'Student Details', and 'Courses Running Next Week'.
15) Close Access.
Sheet088
ICDL Module 5Practice your ICDL skills
Syllabus Section 5.2c - Tables - Practice Session
1) Start Access.
2) Open an Access database called Relate located within the Microsoft Access Samples folder, which in turn is contained within the My Documents (or Documents) folder.
3) Open the Orders table and change the indexing setting on the Order No field so that duplicate order numbers will be allowed.
4) Save and close the Orders table.
5) Re-open the Orders table and reset the indexing setting on the Order No field to prevent duplication of order numbers.
6) Save and close the Orders table.
7) Create a one-to-many relationship between the Employee Number field in the Sales Employees table and the Employee ID field in the Orders table.
8) Delete the relationship.
9) Create a one-to-one relationship between the Customer_ID fields of the Customers and Customer_Details tables. Set options to prevent deletion of related fields and records.
10) Close the database.
11) Close Access.
Sheet089
ICDL Module 5Practice your ICDL skills
Syllabus Section 5.3a - Forms - Practice Session
1) Open an Access database called Forms located within the Microsoft Access Samples folder, which in turn is contained within the My Documents (or Documents) folder.
2) Create a form to allow you to add, delete and modify details within the Suppliers table. Call the form 'Suppliers'.
3) Open the form.
4) Use the form to add a record (make up the information).
5) Use the form to delete a record.
6) Use the form to modify the existing information within a record, (such as changing a name).
7) Experiment with using all the navigation buttons within the form.
8) Go directly to record number 6.
9) Insert your name as a header. Insert the text 'Supplier Form' into the footer.
10) Modify the header to include today’s date. Modify the footer to say 'ABC Enterprises Supplier Form'
11) Save the form.
12) Close the form.
13) Close the database.
14) Open a database called Delete Form located in the Microsoft Access Samples folder, which in turn is contained within the My Documents (or Documents) folder.
15) Delete the form.
16) Close Access.
Sheet090
ICDL Module 5Practice your ICDL skills
Syllabus Section 5.4a - Retrieving Information - Practice Session
1) Open an Access database called Query located in the Microsoft Access Samples folder, which in turn is contained within the My Documents (or Documents) folder.
2) Open the International Suppliers table and search for the text 'UK'. How many instances of the text can you find?
3) Search for all occurrences of the number 21.
4) Search for all occurrences of the number 14/05/2006.
5) Apply a filter so that only companies that have account facilities in place are displayed.
6) Remove the filter so that all the records are displayed.
7) Create a simple query to display the following, and save the query as 'Brief Details'.
8) Create another query to only display records for companies that have more than 30 staff. Save the query using the name Over 30.
9) Create another query to only display records for companies that have less than 20 staff. Save the query using the name Under 20.
10) Create another query, to only show UK companies that have account facilities in place. Save the query using the name UK Account Facilities.
11) Delete the query called Over 30.
12) Close Access.
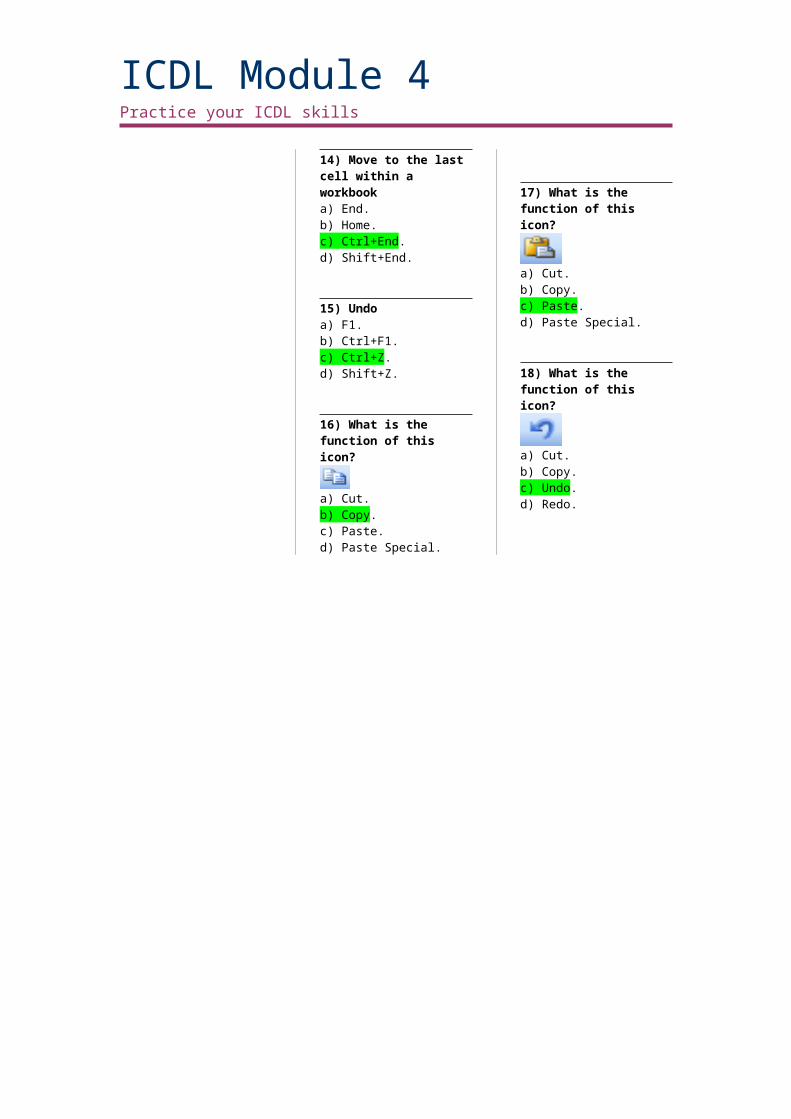
Sheet091
ICDL Module 5Practice your ICDL skills
Syllabus Section 5.4b - Retrieving Information - Practice Session
1) Open an Access database called Query3 located in the Microsoft Access Samples folder, which in turn is contained within the My Documents (or Documents) folder.
2) Create a query called QuantityHigh containing all the fields from the Orders table which will list all records with a quantity value greater than or equal to 100. Run the query.
3) Create a query called QuantityLow containing all the fields from the Orders table which will which will list all records with a quantity value less than or equal to 30. Run the query.
4) Create a query called NoPastaOrSauce containing all the fields from the Orders table which will list all the records where the Category is not equal to Pasta or Sauces. Run the query.
5) Create a query called QuantityMid containing all the fields from the Orders table which will list all the records with a quantity value greater than 40 and less than 100. Run the query.
6) Re-open the query called QuantityLow and add new criteria to display only records where the order number is greater than 10 and less than 20. Run the query.
7) Re-open the query called QuantityLow and delete the order number criteria. Run the query.
8) Remove the fields called Unit Quantity and Order Date from the NoPastaOrSauce query. Run the query.
9) Add the Unit Quantity field back into the NoPastaOrSauce query. Run the query.
10) Re-open the query called QuantityHigh can hide the Order Date field.
11) Move the Quantity field column so that it is displayed between the Category and Product Name fields. Run the query.
12) Unhide the Order Date field and re-run the QuantityHigh query.
13) Save and close the QuantityHigh query.
14) Close Access.
Sheet092
ICDL Module 5Practice your ICDL skills
Syllabus Section 5.4c - Retrieving Information - Practice Session
1) Open an Access database called Sorting located in the Microsoft Access Samples folder, which in turn is contained within the My Documents (or Documents) folder.
2) Open the table called Orders.
3) Sort the table on the field called Product Name in ascending alphabetical order.
4) Sort the table on the field called Category in descending alphabetical order.
5) Sort the table on the field called Quantity in ascending order.
6) Sort the table on the field called Quantity in descending order.
7) Close the Orders table.
8) Open the query called ListBeverages.
9) Sort the query on the field called Quantity in ascending order.
10) Sort the query on the field called Product Name in ascending alphabetical order.
11) Sort the query on the field called Quantity in descending order.
12) Sort the query on the field called Product Name in descending alphabetical order.
13) Close the ListBeverages query.
14) Open the form called FrmOrders.
15) Sort the form on the field called Employee ID in ascending order and browse through the records.
16) Sort the form on the field called Product Name in ascending alphabetical order and browse through the records.
17) Sort the form on the field called Product Name in descending alphabetical order and browse through the records.
18) Sort the form on the field called Employee ID in descending order and browse through the records.
19) Close the FrmOrders form.
20) Close Access.
Sheet093
ICDL Module 5Practice your ICDL skills
Syllabus Section 5.5a - Reports - Practice Session
1) Open an Access database file called Reports, located in the Microsoft Access Samples folder, which in turn is contained within the My Documents (or Documents) folder.
2) Create a report to display the following information.
3) Save the report as International Account Facilities.
4) Add your name to the report header.
5) Modify the report so that the Country field is displayed after the AccountFacilities field within the report. Then reorder the fields back to their original positions.
6) Create a query called WithAccount. This query should list all suppliers with account facilities.
7) Create a new report based this query. Save the report as International Suppliers with Account.
8) Modify the report so that the records are listed alphabetically by country name.
9) Modify the report so that the records are listed in reverse alphabetical order by supplier name.
10) Close the Report. Close Access.
Sheet094
ICDL Module 5Practice your ICDL skills
Syllabus Section 5.5b - Reports - Practice Session
1) Open Access.
2) Open an Access database file called Reports2, located in the Microsoft Access Samples folder, which in turn is contained within the My Documents (or Documents) folder.
3) Open the report called SalesList.
4) Modify the report so that sales are grouped by sales person and show a total of the quantities sold by each sales person.
5) Modify the report so that sales are grouped by sales person and show the minimum sale value for each sales person.
6) Modify the report so that sales are grouped by product name with a count of the number of orders for each product.
7) Modify the report so that sales are grouped by sales person and show the maximum sale value for each sales person.
8) Modify the report so that sales are grouped by sales person and show the average sale value for each sales person.
9) Modify the report so that sales are grouped by sales person and show a total of the quantities sold by each sales person.
10) Add your name to the report header.
11) Add today’s date to the report footer.
12) Modify the report header to include the text My Sales Report.
13) Modify the report footer to include the text European Computer Driving Licence.
14) Close the report.
15) Close the database.
16) Close Access.
Sheet095
ICDL Module 5Practice your ICDL skills
Syllabus Section 5.6a - Printing Issues - Practice Session
1) Open an Access database called Printing located in the Microsoft Access Samples folder, which in turn is contained within the My Documents (or Documents) folder.
2) Examine the Suppliers table in Print Preview view.
3) Examine the Suppliers form in Print Preview view.
4) Examine the Suppliers report in Print Preview view.
5) Change the report to Landscape page orientation.
6) Check to see what paper size setting is being used, and if necessary change the setting.
7) Change the report page orientation back to portrait and then print the report.
8) Print the table.
9) Print 1 page only.
10) Print record 2 only.
11) Print records 6 thru 10 inclusive only.
12) Close Access.
ICDL Module 5Practice your ICDL skills
ICDL Module Five - Complete Quizzes
Sheet096ICDL Module 5
Practice your ICDL skills
ICDL Module Five: Complete Module Quiz (1)
1) Open a file called Contacts, located in the Microsoft Access Samples folder, which in turn is contained within the My Documents (or Documents) folder.
2) Open a table called Contact Details.
3) Change the name of the field called 'Title', to 'Contact_Title'.
4) Change the field size of the 'Contact_Second_Name' field, to a maximum of 30 characters.
5) Find a supplier called 'Learning Early', and change the name to 'Early Developers'.
6) Insert a new field that will be displayed at the end of each record. Call the new field 'Approval_Status'
7) Format the Approval_Status field to use a Yes/No data type.
8) Mark all the suppliers as approved, apart from 'AW Designs'.
9) The company called 'Tremendous' has ceased trading and needs to be removed from the database.
10) Add details for a new company called 'Cheltenham ABC', based in Ireland. The contact name is Yvette Jones, who is the Sales Manager. The company has approved status.
11) Reorder the records, so that the Country field is displayed at the end of the record.
12) Create a form based on the Contact Details table. Use all the fields.
13) Save the form as Contact Management.
14) Create a query based on the Contact Details table, to only display UK and Ireland based companies.
15) Save the query as UK Contacts.
16) Create a report based on the Contact Details table. Use all the fields.
17) Add your name as a header within the report.
18) Save the report.
19) Print the report.
20) Close the Access program.
Sheet097ICDL Module 5
Practice your ICDL skills
ICDL Module Five: Complete Module Quiz (2)
1) Open a file called Business, located in the Microsoft Access Samples folder, which in turn is contained within the My Documents (or Documents) folder.
2) Open a table called Suppliers.
3) Sort the data within the table so that the data is sorted by country, with Australia displayed at the top of the list.
4) Increase the width of the columns as displayed within the table.
5) Delete any records relating to Germany.
6) Close the table.
7) Create a new table called Approved, containing a field called ApprovalStatus. This field should allow yes/no values. Also insert the SupplierID field.
8) Add 'approval ticks' for companies with a SupplierID of 1, 3, 5 & 9. Save
9) Save your changes and close any open tables.
10) Set up a relationship between the two tables.
11) Create a report to display the name of all approved companies.
12) Add you name to the report footer.
13) Print the report.
14) Delete the report.
15) Create a query to find all companies based in Egypt.
16) Save the query as Egypt.
17) Edit your records to approve the following companies:
- Mouse Systems- Training Solutions- Computer Results- IC Computers
18) Delete the Query called Egypt.
19) Create a report to display all approved companies based in Egypt, and save the report as Egypt Approved.
20) Close Access.
Sheet098ICDL Module 5
Practice your ICDL skills
ICDL Module Five: Complete Module Crossword Quiz1 2
3 4
5 6
7 8
9
10
11 12 13 14
15 16 17
18
19
20 21
22
23
24 25
Across 2 An Access feature that makes it easier to input data. (4)6 Ctrl+P is equivalent to which command? (5)7 Type of key used to uniquely identify a field. (7)8 What is displayed within Access when you press the F1 keyword shortcut? (4)9 Ctrl+Z is equivalent to which command? (4)
11 An Access table view. (6)12 Items of information that together make up a record. (5)15 Are records represented by columns or rows? (4)17 Which key would you to press, to move from cell to cell, within a table? (3)18 Ctrl+H is equivalent to which command? (7)19 Are fields represented by columns or rows? (7)22 Ctrl+X is equivalent to which command? (3)23 Which key would you press to move to the last field of the current record, within a table? (3)24 The type of database used by Access. (10)
Down 1 Ctrl+C is equivalent to which
command? (4)2 Ctrl+F is equivalent to which
command? (4)3 An Access feature that
makes it easier to output and print data. (6)
4 Ctrl+O is equivalent to which command? (4)
5 Ctrl+V is equivalent to which command? (5)
8 Which key would you press to move to the first field of the current record, within a table? (4)
10 A feature that lets you only display relevant information, from open tables. (6)
13 An Access table view. (9)14 File name extension used by
Access XP and Access 2003 (3)
15 A collection of related fields within a table. (6)
16 When searching * and ? are known as: (9)
20 An Access feature that makes it easier to interrogate your data and extract information. (5)
21 What do you check when you press the F7 key within Access? (8)
25 Ctrl+N is equivalent to which command? (3)
ICDL Module 5Practice your ICDL skills
ICDL Module Five: Complete Module Crossword Solution
C F O R MR O I OE P P R I N T PP R I M A R Y D E H E L PO S U N D OR T F MT D E S I G N F I E L D M
L A DT R O W S T A B
R E P L A C E I AR C O L U M N S
Q O D H SU R C U T E PE N D A E ER R E L A T I O N A LY D E L
S W ING
ICDL Module 6Practice your ICDL skills
ICDL Module Six Presentation
Sheet099ICDL Module 6
Practice your ICDL skills
Syllabus Section 6.1a - Using PowerPoint - Shortcuts & Toolbar Buttons
1) Open a Presentation.a) Alt+O.b) Ctrl+O.c) Shift+O.d) Ctrl+N.
2) Create a new presentation.a) Alt+N.b) Ctrl+O.c) Alt+O.d) Ctrl+N.
3) Switch between open presentations.a) Alt+Tab.b) Esc.c) Enter.d) Ctrl+F1.
4) Display Help.a) F1.b) F5.c) F6.d) F10.
5) Save the presentation.a) Alt+S.b) Shift+S.c) Tab+S.d) Ctrl+S.
6) Close PowerPointa) Alt+F4.b) Ctrl+F4.c) Alt+F6.d) Ctrl+F6.
7) What is the function of this icon?
a) New.b) Open.c) Save.d) Help.
8) What is the function of this icon?
a) New.b) Open.c) Save.d) Help.
9) What is the function of this icon?
a) New.b) Open.c) Save.d) Help.
10) What is the function of this icon?
a) New.b) Open.c) Save.d) Help.
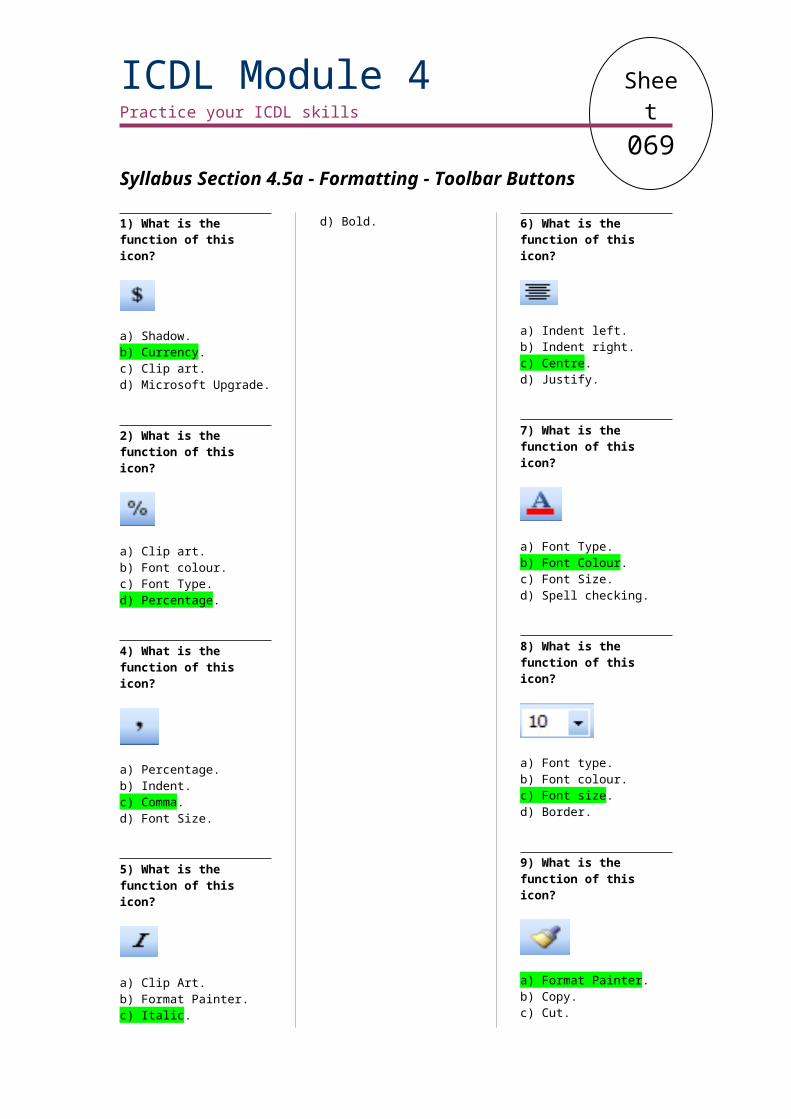
Sheet100
Syllabus Section 6.1b - Using PowerPoint - Practice Session
1) Open the PowerPoint presentation program.
2) Open a file called Presentation-01, located in the Microsoft PowerPoint Samples folder, which in turn is contained within the My Documents (or Documents) folder. Also open a file called Presentation-02, and a file called Presentation-03.
3) Practice switching between the three presentations.
4) Close the Presentation-02 and the Presentation-03 files.
5) Re-save the file called Presentation-01, using a different file name of My Renamed Presentation.
6) Display the PowerPoint Help, and search for help relating to 'keyboard shortcuts'.
7) Close the PowerPoint program.
8) Re-open the PowerPoint program. Create a new, one page presentation, using your name as the slide title text. Save the file using the name 'My New Presentation' (in the Microsoft PowerPoint Samples folder).
9) Re-save the presentation using the RTF (Rich Text Format) file type.
10) Re-save the presentation as a GIF file.
11) Re-save the presentation as a JPEG file.
12) Re-save the presentation in a file format that would be compatible with earlier versions of PowerPoint.
13) Display some additional toolbars, such as the Picture or Drawing toolbars. Then re-hide these toolbars.
14) Save the presentation as a template file called My New Template. Close PowerPoint.

Sheet101
Syllabus Section 6.1c - Using PowerPoint - Practice Session
1) Open a file called Presentation-04, located in the Microsoft PowerPoint Samples folder, which in turn is contained within the My Documents (or Documents) folder.
2) Make a note of the current Zoom setting. Use the zoom feature so that you can read all the text on the page. Reset the zoom to the original level.
3) Modify the options so that PowerPoint will store and use your name within the program.
4) Modify the default save folder so that it points to the Microsoft PowerPoint Samples folder.
5) Access the online Help page on the Microsoft web site and print a page of Help information.
6) Create a new presentation.
7) Enter your name into the slide, as the slide title.
8) Enter the following text as the sub-title:
'My First presentation'.
8) Save the new presentation as 'My brand new presentation', within the Microsoft PowerPoint Samples folder, which in turn is contained within the My Documents (or Documents) folder.
9) Resave the presentation using the file name 'Backup Copy'.
10) Close the PowerPoint program.
Sheet102
Syllabus Section 6.2a - Developing Presentations - Shortcuts & Toolbar Buttons
1) What is the function of this icon?
a) Outline view.b) Slide sorter view.c) Normal view.d) Master view.
2) What is the function of this icon?
a) Slide sorter view.b) Outline view.c) Slide show view.d) Normal view.
3) What is the function of this icon?
a) Slide show view.b) Slide sorter view.c) Normal view.d) Outline view.
4) What is the function of this icon?
a) Open presentation.b) Close presentation.c) Print Preview.d) Slide sorter view.
5) What is the function of this icon?
a) Slide show.b) Outline view.c) New slide.d) Master view.
6) What is the function of this icon?
a) Slide Design.b) Insert slide.c) Slide layout.d) Slide show.
7) Insert new slide.a) Ctrl+I.b) Ctrl+O.c) Ctrl+M.d) Ctrl+K.

Sheet103
Syllabus Section 6.2b - Developing Presentations - Practice Session
1) Open a file called Views, located in the Microsoft PowerPoint Samples folder, which in turn is contained within the My Documents (or Documents) folder.
2) Change to Outline view and examine the presentation.
3) Change to Slide Sorter view and examine the presentation.
4) Change to Slide Show view. Press the Enter key a few times to view the slide show. Close the presentation.
5) Change back to the normal view. Close the presentation.
6) Open a file called Slide manipulation. Change the slide layout of the first slide to 'Title Slide'
7) Insert a slide at the end of the presentation, using the 'Title and text' slide layout. In the title area insert the text 'Laptops'. In the text area insert the following bullet points: - Battery powered- Portable
8) Insert a slide at the end of the presentation, using the 'Title and text' slide layout.
9) Insert a slide at the end of the presentation, using the 'Title and text' slide layout.
10) Insert a slide at the end of the presentation, using the 'Chart and Text' slide layout. Then change the slide layout to 'Title and text'
11) Change the background colour of all the slides to be a blue colour.
12) Change the background colour of just the first slide to be a red colour.
13) Apply a Slide Design of your choice to the presentation.
14) Apply a different Slide Design of your choice to the presentation.
15) Save your changes and close the presentation.
Sheet104
Syllabus Section 6.2c - Developing Presentations - Practice Session
1) Open a presentation called Slide masters located in the Microsoft PowerPoint Samples folder, which in turn is contained within the My Documents (or Documents) folder.
2) Remove the clip art from the top-left of the slide and replace it with a star shaped AutoShape.
3) Insert a picture called 'computer', from your hard disk (stored in the Microsoft PowerPoint Samples folder, which in turn is contained within the My Documents (or Documents) folder. Move the picture down to the bottom-right corner of the master slide, and if necessary re-size the picture.
4) Insert the text 'About Computers' as a header that will be displayed on every slide.
5) Insert your name so that it will be displayed as a header, on just the first slide.
6) Change the header so that it is displayed on every slide.
7) Insert automatic slide numbering on all slides, apart from the first slide.
8) Open a presentation called Slide masters. Remove the text 'Cheltenham Courseware' from the slide master.
9) Remove the graphic from the bottom-right corner of the slide master.
10) Insert a star shape in the top-left corner of the slide master.
11) Insert today's date into the slide master, which will update to the correct date every time you reopen the presentation.
12) Delete the date within the slide master. Re-insert the date, so that it will no longer update each time you reopen the presentation.
13) Delete the date. Re-insert the date on just the first slide, so that it updates automatically.
14 Delete the date. Re-insert the date on just the first slide, so that it does not update automatically.
15) Save your changes and close the presentations.

Sheet105
Syllabus Section 6.3a - Text & Images - Toolbar ButtonsNOTE. The following assumes that the Drawing toolbar is displayed.
1) What is the function of this icon?
a) Undo.b) Redo.c) Close.d) Open.
2) What is the function of this icon?
a) Bold.b) Italic.c) Underline.d) Shadow.
3) What is the function of this icon?
a) Bold.b) Italic.c) Underline.d) Shadow.
4) What is the function of this icon?
a) Spelling.b) Font size.c) Font colour.d) Font type.
5) What is the function of this icon?
a) Undo.b) Redo.c) Open.d) Close.
6) What is the function of this icon?
a) Bold.b) Italic.c) Underline.d) Shadow.
7) What is the function of this icon?
a) Align left.b) Centre.c) Align right.d) Justify.
7) What is the function of this icon?
a) Increase font size.b) Decrease font size.c) All caps.d) All lower case.
7) What is the function of this icon?
a) Increase font size.b) Decrease font size.c) Increase line spacing.d) Decrease line spacing.
7) What is the function of this icon?
a) Bold.b) Italic.c) Underline.d) Shadow.
7) What is the function of this icon?
a) Align left.b) Centre.c) Align right.d) Justify.
7) What is the function of this icon?
a) Open.b) Insert Chart.c) Insert Clip Art.d) Insert WordArt.
Sheet106
Syllabus Section 6.3b - Text & Images - Shortcuts
1) Select a character to the right.a) Esc.b) Ctrl+R.c) Ctrl_L.d) Shift+Right Arrow.
2) Select to the end of a word.a) Ctrl+Shift+Right Arrow.b) Ctrl+E.c) Ctrl+Tab.d) F7.
3) Select one line up.a) F6.b) F1.c) Shift+Up Arrow.d) Ctrl+!.
4) Delete one word to the right.a) Ctrl+Esc.b) Esc.c) Ctrl+D.d) Ctrl+Del.
5) Paste from the Clipboard.a) Ctrl+A.b) Ctrl+C.c) Ctrl+V.d) Ctrl+X.
6) Copy a selected picture to the Clipboarda) Ctrl+A.b) Ctrl+C.c) Ctrl+V.d) Ctrl+X.
7) Delete one word to the lefta) Ctrl+D.b) Ctrl+R.c) Ctrl+L.d) Ctrl+Backspace.
8) Cut pictures to the Clipboarda) Ctrl+A.b) Ctrl+C.c) Ctrl+V.d) Ctrl+X.
9) Undoa) Esc.b) Ctrl+F1.c) Ctrl+Z.d) F1.
10) Select one character to the lefta) Esc.b) Enter.c) Shift+Left Arrow.d) Ctrl+F1.
11) Select to the start of a word.a) Ctrl+Shift+Left Arrow.b) Ctrl+S.c) Ctrl+E.d) Esc.
12) Select one line downa) Ctrl+O.b) Shift+Down Arrow.c) Ctrl+F9.d) F9.

Sheet107
Syllabus Section 6.3c - Text & Images - Practice Session
1) Open a file called Formatting, located in the Microsoft PowerPoint Samples folder, which in turn is contained within the My Documents (or Documents) folder.
2) Display the second slide. Change to Outline view. Enter the text 'Types of Computers', into the title area.
3) Change back to Normal view. Enter the text 'We will now look at different types of computer' into the text area of the slide.
4) Display the first page, and insert your name into the Notes area.
5) Display the slide relating to Laptops. Delete the notes text on this slide.
6) Display the first slide. Change the font type used by the slide title.
7) Increase the font size used by the title, on the first slide.
8) Apply bold, italic and underlining formatting, to the title on the first slide.
9) Format the title on the first slide, so that it is displayed in all upper case letters.
10) Format the title on the last slide, so that it is displayed in a light red colour.
11) Apply shadow formatting to the title on the second slide.
12) Centre the title of the first slide.
13) Align the title of the second slide to the right. Then align it to the left
14) Display the slide referring to a 'Mainframe Computer'. Apply a different bullet style.
15) Display the slide referring to a 'Desktop Computer'. Apply numbering rather than bulleting to the list.
16) Apply a different numbering style.
17) Display the slide referring to a 'Mainframe Computer'. Increase the 'before and after' line spacing used by the list.
18) Display the second slide. Insert an image of a computer, using clip art installed on your computer.
19) Insert a picture file, called Computer, stored within the Microsoft PowerPoint Samples folder, which in turn is contained within the My Documents (or Documents) folder.
20) Open a file called Empty. Copy the text from the third slide within the first presentation, to the slide on the second presentation.
21) Copy one of the computer pictures from the first presentation, to the second presentation. Save your changes and close all open files.
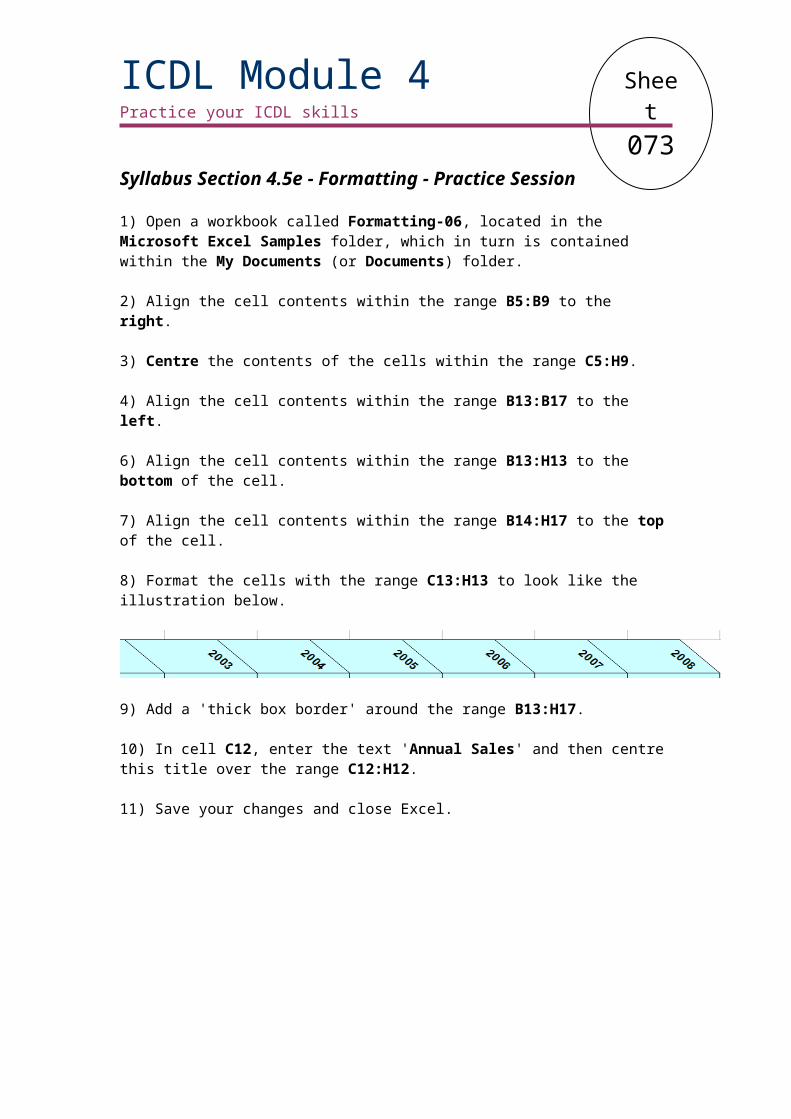
Sheet108
Syllabus Section 6.3d - Text & Images - Practice Session
1) Open a presentation called Pictures-01, located in the Microsoft PowerPoint Samples folder, which in turn is contained within the My Documents (or Documents) folder. Display the second slide within the presentation.
2) Open a second presentation called Pictures-02. Move the picture from the second slide, within the first presentation, to the second presentation file.
3) Move the title text from the slide in the first presentation, to the slide in the second presentation. Move the bulleted text from the slide in the first presentation, to the slide in the second presentation. Close the second presentation and save your changes.
4) Move the picture from the last slide to the first slide.
5) Copy the picture from the first slide to the second slide.
6) Resize the picture you have just copied and move it to the bottom-left of the slide.
7) Delete the picture on the first slide.
8) Undo the deletion.
9) Redo the deletion.
10) Delete the subtitle on the first slide.
11) Open a presentation called Training. On slide 2, align the title to the right.
12) On slide 3, centre the title.
13) On slide 4, align the title to the left.
14) On slide 2, increase the line spacing before and after the bullet points.
15) On slide 4, change the bullet style used in the slide.
16) On slide 3, change the bullet formatting to a numbering format.
17) On slide 3, apply a different numbering style.
14) Save your changes and close the PowerPoint program.
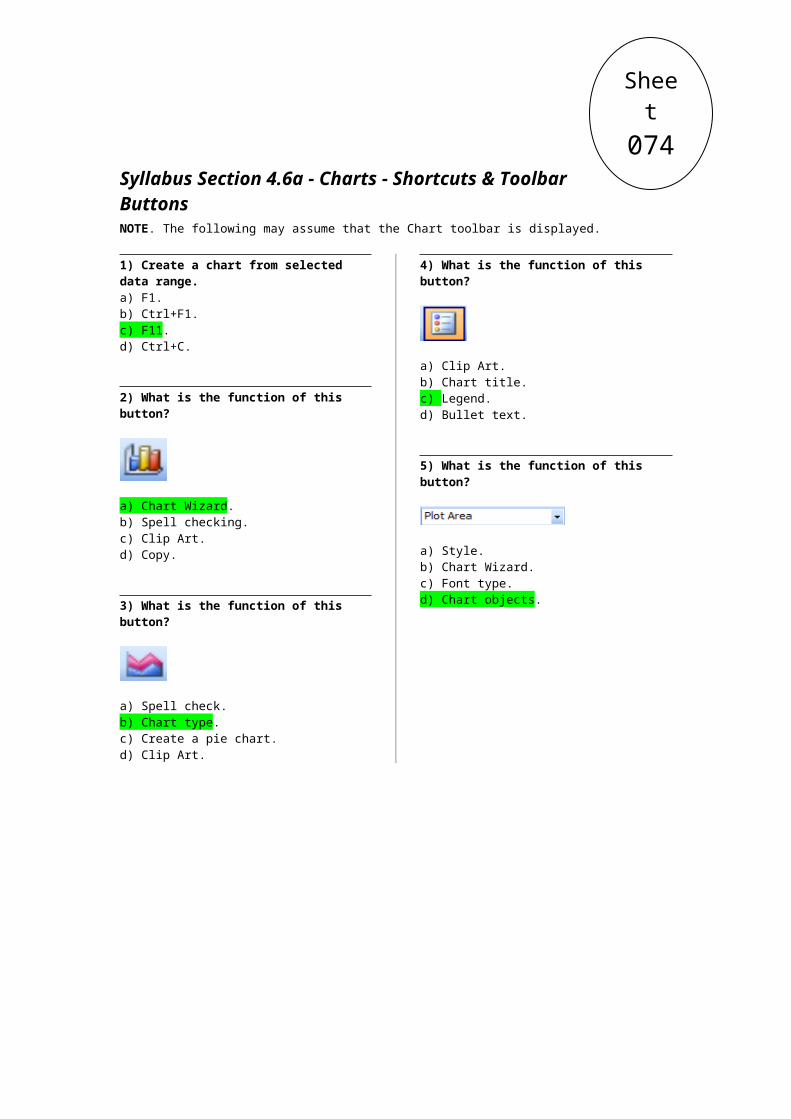
Sheet109
Syllabus Section 6.4a - Objects - Toolbar ButtonsNOTE. These questions assume that the Drawing toolbar & Picture toolbar are displayed.
1) What is the function of this icon?
a) Insert chart.b) Clip Art.c) Insert picture.d) Import chart.
2) What is the function of this icon?
a) Insert a line.b) Insert arrowed line.c) Insert rectangle.d) Insert ellipse.
3) What is the function of this icon?
a) Insert a line.b) Insert arrowed line.c) Insert rectangle.d) Insert ellipse.
4) What is the function of this icon?
a) Insert a line.b) Insert arrowed line.c) Insert rectangle.d) Insert ellipse.
5) What is the function of this icon?
a) 3D Object.b) Object shadow.c) Object alignment.d) Object transparency.
6) What is the function of this icon?
a) Insert a line.b) Insert arrowed line.c) Insert rectangle.d) Insert ellipse.
7) What is the function of this icon?
a) Shape fill colour.b) Shape line colour.c) Shape shadow.d) 3D shape.
8) What is the function of this icon?
a) Font size.b) Font type.c) Shape fill colour.d) Shape line colour.
9) What is the function of this icon?
a) Bullet formatting.b) Numbering.c) Change arrow style.d) Insert rectangle.
10) What is the function of this icon?
a) Chart title.b) Chart legend.c) Chart colour.d) Chart type.
Sheet110
Syllabus Section 6.4b - Objects - Practice Session
1) Open a file called Chart, located in the Microsoft PowerPoint Samples folder, which in turn is contained within the My Documents (or Documents) folder.
2) Display the first slide within the presentation, and create a column chart.
3) Display the next slide within the presentation, and create a bar chart.
4) Display the next slide within the presentation, and create a line chart.
5) Display the next slide within the presentation, and create a pie chart.
6) Display slide number 5, and change the colour of the chart background.
7) Display slide number 6, and change the chart type to display a line chart.
8) Display slide number 7, and change the chart type to display a bar chart.
9) Display slide number 8, and change the chart type to display a pie chart.
10) Display slide number 9, and change the chart type to display a column chart.
11) Display slide number 10, and change the colour of the bars.
12) Display slide number 11, and change the colour of the columns.
13) Display slide number 12, and change the colour of the lines.
14) Display slide number 13, and change the colour of the pie slices.
15) Save your changes and close the PowerPoint program.
Sheet111
Syllabus Section 6.4c - Objects - Practice Session
1) Open a file called Organisation chart, located in the Microsoft PowerPoint Samples folder, which in turn is contained within the My Documents (or Documents) folder.
2) Display slide 1 and create an organisational chart, as illustrated below.
3) Display slide 2. Add a Sales box, as illustrated below.
4) Delete the Marketing box.
5) Change the text within the Sales box to read Sales & Marketing.
6) Add a subordinate to the marketing box, called Market Research.
7) Save your changes and close PowerPoint.

Sheet112
Syllabus Section 6.4d - Objects - Practice Session
1) Open a file called Shapes-01, located in the Microsoft PowerPoint Samples folder, which in turn is contained within the My Documents (or Documents) folder.
2) Within the Lines slide, insert a line.
3) Within the Free Drawn Lines slide, insert a free drawn line.
4) Within the Arrowed Lines slide, insert an arrowed line.
5) Within the Rectangles slide, insert a rectangle.
6) Within the Squares slide, insert a perfect square.
7) Within the Ovals slide, insert an oval.
8) Within the Circle slide, insert a perfect circle.
9) Within the Text Box slide, insert a text box. Insert your name into the text box.
10) Within the Basic Shapes slide, insert a basic shape, such as a smiley face.
11) Within the Block Arrows slide, insert a block arrow shape.
12) Within the Stars and Banners slide, insert a star or banner shape.
13) Within the Call Outs slide, insert a call out shape.
14) Within the Squares slide, change the background colour of the square.
15) Within the Arrowed Lines slide, change the colour of the line.
16) Within the Arrowed Lines slide, increase the line weight used by the arrowed line.
17) Within the Arrowed Lines slide, apply a different line style to the line.
18) Save your changes and close PowerPoint.
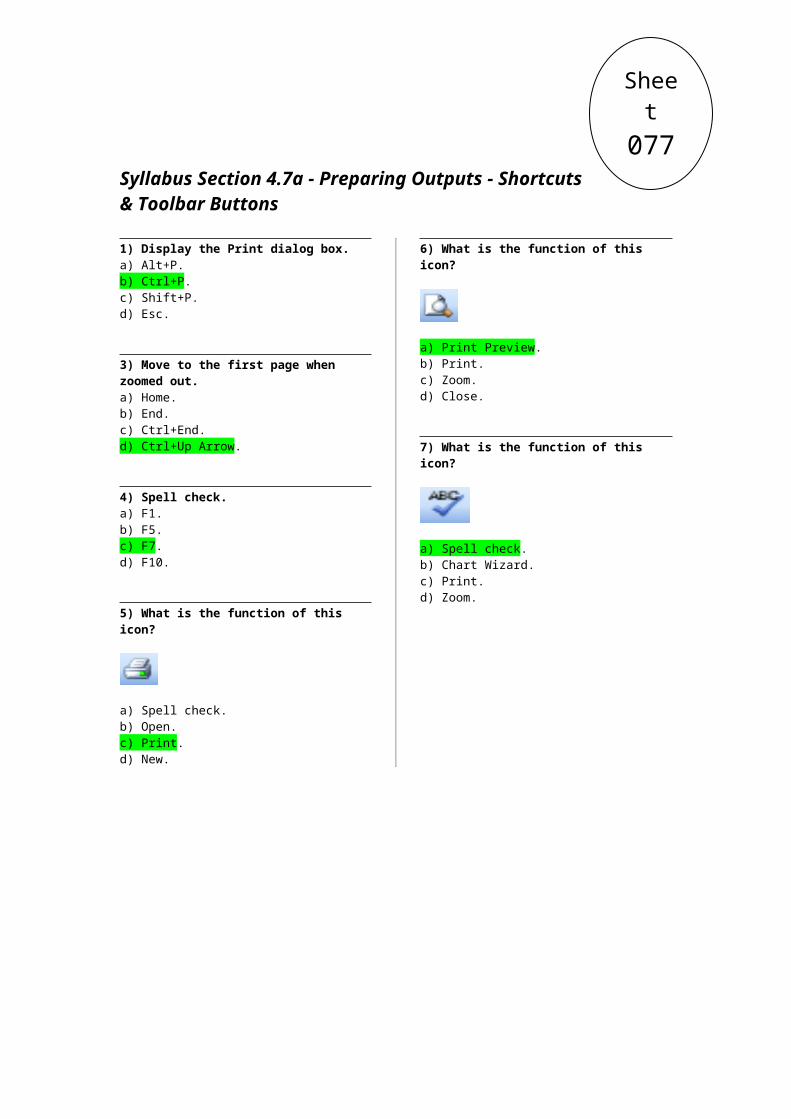
Sheet113
Syllabus Section 6.4e - Objects - Practice Session
1) Open a file called Shapes-02, located in the Microsoft PowerPoint Samples folder, which in turn is contained within the My Documents (or Documents) folder.
2) Within the Arrow Styles slide, change the arrow start style.
3) Within the Arrow Styles slide, change the arrow finish style.
4) Within the Shadow Formatting slide, apply shadow formatting to the objects.
5) Within the Rotation slide, rotate both objects by 90 degrees.
6) Within the Rotation slide, flip the first object horizontally and flip the second object vertically.
7) Within the Align Left slide, align the objects so that all the objects line up on the left edge of the slide.
8) Within the Align Centre slide, align the objects so that all the objects line up, vertically in the centre of the slide.
9) Within the Align Right slide, align the objects so that all the objects line up on the right edge of the slide.
10) Within the 'Align Top of Slide' slide, align the objects so that all the objects line up, horizontally along the top of the slide.
11) Within the 'Align Bottom of Slide' slide, align the objects so that all the objects line up, horizontally along the bottom of the slide.
12) Save your changes and close PowerPoint.
Sheet114
Syllabus Section 6.4f - Objects - Practice Session
1) Open a presentation called Shapes-03.
2) Within the Resizing slide, make the first object larger and the second object smaller.
3) Within the Chart slide, resize the chart to make it a little smaller.
4) Within the Send to Back slide, send the heart shape to the back
5) Within the Bring to Front slide, bring the arrow shape to the front.
6) Save you changes and close the presentation. Open a presentation called Shapes-04.
7) Copy the chart on slide 2 to slide 3.
8) Copy the smiley face shape on slide 4 to slide 5.
9) Open a second presentation called Shapes-04.
7) Copy the chart on slide 2 within the first presentation, to slide 2 within the second presentation.
8) Copy the smiley face shape on slide 4, within the first presentation, to slide 4 within the second presentation.
9) Move the chart on slide 2 to slide 8.
10) Move the smiley face shape on slide 4 to slide 9.
9) Move the chart on slide 8, within the first presentation, to slide 8 within the second presentation.
10) Move the smiley face shape on slide 9 within the first presentation to slide 9 within the second presentation.
11) Delete one of the chart objects.
12) Delete one of the shape objects.
13) Save your changes and close PowerPoint.
Sheet115
Syllabus Section 6.5a - Slide Show Effects - Practice Session
1) Open a file called Slide Show, located in the Microsoft PowerPoint Samples folder, which in turn is contained within the My Documents (or Documents) folder.
2) Display the first slide. Add a 'Fly in', custom animation effect to the small 'mouse surfer' at the bottom left of the screen.
3) Display the second slide. Add a 'different custom animation effect to the picture within this slide.
4) Display the third slide. Add a 'different custom animation effect to the picture within this slide.
5) Display the fourth slide. Add a 'different custom animation effect to the picture within this slide.
6) Display the first slide. Change the custom animation effect that you assigned to the picture.
7) Add a different animation effect to the title text on each slide.
8) Add a different animation effect to the bulleted text on each slide.
9) Add a transition effect to each slide within the presentation.
10) Apply a different slide transition effect to all the slides.
11) Display the slide and watch the animations and transitions. Save your changes and close the presentation.
Sheet116
Syllabus Section 6.6a - Output - Shortcuts & Toolbar Buttons
1) Stop a slide show.a) Alt+S.b) Ctrl+S.c) Shift+S.d) Esc.
2) Go to the first slide within a slideshow.a) Ctrl+1.b) Enter.c) 1+Enter.d) Esc.
3) Toggle between starting and stopping an automatic slide show.a) Alt+S.b) Ctrl+S.c) S.d) B.
4) Print a presentationa) Enter.b) Alt+P.c) Shift+P.d) Ctrl+P.
5) Go to the next hidden slide within a slideshow.a) H.b) Ctrl+H.c) Shift+H.d) Enter.
6) View the presentation as a slide showa) F1.b) F3.c) F4.d) F5
7) Start spell checking the presentationa) Ctrl+S.b) S.c) F7.d) Alt+F4.
8) What is the function of this icon?
a) Spell check.b) Print.c) Print Preview.d) Print Setup.
9) What is the function of this icon?
a) Spell check.b) Print.c) Print Preview.d) Print Setup.
10) What is the function of this icon?
a) Spell check.b) Print.c) Print Preview.d) Print Setup.
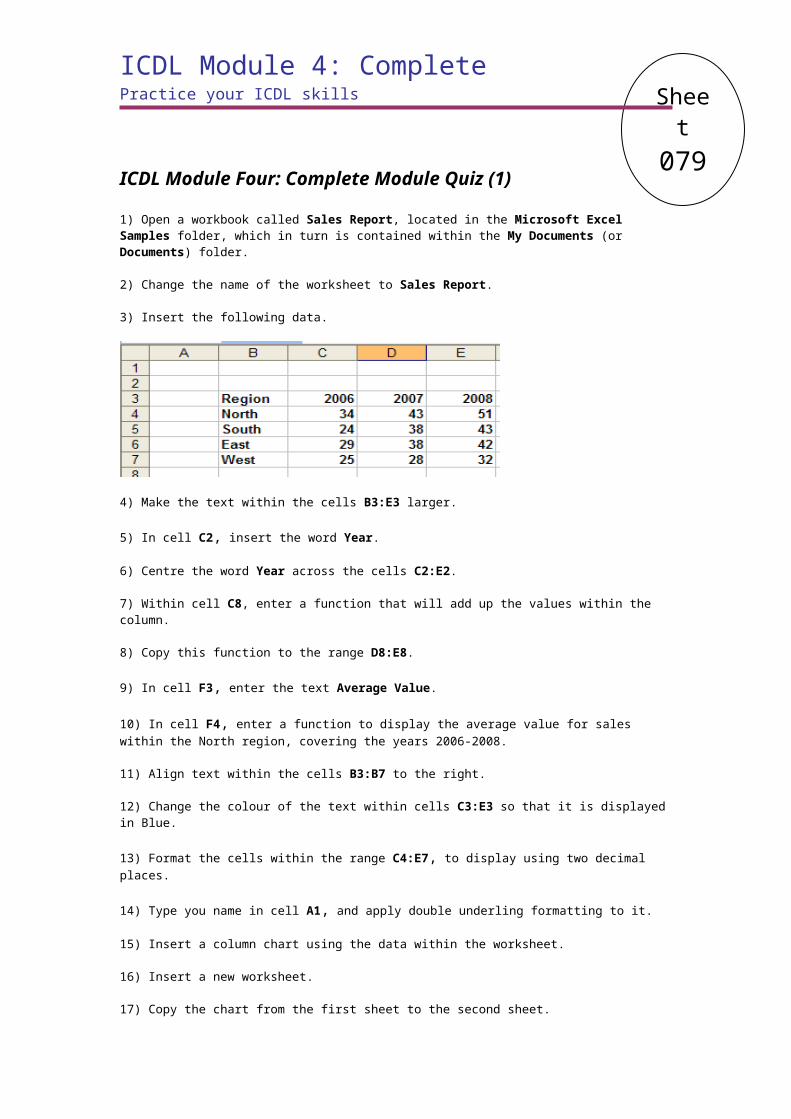
Sheet117
Syllabus Section 6.6b - Output - Practice Session
1) Open a file called Output-01, located in the Microsoft PowerPoint Samples folder, which in turn is contained within the My Documents (or Documents) folder.
2) Run the spell checker and fix the spelling errors. You may find that you need to read the text on each page to fix errors not fixed by the spell checker (such as graphics displayed on top of the text).
3) Add a note to the first slide explaining that the presentation has now been spell checked.
4) Check the slide show setup, and if necessary modify the setup, so that you will be able to print using the correct page size.
5) Experiment with changing the slide orientation, and then set the orientation back to the original setting.
6) Copy the second slide, and insert the copy at the end of the presentation.
7) Delete the last slide.
8) Delete slides 1 and 2. Undo the deletion.
9) Move the second slide to the end of the presentation.
10) Mark the second slide as 'hidden' when you run a slide show.
11) Print just the slide that is currently displayed.
12) Print the entire presentation.
13) Print out the slides as handouts displaying 6 slides per page.
14) Start the slide show and view the hidden slide during the slide show.
15) Save your changes and close the presentation.
ICDL Module 6: CompletePractice your ICDL skills
ICDL Module Six - Complete Quizzes
Sheet118ICDL Module 6: Complete
Practice your ICDL skills
ICDL Module Six: Complete Module Quiz (1)
1) Open a file called Complete-01, located in the Microsoft PowerPoint Samples folder, which in turn is contained within the My Documents (or Documents) folder.
2) Insert a new slide at the end of the presentation, using the 'Title and Text' slide layout.
3) Within the title area of this new slide, enter the text 'Laptop Computer'
4) Within the text area of this new slide enter the following bullet points.
5) Insert an item of clip art relating to laptop computers.
6) Apply a different design template to the presentation.
7) Enter your name on the master slide.
8) Place a small picture of a computer on the master slide, at the bottom-left of the slide.
9) Display slide 1, and increase the font size that is applied to the word 'Computers'.
10) Change the font colour used by the word 'Computers', so that it is displayed in red.
11) Insert a picture from your hard disk called Keyboard, which is located in the Microsoft PowerPoint Samples folder, which in turn is contained within the My Documents (or Documents) folder.
12) Move the picture to the top-right corner and re-size the picture so that it does not take up too much space on the slide.
13) Insert an arrow AutoShape. Move and resize the AutoShape so that it looks like this.
14) Apply a transition effect that will be seen when you run the slide show.
15) Apply a preset animation effect to the arrow that you inserted into the first slide.
16) Copy the arrow AutoShape and insert it next to the other titles within the presentation.
17) Print just the second slide.
18) Save your changes.
19) Resave the file in RTF format.
20) Close the PowerPoint program.
Sheet119ICDL Module 6: Complete
Practice your ICDL skills
ICDL Module Six: Complete Module Quiz (2)
1) Open a file called Complete-02, located in the Microsoft PowerPoint Samples folder, which in turn is contained within the My Documents (or Documents) folder.
2) Delete the picture on slide 1.
3) Copy the picture from slide 2, to slide 1.
4) Insert a new slide at the end of the presentation, using the 'Content' slide layout.
5) Insert an organisation chart into your new slide.
6) Insert text within the chart, as illustrated below.
7) Apply a blue background colour to just slide 2.
8) Change the slide transition effect that is applied to all the slides.
9) On slide three, bring the keyboard picture to the front.
10) Within slide 3, add arrow heads to both ends of the line, displayed at the bottom of the slide.
11) Change the animation effect of the last slide, to a different effect.
12) Align the stars on the last slide, so that they align to the left-most star.
13) Delete the second bullet point on the last slide.
14) On the third slide change the bulleted list to a numbered list.
15) Remove the mouse clip art at the bottom-left of the slide master.
16) Enter you name as a slide footer.
17) Print the slides as handouts.
18) View your presentation as a slide show.
19) Save your changes.
20) Save your changes in a format that is compatible with an earlier version of PowerPoint, and then close the PowerPoint program.
Sheet120ICDL Module 6: Complete
Practice your ICDL skills
ICDL Module Six: Complete Module Quiz (3)
1) Open a file called Complete-03, located in the Microsoft PowerPoint Samples folder, which in turn is contained within the My Documents (or Documents) folder.
2) Enter your name as the sub-title on the first slide.
3) Insert a new slide using the 'Title and two column text' slide layout.
4) Insert the following data.
5) Format the first item in each column as bold.
6) Insert a new slide and insert a chart into the slide.
7) Add a shadow effect to the title on the first slide.
8) Align the title text on the first slide to the right.
9) Apply a different bullet style to each slide.
10) Display the presentation in Outline view.
11) Change the view back to the normal view.
12) Double the size of the title text on the first slide.
13) Display some additional toolbars, and then re-hide them, so that just the original toolbars are displayed.
14) Change the background colour, of all the slides, to a light green colour.
15) Insert a slide at the end of the presentation and then delete the slide.
16) Insert a star shaped, AutoShape and then apply a dark blue fill colour.
17) Add a perfect circle AutoShape to the first slide.
18) Add a shadow effect to the AutoShape circle.
19) Change the font type used by the title on the first slide.
20) Save your changes and close the PowerPoint program.
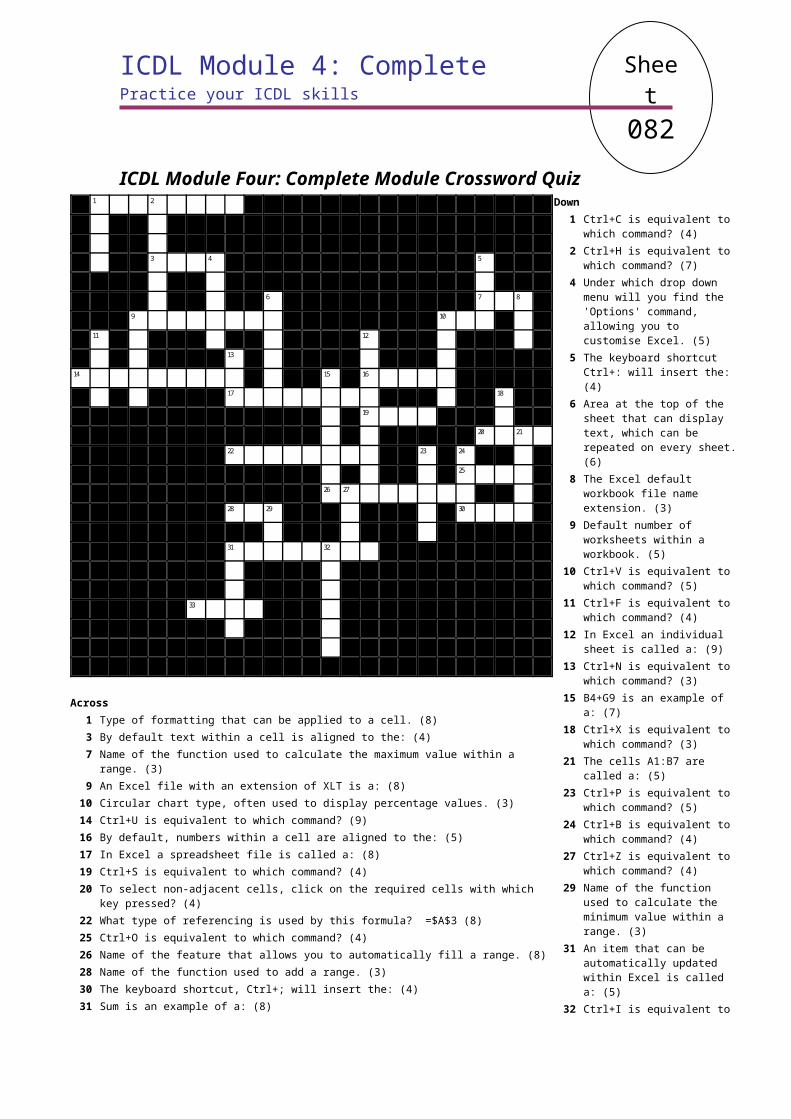
Sheet121ICDL Module 6: Complete
Practice your ICDL skills
ICDL Module Six: Complete Module Crossword Quiz1 2 3
4 5
6
7
8
9 10 11
12 13
14
15
16 17
18
19 20
21
22
23
24
25
26
27
Across 1 A common picture format. (3)4 The company that produces PowerPoint. (9)6 The underlying slide template, that you can modify, to display changes on every slide is
called a slide: (6)8 Ctrl+I is equivalent to which command? (6)
10 Ctrl+F is equivalent to which command? (4)13 Ctrl+Z is equivalent to which command? (4)14 What is normally displayed within PowerPoint when you press the F1 key? (4)15 Ctrl+S is equivalent to which command? (4)16 Left, right and centre are example of text: (9)18 Ctrl+H is equivalent to which command? (7)19 An effect used to move elements within a slide during a slide show. (9)21 The PowerPoint view, that lets you see what the printed version will look like, is called Print:
(7)23 Under which drop down menu, would you find the Paste command? (4)24 A PowerPoint view. (7)26 Ctrl+V is equivalent to which command? (5)27 Ctrl+P is equivalent to which command? (5)
Down 2 RTF stands for Rich Text: (6)3 PowerPoint file name extension.
(3)5 Normally two toolbars are
displayed, the Standard toolbar and the … toolbar. (10)
7 Ctrl+B is equivalent to which command? (4)
9 A common picture format. (4)10 Under which drop down menu,
would you find the Save As command? (4)
11 To delete a selected image, what key do you press? (3)
12 What will pressing the F7 key check? (8)
13 Ctrl+U is equivalent to which command? (9)
15 A font formatting effect. (6)17 Effect that can be used as you
move from one slide to the next, within a slide show. (10)
20 Ctrl+N is equivalent to which command? (3)
21 Font sizes are measured in: (6)22 Ctrl+X is equivalent to which
command? (3)24 Ctrl+O is equivalent to which
command? (4)25 Ctrl+C is equivalent to which
command? (4)

Sheet122ICDL Module 6: Complete
Practice your ICDL skills
ICDL Module Six: Complete Module Crossword Solution
G I F PO P
M I C R O S O F TM O
M A S T E RT M B
I T A L I C OJ T L F I N DP S T U N D O I E
H E L P I N L LG E N D S A V E
A L I G N M E N T HL R R E P L A C EI L A D
A N I M A T I O N N OG N S E W
P R E V I E WC I TU X E D I T
O U T L I N E OC P L NO E P A S T EP R I N TY
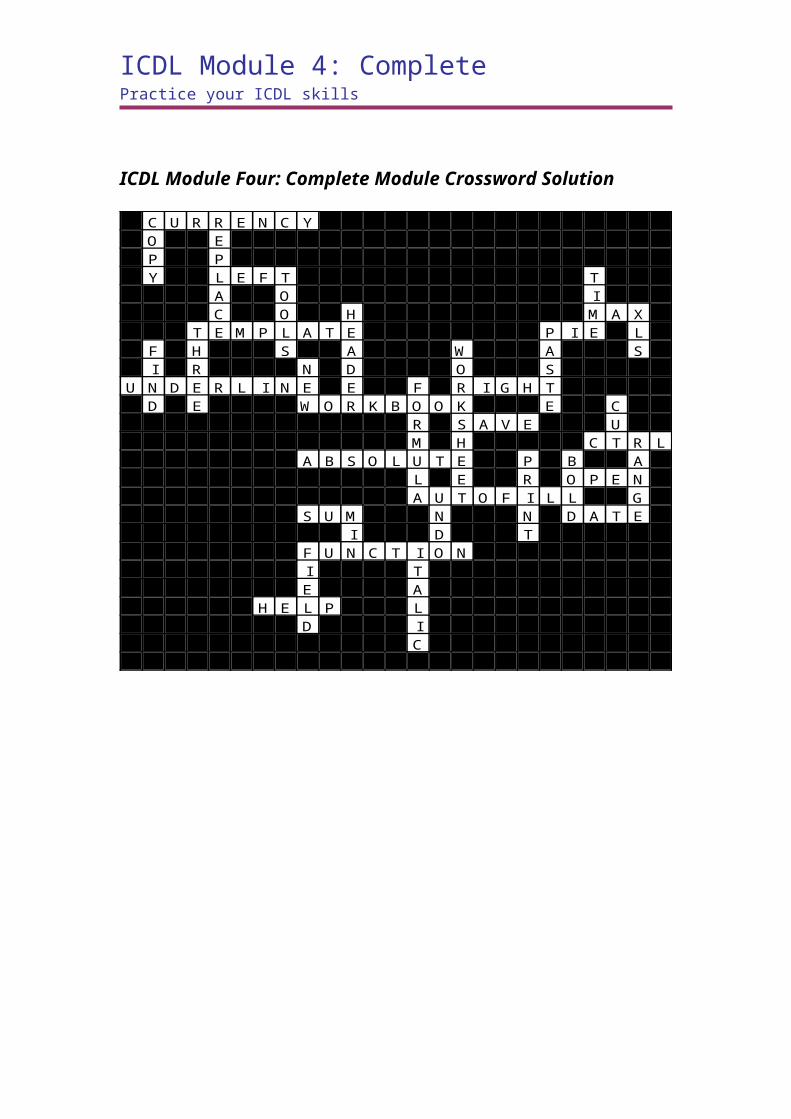
ICDL Module 7Practice your ICDL skills
ICDL / ICDL Module Seven - Information and Communication
Sheet123ICDL Module 7
Practice your ICDL skills
Syllabus Section 7.1a - The Internet - Shortcuts & Buttons
1) To display Internet Explorer help.a) F1.b) F2.c) Alt+F9.d) Alt+Enter.
2) To stop a web page from completely downloading.a) Ctrl+H.b) Ctrl+S.c) Ctrl+P.d) Esc.
3) To refresh the current web page.a) Alt+R.b) Ctrl+R.c) F5.d) F1.
4) What is the function of this icon?
a) Home Page.b) Stop downloading.c) Refresh.d) Help.
5) What is the function of this icon?
a) Home Page.b) Stop downloading.c) Refresh.d) Help.
6) What is the function of this icon?
a) Home Page.b) Stop downloading.c) Refresh.d) Help.
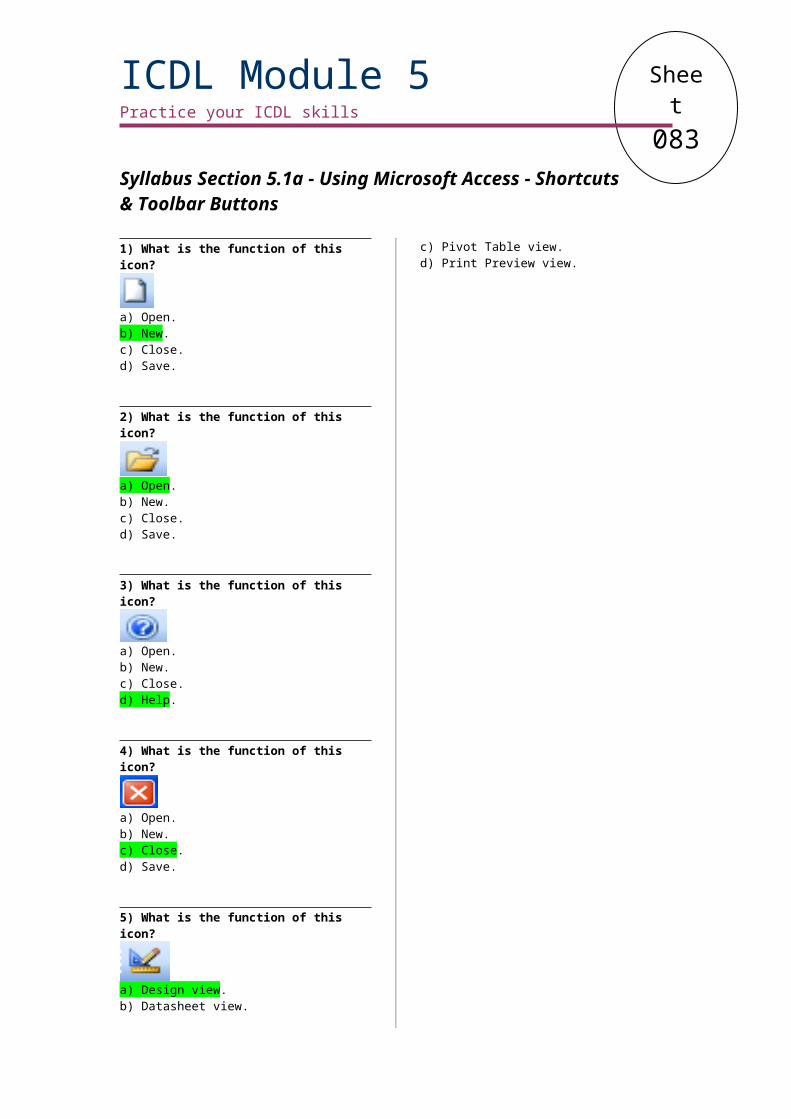
Sheet124
ICDL Module 7Practice your ICDL skills
Syllabus Section 7.1b - The Internet - Multiple Choice
1) What does WWW stand for?a) World Wide Wait.b) Wild West Web.c) World Wide Web.d) Which Wide Web.
2) What does HTTP stand for?a) High Traffic Transfer Payment.b) Hypertext Transfer Protocol.c) High Tax Transfer Protocol.d) Help Transferring The Protocol.
3) It is impossible to catch a computer virus, by downloading files from the WWW. Is this true or false?a) True.b) False.
4) A firewall helps to protect you from online threats, such as computer viruses. Is this true or false?a) True.b) False.
5) Internet Explorer keeps a history of pages that it has displayed. Is this true or false?a) True.b) False.
6) What does URL stand for?a) United Resource Locator.b) Useless Resource Located.c) Universal Rail Link.
d) Uniform Resource Locator.7) Most Credit cards fully protect you from fraud relating to use on the Internet. Is this true or false?a) True.b) False.
8) Microsoft Internet Explorer is a Search Engine. Is this true or false?a) True.b) False.
9) Microsoft Internet Explorer is a web browser. Is this true or false?a) True.b) False.
10) What does ISP stand for?a) International Sound Provider.b) Internet Sales Provider.c) Internet Service Product.d) Internet Service Provider.
10) What does FTP stand for?a) File Transfer Protocol.b) Federal Traffic Protocol.c) Full Traffic Protocol.d) Fast Traffic Protocol.
11) Google is a web browser. Is this true or false?a) True.b) False.
Sheet125
ICDL Module 7Practice your ICDL skills
Syllabus Section 7.1c - The Internet - Practice Session
1) Open the Internet Explorer program.
2) Set the Internet Explorer program 'home page', to display the Microsoft Internet 'home page' at. http//www.microsoft.com
3) Display the Microsoft home page.
4) Follow a few hyperlinks within the Microsoft web site.
5) Force one of the hyperlinks, to display a web page within a new window. Then close that window, so only one window is displayed.
6) Display the list of visited web pages, using the History feature.
7) See if you can display a list of previously visited web pages, via the Internet Explorer address bar.
8) See what other Internet Explorer toolbars you can display, experiment with displaying & hiding those toolbars.
9) Display the Internet Explorer Help window. Find help on a topic of your choice. Close the Help window.
10) Delete your browsing history.
11) Refresh the current web page
12) Set up the Internet Explorer to not display pictures, and try viewing some pages that would normally display pictures. Reactivate the displaying of pictures before continuing.
13) Close the Internet Explorer program.
Sheet126
ICDL Module 7Practice your ICDL skills
Syllabus Section 7.1d - The Internet - Quick Quiz
1) Briefly describe the difference between the Internet and the WWW.
2) Briefly explain the term 'cookie'.
3) Briefly explain the term 'digital certificate'.
4) Explain the term 'home page', in relation to settings within the Internet Explorer program.
5) Briefly explain why you might want to 'refresh' a web page that is displayed within the Internet Explorer.
6) Explain the separate elements making up a web address such as. http//www.microsoft.com
7) What is the function of a web browser?
8) How many types of web browser can you list?
9) What is the function of a search engine?
10) How many different search engines can you list?
11) Briefly explain the term 'firewall'.
12) How can you tell if a web page is protected?
13) Why is encryption used on the web?
14) Briefly explain the term 'cache'.
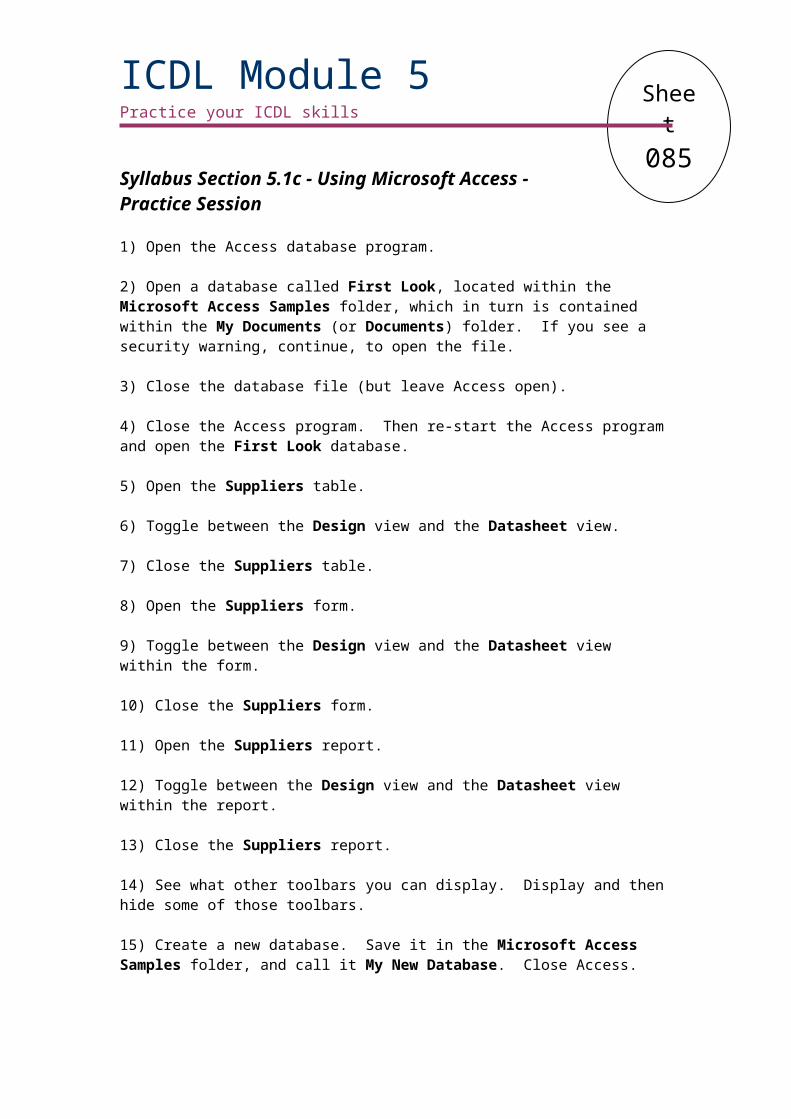
Sheet127
ICDL Module 7Practice your ICDL skills
Syllabus Section 7.2a - Web Navigation - Shortcuts & ButtonsNOTE. Bookmarks and Favourites are the same thing.
1) Display the Favourites list.a) Alt+F.b) Alt+C.c) Alt+B.d) Ctrl+B.
2) Move to the previous text field within a web based form.a) N.b) Tab.c) Alt+Tab.d) Shift+Tab.
3) Add to Favourites.a) Ctrl+F.b) Shift+F.c) Alt+Z.d) Alt+B.
4) Move to the next text field within a web based form.a) N.b) Tab.c) Alt+Tab.d) Shift+Tab.
5) Go to the Search box.a) Ctrl+F.b) Ctrl+E.c) Alt+P.d) Alt+F4.
6) What does this icon do?
a) Display favourites.b) Delete favourites.c) Add to favourites.d) Reorder favourites.
7) What does this icon do?
a) Display favourites.b) Delete favourites.c) Add to favourites.d) Reorder favourites.
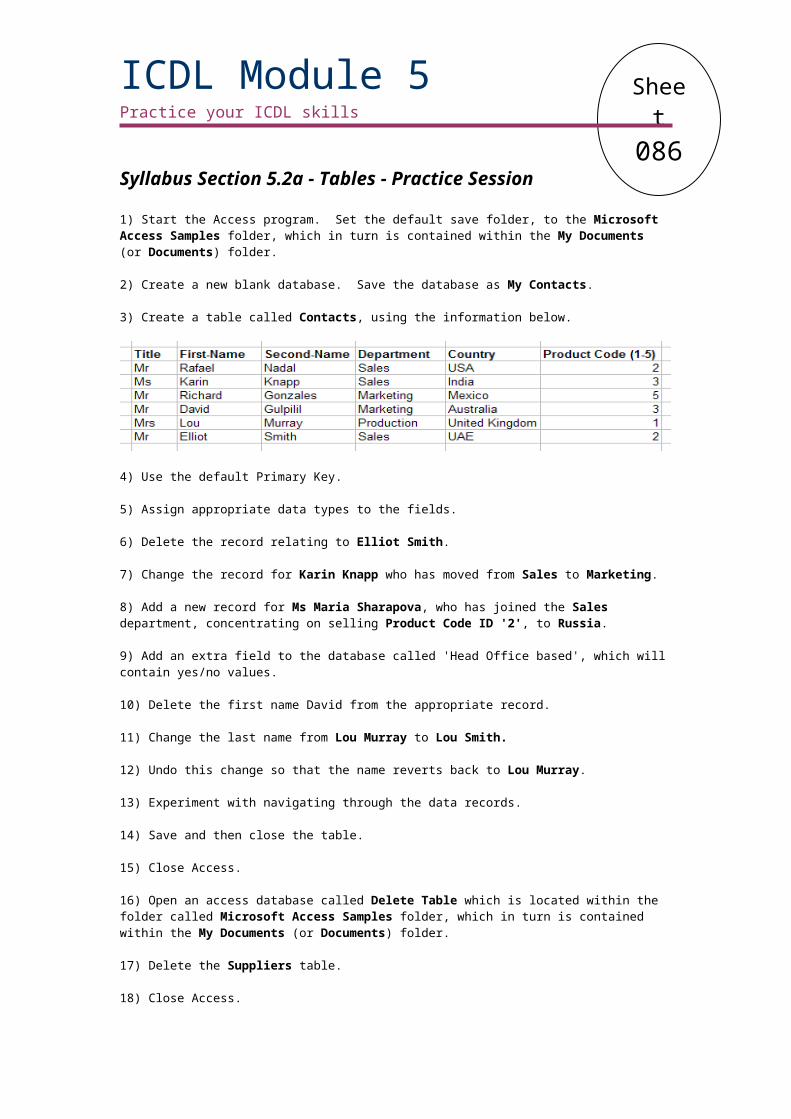
Sheet128
ICDL Module 7Practice your ICDL skills
Syllabus Section 7.2b - Web Navigation - Practice Session
1) Open the Internet Explorer program and display the Intel home page at http://www.intel.com
2) Follow a few hyperlinks within the site, and then use the Back and Forward buttons to navigate through the pages.
3) Create a favourites folder called Computer Stuff.
4) Re-display the Intel home page, and mark it as a favourite, within the Computer Stuff folder.
5) Display a different page, such as http://www.microsoft.com. Then use the favourite feature to display the Intel home page.
6) Delete the favourite you created.

Sheet129
ICDL Module 7Practice your ICDL skills
Syllabus Section 7.3a - Web Searching - Practice Session
1) Open the Internet Explorer and display the Google search engine home page.
Compare the effects of the next three searches2) Search Google using the following text. Windows Vista3) Search Google using the following text. "Windows Vista"4) Search Google using the following text. Windows+Vista
Compare the effects of the next three searches5) Display the Lycos search engine home page.6) Search Lycos using the following text. Windows Vista7) Search Lycos using the following text. "Windows Vista"8) Search Lycos using the following text. Windows+Vista
Compare the effects of the next three searches9) Display the Yahoo search engine home page.10) Search Yahoo using the following text. Windows Vista11) Search Yahoo using the following text. "Windows Vista"12) Search Yahoo using the following text. Windows+Vista
Compare the effects of the next three searches13) Display the MSN search engine home page.14) Search MSN using the following text. Windows Vista15) Search MSN using the following text. "Windows Vista"16) Search MSN using the following text. Windows+Vista
17) Open a file called Searching, located in the Microsoft Internet Explorer Samples folder, which in turn is contained within the My Documents (or Documents) folder.
18) Display a web site and copy a picture from that web site to the Searching document that you previously opened.
19) Select some text within a web page and copy it to the Searching document.
20) Copy the web site URL to the Searching document.
21) Save and close the Searching document.
22) Save the current web page to the Microsoft Internet Explorer Samples folder. Save the page again, this time as a TXT file type.
23) Print the current web page.
24) Close the Internet Explorer.
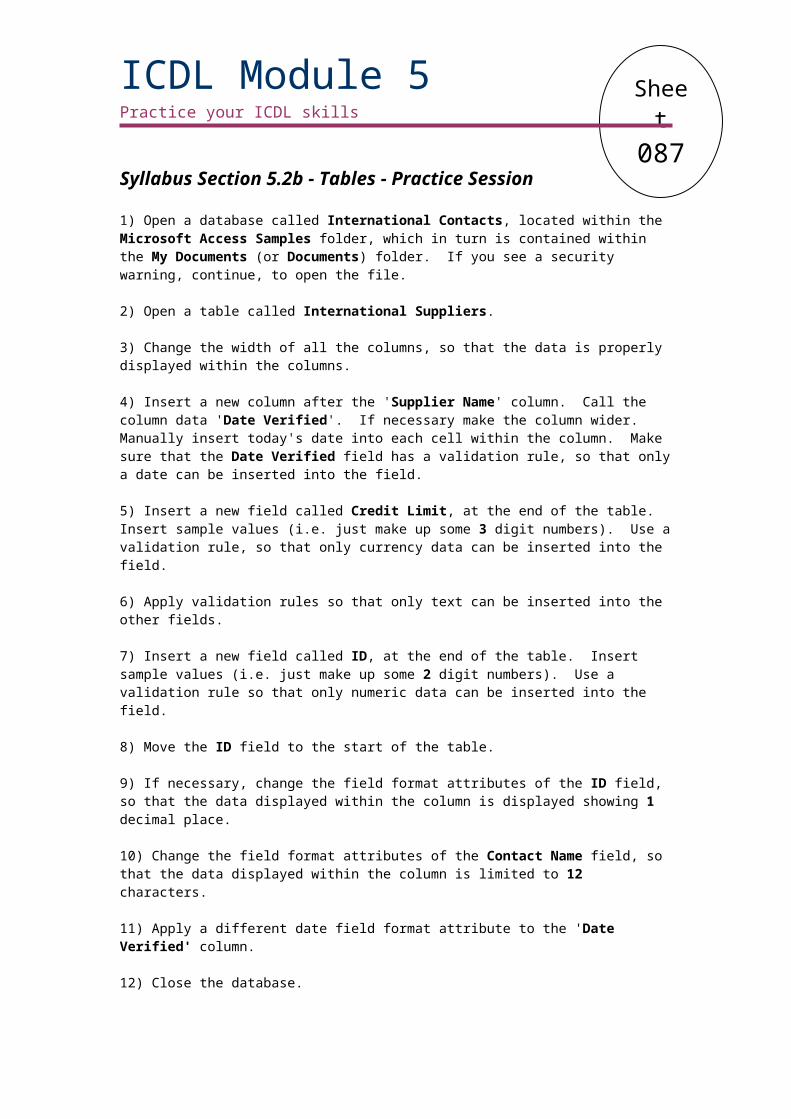
Sheet130
ICDL Module 7Practice your ICDL skills
Syllabus Section 7.3b - Web Searching - Practice Session
1) Open the Internet Explorer.
2) Display the CNET Technology News web site at http://www.news.com
3) Use Print Preview view to see the web page as it would be printed. Close Print Preview view.
4) Change the Page Setup options so that the web page will print in landscape orientation.
5) Reset the print orientation back to portrait.
6) Change the Page Setup options to specify a different paper size.
7) Change the Page Setup options to control the size of the print margins.
8) Print the entire web page.
9) Print 2 copies of a single selected paragraph of text.
10) If possible, print a single frame from the site.
10) Search for and download an image file, a text file, a sound file, a short video file and a piece of free software. Save the downloaded files into the Microsoft Internet Explorer Samples folder, which in turn is contained within the My Documents (or Documents) folder.
11) Close Internet Explorer.
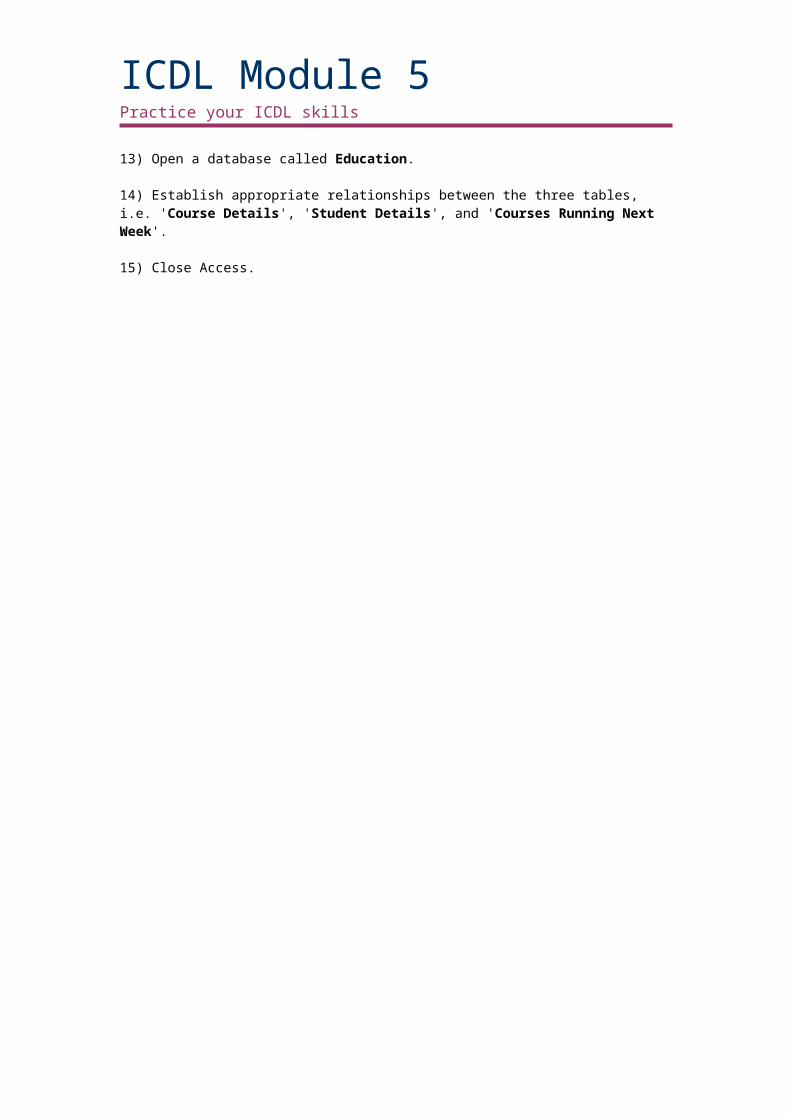
Sheet131
ICDL Module 7Practice your ICDL skills
Syllabus Section 7.4a - Electronic Mail - Quick Quiz
1) Explain the elements that make up an email address such as: [email protected]
2) List some of the advantages of email, compared to traditional mail.
3) Briefly explain why you should always be cautious about opening an attached file.
4) What is the name of the Microsoft email program supplied with Microsoft Windows?
5) Which key would you press within Microsoft Outlook to display help information?
6) Briefly explain what a 'digital signature' is.
7) List some items that would be regarded as good netiquette when sending or replying to an email.
8) What term is used to describe junk mail arriving in your inbox?
Sheet132
ICDL Module 7Practice your ICDL skills
Syllabus Section 7.4b - Electronic Mail - Practice Session
1) Open the Outlook program.
2) View the contents of your mail inbox.
3) Open a message. Open a second message.
4) Practice switching between the messages.
5) Close one of the open messages.
6) Display help within the Outlook program. Print out a page from the Help, about a topic of your choice.
7) See what other Outlook toolbars you can display, experiment with displaying & hiding those toolbars.
8) Experiment with adding/removing inbox headings (i.e. items such as subject, date received and sender). Restore these to their original settings before continuing.
9) Mark an email message as read.
10) Mark an email message as unread.
11) Close the Outlook program.
Sheet133
ICDL Module 7Practice your ICDL skills
Syllabus Section 7.5a - Messaging - Quick Quiz
1) Briefly explain the difference between 'reply' and 'reply to all', when replying to an email.
2) Explain the term 'blind copy'.
3) Briefly explain the function of email flags.
4) Which key would you press to spell check a message, within Microsoft Outlook?
5) Explain the terms 'high' or 'low' priority in relation to emails.
6) Explain the concept of 'forwarding' an email.
7) What is BCC short for?
8) How would you send an email message to all the contacts on a distribution list?

Sheet134
ICDL Module 7Practice your ICDL skills
Syllabus Section 7.5b - Messaging - Practice Session
1) Open the Microsoft Outlook program.
2) Open a message containing a file attachment. Save the attached file into a folder called Microsoft Outlook Samples folder, which in turn is contained within the My Documents (or Documents) folder. Use the file name 'My Attachment' when you save the file.
3) Reply to a message, using the 'reply', rather than the 'Reply to all' option.
4) Create a new email and insert a subject of 'Test only from <your name>'
5) Insert an email address that you want to send the message to.
6) Set up the email to send 'blind copies' to three other recipients.
7) Type in a short message.
8) Spell check your message.
9) Attach a picture file, called Peace, located within a folder called Microsoft Outlook Samples folder, which in turn is contained within the My Documents (or Documents) folder.
10) Set the message priority to low.
11) Send the message.
12) Open a message and forward the message to another recipient.
13) Practice moving and copying text between email messages.
14) Practice deleting a file attachment from a message, prior to sending the message.
15) Close Outlook.
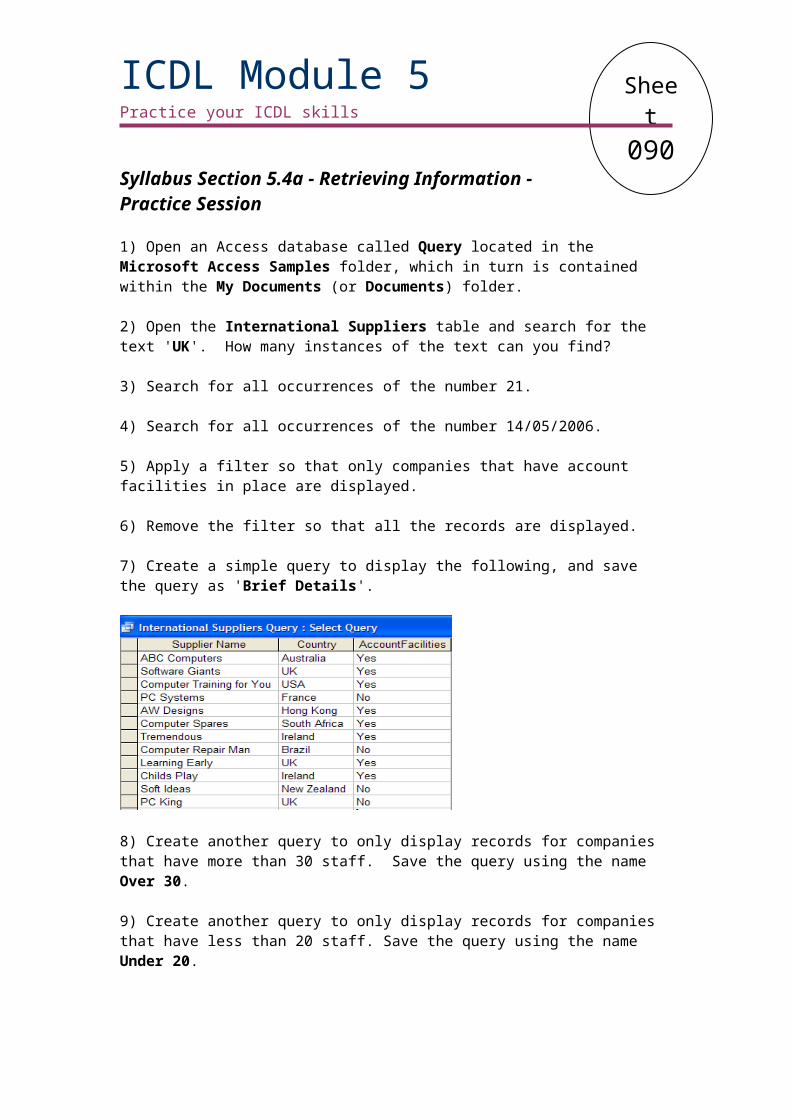
Sheet135
ICDL Module 7Practice your ICDL skills
Syllabus Section 7.6a - Mail Management – Quick Quiz
1) How do mail folders help you organise your messages?
2) Describe some of the techniques you would use for managing email messages.
3) What is the benefit of an address book?
4) Deleted messages are moved to which folder?
5) Within which folder are new messages normally stored?
Sheet136
ICDL Module 7Practice your ICDL skills
Syllabus Section 7.6b - Mail Management – Practice Session
1) Start Outlook and open the Inbox folder.
2) Create a sub-folder called Important Mail.
3) Copy a message from your Inbox folder to your new Important Mail folder.
4) Move a message from your Inbox folder to your new Important Mail folder.
5) Rename the Important Mail folder to Private Mail.
6) Delete a message from the Private Mail folder.
7) Restore the deleted message from the Deleted Items folder to the Inbox folder.
8) Delete the Private Mail folder.
9) Empty the Deleted Items folder.
10) Sort the messages in your Inbox folder, by date.
11) Sort the messages in your Inbox folder, by sender.
12) Search the messages in your Inbox folder, using criteria of your choosing.
13) Use the Print Preview command to view a message as it would be printed.
14) Select some text in a message and print only that text.
15) Print two copies of a complete message from your Inbox folder.
16) Close Microsoft Outlook.
Sheet137
ICDL Module 7Practice your ICDL skills
Syllabus Section 7.6c - Mail Management – Practice Session
1) Open the Microsoft Outlook program.
2) Open your address book/contacts folder.
3) Add 5 people to your address book.
4) Delete 1 of the contacts in your address book.
5) Compose & send a new message, using the address book to look-up the mail address.
6) Open your Inbox folder.
7) Display a message from your Inbox folder.
8) Add the sender of the message to your address book/contacts.
9) Create a new distribution list called ICDL7.
10) Add 3 contacts to your new distribution list.
11) Delete a contact from the distribution list.
12) Close the Microsoft Outlook program.
ICDL Module 7: CompletePractice your ICDL skills
ICDL Module Seven - Complete Quizzes
Sheet138ICDL Module 7: Complete
Practice your ICDL skills
ICDL Module Seven: Complete Module Practice Quiz - (1)
1) Open the Internet Explorer and display the Google search engine home page.
2) Perform a search using the phrase “Car Rental”.
3) View one of the web sites displayed in the search results.
4) Add the web site to your favourites.
5) Close and then re-open Internet Explorer.
6) Use the favourite you just created to return to the car rental web site.
7) Copy the URL of the web site to the Windows Clipboard.
8) Open the Microsoft Outlook program.
9) Create a new message and paste the URL into the body of the email.
10) Insert an email address that you want to send the message to.
11) Delete some text from your message.
12) Send the message.
13) Close Microsoft Outlook.
14) Return to Internet Explorer.
15) Use 'Print Preview' to view the web site as it would be printed. Close 'Print Preview'.
16) Rename the favourite you created to 'My Car Rental Site'.
17) Delete the 'My Car Rental Site' favourite.
18) Close Internet Explorer.
Sheet139ICDL Module 7: Complete
Practice your ICDL skills
ICDL Module Seven: Complete Module Practice Quiz - (2)
1) Open Microsoft Outlook and display the contents of the Inbox.
2) Use the column headings to sort the message list by, sender, date and subject.
3) Open one of the messages.
4) Use Print Preview to view the email as it would be printed. Close Print Preview.
5) Add the sender of the message to your address book/contacts.
6) Reply to the message and insert the text 'Reply Test only from <your name>' at the top of your message.
7) Spell check the message.
8) Set up the email to send carbon copies (CC), to up to 3 other recipients.
9) Attach a picture file, called Apple, located within a folder called Microsoft Outlook Samples folder, which in turn is contained within the My Documents (or Documents) folder.
10) Set the message priority to high and send the message.
11) Check for any new messages.
12) Create a new message, using the address book to enter the email address for you. Send the message.
13) Flag a message in your inbox.
14) Remove the flag from the message.
15) Delete a message.
16) Restore the deleted message.
17) Close Outlook.
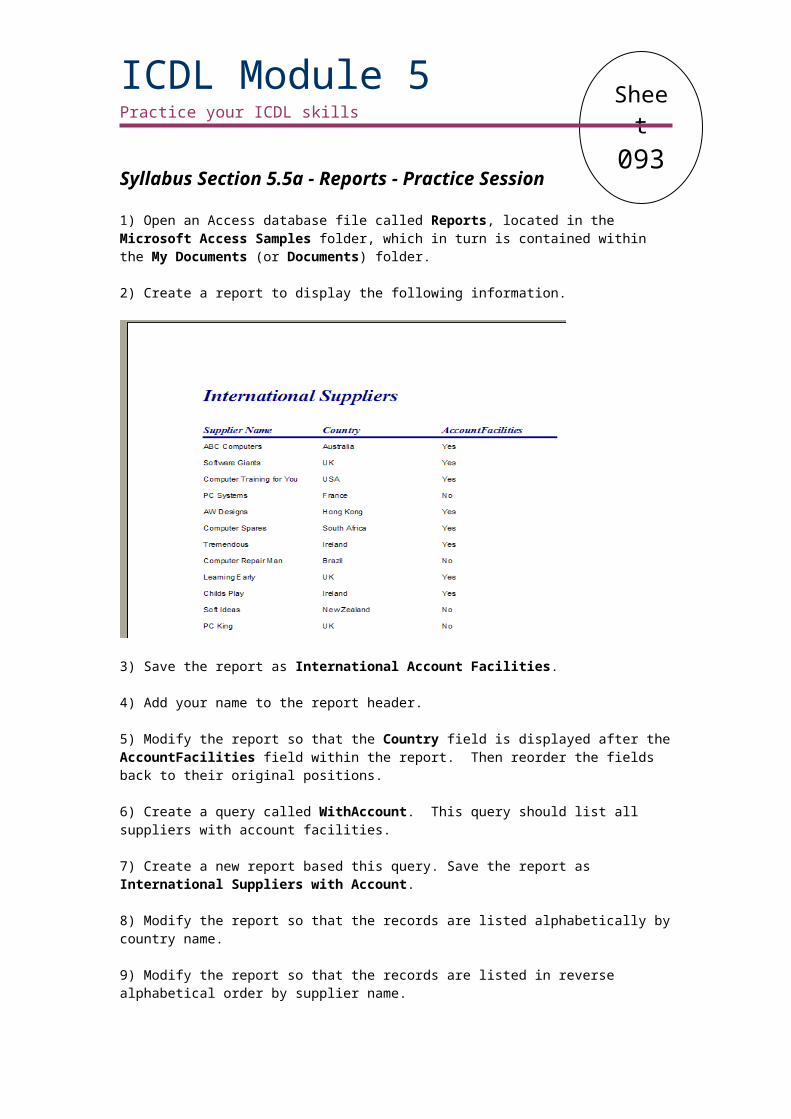
Sheet140ICDL Module 7: Complete
Practice your ICDL skills
ICDL Module Seven: Complete Module Practice Quiz - (3)
1) Open the Microsoft Outlook program.
2) Create a mail sub-folder, under the Inbox folder. Call your new folder 'Test Messages'.
3) Move 3 messages from the Inbox to the Test Messages folder.
4) Display the contents of the Test Messages folder, and sort the messages by their subject.
5) Rename the Test Messages folder to 'Old Mail'.
6) Create a new message. Insert an email address that you want to send the message to.
7) Type in a short message.
8) Open the Microsoft Internet Explorer program, and open the web site http://www.microsoft.com
9) Copy some text from the web site, and paste it into the body of your message.
10) Display another web site of your choosing, and copy a picture from that web site, to the body of your message.
11) Set the subject of your message to 'Web Quote with pics from <your name>'.
12) Send the message.
13) Open a message and forward the message to another recipient.
14) Delete a message.
15) Configure Outlook so that it will not automatically quote the original message in a reply. Reply to a message to confirm setting.
16) Close Outlook.
17) Search for a web site containing a form. Complete & submit the form.
18) Close Internet Explorer.
Sheet141ICDL Module 7: Complete
Practice your ICDL skills
ICDL Module Seven: Complete Module Crossword Quiz1
2 3
4
5 6 7
8
9
10
11 12
13 14
15 16 17
18
19
20 21
22
23 24
25
26 27
28 29
30
31
Across 3 New email messages are normally stored in which folder? (5)6 Google is an example of a search: (6)8 Protocol used to transfer files across the Internet. (3)9 What does the “R” in URL stand for? (8)
10 What does the “S” in ISP stand for? (7)11 An unwanted self replicating program. (5)13 What does the first “W”, in WWW stand for? (5)14 The message field which contains a short summary of the email message. (7)16 What does the 'U', in URL stand for? (7)18 What does the “B”, in Bcc stand for? (5)20 Clickable text or graphic that takes you to another web page. (9)22 Name of the Internet Explorer button that lets you re-display the previous web page. (4)24 A popular Internet search engine. (5)25 A popular Internet search engine. (5)26 What does the “E”, in email stand for? (10)28 A file sent with an email message is called an: (10)30 Internet Explorer is an example of a web: (7)31 Microsoft’s Web Browser is called Internet: (8)
Down 1 Name of the page that loads
by default within your web browser. (4)
2 The protocol used to transfer web pages across the Internet. (4)
3 A company that supplies your link to the Internet. (3)
4 Secure sites that accept credit cards use a technology called: (10)
5 Some sites store information about you by using: (7)
7 A popular Internet search engine. (6)
8 Protects your computer from attack via the Internet. (8)
10 Protocol used to encrypt web pages. (3)
12 What is unsolicited email commonly known as? (4)
15 What is normally displayed when you press the F1 key within the Internet Explorer? (4)
17 Terms relating to good behaviour when sending emails. (10)
18 An alternative name for a Favourite. (8)
19 Secure internet sites are indicated by a: (7)
21 Term for re-loading web site contents. (7)
23 Send a copy of a received message to a third party. (7)
27 Popular email software from Microsoft. (7)
29 Which key would you normally press to move from field to field, within a web based form? (3)
ICDL Module 7: CompletePractice your ICDL skills
ICDL Module Seven: Complete Module Crossword Solution
HH I N B O XT S M E
C T P E N G I N EO F T P O CO I R E S O U R C EK S E R V I C E G Y
V I R U S E L P SE L W O R L D S U B J E C T PS A I A
L H U N I F O R MB L I N D E E NO L T PO H Y P E R L I N K A
B A C K E Q DM F F U L Y C O S
Y A H O O R E OR R E L E C T R O N I CK W S T U K
A T T A C H M E N TB R O W S E R A L
D B E X P L O R E ROK