Embed Size (px)
Citation preview

Writing Procedures
75
Chapter 3. Writing Procedures
Bet you're getting tired of typing all those commands over and over and over again.
But it’s the only way you can tell the turtle what to do.
However…think about this for a minute.
Did you have to tell the turtle how to go FORWARD? Or BACK?
Of course not! She already knew that. FORWARD, BACK, LEFT, RIGHT…these are all Logo primitives, remember. Primitives are the procedures the turtle already knows.
Now…how about this!
What if there was a way to teach the turtle how to draw squares, rectangles, triangles, flowers, snowflakes and other things…and she won't forget?
That’s just what this chapter is all about.
Writing Procedures
76
You can teach the turtle to do all sorts of things…lot's more than just drawing shapes.
But since drawing shapes is all we've been doing so far, let's start off with shape procedures. Then we can use them to do lots more things.
After all, we haven’t even mentioned circles yet! ________________________________________________
What is a Procedure
First of all, just what is a procedure?
Let’s look at it this way. What procedure do you follow when you wake up in the morning?
You get out of bed. Some people have a lot of trouble with that.
You get cleaned up, put on your clothes, eat your breakfast, brush your teeth, go to school…or something like that.
Procedures are how you do things, the steps you take to make something happen.
Logo procedures are things you teach Logo to do. They include all the steps Logo must take to make something happen.________________________________________________

Writing Procedures
77
Write Your Own ProceduresWhen you write a procedure to draw a shape, you
teach Ernestine, the turtle, how to draw it. This is why you always start a procedure with the word, TO. You want the turtle TO do something.
What would call your procedure for getting up in the morning? You could call it…
TO GET.UP
Then you could add procedures for all the things you do when you get up.
TO GET.UPGET.OUT.OF.BEDWASH.YOUR.FACEGET.DRESSEDEAT.BREAKFASTBRUSH.YOUR.TEETHEND
To get started writing procedures, why not teach the turtle how to make the shapes you made in Chapter 2?
The simplest shape you made was the corner. So let's teach the turtle…
TO CORNER
When you type this in the MSW Logo Input Box and press ENTER, a little window pops up on the screen…

Writing Procedures
78
________________________________________________
Using the To Mode Window
Type the first line of what you want the turtle to do in that little box right below the word Input:
Click on OK or press Enter after each line that you type. If you don’t like what you typed, you can delete a word or two. Or click on Cancel. That erases the whole procedure so you can start all over again.
When you have typed the last command of your procedure, type the word END on a line by itself so Logo will know this is the end of your procedure.________________________________________________
Writing the Corner Procedure
To write the Corner procedure…
Type…
FD ______ RT 90
Fill in any number you want. You can change it later. Then type END on a separate line.
TO CORNERFD 100 RT 90END
Writing Procedures
79
After you press Enter, Logo then sends you a message that says…
corner defined
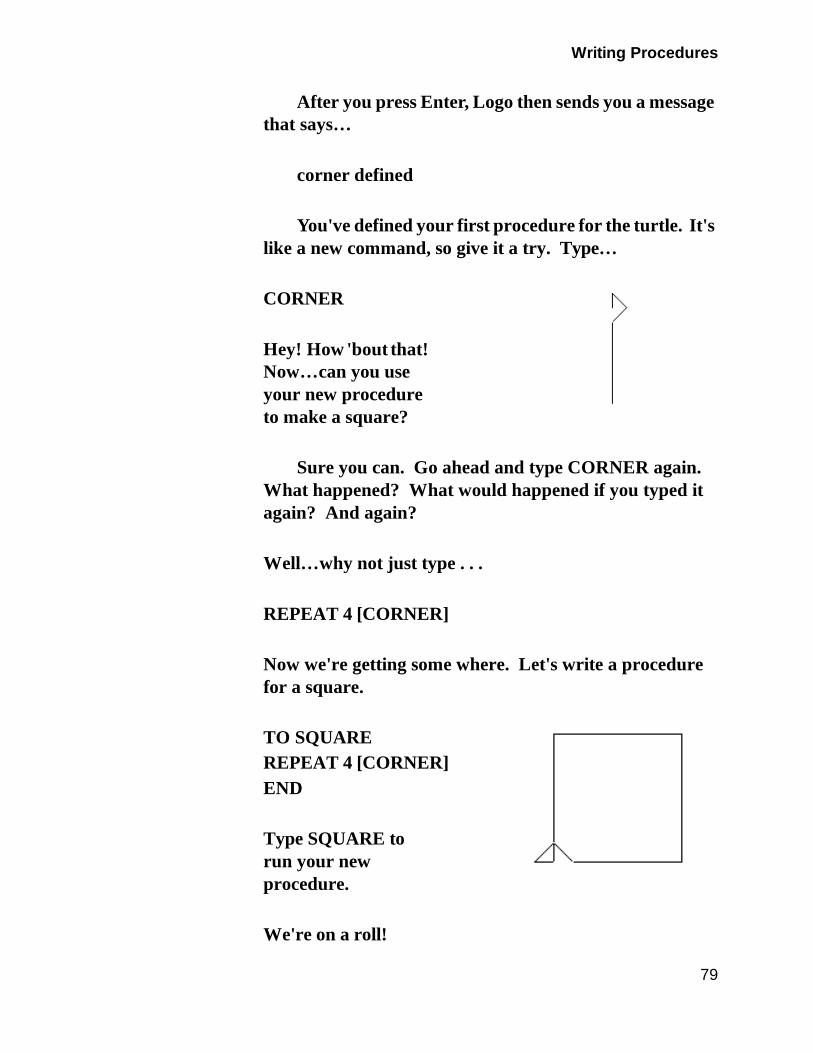
You've defined your first procedure for the turtle. It's like a new command, so give it a try. Type…
CORNER
Hey! How 'bout that! Now…can you use your new procedure to make a square?
Sure you can. Go ahead and type CORNER again. What happened? What would happened if you typed it again? And again?
Well…why not just type . . .
REPEAT 4 [CORNER]
Now we're getting some where. Let's write a procedure for a square.
TO SQUAREREPEAT 4 [CORNER]END
Type SQUARE to run your new procedure.
We're on a roll!

Writing Procedures
80
Naming ProceduresLet’s take another look at how to name a procedure.
Remember the commands we wrote for a triangle with equal sides?
REPEAT 3 [FD 100 RT 120]
Now we can make that a procedure too!
Since TRIANGLE is a long word, why not make a shorter name for the procedure. Call it TRI, for example. If you want, you can call it…
SUPERCALIFRAGILISTICEXPIALIDOCIOUS… or maybe just T.
Your procedure name can be whatever you want it to be as long as it…
• Has no spaces. TO GET is fine. TO GET UP is not.
• Is not just a number. TO SEVEN is OK. TO 7 is not. TO 7A or TO A7 is OK. A procedure name has to have a least one letter in it.
• Is not a symbol that Logo uses… ( : ) # “ [ or ]You can use all the others…TO GET.UP or TO GET_UP are OK.
But back to triangles…let’s call the triangle procedure
TRI.
TO TRIREPEAT 3 [FD 100 RT 120]END
Writing Procedures
81
What do you think would happen if we put the triangle on top of the square?
Try it. Don't worry about getting it right the first time. Play around with your new procedures and see what you can come up with.
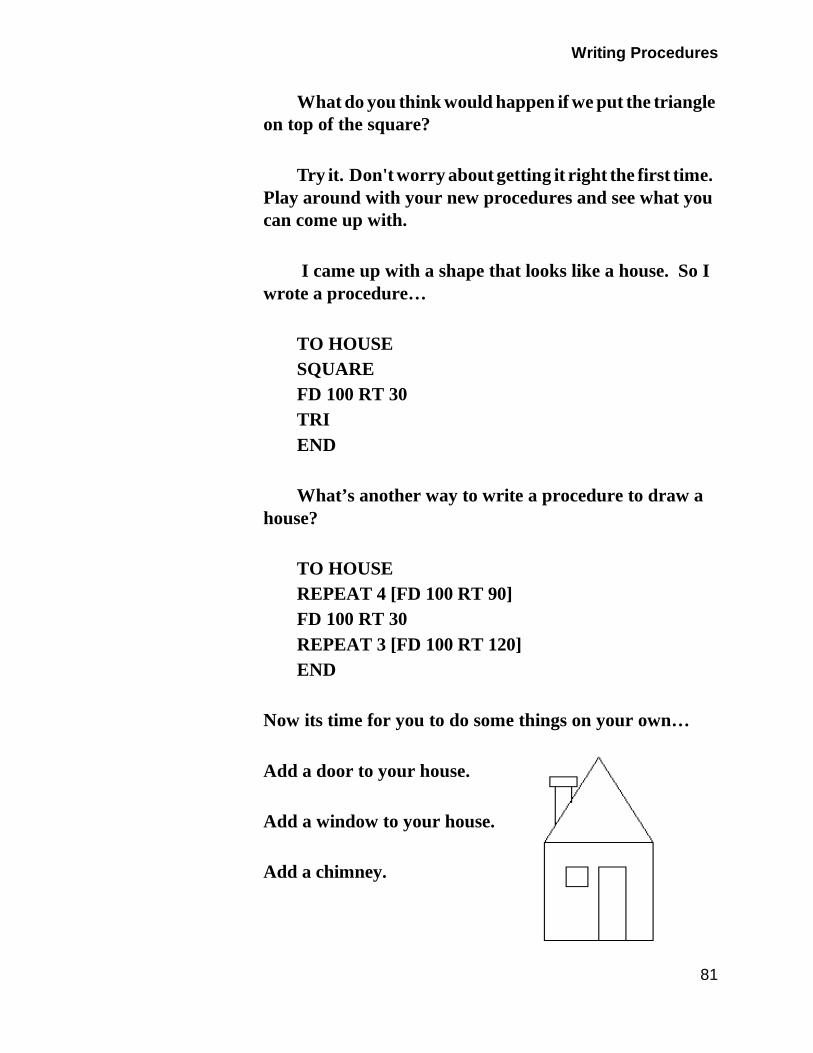
I came up with a shape that looks like a house. So I wrote a procedure…
TO HOUSESQUAREFD 100 RT 30TRIEND
What’s another way to write a procedure to draw a house?
TO HOUSEREPEAT 4 [FD 100 RT 90]FD 100 RT 30REPEAT 3 [FD 100 RT 120]END
Now its time for you to do some things on your own…
Add a door to your house.
Add a window to your house.
Add a chimney.
Writing Procedures
82
We started out working with squares, triangles, and rectangles. Now we’re putting them to work. If you want to draw something else, go right ahead!
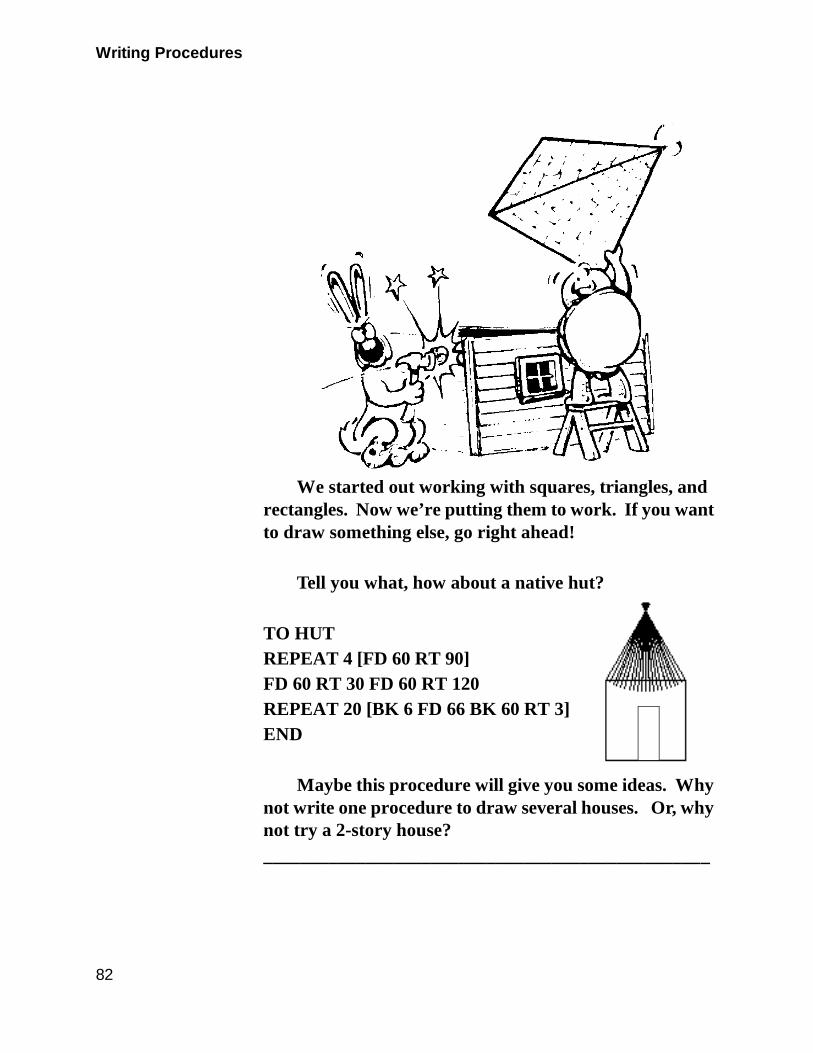
Tell you what, how about a native hut?
TO HUTREPEAT 4 [FD 60 RT 90]FD 60 RT 30 FD 60 RT 120REPEAT 20 [BK 6 FD 66 BK 60 RT 3]END
Maybe this procedure will give you some ideas. Why not write one procedure to draw several houses. Or, why not try a 2-story house?________________________________________________
Writing Procedures
83
Rabbit Trail 10. Houses, Squares, Wheels, and Things
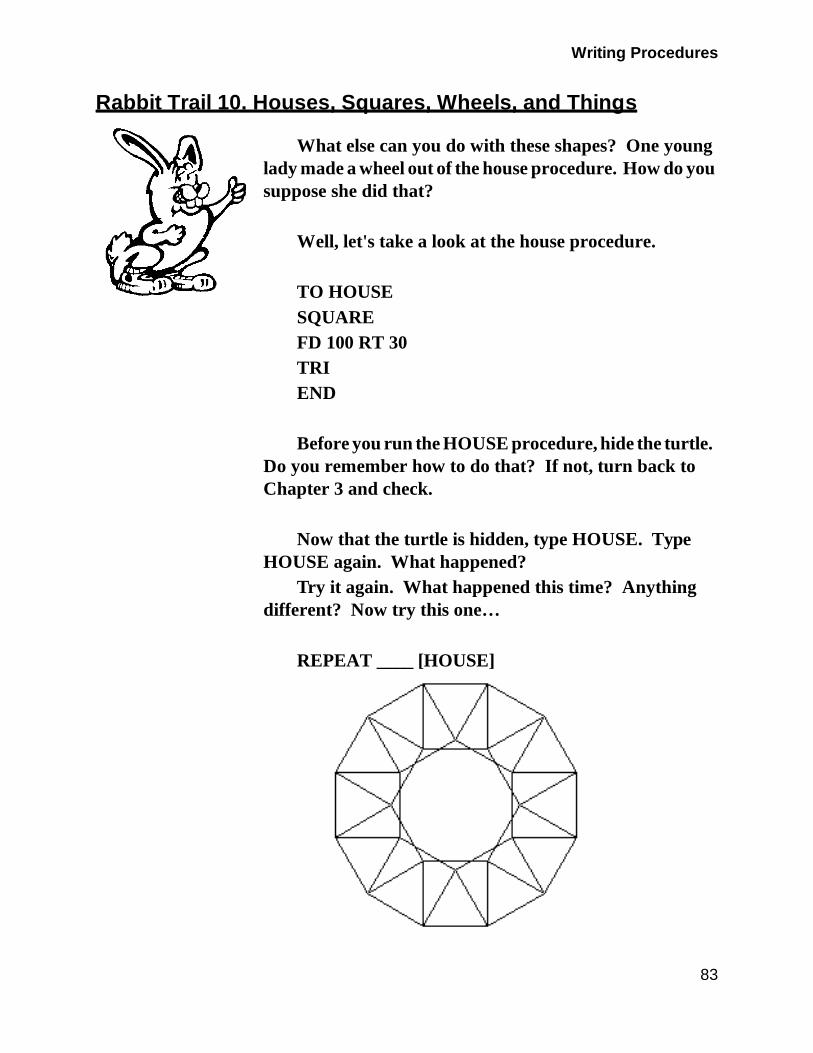
What else can you do with these shapes? One young lady made a wheel out of the house procedure. How do you suppose she did that?
Well, let's take a look at the house procedure.
TO HOUSESQUAREFD 100 RT 30TRIEND
Before you run the HOUSE procedure, hide the turtle. Do you remember how to do that? If not, turn back to Chapter 3 and check.
Now that the turtle is hidden, type HOUSE. Type HOUSE again. What happened?
Try it again. What happened this time? Anything different? Now try this one…
REPEAT ____ [HOUSE]
Writing Procedures
84
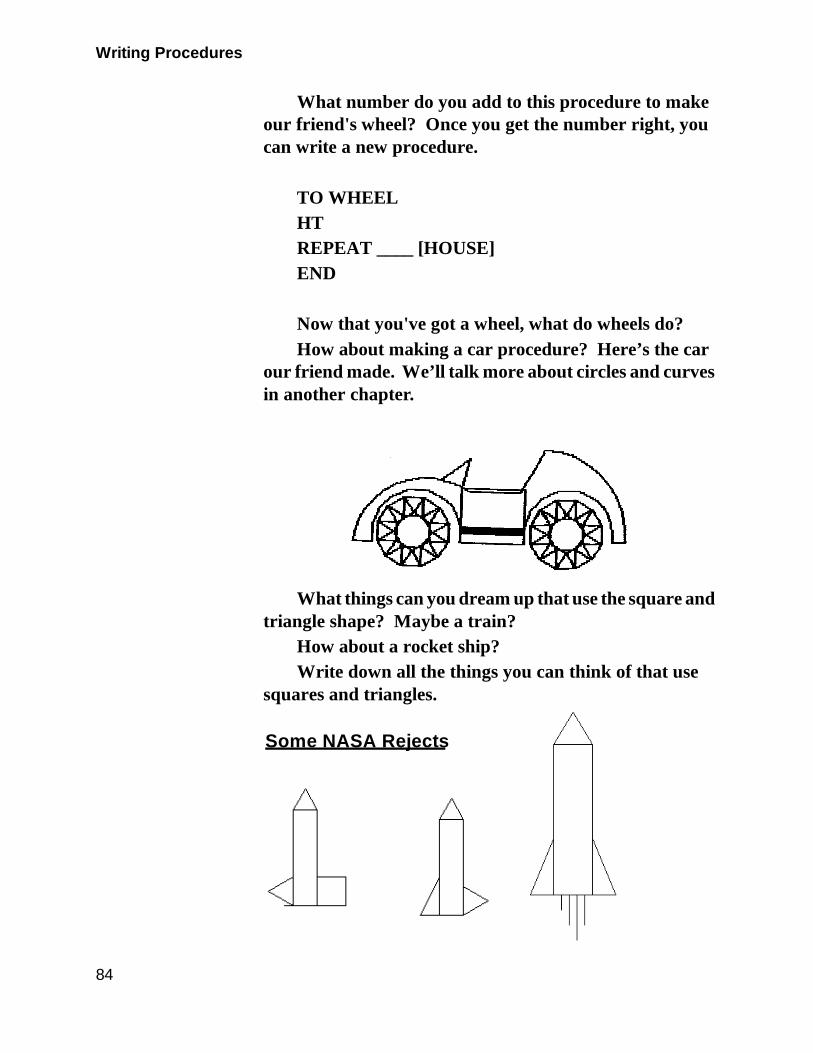
What number do you add to this procedure to make our friend's wheel? Once you get the number right, you can write a new procedure.
TO WHEELHTREPEAT ____ [HOUSE]END
Now that you've got a wheel, what do wheels do? How about making a car procedure? Here’s the car
our friend made. We’ll talk more about circles and curves in another chapter.
What things can you dream up that use the square and triangle shape? Maybe a train?
How about a rocket ship? Write down all the things you can think of that use
squares and triangles.
Some NASA Rejects

Writing Procedures
85
Rabbit Trail 11. Snowflakes Using Repeat 6
Know what a snowflake is? It’s an ice crystal.
They say that no two snowflakes are alike. But they all have something in common. They are all crystals that have six sides or six points.
That means you can draw snowflakes using Logo.
Why not get some friends together to see who can draw the fanciest snowflake. To get you started, here’s a couple of examples from some fourth grade students.
TO STARFLAKEHT REPEAT 6 [SNO
RT 60]END
TO SNOSNF FD 30 RT 45SNF SNF FD 10BK 50 LT 90 SNFSNF FD 10 BK 50RT 45 FD 50 LT 45 SRT 45 BK 100END
TO SNFFD 20 RT 45 S LT 180 S RT 135END
Writing Procedures
86
TO SREPEAT 5 [FD 10 RT 144]END________________________________________________
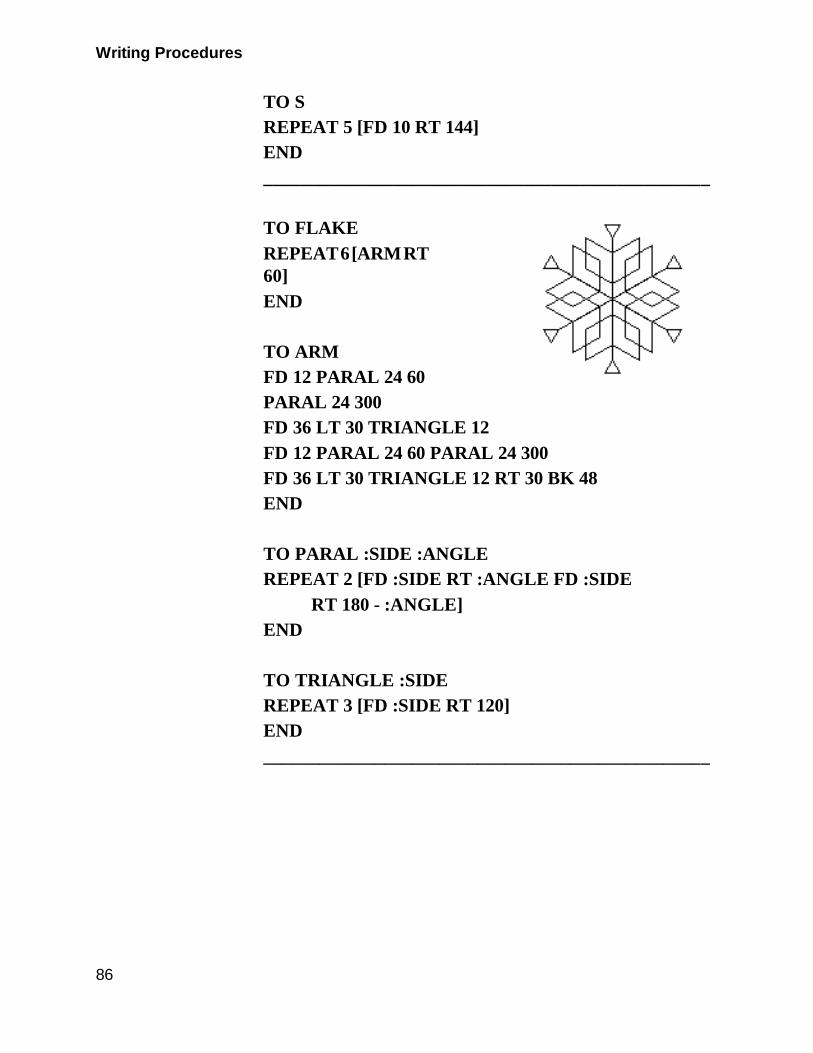
TO FLAKEREPEAT 6 [ARM RT 60]END
TO ARMFD 12 PARAL 24 60PARAL 24 300FD 36 LT 30 TRIANGLE 12FD 12 PARAL 24 60 PARAL 24 300FD 36 LT 30 TRIANGLE 12 RT 30 BK 48END
TO PARAL :SIDE :ANGLEREPEAT 2 [FD :SIDE RT :ANGLE FD :SIDE
RT 180 - :ANGLE]END
TO TRIANGLE :SIDEREPEAT 3 [FD :SIDE RT 120]END________________________________________________
Writing Procedures
87
Editing Your ProceduresSometimes your procedures don't do exactly what you
want them to do. You have to change them. In Logo, we call this “editing.” Guess where we go to do that?
Give yourself a Gold Star and double-dip ice cream cone if you said go to the “Editor.” Type…
EDIT “HOUSE
Presto! The Editor window appears with the name of the procedure in the title bar. This is where you make any changes you want to make to your procedure.
If you want to look at more than one procedure at a time, type EDALL. All the procedures that are in Logo’s workspace are listed in the Editor window.________________________________________________
SPECIAL NOTE: Your workspace is the active part of the computer’s memory where your procedures and things stay while your are working on them, and while Logo is up and running. You’ll see later on that a lot more goes on in the computer’s memory than just holding procedures.
________________________________________________
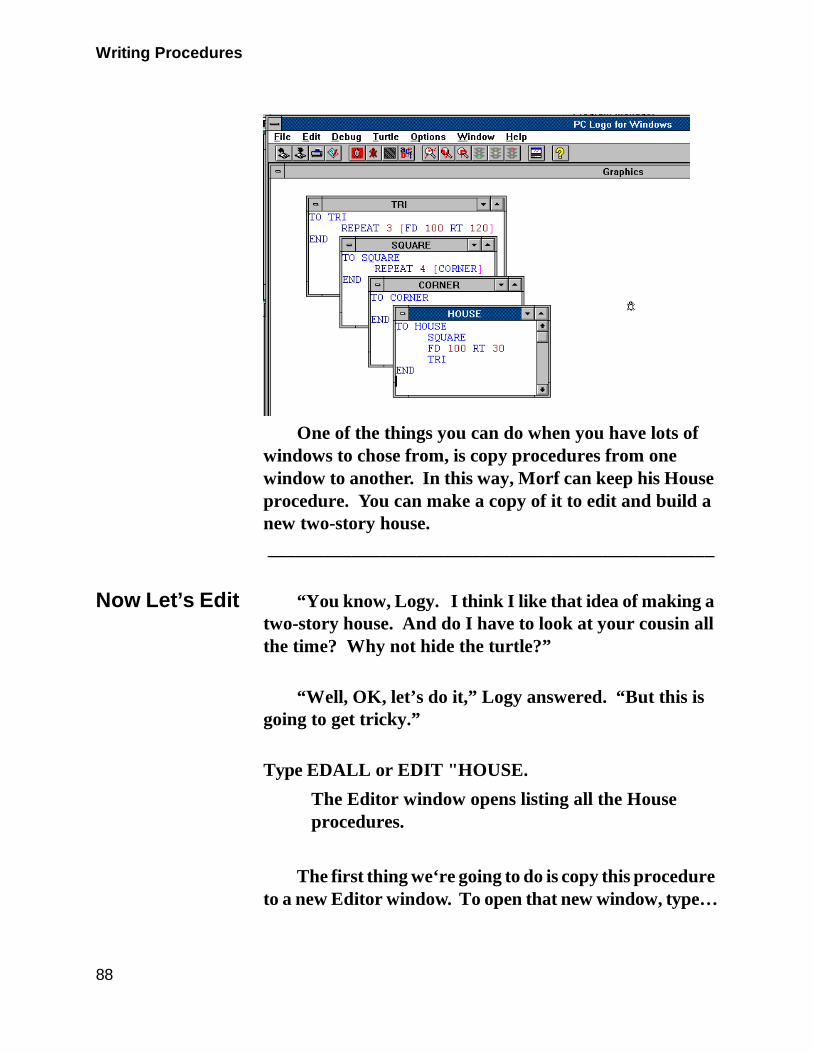
MSW Logo lets you open as many Editor windows as you want. Take a look.
Writing Procedures
88
One of the things you can do when you have lots of windows to chose from, is copy procedures from one window to another. In this way, Morf can keep his House procedure. You can make a copy of it to edit and build a new two-story house. ________________________________________________
Now Let’s Edit “You know, Logy. I think I like that idea of making a two-story house. And do I have to look at your cousin all the time? Why not hide the turtle?”
“Well, OK, let’s do it,” Logy answered. “But this is going to get tricky.”
Type EDALL or EDIT "HOUSE.
The Editor window opens listing all the House procedures.
The first thing we‘re going to do is copy this procedure to a new Editor window. To open that new window, type…

Writing Procedures
89
EDIT “APT(That’s short for Apartment.)
A new window opens displaying two lines…
to aptend
Left-click your mouse in the Editor Title Bar and drag the Editor window out of the way so you can see the window with the House procedure in it.
1. Put the cursor in front of the word “square” in the House procedure.
2. Drag the mouse over the commands in the House procedure and all the other procedures except the last END command.
The text you highlighted changes color like that shown below.
Writing Procedures
90
3. Left-click on Edit/Copy.
4. Now go over to the APT procedure. Put the cursor to the left of the word END and click on Edit/Paste.
Presto! You now have the beginning of an APT procedure.
You just saved yourself some typing. You also saw how you can copy all or parts of procedures from one Editor window to another.
Pretty cool! So let’s close the House Editor window and then we can get to the editing.
1. Left-click on the square in the upper left corner of the Editor window.
A menu is displayed.
2. Left-click on Close to close the window.
The Editor window is closed.
Now…put you mouse in front of the word SQUARE in the first line of the APT procedure.
Type CS HT and leave a space. (Add CS to clear the screen and bring the turtle Home
before you begin. In that way, you know your house will be on the ground and not tilted up in the air somewhere.)
The first line of your procedure should now look like this:
CS HT SQUARE
Drag your mouse over the line that reads…

Writing Procedures
91
FD 100 RT 30.
Type FD 200 RT 30.
See what happened? The old line was erased automatically and replaced by the new line.
Now! Drag your mouse over the line that reads TRI. Type…
TRI RT 60 REPEAT 2 [CORNER]
What do you see? Does it look like a two-story house?
OK, do you remember the procedures you wrote to make the house?
HOUSESQUARETRICORNER
Maybe you wrote some others for a chimney, a door, or a window. To list all the procedures you have stored in your workspace, type…
POTS (That’s short for Print Out TitleS.)
Presto! There’s the names of all the procedures in your workspace.________________________________________________

Writing Procedures
92
Tracing Procedures
Everybody makes mistakes. We all know that. We talked about correcting typing mistakes before. But what about mistakes in commands. For example, the procedure doesn’t do what you want it to do. Sometimes it can be difficult to find these mistakes.
That’s where “tracing” comes in.Type the word, TRACE. Then, when you run your
procedure, each step is displayed in the Trace window. When the procedure has finished, you can look at each step to make sure it is doing what you want it to do.
To turn Trace OFF, type UNTRACE.
Another way to trace procedures is to read them the way that Logo does. For example, let’s take a look at one of Morf’s one-liners.
REPEAT 12 [REPEAT 4 [FD 100 RT 90] RT 30]Is this right?
Logo starts from the left and reads the first word. It’s the command REPEAT. To run correctly, REPEAT needs a number to tell it how many times to repeat, and a list of instructions to repeat.
So…Logo reads to the right.Yep…there’s the number 4. So the next step is to look
for a list that will tell REPEAT what it is going to repeat four times.
The brackets…those are the things that look like square parentheses… [ ] …tell you that the things inside the brackets are a List. In Logo, Lists can be words, numbers…even other Lists.
And that’s just what you find here…another List.There’s that REPEAT command again. And, yes, it is
followed by a number and a List. The List tells the turtle to go forward 100 and to turn 90-degrees to the right.

Writing Procedures
93
That’s OK. This is followed by the command RT 30. So it seems that there’s a perfectly good list for the first REPEAT command.
[REPEAT 4 [FD 100 RT 90] RT 30]
This is what Logo repeats 12 times.Now let’s try something. Type the command like this
and press Enter…
REPEAT 12 [REPEAT 4 [FD 100 RT 90 RT 30]
What happened?
What’s that teach you about brackets? For every left bracket, there has to be a right bracket.
Sometimes, you’ll use parentheses. For every left parenthesis, there has to be a right parenthesis. Here’s an experiment to try. You know how Morf loves experiments. We’ll experiment with a new command, too…the PRINT command. Type this in the Input Box…
PRINT “HELLO, “LOGY!
What happened? Now try this…
(PRINT “HELLO, “LOGY!)
What happened this time? Do you see what the parentheses did?
OK…let’s get back to brackets. Try this one…
PRINT [Hello, Logy!]
Writing Procedures
94
No quotation marks this time. Why not? What happens if you include parentheses inside the brackets?
PRINT [“HELLO, “LOGY!]
What does this tell you about quotation marks?
Think about that for awhile. We’ll talk more about quotes, words, lists, brackets, and parentheses lots more.
But…before we go…what can you do with the PRINT command? How about this…
REPEAT 12 [REPEAT 4 [FD 100 RT 90] RT 30 PRINT “WOW]
Or…how about adding a title to your procedures.
TO STARFLAKEHT REPEAT 6 [SNO RT 60]PR [A Starflake by Ernestine.]END
But we’re getting off track…where were we? To sum up tracing…
Some Logo procedures look pretty complicated. But they can all be made pretty simple if you take them one command at a time, one line at a time, and make sure that each primitive has all the parts it’s supposed to have.
You’ll get lots of practice as we go through the rest of this book.________________________________________________

Writing Procedures
95
Saving ProceduresSaving your work is easy. Just type…
SAVE “HOUSEor SAVE “<whatever you want to call it>
Now all the procedures you've have in your workspace are saved under that name. Let's see how this works.
Type…
ERASE ALL.
All your procedures are erased from your Logo workspace.
Now what happens when you type HOUSE. Logo comes back and says…
HOUSE is not a Logo procedure.________________________________________________
Loading ProceduresIf you want to see your house, what do you have to do?
You have to load it back into the workspace, right? Well, don't just sit there, go ahead and do it! Type…
LOAD “HOUSE
You can also use your mouse and select File/Load. A menu appears from which you can pick the procedure you want to load. The WinLogo directory has lots to explore.

Writing Procedures
96
You’ll be working with the editor a lot in Logo. So why not play around with it for awhile. When you’re ready, take a look at superprocedures.____________________________________________________________________
Superprocedures, Subprocedures, and Such
“Enough of this boring stuff. It's time to move on to some fun!”
“But wait a minute, Morf! There’s lots more to writing procedures than this. So far, we’ve been talking about short, easy procedures. What are you going to do when you want to make a really complicated drawing?
“How are you going to organize them? How are you going to know what’s supposed to happen if you don’t organize your thinking?”
“You mean like this procedure of New York City?”
TO NYHT RT 180 PU FD 50 RT 90 PDFD 150 RT 90 R 70 25 FD 60PU RT 90 FD 5 LT 90 PD S 2RT 90 PU FD 10 LT 90 PD S 2

Writing Procedures
97
PU BK 20 PD S 2 PU LT 90FD 10 RT 90 PD S 2 PUBK 20 PD S 2 PU RT 90 FD 10LT 90 PD S 2 PU BK 20 LT 90FD 5 RT 90 PD R 10 4 PU RT 90FD 15 PD LT 90 R 35 70 RT 90FD 15 LT 90 S 15 RT 90 FD 30LT 90 S 15 FD 10 PU LT 90FD 10 RT 90 PD S 5 LT 90PU FD 30 RT 90 PD S 5 PU FD 10RT 90 PD FD 60 LT 90 PU FD 15RT 90 FD 5 LT 90 PD FD 10 RT 90FD 25 RT 90 FD 45 LT 180 LT 90FD 10 RT 90 R 10 4 LT 90 FD 4RT 90 R 10 4 LT 90 FD 4 RT 90R 10 4 PU FD 15 PD S 4 RT 90PU FD 5 PD LT 90 S 4 PU FD 15PD S 4 LT 90 FD 5 RT 90 S 4 PURT 180 FD 30 LT 90 PD FD 19LT 90 R 100 35 FD 100 RT 90FD 5 LT 90 S 20 FD 20 RT 90 FD 5LT 90 S 10 FD 10 RT 90 FD 5LT 90 FD 7 BK 7 PU BK 25 LT 90FD 5 PD LT 180 PU FD 5 LT 90BK 15 LT 90 FD 5 RT 90 PDS 3 RT 90 PU FD 10 PD LT 90 S 3PU BK 20 PD S 5 LT 90 PU FD 10RT 90 PD S 5 PU BK 20 PD S 5RT 90 PU FD 10 LT 90 PD S 5 PUBK 15 PD S 5 LT 90 PU FD 10RT 90 PD S 5 PU BK 15 PD S 5RT 90 PU FD 10 LT 90 PD S 5PU BK 20 PD R 10 3 RT 90 BK 3LT 90 R 10 3 RT 90 BK 3 LT 90

Writing Procedures
98
R 10 3 RT 90 FD 25 LT 90LT 90 FD 280 RT 90R 120 30 FD 120 RT 90 FD 5LT 90 S 20 RT 90 BK 5 LT 90BK 15REPEAT 7 [RT 90 R 30 3 LT 90 BK 15]FD 120 RT 90 FD 5 LT 90 FD 20 RT 90FD 5 LT 90 S 10 FD 10 RT 90 FD 5LT 90 FD 10 RT 180 PU FD 40 PDFD 110 PU FD 10 RT 180 PD R 10 4RT 90 FD 15 LT 90 R 100 30 FD 100RT 45 FD 10 RT 45 FD 30 LT 225FD 10 BK 10 LT 45 FD 107 RT 90FD 25 RT 90 FD 100 RT 90 FD 5 RT 90FD 100 RT 180 FD 75 LT 90 FD 5RT 90 R 7 5 BK 75 RT 90 FD 5 LT 90R 10 4 RT 90 FD 5 PU LT 90 FD 70PD S 4 PU BK 20 PD S 4 PU BK 20 PDS 4 PU BK 30 RT 90 FD 35 LT 90 PDR 25 32 FD 25 RT 90 FD 4 LT 90R 100 28 FD 100 RT 45 FD 10 RT 45FD 28 LT 225 FD 10 BK 10 LT 45FD 62 BK 62 RT 90 FD 28 LT 45 FD 10LT 45 FD 100 RT 180 PU BK 15 PD S 4RT 90 PU FD 10 PD LT 90 S 4 RT 90PU FD 10 LT 90 PD S 4 PU BK 10RT 90 BK 5 LT 90 PD R 8 5 RT 90BK 5 LT 90 R 8 5 RT 90 BK 15 LT 90FD 25 RT 90 FD 4 LT 90 FD 80 RT 90PU FD 4 LT 90REPEAT 8 [PD S 4 RT 90 PU FD 10 LT 90 PD S 4
RT 90 PU BK 14 PD LT 90 BK 10 RT 90FD 4 LT 90]
LT 90 FD 9 RT 90 PU RT 90 FD 61
Writing Procedures
99
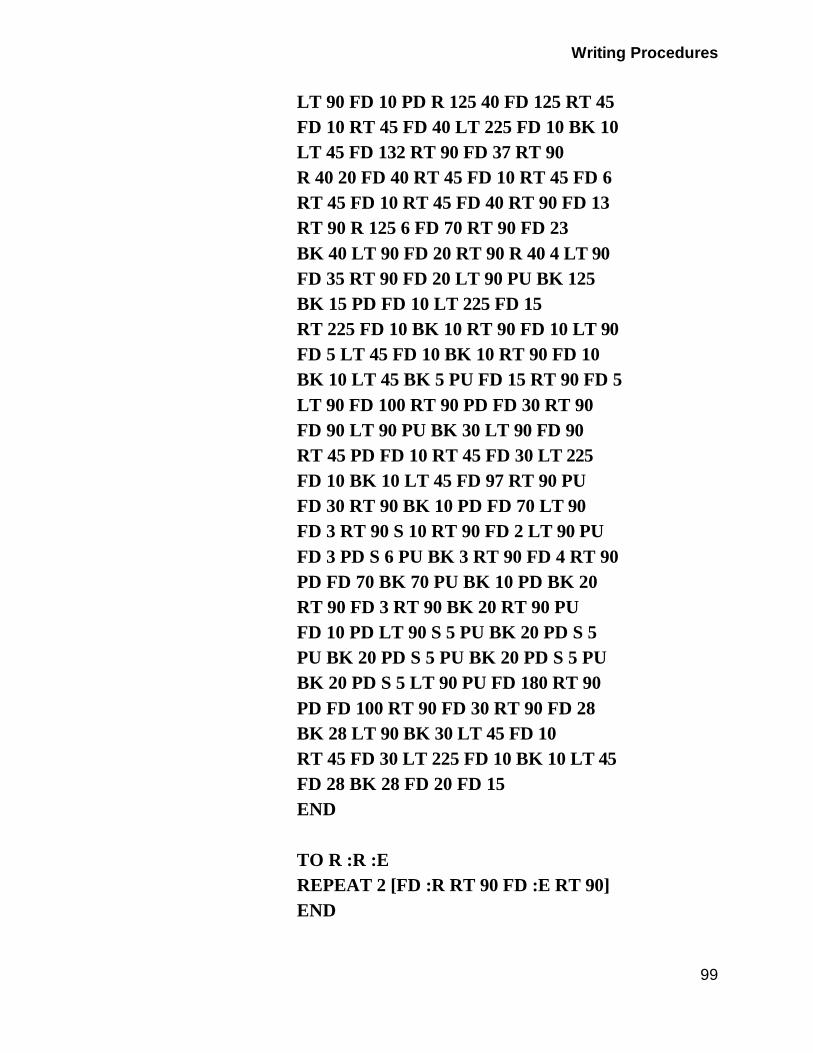
LT 90 FD 10 PD R 125 40 FD 125 RT 45FD 10 RT 45 FD 40 LT 225 FD 10 BK 10LT 45 FD 132 RT 90 FD 37 RT 90R 40 20 FD 40 RT 45 FD 10 RT 45 FD 6RT 45 FD 10 RT 45 FD 40 RT 90 FD 13RT 90 R 125 6 FD 70 RT 90 FD 23BK 40 LT 90 FD 20 RT 90 R 40 4 LT 90FD 35 RT 90 FD 20 LT 90 PU BK 125BK 15 PD FD 10 LT 225 FD 15RT 225 FD 10 BK 10 RT 90 FD 10 LT 90FD 5 LT 45 FD 10 BK 10 RT 90 FD 10BK 10 LT 45 BK 5 PU FD 15 RT 90 FD 5LT 90 FD 100 RT 90 PD FD 30 RT 90FD 90 LT 90 PU BK 30 LT 90 FD 90RT 45 PD FD 10 RT 45 FD 30 LT 225FD 10 BK 10 LT 45 FD 97 RT 90 PUFD 30 RT 90 BK 10 PD FD 70 LT 90FD 3 RT 90 S 10 RT 90 FD 2 LT 90 PUFD 3 PD S 6 PU BK 3 RT 90 FD 4 RT 90PD FD 70 BK 70 PU BK 10 PD BK 20RT 90 FD 3 RT 90 BK 20 RT 90 PUFD 10 PD LT 90 S 5 PU BK 20 PD S 5PU BK 20 PD S 5 PU BK 20 PD S 5 PUBK 20 PD S 5 LT 90 PU FD 180 RT 90PD FD 100 RT 90 FD 30 RT 90 FD 28BK 28 LT 90 BK 30 LT 45 FD 10RT 45 FD 30 LT 225 FD 10 BK 10 LT 45FD 28 BK 28 FD 20 FD 15END
TO R :R :EREPEAT 2 [FD :R RT 90 FD :E RT 90]END

Writing Procedures
100
TO S :SREPEAT 4 [FD :S RT 90]END
“How do you like that one? Pretty cool, isn’t it!”
“Morf, how could you ever edit anything like that? It’s humongous!”
When you’re writing procedures, you do much better when you divide your procedures into chunks that are easy to work with, and easy to understand.
Take a look at this skyline of Dallas.
And here’s the procedures…
TO DALLASHOTELREUNION BUILDINGBANK BUILDING2SPIRE BUILDING3BUILDING4 LIGHTSBORDEREND

Writing Procedures
101
TO HOTELCS HT PU LT 90 FD 100 RT 90 PD FD 10 RT 90 FD 5 LT 90 FD 5 RT 90 FD 5 LT 90 FD 5RT 90 FD 10 RT 90 FD 10 LT 90 FD 5 RT 90 FD 3 LT 90 FD 3END
TO REUNIONLT 90 FD 33 LT 90REPEAT 26 [FD 1 RT 7] FD 5REPEAT 26 [FD 1 RT 7]SETH 180 FD 40 LT 90FD 5 RT 90 FD 10 LT 90 FD 5END
TO BUILDINGLT 90 FD 45 RT 90 FD 15RT 90 FD 15 LT 90 FD 15RT 90 FD 23 LT 90 FD 5END
TO BANKLT 90 FD 5 RT 90 FD 5LT 90 FD 33 RT 160 FD 15LT 70 FD 10 RT 90 FD 10LT 90 FD 3END
TO BUILDING2LT 90 FD 25 RT 90 FD 10RT 90 FD 30 LT 90 FD 5RT 90 FD 10 LT 90 FD 3END
Writing Procedures
102
TO BUILDING3LT 90 FD 25 LT 90 FD 1RT 90 FD 10 RT 90 FD 1LT 90 FD 1 RT 90 FD 15RT 90 FD 1 LT 90 FD 1RT 90 FD 10 RT 90 FD 1LT 90 FD 20 LT 90 FD 10RT 90 FD 15 LT 90 FD 3END
TO BUILDING4LT 90 FD 20 RT 90FD 10 RT 90 FD 20END
TO LIGHTSDOT -64 48DOT -66 43DOT -66 53DOT -77 48DOT -75 43DOT -75 53DOT -71 53DOT -71 43DOT -73 48DOT -68 48END
TO SPIRELT 90 FD 20 RT 90 FD 10LT 90 FD 5 RT 90 FD 3LT 70 FD 10 RT 140 FD 10LT 70 FD 3 RT 90 FD 5LT 90 FD 5 RT 90

Writing Procedures
103
FD 18 LT 90 FD 5ENDTO BORDERPU HOME LT 90 FD 100 PD FD 20 RT 90FD 100 RT 90 FD 230 RT 90 FD 111RT 90 FD 20END
_______________________________________________
SPECIAL NOTE: These two skylines actually came from a contest that Logy and Morf conducted a number of years ago. Who could draw the most creative skyline for their city?They got some really creative procedures. So think about it. You can use pictures from magazines, or photographs from the travel section of your newspaper.
Go on…Get creative!________________________________________________
Do you see the difference between the NY and the DALLAS procedures? NY is probably the biggest single procedure you will ever see. DALLAS makes a lot more sense. Each building is a separate procedure. If you ever want to change the drawing, you can simply change one procedure. If you ever wanted to change the NY procedure, where would you start?
Let’s look at some other examples.________________________________________________
Writing Procedures
104
Tessellations and Optical Illusions
Let's tessellate!
Tessellations can be lots of fun...real brain teasers. They also are great examples of superprocedures and subprocedures. But what's a tessellation?
You see tessellations all over the place. They're the patterns you see in wallpaper, in tile floors, in blankets ...even in clothes. Strictly speaking, tessellations are patterns made by repeating one or more shapes over and over again in what seems like an endless pattern.
There’s lots of books on tessellations. You can find them in your library and then try them on the computer.
Some tessellations are optical illusions...they look like something they are not. You can also find lots of books on optical illusions.
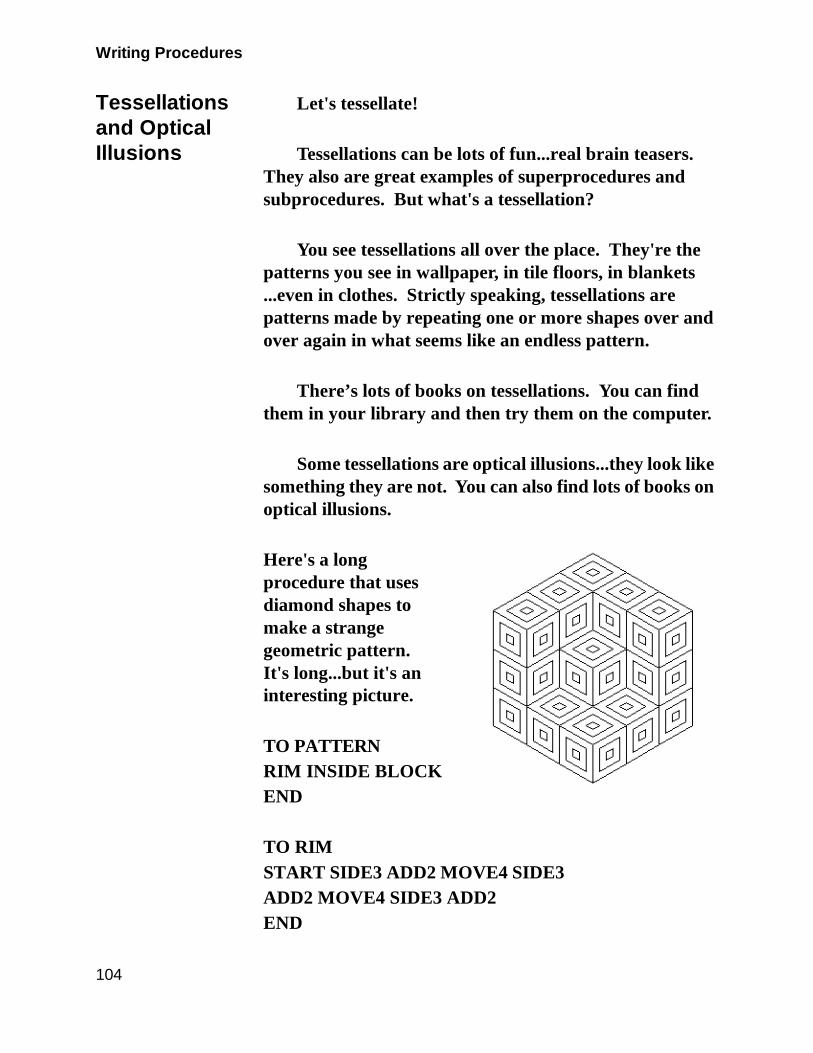
Here's a long procedure that uses diamond shapes to make a strange geometric pattern. It's long...but it's an interesting picture.
TO PATTERNRIM INSIDE BLOCKEND
TO RIM START SIDE3 ADD2 MOVE4 SIDE3 ADD2 MOVE4 SIDE3 ADD2END
Writing Procedures
105
TO START PU BK 103 LT 60 FD 16 PDEND
TO SIDE3 DIAMONDS MOVE2 DIAMONDS MOVE2 DIAMONDSEND
TO ADD2 MOVE3 DIAMONDS MOVE3 DIAMONDSEND
TO MOVE3 PU FD 16 RT 60 FD 56 LT 60 PDEND
TO DIAMONDS DIAMOND 8 MOVE DIAMOND 24 MOVE DIAMOND 40END
TO DIAMOND :NREPEAT 2 [FD :N RT 60 FD :N RT 120]ENDTO MOVE PU RT 60 BK 8 LT 60 BK 8 PDEND
TO INSIDE MOVE5 SIDE2 ADD1 MOVE4 SIDE2 ADD1 MOVE4 SIDE2 ADD1END

Writing Procedures
106
TO MOVE5 PU RT 60 BK 24 RT 60 FD 16 LT 60 PDEND
TO MOVE4 PU FD 24 RT 60 FD 40 RT 60 FD 16 PDEND
TO SIDE2 DIAMONDS MOVE2 DIAMONDSEND
TO MOVE2 PU FD 56 RT 60 FD 16 LT 60 PDEND
TO ADD1 MOVE3 DIAMONDSEND
TO BLOCK MOVE6 DIAMONDS MOVE7 DIAMONDS MOVE7 DIAMONDSEND
TO MOVE6 PU RT 60 FD 16 RT 60 FD 16 LT 60 PDEND
TO MOVE7 PU FD 24 RT 60 FD 40 RT 60 FD 16 PDEND
Writing Procedures
107
To see what all this typing is about, type PATTERN. Pretty neat, huh?
These long procedures are good examples of superprocedures and subprocedures.
A superprocedure is one like PATTERN, RIM, and INSIDE. DALLAS is another example of a superprocedure.
TO PATTERNRIM INSIDE BLOCKEND
TO RIM START SIDE3 ADD2 MOVE4 SIDE3 ADD2 MOVE4SIDE3 ADD2END
TO INSIDE MOVE5 SIDE2 ADD1 MOVE4 SIDE2 ADD1 MOVE4 SIDE2 ADD1END
TO DALLASHOTEL REUNION BUILDINGBANK BUILDING2 SPIRE BUILDING3BUILDING4 LIGHTS BORDEREND
Superprocedures don't do anything by themselves, do they? But they do make a lot happen. That's because they call other subprocedures. Those are the ones like the MOVE procedures, and DIAMOND.

Writing Procedures
108
Think what it would be like if you had to type in every move the turtle made to draw that optical illusion? That would sure be a lot of typing. It might even be worse than the NY procedure!
Superprocedures help you organize your thinking when you're putting together long, complicated “super” procedures. They can also save you a lot of work.
Now...see what you can dream up. If you need a little help getting started, see what kind of vines you can grow.
TO VINE REPEAT 12 [HALFVINE OTHERHALF.VINE FD 20]END
TO HALFVINE FD 6 RT 30 REPEAT 6 [FD 4 RT 20]RT 60 REPEAT 6 [FD 4 RT 20] RT 30END
TO OTHERHALF.VINE FD 6 LT 30 REPEAT 6 [FD 4 LT 20]LT 60 REPEAT 6 [FD 4 LT 20]END
This vine grows in a circle. Can you make it grow up a wall? What would you have to change?
And another thing…did you ever see a black and white vine? How about adding some color to it?
That’s coming up in the next chapter.________________________________________________