Embed Size (px)
Citation preview

Changing Adobe Flash Player Security Settings for Headstart2
Note: In order to run the stand‐alone Headstart2, you will need to adjust the settings of your computer’s Flash player. This requires a connection to the Internet since access to Adobe’s commercial web site is required. The instructions below will guide you through this process.
1. When the Headstart2 course from start.html in the HS2 stand‐alone version is launched for the first time, a dialog box will appear (see screenshot below). Close the dialog box by clicking either “OK” or “Settings…”
OR

2. Right‐click anywhere in the HS2 browser window and select “Global Settings” from the menu (below).
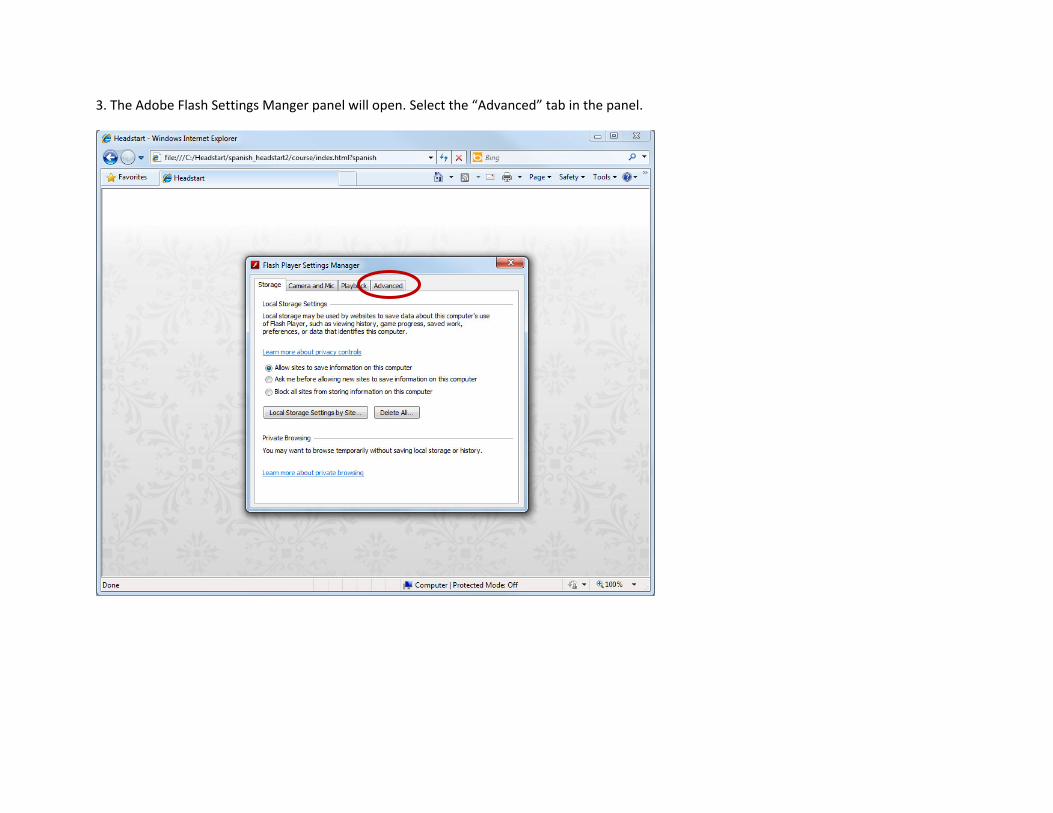
3. The Adobe Flash Settings Manger panel will open. Select the “Advanced” tab in the panel.

4. Select the “Trusted Location Settings…” button in the “Advanced” tab.

5. The “Trusted Location Settings” panel open. Select the “Add” button in the panel to designate the location of content from trusted sites.
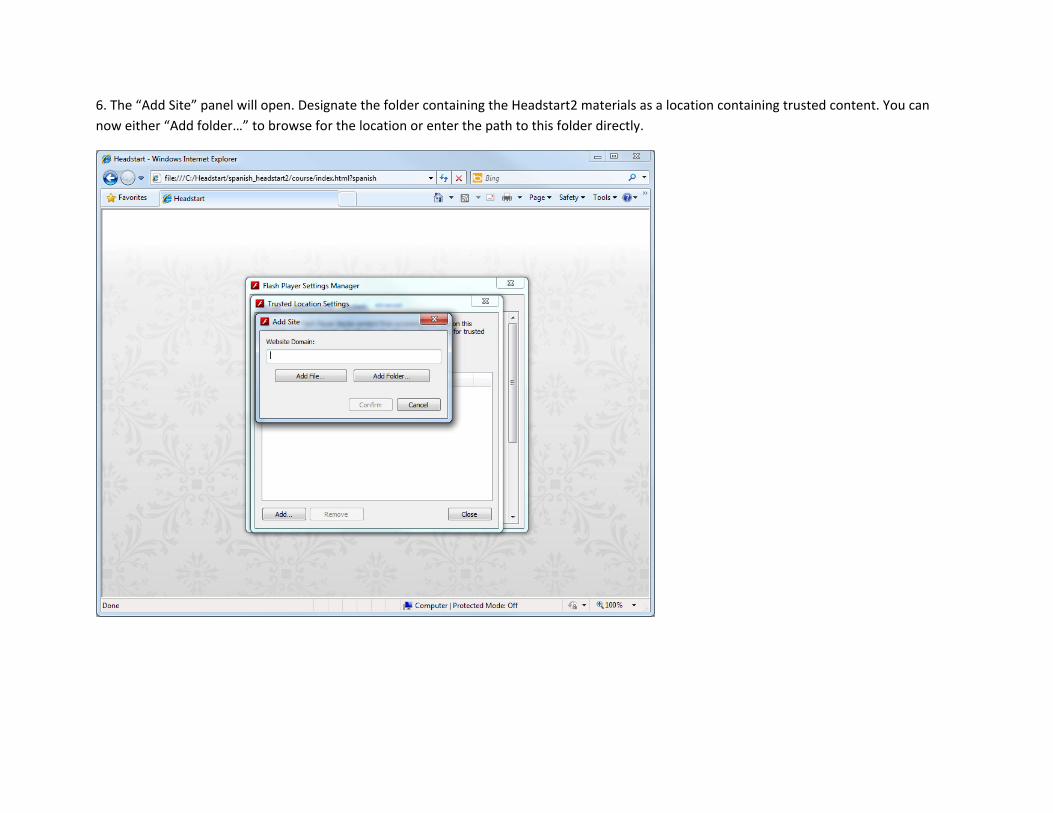
6. The “Add Site” panel will open. Designate the folder containing the Headstart2 materials as a location containing trusted content. You can now either “Add folder…” to browse for the location or enter the path to this folder directly.

7. Here is the one example. If the Headstart2 Stand‐alone version is in C:\Headstart, then type this location into the empty field and select “Confirm.”

9. The trusted location is now set up. Close all open panels. Close the browser window as well.

10. Open start.html again and the Log‐In page will appear.