Embed Size (px)
Citation preview
Operation Manual
ComisiónFederaldeElectricidadElectronicPlatform2016
Index
1. SingupCFEElectronicPlatform 2
2. Signin 4
3. Passwordrecovery 5
4. Eventsubscription 7
5. DownloadRFQandProposalFormat. 9
6. SearchforanEvent 10
7. EventNews 11
8. Signandencryptproposal. 14
9. Clarificationsessionofthelistofrequirements 31
10. Re-questions:clarificationssecondseason. 37

2
1. Sing up CFE Electronic Platform
1. Create new user account. Click on the following link to access CFE Portal: http://www.cfe.gob.mx/Proveedores/1_Adquisicionesarrendamientosyservicios/ProcedimientosRegimenEspecial/PREProceso/Paginas/default.aspx or use http://cfe.aklara.com
2. Click on “New User” and provide your user and company data.
3. When click on Create user the following screen shows.

3
4. In case of any questions or doubts regarding the registration process or the CFE Electronic platform
please call our Assistance Line: +52 (55) 50004224 or send an email to: [email protected]

4
2. Sign in
1. Open the following URL http://cfe.aklara.com in your browser and type your User Id and Password, and then click on “Enter” button.

5
3. Password recovery
1. In http://cfe.aklara.com click on the link Forgot your password?
Enter the email account you use to sing in to CFE Electronic Platform. Then press the Send button.
6
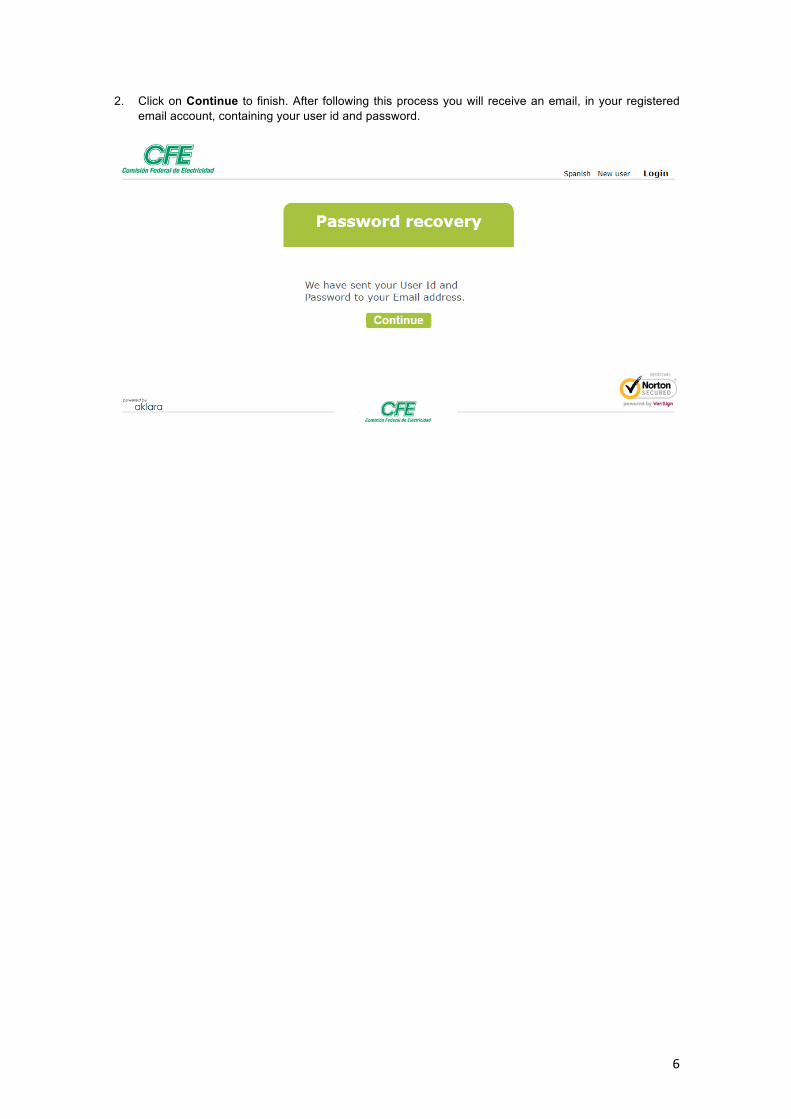
2. Click on Continue to finish. After following this process you will receive an email, in your registered email account, containing your user id and password.

7
4. Event subscription To receive event news or notifications you need to subscribe to the event. The instructions for subscribing to an event are as follows. 1. After signing in the screen shows the Events list.
2. On Events List click on link Detail which is located at the right of every event listed.
3. The window shows the details of the event selected.
4. In the upper right press the Subscribe link.
8
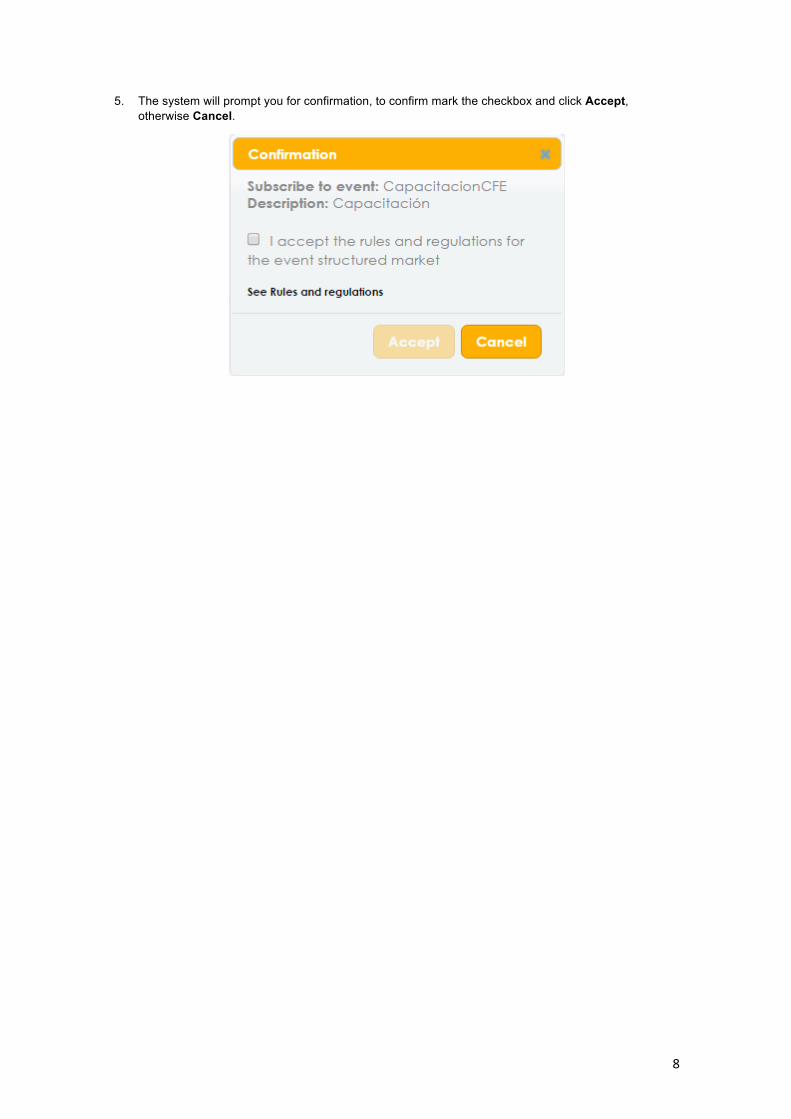
5. The system will prompt you for confirmation, to confirm mark the checkbox and click Accept, otherwise Cancel.

9
5. Download RFQ and Proposal Format.
1. Click on Detail link, it shows the Detail window.
2. In the upper right press the RFQ button to start downloading the file.
3. Also, is the Proposal Format.
10
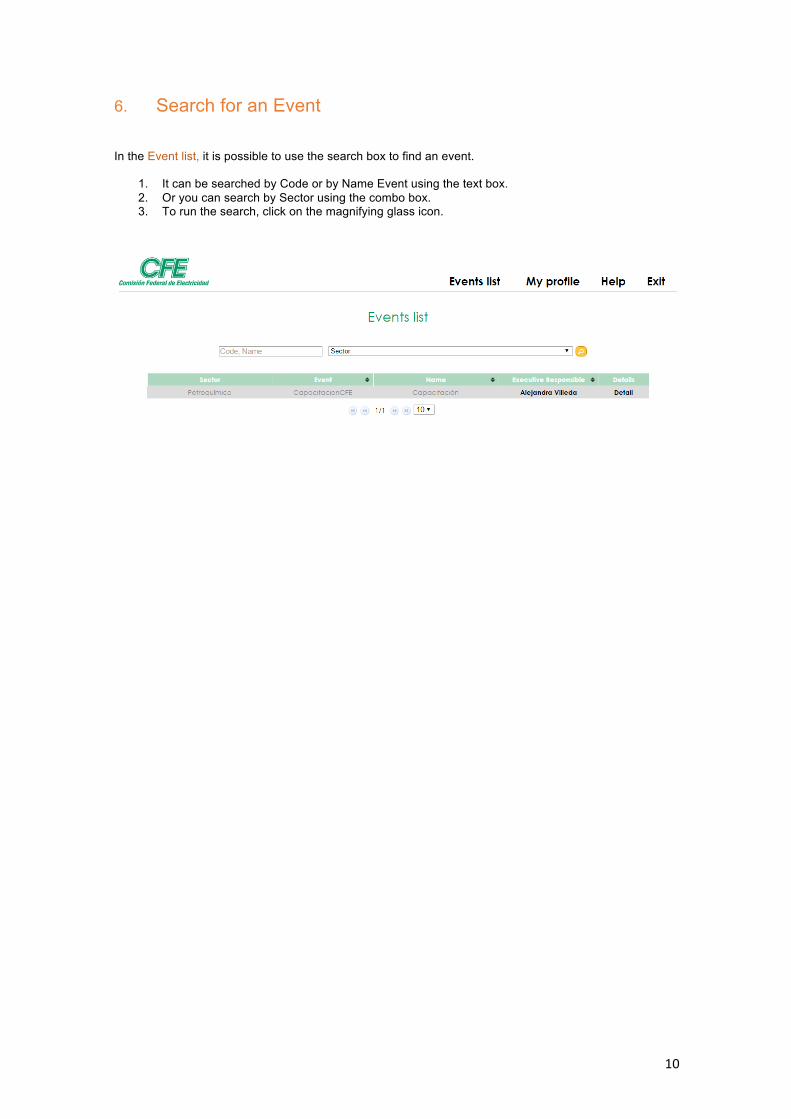
6. Search for an Event
In the Event list, it is possible to use the search box to find an event.
1. It can be searched by Code or by Name Event using the text box. 2. Or you can search by Sector using the combo box. 3. To run the search, click on the magnifying glass icon.
11
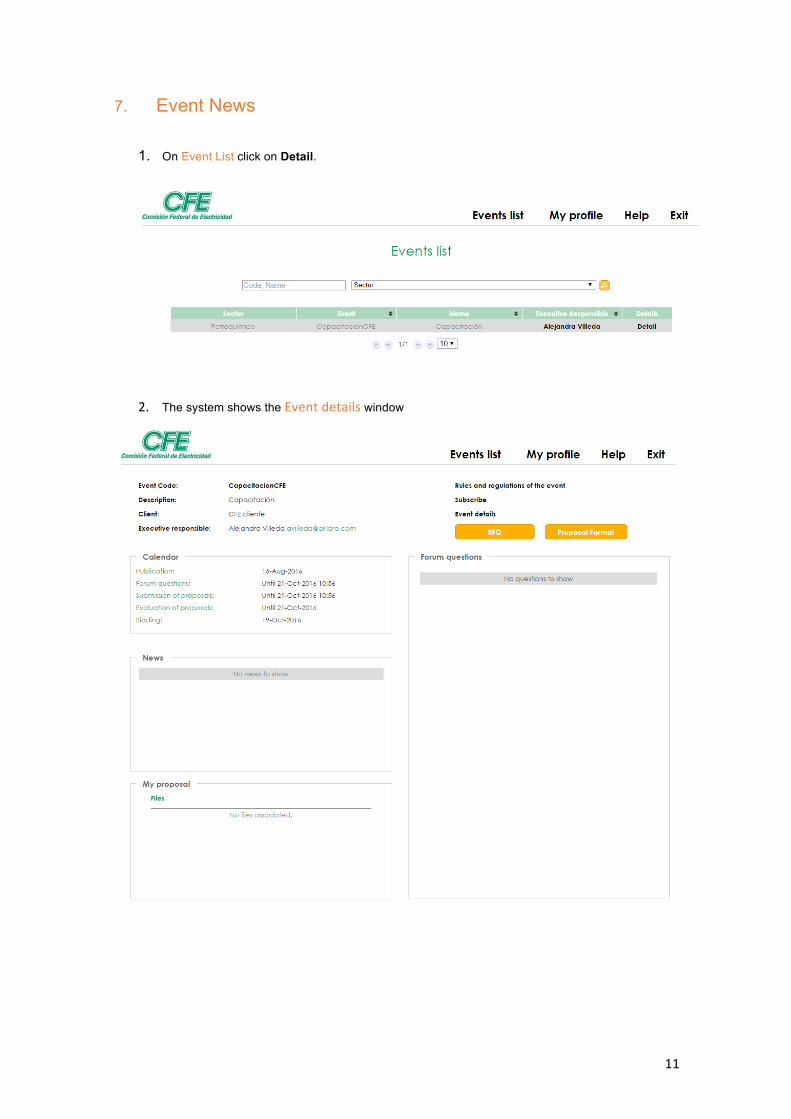
7. Event News
1. On Event List click on Detail.
2. The system shows the Eventdetails window
12
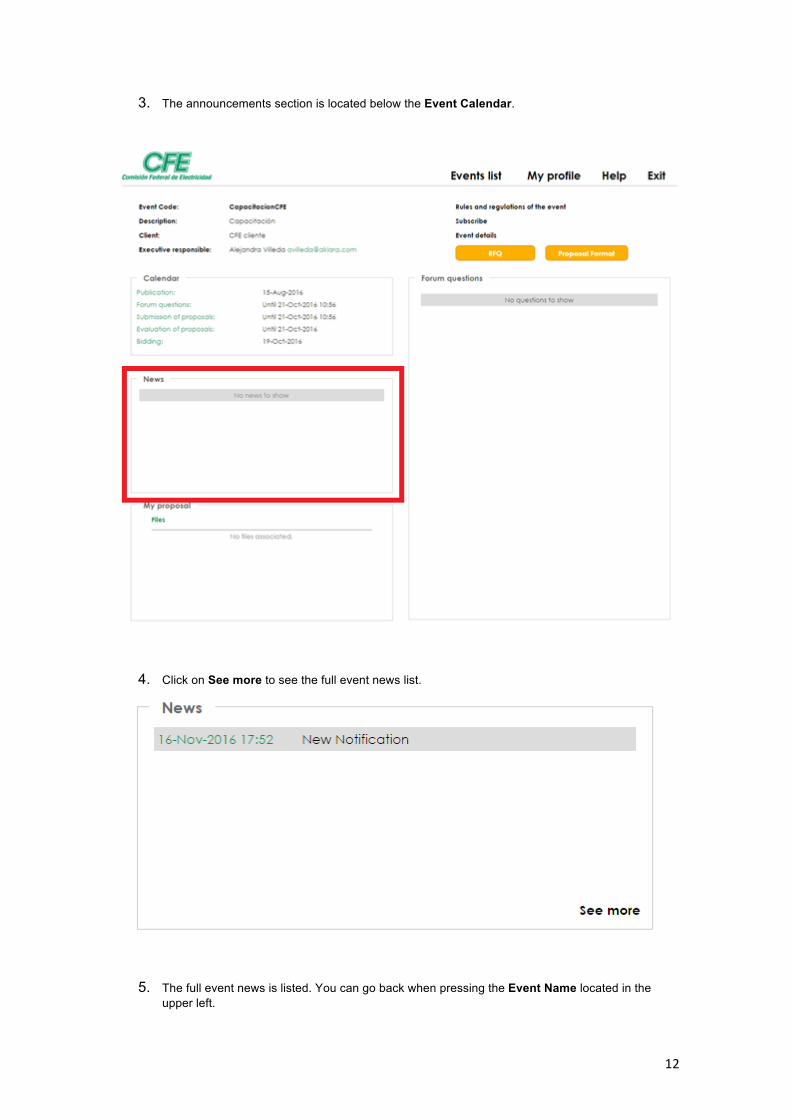
3. The announcements section is located below the Event Calendar.
4. Click on See more to see the full event news list.
5. The full event news is listed. You can go back when pressing the Event Name located in the upper left.

13

14
8. Sign and encrypt proposal.
I. Electronic Sign:
1. On Event list click on link Detail.
2. The system will show the event details. My Proposal section is located at the bottom left.
3. Press See more link on My Proposal section
15
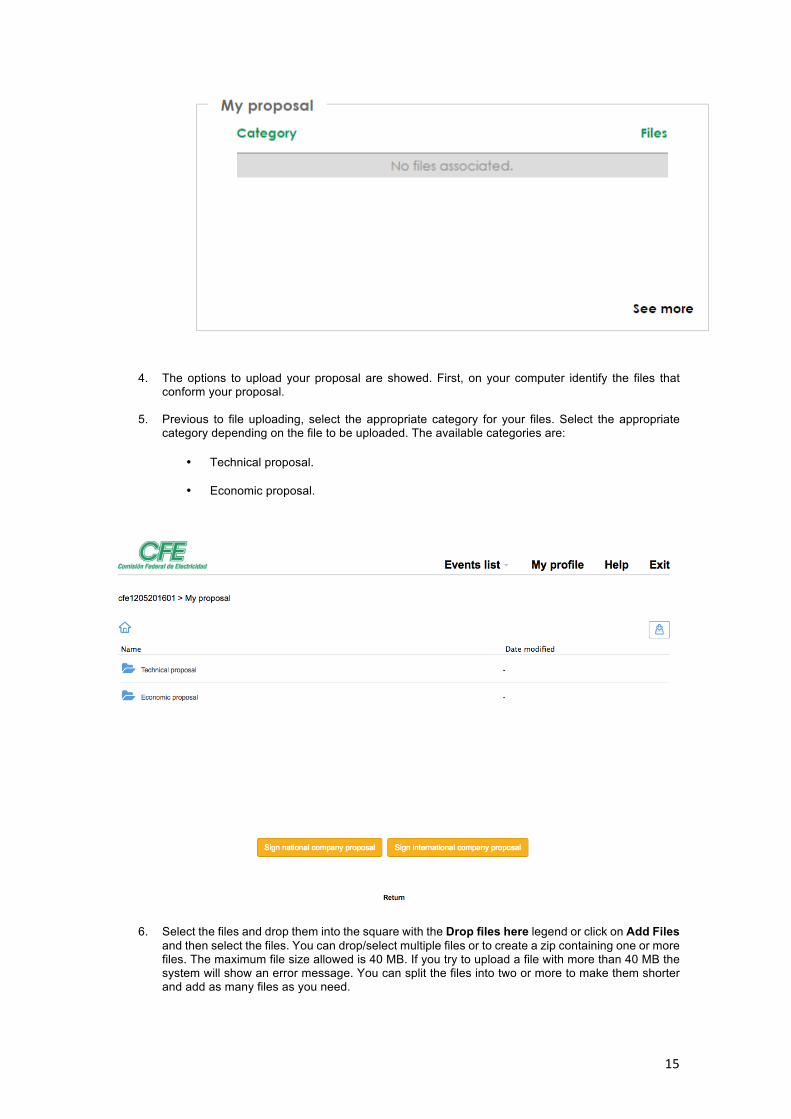
4. The options to upload your proposal are showed. First, on your computer identify the files that
conform your proposal.
5. Previous to file uploading, select the appropriate category for your files. Select the appropriate category depending on the file to be uploaded. The available categories are:
• Technical proposal.
• Economic proposal.
6. Select the files and drop them into the square with the Drop files here legend or click on Add Files and then select the files. You can drop/select multiple files or to create a zip containing one or more files. The maximum file size allowed is 40 MB. If you try to upload a file with more than 40 MB the system will show an error message. You can split the files into two or more to make them shorter and add as many files as you need.

16
7. There are two options to sign the files: one for national members with FIEL and other for foreign members.
17
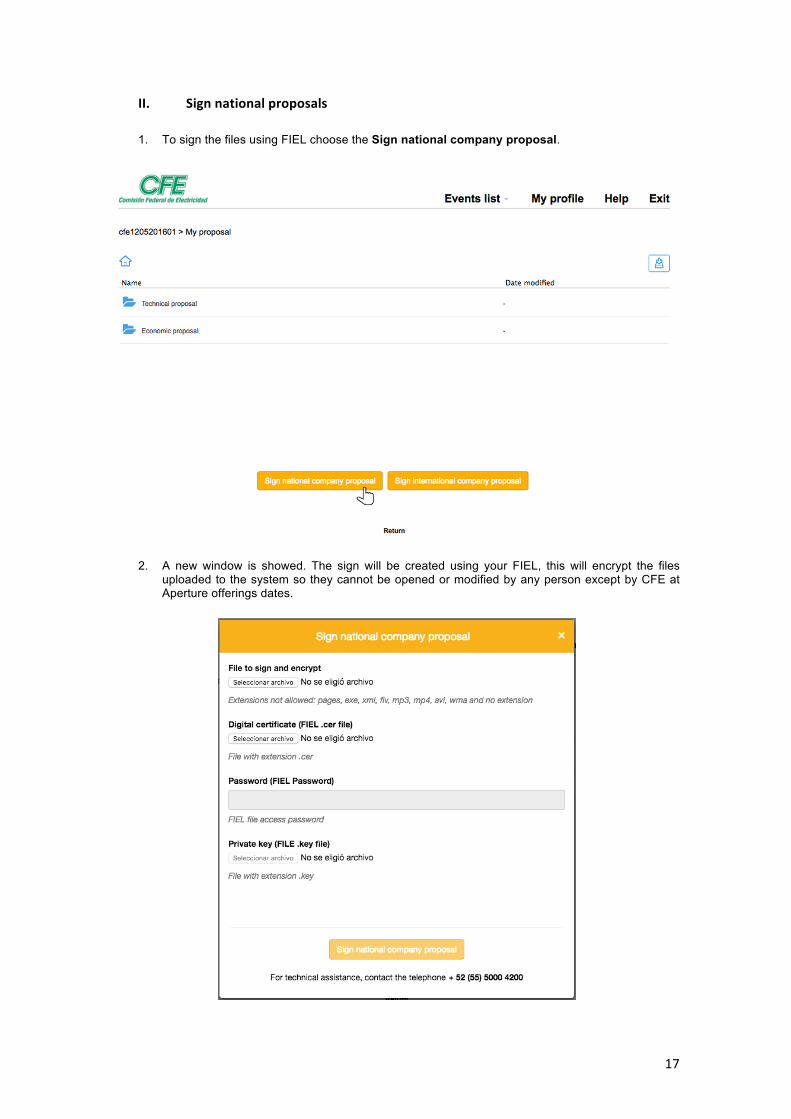
II. Signnationalproposals
1. To sign the files using FIEL choose the Sign national company proposal.
2. A new window is showed. The sign will be created using your FIEL, this will encrypt the files uploaded to the system so they cannot be opened or modified by any person except by CFE at Aperture offerings dates.

18
3. First select the file to sign and encrypt. Click on Select file and it opens a window to select the file to be signed and encrypted.
4. Select the .cer file that belongs to you FIEL.

19
5. Type your FIEL password.
6. Finally, select the .key file that belongs to you FIEL.
20
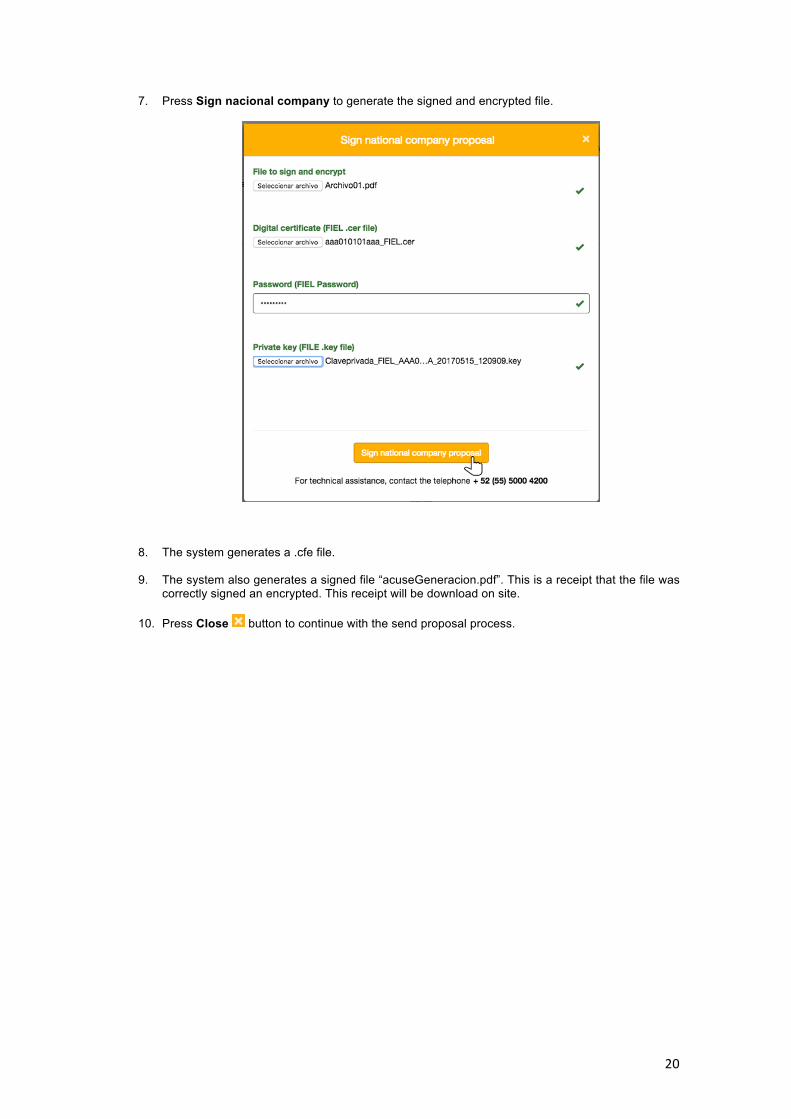
7. Press Sign nacional company to generate the signed and encrypted file.
8. The system generates a .cfe file.
9. The system also generates a signed file “acuseGeneracion.pdf”. This is a receipt that the file was correctly signed an encrypted. This receipt will be download on site.
10. Press Close button to continue with the send proposal process.
21
III. Sign foreign proposals
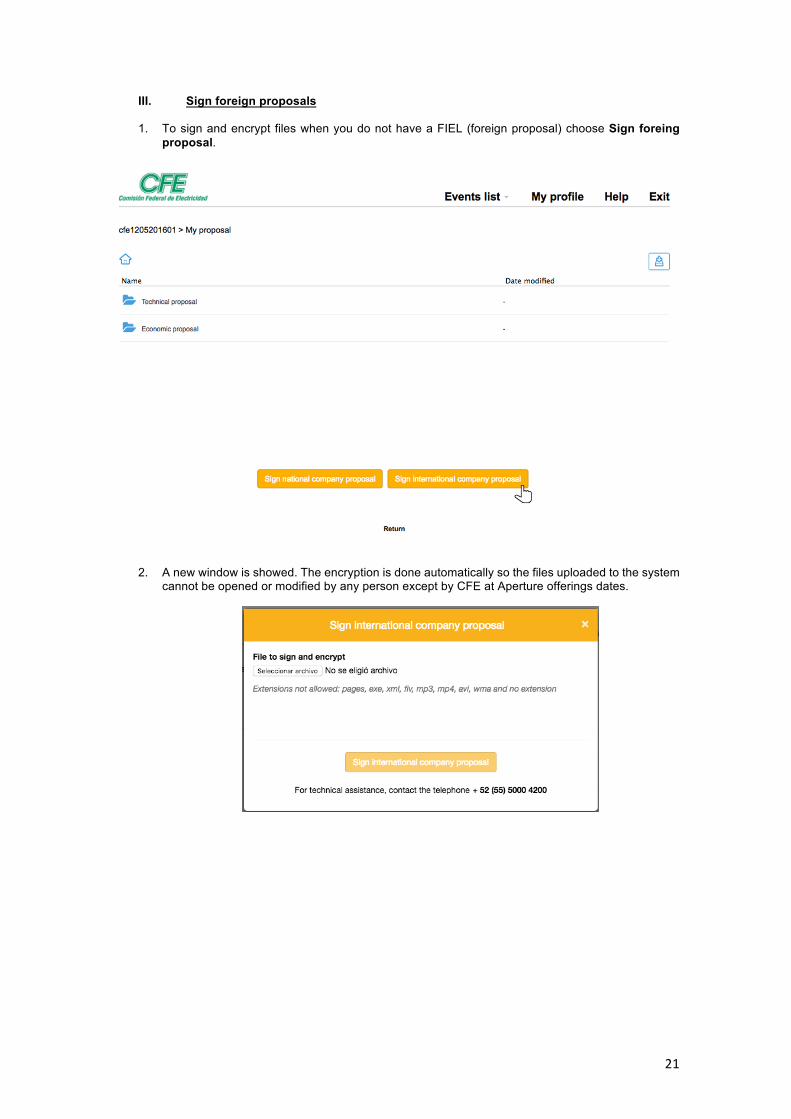
1. To sign and encrypt files when you do not have a FIEL (foreign proposal) choose Sign foreing proposal.
2. A new window is showed. The encryption is done automatically so the files uploaded to the system
cannot be opened or modified by any person except by CFE at Aperture offerings dates.
22
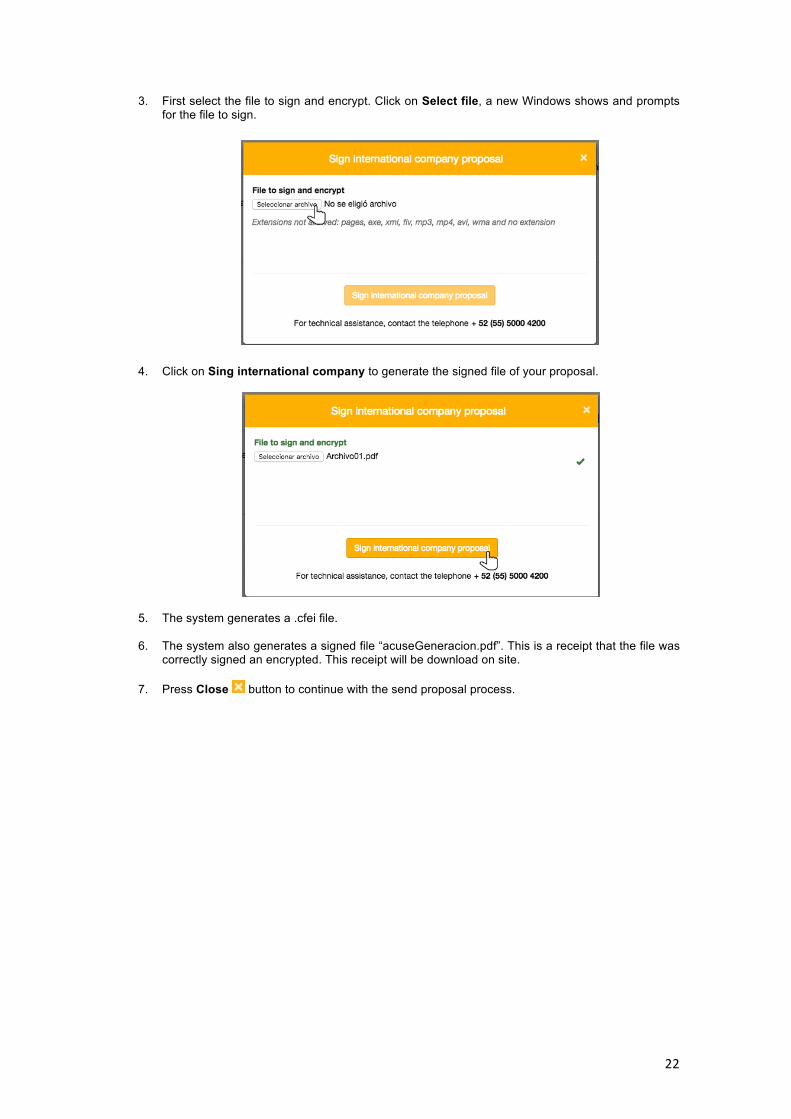
3. First select the file to sign and encrypt. Click on Select file, a new Windows shows and prompts for the file to sign.
4. Click on Sing international company to generate the signed file of your proposal.
5. The system generates a .cfei file.
6. The system also generates a signed file “acuseGeneracion.pdf”. This is a receipt that the file was correctly signed an encrypted. This receipt will be download on site.
7. Press Close button to continue with the send proposal process.
23
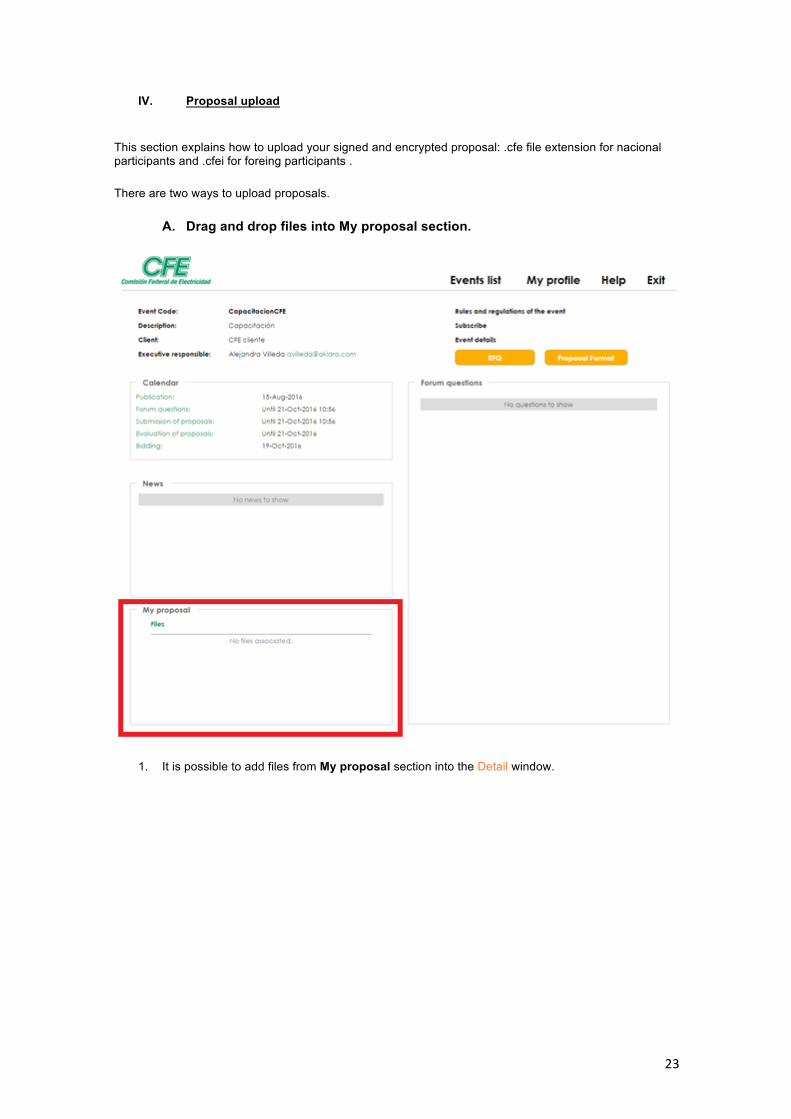
IV. Proposal upload
This section explains how to upload your signed and encrypted proposal: .cfe file extension for nacional participants and .cfei for foreing participants .
There are two ways to upload proposals.
A. Drag and drop files into My proposal section.
1. It is possible to add files from My proposal section into the Detail window.
24

25
2. Drag and drop files into My proposal (.cfe and cfei files generated in Sign and encrypt files)
3. Select the file category which the file belongs to, and click Accept
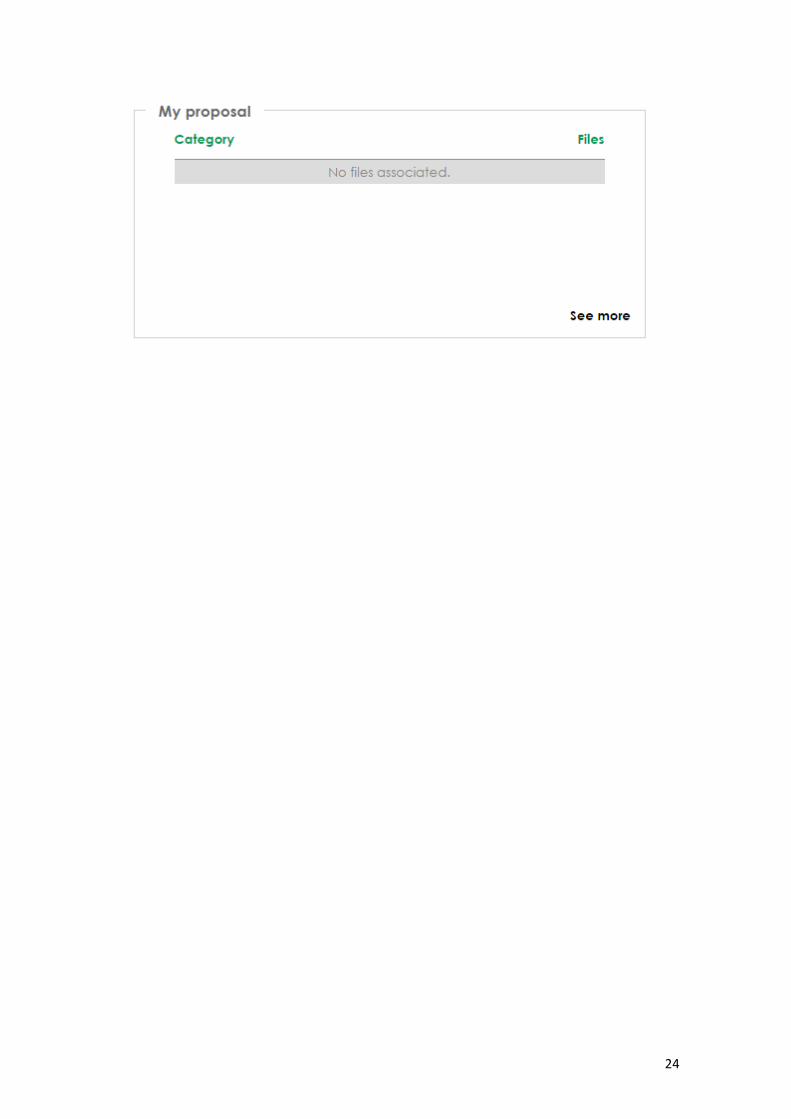
B. In section My proposal click on See more
26
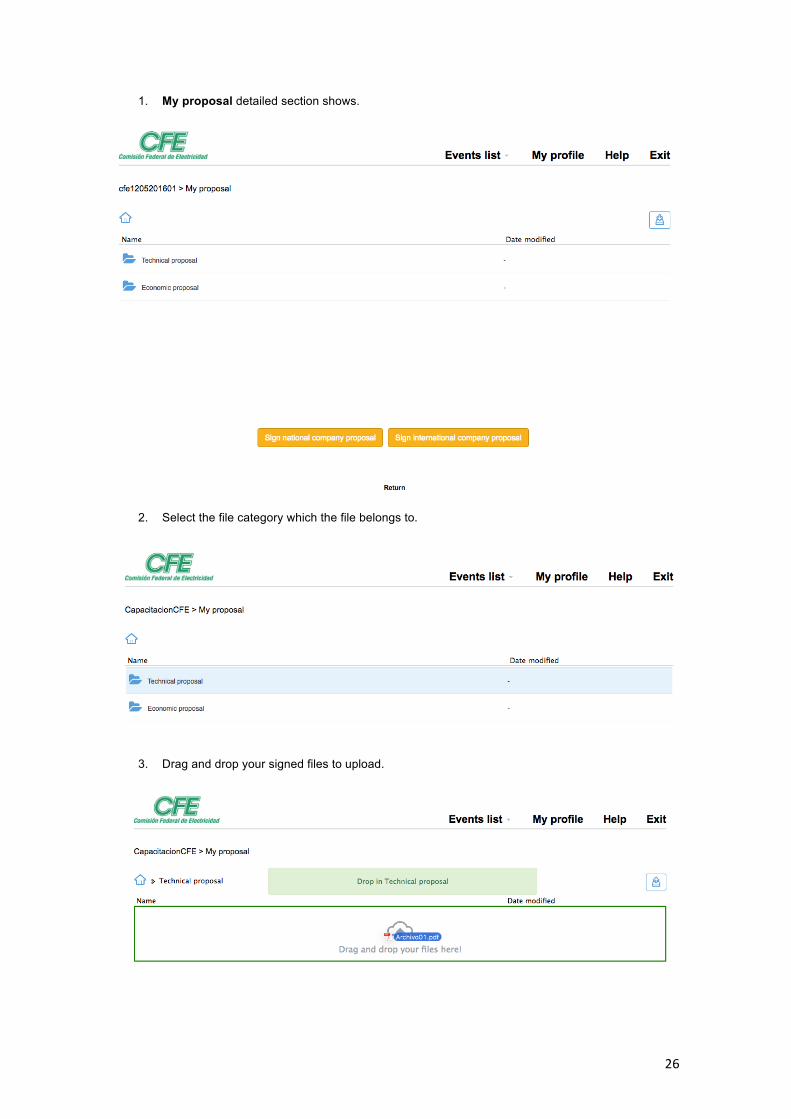
1. My proposal detailed section shows.
2. Select the file category which the file belongs to.
3. Drag and drop your signed files to upload.
27
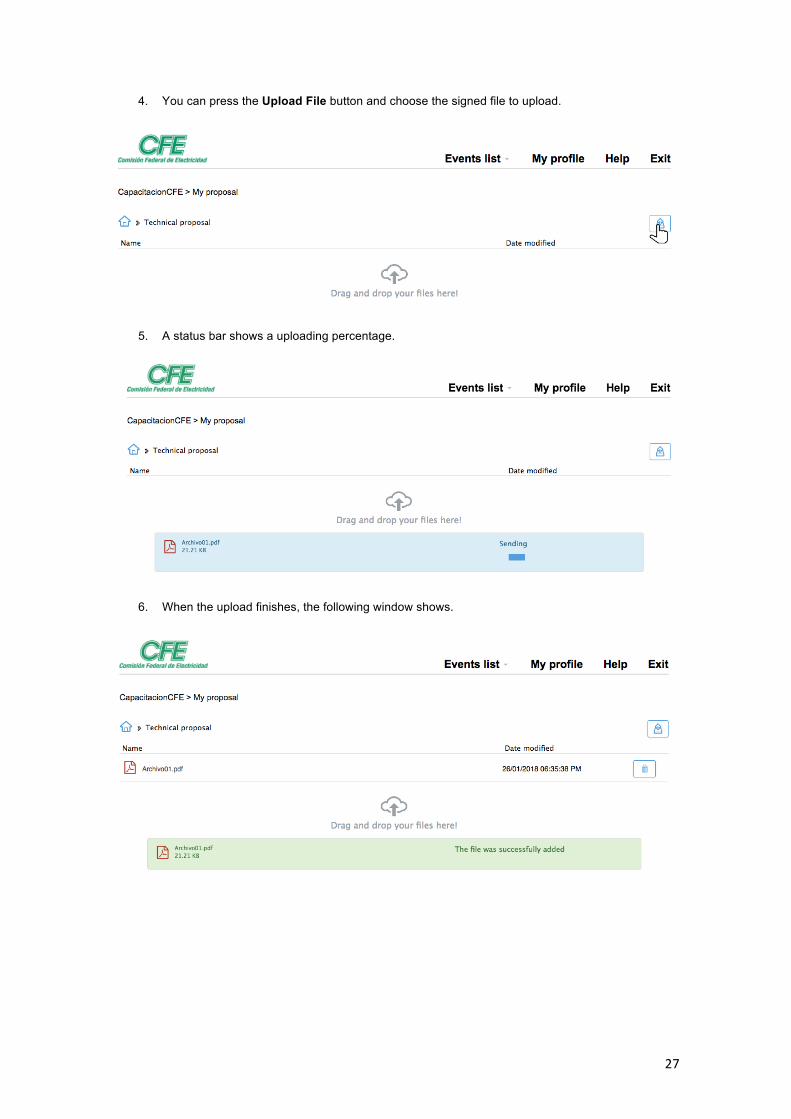
4. You can press the Upload File button and choose the signed file to upload.
5. A status bar shows a uploading percentage.
6. When the upload finishes, the following window shows.
28
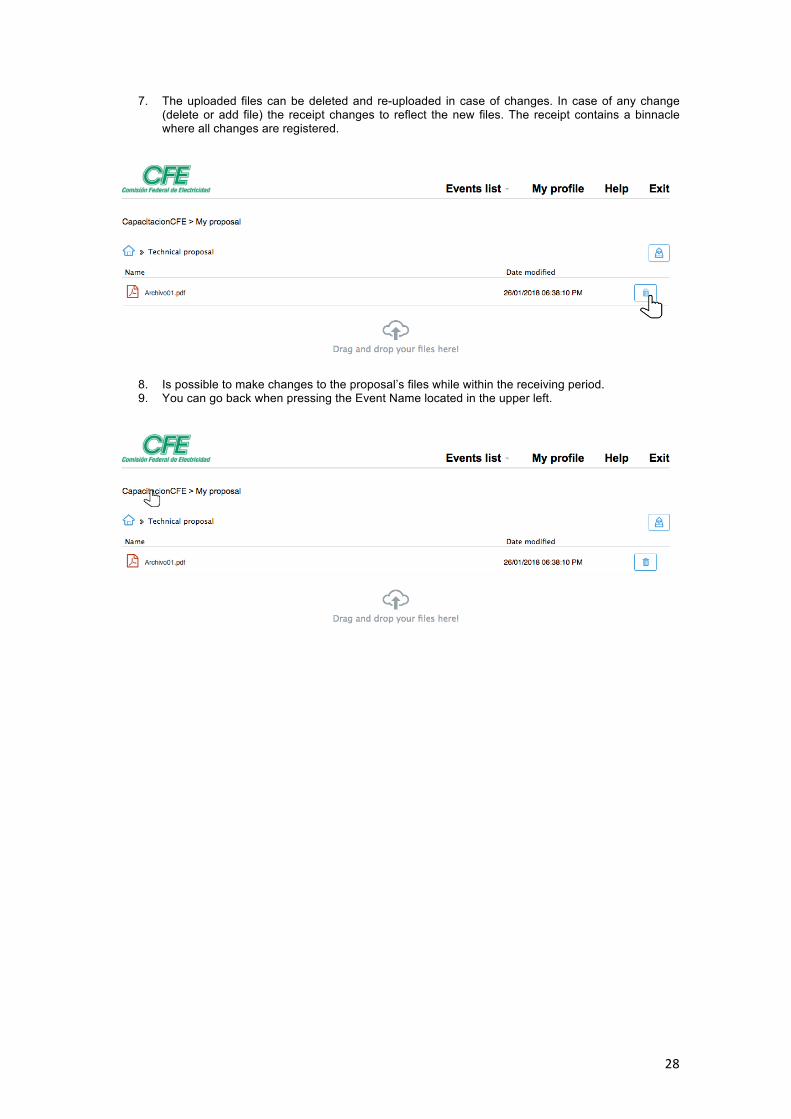
7. The uploaded files can be deleted and re-uploaded in case of changes. In case of any change (delete or add file) the receipt changes to reflect the new files. The receipt contains a binnacle where all changes are registered.
8. Is possible to make changes to the proposal’s files while within the receiving period. 9. You can go back when pressing the Event Name located in the upper left.

29
V. Receipt
1. Once uploaded any proposal file a receipt will be available to download.
2. The receipt shows the list of the uploaded files.
3. In case you had deleted any file, a register will be showed in the receipt.

30

31
9. Clarification session of the list of requirements
There are two ways to post a question:
I. Inside Event Resume Window
1. In the upper right side of the window, the Question Forum is located. This is where you can post event related questions.
32
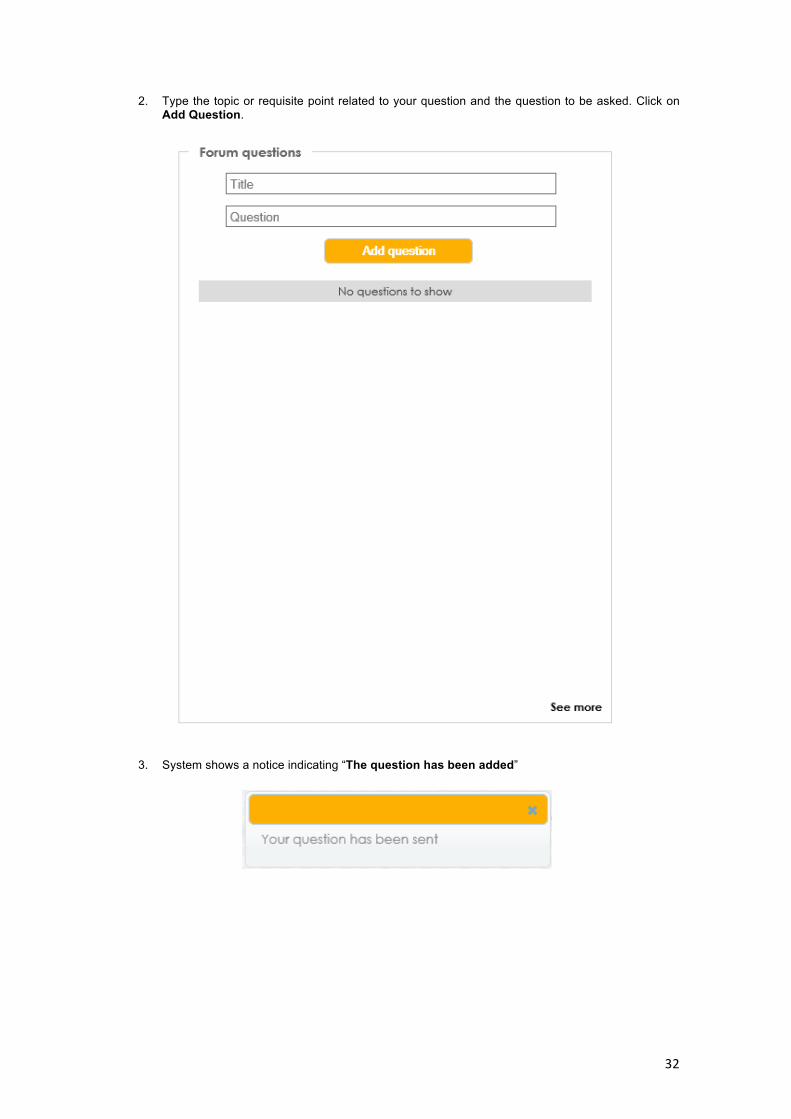
2. Type the topic or requisite point related to your question and the question to be asked. Click on Add Question.
3. System shows a notice indicating “The question has been added”
33
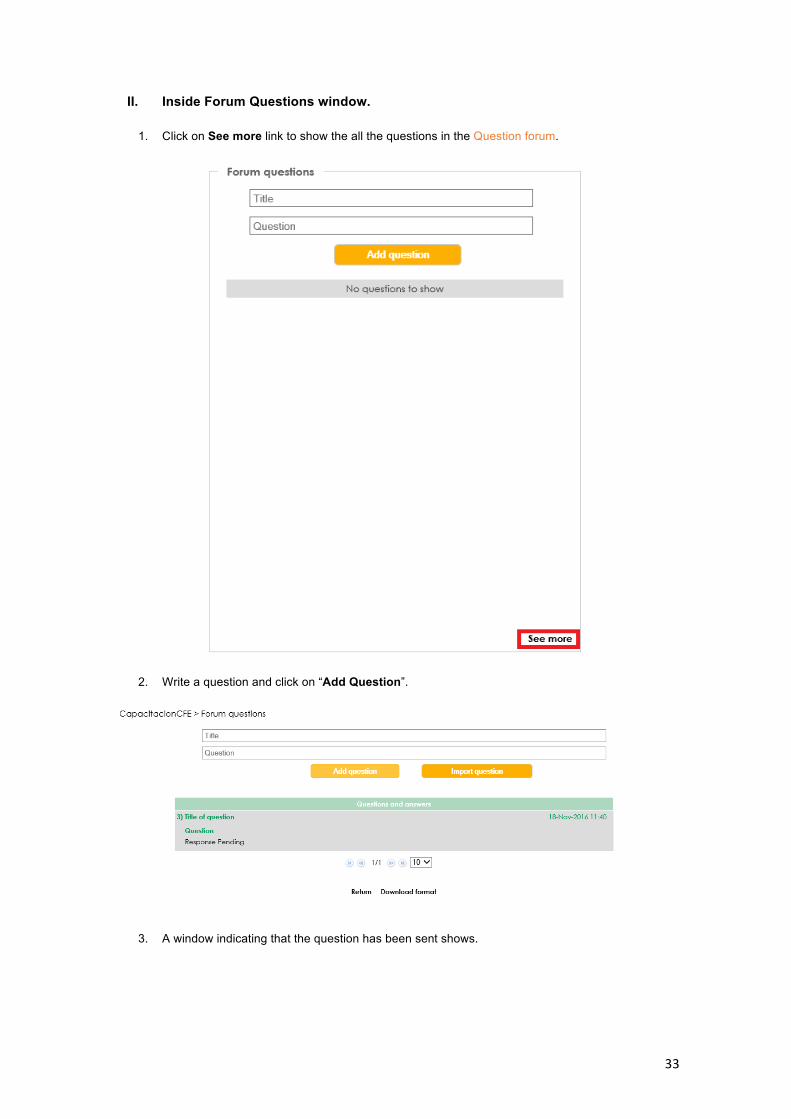
II. Inside Forum Questions window.
1. Click on See more link to show the all the questions in the Question forum.
2. Write a question and click on “Add Question”.
3. A window indicating that the question has been sent shows.
34
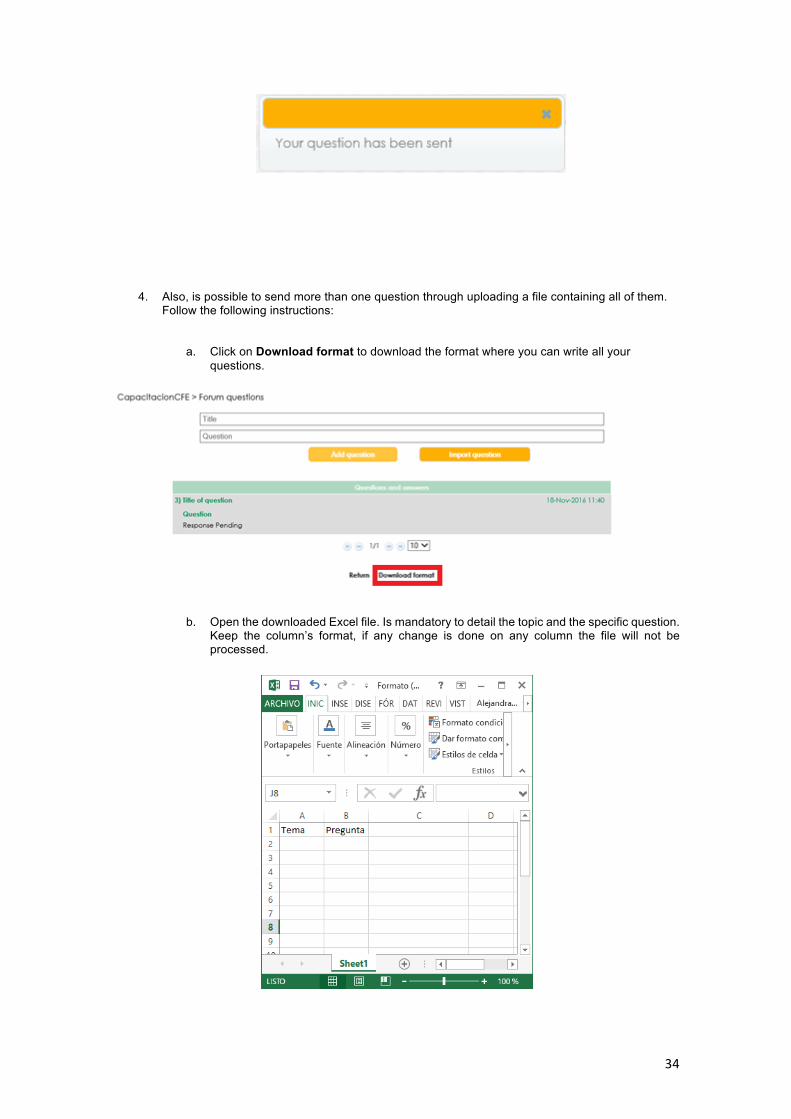
4. Also, is possible to send more than one question through uploading a file containing all of them. Follow the following instructions:
a. Click on Download format to download the format where you can write all your questions.
b. Open the downloaded Excel file. Is mandatory to detail the topic and the specific question. Keep the column’s format, if any change is done on any column the file will not be processed.
35
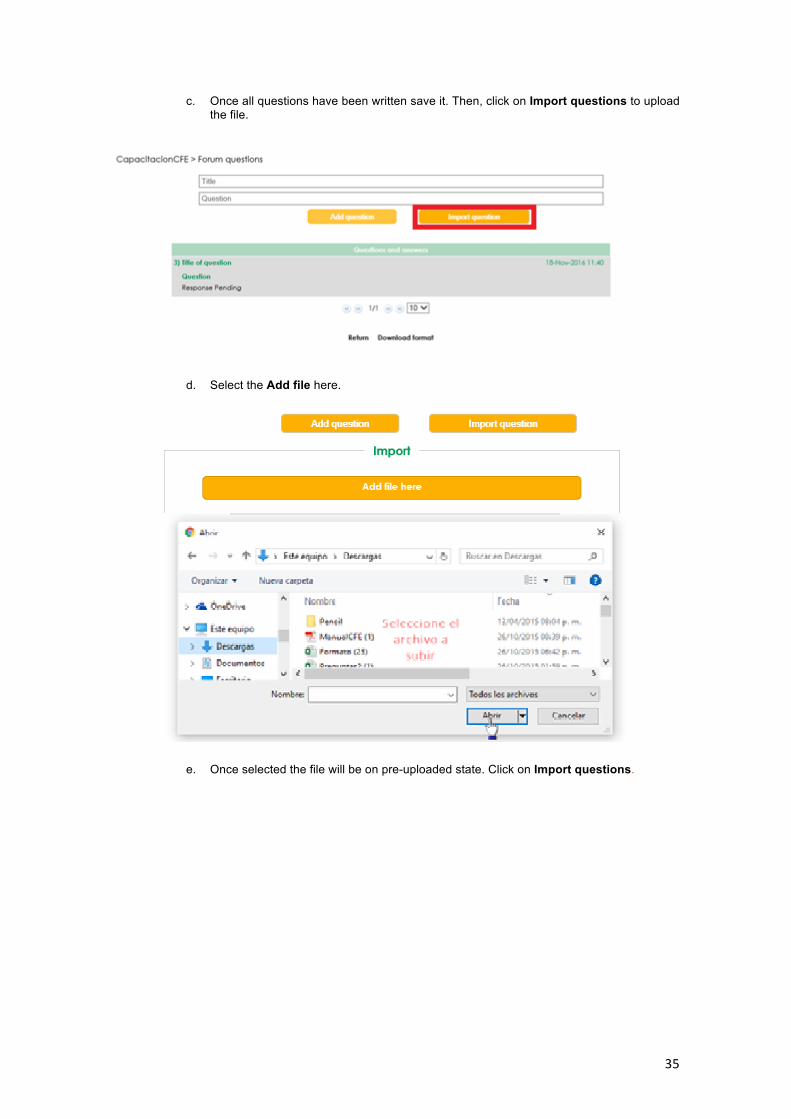
c. Once all questions have been written save it. Then, click on Import questions to upload the file.
d. Select the Add file here.
e. Once selected the file will be on pre-uploaded state. Click on Import questions.

36
f. The System shows a notice “Your file has been sent”. At this moment your questions have been posted in the question forum.
5. You can go back when pressing the Event Name located in the upper left.
37
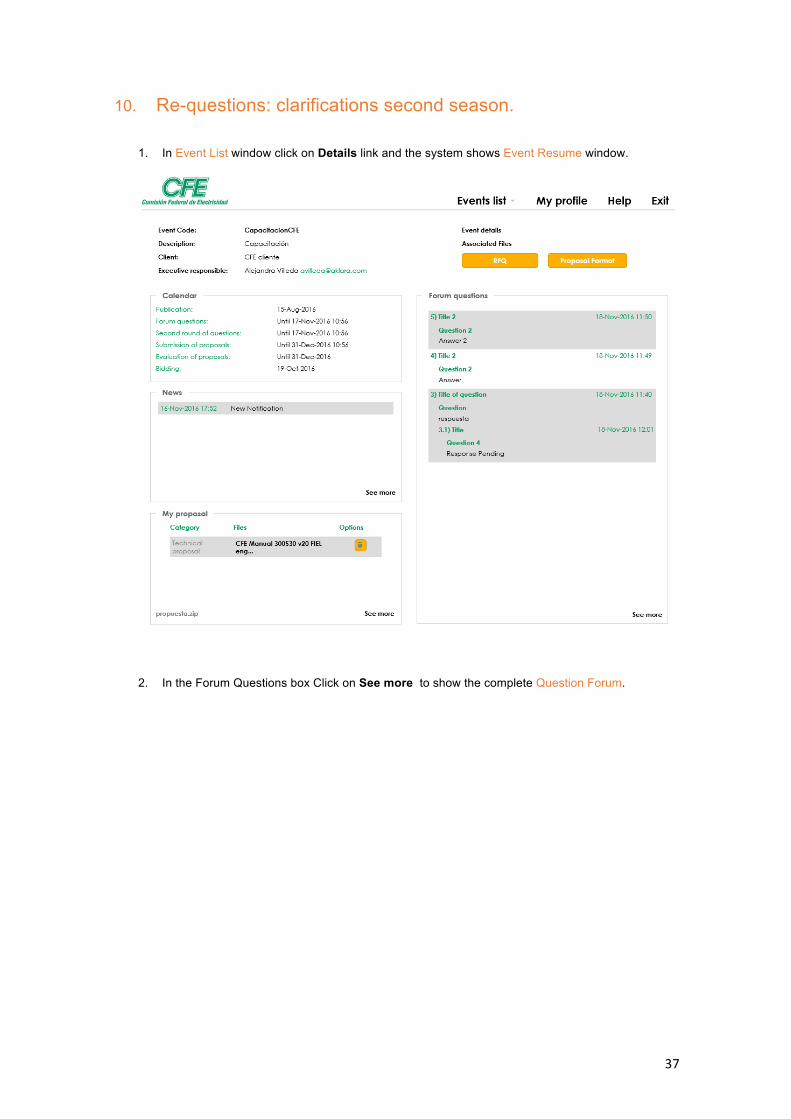
10. Re-questions: clarifications second season.
1. In Event List window click on Details link and the system shows Event Resume window.
2. In the Forum Questions box Click on See more to show the complete Question Forum.
38
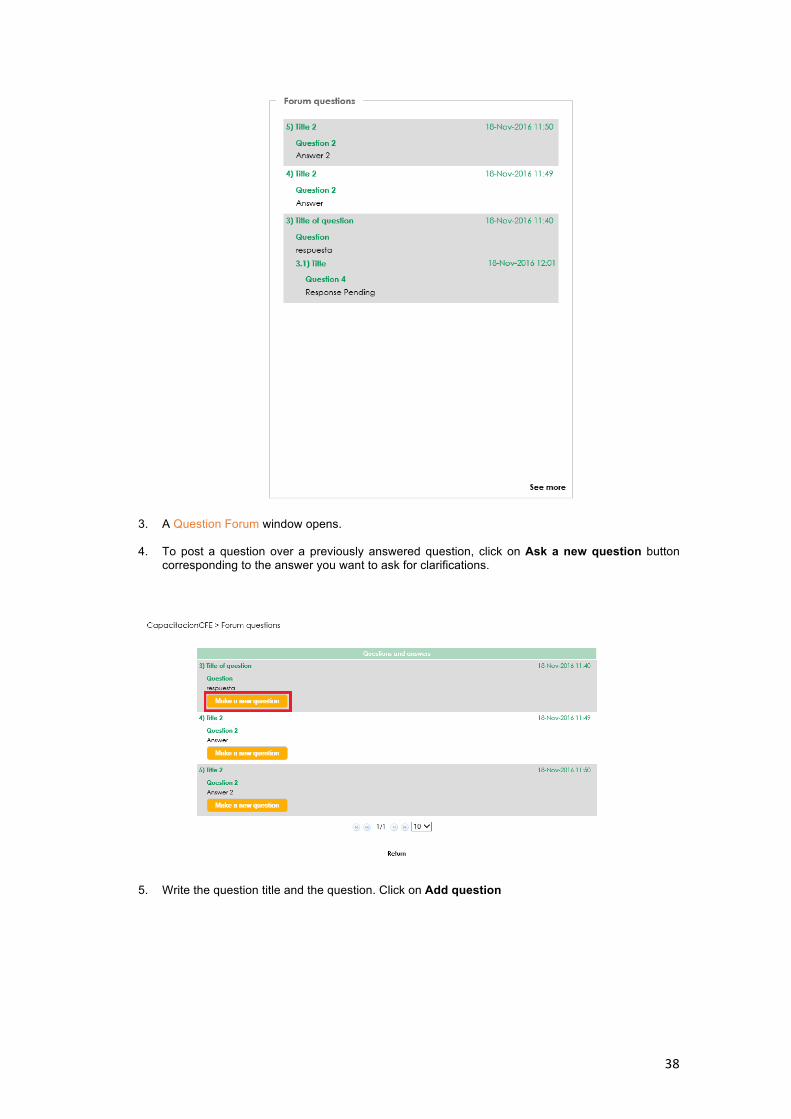
3. A Question Forum window opens.
4. To post a question over a previously answered question, click on Ask a new question button corresponding to the answer you want to ask for clarifications.
5. Write the question title and the question. Click on Add question

39
6. A notice opens “Your question has been sent”
NOTICE. You can only post a second question once, so, you have to write all the existing doubts in one post.


![what works? [ 2 ] v21](https://img.pdfslide.us/doc/110x75/6284c299450b3950ec18acfe/what-works-2-v21.jpg)