Embed Size (px)
Citation preview
CESM TutorialNCAR Climate and Global Dynamics Laboratory
CESM 2.0CESM1.2.x and previous (see earlier tutorials)
Alice Bertini
NCAR is sponsored by the National Science Foundation
Outline
• The CESM webpage
• Software & Hardware Requirements
• One-Time Setup
• Creating & Running a Case
• Getting More Help
• 7th Inning Stretch
• Review of Hands-on Exercises
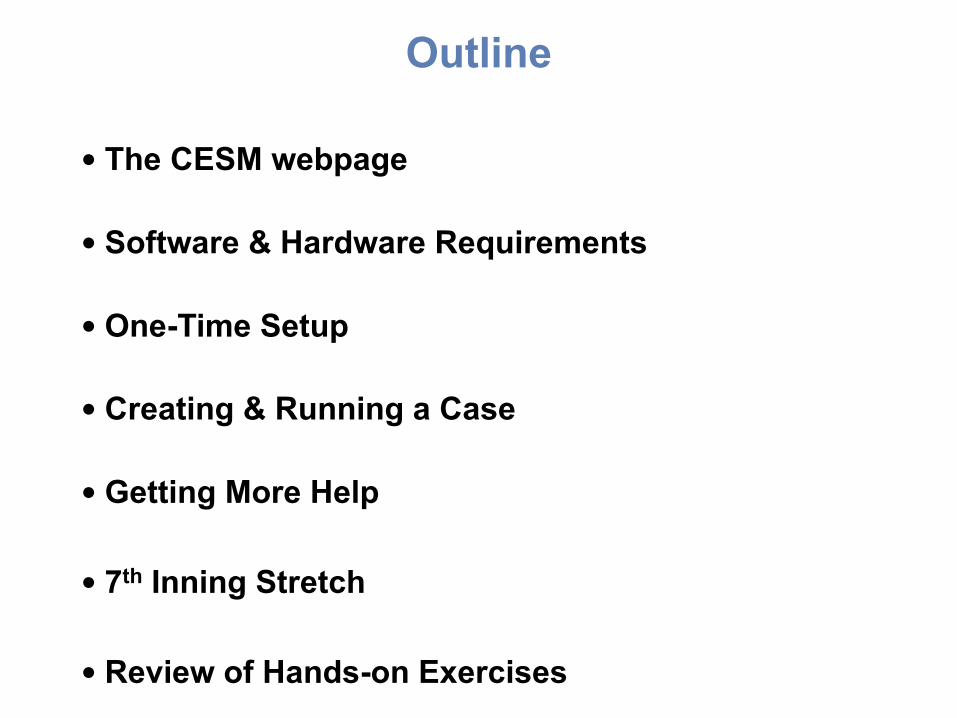
CESM Web Pagehttp://www.cesm.ucar.edu
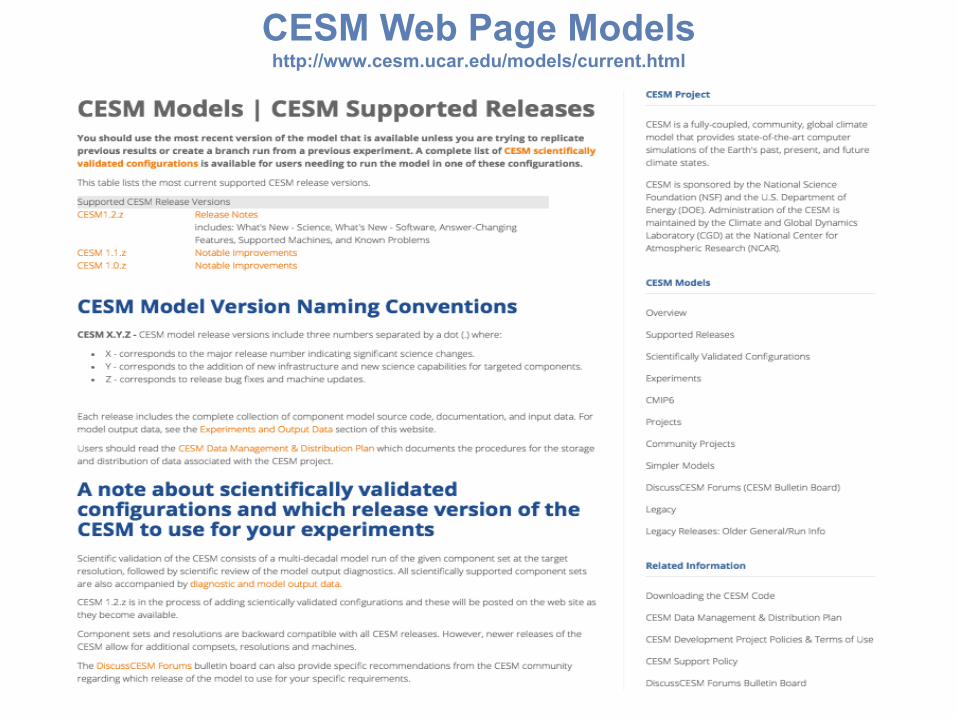
CESM Web Page Modelshttp://www.cesm.ucar.edu/models/current.html
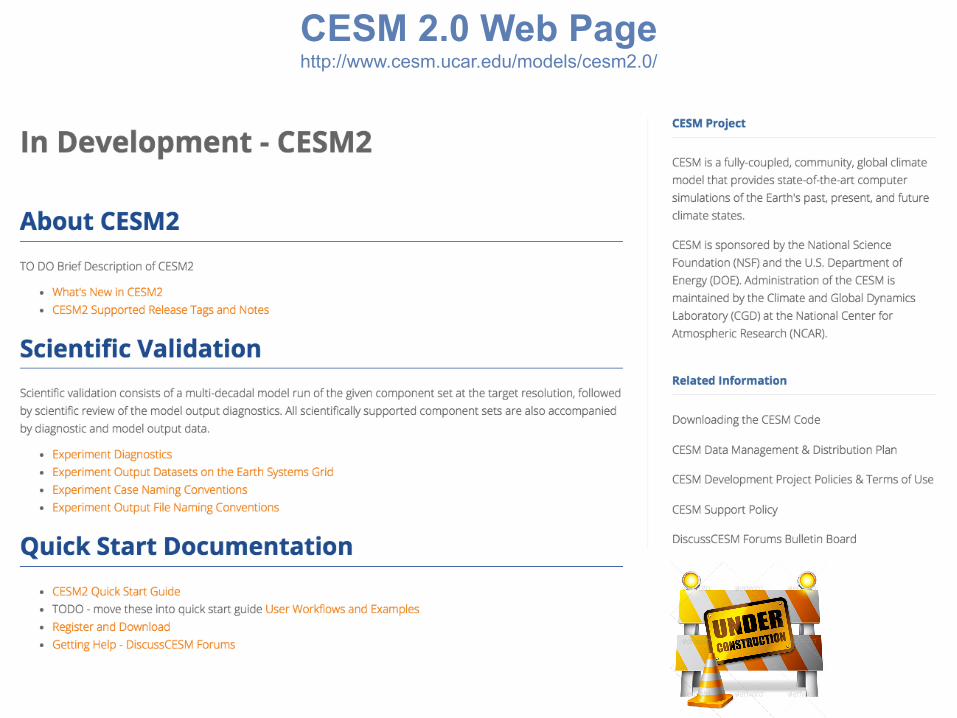
CESM 2.0 Web Pagehttp://www.cesm.ucar.edu/models/cesm2.0/
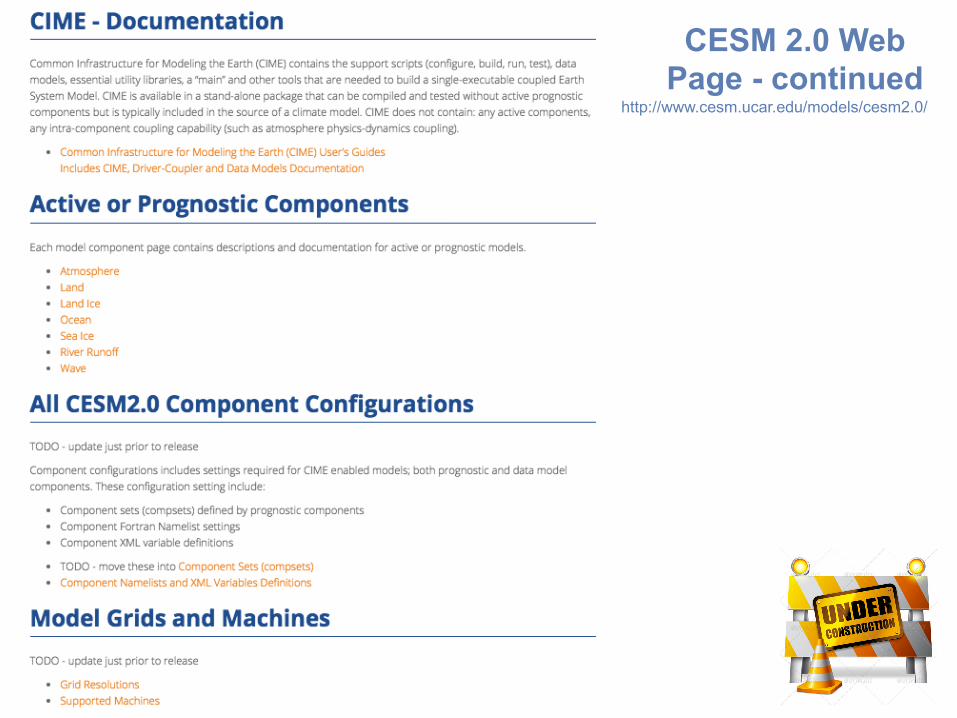
CESM 2.0 Web Page - continued
http://www.cesm.ucar.edu/models/cesm2.0/
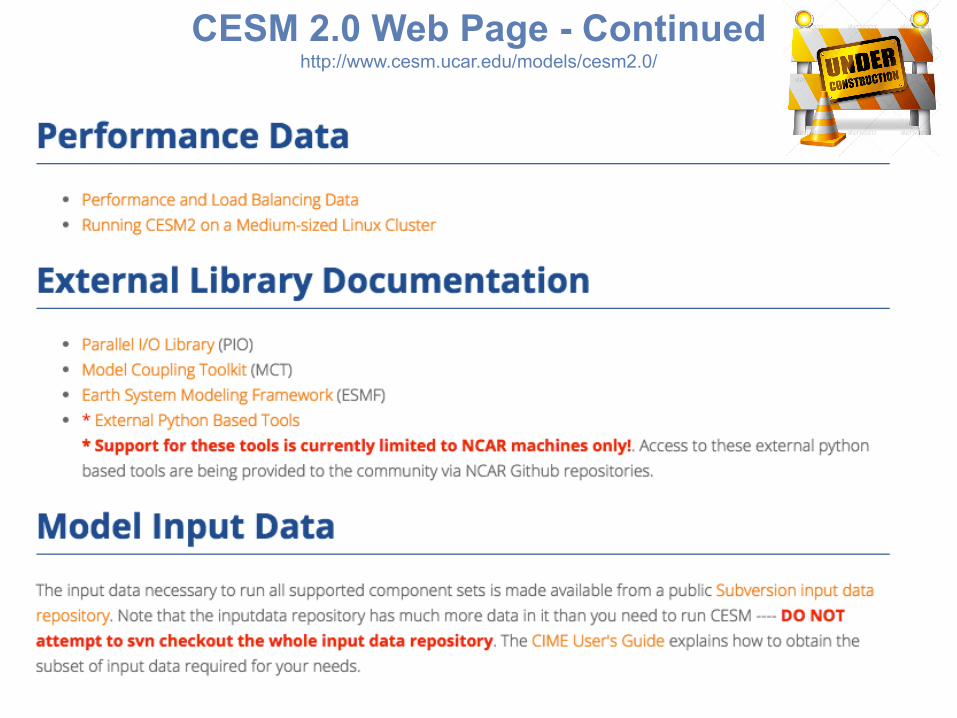
CESM 2.0 Web Page - Continuedhttp://www.cesm.ucar.edu/models/cesm2.0/
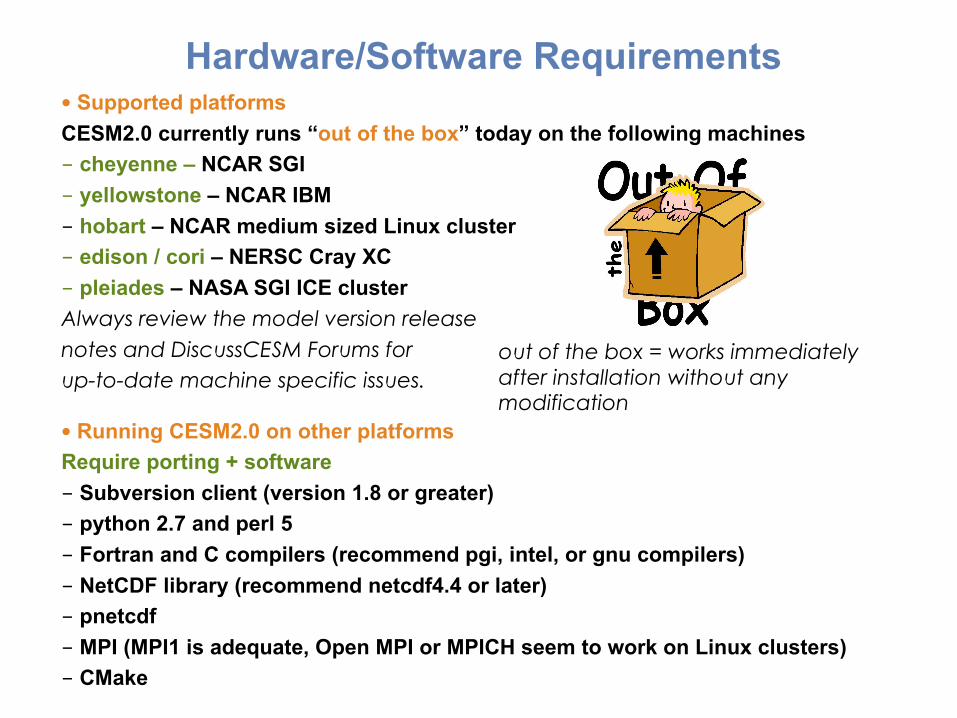
Hardware/Software Requirements
• Running CESM2.0 on other platformsRequire porting + software- Subversion client (version 1.8 or greater)- python 2.7 and perl 5 - Fortran and C compilers (recommend pgi, intel, or gnu compilers)- NetCDF library (recommend netcdf4.4 or later)- pnetcdf- MPI (MPI1 is adequate, Open MPI or MPICH seem to work on Linux clusters)- CMake
• Supported platformsCESM2.0 currently runs “out of the box” today on the following machines- cheyenne – NCAR SGI- yellowstone – NCAR IBM- hobart – NCAR medium sized Linux cluster- edison / cori – NERSC Cray XC- pleiades – NASA SGI ICE clusterAlways review the model version release notes and DiscussCESM Forums for up-to-date machine specific issues.
out of the box = works immediately after installation without any modification
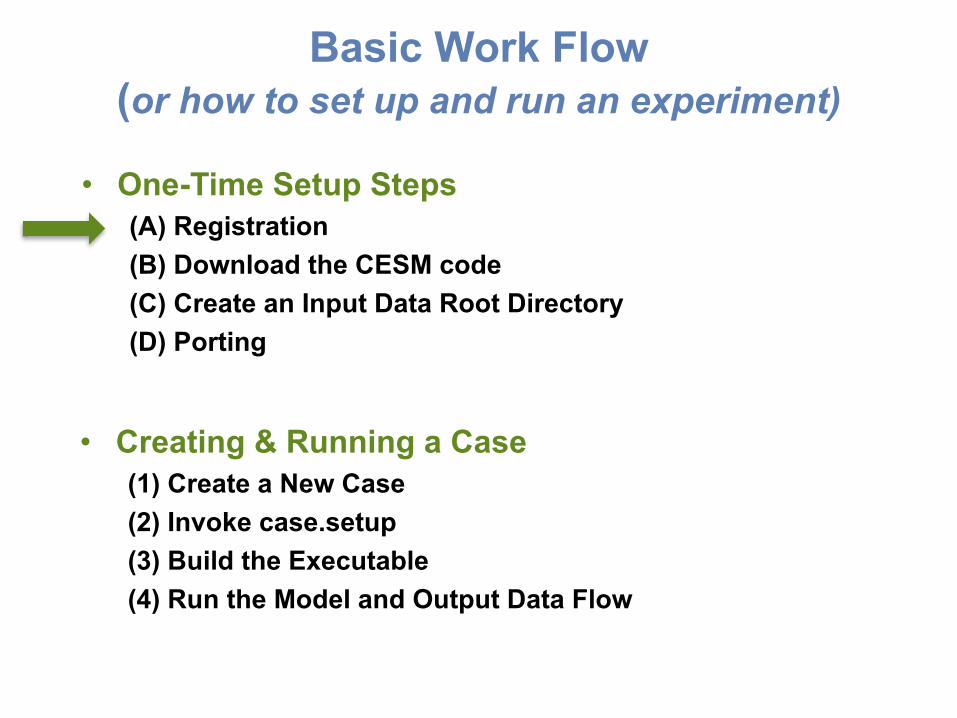
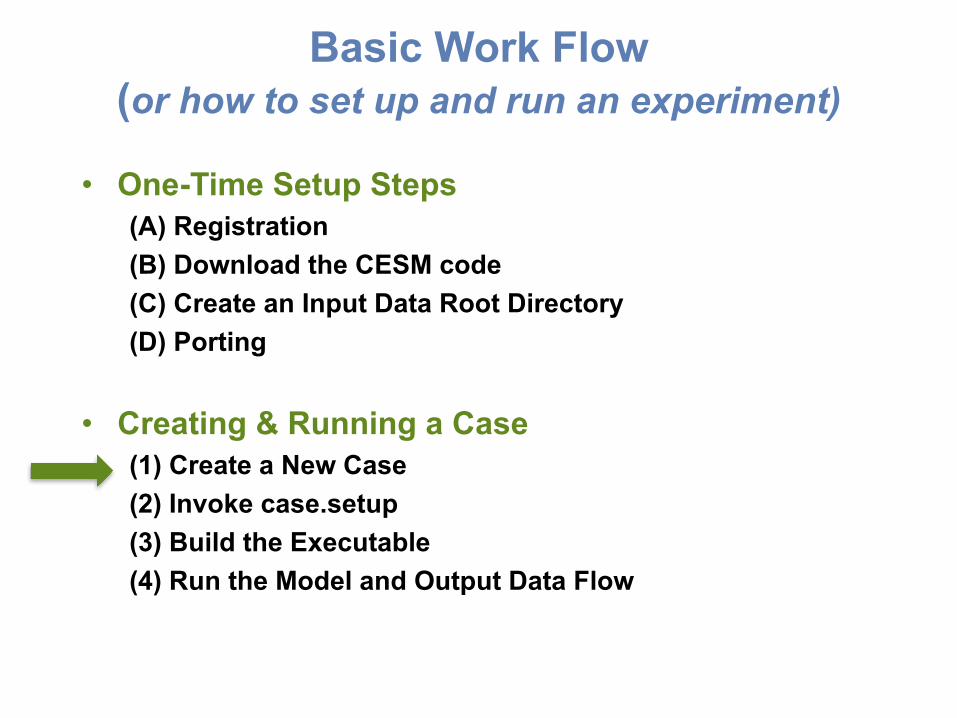
Basic Work Flow (or how to set up and run an experiment)
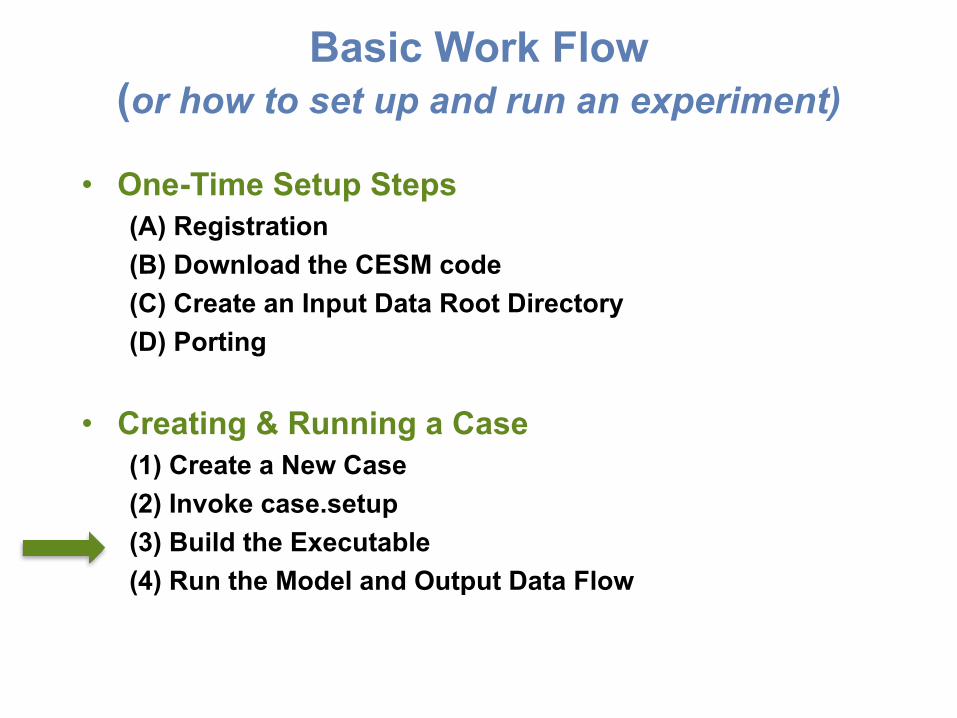
• One-Time Setup Steps(A) Registration(B) Download the CESM code(C) Create an Input Data Root Directory(D) Porting
• Creating & Running a Case(1) Create a New Case(2) Invoke case.setup(3) Build the Executable(4) Run the Model and Output Data Flow
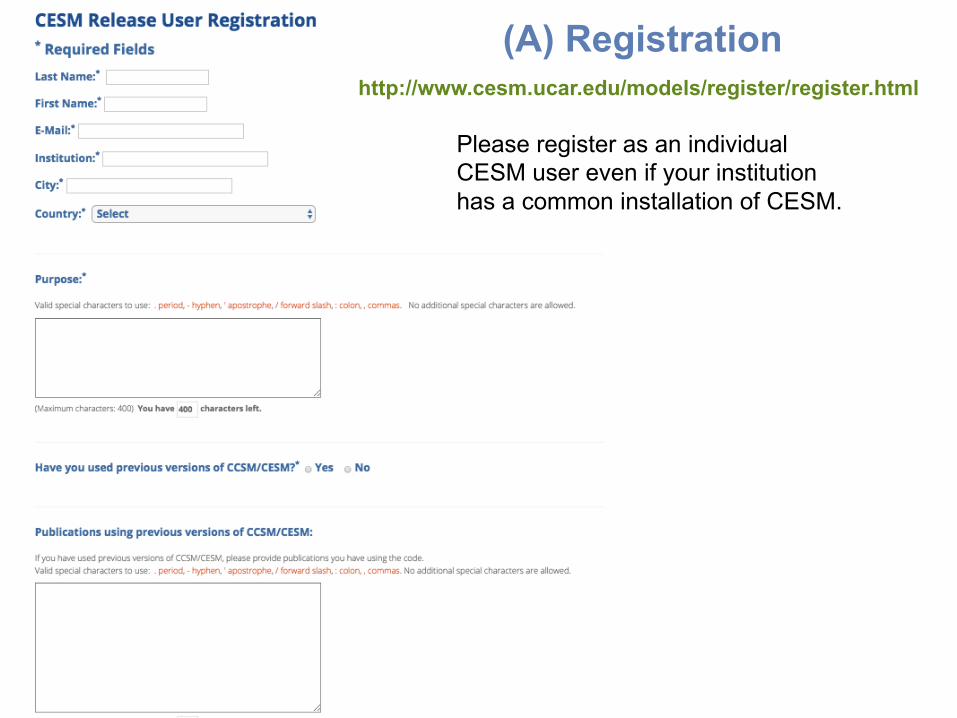
(A) Registrationhttp://www.cesm.ucar.edu/models/register/register.html
Please register as an individual CESM user even if your institution has a common installation of CESM.
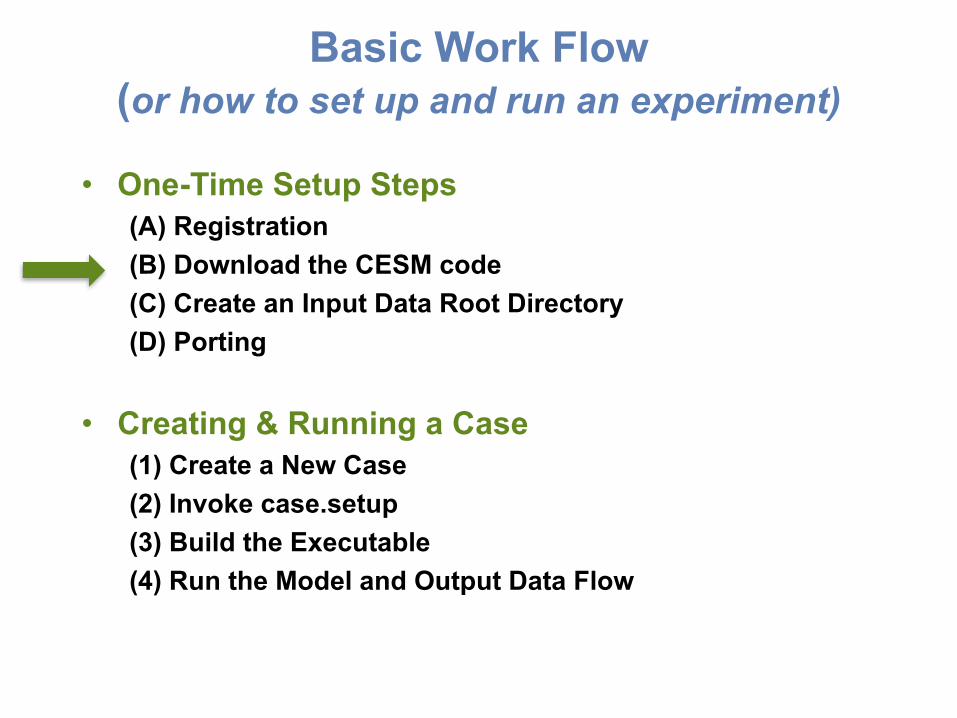
Basic Work Flow (or how to set up and run an experiment)
• One-Time Setup Steps(A) Registration(B) Download the CESM code(C) Create an Input Data Root Directory(D) Porting
• Creating & Running a Case(1) Create a New Case(2) Invoke case.setup(3) Build the Executable(4) Run the Model and Output Data Flow
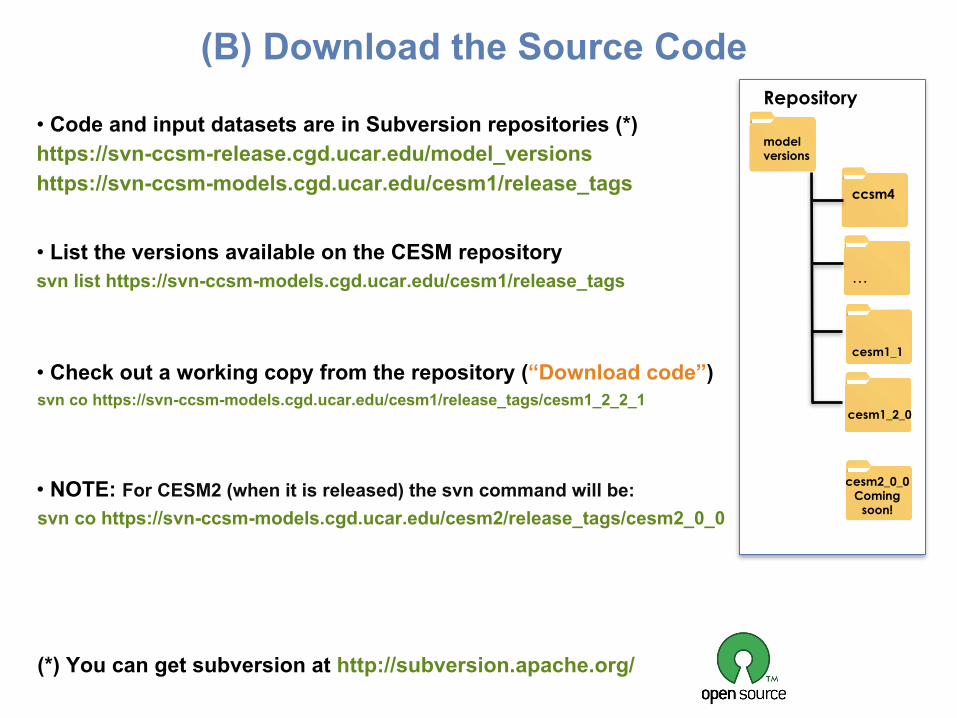
(B) Download the Source Code
• List the versions available on the CESM repositorysvn list https://svn-ccsm-models.cgd.ucar.edu/cesm1/release_tags
• Check out a working copy from the repository (“Download code”)svn co https://svn-ccsm-models.cgd.ucar.edu/cesm1/release_tags/cesm1_2_2_1
• Code and input datasets are in Subversion repositories (*)https://svn-ccsm-release.cgd.ucar.edu/model_versionshttps://svn-ccsm-models.cgd.ucar.edu/cesm1/release_tags
(*) You can get subversion at http://subversion.apache.org/
Repository
cesm1_1
…
ccsm4
cesm1_2_0
modelversions
cesm2_0_0Coming
soon!• NOTE: For CESM2 (when it is released) the svn command will be:svn co https://svn-ccsm-models.cgd.ucar.edu/cesm2/release_tags/cesm2_0_0
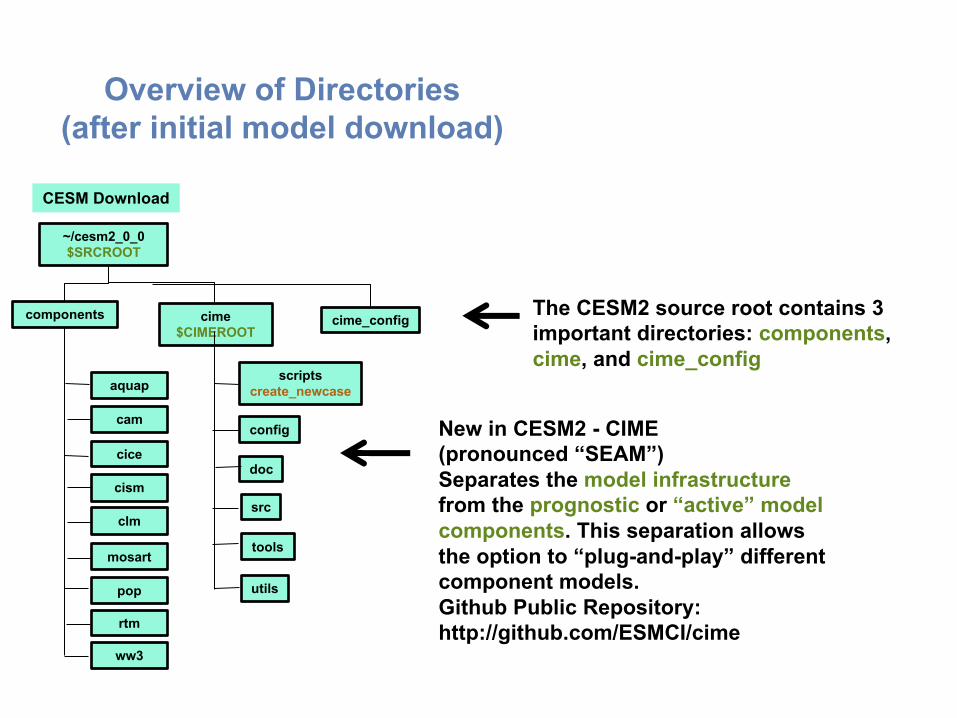
Overview of Directories(after initial model download)
components cime$CIMEROOT
~/cesm2_0_0$SRCROOT
CESM Download
aquap
cam
cice
cism
clm
pop
mosart
rtm
ww3
The CESM2 source root contains 3 important directories: components, cime, and cime_config
scriptscreate_newcase
cime_config
config
doc
src
tools
utils
New in CESM2 - CIME (pronounced “SEAM”)Separates the model infrastructurefrom the prognostic or “active” model components. This separation allowsthe option to “plug-and-play” different component models. Github Public Repository:http://github.com/ESMCI/cime
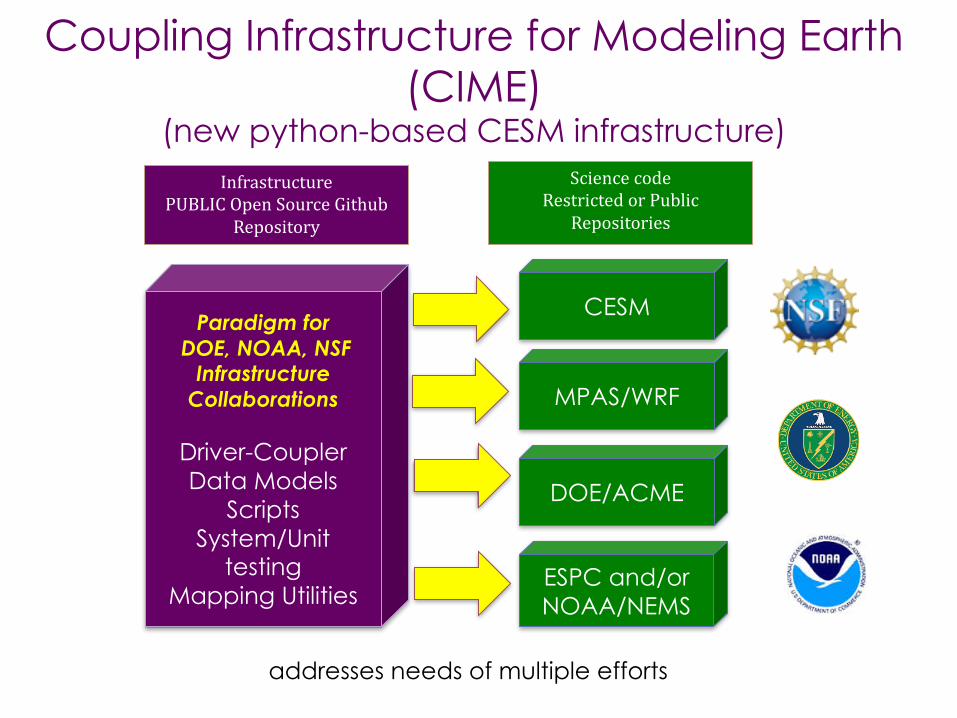
InfrastructurePUBLICOpenSourceGithub
Repository
Paradigm forDOE, NOAA, NSF
InfrastructureCollaborations
Driver-CouplerData Models
ScriptsSystem/Unit
testingMapping Utilities
DOE/ACME
SciencecodeRestrictedorPublic
Repositories
ESPC and/orNOAA/NEMS
CESM
Coupling Infrastructure for Modeling Earth (CIME)
(new python-based CESM infrastructure)
addresses needs of multiple efforts
MPAS/WRF
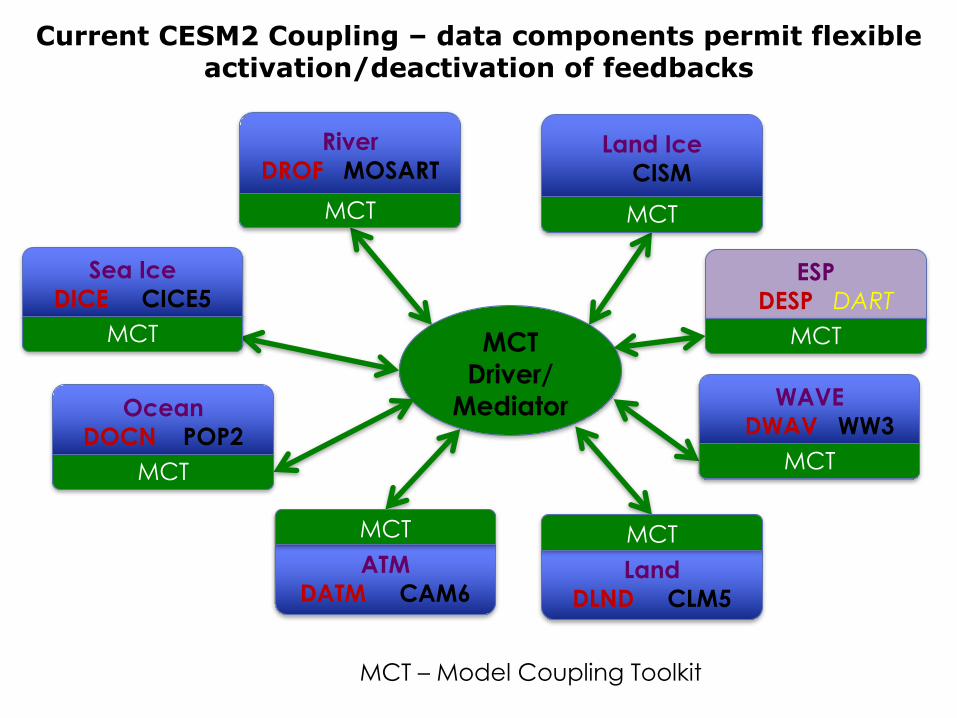
Current CESM2 Coupling – data components permit flexible activation/deactivation of feedbacks
MCTDriver/
Mediator
River DROF MOSART
MCT
Land Ice CISMMCT
Sea Ice DICE CICE5
MCT
Ocean DOCN POP2
MCT
WAVE DWAV WW3
MCT
ESPDESP DART
MCT
ATM DATM CAM6
MCTLand
DLND CLM5
MCT
MCT – Model Coupling Toolkit
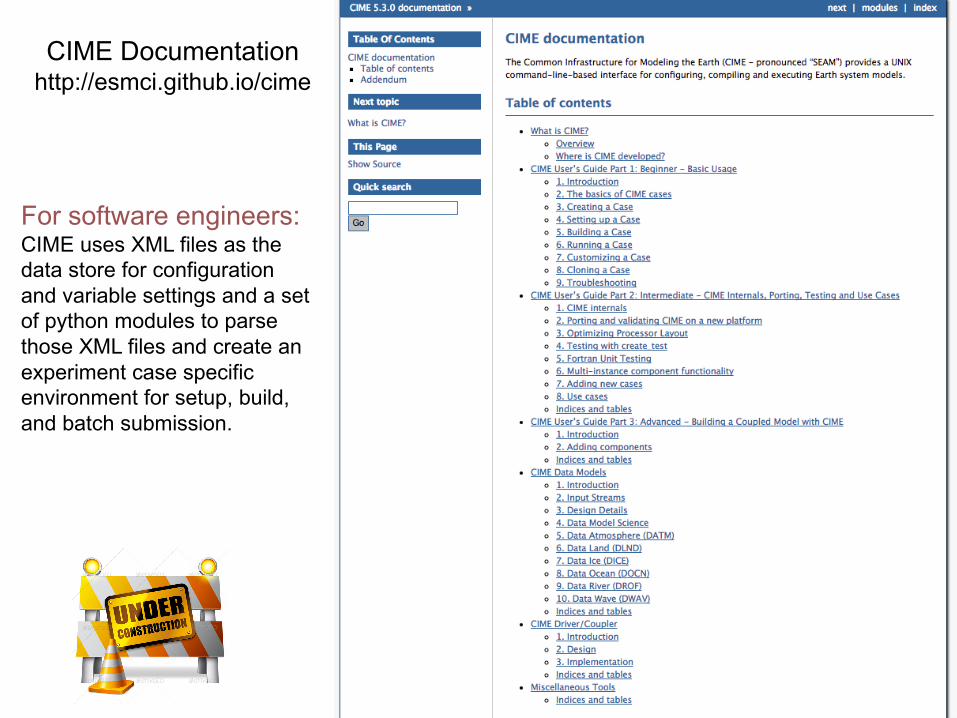
CIME Documentationhttp://esmci.github.io/cime
For software engineers:CIME uses XML files as the data store for configuration and variable settings and a set of python modules to parse those XML files and create an experiment case specific environment for setup, build, and batch submission.
Basic Work Flow (or how to set up and run an experiment)
• One-Time Setup Steps(A) Registration(B) Download the CESM code(C) Create an Input Data Root Directory(D) Porting
• Creating & Running a Case(1) Create a New Case(2) Invoke case.setup(3) Build the Executable(4) Run the Model and Output Data Flow

Overview of Directories(+ inputdata directory)
Inputdata directory $DIN_LOC_ROOTcontains all input data required to run the model
/glade/p/cesm/cseg/inputdata
atm lnd ocn ice glc wav
/glade/p/cesm/cseg/inputdata$DIN_LOC_ROOT
INPUTDATA Directory
rofshare cpl
• Ideally directory is shared by a group of users to save disc space
• To download input data: use the script check_input_data which is copied into every caseroot directory. - downloads only the data needed- puts the data in the proper subdirectories- Do NOT download input data manually (ie. by using svn co)
- on supported machines - populated inputdata already exists- on non-supported machines - need to create inputdata
directory rootcomponents cime/scripts
create_newcase
~/cesm2_0_0$SRCROOT
CESM Download
aquap
cam
cice
cism
clm
pop
mosart
rtm
ww3
cime_config
Basic Work Flow (or how to set up and run an experiment)
• One-Time Setup Steps(A) Registration(B) Download the CESM code(C) Create an Input Data Root Directory(D) Porting
• Creating & Running a Case(1) Create a New Case(2) Invoke case.setup(3) Build the Executable(4) Run the Model and Output Data Flow
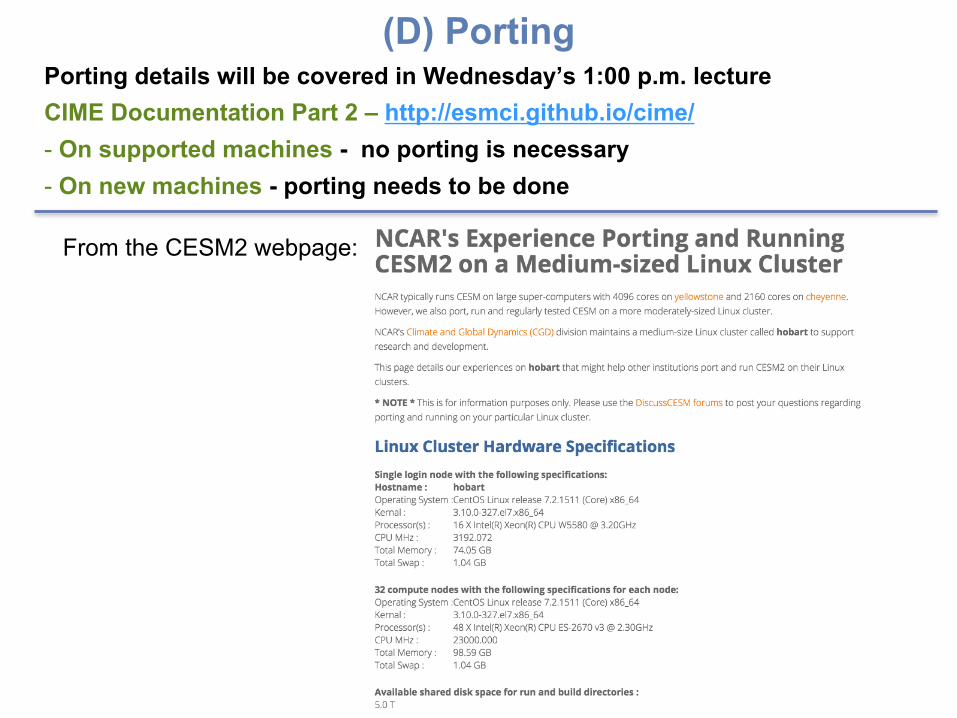
(D) PortingPorting details will be covered in Wednesday’s 1:00 p.m. lectureCIME Documentation Part 2 – http://esmci.github.io/cime/- On supported machines - no porting is necessary- On new machines - porting needs to be done
From the CESM2 webpage:
Basic Work Flow (or how to set up and run an experiment)
• One-Time Setup Steps(A) Registration(B) Download the CESM code(C) Create an Input Data Root Directory(D) Porting
• Creating & Running a Case(1) Create a New Case(2) Invoke case.setup(3) Build the Executable(4) Run the Model and Output Data Flow
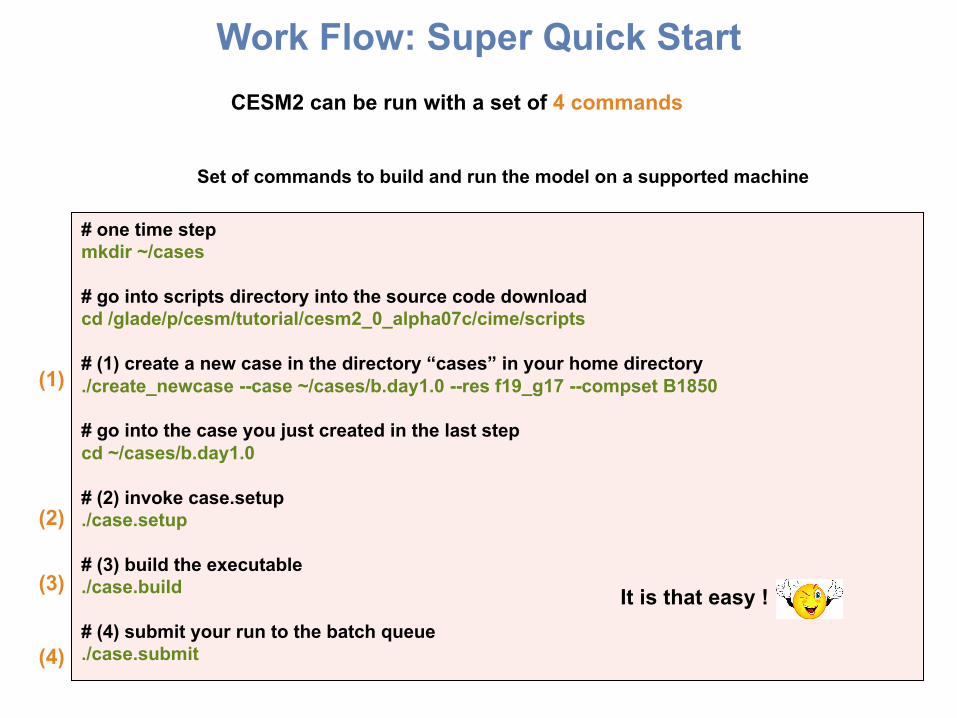
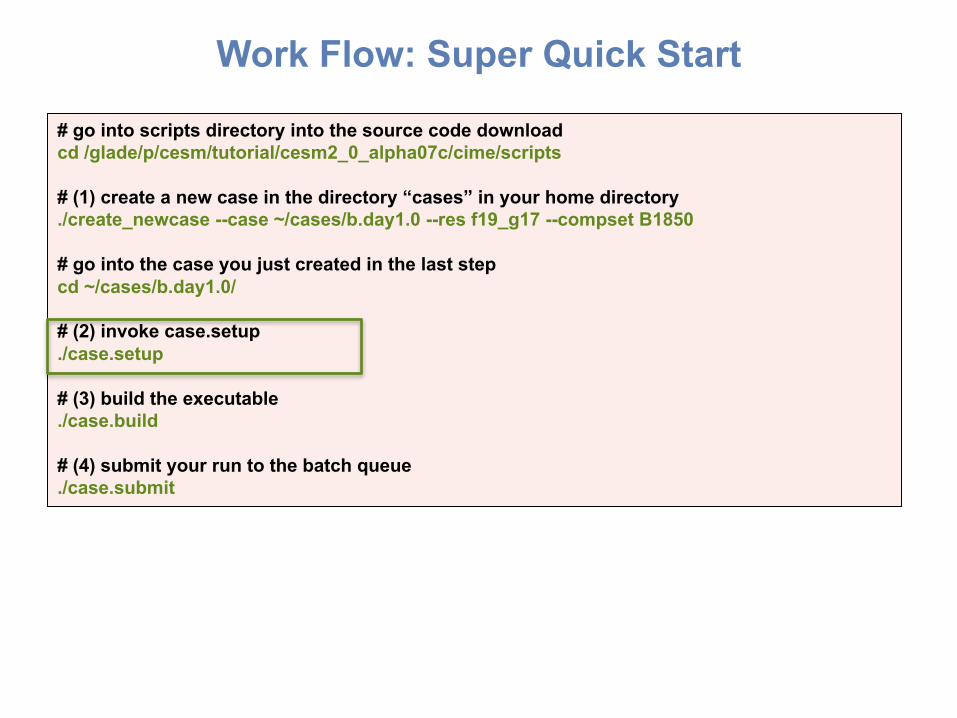
Work Flow: Super Quick StartCESM2 can be run with a set of 4 commands
# one time stepmkdir ~/cases
# go into scripts directory into the source code downloadcd /glade/p/cesm/tutorial/cesm2_0_alpha07c/cime/scripts
# (1) create a new case in the directory “cases” in your home directory./create_newcase --case ~/cases/b.day1.0 --res f19_g17 --compset B1850
# go into the case you just created in the last stepcd ~/cases/b.day1.0
# (2) invoke case.setup./case.setup
# (3) build the executable./case.build
# (4) submit your run to the batch queue./case.submit
Set of commands to build and run the model on a supported machine
It is that easy !
(1)
(2)
(3)
(4)
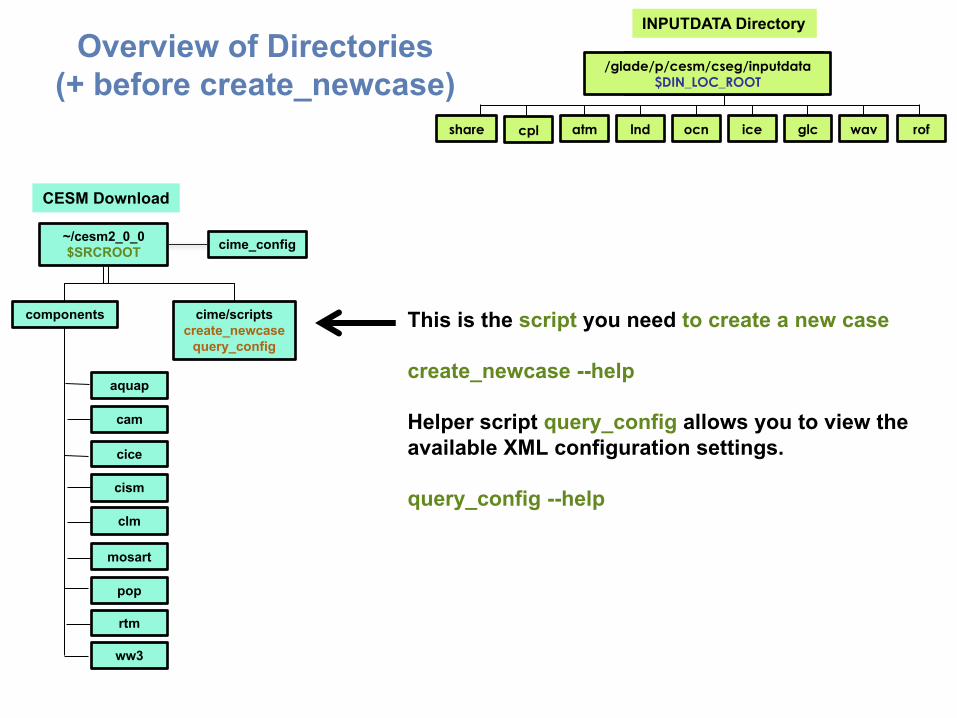
Overview of Directories(+ before create_newcase)
This is the script you need to create a new case
create_newcase --help
Helper script query_config allows you to view the available XML configuration settings.
query_config --help
/glade/p/cesm/cseg/inputdata
atm lnd ocn ice glc wav
/glade/p/cesm/cseg/inputdata$DIN_LOC_ROOT
INPUTDATA Directory
rofshare cpl
components cime/scriptscreate_newcase
query_config
~/cesm2_0_0$SRCROOT
CESM Download
aquap
cam
cice
cism
clm
pop
mosart
rtm
ww3
cime_config
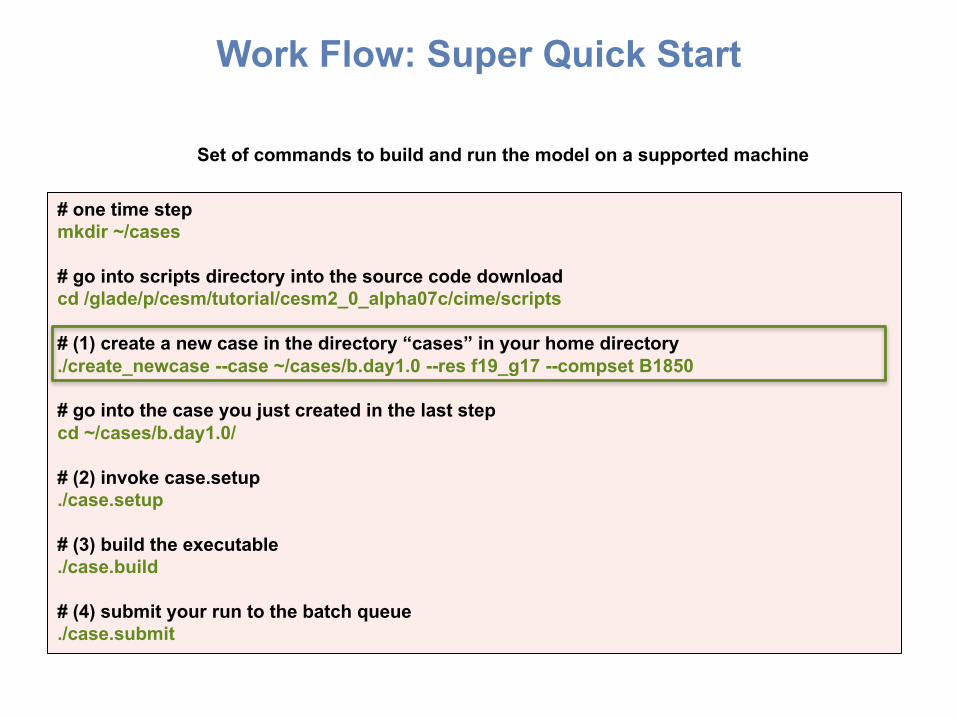
Work Flow: Super Quick Start
# one time stepmkdir ~/cases
# go into scripts directory into the source code downloadcd /glade/p/cesm/tutorial/cesm2_0_alpha07c/cime/scripts
# (1) create a new case in the directory “cases” in your home directory./create_newcase --case ~/cases/b.day1.0 --res f19_g17 --compset B1850
# go into the case you just created in the last stepcd ~/cases/b.day1.0/
# (2) invoke case.setup./case.setup
# (3) build the executable./case.build
# (4) submit your run to the batch queue./case.submit
Set of commands to build and run the model on a supported machine
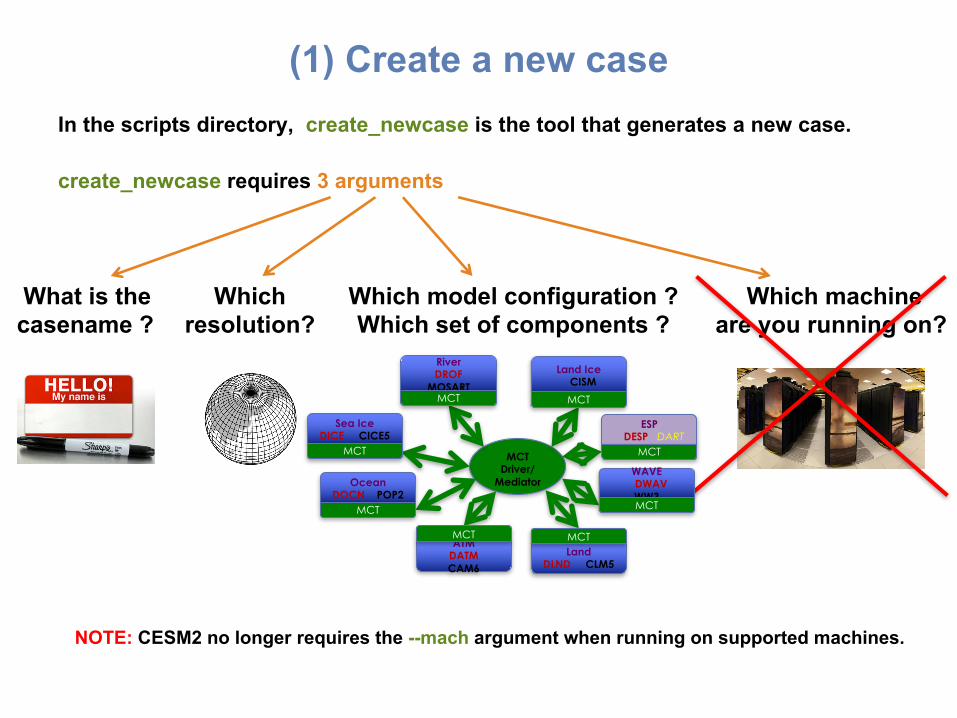
(1) Create a new caseIn the scripts directory, create_newcase is the tool that generates a new case.
create_newcase requires 3 arguments
What is the casename ?
Which resolution?
Which machine are you running on?
Which model configuration ?Which set of components ?
MCTDriver/
Mediator
River DROF
MOSARTMCT
Land Ice CISMMCT
Sea Ice DICE CICE5
MCT
Ocean DOCN POP2
MCT
WAVE DWAV WW3MCT
ESPDESP DART
MCT
ATM DATM CAM6
MCTLand
DLND CLM5
MCT
NOTE: CESM2 no longer requires the --mach argument when running on supported machines.
(1) create_newcase arguments
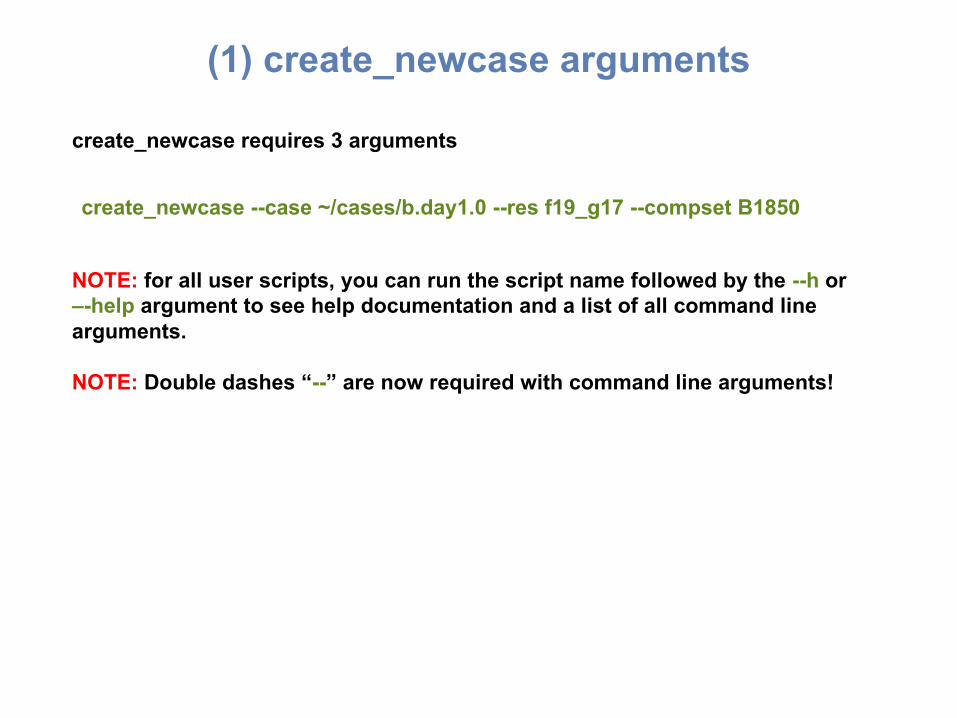
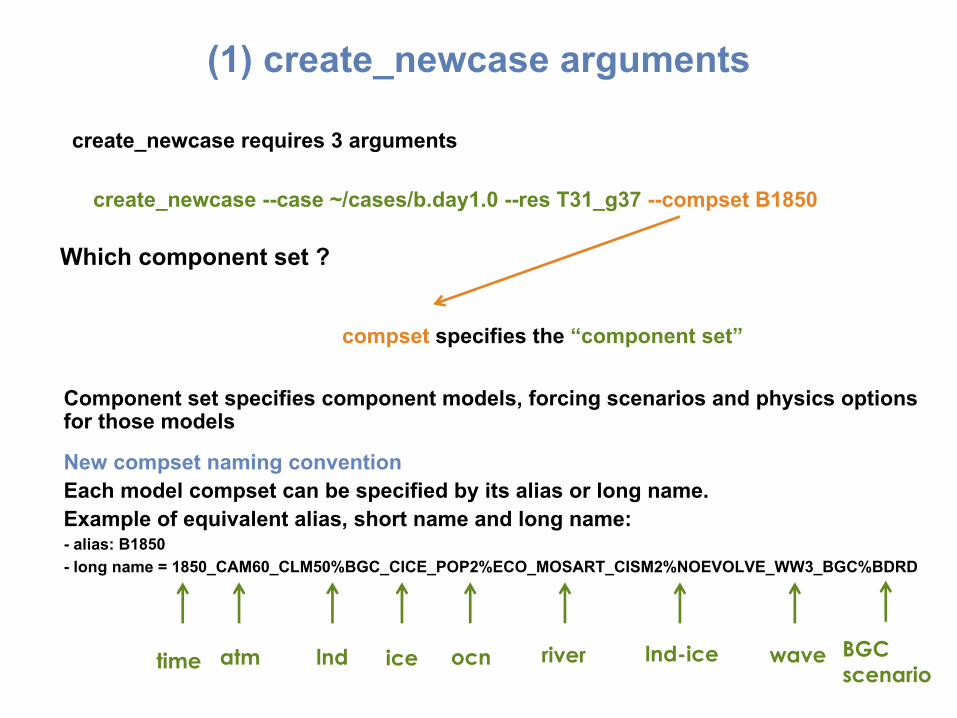
create_newcase requires 3 arguments
create_newcase --case ~/cases/b.day1.0 --res f19_g17 --compset B1850
NOTE: for all user scripts, you can run the script name followed by the --h or –-help argument to see help documentation and a list of all command line arguments.
NOTE: Double dashes “--” are now required with command line arguments!
(1) create_newcase arguments
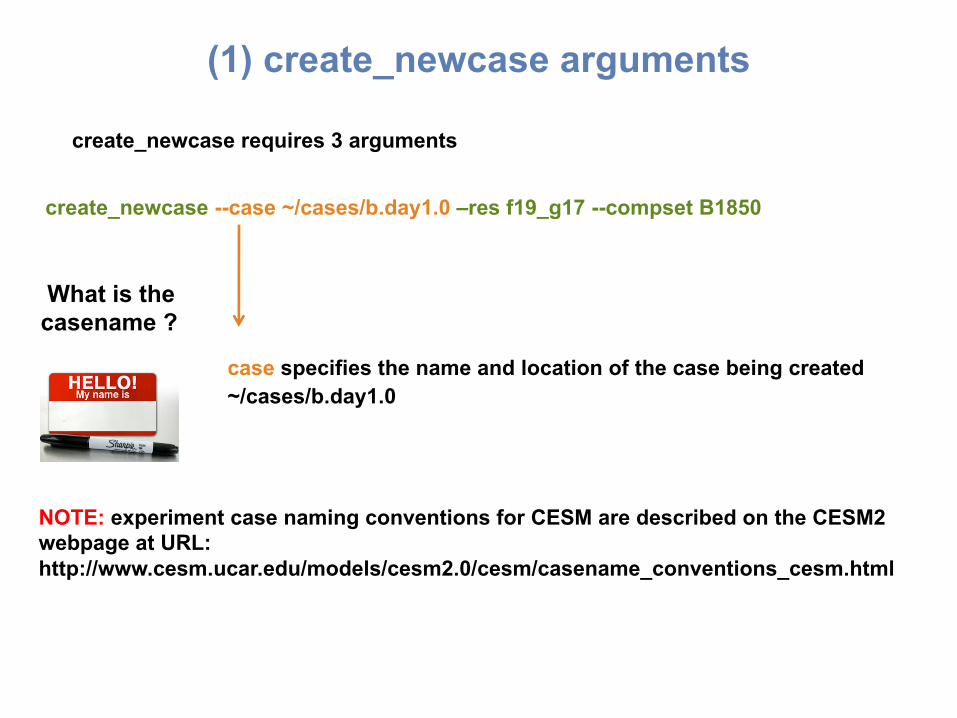
create_newcase requires 3 arguments
create_newcase --case ~/cases/b.day1.0 –res f19_g17 --compset B1850
case specifies the name and location of the case being created~/cases/b.day1.0
What is the casename ?
NOTE: experiment case naming conventions for CESM are described on the CESM2 webpage at URL: http://www.cesm.ucar.edu/models/cesm2.0/cesm/casename_conventions_cesm.html
(1) create_newcase arguments
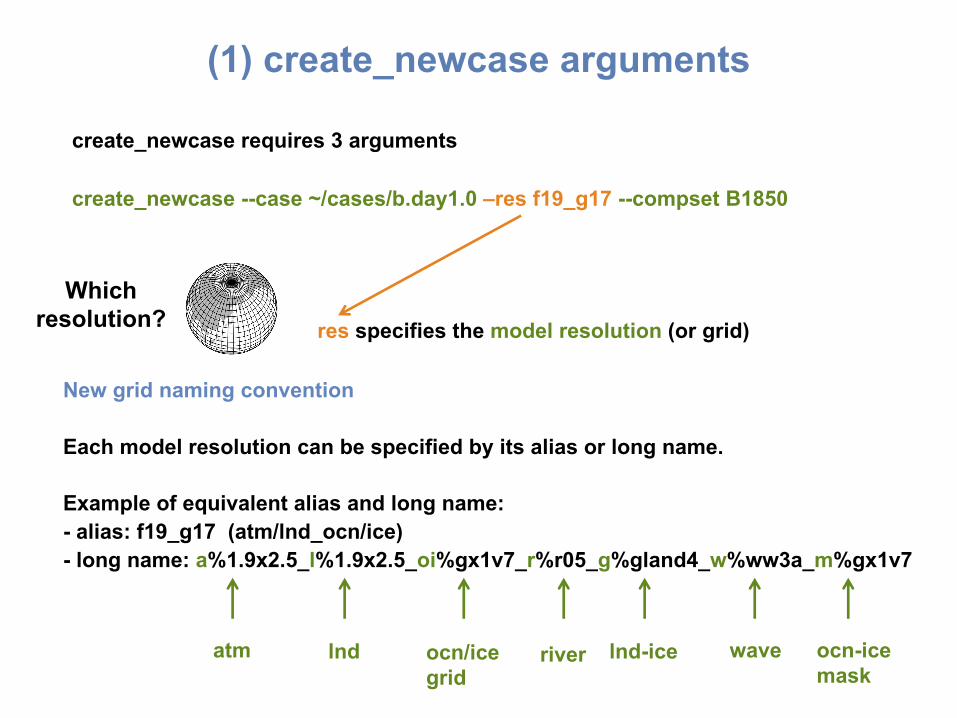
create_newcase requires 3 arguments
create_newcase --case ~/cases/b.day1.0 –res f19_g17 --compset B1850
New grid naming convention
Each model resolution can be specified by its alias or long name.
Example of equivalent alias and long name: - alias: f19_g17 (atm/lnd_ocn/ice)- long name: a%1.9x2.5_l%1.9x2.5_oi%gx1v7_r%r05_g%gland4_w%ww3a_m%gx1v7
atm lnd ocn/icegrid
river lnd-ice wave ocn-icemask
res specifies the model resolution (or grid)
Which resolution?
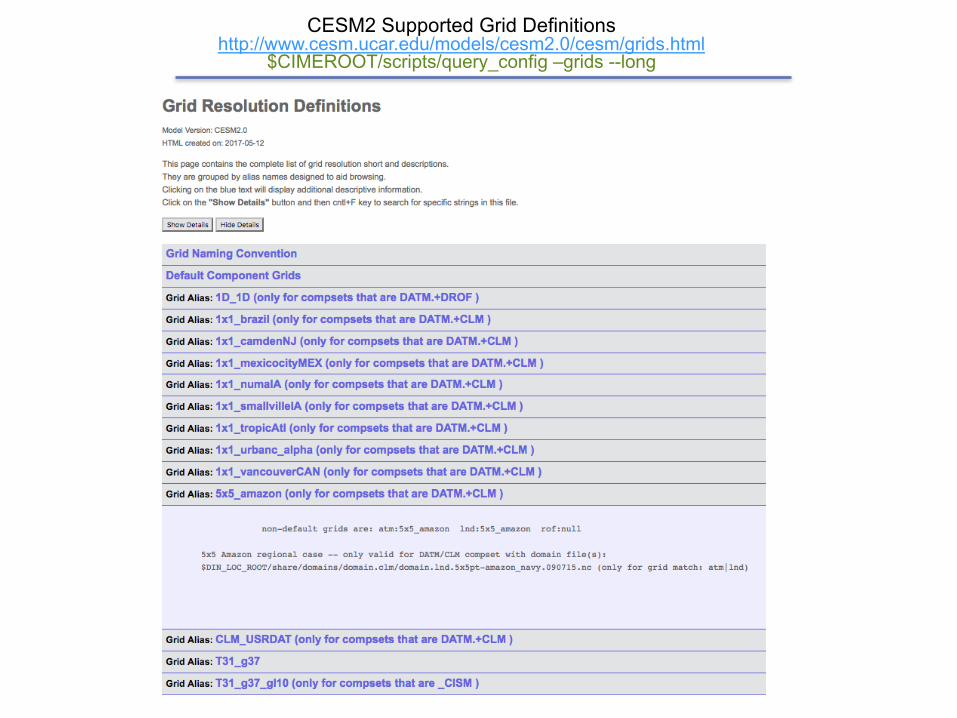
CESM2 Supported Grid Definitionshttp://www.cesm.ucar.edu/models/cesm2.0/cesm/grids.html
$CIMEROOT/scripts/query_config –grids --long
(1) create_newcase arguments
create_newcase requires 3 arguments
create_newcase --case ~/cases/b.day1.0 --res T31_g37 --compset B1850
New compset naming conventionEach model compset can be specified by its alias or long name.Example of equivalent alias, short name and long name: - alias: B1850- long name = 1850_CAM60_CLM50%BGC_CICE_POP2%ECO_MOSART_CISM2%NOEVOLVE_WW3_BGC%BDRD
atm lnd ocn riverice lnd-ice wavetime
Component set specifies component models, forcing scenarios and physics options for those models
Which component set ?
compset specifies the “component set”
BGC scenario
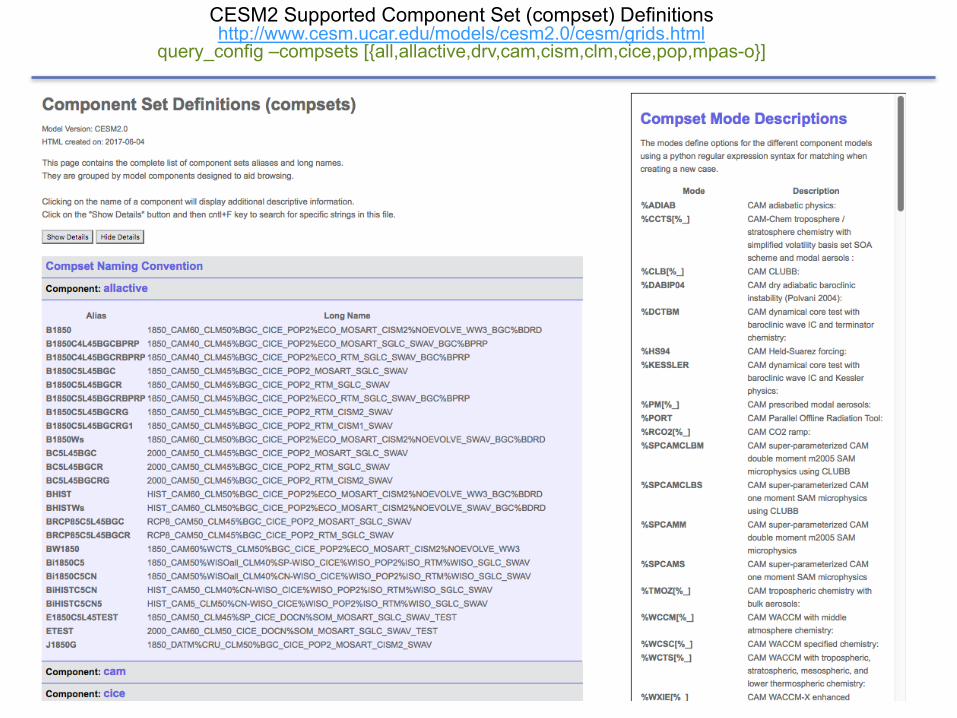
CESM2 Supported Component Set (compset) Definitionshttp://www.cesm.ucar.edu/models/cesm2.0/cesm/grids.html
query_config –compsets [{all,allactive,drv,cam,cism,clm,cice,pop,mpas-o}]
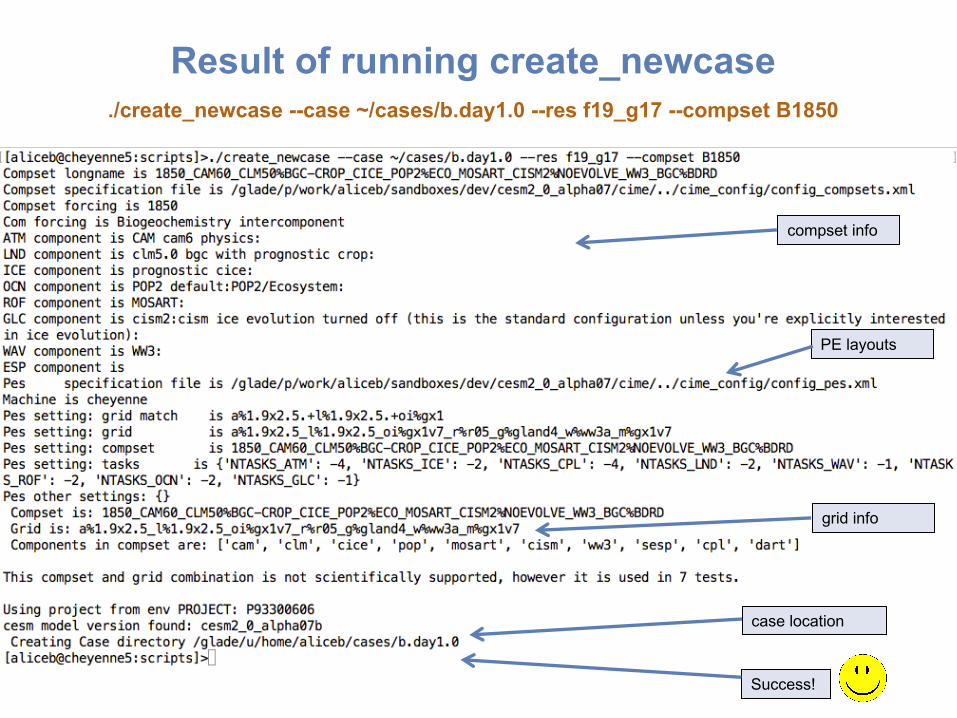
Result of running create_newcase./create_newcase --case ~/cases/b.day1.0 --res f19_g17 --compset B1850
grid info
Success!
case location
compset info
PE layouts
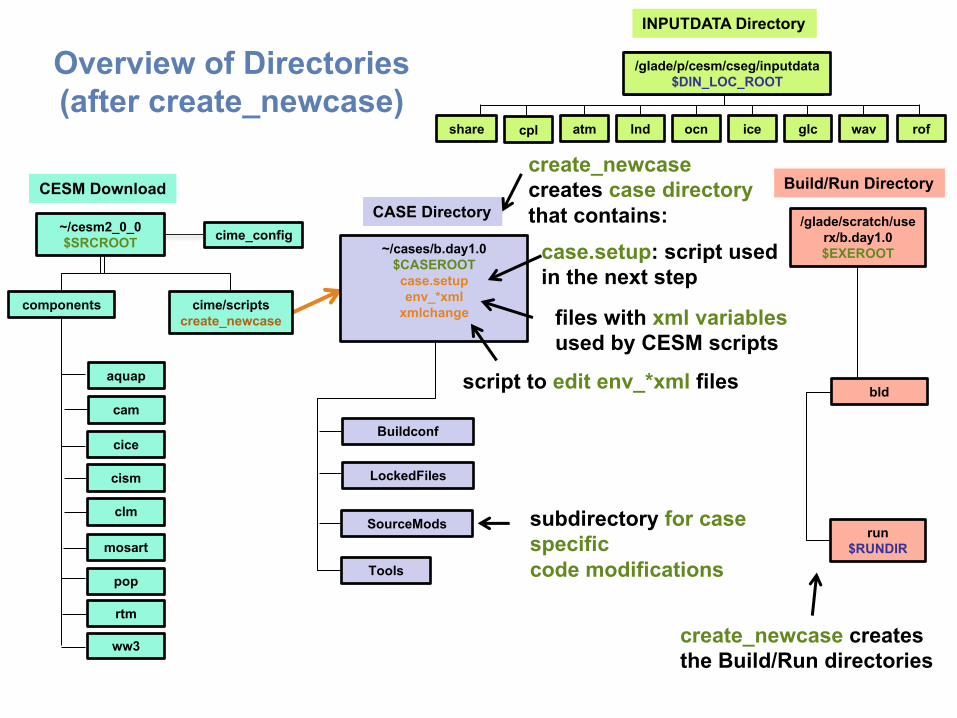
Overview of Directories(after create_newcase)
~/cases/b.day1.0$CASEROOTcase.setupenv_*xml
xmlchange
SourceMods
CASE Directory
Tools
LockedFiles
Buildconf
subdirectory for case specific code modifications
case.setup: script used in the next step
files with xml variables used by CESM scripts
script to edit env_*xml files
/glade/p/cesm/cseg/inputdata
atm lnd ocn ice glc wav
/glade/p/cesm/cseg/inputdata$DIN_LOC_ROOT
INPUTDATA Directory
rofshare cpl
create_newcasecreates case directorythat contains:
components cime/scriptscreate_newcase
~/cesm2_0_0$SRCROOT
CESM Download
aquap
cam
cice
cism
clm
pop
mosart
rtm
ww3
cime_config
run$RUNDIR
/glade/scratch/userx/b.day1.0$EXEROOT
Build/Run Directory
bld
create_newcase createsthe Build/Run directories
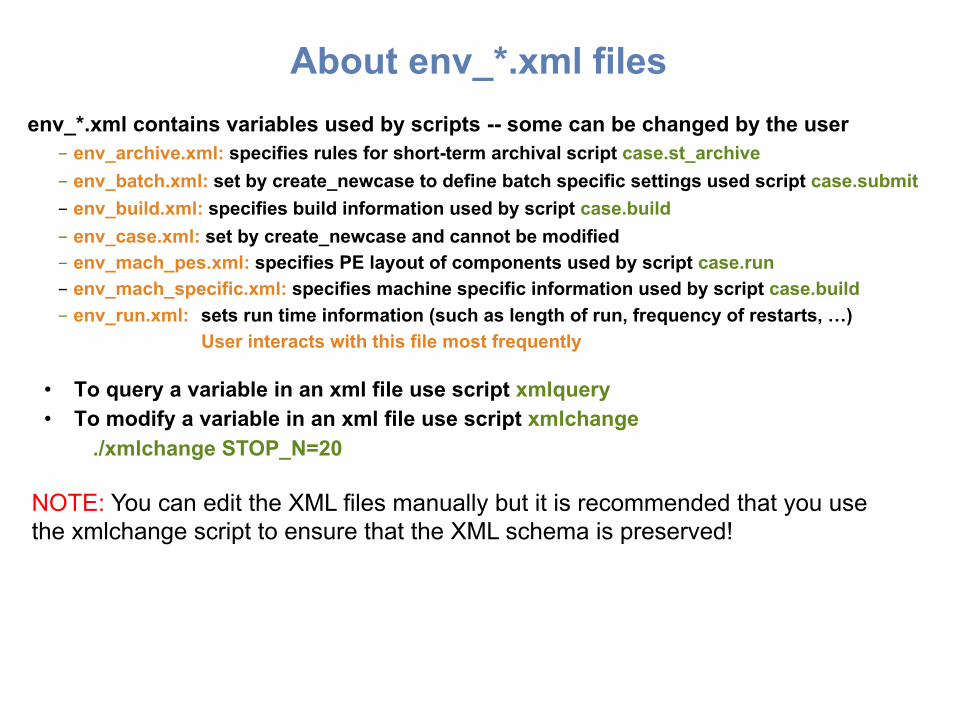
About env_*.xml filesenv_*.xml contains variables used by scripts -- some can be changed by the user
- env_archive.xml: specifies rules for short-term archival script case.st_archive- env_batch.xml: set by create_newcase to define batch specific settings used script case.submit- env_build.xml: specifies build information used by script case.build- env_case.xml: set by create_newcase and cannot be modified- env_mach_pes.xml: specifies PE layout of components used by script case.run- env_mach_specific.xml: specifies machine specific information used by script case.build- env_run.xml: sets run time information (such as length of run, frequency of restarts, …)
User interacts with this file most frequently
• To query a variable in an xml file use script xmlquery• To modify a variable in an xml file use script xmlchange
./xmlchange STOP_N=20
NOTE: You can edit the XML files manually but it is recommended that you use the xmlchange script to ensure that the XML schema is preserved!
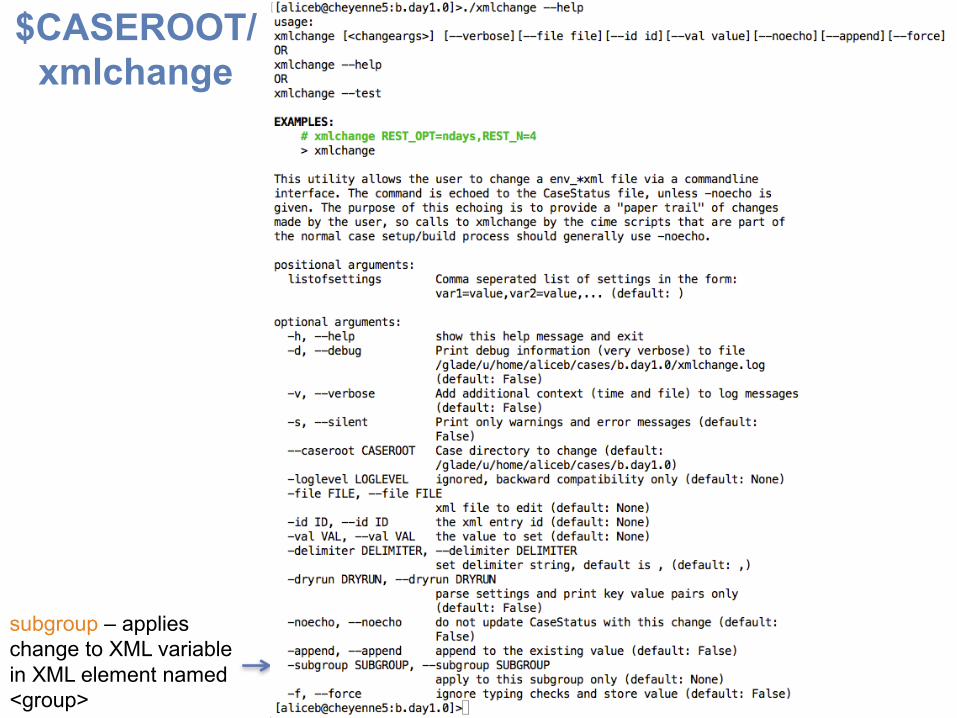
$CASEROOT/xmlchange
subgroup – applieschange to XML variable in XML element named <group>
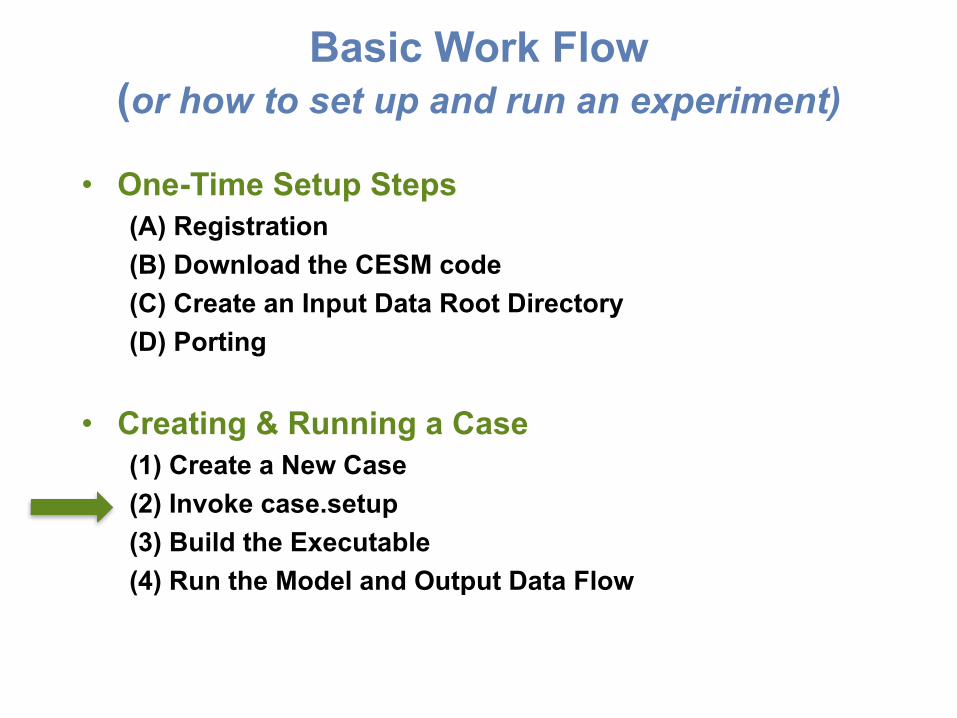
Basic Work Flow (or how to set up and run an experiment)
• One-Time Setup Steps(A) Registration(B) Download the CESM code(C) Create an Input Data Root Directory(D) Porting
• Creating & Running a Case(1) Create a New Case(2) Invoke case.setup(3) Build the Executable(4) Run the Model and Output Data Flow
Work Flow: Super Quick Start
# go into scripts directory into the source code downloadcd /glade/p/cesm/tutorial/cesm2_0_alpha07c/cime/scripts
# (1) create a new case in the directory “cases” in your home directory./create_newcase --case ~/cases/b.day1.0 --res f19_g17 --compset B1850
# go into the case you just created in the last stepcd ~/cases/b.day1.0/
# (2) invoke case.setup./case.setup
# (3) build the executable./case.build
# (4) submit your run to the batch queue./case.submit
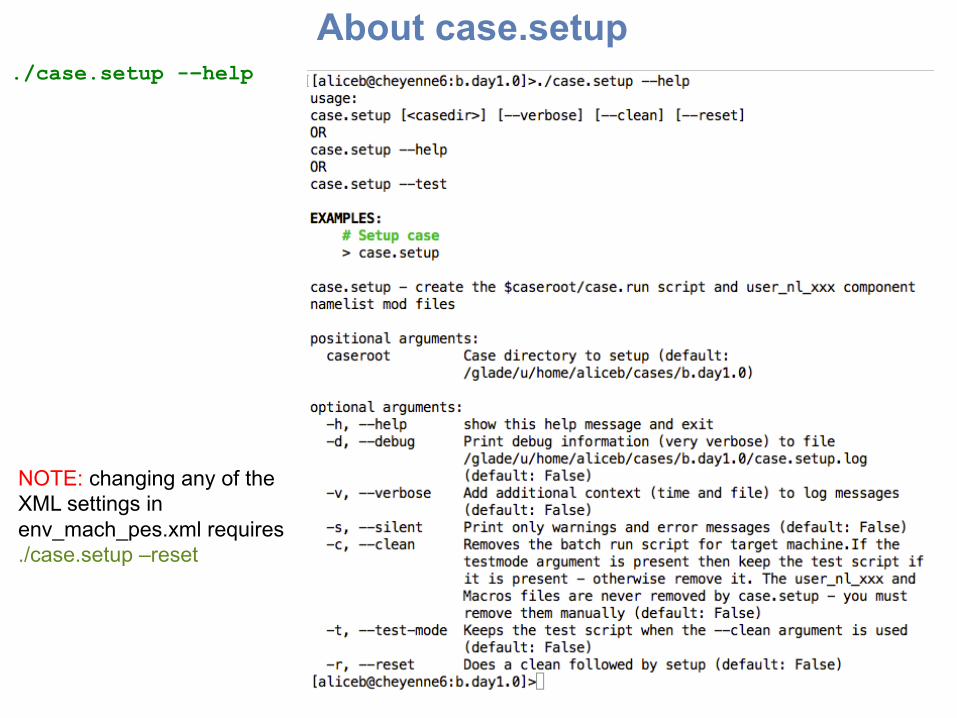
About case.setup./case.setup -–help
NOTE: changing any of the XML settings in env_mach_pes.xml requires./case.setup –reset
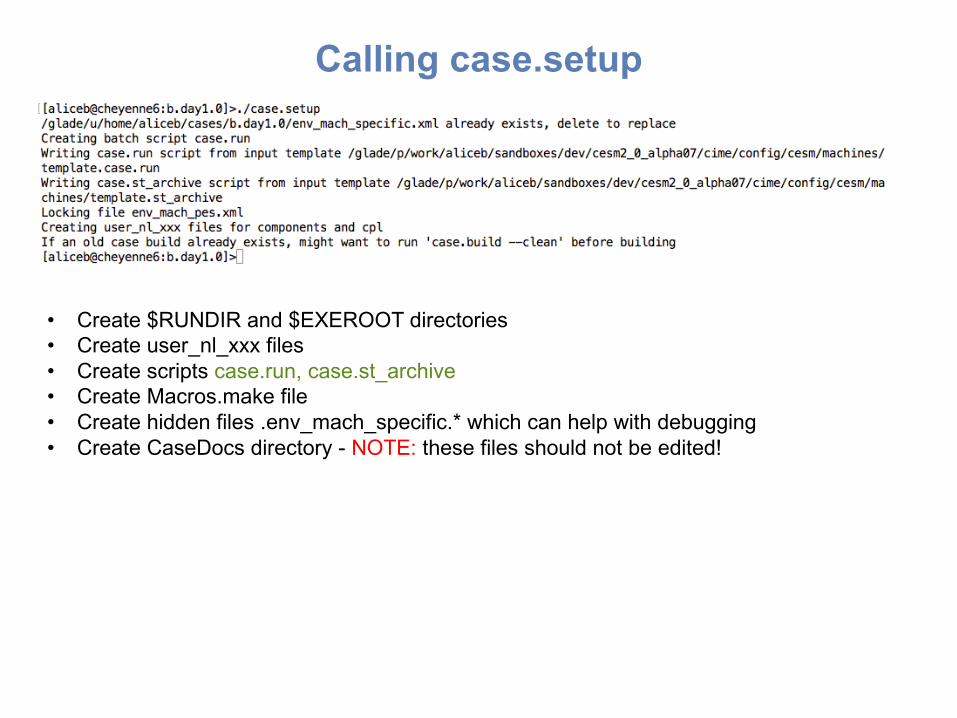
Calling case.setup
• Create $RUNDIR and $EXEROOT directories• Create user_nl_xxx files• Create scripts case.run, case.st_archive• Create Macros.make file• Create hidden files .env_mach_specific.* which can help with debugging• Create CaseDocs directory - NOTE: these files should not be edited!
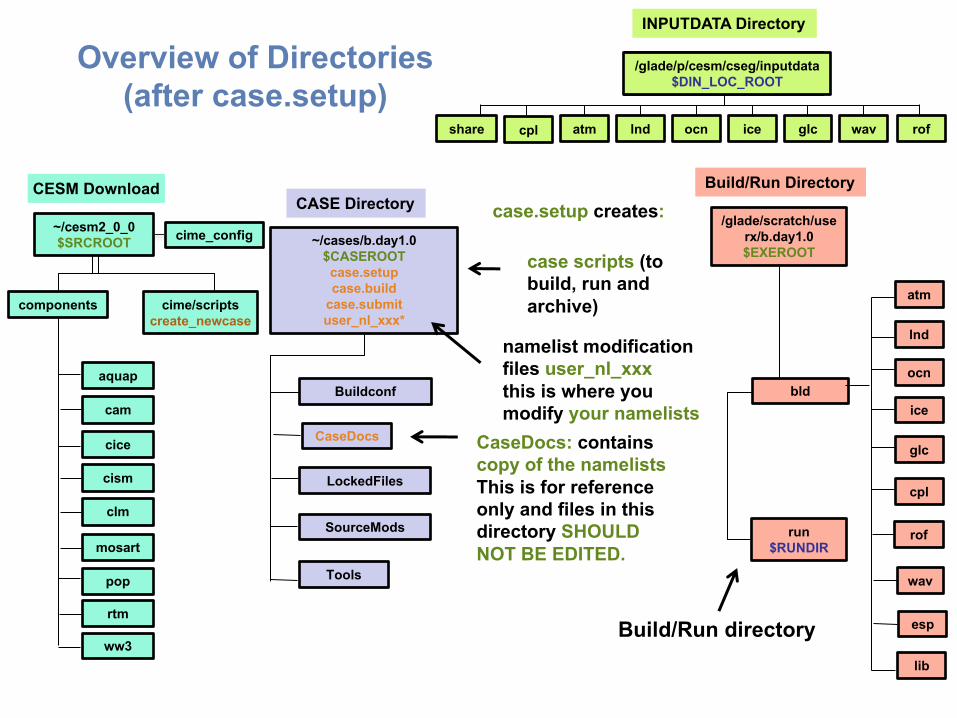
Overview of Directories(after case.setup)
~/cases/b.day1.0$CASEROOTcase.setupcase.build
case.submituser_nl_xxx*
SourceMods
CASE Directory
Tools
CaseDocs
Buildconf
LockedFiles
namelist modification files user_nl_xxxthis is where you modify your namelists
CaseDocs: containscopy of the namelistsThis is for reference only and files in this directory SHOULD NOT BE EDITED.
case scripts (to build, run and archive)
case.setup creates:
/glade/p/cesm/cseg/inputdata
atm lnd ocn ice glc wav
/glade/p/cesm/cseg/inputdata$DIN_LOC_ROOT
INPUTDATA Directory
rofshare cpl
components cime/scriptscreate_newcase
~/cesm2_0_0$SRCROOT
CESM Download
aquap
cam
cice
cism
clm
pop
mosart
rtm
ww3
run$RUNDIR
/glade/scratch/userx/b.day1.0$EXEROOT
Build/Run Directory
bld
atm
lnd
ocn
ice
glc
cpl
esp
wav
lib
rof
Build/Run directory
cime_config
Basic Work Flow (or how to set up and run an experiment)
• One-Time Setup Steps(A) Registration(B) Download the CESM code(C) Create an Input Data Root Directory(D) Porting
• Creating & Running a Case(1) Create a New Case(2) Invoke case.setup(3) Build the Executable(4) Run the Model and Output Data Flow
Work Flow: Super Quick Start
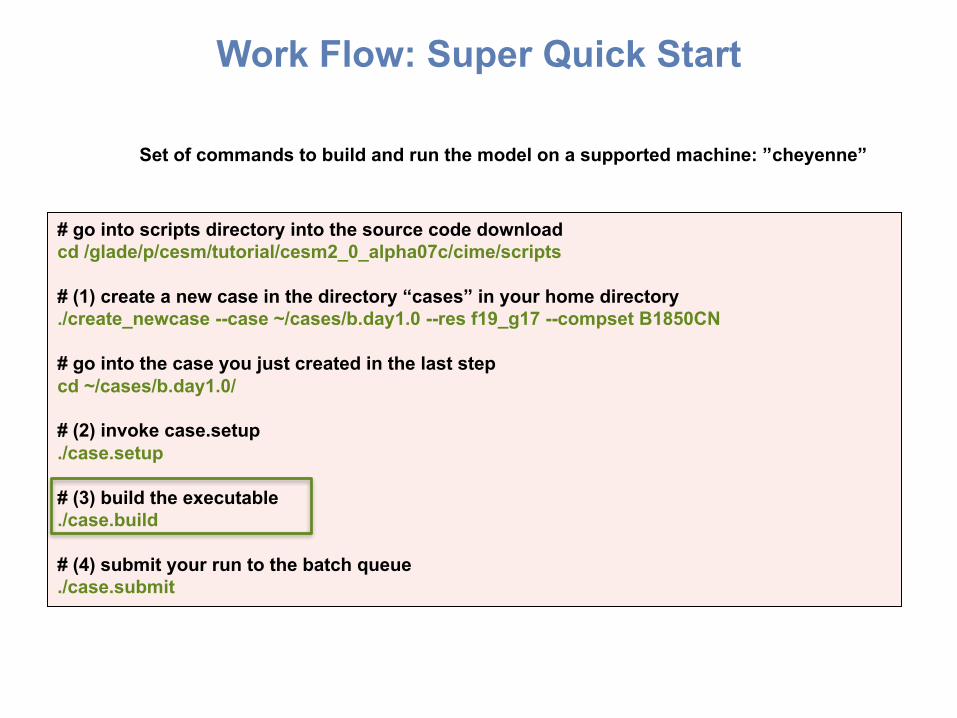
# go into scripts directory into the source code downloadcd /glade/p/cesm/tutorial/cesm2_0_alpha07c/cime/scripts
# (1) create a new case in the directory “cases” in your home directory./create_newcase --case ~/cases/b.day1.0 --res f19_g17 --compset B1850CN
# go into the case you just created in the last stepcd ~/cases/b.day1.0/
# (2) invoke case.setup./case.setup
# (3) build the executable./case.build
# (4) submit your run to the batch queue./case.submit
Set of commands to build and run the model on a supported machine: ”cheyenne”
Build the Model
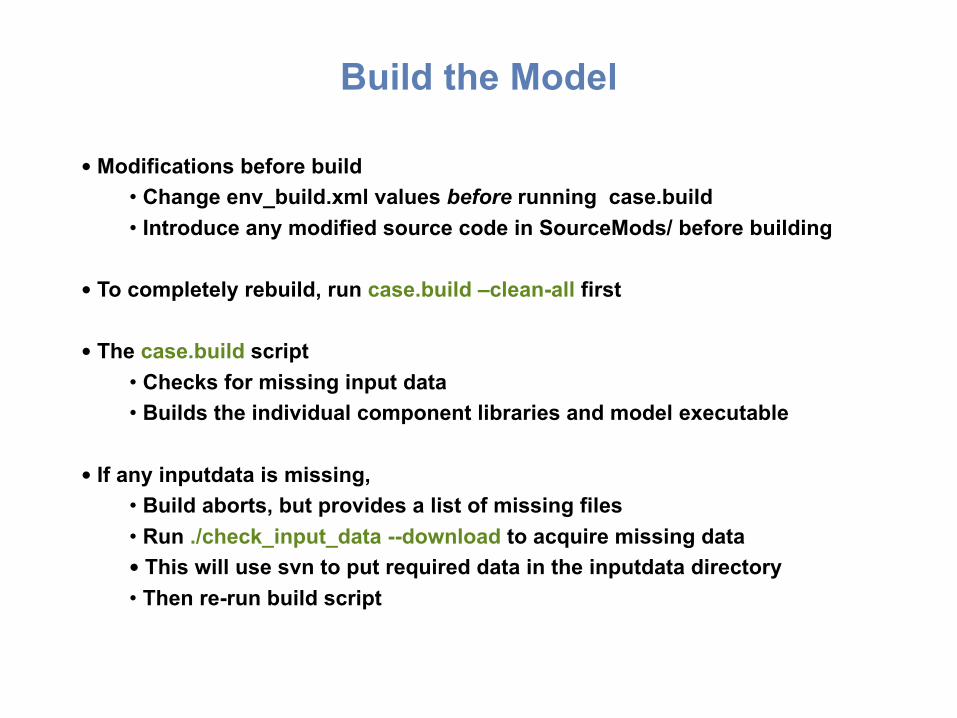
• Modifications before build• Change env_build.xml values before running case.build• Introduce any modified source code in SourceMods/ before building
• To completely rebuild, run case.build –clean-all first
• The case.build script• Checks for missing input data• Builds the individual component libraries and model executable
• If any inputdata is missing,• Build aborts, but provides a list of missing files• Run ./check_input_data --download to acquire missing data• This will use svn to put required data in the inputdata directory• Then re-run build script

Running the case.build Script• Checks for missing input data• Aborts if any input data is missing
44
Namelist creation
Model Build
Success
Overview of Directories(after build)
b.day1.0$CASEROOTcesm_setupcase.build
case.submituser_nl_xxx
SourceMods
CASE Directory
Tools
CaseDocs
Buildconf
LockedFiles
run$RUNDIR
/glade/scratch/userx/b.day1.0$EXEROOT
Build/Run Directory
bld
atm
lnd
ocn
ice
glc
cpl
esp
wav
lib
rof
/glade/p/cesm/cseg/inputdata
atm lnd ocn ice glc wav
/glade/p/cesm/cseg/inputdata$DIN_LOC_ROOT
INPUTDATA Directory
rofshare cpl
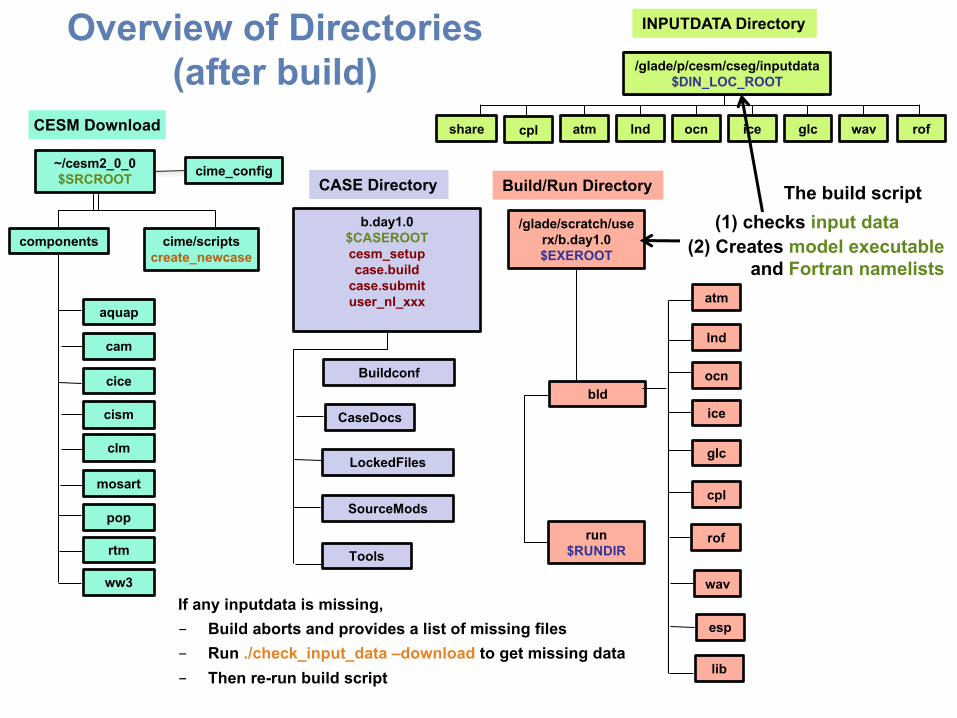
(2) Creates model executableand Fortran namelists
The build script(1) checks input data
If any inputdata is missing,- Build aborts and provides a list of missing files- Run ./check_input_data –download to get missing data- Then re-run build script
components cime/scriptscreate_newcase
~/cesm2_0_0$SRCROOT
CESM Download
aquap
cam
cice
cism
clm
pop
mosart
rtm
ww3
cime_config
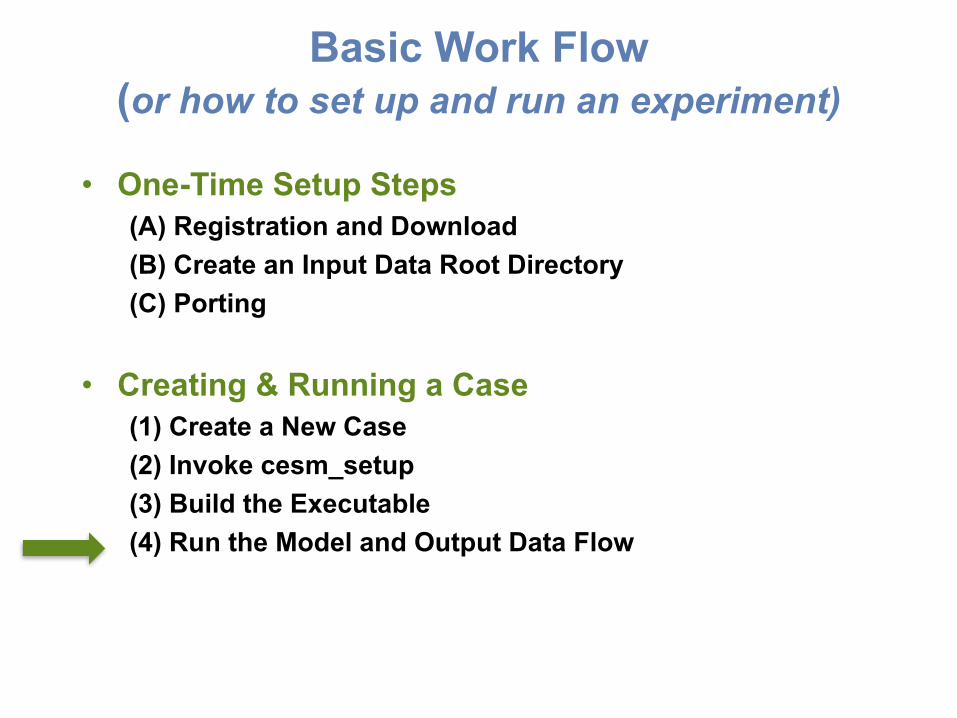
Basic Work Flow (or how to set up and run an experiment)
• One-Time Setup Steps(A) Registration and Download(B) Create an Input Data Root Directory(C) Porting
• Creating & Running a Case(1) Create a New Case(2) Invoke cesm_setup(3) Build the Executable(4) Run the Model and Output Data Flow
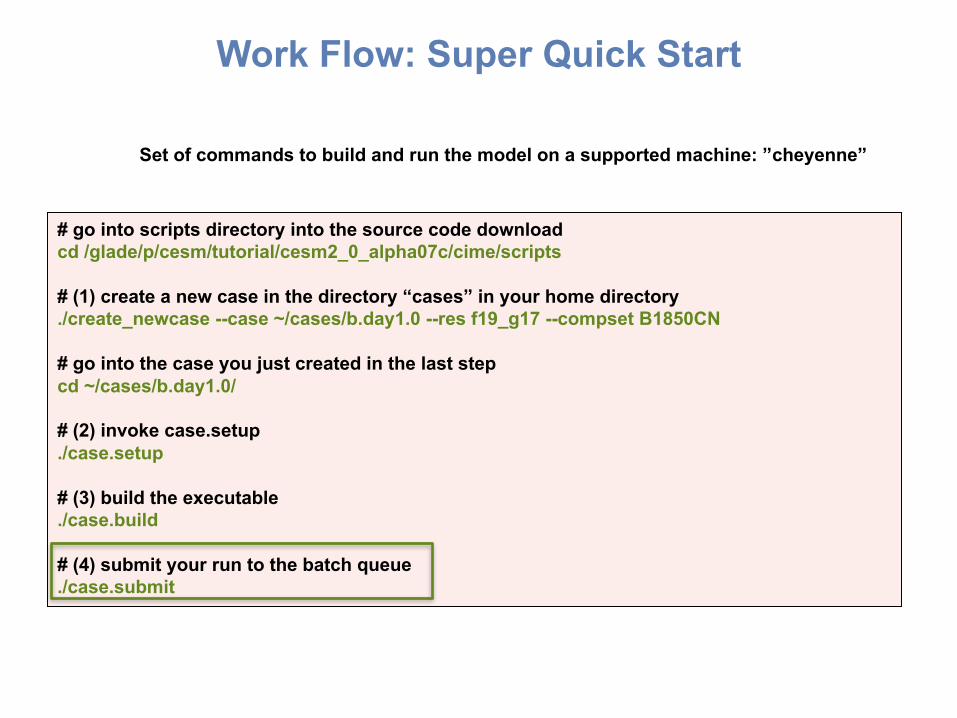
Work Flow: Super Quick Start
# go into scripts directory into the source code downloadcd /glade/p/cesm/tutorial/cesm2_0_alpha07c/cime/scripts
# (1) create a new case in the directory “cases” in your home directory./create_newcase --case ~/cases/b.day1.0 --res f19_g17 --compset B1850CN
# go into the case you just created in the last stepcd ~/cases/b.day1.0/
# (2) invoke case.setup./case.setup
# (3) build the executable./case.build
# (4) submit your run to the batch queue./case.submit
Set of commands to build and run the model on a supported machine: ”cheyenne”
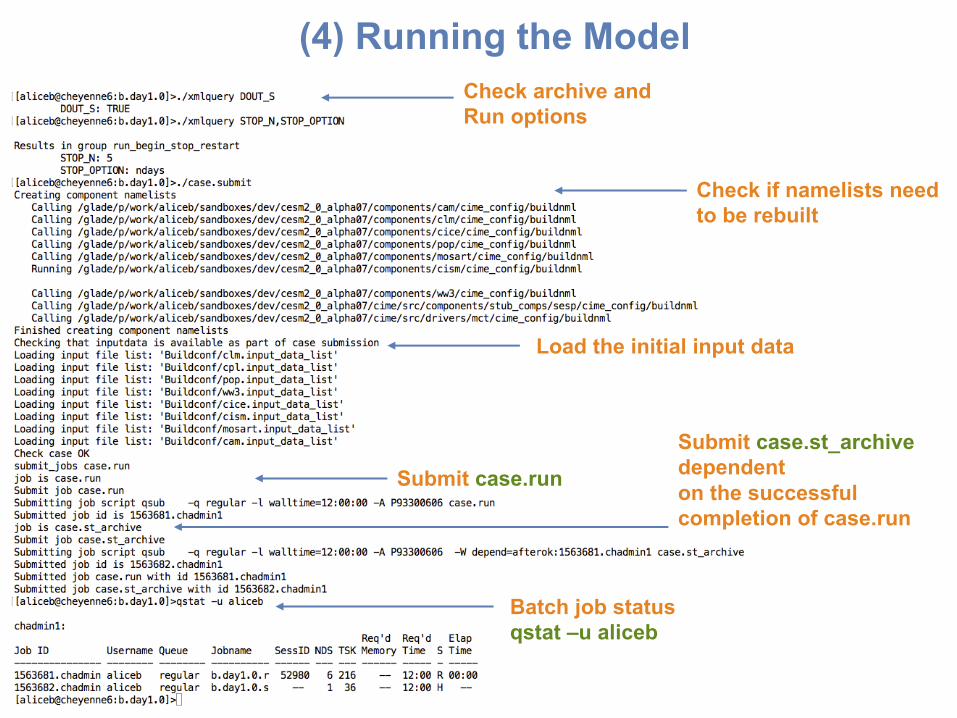
(4) Running the ModelCheck archive andRun options
Check if namelists need to be rebuilt
Load the initial input data
Submit case.runSubmit case.st_archivedependent on the successful completion of case.run
Batch job statusqstat –u aliceb
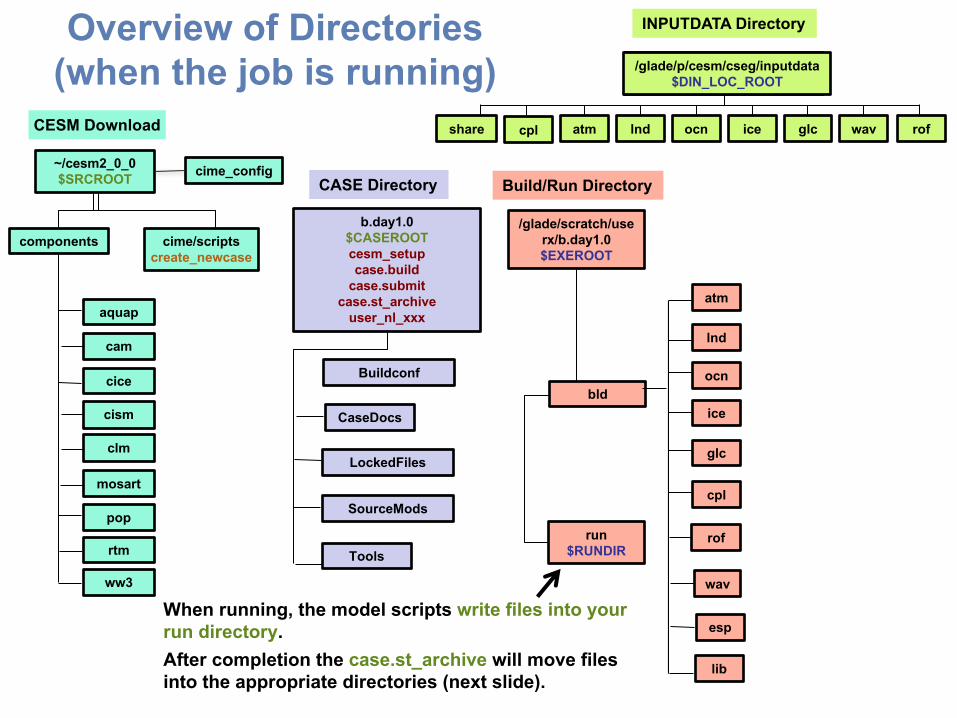
Overview of Directories(when the job is running) /glade/p/cesm/cseg/inputdat
a
atm lnd ocn ice glc wav
/glade/p/cesm/cseg/inputdata$DIN_LOC_ROOT
INPUTDATA Directory
rofshare cpl
When running, the model scripts write files into your run directory.After completion the case.st_archive will move files into the appropriate directories (next slide).
components cime/scriptscreate_newcase
~/cesm2_0_0$SRCROOT
CESM Download
aquap
cam
cice
cism
clm
pop
mosart
rtm
ww3
b.day1.0$CASEROOTcesm_setupcase.build
case.submitcase.st_archive
user_nl_xxx
SourceMods
CASE Directory
Tools
CaseDocs
Buildconf
LockedFiles
run$RUNDIR
/glade/scratch/userx/b.day1.0$EXEROOT
Build/Run Directory
bld
atm
lnd
ocn
ice
glc
cpl
esp
wav
lib
rof
cime_config
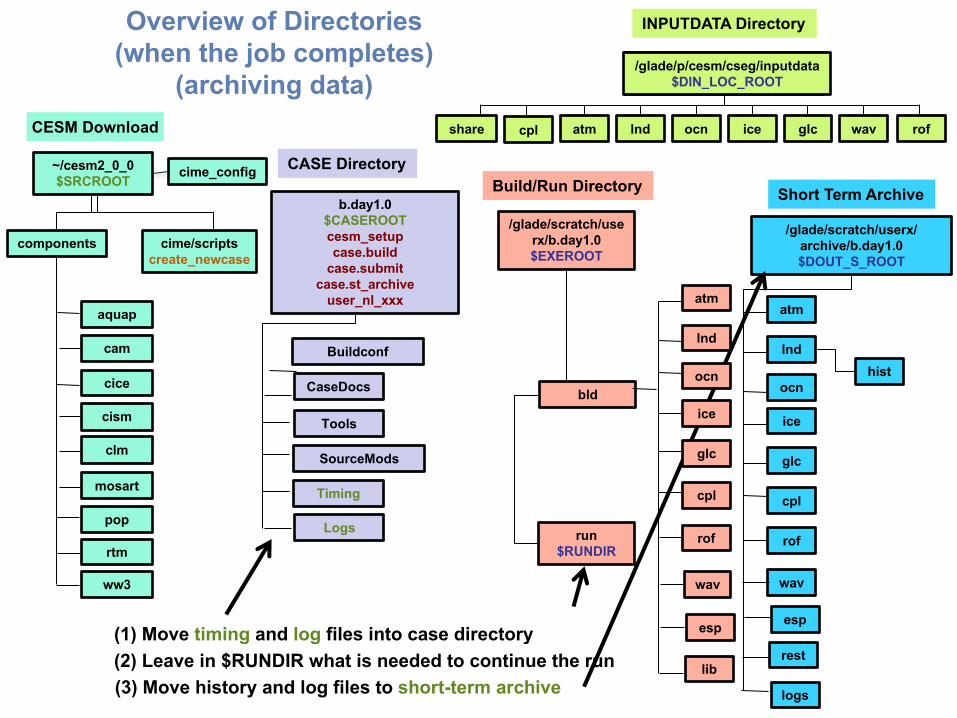
Overview of Directories(when the job completes)
(archiving data)
SourceMods
CASE Directory
Tools
CaseDocs
Buildconf
Logs
Timing
wav
/glade/scratch/userx/archive/b.day1.0$DOUT_S_ROOT
atm
lnd
ocn
ice
glc
rof
cpl
logs
hist
Short Term Archive
rest
esp
/glade/p/cesm/cseg/inputdata
atm lnd ocn ice glc wav
/glade/p/cesm/cseg/inputdata$DIN_LOC_ROOT
INPUTDATA Directory
rofshare cpl
(1) Move timing and log files into case directory(2) Leave in $RUNDIR what is needed to continue the run(3) Move history and log files to short-term archive
components cime/scriptscreate_newcase
~/cesm2_0_0$SRCROOT
CESM Download
aquap
cam
cice
cism
clm
pop
mosart
rtm
ww3
b.day1.0$CASEROOTcesm_setupcase.build
case.submitcase.st_archive
user_nl_xxx
run$RUNDIR
/glade/scratch/userx/b.day1.0$EXEROOT
Build/Run Directory
bld
atm
lnd
ocn
ice
glc
cpl
esp
wav
lib
rof
cime_config
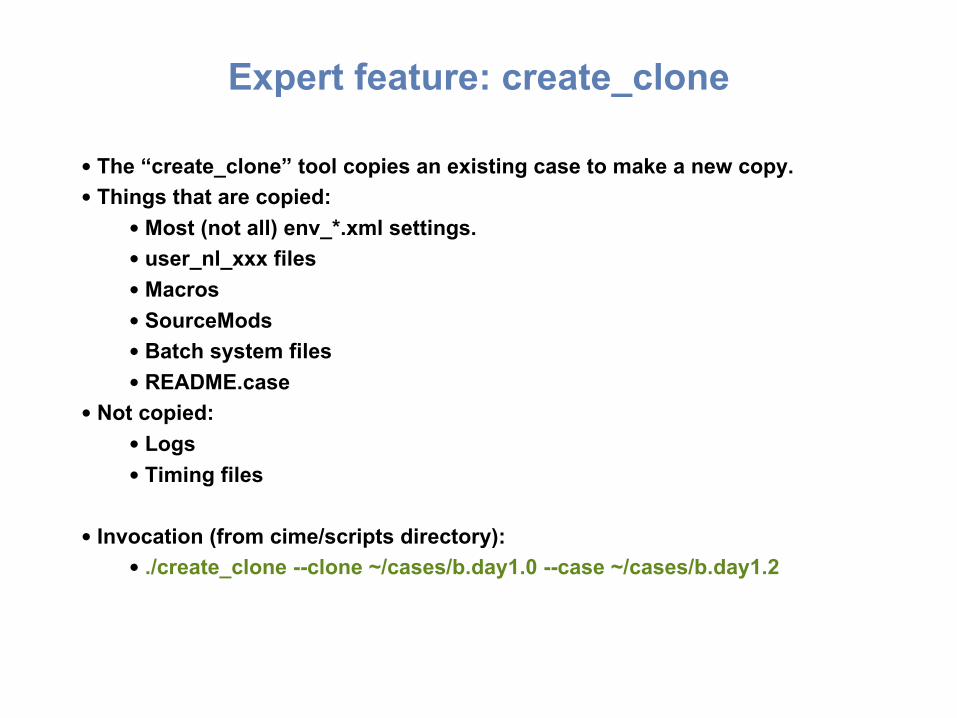
Expert feature: create_clone
• The “create_clone” tool copies an existing case to make a new copy.• Things that are copied:
• Most (not all) env_*.xml settings.• user_nl_xxx files• Macros• SourceMods• Batch system files• README.case
• Not copied:• Logs• Timing files
• Invocation (from cime/scripts directory):• ./create_clone --clone ~/cases/b.day1.0 --case ~/cases/b.day1.2
Best practices for copying cases
• Using “cp –R” does not work!•When using create_clone, make sure that your changes will be minor:
• Same version of the code!• Same grid• Same compset• Namelist/SourceMods changes not too complex.
• Document changes in your case directory so that they are easy to track: README.case is a great place.
• If your changes are more complex, if you use multiple code versions, or if you have to create a great many cases at once, consider writing your own script to set up your cases.
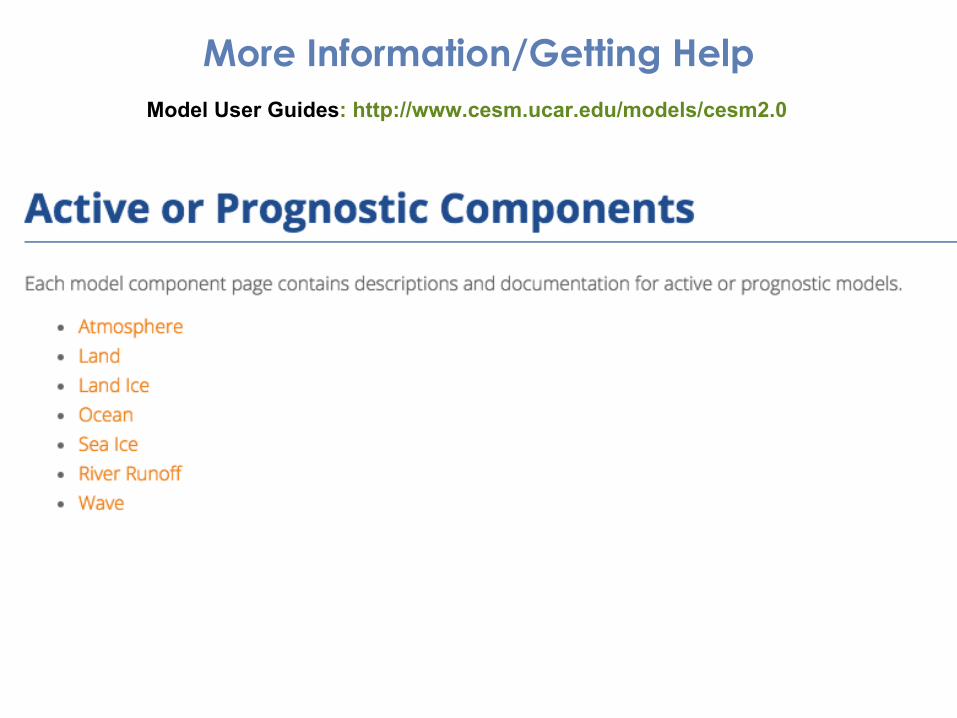
More Information/Getting HelpModel User Guides: http://www.cesm.ucar.edu/models/cesm2.0
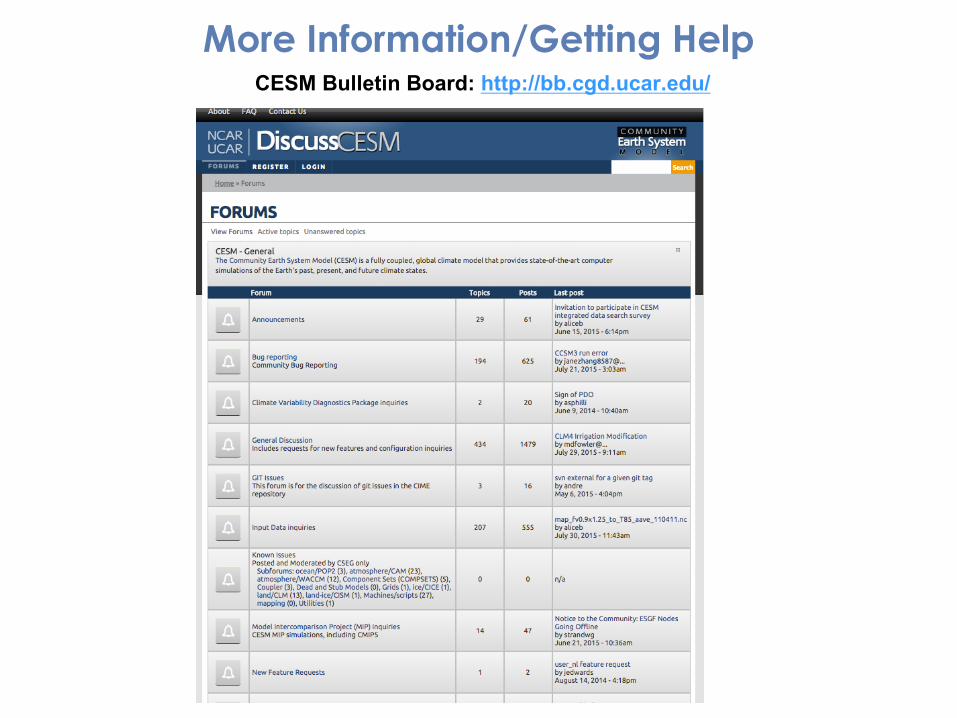
More Information/Getting HelpCESM Bulletin Board: http://bb.cgd.ucar.edu/
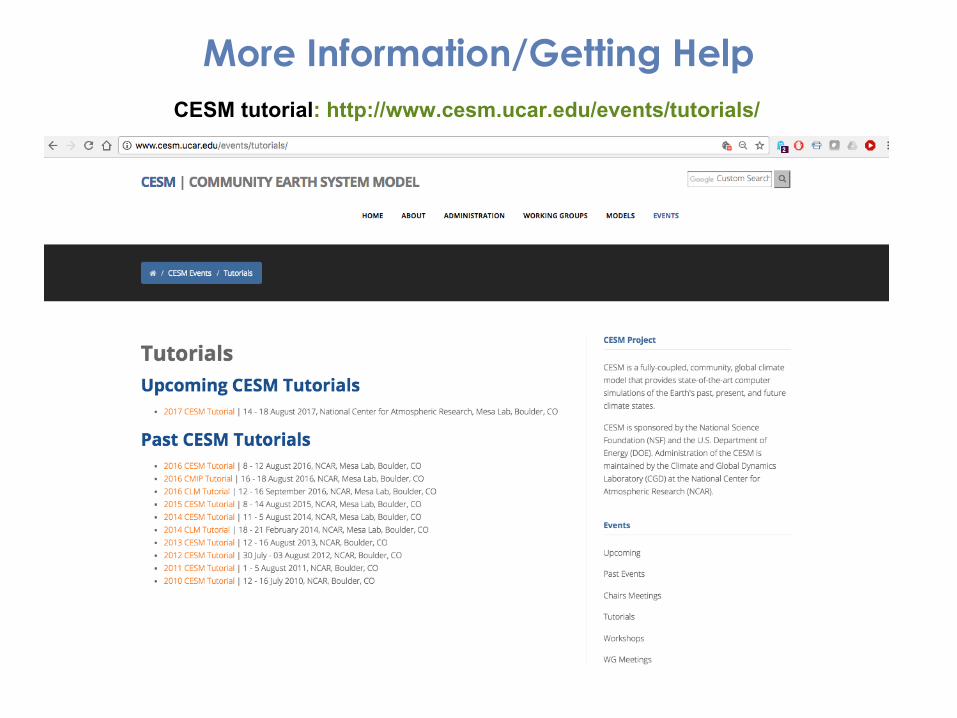
More Information/Getting HelpCESM tutorial: http://www.cesm.ucar.edu/events/tutorials/

Thank You!
The UCAR Mission is:To advance understanding of weather, climate, atmospheric composition and processes;
To provide facility support to the wider community; and,To apply the results to benefit society.
NCAR is sponsored by the National Science Foundation
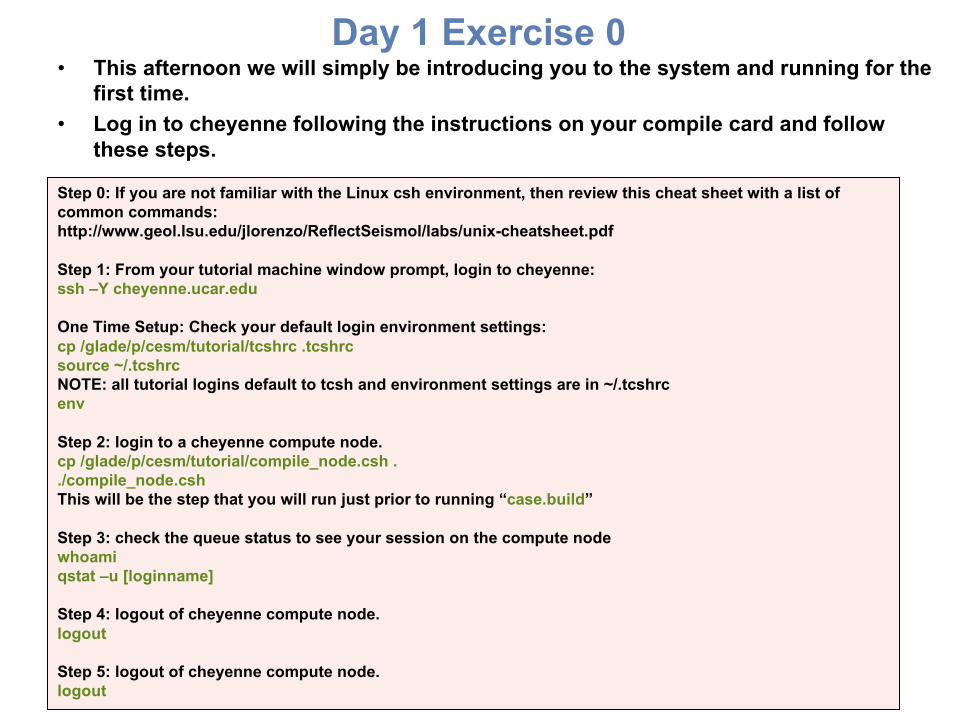
• This afternoon we will simply be introducing you to the system and running for the first time.
• Log in to cheyenne following the instructions on your compile card and follow these steps.
Day 1 Exercise 0
Step 0: If you are not familiar with the Linux csh environment, then review this cheat sheet with a list of common commands: http://www.geol.lsu.edu/jlorenzo/ReflectSeismol/labs/unix-cheatsheet.pdf
Step 1: From your tutorial machine window prompt, login to cheyenne:ssh –Y cheyenne.ucar.edu
One Time Setup: Check your default login environment settings:cp /glade/p/cesm/tutorial/tcshrc .tcshrcsource ~/.tcshrcNOTE: all tutorial logins default to tcsh and environment settings are in ~/.tcshrcenv
Step 2: login to a cheyenne compute node.cp /glade/p/cesm/tutorial/compile_node.csh ../compile_node.cshThis will be the step that you will run just prior to running “case.build”
Step 3: check the queue status to see your session on the compute nodewhoamiqstat –u [loginname]
Step 4: logout of cheyenne compute node.logout
Step 5: logout of cheyenne compute node.logout
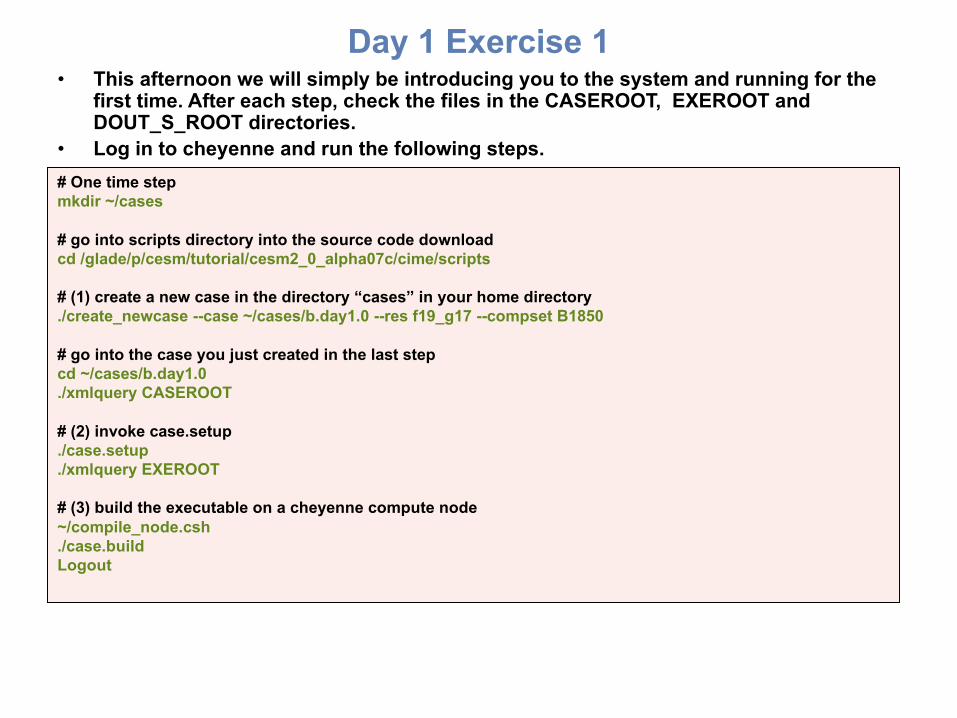
• This afternoon we will simply be introducing you to the system and running for the first time. After each step, check the files in the CASEROOT, EXEROOT and DOUT_S_ROOT directories.
• Log in to cheyenne and run the following steps.
Day 1 Exercise 1
# One time stepmkdir ~/cases
# go into scripts directory into the source code downloadcd /glade/p/cesm/tutorial/cesm2_0_alpha07c/cime/scripts
# (1) create a new case in the directory “cases” in your home directory./create_newcase --case ~/cases/b.day1.0 --res f19_g17 --compset B1850
# go into the case you just created in the last stepcd ~/cases/b.day1.0./xmlquery CASEROOT
# (2) invoke case.setup./case.setup./xmlquery EXEROOT
# (3) build the executable on a cheyenne compute node~/compile_node.csh./case.buildLogout
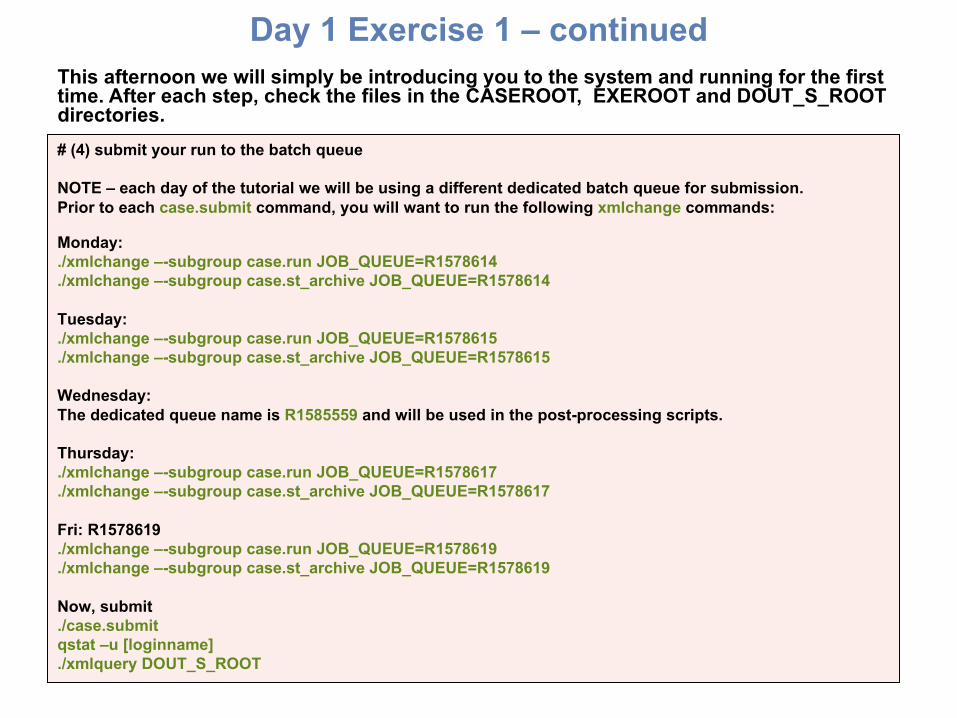
This afternoon we will simply be introducing you to the system and running for the first time. After each step, check the files in the CASEROOT, EXEROOT and DOUT_S_ROOT directories.
Day 1 Exercise 1 – continued
# (4) submit your run to the batch queue
NOTE – each day of the tutorial we will be using a different dedicated batch queue for submission. Prior to each case.submit command, you will want to run the following xmlchange commands:
Monday: ./xmlchange –-subgroup case.run JOB_QUEUE=R1578614./xmlchange –-subgroup case.st_archive JOB_QUEUE=R1578614
Tuesday:./xmlchange –-subgroup case.run JOB_QUEUE=R1578615./xmlchange –-subgroup case.st_archive JOB_QUEUE=R1578615
Wednesday:The dedicated queue name is R1585559 and will be used in the post-processing scripts.
Thursday:./xmlchange –-subgroup case.run JOB_QUEUE=R1578617./xmlchange –-subgroup case.st_archive JOB_QUEUE=R1578617
Fri: R1578619./xmlchange –-subgroup case.run JOB_QUEUE=R1578619./xmlchange –-subgroup case.st_archive JOB_QUEUE=R1578619
Now, submit./case.submitqstat –u [loginname]./xmlquery DOUT_S_ROOT
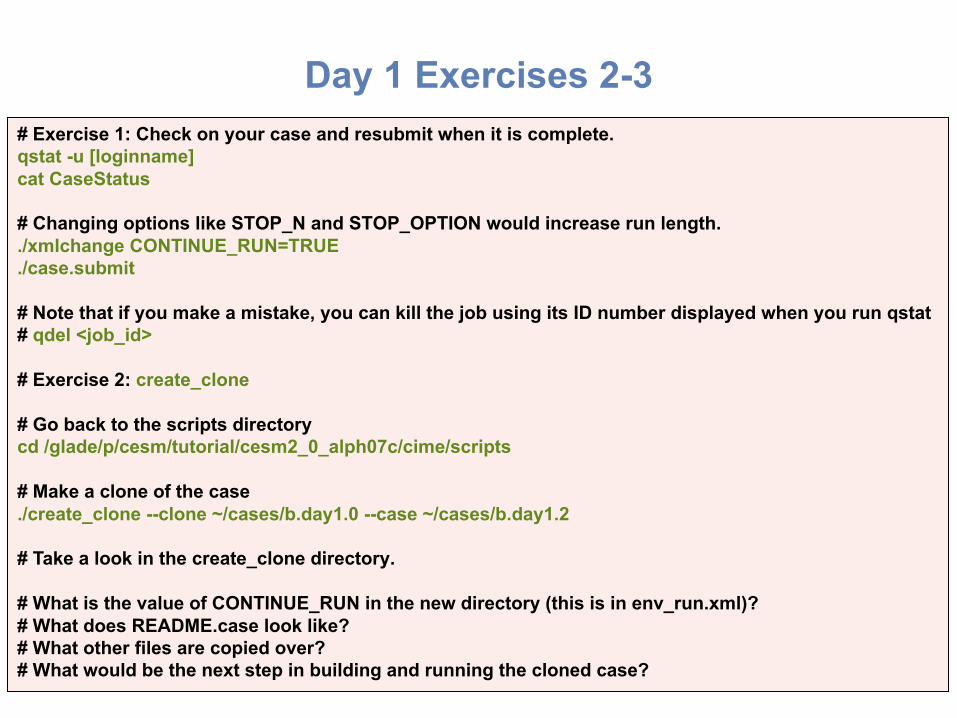
Day 1 Exercises 2-3# Exercise 1: Check on your case and resubmit when it is complete.qstat -u [loginname]cat CaseStatus
# Changing options like STOP_N and STOP_OPTION would increase run length../xmlchange CONTINUE_RUN=TRUE./case.submit
# Note that if you make a mistake, you can kill the job using its ID number displayed when you run qstat# qdel <job_id>
# Exercise 2: create_clone
# Go back to the scripts directorycd /glade/p/cesm/tutorial/cesm2_0_alph07c/cime/scripts
# Make a clone of the case./create_clone --clone ~/cases/b.day1.0 --case ~/cases/b.day1.2
# Take a look in the create_clone directory.
# What is the value of CONTINUE_RUN in the new directory (this is in env_run.xml)?# What does README.case look like?# What other files are copied over?# What would be the next step in building and running the cloned case?
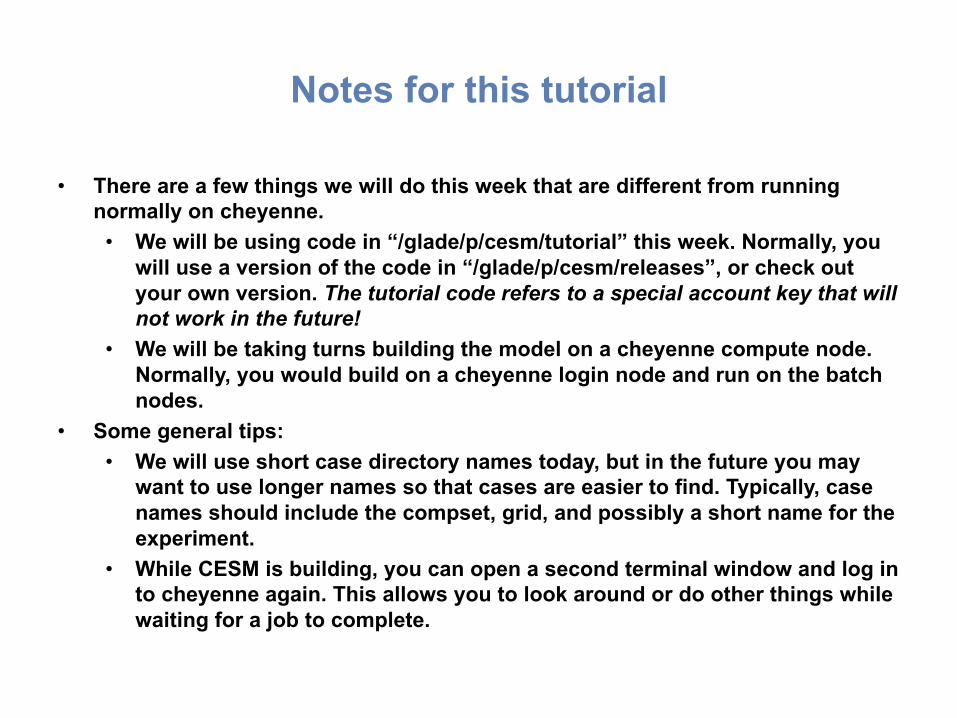
• There are a few things we will do this week that are different from running normally on cheyenne.
• We will be using code in “/glade/p/cesm/tutorial” this week. Normally, you will use a version of the code in “/glade/p/cesm/releases”, or check out your own version. The tutorial code refers to a special account key that will not work in the future!
• We will be taking turns building the model on a cheyenne compute node. Normally, you would build on a cheyenne login node and run on the batch nodes.
• Some general tips:• We will use short case directory names today, but in the future you may
want to use longer names so that cases are easier to find. Typically, case names should include the compset, grid, and possibly a short name for the experiment.
• While CESM is building, you can open a second terminal window and log in to cheyenne again. This allows you to look around or do other things while waiting for a job to complete.
Notes for this tutorial
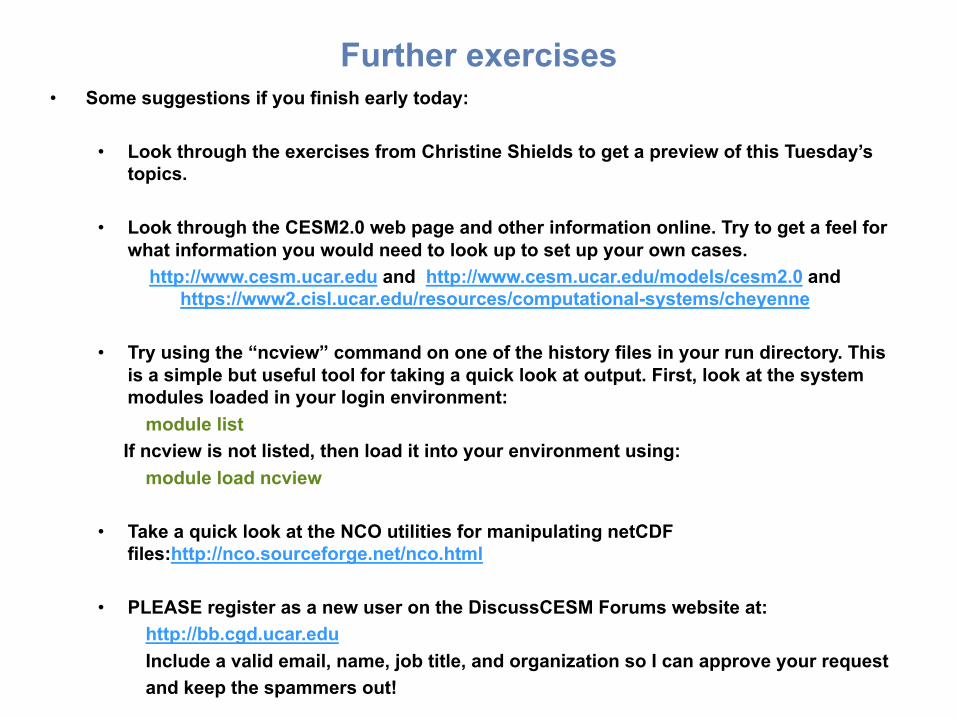
• Some suggestions if you finish early today:
• Look through the exercises from Christine Shields to get a preview of this Tuesday’s topics.
• Look through the CESM2.0 web page and other information online. Try to get a feel for what information you would need to look up to set up your own cases.
http://www.cesm.ucar.edu and http://www.cesm.ucar.edu/models/cesm2.0 and https://www2.cisl.ucar.edu/resources/computational-systems/cheyenne
• Try using the “ncview” command on one of the history files in your run directory. This is a simple but useful tool for taking a quick look at output. First, look at the system modules loaded in your login environment:
module listIf ncview is not listed, then load it into your environment using:
module load ncview
• Take a quick look at the NCO utilities for manipulating netCDFfiles:http://nco.sourceforge.net/nco.html
• PLEASE register as a new user on the DiscussCESM Forums website at: http://bb.cgd.ucar.eduInclude a valid email, name, job title, and organization so I can approve your requestand keep the spammers out!
Further exercises
Day 1 Auxiliary ExercisesIn Wednesday’s lab session you will be learning how to run the various diagnostic packages. You will also learn about the types of tools that are commonly used on model output. Here are some exercises that you can do to prepare yourself for Wednesday’s lab session.
• Go to the CESM1 Large Ensemble Community Project pagehttp://www.cesm.ucar.edu/projects/community-projects/LENS/ After reading the project overview click on the “Diagnostics” link. Take a look at the available experiments and look at diagnostics output from the atmosphere, sea ice, land, and ocean diagnostics packages. Become familiar with the types of calculations the packages do.
• Go to each of the prognostic model web pages
• See http://www.cesm.ucar.edu/working_groups/CVC/cvdp. The Climate Variability Diagnostics Package (CVDP) is different from the other diagnostics packages in that it is usually run over an entire simulation and can be run on numerous simulations (CESM and non-CESM data) at once. The CVDP calculates the major modes of variability, trends, and provides a quantifiable metric table. Look at the website example comparisons.
• Go to http://climatedataguide.ucar.edu and explore the site. The Climate Data Guide contains information on over 150 different datasets, provides inter-dataset comparisons, and has dataset pros and cons evaluated by expert dataset users.
• The programming language NCL is used extensively within the CESM project. You will have the opportunity to run several NCL scripts on Wednesday. Take a look at the NCL Examples page to get an idea of the types of plots NCL can create: http://www.ncl.ucar.edu/Applications/