Embed Size (px)
Citation preview

CERSAI User Manual – Movables Registration
version 1.0
2
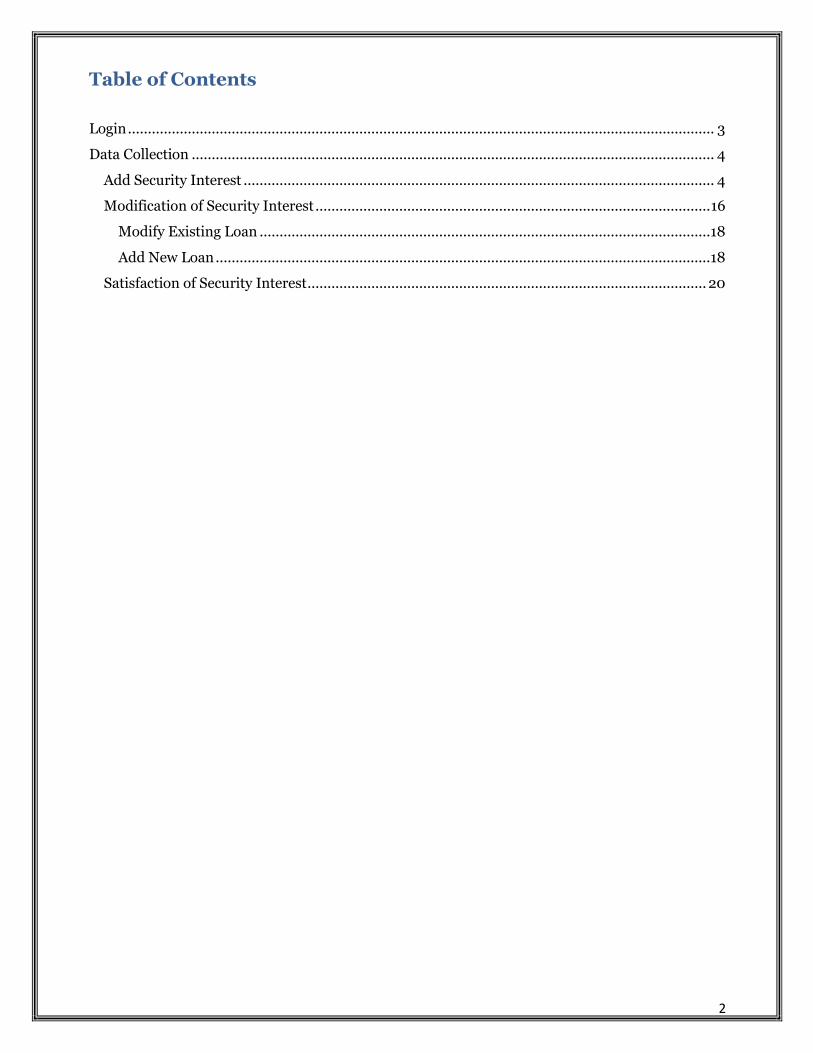
Table of Contents
Login ................................................................................................................................................... 3
Data Collection ................................................................................................................................... 4
Add Security Interest ...................................................................................................................... 4
Modification of Security Interest ................................................................................................... 16
Modify Existing Loan .................................................................................................................18
Add New Loan ............................................................................................................................18
Satisfaction of Security Interest .................................................................................................... 20
3
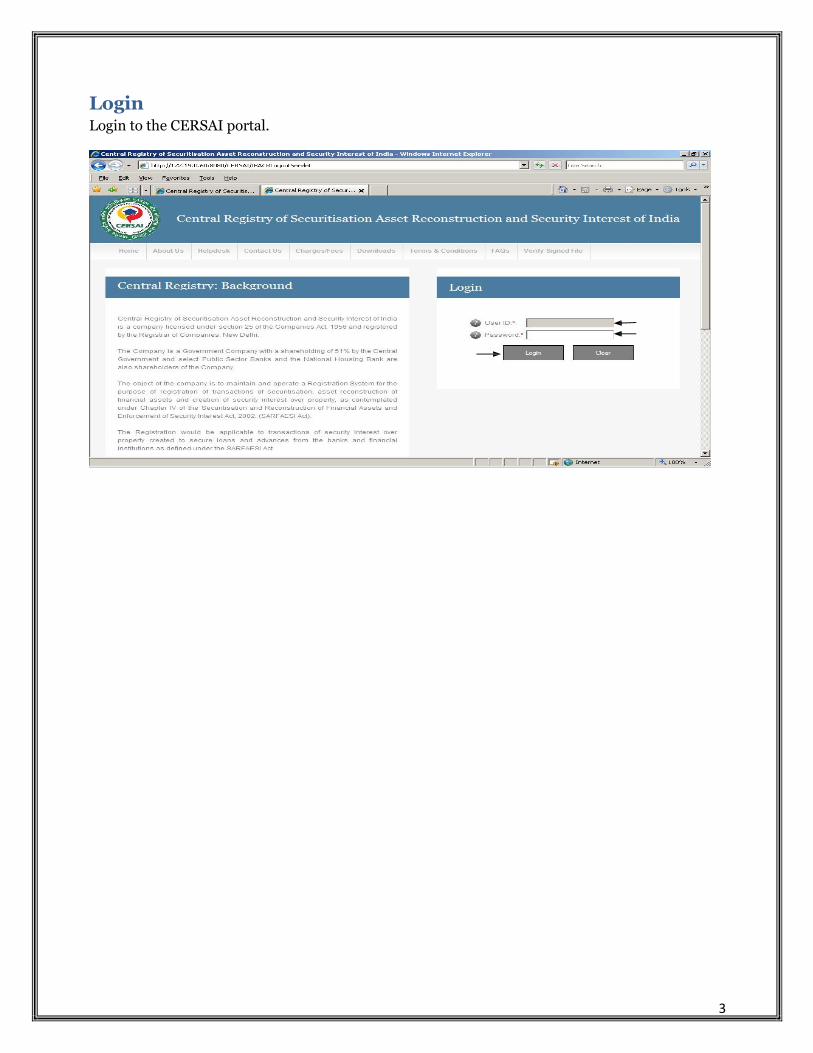
Login Login to the CERSAI portal.
4
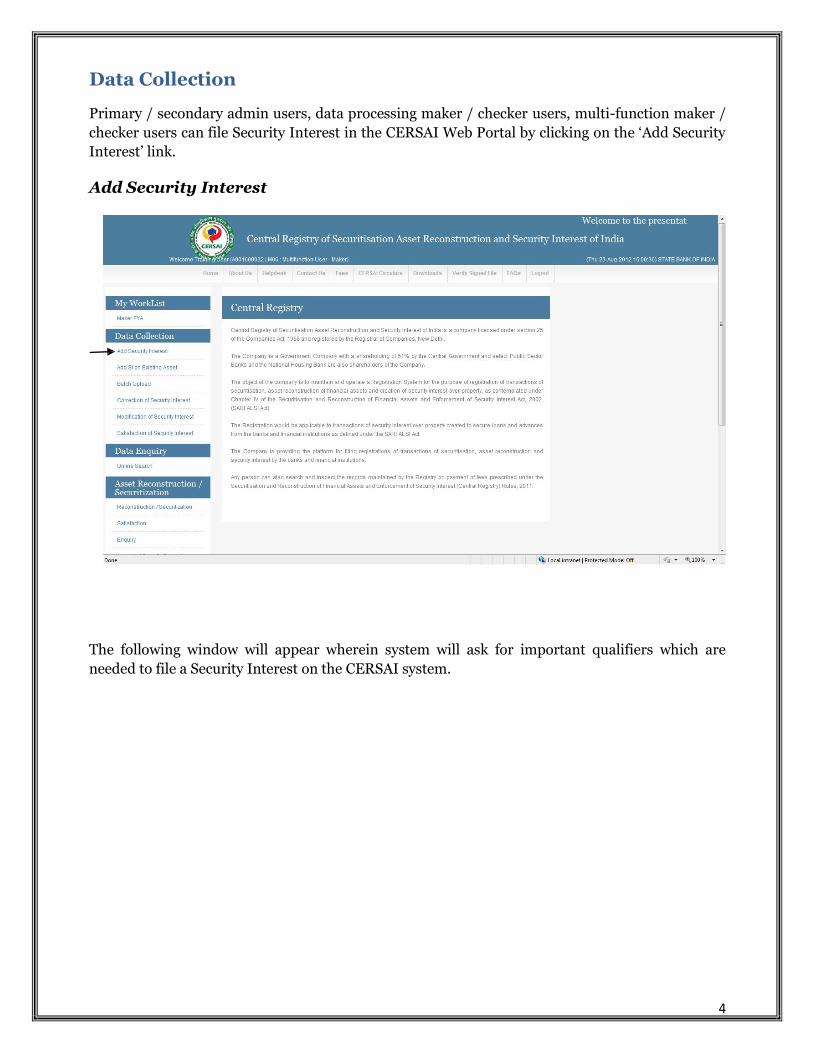
Data Collection
Primary / secondary admin users, data processing maker / checker users, multi-function maker /
checker users can file Security Interest in the CERSAI Web Portal by clicking on the ‘Add Security
Interest’ link.
Add Security Interest
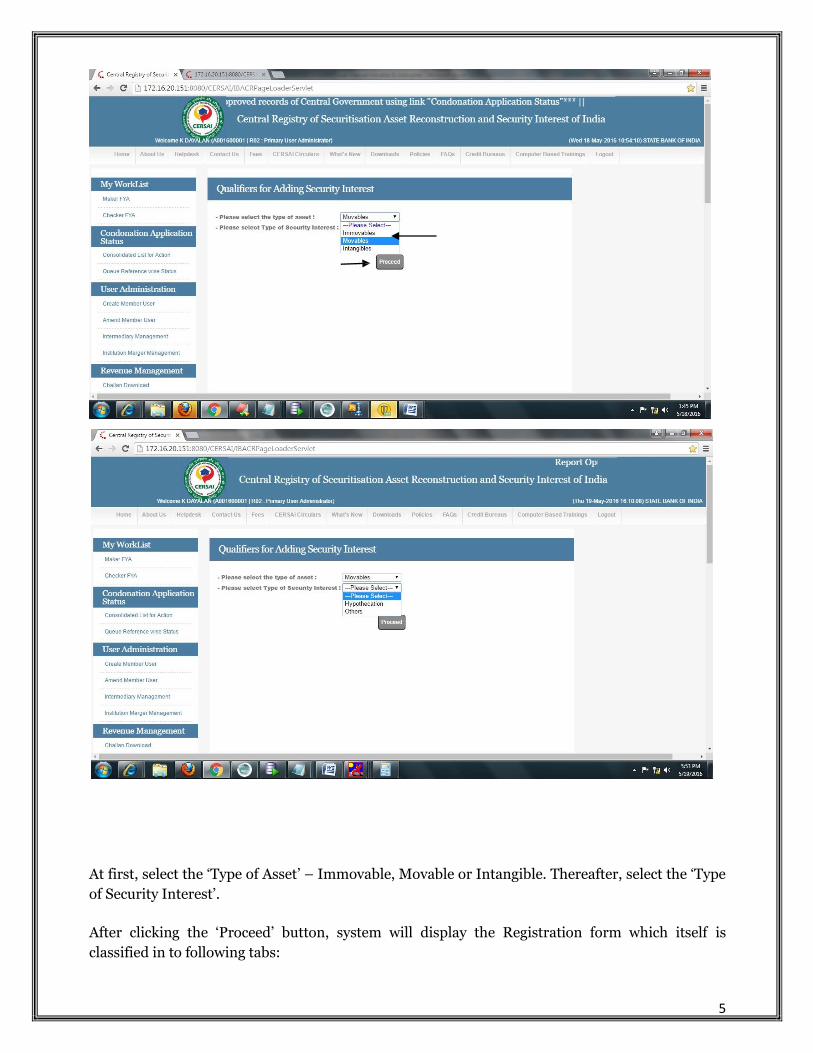
The following window will appear wherein system will ask for important qualifiers which are
needed to file a Security Interest on the CERSAI system.
5
At first, select the ‘Type of Asset’ – Immovable, Movable or Intangible. Thereafter, select the ‘Type
of Security Interest’.
After clicking the ‘Proceed’ button, system will display the Registration form which itself is
classified in to following tabs:

6
Asset Details
Borrower(s)
Third Party(ies)
Nature of SI
SI Holder
Document(s)
Loan(s)

7
Asset Details
Select applicable type of security from drop down list, enter respective details.
Borrower(s) Details
Select the applicable type of Borrower from the drop down list.
On selection of any one of the options, system will display the relevant fields on the form. Multiple
borrowers can be added through the ‘Add Borrower’ option. Already entered Borrowers can also be
deleted before submitting the form. However, there must be at least one borrower left for that
record.
8
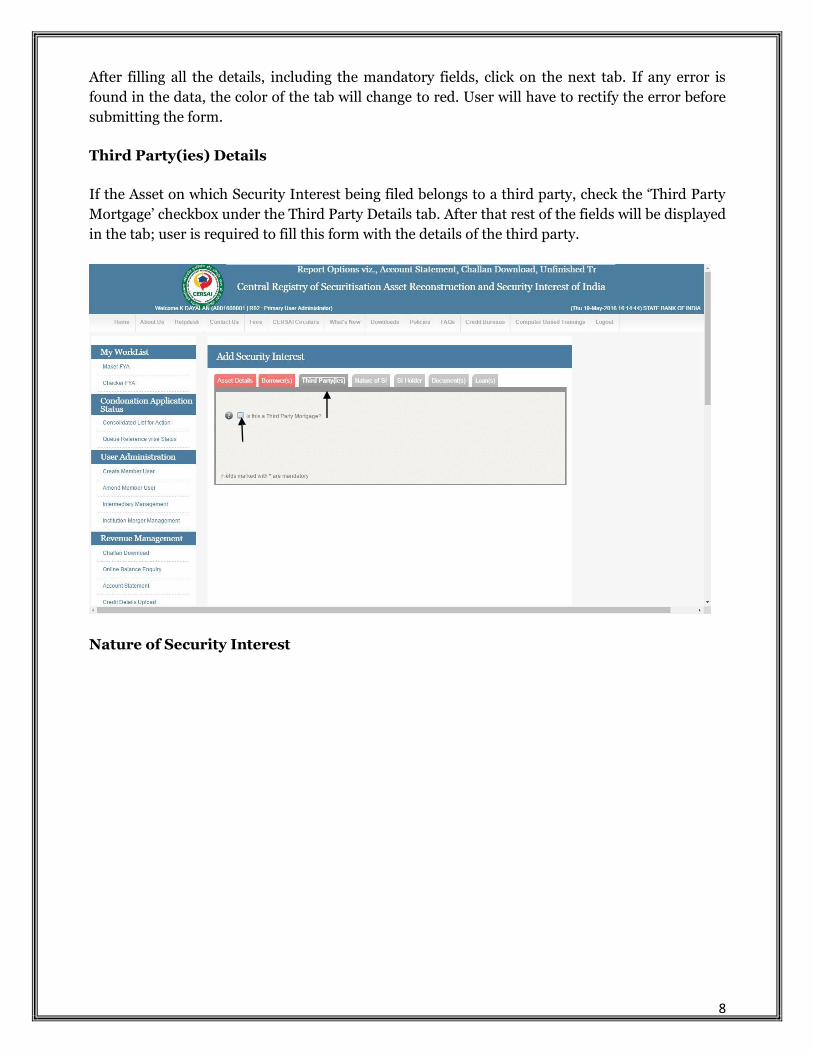
After filling all the details, including the mandatory fields, click on the next tab. If any error is
found in the data, the color of the tab will change to red. User will have to rectify the error before
submitting the form.
Third Party(ies) Details
If the Asset on which Security Interest being filed belongs to a third party, check the ‘Third Party
Mortgage’ checkbox under the Third Party Details tab. After that rest of the fields will be displayed
in the tab; user is required to fill this form with the details of the third party.
Nature of Security Interest

9
Check the appropriate radio button for Consortium / Joint Security Interest depending upon the
type of Security Interest being filed.
In case of Consortium / Joint Security Interest, the lead bank must create provision for other
members of the Consortium / Joint Security Interest by adding them through this tab.
In order to add member institutions, user will have to click the ‘Add SI Holder’ button. After
clicking on the ‘Add SI Holder’ button, system will prompt the user to select the SI Holder Type
followed by the SI holder. Multiple SI holders can be added or deleted by clicking on the ‘Add SI
Holder’ and ‘Remove SI Holder’ buttons respectively.
Details of Security Interest Holder

10
The SI Holder name will be automatically populated by the system. However, user will have to
enter the BSR code as well as address details of the security interest holder branch.

11
Document Details
Enter the Evaluated price of Asset and the Security Interest creation date within the institution
followed by the details of the document. The document date / Registration date must be prior to
the Security Interest Creation Date.
Multiple Documents can be added through the ‘Add Document’ option. Similarly, already added
documents can also be deleted / removed through the ‘Delete Document’ option. However, at least
one document must be added in the form.

12
Loan Details
Multiple loans can be added through the ‘Add Loan’ option.
After entering the details of all the loans tagged under the security Interest transaction being filed,
user will click on the ‘Submit Record’ button to file the charge in CERSAI. Upon submitting the
transaction, system will check if similar Security Interest transaction already exists (based on
borrower and Asset description) in the system or not and will show a list of any such matching
records to the user. User will have the option to select the existing Asset to tag their Security
Interest transaction with the matching asset shown by the system or create a new asset id based on
the information entered by the user.
System will show a confirmation dialog pop-up on the screen as shown below:
Click ‘Ok’ to continue.

13
Once the record is successfully entered in the system, the system will generate a unique queue
reference number for that particular Security Interest Transaction and move the transaction to the
Checker’s queue for approval.

14
Checker member user to login into CERSAI system with his/her Digital Signature, go to ‘Checker
FYA ‘ link & after entering Maker user ID, select type of transaction as ‘Add Security Interest’.

15
System will display the list of security interest transactions entered by that particular maker
member user. Select the appropriate record & click on ‘Show Details’ button.
Checker has to verify the details & if it is correct then click ‘confirm’ button to approve the record.
On successful approval of the record, system will generate and display a unique Security Interest
ID and Asset ID for that particular asset.

16
Modification of Security Interest
When changes are needed to done in loan amount, date of disbursement in existing asset or new
loan is to be added to same asset or an already tagged loan is to be deleted from an Asset ID, it is
treated as ‘Modification of Charge’.
Users authorised to enter data into CERSAI system, are provided with additional link of data
modification.
Only the entity which has created the record is allowed to modify it in Central Registry system.
For this the Users are required to navigate to the ‘Modification of Security Interest’ link.

17
Enter security interest ID to which modification is required.
Select the area of modification :–
- Modify existing loan
- Add new loan

18
Modify Existing Loan
While modify existing loan/s, system will display the details of existing loan/s. User can change
security interest creation date, loan amount & date of disbursement. Click on “submit” button after
making the necessary/relevant modifications.
Add New Loan
User can add new loans to existing security interest only through modification menu. While
Modifying a security interest the details of all the loans tagged to that Asset ID are displayed. User
can also delete already added loans and click on “submit” button.
After successful submission of request by maker member user, system will display the
"Modification Successful' message & the record will be sent to checker’s queue.

19
Checker member user to login into CERSAI system with his/her Digital Signature, then click
‘checker FYA ‘ link & after entering Maker user ID, select type of transaction as ‘Modification of
Security Interest’
System will display the list of security interest IDs which have been modified by that maker
member user. Select the appropriate record & click on ‘Show Details’ button.

20
Click on Confirm / Reject button to approve or reject the transaction.
Satisfaction of Security Interest
On payment or satisfaction in full of any security interest a Lending Entity is required to satisfy its
security interest in Central Registry System by using 'Satisfaction of Security Interest' module.
E.g If a mortgage is created for Rs.50 lakhs & subsequently the borrower repays principal &
interest thereon in full, it is mandatory for bank to mark that security interest as satisfied in
Central Registry system. It conveys that the there is no record of pending security interest in the
Central Registry System on that particular asset.
A user can see the basic details of asset for which security interest is being satisfied by keying in
the Security Interest ID. When there are more than one charge holders for a particular asset, any
of the charge holders can satisfy only the security interest created by it in the system. That means,
one entity cannot satisfy other entity’s security interest in the system. Upon satisfaction of security
interest by all the entities, system will update security interest satisfaction status of that particular
asset to ‘satisfied’.
To file for 'Satisfaction' a Maker member user needs to navigate to the ‘Satisfaction of Security
Interest’ link

21
Enter Security Interest ID.
If Security Interest ID is being processed by some other user or is pending for processing with
some other user, system will not allow satisfaction of that particular Security Interest.

22
System will display basic details of security interest.
Following details can be expanded & seen:
Description of Property
Borrower Information
Third Party Information
Entity(s) Holding a Security interest on the Financial Asset
Loan Information

23
Enter date of satisfaction. This date should be greater than or equal to security interest creation
date.
Select reason for satisfaction from the drop down list.
Click on ‘Submit’ button.
Once a charge is satisfied, the process is irrevocable i.e. once a charged is marked as ‘Satisfied’, the
user cannot revert its status to ‘Unsatisfied’ in the system. In cases of erroneous satisfaction of a
Security Interest, the user will have to create a new charge against the asset the Security Interest of
which was wrongly satisfied earlier.

24
After successful submission of request by maker member user, system will display the successful
message & the record will be sent to checker’s queue.
Checker User to login into CERSAI system with his/her Digital Signature, then navigate to
‘Checker FYA ‘ link & Enter Maker user ID, select type of transaction as “Satisfaction Of Security
Interest” System will display the list of Security Interest IDs that are queued up for filing
satisfaction.
Select the appropriate Security Interest ID & click on ‘Show Details’ button.
25
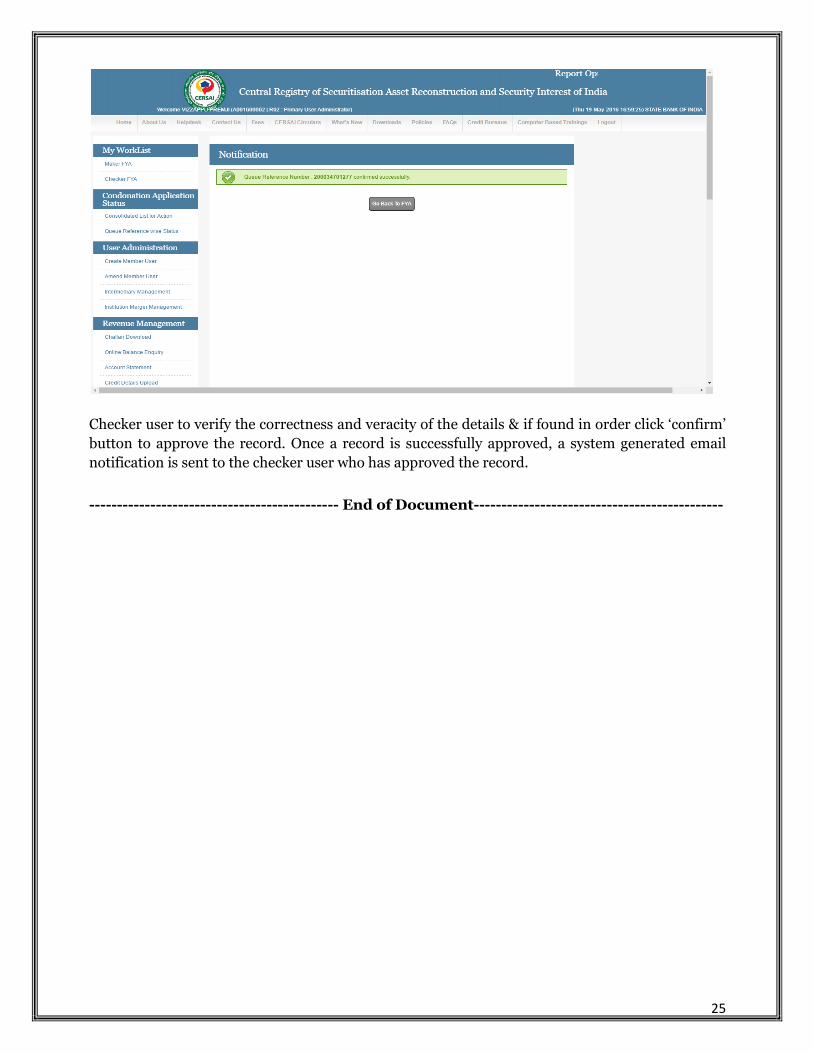
Checker user to verify the correctness and veracity of the details & if found in order click ‘confirm’
button to approve the record. Once a record is successfully approved, a system generated email
notification is sent to the checker user who has approved the record.
--------------------------------------------- End of Document---------------------------------------------