Embed Size (px)
Citation preview
CDM105
Session 9
Macromedia FLASHMX 2004
Part 2 : Animation with Motion Tweening and Shape Tweening
CDM105
Session 9
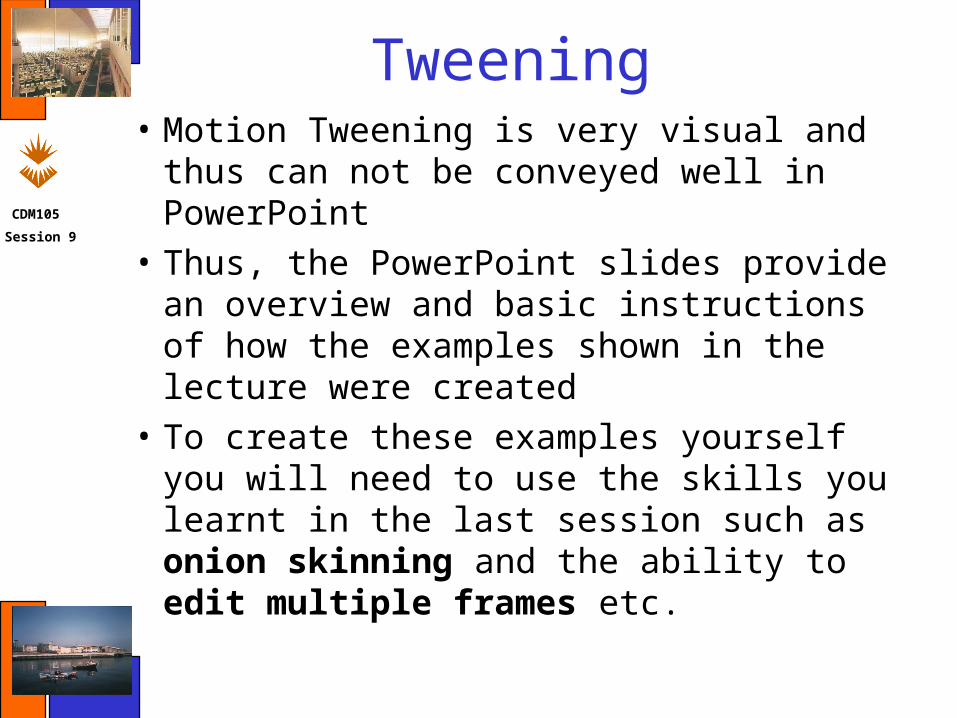
Tweening• Motion Tweening is very visual and thus can
not be conveyed well in PowerPoint• Thus, the PowerPoint slides provide an
overview and basic instructions of how the examples shown in the lecture were created
• To create these examples yourself you will need to use the skills you learnt in the last session such as onion skinning and the ability to edit multiple frames etc.
CDM105
Session 9
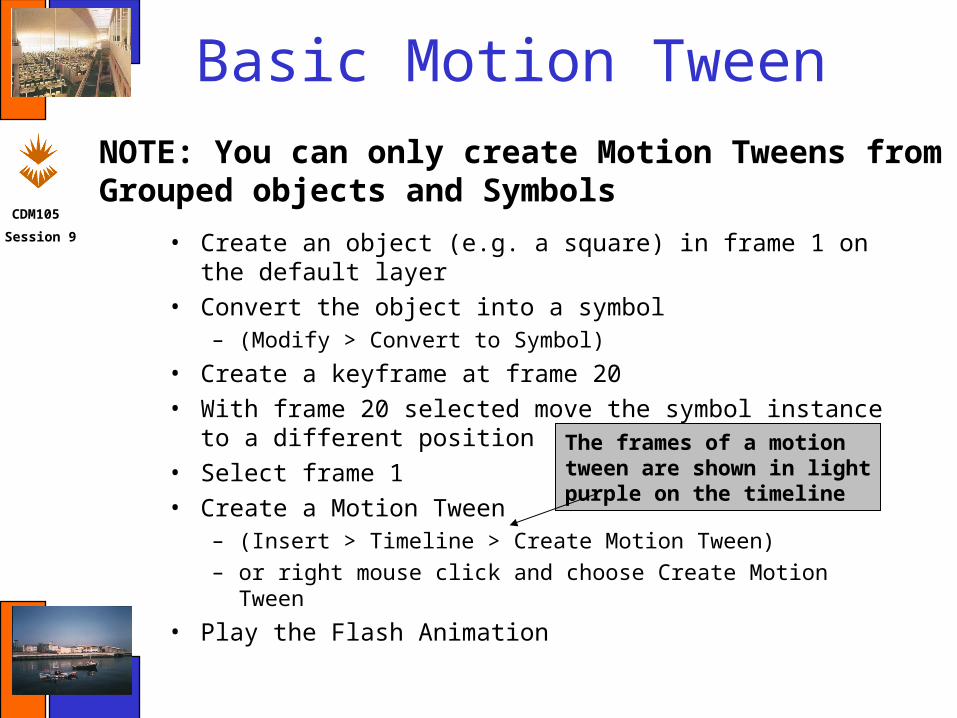
Basic Motion Tween
• Create an object (e.g. a square) in frame 1 on the default layer
• Convert the object into a symbol– (Modify > Convert to Symbol)
• Create a keyframe at frame 20
• With frame 20 selected move the symbol instance to a different position
• Select frame 1
• Create a Motion Tween – (Insert > Timeline > Create Motion Tween)
– or right mouse click and choose Create Motion Tween
• Play the Flash Animation
NOTE: You can only create Motion Tweens fromGrouped objects and Symbols
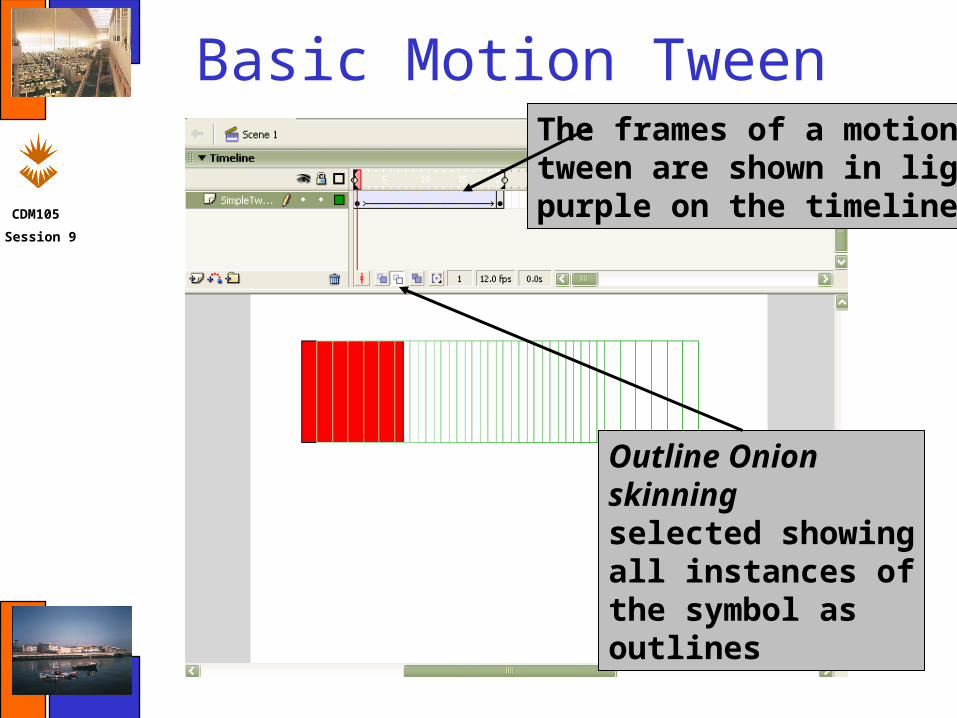
The frames of a motiontween are shown in lightpurple on the timeline
CDM105
Session 9
Basic Motion Tween
Outline Onion skinningselected showingall instances ofthe symbol as outlines
The frames of a motiontween are shown in lightpurple on the timeline
CDM105
Session 9
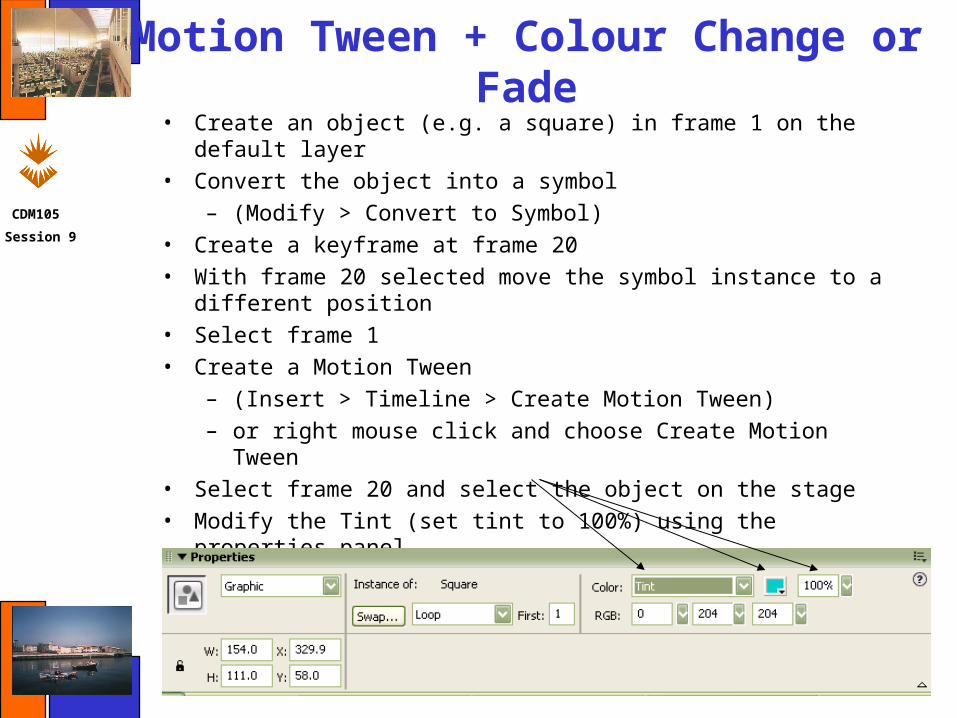
Motion Tween + Colour Change or Fade• Create an object (e.g. a square) in frame 1 on the default layer
• Convert the object into a symbol
– (Modify > Convert to Symbol)• Create a keyframe at frame 20
• With frame 20 selected move the symbol instance to a different position
• Select frame 1
• Create a Motion Tween
– (Insert > Timeline > Create Motion Tween)
– or right mouse click and choose Create Motion Tween
• Select frame 20 and select the object on the stage
• Modify the Tint (set tint to 100%) using the properties panel
• Play the Flash Animation

CDM105
Session 9
Motion Tween + Colour Change or Fade
Onion skinningselected showingall instances ofthe symbol
CDM105
Session 9
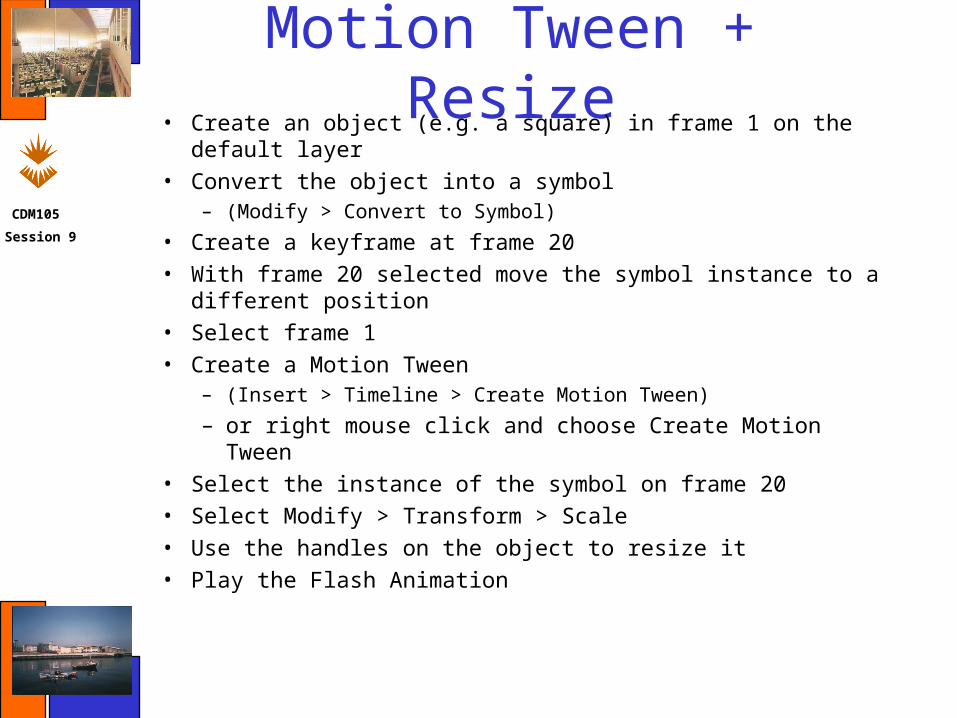
Motion Tween + Resize• Create an object (e.g. a square) in frame 1 on the default layer
• Convert the object into a symbol– (Modify > Convert to Symbol)
• Create a keyframe at frame 20
• With frame 20 selected move the symbol instance to a different position
• Select frame 1
• Create a Motion Tween – (Insert > Timeline > Create Motion Tween)
– or right mouse click and choose Create Motion Tween
• Select the instance of the symbol on frame 20
• Select Modify > Transform > Scale• Use the handles on the object to resize it
• Play the Flash Animation
CDM105
Session 9
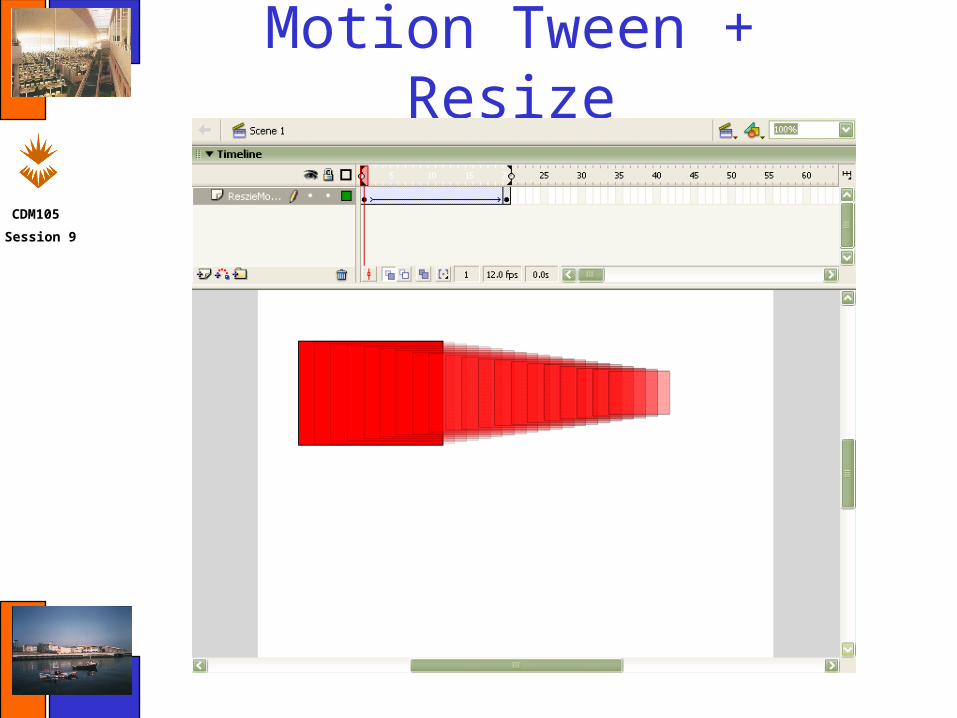
Motion Tween + Resize
CDM105
Session 9
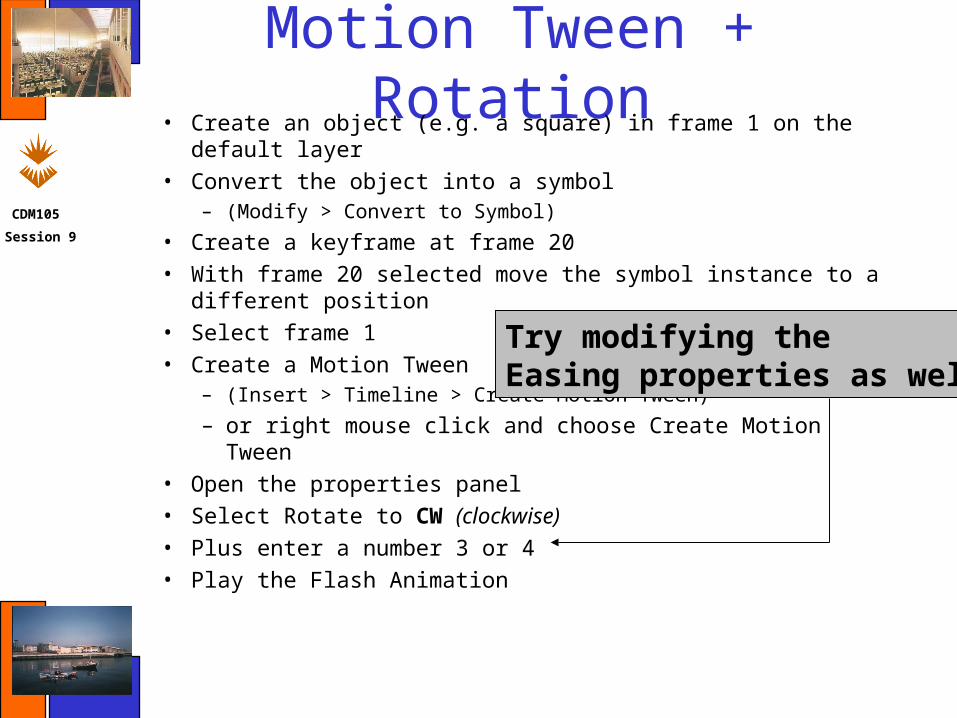
Motion Tween + Rotation• Create an object (e.g. a square) in frame 1 on the default layer
• Convert the object into a symbol– (Modify > Convert to Symbol)
• Create a keyframe at frame 20
• With frame 20 selected move the symbol instance to a different position
• Select frame 1
• Create a Motion Tween – (Insert > Timeline > Create Motion Tween)
– or right mouse click and choose Create Motion Tween
• Open the properties panel
• Select Rotate to CW (clockwise)
• Plus enter a number 3 or 4
• Play the Flash Animation
Try modifying the Easing properties as well !

CDM105
Session 9
Motion Tween + Rotation
CDM105
Session 9
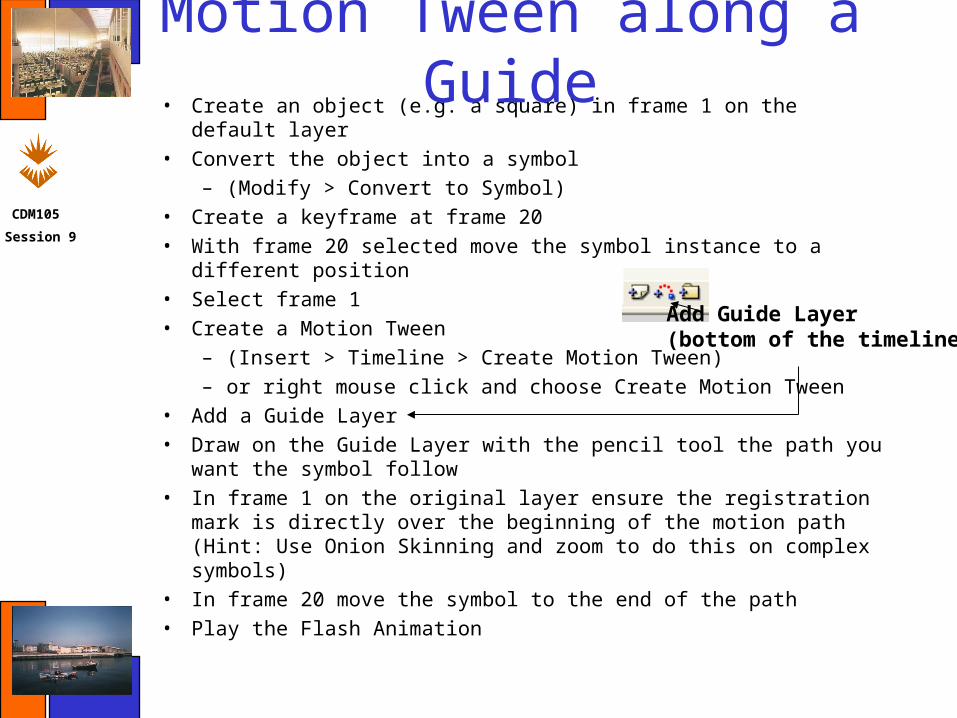
• Create an object (e.g. a square) in frame 1 on the default layer
• Convert the object into a symbol
– (Modify > Convert to Symbol)• Create a keyframe at frame 20
• With frame 20 selected move the symbol instance to a different position
• Select frame 1
• Create a Motion Tween
– (Insert > Timeline > Create Motion Tween)
– or right mouse click and choose Create Motion Tween
• Add a Guide Layer
• Draw on the Guide Layer with the pencil tool the path you want the symbol follow
• In frame 1 on the original layer ensure the registration mark is directly over the beginning of the motion path (Hint: Use Onion Skinning and zoom to do this on complex symbols)
• In frame 20 move the symbol to the end of the path
• Play the Flash Animation
Motion Tween along a Guide
Add Guide Layer(bottom of the timeline)

CDM105
Session 9
Motion Tween along a Guide
CDM105
Session 9
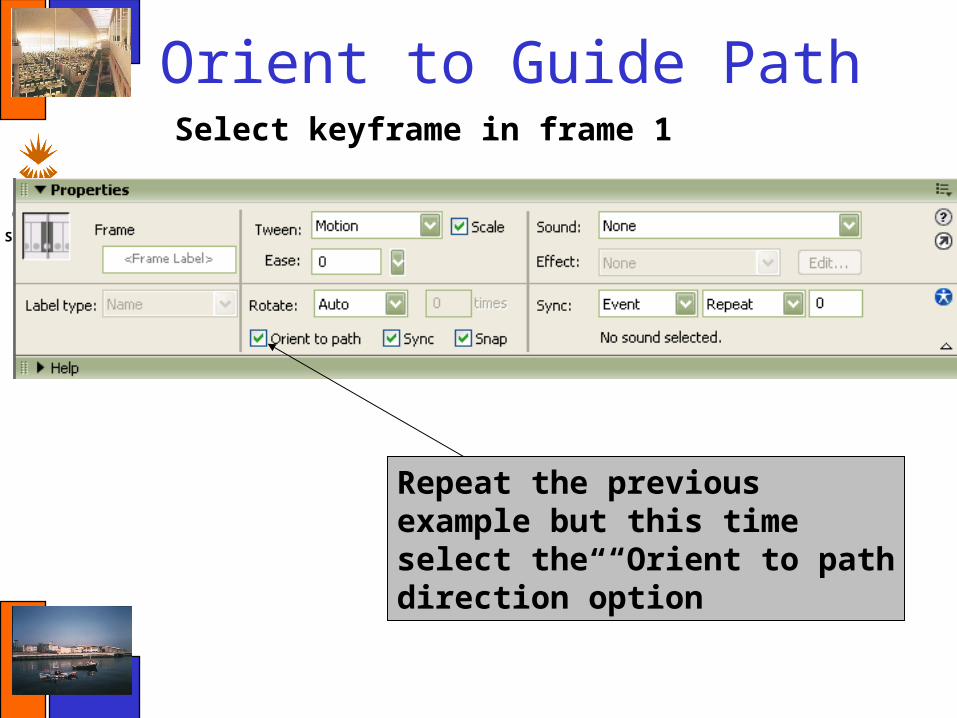
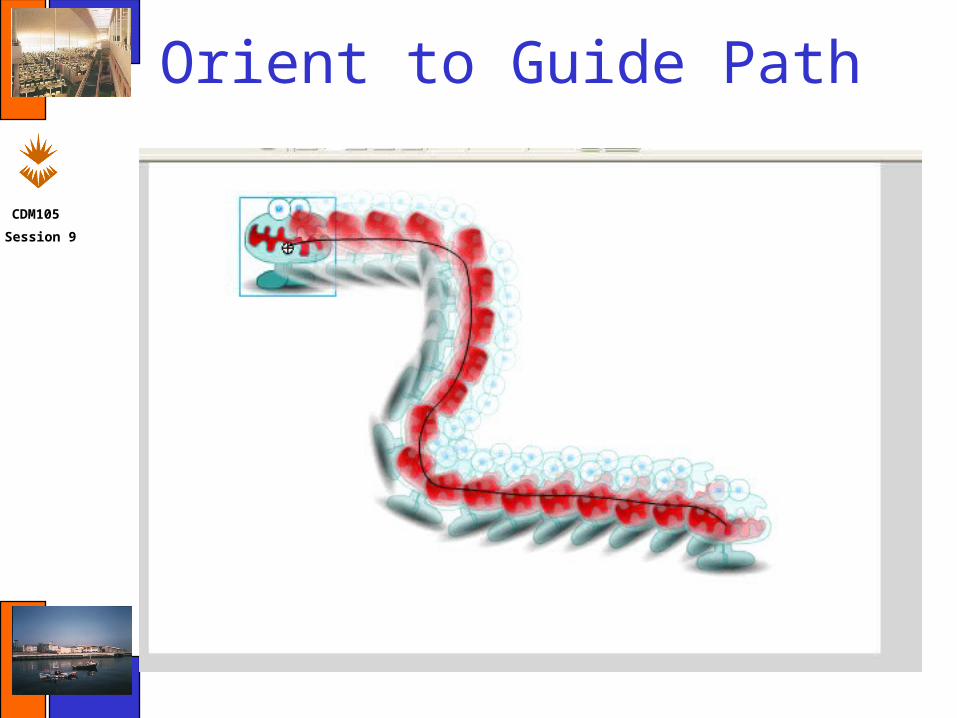
Orient to Guide Path
Repeat the previousexample but this timeselect the “Orient to pathdirection”option
Select keyframe in frame 1
CDM105
Session 9
Orient to Guide Path
CDM105
Session 9
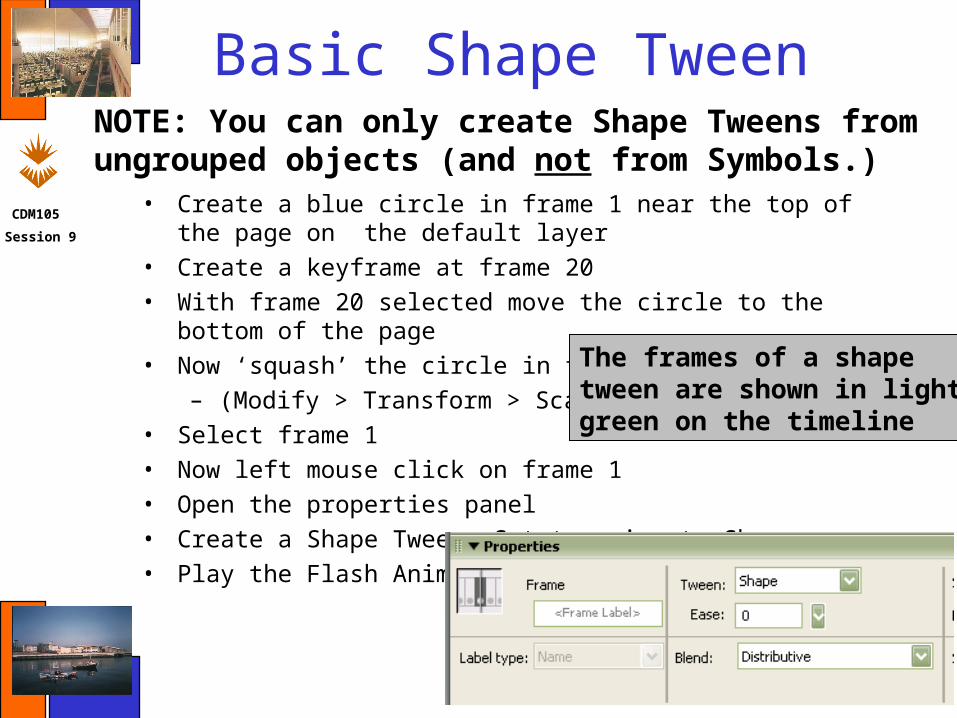
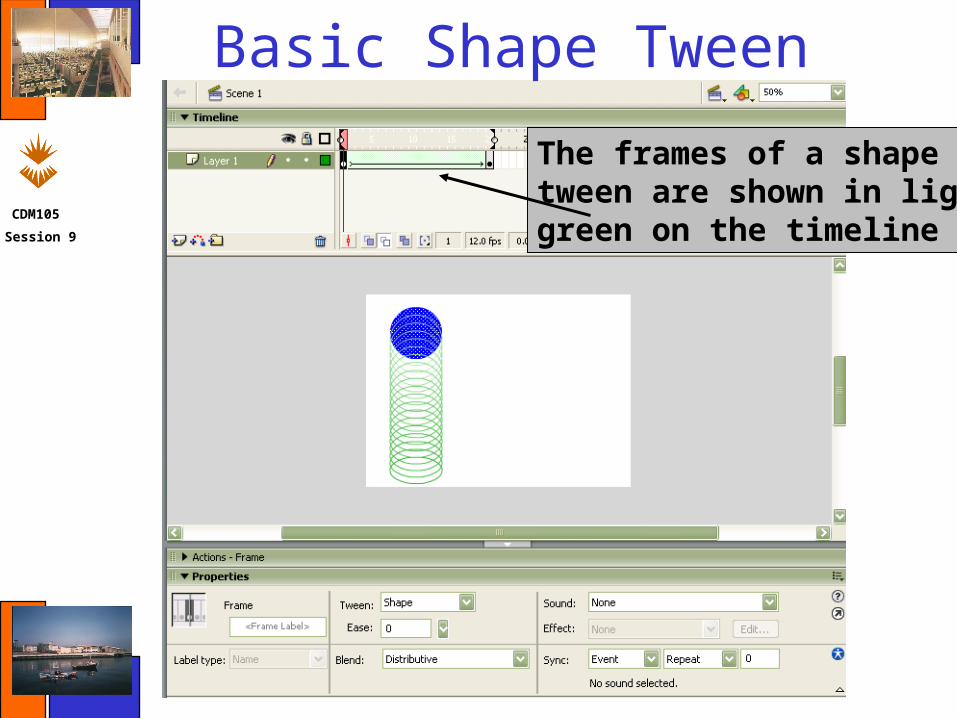
• Create a blue circle in frame 1 near the top of the page on the default layer
• Create a keyframe at frame 20
• With frame 20 selected move the circle to the bottom of the page
• Now ‘squash’ the circle in frame 20
– (Modify > Transform > Scale)
• Select frame 1
• Now left mouse click on frame 1
• Open the properties panel
• Create a Shape Tween: Set tweening to Shape• Play the Flash Animation
NOTE: You can only create Shape Tweens fromungrouped objects (and not from Symbols.)
The frames of a shapetween are shown in lightgreen on the timeline
Basic Shape Tween
CDM105
Session 9
Basic Shape Tween
The frames of a shapetween are shown in lightgreen on the timeline
CDM105
Session 9
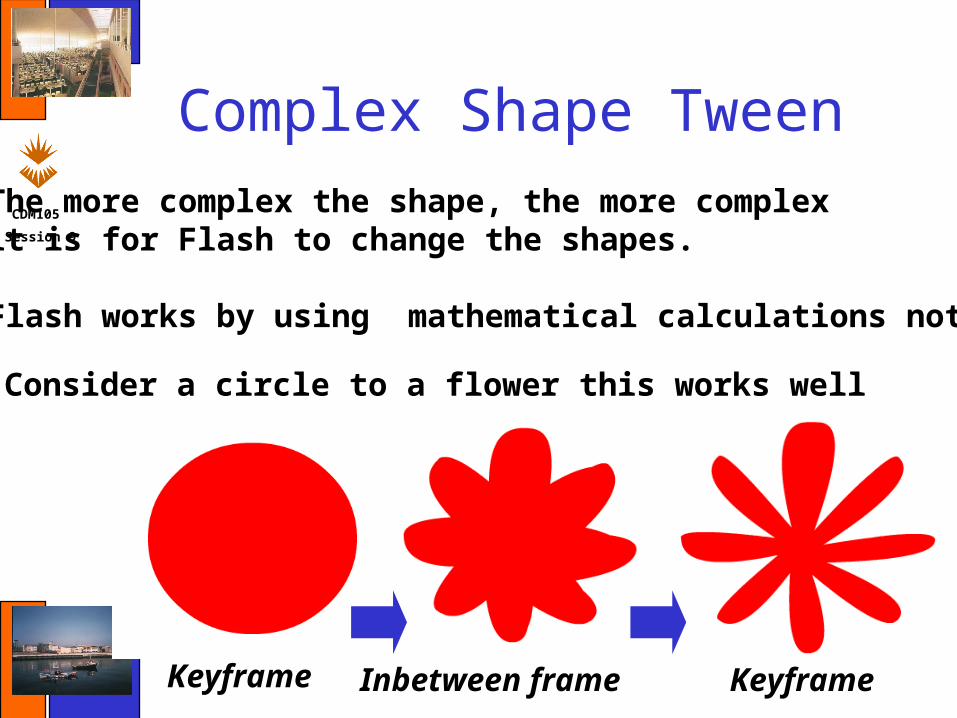
Complex Shape Tween
The more complex the shape, the more complexit is for Flash to change the shapes.
Flash works by using mathematical calculations not magic!
Consider a circle to a flower this works well
Keyframe Inbetween frame Keyframe

CDM105
Session 9
Complex Shape Tween
But looks what happens if we try to tween from theflower to a flower with a stem
Keyframe KeyframeInbetween frames
To overcome this problem you need to add shape hintsto help Flash morph the images correctly
(To add shape hints select Modify > Shape > Add Shape HintTo delete a shape hint right mouse click over and select remove shape hint)

CDM105
Session 9
Start Keyframe End Keyframe
Add shape hints to the start keyframe and place them in a clockwise or anti clockwise position around the shape. Then move the end keyframe and position the shape hints in the corresponding position. Some trail and error is required !
CDM105
Session 9
Shape Tween Text
By default, when you add text to a FLASH animation it is grouped. Thus, you can create MotionTweens with it.
However, you can ‘Break Apart’ text into ungroupedfills. Thus, permitting Shape tweens to be performedbetween text.
Examine the example below which also uses Motiontweens as well to animate a name.
CDM105
Session 9
• Using Macromedia Flash – 1) Try all the examples shown in this presentation
• Try to create them first yourself !• Check them with the examples on the module website
– 2) Create an animation of your name (see the example on the website)
– 3) Create a new summer garden scene that uses shape and motion tweens to make the flowers open from buds and the bees move about more !
• Read Chapters 8 and 9 of the 2nd key text book and experiment more with Flash by creating more animations.– Ulrich, K - Visual Quickstart Guide FLASH MX 2004 for
Windows and Macintosh
Machine Based Tutorial