Embed Size (px)
DESCRIPTION
SketchUcation Community News
Citation preview
SketchUp goes vertical
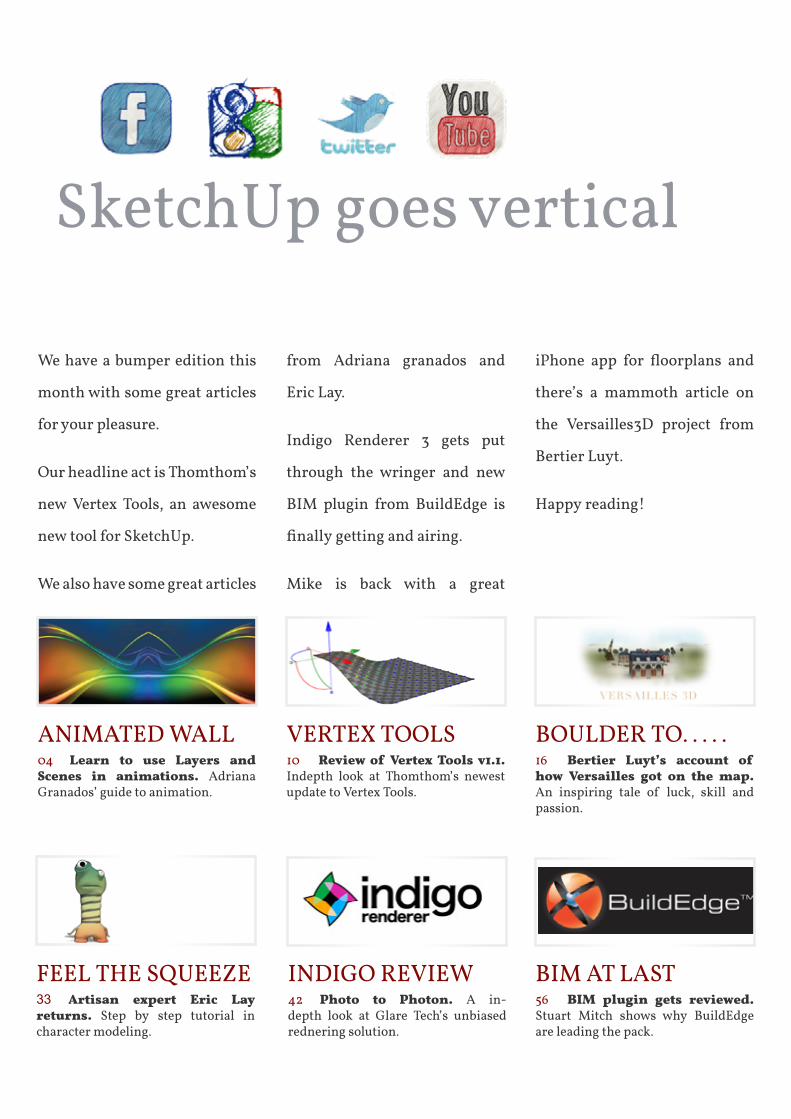
animated wall04 Learn to use Layers and Scenes in animations. adriana Granados’ guide to animation.
vertex toolS10 Review of Vertex Tools v1.1. indepth look at thomthom’s newest update to vertex tools.
boUlder to. . . . .16 Bertier Luyt’s account of how Versailles got on the map. an inspiring tale of luck, skill and passion.
indiGo review42 Photo to Photon. a in-depth look at Glare tech’s unbiased rednering solution.
feel the SqUeeze33 Artisan expert Eric Lay returns. Step by step tutorial in character modeling.
bim at laSt56 BIM plugin gets reviewed. Stuart mitch shows why buildedge are leading the pack.
we have a bumper edition this
month with some great articles
for your pleasure.
our headline act is thomthom’s
new vertex tools, an awesome
new tool for SketchUp.
we also have some great articles
from adriana granados and
eric lay.
indigo renderer 3 gets put
through the wringer and new
bim plugin from buildedge is
finally getting and airing.
mike is back with a great
iPhone app for floorplans and
there’s a mammoth article on
the versailles3d project from
bertier luyt.
happy reading!
ANIMATIONS WITHIN ANIMATIONSby adriana GranadoS
new SketchUp users with a Cad background
often use layers just as they would do in
other Cad applications. in my opinion, since
the concept of layers in SketchUp is more
oriented to a way of controlling visibility
that at the same time can be combined with
scenes, this is the wrong approach. the layers
can be used to show different alternatives
of a project, control the display of certain
geometry in a particular scene or as i will
show here, to simulate an animation inside
another animation.
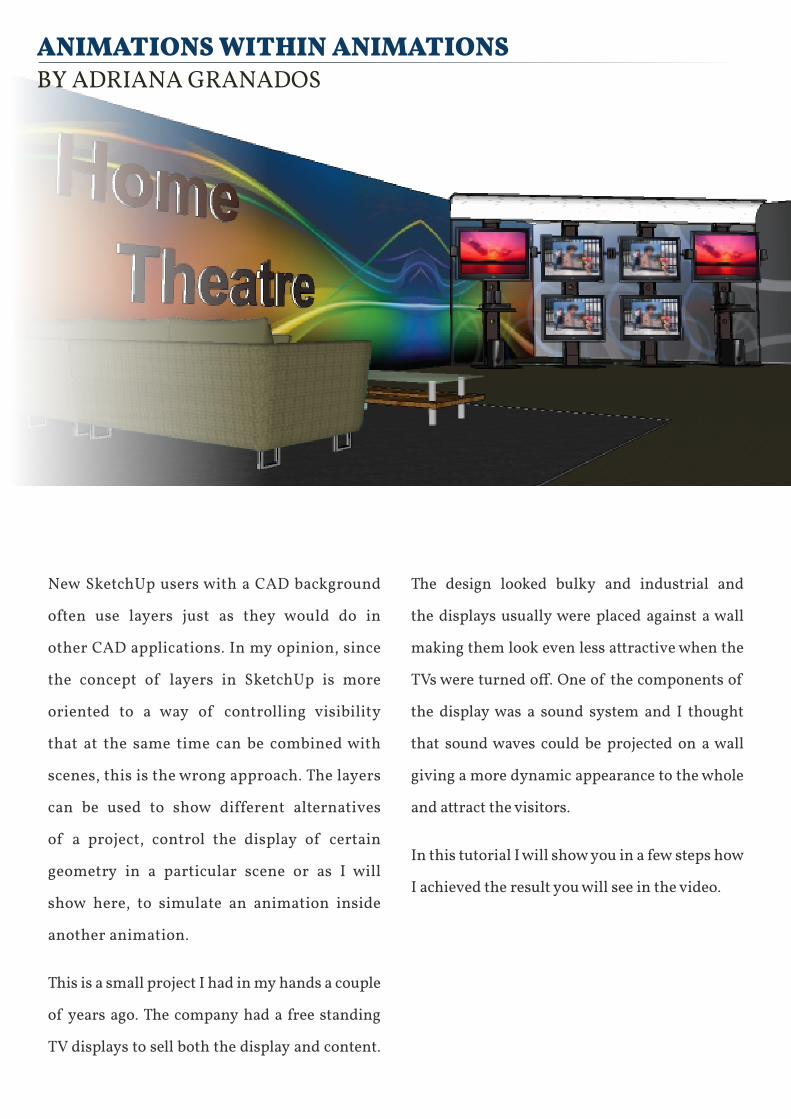
this is a small project i had in my hands a couple
of years ago. the company had a free standing
tv displays to sell both the display and content.
the design looked bulky and industrial and
the displays usually were placed against a wall
making them look even less attractive when the
TVs were turned off. One of the components of
the display was a sound system and i thought
that sound waves could be projected on a wall
giving a more dynamic appearance to the whole
and attract the visitors.
in this tutorial i will show you in a few steps how
i achieved the result you will see in the video.
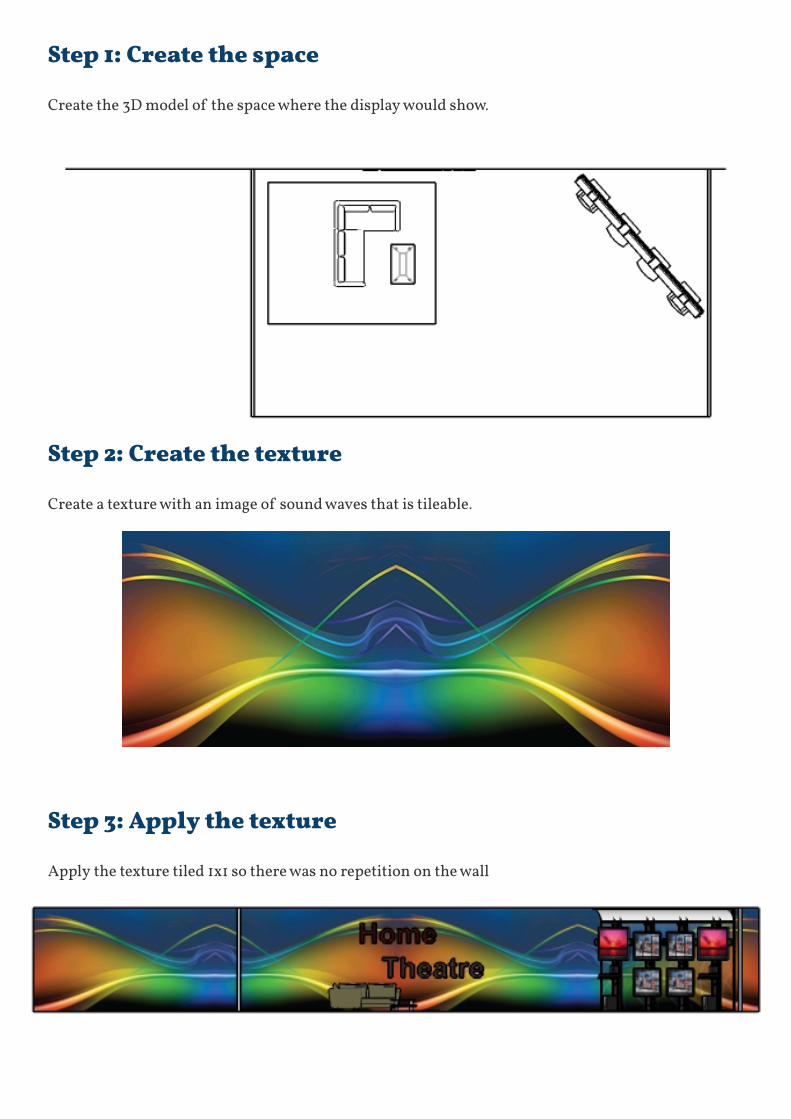
Step 1: Create the space
Create the 3d model of the space where the display would show.
Step 2: Create the texture
Create a texture with an image of sound waves that is tileable.
Step 3: Apply the texture
apply the texture tiled 1x1 so there was no repetition on the wall
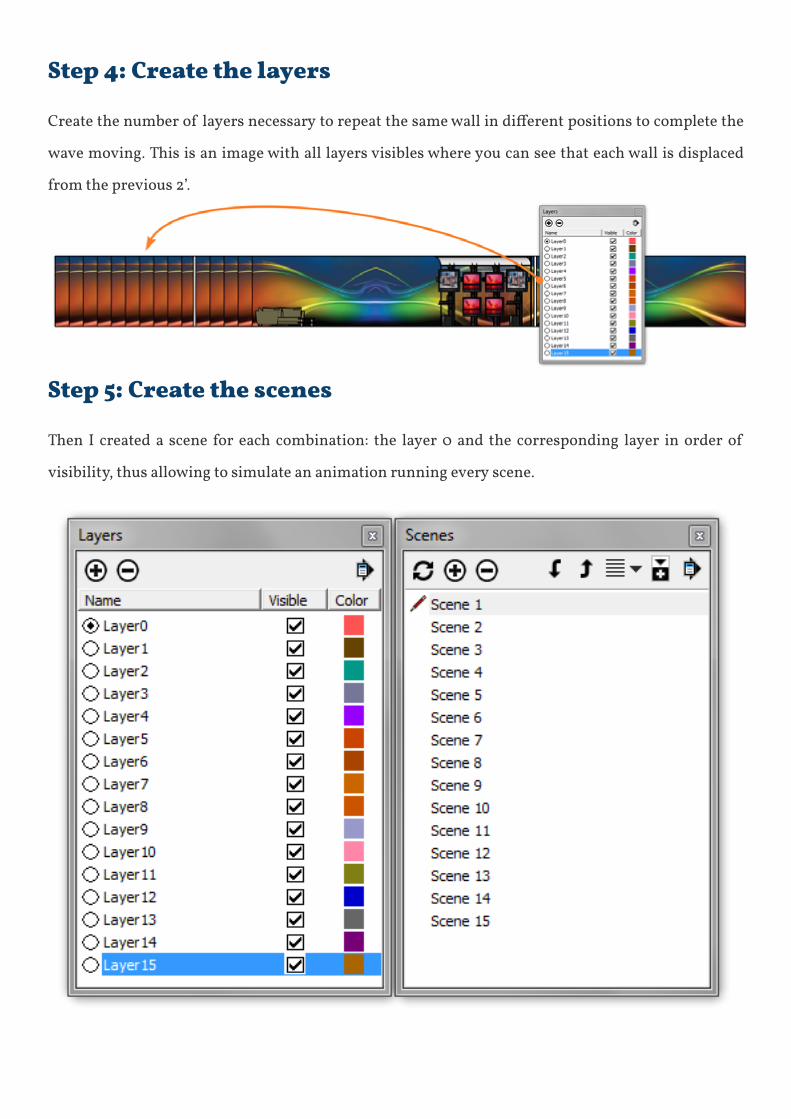
Step 4: Create the layers
Create the number of layers necessary to repeat the same wall in different positions to complete the
wave moving. this is an image with all layers visibles where you can see that each wall is displaced
from the previous 2’.
Step 5: Create the scenes
then i created a scene for each combination: the layer 0 and the corresponding layer in order of
visibility, thus allowing to simulate an animation running every scene.
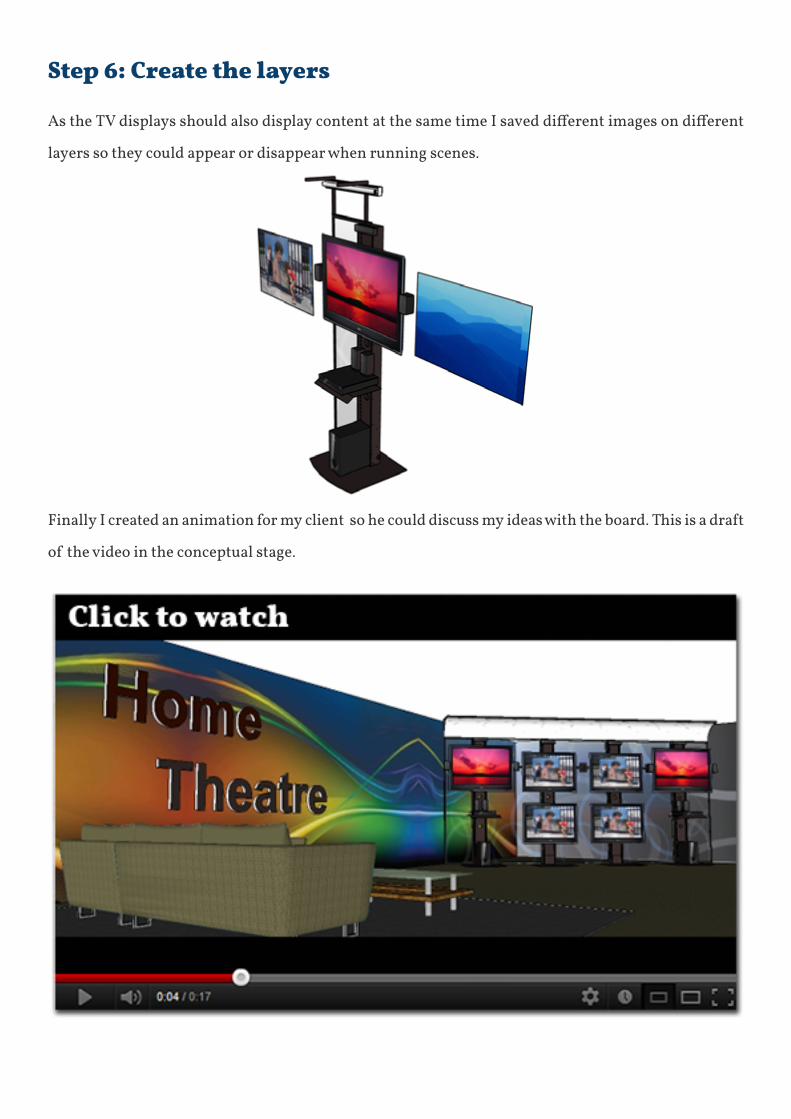
Step 6: Create the layers
As the TV displays should also display content at the same time I saved different images on different
layers so they could appear or disappear when running scenes.
Finally I created an animation for my client so he could discuss my ideas with the board. This is a draft
of the video in the conceptual stage.
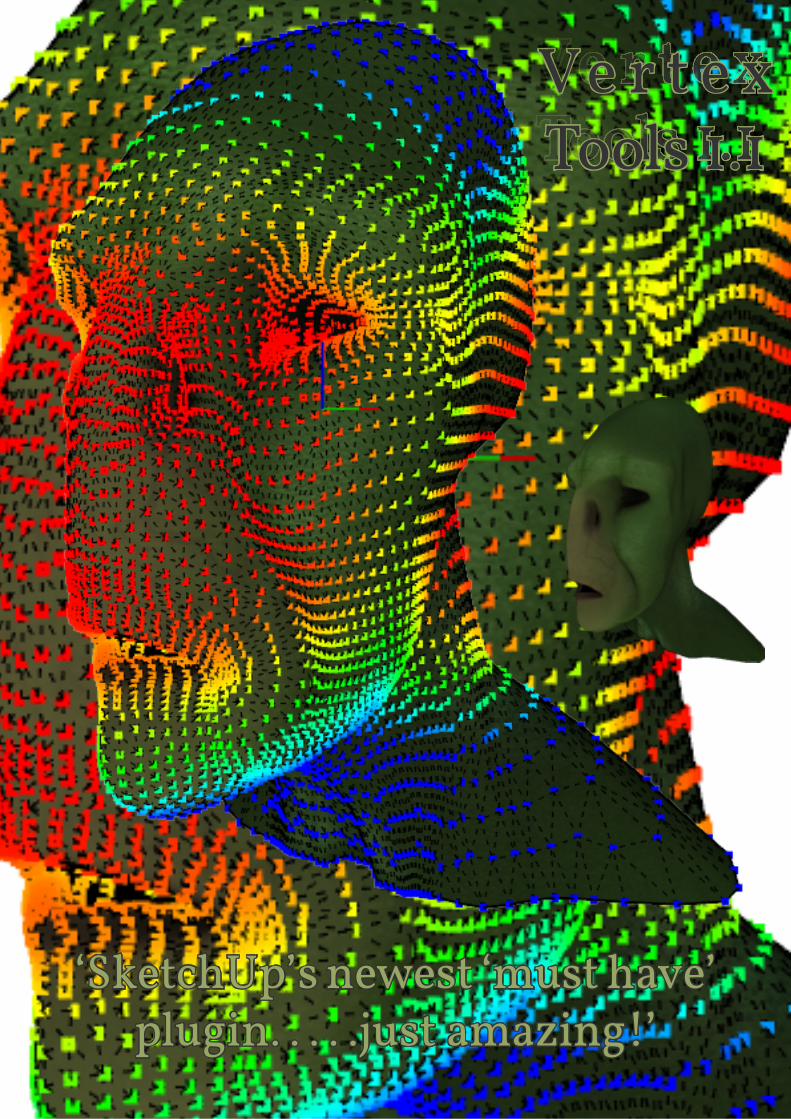
‘SketchUp’s newest ‘must have’ plugin. . . . .just amazing!’
Ve r t e x Tools 1.1ve r t e x tools 1.1
if you read CatchUp Edition #9 you may have noticed the review of vertex tools v1.0. it is worth
reading this to get familiar with the majority of the tools on offer. In this review I will be concentrating
on the new features that thomas thomassen has introduced. these new tools have turned an already
powerful toolset into SketchUp’s newest ‘must have’ plugin.
So what’s new? the toolbar hides alot of the secrets that lie within with only one extra icon from v1.0.
it is not until you activate vertex mode that you begin to see the overhaul vertex tools has undergone.
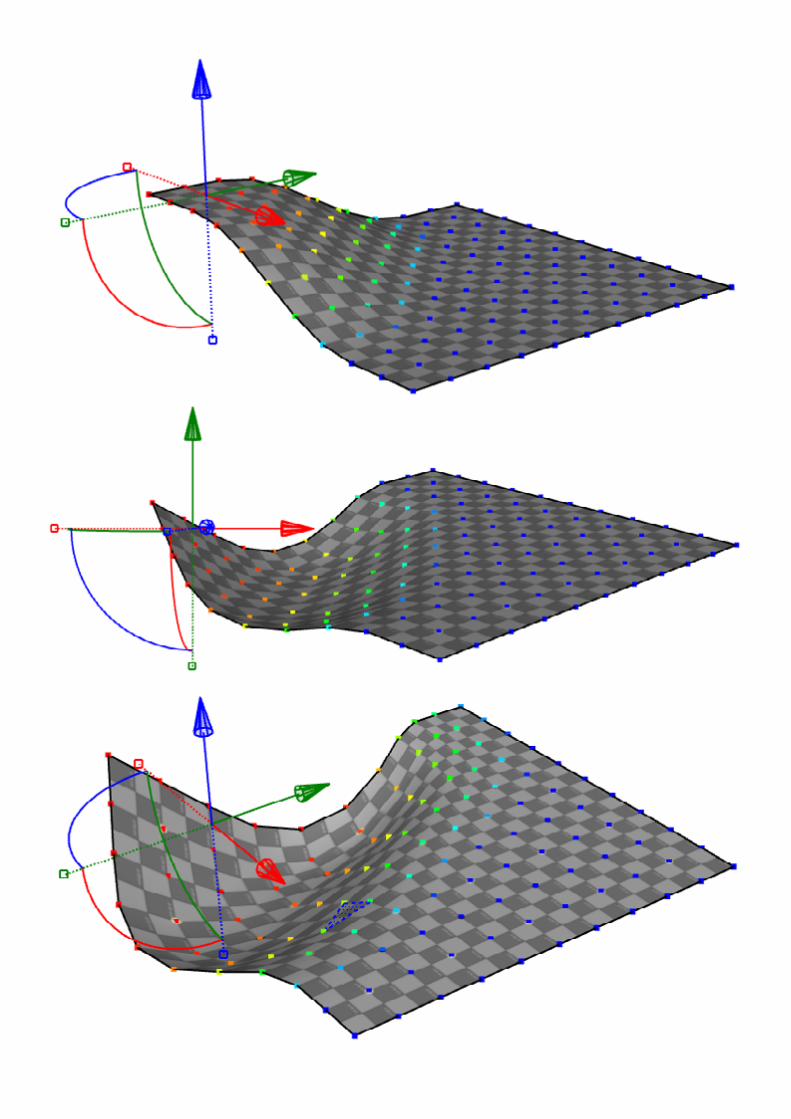
what is immediately noticeable is the Gizmo.
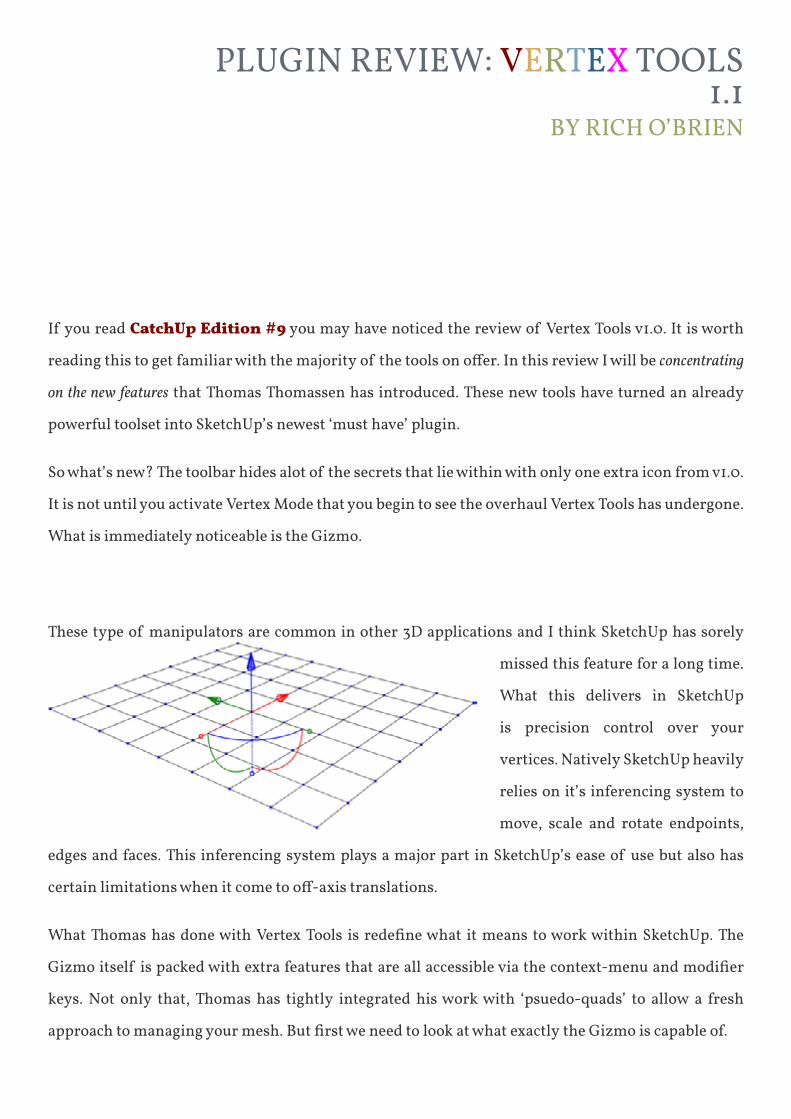
these type of manipulators are common in other 3d applications and i think SketchUp has sorely
missed this feature for a long time.
what this delivers in SketchUp
is precision control over your
vertices. natively SketchUp heavily
relies on it’s inferencing system to
move, scale and rotate endpoints,
edges and faces. this inferencing system plays a major part in SketchUp’s ease of use but also has
certain limitations when it come to off-axis translations.
What Thomas has done with Vertex Tools is redefine what it means to work within SketchUp. The
Gizmo itself is packed with extra features that are all accessible via the context-menu and modifier
keys. not only that, thomas has tightly integrated his work with ‘psuedo-quads’ to allow a fresh
approach to managing your mesh. But first we need to look at what exactly the Gizmo is capable of.
plUGin review: vertex toolS 1.1
by riCh o’brien
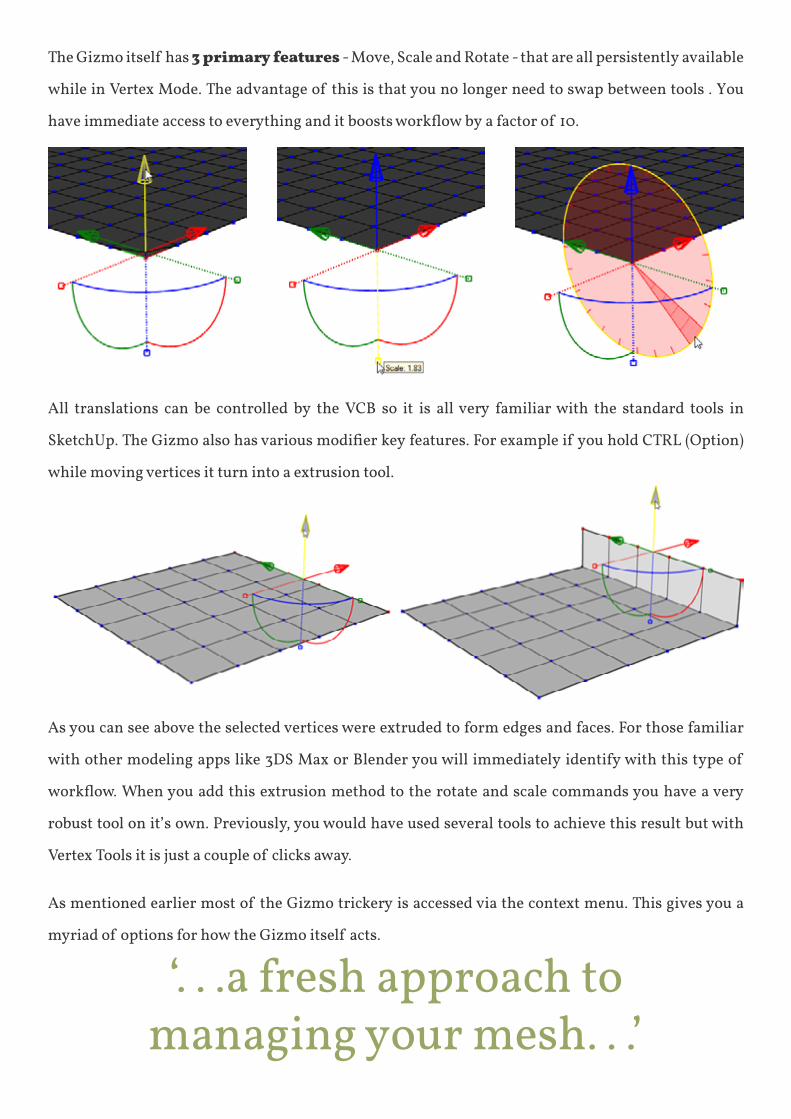
the Gizmo itself has 3 primary features - move, Scale and rotate - that are all persistently available
while in vertex mode. the advantage of this is that you no longer need to swap between tools . you
have immediate access to everything and it boosts workflow by a factor of 10.
all translations can be controlled by the vCb so it is all very familiar with the standard tools in
SketchUp. The Gizmo also has various modifier key features. For example if you hold CTRL (Option)
while moving vertices it turn into a extrusion tool.
as you can see above the selected vertices were extruded to form edges and faces. for those familiar
with other modeling apps like 3dS max or blender you will immediately identify with this type of
workflow. When you add this extrusion method to the rotate and scale commands you have a very
robust tool on it’s own. previously, you would have used several tools to achieve this result but with
vertex tools it is just a couple of clicks away.
as mentioned earlier most of the Gizmo trickery is accessed via the context menu. this gives you a
myriad of options for how the Gizmo itself acts.
‘. . .a fresh approach tomanaging your mesh. . .’
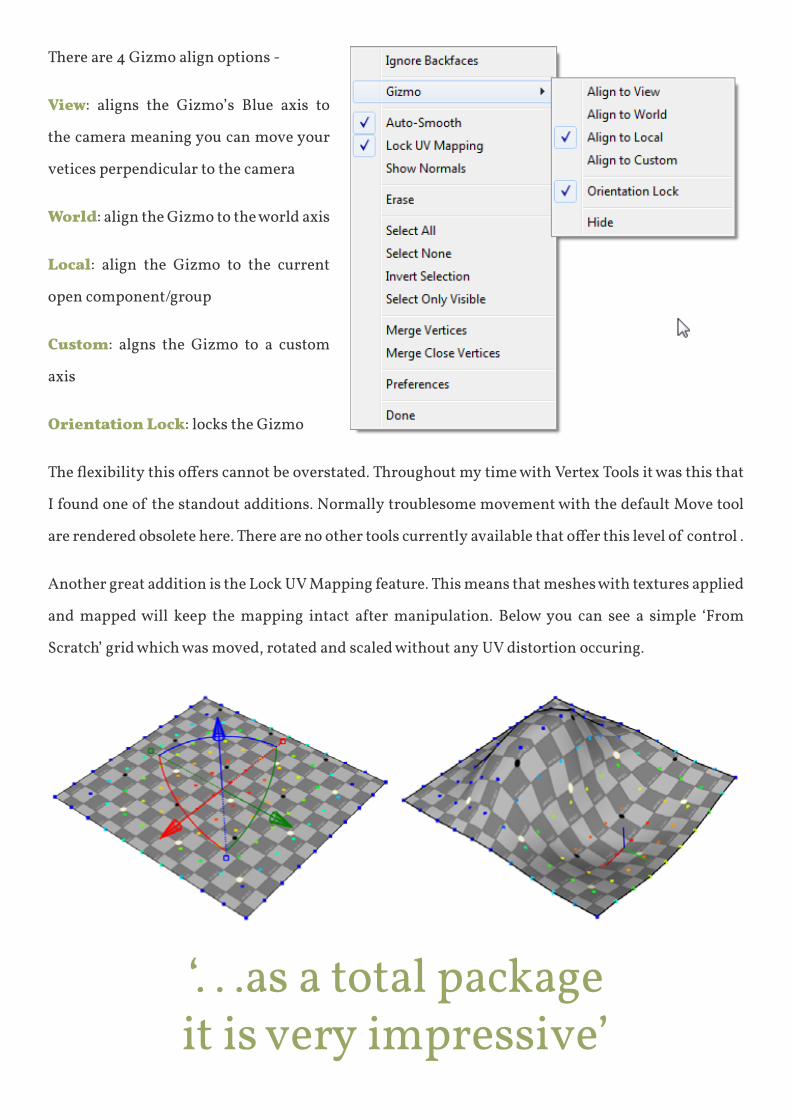
there are 4 Gizmo align options -
View: aligns the Gizmo’s blue axis to
the camera meaning you can move your
vetices perpendicular to the camera
World: align the Gizmo to the world axis
Local: align the Gizmo to the current
open component/group
Custom: algns the Gizmo to a custom
axis
Orientation Lock: locks the Gizmo
The flexibility this offers cannot be overstated. Throughout my time with Vertex Tools it was this that
i found one of the standout additions. normally troublesome movement with the default move tool
are rendered obsolete here. There are no other tools currently available that offer this level of control .
another great addition is the lock Uv mapping feature. this means that meshes with textures applied
and mapped will keep the mapping intact after manipulation. Below you can see a simple ‘From
Scratch’ grid which was moved, rotated and scaled without any Uv distortion occuring.
‘. . .as a total packageit is very impressive’
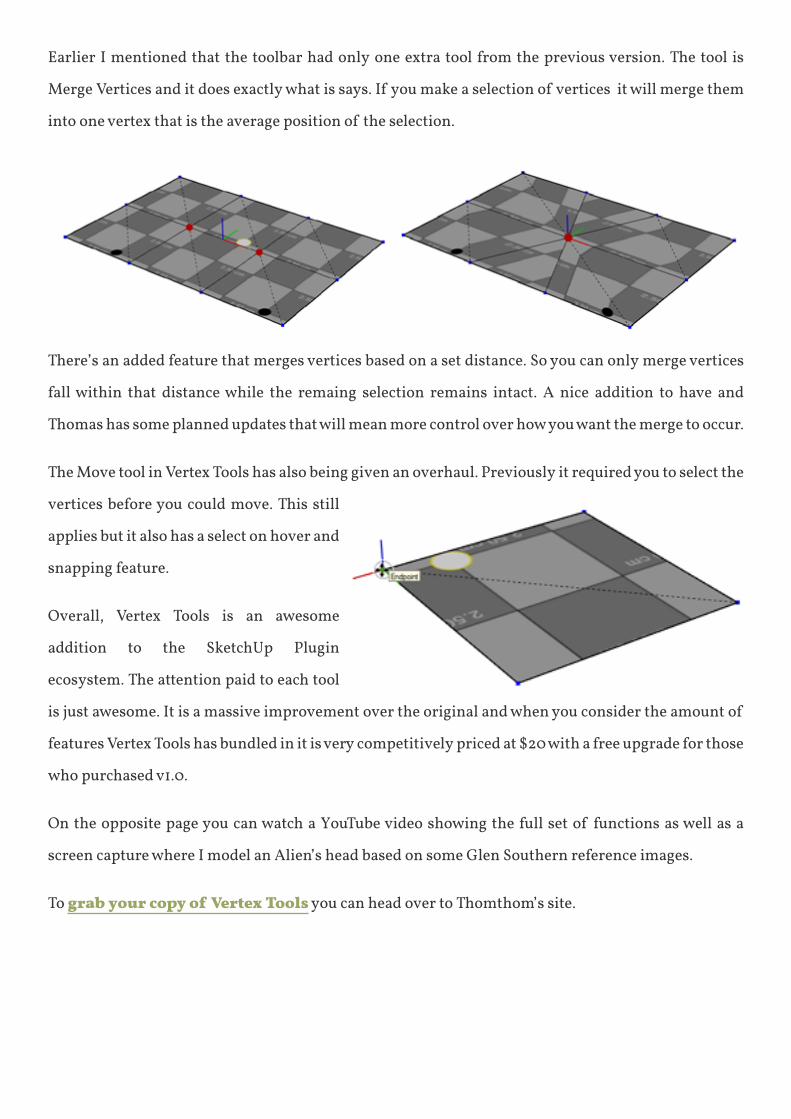
earlier i mentioned that the toolbar had only one extra tool from the previous version. the tool is
merge vertices and it does exactly what is says. if you make a selection of vertices it will merge them
into one vertex that is the average position of the selection.
there’s an added feature that merges vertices based on a set distance. So you can only merge vertices
fall within that distance while the remaing selection remains intact. a nice addition to have and
thomas has some planned updates that will mean more control over how you want the merge to occur.
the move tool in vertex tools has also being given an overhaul. previously it required you to select the
vertices before you could move. this still
applies but it also has a select on hover and
snapping feature.
overall, vertex tools is an awesome
addition to the SketchUp plugin
ecosystem. the attention paid to each tool
is just awesome. it is a massive improvement over the original and when you consider the amount of
features vertex tools has bundled in it is very competitively priced at $20 with a free upgrade for those
who purchased v1.0.
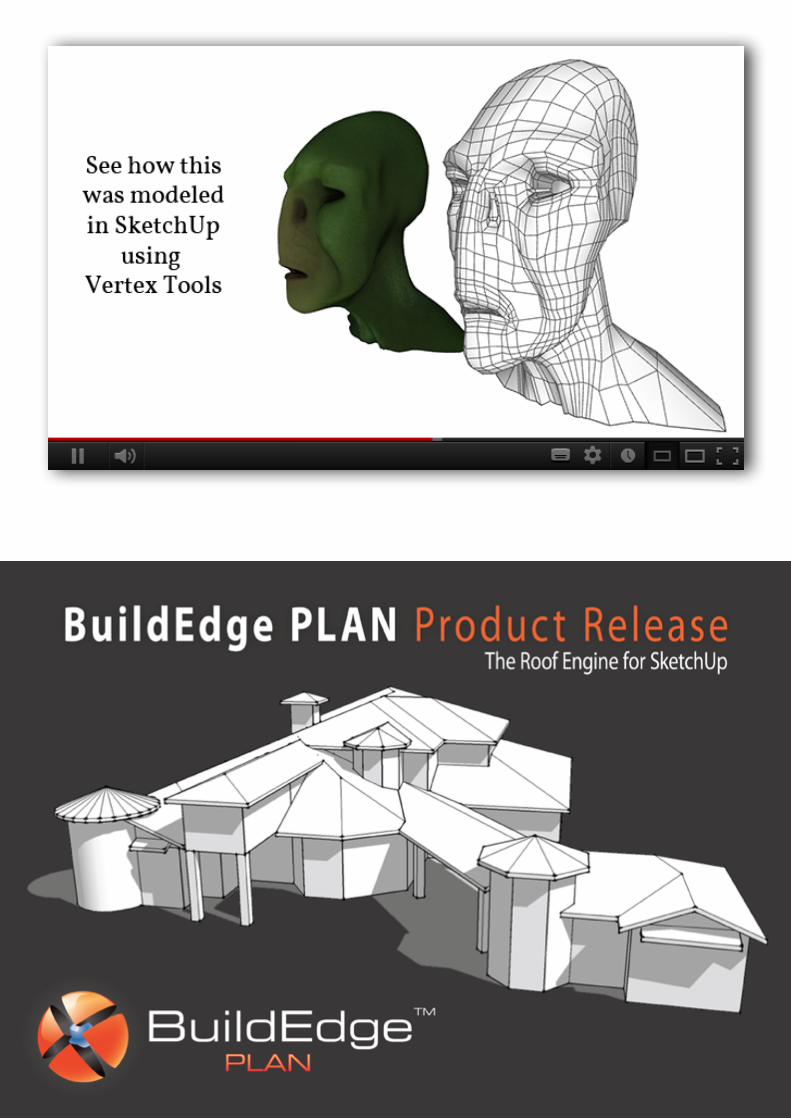
on the opposite page you can watch a youtube video showing the full set of functions as well as a
screen capture where i model an alien’s head based on some Glen Southern reference images.
to grab your copy of Vertex Tools you can head over to thomthom’s site.
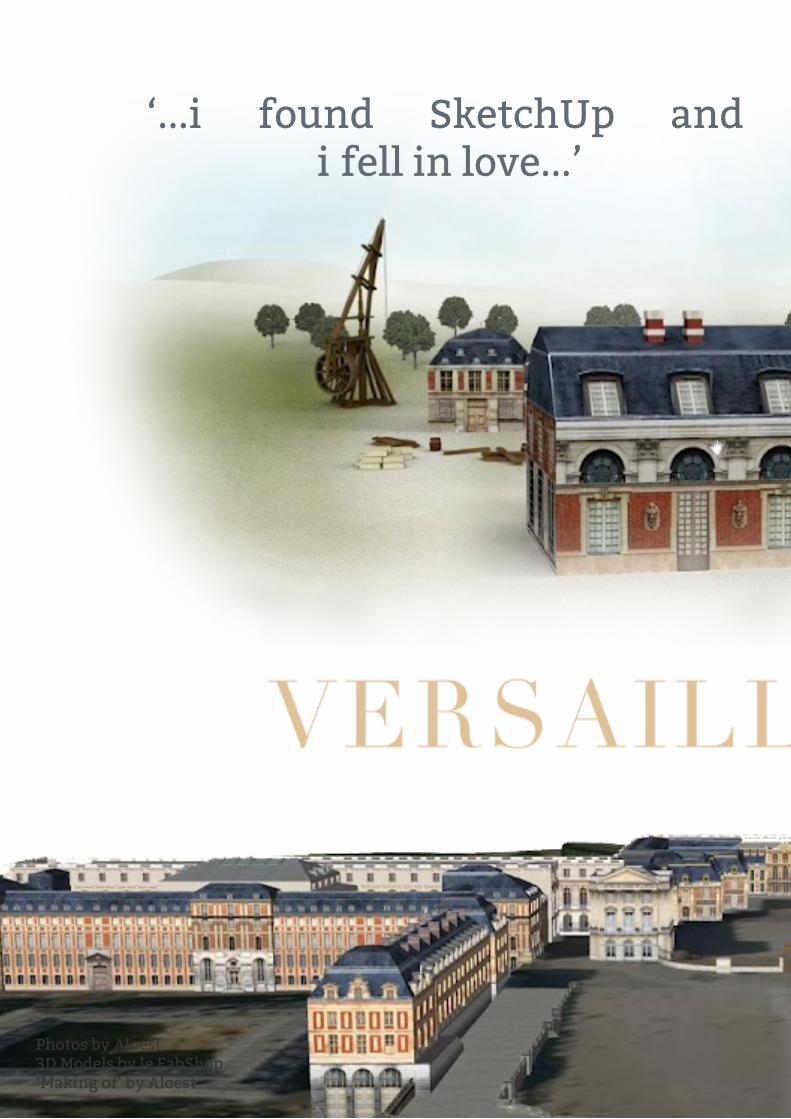
‘...i found SketchUp and i fell in love...’
Photos by Aloest3D Models by le FabShop‘Making of’ by Aloest
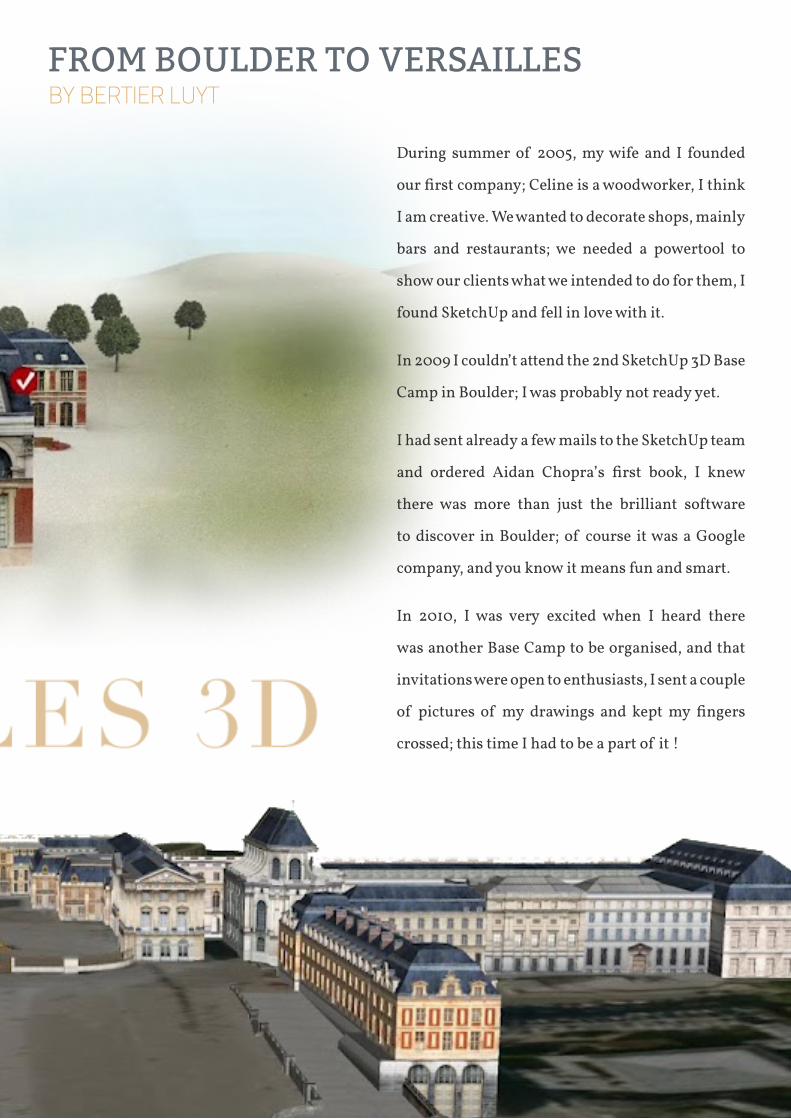
FroM boUlDer to verSAilleS by bertier luyt
during summer of 2005, my wife and i founded
our first company; Celine is a woodworker, I think
i am creative. we wanted to decorate shops, mainly
bars and restaurants; we needed a powertool to
show our clients what we intended to do for them, i
found SketchUp and fell in love with it.
in 2009 i couldn’t attend the 2nd SketchUp 3d base
Camp in Boulder; I was probably not ready yet.
i had sent already a few mails to the SketchUp team
and ordered Aidan Chopra’s first book, I knew
there was more than just the brilliant software
to discover in Boulder; of course it was a Google
company, and you know it means fun and smart.
in 2010, i was very excited when i heard there
was another base Camp to be organised, and that
invitations were open to enthusiasts, i sent a couple
of pictures of my drawings and kept my fingers
crossed; this time I had to be a part of it !
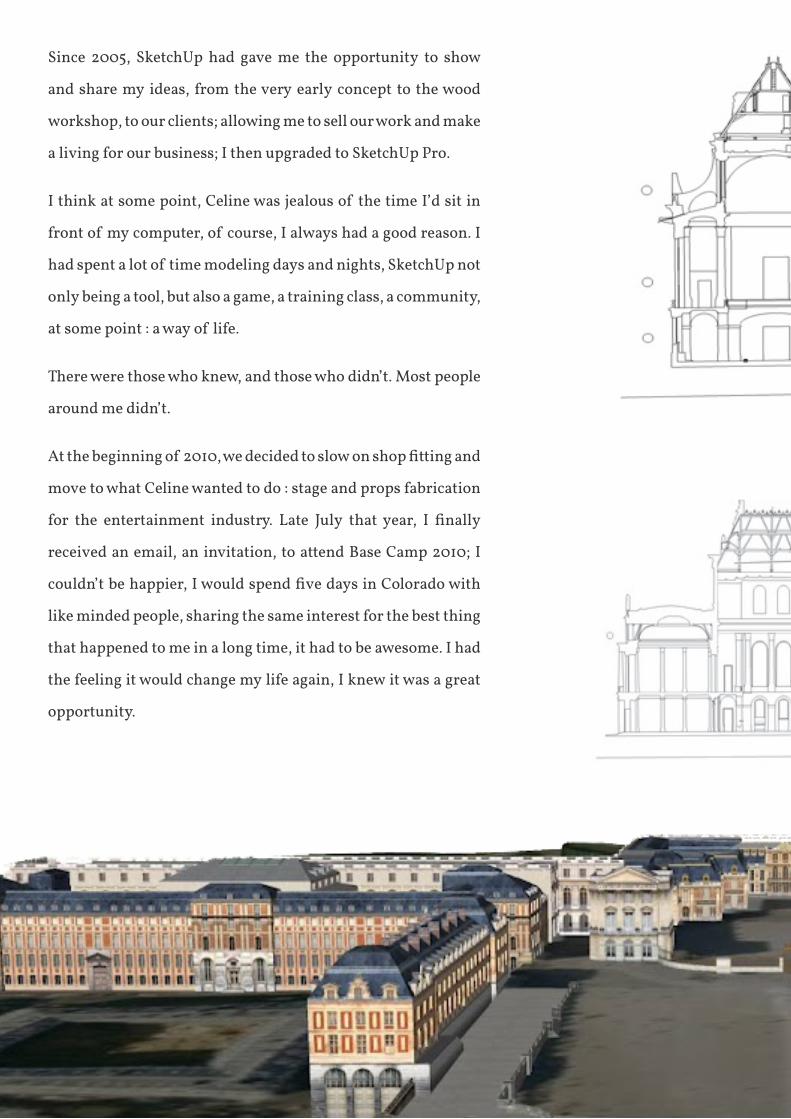
Since 2005, SketchUp had gave me the opportunity to show
and share my ideas, from the very early concept to the wood
workshop, to our clients; allowing me to sell our work and make
a living for our business; I then upgraded to SketchUp Pro.
i think at some point, Celine was jealous of the time i’d sit in
front of my computer, of course, i always had a good reason. i
had spent a lot of time modeling days and nights, SketchUp not
only being a tool, but also a game, a training class, a community,
at some point : a way of life.
there were those who knew, and those who didn’t. most people
around me didn’t.
At the beginning of 2010, we decided to slow on shop fitting and
move to what Celine wanted to do : stage and props fabrication
for the entertainment industry. Late July that year, I finally
received an email, an invitation, to attend Base Camp 2010; I
couldn’t be happier, I would spend five days in Colorado with
like minded people, sharing the same interest for the best thing
that happened to me in a long time, it had to be awesome. i had
the feeling it would change my life again, i knew it was a great
opportunity.
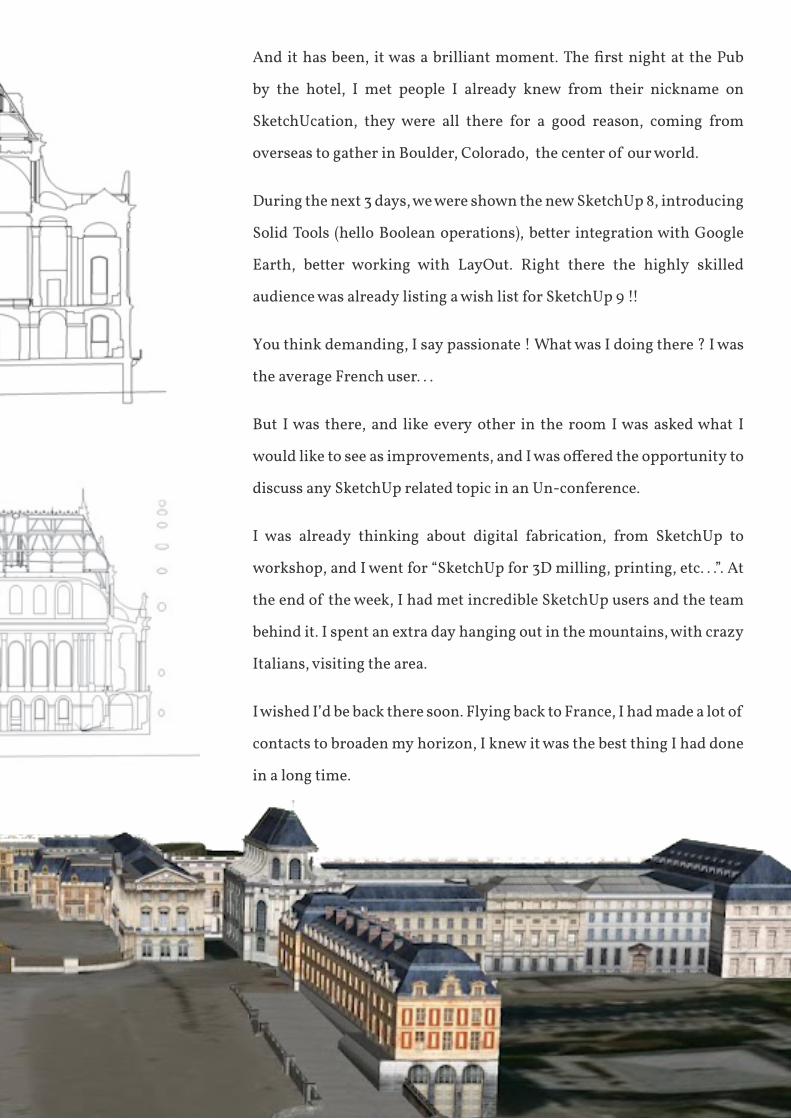
And it has been, it was a brilliant moment. The first night at the Pub
by the hotel, i met people i already knew from their nickname on
SketchUcation, they were all there for a good reason, coming from
overseas to gather in boulder, Colorado, the center of our world.
during the next 3 days, we were shown the new SketchUp 8, introducing
Solid Tools (hello Boolean operations), better integration with Google
earth, better working with layout. right there the highly skilled
audience was already listing a wish list for SketchUp 9 !!
you think demanding, i say passionate ! what was i doing there ? i was
the average french user. . .
but i was there, and like every other in the room i was asked what i
would like to see as improvements, and I was offered the opportunity to
discuss any SketchUp related topic in an Un-conference.
i was already thinking about digital fabrication, from SketchUp to
workshop, and i went for “SketchUp for 3d milling, printing, etc. . .”. at
the end of the week, i had met incredible SketchUp users and the team
behind it. i spent an extra day hanging out in the mountains, with crazy
italians, visiting the area.
i wished i’d be back there soon. flying back to france, i had made a lot of
contacts to broaden my horizon, i knew it was the best thing i had done
in a long time.
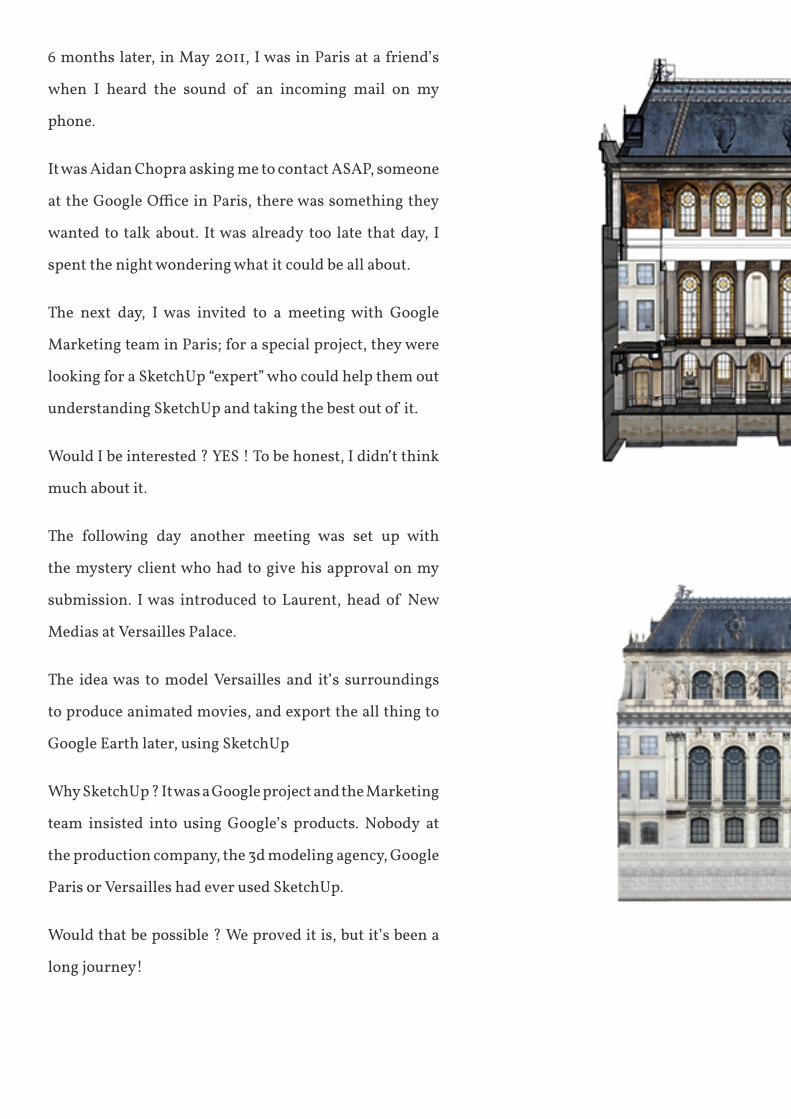
6 months later, in may 2011, i was in paris at a friend’s
when i heard the sound of an incoming mail on my
phone.
it was aidan Chopra asking me to contact aSap, someone
at the Google Office in Paris, there was something they
wanted to talk about. it was already too late that day, i
spent the night wondering what it could be all about.
the next day, i was invited to a meeting with Google
Marketing team in Paris; for a special project, they were
looking for a SketchUp “expert” who could help them out
understanding SketchUp and taking the best out of it.
would i be interested ? yeS ! to be honest, i didn’t think
much about it.
the following day another meeting was set up with
the mystery client who had to give his approval on my
submission. i was introduced to laurent, head of new
medias at versailles palace.
the idea was to model versailles and it’s surroundings
to produce animated movies, and export the all thing to
Google earth later, using SketchUp
why SketchUp ? it was a Google project and the marketing
team insisted into using Google’s products. nobody at
the production company, the 3d modeling agency, Google
paris or versailles had ever used SketchUp.
would that be possible ? we proved it is, but it’s been a
long journey!

For the next 6 months, my first mission was to answer any issue the
modeling team was facing, help the production company collect the best
images for textures, liaise with the SketchUp team and open my address
book.
every wednesday the production company reported to the palace on
progress and issues. they launched a 3d laser scan campaign of the
interiors and of the many statues, captive balloons took aerial photographs
to complete Google Earth’s imagery, films were shot. The data piled up very
quickly, so did problems.
the modelling team under estimated SketchUp, because, you know : it’s
free, and on their very powerful computers they can run heavy models in
other expensive programs, finally they didn’t really want to question their
modelling habits.
then the 3d scanning company failed at completing their goal and proved
unable to export their point of clouds into SKP files.
‘...the idea was to model versailles its
surroundings using SketchUp...
...would that be possible?
We proved it was!’
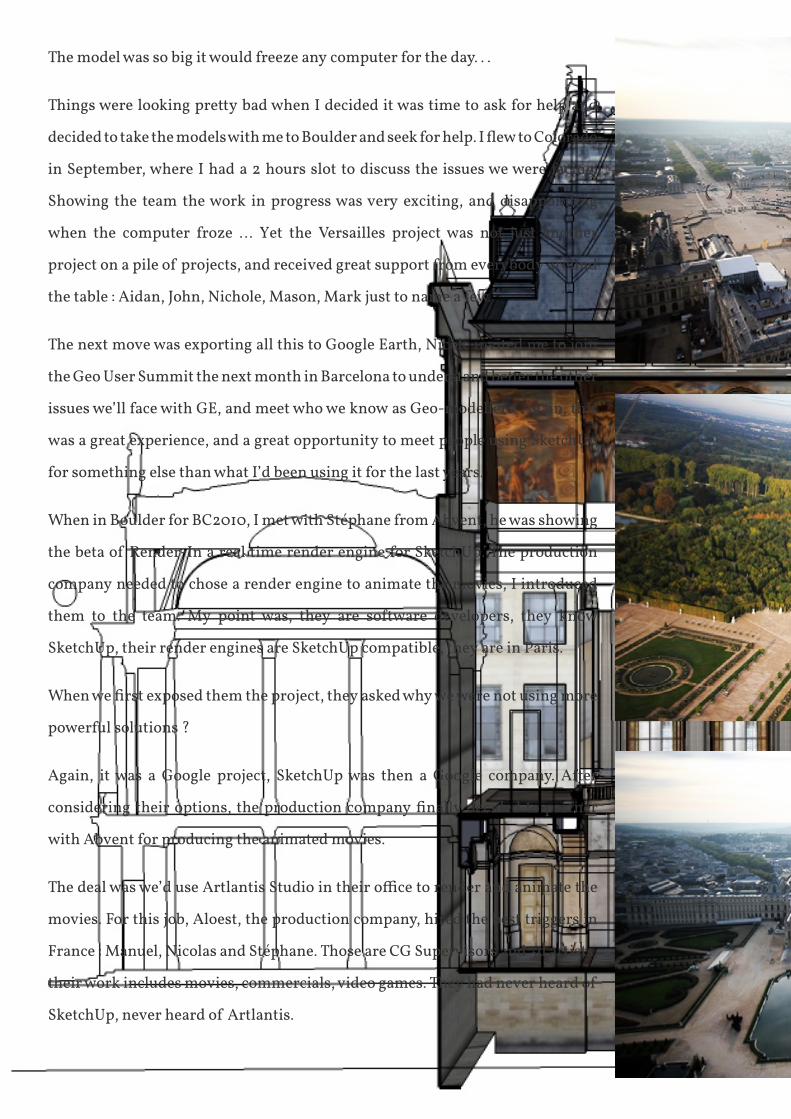
the model was so big it would freeze any computer for the day. . .
things were looking pretty bad when i decided it was time to ask for help and
decided to take the models with me to Boulder and seek for help. I flew to Colorado
in September, where i had a 2 hours slot to discuss the issues we were facing.
Showing the team the work in progress was very exciting, and disappointing
when the computer froze … yet the versailles project was not just another
project on a pile of projects, and received great support from everybody around
the table : aidan, John, nichole, mason, mark just to name a few.
the next move was exporting all this to Google earth, nicole invited me to join
the Geo User Summit the next month in barcelona to understand better the other
issues we’ll face with Ge, and meet who we know as Geo-modellers. again, this
was a great experience, and a great opportunity to meet people using SketchUp
for something else than what i’d been using it for the last years.
when in boulder for bC2010, i met with Stéphane from abvent, he was showing
the beta of render-in a real time render engine for SketchUp. the production
company needed to chose a render engine to animate the movies, i introduced
them to the team. My point was, they are software developers, they know
SketchUp, their render engines are SketchUp compatible, they are in paris.
When we first exposed them the project, they asked why we were not using more
powerful solutions ?
Again, it was a Google project, SketchUp was then a Google company. After
considering their options, the production company finally decided to partner
with abvent for producing the animated movies.
The deal was we’d use Artlantis Studio in their office to render and animate the
movies. for this job, aloest, the production company, hired the best triggers in
france : manuel, nicolas and Stéphane. those are CG Supervisors and 3d artists,
their work includes movies, commercials, video games. they had never heard of
SketchUp, never heard of artlantis.
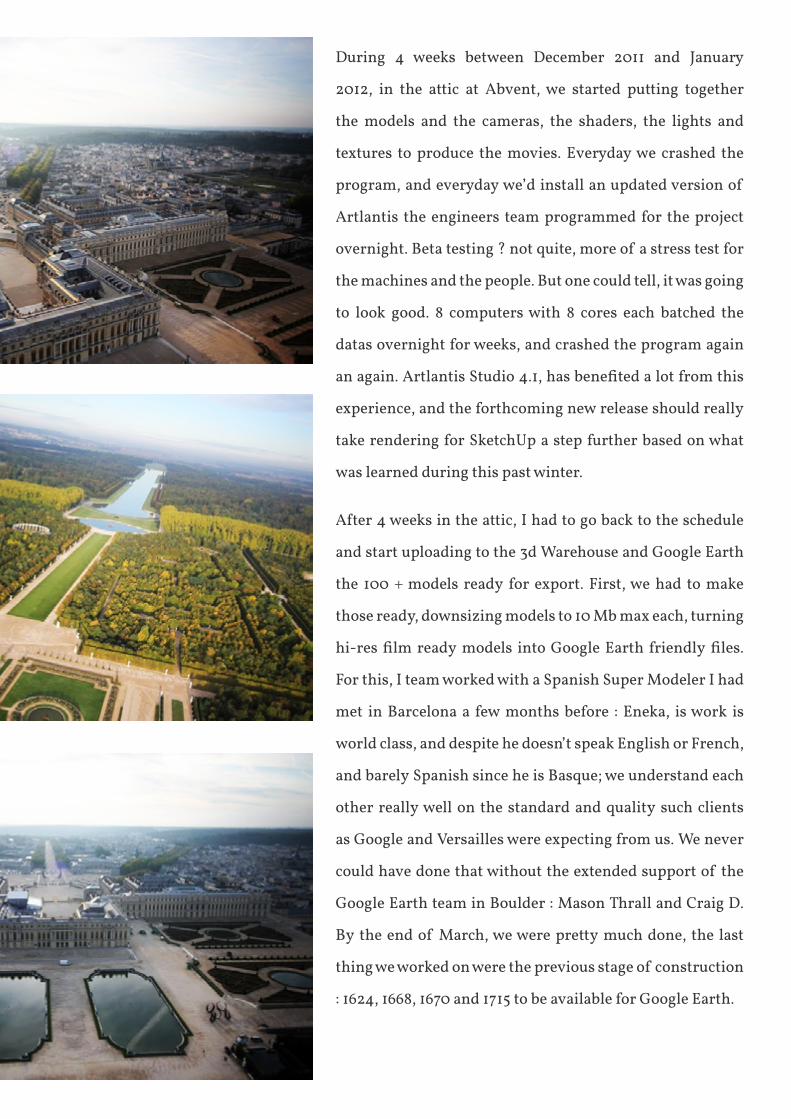
during 4 weeks between december 2011 and January
2012, in the attic at abvent, we started putting together
the models and the cameras, the shaders, the lights and
textures to produce the movies. everyday we crashed the
program, and everyday we’d install an updated version of
artlantis the engineers team programmed for the project
overnight. beta testing ? not quite, more of a stress test for
the machines and the people. but one could tell, it was going
to look good. 8 computers with 8 cores each batched the
datas overnight for weeks, and crashed the program again
an again. Artlantis Studio 4.1, has benefited a lot from this
experience, and the forthcoming new release should really
take rendering for SketchUp a step further based on what
was learned during this past winter.
After 4 weeks in the attic, I had to go back to the schedule
and start uploading to the 3d warehouse and Google earth
the 100 + models ready for export. first, we had to make
those ready, downsizing models to 10 mb max each, turning
hi-res film ready models into Google Earth friendly files.
for this, i team worked with a Spanish Super modeler i had
met in barcelona a few months before : eneka, is work is
world class, and despite he doesn’t speak english or french,
and barely Spanish since he is Basque; we understand each
other really well on the standard and quality such clients
as Google and versailles were expecting from us. we never
could have done that without the extended support of the
Google earth team in boulder : mason thrall and Craig d.
by the end of march, we were pretty much done, the last
thing we worked on were the previous stage of construction
: 1624, 1668, 1670 and 1715 to be available for Google earth.
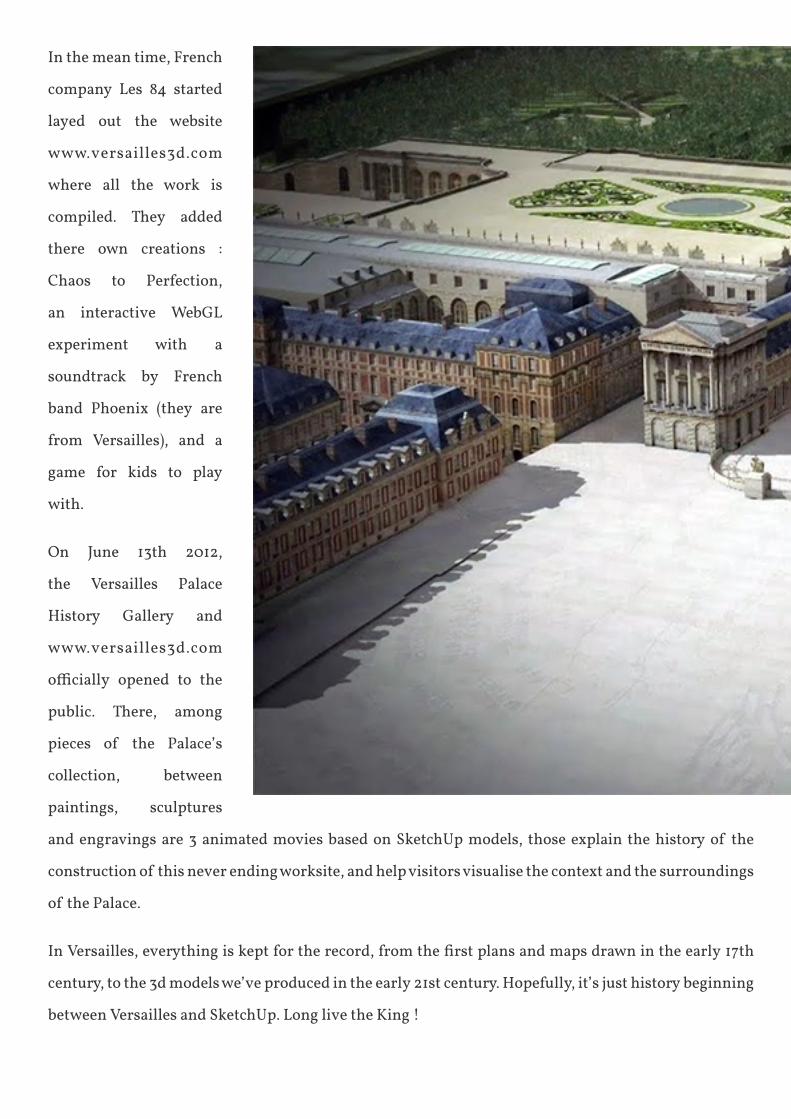
in the mean time, french
company les 84 started
layed out the website
www.versailles3d.com
where all the work is
compiled. they added
there own creations :
Chaos to perfection,
an interactive webGl
experiment with a
soundtrack by french
band Phoenix (they are
from Versailles), and a
game for kids to play
with.
on June 13th 2012,
the versailles palace
history Gallery and
www.versailles3d.com
officially opened to the
public. there, among
pieces of the palace’s
collection, between
paintings, sculptures
and engravings are 3 animated movies based on SketchUp models, those explain the history of the
construction of this never ending worksite, and help visitors visualise the context and the surroundings
of the palace.
In Versailles, everything is kept for the record, from the first plans and maps drawn in the early 17th
century, to the 3d models we’ve produced in the early 21st century. hopefully, it’s just history beginning
between versailles and SketchUp. long live the King !
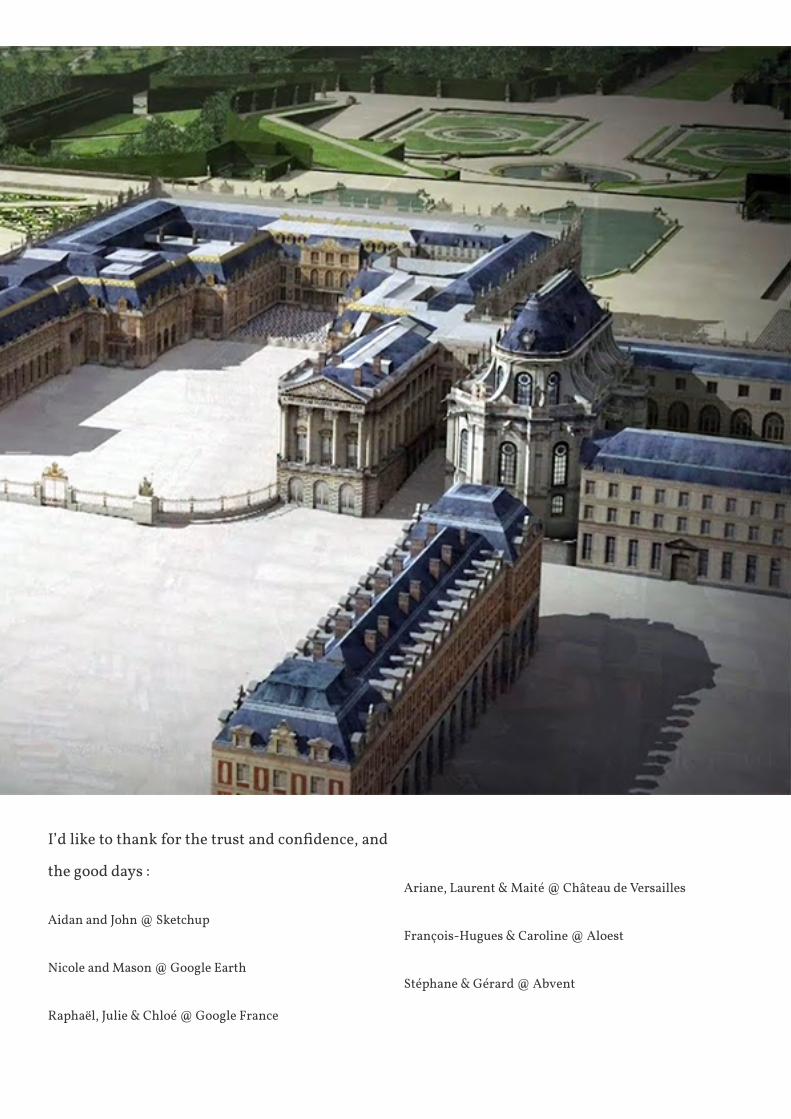
I’d like to thank for the trust and confidence, and
the good days :
aidan and John @ Sketchup
nicole and mason @ Google earth
raphaël, Julie & Chloé @ Google france
ariane, laurent & maité @ Château de versailles
françois-hugues & Caroline @ aloest
Stéphane & Gérard @ abvent
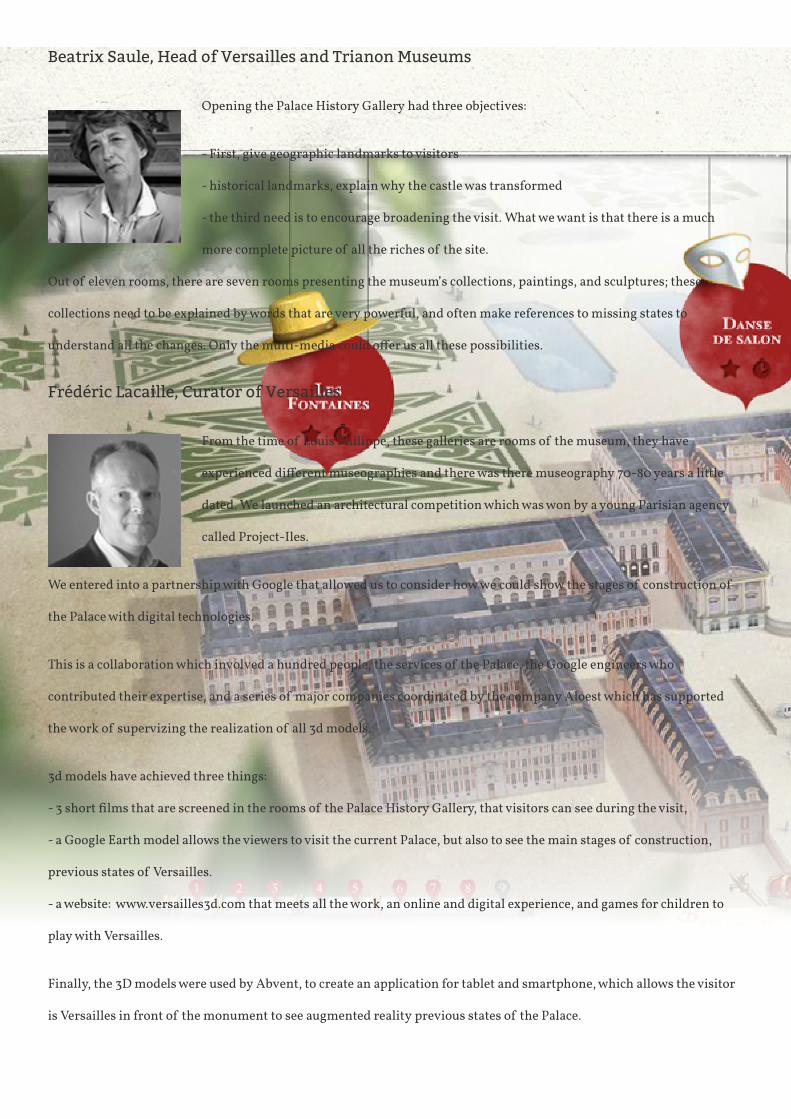
beatrix Saule, Head of versailles and trianon Museums
opening the palace history Gallery had three objectives:
- first, give geographic landmarks to visitors
- historical landmarks, explain why the castle was transformed
- the third need is to encourage broadening the visit. what we want is that there is a much
more complete picture of all the riches of the site.
Out of eleven rooms, there are seven rooms presenting the museum’s collections, paintings, and sculptures; these
collections need to be explained by words that are very powerful, and often make references to missing states to
understand all the changes. Only the multi-media could offer us all these possibilities.
Frédéric lacaille, Curator of versailles
from the time of louis philippe, these galleries are rooms of the museum, they have
experienced different museographies and there was there museography 70-80 years a little
dated. we launched an architectural competition which was won by a young parisian agency
called project-iles.
we entered into a partnership with Google that allowed us to consider how we could show the stages of construction of
the palace with digital technologies.
this is a collaboration which involved a hundred people, the services of the palace, the Google engineers who
contributed their expertise, and a series of major companies coordinated by the company aloest which has supported
the work of supervizing the realization of all 3d models.
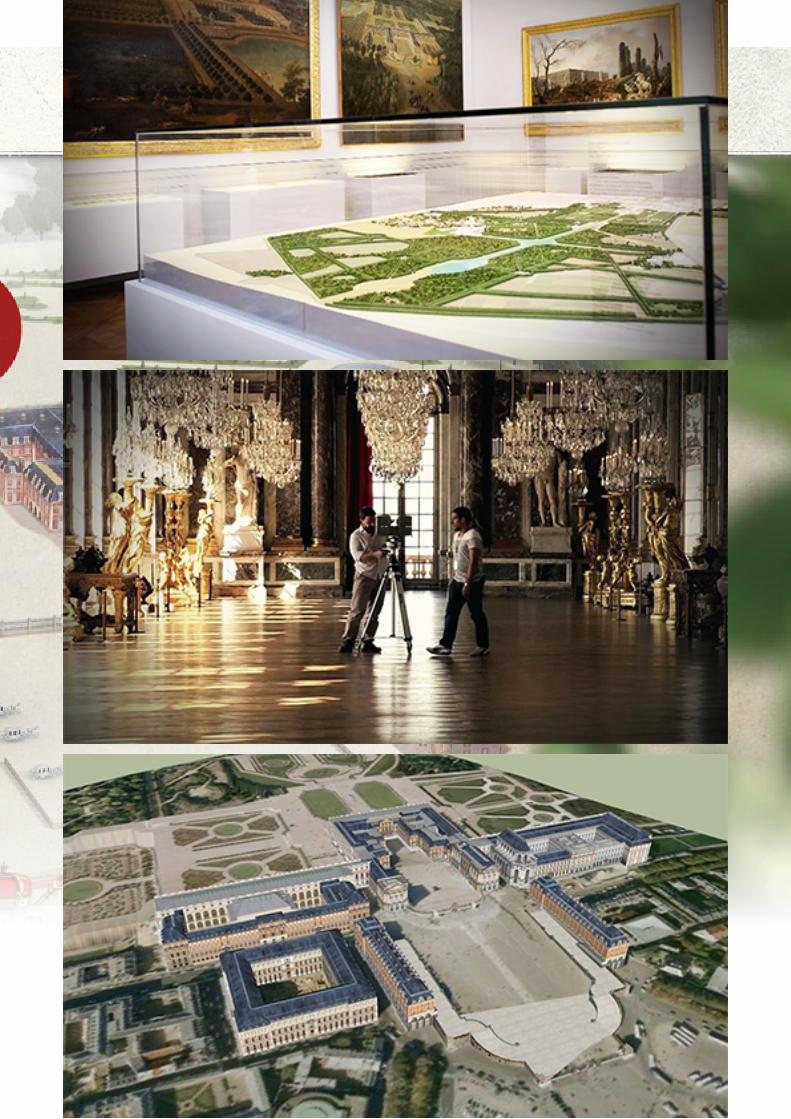
3d models have achieved three things:
- 3 short films that are screened in the rooms of the Palace History Gallery, that visitors can see during the visit,
- a Google earth model allows the viewers to visit the current palace, but also to see the main stages of construction,
previous states of versailles.
- a website: www.versailles3d.com that meets all the work, an online and digital experience, and games for children to
play with versailles.
finally, the 3d models were used by abvent, to create an application for tablet and smartphone, which allows the visitor
is versailles in front of the monument to see augmented reality previous states of the palace.
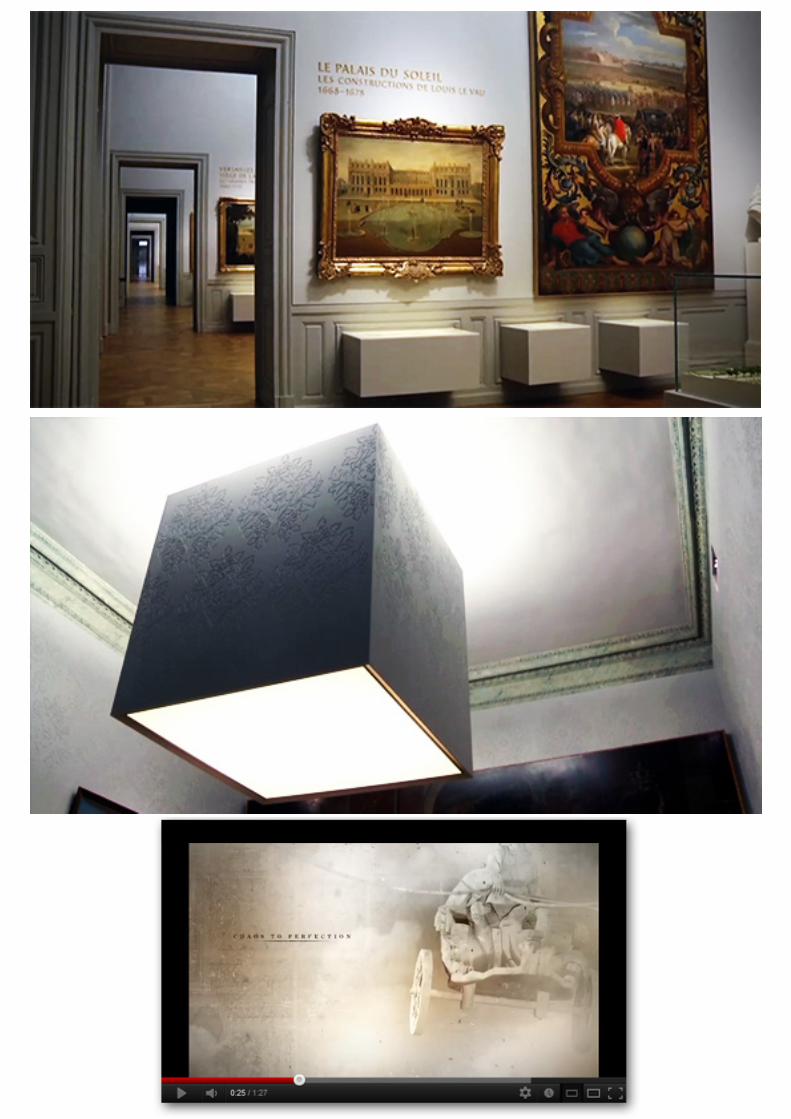
reza Azar, Founder, Ceo Project-iles Architecture
we had to tell the history of the palace through 11 rooms for 10,000 visitors per day, we had to
be very fast, very synthetic, the idea was to be very minimalist to offer the entire chronology of
the history of the palace. the interior design is based on three things:
- the lower stratum, which is the educational stratum, in the louis-philippe panels at the
bottom of the walls, the rectangles are extruded (push-pulled) to create a distance with the art pieces, and create light
tables to serve as teaching aids.
- Stratum medium, a Corian skin, this material is very dense and can bring a design very specific; it forms a gradient from
the top to the bottom of the room. we are facing a wall that can be stucco or plaster, we do not know what material it is, and
that’s what brings the questioning.
-the high stratum, which is a chandelier suspendied as a solid block in the middle of each room, allowing both direct
illumination on the frames and bring both homogeneous light and subtle in all rooms.
raphael Goumain, Product Marketing Manager, Google France
the Google Cultural institute aims to harness new technologies for the promotion and
dissemination of heritage and culture. it is natural that the Google Cultural institute and
versailles teams worked together to trace the history of the palace, via physical, but also online
galeries and the later accessible to all online.
Gerard bomer, Abvent
We worked with the Palace and Aloest to offer a virtual tour on digital tablet. We use a technology
that is unique to artlantis : ivisit3d, that allows to create panoramas, and from a perspective,
360 degrees view of the previous states of palace, wich allows a comparison with the present
day.
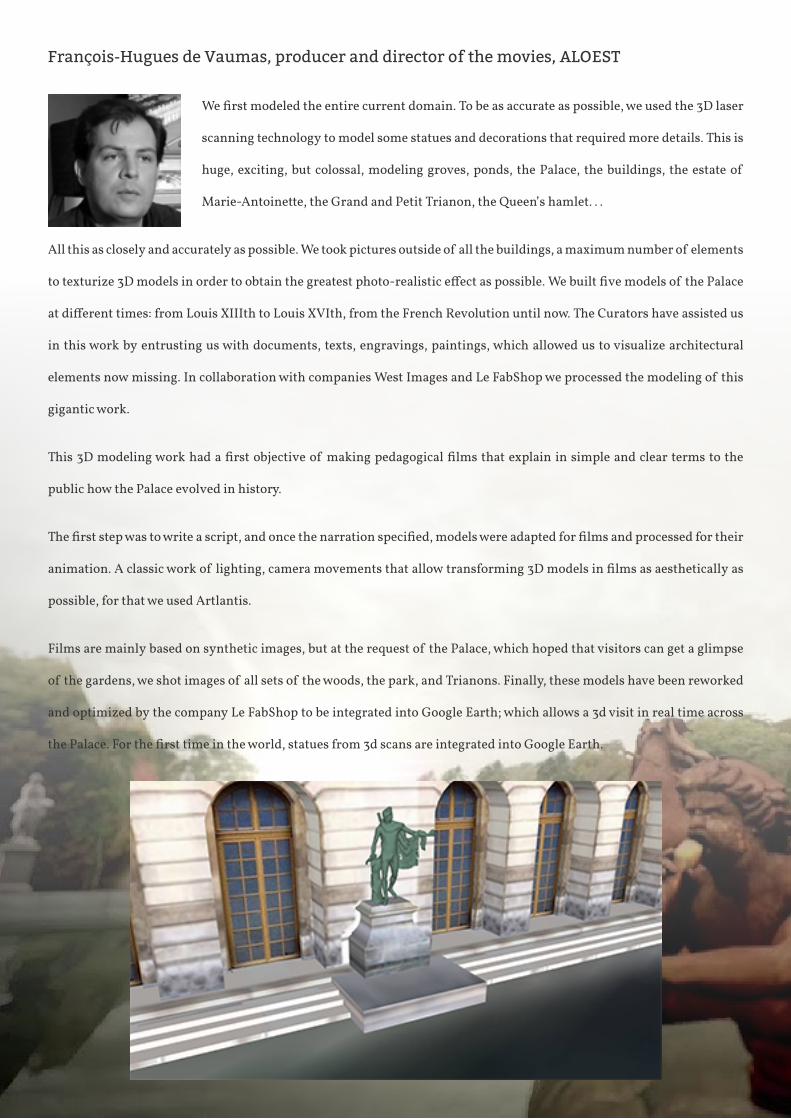
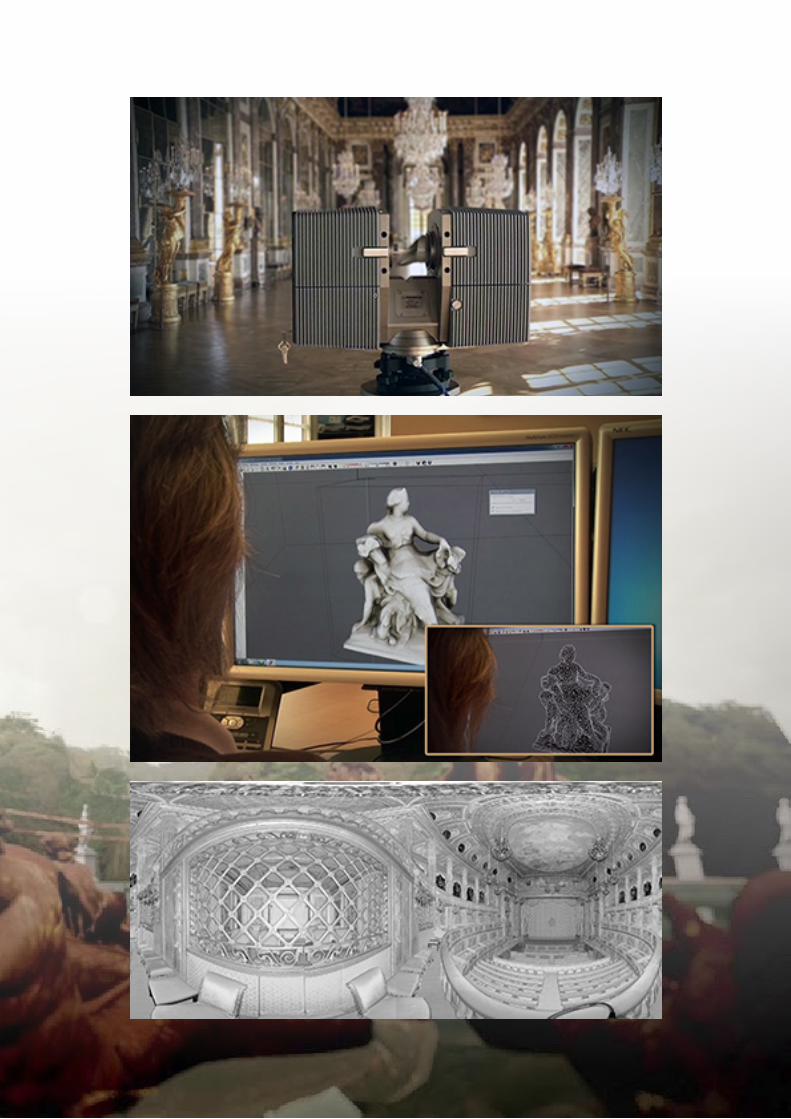
François-Hugues de vaumas, producer and director of the movies, AloeSt
We first modeled the entire current domain. To be as accurate as possible, we used the 3D laser
scanning technology to model some statues and decorations that required more details. this is
huge, exciting, but colossal, modeling groves, ponds, the palace, the buildings, the estate of
marie-antoinette, the Grand and petit trianon, the queen’s hamlet. . .
all this as closely and accurately as possible. we took pictures outside of all the buildings, a maximum number of elements
to texturize 3D models in order to obtain the greatest photo-realistic effect as possible. We built five models of the Palace
at different times: from Louis XIIIth to Louis XVIth, from the French Revolution until now. The Curators have assisted us
in this work by entrusting us with documents, texts, engravings, paintings, which allowed us to visualize architectural
elements now missing. in collaboration with companies west images and le fabShop we processed the modeling of this
gigantic work.
This 3D modeling work had a first objective of making pedagogical films that explain in simple and clear terms to the
public how the palace evolved in history.
The first step was to write a script, and once the narration specified, models were adapted for films and processed for their
animation. A classic work of lighting, camera movements that allow transforming 3D models in films as aesthetically as
possible, for that we used artlantis.
films are mainly based on synthetic images, but at the request of the palace, which hoped that visitors can get a glimpse
of the gardens, we shot images of all sets of the woods, the park, and trianons. finally, these models have been reworked
and optimized by the company Le FabShop to be integrated into Google Earth; which allows a 3d visit in real time across
the Palace. For the first time in the world, statues from 3d scans are integrated into Google Earth.
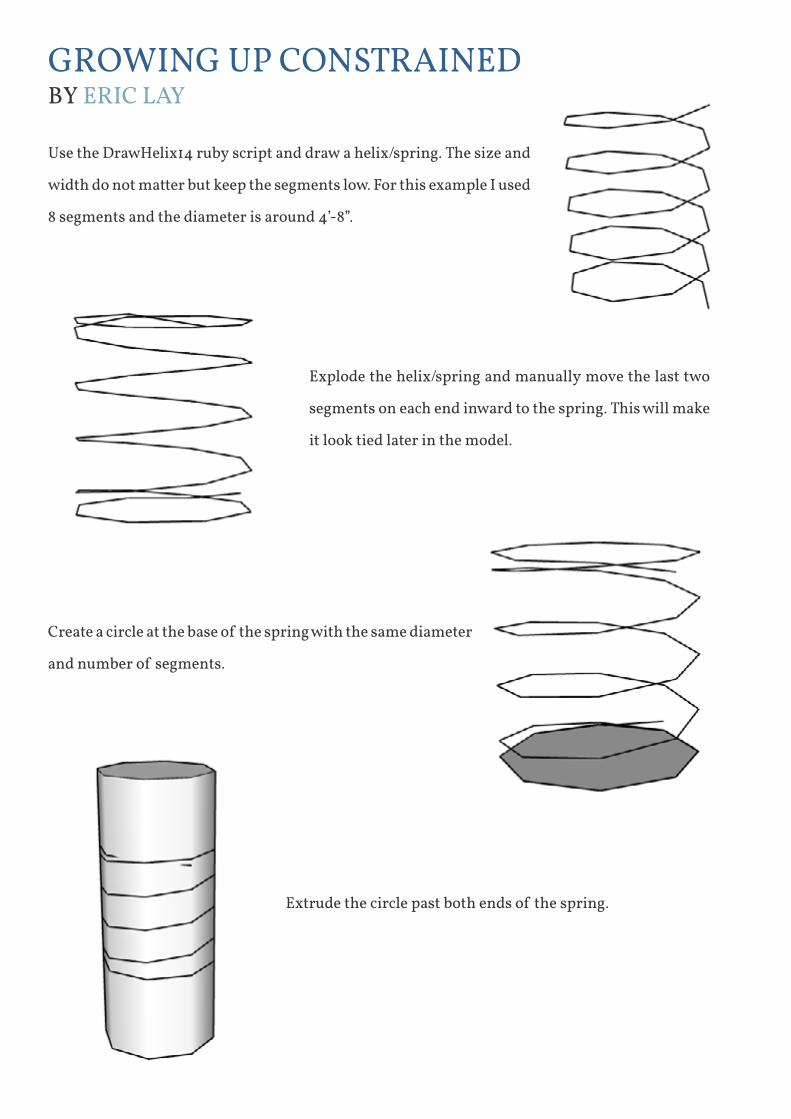
Use the drawhelix14 ruby script and draw a helix/spring. the size and
width do not matter but keep the segments low. for this example i used
8 segments and the diameter is around 4’-8”.
explode the helix/spring and manually move the last two
segments on each end inward to the spring. this will make
it look tied later in the model.
Create a circle at the base of the spring with the same diameter
and number of segments.
GrowinG Up ConStrainedby eriC lay
extrude the circle past both ends of the spring.
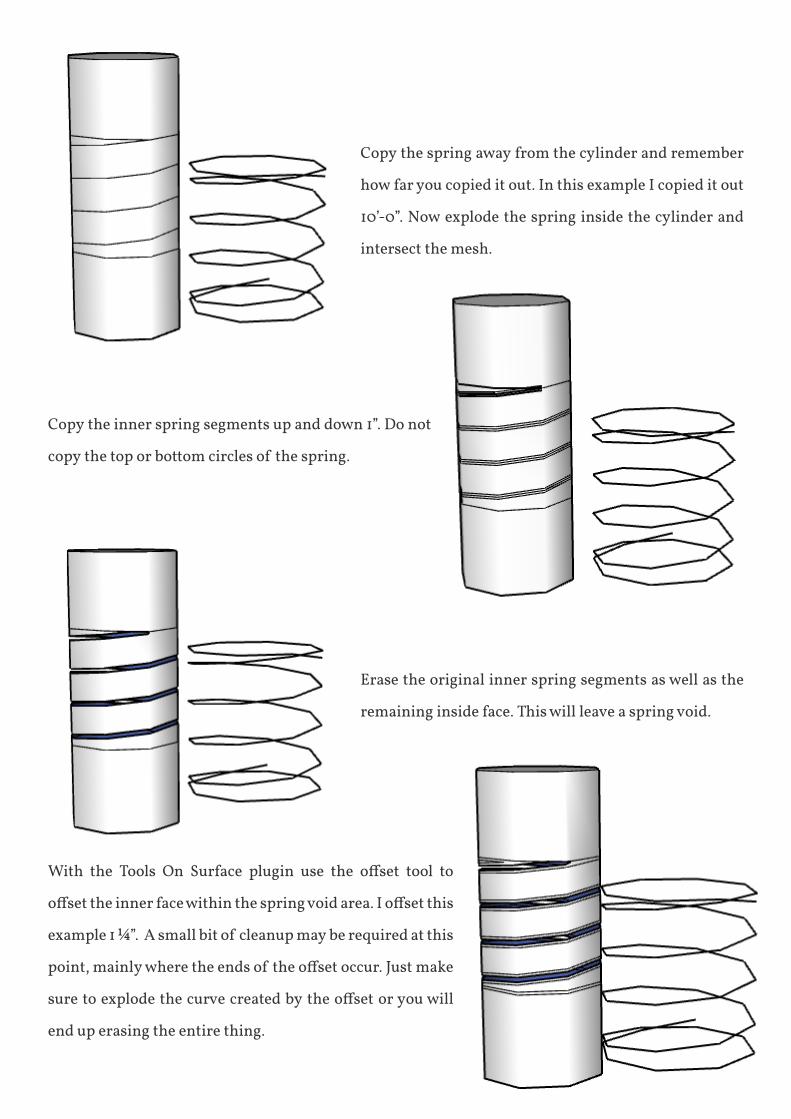
Copy the spring away from the cylinder and remember
how far you copied it out. in this example i copied it out
10’-0”. now explode the spring inside the cylinder and
intersect the mesh.
Copy the inner spring segments up and down 1”. do not
copy the top or bottom circles of the spring.
erase the original inner spring segments as well as the
remaining inside face. this will leave a spring void.
With the Tools On Surface plugin use the offset tool to
offset the inner face within the spring void area. I offset this
example 1 ¼”. a small bit of cleanup may be required at this
point, mainly where the ends of the offset occur. Just make
sure to explode the curve created by the offset or you will
end up erasing the entire thing.
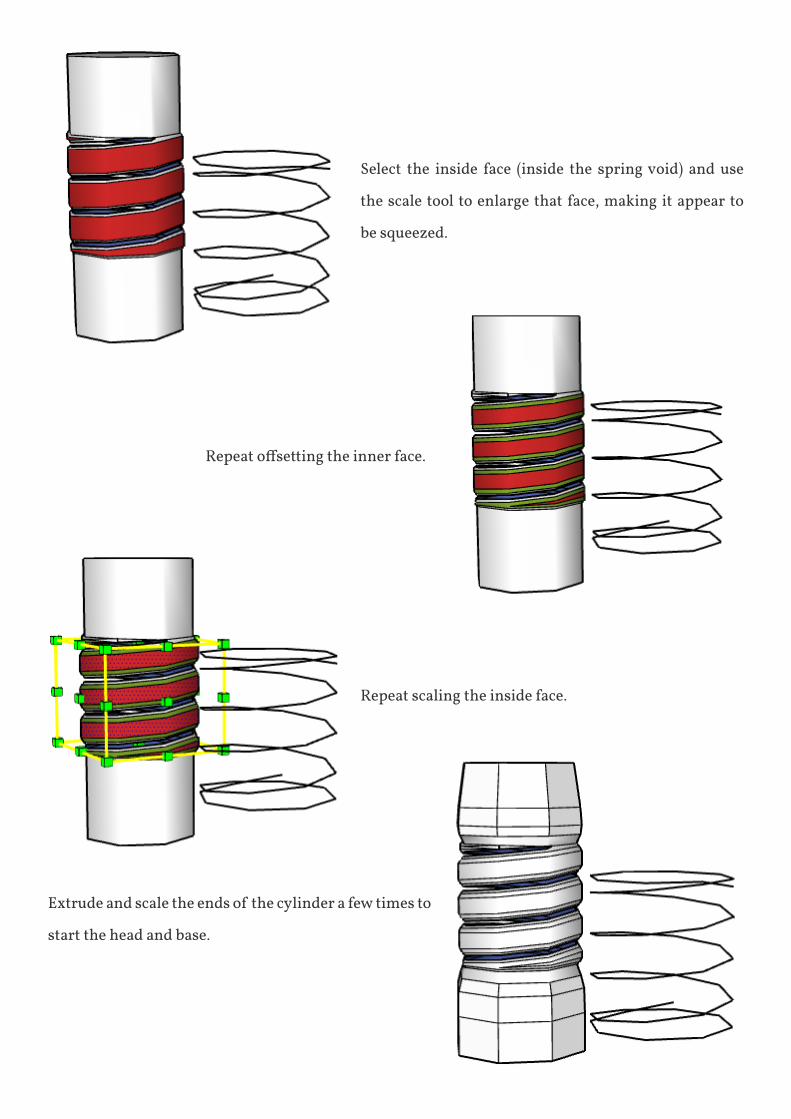
Select the inside face (inside the spring void) and use
the scale tool to enlarge that face, making it appear to
be squeezed.
extrude and scale the ends of the cylinder a few times to
start the head and base.
repeat scaling the inside face.
Repeat offsetting the inner face.
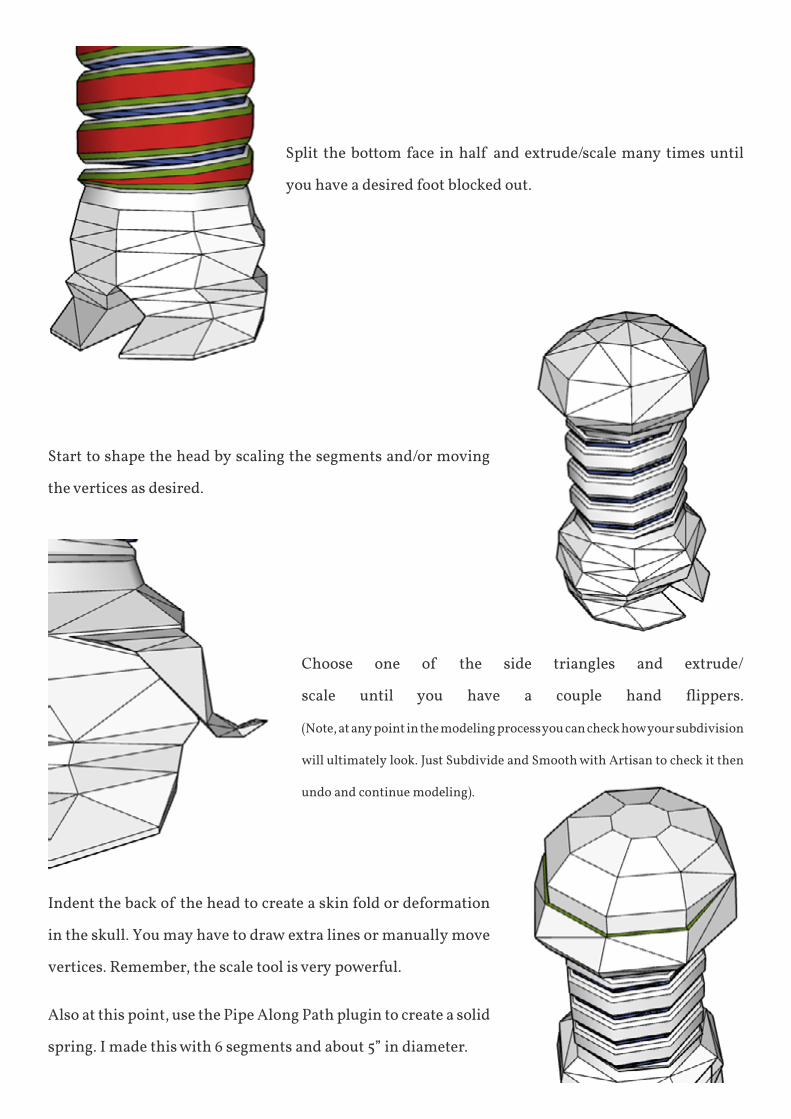
Split the bottom face in half and extrude/scale many times until
you have a desired foot blocked out.
Start to shape the head by scaling the segments and/or moving
the vertices as desired.
indent the back of the head to create a skin fold or deformation
in the skull. you may have to draw extra lines or manually move
vertices. remember, the scale tool is very powerful.
also at this point, use the pipe along path plugin to create a solid
spring. i made this with 6 segments and about 5” in diameter.
Choose one of the side triangles and extrude/
scale until you have a couple hand flippers.
(Note, at any point in the modeling process you can check how your subdivision
will ultimately look. Just Subdivide and Smooth with artisan to check it then
undo and continue modeling).
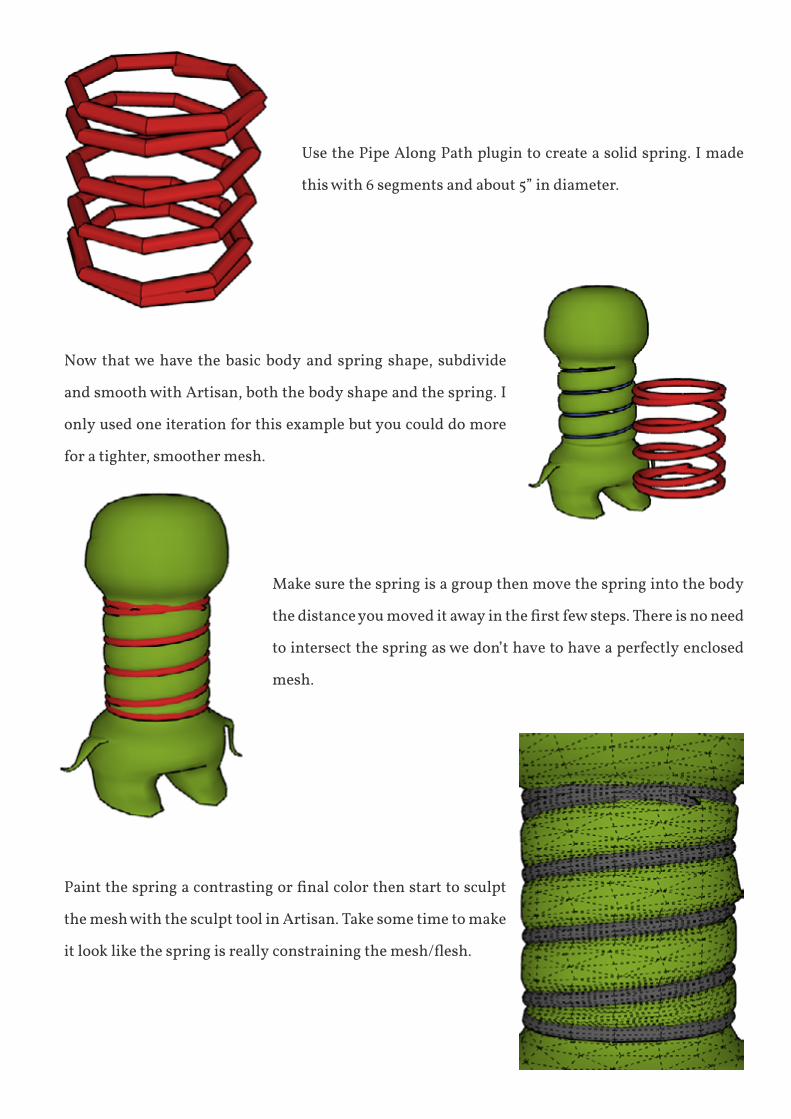
Use the pipe along path plugin to create a solid spring. i made
this with 6 segments and about 5” in diameter.
now that we have the basic body and spring shape, subdivide
and smooth with artisan, both the body shape and the spring. i
only used one iteration for this example but you could do more
for a tighter, smoother mesh.
make sure the spring is a group then move the spring into the body
the distance you moved it away in the first few steps. There is no need
to intersect the spring as we don’t have to have a perfectly enclosed
mesh.
Paint the spring a contrasting or final color then start to sculpt
the mesh with the sculpt tool in artisan. take some time to make
it look like the spring is really constraining the mesh/flesh.
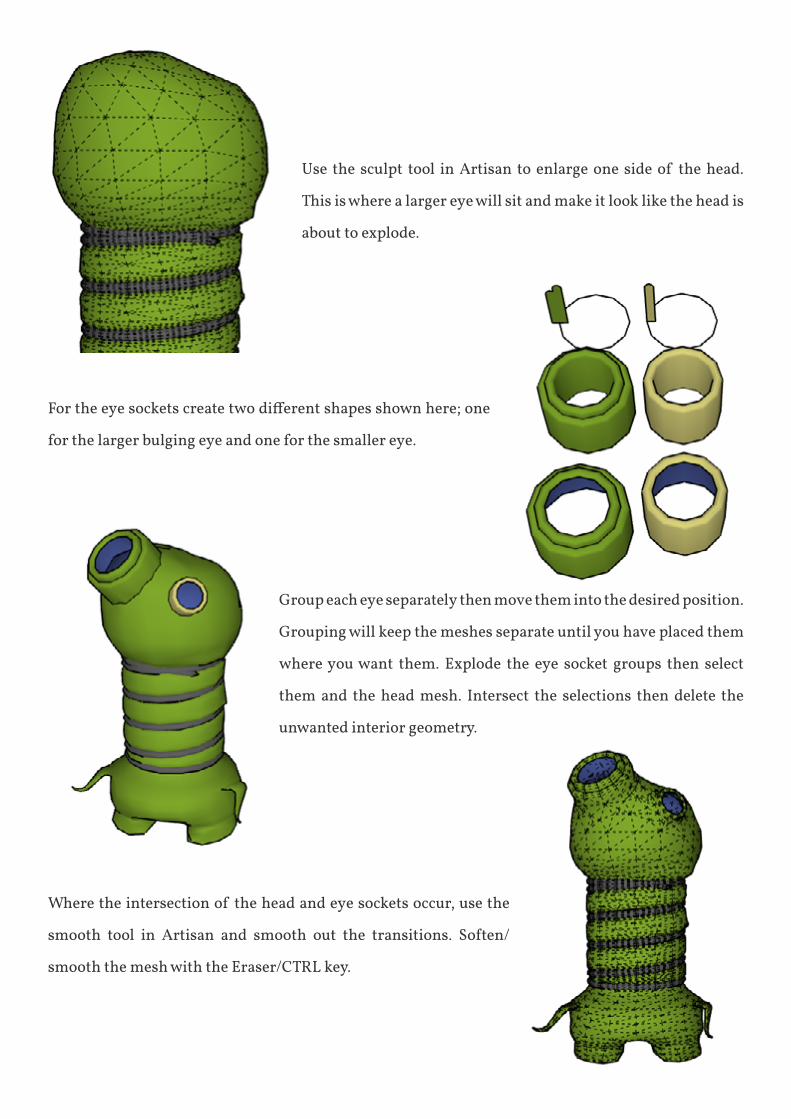
Use the sculpt tool in artisan to enlarge one side of the head.
this is where a larger eye will sit and make it look like the head is
about to explode.
For the eye sockets create two different shapes shown here; one
for the larger bulging eye and one for the smaller eye.
Group each eye separately then move them into the desired position.
Grouping will keep the meshes separate until you have placed them
where you want them. explode the eye socket groups then select
them and the head mesh. intersect the selections then delete the
unwanted interior geometry.
where the intersection of the head and eye sockets occur, use the
smooth tool in Artisan and smooth out the transitions. Soften/
smooth the mesh with the eraser/Ctrl key.
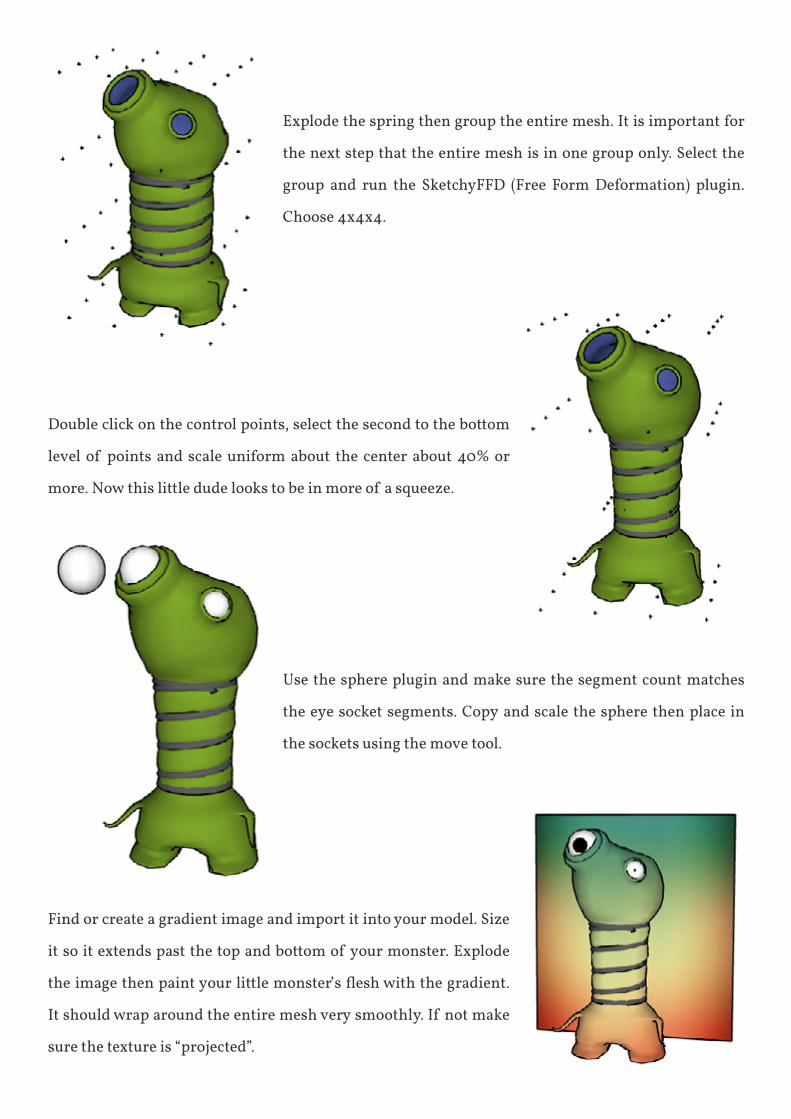
explode the spring then group the entire mesh. it is important for
the next step that the entire mesh is in one group only. Select the
group and run the SketchyFFD (Free Form Deformation) plugin.
Choose 4x4x4.
double click on the control points, select the second to the bottom
level of points and scale uniform about the center about 40% or
more. now this little dude looks to be in more of a squeeze.
Use the sphere plugin and make sure the segment count matches
the eye socket segments. Copy and scale the sphere then place in
the sockets using the move tool.
find or create a gradient image and import it into your model. Size
it so it extends past the top and bottom of your monster. explode
the image then paint your little monster’s flesh with the gradient.
it should wrap around the entire mesh very smoothly. if not make
sure the texture is “projected”.
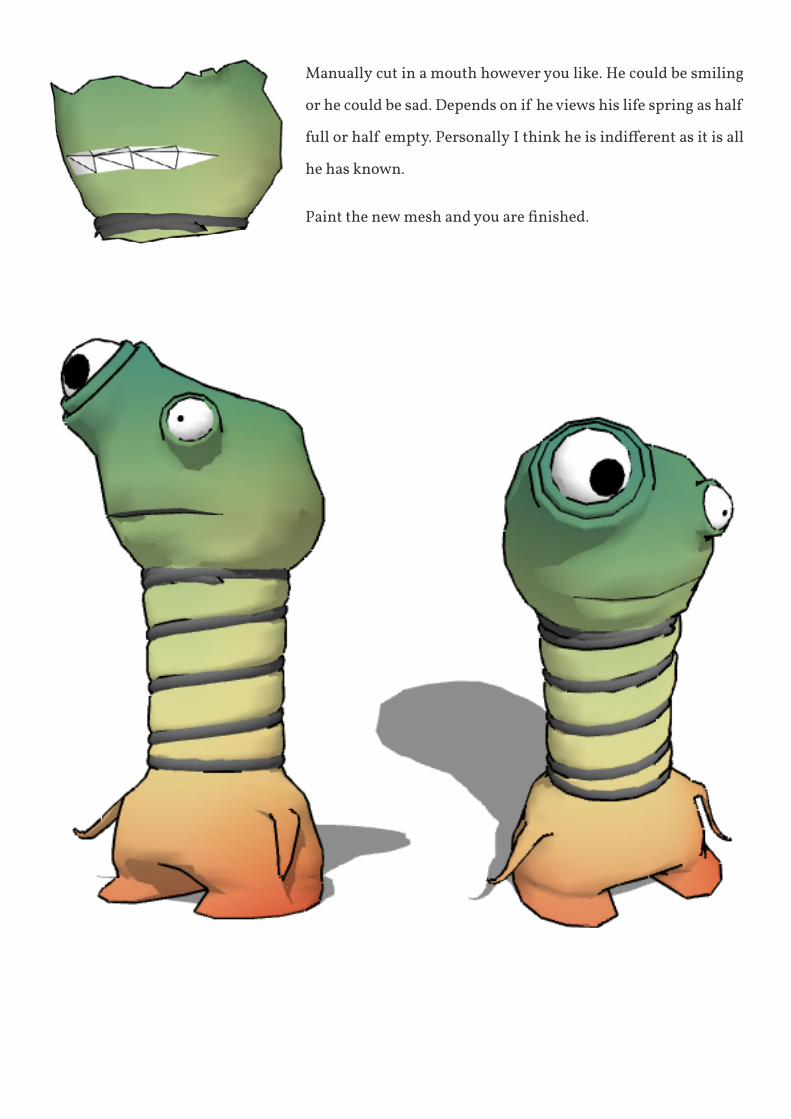
manually cut in a mouth however you like. he could be smiling
or he could be sad. depends on if he views his life spring as half
full or half empty. Personally I think he is indifferent as it is all
he has known.
Paint the new mesh and you are finished.
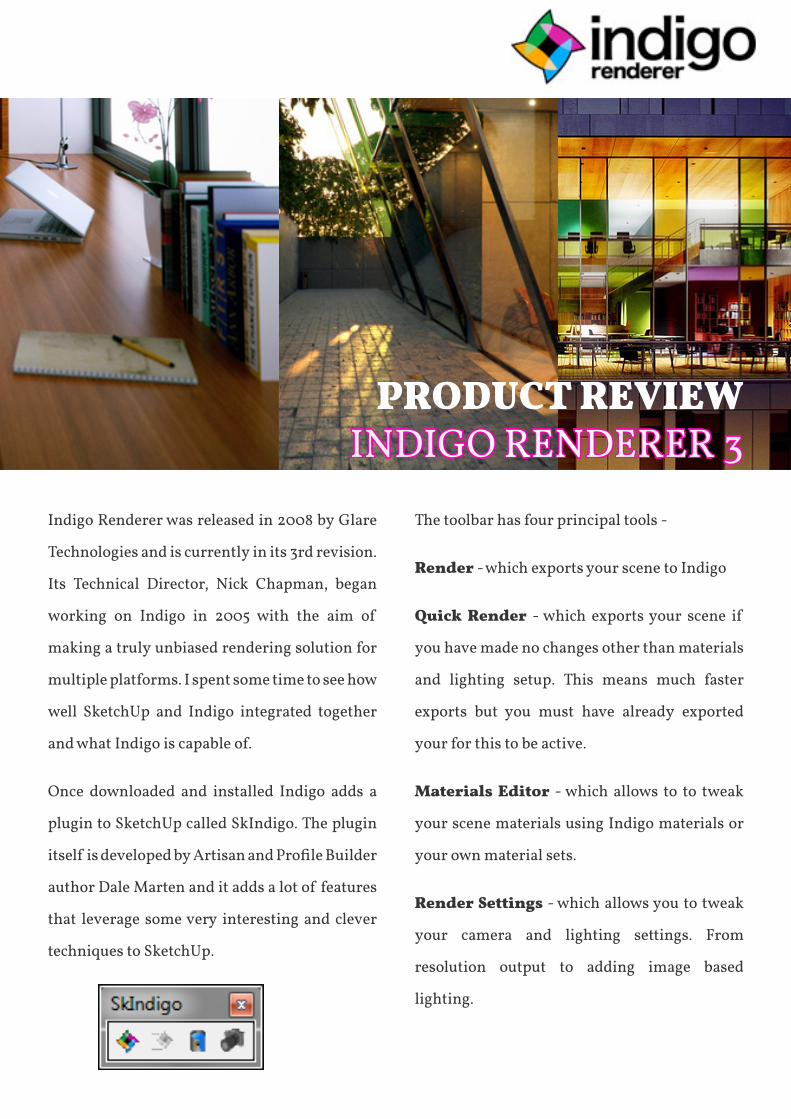
indigo renderer was released in 2008 by Glare
technologies and is currently in its 3rd revision.
its technical director, nick Chapman, began
working on indigo in 2005 with the aim of
making a truly unbiased rendering solution for
multiple platforms. i spent some time to see how
well SketchUp and indigo integrated together
and what indigo is capable of.
once downloaded and installed indigo adds a
plugin to SketchUp called Skindigo. the plugin
itself is developed by Artisan and Profile Builder
author dale marten and it adds a lot of features
that leverage some very interesting and clever
techniques to SketchUp.
the toolbar has four principal tools -
Render - which exports your scene to indigo
Quick Render - which exports your scene if
you have made no changes other than materials
and lighting setup. this means much faster
exports but you must have already exported
your for this to be active.
Materials Editor - which allows to to tweak
your scene materials using indigo materials or
your own material sets.
Render Settings - which allows you to tweak
your camera and lighting settings. from
resolution output to adding image based
lighting.
PRODUCT REVIEWindiGo renderer 3
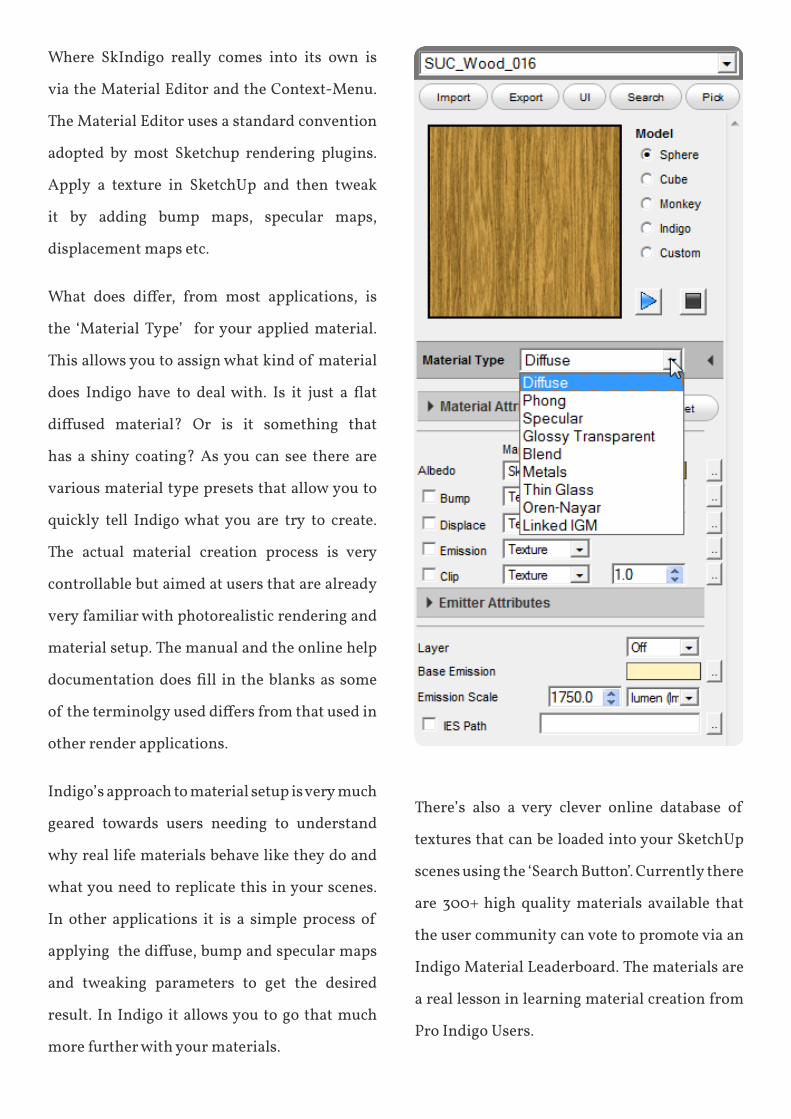
where Skindigo really comes into its own is
via the material editor and the Context-menu.
the material editor uses a standard convention
adopted by most Sketchup rendering plugins.
apply a texture in SketchUp and then tweak
it by adding bump maps, specular maps,
displacement maps etc.
What does differ, from most applications, is
the ‘material type’ for your applied material.
this allows you to assign what kind of material
does Indigo have to deal with. Is it just a flat
diffused material? Or is it something that
has a shiny coating? as you can see there are
various material type presets that allow you to
quickly tell indigo what you are try to create.
the actual material creation process is very
controllable but aimed at users that are already
very familiar with photorealistic rendering and
material setup. the manual and the online help
documentation does fill in the blanks as some
of the terminolgy used differs from that used in
other render applications.
indigo’s approach to material setup is very much
geared towards users needing to understand
why real life materials behave like they do and
what you need to replicate this in your scenes.
in other applications it is a simple process of
applying the diffuse, bump and specular maps
and tweaking parameters to get the desired
result. in indigo it allows you to go that much
more further with your materials.
there’s also a very clever online database of
textures that can be loaded into your SketchUp
scenes using the ‘Search button’. Currently there
are 300+ high quality materials available that
the user community can vote to promote via an
indigo material leaderboard. the materials are
a real lesson in learning material creation from
pro indigo Users.
i already mentioned that Skindigo adds some
clever features via the context-menu and these
do deserve some particular attention.
firstly, there is the ‘proxy instancing’ feature
that allows you to easily overcome SketchUp’s
poly limit. a good example of how this system
works is shown opposite. in my SketchUp scene
i have 1 tree component named ‘3d tree’ and
1 line component named ‘3d tree_dummy’.
indigo sees the ‘_dummy’ tag and adds the ‘3d
tree’ where i have placed ‘3d tree_dummy’
components. what this means is that instancing
objects like vegetation or crowds of 3d people
will have no impact on your SketchUp scene.
i found that on my system SketchUp handled
40,000 to 50,000 line components without any
real noticeable effect.
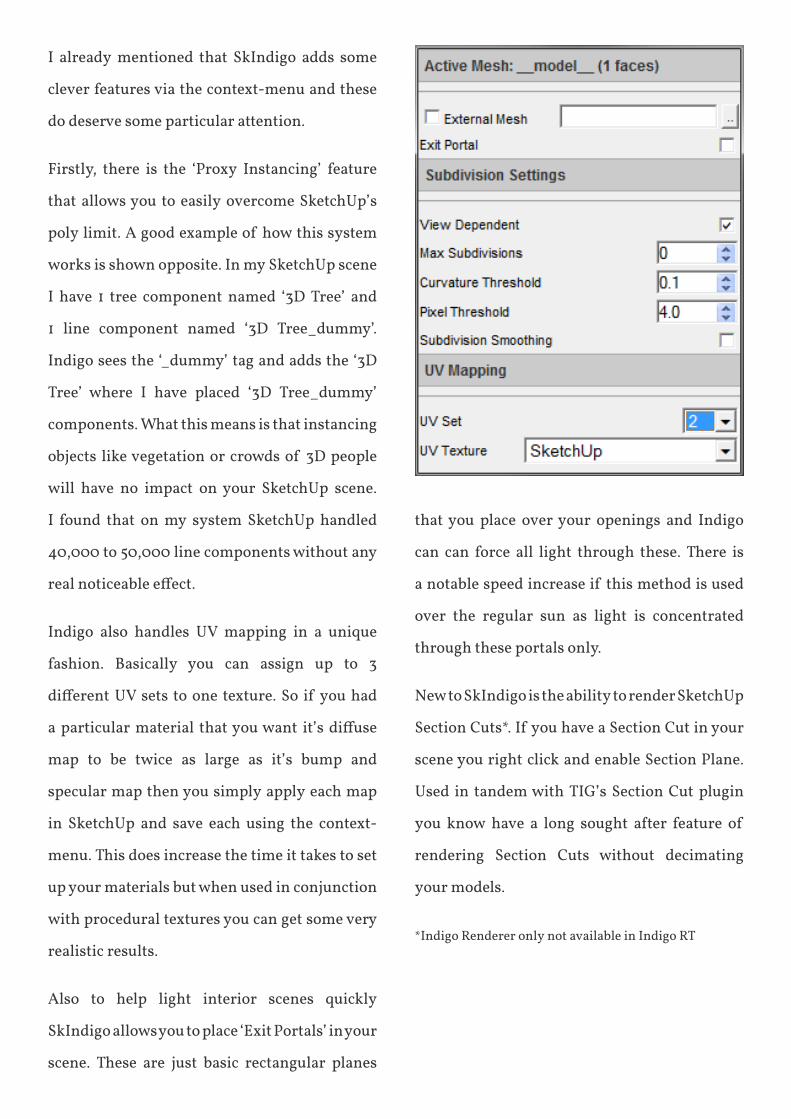
indigo also handles Uv mapping in a unique
fashion. basically you can assign up to 3
different UV sets to one texture. So if you had
a particular material that you want it’s diffuse
map to be twice as large as it’s bump and
specular map then you simply apply each map
in SketchUp and save each using the context-
menu. this does increase the time it takes to set
up your materials but when used in conjunction
with procedural textures you can get some very
realistic results.
also to help light interior scenes quickly
Skindigo allows you to place ‘exit portals’ in your
scene. these are just basic rectangular planes
that you place over your openings and indigo
can can force all light through these. there is
a notable speed increase if this method is used
over the regular sun as light is concentrated
through these portals only.
new to Skindigo is the ability to render SketchUp
Section Cuts*. if you have a Section Cut in your
scene you right click and enable Section plane.
Used in tandem with tiG’s Section Cut plugin
you know have a long sought after feature of
rendering Section Cuts without decimating
your models.
*indigo renderer only not available in indigo rt
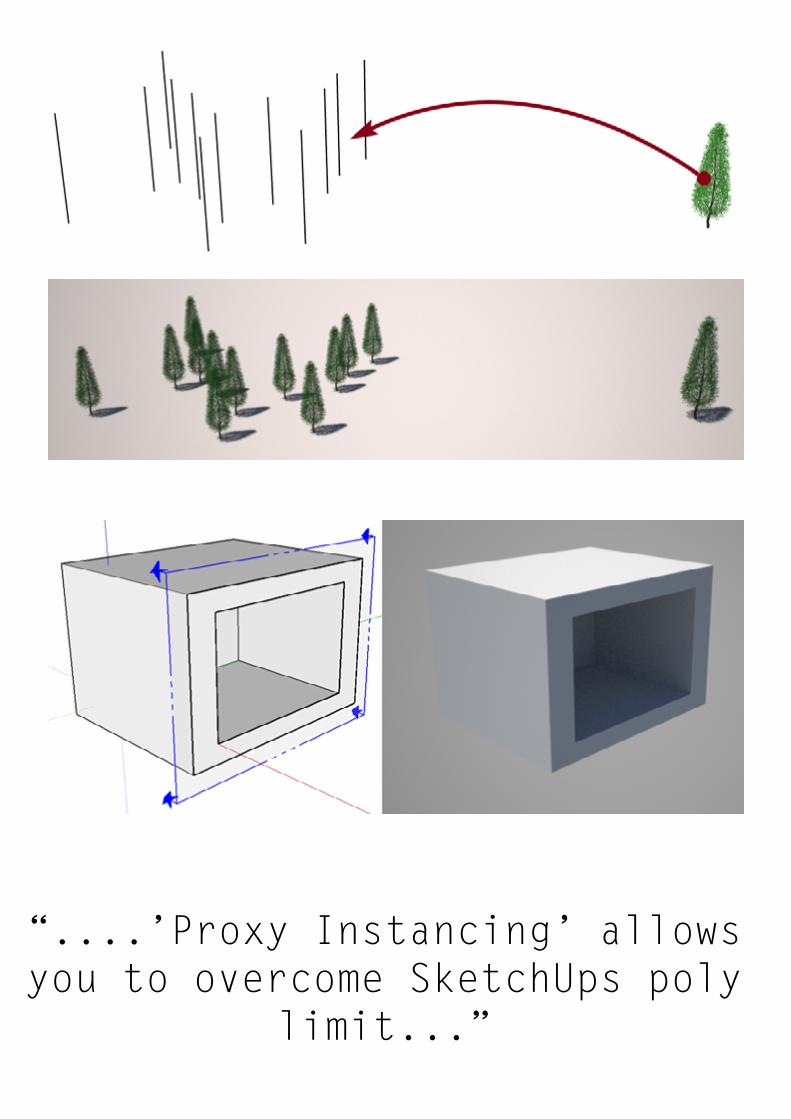
“....’Proxy Instancing’ allows you to overcome SketchUps poly
limit...”
finally, you are ready to launch into the indigo application itself. even though Skindigo allows you to
tweak your scenes before export, it is when you start to use indigo that the ‘photon to photo’ tagline
becomes apparent.
the best way to describe indigo is that it is a physical camera in your computer. it relies on the user to
have an understanding of photography and lighting and its strength is in the level of control it gives
you to tweak your final output.
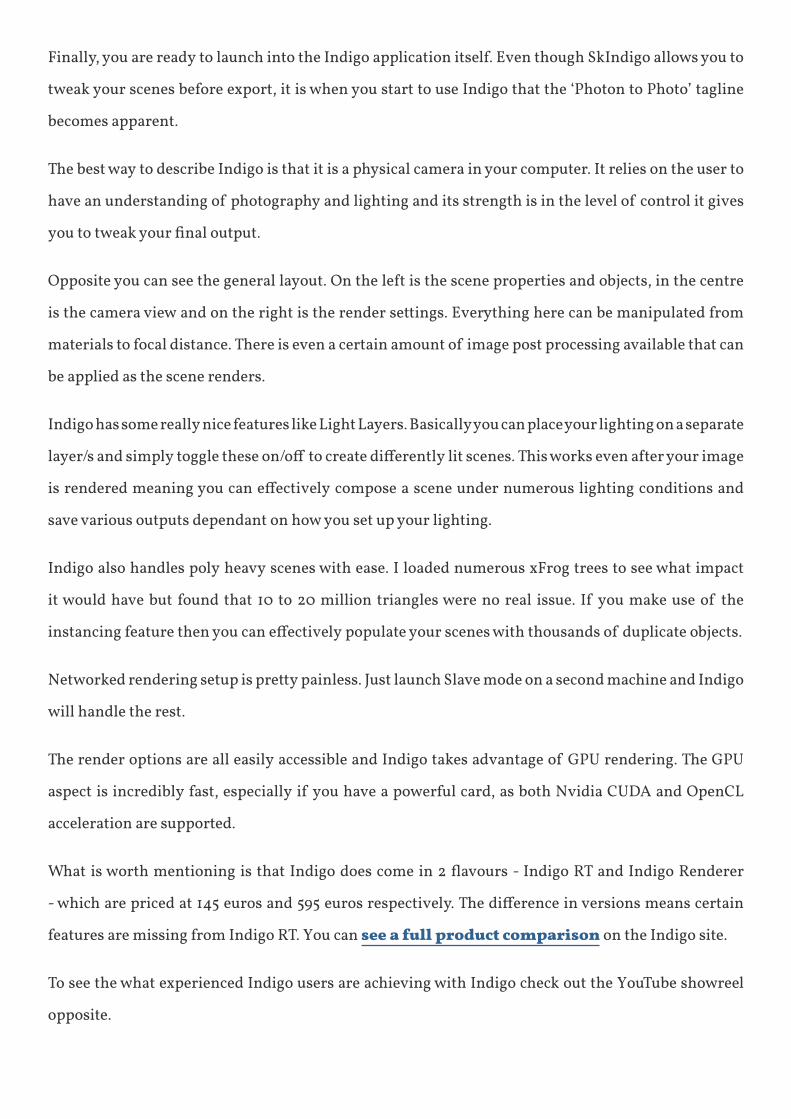
Opposite you can see the general layout. On the left is the scene properties and objects, in the centre
is the camera view and on the right is the render settings. everything here can be manipulated from
materials to focal distance. there is even a certain amount of image post processing available that can
be applied as the scene renders.
indigo has some really nice features like light layers. basically you can place your lighting on a separate
layer/s and simply toggle these on/off to create differently lit scenes. This works even after your image
is rendered meaning you can effectively compose a scene under numerous lighting conditions and
save various outputs dependant on how you set up your lighting.
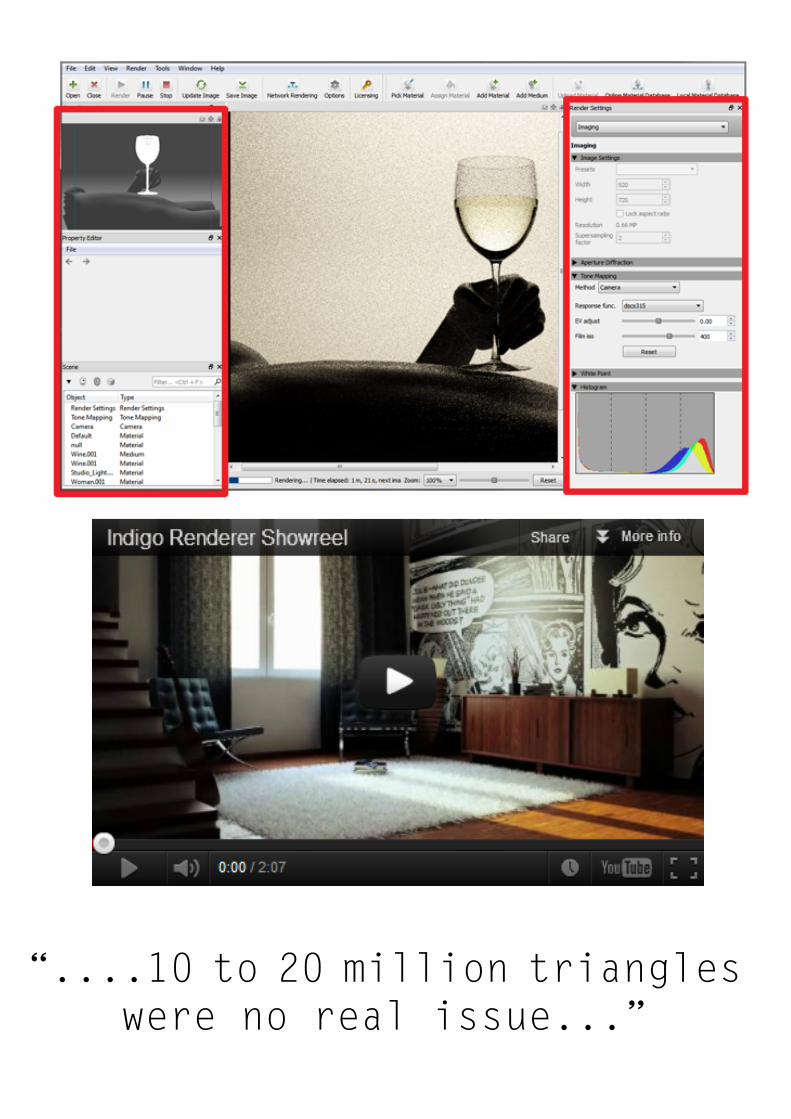
indigo also handles poly heavy scenes with ease. i loaded numerous xfrog trees to see what impact
it would have but found that 10 to 20 million triangles were no real issue. if you make use of the
instancing feature then you can effectively populate your scenes with thousands of duplicate objects.
networked rendering setup is pretty painless. Just launch Slave mode on a second machine and indigo
will handle the rest.
the render options are all easily accessible and indigo takes advantage of GpU rendering. the GpU
aspect is incredibly fast, especially if you have a powerful card, as both nvidia CUda and openCl
acceleration are supported.
What is worth mentioning is that Indigo does come in 2 flavours - Indigo RT and Indigo Renderer
- which are priced at 145 euros and 595 euros respectively. The difference in versions means certain
features are missing from indigo rt. you can see a full product comparison on the indigo site.
to see the what experienced indigo users are achieving with indigo check out the youtube showreel
opposite.
“....10 to 20 million triangles were no real issue...”
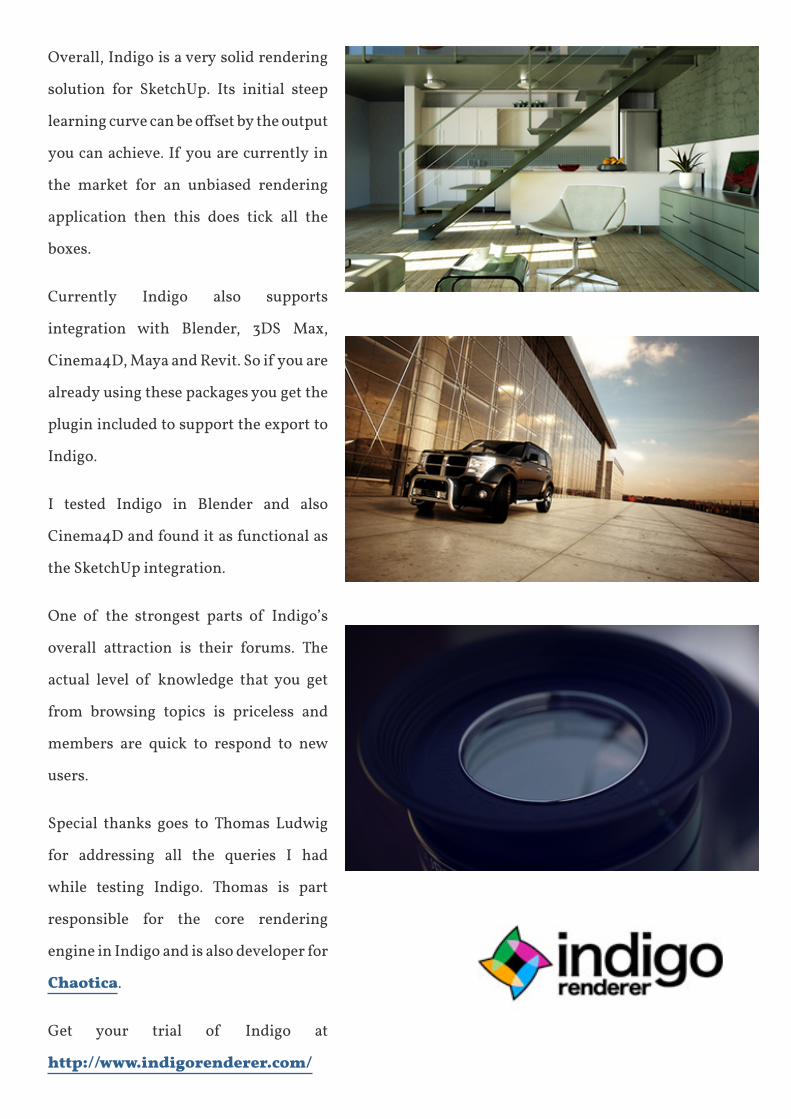
overall, indigo is a very solid rendering
solution for SketchUp. its initial steep
learning curve can be offset by the output
you can achieve. if you are currently in
the market for an unbiased rendering
application then this does tick all the
boxes.
Currently indigo also supports
integration with blender, 3dS max,
Cinema4d, maya and revit. So if you are
already using these packages you get the
plugin included to support the export to
indigo.
i tested indigo in blender and also
Cinema4d and found it as functional as
the SketchUp integration.
one of the strongest parts of indigo’s
overall attraction is their forums. the
actual level of knowledge that you get
from browsing topics is priceless and
members are quick to respond to new
users.
Special thanks goes to thomas ludwig
for addressing all the queries i had
while testing indigo. thomas is part
responsible for the core rendering
engine in indigo and is also developer for
Chaotica.
Get your trial of indigo at
http://www.indigorenderer.com/
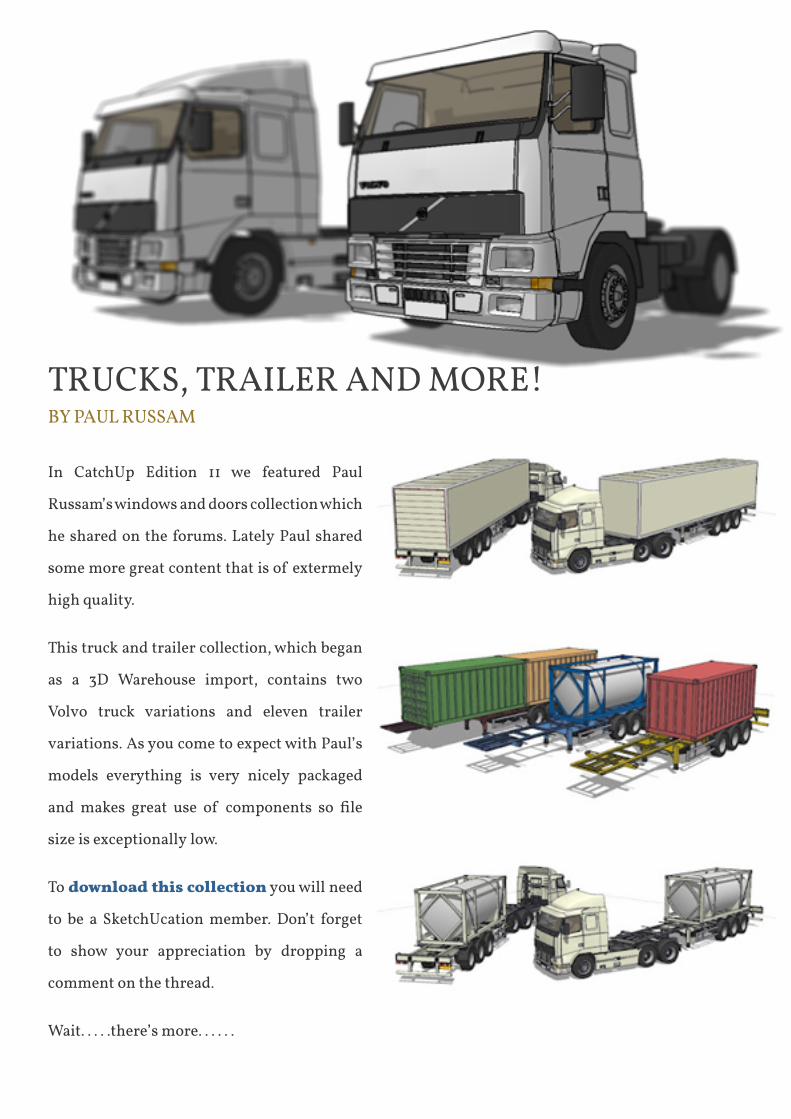
in CatchUp edition 11 we featured paul
russam’s windows and doors collection which
he shared on the forums. lately paul shared
some more great content that is of extermely
high quality.
this truck and trailer collection, which began
as a 3d warehouse import, contains two
volvo truck variations and eleven trailer
variations. as you come to expect with paul’s
models everything is very nicely packaged
and makes great use of components so file
size is exceptionally low.
to download this collection you will need
to be a SketchUcation member. don’t forget
to show your appreciation by dropping a
comment on the thread.
wait. . . . .there’s more. . . . . .
trUCKS, trailer and more!by paUl rUSSam
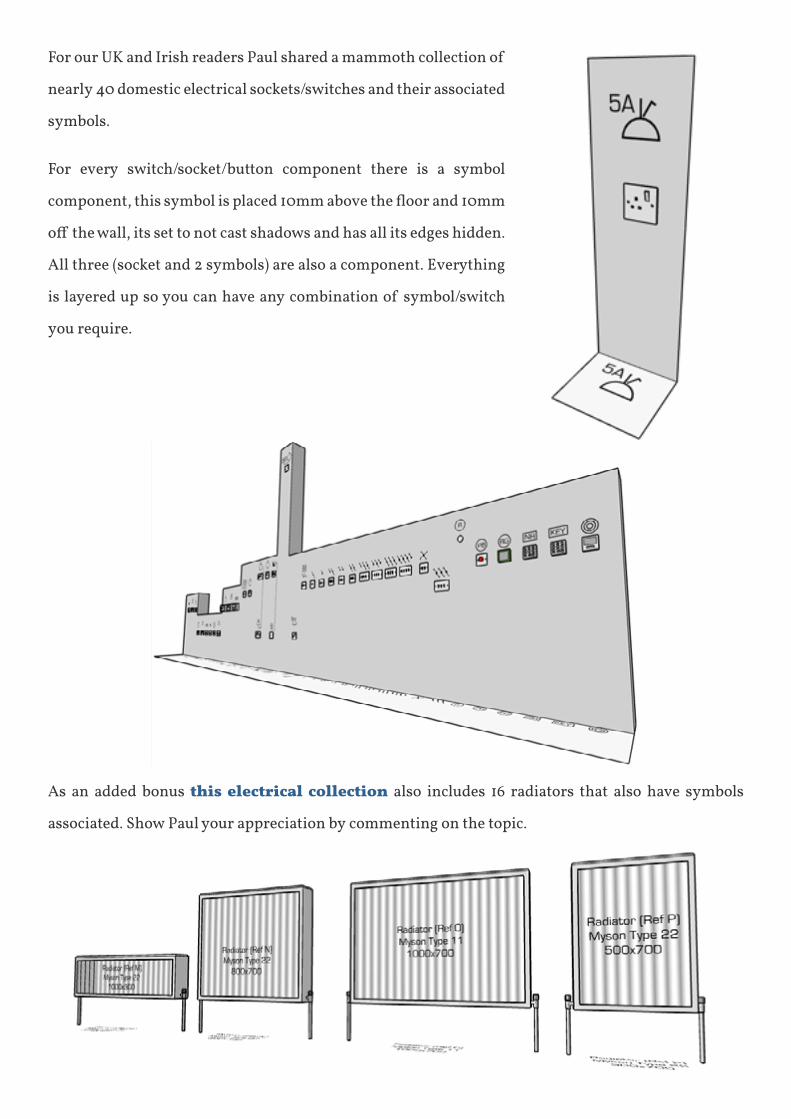
for our UK and irish readers paul shared a mammoth collection of
nearly 40 domestic electrical sockets/switches and their associated
symbols.
for every switch/socket/button component there is a symbol
component, this symbol is placed 10mm above the floor and 10mm
off the wall, its set to not cast shadows and has all its edges hidden.
All three (socket and 2 symbols) are also a component. Everything
is layered up so you can have any combination of symbol/switch
you require.
as an added bonus this electrical collection also includes 16 radiators that also have symbols
associated. Show paul your appreciation by commenting on the topic.
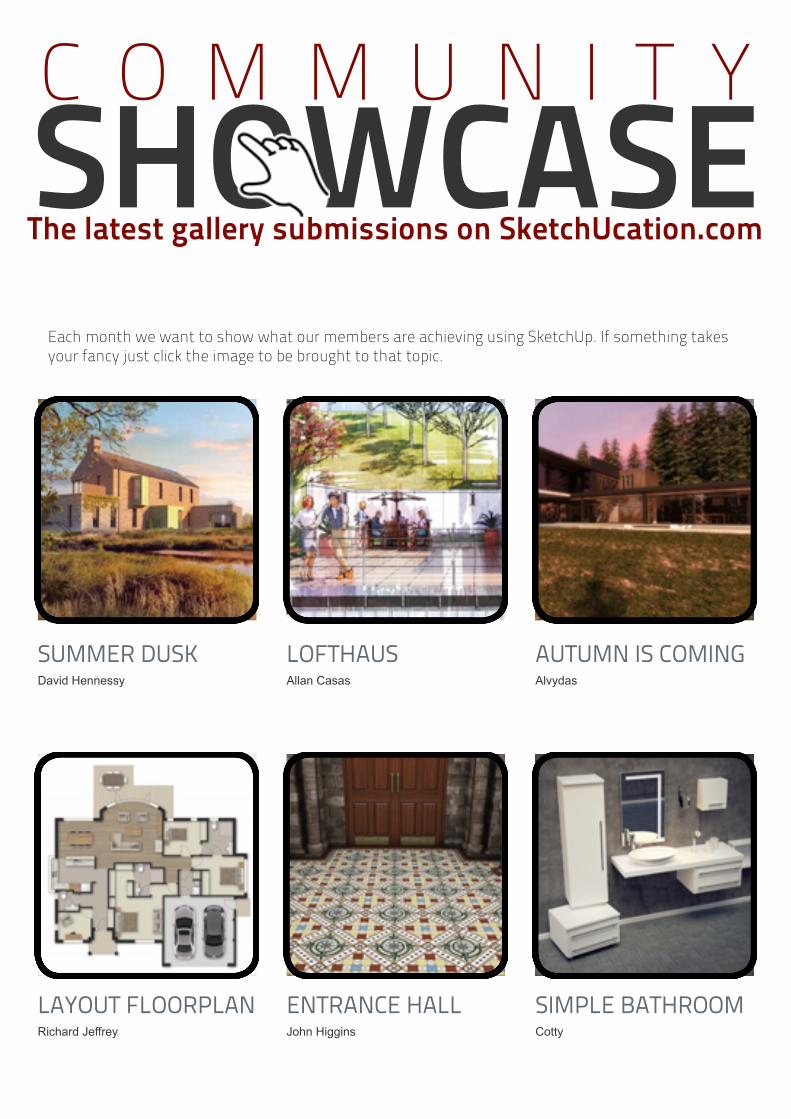
C O M M u N i t ySHOWCASEThe latest gallery submissions on SketchUcation.com
each month we want to show what our members are achieving using Sketchup. if something takes your fancy just click the image to be brought to that topic.
simple bathroomCotty
entrance hall John Higgins
layout floorplan Richard Jeffrey
autumn is comingAlvydas
lofthausAllan Casas
summer DuskDavid Hennessy
mixeD useJason Christiansen
kitchenVizfellas
orthoDox churchBobby Hammond
Different mooDFrederic Yves Moro
layout workMike Beganyi
university campusEdson Mahfuz
books.sketchUcation.comlearn with the experts at your pace
NEW BOOKS ADDED!
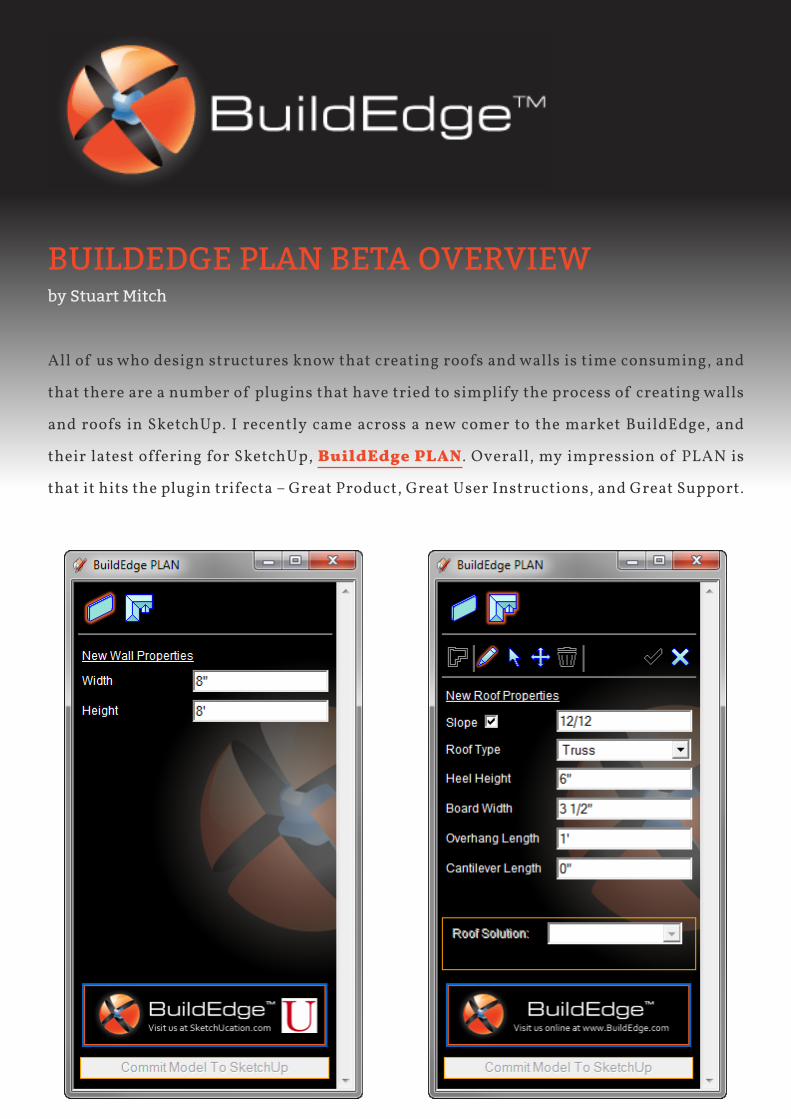
bUilDeDGe PlAn betA overvieWby Stuart Mitch
all of us who design structures know that creating roofs and walls is time consuming, and
that there are a number of plugins that have tried to simplify the process of creating walls
and roofs in SketchUp. i recently came across a new comer to the market buildedge, and
their latest offering for SketchUp, BuildEdge PLAN. overall, my impression of plan is
that it hits the plugin trifecta – Great product, Great User instructions, and Great Support.
the plugin itself is simple yet powerful. after install, plan shows up as a single button
toolbar, and when you click on the buildedge logo, plan launches a well-designed window
that contains commands to allow you to create walls and/or roofs.
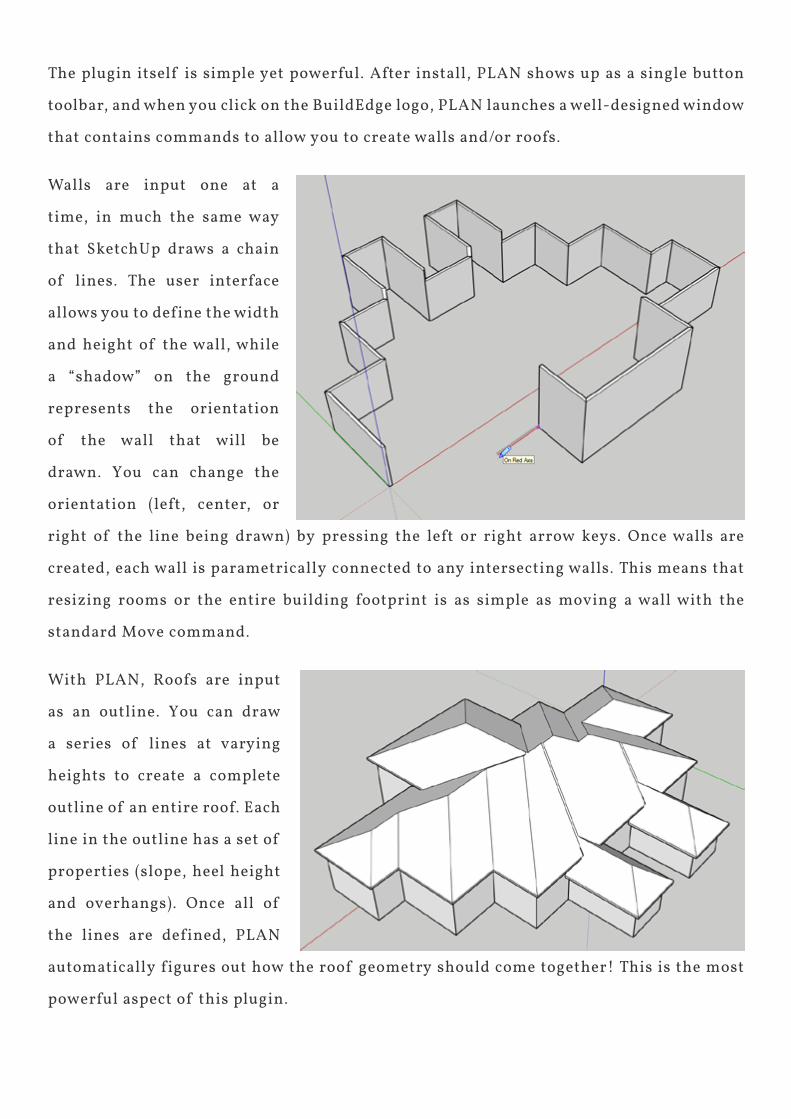
walls are input one at a
time, in much the same way
that SketchUp draws a chain
of lines. the user interface
allows you to define the width
and height of the wall, while
a “shadow” on the ground
represents the orientation
of the wall that will be
drawn. you can change the
orientation (left, center, or
right of the line being drawn) by pressing the left or right arrow keys. Once walls are
created, each wall is parametrically connected to any intersecting walls. this means that
resizing rooms or the entire building footprint is as simple as moving a wall with the
standard move command.
with plan, roofs are input
as an outline. you can draw
a series of lines at varying
heights to create a complete
outline of an entire roof. each
line in the outline has a set of
properties (slope, heel height
and overhangs). Once all of
the lines are defined, plan
automatically figures out how the roof geometry should come together! this is the most
powerful aspect of this plugin.
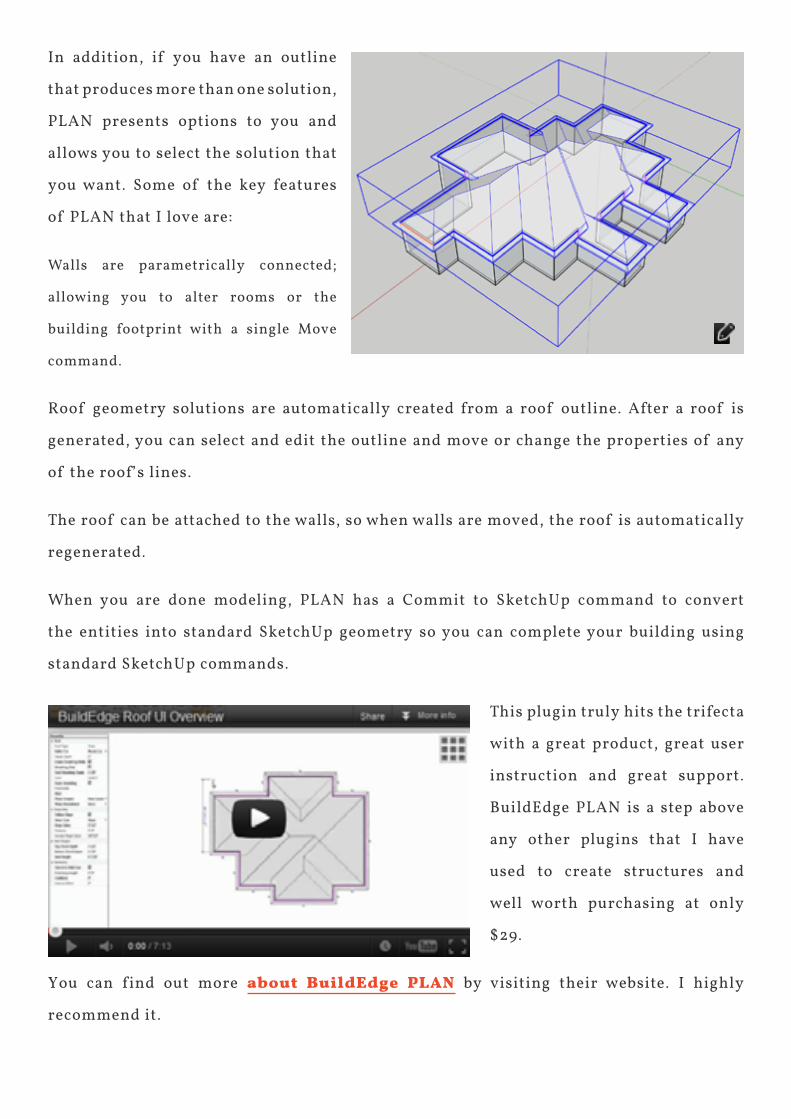
in addition, if you have an outline
that produces more than one solution,
plan presents options to you and
allows you to select the solution that
you want. Some of the key features
of plan that i love are:
Walls are parametrically connected;
allowing you to alter rooms or the
building footprint with a single move
command.
roof geometry solutions are automatically created from a roof outline. after a roof is
generated, you can select and edit the outline and move or change the properties of any
of the roof’s lines.
the roof can be attached to the walls, so when walls are moved, the roof is automatically
regenerated.
when you are done modeling, plan has a Commit to SketchUp command to convert
the entities into standard SketchUp geometry so you can complete your building using
standard SketchUp commands.
this plugin truly hits the trifecta
with a great product, great user
instruction and great support.
buildedge plan is a step above
any other plugins that i have
used to create structures and
well worth purchasing at only
$29.
you can find out more about BuildEdge PLAN by visiting their website. i highly
recommend it.
MAGiC PlAnby Mike lucey
Sensopia’s magicplan2 i feel will be of interest to readers that have an iphone / ipad and
need to complete ‘as is’ building surveys on occasion. with the aid of augmented reality
technology, room dimensions are quickly scanned to create accurate metric or imperial
room plans (with doors) that can be further manipulated and adjusted using MagicPlan’s
software to form complex floor plans.
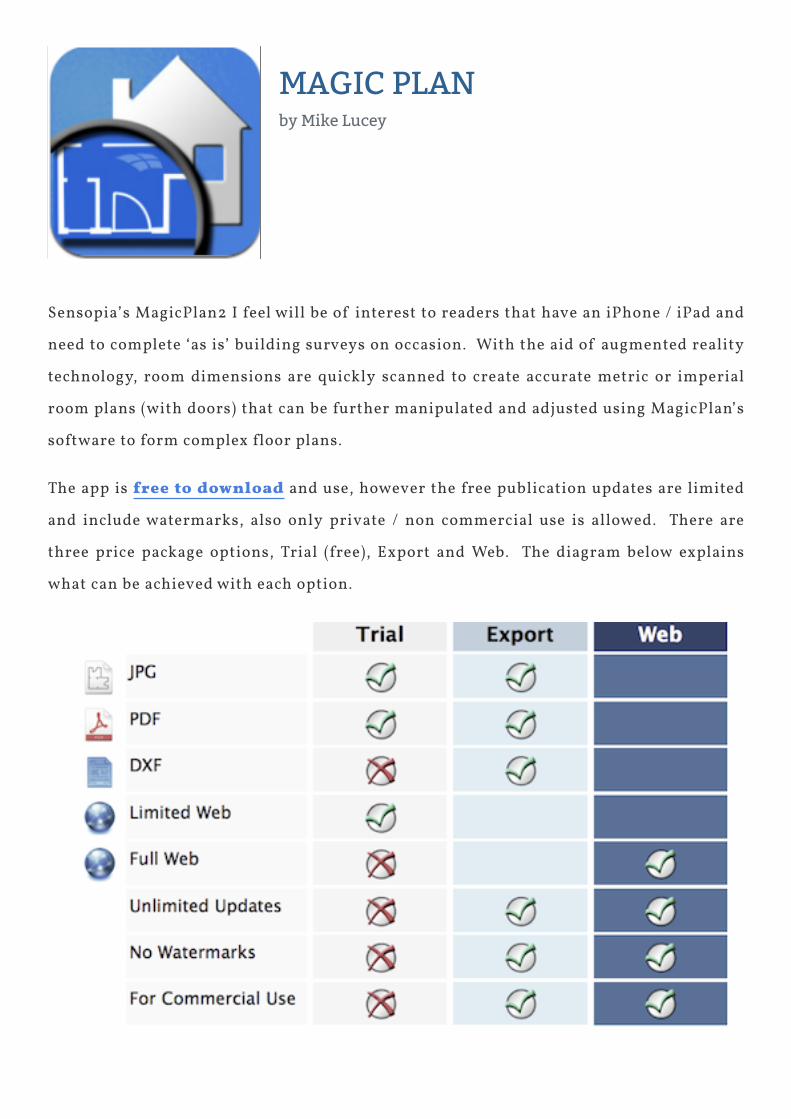
the app is free to download and use, however the free publication updates are limited
and include watermarks, also only private / non commercial use is allowed. there are
three price package options, Trial (free), Export and Web. The diagram below explains
what can be achieved with each option.
there are a number of pricing options for varying degrees of usage on the magicplan site.
i would add that i found the pricing quite reasonable, starting at $2.49 per plan. with a
monthly subscription this figure drops considerably. to get operational, setting up an
account is required and again this is a painless process.
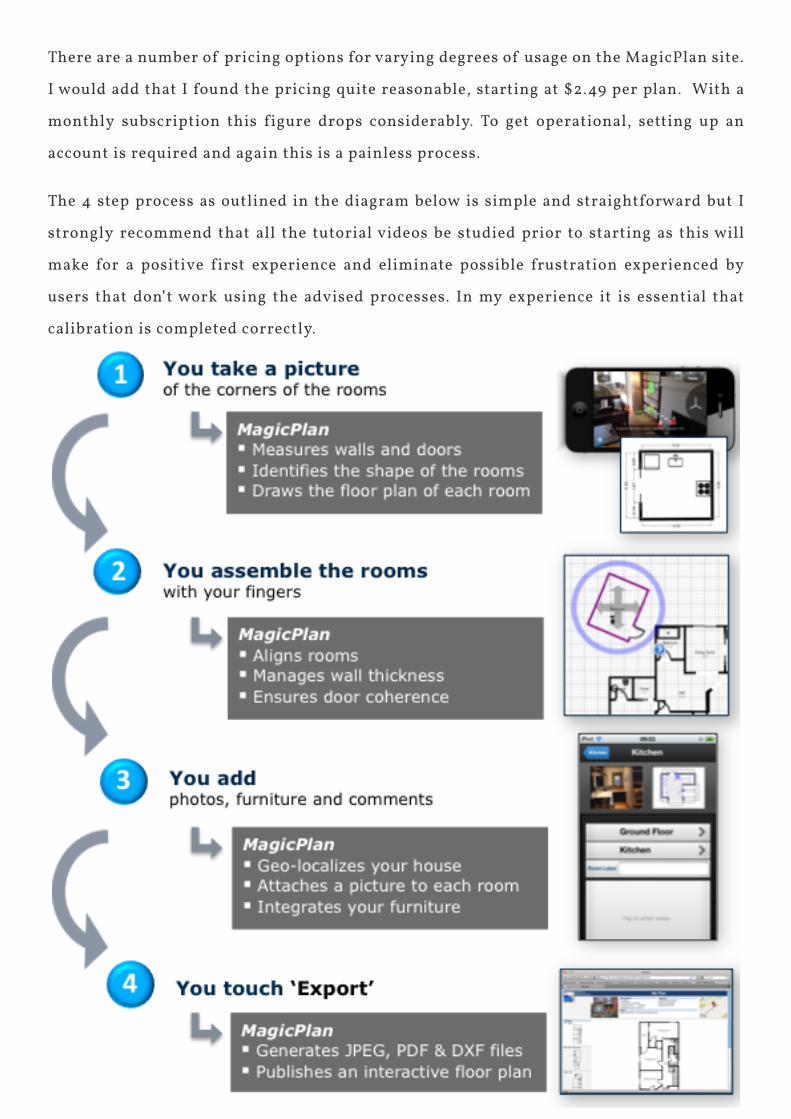
the 4 step process as outlined in the diagram below is simple and straightforward but i
strongly recommend that all the tutorial videos be studied prior to starting as this will
make for a positive first experience and eliminate possible frustration experienced by
users that don’t work using the advised processes. in my experience it is essential that
calibration is completed correctly.
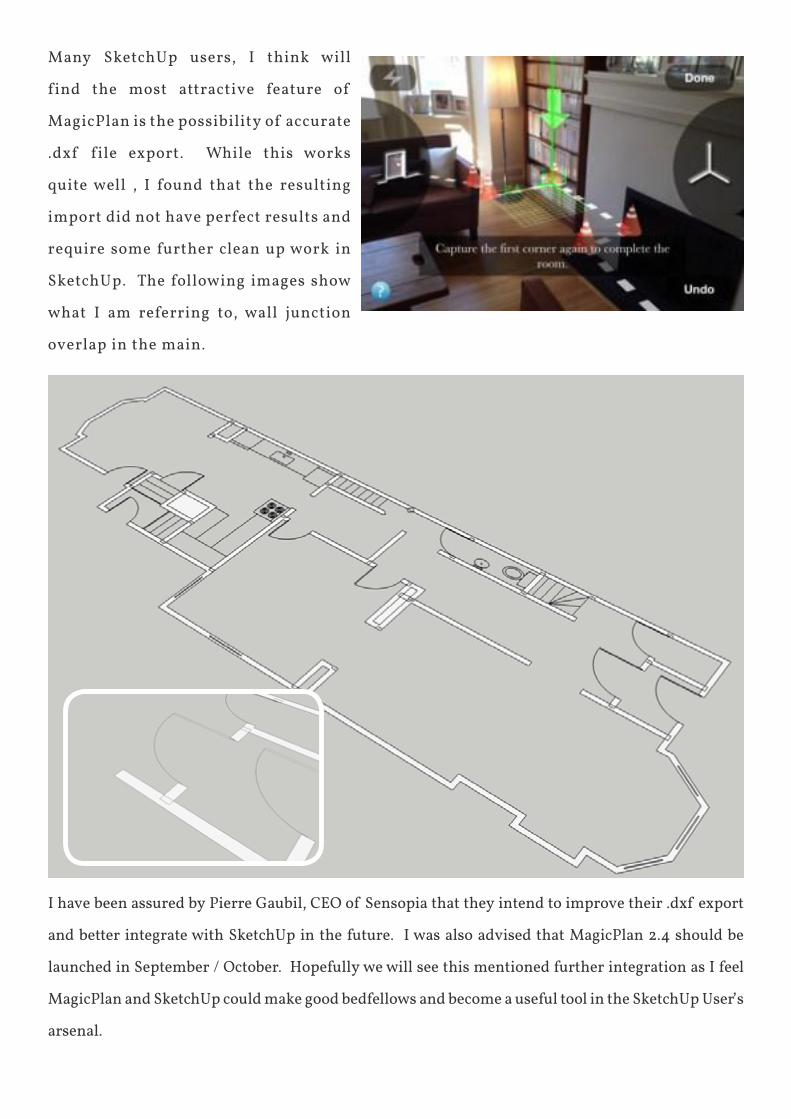
many SketchUp users, i think will
find the most attractive feature of
magicplan is the possibility of accurate
.dxf file export. while this works
quite well , i found that the resulting
import did not have perfect results and
require some further clean up work in
SketchUp. the following images show
what i am referring to, wall junction
overlap in the main.
i have been assured by pierre Gaubil, Ceo of Sensopia that they intend to improve their .dxf export
and better integrate with SketchUp in the future. i was also advised that magicplan 2.4 should be
launched in September / october. hopefully we will see this mentioned further integration as i feel
magicplan and SketchUp could make good bedfellows and become a useful tool in the SketchUp User’s
arsenal.
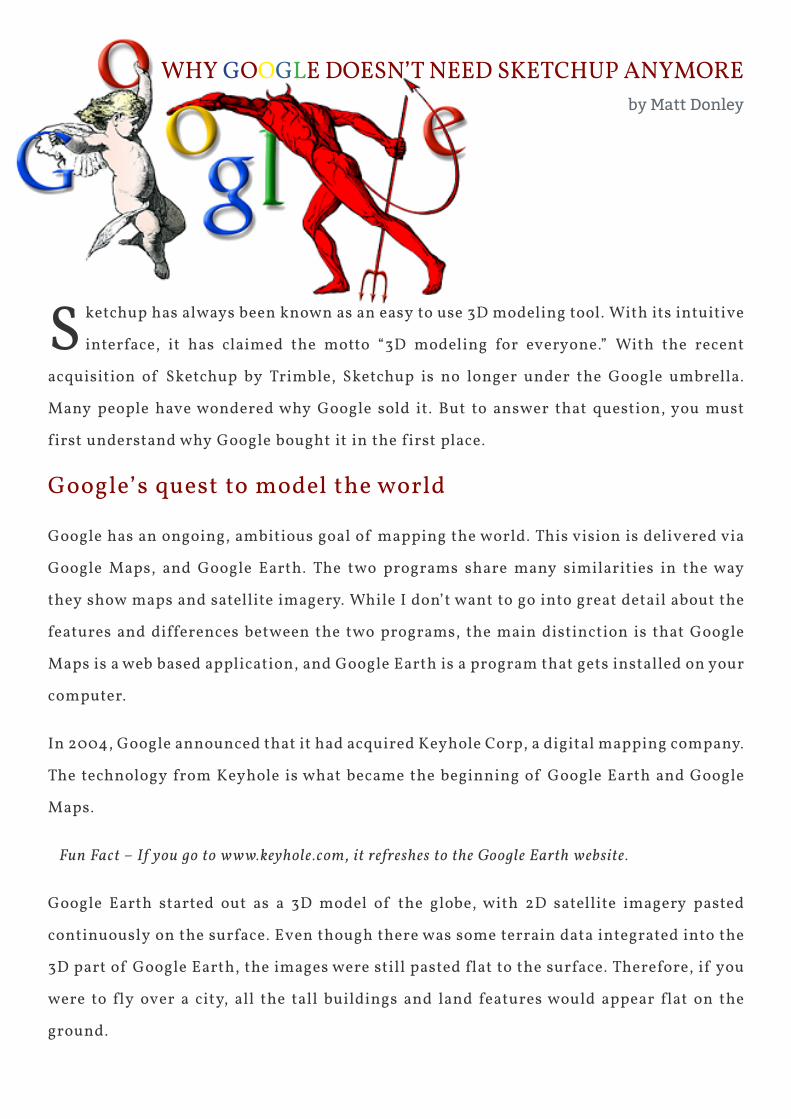
Sketchup has always been known as an easy to use 3d modeling tool. with its intuitive
interface, it has claimed the motto “3d modeling for everyone.” with the recent
acquisition of Sketchup by trimble, Sketchup is no longer under the Google umbrella.
many people have wondered why Google sold it. but to answer that question, you must
first understand why Google bought it in the first place.
Google’s quest to model the world
Google has an ongoing, ambitious goal of mapping the world. this vision is delivered via
Google maps, and Google earth. the two programs share many similarities in the way
they show maps and satellite imagery. while i don’t want to go into great detail about the
features and differences between the two programs, the main distinction is that Google
maps is a web based application, and Google earth is a program that gets installed on your
computer.
in 2004, Google announced that it had acquired Keyhole Corp, a digital mapping company.
the technology from Keyhole is what became the beginning of Google earth and Google
maps.
Fun Fact – If you go to www.keyhole .com , it refreshes to the Google Earth website .
Google earth started out as a 3d model of the globe, with 2d satellite imagery pasted
continuously on the surface. even though there was some terrain data integrated into the
3d part of Google earth, the images were still pasted flat to the surface. therefore, if you
were to fly over a city, all the tall buildings and land features would appear flat on the
ground.
why GooGle doeSn’t need SKetChUp anymoreby Matt Donley
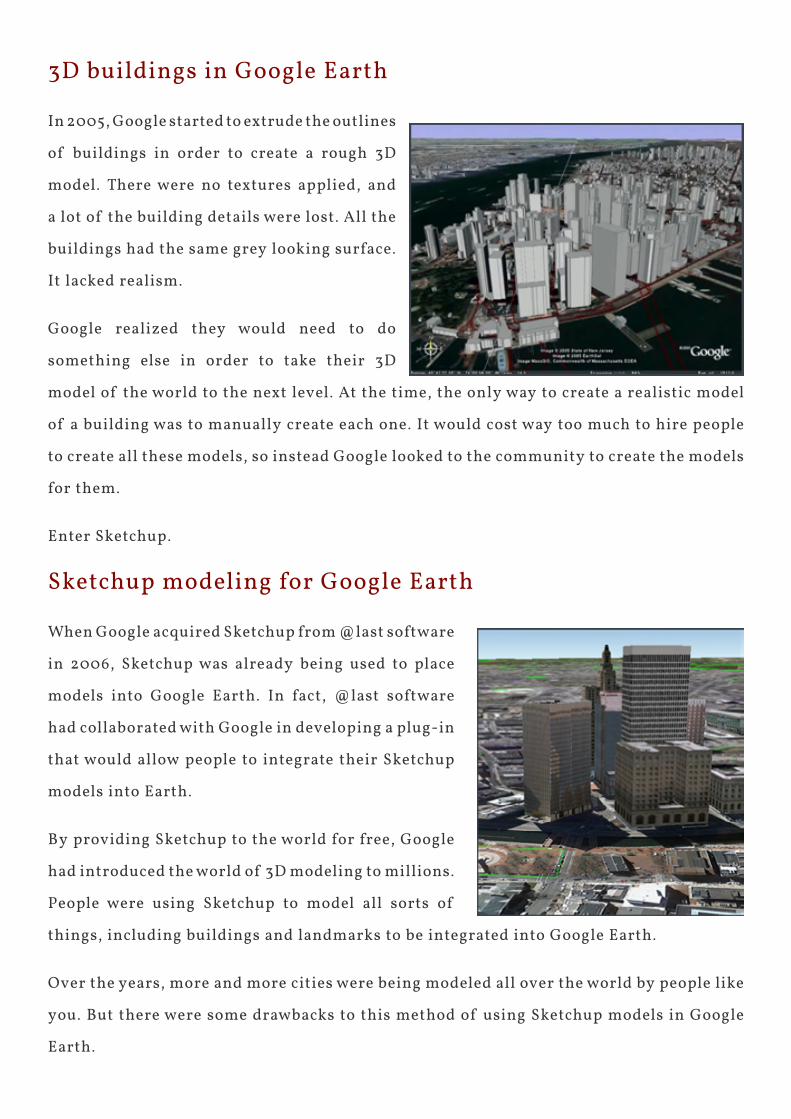
3d buildings in Google earth
in 2005, Google started to extrude the outlines
of buildings in order to create a rough 3d
model. there were no textures applied, and
a lot of the building details were lost. all the
buildings had the same grey looking surface.
it lacked realism.
Google realized they would need to do
something else in order to take their 3d
model of the world to the next level. at the time, the only way to create a realistic model
of a building was to manually create each one. it would cost way too much to hire people
to create all these models, so instead Google looked to the community to create the models
for them.
enter Sketchup.
Sketchup modeling for Google earth
when Google acquired Sketchup from @last software
in 2006, Sketchup was already being used to place
models into Google earth. in fact, @last software
had collaborated with Google in developing a plug-in
that would allow people to integrate their Sketchup
models into earth.
by providing Sketchup to the world for free, Google
had introduced the world of 3d modeling to millions.
people were using Sketchup to model all sorts of
things, including buildings and landmarks to be integrated into Google earth.
over the years, more and more cities were being modeled all over the world by people like
you. but there were some drawbacks to this method of using Sketchup models in Google
earth.
why Sketchup is not the perfect solution for modeling Google earth
there are numerous drawbacks to crowd sourcing the modeling work for Google earth.
most of the problems are a result of having many different people create models, as each
person may have different methods for modeling. they also have different perspectives
on quality, causing inconsistencies between models.
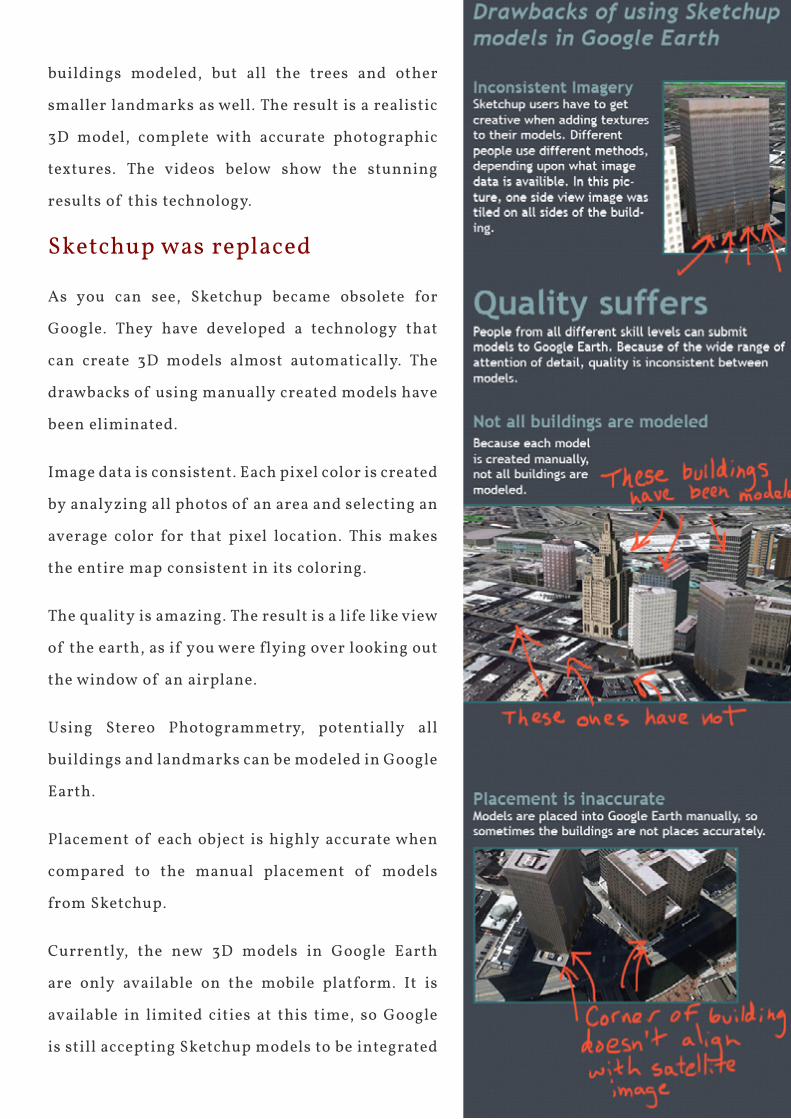
• inconsistent image data would be used to texture the buildings. whether it was aerial
images, user images, or sometimes it would be an artificial texture, many models
would look different from each other depending upon the image source.
• the quality of each model differs, as a result of having many different people create
the models.
• not all buildings are modeled. each building is manually modeled. if someone hasn’t
created it, it won’t be in Google earth.
• placement of buildings is not always accurate.
Google has recently announced a new technology that automates the process of creating
3d models in Google earth.
automated 3d models with Stereo photogrammetry
Stereo photogrammetry at it’s core, is calculating the geometric properties of an object
by comparing multiple photographs taken at different perspectives, and producing a 3d
model of the object as a result. the technology is not new, although it has become more
accurate over the years. Sketchup plugins such as pixdim and photoSketch use similar
technology to create 3d models from images.
to create 3d models for Google earth, an aircraft will take multiple parallel passes over
an area and capture high resolution images of the same area from multiple perspectives.
(Curious, I wonder if they are using the Gatewing UAV, owned by Trimble???)
Using that image data, a complete 3d model is created of the area. not only are the
buildings modeled, but all the trees and other
smaller landmarks as well. the result is a realistic
3d model, complete with accurate photographic
textures. the videos below show the stunning
results of this technology.
Sketchup was replaced
as you can see, Sketchup became obsolete for
Google. they have developed a technology that
can create 3d models almost automatically. the
drawbacks of using manually created models have
been eliminated.
image data is consistent. each pixel color is created
by analyzing all photos of an area and selecting an
average color for that pixel location. this makes
the entire map consistent in its coloring.
the quality is amazing. the result is a life like view
of the earth, as if you were flying over looking out
the window of an airplane.
Using Stereo photogrammetry, potentially all
buildings and landmarks can be modeled in Google
earth.
placement of each object is highly accurate when
compared to the manual placement of models
from Sketchup.
Currently, the new 3d models in Google earth
are only available on the mobile platform. it is
available in limited cities at this time, so Google
is still accepting Sketchup models to be integrated
into Google earth for the locations that have yet to be modeled. wherever the new
automated 3d models are being created, all existing Sketchup models will no longer be
visible from Google earth. they will, however, still show up in the 3d warehouse.
So if you’re like myself, and haven’t done too much geo-modeling, it doesn’t look like now
is the time to start. i was thinking of participating in the “model your town” competition
next year, but i wonder if they will even have it now that they have this new technology.
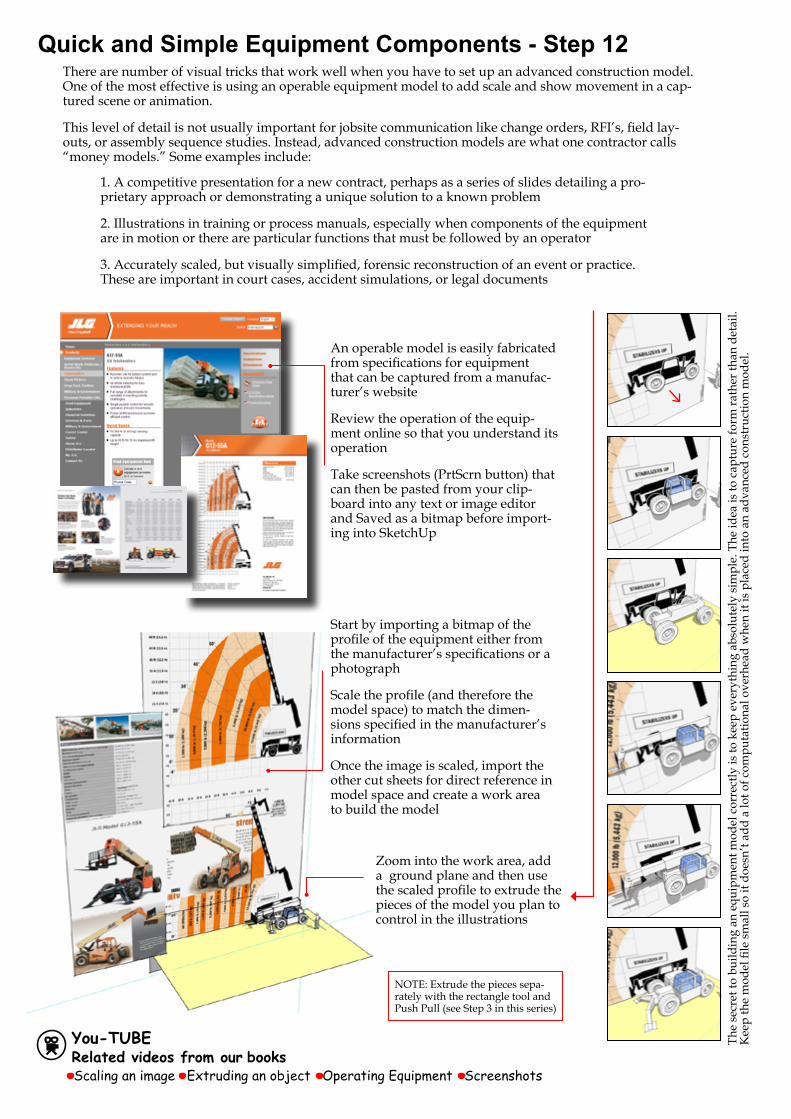
There are number of visual tricks that work well when you have to set up an advanced construction model. One of the most effective is using an operable equipment model to add scale and show movement in a cap-tured scene or animation.
This level of detail is not usually important for jobsite communication like change orders, RFI’s, field lay-outs, or assembly sequence studies. Instead, advanced construction models are what one contractor calls “money models.” Some examples include:
1. A competitive presentation for a new contract, perhaps as a series of slides detailing a pro-prietary approach or demonstrating a unique solution to a known problem
2. Illustrations in training or process manuals, especially when components of the equipment are in motion or there are particular functions that must be followed by an operator
3. Accurately scaled, but visually simplified, forensic reconstruction of an event or practice. These are important in court cases, accident simulations, or legal documents
An operable model is easily fabricated from specifications for equipment that can be captured from a manufac-turer’s website
Review the operation of the equip-ment online so that you understand its operation
Take screenshots (PrtScrn button) that can then be pasted from your clip-board into any text or image editor and Saved as a bitmap before import-ing into SketchUp
Start by importing a bitmap of the profile of the equipment either from the manufacturer’s specifications or a photograph
Scale the profile (and therefore the model space) to match the dimen-sions specified in the manufacturer’s information
Once the image is scaled, import the other cut sheets for direct reference in model space and create a work area to build the model
Zoom into the work area, add a ground plane and then use the scaled profile to extrude the pieces of the model you plan to control in the illustrations
NOTE: Extrude the pieces sepa-rately with the rectangle tool and Push Pull (see Step 3 in this series)
The
secr
et to
bui
ldin
g an
equ
ipm
ent m
odel
cor
rect
ly is
to k
eep
ever
ythi
ng a
bsol
utel
y si
mpl
e. T
he id
ea is
to c
aptu
re fo
rm ra
ther
than
det
ail.
Kee
p th
e m
odel
file
sm
all s
o it
does
n’t a
dd a
lot o
f com
puta
tiona
l ove
rhea
d w
hen
it is
pla
ced
into
an
adva
nced
con
stru
ctio
n m
odel
.
Scaling an image Extruding an object Operating Equipment Screenshots
Quick and Simple Equipment Components - Step 12
You-TUBE Related videos from our books
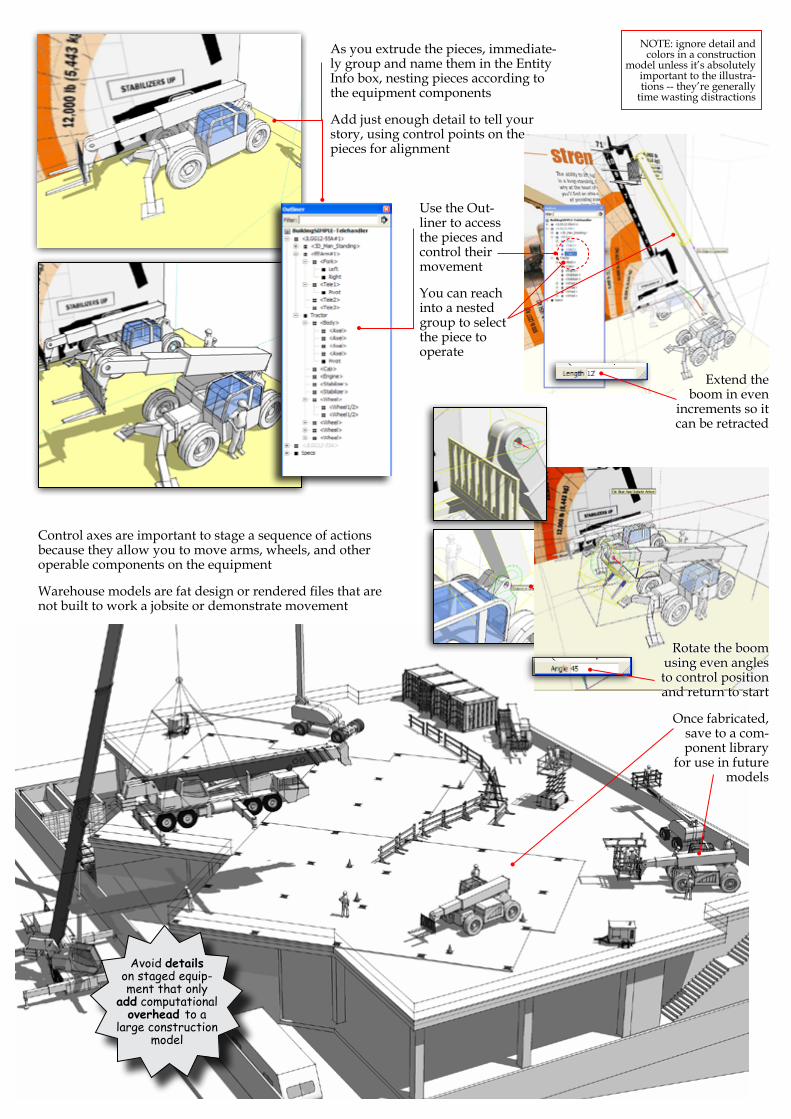
Control axes are important to stage a sequence of actions because they allow you to move arms, wheels, and other operable components on the equipment
Warehouse models are fat design or rendered files that are not built to work a jobsite or demonstrate movement
As you extrude the pieces, immediate-ly group and name them in the Entity Info box, nesting pieces according to the equipment components
Add just enough detail to tell your story, using control points on the pieces for alignment
Use the Out-liner to access the pieces and control their movement
You can reach into a nested group to select the piece to operate
Extend the boom in even
increments so it can be retracted
Rotate the boom using even angles to control position and return to start
Once fabricated, save to a com-ponent library
for use in future models
NOTE: ignore detail and colors in a construction
model unless it’s absolutely important to the illustra-tions -- they’re generally
time wasting distractions
Avoid details on staged equip-ment that only
add computational overhead to a
large construction model

hi all,
i voiced the idea of setting up a SketchUcation Members Network on the forums and many members, some offering services, some with various interests and some 3rd party product ven-dors have expressed an interest in being listed.
to get this moving we are now inviting anyone interested to send along their details which will basically be name, contact, links to web site etc. for the time being this information can be sent to my email here [email protected]
the following is a list that we have drawn up which cover all the categories we can think of that members may be interested in listing under. if you have other areas in mind, please advise.
SketchUcation roundup
Services / Interests
2d products3d printing architectural designbuilding Con docsengineering Civilengineering Structuralengineering mechanicalevent & Conference planningflat metal workingGame modellingillustration- books etcinterior designKitchen designlandscape designmovie productionorganic modelling
product designprogrammingSet designSpace designStore planningSun / Shadow Studiesteaching / education / trainingvehicle designvisualisation / presentationwoodworking design
Products
hardwareSoftware
if anyone wants to comment or discuss matters / details, they can do so on the already active forum thread linked above.
looking forward to hearing for you.
mike lucey