Embed Size (px)
Citation preview
Casebook Connect Faculty Features
Contents 1: View Your Class Options on the Bookshelf Page ............................................................................................................................................... 2
2: Add Class Details .................................................................................................................................................................................................... 3
3: Class Insights Page: Updating Details and Adding Documents ........................................................................................................................ 4
4: Class Insights Page: Enrolled Students ............................................................................................................................................................... 5
5: Class Insights Page: Study Dashboard ................................................................................................................................................................. 6
6: Returning to Your Class Insights Page ................................................................................................................................................................. 7
7: Study Center View .................................................................................................................................................................................................. 8
8: Question Results and Endorsement ..................................................................................................................................................................... 9
9: Adding a Link to the eBook ................................................................................................................................................................................. 11
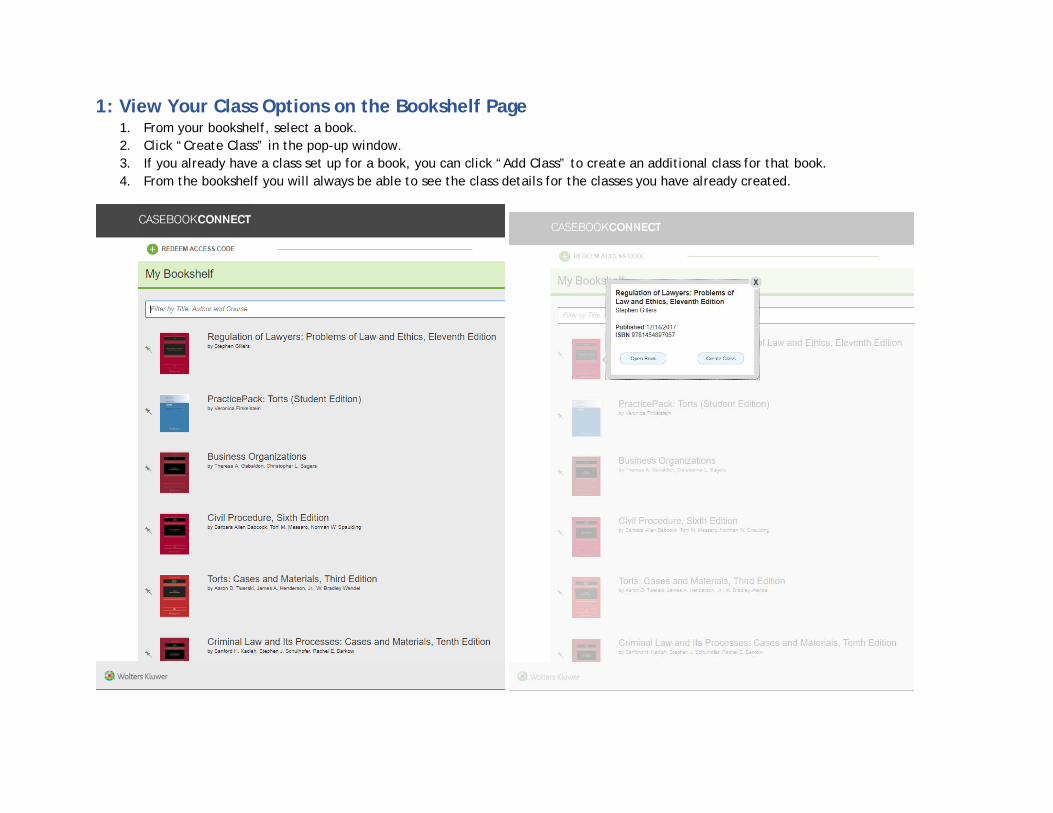
1: View Your Class Options on the Bookshelf Page 1. From your bookshelf, select a book. 2. Click “Create Class” in the pop-up window. 3. If you already have a class set up for a book, you can click “Add Class” to create an additional class for that book. 4. From the bookshelf you will always be able to see the class details for the classes you have already created.
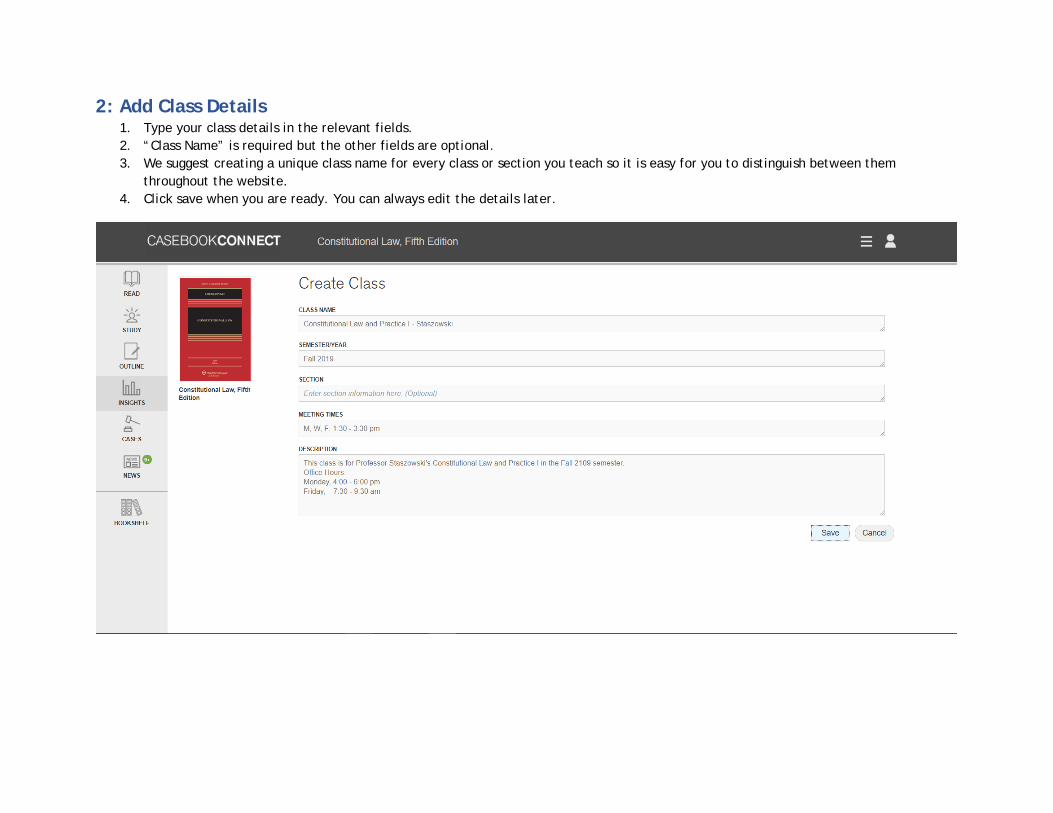
2: Add Class Details 1. Type your class details in the relevant fields. 2. “Class Name” is required but the other fields are optional. 3. We suggest creating a unique class name for every class or section you teach so it is easy for you to distinguish between them
throughout the website. 4. Click save when you are ready. You can always edit the details later.
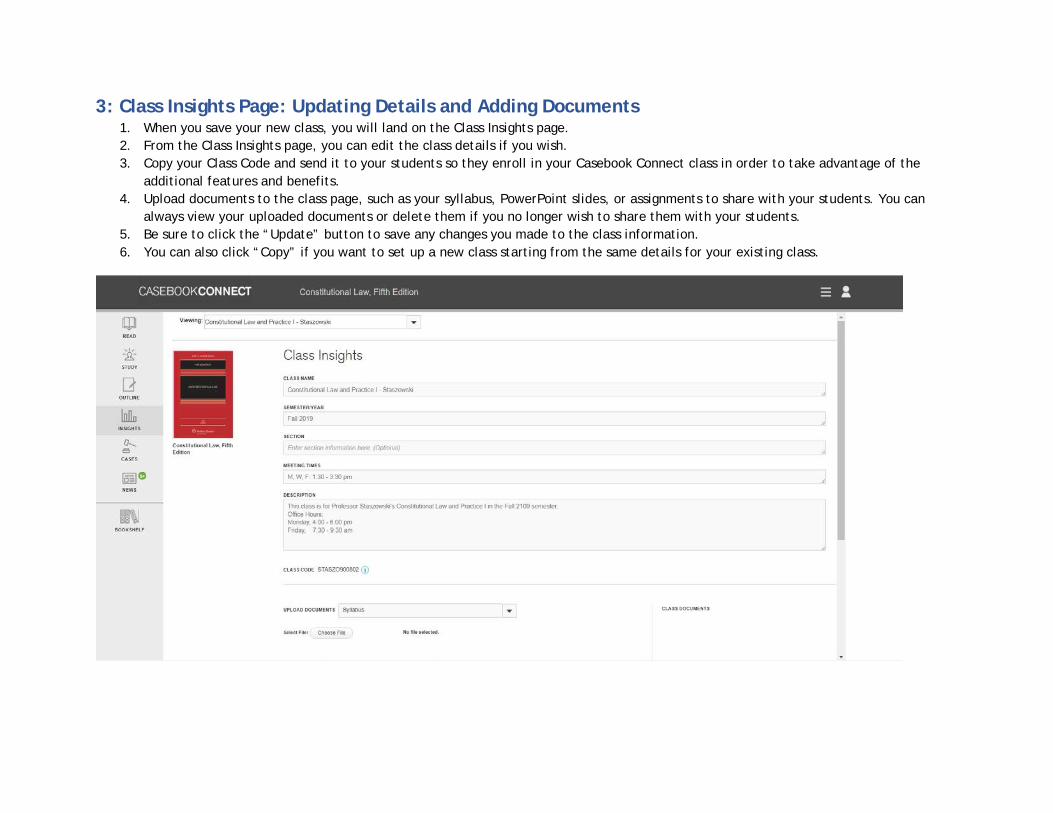
3: Class Insights Page: Updating Details and Adding Documents 1. When you save your new class, you will land on the Class Insights page. 2. From the Class Insights page, you can edit the class details if you wish. 3. Copy your Class Code and send it to your students so they enroll in your Casebook Connect class in order to take advantage of the
additional features and benefits. 4. Upload documents to the class page, such as your syllabus, PowerPoint slides, or assignments to share with your students. You can
always view your uploaded documents or delete them if you no longer wish to share them with your students. 5. Be sure to click the “Update” button to save any changes you made to the class information. 6. You can also click “Copy” if you want to set up a new class starting from the same details for your existing class.
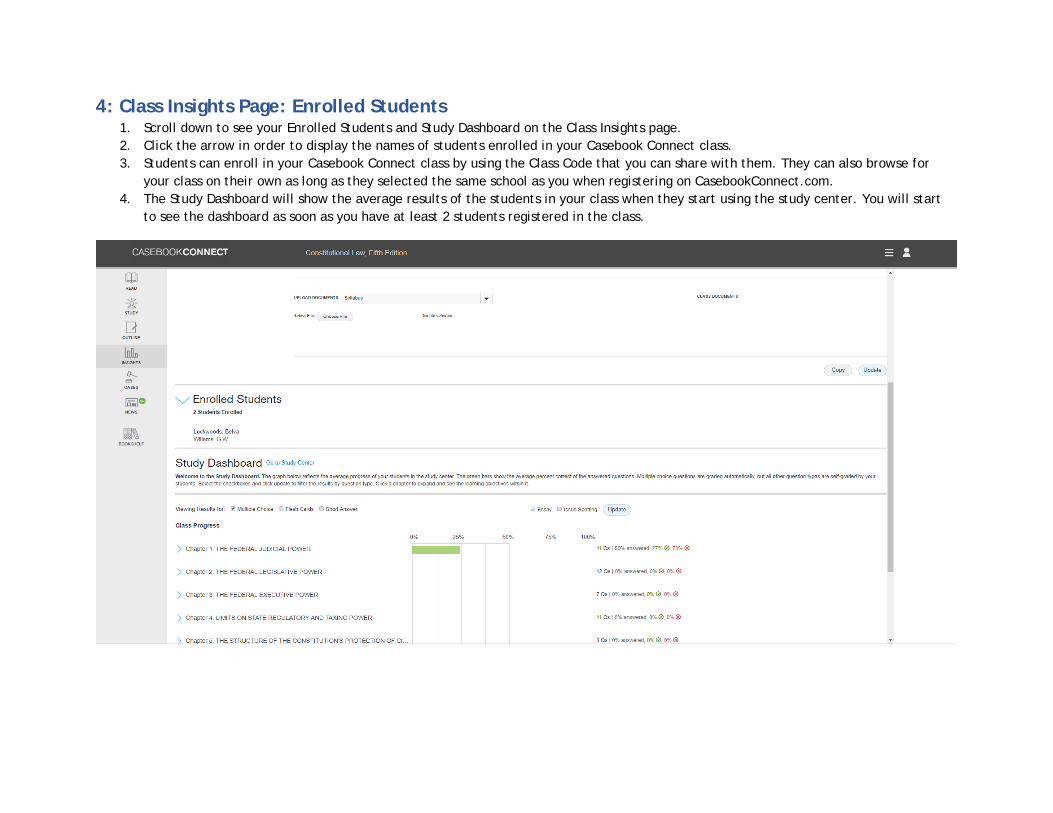
4: Class Insights Page: Enrolled Students 1. Scroll down to see your Enrolled Students and Study Dashboard on the Class Insights page. 2. Click the arrow in order to display the names of students enrolled in your Casebook Connect class. 3. Students can enroll in your Casebook Connect class by using the Class Code that you can share with them. They can also browse for
your class on their own as long as they selected the same school as you when registering on CasebookConnect.com. 4. The Study Dashboard will show the average results of the students in your class when they start using the study center. You will start
to see the dashboard as soon as you have at least 2 students registered in the class.
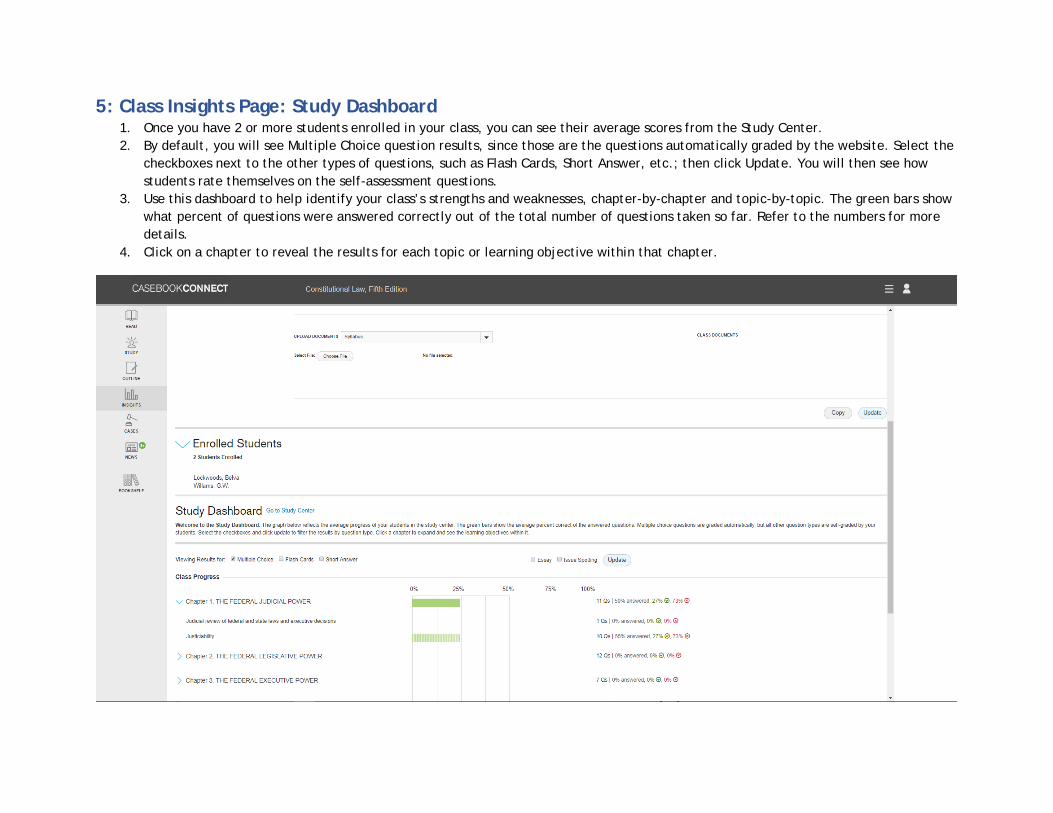
5: Class Insights Page: Study Dashboard 1. Once you have 2 or more students enrolled in your class, you can see their average scores from the Study Center. 2. By default, you will see Multiple Choice question results, since those are the questions automatically graded by the website. Select the
checkboxes next to the other types of questions, such as Flash Cards, Short Answer, etc.; then click Update. You will then see how students rate themselves on the self-assessment questions.
3. Use this dashboard to help identify your class’s strengths and weaknesses, chapter-by-chapter and topic-by-topic. The green bars show what percent of questions were answered correctly out of the total number of questions taken so far. Refer to the numbers for more details.
4. Click on a chapter to reveal the results for each topic or learning objective within that chapter.
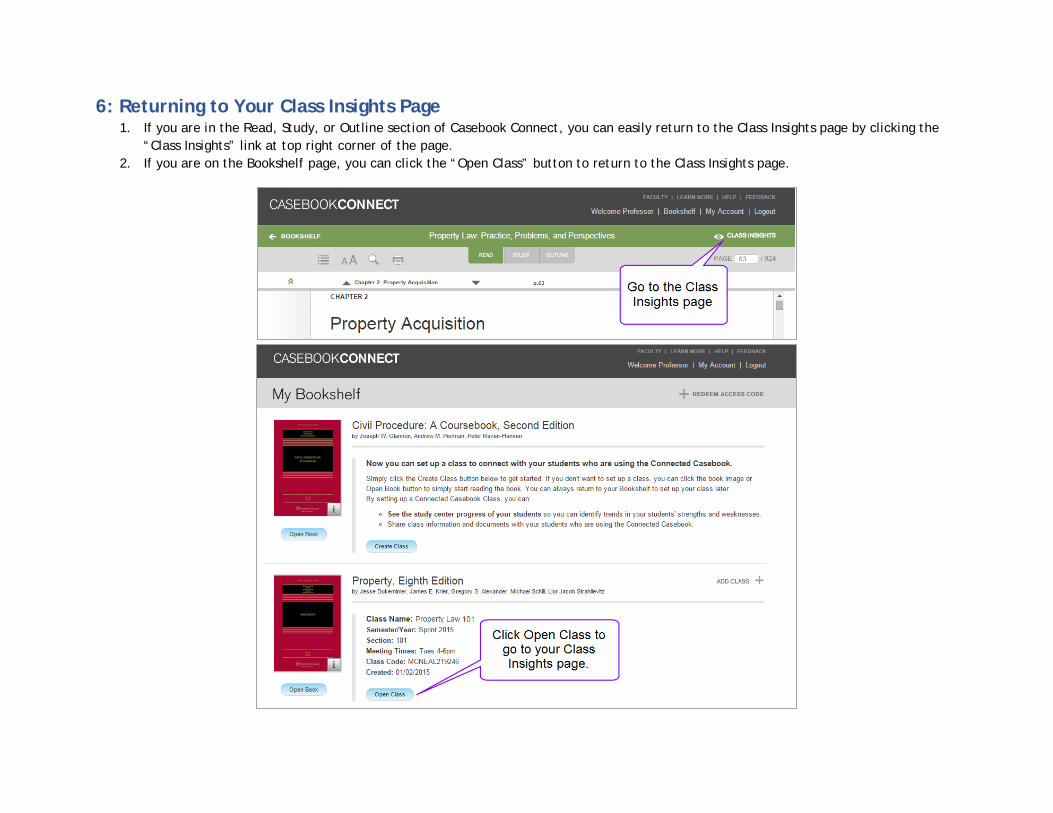
6: Returning to Your Class Insights Page 1. If you are in the Read, Study, or Outline section of Casebook Connect, you can easily return to the Class Insights page by clicking the
“Class Insights” link at top right corner of the page. 2. If you are on the Bookshelf page, you can click the “Open Class” button to return to the Class Insights page.
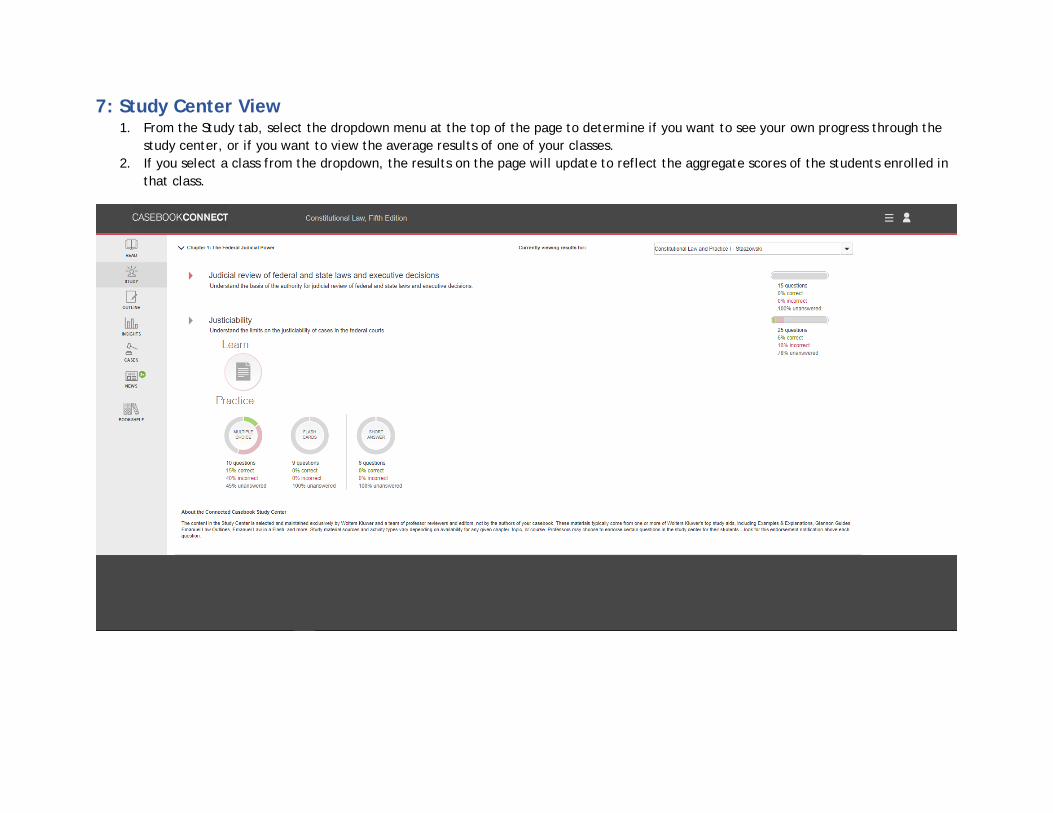
7: Study Center View 1. From the Study tab, select the dropdown menu at the top of the page to determine if you want to see your own progress through the
study center, or if you want to view the average results of one of your classes. 2. If you select a class from the dropdown, the results on the page will update to reflect the aggregate scores of the students enrolled in
that class.
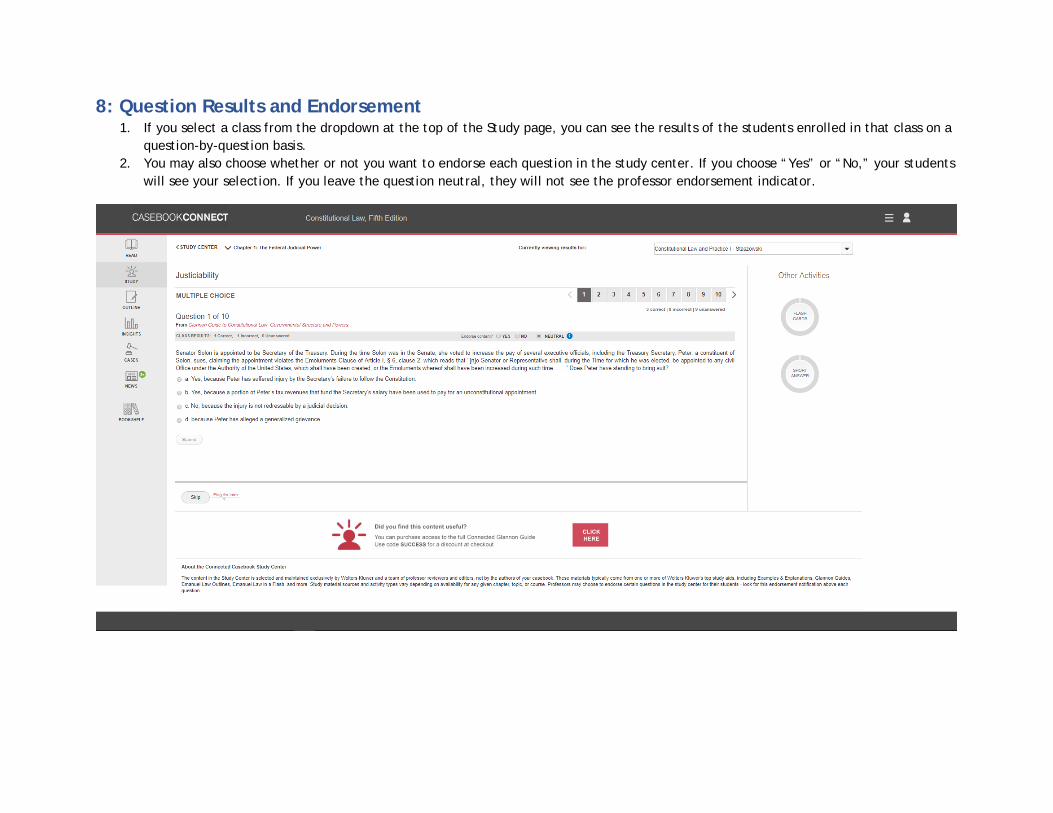
8: Question Results and Endorsement 1. If you select a class from the dropdown at the top of the Study page, you can see the results of the students enrolled in that class on a
question-by-question basis. 2. You may also choose whether or not you want to endorse each question in the study center. If you choose “Yes” or “No,” your students
will see your selection. If you leave the question neutral, they will not see the professor endorsement indicator.
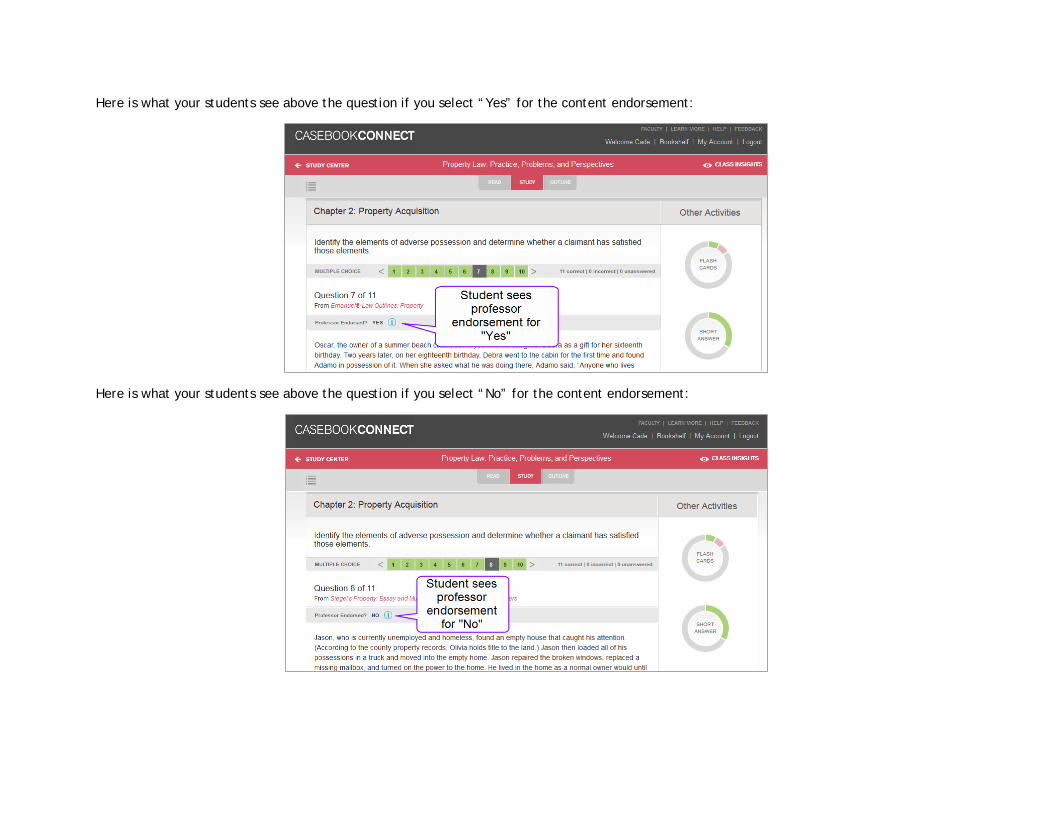
Here is what your students see above the question if you select “Yes” for the content endorsement:
Here is what your students see above the question if you select “No” for the content endorsement:
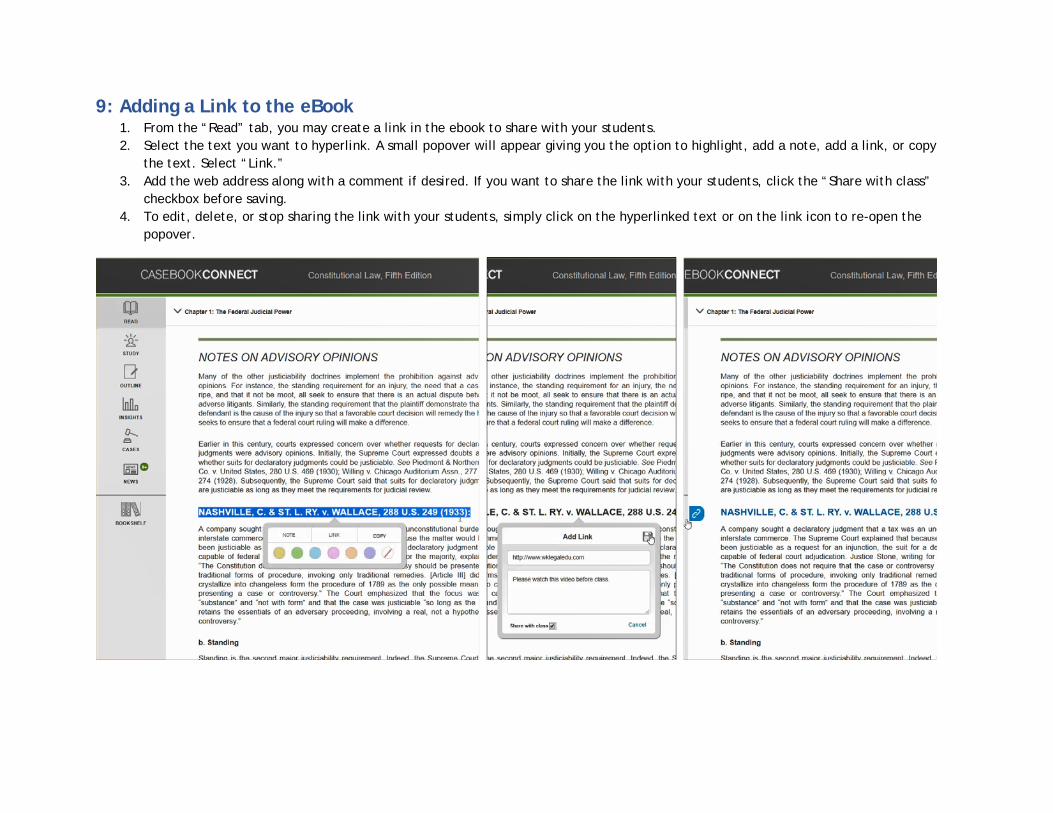
9: Adding a Link to the eBook 1. From the “Read” tab, you may create a link in the ebook to share with your students. 2. Select the text you want to hyperlink. A small popover will appear giving you the option to highlight, add a note, add a link, or copy
the text. Select “Link.” 3. Add the web address along with a comment if desired. If you want to share the link with your students, click the “Share with class”
checkbox before saving. 4. To edit, delete, or stop sharing the link with your students, simply click on the hyperlinked text or on the link icon to re-open the
popover.
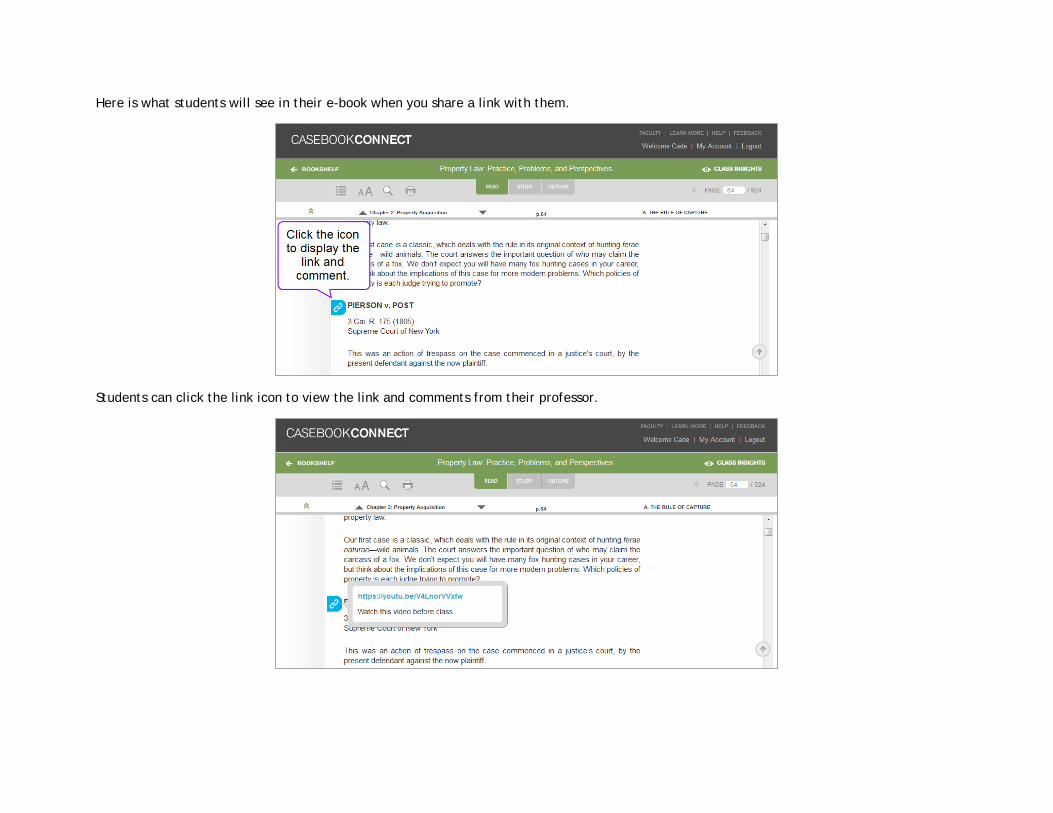
Here is what students will see in their e-book when you share a link with them.
Students can click the link icon to view the link and comments from their professor.