Embed Size (px)
Citation preview
Using blocks
2
Background
This case study is an example of how blocks are used to develop planning, thinking, problem solving and cooperative strategies in a Prep Year classroom. The prep class is located on a school campus. Children in this class have usually not attended pre-preparatory classes and have little or no experience with using blocks in a classroom context.
We have presented this case study in school term units. However, this sequence of teaching and learning could be adapted according to the needs and interests of the children in your setting.
Using blocks
3
Links to Early Years Curriculum Guidelines (EYCG)
Term 1
I began the school year by placing a small number and range of blocks on the shelf. Only a small number of extra props were added to the area, so children could focus on the blocks.
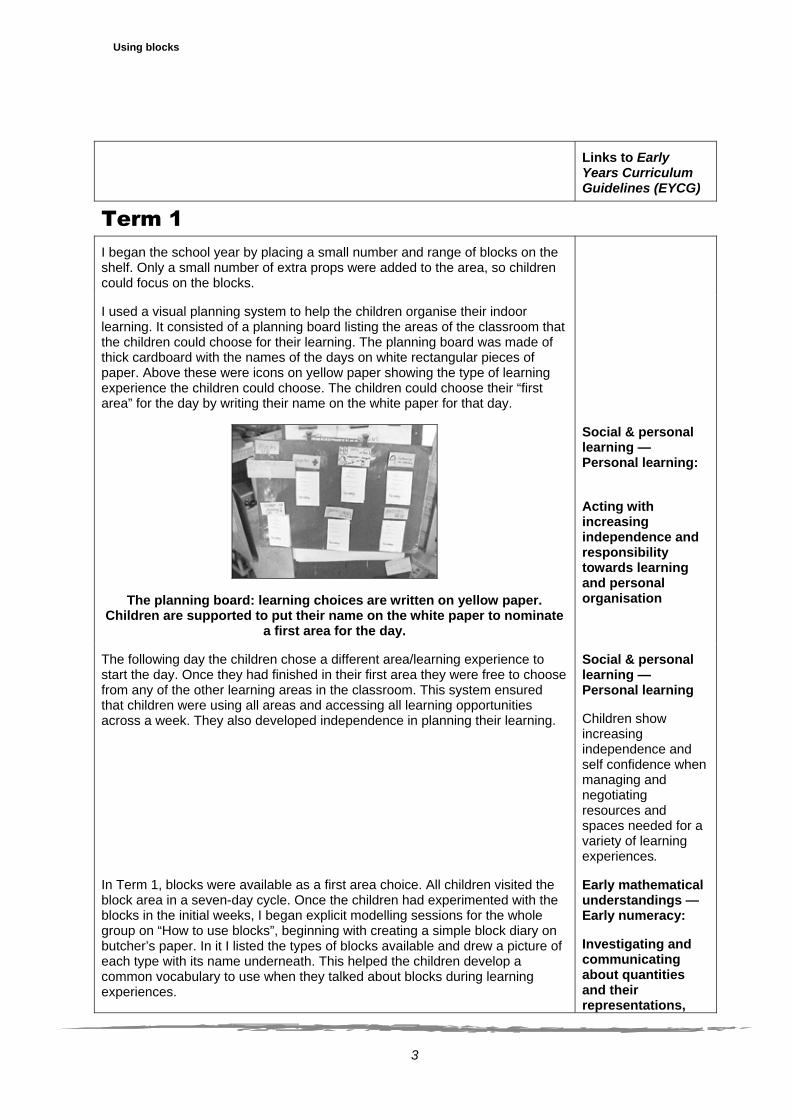
I used a visual planning system to help the children organise their indoor learning. It consisted of a planning board listing the areas of the classroom that the children could choose for their learning. The planning board was made of thick cardboard with the names of the days on white rectangular pieces of paper. Above these were icons on yellow paper showing the type of learning experience the children could choose. The children could choose their “first area” for the day by writing their name on the white paper for that day.
The planning board: learning choices are written on yellow paper. Children are supported to put their name on the white paper to nominate
a first area for the day.
Social & personal learning — Personal learning:
Acting with increasing independence and responsibility towards learning and personal organisation
The following day the children chose a different area/learning experience to start the day. Once they had finished in their first area they were free to choose from any of the other learning areas in the classroom. This system ensured that children were using all areas and accessing all learning opportunities across a week. They also developed independence in planning their learning.
Social & personal learning — Personal learning
Children show increasing independence and self confidence when managing and negotiating resources and spaces needed for a variety of learning experiences.
In Term 1, blocks were available as a first area choice. All children visited the block area in a seven-day cycle. Once the children had experimented with the blocks in the initial weeks, I began explicit modelling sessions for the whole group on “How to use blocks”, beginning with creating a simple block diary on butcher’s paper. In it I listed the types of blocks available and drew a picture of each type with its name underneath. This helped the children develop a common vocabulary to use when they talked about blocks during learning experiences.
Early mathematical understandings — Early numeracy:
Investigating and communicating about quantities and their representations,

Using blocks
4
Links to Early Years Curriculum Guidelines (EYCG) and attributes of objects and collections
Children identify and describe attributes of objects according to shape.
The block diary
I scaffolded the children’s block play by displaying a sorting chart which they used when they were tidying away. I also played sorting games with the children. For example, I placed children’s name cards against a particular block shape and asked them to find all the blocks of that shape and put them away. This developed the children’s ability to use specific language, particularly mathematical language, when using the blocks. For example, “Pass me a flat block, please”; “I think a long block would work well here, what do you think?”; “Pule, you will need to put all of the arches away”.
Social & personal learning — Social learning:
Acknowledging and negotiating rights, roles and responsibilities in a range of contexts
With some prompts, children understand, use and discuss agreed ways of behaving, interacting and communicating in their classroom.
Using blocks
5
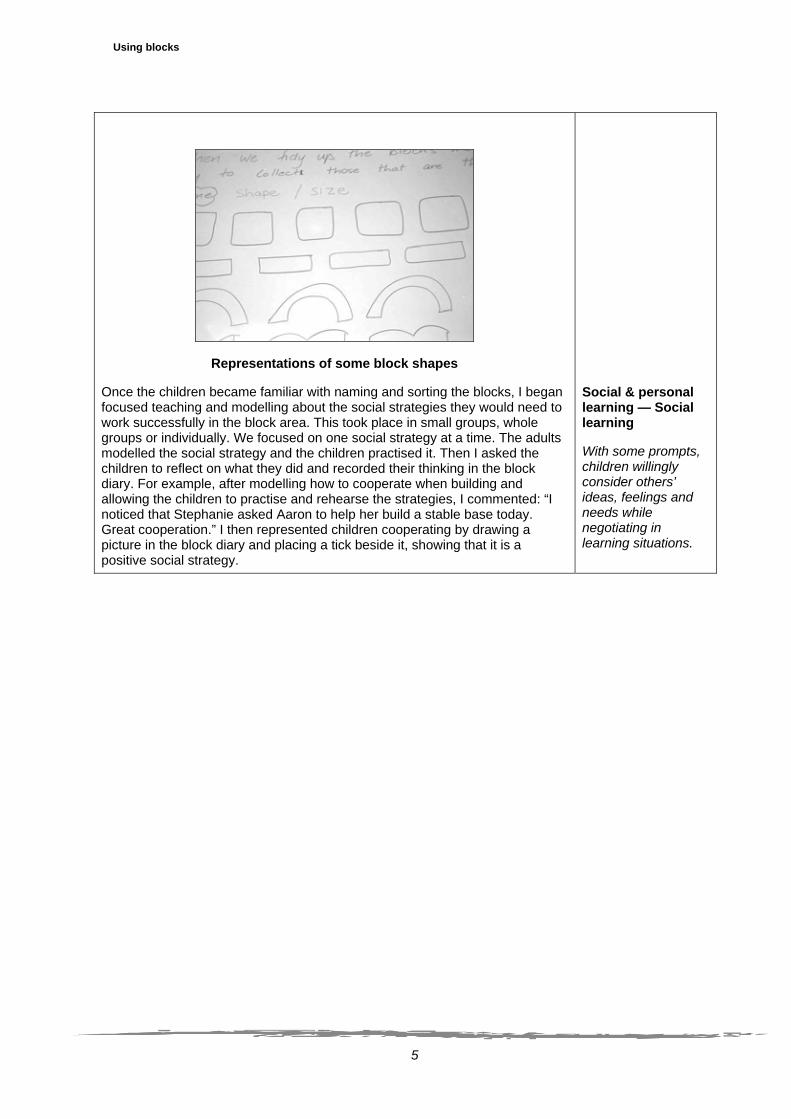
Representations of some block shapes
Once the children became familiar with naming and sorting the blocks, I began focused teaching and modelling about the social strategies they would need to work successfully in the block area. This took place in small groups, whole groups or individually. We focused on one social strategy at a time. The adults modelled the social strategy and the children practised it. Then I asked the children to reflect on what they did and recorded their thinking in the block diary. For example, after modelling how to cooperate when building and allowing the children to practise and rehearse the strategies, I commented: “I noticed that Stephanie asked Aaron to help her build a stable base today. Great cooperation.” I then represented children cooperating by drawing a picture in the block diary and placing a tick beside it, showing that it is a positive social strategy.
Social & personal learning — Social learning
With some prompts, children willingly consider others’ ideas, feelings and needs while negotiating in learning situations.

Using blocks
6
Links to EYCG
To help children who had little experience with blocks, the adults also modelled unsuccessful building strategies, for example, standing blocks on their side and allowing them to fall over. We recorded the unsuccessful strategies or unsafe behaviours in the block diary and crossed them out, so children could reflect on them throughout the term. If another unsuccessful strategy arose during play, it was recorded in the block diary during whole group reflection. Successful strategies were modelled and reflected upon, then recorded with a visual reference in the block diary.
Active learning processes — Investigating technology: investigating technology and considering how it affects everyday life
This poster shows visual representations of building strategies for children to refer to when building with blocks. For example, they are
reminded about the safe height for a block building by the representation of a boy with a block building at shoulder height.
Once the children were using some of the shared block play strategies in their play, I extended and added to their knowledge of building structures. I singled out a design strategy and developed the children’s knowledge and use of the strategy. I was an active observer and scaffolder of the children’s play at this time, building on their interests and ideas and often using these as a focus for discussion and focused learning and teaching.
Active learning processes — Investigating technology
With support, children think about and create their own products and systems from their observations and use of technology.
For example, after observing children covering large flat areas with the blocks, I introduced ways to make flat paving patterns with blocks. Firstly, I demonstrated and modelled how to make flat paving patterns. Then I began to add to the children’s knowledge of patterning by modelling upright patterns. Again, this was done as a focused teaching and learning experience in small and large groups, discussed, practised and reflected upon. During reflection, the children made suggestions about what structures could be added to a particular construction the next day.
Early mathematical understandings — Early numeracy: Investigating and communicating about order, sequence and pattern
Children identify the repeating element of a simple pattern and continue patterns.

Using blocks
7
Links to EYCG
Towards the end of the term, I introduced more intricate representations and models of building structures. For example, I modelled how to make bridges, then I took a digital photograph of each model and put it into the block area for children to use as a reference and adapt to suit their own ideas. These photographs were kept in an album to use throughout the year.
I introduced other models and representations after observing that the children’s needs and interests in block play included walls, fences and buildings. Observing the children’s experimentation with high buildings, I then focused on safety issues associated with height and weight. This encouraged the children to develop a strategy for ”how high” buildings should be. The strategy they decided on (shoulder height) was then recorded in the reflective diary and displayed on posters in the block area.
Finally, I continued to use real-life images of buildings and structures to scaffold the children’s block building. I modelled how to build the structures based on analysis of a picture or image. I used clear and explicit language to give the children a common vocabulary to use when cooperating to design and build.
During Term 1, I scaffolded block play and building in a clear and explicit way. This formed the foundation for extending the children’s building and design concepts in the following terms.
Term 2
At the start of Term 2, I added extra block shapes to the block shelves. This boosted the children’s interest and encouraged them to rediscover the components and shapes that can be used to design and build.
More props were added to the block area to allow the children to embellish their designs and add different textures and colours. Entry to the block area was managed using the planning board; only the children who signed on were allowed to go there. This helped manage the number of children in the area and maintain safety. It also gave all children an opportunity to learn in the block area, so those who might not otherwise have chosen to play with blocks got a sense of enjoyment and achievement from their play. This process encouraged children to persevere with their learning; they didn’t just “pass by” the block area. This focus and modelling promoted deep learning. On average, children spent two sessions in the block area per week in Term 2. The teacher aide helped the block group to plan, review and reflect, focusing on modelling ways to record plans. This process was extended in later terms where the children took more of a role in recording their plans.
Active learning processes — Imagining and responding: Experimenting with materials and processes in a variety of creative, imaginative and innovative ways
With some prompts, children experiment with generating ideas and imaginative designs for play and real-life purposes.
Using blocks
8
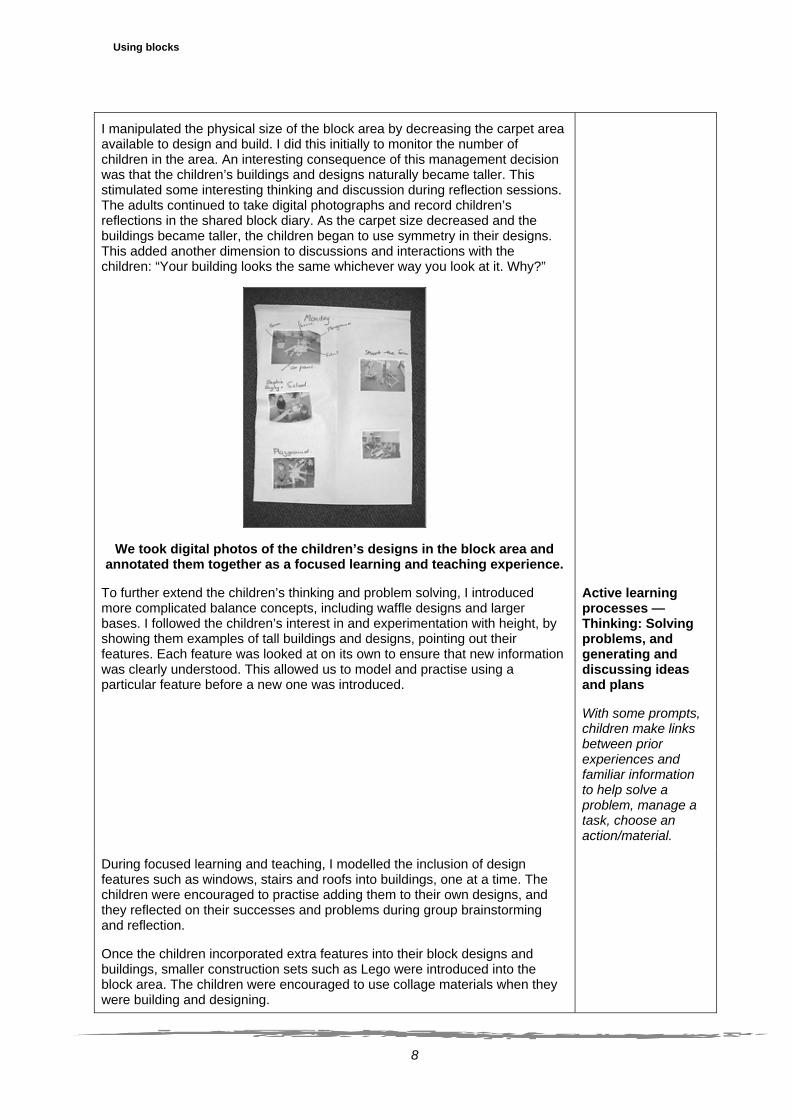
I manipulated the physical size of the block area by decreasing the carpet area available to design and build. I did this initially to monitor the number of children in the area. An interesting consequence of this management decision was that the children’s buildings and designs naturally became taller. This stimulated some interesting thinking and discussion during reflection sessions. The adults continued to take digital photographs and record children’s reflections in the shared block diary. As the carpet size decreased and the buildings became taller, the children began to use symmetry in their designs. This added another dimension to discussions and interactions with the children: “Your building looks the same whichever way you look at it. Why?”
We took digital photos of the children’s designs in the block area and annotated them together as a focused learning and teaching experience.
To further extend the children’s thinking and problem solving, I introduced more complicated balance concepts, including waffle designs and larger bases. I followed the children’s interest in and experimentation with height, by showing them examples of tall buildings and designs, pointing out their features. Each feature was looked at on its own to ensure that new information was clearly understood. This allowed us to model and practise using a particular feature before a new one was introduced.
Active learning processes — Thinking: Solving problems, and generating and discussing ideas and plans
With some prompts, children make links between prior experiences and familiar information to help solve a problem, manage a task, choose an action/material.
During focused learning and teaching, I modelled the inclusion of design features such as windows, stairs and roofs into buildings, one at a time. The children were encouraged to practise adding them to their own designs, and they reflected on their successes and problems during group brainstorming and reflection.
Once the children incorporated extra features into their block designs and buildings, smaller construction sets such as Lego were introduced into the block area. The children were encouraged to use collage materials when they were building and designing.
Using blocks
9
Again, we used reflection to ensure that extra materials and props were used appropriately. I scaffolded the children’s thinking with questions such as: “If we are adding a painted river to our design, is it best to paint it with the paper on the carpet in the block area or at the tables?” “If you want to use sticky tape to attach wool or paper, what is the best way to do it?” “Do you think you could make a roof from cardboard?” “Maybe you could use a slippery dip from the Lego for a playground around your school building.”
The children then brainstormed useful materials for building and designing and recorded them in their block diary. We did this as a whole group as well as in small groups. This allowed the reflections of each small group to be shared with other groups.
During Terms 1 and 2, block constructions were only occasionally left up. This encouraged new groups of children to practise and rehearse building and design strategies each day.
Term 3
Our management strategy changed in Term 3. The children worked in the block area for a week as a first area. The block group (usually 5–6 children) started each day with a planning session with the teacher aide.
The teacher aide recorded the children’s ideas on butcher’s paper as a focused teaching and learning experience.
The children in the block group then constructed the buildings. Once the children’s block play drew to a close, the teacher aide recorded what the children had built on butcher’s paper. She scaffolded discussion, planning and thinking with the children. “What do you like most about your design?” “What did you do to make it balance?” “Do you think you could add a fence or a bridge tomorrow?” At the end of the session, if appropriate, an adult took a digital photograph of each section of the construction.
The process scaffolded by the teacher aide involved planning, building, reviewing, adding detail, reviewing again and at the end of the process or project, the children did a presentation. They chose whether to use oral presentations, use digital photographs, talk about their plan, or draw their final product. I believe it is important for the children to choose who will present and how they will do it. Most presentations involved literacy, for example, some children put up invitations to other classes to come to the presentations, and some groups put a sign up inviting people to look at the end product. The presentations were not always intended as showpieces; often they were simple sharing sessions with the whole class or a couple of parents and carers.
Active learning processes — Thinking: Solving problems, and generating and discussing ideas and plans
With support, children talk about thinking and ways to solve problems using familiar specific language that has been modelled.
Using blocks
10
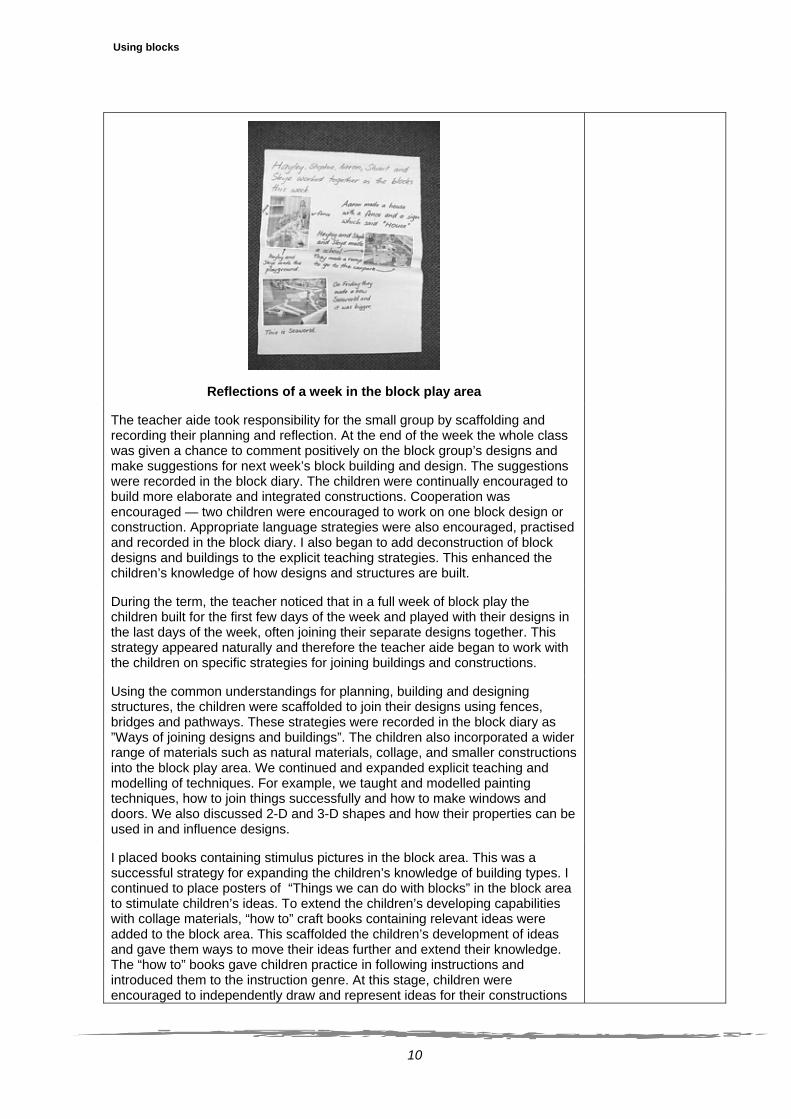
Reflections of a week in the block play area
The teacher aide took responsibility for the small group by scaffolding and recording their planning and reflection. At the end of the week the whole class was given a chance to comment positively on the block group’s designs and make suggestions for next week’s block building and design. The suggestions were recorded in the block diary. The children were continually encouraged to build more elaborate and integrated constructions. Cooperation was encouraged — two children were encouraged to work on one block design or construction. Appropriate language strategies were also encouraged, practised and recorded in the block diary. I also began to add deconstruction of block designs and buildings to the explicit teaching strategies. This enhanced the children’s knowledge of how designs and structures are built.
During the term, the teacher noticed that in a full week of block play the children built for the first few days of the week and played with their designs in the last days of the week, often joining their separate designs together. This strategy appeared naturally and therefore the teacher aide began to work with the children on specific strategies for joining buildings and constructions.
Using the common understandings for planning, building and designing structures, the children were scaffolded to join their designs using fences, bridges and pathways. These strategies were recorded in the block diary as ”Ways of joining designs and buildings”. The children also incorporated a wider range of materials such as natural materials, collage, and smaller constructions into the block play area. We continued and expanded explicit teaching and modelling of techniques. For example, we taught and modelled painting techniques, how to join things successfully and how to make windows and doors. We also discussed 2-D and 3-D shapes and how their properties can be used in and influence designs.
I placed books containing stimulus pictures in the block area. This was a successful strategy for expanding the children’s knowledge of building types. I continued to place posters of “Things we can do with blocks” in the block area to stimulate children’s ideas. To extend the children’s developing capabilities with collage materials, “how to” craft books containing relevant ideas were added to the block area. This scaffolded the children’s development of ideas and gave them ways to move their ideas further and extend their knowledge. The “how to” books gave children practice in following instructions and introduced them to the instruction genre. At this stage, children were encouraged to independently draw and represent ideas for their constructions
Using blocks
11
and designs in the block diary. The teacher aide scaffolded this with discussion.
The children’s ideas were represented in the form of a plan which the teacher aide documented in a small group session. As the building was completed the group drew or recorded their building. This helped them to do their own planning and designing later on. By the end of the term, the children were drawing their plans independently.
Using blocks
12
Term 4
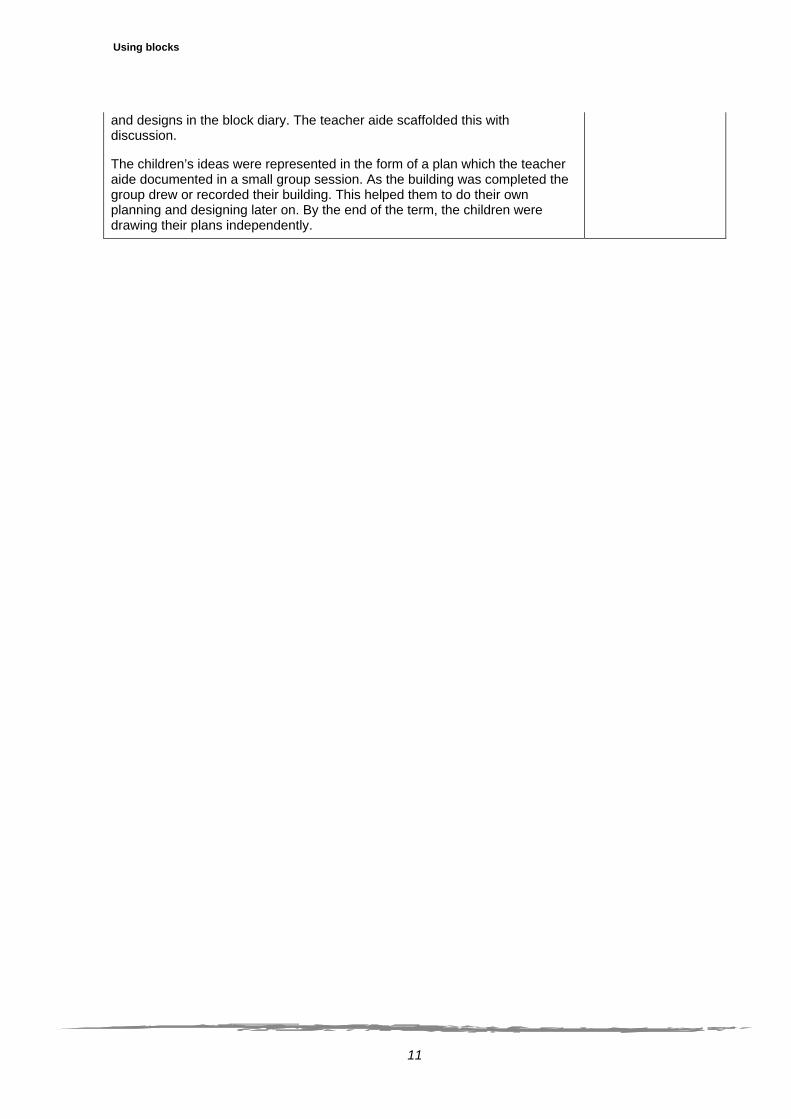
I continued with the management strategies used in Term 3. Usually five or six children worked in the block area for a week with daily planning and reflection provided by the teacher aide. During Term 4, I noticed that some children still needed encouragement to build and design. To help these children I created a lucky dip system, where children could choose a card from a bag. The name of a type of building, for example a school or hospital, was written on each card. An interested group would then begin small group planning with the teacher aide. The structure of the group was flexible, and other children were encouraged to join in a cooperative manner.
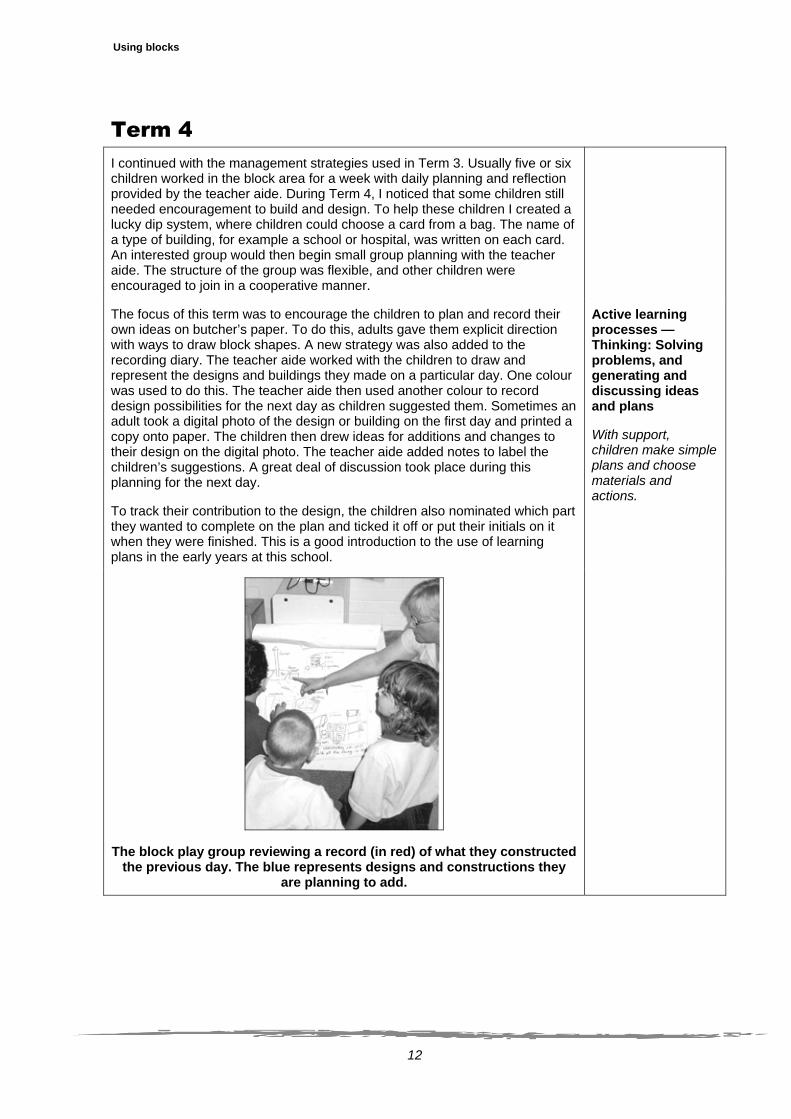
The focus of this term was to encourage the children to plan and record their own ideas on butcher’s paper. To do this, adults gave them explicit direction with ways to draw block shapes. A new strategy was also added to the recording diary. The teacher aide worked with the children to draw and represent the designs and buildings they made on a particular day. One colour was used to do this. The teacher aide then used another colour to record design possibilities for the next day as children suggested them. Sometimes an adult took a digital photo of the design or building on the first day and printed a copy onto paper. The children then drew ideas for additions and changes to their design on the digital photo. The teacher aide added notes to label the children’s suggestions. A great deal of discussion took place during this planning for the next day.
To track their contribution to the design, the children also nominated which part they wanted to complete on the plan and ticked it off or put their initials on it when they were finished. This is a good introduction to the use of learning plans in the early years at this school.
Active learning processes — Thinking: Solving problems, and generating and discussing ideas and plans
With support, children make simple plans and choose materials and actions.
The block play group reviewing a record (in red) of what they constructed the previous day. The blue represents designs and constructions they
are planning to add.

Using blocks
13
Plan of the circus and its representation
Plan of the farm and its representation
Using blocks
14
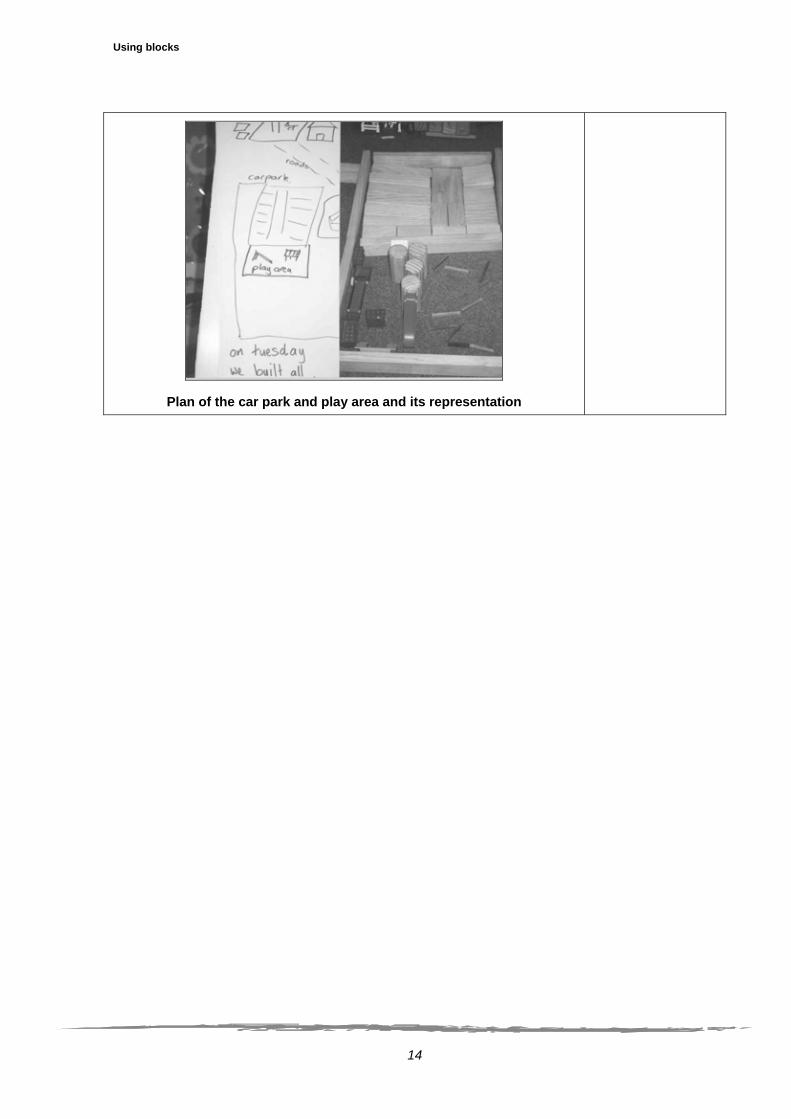
Plan of the car park and play area and its representation
Using blocks
15
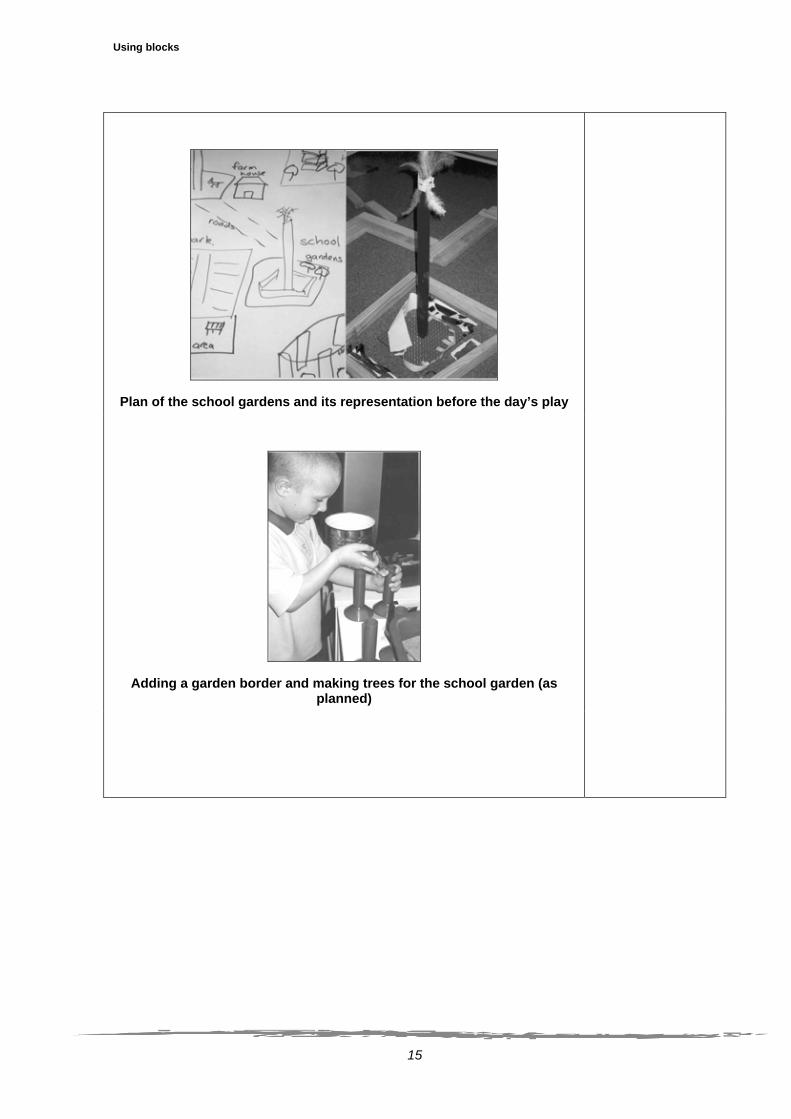
Plan of the school gardens and its representation before the day’s play
Adding a garden border and making trees for the school garden (as planned)
Using blocks
16
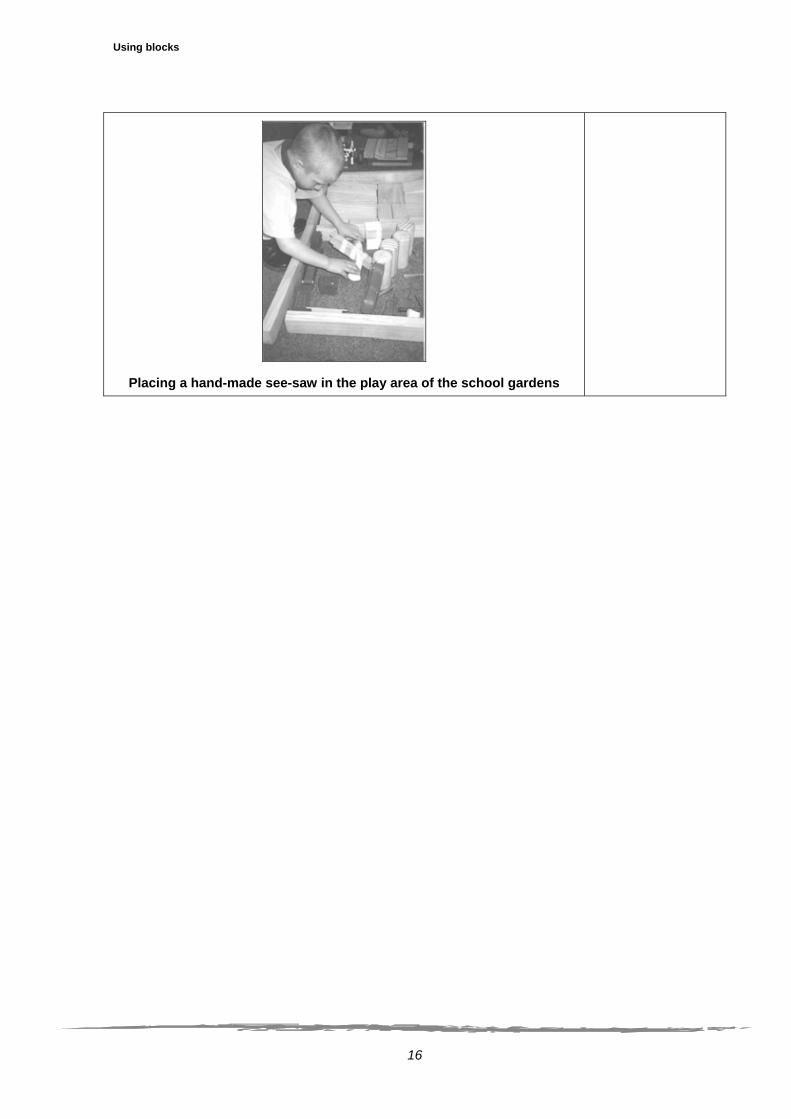
Placing a hand-made see-saw in the play area of the school gardens

Using blocks
17
Making an animal lift for the circus stables
Attaching the lift to the circus stables so that the animals can get down to perform
A new social strategy, “piggybacking” (i.e. working together and building on each others’ ideas), was made explicit to the children during this term. The teacher noticed that the children working in groups of two had some problems with compromise, so the “model, practise, reflect” process was again used to introduce more strategies for working together on a block project. The adults modelled explicit language strategies for the children: “You can build the base and I’ll build the roof”; “I’ll make the fence if you pave the car park”. The children were given opportunities to practise these strategies during focused teaching and learning and play. During reflection, the strategies were represented in the block diary so that the group could refer to them when needed.
Social & personal learning — Social learning: Cooperating with others in social situations
With prompts, children explain their problems and suggest simple options for resolving conflicts.
Using blocks
18
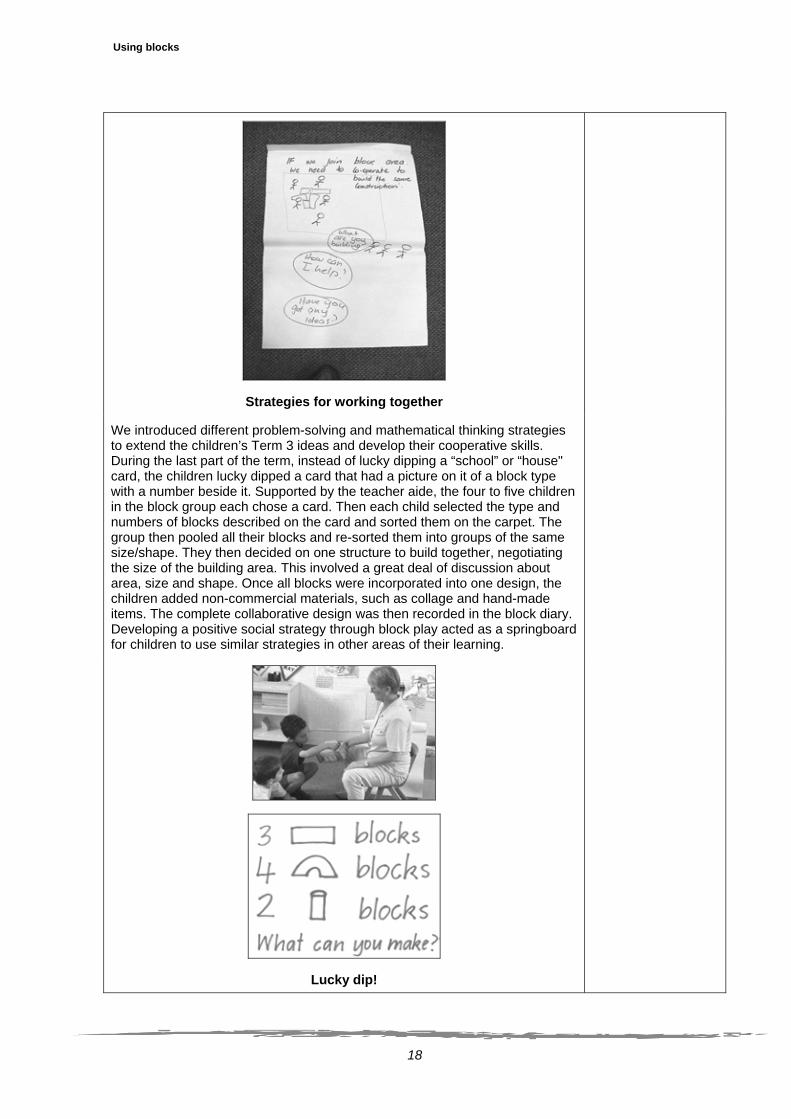
Strategies for working together
We introduced different problem-solving and mathematical thinking strategies to extend the children’s Term 3 ideas and develop their cooperative skills. During the last part of the term, instead of lucky dipping a “school” or “house" card, the children lucky dipped a card that had a picture on it of a block type with a number beside it. Supported by the teacher aide, the four to five children in the block group each chose a card. Then each child selected the type and numbers of blocks described on the card and sorted them on the carpet. The group then pooled all their blocks and re-sorted them into groups of the same size/shape. They then decided on one structure to build together, negotiating the size of the building area. This involved a great deal of discussion about area, size and shape. Once all blocks were incorporated into one design, the children added non-commercial materials, such as collage and hand-made items. The complete collaborative design was then recorded in the block diary. Developing a positive social strategy through block play acted as a springboard for children to use similar strategies in other areas of their learning.
Lucky dip!
Using blocks
19
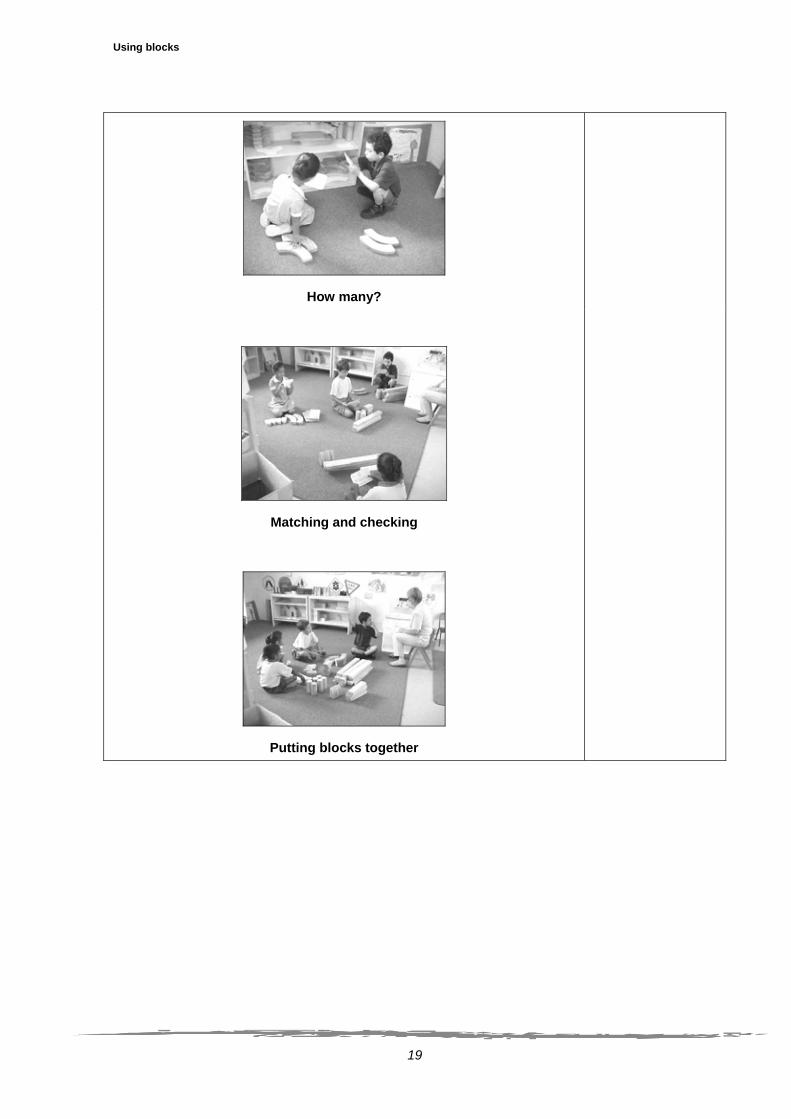
How many?
Matching and checking
Putting blocks together
Using blocks
20
Negotiating what will be built
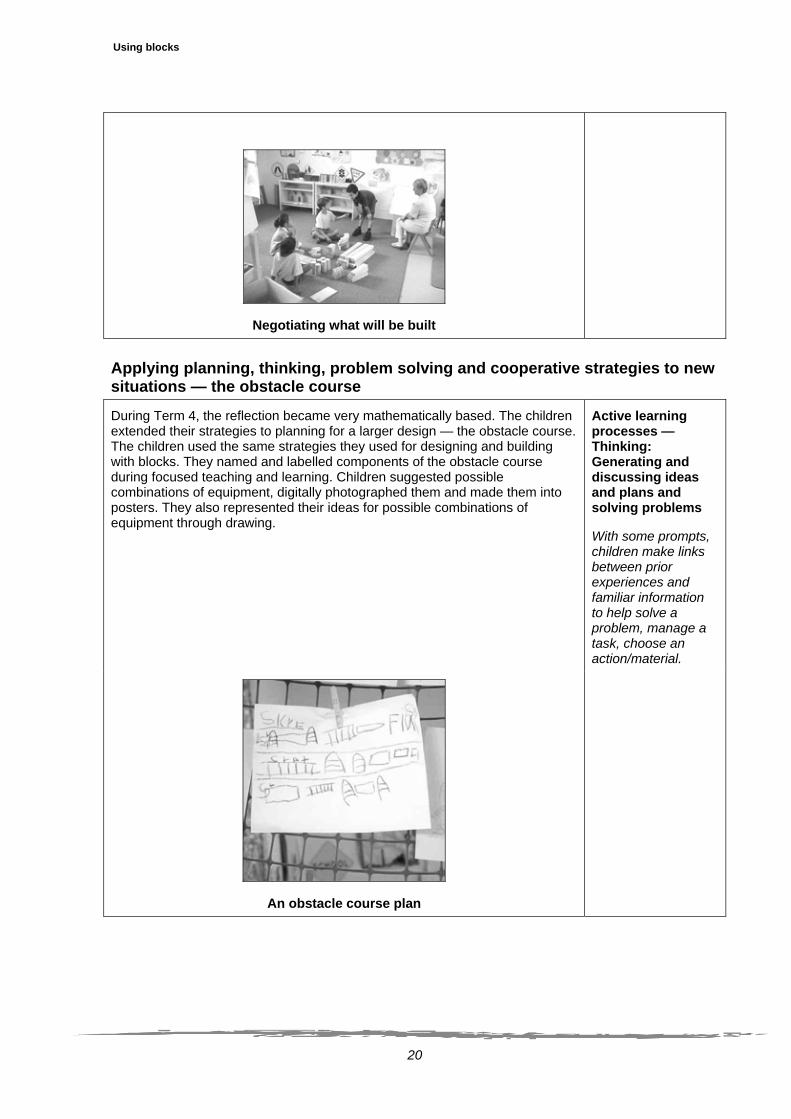
Applying planning, thinking, problem solving and cooperative strategies to new situations — the obstacle course
During Term 4, the reflection became very mathematically based. The children extended their strategies to planning for a larger design — the obstacle course. The children used the same strategies they used for designing and building with blocks. They named and labelled components of the obstacle course during focused teaching and learning. Children suggested possible combinations of equipment, digitally photographed them and made them into posters. They also represented their ideas for possible combinations of equipment through drawing.
Active learning processes — Thinking: Generating and discussing ideas and plans and solving problems
With some prompts, children make links between prior experiences and familiar information to help solve a problem, manage a task, choose an action/material.
An obstacle course plan

Using blocks
21
After preparing a plan, we co-constructed the obstacle course during outdoor learning. A small group of four to five “helpers for the week” helped to set up the course. The plan remained in place for a week and only minimal changes were made the following week. This allowed the children to revisit strategies and develop competencies.
Looking at the plan for the obstacle course
Naming and identifying the parts of the obstacle course
Working together to build the obstacle course

Using blocks
22
Setting up the plank
Making the plank stable
Lastly, the ladder
Using blocks
23
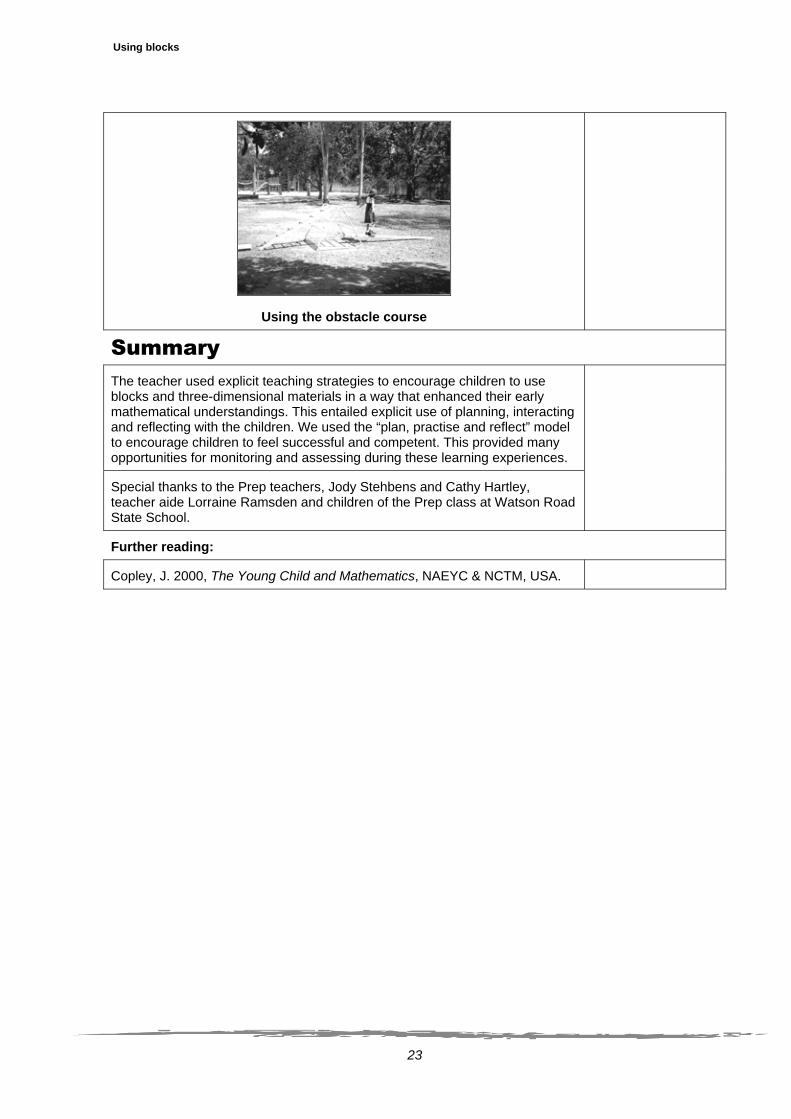
Using the obstacle course
Summary
The teacher used explicit teaching strategies to encourage children to use blocks and three-dimensional materials in a way that enhanced their early mathematical understandings. This entailed explicit use of planning, interacting and reflecting with the children. We used the “plan, practise and reflect” model to encourage children to feel successful and competent. This provided many opportunities for monitoring and assessing during these learning experiences.
Special thanks to the Prep teachers, Jody Stehbens and Cathy Hartley, teacher aide Lorraine Ramsden and children of the Prep class at Watson Road State School.
Further reading:
Copley, J. 2000, The Young Child and Mathematics, NAEYC & NCTM, USA.