Embed Size (px)
Citation preview
CampusNet
A user's guide for academic and administrative staff
Aarhus School of Business University of Aarhus
Version EN – 6.1 – August 2010

Please send your comments or suggestions regarding CampusNet to: Editor: Margit Grønborg, [email protected] This user’s guide will be updated regularly as new functions are implemented. This is version 6.1, August 2010

T able of Content What is CampusNet? ......................................................................................................................................... 4
Access to CampusNet (login procedure) ................................................................................................... 5
The CampusNet user interface ...................................................................................................................... 6
CampusNet’s privileges system ..................................................................................................................... 8
List of participants ............................................................................................................................................... 9
Assignments ....................................................................................................................................................... 10
Calendar .............................................................................................................................................................. 11
Cancellation of teaching ............................................................................................................................... 13
Messages/e-mails ............................................................................................................................................ 14
Discussion board ............................................................................................................................................... 15
File Exchange and document version control ....................................................................................... 17
Links ....................................................................................................................................................................... 19
My Library and Online materials ................................................................................................................. 20
Access to previous courses/groups via Archive ................................................................................... 21
Printing from CampusNet ............................................................................................................................. 23
Updating and displaying a user profile .................................................................................................... 24
Settings ................................................................................................................................................................. 25
Interest groups ................................................................................................................................................... 26
Administration of CampusNet groups ...................................................................................................... 29
Preparing for the start of a new semester .............................................................................................. 32
Help and support .............................................................................................................................................. 34

4
Schedules and cancellations Messages and e-mails Online course materials Updated user lists Discussion board Link lists Interest groups
Students
Academic & Admin. staff
Development and Communication Department
Study Admin. Register Course Catalogue
Library Syllabus + Planning
What is CampusNet? CampusNet is an interactive web-based communication tool that gives students and staff at Aarhus School of Business (ASB) easy and flexible access to a wealth of academic informa-tion. CampusNet also allows documents and information to be shared with for example fellow students or colleagues in your department. The information available on CampusNet is drawn from a wide range of sources (students, academic and administrative staff, the library, etc.) and is published via one central web-site. Each user at ASB is given specific access privileges, ensuring personalised access to the system. Students can find information about their studies, courses they are enrolled on,
course materials and messages from lecturers, lists of fellow students, access to online study materials, relevant cancellations, etc.
Lecturers can find information about students, post messages and distribute materi-als to students, create discussion boards to facilitate academic debate, create links to course homepages, and much more.

5
Access to CampusNet (login procedure) Logging on to CampusNet 1. Start your web browser (e.g. Internet Ex-
plorer)
2. Enter the web address http://campusnet.asb.dk in your browser’s address field and press the En-ter key to display the CampusNet login page.
3. Enter your username and password and click on the Log on button. NB: You log on to CampusNet with your standard username and password for the computers at Aarhus School of Business.
4. After logging on to CampusNet, your name is displayed in the bar at the top of the screen and your groups (organisational units, courses, etc.) are displayed in the left-hand menu.
You can also log on with your digital signature If you have ordered a digital signature and installed it on your home computer, you can use it to log on to CampusNet. The first time you log on with your digital signature, you are required to give your Cam-pusNet username and password. After this you can choose which method you use when you log on. Note that you can only log on with your digital signature if it is installed on the computer you are using! If you use a computer that others may use after you, remember to log off before leaving CampusNet so that no-one else can access your information: Click Log off in the menu at the top, or close all browser windows. NB: if you are inactive for more than 20 minutes, your session will expire for security rea-
sons. You will be prompted to log on again when returning to the system. Where pos-sible, the system will return you to the page that was open when your session expired.

6
The CampusNet user interface The CampusNet user interface has four menus:
The white area in the centre of the window displays the content chosen in the menus. The CampusNet universe contains many groups
• A group may be a department (or other
organisational unit), a course, a class, a subgroup or an interest group.
• Any CampusNet user can create an interest group, but all other types of groups can only be created as subgroups within groups for which the user has administrator privi-leges.
• Members of staff are affiliated to: - a department
- the courses they are responsible for
- the courses and classes they teach
- any other relevant workgroup or interest group
Students are affiliated to:
- a study programme
- the courses and classes they are enrolled in (via the Study Admini-stration)
- any other relevant group or interest group
The personal menu with an overview of your calendar, mes-sages, cancellations, personal set-tings, etc.
The global menu at the top of the page with a number of external links and the current user’s name on the right.
The group menu (or left-hand menu), with an overview of your groups (organisational unit, study programme, cour-ses, groups, in-terest groups, etc.). Each group has a separate submenu.
The right-hand menu, with an overview of your latest messages from the library and all the groups, you are affiliated to, recent uploads to the file exchange, discussion board postings and calendar en-tries.

7
• Each group has its own space with its own calendar, file exchange and communication channels.
• Only the group’s users have access to the group and its content.
• Depending on their function in the group, different users have different roles and privi-leges.
Navigation in CampusNet • When you log on to CampusNet, the system identifies you and displays your name and
customized news information. An overview of the groups you have access to appears in the left-hand group menu (see previous page).
• When you click on a group, the group overview is replaced with the group’s own menu and you are informed of which privileges you have in that group.
• To return to the front page, click the blue back arrow ( ) or the word Front page above the left-hand menu.
• Note that all courses consist of 2 levels: course level (this has the course name and contains among other things links to the course description in the Course Catalogue) and class level (named ClassXX). To maintain consistency across the sys-tem, all teaching activities should take place at class level. Administrators should therefore remove unused services at course level via the group menu command Admin (see how on page 30).
• Your personal menu (My calendar, My messages, etc.) gives you access to an over-view of relevant information from all the groups you are affiliated to. For example, clicking on My messages allows you to see all current messages from all your groups.

8
CampusNet’s privileges system CampusNet has 3 levels of privileges: • user • author • administrator A user may read any information, upload files to public folders, post contributions to dis-cussion groups and create interest groups. In addition to these privileges, an author may send messages, create folders for use in File Exchange, add items to a group’s calendar, etc. (these are the same privileges as an admin-istrator, apart from access to the Admin button) In addition, an administrator can manage groups by adding and removing users, manag-ing privileges, creating subgroups, etc. Allocation of privileges By default, users have the following privileges: • Students have user privileges for the classes and courses they are enrolled in.
• Academic staff typically have administrator privileges for their courses and/or classes.
• A lecturer may have author privileges if there is more than one lecturer for the same class.
• A lecturer who is responsible for a course has administrator privileges for that course, even if the lecturer does not teach on that course.
• Teaching assistants are typically allocated author privileges for their class.
• A user who creates an interest group automatically receives administrator privileges for that group.
Read more about group administration on page 29.

9
List of participants The menu item List of participants under each department, course or group gives an overview of all the participants who are affiliated to the organisational unit, course or group. The list of participants shows pictures, names, e-mail addresses and addresses. If you click on a participant, additional details are displayed. Picture and private address are hidden fields by default. This means that they are only dis-played if the user has allowed public access to them. Choose List (with pics) in the Display drop down menu if you want to see the pictures that are available. It is easy to find and export details about a person or group of people. Finding a person • Enter a search term (first name, surname, etc.) in the search box and press Return.
NB: You only need to enter part of the name. For example, if you enter ann, the
search will return all the names that contain that combination of letters (Anne, Anne-Sofie, Janne, Marianne, Normann etc.)
Exporting a list of participants 1. Choose Export in the drop down menu called Display and if necessary choose a
separator (i.e. the character that needs to be inserted between the fields in the export file). The separator is a semi-colon by default.
2. Select which fields you want to include in your list.
3. Click on the Export to text area button if you want to have the list presented as text that you can copy and paste elsewhere, or Click on the Export to file button, if you want the list to be saved in a comma-separated csv format that can be opened with Excel. If you want the file to be opened in Excel, choose Open. If you want to save the file on your computer, choose Save. The file is given the name eksport.csv by default, but you can choose a different name if you wish.

10
Assignments Assignments is a hand-in function to upload files that only you and the leturer/admini-strator can access. Assignments can be used in exams or in other types of hand-in situa-tions during the semester. Uploading a new assignment 1. Click Create new assignment/report hand-in
2. Fill in Assignment Name, Description, Assignment links and Opening and Closing dates and times for the assignment
3. Click Browse and select the file or write the assignment in Description
4. Click Create assignment
5. Click Go back to the overview.
Downloading student hand-ins 1. Find and click on the assignment in question in the section Active assignments where
the number of hand-ins appears. The list is sorted out by time of handing-in.
2. Click on the name of the student in question to access the files and give your feedback
3. Click Save to save your feedback and/or Back to return to the overview.
You can also choose to download the entire amount of files and assignments as .zip (Download all as .zip) To close down the assignment: As long as the lecturer/administrator has not actively closed down the assignment, students may hand in assignments after closing time, and the hand-in will be marked in red. 1. Click on the assignment in the section Finished Assignments 2. Click Close assignment 3. Click Back to return to the overview.

11
Calendar There are two types of calendars in CampusNet: group calendars (one for each group or class) and personal calendars (one for each user). • Each group calendar is managed by the group’s administrator or authors and con-
tains activities relevant for all group users. If the group is a course or a class, all teaching activities are automatically imported from the planning system of Aarhus School of Business and cannot be changed, re-scheduled or deleted by lecturers in CampusNet.
If teaching has to be rescheduled, you must therefore contact the Planning Office (Planlægningskontor). If teaching has to be cancelled, you must use CampusNet’s cancellation function (see page 13).
• The personal calendar (My calendar) combines activities from all group calendars into one calendar. You can also add your own activities that cannot be seen by other CampusNet users. In Settings you can choose which group activities should be included (i.e. made visi-ble) in your calendar (see page 25).
Inserting new activities 1. Click My calendar in the personal menu. 2. Click Add new activity. 3. Enter date, start time, end time etc. and finally click on the Save button. NB: Don’t forget to enter a subject to the activity. The subject will be the link to view the
rest of the information about the activity. Editing and deleting activities 1. Click on the activity’s heading in the calendar. 2. Click Edit activity or Delete activity as required. NB: Standard users (e.g. students) may only add, edit or delete their own activities in their
own calendar (My calendar). Interaction with other calendars The content of your CampusNet calendar can be integrated with other calendar programs, e.g. Microsoft Outlook 2007 and Google Calendar, using iCalendar. Your CampusNet cal-endar can be fed automatically into the calendar you normally use for other appointments and activities.

12
• Go to My calendar (or group calendar)
• Click the link iCalendar export
• Choose the link beneath the heading stating your favourite calendar.
• If you choose to integrate your CampusNet calendar with Microsoft Outlook 2007 a dialogue box appear, and you can click Advanced to make different changes and ad-justments to your calendar. Otherwise you click Yes to install and subscribe to up-dates of the CampusNet calendar.
• Next, the activities will be transferred from the CampusNet calendar to your Outlook calendar and listed beneath the heading Other Calendars. Here you can choose to show or not to show both calendars. You may drag and drop activities from the Cam-pusNet calendar directly into your Outlook calendar with your mouse.

13
Cancellation of teaching All information about when and where teaching takes place at ASB is imported regularly from the Planning Office’s planning system (Syllabus Plus) and is displayed in CampusNet in the course calendars. Academic staff must cancel their teaching directly via CampusNet, so that CampusNet al-ways has accurate information about whether or not teaching will take place. Clicking on Cancellations in the personal menu allows you to see whether any of the ac-tivities you are involved in have been cancelled. You can also see an overview of the next 8 days’ activities that you are allowed to cancel. If you click View all cancellations at ASB, you can see an overview of all cancelled ac-tivities at ASB (and not just those you are involved in yourself). Cancelling a teaching activity (staff only) 1. Click Cancellations in your personal menu 2. Click Cancel next to the activity you want to cancel 3. Confirm that you want to cancel.
CANCELLED (AFLYST) is now displayed for the activity concerned, and the activity ap-pears under the heading Cancellations. An e-mail is sent automatically to all the students in that class and to the Planning Office. When the Planning Office has registered your cancellation and deleted the item from the planning system, the item will also disappear from the calendar at the next update (updates take place at 9.15, 11.15, 13.15 and 15.15). The cancelled item will be visible under the head-ing Cancellations until midnight on the day when the item was scheduled to take place. NB: A cancellation CANNOT be undone! If you cancel an item by mistake, you can contact the Planning Office to revoke the cancel-lation. Remember that you must also send a message overruling the cancellation to the stu-dents!

14
Messages/e-mails If you have author or administrator privileges in a CampusNet group, you can send mes-sages to the group’s users. Such messages are displayed in CampusNet via the group’s menu item Messages as well as in My messages in the personal menu. By default they are also sent as e-mail to the group users’ official e-mail addresses. Sending a message to a group’s users 1. Click on the relevant group (note the difference between course and class/subgroup –
one course can contain many classes!)
2. Click Messages
3. Click Compose new message
4. Check that the correct group is displayed next to the heading Group.
5. Choose priority (High and Normal are also be default sent as e-mail, Low can only be displayed in CampusNet)
6. Enter the expiry date as a sequence: day-month-year (DD-MM-YYYY). The expiry date is the date when the message should be removed from CampusNet
7. Enter a subject/heading
8. If you want, enter a link (for example, you can copy/paste a link to a folder or a docu-ment you mention in your message; this destination can be in a CampusNet file ex-change area or in another location on the WWW).
9. Enter the text itself (max. 3 400 characters)
10. Click See message to check that everything is correct
11. If you are satisfied with your message, click Send this message. Otherwise click Continue editing this message.
You can still edit a message after it has been sent, but this will only affect the message dis-played in CampusNet. When you click Save after editing a message that has already been sent, a new e-mail will NOT be sent, regardless of priority. In the menu item My messages, you can see an overview of all current messages from all the courses, groups and organisational units you are affiliated to. It is possible to find expired messages in CampusNet. Go to Messages/My messages in CampusNet and then click Include expired messages to see all expired messages that have been sent from the group. Click or Expand all to see more than the top few lines of each message. In Settings (in the personal menu) you can choose which group’s messages should be in-cluded (i.e. visible) via My messages. (See how on page 25) NB: Messages sent as e-mail via CampusNet, are displayed with CN: before the sender’s
name, and if the recipient chooses to reply to a message, the sender’s correct e-mail address is automatically displayed in the To field.

15
Discussion board A discussion board is a site where group users can discuss certain subjects in writing. This can be a very useful study tool (e.g. in connection with writing assignments, discussion of academic questions, exam preparation, etc.) but to be effective, the discussion has to be kept active. • Every CampusNet group has a Discussion board that can contain one or more rooms.
Only an administrator or author may create a room. At least one room must be cre-ated before discussion can start.
• All users can post messages in every room, either by replying to an existing message, i.e. participating in an existing discussion, or by starting a new thread to start a new discussion.
• In the right-hand menu below the heading Discussions you can see the latest post-ings of the discussions you are affiliated to.
• When you click Discussion board in a group (or click My discussions), you can see an overview of how many unread messages there are in each room you are affili-ated to. When you enter each room, new messages are also displayed with their head-ing in bold type.
• Under View history, administrators can check whether messages have been read, when and by whom. If you wish, you can disable the history function (click the button Disable history). Message history is then no longer recorded.
• You can monitor a discussion by selecting Watch next to a thread. You will then re-ceive an e-mail each time a new message is posted in the discussion.
• As a general rule, nothing can be deleted in a discussion board. You can only edit or delete your own messages if no-one has replied to them. However, you can re-name a room and change its descriptive text at any time.
Creating a new discussion board 1. Click on the button Create new room
2. Give the room a descriptive name by entering a title. You can also add a short descrip-tion of the room’s purpose in the text field.
3. Click Create room.
Reading the messages in a discussion board 1. Click the room you want to view
2. Click the thread (topic of discussion) you want to see
3. Click a posting to see the full text of the posting, or click on the View all postings button to see all postings in one view.

16
Replying to a posting 1. Click the posting you want to reply to.
2. Click Reply to posting
3. Fill in the text box and click Create message.
Starting a new discussion 1. Click Create thread.
2. Give the thread a descriptive heading (very important)
3. Enter your message in the text box and click Create message.
Downloading the entire contents of a discussion board as a text file 1. Click Download discussion board as text
2. Indicate a name for the text file and where you want to save it.

17
File Exchange and document version control Every CampusNet group has its own file exchange area where the group's users can share documents with each other. Only members of the group have access to the group's file ex-change area and can upload or download from it. The file exchange area consists of a top level (at the root) and a number of folders and files. There are 2 different kinds of folders:
open folders whereto all users can upload files
course material folders whereto only administrators/authors can upload files
NB: the top level works as a course material folder, which is why ordinary users cannot
upload to that level. If ordinary users are to upload files to the file exchange area, the group's administrator has to create at least one open folder.
How to create a folder: 1. Click Create new folder 2. Give your folder a name and a description 3. Select folder type (open folder or material folder) 4. Click Save.
How to download a file: 1. Click File Exchange to display the file exchange area 2. Click a folder to display its content 3. Click the name of the file you want to download 4. Open the document or save it on your computer first.
How to upload a file: 1. Click File Exchange
2. Click the folder to which you want to upload
3. Click Upload file
4. Click Browse to select the file to upload
5. Enter a description of the file
6. Enter a From and/or a To date to restrict the availability of the file (leave blank if you do not want to restrict availability)
7. Click Upload.
8. When uploaded the text File has been uploaded will be displayed together with the link Send message with link to this file. Doing that you can inform group mem-bers that a new file has been uploaded, and that they can access the file directly by clicking the link.
NB: Ordinary users can only upload to open folders. They cannot upload to the top level or to course material folders.

18
How to edit a folder/a file: 1. Click Edit next to the folder/file you would like to edit. 2. Make the necessary changes 3. Click Save.
How to delete a folder/a file: 1. Select the folder(s) and/or file(s) by ticking them in the Select column 2. Click Delete selected at the bottom of the page. 3. Confirm deletion. NB: Ordinary users can only delete their own files.
How to change the sorting order of your folders/files As an administrator/author you can customize the display order of folders and files in your group's file exchange area. By default folders and files are sorted alphabetically. NB: Every user can change the default sorting order by clicking on a table heading. 1. Select the folder level that you would like to change 2. Click Change sorting order 3. Tick User-defined sorting order 4. Use the Quick sort function or sort manually by clicking on the up and down arrows. Document version control When uploading a file, you can choose to put it under version control. This means that you can upload a new version of the document afterwards without deleting the original version. This facility can be relevant in connection with group work. Every time a new version of the document is uploaded, the new version will receive a new number. The newest version will always be shown at the top. If you wish to see an earlier version of a document, you have to click on the version number, e.g. ver. 2, in the column Version. If you want to prevent other group members from working on the same file at the same time as you, you can “lock” the file: Click on the version number and thereafter click on the Lock button. The label locked will appear under the version number indicating to others that someone is currently working on the document. You may download a locked docu-ment, but you cannot upload a new version before the document is unlocked.

19
Links The menu item Links allows an author or administrator in a CampusNet group to create a series of links that are available to the group. Creating a new link in a CampusNet group 1. Click the menu item Links in the group’s left-hand menu.
2. Click New group link.
3. Give the link a name (you can also add a short description) and enter – or copy/paste – the web address or URL. NB: If you create a link to an external webpage, it is a good idea to select Open link
in new window, so that the CampusNet window remains open in the back-ground.
4. Click Save new link.
Editing an existing link 1. Click the Edit icon beside the link.
2. Make the desired changes.
3. Click Save edited link.
Deleting an existing link • Click the Delete icon beside the link.
NB: Beware! The link will be deleted without further warning!
Changing the order of links • Click on the up and down arrows ( and ) to move a link up or down the list.
The menu item My links in the personal menu gives an overview of the links available in the groups you have access to. In addition to the above, you can create your own personal collection of links that only you can see: • Click New personal link (from My links) and follow the procedure described above.

20
My Library and Online materials My Library
My Library in your personal menu allows you to log on to the library system without hav-ing to enter your library username and password. This allows you to see your library user information and reserve material, renew loans, etc. Recalls and messages from the Library can also be sent to your e-mail address (see page 25) and be visible in My Library and My messages as well as in the right-hand menu below the heading Library. If you do not have access to My Library, you are probably not registered with the Library as a user, or your library username and password may not be correctly entered in the Regis-ter. Please contact your department secretary, or Dorte Uldbjerg at the Library.
Online materials
The expansion of e-learning has naturally created a desire to give students access to course literature in digital form. Today, the Library offers a number of materials that are well adapted to the net-based teaching offered via CampusNet. Please refer to your Library con-tact (or Lone Jensen) for further details about online materials. The menu item Links in the left-hand menu allows an author or administrator in a Cam-pusNet group to insert one or more links to online materials. A description of the online material can be inserted, and the students can be informed about username and password to the online material. Read more about links on page 18.

21
Access to previous courses/groups via Archive When a CampusNet group expires (for example, when a course is completed), it is ar-chived. This means that it is no longer visible in the left-hand menu, but group users may still access it via the menu item Archive in their personal menu. When the group is ar-chived, all material available in File Exchange is thus still available for later use. You cannot, however, upload files to the File exchange of expired groups. Expiry dates Spring courses are archived on August 1 and autumn courses on February 1 by default, but CN-administrators can change these expiry dates (see how on page 30). Other groups do not have a default expiry date, but an expiry date can be set for them. In-terest groups expire automatically if there is a long period with no activity. NB: When a course is archived, a course start semester prefix is added to its name. For
example French grammar with course start in the “Autumn 2009” semester is changed to 09E French grammar when it is archived (E is used for autumn courses, and F for spring courses). This makes it easier to distinguish between different courses.
Archive By clicking the menu item Archive a list of all the courses you are affiliated to will be dis-played, both current and expired. It is possible to distinguish between current and expired courses, as expired courses have check box in front of them. To get an overview of other types of groups (e.g. workgroups, tutor groups, interest groups, etc.), click All CampusNet groups. Making archived groups visible
1. Click Archive.
2. If the group you want to retrieve from the archive is not a course, click All Cam-pusNet groups.
3. Select the group you want to retrieve (if there is no check box, the course is still ac-tive).
4. Click Save changes. When you return to the front page, the old group will be visible in your left-hand menu, and you will have access to it AS IF it was active again. To remove the old group from your left-hand menu again, go back to the same place and remove the tick from the box.

22
Re-activating an archived group When you retrieve a group from the archive, it is only visible to you. If you want to retrieve a group so that all users can see it again in their left-hand menus, retrieve it from the ar-chive and then change the group’s expiry date. 1. Choose the group 2. Choose Admin 3. In the section Group Properties, choose Edit or remove expiry date 4. Change the date and click Save NB: A course that has been archived retains the semester prefix, even if the expiry date is
changed to a future date

23
Printing from CampusNet • Click on the printer icon to open the current page in a new window without Cam-
pusNet menus or background graphics.
You may also print from your browser’s menu:
• Select File > Print and click Print to print the entire CampusNet-page.

24
Updating and displaying a user profile User profile allows you to see your personal data. Some of this data is accessible for other group users, so it is important that contact details are correct. The personal data displayed on CampusNet are stored in the The Register. Editing your personal data 1. Click User profile in your personal menu.
2. Click Edit your personal data. A new window entitled The Register opens.
The following applies for employees only. 3. Clicking on Change per-
sonal data displays the fol-lowing overview: Account: cpr-number,
name
Private address: con-tact details
Profil Pxxxx: details related to your status at the school.
4. Update the details and click
Update. The changes made by employees must be “approved” by the departmental secretary before they appear in CampusNet. This ensures that the secretary always has the latest informa-tion about employees. Besides editing your personal profile you can decide which address should be regarded as official and displayed in CampusNet, and you can search the Register.

25
Settings The Settings window allows you to add or remove menu items in your personal menu. If you never use the Address book, for example, you can remove the tick from the box next to Address book to prevent this item from being displayed in the menu. NB: Addresses you may have in your address book are not deleted if you hide the Address
book menu item, and you can make the item visible again at any time. The Settings window also allows you to choose which groups’ calendars, messages and discussion boards you want to include in My calendar, My messages and My discus-sions. This means that you can decide yourself whether a particular group’s activities and messages should be included in your own calendar (My calendar). If for example you are the course responsible for a course that you yourself do not teach on, you may prefer to remove the tick in the Integrated column next to that course. You will thus avoid irrelevant data being added to your My calendar, My messages and My dis-cussions areas. Likewise, you can decide whether you want to receive CampusNet messages as e-mails, so that you can see them both on CampusNet and in your mail programme. By default messages with normal and high priority are sent as e-mails to group users, but each user can change this setting. You can choose between: • receiving all messages as e-mails • only receiving high priority messages as e-mails • receiving normal and high priority messages as e-mails (default) • not receiving any messages as e-mails.
NB: One consequence of this is that you cannot be certain that your students receive your
messages as e-mails. Settings for Library Info Towards the bottom of the page you can mark Receive personal information from the Li-brary as e-mail and thereby receive reminders and reservation notices etc. from the library in your mailbox as well as in CampusNet.

26
Interest groups An interest group is a group that any user can create in CampusNet and is completely inde-pendent of other groups. The main purpose of interest groups is to allow students to create study groups, discussion groups or other types of interest-related groups. When you create an interest group, you automatically obtain administrator privileges for the group, which means that you can invite other CampusNet users to become group users. An interest group can be open, semi-open or closed: • an open group is immediately accessible to all other CampusNet users, if they are in-
terested in joining it
• a semi-open group is a group that other CampusNet users can apply to become a user of. The group’s administrator must accept or reject the application
• a closed group is only visible to its users.
NB: an individual user may upload a maximum of 50 MB in total to interest groups (this
maximum ONLY applies to interest groups). Creating an interest group • Click Interest group in your personal menu and afterwards on the link Create in-
terest group
• Give your interest group a name and a description
• State whether the group should be open, semi-open or closed
• Click on the Save button.
NB: If you create an open or semi-open interest group, it is important to give it a complete description, as this is the only information other CampusNet users may see about the group.
Editing an existing interest group
• Click the group’s name in the left-hand menu
• Click Admin > Edit group name and properties in the section Group proper-ties
• Make the desired changes and click on the Save button.

27
”Deleting” an interest group Interest groups cannot be deleted, but of course, a group that you no longer want to use may be “sidelined”. Here are your options: • You may archive the group by giving it a (new) expiry date, so that the entire group is
moved to the Archive - complete with users and content - and will no longer be dis-played. - Click Admin > Edit or remove expiry date and enter the current date in the
expiry date field.
• You can delete the content in File Exchange if there is no reason to keep it. Doing this will release space for uploads to other interest groups: - Click File Exchange - Select folders and files to delete - Click Delete selected items.
• You can close the group if you do not want to accept any more users but otherwise want
to keep the group as it is. - Click Admin > Edit group name and properties, click on the radio button
next to closed and click on the Save button.
• Finally, you can remove users if you wish the group to cease to exist. - Click Admin > Remove group users - Select the persons you want to remove from the group - Click on the Remove selected users button - Click Back.
Finding an open or semi-closed group Access to most groups in CampusNet is closed, but it is possible to decide whether a group should be open, semi-closed or closed, see above. The open and semi-open groups can be located from the front page of Interest group on the personal menu: • Click Search open/semi open groups
• Click Show all groups, to display a full list of all open and semi-closed groups.
Keep an eye on your file usage! Click File usages in interest groups on the front page of interest groups to get an over-view. Each user may upload a maximum of 50 MB in total to interest groups.

28
Inviting other CampusNet users People cannot just be added to an interest group. New users must be invited, and it is up to the individual whether to accept or reject the invitation. If you invite John Doe, he will receive an e-mail containing a link to a page in CampusNet where he can accept or reject the invitation. As soon as he accepts, he becomes a user of the group. • Go to the interest group in question in the left hand menu
• Click Admin > Invite users - accept/decline participation requests
• Click Search the user database
• Enter the person’s name and click Search.
• Click on the Select button beside the name of the person you want to invite. This per-son’s Register ID will appear in the field.
• Click on the OK button to confirm the invitation. The person’s name is now displayed in your overview of invited users until that person accepts or rejects your invitation.
Joining an interest group If you wish to become a user of an open or semi-open group, click Search open/semi open groups, and click Display all groups to get a complete overview of all open and semi open interest groups. Unsubscribing from an interest group • Click Settings in your personal menu
• Find the group in your group overview
• Click on the Unsubscribe button in the column to the right.
NB: For practical reasons the last administrator in an interest group cannot unsubscribe
from it.
29
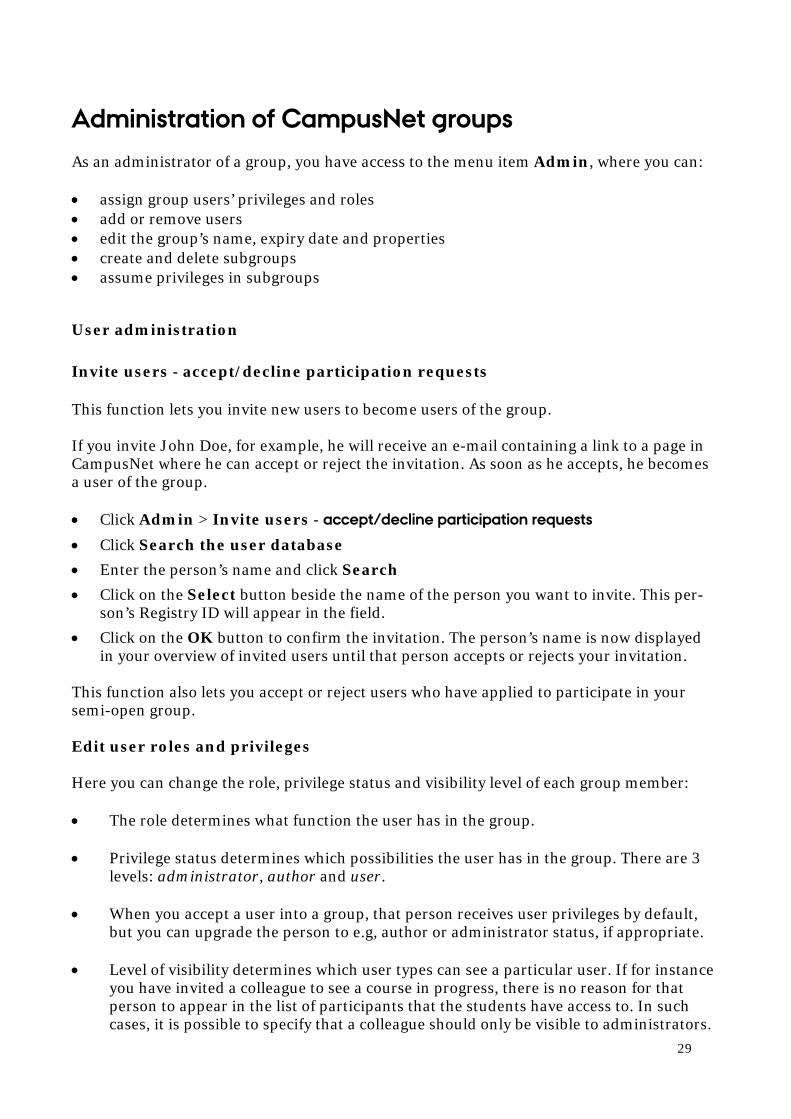
Administration of CampusNet groups As an administrator of a group, you have access to the menu item Admin, where you can: • assign group users’ privileges and roles • add or remove users • edit the group’s name, expiry date and properties • create and delete subgroups • assume privileges in subgroups
User administration
Invite users - accept/decline participation requests This function lets you invite new users to become users of the group. If you invite John Doe, for example, he will receive an e-mail containing a link to a page in CampusNet where he can accept or reject the invitation. As soon as he accepts, he becomes a user of the group. • Click Admin > Invite users - accept/decline participation requests
• Click Search the user database
• Enter the person’s name and click Search
• Click on the Select button beside the name of the person you want to invite. This per-son’s Registry ID will appear in the field.
• Click on the OK button to confirm the invitation. The person’s name is now displayed in your overview of invited users until that person accepts or rejects your invitation.
This function also lets you accept or reject users who have applied to participate in your semi-open group. Edit user roles and privileges Here you can change the role, privilege status and visibility level of each group member: • The role determines what function the user has in the group.
• Privilege status determines which possibilities the user has in the group. There are 3
levels: administrator, author and user.
• When you accept a user into a group, that person receives user privileges by default, but you can upgrade the person to e.g, author or administrator status, if appropriate.
• Level of visibility determines which user types can see a particular user. If for instance
you have invited a colleague to see a course in progress, there is no reason for that person to appear in the list of participants that the students have access to. In such cases, it is possible to specify that a colleague should only be visible to administrators.

30
Add group members This function works in the same way as the Invite function. NB: This function is not available in interest groups! Remove group users • Click Admin > Remove group users • Tick the box next to the people you want to remove from the group • Click on the Remove selected users button. NB: People who have been added automatically by the system (e.g. students who are en-
rolled on a course) cannot be removed manually.
Group properties Edit group name and properties This function lets you rename the group, add or edit the group’s description and change the group’s visibility in CampusNet as a whole. Access to services This function lets you choose which services should be accessible in the group. If for exam-ple you do not want to use the Links or Home page-function, you can remove the tick from the box beside the service concerned and click Save. This service will then disappear from the group’s left-hand menu. Edit or remove expiry dates This function lets you fix a group’s expiry date, i.e. the date on which a group is transferred from being active to being placed in the Archive. The default expiry dates for courses are August 1 for spring courses and February 1 for autumn courses. A course’s expiry date may only be changed by an administrator.
Subgroups Create subgroups You can create a subgroup within the current group by giving it a Danish and an English name, a suitable description, and specifying whether the group should be open, semi-open or closed. NB: If your group is open or semi-open, it can be displayed using the search function. It is
therefore important that the group has a descriptive name and an accurate descrip-tion. To ensure that the group is only visible to group users – and invisible to others – during searches, make it closed.

31
Delete subgroups This function allows you to delete subgroups within the group concerned. NB: Groups that are created automatically (e.g. classes in a course) cannot be deleted in
CampusNet. Get access to a subgroup This function gives you temporary or permanent access to the subgroups within the group you administer. For example, if you are an administrator for a department, this function gives you access to all the courses available in this department.

32
Preparing for the start of a new semester As an administrator, you decide how your courses should be organized in CampusNet, which services should be available, etc.
Remove unnecessary services and levels
All courses are displayed in CampusNet with 2 levels: 1. course level 2. class level (with one or several classes called Class XX) Both levels have access to the same services (list of participants, file exchange, discussion board, etc.) The idea is that course level should be used for features that are common to all the classes in a course and class level should be used for features that are specific for a particular class. If a course consists of only one class, there is no reason to keep the two levels, because the users are identical at both levels. It can therefore be useful to remove the various services at course level and only keep those at class level. To do this, use the course’s Admin menu (see page 30).
Edit welcome text
You can add a welcome message (title and body text) to the front page of the group you administer. You can create Danish and English versions, if you have both types of users in the group.
Adding/editing a welcome text 1. Click Create/Edit welcome text 2. Enter a new message or edit an existing one 3. Finally, click on the Update button NB: You may copy HTML code directly into the text box. Recycle data from previous courses When a previous course is offered again, you can re-use some of your data, so that you do not have to start from scratch each time. E.g. you may import files from File Exchange:

33
Importing a File Exchange from a previous course 1. Choose File Exchange in the new group concerned.
2. Click Import at the top of the screen
3. Click Copy files and folders from another group or from Personal files
4. Click Continue. All groups you have or have had access to are displayed.
5. Mark a group and click Continue (at the bottom)
6. Mark which folder or subfolder to import and click Continue
7. Select the files and folders to import and click Continue
8. Finally your choices are summed up – click Continue (or click Back to reselect)
After importing, you can delete any files that are not relevant. The same procedure can be used to import activities from the Calendar.

34
Help and support CampusNet is well documented and supported:
• You can find Help & Support on the CampusNet logon page
• You can find FAQ (Frequently Asked Questions) inside CampusNet in the global menu.
• While navigating in CampusNet, you can obtain help with the operation you are en-gaged in at the time by clicking on the help icon (next to the printer icon).
• From Monday to Friday, 9 a.m. to 4 p.m. you can call the CampusNet hotline on tel.
45 25 72 74 or e-mail [email protected]
• You can also contact the Service desk at ASB at any time.
CampusNet hotline
(+45) 45 25 72 74 [email protected]
![ASB The Changing Landscape - Chartered Institute of Housing Support/EM resources/ASB... · Recent ASB Case Law Wandsworth LBC v Maggott [2013] • ASB not found to be “in the locality”](https://img.pdfslide.us/doc/110x75/5c050c6d09d3f2133a8cde9d/asb-the-changing-landscape-chartered-institute-of-supportem-resourcesasb.jpg)