Embed Size (px)
DESCRIPTION
Camera Obscura
Citation preview
Construction of camera obscura with varying aperture sizes and screen distances
Co, Harold and Romero Roland AlbertNational Institute of Physics, University of the Philippines, Diliman, Quezon City
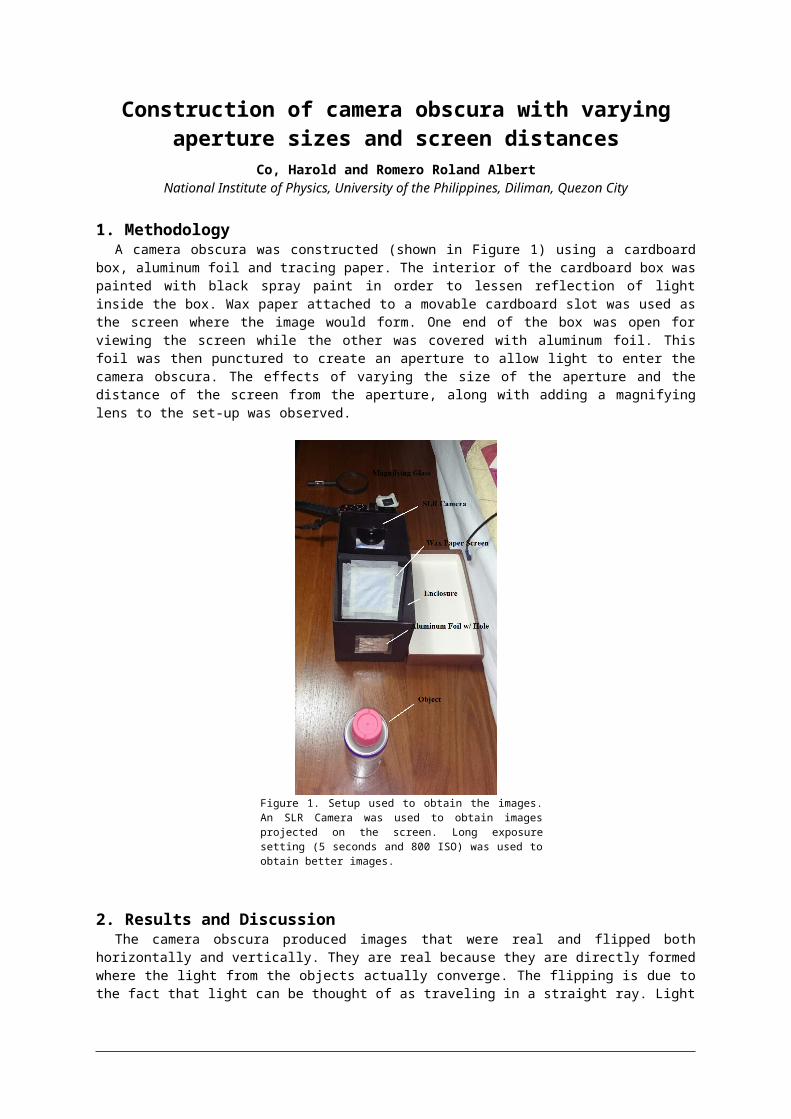
1. MethodologyA camera obscura was constructed (shown in Figure 1) using a cardboard box, aluminum foil and tracing
paper. The interior of the cardboard box was painted with black spray paint in order to lessen reflection of light inside the box. Wax paper attached to a movable cardboard slot was used as the screen where the image would form. One end of the box was open for viewing the screen while the other was covered with aluminum foil. This foil was then punctured to create an aperture to allow light to enter the camera obscura. The effects of varying the size of the aperture and the distance of the screen from the aperture, along with adding a magnifying lens to the set-up was observed.
Figure 1. Setup used to obtain the images. An SLR Camera was used to obtain images projected on the screen. Long exposure setting (5 seconds and 800 ISO) was used to obtain better images.
2. Results and DiscussionThe camera obscura produced images that were real and flipped both horizontally and vertically. They are
real because they are directly formed where the light from the objects actually converge. The flipping is due to the fact that light can be thought of as traveling in a straight ray. Light coming above the aperture will hit the bottom of the screen while light rays below the aperture will hit the top of the screen.
Figure 2. “Flipping” of image after passing through the hole. Thus, the following images obtained from the setup demonstrate this.
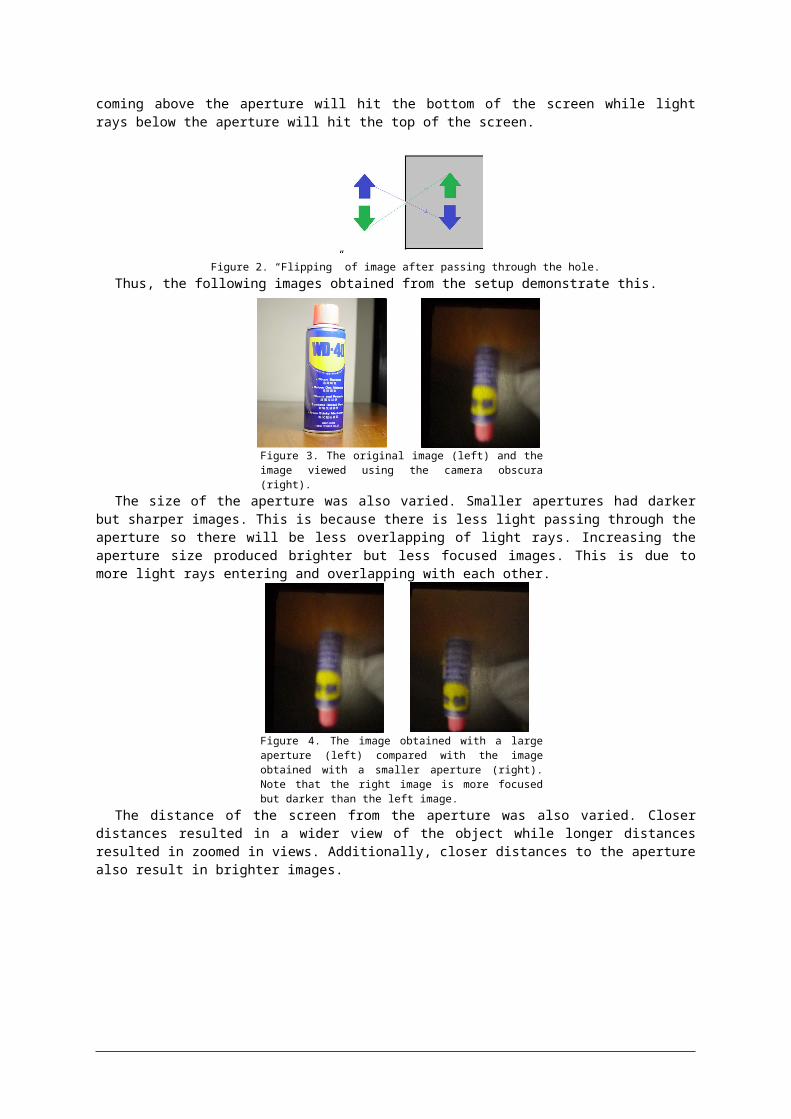
Figure 3. The original image (left) and the image viewed using the camera obscura (right).
The size of the aperture was also varied. Smaller apertures had darker but sharper images. This is because there is less light passing through the aperture so there will be less overlapping of light rays. Increasing the aperture size produced brighter but less focused images. This is due to more light rays entering and overlapping with each other.
Figure 4. The image obtained with a large aperture (left) compared with the image obtained with a smaller aperture (right). Note that the right image is more focused but darker than the left image.
The distance of the screen from the aperture was also varied. Closer distances resulted in a wider view of the object while longer distances resulted in zoomed in views. Additionally, closer distances to the aperture also result in brighter images.
Figure 5. Images produced with the screen near the aperture (left) and with the screen farther from the aperture (right). Note that the right image does not only give a wider view of the object but it is also brighter.
Attaching a magnifying lens right before the aperture resulted in a clearer and less blurred image. This is due to the fact that the magnifying lens ensures that less of the rays “overlap” to form a blurred image.
Figure 6. Images produced with (left) and without (right) a magnifying glass. Note that the right image is slightly more focused.