Embed Size (px)
Citation preview

8/14/2019 Camara Termica Fluke
http://slidepdf.com/reader/full/camara-termica-fluke 1/93
SmartView 3.2.1
8/14/2019 Camara Termica Fluke
http://slidepdf.com/reader/full/camara-termica-fluke 2/93
i
Table of ContentsIntroduction...................................................................................................................... 1
Welcome to SmartView® ............................................................................................. 1Understanding the System Requirements.................................................................... 2
Installing SmartView..................................................................................................... 3Updating SmartView ia the We! ................................................................................ "Uninstalling SmartView So#tware ................................................................................. $%our &ard Reader ........................................................................................................ 'Reporting (ro!lems ..................................................................................................... )&ontact Us ................................................................................................................... *+icense ,greement ...................................................................................................... -
SmartView asics.......................................................................................................... 11Saing and /rans#erring %our Images........................................................................ 11&onnecting to your /hermal Imager........................................................................... 12Update your /hermal Imager ..................................................................................... 13
Starting SmartView .................................................................................................... 1"Using the SmartView 0ain Window ........................................................................... 1$Using Worspaces to rganie Images ..................................................................... 1'Setting (re#erences.................................................................................................... 1)
Viewing .......................................................................................................................... 22pening 4iles #or Viewing .......................................................................................... 22Using Sample Images ................................................................................................ 23Understanding the Image Window ............................................................................. 2"Using the Image (opup 0enu.................................................................................... 2$Viewing (i5el /emperatures ...................................................................................... 2'Using the Image In#o Window .................................................................................... 2)
Using the 0arer 6ata Window ................................................................................. 2*Using 7raphs ............................................................................................................. 2-Viewing the IR84usion Visi!le +ight Image ................................................................. 39Woring with Videos................................................................................................... 31Streaming Video ........................................................................................................ 32
Using the Image :ditor .................................................................................................. 33Using the &olor (alette .............................................................................................. 3"Using &olor ,larms and Isotherms............................................................................. 3$&hanging :missiity and acground /emperature .................................................. 3)&hanging /ransmission &orrection ............................................................................ 3*Using Image 0arers ................................................................................................. 3-
Remoing 0arers ..................................................................................................... "2Rotating Images or Videos ......................................................................................... "30odi#ying 0arer (roperties ...................................................................................... ""Woring with IR84usion® Images............................................................................... "$:diting Image ,nnotations ......................................................................................... "'Using Re#erence Images............................................................................................ "):diting Image &omments ........................................................................................... "*:diting 0ultiple Images ,t nce ................................................................................ "-
8/14/2019 Camara Termica Fluke
http://slidepdf.com/reader/full/camara-termica-fluke 3/93
ii
,nnotations.................................................................................................................... $9:5ploring the ,nnotations :ditor ................................................................................ $2Using the ,nnotations :ditor /utorial......................................................................... $$
,nnotation 6rag and 6rop ......................................................................................... $*Voice ,nnotation ........................................................................................................ $-
7enerating Reports ....................................................................................................... '9SmartView Reports; eriew ................................................................................... '97enerating Reports.................................................................................................... '1Report /emplates ...................................................................................................... '$
,ctiating Report /emplate :diting ............................................................................ '*0odi#ying Report /emplates ...................................................................................... '-&reating a Report /emplate ....................................................................................... )1Report /emplate :lements ........................................................................................ )2Report /emplate :lement ,ttri!utes .......................................................................... )$
Using the &lip!oard ....................................................................................................... ))&opying and (asting an Image .................................................................................. ))&opy and (aste Image In#o........................................................................................ )*&opying and (asting a 7raph .................................................................................... )-&opying and (asting 0arer 6ata ............................................................................. *9
:5porting Images and /emperature 6ata...................................................................... *17etting ,ccurate /emperatures..................................................................................... *3
asic In#rared Radiometry.......................................................................................... *3Understanding /echnology +imitations ...................................................................... *$:missiity <uic /ips ................................................................................................. *':missiity /a!le ......................................................................................................... *)
8/14/2019 Camara Termica Fluke
http://slidepdf.com/reader/full/camara-termica-fluke 4/93
1
Introduction
Welcome to SmartView® SmartView® =elp 4ile Reision 3.2.1
SmartView is the power#ul> yet easy8to8use> analysis and reporting so#tware proidedon a &68R0 dis included with your system.
SmartView> together with your thermal imager> ena!les you to;• /rans#er thermographic images to a computer and e##iciently manage them
• ptimie and analye your in#rared and isi!le light control images
• &reate and print detailed> pro#essional reports containing important image
data
8/14/2019 Camara Termica Fluke
http://slidepdf.com/reader/full/camara-termica-fluke 5/93
2
Understanding the Sstem !e"uirementse#ore installing and using SmartView®> !e sure that your computer meets the#ollowing system requirements;
Software !e"uirements• 0icroso#t® Windows? @(AVistaA).
• , We! !rowser #or product registration and iewing 4,<s; 0icroso#t®Internet :5plorer *.9 or newer.
• 0icroso#t Word 299) #or report template modi#ication BoptionalC.
#ardware !e"uirements• 0 emo ry c a rd r e a d e r.
• $12 0 R,0 B1 7 #or Vista or )C> not including space requirements #or We!
!rowser and 0icroso#t® Word.• 1'8!it color> 192" 5 )'* resolution ideo or !etter.
• &olor printer B#or printing your imagesC.
• &68R0 drie B#or installing SmartView so#twareC.
• Windows 0edia (layer and ideo codec #or ideo playing BoptionalC.
8/14/2019 Camara Termica Fluke
http://slidepdf.com/reader/full/camara-termica-fluke 6/93
3
Installing SmartViewTo install SmartView software$
1. &lose all programs.2. Insert the SmartView &68R0 dis into your &68R0 drie. I# the ,utorun
#eature is ena!led on your system> the installation !egins automaticallyD goto step $.
3. 4rom the Start menu> select Run i# ,utorun is not ena!led.". /ype E6;FsetupG Bsu!stitute the appropriate letter o# your &68R0 drie #or ‖6‖ i#
your drie letter is di##erentC.$. 4ollow the on8screen instructions to complete the installation.

8/14/2019 Camara Termica Fluke
http://slidepdf.com/reader/full/camara-termica-fluke 7/93
"
U%dating SmartView &ia the WebHeep SmartView up to date !y checing #or updates #rom the we!. SmartView canautomatically chec #or updates eery time the application starts or manually chec#or updates #rom the =elp menu !ar.
'utomatic U%datesSmartView will automatically chec #or updates eery time the application starts.
To enable SmartView to automaticall chec( for u%dates from the web$1. &lic :dit on the SmartView 0enu ar and select (re#erences.2. &lic on the ,pplication ta!.3. &hec the !o5 to ena!le automatic updates. 6isa!le the chec !o5 to
disa!le #i5ed images.". &lic H.
)ote$ /he de#ault is to hae automatic we! updates actiated.
*anual U%datesSmartView will chec #or updates #rom the we! when prompted !y the user.
To manuall chec( for SmartView u%dates from the web$1. &lic =elp on the SmartView 0enu ar and select J&hec #or UpdatesJ.2. I# new updates are aaila!le> SmartView will indicate updates are
aaila!le. a. &lic %es.!. , message will appear indicating an update has !een downloaded and
will !e aaila!le with the ne5t program start with the option to update nowor later.
c. &lic Kow to install immediately or clic +ater to install the ne5t timeSmartView is started.
3. I# new updates are not aaila!le !ecause SmartView is already up to date>then a message stating J%our current SmartView installation is up to date.Ja. &lic .

8/14/2019 Camara Termica Fluke
http://slidepdf.com/reader/full/camara-termica-fluke 8/93
$
Uninstalling SmartView SoftwareTo uninstall SmartView software from our com%uter$
1. pen the Windows control panel.2. In the Windows control panel> select ,dd or Remoe (rograms.3. Select SmartView and clic the appropriate !utton to remoeAuninstall
SmartView so#tware.". 4ollow any on8screen instructions displayed.
)ote$ utton names ary depending on the ersion o# Windows? you are running. 4or e5ample> in Windows? @(> select &hangeARemoe.

8/14/2019 Camara Termica Fluke
http://slidepdf.com/reader/full/camara-termica-fluke 9/93
'
+our Card !eader /o trans#er images #rom your thermal imager to your computer> use the memorycard reader included with your system. /his deice connects to a US port.
/o install and operate your card reader> #ollow the instructions that come with the deice.

8/14/2019 Camara Termica Fluke
http://slidepdf.com/reader/full/camara-termica-fluke 10/93
)
!e%orting ,roblemsI# you hae pro!lems installing or operating SmartView> or i# you wish to reporta so#tware !ug> contact / e c hn ical S u p po r t.
When reporting so#tware !ugs> please proide the #ollowing in#ormation;1. /he operating system you are running.2. /he computer mae and model you are using.3. /he SmartView ersion you are running.". , detailed description o# the pro!lem and how it is produced. e sure you
accurately spell any error messages you receie. Screen shots or errorreports are pre#erred.

8/14/2019 Camara Termica Fluke
http://slidepdf.com/reader/full/camara-termica-fluke 11/93
*
Contact Us/echnical Support;
4rom US,; B*99C )'98"$23International; 1."2$.""'.$$99
,ddress;
4lue /hermography3$$9 ,nnapolis +ane K.Suite )9(lymouth> 0innesota $$"")US,
4lue &orporation'-29 Seaway ld.:erett> W, -*29'US,
We!;
w w w .# lu e .c o m

8/14/2019 Camara Termica Fluke
http://slidepdf.com/reader/full/camara-termica-fluke 12/93
-icense 'greementL 299'82912 4lue &orporation.
/he in#ormation contained in this document is su!Mect to change without notice.4lue> the 4lue logo and SmartView are trademars o# 4lue &orporation. Windowsis a trademar o# 0icroso#t &orporation. (entium is a trademar o# Intel &orporation.
,ll other trademars are the property o# their respectie holders.
:K6 US:R +I&:KS: ,7R::0:K/ B:U+,C
/he enclosed so#tware product is #urnished su!Mect to the terms and conditions o# thisagreement. Retention o# the so#tware product #or more than thirty days> opening thesealed wrapper surrounding the product> or use o# the product in any manner will !econsidered acceptance o# the agreement terms. I# these terms are not accepta!le> theunused product and any accompanying written material should !e returned promptlyto 4lue or the place o# purchase #or a #ull re#und o# the license #ee paid.
1. 7R,K/ 4 +I&:KS:. 4lue &orporation B4lueC grants you the right to use theenclosed so#tware in accordance with the terms o# this :U+,. /his grant o# licensedoes not include the right to modi#y or distri!ute the so#tware.
2. /I/+:> &(%RI7=/ ,K6 /R,6:0,RH. /his so#tware product is owned !y 4lueor its suppliers and is protected !y United States copyright laws and international treatyproisions. /here#ore> e5cept #or the rights granted to you a!oe> you must treat theso#tware product lie any other copyrighted material> and any copies must include theproper copyright notice.
3. R:S/RI&/IKS. %ou may not reerse engineer> decompile> or disassem!le theso#tware. I# the so#tware product is an update> any trans#er must include the updateand all prior ersions.
%ou may use the so#tware only in conMunction with the 4lue products #or which itis intended.
%ou may not e5port or re8e5port the so#tware to any country to which such e5port orre8 e5port is restricted !y law or regulation o# the United States> or any othergoernment haing Murisdiction> without prior permission #rom 4lue.
". /:R0. /his license agreement is e##ectie upon your acceptance and shall remainin e##ect until terminated !y BaC written noti#ication to 4lue or B!C a #ailure on your partto comply with the license agreement. Upon termination o# the license agreement> youshall return to 4lue or destroy all copies o# the so#tware product and associatedwritten materials.

8/14/2019 Camara Termica Fluke
http://slidepdf.com/reader/full/camara-termica-fluke 13/93
$. /=:R ,7R::0:K/S. Where terms or conditions o# this agreement con#lict withterms or conditions o# other agreements> this agreement supersedes otheragreements.
'. +I0I/:6 W,RR,K/%. 4lue warrants that the so#tware product will per#orm in
its intended enironment su!stantially in accordance with the accompanying writtenmaterials #or a period o# -9 days #rom the date o# license acceptance. 4lue #urtherwarrants that the original copy o# the so#tware has !een recorded on non8de#ectiemedia. 4lue does not warrant that the so#tware will !e error #ree or operate withoutinterruption.
). R:0:6I:S. 4lueNs entire lia!ility and your e5clusie remedy shall !e at 4lueNsoption> BaC the return o# the price paid #or the product> or B!C repair or replacement o#the so#tware product that does not meet the limited warranty. /his limited warranty isoid i# #ailure o# the product has resulted #rom accident> a!use> or misapplication. ,nyreplacement so#tware product will !e warranted #or the remainder o# the -98day originalwarranty period or 39 days> whicheer is longer.
*. K /=:R W,RR,K/I:S. 4+UH: 6IS&+,I0S ,++ /=:R W,RR,K/I:S>:I/=:R :@(R:SS R I0(+I:6 U/ K/ +I0I/:6 / I0(+I:6 W,RR,K/I:S 40:R&=,K/,I+I/% ,K6 4I/K:SS 4R , (,R/I&U+,R (UR(S:> WI/=R:S(:&/ / /=: S4/W,R: (R6U&/ ,K6 /=: ,&&0(,K%IK7 WRI//:K0,/:RI,+S. In no eent shall 4lue or its suppliers !e lia!le #or any damageswhatsoeer Bincluding> without limitation> indirect> consequential> or incidental damages>damages #or loss o# !usiness pro#its> !usiness interruption> loss o# !usinessin#ormation> or other pecuniary lossC arising out o# the use o# or ina!ility to use thisso#tware product> een i# 4lue has !een adised o# the possi!ility o# such damages.
-. 7V:RKIK7 +,W. /his agreement and license shall !e goerned in the UnitedStates !y the laws o# the State o# Washington> U.S.,.> and elsewhere !y the laws o#the country within which the agreement is made.
8/14/2019 Camara Termica Fluke
http://slidepdf.com/reader/full/camara-termica-fluke 14/93
SmartView asics
Sa&ing and Transferring +our Images/o sae the images you capture with your thermal imager> use the remoa!lememory card included with your system> or connect your imager directly to yourcomputer.
/o trans#er the #iles saed on the memory card to your computer> use the c a rdr ea d e r included with your system.
/o trans#er the #iles saed on the memory card to your computer> or delete them iathe proided ca!le;
1. &o nne c t your thermal imager to your computer.2. &hoose #rom the #ollowing options;• 6ownload Kew 8 download only the new #iles created a#ter the preious
download.• 6ownload ,ll 8 download all #iles.
• 6ownload ,ll O 6elete 8 download all #iles and delete them #rom the memory
card.• 6elete ,ll 8 delete all #iles on the memory card.

8/14/2019 Camara Termica Fluke
http://slidepdf.com/reader/full/camara-termica-fluke 15/93
Connecting to our Thermal Imager &onnect your thermal imager to your computer to tr a n s # e r # ile s to th e c o mp u te r>str e a m id eo> up d a te y ou r t he r ma l ima g e r> or restore #actory settings.
)ote$ Kot aaila!le on all thermal imagers.
When a thermal imager is connected to your computer> the camera connected!utton will appear. Use the !utton to;
• Stream ideo !y selecting JRe m o te 6ispl a yJ.
• /rans#er or delete #iles #rom your memory card using the # iletra n s #e r s e lec t io n s.
• Update your thermal imagerPs #irmware !y selecting JU p da te 4i rm w a r eJ.
• Restore your thermal imagerPs #actory settings !y selecting JRestore 4actorySettingsJ. /his action will set the imager to the de#ault settings> including
resetting your image counter to ero.
)ote$ /he image counter will reset to ero i# there are no other image #iles on thememory card. I# there are image #iles on the card> the counter will !e set to thehighest image num!er plus one.

8/14/2019 Camara Termica Fluke
http://slidepdf.com/reader/full/camara-termica-fluke 16/93
U%date our Thermal Imager Heep your thermal imager up to date !y checing #or updates #rom the we!. SmartViewautomatically checs the we! #or an update eery time you connect your thermal imagerto your computer> or manually chec #or updates when your imager is connected !y
using the camera connected icon.
'utomatic U%datesSmartView will automatically chec #or updates eery time the thermal imager isconnected to the computer.
To automaticall chec( for u%dates from the web$1. +aunch SmartView2. &onnect your thermal imager to your computer.3. I# an update is aaila!le> SmartView will automatically download the
latest ersion.". SmartView will present a message when the update is downloaded stating>
J, #irmware update is aaila!le #or the connected camera. /his update maytae up to $ minutes. /he camera will turn o## when done.J
*anual U%datesSmartView will chec #or updates #rom the we! when prompted !y the user.
To manuall chec( for u%dates from the web$1. +aunch SmartView2. &onnect your thermal imager to your computer.
3. (ress the camera connected icon and select JUpdate #irmwareJ.". I# an update is aaila!le> SmartView will download the latest ersion.$. SmartView will present a message when the update is downloaded stating>
J, #irmware update is aaila!le #or the connected camera. /his update maytae up to $ minutes. /he camera will turn o## when done.J
'. I# an update is not aaila!le> the JUpdate #irmwareJ selection will not !eaaila!le.

8/14/2019 Camara Termica Fluke
http://slidepdf.com/reader/full/camara-termica-fluke 17/93
Starting SmartViewWhen you install the SmartView so#tware on your computer> a SmartView startup icon isplaced on your Windows? destop and in the Windows Start menu.
/o start SmartView a#ter installing the so#tware> dou!le8clic the SmartView icon onyour destop. r> clic the SmartView icon #rom the Windows Start menu Binside theJ4lueJ #older using the standard installationC.
8/14/2019 Camara Termica Fluke
http://slidepdf.com/reader/full/camara-termica-fluke 18/93
Using the SmartView *ain WindowUse the SmartView main window to access SmartView #unctions. /he SmartViewwindow elements include;
• /itle ar; +ocated across the top o# the SmartView window. &ontains controlsto minimie> ma5imie> and close the SmartView window
• 0enu ar; +ocated under the /itle ar. &ontains a num!er o# drop down
menus used to launch arious SmartView #unctions• /ool ar; +ocated under the 0enu ar. &ontains a num!er o# controls> #rom
le#t to right;
• pen image #ile !utton; &lic this to open an image
• Sae actie image !utton; &lic this to sae an actie image
• Sae all images !utton; &lic this to sae all open images
• :dit actie image !utton; &lic this to open the image editing window to
edit the actie image. BKote; %ou can also dou!le8clic the actie image toopen the image editing window.C
• <uic report on all images !utton; &lic this to open report templateand generate report #or the actie image
• ,nnotation 4ile :ditor !utton; &lic this to open the annotation #ileeditor to create or modi#y an annotation #ile
'cti&e Image Window• ,lthough you can hae multiple images open at a time> there can !e only one
JactieJ image at a time. 0any SmartView controls operate on the actie
image. ,n actie image is open in the SmartView w o rsp a ce and its windowis highlighted and !rought to the #ront o# the worspace i# more than oneimage is open.
To acti&ate an o%en image window$1. +e#t8clic on the image window you want.2. 6ou!le8clic on the image to open the Ima ge :d it W in do w.
Image Icon /escri%tion$
• In#rared image
• In#rared image with te5t annotations
• IR84usion image
• IR84usion image with te5t annotations
8/14/2019 Camara Termica Fluke
http://slidepdf.com/reader/full/camara-termica-fluke 19/93
Using Wor(s%aces to 0rganie ImagesImages you trans#er #rom your thermal imager may !e stored in seeral di##erent#olders on your computerPs hard drie or company networ.
Use SmartView worspaces and the #ollowing recommendations to organieyour images;
• Heep images #rom a single inspection or route together
• 7roup all images o# the same target o!Mect together. /hen>
• 6etermine the relatie health o# a piece o# equipment !y comparing the
current condition ersus preious inspection conditions• Veri#y maintenance corrected the thermal symptom
• Veri#y repair wor in a !e#ore and a#ter scenario

8/14/2019 Camara Termica Fluke
http://slidepdf.com/reader/full/camara-termica-fluke 20/93
Setting ,references/he (re#erences dialog !o5 is where you can choose most o# the SmartView settings.
'%%lication Tab
Sorting ImagesWhen you hae multiple images open> you can sort them either !y the time theimage was taen or !y the image #ile name.
To select how image windows are sorted$1. &lic :dit on the SmartView 0enu ar and select (re#erences.2. &lic on the ,pplication ta!.
3. &lic the down arrow !y the JWindows Sort 0ethodJ !o5 and select either Image /ime or 4ile Kame.
". &lic H.
Changing -anguage Setting
To change the SmartView language setting$1. &lic :dit on the SmartView 0enu ar and select (re#erences.2. &lic on the ,pplication ta!.3. &lic the down arrow !y the J+anguageJ !o5 and select the language
you want.
". &lic H.
)ote$ %ou must close and restart SmartView !e#ore the language change taes e##ect.
Changing Tem%erature Unit/he temperature unit controls ena!le you to change the temperature unit BQ4> QH> Q&Cassociated with an image.
To change the tem%erature unit$1. &lic :dit on the SmartView 0enu ar and select (re#erences.2. &lic on the ,pplication ta!.
3. &lic the down arrow !y the J/emperature UnitJ !o5 and select thetemperature unit you want.
". &lic H.
)ote$ /he 4ahrenheit temperature unit is not aaila!le when the apanese languageis actie.
8/14/2019 Camara Termica Fluke
http://slidepdf.com/reader/full/camara-termica-fluke 21/93
Changing the ied Image SettingWhen you change the emissiity alue o# an image> the image appearance changes!ecause the image pi5el temperatures change as you adMust the emissiity and arethen re8colored accordingly. &hecing the !o5 ne5t to the JImages stay #i5ed eenwhen temperatures changeJ setting causes the color palette alues to change
wheneer the imageNs emissiity alue is changedD howeer> the image does notappear to change isually een though the image temperatures hae.
To change the ied Image setting$1. &lic :dit on the SmartView 0enu ar and select (re#erences.2. &lic on the ,pplication ta!.3. &hec the !o5 to ena!le #i5ed images. 6isa!le the chec !o5 to disa!le
#i5ed images.". &lic H.
Changing the *ar(er ,ro%erties Setting
When you place a marer on an image> you may want to edit the m a rerp r o p e rties immediately a#ter placing the marer.
To change the edit mar(er %ro%erties setting$1. &lic :dit on the SmartView 0enu ar and select (re#erences.2. &lic on the ,pplication ta!.3. &hec the !o5 to hae SmartView automatically open the marer properties
window a#ter placing a marer. 6isa!le the chec i# you do not want themarer properties window to automatically open.
". &lic H.
Changing the Chec( for Web u%dates after startu% Setting/o eep SmartView updated> you can choose to hae SmartView chec #orupdates eery time you open the application.
To change the chec( for web u%dates after startu% setting$1. &lic :dit on the SmartView 0enu ar and select (re#erences.2. &lic on the ,pplication ta!.3. &hec the !o5 to hae SmartView automatically chec #or updates when
you open the application. 6isa!le the chec i# you do not want SmartView toautomatically chec #or updates.
". &lic H.
8/14/2019 Camara Termica Fluke
http://slidepdf.com/reader/full/camara-termica-fluke 22/93
!e%orts Tab
!e%ort 4eneration 0%tion%ou can choose to generate a report in (64 or .doc5 #ormat. /he (64 #ormat can !e
utilied in ,do!e ,cro!at so#tware or similar. /he .doc5 #ormat is natiely supported!y 0icroso#t Word 299).
/he .doc5 #ormat is also supported in earlier ersions o# 0icroso#t Word !y using an##ice compati!ility tool proided !y 0icroso#t. (lease isit w w w. m ic r o s o # t. c o m andsearch #or J##ice compati!ilityJ. 6ownload the ##ice compati!ility pac #or Word>:5cel> and (ower(oint 299) #ile #ormats.
%ou may also generate a (64 document #rom a doc5 document !y using the Sae ,sor (rint options within 0S Word 299). /his is use#ul in the eent you need to modi#y oradd to your report a#ter using SmartView to generate the report.
)ote$ %ou may need to download and install the JSae as (64 or @(S add8inJ #rom0icroso#t.
To change the generated re%ort format$1. &lic :dit on the SmartView 0enu ar and select (re#erences.2. &lic on the Reports ta!.
• &hec the !o5 ne5t to the J(64J setting to generate the report in .(64
• &hec the !o5 ne5t to J0S Word doc5J to generate the report in .doc5#ormat
• &hec the !o5 ne5t to J(64 and 0S Word doc5 to generate the report in
!oth (64 and doc5 #ormats3. &lic H.
To change the re%ort &iewing o%tion$1. &lic :dit on the SmartView 0enu ar and select (re#erences.2. &lic on the Reports ta!.3. &hec the !o5 ne5t to the JView Report Upon 7enerationJ setting to iew the
report immediately a#ter completion. 6isa!le the chec !o5 to sae thereport without immediately iewing the report. , JSae ,s...J dialog !o5 willappear to allow you to name the report and sae it in a conenient location.
". &lic H.
8/14/2019 Camara Termica Fluke
http://slidepdf.com/reader/full/camara-termica-fluke 23/93
iles Tab
Settings ile/he settings #ile stores the settings included in the pre#erences window> report wiard>
and quic report. %ou may hae multiple settings #iles #or di##erent users much in thesame way some cameras store unique user settings. /he settings #ile can also !eused to trans#er SmartView settings #rom one computer to another> or across so#twareupgrades.
SmartView will automatically update the settings #ile as you modi#y your settings. I# youwould lie to sae your current settings prior to maing settings changes> use theJSae ,s...J option. I# you would lie to use a preious settings #ile> use the Jpen 4ileJoption.
)ote$ /he de#ault location #or the settings #ile is the 0icroso#t recommended
user settings directory. %ou may change the location o# the settings #ile.
To change the settings file SmartView uses$1. &lic :dit on the SmartView 0enu ar and select (re#erences.2. &lic on the 4iles ta!.3. &lic on Jpen 4ileJ.". +ocate the settings #ile you wish to use and clic pen.$. &lic H.
To create a new settings file$1. &lic :dit on the SmartView 0enu ar and select (re#erences.
2. &lic on the 4iles ta!.3. &lic on JSae ,s...J to create a new settings #ile !ased on yourcurrent settings.
". &lic H.
!e%ort Tem%late /irector/he report template directory setting is used to indicate the location wherere po rt te m p la te s are stored.
To change the re%ort tem%late director$1. &lic :dit on the SmartView 0enu ar and select (re#erences.
2. &lic on the 4iles ta!.3. &lic on J&hangeJ to change the report template directory.". &lic H.
)ote$ /he de#ault report template directory is J&;F(rogram 4ilesF4lueFSmartView2.9FReport /emplatesJ. /his assumes a standard installation.
8/14/2019 Camara Termica Fluke
http://slidepdf.com/reader/full/camara-termica-fluke 24/93
Insight settings Tab
Select /efault Comm ,ort/he communications port the computer uses to communicate with the IR8InSight
thermal imager is set with the JSelect 6e#ault &omm (ortJ control. SmartViewautomatically searches #or a alid communication port when the thermal imager isconnected to the computer.
To change the default comm %ort setting$1. &lic :dit on the SmartView 0enu ar and select (re#erences.2. &lic on the Insight settings ta!.3. &lic the down arrow under the JSelect 6e#ault &omm (ortJ !o5 to adMust
the communication port.". &lic H.

8/14/2019 Camara Termica Fluke
http://slidepdf.com/reader/full/camara-termica-fluke 25/93
Viewing
0%ening iles for ViewingTo o%en an image for &iewing or &ideo for %labac($
1. &lic the pen image #ile !utton on the SmartView /ool ar.2. Use the +oo in menu to select the #older containing the #ile or #iles you want.3. &lic on and select the #ile you want to openD hold the Shi#t ey down to select
and open a range o# #ilesD hold the &ontrol ey down to selectiely openmultiple #iles.

8/14/2019 Camara Termica Fluke
http://slidepdf.com/reader/full/camara-termica-fluke 26/93
Using Sam%le ImagesSmartView comes with sample images installed in a #older named Sample Imageslocated in the SmartView installation #older. With these images> you can practiceusing SmartViewNs iewing> analying> and reporting #eatures.

8/14/2019 Camara Termica Fluke
http://slidepdf.com/reader/full/camara-termica-fluke 27/93
Understanding the Image WindowWhen you open an in#rared image in SmartView> the image is displayed in an imagewindow. %ou can open and display any num!er o# image windows at onceDhoweer> only one image window at a time will !e actie.
In the image window$• 6ou!le8clic the image to open the image editing window in which you can
modi#y> or edit> the actie image properties.
)ote$ When you modi#y an imageNs properties> an asteris BC> or dirty star> may appearin the windowNs title. /his indicates that you must re8sae the image in order to saeany property modi#ications you made. When you attempt to close an image window thatdisplays a dirty star> you will !e prompted to sae the image> i# you wish> !e#ore closing.
• Right8clic on an actie image to open the image popup menu. /his menu
proides shortcuts to image editing and iewing options.• %ou can c op y a n d pa st e t h e ima g e ia the clip!oard.• 0oe the mouse pointer oer the image to iew pi5el temperatures.
)ote$ /he pi5el temperature alue changes as you moe the pointer oerdi##erent areasApi5els o# the image.
8/14/2019 Camara Termica Fluke
http://slidepdf.com/reader/full/camara-termica-fluke 28/93
Using the Image ,o%u% *enu/he image popup menu proides shortcuts to image editing and iewing
options. /o open an actie imageNs popup menu> right8clic on an actie image
window.
With the Image (opup 0enu> you can;• &lic ‖&opy‖ to c op y t h e ima g e to th e cli p ! o a r d.
• &lic :‖ dit‖ to open the im a g e e d iting w in do w.
• &lic J(aste ,nnotationsJ to paste annotations copied #rom the
a n no ta ti o n ed it o r or #rom another image.• &lic J:5portJ to e 5 po rt the #ile as an image or temperature data.
• &lic Vi‖ ew image in#o‖ to open the im a g e in #o w in do w.
• &lic Vi‖ ew graph‖ to open the g ra p h w in do w.
• &lic Vi‖ ew data‖ to open the ma rer da ta w in do w.• &lic JView Visi!leJ to open the is i! le w in do w .
• &lic ‖Toom‖ to adMust oom leel in or out.
8/14/2019 Camara Termica Fluke
http://slidepdf.com/reader/full/camara-termica-fluke 29/93
Viewing ,iel Tem%eraturesTo &iew indi&idual %iel tem%eratures in an image using the image window$
1. 0oe the mouse pointer to the area o# the image> or pi5el> o# interest.
To &iew indi&idual %iel tem%eratures in an image using the image editor$1. 6ou!le8clic the actie image to open the image editor.2. ,dMust the image em is si it y an d !a c g ro u n d tem p e ra tu re to
appropriate alues.3. In the image that appears in the image editor window> moe the
mouse pointer to the area o# the image> or pi5el> o# interest.
)ote$ /he pi5el temperature alue changes as you moe the pointer oerdi##erent areasApi5els o# the image.
8/14/2019 Camara Termica Fluke
http://slidepdf.com/reader/full/camara-termica-fluke 30/93
Using the Image Info Window/he image in#o window displays details a!out the actie image such as where theimage is stored> the time and date the image was captured and image properties suchas the emissiity and !acground temperature alues.
To o%en the image info window$1. Right8clic on an actie image window to open the image popup menu.2. Select JView image in#oJ on the menu. /he image in#o window appears !elow
the image.
To &iew image info from the image editing window$1. 6ou!le8clic an actie image to open the image editing window.2. &lic the Image In#o ta! !elow the image.
8/14/2019 Camara Termica Fluke
http://slidepdf.com/reader/full/camara-termica-fluke 31/93
Using the *ar(er /ata Window/he marer data window displays alues and statistics related to the marers youplace on your image.
To &iew mar(er data$1. Right8clic on an actie image window to open the image popup menu.2. Select JView dataJ on the menu. /he marer data appears !elow the image.
To &iew mar(er data from the image editing window$1. 6ou!le8clic an actie image to open the image editing window2. &lic the 0arer 6ata ta! !elow the image.
To access mar(er %ro%erties from the image edit window$
1. &lic on the JSelect marersJ icon in the draw mode menu> then dou!le8clic a marer on the image to open a marer properties window2. 6ou!le8clic on the marer la!el in the 0arer 6ata ta!
The &alues dis%laed for each mar(er are$• +a!el; Used to identi#y the marer
• :missiity; :missiity associated with the marer. It a##ects the marerNstemperature8!ased statistics.
• acground /emp; acground temperature associated with the marer. Ita##ects the marerNs temperature8!ased statistics.
• 0in; 0inimum temperature
• ,e; ,erage temperature• 0a5; 0a5imum temperature
• Stde; Standard deiation
• Unit; /emperature unit
)ote$ &lic on a column header in the marer data ta!le to sort the ta!le !y thatcolumn header.
8/14/2019 Camara Termica Fluke
http://slidepdf.com/reader/full/camara-termica-fluke 32/93
Using 4ra%hsSeeral graphs are aaila!le #or adanced analysis in SmartView. SmartView o##ers linepro#iles> histograms> and 368IR? graphs. +ine pro#ile graphs display the pi5eltemperatures #or a line marer. /he user may iew the temperatures on the line or the@ or % temperature component o# the line. /he 368IR? graph displays the threedimensional plot o# the thermal image. IR84usion images hae the isi!le light portion o#the image displayed on the #loor o# the 368IR? map as a re#erence. , histogram is agraph representing the distri!ution o# a statistical #requency> or rate o# recurrence. InSmartView> you can open a histogram window to see a histogram o# an imageNs pi5els!y temperature. /he imageNs temperature range is diided into equal8sied !ins. /heheight o# the graph indicates how many pi5els hae a temperature within the range o#that !in.
To o%en a 4ra%h window$1. Right8clic on an actie image window to open the image popup menu.2. Select View graph on the menu. /he 7raph window appears !elow
the image.3. Select the graph type #rom the J/ypeJ control.
To &iew the image gra%h from the image editing window$1. 6ou!le8clic an actie image to open the image editing window.2. &lic the 7raph ta! !elow the image.3. Select the graph type #rom the J/ypeJ control.
4ra%h t%es$1. +ine (ro#ile 8 displays the pi5el temperatures at eery point on the line.2. @ (ro#ile 8 displays the pi5el temperatures #or the horiontal or @8
a5is component o# the line marer.3. % (ro#ile 8 displays the pi5el temperatures #or the ertical or %8
a5is component o# the line marer.". =istogram 8 displays the temperature distri!ution o# the pi5els !y grouping
the pi5els into temperature !ins.$. 368IR? 8 displays the pi5el temperatures #or the image in a three
dimensional representation. /he @ and % a5es consist o# the pi5ellocations on the image and the T a5is is the temperature alue at the
corresponding B@>%C location in the image.
)ote$ &lic the chart area o# the 368IR? graph with the le#t8clic mouse !utton andhold the !utton while you moe your mouse to rotate the graph.
)ote$ Use the clip!oard to cop y a nd pa ste the grap h to another application.
Right8clic on the graph image and choose &opy #rom the popup menu.
8/14/2019 Camara Termica Fluke
http://slidepdf.com/reader/full/camara-termica-fluke 33/93
Viewing the I!5usion Visible -ight Image/he Visi!le window displays the isi!le light portion o# IR84usion images.
)ote$ SmartView displays only isi!le light images #rom IR84usion ena!ledthermal imagers.
To o%en a Visible -ight Image window$1. Right8clic on an actie image window to open the image popup menu.2. Select View Visi!le on the menu. /he Visi!le window appears !elow the
image.
To &iew the Visible -ight Image from the image editing window$1. 6ou!le8clic an actie image to open the image editing window.2. &lic the Visi!le ta! !elow the image.
)ote$ /he J4ull 4rameJ chec !o5 controls the sie o# the isi!le light imagedisplayed !oth in SmartView and on the report. :na!le the control to iew the entireisi!le light image. 6isa!le the control to display the isi!le light image in the sameratio as the in#rared image.
8/14/2019 Camara Termica Fluke
http://slidepdf.com/reader/full/camara-termica-fluke 34/93
Wor(ing with VideosView ideos in the worspace or in the image editor #or adanced iewing optionsand control.
or basic %labac($1. pen a ideo2. Use the !asic ideo controls
• (lay 8 (lay the ideo. /he (lay !utton conerts to the (ause !utton
during play!ac.
• (ause 8 (ause the ideo.
• 4orward one #rame 8 0oe #orward one #rame.
• ac one #rame 8 0oe !acward one #rame.
• Speed up 8 Increase the play!ac speed.
• Slow down 8 6ecrease the play!ac speed.
• :nd 8 ,dance to the end o# the #ile.
• eginning 8 7o !ac to the !eginning o# the #ile.
• &onert to still image 8 conert the current #rame to a still image B.is2C./he conerted .is2 is aaila!le to !e enhanced> analyed> and includedin reports the same way as natie .is2 #iles.
• Volume 8 Single clic toggles muteD dou!le clic opens the olumecontrol. Use the olume control to adMust olume leel or mute the audio.
or ad&anced %labac($1. 6ou!le clic on the ideo to open the image editor> then clic on the ,nalysis ta!.2. Use the image editor controls to enhance> adMust> and analye the ideo.
)ote$ Use the &onert to a still image !utton to adMust emissiity> transmission>or !acground temperature.
)ote$ SmartView supports .ai or .is3 #ile #ormats. .ai #iles can only use !asicideo controls> with the e5ception o# the &onert to still image !utton.
8/14/2019 Camara Termica Fluke
http://slidepdf.com/reader/full/camara-termica-fluke 35/93
Streaming VideoStream lie ideo #rom your thermal imager in SmartView #or pu!lic eents> training> orcapturing screen shots o# the imager display. %ou may also pause the lie ideo andchoose to display or hide the on screen graphics. /he streaming ideo will !e displayedin a window within SmartView. /o display the streaming ideo on an e5ternal deicelie a proMector or electronic display> connect the deice to your computer.
To access the streaming &ideo controls$
1. Use the &amera &onnected !utton to select> JRemote 6isplayJ.2. , Remote 6isplay window will appear. SmartView displays e5actly what is
displayed on the imager display.
3. (ress the (ause !utton to pause the lie display. Kote that any changesin the imager display will not !e re#lected in the remote display while the
streaming ideo is paused.
". (ress the (lay !utton to resume lie streaming ideo.$. Use the J6isplay 7raphicsJ chec !o5 to display or hide the imagerPs on
screen graphics.• , chec mar means the graphics are ena!led.
• 6eselect the !o5 to hide the graphics.
'. (ress the Sae !utton to sae a screen shot o# the imagerPs on screendisplay.
)ote$ (ressing the sae !utton pauses the lie display. Select play to resume
steaming ideo.
)ote$ Screen shots may !e saed as .Mpg or .!mp #ile types.
8/14/2019 Camara Termica Fluke
http://slidepdf.com/reader/full/camara-termica-fluke 36/93
Using the Image 6ditor
Using the Image 6ditor /he SmartView Image :ditor ena!les you to quicly and easily enhance and adMustyour in#rared images or ideos. Use the Image :ditor to;
• &hange the c o lo r p a let te and adMust the leel and span
• Utilie controls #or IR 8 4usi o n images• View the IR 8 4usi o n is i! le lig h t ima g e
• ,nalye the image using ma rers
• Rotate the image or ideo
• ,dd r e #e re n c e ima g e s
• &reate> reiew> and ed it te 5 t an n o ta ti on s
• (er#orm g ra ph ical a na ly sis
• ,dd te5t c o m m e n ts to the image
• &reate an iso the r m o r ad d a c o lor a larm
• ,dMust the e m iss i it y an d ! a c g ro un d t e m p e rat u re alues
• ,dMust the tra n s m iss io n c o r r e cti o n setting
• Utilie controls #or radiometric ideos• &onert a radiometric ideo #rame to an in#rared image
/o open the Image :ditor> dou!le8clic on an actie image or radiometric ideo.
)ote$ 4rom the image editor> press the :scape B:scC ey at any time to close theeditor and return to the actie image.

8/14/2019 Camara Termica Fluke
http://slidepdf.com/reader/full/camara-termica-fluke 37/93
Using the Color ,alette ,lthough all SmartView color palettes can !e used with any image> you may #ind thatsome color palettes wor !etter than others #or analying your images depending onthe situation. SmartView displays the detailed color palette to the right o# the mainimage and displays the color palette control on the J,nalysisJ ta! in the Im a g e :d it W in d o w.
To change the color %alette 7tem%erature range bar8$1. 6ou!le8clic the actie image to open the image editor.2. &lic on the J,nalysisJ ta!.3. &lic on the J&olorsJ down arrow in the J(aletteJ control area to open a menu
o# color palette options.". &lic on the palette option you wantD the color palette changes accordingly.$. &lic H in the image editor to sae the change.
To change the saturation colors on the color %alette$1. 6ou!le8clic the actie image to open the image editor.2. &lic on the J,nalysisJ ta!.3. &lic on the JSaturationJ down arrow in the J(aletteJ control area to open a
menu o# saturation color options.". &lic on the saturation color option you wantD the color palette
changes accordingly.$. &lic H in the image editor to sae the change.
To change the color %alette tem%erature 7tem%erature range8 &alues$1. 6ou!le8clic the actie image to open the image editor.
2. &lic on the ,nalysis ta!D a set o# sliding !o5es that indicate the lowerspan B!ottom setC> leel Bmiddle setC> and upper span Btop setC pi5eltemperature alues> appears to the le#t o# the temperature range !ar.
3. Slide the !o5es up or down along the temperature !ar to moe in largerincrementsD use the set o# upAdown arrows ne5t to the !o5es to moe in smallerincrements> or type alues in the !o5es to change to a speci#ic temperaturealue.
)ote$ ,s you change the minimum or ma5imum alues> or span> the center alue> orleel> changes accordingly. ,nd> i# you moe the leel alue> !oth the lower spanand upper span alues change accordingly.

8/14/2019 Camara Termica Fluke
http://slidepdf.com/reader/full/camara-termica-fluke 38/93
Using Color 'larms and IsothermsIn general scienti#ic terminology> an isotherm is set o# cures on a thermogram Banimage you capture with your thermal imagerC> that mar di##erent points that hae thesame temperature. In SmartView> an isotherm is an image that highlights all imagepi5els within a speci#ied temperature range. /hese i‖ n8range‖ pi5els are displayed ina single color so that they stand out #rom the rest o# the image.
, color alarm is an adanced #orm o# an isotherm and is aaila!le on IR 8 4usi o nimages. (alette colors mar the image where the color alarm temperature criteria aremet. /he color alarm #unction allows you to highlight target o!Mect areas o# thermalinterest !y selectiely !lending isi!le light and in#rared images. %ou can ena!le a coloralarm !ased on high> low> or high and low temperature alues. %ou can also speci#y atemperature range and ena!le a color alarm #or temperatures within that range. Withthe color alarm #unction ena!led> target o!Mect temperatures are highlighted in thein#rared color B!ased on the color palette settingsC that corresponds to the color alarmtemperatureBsC youNe set.
)ote$ &olor alarms wor in !oth #ull screen and picture8in8picture iew. With the onscreen alarm disa!led> the entire in#rared image is !lended with the isi!le lightimage according to the IR84usion !lend setting.
To enable a color alarm and define the color alarm tem%erature criteria$1. 6ou!le8clic the actie image to open the image editor> then clic on the
,nalysis ta!.2. &lic on the down arrow in the J&olor ,larmJ control area to open a menu
o# color alarm options.
3. When J&olor ,larmJ is selected> the JRangeJ down arrow is actiated.• 4our options are aaila!le;
1. ,larm a!oe threshold 8 o!Mects in the image withtemperatures a!oe the threshold temperature will display inthe appropriate palette colors
2. ,larm !elow threshold 8 o!Mects in the image withtemperatures !elow the threshold temperature will display inthe appropriate palette colors
3. ,larm inside range 8 o!Mects in the image with temperatures!etween the threshold temperatures will display in theappropriate palette colors
". ,larm outside range 8 o!Mects in the image with temperaturesa!oe and !elow the threshold temperatures will display inthe appropriate palette colors
". Set the color alarm temperature thresholds !y sliding the !o5A!o5es upor down along the right side o# the temperature range !ar Bcolor paletteCto moe in large increments> clicing the set o# upAdown arrows ne5t tothe !o5es to moe in small increments> or typing the temperature alue.

8/14/2019 Camara Termica Fluke
http://slidepdf.com/reader/full/camara-termica-fluke 39/93
To enable an isotherm and define isotherm tem%erature range$1. 6ou!le8clic the actie image to open the image editor> then clic on the
,nalysis ta!.2. &lic on the down arrow in the J&olor ,larmJ control area to open a menu
o# color alarm options.3. When Isotherm is selected> a set o# sliding !o5es> which indicate theminimum and ma5imum isotherm temperature range alues> appearsto the right o# the temperature range !ar Bcolor paletteC.
". Set the isotherm temperature range !y sliding the !o5es up or downalong the temperature range !ar to moe in large increments> clicing theset o# upAdown arrows ne5t to the !o5es to moe in small increments> ortyping the temperature alue.
$. &lic the JIsotherm &olorJ !utton to open a range o# color optionsD clicon the color you wish to represent the isotherm and clic H.
)ote$ nce you set the isotherm or color alarm range> you can clic on theisothermAcolor alarm temperature !and on the color palette and slide it up and downthe temperature !ar to adMustthe color alarmPs minimum and ma5imum alueschange accordingly.
8/14/2019 Camara Termica Fluke
http://slidepdf.com/reader/full/camara-termica-fluke 40/93
Changing 6missi&it and ac(ground Tem%eratureChanging 6missi&it and ac(ground Tem%erature/he emissiity control ena!les you to change the emissiity associated with an image.
To change an image9s emissi&it &alue$1. 6ou!le8clic the actie image to open the image editor> then clic on the
,nalysis ta!.2. &lic in the J:missiityJ alue !o5 and type in the emissiity alue you want> or
use the upAdown arrows ne5t to the emissiity alue to scroll to the alue youwant.
)ote$ 4or re#erence> clic the large down arrow to open a list o# common materialsand their emissiity alues. /o learn more a!out the importance o# using the correctemissiity alue to capture quality images and interpret them properly> see a sicIn # rared R ad io m e try and : m iss i it y <u ic / ip s sections.
/he !acground temperature control ena!les you to change the!acground temperature associated with an image.
To change an image9s bac(ground tem%erature$1. 6ou!le8clic the actie image to open the image editor> then clic on the
,nalysis ta!.2. &lic in the acground /emp; alue !o5 and type in the !acground
temperature alue you want or use the upAdown arrows ne5t to the !acgroundtemperature alue to scroll to the alue you want.
)ote$ /o learn more a!out the importance o# using the correct !acgroundtemperature alue to capture quality images and interpret them properly> see a sicIn # rared Ra d iometry and : m is s i it y <u ic / ips sections.

8/14/2019 Camara Termica Fluke
http://slidepdf.com/reader/full/camara-termica-fluke 41/93
Changing Transmission Correction/he transmission control ena!les you to change the transmission setting #or an image.
To change an image9s transmission &alue$1. 6ou!le8clic the actie image to open the image editor> then clic on the
,nalysis ta!.2. &lic in the J/ransmissionJ alue !o5 and type in the transmission alue you
want> or use the upAdown arrows ne5t to the transmission alue to scroll tothe alue you want.
)ote$ /he alues #or transmission correction range !etween 39 8 199.

8/14/2019 Camara Termica Fluke
http://slidepdf.com/reader/full/camara-termica-fluke 42/93
8/14/2019 Camara Termica Fluke
http://slidepdf.com/reader/full/camara-termica-fluke 43/93
• 4or line> rectangle> or ellipse marers;
• &lic on the appropriate draw marer icon
• +ine marer
• Rectangle marer
• :llipse marer
• n the image> le#t8clic and then hold mouse !utton to esta!lish a starting
point> then drag the mouse to the ending point and release the mouse!utton to complete the marer
• 4or polygon marers;
• &lic on the 6raw polygon marer icon in the draw mode menu !ar • +e#t8clic on the image to start the #irst segment. +e#t8clic again at the
position where the ne5t segment is to start. Repeat until all thesegments you want> e5cept #or the #inal segment> hae !een drawn
• 6ou!le8clic at the start o# the last segment drawn. /he #inal segment is
automatically drawn #rom the dou!le8clic position to the start o# the #irstsegment> #orming a closed polygon
To &iew and edit image %ro%erties$1. 6ou!le8clic the actie image to open the image editor.2. &lic on the ,nalysis ta!> then
• &lic the Select marers icon in the draw mode menu> then dou!le8clic amarer on the image to open a marer properties window• &lic the 6isplay ta!
• &reate a name #or the marer
• Use the chec !o5es to select the te5t or statistics to display on theimage
• /he marer name
• 0inimum temperature
• ,erage temperature
• 0a5imum temperature
• ,dMust the location o# the marer te5t !y using the J+a!el(lacementJ control
• ,dMust the color o# the marer te5t !y clicing on the down arrow in
the J&olor SelectionJ control area• rowse #or colors or create custom colors
• &lic the ,nnotations ta!
• ,dd an n o ta ti on s to the marer
• &lic the :missiity ta!
• ,dMust the e m iss i it y an d ! a c g ro un d t e m p e rat u re o# the marer

8/14/2019 Camara Termica Fluke
http://slidepdf.com/reader/full/camara-termica-fluke 44/93
6am%le$ne o!Mect in an image may hae a di##erent emissiity alue #rom other o!Mects in theimage. 6raw a marer around the #irst o!Mect and change the emissiity alue o# themarer !y dou!le8clicing the marer. /he marer temperature statistics re#lect the newemissiity.
)ote$ /he J#lyoerJ temperature displayed on the image will not re#lect thenew emissiity alue. nly the marer statistics will re#lect the new emissiity
)ote$ Speci#ic statistical marer properties depend on the marer type. ,ll marershae a name> emissiity> and !acground temp. (oint marers can display name andpoint temp. ,ll other marers can display a name and minimum> ma5imum> and aeragetemperature.
To &iew statistics related to the mar(ers ou ha&e %laced$
4rom the SmartView window;1. Right8clic on an actie image window to open the image popup menu.2. Select View data on the menu.
4rom the image editing window;1. 6ou!le8clic an actie image to open the image editing window2. &lic the 0arer 6ata ta! !elow the image.
)ote$ (ress the :scape B:scC ey at any time to return to the actie image.

8/14/2019 Camara Termica Fluke
http://slidepdf.com/reader/full/camara-termica-fluke 45/93
!emo&ing *ar(ersTo remo&e mar(ers$
1. 6ou!le8clic the actie image to open the image editor> then &lic on the ,nalysis ta!.
2. &lic on the Select 0arers icon in the draw mode menu.3. &lic the marer on the image you want to delete.". (ress the 6elete B6elC ey on your ey!oard.$. Repeat Steps 38" #or each additional marer you want to delete.'. &lic 2H‖ ‖ to sae.). Sae the image !e#ore closing !y clicing ‖4ile‖ on the 0enu ar> then clicing
‖Sae‖ to eep the same #ile name> or ‖Sae ,s‖ to create a new #ile.

8/14/2019 Camara Termica Fluke
http://slidepdf.com/reader/full/camara-termica-fluke 46/93
!otating Images or VideosI# your image or ideo appears sideways> rotate it !y -9 degree increments clocwiseor counterclocwise.
To rotate images or &ideos$1. 6ou!le8clic the actie image to open the image editor.
2. &lic on the rotate clocwise or counterclocwise icon.
8/14/2019 Camara Termica Fluke
http://slidepdf.com/reader/full/camara-termica-fluke 47/93
*odifing *ar(er ,ro%ertiesTo modif mar(er %ro%erties$
1. 6ou!le8clic the actie image to open the image editor.
2. &lic on the JSelect marersJ icon in the draw mode menu at the top o#the Ima g e : d it W in dow.
3. 6ou!le8clic a marer on the image or 6ou!le8clic on the marer la!el in the0arer 6ata ta! to open a marer properties window.• &lic the 6isplay ta! to;
• :ditAcreate a name #or the marer
• Select to display the marer name on the image
• Select to include temperature data on the image Bchoices include
temperature #or point marers and minimum> aerage> andma5imum #or all other marer typesC
• ,dMust the placement and color o# the marer la!el andAor te5t
• &lic the ,nnotations ta! to add annotations to the marer • &lic the :missiity ta! to adMust the marer emissiity andAor !acground
alues
8/14/2019 Camara Termica Fluke
http://slidepdf.com/reader/full/camara-termica-fluke 48/93
Wor(ing with I!5usion® ImagesSmartView ena!les you to change the !lend leel o# your IR84usion images #rom#ull in#rared BIRC to #ull isi!le light BV+C or some com!ination in !etween. %ou canalso modi#y other IR84usion settings including the display iew B#ull screen orpicture8in8 pictureC> the &ol o r ,la r m> and the (aralla5 ,dMustment.
'd<usting I!5usion image settings• 6ou!le8clic the actie image to open the image editor
'd<usting the blend -e&el• Slide the Jlending +eelJ control !etween J4ull In#raredJ and J4ull Visi!leJ to
adMust the image contri!ution #rom 199 in#rared to 199 isi!le light
,icture in ,icture• &lic in the JIR84usion (icture in (ictureJ control to create an in#rared
PwindowP surrounded !y a isi!le light #rame to easily identi#y pro!lems>while maintaining a #rame o# re#erence with surroundings
)ote$ ,dMusting the !lend leel wors in !oth #ull screen and picture8in8picture iew.
Color 'larm• &lic on the ,nalysis ta!
• ,dMust the & o lor , la r m settings to display only temperatures #alling
a!oe> !elow> in !etween> or outside temperature criteria in in#rared> andanything that does not meet the temperature criteria in isi!le light
)ote$ &olor alarms wor in !oth #ull screen and picture8in8picture iew. With the onscreen alarm disa!led> the entire in#rared image is !lended with the isi!le lightimage according to the IR84usion !lend setting.
Image 'lignmentImage alignment is an automatic adMustment that occurs as you #ocus the in#raredcamera lens. /he isi!le light image and the in#rared image are lined up !ased onthe #ocusing distance o# the in#rared lens so that they may !e com!ined #or iewingand analysis.
%ou can precisely adMust the isi!le light image relatie to the in#rared image asneeded #or improed iewing and analysis.
To use the image ad<ustment controls$• &lic the up> down> le#t> and right arrows as needed to #inely adMust the imageD
clic the Tero !utton to reset the adMustment to the original calculated alue
8/14/2019 Camara Termica Fluke
http://slidepdf.com/reader/full/camara-termica-fluke 49/93
6diting Image 'nnotationsUse the image editor to edit andAor add image categories and annotations.
To add annotation categories$1. 6ou!le8clic the actie image to open the image editor.
2. &lic on the ,nnotations ta!> then clic on the Jcreate new annotationcategoryJ icon. /he :dit &ategory window opens.
3. &lic in the Kame !o5> then type the new category name.". &lic in the Select !o5> then choose ne or 0any.$. &lic H.
To add annotations$1. 6ou!le8clic the actie image to open the image editor.
2. &lic on the ,nnotations ta!> then clic on the Jadd new annotationJ icon.
/he :dit ,nnotation window opens.3. /ype the new annotation name". &lic H.
To change annotation categories alread sa&ed to an image$1. 6ou!le8clic the actie image to open the image editor.2. &lic on the ,nnotations ta!> then dou!le8clic on the category in the
tree iewer you want to change. /he :dit &ategory window opens.3. &lic in the Kame !o5> then type the new category name.". &lic in the Select !o5> then choose ne or 0any.$. &lic H.
To change annotations alread sa&ed to an image$1. 6ou!le8clic the actie image to open the image editor.2. &lic on the ,nnotations ta!> then dou!le8clic on the annotation in the
tree iewer you want to change. /he :dit ,nnotation window opens.3. /ype the new annotation name". &lic H.
8/14/2019 Camara Termica Fluke
http://slidepdf.com/reader/full/camara-termica-fluke 50/93
Using !eference ImagesIn SmartView> you can add re#erence images to an in#rared image. , re#erence imageis an image> whether in#rared or not> that is associated with the target image and thatyou want to note the association using the image editor. /he #ollowing e5amplesdescri!e a #ew common types o# re#erence images you may want to use.
6am%les$1. &ontrol imagea isi!le light picture o# the target o!Mect.2. 7ood imagean in#rared image o# what the target o!Mect should loo lie.3. e#oreA,#teran in#rared image o# what the target o!Mect looed lie !e#ore
or a#ter some operation lie a repair or maintenance.
To add a reference image$1. 6ou!le8clic the actie image to open the image editor.2. &lic on the Re#erence Images ta!.3. &lic either the ,dd in#rared image !utton or ,dd isi!le light image !utton>
depending on which type you are adding.". In the pen dialog !o5> !rowse to #ind the image you want to use as
a re#erence.$. &lic on the image> then clic ‖2pen.‖ /he image appears in the re#erence
image thum!nail !o5.'. &lic on the re#erence image to highlight it> then> in the !o5 !elow> enter
a description o# the relationship !etween the main image and there#erence image you Must added !y typing oer the prompt te5t.
)ote$ %ou can select multiple re#erence images #or each target image.
To delete a reference image from the image editor$1. &lic on the re#erence image thum!nail to highlight it.2. (ress the 6elete Bor 6:+C !utton on your ey!oard.
)ote$ 4or IR84usion images> the isi!le light image that is taen with the in#raredimage is automatically selected as the isi!le light re#erence image. /his re#erenceimage cannot !e deleted.

8/14/2019 Camara Termica Fluke
http://slidepdf.com/reader/full/camara-termica-fluke 51/93
8/14/2019 Camara Termica Fluke
http://slidepdf.com/reader/full/camara-termica-fluke 52/93
6diting *ulti%le Images 't 0nceTo edit the color %alette and;or emissi&it and bac(ground tem%erature &alue ofall o%en images at once$
1. pen the images you want to edit.2. &lic :dit on the SmartView 0enu ar> then clic :dit ,ll /he :dit ,ll images
window appears.3. Use the ( a le tt e control to change the palette and saturation colors o# all
open imagesD use : m issi ity controls to change the emissiity and!acground temperature alues o# all open images.
)ote$ &lic the Select sample image down arrow to iew arious images in theimage editor window.

8/14/2019 Camara Termica Fluke
http://slidepdf.com/reader/full/camara-termica-fluke 53/93
'nnotations
Using 'nnotations%ou can add notes> or annotations> to your thermal images. ,n annotations #ile is a #ilenamed ‖notations.t5t‖ located in the root directory o# the memory card. /his #ile containsa prede#ined list o# aaila!le annotations and annotation categories. When you insertthe card into your imager> the annotation #ile tells the imager what annotations can !eapplied to an image captured with the imager. %ou can apply these prede#inedcategories and annotations to images captured !y that imager. BSee yourthermal imagerPs users manual #or instructions.C
)ote$ , de#ault annotation #ile is included in the internal memory o# imagers withte5t annotation capa!ilities. /he de#ault annotation #ile is included in the SmartViewinstallation.
)ote$ ,nnotations are not aaila!le on all thermal imagers. ,nnotations may !e usedon any image once the image is in SmartView.
%ou can then iew these images in the SmartView image editor and changethe annotation categories and annotations originally saed with the image.
%ou can also use the ,nnotations :ditor in SmartView to change the prede#ined list onthe memory card and create your own categories and annotations to later !e appliedto images saed to the memory card. 4or instructions> see the : 5 p lor in g th e
, n n o ta tion s : d it o r section and the , nn o ta ti o n s : d it o r / u to r ia l.
%ou can also add annotations to images using the image editor or the d rag a n dd r o p #eature in SmartView to quicly add annotations to images open in SmartView.
,nnotations #iles consist o#;• annotations
• annotation categories
Annotations ,n annotation is a te5tual description that can !e attached to an image. %ou canuse annotations to store e5tra in#ormation with an image such as where the image
was captured> what equipment is represented in the image> and who captured theimage. ,ll annotations must !e a mem!er o# an annotation category.
Annotation Categories ,n annotation category is a grouping o# similar annotations. 4or e5ample> theannotation category +‖ ocation‖ may contain the annotations ‖ asement>‖ ‖0ain 4loor>‖ and /op‖ 4loor.‖

8/14/2019 Camara Termica Fluke
http://slidepdf.com/reader/full/camara-termica-fluke 54/93
,nnotation categories come in two types; select one and select many. When you choosethe ‖Select 2ne‖ category> you can apply 9 or 1 annotation to the image. I# you choose‖Select 0any>‖ you can apply any num!er o# annotations B#rom 9 to the num!er o# annotations in the categoryC to the image.
)ote$ Use select‖ one>‖ #or e5ample> with the category &lient> since an image mostliely applies only to one client. Use Jselect many>‖ #or e5ample> with the category&onditions> o# which there could !e many; dusty> cold> dar> etc.
8/14/2019 Camara Termica Fluke
http://slidepdf.com/reader/full/camara-termica-fluke 55/93
6%loring the 'nnotations 6ditor /he annotation editor is designed to mae editing annotations #iles quic and simple./he editor consists o# a tree iewer and /ool ar. 0ost commands can !e quiclyaccessed !y clicing a /ool ar icon in the annotations editor andAor right8clicing onthe tree iewer to open a conte5t> or popup> menu. /he annotations editor is also usedto Jdrag and dropJ annotations #rom the editor to thermal images open in the SmartViewwindow.
Tree Viewer /he tree iewer in the annotations editor displays the categories and annotations inthe annotations #ile in a hierarchical #ormat. I# an annotation category is preceded !y a> then its annotations are hidden. &lic the to e5pand the category and display itsannotations. I# an annotation category is preceded !y a 8> then its annotations aredisplayed. &lic the 8 tocollapse the category and hide its annotations. ,nnotations with multiple te5t lines aredisplayed with a#ter the #irst line.
)ote$ Right8clic on the tree iewer to open the conte5t> or popup> menu
Tool ar /he annotations editor tool !ar allows quic access to the editor commands youuse most. &lic on the tool !ar !utton you want to access the command.
To o%en the 'nnotations 6ditor$1. pen the image you want to annotate or clic on an open image to actiate.2. &lic /ools on the Smart View 0enu ar> then select ,nnotations :ditor.. ,n
annotations window appears.
3. 4rom here you can use the /ool ar &ommands !elow;
Tool ar Commands/he #ollowing commands are aaila!le #or creating and editing annotations #ilesD #orthese commands> you can clic the appropriate icon to use the #unctionD in some cases>you can also right8clic on the tree iewer to open the popup menu and use the#unction;
• &reate new empty annotations #ile
• pen annotations #ile
• Sae annotations #ile
• &reate new category
• &reate new annotation
• :dit the selected category or annotation
• 6elete the selected category or annotation
• 0oe the selected category or annotation up
• 0oe the selected category or annotation down
8/14/2019 Camara Termica Fluke
http://slidepdf.com/reader/full/camara-termica-fluke 56/93
Create new em%t annotations file&lic this icon to create an empty annotations #ile #or editing in the annotations editortree iewer. I# an annotations #ile is already open and has !een modi#ied since the lasttime it was saed> you will !e prompted to sae the #ile. &lic %es to sae thechanges> then clic the icon to open an empty annotations #ile. &lic Ko to open an
empty annotations #ile without saing changes.
0%en annotations file&lic this icon to display the pen window where you can !rowse locations to #ind thesaed annotations #ile you want to open. nce you #ind and open the #ile> the contentsare displayed in the annotations editor tree iewer. I# you hae another annotations #ileopen that you hae modi#ied> a prompt is displayed asing i# the current #ile should !esaed !e#ore closing. While you should typically name annotations #iles ‖notations.t5t. ‖=oweer> you can sae multiple annotations #iles in the same directory !y usingdi##erent #ile names.
Sa&e annotations file&lic this icon to sae the changes made to the tree iewer using the original #ilename. I# the tree iewer contents did not come #rom a #ile then youNll !e prompted touse the Sae ,s command to sae the #ile with a new name.
Create new categor&lic this icon to open the :dit &ategory windowD #rom here> type a newannotation category in the Kame; !o5> and select ne or 0any #rom the Select!o5.
Create new annotation=ighlight an annotation or category in the ,nnotations :ditor window. /hen> clicthis icon to open the :dit ,nnotation windowD #rom here> type in a new annotation.
6dit the selected categor or annotation=ighlight an annotation category in the ,nnotation :ditor window> then clic this iconBor dou!le8clic the highlighted annotation categoryC to open the :dit &ategory windowD#rom here you can type a new annotation category in the Kame;!o5> and select ne or 0any #rom the Select !o5.
=ighlight an annotation in the ,nnotation :ditor window> then clic this icon Bor dou!le8clic the highlighted annotationC to open the :dit ,nnotation windowD #rom here> youcan type in a new annotation.
)ote$ %our annotations may require multiple lines o# te5t. While editing annotationte5t> press and hold the &ontrol B&trlC ey and press the :nter ey to insert a new line.
/elete the selected categor or annotation=ighlight an annotation category or annotation. /hen> clic this icon Bor press the6elete eyC to delete the currently selected annotation category or annotation. , promptis displayed eri#ying that the selected annotation or category should !e deleted.
8/14/2019 Camara Termica Fluke
http://slidepdf.com/reader/full/camara-termica-fluke 57/93
*o&e the selected categor or annotation u%=ighlight an annotation category or annotation. /hen> clic this icon to moe upthe currently selected annotation category or annotation.
)ote$ ,n annotation cannot !e moed out o# its category. /his command has no
e##ect on an annotation or category that is #irst in its list.
*o&e the selected categor or annotation down=ighlight an annotation category or annotation. /hen> clic this icon to moe downthe currently selected annotation category or annotation.
)ote$ ,n annotation cannot !e moed out o# its category. /his command has noe##ect on an annotation or category that is last in its list.
6it;Close&lic the close !utton or the @ icon to close an open annotations editor dialog !o5. I#a #ile is open and has !een modi#ied since the last time it was saed> a prompt isdisplayed asing i# the current #ile should !e saed.

8/14/2019 Camara Termica Fluke
http://slidepdf.com/reader/full/camara-termica-fluke 58/93
Using the 'nnotations 6ditor TutorialUse this tutorial to help #amiliarie yoursel# with the S ma rtV ie w ,nno ta ti on s : d it o r.%ou can use the ,nnotations :ditor to change the prede#ined annotation categoriesand annotations in the n‖ otations.t5t‖ #ile on your memory card.
Upon completing this tutorial> you will !e a!le to;1. &reate a new annotations #ile2. ,dd a new annotation category3. ,dd a new annotation". Sae an annotations #ile$. Sae with a di##erent #ile name'. pen an annotations #ile). :dit an annotation category*. :dit an annotation-. &lose the editor
To change the %redefined annotation categor and annotations list using the'nnotations 6ditor$
1. (lug the memory card reader into your computer.2. Remoe the memory card #rom your thermal imager and insert card into
the card reader.3. pen your SmartView so#tware> then clic /ools on the 0enu ar.". &lic on ,nnotations :ditor in the SmartView /ools drop down menu.
4ollow the procedures under , X 4.
'. To o%en an 'nnotations ile$
1. pen your SmartView so#tware> then clic /ools on the 0enu ar.2. &lic on ,nnotations :ditor in the SmartView /ools dropdown menu.
3. &lic the p‖ en annotations #ile‖ icon. /he pen ,nnotation 4ile windowopens to the last location where an annotations #ile was opened or saed.
". Kaigate to another location i# necessary and select the #ile you want to open.4or this tutorial> open the #ile ‖notations.t5tJ that comes in theSmartView installation.
$. =ighlight the #ile n‖ otations.t5t‖ and clic pen.
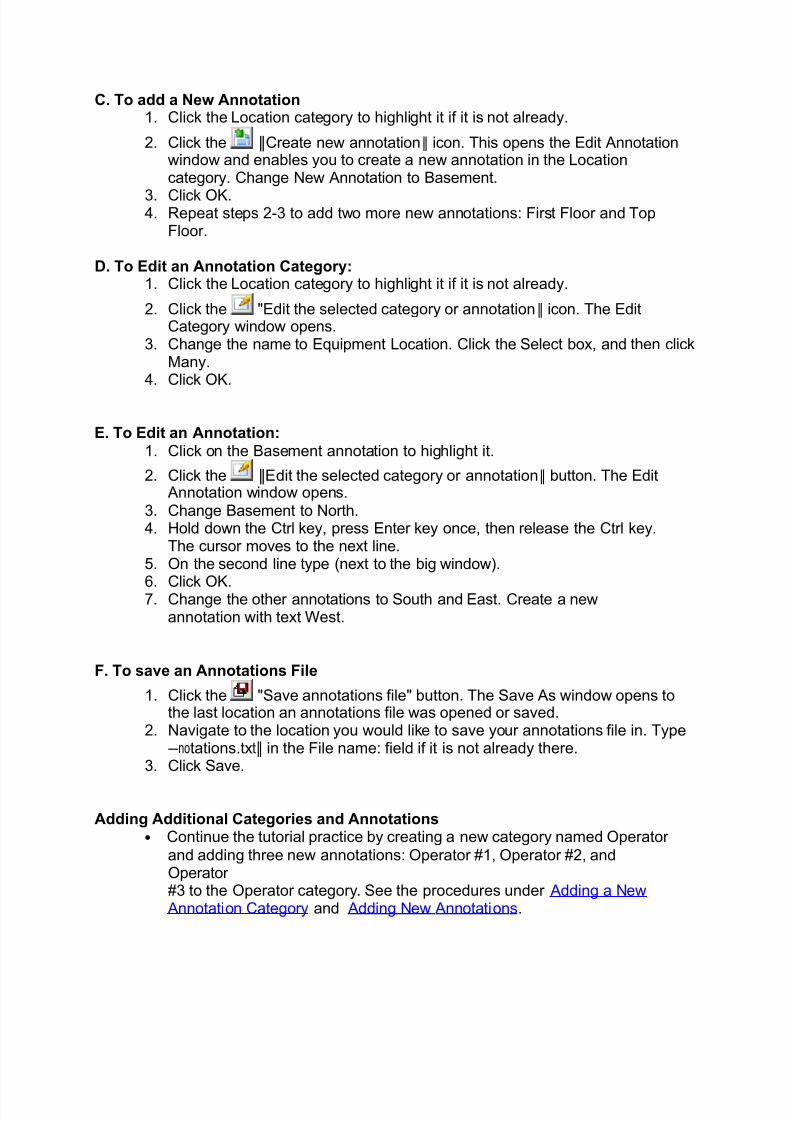
. To add a )ew 'nnotation Categor
1. &lic the J&reate new category‖ icon. /his opens the :dit &ategorywindow and ena!les you to create a new category.
2. In the Kame !o5> change Kew &ategory to J+ocationJ. +eae the Selection!o5 set at ‖ ne.J
3. &lic H.
8/14/2019 Camara Termica Fluke
http://slidepdf.com/reader/full/camara-termica-fluke 59/93
C. To add a )ew 'nnotation1. &lic the +ocation category to highlight it i# it is not already.
2. &lic the ‖&reate new annotation‖ icon. /his opens the :dit ,nnotationwindow and ena!les you to create a new annotation in the +ocationcategory. &hange Kew ,nnotation to asement.
3. &lic H.". Repeat steps 283 to add two more new annotations; 4irst 4loor and /op
4loor.
/. To 6dit an 'nnotation Categor$1. &lic the +ocation category to highlight it i# it is not already.
2. &lic the J:dit the selected category or annotation‖ icon. /he :dit&ategory window opens.
3. &hange the name to :quipment +ocation. &lic the Select !o5> and then clic0any.
". &lic H.
6. To 6dit an 'nnotation$1. &lic on the asement annotation to highlight it.
2. &lic the :‖ dit the selected category or annotation‖ !utton. /he :dit ,nnotation window opens.
3. &hange asement to Korth.". =old down the &trl ey> press :nter ey once> then release the &trl ey.
/he cursor moes to the ne5t line.$. n the second line type Bne5t to the !ig windowC.
'. &lic H.). &hange the other annotations to South and :ast. &reate a newannotation with te5t West.
. To sa&e an 'nnotations ile
1. &lic the JSae annotations #ileJ !utton. /he Sae ,s window opens tothe last location an annotations #ile was opened or saed.
2. Kaigate to the location you would lie to sae your annotations #ile in. /ypeYnotations.t5t‖ in the 4ile name; #ield i# it is not already there.
3. &lic Sae.
'dding 'dditional Categories and 'nnotations• &ontinue the tutorial practice !y creating a new category named perator
and adding three new annotations; perator Z1> perator Z2> andperator Z3 to the perator category. See the procedures under , dd ing a K e w
, nn o ta ti o n & a te g o ry and , dd ing K e w ,nn o ta ti on s.

8/14/2019 Camara Termica Fluke
http://slidepdf.com/reader/full/camara-termica-fluke 60/93
To create a )ew 'nnotations ile• When the annotation editor is #irst displayed it should !e empty. I# it is not
empty> clic the ‖&reate new empty annotations #ile‖ icon.
To Close the 'nnotations 6ditor 1. &lic &lose.2. &lic %es to sae the #ile with any edits you made and e5it the editor.
)ote$ &lic Ko to close the editor without saing your edits. ,ny changes you madewill !e lost i# you clic Ko. &lic &ancel to return to the editor without saing the edits orclosing the editor.
8/14/2019 Camara Termica Fluke
http://slidepdf.com/reader/full/camara-termica-fluke 61/93
'nnotation /rag and /ro% ,n e##icient way to add annotations to images is to use the annotation drag anddrop #unction. ,dd annotations #rom the annotation #ile editor to a single openimage> or simultaneously add an annotation to all open images.
To utilie 'nnotation /rag and /ro%$1. pe n ima g es.2. pen the , n no ta ti o n 4 ile :d it o r and an annotation #ile.3. 0oe the ,nnotation 4ile :ditor window to a position where you can iew
your imageBsC.". +e#t clic and hold on the annotation you want to add to your imageBsC.$. /o add the annotation to a single image> drag the mouse oer the image
and release the le#t mouse !utton.'. /o add the annotation to all open images> drag the mouse to the
grey !acground and release the le#t mouse !utton.). ,nswer J%esJ to add the annotation to all open images.*. Repeat steps "8) as needed.
8/14/2019 Camara Termica Fluke
http://slidepdf.com/reader/full/camara-termica-fluke 62/93
Voice 'nnotation%ou can add oice annotations to your images with your thermal imager Bsee yourthermal imagerPs users manual #or instructionsC. %ou can use the SmartView imageeditor to reiew oice annotations captured with your thermal imager BKote; Voiceannotations are not aaila!le on all thermal imagersC. %ou can also import> e5port>and delete oice annotations.
!e&iewing &oice annotations$
• &lic on the Voice ,nnotation> &omments> or ,nnotations ta!.
• /he oice annotation control displays the play!ac inde5 to indicate the
position in the #ile and the duration o# the #ile
• Use the J(layJ !utton to reiew oice annotations
• Use the J(auseJ !utton to pause a oice annotation during play!ac
• Use the JResume (layJ !utton to resume oice annotation play!ac
• Use the JStopJ !utton to stop oice annotation play!ac
• Use the J(lay!ac positionJ
control to moe to a speci#ic point in the #ile. 6rag the Jplay!acpositionJ !utton to the point that you want the #ile to play.
Wor(ing with &oice annotations$
• Use the JImport...J !utton to import a oice annotation B.wa #ileC
• Use the J:5port...J !utton to e5port the oice annotation to use in another
program B.wa #ileC• Use the J6eleteJ !utton to delete the oice annotation
8/14/2019 Camara Termica Fluke
http://slidepdf.com/reader/full/camara-termica-fluke 63/93
4enerating !e%orts
SmartView !e%orts$ 0&er&iewSmartView allows you to create and print detailed> pro#essional reports that containimages you capture with your thermal imager> comments> recommendations> andother related in#ormation you wish to analye andAor share with others.
%ou can con#igure reports in arious ways to include a main in#rared BIRC image> IRre#erence imageBsC> isi!le light BV+C re#erence imageBsC> andAor other output optionsyou select. %ou can also include a summary ta!le and description and can customiethe report title page> i# you choose to include one> and other report appearance settings.%ou may also modi#y or create the repo rt template s used to generate your report.
7enerate reports !y using either the < u ic R e po rt #unction to create a standardreport #ormat you can use oer and oer with the push o# a !utton> or the R epo rt W i a rd to deiate #rom the <uic Report settings.
In !oth the < u ic R e p o rt Se tt in g s and the Re p o rt W i a r d> you can choose #rom threestandard report templates; !asic> comparison> and thum!nail. %ou may also selectany customied report templates.
%ou can generate a report in either .(64 or .doc5 #ormat. /he (64 #ormat can !eutilied in ,do!e ,cro!at so#tware or similar. /he .doc5 #ormat is natiely supported!y 0icroso#t Word 299). See R e po rt 7 e n e rati o n p tion s #or more details.
8/14/2019 Camara Termica Fluke
http://slidepdf.com/reader/full/camara-termica-fluke 64/93
4enerating !e%orts
Using =uic( !e%ortUse <uic Report to set up a standard report con#iguration you can use oer and oer
and can generate quicly with a single mouse clic. < u ic R e po rt and R e po rt W i a rdcon#iguration options are the same> !ut you can choose di##erent settings #or eachBsee> &h an g ing <u ic Re p o rt Se tti n g sC.
)ote$ <uic Report includes all open images.
To generate one report with all open images using Quick Report:
1. &hange the < u ic Re p o rt Se tti n g s i# necessary.2. pen the imageBsC you want to include in the report.
3. &lic the <uic report on all images icon on the SmartView /ool ar. Br
clic Report> then <uic Report #rom the SmartView 0enu arC. , report willgenerate !ased on your Re po rt 7 ene r a ti o n p r e # e re n c e s.
Changing =uic( !e%ort SettingsTo view and change Quick Report settings:
1. &lic Report on the SmartView 0enu ar> then select <uic ReportSettings.
2. Select the report template you want to use B! a sic> c o mpa r is o n> th u m! n a il>!a sic ! u ild ing d ia g no s tic> !a sic e le c trom e c ha n ical or c u s to mC #rom thedrop down menu.
3. &on#igure the report !y checing or typing in arious output options #romthe title page> layout> appearance> and summary ta!s. +eae the optionsyou do not want to include in the report uncheced.
". &lic H.
Kow you are ready to generate a <u ic Report.
Using the !e%ort WiardUse the Report Wiard to customie a report and deiate #rom the standard < u icRe po rt S e tt in g s. /he Report Wiard allows you to select a report template and whicho# the open images you want to include in a report.
To generate a report using the Report Wizard:
1. pen the imageBsC you want to include in the report.2. &lic Report on the SmartView 0enu ar> then select Wiard. /he Report
Wiard window opens. Unchec the !o5 !eside any images you do notwant to include in the report.

8/14/2019 Camara Termica Fluke
http://slidepdf.com/reader/full/camara-termica-fluke 65/93
3. &lic Ke5t> then clic on the report template you want to use B!a sic>c om p a r is o n> th um !na il> !a sic !u ild ing d ia g n o sti c> !a sic e lec t r o me c h an ica l>or c u st o mC.
)ote$ %ou may adMust the Report /emplate 6irectory setting in the JSelect Report
/emplateJ step.
". &lic Ke5t> then con#igure the report !y checing or typing in arious outputoptions #rom the title page> layout> appearance> and summary ta!s. +eaethe options you do not want to include in the report uncheced.
)ote$ n the layout ta!> i# you select Incl‖ ude isi!le re#erence‖ and then select Use‖iew settings‖ the image appears in the report e5actly as it appears in the SmartViewimage iewer. /he U‖ se iew settings‖ option applies only to IR 4usion images. 4orthe main image> i# you select ‖Use iew settings‖ then the Visi!le‖ light only‖ setting isused #or the isi!le re#erence image. I# you select ‖In#rared only‖ #or the main image>then‖Use iew settings‖ is used #or the isi!le re#erence image.
$. &lic 4inish.'. , report will generate !ased on your Report 7ene ratio n p re# e ren ces.
Including a Title ,age/o ensure a pro#essional loo to your report> add a title page.
To include a title page in your report:
1. pen the imageBsC you want to include in the report.2. &hange the <uic Report Settings or use the Report Wiard.3. Select the report template you want to use B! a sic> c o mpa r is o n>
th u m! n a il> !a sic ! u ild ing d ia g no s tic> !a sic e le c trom e c ha n ica l> orc u s to mC.
". &lic on the title ta! to con#igure the title page;i. &hec the I‖ nclude /itle (age‖
!o5.
)ote$ /he title page is included in the report only when the I‖ nclude /itle (age‖ !o5 ischeced.
ii. ,dd a report title> report su!title> your company name and contactin#ormation> your clientPs name and contact in#ormation BwhenappropriateC> your company logo> and a title page image !y usingthe appropriate #ields and associated controls.
)ote$ SmartView saes the1$ most recent entries in each o# the title page #ields #or#ast recall o# #requently used te5t and #iles.
$. &lic H B#rom <uic ReportC or 4inish B#rom Report WiardC.

8/14/2019 Camara Termica Fluke
http://slidepdf.com/reader/full/camara-termica-fluke 66/93
'. , report will generate !ased on your Re po rt 7 ene r a ti o n p r e # e r en c e s.
8/14/2019 Camara Termica Fluke
http://slidepdf.com/reader/full/camara-termica-fluke 67/93
Including a Summar ,age0ae your reports easy to understand at a glance !y creating a summary pagethat includes a ta!le andAor paragraph description that summaries the entirereport.
%ou can include the summary ta!le only> the paragraph description only> or !oth.
To include a summary table and/or description in your report:
1. pen the imageBsC you want to include in the report.2. &hange the <uic Report Settings or use the Report Wiard.3. Select the report template you want to use B! a sic> c o mpa r is o n>
th u m! n a il> !a sic ! u ild ing d ia g no s tic> !a sic e le c trom e c ha n ica l> orc u s to mC.
". &on#igure the report !y checing or typing in arious output options #rom
the title pa g e> la y ou t> a p pe a ra n c e> and report s u m m a ry ta!s. +eae theoptions you do not want to include in the report uncheced.
a. &lic on the s u m m a ry ta! to con#igure the report summarypage;
i. &hec the I‖ nclude report summary‖ !o5.
)ote$ /he report summary page is included in the report only when the I‖ ncludereport summary‖ !o5 is checed.
ii. &reate a summary ta!le !y typing a #ield name in the 4‖ ield‖column. BSample #ield names; :le‖ ctrical‖
‖0echanical‖C.iii. /hen> clic in the S‖ ummary‖ column to type a comment speci#ic to
that #ield. BSample comment; S‖ ome electrical wires areoerheating.‖ r Sc‖ hedule maintenance and monitor asindicated. C‖
i. &ontinue adding #ields and comments as needed to create thesummary ta!le.
. &hec the !o5 in the ‖Include‖ column #or each row you want toinclude in your summary ta!le. Unchec the !o5 !eside any row youdecide not to include.
i. &lic in the R‖ eport summary te5t‖ area to type a summary
paragraph description. BSample summary paragraph;‖0aintenance team should #ollow up where indicated. 0onitor allother components regularly. (er#orm a #ollow up inspection on allequipment where maintenance is per#ormed. C‖
$. &lic H B#rom <uic ReportC or 4inish B#rom Report WiardC.'. , report will generate !ased on your Re po rt 7 ene r a ti o n p r e # e r en c e s.

8/14/2019 Camara Termica Fluke
http://slidepdf.com/reader/full/camara-termica-fluke 68/93
0%ening a !e%ort 4enerated from SmartView 1.> or 6arlier To open a report generated with mart!iew "#$ or earlier:
1. &lic JReportJ on the SmartView 0enu ar> then select Jpen +egacyReport...J
2. Select the location on the computerAhard drie where the report is saed.3. In the J4ile name;J !o5> select the report you want to open.". &lic Jpen.J
8/14/2019 Camara Termica Fluke
http://slidepdf.com/reader/full/camara-termica-fluke 69/93
!e%ort Tem%lates4or each report template> you can customie the report title pa g e> la y out >a p pea r a n c e> and r e po rt s u m ma ry #rom the Report Wiard or <uic Report Settings.
• Title ,age,llows you to choose to include a title page and add the
in#ormation you want to include on the report titleAcoer page.• -aout,llows you to choose in#ormation you want to include in the report>
such as page num!ers> a ta!le o# contents> re#erence images> and image8related details such as annotations> marer data> and image in#ormation.
• '%%earance,llows you to choose accent colors and the header andAor#ooter you want to include in the report.
• Summar,llows you to choose to include a ta!le andAor paragraphdescription that summaries the entire report on one page.
asic !e%ortUse this general8purpose report to descri!e the results o# an inspection andproide recommendations #or #ollow8up action.In a !asic report> you can include;
• /hree image types; the main IR image> V+ and IR re#erence imageBsC.
• &omments and marer details #or the main IR image.
• Image in#ormation #or the main IR image including annotations that categoriethe o!MectNs location> pro!lem> seerity> and recommended actionD the imagecali!ration range> emissiity> and !acground temperatureD and the camera
serial num!er.
%ou can also customie the report title page> layout> appearance> and report summary.
asic uilding /iagnostic !e%ortUse this report to communicate results #rom a !uilding related inspection. /his reporttemplate satis#ies most pu!lished standards #or documenting thermographicinspections o# !uildings.
In a !asic !uilding diagnostic report> you can include;
• /hree image types; the main IR image> V+ and IR re#erence imageBsC.
• &omments and marer details #or the main IR image.
• Inspection speci#ics presented in a ta!le preceding each image that descri!es
the location> indoor and outdoor enironmental conditions> details o# thepotential pro!lem> and imager related in#ormation.
• &ompany logo on each page.
%ou can also customie the report title page> layout> appearance> and report summary.
8/14/2019 Camara Termica Fluke
http://slidepdf.com/reader/full/camara-termica-fluke 70/93
asic 6lectromechanical !e%ortUse this report to communicate results #rom an inspection including electricalandAor mechanical equipment. /his report template satis#ies most pu!lishedstandards #or documenting thermographic inspections o# electrical and mechanical
equipment.
In a !asic electromechanical report> you can include;
• /hree image types; the main IR image> V+ and IR re#erence imageBsC.• &omments and marer details #or the main IR image.
• Inspection speci#ics presented in a ta!le preceding each image that descri!esthe location> indoor and outdoor enironmental conditions> details o# thepotential pro!lem> and imager related in#ormation.
• &ompany logo on each page.
%ou can also customie the report title page> layout> appearance> and report summary.
Com%arison !e%ortUse this report to compare two IR images> #or e5ample; one image captured !e#orea repair and one captured a#ter> or one image showing an o!Mect in good or woringcondition and one image showing an o!Mect in !ad or nonworing condition.In a comparison report> you can include;
• /wo images; a main IR image and an IR re#erence image.
• &omments and marer details #or !oth IR images.
• Image in#ormation #or !oth IR images including annotations that categorie
the o!MectNs location> pro!lem> seerity> and recommended actionD theimage cali!ration range> emissiity> and !acground temperatureD and thecamera serial num!er.
%ou can also customie the report title page> layout> appearance> and report summary.
Thumbnail !e%ortUse this general summary report to display thum!nailthat is> reduced8sieersions o# all IR and IR 4usion images captured during an inspection.In a thum!nail report> you can include;
• Up to - IRAIR 4usion images on one page.• &omments #or all IR images.
%ou can also customie the report title page> layout> appearance> and report summary.

8/14/2019 Camara Termica Fluke
http://slidepdf.com/reader/full/camara-termica-fluke 71/93
CustomUse the te mp la te ed iti n g t oo ls to create a customied report template !ased on oneo# the three proided templates or c r ea te o n e o # y ou r o w n.
)ote$ It is recommended that you customie an e5isting report template.
)ote$ %ou must hae 0icroso#t Word 299) to customie report templates.
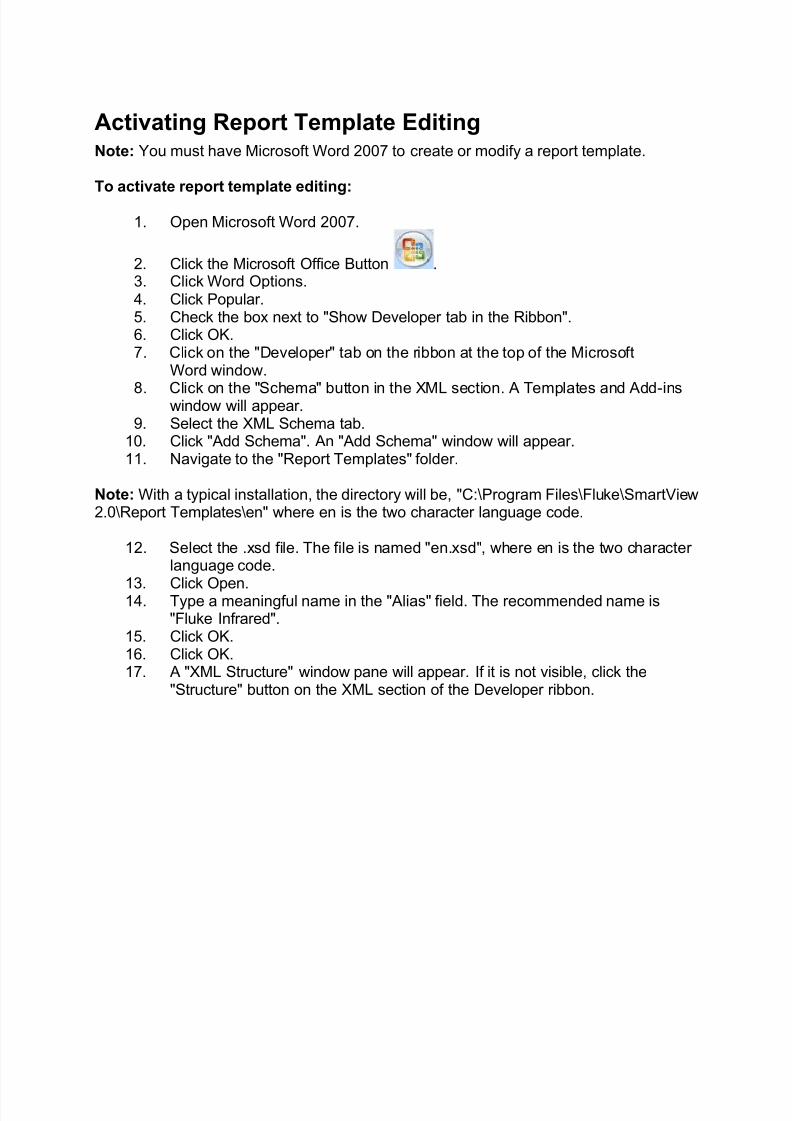
8/14/2019 Camara Termica Fluke
http://slidepdf.com/reader/full/camara-termica-fluke 72/93
'cti&ating !e%ort Tem%late 6diting)ote$ %ou must hae 0icroso#t Word 299) to create or modi#y a report template.
To acti&ate re%ort tem%late editing$
1. pen 0icroso#t Word 299).
2. &lic the 0icroso#t ##ice utton .3. &lic Word ptions.". &lic (opular.$. &hec the !o5 ne5t to JShow 6eeloper ta! in the Ri!!onJ.'. &lic H.). &lic on the J6eeloperJ ta! on the ri!!on at the top o# the 0icroso#t
Word window.
*. &lic on the JSchemaJ !utton in the @0+ section. , /emplates and ,dd8inswindow will appear.-. Select the @0+ Schema ta!.
19. &lic J,dd SchemaJ. ,n J,dd SchemaJ window will appear.11. Kaigate to the JReport /emplatesJ #older.
)ote$ With a typical installation> the directory will !e> J&;F(rogram 4ilesF4lueFSmartView2.9FReport /emplatesFenJ where en is the two character language code.
12. Select the .5sd #ile. /he #ile is named Jen.5sdJ> where en is the two characterlanguage code.
13. &lic pen.1". /ype a meaning#ul name in the J,liasJ #ield. /he recommended name isJ4lue In#raredJ.
1$. &lic H.1'. &lic H.1). , J@0+ StructureJ window pane will appear. I# it is not isi!le> clic the
JStructureJ !utton on the @0+ section o# the 6eeloper ri!!on.

8/14/2019 Camara Termica Fluke
http://slidepdf.com/reader/full/camara-termica-fluke 73/93
*odifing !e%ort Tem%lates0odi#y one o# the proided report templates B!asic> comparison> or thum!nailC tocreate a customied template. %ou hae complete control oer the report template.
)ote$ %ou must hae 0icroso#t Word 299) to create or modi#y a report template.
)ote$ ,#ter modi#ying a template> s a e the customied report template #ile as anew name to presere the integrity o# the de#ault template.
*odifing a re%ort tem%late
To o%en a re%ort tem%late for editing$1. pen 0icroso#t Word 299).2. 0ae sure te mp la te ed iting is a cti a te d.
3. pen the report temp la te you want to modi#y.
)ote$ With a typical installation> the directory will !e> J&;F(rogram 4ilesF4lueFSmartView2.9FReport /emplatesFenJ where en is the two character language code..
". &lic on the J6eeloperJ ta!.$. &lic on the JStructureJ !utton. , J@0+ StructureJ window pane will appear.
To mo&e re%ort ob<ects$
1. pe n a r e po rt te m p la te # o r e d itin g.
2. Use the right8clic menu or ey!oard shortcuts B&trl & #or copy and &trl V#or pasteC to moe a report element using copy and paste. %ou may alsohighlight and drag a report element to a di##erent location.
To add re%ort ob<ects$
1. pe n a r e po rt te m p la te # o r e d itin g.2. Right8clic in the location where you want to add a report element.3. Select ,pply @0+ :lement. , list o# aaila!le re po rt e le m e n ts will appear.". +e#t8clic on the report element you want to add to the template.$. ,d Must the report e lemen t a ttri!u te s as needed.
To delete re%ort ob<ects$
1. pe n a r e po rt te m p la te # o r e d itin g.2. =ighlight the element you wish to delete.3. (ress the !acspace or delete !utton on your ey!oard.

8/14/2019 Camara Termica Fluke
http://slidepdf.com/reader/full/camara-termica-fluke 74/93
To re5sie an image in the tem%late$
1. pe n a r e po rt te m p la te # o r e d itin g.2. +e#t8clic on the image you want to re8sie.3. /o increase or decrease the sie in one or more directions> drag a siing
handle away #rom or toward the center.
To ad<ust the font of tet or tet elements in the tem%late$
1. pe n a r e po rt te m p la te # o r e d itin g.2. +ocate the te5t or te5t report element you want to modi#y.3. +e#t8&lic at the !eginning o# the te5t or te5t report element.". =old down the le#t mouse !utton> and then drag the pointer oer the te5t
or te5t report element you want to select.$. Use the #ormatting 0ini tool!ar to adMust the #ont sie> type> color> and more.
/he 0ini tool!ar appears automatically when you select te5t or a te5treport element. It also appears with the menu when you select te5t andthen right8 clic.
To ad<ust re%ort element attributes$
1. pe n a r e po rt te m p la te # o r e d itin g.2. Right8clic on the report element you want to adMust.3. Select ,t t r i!u te s. ,n attri!utes window will appear.". +e#t clic on the attri!ute you want to add to the report element.$. &hoose the alueAoption you want #rom the Value #ield.'. &lic on ,dd. /he attri!ute will !e listed in the ,ssigned attri!utes section.). &lic H.
)ote$ /o remoe an attri!ute> #ollow steps 183> then highlight the attri!ute in the ,ssigned attri!utes section and clic 6elete.
)ote$ Some report elements do not hae attri!utes.
To sa&e the changes to the re%ort tem%late$
1. pe n a r e po rt te m p la te # o r e d itin g.2. 0odi#y the report template.
3. &lic the 0icroso#t ##ice utton > and then clic Sae ,s.". In the 4ile name !o5> enter a new name #or the #ile.$. &lic Sae.
)ote$ /o sae a copy in a di##erent #older> clic a di##erent drie in the JSae inJ list or adi##erent #older in the #older list. /o sae a copy in a new #older> clic the &reate Kew
4older !utton . ,dMust the re p o rt te m p la t e d ire ct o ry to re#lect the new location o# areport template.
8/14/2019 Camara Termica Fluke
http://slidepdf.com/reader/full/camara-termica-fluke 75/93
Creating a !e%ort Tem%late&reate custom report templates using 0icroso#t Word.
)ote$ It is recommended that you create a report template !y m o d i#y ing a ne 5 isting re po rt te m p la te.
)ote$ %ou must hae 0icroso#t Word 299) to create report templates.
To create a re%ort tem%late$
1. pen 0icroso#t Word 299).2. 0ae sure te mp la te ed iting is a cti a te d.3. ,dd the temp late e le men ts you want to the document.
)ote$ Re#er to the 0o d i# y ing a R e p o rt / e mp la te section #or instructions onadding> deleting> moing> or re8siing image report elements.
". Sae the report template to the re p o rt t e mp la te d ir e ct o r y.

8/14/2019 Camara Termica Fluke
http://slidepdf.com/reader/full/camara-termica-fluke 76/93
!e%ort Tem%late 6lements!e%ort Tem%late 6lements$/here are seeral report template elements aaila!le #or inclusion on the template.
4lossar of !e%ort Tem%late 6lements
6e#ault Kon8repeating sections. /hese sections only appear once on a report.
• /itle page
• /itle[(age[Section 8 this is a section that contains all the su!sequent title
page elements. ,ll in#ormation is entered in the /itle page ta! in the<uic Report Settings or Report Wiard
• /itle[(age[Image 8 title page image
• &lient[&ontact[In#o 8 client contact in#ormation
• &lient[Kame 8 client company name
• &ompany[&ontact[In#o 8 your contact in#ormation
• &ompany[+ogo 8 your company logo
• &ompany[Kame 8 your company name• Report[Su!title 8 su!title #or the report
• Report[/itle 8 title #or the report
• Report[6ate 8 date the report was generated Bnot included in any o# theproided report templatesC
• /a!le o# contents• /a!le[#[&ontents[Section 8 ta!le o# contents that includes the #ile name
and associated page num!er in the report
• Summary page 8 ,ll in#ormation is entered in the Summary ta! in the <uic
Report Settings or Report Wiard• Summary[Section 8 this is a section that contains all the su!sequent
summary page elements. ,ll in#ormation is entered in the Summary ta!in the <uic Report Settings or Report Wiard
• Summary 8 paragraph style summary
• Summary[/a!le 8 ta!le style summary
6e#ault Repeating sections. /hese sections repeat #or eery image included inthe report.
• 0ain In#rared Image
• Image[Section 8 this is a section that contains all the su!sequent main
in#rared image elements• Image[,nnotations[/a!le 8 te5t annotations associated with the image
• Image[&omment 8 comments #rom the &omments ta! in the image editor

8/14/2019 Camara Termica Fluke
http://slidepdf.com/reader/full/camara-termica-fluke 77/93
• Image[7raph 8 graph #rom the 7raph ta! in the image editor Bline> @> %>histogram> or 368IR?C
• Image[=eader 8 header #rom the &omments ta! in the image editor
• Image[0arer[/a!le 8 ta!le that includes the statistics #or image marers• Image[/ime 8 date and time the image was captured
• 0ain[Image 8 main in#rared image
• Image[Kame 8 main in#rared image #ile name
)ote$ ,n image is placed in the location o# an image on the template to de#ine thesie o# the image on the report. I# an image is not placed on the template> the image ispresented in the natie image sie. It is recommended to place an image on thetemplate !ecause isi!le light images will !e ery large without one.
• Image[In#o[/a!le[Section 8 this is a section that contains all the
su!sequent main in#rared image in#ormation elements• Image[:missiity 8 0ain in#rared imagePs emissiity
• Image[4ile[+ocation 8 #ile directory on the computer hard drie orserer
• Image[,erage[/emperature 8 0ain in#rared imagePs aeragetemperate
• Image[acground[/emperature 8 0ain in#rared imagePs
!acground temperature• Image[&ali!ration[Range 8 0ain in#rared imagePs cali!ration range• Image[Range 8 0ain in#rared imagePs temperature range
• Image[/ime 8 date and time the image was captured
• &amera[6S([Version 8 thermal imagerPs 6S( ersion B#irmwareC• &amera[+ens[6escription 8 lens used to capture the image
• &amera[+ens[Serial[Kum!er 8 serial num!er o# the lens• &amera[0anu#acturer 8 0anu#acturer o# the thermal imager used to
capture the image• &amera[0odel 8 model o# the thermal imager used to capture the
image• &amera[&,[Version 8 thermal imagerPs &, ersion B#irmwareC• &amera[Serial[Kum!er 8 serial num!er o# the thermal imager used
to capture the image
• Re#erence ImageBsC
• Re#erence[Image[Section 8 this is a section that contains all the
su!sequent re#erence image elements• Image[In#o[&ompare[/a!le 8 re#erence image in#ormation
• Re#erence[Image[&omment 8 re#erence image comments #rom theRe#erence Images ta! in the image editor
• Re#erence[In#rared 8 in#rared re#erence image
• Re#erence[Visi!le 8 isi!le light re#erence image

8/14/2019 Camara Termica Fluke
http://slidepdf.com/reader/full/camara-termica-fluke 78/93
• (age :lements
• (age[rea 8 page !rea
• (age[4ooter 8 page #ooter
• (age[=eader 8 page header
• /hum!nail[/a!le 8 this element is used in the thum!nail report template as asection that contains all the images used in the report and their associatedin#ormation

8/14/2019 Camara Termica Fluke
http://slidepdf.com/reader/full/camara-termica-fluke 79/93
!e%ort Tem%late 6lement 'ttributesSeeral report template elements hae attri!utes that can !e set in the template. Whenan attri!ute is added to a template element> the report will oer ride any selections inthe <uic Report Settings or Report Wiard.
• 0ain[Image 8 the #ollowing attri!utes apply to the main in#rared image
• lend[(ercent 8 this attri!ute controls the !lend leel #or IR84usion images
• 9 8 199 B199 \ 199 in#rared contri!ution> 9 \ 199 isi!le light
contri!utionC• (alette 8 this attri!ute controls the in#rared imagePs palette
• ,m!er
• ,m!er[Inerted• lue[Red
• 7rayscale
• 7rayscale[Inerted• =igh[&ontrast
• =ot[0etal
• Iron!ow
• Show[&olor[ar 8 this attri!ute controls the presence o# the palette !ar
• yes
• no
• Image[7raph
• (ro#ile[Settings 8 this attri!ute controls the type o# graph displayed
• =istogram
• +ine• 368IR?• @[(ro#ile
• %[(ro#ile
• Image[6isplay[Settings 8 this attri!ute only applies to IR84usion images and
controls how the in#rared and isi!le light images are displayed• 4ull[4rame 8 displays the isi!le light re#erence image in the #ull image
sie. 0ore pi5els are displayed than are aaila!le on the thermalimager.
• 0atch[In#rared[Sie 8 displays the isi!le light re#erence image in the sie
corresponding to the in#rared portion o# the IR84usion image• (icture[In[(icture 8 displays the in#rared image as an in#rared window
surrounded !y a isi!le light image #rame. /he isi!le light re#erenceimage will match the sie o# the picture in picture image com!ination.
• View[Settings 8 de#ault. /he in#rared image is displayed according to the
imagePs display settings saed with the #ile. /he isi!le light re#erenceimage will match the sie corresponding to the display settings o# thein#rared image.

8/14/2019 Camara Termica Fluke
http://slidepdf.com/reader/full/camara-termica-fluke 80/93
• Sae[4ormat 8 this attri!ute applies to all images in the report
• Mpg 8 with compression
• png 8 without compression
• Units 8 this attri!ute applies to all in#rared images
• &elsius
• 4ahrenheit• Helin
8/14/2019 Camara Termica Fluke
http://slidepdf.com/reader/full/camara-termica-fluke 81/93
Using the Cli%board
Co%ing and ,asting an ImageTo co% and %aste an image 7bitma% format8 into a different a%%lication$
1. pen the image you want to copy> or clic on an open image to actiate.2. Right8clic on the actie image to open the image popup window.3. Select &opy #rom the menu to place the !itmap on the Windows clip!oard.". pen an application> such as 0icroso#t Word> that can accept !itmap
images #rom the clip!oard.$. (aste the !itmap graphic into the application. , common ey!oard shortcut to
paste an image is to press and hold the control B&trlC ey> then press the Vey.
)ote$ /he !itmap graphic no longer contains any temperature in#ormation.

8/14/2019 Camara Termica Fluke
http://slidepdf.com/reader/full/camara-termica-fluke 82/93
Co% and ,aste Image InfoTo co% &alues from the image info window to the Windows cli%board$
1. In the im a g e in #o w in do w> highlight the te5t you are interested in. /o do this>drag the mouse oer the te5t with le#t !utton held down.
2. Right8clic on the image in#o window to open a popup menu.3. /o copy only the highlighted te5t> choose the &opy Selected item. /o copy all
the te5t> choose the &opy ,ll item. /he alues are now in the Windowsclip!oard> ready to !e pasted into another application.
8/14/2019 Camara Termica Fluke
http://slidepdf.com/reader/full/camara-termica-fluke 83/93
Co%ing and ,asting a 4ra%hTo co% and %aste a gra%h into a different a%%lication$
1. pen the image you want to copy a graph #rom> or clic on an open imageto actiate.
2. Right8clic on an actie image window to open the image popup menu.3. Select View graph on the menu.". Select the graph type #rom the J/ypeJ control.$. Right8clic on the graph window to open another popup menu.'. Select &opy to place the graph on the clip!oard. %ou can now paste the
graph into a di##erent application Bpress and hold the control B&trlC ey> thenpress the V eyC. %ou may hae to select (aste Special in the application towhich you are pasting the image in order to paste a graphic rather than te5t.
)ote$ %ou cannot adMust the !ar width o# a histogram image you paste into adi##erent application.

8/14/2019 Camara Termica Fluke
http://slidepdf.com/reader/full/camara-termica-fluke 84/93
Co%ing and ,asting *ar(er /ata/o copy alues #rom the data window to the Windows clip!oard;1. Right8clic on the data window to open a popup menu.2. Select the &opy ,ll item. %ou can now paste the alues into a di##erent program.
8/14/2019 Camara Termica Fluke
http://slidepdf.com/reader/full/camara-termica-fluke 85/93
6%orting Images and Tem%erature /ata
To e%ort an image or tem%erature data$
1. pen the image you want to e5port> or clic on an open image to actiate.2. &lic 4ile on the /ool ar> then clic :5port> or right8clic and select :5port.3. ,n :5port dialog window appears.". &lic the appropriate radio !utton to e5port the image or the image
temperature data.$. &lic the 4ormat down arrow to select the #ile #ormat you want to e5port.'. I# you chose Image> chec the JInclude 6ate /ime StampJ !o5 to add a
date time stamp to imageD chec also JInclude ScaleJ to add the colorpalette to the image.
• 4or IR84usion images> select the image presentation using the J/ypeJ
down arrow•
Select J&urrent ViewJ to e5port the image using the current IR84usion image settings• Select JIn#rared nlyJ to e5port the in#rared component o# the
image• Select JVisi!le +ight nlyJ to e5port the isi!le light component
o# the image). I# you chose /emperature 6ata> chec the JInclude 0arersJ !o5 to
include marers in the e5ported #ileD chec also J0arers nlyJ to e5portonly the marer data.
*. &lic the +ocation !rowse !utton BC to open a Sae ,s dialog window> thenspeci#y the location B#olderC to which you want to e5port the image or data
and press Sae.-. &lic H to e5port the image or data to the speci#ied location.
To e%ort all o%en images or tem%erature data$1. pen the images you want to e5port.2. &lic 4ile on the /ool ar> then clic :5port ,ll. ,n :5port dialog window
appears.3. &lic the appropriate radio !utton to e5port the images or the imagesN
temperature data.". &lic the 4ormat down arrow to select the #ile #ormat you want to e5port.$. I# you chose Image> chec the JInclude 6ate /ime StampJ !o5 to add a
date time stamp to imageD chec also JInclude ScaleJ to add the colorpalette to the image.
• 4or IR84usion images> select the image presentation using the J/ypeJ
down arrow• Select J&urrent ViewJ to e5port the image using the current IR8
4usion image settings• Select JIn#rared nlyJ to e5port the in#rared component o# the
image

8/14/2019 Camara Termica Fluke
http://slidepdf.com/reader/full/camara-termica-fluke 86/93
• Select JVisi!le +ight nlyJ to e5port the isi!le light componento# the image
'. I# you choose /emperature 6ata> chec the Include 0arers !o5 to includemarers in the e5ported imageD chec also 0arers nly to e5port only themarer dataD chec also Single 4ile i# you want to e5port the marer data
#rom all e5ported images to one #ile ersus separate #iles.). &lic the +ocation !rowse !utton BC to open a Sae ,s dialog window>then speci#y the location B#olderC to which you want to e5port the images ordata and press Sae.
*. &lic H to sae the images or data to the speci#ied location.
)ote$ %ou can also c o p y an d p a ste a n ima g e using the Windows clip!oard.
8/14/2019 Camara Termica Fluke
http://slidepdf.com/reader/full/camara-termica-fluke 87/93
4etting 'ccurate Tem%eratures
asic Infrared !adiometr/he thermal imager measures the temperature o# target materials !y measuring theamount o# in#rared energy radiating #rom the targetNs sur#ace.
/his energy may !e emitted directly #rom the target into the thermal imager. /heenergy o# other o!Mects may !e re#lected o## the sur#ace o# the target and into thethermal imager. In the case o# translucent materials some o# the energy may !etransmitted through the target to the camera. /he thermal imager ‖sees‖ energy #romall three o# these sources and produces a corresponding temperature measurementthat may or may not re#lect the true temperature o# the target o!Mect.
In order to o!tain accurate temperature readings> the thermal imager measurement#or re#lected energy> that is> the energy not emanating directly #rom the target o!Mect>must !e corrected. Since most materials o# interest in maintenance and !uildingrelated applications are opaque to in#rared radiation> the transmitted energy can !eignored. /hus> we hae to deal only with the directly emitted and re#lected radiationwhen measuring temperatures.
In order to understand how we correct #or a materialNs characteristics to get accuratetemperature measurements> you need to !e #amiliar with a material property calledemissivity . ,ll materials can !e compared to an ideal o!Mect called a black body . , !lac!ody does not re#lect or transmit any energy. ,ll energy that reaches the thermalimager #rom a per#ect !lac !ody is directly emittedD there#ore> the thermal imager willread the true temperature o# the !lac !ody.
y de#inition> the emissiity o# a per#ect !lac !ody is 1.9. In the real world> materials donot !ehae as per#ect !lac !odies. /hey re#lect some energy #rom their surroundingsas well as emit radiation directly. :missiity is e5pressed as the ratio o# the materialNsdirect energy emittance as compared with the energy emittance o# a !lac !ody when!oth are at the same temperature.
4or e5ample> gien a !lac !ody and a target o!Mect !oth at the same temperature> i#the emissiity o# the target o!Mect is 9.$> the target o!Mect is directly emitting hal# theenergy that the !lac !ody is and re#lecting hal# the energy o# the surroundings> or
!acground.I# the !acground temperature is less than that o# the o!Mect> the thermal imager showsthat the o!Mect is cooler than it really is !ecause the thermal imager sees less radiationthan it sees #rom the !lac !ody. In order to get an accurate reading o# the targeto!Mect> the thermal imager must correct its measurement !ased on the emissiity o# thetarget o!Mect and !acground temperature !eing re#lected o## o# the target. %our thermalimager and SmartView so#tware allow you to speci#y the emissiity o# the targetand !acground temperature in order to get a more accurate temperature reading.
8/14/2019 Camara Termica Fluke
http://slidepdf.com/reader/full/camara-termica-fluke 88/93
SmartView contains a ta!le o# emissiity alues #or a wide ariety o# materials you canuse #or re#erence. 7enerally> the emissiity o# shiny metal materials is low> usuallyless than 9.2$> increasing dramatically with sur#ace te5ture or o5idationD the emissiityo# nonmetal materials is high> usually more than 9.*. Radiation #rom an opaquematerial originates within a #ew microns o# the sur#ace. So> the emissiity o# painted
sur#aces is characteristic o# the coating rather than the underlying materials. 0ostorganic paints hae ery high emissiity alues o# around 9.-$.
4or most common applications> you do not need to now the e5act temperature o# ano!Mect> !ut rather that it is warmer or cooler than neigh!oring o!Mects. 4or thesegeneral applications> we recommend you set the emissiity o# your thermal imager to9.-$ and set the !acground temperature to room temperature.
4or applications that require precise temperature measurements> or where targetmaterials hae ery low emissiity alues> you need to correct the target emissiityand !acground temperature measurements. %ou can #ind the appropriate alues inthe : m iss i ity Va lu e s ta! le> or you can measure them using your camera.
It can !e di##icult to precisely measure the temperatures o# target o!Mects that haee5tremely low emissiity alues> !ecause most o# the radiation is re#lectedD there#ore>radiation #rom hot o!Mects near the target may !e re#lected o## the o!Mects and appearin an image as hot or cold spots. /hin o# a mirror> #or e5ample; When you loo into amirror> you see the room !ehind you> !ut you do not see the mirror itsel#. Werecommend that you apply e5treme care when interpreting measured temperatures o#target o!Mects with low emissiity alues.
8/14/2019 Camara Termica Fluke
http://slidepdf.com/reader/full/camara-termica-fluke 89/93
Understanding Technolog -imitationsIn certain situations> such as those in the #ollowing e5amples> it is di##icult oreen impossi!le to get an accurate temperature reading
• When iewing a distant scene through an atmosphere containing signi#icantwater apor> #or e5ample> during high humidity conditions. Water apor andwater droplets in the atmosphere a!sor! and scatter in#rared radiation.
• When iewing a target with a temperature outside the cali!ration range o#your thermal imager. 4or e5ample> when iewing the sun or a c‖ lear ‖ sy.
• When iewing a target with an apparent diameter too small to #ill a #ull pi5el.4or e5ample> when looing at a power line #rom a distance.
• When iewing a target material> such as shiny metal> with low emissiity. In
some situations> you may !e a!le to get around this pro!lem !y attaching asmall piece o# thermal8conducting> high8emissiity material to the targeto!Mect sur#ace.
• When iewing targets> such as gasses> that are semi8transparent to in#raredradiation.
• When iewing a target that does not re#lect or emit in#rared radiation eenly
in all directions. /hese o!Mects may sometimes act as a mirror oer all orportions o# their sur#acesD as such> you could !e looing at the re#lection o#an o!Mect !ehind you.
)ote$ Some o# these materials may transmit in#rared waelengths !ut not isi!lelight> and ice8ersa.
)ote$ Some materials may appear re#lectie to the in#rared spectrum> !ut maynot appear re#lectie to isi!le light> and ice8ersa.
8/14/2019 Camara Termica Fluke
http://slidepdf.com/reader/full/camara-termica-fluke 90/93
6missi&it =uic( Ti%s0ost materials hae an appro5imately nown emissiity at a particular temperatureBsee emissiity com!o !o5 in ,nalysis ta!C. 7enerally speaing> you will enter theemissiity alue o# the target o!MectNs material> !ut there are other more complicatedreasons #or entering other emissiity alues.
,lso> you can enter the room temperature into the !acground temperature #ield>!ut realistically the !acground temperature should !e the temperature o# the o!Mector o!Mects that are !eing re#lected !y the target o!Mect.
=uic( Ti%$ I# you can see your re#lection in the target o!Mect> then set the!acground temperature to -*.']4 B3)]&C> your appro5imate !ody temperature.
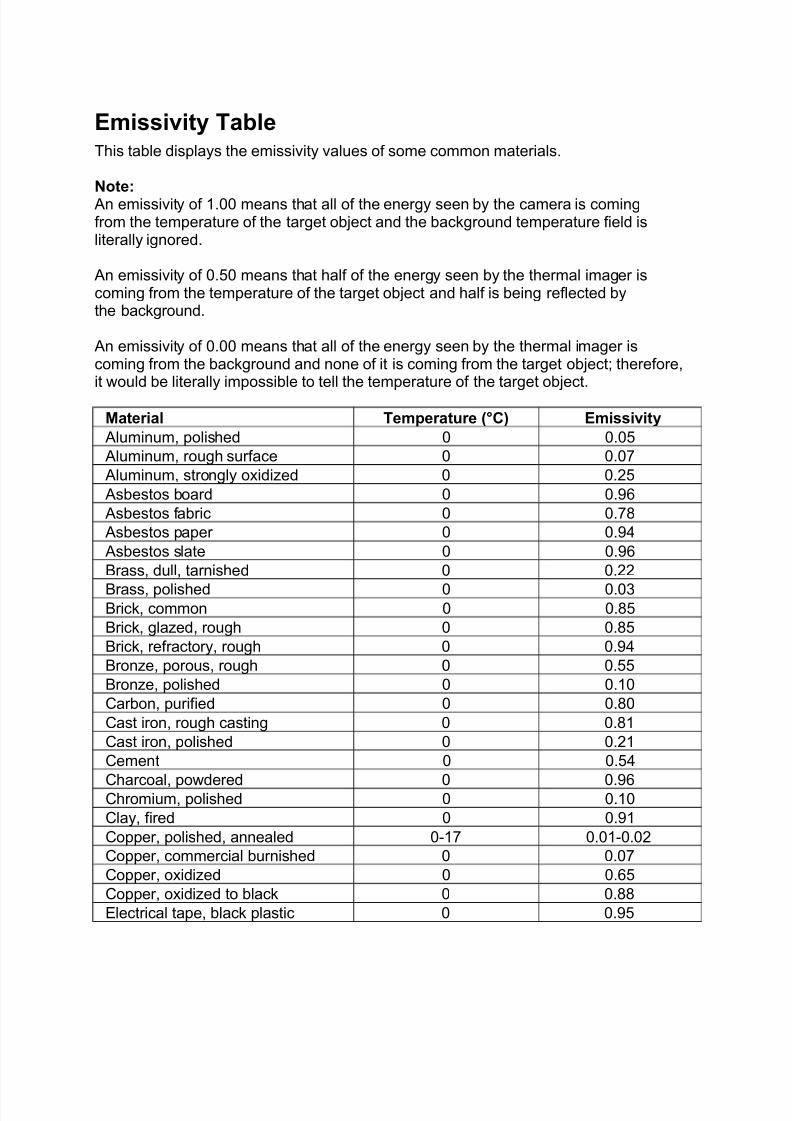
8/14/2019 Camara Termica Fluke
http://slidepdf.com/reader/full/camara-termica-fluke 91/93
6missi&it Table/his ta!le displays the emissiity alues o# some common materials.
)ote$ ,n emissiity o# 1.99 means that all o# the energy seen !y the camera is coming#rom the temperature o# the target o!Mect and the !acground temperature #ield isliterally ignored.
,n emissiity o# 9.$9 means that hal# o# the energy seen !y the thermal imager iscoming #rom the temperature o# the target o!Mect and hal# is !eing re#lected !ythe !acground.
,n emissiity o# 9.99 means that all o# the energy seen !y the thermal imager iscoming #rom the !acground and none o# it is coming #rom the target o!MectD there#ore>it would !e literally impossi!le to tell the temperature o# the target o!Mect.
*aterial Tem%erature 7?C8 6missi&it
,luminum> polished 9 9.9$
,luminum> rough sur#ace 9 9.9)
,luminum> strongly o5idied 9 9.2$
,s!estos !oard 9 9.-'
,s!estos #a!ric 9 9.)*
,s!estos paper 9 9.-"
,s!estos slate 9 9.-'
rass> dull> tarnished 9 9.22
rass> polished 9 9.93ric> common 9 9.*$
ric> glaed> rough 9 9.*$
ric> re#ractory> rough 9 9.-"
rone> porous> rough 9 9.$$
rone> polished 9 9.19
&ar!on> puri#ied 9 9.*9
&ast iron> rough casting 9 9.*1
&ast iron> polished 9 9.21
&ement 9 9.$"
&harcoal> powdered 9 9.-'&hromium> polished 9 9.19
&lay> #ired 9 9.-1
&opper> polished> annealed 981) 9.9189.92
&opper> commercial !urnished 9 9.9)
&opper> o5idied 9 9.'$
&opper> o5idied to !lac 9 9.**
:lectrical tape> !lac plastic 9 9.-$

8/14/2019 Camara Termica Fluke
http://slidepdf.com/reader/full/camara-termica-fluke 92/93
:namel 2) 9.-9
4ormica 9 9.-3
4roen soil 9 9.-3
7lass 9 9.-2
7lass> #rosted 9 9.-'
7old> polished 9 9.92Ice 9 9.-)
Iron> hot rolled 9 9.))
Iron> o5idied 9 9.)"
Iron> sheet galanied> !urnished 9 9.23
Iron> sheet> galanied> o5idied 9 9.2*
Iron> shiny> etched 9 9.1'
Iron> wrought> polished 9 9.2*
+acquer> aelite 9 9.-3
+acquer> !lac> dull 9 9.-)
+acquer> !lac> shiny 9 9.*)+acquer> white 9 9.*)
+amp!lac 9 9.-'
+ead> gray 9 9.2*
+ead> o5idied 9 9.'3
+ead> red> powdered 9 9.-3
+ead> shiny 9 9.9*
0ercury> pure 9 9.19
Kicel> on cast iron 9 9.9$
Kicel> pure polished 9 9.9$
(aint> siler #inish 2$ 9.31
(aint> oil> aerage 9 9.-"
(aper> !lac> shiny 9 9.-9
(aper> !lac> dull 9 9.-"
(aper> white 9 9.-9
(latinum> pure> polished 9 9.9*
(orcelain> glaed 9 9.-2
<uart 9 9.-3
Ru!!er 9 9.-3
Shellac> !lac> dull 9 9.-1
Shellac> !lac> shiny 9 9.*2
Snow 9 9.*9Steel> galanied 9 9.2*
Steel> o5idied strongly 9 9.**
Steel> rolled #reshly 9 9.2"
Steel> rough sur#ace 9 9.-'
Steel> rusty red 9 9.'-
Steel> sheet> nicel8plated 9 9.11
**

8/14/2019 Camara Termica Fluke
http://slidepdf.com/reader/full/camara-termica-fluke 93/93
Steel> sheet> rolled 9 9.$'
/ar paper 9 9.-2
/in> !urnished 9 9.9$
/ungsten 9 9.9$
Water 9 9.-*
Tinc> sheet 9 9.29