Embed Size (px)
Citation preview
Introduction
Many times it's been said, and yet it's relevant to repeat it here: the world of first person shooters would be incomplete without Nazis. Coincidentally, Activision's own history of FPS has oft featured them, and Call of Duty: World at War is their latest anti-Third Reich gaming experience. With fifteen grueling single-player stages that will drag you through the Battle of Okinawa, the Nazi-Soviet War, and a comprehensive mutli-player experience, it brings a lot to the table.
Fortunately, IGN Guides is here to help you sort the wheat from the chaff. We'll tell you the best routes, where great weapons await, and how to find every Death Card without ever having to retrace a step. It won't be long before you've fought for and won many victories, unlock everything the Co-Op Mode has to offer, and earn the privilege of tearing down Nazi Zombies. Yes, that's right -- Nazi Zombies!
In this Call of Duty: World at War strategy guide, you'll find:
� COMBAT TRAINING // Basic combat tips for new recruits. � WALKTHROUGH // Our complete Call of Duty: World at
War walkthrough with strategy for completing every mission. � DEATH CARDS // Info for unlocking all of the game's Death Cards. � MULTIPLAYER // A multiplayer tip sheet of strategies to take online. � ZOMBIE MODE // Quick tips for the game's undead Zombie Mode.
What are you waiting for? You've got a lot to look forward to, and we'll hold your hand to help you find everything. Let's get started!
Guide by: Valerie Hilgenfeldt
© 2008, IGN Entertainment, Inc. May not be sold, distributed, transmitted, displayed, published or broadcast, in whole or part, without IGN’s express permission. You
may not alter or remove any trademark, copyright or other notice from copies of the content. All rights reserved.
Page 1© 2008 IGN Entertainment, Inc.
Call of Duty: World at War Combat Training
In the past, Call of Duty opened with a tutorial level. World at War cuts right to the chase, leaving you to figure out everything yourself. Luckily, you've got us to send some advice your way. A lot of this applies to the single player experience, so keep that in mind.
Look, Move, Combat, Interact These are the four configuration sub-menus, located under "Controls." If you didn't visit them prior to starting your game, do so immediately upon starting it. It's important to spend some time with these menus, and -- following that -- to familiarize yourself with the controls in-game. Unless you've never played a FPS before, you're already used to things like primary fire and grenades, so we'll focus on the features that aren't as common.
Toggle Crouch, Toggle Prone Since Call of Duty doesn't cater to the run-and-gun types, you should quickly befriend the Crouch and Prone commands. You can use them in various ways, but the Toggle method is perhaps the most natural. Assign each function to a key you can easily strike, then test them out in-game. Crouch will lower your profile and let you duck behind cover, while Prone lowers you further still and lets you crawl quietly. It's also good to go Prone near a great hiding spot when you're severely wounded, and need time to recover.
Aim Down Sight (ADS) With Crouch or Prone, you'll set yourself up to dole out the kills, but your accuracy won't be that great until you use Aim Down Sight. The best combatants are capable of using ADS while running around too, and you want to be the best you can be, don't you? Better start practicing, then! Use ADS as often as possible, but apply common sense to the situation, too. As aforementioned, it increases your accuracy by letting you aim with sights, but it also slows you down. Thus, there are some situations where spraying with lower accuracy is better.
Lean Left and Right Occasionally, you'll find a spot to hide in, but won't be able to see your enemies from it. When this happens, it's much better to lean than it is to simply move away from your cover. Too many soldiers don't use this functionality, and everyone should. Be careful, though; a quick sniper can pop your skull if you lean out for too long. As in ADS, don't be afraid to use this, but do so with discretion.
Throwing Enemy Grenades When they realize where you're hiding, your enemies might lob a grenade into your area. If it lands close by, you may have an opportunity to pick it up and throw it back. This requires lightning-quick reflexes, but can be incredibly useful. It basically grants you the destructive power of an extra grenade for free, and also saves your bacon. If you can't get the timing down, there's only one other option: run for cover!
Melee Attack If your aggressive foes don't have any grenades, they may try to run into your hidey-hole and blow your face off. When they're up close and personal, you can use a Melee Attack against them and conserve your bullets. In situations like these, it's kill or be killed, so this is another function you should be plenty familiar with.
Learning the Essentials
Navigating
In the lower left corner, you have a radar-like compass. This will tell you where friendlies are, among other things. You'll see a star-decorated emblem on-screen, and that's showing you where your next objective is, which is what you should be headed toward.
Stocking Ammunition
If you're carrying a gun that eats ammo like there's no tomorrow, you shouldn't wastefully spray its bullets. Target with your sights whenever possible and kill with a minimal amount of shots. This will help you hone your aiming skills, and it'll lead to less frustration. When it comes to collecting ammunition or obtaining new guns, never be afraid of backtracking. Your objectives are rarely timed, and guns don't disappear, even if you've died. Additionally, you should replace your handgun with a larger gun as soon as possible. To do this, simply switch weapons, pick up something fancy, and you're done. One more tip: reload your gun before you search for more bullets. If your gun isn't fully loaded but your reserve capacity is maxed, you won't be able to pick up more. However, as soon as you reload, you'll be able to replenish your stock.
Page 2© 2008 IGN Entertainment, Inc.
Call of Duty: World at War Walkthrough
Walkthrough Index
Semper Fi
01 part 1
Little Resistance
02 part 1
Hard Landing
03 part 1
04 part 2
Vendetta
05 part 1
Their Land, Their Blood
06 part 1
Burn 'em Out
07 part 1
Relentless
08 part 1
09 part 2
Blood & Iron
10 part 1
Ring of Steel
11 part 1
12 part 2
Eviction
13 part 1
Black Cats
14 part 1
Blowtorch & Corkscrew
15 part 1
16 part 2
Breaking Point
17 part 1
18 part 2
Heart of the Reich
19 part 1
Downfall
20 part 1
Page 3© 2008 IGN Entertainment, Inc.
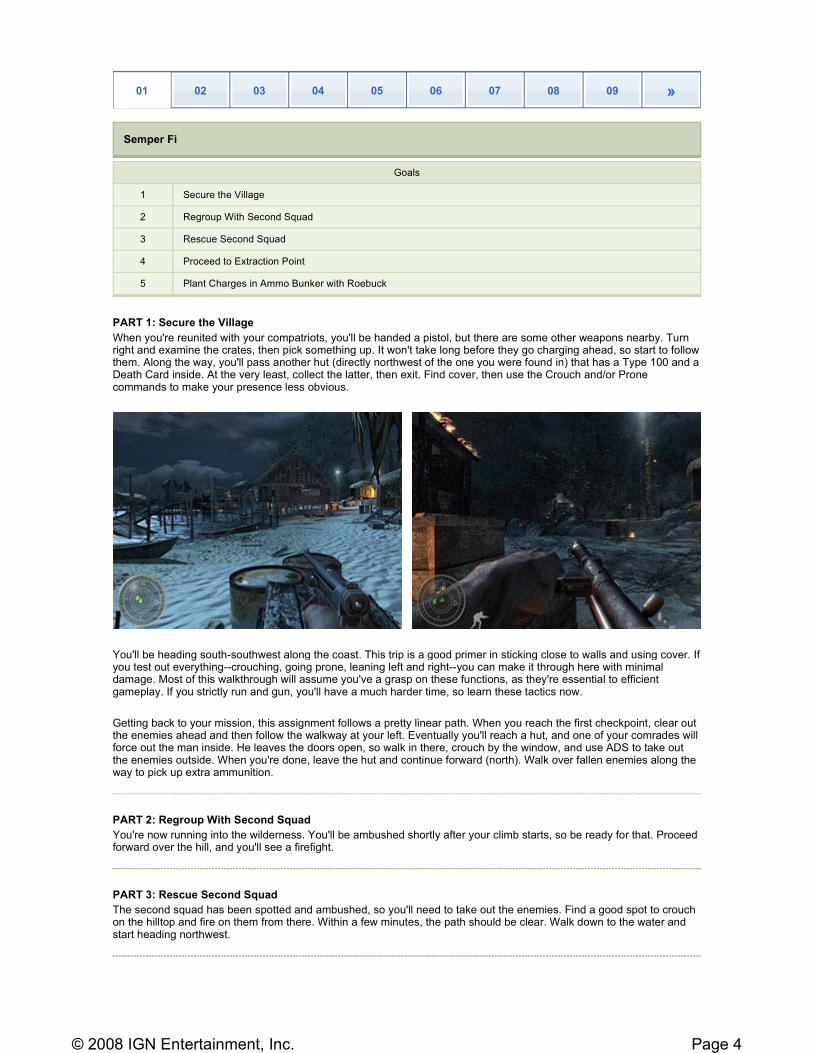
PART 1: Secure the Village When you're reunited with your compatriots, you'll be handed a pistol, but there are some other weapons nearby. Turn right and examine the crates, then pick something up. It won't take long before they go charging ahead, so start to follow them. Along the way, you'll pass another hut (directly northwest of the one you were found in) that has a Type 100 and a Death Card inside. At the very least, collect the latter, then exit. Find cover, then use the Crouch and/or Prone commands to make your presence less obvious.
You'll be heading south-southwest along the coast. This trip is a good primer in sticking close to walls and using cover. If you test out everything--crouching, going prone, leaning left and right--you can make it through here with minimal damage. Most of this walkthrough will assume you've a grasp on these functions, as they're essential to efficient gameplay. If you strictly run and gun, you'll have a much harder time, so learn these tactics now.
Getting back to your mission, this assignment follows a pretty linear path. When you reach the first checkpoint, clear out the enemies ahead and then follow the walkway at your left. Eventually you'll reach a hut, and one of your comrades will force out the man inside. He leaves the doors open, so walk in there, crouch by the window, and use ADS to take out the enemies outside. When you're done, leave the hut and continue forward (north). Walk over fallen enemies along the way to pick up extra ammunition.
PART 2: Regroup With Second Squad You're now running into the wilderness. You'll be ambushed shortly after your climb starts, so be ready for that. Proceed forward over the hill, and you'll see a firefight.
PART 3: Rescue Second Squad The second squad has been spotted and ambushed, so you'll need to take out the enemies. Find a good spot to crouch on the hilltop and fire on them from there. Within a few minutes, the path should be clear. Walk down to the water and start heading northwest.
01 02 03 04 05 06 07 08 09 »
Semper Fi
Goals
1 Secure the Village
2 Regroup With Second Squad
3 Rescue Second Squad
4 Proceed to Extraction Point
5 Plant Charges in Ammo Bunker with Roebuck
Page 4© 2008 IGN Entertainment, Inc.
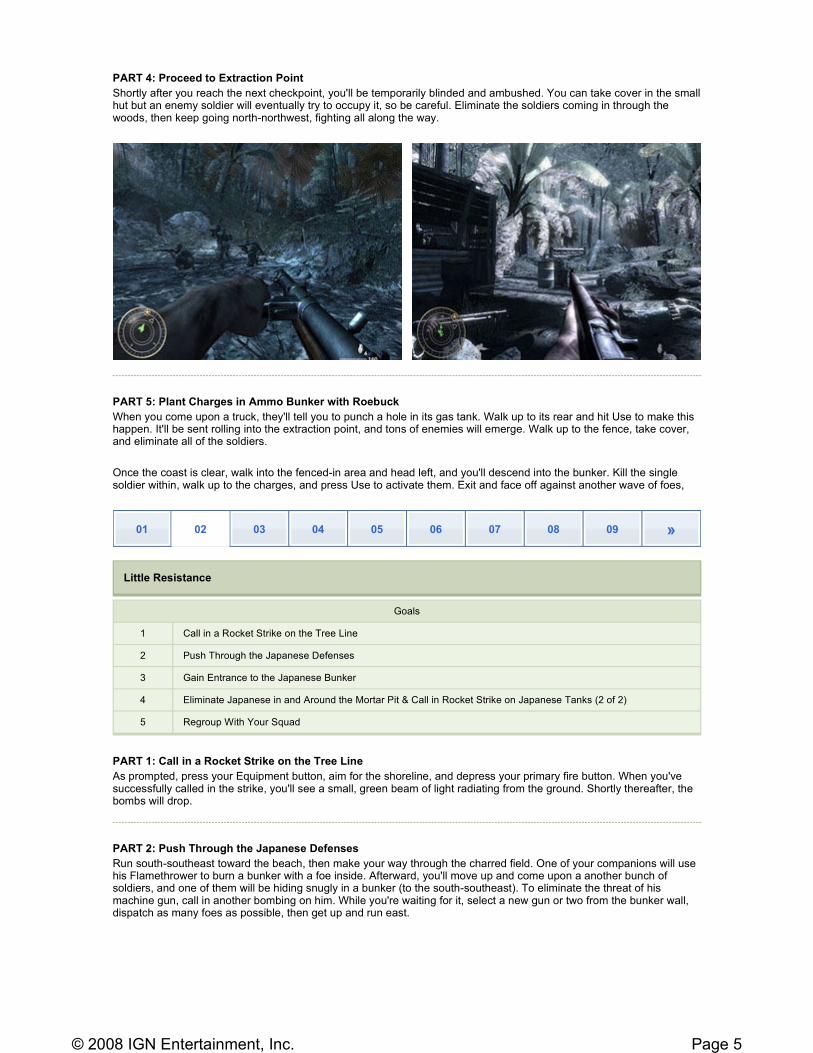
PART 4: Proceed to Extraction Point Shortly after you reach the next checkpoint, you'll be temporarily blinded and ambushed. You can take cover in the small hut but an enemy soldier will eventually try to occupy it, so be careful. Eliminate the soldiers coming in through the woods, then keep going north-northwest, fighting all along the way.
PART 5: Plant Charges in Ammo Bunker with Roebuck When you come upon a truck, they'll tell you to punch a hole in its gas tank. Walk up to its rear and hit Use to make this happen. It'll be sent rolling into the extraction point, and tons of enemies will emerge. Walk up to the fence, take cover, and eliminate all of the soldiers.
Once the coast is clear, walk into the fenced-in area and head left, and you'll descend into the bunker. Kill the single soldier within, walk up to the charges, and press Use to activate them. Exit and face off against another wave of foes,
PART 1: Call in a Rocket Strike on the Tree Line As prompted, press your Equipment button, aim for the shoreline, and depress your primary fire button. When you've successfully called in the strike, you'll see a small, green beam of light radiating from the ground. Shortly thereafter, the bombs will drop.
PART 2: Push Through the Japanese Defenses Run south-southeast toward the beach, then make your way through the charred field. One of your companions will use his Flamethrower to burn a bunker with a foe inside. Afterward, you'll move up and come upon a another bunch of soldiers, and one of them will be hiding snugly in a bunker (to the south-southeast). To eliminate the threat of his machine gun, call in another bombing on him. While you're waiting for it, select a new gun or two from the bunker wall, dispatch as many foes as possible, then get up and run east.
01 02 03 04 05 06 07 08 09 »
Little Resistance
Goals
1 Call in a Rocket Strike on the Tree Line
2 Push Through the Japanese Defenses
3 Gain Entrance to the Japanese Bunker
4 Eliminate Japanese in and Around the Mortar Pit & Call in Rocket Strike on Japanese Tanks (2 of 2)
5 Regroup With Your Squad
Page 5© 2008 IGN Entertainment, Inc.
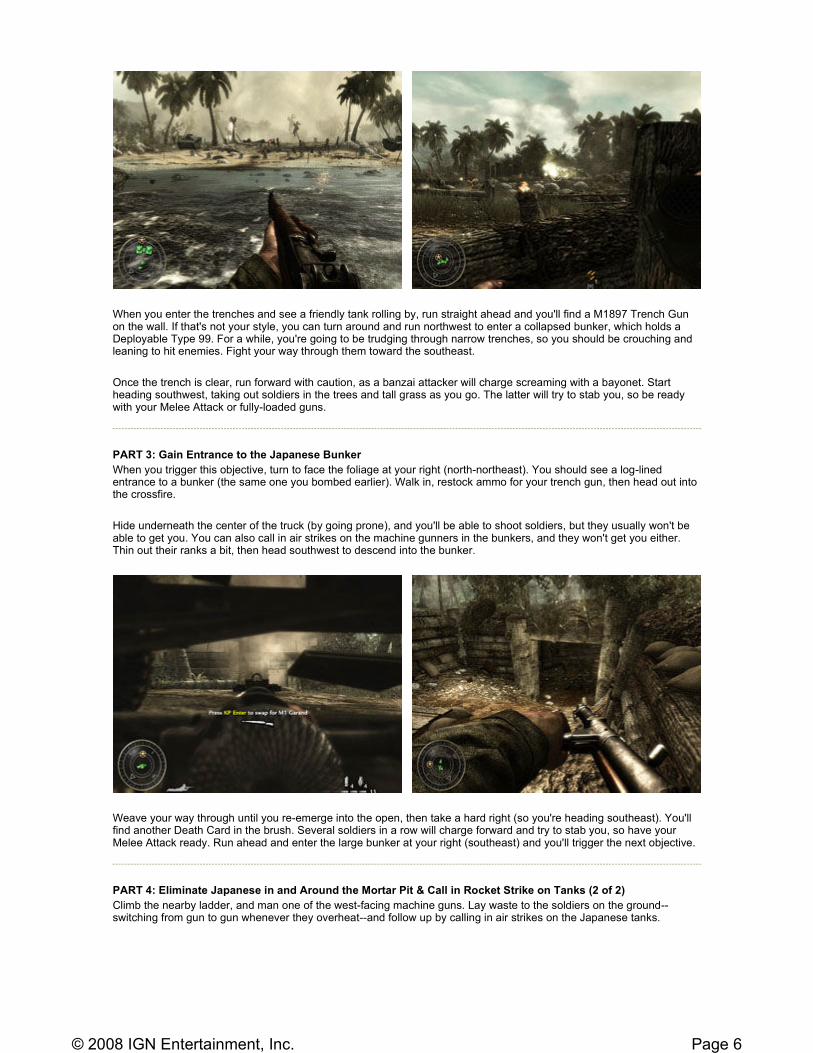
When you enter the trenches and see a friendly tank rolling by, run straight ahead and you'll find a M1897 Trench Gun on the wall. If that's not your style, you can turn around and run northwest to enter a collapsed bunker, which holds a Deployable Type 99. For a while, you're going to be trudging through narrow trenches, so you should be crouching and leaning to hit enemies. Fight your way through them toward the southeast.
Once the trench is clear, run forward with caution, as a banzai attacker will charge screaming with a bayonet. Start heading southwest, taking out soldiers in the trees and tall grass as you go. The latter will try to stab you, so be ready with your Melee Attack or fully-loaded guns.
PART 3: Gain Entrance to the Japanese Bunker When you trigger this objective, turn to face the foliage at your right (north-northeast). You should see a log-lined entrance to a bunker (the same one you bombed earlier). Walk in, restock ammo for your trench gun, then head out into the crossfire.
Hide underneath the center of the truck (by going prone), and you'll be able to shoot soldiers, but they usually won't be able to get you. You can also call in air strikes on the machine gunners in the bunkers, and they won't get you either. Thin out their ranks a bit, then head southwest to descend into the bunker.
Weave your way through until you re-emerge into the open, then take a hard right (so you're heading southeast). You'll find another Death Card in the brush. Several soldiers in a row will charge forward and try to stab you, so have your Melee Attack ready. Run ahead and enter the large bunker at your right (southeast) and you'll trigger the next objective.
PART 4: Eliminate Japanese in and Around the Mortar Pit & Call in Rocket Strike on Tanks (2 of 2) Climb the nearby ladder, and man one of the west-facing machine guns. Lay waste to the soldiers on the ground--switching from gun to gun whenever they overheat--and follow up by calling in air strikes on the Japanese tanks.
Page 6© 2008 IGN Entertainment, Inc.

PART 5: Regroup With Your Squad Proceed to the emblem on your map, then watch the resultant cut scene.
PART 1: Flank Japanese Artillery Positions Slowly walk forward with your teammates until you reach the first checkpoint, which is near a smoldering plane. Wait for it to be inspected, then fight back against the soldiers who run out of the brush to your right (north). When the fight is over, run all around the area to pick up any ammo hidden by the water.
Fight your way through, and follow the winding waterway until you're heading west. Wait for your comrades to throw grenades, then climb the hill.
PART 2: Assault the Bunkers When you've reached the top of the hill, look left. You'll see a big, steel-blue field gun. On the ground near it, there are several Type 100s which you can collect. After gathering them, find cover nearby. The fencing and crates work well enough, but you should use leaning to shoot from behind them, as anything else leaves you open to enemy fire.
Once you've killed off enough enemies to move forward, proceed southwest to the center of the field, where a bunker waits. There are soldiers inside using Type 100s. Mow them down as you walk straight through, pick up their discarded guns (reloading first if needed), and continue southwest.
01 02 03 04 05 06 07 08 09 »
Hard Landing
Goals
1 Flank Japanese Artillery Positions
2 Assault the Bunkers
3 Lay Suppressing Fire on the Bunker
4 Retrieve the Flamethrower & Flame the Bunker
5 Advance Towards the Airfield
6 Clear the Building
7 Get the Bazooka From the Trench & Destroy the Enemy Tanks with Bazookas (3 of 3)
8 Assault the Anti-Aircraft Bunker
9 Take Out the AA Crews (4 of 4) & Secure the AA Bunker
10 Defend Against the Counterattack
Page 7© 2008 IGN Entertainment, Inc.
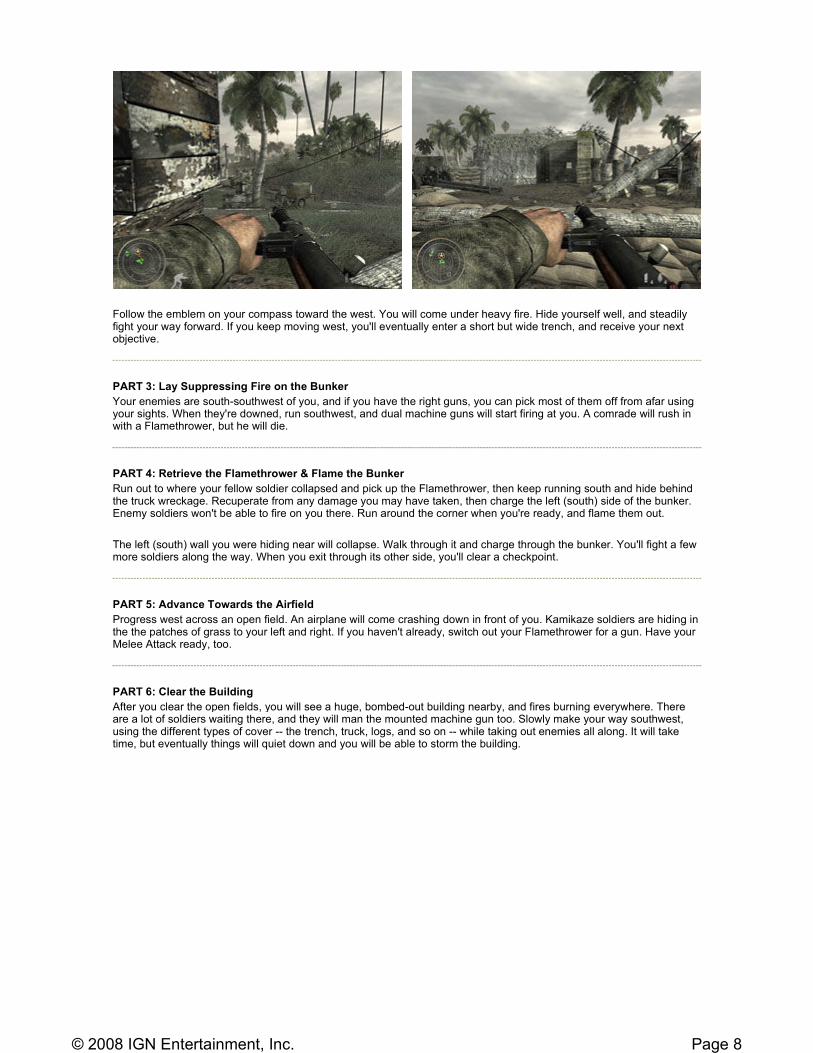
Follow the emblem on your compass toward the west. You will come under heavy fire. Hide yourself well, and steadily fight your way forward. If you keep moving west, you'll eventually enter a short but wide trench, and receive your next objective.
PART 3: Lay Suppressing Fire on the Bunker Your enemies are south-southwest of you, and if you have the right guns, you can pick most of them off from afar using your sights. When they're downed, run southwest, and dual machine guns will start firing at you. A comrade will rush in with a Flamethrower, but he will die.
PART 4: Retrieve the Flamethrower & Flame the Bunker Run out to where your fellow soldier collapsed and pick up the Flamethrower, then keep running south and hide behind the truck wreckage. Recuperate from any damage you may have taken, then charge the left (south) side of the bunker. Enemy soldiers won't be able to fire on you there. Run around the corner when you're ready, and flame them out.
The left (south) wall you were hiding near will collapse. Walk through it and charge through the bunker. You'll fight a few more soldiers along the way. When you exit through its other side, you'll clear a checkpoint.
PART 5: Advance Towards the Airfield Progress west across an open field. An airplane will come crashing down in front of you. Kamikaze soldiers are hiding in the the patches of grass to your left and right. If you haven't already, switch out your Flamethrower for a gun. Have your Melee Attack ready, too.
PART 6: Clear the Building After you clear the open fields, you will see a huge, bombed-out building nearby, and fires burning everywhere. There are a lot of soldiers waiting there, and they will man the mounted machine gun too. Slowly make your way southwest, using the different types of cover -- the trench, truck, logs, and so on -- while taking out enemies all along. It will take time, but eventually things will quiet down and you will be able to storm the building.
Page 8© 2008 IGN Entertainment, Inc.
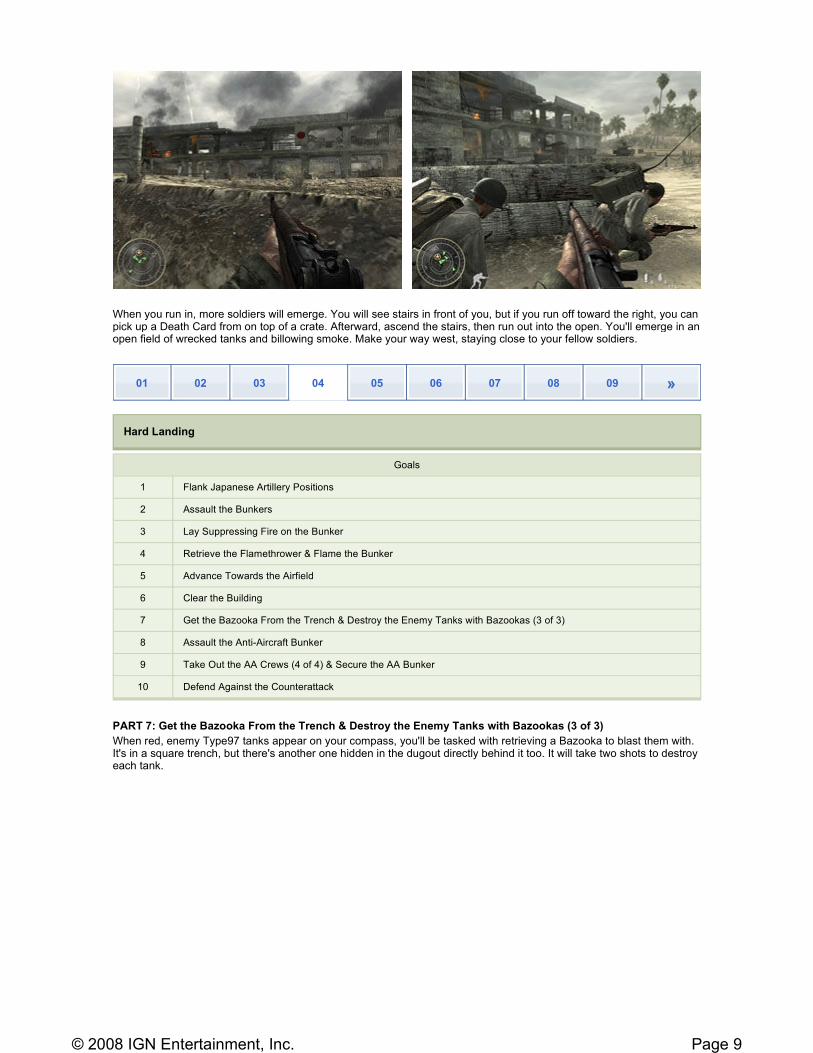
When you run in, more soldiers will emerge. You will see stairs in front of you, but if you run off toward the right, you can pick up a Death Card from on top of a crate. Afterward, ascend the stairs, then run out into the open. You'll emerge in an open field of wrecked tanks and billowing smoke. Make your way west, staying close to your fellow soldiers.
PART 7: Get the Bazooka From the Trench & Destroy the Enemy Tanks with Bazookas (3 of 3) When red, enemy Type97 tanks appear on your compass, you'll be tasked with retrieving a Bazooka to blast them with. It's in a square trench, but there's another one hidden in the dugout directly behind it too. It will take two shots to destroy each tank.
01 02 03 04 05 06 07 08 09 »
Hard Landing
Goals
1 Flank Japanese Artillery Positions
2 Assault the Bunkers
3 Lay Suppressing Fire on the Bunker
4 Retrieve the Flamethrower & Flame the Bunker
5 Advance Towards the Airfield
6 Clear the Building
7 Get the Bazooka From the Trench & Destroy the Enemy Tanks with Bazookas (3 of 3)
8 Assault the Anti-Aircraft Bunker
9 Take Out the AA Crews (4 of 4) & Secure the AA Bunker
10 Defend Against the Counterattack
Page 9© 2008 IGN Entertainment, Inc.
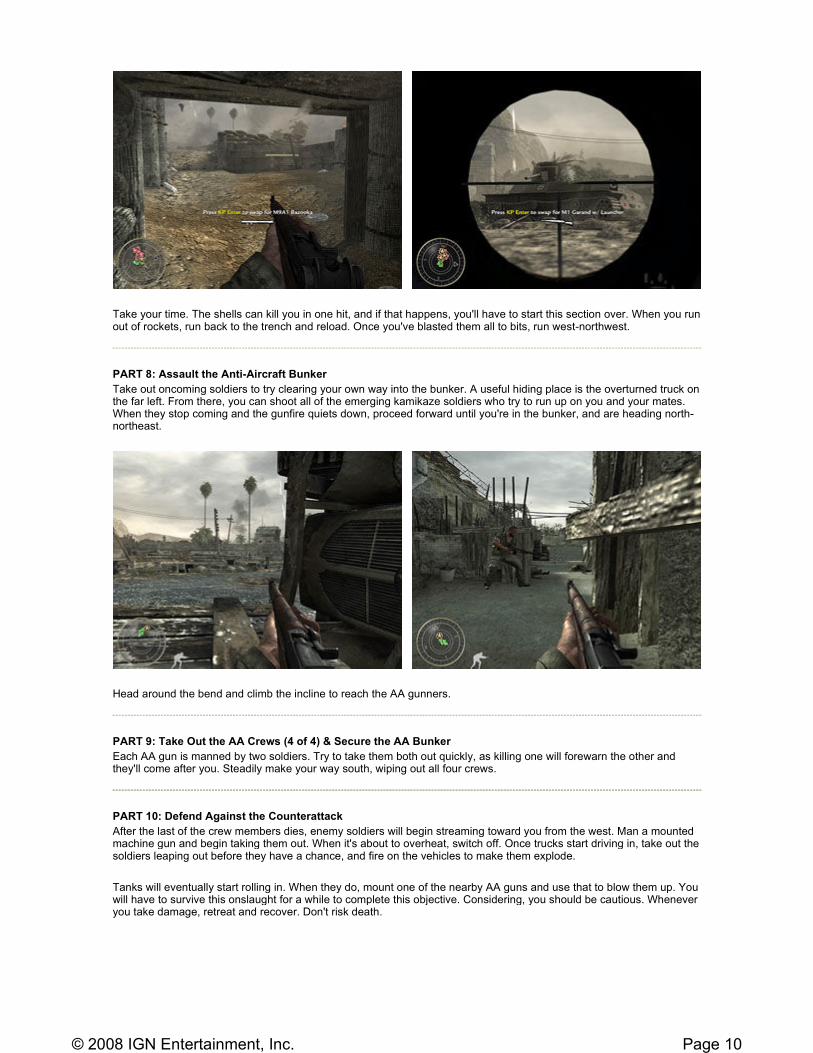
Take your time. The shells can kill you in one hit, and if that happens, you'll have to start this section over. When you run out of rockets, run back to the trench and reload. Once you've blasted them all to bits, run west-northwest.
PART 8: Assault the Anti-Aircraft Bunker Take out oncoming soldiers to try clearing your own way into the bunker. A useful hiding place is the overturned truck on the far left. From there, you can shoot all of the emerging kamikaze soldiers who try to run up on you and your mates. When they stop coming and the gunfire quiets down, proceed forward until you're in the bunker, and are heading north-northeast.
Head around the bend and climb the incline to reach the AA gunners.
PART 9: Take Out the AA Crews (4 of 4) & Secure the AA Bunker Each AA gun is manned by two soldiers. Try to take them both out quickly, as killing one will forewarn the other and they'll come after you. Steadily make your way south, wiping out all four crews.
PART 10: Defend Against the Counterattack After the last of the crew members dies, enemy soldiers will begin streaming toward you from the west. Man a mounted machine gun and begin taking them out. When it's about to overheat, switch off. Once trucks start driving in, take out the soldiers leaping out before they have a chance, and fire on the vehicles to make them explode.
Tanks will eventually start rolling in. When they do, mount one of the nearby AA guns and use that to blow them up. You will have to survive this onslaught for a while to complete this objective. Considering, you should be cautious. Whenever you take damage, retreat and recover. Don't risk death.
Page 10© 2008 IGN Entertainment, Inc.
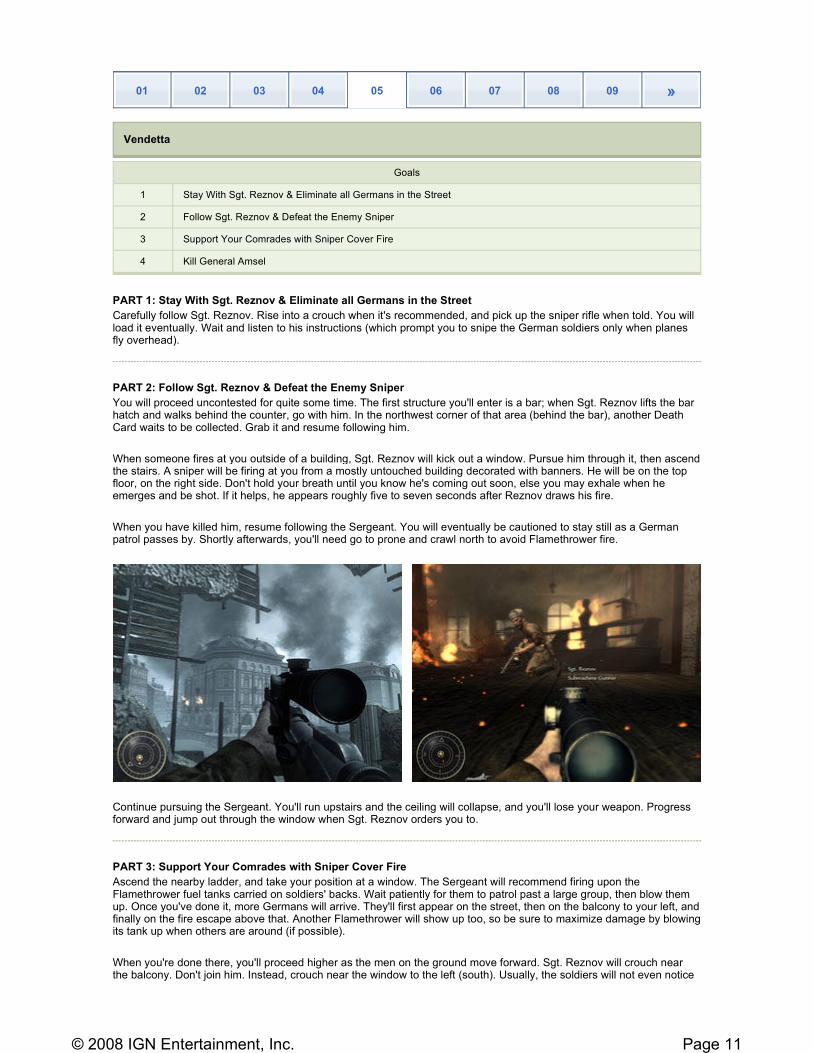
PART 1: Stay With Sgt. Reznov & Eliminate all Germans in the Street Carefully follow Sgt. Reznov. Rise into a crouch when it's recommended, and pick up the sniper rifle when told. You will load it eventually. Wait and listen to his instructions (which prompt you to snipe the German soldiers only when planes fly overhead).
PART 2: Follow Sgt. Reznov & Defeat the Enemy Sniper You will proceed uncontested for quite some time. The first structure you'll enter is a bar; when Sgt. Reznov lifts the bar hatch and walks behind the counter, go with him. In the northwest corner of that area (behind the bar), another Death Card waits to be collected. Grab it and resume following him.
When someone fires at you outside of a building, Sgt. Reznov will kick out a window. Pursue him through it, then ascend the stairs. A sniper will be firing at you from a mostly untouched building decorated with banners. He will be on the top floor, on the right side. Don't hold your breath until you know he's coming out soon, else you may exhale when he emerges and be shot. If it helps, he appears roughly five to seven seconds after Reznov draws his fire.
When you have killed him, resume following the Sergeant. You will eventually be cautioned to stay still as a German patrol passes by. Shortly afterwards, you'll need go to prone and crawl north to avoid Flamethrower fire.
Continue pursuing the Sergeant. You'll run upstairs and the ceiling will collapse, and you'll lose your weapon. Progress forward and jump out through the window when Sgt. Reznov orders you to.
PART 3: Support Your Comrades with Sniper Cover Fire Ascend the nearby ladder, and take your position at a window. The Sergeant will recommend firing upon the Flamethrower fuel tanks carried on soldiers' backs. Wait patiently for them to patrol past a large group, then blow them up. Once you've done it, more Germans will arrive. They'll first appear on the street, then on the balcony to your left, and finally on the fire escape above that. Another Flamethrower will show up too, so be sure to maximize damage by blowing its tank up when others are around (if possible).
When you're done there, you'll proceed higher as the men on the ground move forward. Sgt. Reznov will crouch near the balcony. Don't join him. Instead, crouch near the window to the left (south). Usually, the soldiers will not even notice
01 02 03 04 05 06 07 08 09 »
Vendetta
Goals
1 Stay With Sgt. Reznov & Eliminate all Germans in the Street
2 Follow Sgt. Reznov & Defeat the Enemy Sniper
3 Support Your Comrades with Sniper Cover Fire
4 Kill General Amsel
Page 11© 2008 IGN Entertainment, Inc.
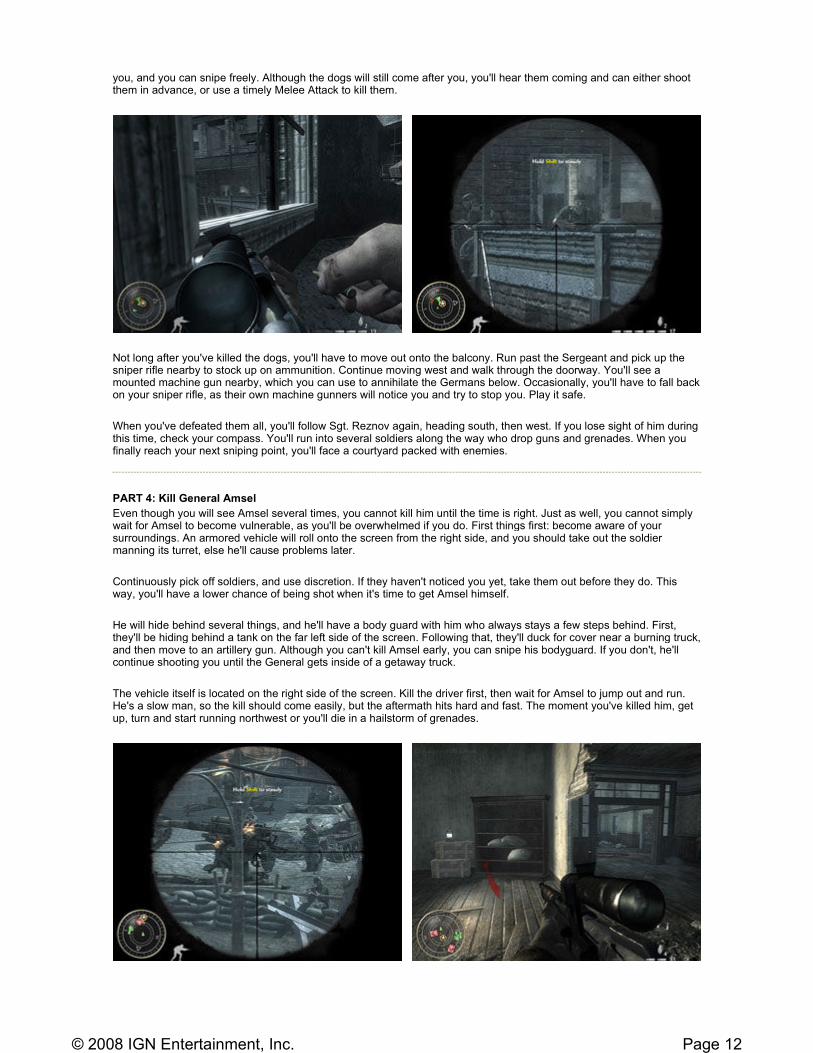
you, and you can snipe freely. Although the dogs will still come after you, you'll hear them coming and can either shoot them in advance, or use a timely Melee Attack to kill them.
Not long after you've killed the dogs, you'll have to move out onto the balcony. Run past the Sergeant and pick up the sniper rifle nearby to stock up on ammunition. Continue moving west and walk through the doorway. You'll see a mounted machine gun nearby, which you can use to annihilate the Germans below. Occasionally, you'll have to fall back on your sniper rifle, as their own machine gunners will notice you and try to stop you. Play it safe.
When you've defeated them all, you'll follow Sgt. Reznov again, heading south, then west. If you lose sight of him during this time, check your compass. You'll run into several soldiers along the way who drop guns and grenades. When you finally reach your next sniping point, you'll face a courtyard packed with enemies.
PART 4: Kill General Amsel Even though you will see Amsel several times, you cannot kill him until the time is right. Just as well, you cannot simply wait for Amsel to become vulnerable, as you'll be overwhelmed if you do. First things first: become aware of your surroundings. An armored vehicle will roll onto the screen from the right side, and you should take out the soldier manning its turret, else he'll cause problems later.
Continuously pick off soldiers, and use discretion. If they haven't noticed you yet, take them out before they do. This way, you'll have a lower chance of being shot when it's time to get Amsel himself.
He will hide behind several things, and he'll have a body guard with him who always stays a few steps behind. First, they'll be hiding behind a tank on the far left side of the screen. Following that, they'll duck for cover near a burning truck, and then move to an artillery gun. Although you can't kill Amsel early, you can snipe his bodyguard. If you don't, he'll continue shooting you until the General gets inside of a getaway truck.
The vehicle itself is located on the right side of the screen. Kill the driver first, then wait for Amsel to jump out and run. He's a slow man, so the kill should come easily, but the aftermath hits hard and fast. The moment you've killed him, get up, turn and start running northwest or you'll die in a hailstorm of grenades.
Page 12© 2008 IGN Entertainment, Inc.
Keep on running after the Sergeant, as the star emblem on your compass is no longer useful. You'll eventually come to a window and--once again--you'll have to jump.
PART 1: Advance to the River When the opening scene concludes, search the room for potential weapon replacements. You'll have to leave and start heading north-northwest, but you should examine the crates in the grassy field along the way, as you'll find three PPSh-41s. They'll give you plenty of ammunition, which you'll need.
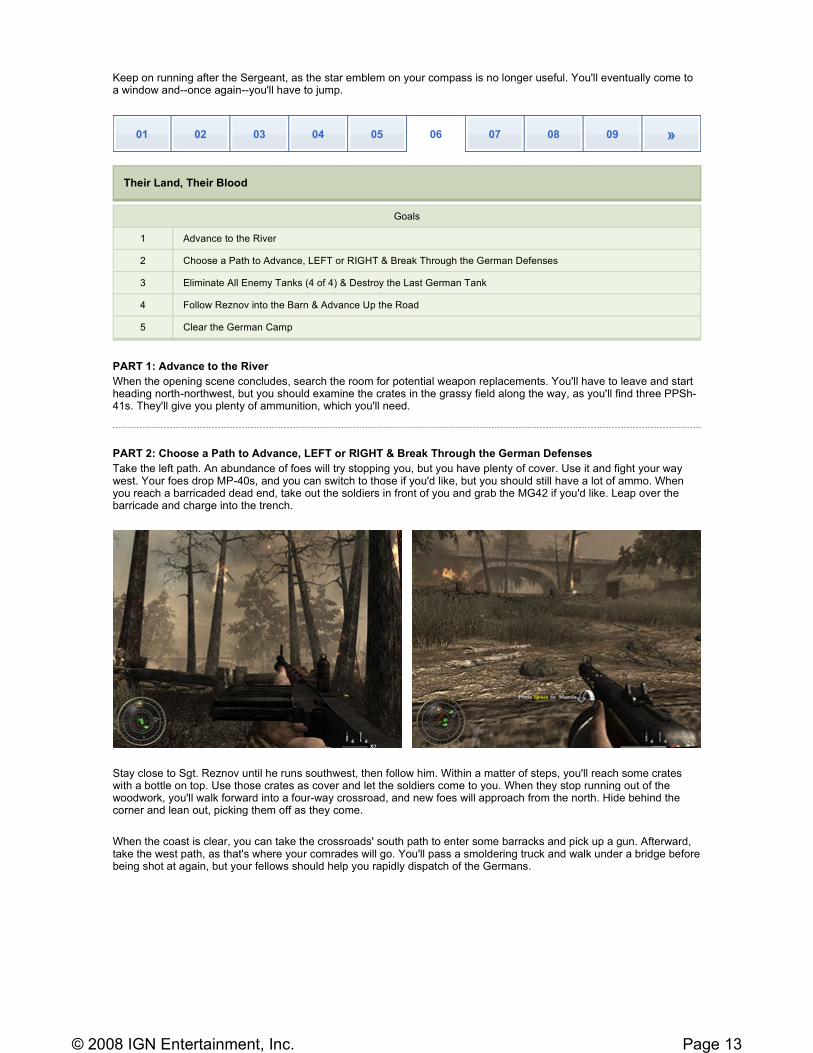
PART 2: Choose a Path to Advance, LEFT or RIGHT & Break Through the German Defenses Take the left path. An abundance of foes will try stopping you, but you have plenty of cover. Use it and fight your way west. Your foes drop MP-40s, and you can switch to those if you'd like, but you should still have a lot of ammo. When you reach a barricaded dead end, take out the soldiers in front of you and grab the MG42 if you'd like. Leap over the barricade and charge into the trench.
Stay close to Sgt. Reznov until he runs southwest, then follow him. Within a matter of steps, you'll reach some crates with a bottle on top. Use those crates as cover and let the soldiers come to you. When they stop running out of the woodwork, you'll walk forward into a four-way crossroad, and new foes will approach from the north. Hide behind the corner and lean out, picking them off as they come.
When the coast is clear, you can take the crossroads' south path to enter some barracks and pick up a gun. Afterward, take the west path, as that's where your comrades will go. You'll pass a smoldering truck and walk under a bridge before being shot at again, but your fellows should help you rapidly dispatch of the Germans.
01 02 03 04 05 06 07 08 09 »
Their Land, Their Blood
Goals
1 Advance to the River
2 Choose a Path to Advance, LEFT or RIGHT & Break Through the German Defenses
3 Eliminate All Enemy Tanks (4 of 4) & Destroy the Last German Tank
4 Follow Reznov into the Barn & Advance Up the Road
5 Clear the German Camp
Page 13© 2008 IGN Entertainment, Inc.
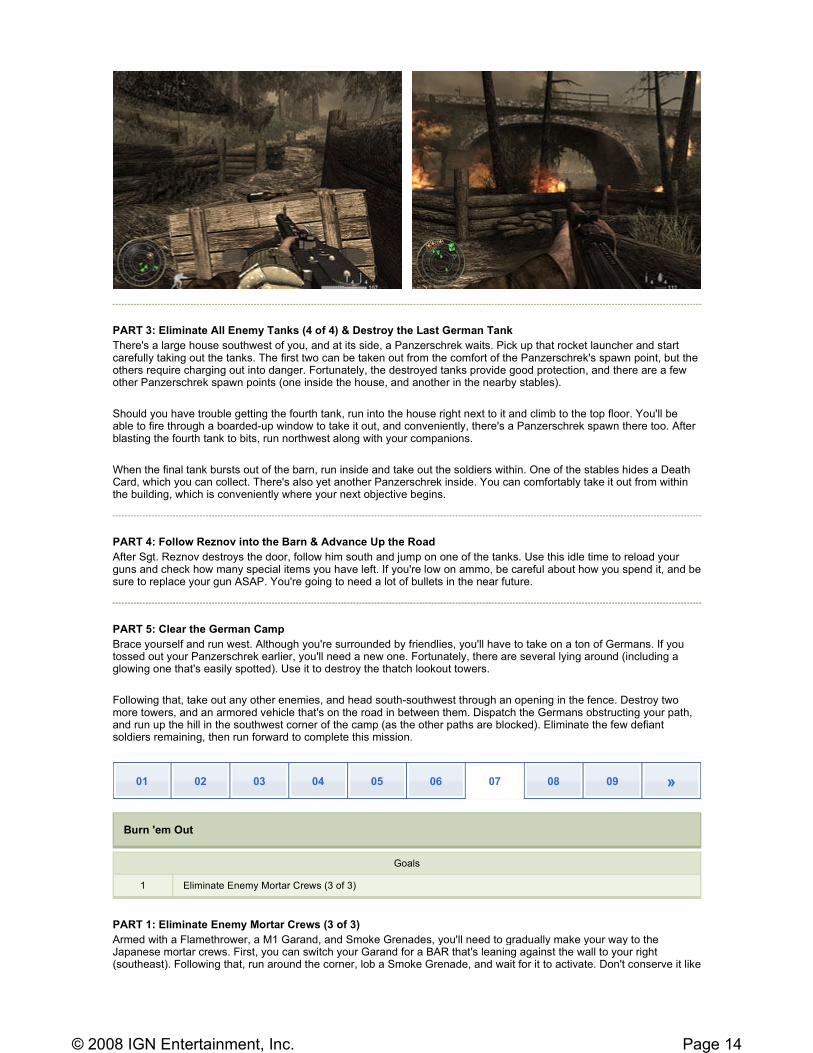
PART 3: Eliminate All Enemy Tanks (4 of 4) & Destroy the Last German Tank There's a large house southwest of you, and at its side, a Panzerschrek waits. Pick up that rocket launcher and start carefully taking out the tanks. The first two can be taken out from the comfort of the Panzerschrek's spawn point, but the others require charging out into danger. Fortunately, the destroyed tanks provide good protection, and there are a few other Panzerschrek spawn points (one inside the house, and another in the nearby stables).
Should you have trouble getting the fourth tank, run into the house right next to it and climb to the top floor. You'll be able to fire through a boarded-up window to take it out, and conveniently, there's a Panzerschrek spawn there too. After blasting the fourth tank to bits, run northwest along with your companions.
When the final tank bursts out of the barn, run inside and take out the soldiers within. One of the stables hides a Death Card, which you can collect. There's also yet another Panzerschrek inside. You can comfortably take it out from within the building, which is conveniently where your next objective begins.
PART 4: Follow Reznov into the Barn & Advance Up the Road After Sgt. Reznov destroys the door, follow him south and jump on one of the tanks. Use this idle time to reload your guns and check how many special items you have left. If you're low on ammo, be careful about how you spend it, and be sure to replace your gun ASAP. You're going to need a lot of bullets in the near future.
PART 5: Clear the German Camp Brace yourself and run west. Although you're surrounded by friendlies, you'll have to take on a ton of Germans. If you tossed out your Panzerschrek earlier, you'll need a new one. Fortunately, there are several lying around (including a glowing one that's easily spotted). Use it to destroy the thatch lookout towers.
Following that, take out any other enemies, and head south-southwest through an opening in the fence. Destroy two more towers, and an armored vehicle that's on the road in between them. Dispatch the Germans obstructing your path, and run up the hill in the southwest corner of the camp (as the other paths are blocked). Eliminate the few defiant soldiers remaining, then run forward to complete this mission.
PART 1: Eliminate Enemy Mortar Crews (3 of 3) Armed with a Flamethrower, a M1 Garand, and Smoke Grenades, you'll need to gradually make your way to the Japanese mortar crews. First, you can switch your Garand for a BAR that's leaning against the wall to your right (southeast). Following that, run around the corner, lob a Smoke Grenade, and wait for it to activate. Don't conserve it like
01 02 03 04 05 06 07 08 09 »
Burn 'em Out
Goals
1 Eliminate Enemy Mortar Crews (3 of 3)
Page 14© 2008 IGN Entertainment, Inc.
a worry-wart, as its protection against the upcoming slew of enemies is invaluable. Against them, you should use a normal gun, since your Flamethrower's range is limited. Use the exploding red barrels to your advantage, too.
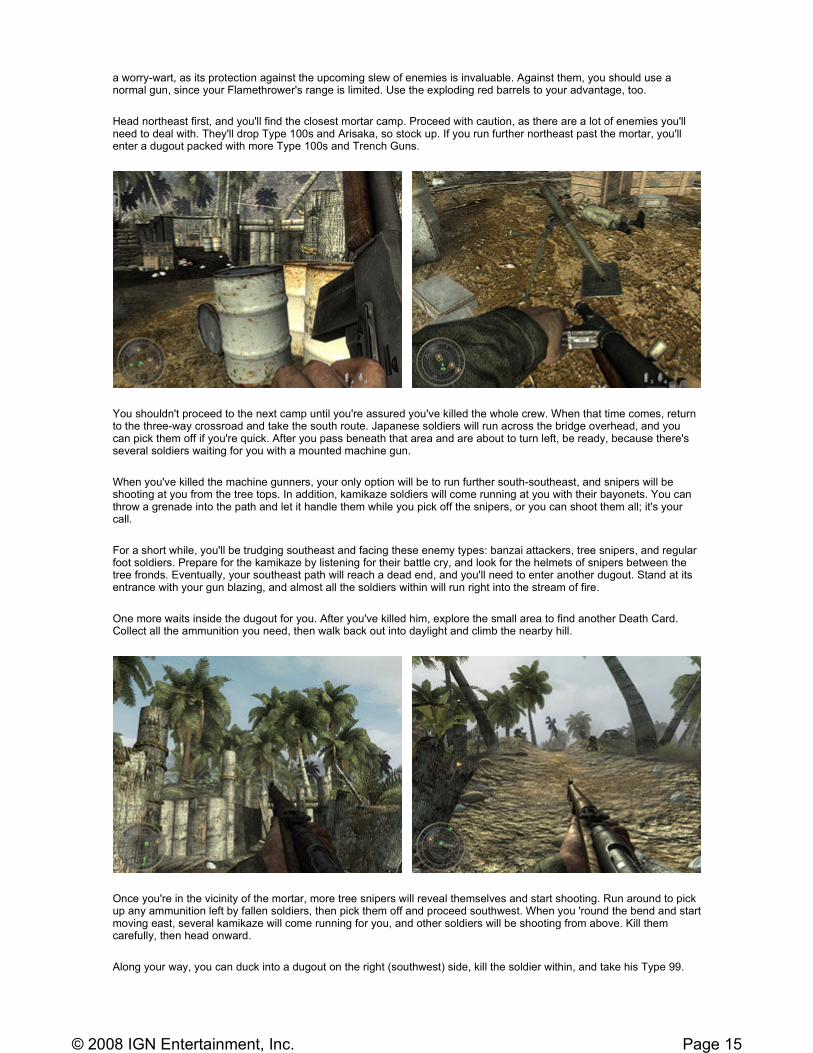
Head northeast first, and you'll find the closest mortar camp. Proceed with caution, as there are a lot of enemies you'll need to deal with. They'll drop Type 100s and Arisaka, so stock up. If you run further northeast past the mortar, you'll enter a dugout packed with more Type 100s and Trench Guns.
You shouldn't proceed to the next camp until you're assured you've killed the whole crew. When that time comes, return to the three-way crossroad and take the south route. Japanese soldiers will run across the bridge overhead, and you can pick them off if you're quick. After you pass beneath that area and are about to turn left, be ready, because there's several soldiers waiting for you with a mounted machine gun.
When you've killed the machine gunners, your only option will be to run further south-southeast, and snipers will be shooting at you from the tree tops. In addition, kamikaze soldiers will come running at you with their bayonets. You can throw a grenade into the path and let it handle them while you pick off the snipers, or you can shoot them all; it's your call.
For a short while, you'll be trudging southeast and facing these enemy types: banzai attackers, tree snipers, and regular foot soldiers. Prepare for the kamikaze by listening for their battle cry, and look for the helmets of snipers between the tree fronds. Eventually, your southeast path will reach a dead end, and you'll need to enter another dugout. Stand at its entrance with your gun blazing, and almost all the soldiers within will run right into the stream of fire.
One more waits inside the dugout for you. After you've killed him, explore the small area to find another Death Card. Collect all the ammunition you need, then walk back out into daylight and climb the nearby hill.
Once you're in the vicinity of the mortar, more tree snipers will reveal themselves and start shooting. Run around to pick up any ammunition left by fallen soldiers, then pick them off and proceed southwest. When you 'round the bend and start moving east, several kamikaze will come running for you, and other soldiers will be shooting from above. Kill them carefully, then head onward.
Along your way, you can duck into a dugout on the right (southwest) side, kill the soldier within, and take his Type 99.
Page 15© 2008 IGN Entertainment, Inc.
You'll have to kill a lot of soldiers camping up above the trenches, so its firepower may be useful, but it doesn't have many bullets. There's another one up ahead, but it probably won't last till you reach it. Regardless, progress to the circular area with the mortar in its middle, and use a Smoke Grenade. A lot of enemies will come after you, so you should try to stay covered at all times.
When you've cleared the area, begin heading southwest. Kamikaze soldiers will run toward you from the dugout at your left. Kill them, then explore the dugout to find another Type 99. Exit and continue along the path to the next crew. You'll be trudging through an underground area with water, and there are a lot of soldiers packed inside (several carry Type 99s). Additionally, there's an opening in the ceiling where more will shoot at you from above. It goes without saying, but proceed with caution.
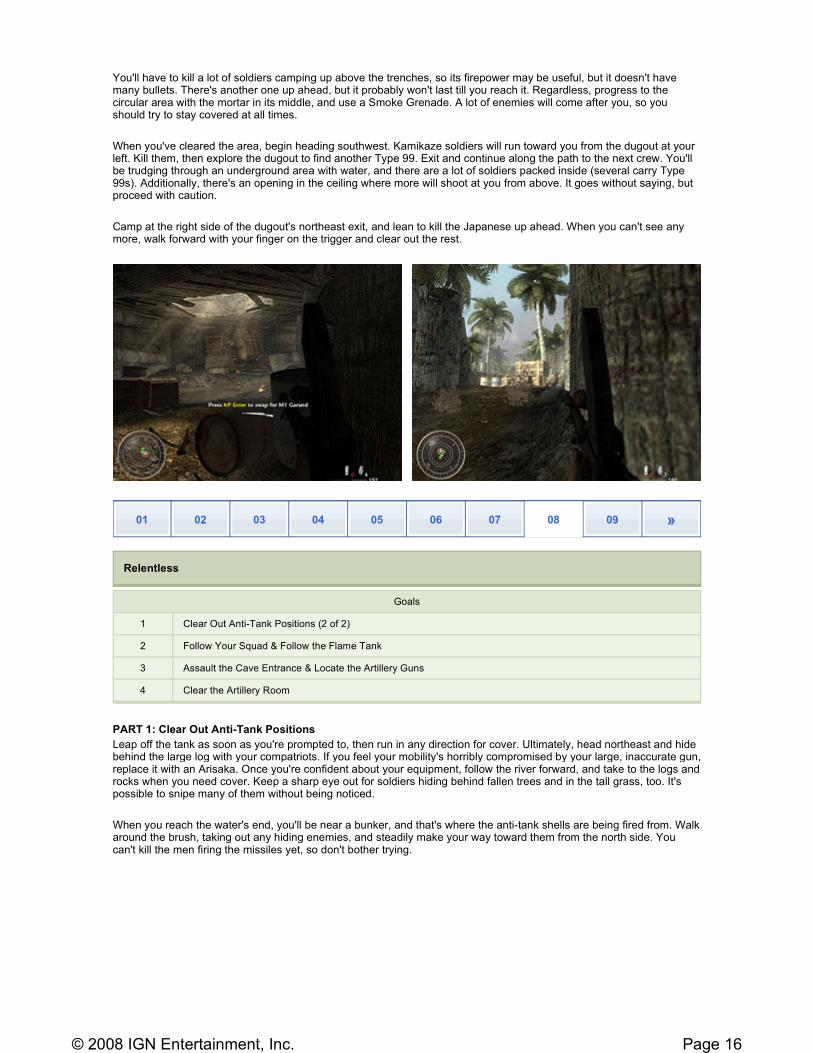
Camp at the right side of the dugout's northeast exit, and lean to kill the Japanese up ahead. When you can't see any more, walk forward with your finger on the trigger and clear out the rest.
PART 1: Clear Out Anti-Tank Positions Leap off the tank as soon as you're prompted to, then run in any direction for cover. Ultimately, head northeast and hide behind the large log with your compatriots. If you feel your mobility's horribly compromised by your large, inaccurate gun, replace it with an Arisaka. Once you're confident about your equipment, follow the river forward, and take to the logs and rocks when you need cover. Keep a sharp eye out for soldiers hiding behind fallen trees and in the tall grass, too. It's possible to snipe many of them without being noticed.
When you reach the water's end, you'll be near a bunker, and that's where the anti-tank shells are being fired from. Walk around the brush, taking out any hiding enemies, and steadily make your way toward them from the north side. You can't kill the men firing the missiles yet, so don't bother trying.
01 02 03 04 05 06 07 08 09 »
Relentless
Goals
1 Clear Out Anti-Tank Positions (2 of 2)
2 Follow Your Squad & Follow the Flame Tank
3 Assault the Cave Entrance & Locate the Artillery Guns
4 Clear the Artillery Room
Page 16© 2008 IGN Entertainment, Inc.
Once you're near the top of the hill, enemies will come running down toward you. You can shoot most of them before they reach a beneficial position. Carefully continue climbing into the anti-tank bunker, staying on the lookout for kamikaze soldiers. Kill off all the enemies around the field gun, and you'll be told you've cleared out the first camp. Before moving on, you can explore the dugout to your left (northeast) to pick up guns.
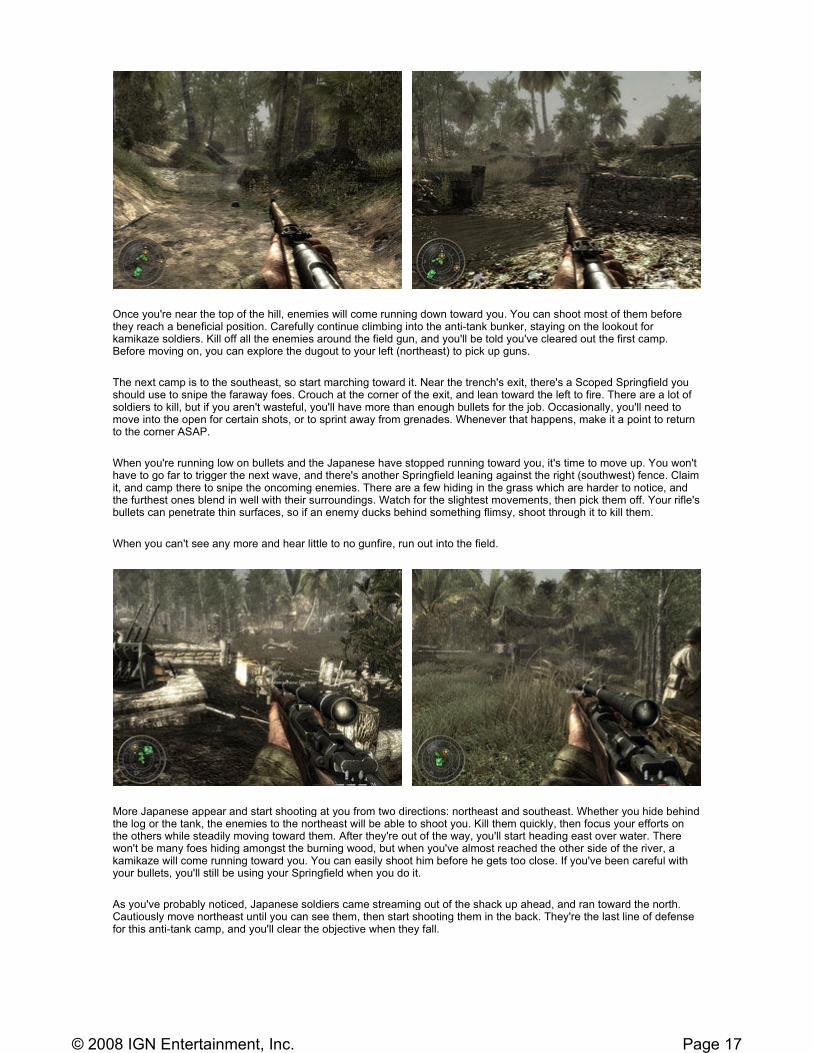
The next camp is to the southeast, so start marching toward it. Near the trench's exit, there's a Scoped Springfield you should use to snipe the faraway foes. Crouch at the corner of the exit, and lean toward the left to fire. There are a lot of soldiers to kill, but if you aren't wasteful, you'll have more than enough bullets for the job. Occasionally, you'll need to move into the open for certain shots, or to sprint away from grenades. Whenever that happens, make it a point to return to the corner ASAP.
When you're running low on bullets and the Japanese have stopped running toward you, it's time to move up. You won't have to go far to trigger the next wave, and there's another Springfield leaning against the right (southwest) fence. Claim it, and camp there to snipe the oncoming enemies. There are a few hiding in the grass which are harder to notice, and the furthest ones blend in well with their surroundings. Watch for the slightest movements, then pick them off. Your rifle's bullets can penetrate thin surfaces, so if an enemy ducks behind something flimsy, shoot through it to kill them.
When you can't see any more and hear little to no gunfire, run out into the field.
More Japanese appear and start shooting at you from two directions: northeast and southeast. Whether you hide behind the log or the tank, the enemies to the northeast will be able to shoot you. Kill them quickly, then focus your efforts on the others while steadily moving toward them. After they're out of the way, you'll start heading east over water. There won't be many foes hiding amongst the burning wood, but when you've almost reached the other side of the river, a kamikaze will come running toward you. You can easily shoot him before he gets too close. If you've been careful with your bullets, you'll still be using your Springfield when you do it.
As you've probably noticed, Japanese soldiers came streaming out of the shack up ahead, and ran toward the north. Cautiously move northeast until you can see them, then start shooting them in the back. They're the last line of defense for this anti-tank camp, and you'll clear the objective when they fall.
Page 17© 2008 IGN Entertainment, Inc.
PART 2: Follow Your Squad & Follow the Flame Tank Stay with your fellows, running northeast. They'll mantle some logs and run down into a trench, but if you have your Springfield still, don't stay down there with them. Wait for the enemies to start emerging, then run back up the hill and snipe them. Eventually, the Flame Tank will start making progress, and your commanding officer will order you to keep up with it. Let it get a bit of a lead on you, as it'll take out enemies as it goes, then follow.
The tank doesn't get far before it's stuck in a dead end. Clear out all of the enemies surrounding it until your objective is marked complete. By now, your Springfield is surely out of bullets, which means a replacement's in order. Run around and collect plenty of ammo before proceeding.
PART 3: Assault the Cave Entrance & Locate the Artillery Guns The cave has two entranceways, but both are very short and lead to the same wide-open room. Either works, but you'll face less opposition if you choose the east-most hall. When you've reached the mouth of the hallway, take cover and start shooting the soldiers within the large room. Most of your compatriots should've taken the west-most path and killed a lot of them for you, which makes your job easier.
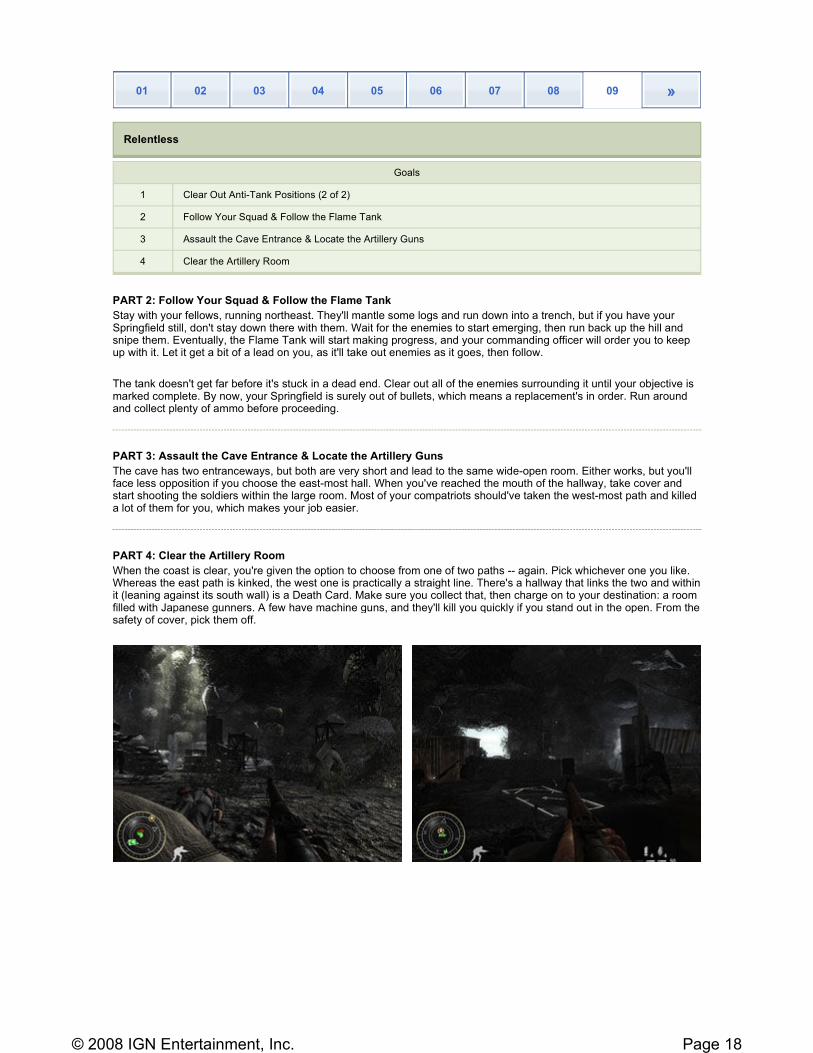
PART 4: Clear the Artillery Room When the coast is clear, you're given the option to choose from one of two paths -- again. Pick whichever one you like. Whereas the east path is kinked, the west one is practically a straight line. There's a hallway that links the two and within it (leaning against its south wall) is a Death Card. Make sure you collect that, then charge on to your destination: a room filled with Japanese gunners. A few have machine guns, and they'll kill you quickly if you stand out in the open. From the safety of cover, pick them off.
01 02 03 04 05 06 07 08 09 »
Relentless
Goals
1 Clear Out Anti-Tank Positions (2 of 2)
2 Follow Your Squad & Follow the Flame Tank
3 Assault the Cave Entrance & Locate the Artillery Guns
4 Clear the Artillery Room
Page 18© 2008 IGN Entertainment, Inc.
PART 1: Neutralize All Enemy Artillery (4 of 4) Get ready for something new: tank driving. When you start rolling northwest, your Sergeant will inform you of your vehicle's functions. Its primary form of fire is shells, but the Grenade button will control your Flame Thrower. You can also use ADS to focus on faraway targets.
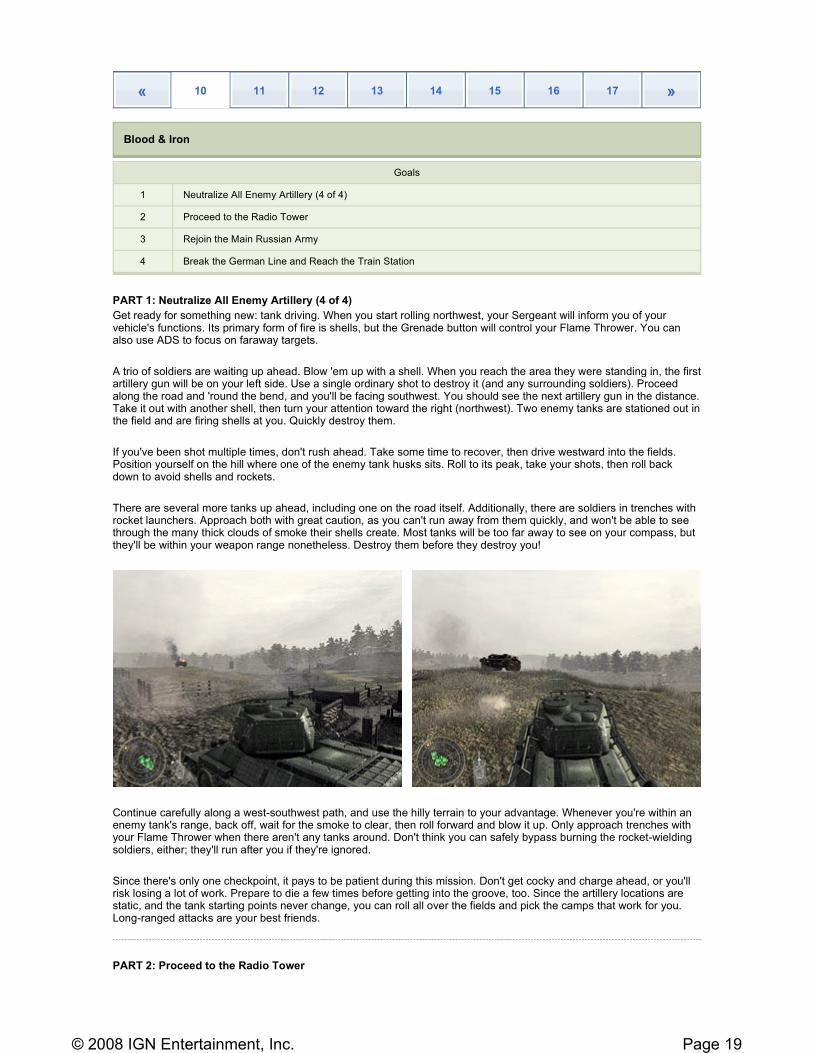
A trio of soldiers are waiting up ahead. Blow 'em up with a shell. When you reach the area they were standing in, the first artillery gun will be on your left side. Use a single ordinary shot to destroy it (and any surrounding soldiers). Proceed along the road and 'round the bend, and you'll be facing southwest. You should see the next artillery gun in the distance. Take it out with another shell, then turn your attention toward the right (northwest). Two enemy tanks are stationed out in the field and are firing shells at you. Quickly destroy them.
If you've been shot multiple times, don't rush ahead. Take some time to recover, then drive westward into the fields. Position yourself on the hill where one of the enemy tank husks sits. Roll to its peak, take your shots, then roll back down to avoid shells and rockets.
There are several more tanks up ahead, including one on the road itself. Additionally, there are soldiers in trenches with rocket launchers. Approach both with great caution, as you can't run away from them quickly, and won't be able to see through the many thick clouds of smoke their shells create. Most tanks will be too far away to see on your compass, but they'll be within your weapon range nonetheless. Destroy them before they destroy you!
Continue carefully along a west-southwest path, and use the hilly terrain to your advantage. Whenever you're within an enemy tank's range, back off, wait for the smoke to clear, then roll forward and blow it up. Only approach trenches with your Flame Thrower when there aren't any tanks around. Don't think you can safely bypass burning the rocket-wielding soldiers, either; they'll run after you if they're ignored.
Since there's only one checkpoint, it pays to be patient during this mission. Don't get cocky and charge ahead, or you'll risk losing a lot of work. Prepare to die a few times before getting into the groove, too. Since the artillery locations are static, and the tank starting points never change, you can roll all over the fields and pick the camps that work for you. Long-ranged attacks are your best friends.
PART 2: Proceed to the Radio Tower
« 10 11 12 13 14 15 16 17 »
Blood & Iron
Goals
1 Neutralize All Enemy Artillery (4 of 4)
2 Proceed to the Radio Tower
3 Rejoin the Main Russian Army
4 Break the German Line and Reach the Train Station
Page 19© 2008 IGN Entertainment, Inc.
Head toward the far northwest corner of the field. Two new tanks will emerge, but their won't be paying attention to you yet, which gives you an advantage. Blow them up, then follow the star emblem on your compass to reach the tower's location. It can be destroyed from afar, and you should explode the three tanks defending it first. If you annihilate the tower quickly -- it takes four shots -- none of the soldiers around it will be able to hit you with their rockets.
PART 3: Rejoin the Main Russian Army Roll back to where the road was, and follow it up a hill toward the northwest. An enemy tank is waiting at the top, so take it out quickly, then roll back down to where you were. Start heading northwest, and hug the west wall as you do. The soldiers running around in the radio tower camp won't be able to hit you, as you'll be out of their range.
It won't be long before you run into two more German tanks, and soldiers with rocket launchers. Dispatch of the tanks from afar, then charge past the soldiers' bunker, as you'll do yourself more harm than good if you bother with them. Keep heading for the emblem on your compass.
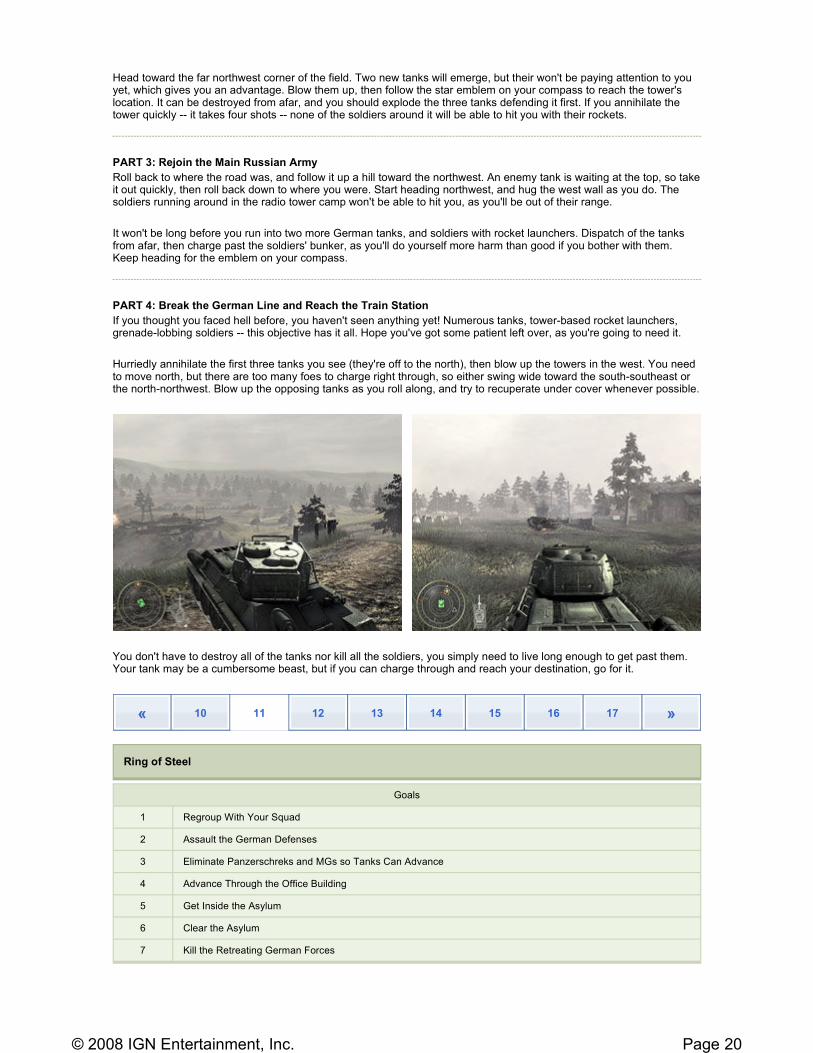
PART 4: Break the German Line and Reach the Train Station If you thought you faced hell before, you haven't seen anything yet! Numerous tanks, tower-based rocket launchers, grenade-lobbing soldiers -- this objective has it all. Hope you've got some patient left over, as you're going to need it.
Hurriedly annihilate the first three tanks you see (they're off to the north), then blow up the towers in the west. You need to move north, but there are too many foes to charge right through, so either swing wide toward the south-southeast or the north-northwest. Blow up the opposing tanks as you roll along, and try to recuperate under cover whenever possible.
You don't have to destroy all of the tanks nor kill all the soldiers, you simply need to live long enough to get past them. Your tank may be a cumbersome beast, but if you can charge through and reach your destination, go for it.
« 10 11 12 13 14 15 16 17 »
Ring of Steel
Goals
1 Regroup With Your Squad
2 Assault the German Defenses
3 Eliminate Panzerschreks and MGs so Tanks Can Advance
4 Advance Through the Office Building
5 Get Inside the Asylum
6 Clear the Asylum
7 Kill the Retreating German Forces
Page 20© 2008 IGN Entertainment, Inc.
PART 1: Regroup With Your Squad When you leave the train, you can look toward the left to find some crates. On top of them are two PPSh-41s. Stock up, then charge ahead to where your comrades are.
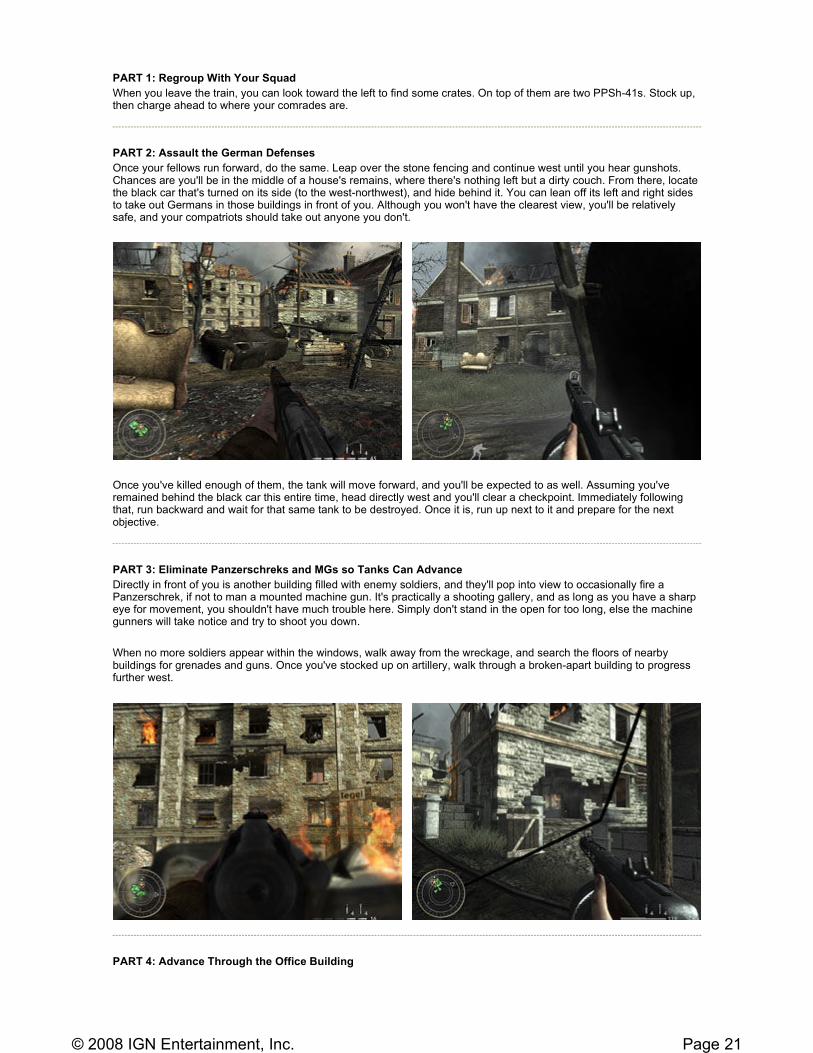
PART 2: Assault the German Defenses Once your fellows run forward, do the same. Leap over the stone fencing and continue west until you hear gunshots. Chances are you'll be in the middle of a house's remains, where there's nothing left but a dirty couch. From there, locate the black car that's turned on its side (to the west-northwest), and hide behind it. You can lean off its left and right sides to take out Germans in those buildings in front of you. Although you won't have the clearest view, you'll be relatively safe, and your compatriots should take out anyone you don't.
Once you've killed enough of them, the tank will move forward, and you'll be expected to as well. Assuming you've remained behind the black car this entire time, head directly west and you'll clear a checkpoint. Immediately following that, run backward and wait for that same tank to be destroyed. Once it is, run up next to it and prepare for the next objective.
PART 3: Eliminate Panzerschreks and MGs so Tanks Can Advance Directly in front of you is another building filled with enemy soldiers, and they'll pop into view to occasionally fire a Panzerschrek, if not to man a mounted machine gun. It's practically a shooting gallery, and as long as you have a sharp eye for movement, you shouldn't have much trouble here. Simply don't stand in the open for too long, else the machine gunners will take notice and try to shoot you down.
When no more soldiers appear within the windows, walk away from the wreckage, and search the floors of nearby buildings for grenades and guns. Once you've stocked up on artillery, walk through a broken-apart building to progress further west.
PART 4: Advance Through the Office Building
Page 21© 2008 IGN Entertainment, Inc.

Follow the star emblem on your compass to locate the nearby office building. When you stroll in, all of your nearby comrades will suddenly charge up the stairs. Go with them. Two soldiers will try stopping you once you've reached the second floor, but your comrades will likely take them out before you've seen them. They'll then crouch in hiding, leaving you to continue moving forward.
Exit through the hole in the building's west side, and follow the fire escape southwest to the next structure. Walk down the stairs, and you'll see friendly soldiers clustered around the door. The nearby tank will plow through a brick fence, which you'll have to head through to proceed.
PART 5: Get Inside the Asylum Directly northwest of you, your destination -- the Asylum -- waits. Before you reach it, many German soldiers will ambush your right (north) flank. Clear them out, take their ammunition, and turn your attention back to the Asylum itself. When you approach, more soldiers will appear in its courtyard and windows, including a machine gunner. Take them out carefully from behind cover, then charge in.
PART 6: Clear the Asylum There are no Germans in the eerily silent courtyard, so run to its southeast corner. A small concrete courtyard waits there, and in its northeast corner lies a dead soldier and a Death Card. From there, trudge through the Asylum alongside your comrades (toward the west). Re-enter the building and walk up to the staircase, and your fellows will run upstairs ahead of you. The Sergeant will suggest grabbing a shotgun, and one waits on a crate in the middle of the staircase. If you've stocked plenty of ammo, don't bother to pick it up (unless you're craving a dangerous change of pace).
Head north until you hear yelling. From there, move east into the bathroom, and a dozen or so enemies will appear. Backtrack to find cover, then begin picking them off. The mist will make it difficult to see, so if you decide to progress inward, gradually make your way toward the southeast. Keep an eye out for a mounted machine gun--if you're outdoors, you've run too far--and use it to take out Germans directly across from you.
« 10 11 12 13 14 15 16 17 »
Ring of Steel
Goals
1 Regroup With Your Squad
2 Assault the German Defenses
3 Eliminate Panzerschreks and MGs so Tanks Can Advance
4 Advance Through the Office Building
5 Get Inside the Asylum
6 Clear the Asylum
7 Kill the Retreating German Forces
Page 22© 2008 IGN Entertainment, Inc.
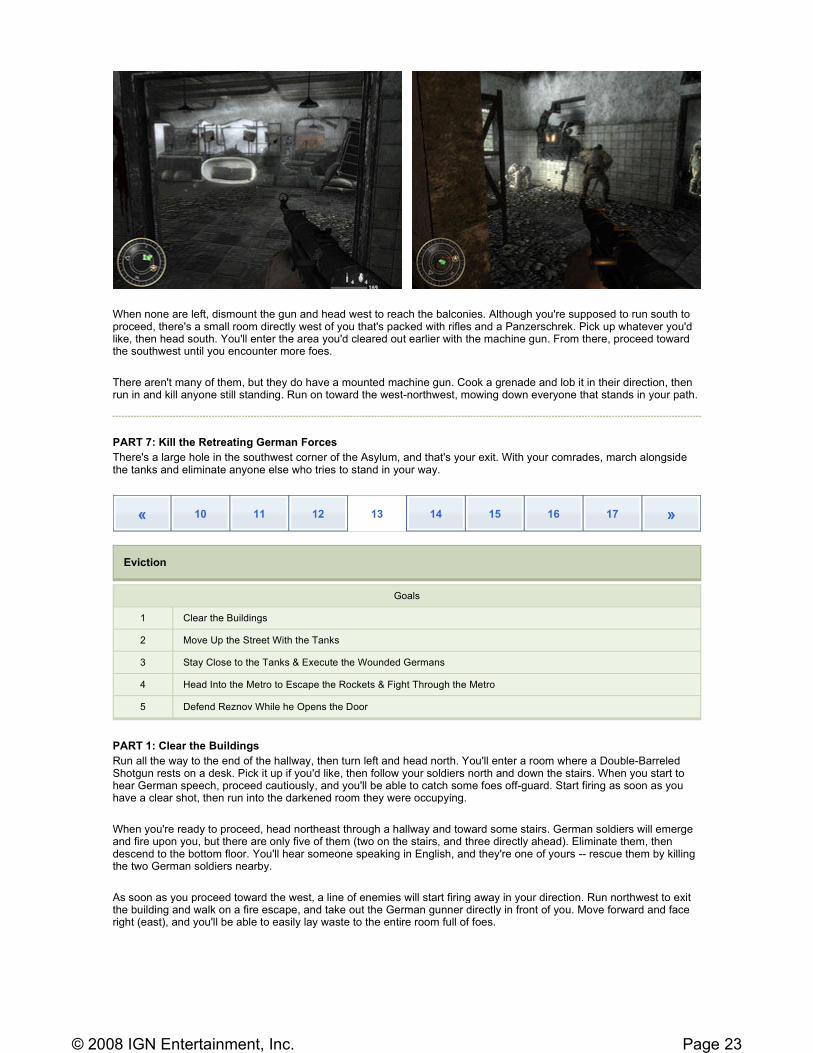
When none are left, dismount the gun and head west to reach the balconies. Although you're supposed to run south to proceed, there's a small room directly west of you that's packed with rifles and a Panzerschrek. Pick up whatever you'd like, then head south. You'll enter the area you'd cleared out earlier with the machine gun. From there, proceed toward the southwest until you encounter more foes.
There aren't many of them, but they do have a mounted machine gun. Cook a grenade and lob it in their direction, then run in and kill anyone still standing. Run on toward the west-northwest, mowing down everyone that stands in your path.
PART 7: Kill the Retreating German Forces There's a large hole in the southwest corner of the Asylum, and that's your exit. With your comrades, march alongside the tanks and eliminate anyone else who tries to stand in your way.
PART 1: Clear the Buildings Run all the way to the end of the hallway, then turn left and head north. You'll enter a room where a Double-Barreled Shotgun rests on a desk. Pick it up if you'd like, then follow your soldiers north and down the stairs. When you start to hear German speech, proceed cautiously, and you'll be able to catch some foes off-guard. Start firing as soon as you have a clear shot, then run into the darkened room they were occupying.
When you're ready to proceed, head northeast through a hallway and toward some stairs. German soldiers will emerge and fire upon you, but there are only five of them (two on the stairs, and three directly ahead). Eliminate them, then descend to the bottom floor. You'll hear someone speaking in English, and they're one of yours -- rescue them by killing the two German soldiers nearby.
As soon as you proceed toward the west, a line of enemies will start firing away in your direction. Run northwest to exit the building and walk on a fire escape, and take out the German gunner directly in front of you. Move forward and face right (east), and you'll be able to easily lay waste to the entire room full of foes.
« 10 11 12 13 14 15 16 17 »
Eviction
Goals
1 Clear the Buildings
2 Move Up the Street With the Tanks
3 Stay Close to the Tanks & Execute the Wounded Germans
4 Head Into the Metro to Escape the Rockets & Fight Through the Metro
5 Defend Reznov While he Opens the Door
Page 23© 2008 IGN Entertainment, Inc.
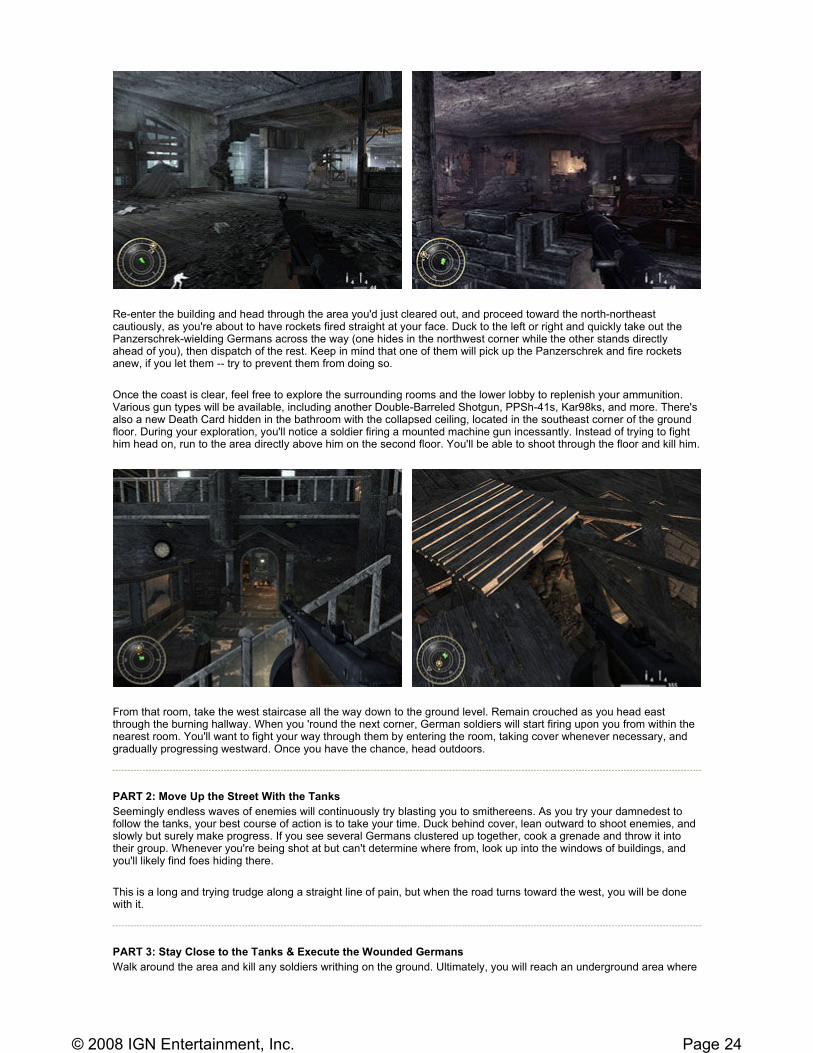
Re-enter the building and head through the area you'd just cleared out, and proceed toward the north-northeast cautiously, as you're about to have rockets fired straight at your face. Duck to the left or right and quickly take out the Panzerschrek-wielding Germans across the way (one hides in the northwest corner while the other stands directly ahead of you), then dispatch of the rest. Keep in mind that one of them will pick up the Panzerschrek and fire rockets anew, if you let them -- try to prevent them from doing so.
Once the coast is clear, feel free to explore the surrounding rooms and the lower lobby to replenish your ammunition. Various gun types will be available, including another Double-Barreled Shotgun, PPSh-41s, Kar98ks, and more. There's also a new Death Card hidden in the bathroom with the collapsed ceiling, located in the southeast corner of the ground floor. During your exploration, you'll notice a soldier firing a mounted machine gun incessantly. Instead of trying to fight him head on, run to the area directly above him on the second floor. You'll be able to shoot through the floor and kill him.
From that room, take the west staircase all the way down to the ground level. Remain crouched as you head east through the burning hallway. When you 'round the next corner, German soldiers will start firing upon you from within the nearest room. You'll want to fight your way through them by entering the room, taking cover whenever necessary, and gradually progressing westward. Once you have the chance, head outdoors.
PART 2: Move Up the Street With the Tanks Seemingly endless waves of enemies will continuously try blasting you to smithereens. As you try your damnedest to follow the tanks, your best course of action is to take your time. Duck behind cover, lean outward to shoot enemies, and slowly but surely make progress. If you see several Germans clustered up together, cook a grenade and throw it into their group. Whenever you're being shot at but can't determine where from, look up into the windows of buildings, and you'll likely find foes hiding there.
This is a long and trying trudge along a straight line of pain, but when the road turns toward the west, you will be done with it.
PART 3: Stay Close to the Tanks & Execute the Wounded Germans Walk around the area and kill any soldiers writhing on the ground. Ultimately, you will reach an underground area where
Page 24© 2008 IGN Entertainment, Inc.
a few Germans will try to surrender. Either kill them yourself or wait, then descend the stairs they were standing on.
PART 4: Head Into the Metro to Escape the Rockets & Fight Through the Metro After the entrance is pried open, you'll head down some stairs, and your group will be ordered to split up. You can either head south-southwest or east, and both paths lead to roughly the same amount of enemies. They'll lead you to the same destination ultimately, so you may choose either.
Once again, your best friend is patience. Use cover to your advantage, and if you wish to aid your comrades across the way, occasionally look toward their side of the station and kill their opponents too. The side rooms and cars rarely contain any guns at all, so there's no need to explore here (unless you ache for shotguns). Take what you need from the bodies on your path, steadily heading southwest.
When no one's left to shoot at you, meet up with your fellow soldiers in the water.
PART 5: Defend Reznov While he Opens the Door While your Sergeant tries to open the door, defend him from the onslaught of German soldiers. This task will last for a minute or two, and then the objective will end.
PART 1: Destroy Japanese Merchant Ships (3 of 3) & Defend Against Japanese PT Boats This time you're gunning in an airplane, and the Use command will let you switch positions within it. Occasionally, you'll be forced to move. That's because your craft follows a set path you've no control over, and you'll need to be in certain positions during key moments.
Throughout this fight, you shouldn't ignore the small yet fearsome PT Boats. There are approximately thirteen of them, and if you don't sink those, they'll shoot you out of the sky. Whenever you're not taking one of those down, fire on the Merchant Ships as much as possible. The destruction of all three ends the objective.
PART 2: Respond to Fleet Distress Call & Defend Against Japanese Zeros Earlier, your only worries were slow-moving boats. Now you're up against other aircraft. Your compatriots will notify you of incoming bogeys by stating their clock position. If you're unfamiliar with this terminology, visualize your plane sitting on a clock face and you'll be able to understand it (e.g., directly ahead/upward is 12 o'clock, directly behind/below is 6 o'clock, and so on).
After you've dealt with over a dozen Zeros, your plane will turn downward and land in the water.
PART 3: Rescue All Possible Survivors At this point, you'll have to deal with planes, PT Boats, and friendly survivors begging for rescue. To save them, execute the Use function when you're prompted to. Although you should perform this every time you're told to, don't neglect to shoot the PT Boats, or they'll off you.
Shortly after you touch down, the first wave of survivors will come, and two PT Boats will appear directly in front of you. Take them out ASAP, bringing in survivors between your volleys of fire. After they're destroyed, several more planes will approach, and then two new PT boats will approach from your right side. Keep an eye out for them, as you'll have to
« 10 11 12 13 14 15 16 17 »
Black Cats
Goals
1 Destroy Japanese Merchant Ships (3 of 3) & Defend Against Japanese PT Boats
2 Respond to Fleet Distress Call & Defend Against Japanese Zeros
3 Rescue All Possible Survivors
4 Clear the Skies of Japanese Zeros
Page 25© 2008 IGN Entertainment, Inc.
take them out as soon as possible, or they'll destroy you before you get a fighting chance.
Following that, you'll move to the other side of the plane and have to fend off more enemies. This will include one wave of planes, the approach of two PT Boats, and then several more Zero attacks. When the next set of PT Boats approach, they'll come in from your right side, so be ready for that.
PART 4: Clear the Skies of Japanese Zeros You'll then switch guns and face off against countless planes. They'll frequently dive bomb directly at you, which gives you a good opportunity to shoot them to bits. Aside from that, they'll attack the destroyers kamikaze-style, and if you can do it, try to destroy them before they make impact.
PART 1: Assault Wana Ridge When you begin ascending the hill, you'll be instructed on how to use a new device: the Satchel Charge. In case you forget, here's what you do: press the Rifle Grenade key to select the Satchel Charge, then use your ADS button to throw it, and your Primary Fire button for detonation. There are a few situations this will prove useful in, but you won't need it just yet.
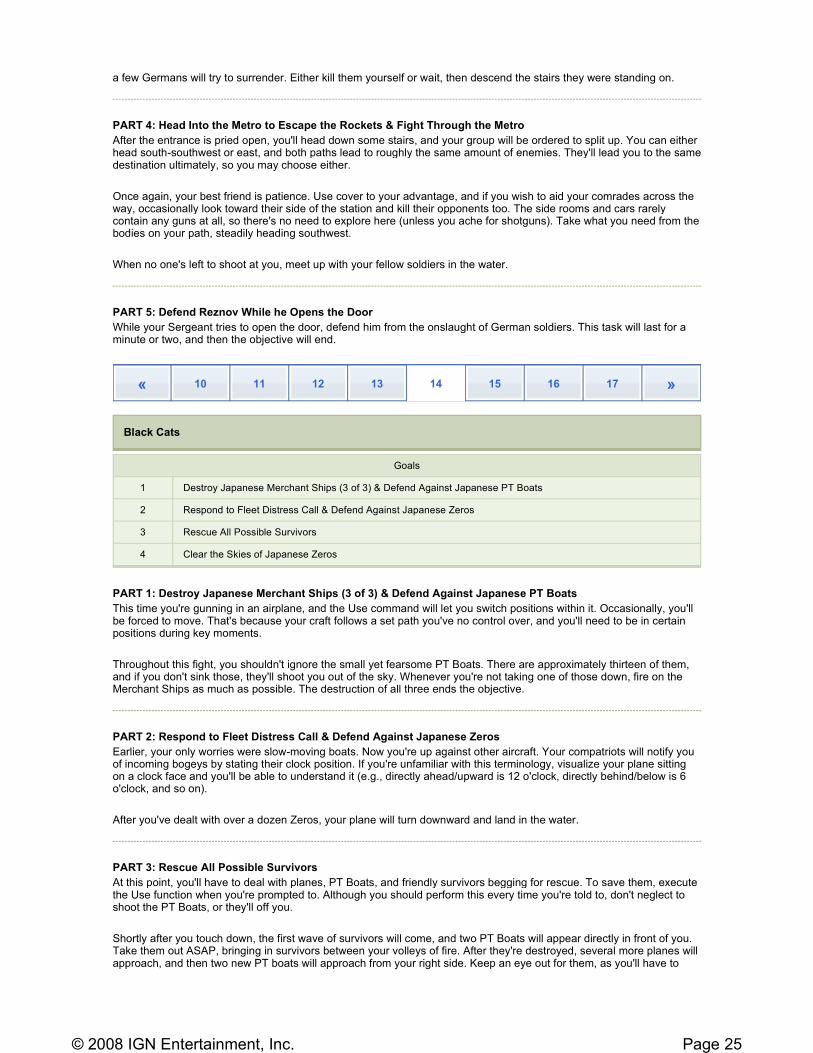
Shortly after your trek begins, you'll be attacked by four kamikaze soldiers. When they reveal themselves, you'll be ordered to burn the grass. With your Flamethrower in hand, rush forward, set fire to as much of it as possible, and then retreat. Whip out your Browning M1919, pick off the soldiers you didn't burn, and proceed toward the south-southwest. You may also want to swap your Browning for one of their Arisaka Bayonets, as that'll increase your long-range accuracy and movement speed.
You won't get much further before about a dozen Japanese soldiers ambush you from your right (southwest) side. When this happens, burn more land, then turn around and run. By hiding where the kamikaze attacked you, you'll be able to use the rocks for cover and pick off foes from afar. If you didn't pick up an Arisaka Bayonet -- or if sniping isn't working out -- another reckless option is to run right into the fray and use grenades.
Steadily fight your way forward. When you reach the hill that's ascending toward the west, the safest cover lies behind the rocks to the east. Use guns with relatively good long-range accuracy to carefully fight your way westward. These enemies are going to be throwing a lot of grenades your way, too, so be ready to return 'em to sender ASAP.
« 10 11 12 13 14 15 16 17 »
Blowtorch & Corkscrew
Goals
1 Assault Wana Ridge
2 Eliminate the 200mm Guns (3 of 3)
3 Rendezvous with Sarge & Locate Bunker Entrance
4 Secure the Bunker
Page 26© 2008 IGN Entertainment, Inc.
When you've about reached the hill's halfway point, a machine gunner will start firing at you. Use a Smoke Grenade to blind them, then take out any nearby Japanese and charge ahead. If you ever get lost in the mist, remember that you're climbing a hill, and that you're heading west. You won't face a lot of opposition from here to the top, but that machine gunner is practically a one-man army, which compensates for the lack of foes.
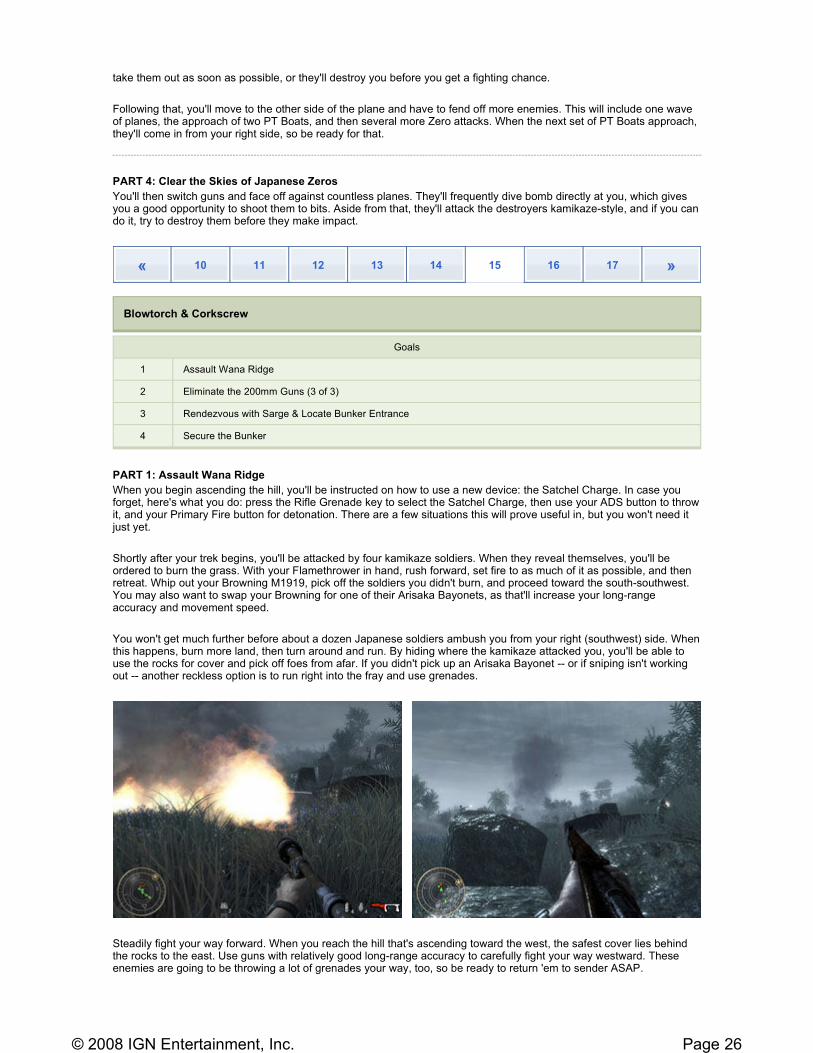
Once you're close enough to do so, shoot the machine gunner and carefully eliminate any remaining enemies. When you reach the top of the hill and enter the waterfall area, you'll clear a checkpoint. You'll also see a series of planks leading across a trench. Walk across them to find and pick up a Scoped Arisaka. Naturally, this means it's time to do some sniping.
Retreat to the far northeast edge of the planks, then Aim Down Sight and you'll see a few soldiers beyond the mist. Snipe them.
Before proceeding, run back down the hill and collect more Arisaka ammunition, then return to the planks. Walk to where you'd picked up the Scoped Arisaka, and inch forward to the edge. You'll be able to spy more Japanese soldiers to the south. Dispatch of them, then move into the water before you.
PART 2: Eliminate the 200mm Guns (3 of 3) Soon, it will be time to use your Satchel Charges. If you already did, worry not, as there's an unlimited supply of them next to the pond you've just set foot in. Should you ever run out, return to this place (the pool in front of the Scoped Arisaka spawn) to replenish your supplies.
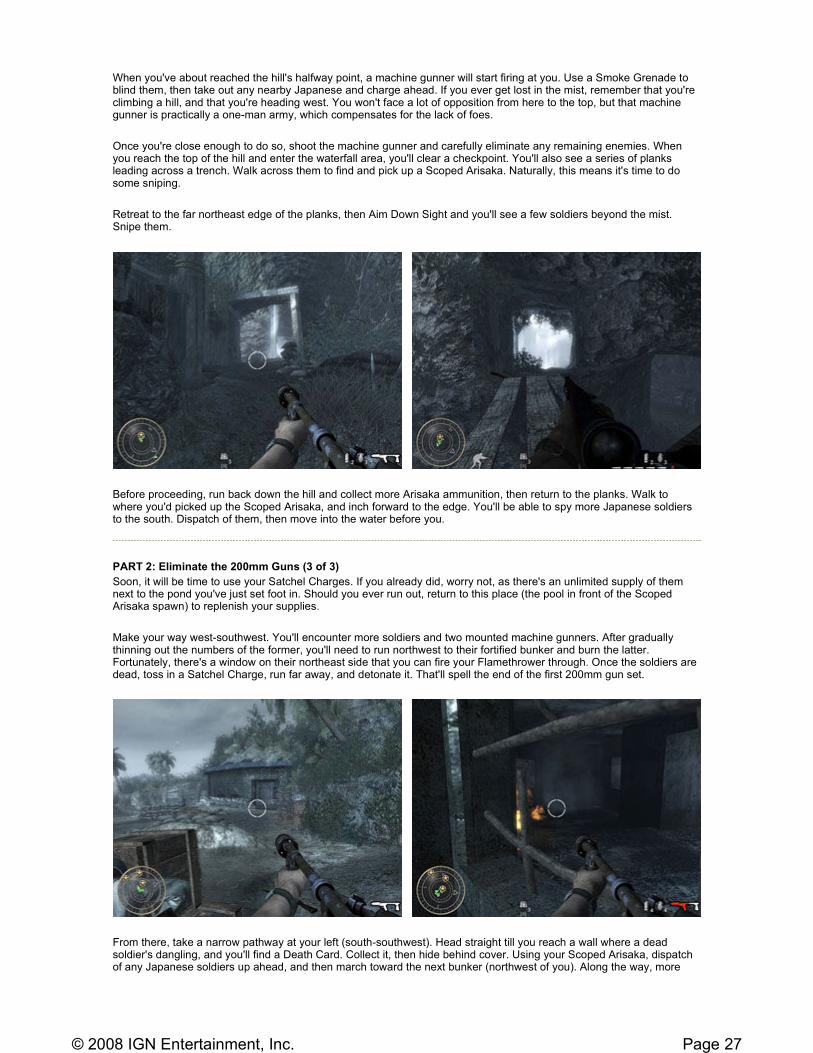
Make your way west-southwest. You'll encounter more soldiers and two mounted machine gunners. After gradually thinning out the numbers of the former, you'll need to run northwest to their fortified bunker and burn the latter. Fortunately, there's a window on their northeast side that you can fire your Flamethrower through. Once the soldiers are dead, toss in a Satchel Charge, run far away, and detonate it. That'll spell the end of the first 200mm gun set.
From there, take a narrow pathway at your left (south-southwest). Head straight till you reach a wall where a dead soldier's dangling, and you'll find a Death Card. Collect it, then hide behind cover. Using your Scoped Arisaka, dispatch of any Japanese soldiers up ahead, and then march toward the next bunker (northwest of you). Along the way, more
Page 27© 2008 IGN Entertainment, Inc.
foes will try to stop you; kill them, then burn out the men manning the 200mm guns. Once again, you'll want to lob a Satchel Charge inside of that area and detonate it.
There's only one 200mm bunker left, and many foes will rush out to defend it. If you retreat to the southeast and snipe them from afar, it's doubtful they'll even notice you. When you've cleared out a reasonable amount, approach the final bunker to make another wave of soldiers appear, then immediately return to your safe place. Using your trusty Scoped Arisaka, eliminate the remainder, and then approach the last bunker. Destroy anything lurking within via Flamethrower, then explode it with your last Satchel Charge.
PART 3: Rendezvous with Sarge & Locate Bunker Entrance From the last 200mm bunker, head southeast to regroup with your squad. Once the door's broken, walk through and emerge behind a tank. Follow it, but not too closely, as it'll be destroyed once it reaches the top of the road. At that point, head along the west border of the field. Enemy soldiers will begin leaping from the brush atop a hut. Take cover amongst the rocks, barrels and logs, and snipe them from afar. Slowly but surely make your way further west, and know that just when you think you're done, more will arrive. Their numbers aren't infinite, however; after about five or six waves, they'll stop coming.
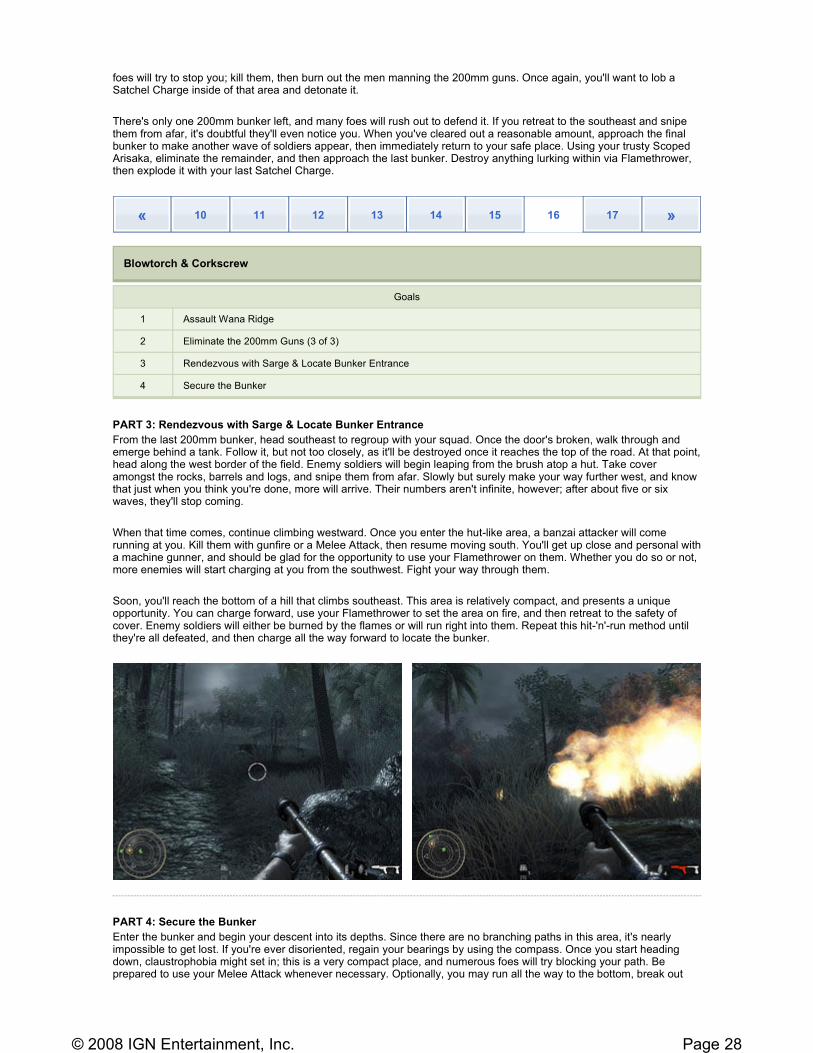
When that time comes, continue climbing westward. Once you enter the hut-like area, a banzai attacker will come running at you. Kill them with gunfire or a Melee Attack, then resume moving south. You'll get up close and personal with a machine gunner, and should be glad for the opportunity to use your Flamethrower on them. Whether you do so or not, more enemies will start charging at you from the southwest. Fight your way through them.
Soon, you'll reach the bottom of a hill that climbs southeast. This area is relatively compact, and presents a unique opportunity. You can charge forward, use your Flamethrower to set the area on fire, and then retreat to the safety of cover. Enemy soldiers will either be burned by the flames or will run right into them. Repeat this hit-'n'-run method until they're all defeated, and then charge all the way forward to locate the bunker.
PART 4: Secure the Bunker Enter the bunker and begin your descent into its depths. Since there are no branching paths in this area, it's nearly impossible to get lost. If you're ever disoriented, regain your bearings by using the compass. Once you start heading down, claustrophobia might set in; this is a very compact place, and numerous foes will try blocking your path. Be prepared to use your Melee Attack whenever necessary. Optionally, you may run all the way to the bottom, break out
« 10 11 12 13 14 15 16 17 »
Blowtorch & Corkscrew
Goals
1 Assault Wana Ridge
2 Eliminate the 200mm Guns (3 of 3)
3 Rendezvous with Sarge & Locate Bunker Entrance
4 Secure the Bunker
Page 28© 2008 IGN Entertainment, Inc.
your Flamethrower, and spray fire in an arc from your left to your right. This can actually kill the vast majority of foes, but may also result in your death, so a more cautious approach is advised.
After you've cleared out the first batch of foes, keep your Flamethrower out. Its short range is excusable in these close quarters, and it can quickly eliminate anyone that gets in your face. Progress northward until you climb a staircase, and then prepare to be ambushed from the southeast. You can either take cover and kill the enemies from afar, or you can charge ahead and burn them; it's up to you.
There's another ladder in the east corner of the room. Before you climb to its top, prepare yourself, as Japanese soldiers will start firing on you the moment you get there. Have your Flamethrower at the ready to quickly take care of them, then switch to a more traditional gun and prepare for long-range combat.
Fight your way through the murky room, then walk up to the next ladder on its southwest side. Don't climb it yet.
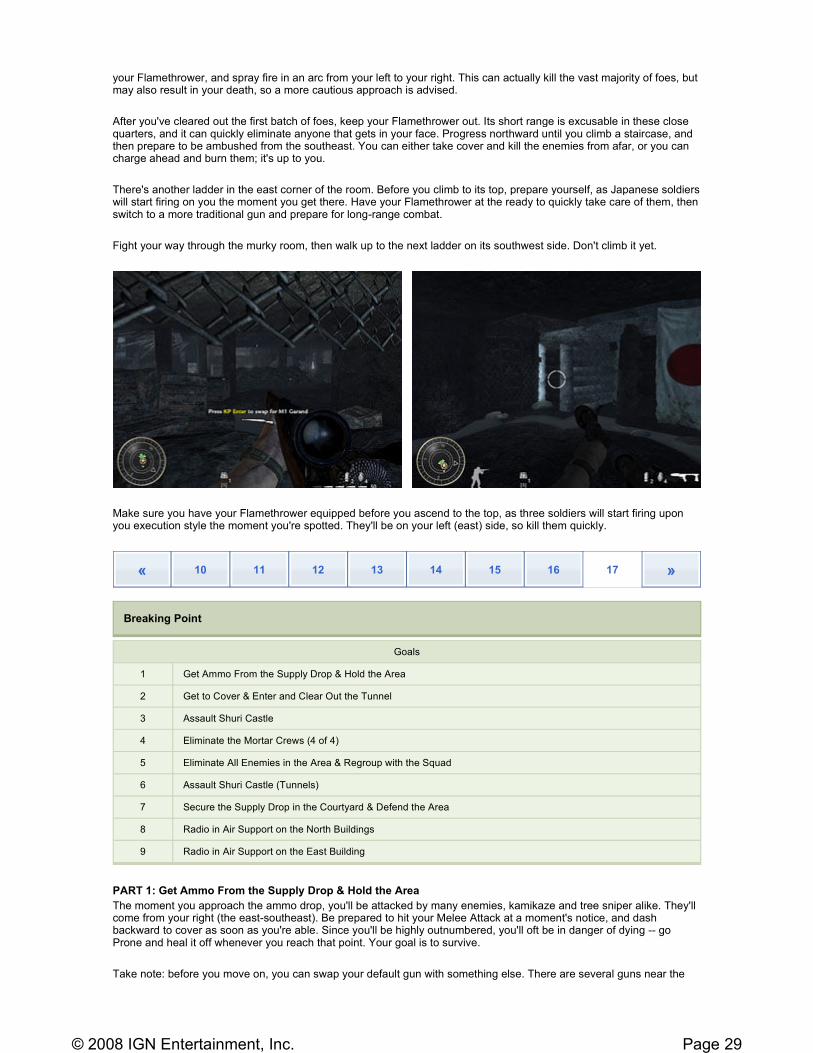
Make sure you have your Flamethrower equipped before you ascend to the top, as three soldiers will start firing upon you execution style the moment you're spotted. They'll be on your left (east) side, so kill them quickly.
PART 1: Get Ammo From the Supply Drop & Hold the Area The moment you approach the ammo drop, you'll be attacked by many enemies, kamikaze and tree sniper alike. They'll come from your right (the east-southeast). Be prepared to hit your Melee Attack at a moment's notice, and dash backward to cover as soon as you're able. Since you'll be highly outnumbered, you'll oft be in danger of dying -- go Prone and heal it off whenever you reach that point. Your goal is to survive.
Take note: before you move on, you can swap your default gun with something else. There are several guns near the
« 10 11 12 13 14 15 16 17 »
Breaking Point
Goals
1 Get Ammo From the Supply Drop & Hold the Area
2 Get to Cover & Enter and Clear Out the Tunnel
3 Assault Shuri Castle
4 Eliminate the Mortar Crews (4 of 4)
5 Eliminate All Enemies in the Area & Regroup with the Squad
6 Assault Shuri Castle (Tunnels)
7 Secure the Supply Drop in the Courtyard & Defend the Area
8 Radio in Air Support on the North Buildings
9 Radio in Air Support on the East Building
Page 29© 2008 IGN Entertainment, Inc.
ammo drop bag, including a Thompson, Browning M1919, and a Scoped Springfield. After you pick one up, refill your ammunition by using the bag. The rest of this mission's walkthrough will assume you have the Scoped Springfield.
PART 2: Get to Cover & Enter and Clear Out the Tunnel Quickly refill your ammo at the bag, then run south-southwest as fast as you can, and duck into the bunker. Drop down the hole nearby, and progress westward with caution. You'll hear voices becoming increasingly louder. Stick to the left side of the tunnel, and the guards within the underground room won't notice you. Cook a grenade and throw it in to kill them with little trouble.
If you're a good shot, you can kill several foes at once with your Scoped Springfield. Since the tunnel is so narrow, chances are high that they'll line up for you, and you can then shoot a single bullet through them. Sadly, you won't be able to kill them all this way, as some won't move; if your grenade didn't get 'em, pick them off normally. Keep your Springfield and switch out your other weapon for one of their Type 100s.
With them out of the way, you're free to move forward. Climb the ladder when you reach it.
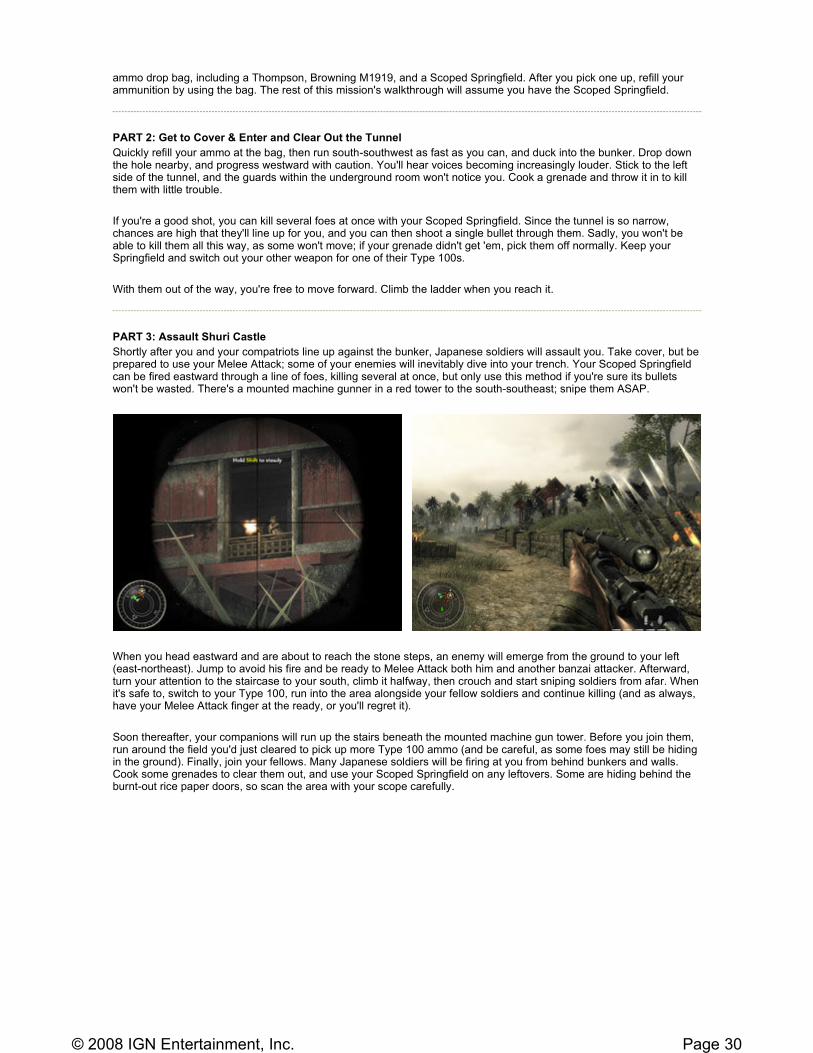
PART 3: Assault Shuri Castle Shortly after you and your compatriots line up against the bunker, Japanese soldiers will assault you. Take cover, but be prepared to use your Melee Attack; some of your enemies will inevitably dive into your trench. Your Scoped Springfield can be fired eastward through a line of foes, killing several at once, but only use this method if you're sure its bullets won't be wasted. There's a mounted machine gunner in a red tower to the south-southeast; snipe them ASAP.
When you head eastward and are about to reach the stone steps, an enemy will emerge from the ground to your left (east-northeast). Jump to avoid his fire and be ready to Melee Attack both him and another banzai attacker. Afterward, turn your attention to the staircase to your south, climb it halfway, then crouch and start sniping soldiers from afar. When it's safe to, switch to your Type 100, run into the area alongside your fellow soldiers and continue killing (and as always, have your Melee Attack finger at the ready, or you'll regret it).
Soon thereafter, your companions will run up the stairs beneath the mounted machine gun tower. Before you join them, run around the field you'd just cleared to pick up more Type 100 ammo (and be careful, as some foes may still be hiding in the ground). Finally, join your fellows. Many Japanese soldiers will be firing at you from behind bunkers and walls. Cook some grenades to clear them out, and use your Scoped Springfield on any leftovers. Some are hiding behind the burnt-out rice paper doors, so scan the area with your scope carefully.
Page 30© 2008 IGN Entertainment, Inc.
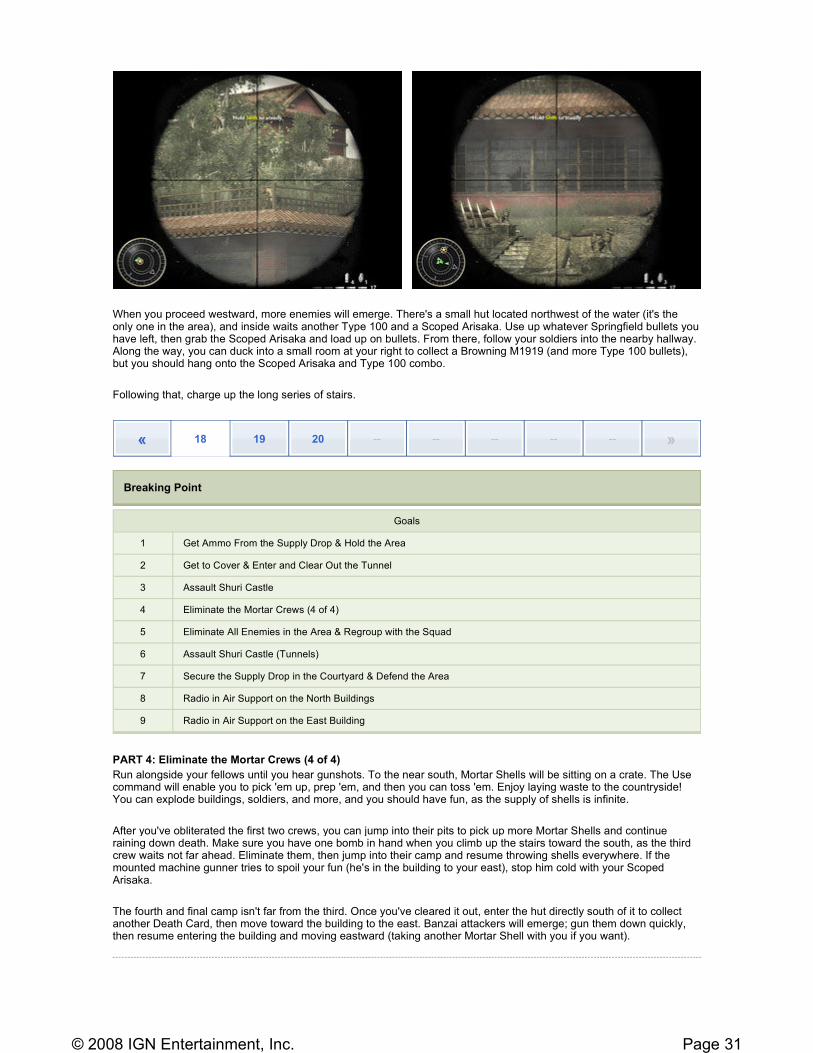
When you proceed westward, more enemies will emerge. There's a small hut located northwest of the water (it's the only one in the area), and inside waits another Type 100 and a Scoped Arisaka. Use up whatever Springfield bullets you have left, then grab the Scoped Arisaka and load up on bullets. From there, follow your soldiers into the nearby hallway. Along the way, you can duck into a small room at your right to collect a Browning M1919 (and more Type 100 bullets), but you should hang onto the Scoped Arisaka and Type 100 combo.
Following that, charge up the long series of stairs.
PART 4: Eliminate the Mortar Crews (4 of 4) Run alongside your fellows until you hear gunshots. To the near south, Mortar Shells will be sitting on a crate. The Use command will enable you to pick 'em up, prep 'em, and then you can toss 'em. Enjoy laying waste to the countryside! You can explode buildings, soldiers, and more, and you should have fun, as the supply of shells is infinite.
After you've obliterated the first two crews, you can jump into their pits to pick up more Mortar Shells and continue raining down death. Make sure you have one bomb in hand when you climb up the stairs toward the south, as the third crew waits not far ahead. Eliminate them, then jump into their camp and resume throwing shells everywhere. If the mounted machine gunner tries to spoil your fun (he's in the building to your east), stop him cold with your Scoped Arisaka.
The fourth and final camp isn't far from the third. Once you've cleared it out, enter the hut directly south of it to collect another Death Card, then move toward the building to the east. Banzai attackers will emerge; gun them down quickly, then resume entering the building and moving eastward (taking another Mortar Shell with you if you want).
« 18 19 20 -- -- -- -- -- »
Breaking Point
Goals
1 Get Ammo From the Supply Drop & Hold the Area
2 Get to Cover & Enter and Clear Out the Tunnel
3 Assault Shuri Castle
4 Eliminate the Mortar Crews (4 of 4)
5 Eliminate All Enemies in the Area & Regroup with the Squad
6 Assault Shuri Castle (Tunnels)
7 Secure the Supply Drop in the Courtyard & Defend the Area
8 Radio in Air Support on the North Buildings
9 Radio in Air Support on the East Building
Page 31© 2008 IGN Entertainment, Inc.
PART 5: Eliminate All Enemies in the Area & Regroup With the Squad This objective is relatively self-explanatory, and -- aside from the occasional grenade threat -- shouldn't prove too difficult. There are countless spots for ducking and covering, and you should still have a fully-loaded Scoped Arisaka on you, which makes things even easier. Your Type 100 will work for close- and long-range encounters, thanks to its accuracy, and you'll be able to pick up ammo for both from the corpses. Make sure you do that before proceeding.
PART 6: Assault Shuri Castle (Tunnels) When the shooting dies down, regroup with your squad and enter the castle. You won't get far before you're ordered to man an MG, so find that mounted machine gun and annihilate a courtyard of foes. Once you're done, switch to your Type 100 and head east. A few more soldiers will try to stop you before you reach the stairs leading downward (in the east-northeast corner of the floor). Crawl forward through the tunnels until you hear gunshots and see two red barrels. Shoot those to blow them up, and it will kill any enemies nearby; move south afterward.
Eventually, you'll enter a large, round area, filled with fires and foes. Using cover to your advantage, take them out carefully. Grenades, if you have any, will help to make short work of them -- they'll often be sitting together in groups of two or more. When they've all fallen, your only option is to head southeast. Use any red barrels you see to damage your enemies, and keep moving forward.
After dealing with a handful of foes, you'll ascend a staircase leading west.
PART 7: Secure the Supply Drop in the Courtyard & Defend the Area Follow your Sergeant until you're told to hold your fire, then stand back. Shortly after they inspect some Japanese soldiers, a slew of them will ambush you. Find some strong, secure cover, and fight back until you're given permission to call for air strikes.
PART 8: Radio in Air Support on the North Buildings A good place to position yourself is at the bottom of the stairs, just southeast of where your comrades were blown up. Call in air support on the north building, then go prone. Numerous banzai attackers will try to kill you, but instead of shooting, they'll just run up to you and you can Melee Attack them all.
PART 9: Radio in Air Support on the East Building Stay in your prone position, and call in two air strikes on the east building to destroy it.
PART 1: Regroup With Your Squad Prior to actually meeting with your comrades, run directly south of your starting point, and turn left to descend into a dead end. You'll find another Death Card there. Collect it, then meet with your fellows and listen to the Commissar's words. They'll start running southwest, and you'll want to stick with them, else you'll get blown up by a grenade that's tossed behind their group. Shortly afterward, Germans will emerge from the nearby building and start firing upon you. Take cover, shoot whenever you can, and be ready to return grenades to their senders. If you can't figure out who's shooting at you, don't forget to check the windows.
When everything is clear, charge over the puddle of blood and up the steps.
« 18 19 20 -- -- -- -- -- »
Heart of the Reich
Goals
1 Regroup With Your Squad
2 Advance Through the Buildings
3 Storm the Plaza & Destroy the Flak 88s (4 of 4)
4 Enter the Reichstag
Page 32© 2008 IGN Entertainment, Inc.
PART 2: Advance Through the Buildings Run through the hole in the wall, and shoot the Germans on the staircase to your left and up above on your right. Kill those on the same level as you, and then swap out your SVT-40 (secondary gun) for an MP40. Head back outside, eliminate any soldiers along the west wall and around the corner, and pick up additional MP40 ammunition. Use whichever gun you'd like to as you move on toward the west-northwest.
When you enter the library, you won't have too many soldiers to contend with, but they'll be throwing grenades at you. Be aware of your surroundings when you throw them back, else they'll bounce off of a nearby bookcase and return to your face. Once the library is clear, you can either jump through the opening in the wall and proceed, or you can explore a room in the far southeast corner. Within it waits a Deployable FG42, a STG-44, and grenades.
PART 3: Storm the Plaza & Destroy the Flak 88s (4 of 4) Trudge through the trench and a tunnel, and wait with your comrades till the Sergeant is done speaking (if you so choose), then run forward and up the hill. You'll enter a very wide-open area, and be swarmed by a seemingly never-ending flow of Germans. Your task isn't to kill all of them, but rather to cut through their masses and find the Flak 88s. They're big anti-tank guns, and when you approach them, the Use command will make you plant an explosive charge at their base. Run away and take cover afterward, and rinse and repeat for the remaining three Flak 88s.
Because there are many places for you to hide, your best strategy here is the simple, tried-and-true, "duck, lean and shoot" method. Whenever you have a good chance to run up to a Flak 88 and survive, do it. You'll clear the objective when all four have been exploded, whether there are enemies running around or not.
PART 4: Enter the Reichstag Once again, you'll have to make your way through a large clearing. This one is smaller than the previous area, and you can bypass almost all of the fearsome fighting by running along its far north side. You'll only encounter one or two soldiers beside a bombed-out building, and will then be able to enter through a hole in its wall. Upon going in, you'll be able to see a large staircase right outside, and plenty of German soldiers ripe for the picking off.
Optionally, you may head to a building in the far southwest side of this area, climb two its second floor, and arm yourself with your very own Panzerschrek -- which will likely be out of ammunition. In the room to the right of it however, there's another FG42. If you picked up the FG in the library, equip it, reload it, and replenish your ammo stock.
No matter which path you choose, your ultimate goal is to storm the stairs and enter the building. You may want to pick up a Kar98k, retreat to a relatively safe sniping spot -- the room with the FG42 is a nice fit -- and take out the enemies with ADS. Charging through them is an option too, but it's unlikely you'll survive that. If your patience wears thin and you're afraid their forces are infinite, don't worry -- they're not.
When you get inside, your current mission ends.
Page 33© 2008 IGN Entertainment, Inc.
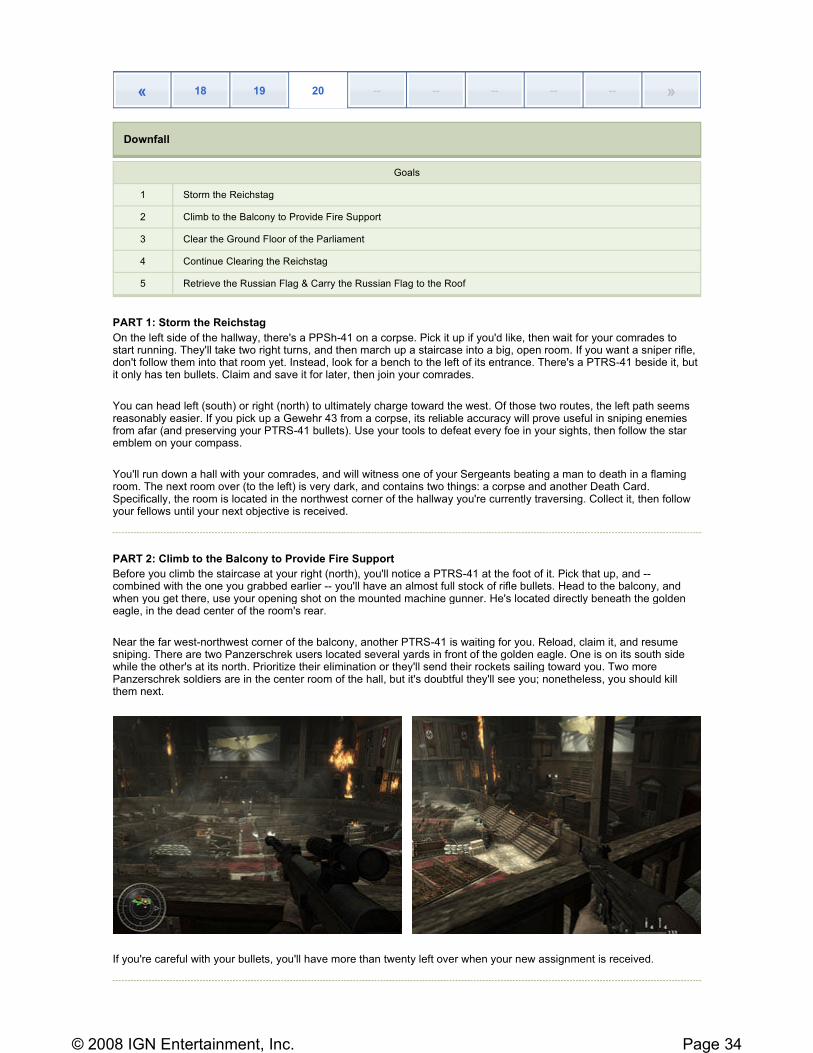
PART 1: Storm the Reichstag On the left side of the hallway, there's a PPSh-41 on a corpse. Pick it up if you'd like, then wait for your comrades to start running. They'll take two right turns, and then march up a staircase into a big, open room. If you want a sniper rifle, don't follow them into that room yet. Instead, look for a bench to the left of its entrance. There's a PTRS-41 beside it, but it only has ten bullets. Claim and save it for later, then join your comrades.
You can head left (south) or right (north) to ultimately charge toward the west. Of those two routes, the left path seems reasonably easier. If you pick up a Gewehr 43 from a corpse, its reliable accuracy will prove useful in sniping enemies from afar (and preserving your PTRS-41 bullets). Use your tools to defeat every foe in your sights, then follow the star emblem on your compass.
You'll run down a hall with your comrades, and will witness one of your Sergeants beating a man to death in a flaming room. The next room over (to the left) is very dark, and contains two things: a corpse and another Death Card. Specifically, the room is located in the northwest corner of the hallway you're currently traversing. Collect it, then follow your fellows until your next objective is received.
PART 2: Climb to the Balcony to Provide Fire Support Before you climb the staircase at your right (north), you'll notice a PTRS-41 at the foot of it. Pick that up, and -- combined with the one you grabbed earlier -- you'll have an almost full stock of rifle bullets. Head to the balcony, and when you get there, use your opening shot on the mounted machine gunner. He's located directly beneath the golden eagle, in the dead center of the room's rear.
Near the far west-northwest corner of the balcony, another PTRS-41 is waiting for you. Reload, claim it, and resume sniping. There are two Panzerschrek users located several yards in front of the golden eagle. One is on its south side while the other's at its north. Prioritize their elimination or they'll send their rockets sailing toward you. Two more Panzerschrek soldiers are in the center room of the hall, but it's doubtful they'll see you; nonetheless, you should kill them next.
If you're careful with your bullets, you'll have more than twenty left over when your new assignment is received.
« 18 19 20 -- -- -- -- -- »
Downfall
Goals
1 Storm the Reichstag
2 Climb to the Balcony to Provide Fire Support
3 Clear the Ground Floor of the Parliament
4 Continue Clearing the Reichstag
5 Retrieve the Russian Flag & Carry the Russian Flag to the Roof
Page 34© 2008 IGN Entertainment, Inc.
PART 3: Clear the Ground Floor of the Parliament Although your Sergeant will tell you to follow him, don't. Stay where you are, and -- using your regular gun, not your PTRS-41 -- continue to clear out the Germans below until no more come. This will make your true goal much easier to accomplish. If you're still in the west-northwest balcony segment, you can turn around and the new staircase leading downward will be in front of you.
When you reach the bottom floor, look toward the south-southwest corner of the room, as an enemy with a Flamethrower will appear. Kill them, and then walk out into the center area to find a Panzerschrek. Fire it toward the eagle, then walk to the area beneath it, and your comrades will run to a door that's just south of you.
PART 4: Continue Clearing the Reichstag Once the door is broken down, walk through it and climb the nearby staircase. When you're back on the balcony, numerous German soldiers will spring into action on your right (east) side. Take cover, and dispatch them. Steadily fight your way through them, progressing further and further east-northeast. When they stop coming, you'll be in a water-flooded hallway. Follow it until you once again come out into the open.
A mounted machine gunner will be firing upon you, and your only hope for immediate relief is your PTRS-41. They're in the east-northeast area of the room, all the way across from you. Snipe them, then take out the rest of the Germans northeast of you. You won't be able to snipe all of them from afar, as some will be hiding; you'll have to run forward and get them once the coast is clear.
Since good cover will be hard to come by, proceed with caution. When you're about halfway through the room, another enemy with a Panzerschrek will start firing upon you. They'll be up above you, in the northeast corner. Eliminate them and anyone else who stands in your way as you charge up to the balcony.
PART 5: Retrieve the Russian Flag & Carry the Russian Flag to the Roof Walk to the Russian Flag, lift it up, and go forward to mount it.
Congratulations, as you've conquered Call of Duty: World at War! Be sure to watch everything that follows, including the credits! There's something waiting for you at the end of them...
Page 35© 2008 IGN Entertainment, Inc.
Call of Duty: World at War Death Cards
Throughout the "Single-Player Walkthrough," the location of each Death Card is mentioned. If you're unfamiliar with these nifty collectibles, they unlock additional, fun and/or challenging options for Co-Op Mode. There are thirteen in all, and in case you missed any, here's a list of their locations. More specific information is available on these missions' respective walkthrough pages, and you can find the right paragraph by searching for "Death Card."
Card Mission Sub-Mission
Eight of Hearts Semper Fi Secure the Village
Four of Clubs Little Resistance Gain Entrance to the Japanese Bunker
King of Hearts Hard Landing Clear the Building
Five of Diamonds Vendetta Follow Sgt. Reznov & Defeat the Enemy Sniper
Joker Their Land, Their Blood Eliminate All Enemy Tanks (4 of 4) & Destroy the Last German Tank
Queen of Hearts Burn 'em Out Eliminate Enemy Mortar Crews (3 of 3)
Nine of Diamonds Relentless Clear the Artillery Room
Jack of Spades Ring of Steel Clear the Asylum
Ace of Spades Eviction Clear the Buildings
Ten of Clubs Blowtorch & Corkscrew Eliminate the 200mm Guns (3 of 3)
Three of Diamonds Breaking Point Eliminate the Mortar Crews (4 of 4)
Six of Clubs Heart of the Reich Regroup With Your Squad
Two of Spades Downfall Storm the Reichstag
Page 36© 2008 IGN Entertainment, Inc.
Call of Duty: World at War Multiplayer
You've read the "Combat Tips" section, haven't you? If not, give it a glance. Although it specifies that a lot of its contents apply to the single-player experience, much of the information it holds is still relevant to multi-player. However, here are some clarifications:
Unless you're absolutely positive you won't be found, going Prone isn't advisable. It limits your ability to look around, maneuver, and leaves you a sitting duck for an aggressor's Melee Attack. Naturally, more skilled players will know when and where to use the Prone function, and this will also come to you in time. Until you're that seasoned, your best choices are to crouch and/or lean from behind cover. This will let you look around and run in an emergency (e.g., a grenade thrown into your camp).
Using ADS (Aim Down Sight) is a great habit to grow attached to. As mentioned within "Combat Tips," many of the finest players will use ADS during almost every encounter. Though there are times when spraying is superior, ADS can and will make you a killing machine if you master it. Even if it feels awkward at first, give it a try.
Adjust your sensitivity and button configuration for maximum mobility. If you've ever wondered how your foes have seemingly grown eyes in the backs of their heads, it's partially due to their high mouse/analog sensitivity. They can spin around rapidly and with a mere flick of their wrists, and you should try that, too. For some players, this can be a disorienting modification, and potentially nauseating. If that applies to you, don't stress yourself, but if you can change this and continue to enjoy your Call of Duty experience, do so. A soldier who frequently uses ADS and whips around at a millisecond's notice is a force to be reckoned with.
Do not be afraid of cooking and using grenades. They're a precious resource, but if you're being felled by enemies and you haven't used a single one of them, it's time you had your explosive revenge. It is strongly advised, however, that you cook them -- namely, hold them until they're soon to explode -- prior to throwing. In reaction, your opponents will either try to run away or pick it up and throw it back, and if your timing is just right, they'll get away with neither. Additionally, if you're surrounded and you know you're going out, you might as well do it in style. Start cooking a grenade, and leave a present behind.
Just as well, do not be afraid of using your Melee Attack. If you sneak up on a sniper, rush up a staircase, or are otherwise up close and personal with an opponent, feel free to melee them. Although some players view this as an insult, it is honestly an efficient method that will help you conserve your ammunition and keep up your momentum. It is more useful than most give it credit for, and it's recommended that you try assigning this function to an easily reached key/button and use it during battles.
Try to collect weapons that will serve you well in more than one category, and avoid the others. For example, if you're on a map with numerous open spaces but also a fair amount of tight ones, a Type 100 is fantastic. It's an excellent all-around gun that has sharp accuracy from afar, reasonable power up close, and large ammo clips. Meanwhile, heavy machine guns like the Browning M1919 are -- to the average fellow -- only good for shooting through thin walls and catching enemies by surprise. Versatility is the key, and as your skills excel, you'll learn to use almost any gun in any situation, but do not pressure yourself into doing that right away. There is no shame in using an all-purpose gun, especially if it leads you to victory.
If you're going to jump repeatedly -- thereby performing the "bunny hop" -- don't do so in a predictable manner. Although jumping every now and then is a good headshot deterrent, reasonably skilled opponents will watch you, quickly realize your pattern, and take you down. The only way to prevent this is to use the jump sparingly rather than predictably. During your run across a large, open field, you may jump once at the start, make some distance, and then jump again -- that is fine. Jumping every step of the way turns you into an easy-to-shoot (if bouncy) target.
In short, don't let yourself fall into patterns. Don't camp in the same exact spot, don't jump every step of the way, and don't explore the same parts of the map. Applying some strategy and variety to your methods will help you climb the rankings and make a name for yourself. At the very least, even if you don't care about your online reputation, you'll live longer and have more fun. You don't have to be perfect, but you also don't deserve to be frustrated and disappointed. You'll get to score and your teammates will appreciate you. Win-win, eh?
Page 37© 2008 IGN Entertainment, Inc.
Call of Duty: World at War Zombie Mode
Unlike the rest of Call of Duty: World at War, the zombie mode is survival horror. After you've played through the single-player game, have waited till the end of its credits, and played a round of it, you'll be able to do so as many times as you'd like. Simply visit the Mission menu, select "Nacht der Untoten," and you'll be on your way!
Since your undead foes crave your delicious brains, they'll come at you several at a time, and will attempt to break down the wooden planks you've nailed to the windows. If they succeed, they'll climb in and shuffle toward you, fully intending to make a snack out of your body. To avoid this, you'll have to defend yourself, and there's a number of ways to.
When things start, you're armed with a pistol; use this to rack up a few hundred points, then replace it. By walking up to one of the chalk outlines on the wall, you'll be able to buy a gun. When the round begins, the closest gun will be affordable, but it is not very useful, and the first wave of zombies is slow. Thus, your pistol is suitable for dispatching them with. Look through the windows, anticipate their paths, and shoot them down with your pistol. Once you have amassed enough points, buy the better of the two available guns (the M1A1 Carbine).
With your more potent gun in hand, go for head shots. Above all else, your goal is to survive. If you cannot score head shots, do whatever it takes to live for as long as possible. On the other hand, if you can perform them successfully, do so often. You will use considerably less ammo and earn far more points, which are essential, since foes drop neither ammunition nor guns.
If you aren't in immediate danger, visit the windows whose planks have been torn away and repair them with the Use command. These wooden boards temporarily deter zombies, and can also serve up audio and visual cues when you're trying to determine where they'll enter. While you're repairing them, hold down the Use function and turn your back to the windows so you can look around freely. If you stare blankly outward while fixing them, you'll inevitably be bitten in the back.
If a power-up drops, claim it quickly. These useful items will vanish in thirty seconds if they aren't picked up. That means you can apply some strategy toward using them, but you can't dawdle for too long, or your opportunity will be forever lost. There are several kinds, including Double Points, Insta-Kill, Napalm (which kills everything within your immediate vicinity), and Ammo Boxes.
Once you can afford to do so without going broke, open the door and clear the staircase. Performing these acts will enable you to move more freely and purchase different kinds of items, but the zombies will not stick to infiltrating the ground floor. They will come at you no matter where you are, by any means they can possibly manage, yet opening these passageways is a necessity. The guns you start out with won't beat back the hordes forever, and you'll need breathing room every now and then. Give yourself that.
When it comes to picking your weaponry, remember: all-around is best. Specialized and limited guns, such as the Scoped Kar98k and the Double-Barrel Shotgun, are not as oft useful as fully automatics. There will be times when a Melee Attack will not be enough to save you, and you'll need to spray some bullets. Conserve your points for those types of guns, and don't be afraid to experiment.
In Zombie Mode, you'll die many times, but this mode is never-ending. Have fun, enjoy its intensity, and laugh at your inevitable dogpile deaths. And when you're ready for it, bring your friends into it! The multi-player version of Zombie Mode enables you to revive your near-dead teammates and do so much more, although everything you'll learn from playing it by yourself will still apply. Get some practice in, and then invite your buddies to a good ol' brain-munching time.
Page 38© 2008 IGN Entertainment, Inc.