Embed Size (px)
Citation preview

Call Accounting Mate Cisco Call Manager Express Integration Guide
North America
Sales Inquiries Tel: +1 (905) 448-2588
Email Sales: [email protected] Live Sales (MSN): [email protected]
Customer Service
Support: [email protected] Forum: www.callaccounting.ws/forum
Europe
Sales Inquiries
Email Sales: [email protected]
Customer Service Support: [email protected]

Call Accounting Mate Cisco Call Manager Express Integration Guide
Callaccounting.ws Confidential Page 1
TABLE OF CONTENTS 1.0 OVERVIEW ........................................................................................................... 2
1.1 PRODUCT OVERVIEW ...................................................................................................................... 3 1.2 NOTICE ........................................................................................................................................... 4
2.0 GETTING STARTED .............................................................................................. 5 2.1 SYSTEM REQUIREMENTS ................................................................................................................. 5 2.2 INSTALLING WINLINK ...................................................................................................................... 5
3.0 CAPTURING CALL MANAGER EXPRESS CDRS .................................................... 6 3.1 CONFIGURING CISCO CALL MANAGER EXPRESS TO DELIVER CDRS TO A SYSLOG SERVER ................. 6 3.2 CONFIGURING CISCO CALL MANAGER EXPRESS TO DELIVER CDRS TO A FTP SERVER ....................... 7 3.3 CONFIGURING THE WINLINK IP & SERIAL DATA STORAGE MODULE ................................................... 9
3.3.1 Starting the WinLINK IP & Serial Data Storage ........................................................................ 9 3.3.2 Configuring WinLINK IP & Serial Data Storage as a Syslog Server ....................................... 10
3.4 CONFIGURING THE WINLINK FTP SERVER MODULE ....................................................................... 13 3.4.1 Starting the WinLINK FTP Server .......................................................................................... 13 3.4.2 Configuring the WinLINK FTP Server .................................................................................... 15
4.0 INTEGRATING WINLINK REMOTE CME WITH CALL ACCOUNTING MATE ........ 19 4.1 CALL ACCOUNTING MATE .............................................................................................................. 19 4.2 THE WINLINK REMOTE CME SOFTWARE ....................................................................................... 22
5.0 ADDING/MODIFYING A CISCO CALL EXPRESS MANAGER PROFILE ................. 24 5.1 CREATING/MODIFYING A PROFILE NAME ......................................................................................... 24 5.2 WINLINK REMOTE CME SOFTWARE LICENSE INFORMATION ........................................................... 27
6.0 TESTING A CISCO CALL MANAGER EXPRESS PROFILE ................................... 28 6.1 CALL ACCOUNTING MATE TEST ...................................................................................................... 28
7.0 REGISTERING YOUR SOFTWARE ...................................................................... 30

Call Accounting Mate Cisco Call Manager Express Integration Guide
Callaccounting.ws Confidential Page 2
1.0 Overview Call Accounting Mate (CAM) can connect to virtually any telephone system, collect call detail records (CDR) and allocate cost. With the growing number of IP phone systems and communication servers, customers need a solution that can keep up with the times. Customers want an easy to navigate application that will not require countless hours or resources or training. CAM includes many preset and ad hoc reports, support for account and pin codes for client biling, a contact database for identifying business and personal calls, and a built-in query builder. It is 100% browser based with a built-in Web server and an embedded SQL database engine. It can monitor emergency calls, misuse, network traffic patterns and cost allocation. Third party applications can access priced call detail records through an XML interface. The program is designed to work in any country around the world. The tariff tables are user configurable. The software has a library of JavaScript drivers designed to work with virtually any telephone system from all major manufacturers including Avaya, Cisco, Nortel, Siemens, Alcatel, NEC, Samsung, Panasonic and Asterisk. Most environments can install this application on an existing non-dedicated computer. This software will operate on Pentium computer 200 MHZ or greater, operating Microsoft Windows 2000 or later and Internet Explorer 5.5 or later. With CAM, SMDR/CDR data collection is completely integrated within the application. There is no requirement for additional hardware buffers. Data is captured via either an RS-232 (serial) or IP connection between your telephone system and the computer operating our CAM software. Authorized users can access the software via Internet Explorer and generate reports at any time from their own Desktop PC. CAM will generate up-to-the-minute information that highlights network traffic, corporate cost allocation, account code billing, dialing patterns and misuse and abuse. Reports can be generated in PDF or Excel format and delivered to the screen, the hard driver, and/or printer. Reports can also be distributed by email. Users can customize reports by entering personnel, telephone line and customer information into the applications databases. This document provides a detailed description of the implementation of Call Accounting Mate (CAM) software with the Cisco Call Manager Express platform. This document includes an overview of the configuration of the Cisco Call Manager Express telephone system and its integration with the Call Accounting Mate software. A description of the customer’s network and workstations on which this solution is implemented is also provided.

Call Accounting Mate Cisco Call Manager Express Integration Guide
Callaccounting.ws Confidential Page 3
1.1 Product Overview The WinLINK Remote CME for Cisco Call Manager Express software continues our unique approach to data processing. WinLINK Remote CME is used in conjunction with our WinLINK IP and Serial Data Storage software to collect and process call record data from a Cisco Call Manager Express system. We utilize these two software applications and a non-dedicated computer as a cost-effective solution to your company’s CDR data collection. The WinLINK IP and Serial Data Storage software is only required when the Cisco CME is configured to deliver its call record data to a SysLog server. It is not required when the CME is configured to deliver CDR data to an FTP Server. Customers utilizing this configuration can either use their own FTP server or our WinLINK FTP Server module (contact us for details). The WinLINK IP and Serial Data software eliminates the need for expensive proprietary hardware solutions. This software must be configured as a SysLog server to capture call record data generated by a Cisco Call Manager Express system. The telephone records collected by the computer operating our WinLINK software are stored onto its hard drive The captured data will be processed by the WinLINK Remote CME software and converted to a standard ASCII file format for processing by Call Accounting Mate. These applications may be either located on the same computer or located on another network workstation. The WinLINK FTP Server eliminates the need for expensive proprietary hardware solutions. The Cisco Call Manager Express must be configured to capture and deliver its call record data to the FTP Server. The telephone records collected by the computer operating our WinLINK software are stored onto its hard drive The captured data will be processed by the WinLINK Remote CME software and converted to a standard ASCII file format for processing by Call Accounting Mate. These applications may be either located on the same computer or located on another network workstation. We are committed to continued refinement and enhancement of all our product line. To assist us in future enhancements, both with the product itself and the effectiveness of our literature and documentation, you are invited to call us at (718) 576-2066.

Call Accounting Mate Cisco Call Manager Express Integration Guide
Callaccounting.ws Confidential Page 4
1.2 Notice Callaccounting.ws reserves the right to make improvements to the product described in this manual at any time and without notice. This document contains no warranty of any kind with regard to this material, including but not limited to, the implied warranties of merchantability and fitness for a particular purpose. Callaccounting.ws shall not be liable for errors contained herein or for incidental consequential damages in connection with the furnishing, performance or use of this material or product. In no event will callaccounting.ws be liable to you for any special damages including, any lost profits; lost savings, or other incidental or consequential damages, even if callaccounting.ws has been advised of the possibility of such damages, or for any claim by any other party. Some places do not allow the exclusion or limitation of special, incidental or consequential damages, so the above limitation or exclusion may not apply to you. This document is copyrighted. All rights are reserved. This document may not, in whole or in part, be copied, photocopied, reproduced, translated or reduced to any electronic medium or machine-readable form without prior consent, in writing, from callaccounting.ws.

Call Accounting Mate Cisco Call Manager Express Integration Guide
Callaccounting.ws Confidential Page 5
2.0 Getting Started The following section details the computer hardware requirements to operate our WinLINK IP & Serial Data Storage and WinLINK Remote CME software modules. Installation instructions are also provided. 2.1 System Requirements To use WinLINK IP & Serial Data Storage / WinLINK FTP Server and WinLINK Remote CME, you need: • Any IBM®-Compatible machine with a Pentium II processor or higher • This software does NOT require a dedicated computer. The software can function on a computer
that is used for other tasks (i.e. Call Accounting Mate software, word processing, spreadsheets, etc.).
• A CD-ROM or floppy drive (dependent on distribution media – normally CD) • A hard disk drive with a minimum of 60 MB available (for most environments) • At least 32MB of memory • Microsoft Internet Explorer version 5 or later. • MicroSoft® Windows 2000™ , Microsoft® Windows 2003™, MicroSoft® Windows XP™, Microsoft
Windows® Vista™ or later • 1 Network Card and network connection (required for TCP/IP connection to Cisco Call Manager
Express) • Microsoft Windows .NET Framework v 2.0 or later A MicroSoft® mouse or compatible is recommended. Any changes to the above requirements are found in your WinLINK Readme file on your distribution diskettes. 2.2 Installing WinLINK The WinLINK IP and Serial Data Storage, WinLINK FTP Server and WinLINK Remote CME modules are not included with our Call Accounting Mate software. However it is available upon request, via download from our corporate website. For information on licensing and pricing please contact us (see www.callaccounting.ws). After you have successfully installed either the WinLINK IP & Serial Data Storage or WinLINK FTP Server module it will need to be properly configured to capture CDRs from a Call Manager Express system (see Capturing Call Manager Express CDRs). Additionally you will also need to configure both the WinLINK Remote CME and the Call Accounting Mate software to process the Cisco Call Manager Express CDRs captured by the WinLINK IP & Serial Data Storage module (see Call Accounting Mate).

Call Accounting Mate Cisco Call Manager Express Integration Guide
Callaccounting.ws Confidential Page 6
3.0 Capturing Call Manager Express CDRs The Cisco Call Manager Express can generate call records (CDRs) for each telephone call it handles. The CME can then be configured to deliver CDRs (i.e. call records) to either a SysLog or FTP Server. The WinLINK IP & Serial Data Storage Module can be configured as a SysLog server to capture the CME CDRs. The WinLINK FTP Server can capture telephone data from a Cisco CME configured to deliver it an FTP Server. The following section of this guide provides instructions on how to configure both the Cisco Call Manager Express, the WinLINK IP & Serial Data Module and the WinLINK FTP Server to deliver and capture CDRs respectively. The WinLINK IP & Serial Data Storage / WinLINK FTP Server software must be installed prior to its use. For information on how to install WinLINK please refer to the Installing WinLINK section of this guide. Additionally, the WinLINK IP & Serial Data Storage Module / WinLINK FTP Server must be configured and operational prior to utilizing the WinLINK Remote CME module. If you have already configured the WinLINK IP & Serial Data / WinLINK FTP Server module and its successfully capturing call records from your Cisco Call Manager Express then skip ahead to the Configuring WinLINK Remote CME Module section of this guide. 3.1 Configuring Cisco Call Manager Express to deliver CDRs to a SysLog Server The Cisco Call Manager Express (CME) platform utilizes the Syslog protocol to deliver CDR records to a SysLog server. The CME Syslog feature must be activated and configured to deliver call records to a SysLog Server (this feature is disabled by default). The following steps provide an overview on how to configure a Cisco CME to deliver CDRs to a WinLINK IP & Serial Data Storage module configured as a SysLog Server. Please note this information is provided as a guide only. We are not responsible for its accuracy or any issues caused by its use. We strongly recommend you contact your Cisco Call Manager Express administrator or equipment provider and ask them to activate the Cisco CME CDR SysLog feature.
1. Execute the following bolded sample configuration commands to configure the CME Syslog feature.
!--- Use the following command to ensure CDRs are time stamped with an accurate value. router#(config)service timestamps log datetime msec localtime ! !--- Use the following commands to Enable AAA, prevent Telnet authentication via AAA. router#(config)aaa new-model ! router#(config)aaa authentication login default none !--- Use the following command to Generate the H.323 call start/stop CDRs. router#(config)aaa accounting connection h323 start-stop radius !--- Use the following command to Send the H.323 CDRs to the syslog server. router#(config)gw-accounting syslog !--- Use the following command to specify the IP address of syslog server. The IP Address specified should be the IP Address of the computer where the WinLINK Serial & IP Data Storage module is installed (i.e. 192.168.0.33) router#(config)logging 192.168.0.33

Call Accounting Mate Cisco Call Manager Express Integration Guide
Callaccounting.ws Confidential Page 7
2. Ensure the H.323 start/stop records have the correct time value, the NTP has to be running on
the Cisco IOS router or gateway. Use one of the following two methods to configure the NTP.
a. Use the following Cisco IOS software global configuration command to synchronize the Cisco IOS router or gateway to an external NTP server.
router#(config)ntp server ip address
Note: ip address should be replaced with the IP address of the time server providing the clock synchronization.
b. If there is no external NTP time source, use the internal clock as the time source. This is
done using the following Cisco IOS software global configuration command
router#(config)ntp master
After the above command has been entered successfully you must ensure that the timestamps are correct (i.e. the router clock should be set to the correct time - from normal EXEC mode). For example if the current date and time is 2:30 pm July 1, 2008 the command would be entered as follows:
router#clock set 14:30:00 1 July 2008
You have now successfully configured your Cisco Call Manager Express to deliver CDRs to a Syslog server. Please note, the above information is provided as a guide only. For up to date information on how to configure the CME platform Syslog feature please refer to your Cisco CME documentation (i.e. CDR Logging Configuration with Syslog Servers and Cisco IOS Gateways (Document ID: 14068)) 3.2 Configuring Cisco Call Manager Express to deliver CDRs to a FTP Server The Cisco Call Manager Express (CME) platform utilizes the FTP protocol to deliver CDR records to a FTP server. The CME FTP feature must be activated and configured to deliver call records to a FTP Server (this feature is disabled by default). The following steps provide an overview on how to configure a Cisco CME to deliver CDRs to our WinLINK FTP Server module. Please note this information is provided as a guide only. We are not responsible for its accuracy or any issues caused by its use. We strongly recommend you contact your Cisco Call Manager Express administrator or equipment provider and ask them to activate the Cisco CME CDR FTP Server feature. Execute the following bolded sample configuration commands to configure the CME FTP feature.
!--- Use the following command to enable priviledged EXEC mode (enter password if required) Router> Enable !--- Use the following command to enter global configuration mode. Router# configure terminal !--- Use the following command to enable file accounting (FTP Delivery) Router (config)# gw-accounting file

Call Accounting Mate Cisco Call Manager Express Integration Guide
Callaccounting.ws Confidential Page 8
!--- Use the following commands to for specifying the primary location for storing CDRs generated for file accounting.. Router (config-gw-accounting-file)# primary ftp server1/cdrtest1 username <user> password <pswd> Note: server1 is the computer name or IP address of the WinLINK FTP Server. Cdrtest1 is the file name where the call records are stored on the FTP server. Replace <user> and <pswd> with the a valid WinLINK FTP server user account and password. !--- Use the following commands to specify the maximum number of times the router attempts to connect to the primary file device before switching to the secondary device. Router (config-gw-accounting-file)# maximum retry-count 3 !--- Use the following commands to specify the maximum time in minutes for writing records to an accounting file before closing it and creating a new file (default 1440 – 24 hours). This timer must be set to at least 5 minutes greater than the flush timer (i.e. maximum cdrflush-timer – see next step.) Router (config-gw-accounting-file)# maximum fileclose-timer <minutes> Note: Replace <minutes> with the number of minutes you wish to wait before a new file is started (i.e. we recommend 60 minutes). !--- Use the following commands to specify the maximum time in minutes to hold call records in the buffer before appending the records to the accounting file (default is 60). This timer must be set to at least 5 minutes less than the fileclose timer (i.e. maximum fileclose-timer – see previous step.) Router (config-gw-accounting-file)# maximum cdrflush-timer <minutes> Note: Replace <minutes> with the number of minutes you wish to wait before the data is flushed to the account file (i.e. we recommend 30 minutes). !--- Use the following commands to specify the format of the CDRs generated fo file accounting (default is detailed). Router (config-gw-accounting-file)# cdr-format <format> Note: Replace <format> with either detailed or compact. We recommend you use the detailed format. !--- Use the following commands to specify the voice attributes to collect. Router (config-gw-accounting-file)# acct-template callhistory-detail Note: This value must be set to callhistory-detail. !--- Use the following commands to exit the file accounting configuration mode Router (config-gw-accounting-file)# end
You have now successfully configured your Cisco Call Manager Express to deliver CDRs to an FTP server. Please note, the above information is provided as a guide only. For up to date information on how to configure the CME platform FTP feature please refer to your Cisco CME documentation (i.e. CDR Accounting for Cisco IOS Voice Gateways (Document ID: OL-16464-01))

Call Accounting Mate Cisco Call Manager Express Integration Guide
Callaccounting.ws Confidential Page 9
3.3 Configuring the WinLINK IP & Serial Data Storage Module The Cisco Call Manager Express can be configured to deliver telephone information records via an IP Connection (UDP) to a Syslog server (i.e. WinLINK IP & Serial Data Storage module). The following instructions detail how to configure the WinLINK IP & Serial Data Storage module as a Syslog server. 3.3.1 Starting the WinLINK IP & Serial Data Storage The WinLINK IP & Serial Data Storage module must be installed prior to its use. For information on how to install this module please refer to the Installing WinLINK section of this guide. To start WinLINK please use the following steps:
1. Press the Windows Start button. 2. Next, click the Programs menu item. 3. Next, find the RSI/CMS program group and click on it. 4. Find the WinLINK program icon and click on it. 5. WinLINK will start.
Alternatively, you may find it easier to use the Windows RUN command. Follow these steps to use the RUN command.
1. Press the Windows Start Button 2. Select the RUN command. The following dialog should appear.
Type c:\program files\rsi\winlink\winlink.exe in the Open box and then press the OK button. Alternatively a short cut for WinLINK IP & Serial Data Storage module may appear on your desktop. Simply double click this shortcut to start the WinLINK software.
3. The WinLINK Remote Serial & Data Storage software will now start. The first time WinLINK
starts the following message box should appear on your screen.

Call Accounting Mate Cisco Call Manager Express Integration Guide
Callaccounting.ws Confidential Page 10
If you answer Yes to the above question the WinLINK Remote IP & Serial Data Storage software will automatically start each time you restart windows. If you answer No to this question then you will have to manually restart the WinLINK program each time you reboot Windows. WinLINK must collect all telephone records at any time of the day. Therefore, if your computer was to reboot due to a power failure or some other problem WinLINK would need to be restarted. If this power failure occurs when you are away from the desk and if WinLINK does not restart automatically you may LOSE data. We recommend you answer Yes to the above question. The WinLINK IP & Serial Data Storage main window will now be visible on your screen.
You have now successfully started the WinLINK IP & Serial Data Storage software. Next you must configure the software to be a Syslog server (see Configuring WinLINK IP & Serial Data Storage as a Syslog Server). 3.3.2 Configuring WinLINK IP & Serial Data Storage as a Syslog Server A Cisco Call Manager Express (CME) telephone system can be configured to deliver call records (CDRs) to a Syslog server (see Configuring Cisco Call Manager Express to deliver CDRs). Our WinLINK IP & Serial Data Storage software, when configured as a Syslog server, will capture the CDRs generated by the CME. Use the following steps to configure the WinLINK IP & Serial Data Storage module to capture Cisco Call Manager Express CDRs.
1. Start the WinLINK IP & Serial Data Storage software (see Starting the WinLINK IP & Serial Data Storage).
2. Select the Data Source command from the Configure menu.
3. The Data Source configuration dialog box should now be visible on your screen.

Call Accounting Mate Cisco Call Manager Express Integration Guide
Callaccounting.ws Confidential Page 11
Use the Select the Winlink data source drop down list to select the Cisco Call Manager Express option (pictured above).
4. Press the OK button. The following confirmation message should be displayed on your screen.
After pressing the OK button to confirm your selection the WinLINK IP & Serial Data Storage module will close.
5. Restart the WinLINK IP & Serial Data Storage software (see Starting the WinLINK IP & Serial Data Storage).
6. Select the UDP Server command from the Configure menu (If this option is not available repeat steps 2-5). The IP Configuration dialog box will now be visible on your screen.
Set the Name (or IP address) box to the IP Address of the computer operating the WinLINK IP & Serial Data Storage module. Set the Port box to the port number the CME is utilizing to

Call Accounting Mate Cisco Call Manager Express Integration Guide
Callaccounting.ws Confidential Page 12
deliver its CDRs. The default port number utilized by the CME for delivery of CDRs is 514. An example of the UDP Server screen is displayed above.
7. Press the OK button to record your changes.
8. Click the File Path / Data Storage Mode option from the Options menu. The Data Output
dialog box should now be visible on your screen.
Set the Data Storage Mode option to Save to file (Default). All CDRs captured by the WinLINK software from the Call Manager Express will be saved to the file name specified in the Enter the complete file path/name where to store the incoming data option. The file name specified here must be also utilized as the Source Path & Filename option in the WinLINK Remote CME profile being utilized to process this captured data (see step 4 of Adding/Modifying a Cisco Call Express Manager Profile).
9. Press the OK button to save your settings. The WinLINK IP & Serial Data Storage software is now configured to capture CDRs from a Cisco Call Manager Express. Each time a telephone call completes the CME CDRs records should be visible within the WinLINK IP & Serial Data Storage main window. See below

Call Accounting Mate Cisco Call Manager Express Integration Guide
Callaccounting.ws Confidential Page 13
3.4 Configuring the WinLINK FTP Server Module The Cisco Call Manager Express can be configured to deliver telephone information records via an IP Connection to an FTP server (i.e. WinLINK FTP Server module). The following instructions detail how to configure the WinLINK FTP server module. 3.4.1 Starting the WinLINK FTP Server The WinLINK FTP Server module must be installed prior to its use. For information on how to install this module please refer to the Installing WinLINK section of this guide.
1. Press the Start button. 2. Next, click the Run menu item. 3. Use the Browse button to locate the FTP Server application (ftpserv.exe). If the default settings
were utilized during installation then the application can be found in the following folder:
c:\program files\rsi\cms\drivers\ftpserv.exe
4. Press the OK button. The WinLINK FTP Server software can be configured to launch each time your computer is started. The software can either be configured to start each time you log in (installed in Windows startup group) and/or continue to operate even if you are logged off (installed as a Windows service). Alternatively, you may find it easier to use the Windows RUN command. Follow these steps to use the RUN command.
1. Press the Windows Start Button 2. Select the RUN command. The following dialog should appear.
Captured Cisco CDRs will be visible here.

Call Accounting Mate Cisco Call Manager Express Integration Guide
Callaccounting.ws Confidential Page 14
Type c:\program files\rsi\cms\drivers\ftpserv.exe in the Open box and then press the OK button. Alternatively a short cut for WinLINK FTP Server module may appear on your desktop. Simply double click this shortcut to start the WinLINK software.
The FTP Server main window should now be visible on your screen.
You have now successfully started the WinLINK FTP Server software. Next you must configure the software (see Configuring WinLINK FTP Server).

Call Accounting Mate Cisco Call Manager Express Integration Guide
Callaccounting.ws Confidential Page 15
3.4.2 Configuring the WinLINK FTP Server The WinLINK FTP Server can support both FTP and SFTP connections. Additionally access to the server can be restricted by account or workstation name/IP address. Use the following instructions to configure the WinLINK FTP Server.
1. Start the WinLINK FTP Server (see Starting the FTP Server)
2. Select the Properties menu item from the FTP Server File menu. The Properties dialog box should now be visible on your screen.
Use the Services tab to identify the FTP and SFTP port numbers to be utilized by the WinLINK FTP Server. By default the FTP port is set to 21 and the SFTP port to 22. These are the most commonly used ports for these services. These are the port values utilzied by the Cisco Call Manager Express to deliver CDR data files to an FTP Server. Use the Maximum Connections option to limit the number of simultaneous connections to the WinLINK FTP Server. For example if this option is set to 10 then up to 10 clients can be connected to the FTP server at a single time. Use the Allow anonymous connections using the following options to configure the username and password supported for anonymous connections. To prevent unauthorized access to your FTP server it is recommend that this feature be deactivated.
3. Next, click the Messages tab. The Welcome Message dialog box should now be visible on your screen.

Call Accounting Mate Cisco Call Manager Express Integration Guide
Callaccounting.ws Confidential Page 16
Use this dialog box to configure a custom greeting that is sent to each client when it connects to the FTP Server. If the Welcome Message option is unchecked then the standard greeting will be displayed.
4. Next, click the Directories tab. The Directories dialog box should now be visible on your screen.
Use this dialog box to identify the Home Directory of the FTP Server. The Home Directory is the initial directory the user will be attached to when they connect to the server. It can also be utilized as the default directory where all Cisco CDR files received from the repository will be stored. Use the Browse button to locate or create the Home Directory. We strongly recommend you store the CDR Files in the either the same directory as the Call Accounting Mate software

Call Accounting Mate Cisco Call Manager Express Integration Guide
Callaccounting.ws Confidential Page 17
(i.e. c:\bill) or a sub folder (c:\bill\cisco). Please note the directory specified must already exist. If it does not exist then you must create it.
5. Next, click the Advanced tab. The Advanced dialog box should now be visible on your screen.
Use the Advanced tab to restrict access to the FTP Server by IP Address and/or account. Select the Granted Access to limit access to the FTP Server to only the computers/accounts listed in the “Except those listed below” options. Select the Denied Access to prevent access to the FTP Server to computers/accounts NOT listed in the “Except those listed below” options. Press the Add button to add a new computer/account to the exception list. The Advanced Access dialog box should now be visible.
The Advanced Access box should contain the IP Address of the Cisco Call Manager Express that will be sending the FTP Server files. The User Name and Password must match those configured within the Cisco CME (see Configuring Cisco Call Manager Express to deliver CDRs to a FTP Server). Press the OK button to add the access information.

Call Accounting Mate Cisco Call Manager Express Integration Guide
Callaccounting.ws Confidential Page 18
Press the Edit button to modify the currently selected item in the exception list. Press the Delete button to remove the currently selected item from the exception list. Press the Apply button to record your changes.
6. Next, click the Backup tab. The Backup dialog box should now be visible on your screen.
The Backup options should not be utilized when integrating with a Cisco Call Manager Express. Please ensure all options remain unchecked (as shown above).
You have now successfully configured your WinLINK FTP Server. Please note, the Cisco Call Manager Express CDR Feature must be enabled and configured to deliver CDR data files to the WinLINK FTP Server (see Configuring Cisco Call Manager Express to deliver CDRs to a FTP Server). Finally, you must configure your Call Accounting Mate software to utilize the FTP Server (see Configuring Call Accounting Mate).

Call Accounting Mate Cisco Call Manager Express Integration Guide
Callaccounting.ws Confidential Page 19
4.0 Integrating WinLINK Remote CME with Call Accounting Mate The WinLINK Remote CME software processes Cisco Call Manager CDRs captured by the WinLINK IP & Serial Data Storage software. The WinLINK Remote CME software can be either executed manually or integrated within your Call Accounting Mate software and automatically executed. WinLINK Remote CME for Cisco Call Manager Express must be installed prior to its use. For information on how to install the WinLINK Remote CME software please refer to the Installing WinLINK section of this guide. Additionally the Cisco Call Manager Express system must be configured to deliver CDR records to the WinLINK IP & Serial Remote software (see Configuring Cisco Call Manager Express to deliver CDRs to a SysLog Server) and Configuring the WinLINK IP & Serial Data Storage Module).
4.1 Call Accounting Mate Use the following instructions to integrate the WinLINK Remote CME software with our Call Accounting Mate software.
1. Press the Windows Start button.
2. Next, click the Programs menu item.
3. Next, click the Call Accounting Mate program group and then find the Run Call Accounting Mate program icon and click on it. The Call Accounting Mate login window will now be displayed (if Call Accounting Mate is already running skip ahead to step 5).
Enter your Call Accounting Mate User Name and Password and then press the Login button.
4. The Call Accounting Mate main window should now be displayed. Select the PBX Communications command from the Configuration menu. The communications settings dialog should now be visible on your screen.

Call Accounting Mate Cisco Call Manager Express Integration Guide
Callaccounting.ws Confidential Page 20
Set the PBX ID box to <New>. Next, enter a PBX Name (i.e. your Cisco Call Manager Express name or site name) and Description into the corresponding boxes (see above).
5. Next, select the PBX Communications dialog Port tab and set the Port option to File.
Set the Before import option to either Execute command line, wait for completion & proceed or Execute command line & wait it’s completed. The Command line option must contain the folder and file name of the WinLINK for CME program followed by a valid CME profile name. The format of this line is as follows:
<WinLINK CME Program Folder and File Name> <WinLINK CME Profile Name>

Call Accounting Mate Cisco Call Manager Express Integration Guide
Callaccounting.ws Confidential Page 21
The WinLINK CME Program Folder and File Name is the location on your hard drive where you installed the WinLINK CME software (i.e. c:\program files\rsi\cms\drivers\wcme.exe). For more information see section Installing WinLINK. The CME profile name contains the required connection information to retrieve CDRs from a Cisco Call Manager Express. You must use the WinLINK Remote CME software to create a profile. For information on creating a profile please see the Adding/Modifying a Cisco Call Manager Express Profile section of this guide. For example if the CME profile name is CME1 then the Command line box should contain the following.
c:\program files\rsi\cms\drivers\wcme.exe CME1
Set the File Mask option to the folder and file name where the WinLINK Remote CME software is storing the processed Cisco Call Manager Express SMDR/CDR data (i.e. c:\bill\smdr.raw). This file name can be found in the WinLINK Remote CME profile specified in the command line. Additionally it can be found in the Destination Path & Filename option pictured in step 4 of the Adding/Modifying a Cisco Call Express Manager Profile section of this guide. Set the Type, Every and After Import boxes to scheduled, 1 Hour and Delete File respectively (pictured above). Please note if the After Import option is not set to Delete File call record data may be duplicated.
6. Next, click the Driver tab. The driver options used to process telephone call records will now be displayed on your screen.
Set the PBX driver option to Cisco Call Manager Express (WinLINK CME).
7. Press the Save button to store your configuration. The Call Accounting Mate software is now configured to process CDR data retrieved from a Cisco Call Manager Express.

Call Accounting Mate Cisco Call Manager Express Integration Guide
Callaccounting.ws Confidential Page 22
4.2 The WinLINK Remote CME Software The WinLINK Remote CME software utilizes the Microsoft .NET Framework. If the .NET framework is not installed on the computer where the WinLINK Remote CME software is installed then the following error message will appear.
If the above message appears on the screen you must obtain and install a copy of the Microsoft .NET framework. The .Net Framework can be downloaded from Microsoft’s website (www.microsoft.com). Please ensure you download the .NET Framework compatible with your computer’s Windows operating system. The first time you start the WinLINK Remote CME software the Product Registration screen will appear.
Unless your WinLINK Remote CME Software is registered it will operate on your computer for only 31 days. You can register your software at any time by pressing the Register button. You do NOT have to register the software to complete your installation. In fact you can continue to use your software for up to 31 days after it has been installed, without registering it. Press the Register button to register your software (for information on how to register your software see the “Registering your Software” section of this guide. Press the Proceed button to start using your WinLINK Remote CME software. Customer’s using a trial version must press the Proceed button. Once the software is registered the above screen will no longer be displayed.
Call Accounting Mate Cisco Call Manager Express Integration Guide
Callaccounting.ws Confidential Page 23
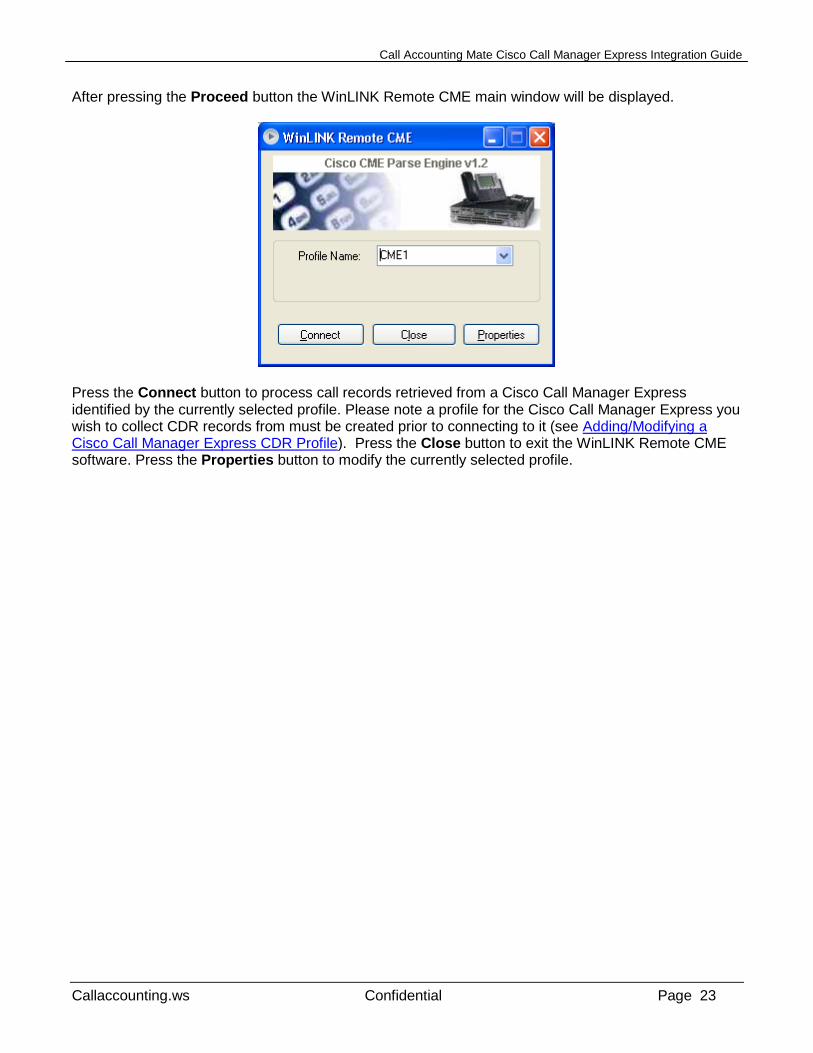
After pressing the Proceed button the WinLINK Remote CME main window will be displayed.
Press the Connect button to process call records retrieved from a Cisco Call Manager Express identified by the currently selected profile. Please note a profile for the Cisco Call Manager Express you wish to collect CDR records from must be created prior to connecting to it (see Adding/Modifying a Cisco Call Manager Express CDR Profile). Press the Close button to exit the WinLINK Remote CME software. Press the Properties button to modify the currently selected profile.

Call Accounting Mate Cisco Call Manager Express Integration Guide
Callaccounting.ws Confidential Page 24
5.0 Adding/Modifying a Cisco Call Express Manager Profile The WinLINK Remote CME software can be configured to process call records retrieved a from Cisco Call Manager Expresse utilizing either our WinLINK IP & Serial Data Storage (see Configuring the WinLINK IP & Serial Data Storage Module) or WinLINK FTP Server (see Configuring the WinLINK FTP Server Module) software. A WinLINK Remote CME site license must be purchased for each Cisco Call Manager Express CDRs you are processing (contact us for licensing and pricing information). 5.1 Creating/Modifying a Profile Name Use the following steps to configure the WinLINK Remote CME software to create a profile that will process Call Manager Express CDRs.
1. Start the WinLINK Remote CME software (see Installing WinLINK). The WinLINK Remote CME main window should now be displayed on your screen.
2. A unique Profile name must be provided for each Call Manager Express system. Use a Profile name that identifies the Call Manager Express you will be polling (i.e. the location name or city where the Call Manager Express is located, a site number, etc.). Please note Profile names CANNOT contain spaces, instead use the underscore character ‘_’. For the purposes of this documentation we will use the profile name CME1 (i.e. CME from site 1). Type CME1 into the profile name box. If the profile name box already contains information simply highlight and delete the existing name and then enter the new profile name. You can modify an existing profile by selecting it from the Profile Name drop down list box.

Call Accounting Mate Cisco Call Manager Express Integration Guide
Callaccounting.ws Confidential Page 25
3. Press the Properties button to modify/create the profile’s settings. The WinLINK Remote CME
Properties dialog box will be displayed. Now, press the General tab (first tab, top left corner). The General properties will now be displayed.
The Enter Profile Name option should contain the profile name you specified in step 2. You can change the profile name by simply modifying the contents of this field.
4. Next click the Files tab. The Files properties will now be displayed.
Use the Source Path & Filename option to specify the file path and name of the file where the Call Manager Express CDRs captured by the WinLINK Remote & Data Storage software are stored (i.e. c:\bill\cme1.raw). Please note this file name must match the file name configured in the WinLINK Remote & Data Storage software (see step 8 of Configuring WinLINK IP & Serial Data Storage as a Syslog Server) Use the Destination Path & Filename option to specify the file path and name where the processed Call Manager Express CDRs will be saved. Please note this file name must match
Call Accounting Mate Cisco Call Manager Express Integration Guide
Callaccounting.ws Confidential Page 26
the file name configured in the call accounting software. We recommend you store the data in the same directory as the Call Accounting Mate software (i.e. “c:\bill). The file name specified should be “smdr.raw” (i.e. the destination file path and name should be c:\bill\smdr.raw). If you are using our WinLINK Remote & Data Storage software then this file name must also be assigned to the File Mask option pictured in step 5 of the Call Accounting Mate section of this guide. If you are using our WinLINK FTP Server software then this file name must also be the same as the file folder/name configured on your Cisco Call Manager Express file accounting settings (see Configuring Cisco Call Manager Express to deliver CDRs to a FTP Server)
5. Press the Ok button to save any changes you have made to the currently selected WinLINK
Remote CME Profile. Press the Cancel button to ignore any of the changes you have made.
You have now successfully created/modified a WinLINK Remote CME profile to process Cisco Call Manager Express CDRs captured by the WinLINK Remote IP & Serial Data Storage software (see Configuring the WinLINK IP & Serial Data Storage Module) or the WinLINK FTP Server (see Configuring the WinLINK FTP Server Module).

Call Accounting Mate Cisco Call Manager Express Integration Guide
Callaccounting.ws Confidential Page 27
5.2 WinLINK Remote CME Software License Information Access the WinLINK Remote CME software license information by selecting a WinLINK Remote CME Profile and then pressing the Properties button. The WinLINK Remote CME Properties dialog box will be displayed. Next, press the License tab. The License Properties will now be displayed.
Press the OK button to save any changes you have made to the currently selected WinLINK Remote CME Profile. Press the Cancel button to ignore any of the changes you have made.

Call Accounting Mate Cisco Call Manager Express Integration Guide
Callaccounting.ws Confidential Page 28
6.0 Testing a Cisco Call Manager Express Profile A WinLINK Remote CME Profile must be created for each Cisco Call Manager Express you wish to retrieve call records from (see Adding/Modifying a Cisco Call Manager Profile). Once a Profile has been created it should be tested. A successful test has occurred if your Call Accounting Mate software can retrieve and process Cisco Call Manager Express CDRs specified by your profile. 6.1 Call Accounting Mate Test Use the following steps to test a WinLINK Remote CME profile with our Call Accounting Mate software.
1. Press the Windows Start button.
2. Next, click the Programs menu item.
3. Next, click the Call Accounting Mate program group and then find the Run Call Accounting Mate program icon and click on it. The Call Accounting Mate login window will now be displayed (if Call Accounting Mate is already running skip ahead to step 5).
Enter your Call Accounting Mate User Name and Password and press the Login button.
4. The Call Accounting Mate main window should now be displayed. Select the PBX Communications command from the Configuration menu. The communications settings dialog should now be visible on your screen.

Call Accounting Mate Cisco Call Manager Express Integration Guide
Callaccounting.ws Confidential Page 29
Press the Save button to instruct the Call Accounting Mate software to process the Cisco Call Manager Express CDRs collected by either the WinLINK IP & Serial Data Storage software (see Configuring the WinLINK IP & Serial Data Storage Module) or the WinLINK FTP Server (see Configuring the WinLINK FTP Server Module).
5. Wait until the Cisco Call Manager CDRs have been processed (the Call Accounting Mate phone icon color, located in the system tray, changes from blue and/or red to black).
6. Select the Live option from the Views menu. Next click the Calls option and verify new call records have been added to the database.
If the CDR retrieval fails verify your profile’s properties and make any necessary changes (see Adding/Modifying a Cisco Call Manager Express Profile). Additionally verify the WinLINK IP & Serial Data Storage module is capturing CDRs from your Cisco Call Manager Express (see Configuring WinLINK IP & Serial Data Storage as a Syslog Server). If you are using the WinLINK FTP Server then verify the WinLINK software is capturing CDRs from your Cisco Call Manager Express (see Configuring the WinLINK FTP Server Module). Repeat steps 4 thru 6 until a successful test has occurred. If you require assistance please contact us ([email protected]).

Call Accounting Mate Cisco Call Manager Express Integration Guide
Callaccounting.ws Confidential Page 30
7.0 Registering your Software Unless your WinLINK Remote CME Software is registered it will operate on your computer for only 31 days. You can register your software at any time by pressing the Register button. You do NOT have to register the software to complete your installation. In fact you can continue to use your software for up to 31 days after it has been installed without registering it. Press the Register button to register your WinLINK software. The Registration Wizard should now appear on your screen.
Press the Next button to continue with the Registration. The Software License Agreement will be displayed.

Call Accounting Mate Cisco Call Manager Express Integration Guide
Callaccounting.ws Confidential Page 31
Press the Yes button to continue. The Application To Register window will be displayed. The Application Name box should already contain the location where the WinLINK Remote CME software was installed.
You should not have to change anything on this screen. Press the Next button to continue.

Call Accounting Mate Cisco Call Manager Express Integration Guide
Callaccounting.ws Confidential Page 32
Enter your WinLINK Remote CME software Serial Number (S/N) or CD Key into the space provided. This 14 character serial number is usually located on the back of the CD-ROM packaging. If you downloaded the software from our website this number will have been sent to you via email. If you do not have a serial number contact us ([email protected]). Press the Next button to continue. The Unlock Software Form will now appear on your screen.
Fill in the Company Name and User Name information. Do NOT modify the Application Options box unless instructed to do so by a support technician. Next, contact us (email [email protected]) and provide us with the User Identification Number (red) located on this screen. Type the unlocking number provided by our technician, into the space provided, and then press the Next button.

Call Accounting Mate Cisco Call Manager Express Integration Guide
Callaccounting.ws Confidential Page 33
Your software is now registered. Press the Finish button to complete the Registration process.