Embed Size (px)
Citation preview

Owner’s Manual
1999
Save These Instructions 1
Important Safety Instructions
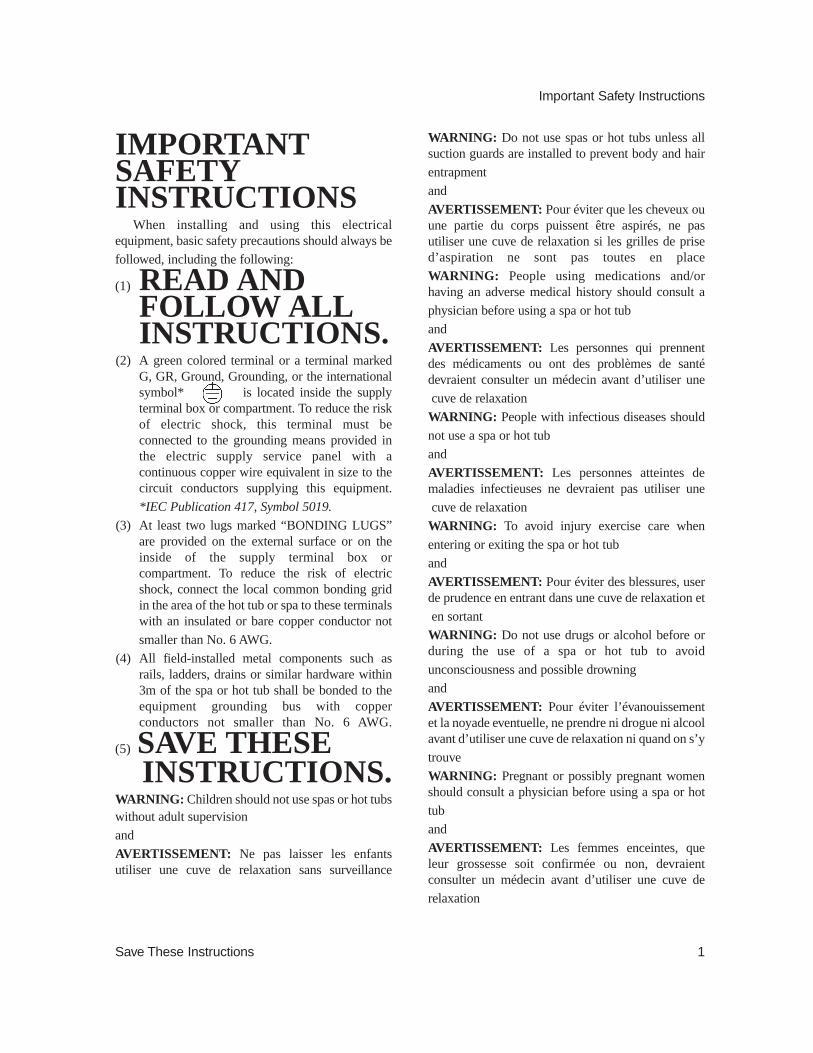
IMPORTANT SAFETY INSTRUCTIONS
When installing and using this electricalequipment, basic safety precautions should always be
followed, including the following:
(1) READ ANDFOLLOW ALLINSTRUCTIONS.
(2) A green colored terminal or a terminal markedG, GR, Ground, Grounding, or the internationalsymbol* is located inside the supplyterminal box or compartment. To reduce the riskof electric shock, this terminal must beconnected to the grounding means provided inthe electric supply service panel with acontinuous copper wire equivalent in size to thecircuit conductors supplying this equipment.
*IEC Publication 417, Symbol 5019.
(3) At least two lugs marked “BONDING LUGS”are provided on the external surface or on theinside of the supply terminal box orcompartment. To reduce the risk of electricshock, connect the local common bonding gridin the area of the hot tub or spa to these terminalswith an insulated or bare copper conductor not
smaller than No. 6 AWG.
(4) All field-installed metal components such asrails, ladders, drains or similar hardware within3m of the spa or hot tub shall be bonded to theequipment grounding bus with copperconductors not smaller than No. 6 AWG.
(5) SAVE THESE INSTRUCTIONS.
WARNING: Children should not use spas or hot tubswithout adult supervision
and
AVERTISSEMENT: Ne pas laisser les enfantsutiliser une cuve de relaxation sans surveillance
WARNING: Do not use spas or hot tubs unless allsuction guards are installed to prevent body and hair
entrapment
and
AVERTISSEMENT: Pour éviter que les cheveux ouune partie du corps puissent être aspirés, ne pasutiliser une cuve de relaxation si les grilles de prised’aspiration ne sont pas toutes en place
WARNING: People using medications and/orhaving an adverse medical history should consult a
physician before using a spa or hot tub
and
AVERTISSEMENT: Les personnes qui prennentdes médicaments ou ont des problèmes de santédevraient consulter un médecin avant d’utiliser une
cuve de relaxation
WARNING: People with infectious diseases should
not use a spa or hot tub
and
AVERTISSEMENT: Les personnes atteintes demaladies infectieuses ne devraient pas utiliser une
cuve de relaxation
WARNING: To avoid injury exercise care when
entering or exiting the spa or hot tub
and
AVERTISSEMENT: Pour éviter des blessures, userde prudence en entrant dans une cuve de relaxation et
en sortant
WARNING: Do not use drugs or alcohol before orduring the use of a spa or hot tub to avoid
unconsciousness and possible drowning
and
AVERTISSEMENT: Pour éviter l’évanouissementet la noyade eventuelle, ne prendre ni drogue ni alcoolavant d’utiliser une cuve de relaxation ni quand on s’y
trouve
WARNING: Pregnant or possibly pregnant womenshould consult a physician before using a spa or hot
tub
and
AVERTISSEMENT: Les femmes enceintes, queleur grossesse soit confirmée ou non, devraientconsulter un médecin avant d’utiliser une cuve de
relaxation
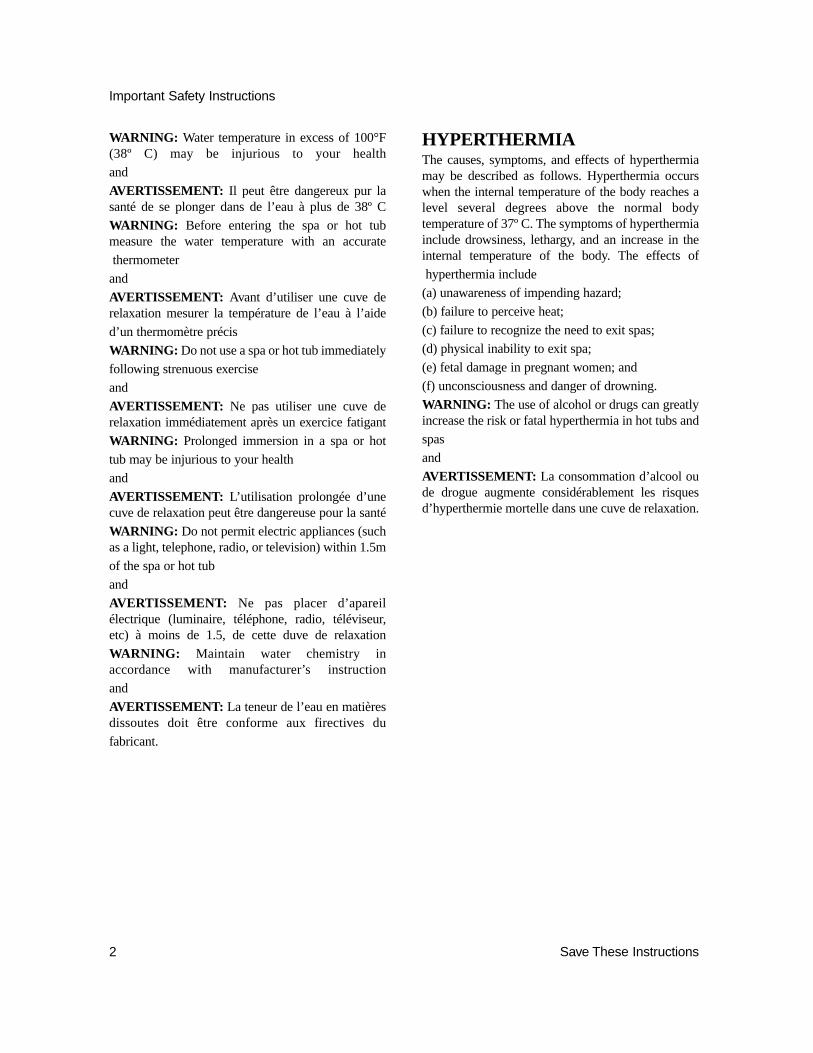
WARNING: Water temperature in excess of 100°F(38º C) may be injurious to your health
and
AVERTISSEMENT: Il peut être dangereux pur lasanté de se plonger dans de l’eau à plus de 38º C
WARNING: Before entering the spa or hot tubmeasure the water temperature with an accurate
thermometer
and
AVERTISSEMENT: Avant d’utiliser une cuve derelaxation mesurer la température de l’eau à l’aide
d’un thermomètre précis
WARNING: Do not use a spa or hot tub immediately
following strenuous exercise
and
AVERTISSEMENT: Ne pas utiliser une cuve derelaxation immédiatement après un exercice fatigant
WARNING: Prolonged immersion in a spa or hot
tub may be injurious to your health
and
AVERTISSEMENT: L’utilisation prolongée d’unecuve de relaxation peut être dangereuse pour la santé
WARNING: Do not permit electric appliances (suchas a light, telephone, radio, or television) within 1.5m
of the spa or hot tub
and
AVERTISSEMENT: Ne pas placer d’apareilélectrique (luminaire, téléphone, radio, téléviseur,etc) à moins de 1.5, de cette duve de relaxation
WARNING: Maintain water chemistry inaccordance with manufacturer’s instruction
and
AVERTISSEMENT: La teneur de l’eau en matièresdissoutes doit être conforme aux firectives du
fabricant.
HYPERTHERMIAThe causes, symptoms, and effects of hyperthermiamay be described as follows. Hyperthermia occurswhen the internal temperature of the body reaches alevel several degrees above the normal bodytemperature of 37º C. The symptoms of hyperthermiainclude drowsiness, lethargy, and an increase in theinternal temperature of the body. The effects of
hyperthermia include
(a) unawareness of impending hazard;
(b) failure to perceive heat;
(c) failure to recognize the need to exit spas;
(d) physical inability to exit spa;
(e) fetal damage in pregnant women; and
(f) unconsciousness and danger of drowning.
WARNING: The use of alcohol or drugs can greatlyincrease the risk or fatal hyperthermia in hot tubs and
spas
and
AVERTISSEMENT: La consommation d’alcool oude drogue augmente considérablement les risquesd’hyperthermie mortelle dans une cuve de relaxation.
Save These Instructions2
Important Safety Instructions

Save These Instructions 3
Important Safety Instructions
Important Safety Instructions . . . . . . . 4 Do’s and Don’ts . . . . . . . . . . . . . . . . 5Hyperthermia . . . . . . . . . . . . . . . . . . 5
Spa System Components . . . . . . . . . . . 6
Spa Components . . . . . . . . . . . . . . . . . . 7
Spa Installation . . . . . . . . . . . . . . . . . . . 8Site and Positioning . . . . . . . . . . . . . 8Outdoor Installation . . . . . . . . . . . . . 8Indoor Installation . . . . . . . . . . . . . . . 8
Electrical Information . . . . . . . . . . . . . 8Ground-Fault Circuit-Interrupter . . . . 8
Important Safety Instructions . . . . . . . . . 9Installation Options . . . . . . . . . . . . . . 9
Start Up Procedures . . . . . . . . . . . . . . . . 10
Operating Instructions . . . . . . . . . . . . . 11California Cooperage Series
Control System . . . . . . . . . . . . . . . 11Light . . . . . . . . . . . . . . . . . . . . . . . 11Jets . . . . . . . . . . . . . . . . . . . . . . . . 11Filtration . . . . . . . . . . . . . . . . . . . . 11Temperature Control . . . . . . . . . . . 12
Safety Features . . . . . . . . . . . . . . . . . . . 12Overheat Protection . . . . . . . . . . . . . 12Flow Switch Detection . . . . . . . . . . . 12Open Sensor . . . . . . . . . . . . . . . . . . . 12
Jets and Air Controls . . . . . . . . . . . . . . 12Jets . . . . . . . . . . . . . . . . . . . . . . . . . . 12Air Controls . . . . . . . . . . . . . . . . . . . 12
Maintenance . . . . . . . . . . . . . . . . . . . . . 13
Water Chemistry . . . . . . . . . . . . . . . . 13Sanitizing . . . . . . . . . . . . . . . . . . . 13pH Level . . . . . . . . . . . . . . . . . . . . 13
Water Maintenance With thePowerworks® Ozonator . . . . . . . . . . . 13Sanitizing With Ozone . . . . . . . . . . . 13Specialty Chemicals . . . . . . . . . . . . . 14Hot Water Guide . . . . . . . . . . . . . . . . 14BioQuest . . . . . . . . . . . . . . . . . . . . . . 15Spa Cabinet Care . . . . . . . . . . . . . . . 15Spa Surface Care and Cleaning . . . . . 16Filter Maintenance . . . . . . . . . . . . . . 16Draining Spa . . . . . . . . . . . . . . . . . . . 16Drain Access . . . . . . . . . . . . . . . . . . . 17Priming Spa . . . . . . . . . . . . . . . . . . . 17Winterizing . . . . . . . . . . . . . . . . . . . . 17Light Bulbs . . . . . . . . . . . . . . . . . . . . 17
Problem Solving Guide . . . . . . . . . . . . . 18
Spa Soaking Guidelines . . . . . . . . . . . . 20
Technical Specifications . . . . . . . . . . . . 20
Wiring Diagram . . . . . . . . . . . . . . . . . . 21
Accessories . . . . . . . . . . . . . . . . . . . . . . 23
Notes . . . . . . . . . . . . . . . . . . . . . . . . . . . 24
Contents

IMPORTANT SAFETY INSTRUCTIONS
When installing and using this electricalequipment, basic safety precautions should always be
followed, including the following:
1. READ ANDFOLLOW ALLINSTRUCTIONS
2. Warning: To reduce the risk of injury, do notpermit children to use this product unless theyare closely supervised at all times.
3. A wire connector is provided on this unit toconnect a minimum No. 6 AWG (5.15 mm2)solid copper conductor between this unit and anymetal equipment, metal enclosures of electricalequipment, metal water pipe, or conduit within 5
feet (1.5 m) of the unit.
4. Danger: Risk of Injury.
d) Never connect unit to a power supply with aload controller.
IMPORTANT SAFETYINSTRUCTIONS
5. Danger: Risk of Accidental Drowning. Extremecaution must be exercised to pre-ventunauthorized access by children. To avoidaccidents, ensure that children cannot use thisspa unless they are supervised at all times.
6. Danger: Risk of Injury. The suction fittings inthis spa are sized to match the specific water flowcreated by the pump. Should the need arise toreplace the suction fittings or the pump, be surethat the flow rates are compatible.
Never operate spa if the suction fittings arebroken or missing. Never replace a suction fittingwith one rated less than the flow rate marked on
the original suction fitting.
7. Danger: Risk of Electrical Shock. Install at least5 feet (1.5 m) from all metal surfaces. As analternative, a spa may be installed within 5 feetof metal surfaces if each metal surface ispermanently connected by a minimum No. 6AWG (5.15 mm2) solid copper conductorattached to the wire connector on the terminalbox that is provided for this purpose.
8. Danger: Risk of Electric Shock. Do not permitany electric appliance, such as a light, telephone,radio, or television, within 5 ft. (1.5 m) of a spa.
A licensed electrician should make the finalelectrical connections.The electrical supply for this product mustinclude a suitably rated switch or circuit breakerto open all ungrounded supply conductors tocomply with section 422-20 of the NationalElectrical Code ANSI/NFPA 70-1987. Thisdisconnecting means must be readily accessiblefor operation but installed at least 5 ft. (1.5 m)from the spa as required to comply with local
code requirements.
Install to provide drainage of compartment for
electrical components.
9. Warning: To reduce the risk of injury:
a) The water in a spa should never exceed 104ºF(40ºC). Water temperatures between 100ºF(38ºC) and 104ºF (40ºC) are considered safefor a healthy adult. Lower water temperaturesare recommended for young children andwhen spa use exceeds 10 minutes.
b) Since excessive water temperatures have ahigh potential for causing fetal damageduring the early months of pregnancy,pregnant or possibly pregnant women shouldlimit spa water temperatures to 100ºF (38ºC).
c) Before entering a spa, the user shouldmeasure the water temperature with anaccurate thermometer since the tolerance ofwater temperature-regulating devices varies.
d) The use of alcohol, drugs, or medicationbefore or during spa use may lead tounconsciousness with the possibility of
drowning.
e) Persons suffering from obesity or with amedical history of heart disease, low or highblood pressure, circulatory system problems,
Save These Instructions4
Important Safety Instructions
Caution: Risk of electrical shock.Read and follow all instructions.
or diabetes should consult a physician before
using a spa.
f) Persons using medication should consult aphysician before using a spa since somemedication may induce drowsiness whileother medication may affect heart rate, blood
pressure, and circulation.
8. SAVE THESEINSTRUCTIONS.
Do’s and Don’ts Do • Replace your cover immediately after use.
• Be aware of the dangers of a wet and slipperysurface. Use caution when entering and exiting
your spa.
• Have a licensed electrician make all finalelectrical connections.
• Keep your water chemistry correctly balanced.Untreated spa water will cause problems withyour spa and equipment as well as being a health
risk.
• Clean your filter monthly.
• It is recommended you position the spa in such away as to leave adequate room to access all sides
for maintenance purposes.
• Use a bathing cap with long hair.
• Refer to information on hyperthermia on this
page.
• Use only genuine Coleman Spas’ Spa Careproducts for the best performance and to keepyour water properly balanced for years of
enjoyment. (See p. 23)
Don’t:• Use the spa at 104ºF (40ºC) for long periods of
time. Do refer to information on hyperthermia
below.
• Use an extension cord to power your spa.
• Allow anyone to stand on the spa cover. It is not
designed to support weight.
• Power the spa unless it is filled with water to the
water level mark on the Weir door.
• Operate the pump for extended periods of time
with the cover in place. Extended operation cancause heat build-up and interfere with spaoperation.
Save These Instructions 5
Important Safety Instructions
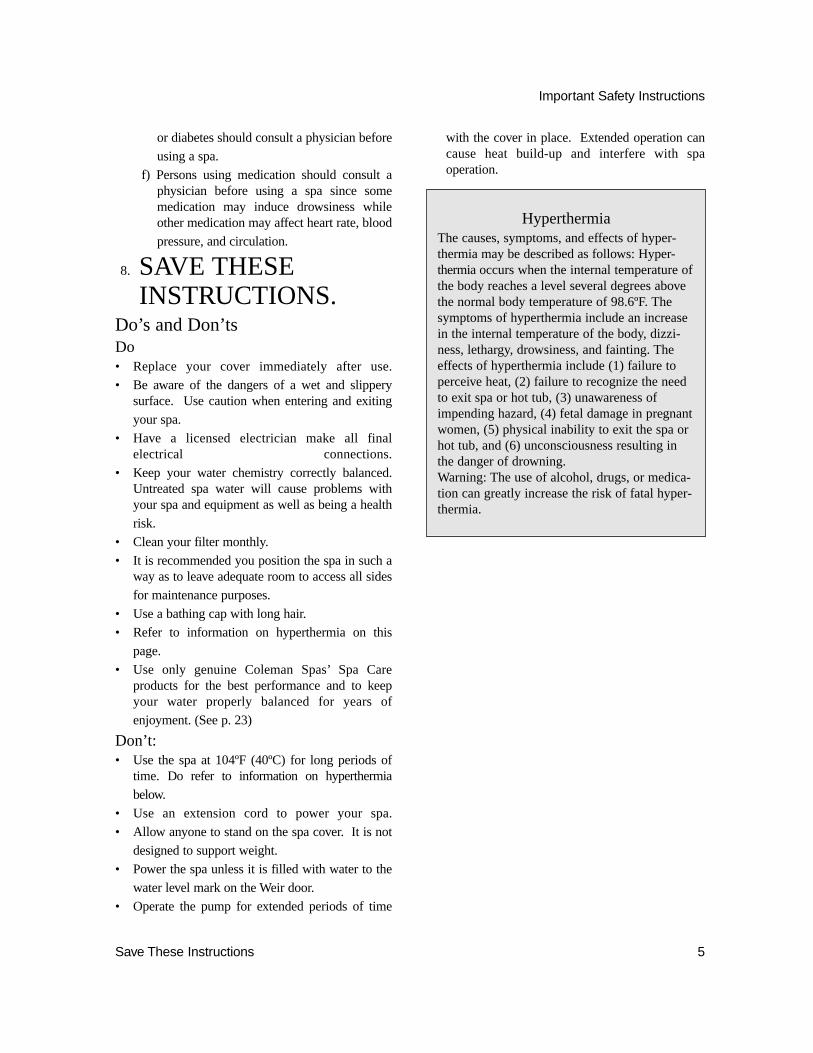
HyperthermiaThe causes, symptoms, and effects of hyper-thermia may be described as follows: Hyper-thermiaoccurs when the internal temperature ofthe body reaches a level several degrees abovethe normal body temperature of 98.6ºF. Thesymptoms of hyperthermia include an increasein the internal temperature of the body, dizzi-ness, lethargy, drowsiness, and fainting. Theeffects of hyperthermia include (1) failure toperceive heat, (2) failure to recognize the needto exit spa or hot tub, (3) unawareness ofimpending hazard, (4) fetal damage in pregnantwomen, (5) physical inability to exit the spa orhot tub, and (6) unconsciousness resulting inthe danger of drowning.Warning: The use of alcohol, drugs, or medica-tion can greatly increase the risk of fatal hyper-thermia.

Save These Instructions6
A. Filter Skimmer/Weir Door:Removes floating debris from the water surface,provides a water return path to equipment, and
houses water filter element.
B. Spa Side Control Panel: Used to controltemperature setting, pump for jets, and light.
C. Air Controls: Increases or decreases air enteringthe jets. Close during heating for maximum
efficiency.
D. Equipment Pack Service Panel (no userserviceable parts): Spa support system
consisting of pump(s), heater, and associated
electrical controls (not shown).
E. Drain Access (remove the door panel andadjacent corner posts): Spa drain hoses.
F. Manufacturer’s Identification Label: Containsidentification information for warranty service.
Spa System Components
Spa System Components
A
CB
E FD

Save These Instructions 7
A. Pumps: Low speed for efficient watercirculation during filtration and heating; high speed for maximum action of the jets. Thepump functions are activated by the topside
controls.
B. Warning and Installation Label:Contains important safety information and
installation instructions.
C. Slice Valve:Used to shut off water flow from thespa to the equipment while servicing. It shouldbe open and locked during normal operations.
D. Electrical Connections: The electricalcomponents connect here. All existing
connections should be intact.
E. Heater Assembly:Thermostatically controlledand equipped with an overheat safety shut-off.
Spa Components
Note: No consumer serviceable parts.
Spa Components
Reference Only. Equipment is not always as shown.
AB ECD
C

Save These Instructions8
Spa Installation
The electrical supply for this product must includea suitably rated switch or circuit breaker to open allungrounded supply conductors to comply withSection 422- 20 of the National Electrical Code,ANSI/NFPA70-1987. The disconnecting meansmust be readily accessible but installed at least 5 feet
(1.5 meters) from the spa water.
Site and PositioningLocate the spa on solid, level foundation or
flooring. Keep in mind the weight of the filled spa (in excess of 4,000 lbs. on some models). If you haveany doubts about the load bearing ability of yourchosen site, contact an architect, your buildingdepartment or a building contractor. The entireperimeter of the spa cabinet and the spa bottom mustbe evenly supported.
If your spa is installed outdoors, we recommendthat you provide a concrete pad for the spa to rest on(8’x 8’x 4" level pad). Failure to provide a levelsurface could structurally damage your spa and will
void the warranty.
Installation must provide for drainage for theelectrical compartment. The spa must be installed toallow access for service and maintenance; therefore,below grade level installation is not recommended.
Outdoor InstallationKeep the following additional factors in mind
when installing your spa outdoors:
1. Local codes pertaining to fencing.
2. Local electrical and plumbing codes.
3. View from your house.
4. Wind direction.
5. Exposure to sunlight.
6. Location in regard to trees(falling leaves andshade).
7. Dressing and bathroom location.
8. Storage area for maintenance equipment andchemicals.
9. Location to facilitate adult supervision.
10. Landscaping and nighttime lighting.
11. Access to equipment cabinet panels.
12. Power supply location and foot traffic.
Indoor InstallationKeep the following additional factors in mind
when installing your spa indoors:
1. Indoor spas promote high humidity, so a meansof decreasing this humidity must be provided.This can be accomplished by using eitherventilation fans or oversized de-humidifiers.
Consult your dealer.
2. Floor drains must be provided to drain off waterwhich may cause walking hazards and/or waterdamage. No carpeting, ceramic tile is preferred.
3. Floor area should be flat and non-skid.
4. Walls, ceilings, woodwork should be ofmaterials capable of withstanding high humidity
(redwood, cedar).
5. Be sure floor load bearing capacities areadequate to support the concentrated spa weight.
6. Spas should be double checked for leaks beforeinstalling to avoid possible water damage.
7. Indoor sunrooms are capable of maintaininghigh ambient temperatures which may effect thespa water temperature. It is not recommendedthat you operate your filter cycles for longer than
6 hours under these conditions.
Electrical Information
Ground-Fault Circuit-InterrupterA qualified electrician shall connect the spa to a
circuit protected by a GFCI. This is a requirement bythe National Electric Code (NEC), ANSI/NFPA 70and is in compliance with Underwriter’sLaboratories, INC .
Spa Installation
Danger: Risk of electrical shock. Install atleast 5 feet from all metal surfaces.
Caution: Risk of electrical shock.Read and follow all instructions.

Important Safety InstructionsPrior to performing any service to the spa
equipment, turn off all primary electrical power at themain circuit breaker or disconnect panel. All fieldelectrical connections can be made by removing thefront panel of the electrical control box. To gainaccess to the control box you must remove theequipment compartment access panel.
All electrical connections to this spa packagemust be accomplished by a qualified licensedelectrician in accordance with the National ElectricalCode and in accordance with local electrical codes in
effect at the time of installation.
All connections should be made in accordancewith the wiring diagram in the control box.
This equipment is designed to operate on 60Hzalternating current only, at a voltage of 120 or 240
volts as required.
Connections should be made using copperconductors only. The connecting wire and circuitbreakers or fuses must all be sized to accommodatethe Total Ampere load as specified on the equipment
label.
ALL UNIONS MUST BE HAND-TIGHT ANDALL SLICE VALVES MUST BE LOCKED IN THE“OPEN” POSITION BEFORE FILLING ORREFILLING THE SPA!
Installation OptionsCalifornia Cooperage
The California Cooperage models 103 and 105 are
convertible to either 120 volt or 240 volt electrical
service. Model 107 can only be connected to a 240
volt electrical service.
120 Volt Installation
Permanently Connected
Model:• The California Cooperage model 103 and 105.
Electrical Requirements:• 120 Volts, 60Hz, Single Phase, 30 amp. or *20
amp 3 wire service (including ground).
*20 Amp Option(see J8 diagram on p10)
The heater can only be activated with thepump on low speed. Only the light can be
operating at the same time without disablingthe heater. See your authorized Coleman Spas dealer to select this option.
• California Cooperage spas installed for 120 voltoperation require a 3 wire, 30 amp., 120 voltsubfeed in non-metallic pipe to the spa equipmentcompartment (line 1, neutral, and ground). Referto wiring diagram on page 20. A green coloredterminal (or wire connector marked “G”, “GR”,“Grounding”) is provided in the control box. Toreduce the risk of electrical shock, connect thisterminal or connector to the grounding terminal ofyour electrical service or supply panel with acontinuous green insulated copper wire equivalentto the circuit conductor supplying this equipment,but no smaller than No. 12 AWG. In addition, asecondpressure wire connector is provided on thesurface of the control box for bonding to localground points. To reduce the risk of electricalshock, this connector should be bonded with a No.6 AWG copper wire to any metal ladders, waterpipes, or any metal within 5 feet of the spa. Colemanrecommends using copper wire for all electrical
connections.
240 Volt Installation
Permanently Connected
Model:• The California Cooperage models 103, 105, and
107.
Electrical Requirements:• 240 Volts, 60Hz, Single Phase, 50 amp., 4 wire
service (including ground).
• *30 Amp Option(see J8 diagram on p10)
The heater can only be activated with thepump on low speed. Only the light can beoperating at the same time without disablingthe heater. See your authorized Coleman Spasdealer to select this option.Units to be operated at 240 volts must have all
electrical connections made by a qualifiedelectrician in accordance with the NationalElectric Code and in accordance with all localelectrical codes in effect at the time of installation.
A hole can be drilled in the pedestal or base of theunit to bring the conduit to the equipment
compartment.
Save These Instructions 9
Electrical Information

• California Cooperage spas installed for 240 voltoperation require a 4 wire, 50 amp., 240 voltsubfeed in non-metallic pipe to the spa equipmentcompartment (line 1, line 2, neutral, and ground).Refer to wiring diagram on page 21. A greencolored terminal (or wire connector marked “G”,“GR”, “Grounding”) is provided in the controlbox. To reduce the risk of electrical shock,connect this terminal or connector to thegrounding terminal of your electrical service orsupply panel with a continuous green insulatedcopper wire equivalent to the circuit conductorsupplying this equipment, but no smaller than No.12 AWG. In addition, a secondpressure wireconnector is provided on the surface of the controlbox for bonding to local ground points. To reducethe risk of electrical shock, this connector shouldbe bonded with a No. 6 AWG copper wire to anymetal ladders, water pipes, or any metal within 5 feetof the spa. Coleman recommends using copper wire
for all electrical connections.
The UL and the NEC (National Electric Code)both dictate that the amperage rating and theamperage requirements be listed on all electricalappliances. Coleman Spas, Inc. supplies both therating and the requirements printed on our spas and inour manuals. The rating merely designates a class orrange of amperages. For example, an appliance ratedat 40 amps may actually draw as little as 36 amps oras much as 44 amps. But it is rated at 40 ampsregardless. In contrast, the requirement listed on anappliance states the size of load that the wiring,overcurrent protective device, etc. must be capable ofsupporting in order to supply current to thisappliance. This requirement includes a built-in safety
factor. Home inspectors, licensed electricians, andUL technicians receive training explaining thedifference between these two terms.
The NEC states: "The ampacity of the branch-circuit conductors, and the rating or setting ofovercurrent protective devices, shall not be less that125% of the total load of the nameplate rating" seearticle 680-41h of the NEC and UL section 63.1.
(UL Device Rating) times 125% = (DeviceRequirements)
(40 Amperes) times 125% = (50 Amperes)
Therefore a spa with a rating of 40 amperes willneed an overcurrent protective device and copperwiring capable of handling 50 Amperes.
Start Up ProceduresFollow recommendations for site location and
electrical connection.
1. Fill the spa through the filter hole to the waterline on the weir door with tap water. Never use
“softened” water in your spa.
2. Turn power on to unit at circuit breaker or
disconnect.
3. Open the air controls and press the Jets buttontwice. Water should come from the therapy jets.If water flow is not established, turn off jets and
see Priming Spa (page 17).
4. Add chemicals. See Chemical treatment andWater Maintenance section (pages 13-15).
Follow Operating Instructions for your particularmodel and set the spa to heat to the desiredtemperature. Initially you may find that the sparequires 12 to 14 hours on 240 Volt installations toreach temperature or up to 18 hours on 120installations. Keep your thermal cover on the unit andclose the air controls to help the heating process.
Save These Instructions10
Start Up Procedures
Note: Never operate the spa when the waterlevel is below water level mark on weir door.It can damage the pumps and heater and is
potentially dangerous.
Important: Do not operate the spawithout full water flow.
NoYes
NoYes
120V/20A120V/30A
240V/30A240V/50A
Input
2050
2050
JumperPosition
Heater &Hi Pump
Heater &Low Pump
YesYes
YesYes
Jumper J8 Settings
Save These Instructions 11
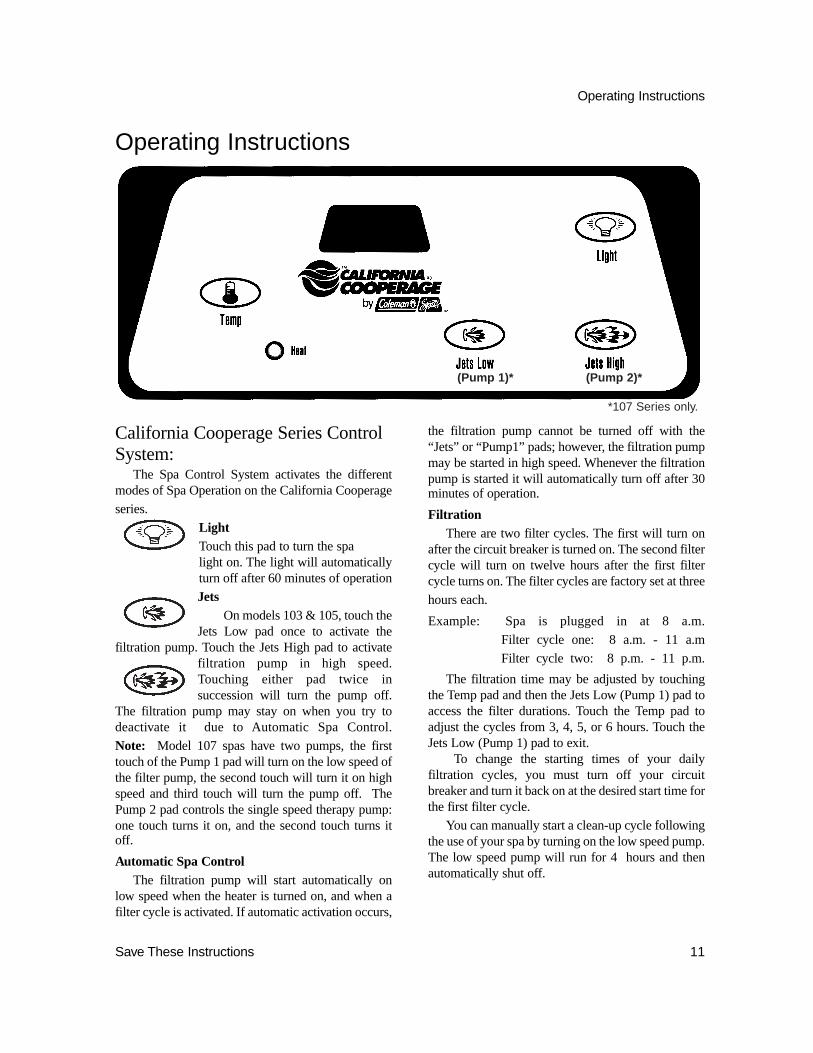
California Cooperage Series ControlSystem:
The Spa Control System activates the differentmodes of Spa Operation on the California Cooperage
series.
LightTouch this pad to turn the spa light on. The light will automaticallyturn off after 60 minutes of operation
JetsOn models 103 & 105, touch the
Jets Low pad once to activate thefiltration pump. Touch the Jets High pad to activate
filtration pump in high speed.Touching either pad twice insuccession will turn the pump off.
The filtration pump may stay on when you try todeactivate it due to Automatic Spa Control.
Note: Model 107 spas have two pumps, the firsttouch of the Pump 1 pad will turn on the low speed ofthe filter pump, the second touch will turn it on highspeed and third touch will turn the pump off. ThePump 2 pad controls the single speed therapy pump:one touch turns it on, and the second touch turns itoff.
Automatic Spa ControlThe filtration pump will start automatically on
low speed when the heater is turned on, and when afilter cycle is activated. If automatic activation occurs,
the filtration pump cannot be turned off with the“Jets” or “Pump1” pads; however, the filtration pumpmay be started in high speed. Whenever the filtrationpump is started it will automatically turn off after 30minutes of operation.
FiltrationThere are two filter cycles. The first will turn on
after the circuit breaker is turned on. The second filtercycle will turn on twelve hours after the first filtercycle turns on. The filter cycles are factory set at three
hours each.
Example: Spa is plugged in at 8 a.m.
Filter cycle one: 8 a.m. - 11 a.m
Filter cycle two: 8 p.m. - 11 p.m.
The filtration time may be adjusted by touchingthe Temp pad and then the Jets Low (Pump 1) pad toaccess the filter durations. Touch the Temp pad toadjust the cycles from 3, 4, 5, or 6 hours. Touch the Jets Low (Pump 1) pad to exit.
To change the starting times of your dailyfiltration cycles, you must turn off your circuitbreaker and turn it back on at the desired start time forthe first filter cycle.
You can manually start a clean-up cycle followingthe use of your spa by turning on the low speed pump.The low speed pump will run for 4 hours and thenautomatically shut off.
Operating Instructions
Operating Instructions
(Pump 1)* (Pump 2)*
*107 Series only.

Note: Ozone systems will only run during the filtercycles. If a pad is touched, the ozonator will bedisabled for 30 minutes from the last time a pad
was touched.
Temperature ControlThe spa water temperature iscontrolled by touching the set
“Temp” pad. The maximum set temperature is 104ºF(40° C) and the minimum set temperature is 80ºF(27° C). When the pad is touched, the display willshow the set temperature. Touching the pad a secondtime will cause the set temperature to increase ordecrease depending on what direction was lastchosen. Each successive touch will change the settemperature in the same direction. If the oppositedirection is desired, release the pad and let the displayrevert to the actual water temperature again. Touchthe pad to display the set temperature, and again tomake the temperature change in the desired direction.The set temperature read-out flashes, the actual water
temperature read-out does not flash.
Safety FeaturesOverheat Protection
If the spa should overheat, the display will read“OH” and the spa will shut down. In such acondition, DO NOT ENTER THE WATER. Turn offall power to the spa and contact your dealer or serviceorganization. To reset the spa, touch any panel button.
Flow Switch DetectionThe California-Cooperage spas are equipped with
a pressure switch to detect pump flow. If a pressureswitch malfunctions, i.e. remains closed, the displaywill constantly read “FL” and the spa will shut down.Contact your dealer or service
organization.
If there is reduced water flow, low water level oran obstruction, the heater will be disabled. Check fora low water level, a dirty filter or an obstruction.
Open Sensor (Spa is Deactivated)If either the high-limit or water temperature
sensor malfunction, the display will read “Sn” .Contact your dealer or service organization.
Jets
California Cooperage jets are all individuallyengineered to provide a unique hydro-massage. Thejet system is balanced so that all full size therapy jetnozzles are interchangeable and can be added in anyquantity. Depending on the model, your spa will havea combination of the following jets.
Euro Therapeutic Jets (neck jets, lounge andfootwell jets) positioned to deliver a concentratedmassage on the muscles that need it most!
Euro Ozone Jet (footwell) provides a circular,penetrating massage. This jet is also the entry pointfor ozone during the automatic filtration cycles.Ozone production is disabled when other functionsare activated on the control panel by the spa user.
Euro Turbo Swirl Jets (therapy pulse flow jetslocated throughout the spa) offer a spinning,pulsating massage action with a v-shaped jet stream.
LS Adjustable Jets (larger jets throughout the spa)create a genuine buoyant, whirlpool effect.
Air ControlsThe intensity of the jet action can be controlled by
altering the amount of air injected with water throughthe jets. Your spa has 2 air controls located on the lipof the spa. Each control activates air to specific jets inthe spa allowing you to create various combinationsand levels of jet action to suit individual taste.
Save These Instructions12
Safety Features
Warning! Shock Hazard!No User Serviceable Parts.
Do not attempt service of this control. Contactyour dealer or service organization for
assistance. Follow all owner’s manual powerconnection instructions. Installation must beperformed by a licensed electrician, and allgrounding connections must be properly
installed.
Note: Air controls should be closedduring heating cycles for maximum
energy efficiency.

Maintenance
Water ChemistryWater chemistry is critical in a spa system. The
combination of high temperature and small volumemeans that the chemical balance must be watchedcarefully. Use only genuine Coleman Spas’ spa careproducts for the best performance and to keep yourwater properly balanced for years of enjoyment. It isrecommended that you purchase a Coleman Spas SpaCare Start Up Kit from your dealer. For water usageinformation, please see t table on page20.
SanitizingSanitizing your water destroys harmful organisms
and keeps your spa healthy and safe. Two commonlyused spa sanitizers are bromine and chlorine, withozone being used as an oxidizer. Chlorine andbromine are chemicals that you will add to the water.Ozone is a gas that is produced by an ozonator andinjected into the water. It is important that a residualof sanitizer remain in your water. High watertemperature, aeration and use will increase the needfor sanitizer. In addition to maintaining a residual, itis important to “shock” your spa water periodicallyand after heavy use. This addition of substantialamounts of sanitizer super-chlorinates the water andoxidizes non-filterable organic residue. Allow thesanitizer level to drop back to the residual amountbefore using. Also use your Clean Up Cycle, page 11,after heavy use for additional filtration.Note: Coleman Spas does not recommend the use of
trichlor (swimming pool chlorine) in its spas.
pH LevelpH is a balance of acidity and alkalinity in the
water. Maintaining proper pH is important for theeffectiveness of your sanitizer, for user comfort and toprevent corrosion of the spa equipment.
Note: Keep a chlorine or bromine residual of 3.0 to5.0 ppm. Tests should be done daily with your testkit.
Note: Never mix two chemicals together. Never storeany chemicals in the equipment compartment.
Note: Do not use muriatic acid to balance pH as itwill damage your spa surface and equipment.
Recommended LevelspH: 7.2–7.6 (Ideal 7.4–7.6)
Sanitizer Residual:3.0–5.0 ppmTotal Dissolved Solids:100–200 ppm Free Available Sanitizer:3.0–5.0 ppm
Note: Make sure you use fresh test kit reagents. Theylose their accuracy with age. (Date the bottleupon purchase). Recommended to use tri-colorvs. di-color test kit.
Total Alkalinity: 80–100 ppm ideal for dichlor, andbromine.
Water Maintenance With thePowerworks® Ozonator
Equipping your spa with a Powerworks® Ozonatoris a smart decision. The use of ozone in conjunctionwith the normal spa sanitizing and water balancingchemicals will give you a cleaner, healthier spaenvironment. Maintenance and chemical usage maybe significantly reduced, and you will enjoy cleanerwater.
Sanitizing With OzoneSpas vary in size and the amount that they areused
will vary considerably from family to family. For thisreason you will need to establish your sanitizingprogram based upon your own personal use. Whenusing ozone you should start by balancing your waterchemistry as you normally would. Aspa should run andbe ozonated no less than six hours per day. Thisstarting point should not be considered final. If yourspa is heavily used, this run time should be increased.Your spa produces ozone during filtration cycles. (Seepage 11.)
The amount of a residual sanitizer (chlorine orbromine) that you maintain in the water will also varydepending on use. It is recommended that youmaintain a residual of 3.0–5.0 ppm. Periodically, andafter periods of heavy use, it is necessary to “shock”your spa with additional amounts of sanitizer. Referto your spa care products for further information.
Save These Instructions 13
Maintenance

Save These Instructions14
Maintenance
Specialty ChemicalsAlthough ozone will reduce the need forspecialty
chemicals, it is recommended to always have some onhand. There may come a time whenyou will berequired to add some of these due to heavy usage of
the spa or when changing the water.
If you are in an area which has metals in thesource water, a specialty chemical program should be
followed to avoid staining. Use only genuineColeman Spas’ spa care products for the bestperformance and to keep your water properly
balanced for years of enjoyment.
These guidelines cover the most commonprocedures when operating a spa with ozone. Shouldyou encounter a situation which you don’t completelyunderstand, contact your dealer for assistance.
Problem Cause SolutionCloudy Water • Inadequate filtration/dirty filter • Check to make sure the filter is running
properly/Clean filter with a filter cleaner or degreaser.
• Excessive oils/organic matter • Shock the spa with a chlorine or bromine sanitizer/shock or other shock treatment product.
• Improper sanitation/bacteria • Increase sanitizer level to balance water and shock if needed.
• High pH and/or high alkalinity • Adjust pH; add appropriate sodium bisulfate product.
• Suspended particles/organic matter • Use clarifierNote: If using an ozone generator, do not use polymer based clarifiers.
• High total dissolved solids (TDS) • Depending on the severity-drain the spa to half and refill; or drain the spa completely, clean and refill.
Water Odor • Excessive organics/too many • Shock the spa with a chlorine orchloramines insufficient free available bromine sanitizer/shock or other shock
treatment product.• Improper sanitation • Increase sanitizer level to balance water;
shock if needed.• Inadequate filtration • Check to make sure the filter is running
properly/Clean filter with a filter cleaner or degreaser.
• Low pH • Raise pH with sodium bicarbonate product. If metals are present, add chelating agent.
Chlorine Odor • Too many chloramines-insufficient free • Shock the spa with a chlorine available chlorine sanitizer/shock or non-chlorine shock
treatment.• Low pH • Adjust pH; raise pH with sodium
bicarbonate product.Bromine Odor/ • Low pH • Adjust pH; raise pH with sodiumYellow Water bicarbonate product.Musty Odor • Bacterial or algae growth • Shock the spa with a chlorine or
bromine sanitizer/shock or equivalent shock treatment product. If problem is visible drain, clean, refill and balance spa.
Foaming/Scum • Build up of body oils, lotion and • Add defoamer; or drain and refill.Ring Around the chemicals resulting from soap orTub detergentAlgae • pH Imbalance • Adjust pH
Hot Water Guide
Save These Instructions 15
Maintenance
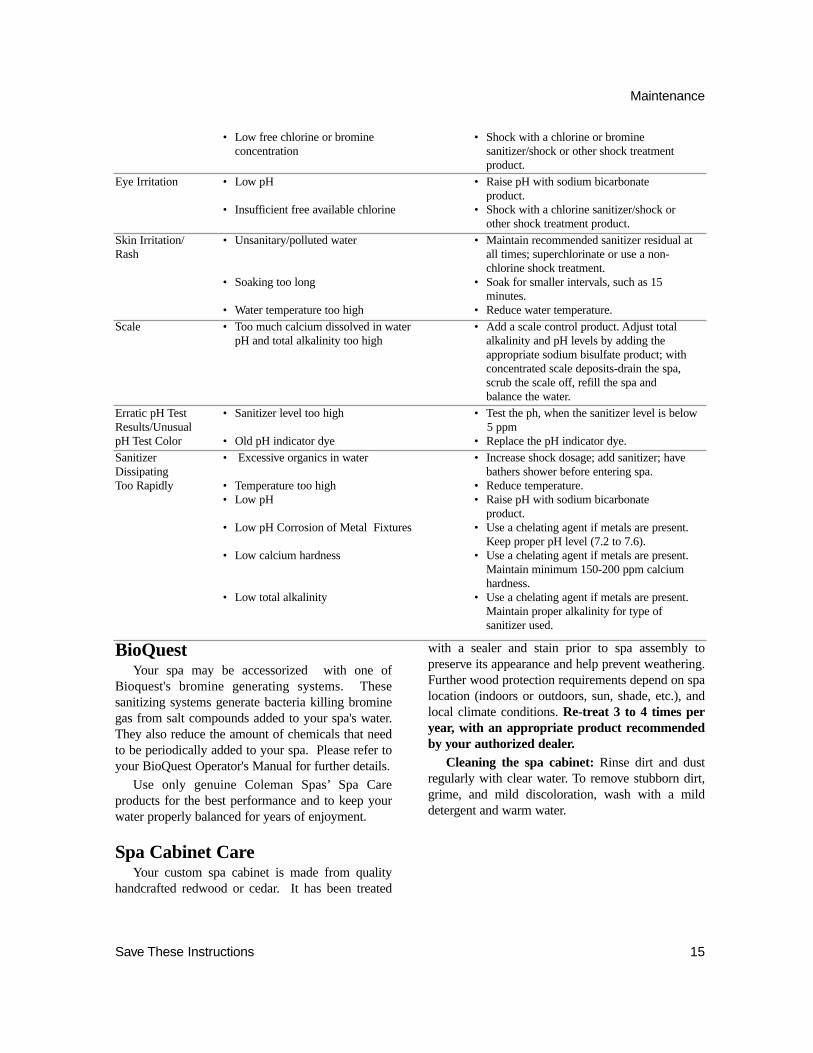
BioQuestYour spa may be accessorized with one of
Bioquest's bromine generating systems. Thesesanitizing systems generate bacteria killing brominegas from salt compounds added to your spa's water.They also reduce the amount of chemicals that needto be periodically added to your spa. Please refer toyour BioQuest Operator's Manual for further details.
Use only genuine Coleman Spas’ Spa Careproducts for the best performance and to keep yourwater properly balanced for years of enjoyment.
Spa Cabinet CareYour custom spa cabinet is made from quality
handcrafted redwood or cedar. It has been treated
with a sealer and stain prior to spa assembly topreserve its appearance and help prevent weathering.Further wood protection requirements depend on spalocation (indoors or outdoors, sun, shade, etc.), andlocal climate conditions. Re-treat 3 to 4 times peryear, with an appropriate product recommendedby your authorized dealer.
Cleaning the spa cabinet:Rinse dirt and dustregularly with clear water. To remove stubborn dirt,grime, and mild discoloration, wash with a milddetergent and warm water.
• Low free chlorine or bromine • Shock with a chlorine or bromine concentration sanitizer/shock or other shock treatment
product.Eye Irritation • Low pH • Raise pH with sodium bicarbonate
product.• Insufficient free available chlorine • Shock with a chlorine sanitizer/shock or
other shock treatment product.Skin Irritation/ • Unsanitary/polluted water • Maintain recommended sanitizer residual atRash all times; superchlorinate or use a non-
chlorine shock treatment.• Soaking too long • Soak for smaller intervals, such as 15
minutes.• Water temperature too high • Reduce water temperature.
Scale • Too much calcium dissolved in water • Add a scale control product. Adjust totalpH and total alkalinity too high alkalinity and pH levels by adding the
appropriate sodium bisulfate product; with concentrated scale deposits-drain the spa,scrub the scale off, refill the spa and balance the water.
Erratic pH Test • Sanitizer level too high • Test the ph, when the sanitizer level is belowResults/Unusual 5 ppmpH Test Color • Old pH indicator dye • Replace the pH indicator dye.Sanitizer • Excessive organics in water • Increase shock dosage; add sanitizer; haveDissipating bathers shower before entering spa.Too Rapidly • Temperature too high • Reduce temperature.
• Low pH • Raise pH with sodium bicarbonate product.
• Low pH Corrosion of Metal Fixtures • Use a chelating agent if metals are present. Keep proper pH level (7.2 to 7.6).
• Low calcium hardness • Use a chelating agent if metals are present. Maintain minimum 150-200 ppm calcium hardness.
• Low total alkalinity • Use a chelating agent if metals are present. Maintain proper alkalinity for type of sanitizer used.

Spa Surface Care and CleaningYour spa shell is made of a reinforced acrylic
material. A minimum amount of care and cleaningwill keep your spa looking new for years.
Use a spa cleaner for residue and lime buildup atthe water level of the spa surface. This can be appliedto the acrylic surface with a soft cloth and wipedclean. Use small amounts to avoid polluting spawater. It may be necessary to lower the water level 2to 3 inches before cleaning if heavily soiled at thewaterline.
Use common household, non-abrasive cleaners toclean your spa shell. (For example: Lysol Basin, Tub& Tile Cleaner®; Glass Plus®; Mr. Clean®; and TopJob®, or a mild dishwashing detergent such as Ivory®
Liquid.) Rinse well and dry with a clean cloth.
Do not allow your spa’s acrylic surface to comeinto contact with products such as acetone (nail polishremover), nail polish, dry cleaning solution, lacquerthinners, gasoline, pine oil, etc.
Remove dust and dry dirt with a soft, damp cloth.
Clean grease, oil, paint and ink stains withisopropyl (rubbing) alcohol.
Avoid using razor blades or other sharpinstruments that might scratch the surface.
Filter MaintenanceThe removable filter cartridge is located in the
filter canister beneath the strainer basket. The filtershould be inspected at leastmonthly during normaluse, and more often during heavy use.
Keep the filter clean! A clogged filter decreasesboth performance and water quality.
To clean the filter, simply follow these steps:(Note: It is not necessary to drain the spa.)
1. Turn the pump off.
2. Remove skimmer lid.
3. Remove strainer basket.
4. Remove filter cartridge from the filter canister bygrasping the top and lifting upwards.
5. Soak, filter in filter cleaner/degreaser and hoseout filter cartridge, unless replacing with new
cartridge.
6. Place filter cartridge back into filter canister.When the spa is empty the Weir door will blockthe filter canister. You must hold it out of the waywhen reinstalling the cartridge. When the tub isfull of water the door will float so you will haveeasy access for installing the filter cartridge.
7. Replace strainer basket and skimmer lid.
8. Turn the pump ON.
In addition to performing normal filtermaintenance, it will be necessary to occasionallyremove oils that coat the filter reducing filter flow. Toremove these oils, soak the cartridge in a plastic pailcontaining a commercial filter cleaning solution(available from your Coleman Spas dealer or mostpool supply stores). Follow the manufacturer’sinstructions for use.
We suggest that you replace your filter cartridgeyearly to maintain optimum performance. Filtermaintenance depends on usage. Colemanrecommends the filter be cleaned once every 90 daysat a minimum, more often after heavy use or if waterbecomes cloudy.
Draining SpaAlways turn power off to your spa before
draining. Immediately after turning the spa back on,lower the temperature setting so the heater will notcome on. Keep the heater disabled until you have fullflow coming out your jets for several minutes.
The water level in the spa must be kept at itsnormal level water line mark. Note: Evaporation andsplashing will cause the water level to drop.
High concentrations of impurities caused by waterevaporation, body oils, perfumes, and othercontaminants may accumulate in the spa and cannotbe filtered out. Consequently, it is advisable to drainyour spa and refill it with fresh water every six toeight weeks or more often, depending on the amountof use.
Save These Instructions16
Maintenance
Important: Do not operate the spawithout full water flow.

Drain AccessDrain access is on the Control side of the spa
behind the U.L. label. Remove both corner posts &door panel to gain access to the drain hoses.
Attach a garden hose to the spa drain faucets andopen the valves. Do not attempt to use the pump to
drain the spa.
Priming SpaBe aware that after draining and refilling your spa
you may need to discharge air in the system in orderfor the pump to operate again. Should you experiencean air-lock, you can remove the filter and insert agarden hose into the center hole and flush waterthrough the system.
WinterizingIn cold climates where freezing temperatures
occur, special care is required to prevent thepossibility of damage to the spa, plumbing and
equipment due to freezing.
If you plan on using your spa during cold months,be sure your the spa in proper working order. The spashell has been insulated to provide efficient operation
in cold weather areas.
Special Note:If you do not intend to use your spaduring the winter months and there is danger offreezing, the spa must be winterized! You must do
the following:
1. Turn off all electrical power to the spa.
2. Drain the spa through all of the drain hoses. Thedrain hoses will not drain off all of the water.You may use a wet-vac to remove the remainingwater from the spa. R.V. antifreeze should beadded to any remaining water in the spa throughthe bottom of the skimmer and through the jets.If antifreeze is used, it must be an inhibitorPropylene Glycol such as Dow Frost available
through Dow Chemical Distributors.
3. Be sure to drain all drain hoses.
4. The filter should be drained, and the cartridge
removed and cleaned.
5. Check to see that there is no water in the heater
element chamber and pump.
6. Clean your spa as per previous maintenance
instructions.
7.Cover your spa with a waterproof,water-shedding, impenetrable cover. Your spathermal-hard cover will not prevent all moisture
from getting into the spa.
8. For further information on blowing out theplumbing lines and winterizing procedures,
contact your local dealer.
Note: If you elect not to drain your spa and thetemperature is going to be below freezing forextended periods of time, especially 0° F (-19.4°C) and sub zero, it is best to operate the spa heaterat high temperature (95°–104°F) (35°-40° C). Ifthe tub is not going to be used and kept in the100°F (38° C)range, you may have problems ifyour power goes out. It is wise during these badweather periods to set the thermostat higher. Thiswill keep the spa water from freezing quickly ifyou have a power failure. You should check yourspa frequently during this time to insure proper
operation.
Light BulbThe Spa light bulb is serviceable from outside the
spa. You must remove the cedar panel and insulationclosest to the light. Once the panel is removed, locatethe bulb holding bracket, twist and pull bracket
towards you to change the bulb.
Save These Instructions 17
Maintenance
Warning: Turn off electrical supplybefore removing cabinet panels.

Save These Instructions18
Problem Usual Cause Solution
1. System not A. House circuit breaker tripped or if A. Reset circuit breaker on home operating. OFF position. breaker panel.
2. Heater not A. Heater mode not selected. A. Refer to temperature and heater functioning. control instructions on pages 12.
B. No power to heater. B. Check house circuit breaker.
C. Thermostat set lower than water C. Set to desired temperature.temperature.
D. Heater not operating. D. Contact dealer.
3. Water not clean. A. Clogged or blocked floor suction or A. Clean floor suction/skimmer.skimmer.
B. Filter clogged (dirty). B. Clean or replace.
C. Poor water chemistry. C. See “Chemical Treatment”section.
D. Insufficient filtering time. D. Run filtration mode longer. Contact dealer.
E. Improper maintenance. E. See maintenance section.
F. High content of solids in water. F. Use clarifier or drain and refill spa.
4. Abnormal A. Excessive evaporation and/or A. Use spa cover.water usage. splashing.
5. Overheating. A. High ambient temperature A. See page 8, Indoor Installation.
6. Low water A. Operating in FILTER mode-low speed. A. Select hi-speed jets.flow from jets.
B. Clogged or blocked suction or B. Clean floor suction/skimmer.skimmer.
C. Dirty filter. C. Clean or replace.
7. No water A. Pump not primed. A. See priming section page 17.flow from jets.
B. House circuit breaker tripped, no B. Reset circuit breaker at home panel. power to system.
C. Faulty pump or motor. C. Contact dealer.
D. Pump surges. D. Low water. Check level on Weir door.
Problem Solving Guide
Problem Solving Guide

Save These Instructions 19
Problem Solving Guide
Problem Solving GuideProblem Usual Cause Solution
8. Noisy pump A. Clogged floor suction or skimmer. A. Clean floor suction/skimmer.and motor.
B. Low water level. B. Add water to normal water level (6" below lip).
C. Damaged or worn motor bearings. C. Contact dealer.
9. Water A.Check unions and drain hoses. A. Contact dealer.leakage fromunder spa.
10. No air flow A. Air control not open. A. Open control.from jets.
B. Jet nozzle not seated properly. B. Check jet nozzles.
C. Jet nozzle missing. C. Inspect jets.
11. Motor will A. House circuit breaker tripped or in A. Reset circuit breakernot operate. OFF position.
B. Improper or defective wiring or B. Contact dealer.electrical supply.
C. Thermal Overload Protection switch C. Auto reset after motor has cooled.tripped. Contact dealer if motor continues to
cycle.
14. The spa will A. Spa trying to heat A. Check set temperature in Standardnot shut off mode
B. 400 Series overlapping B. Reset filter times.filter cycles.
C. Spa is in filter cycle C. Normal. No need to change.
Save These Instructions20
Spa Soaking Guidelines
1. Persons with heart disease, diabetes, high or lowblood pressure or any serious illness, andpregnant women should not enter a spa withoutprior consultation with their doctor.
2. People with skin, ear, genital or other bodyinfections, open sores or wounds should not usethe spa because of the possibility of spreadinginfection.
3. Before entering, look at the water in your spa. Ifthere is cloudiness or foaming, or if a strongchlorine smell is present, the water needstreatment. Soaking in such water greatly increasesyour chances of getting a skin rash(pseudomonas). Be sure to maintain the waterproperly. Ask your Authorized Coleman SpasDealer for guidance.
4. Shower with soap and water before and afterusing the spa. Showering before use washes awaymany of the common skin bacteria, and removeslotions, deodorants, creams, etc. Perspiration andlotions will reduce the effectiveness of thesanitizer and lessen the ability of the filter towork efficiently.
5. Enter the spa slowly and cautiously. Be careful ofyour footing, and allow your body to graduallyget used to the water temperature. Leave slowlyas well, because your leg muscles may besufficiently relaxed to make you a bit unsteady,and you may become lightheaded.
6. Soaking for too long makes some peoplenauseous, dizzy, lightheaded or faint. Don’t soakin 104ºF (40ºC)water. If you wish to soak for alonger period of time in high temperatures, leavethe spa after 15 minutes, shower, cool down andthen return for another brief stay. In lowertemperatures (e.g. 98.6ºF (37°C)—normal bodytemperature) most people can comfortably andsafely soak for longer periods at one sitting. Ifyou have any questions about what’s right for youand your family, consult with your doctor.
7. Be sure you check the water temperature beforeand while in the spa.
8. Never use the spa while under the influence ofalcohol.
9. With any drug or medication, consult with yourdoctor about potential harmful effects fromcombined use of the drug and hot water soaking.
10. Never use the spa when you are alone, forsafety’s sake.
11. Never allow children to use the spa unsupervised.
Spa Soaking Guidelines
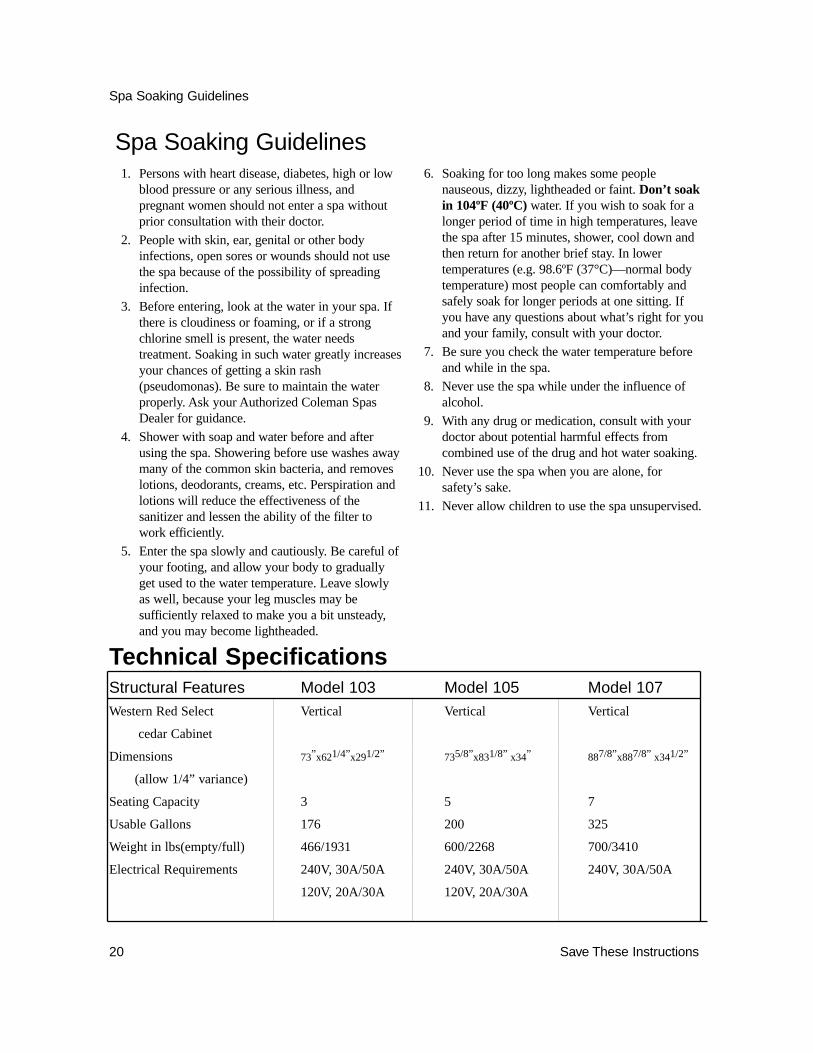
Structural Features Model 103 Model 105 Model 107Western Red Select Vertical Vertical Vertical
cedar Cabinet
Dimensions 73”x621/4”x291/2” 735/8”x831/8” x34” 887/8”x887/8” x341/2”
(allow 1/4” variance)
Seating Capacity 3 5 7
Usable Gallons 176 200 325
Weight in lbs(empty/full) 466/1931 600/2268 700/3410
Electrical Requirements 240V, 30A/50A 240V, 30A/50A 240V, 30A/50A
120V, 20A/30A 120V, 20A/30A
Technical Specifications

Save These Instructions 21
NoYes
NoYes
Wiring Diagram - Model 103, 105
Wiring Diagram:103, 105
120V/20A120V/30A
240V/30A240V/50A
Input
2050
2050
JumperPosition
Heater &Hi Pump
Heater &Low Pump
YesYes
YesYes
Jumper J8 Settings

Save These Instructions22
Wiring Diagram - 107
Wiring Diagram - Model 107
Save These Instructions 23
Accessories
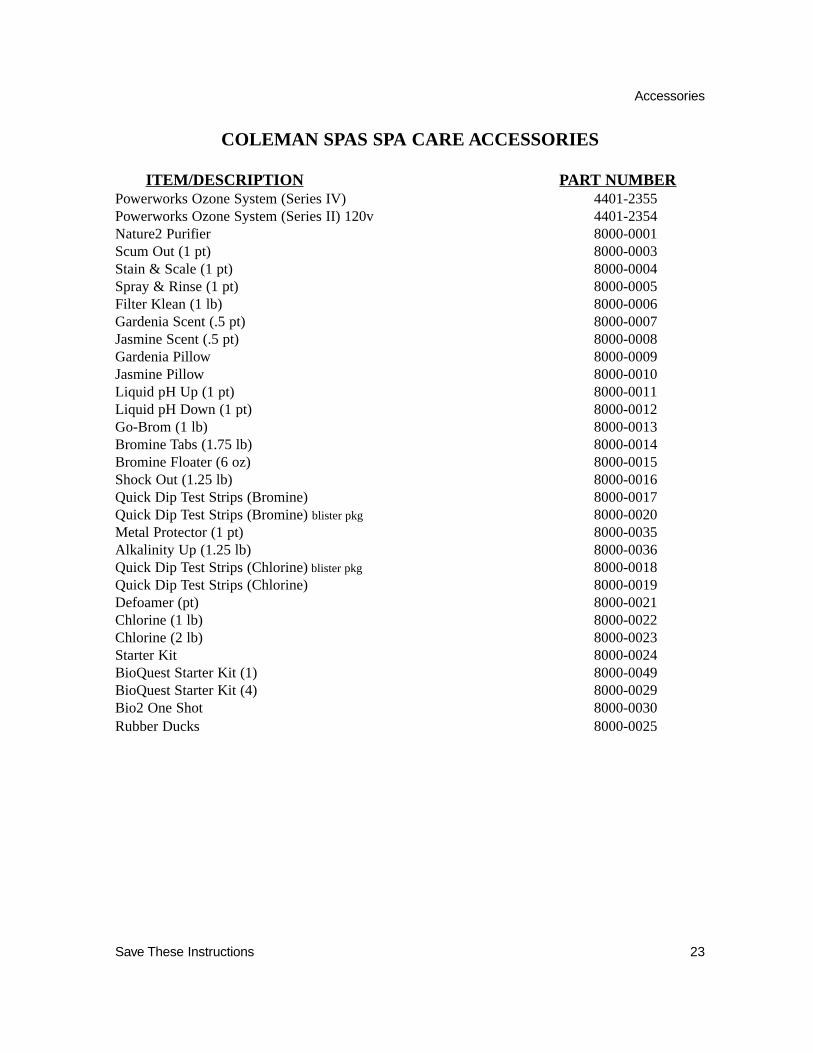
COLEMAN SPAS SPA CARE ACCESSORIES
ITEM/DESCRIPTION PART NUMBERPowerworks Ozone System (Series IV) 4401-2355Powerworks Ozone System (Series II) 120v 4401-2354Nature2 Purifier 8000-0001Scum Out (1 pt) 8000-0003Stain & Scale (1 pt) 8000-0004Spray & Rinse (1 pt) 8000-0005Filter Klean (1 lb) 8000-0006Gardenia Scent (.5 pt) 8000-0007Jasmine Scent (.5 pt) 8000-0008Gardenia Pillow 8000-0009Jasmine Pillow 8000-0010Liquid pH Up (1 pt) 8000-0011Liquid pH Down (1 pt) 8000-0012Go-Brom (1 lb) 8000-0013Bromine Tabs (1.75 lb) 8000-0014Bromine Floater (6 oz) 8000-0015Shock Out (1.25 lb) 8000-0016Quick Dip Test Strips (Bromine) 8000-0017Quick Dip Test Strips (Bromine) blister pkg 8000-0020Metal Protector (1 pt) 8000-0035Alkalinity Up (1.25 lb) 8000-0036Quick Dip Test Strips (Chlorine)blister pkg 8000-0018Quick Dip Test Strips (Chlorine) 8000-0019Defoamer (pt) 8000-0021Chlorine (1 lb) 8000-0022Chlorine (2 lb) 8000-0023Starter Kit 8000-0024BioQuest Starter Kit (1) 8000-0049BioQuest Starter Kit (4) 8000-0029Bio2 One Shot 8000-0030Rubber Ducks 8000-0025

Save These Instructions24
Notes
__________________________________________________________________
__________________________________________________________________
__________________________________________________________________
__________________________________________________________________
__________________________________________________________________
__________________________________________________________________
__________________________________________________________________
__________________________________________________________________
__________________________________________________________________
__________________________________________________________________
__________________________________________________________________
__________________________________________________________________
__________________________________________________________________
__________________________________________________________________
__________________________________________________________________
__________________________________________________________________
__________________________________________________________________
__________________________________________________________________
__________________________________________________________________
__________________________________________________________________

Save These Instructions 25

Save These Instructions26

Save These Instructions 27

Save These Instructions28
Now you can relax.
By MAAX Spas USA
Horizon & Spectrum Series
Owner’s Manual
1999
Owner’s Manual
1999
Owner’s Manual
1999
Now you can relax.
Journey™
Choose a Manual
To View
Choose a Manual
To View