Embed Size (px)
Citation preview
CADET HANDBOOK
STRANDS
SEVEN-ELEVEN
Promotion Test Study Guide for Cadet to Cadet First Class Test
1
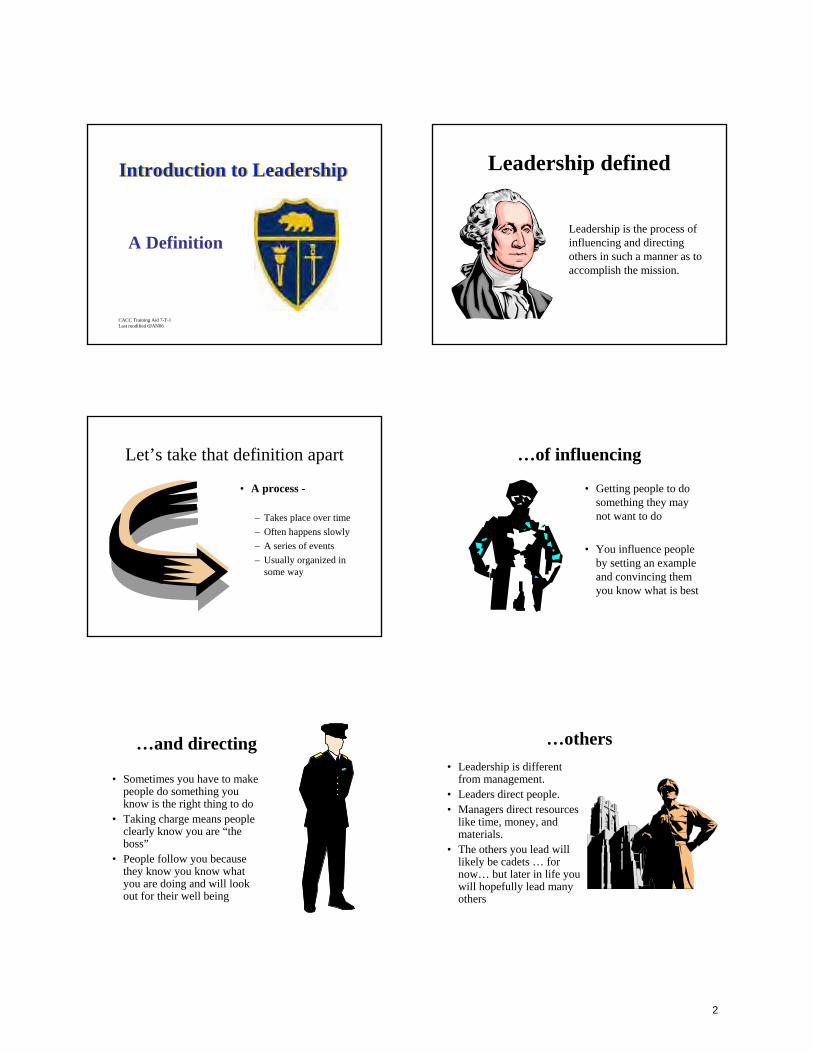
Introduction to Leadership
A Definition
Introduction to Leadership
CACC Training Aid 7-T-1Last modified 6JAN06
Leadership defined
Leadership is the process of influencing and directing others in such a manner as to accomplish the mission.
Let’s take that definition apart
• A process -
– Takes place over time– Often happens slowly– A series of events– Usually organized in
some way
…of influencing
• Getting people to do something they may not want to do
• You influence people by setting an example and convincing them you know what is best
…and directing
• Sometimes you have to make people do something you know is the right thing to do
• Taking charge means people clearly know you are “the boss”
• People follow you because they know you know what you are doing and will look out for their well being
…others• Leadership is different
from management. • Leaders direct people. • Managers direct resources
like time, money, and materials.
• The others you lead will likely be cadets … for now… but later in life you will hopefully lead many others
2
…in such a manner as to accomplish the mission
• Getting the job done• Knowing clearly your
goal and focusing on reaching that goal
• People like following someone who helps them accomplish goals, especially hard-to-achieve goals
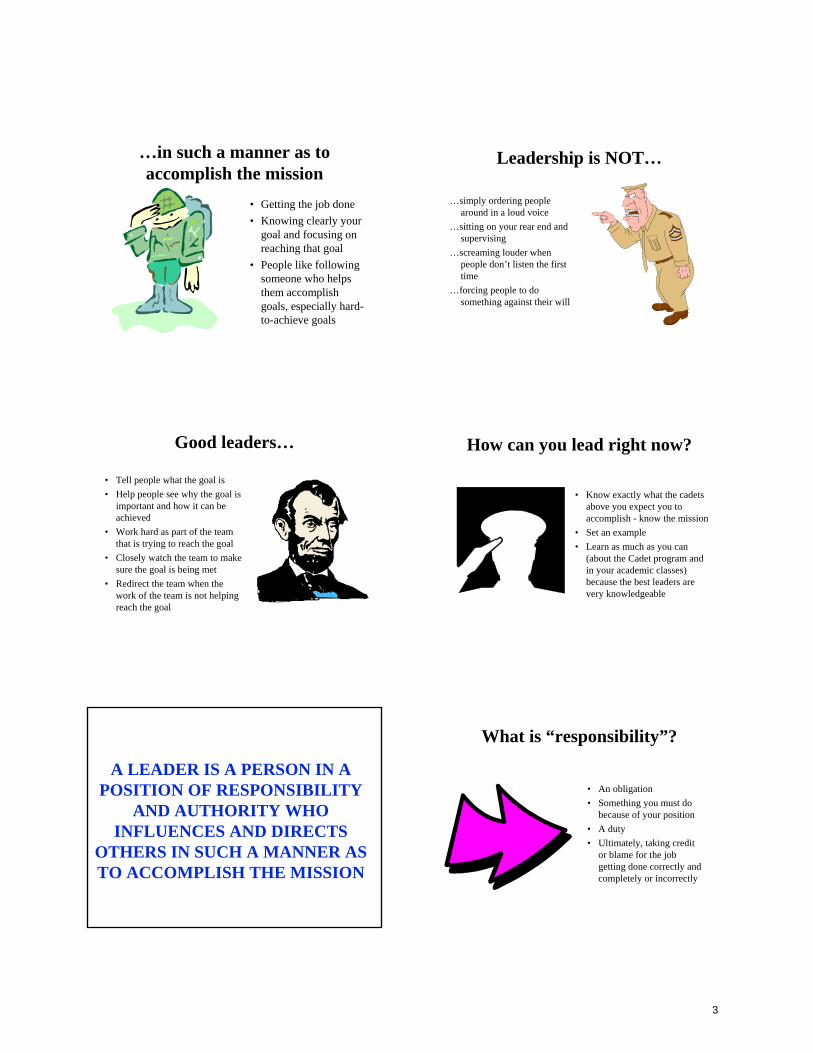
Leadership is NOT…
…simply ordering people around in a loud voice
…sitting on your rear end and supervising
…screaming louder when people don’t listen the first time
…forcing people to do something against their will
Good leaders…
• Tell people what the goal is• Help people see why the goal is
important and how it can be achieved
• Work hard as part of the team that is trying to reach the goal
• Closely watch the team to make sure the goal is being met
• Redirect the team when the work of the team is not helping reach the goal
How can you lead right now?
• Know exactly what the cadets above you expect you to accomplish - know the mission
• Set an example• Learn as much as you can
(about the Cadet program and in your academic classes) because the best leaders are very knowledgeable
A LEADER IS A PERSON IN A POSITION OF RESPONSIBILITY
AND AUTHORITY WHO INFLUENCES AND DIRECTS
OTHERS IN SUCH A MANNER AS TO ACCOMPLISH THE MISSION
What is “responsibility”?
• An obligation• Something you must do
because of your position• A duty• Ultimately, taking credit
or blame for the job getting done correctly and completely or incorrectly
3
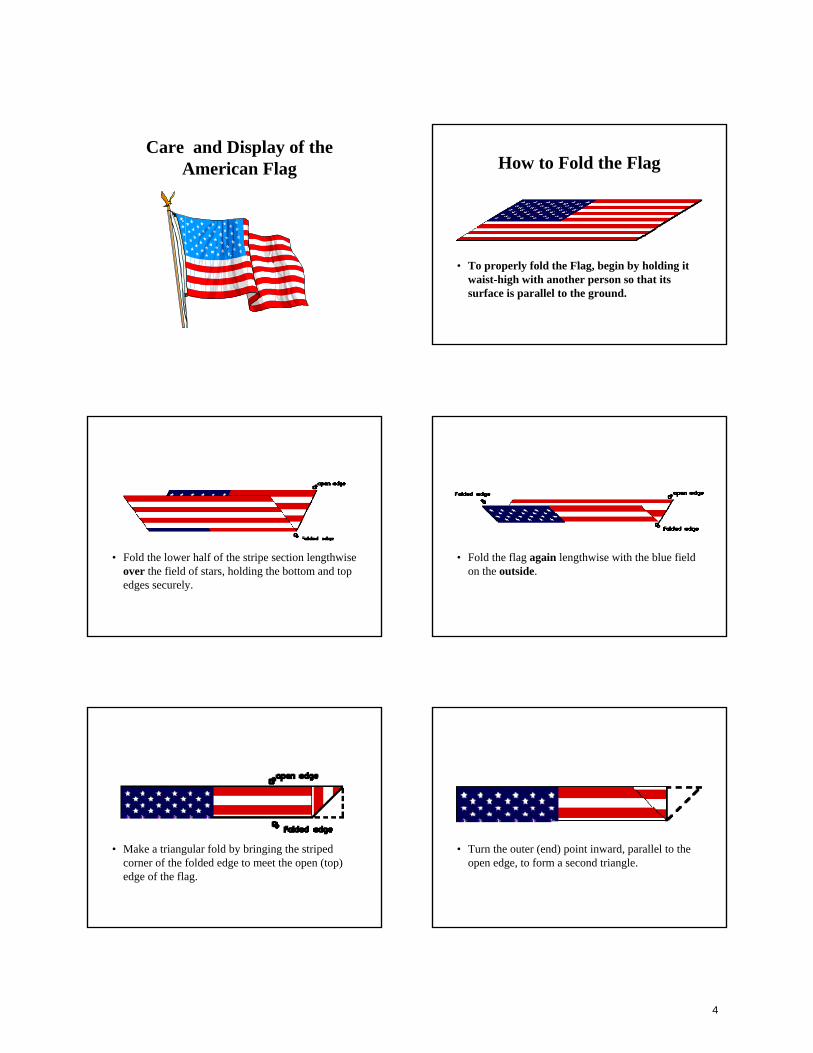
Care and Display of the American Flag How to Fold the Flag
• To properly fold the Flag, begin by holding it waist-high with another person so that its surface is parallel to the ground.
• Fold the lower half of the stripe section lengthwise over the field of stars, holding the bottom and top edges securely.
• Fold the flag again lengthwise with the blue field on the outside.
• Make a triangular fold by bringing the striped corner of the folded edge to meet the open (top) edge of the flag.
• Turn the outer (end) point inward, parallel to the open edge, to form a second triangle.
4
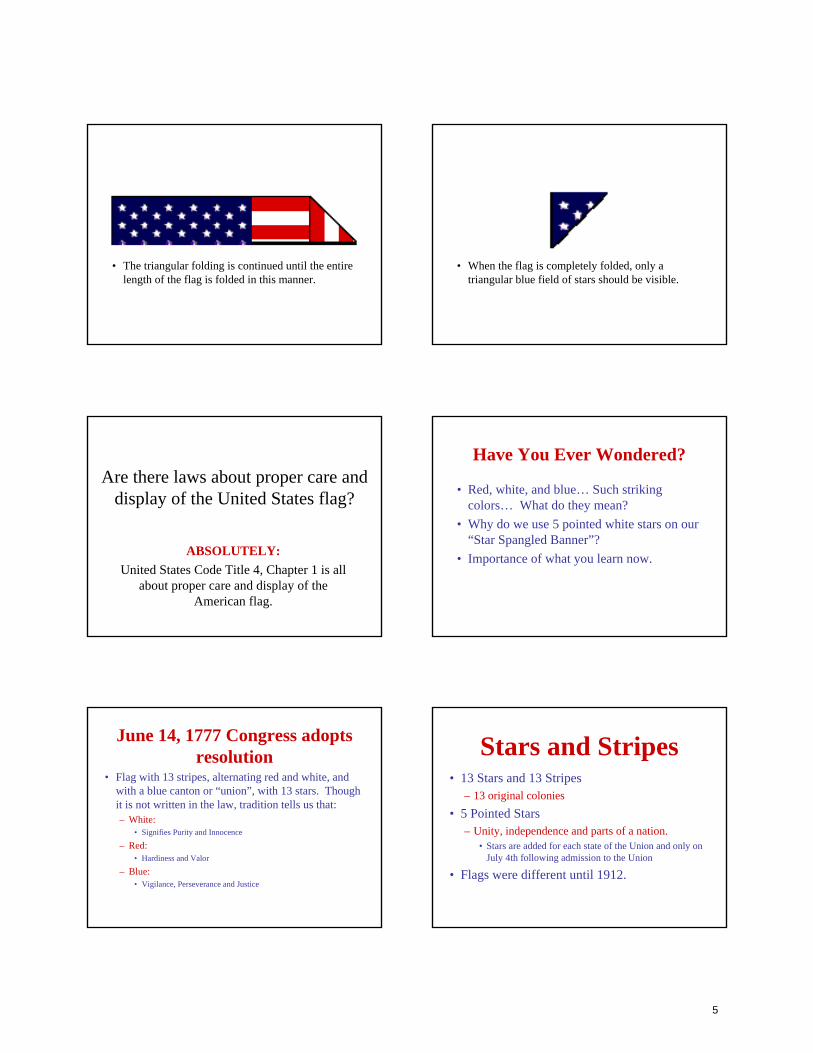
• The triangular folding is continued until the entire length of the flag is folded in this manner.
• When the flag is completely folded, only a triangular blue field of stars should be visible.
Are there laws about proper care and display of the United States flag?
ABSOLUTELY: United States Code Title 4, Chapter 1 is all
about proper care and display of the American flag.
Have You Ever Wondered?
• Red, white, and blue… Such striking colors… What do they mean?
• Why do we use 5 pointed white stars on our “Star Spangled Banner”?
• Importance of what you learn now.
June 14, 1777 Congress adopts resolution
• Flag with 13 stripes, alternating red and white, and with a blue canton or “union”, with 13 stars. Though it is not written in the law, tradition tells us that:– White:
• Signifies Purity and Innocence
– Red:• Hardiness and Valor
– Blue:• Vigilance, Perseverance and Justice
Stars and Stripes• 13 Stars and 13 Stripes
– 13 original colonies• 5 Pointed Stars
– Unity, independence and parts of a nation.• Stars are added for each state of the Union and only on
July 4th following admission to the Union
• Flags were different until 1912.
5
Fly Your Flag Regularly!
• Respect It!• Display It Correctly!• Treat It With Care!
Public Law 94-344 94th Congress and Amendments thereto.
Flag Smarts• It is the universal custom to display the
national flag from sunrise to sunset on buildings and on stationary flagstaffs in the open on all days that weather permits, but especially on national and state holidays and other days that may be proclaimed by the President of the United States. On Memorial Day, fly it at half-mast till noon.
Flag Smarts• The U.S. flag may be displayed 24 hours a day
if properly illuminated during hours of darkness.
• Always hoist the U.S. flag briskly. Lower it ceremoniously.
• The U.S. Flag always leads in procession.– On the marching right (flag’s own right)– In front of the center of a line of flags
Flag Smarts• Saluting
– When a national flag is raised or lowered as part of a ceremony.
– Passes by in a parade or in review.• All persons, except those in uniform, should face the
flag and stand at attention with the right hand over the heart Males - remove hats with right hand and hold over left shoulder, the hand being over the heart
• Those in uniform should give a military salute
Flag Smarts• Saluting
– The flag should be saluted 6 paces prior and held till the you or the flag has passed 6 paces.
– Citizens of other countries stand at attention, but need not salute.
Flag Smarts• Display
– Always to the speaker’s right. Left of audience.– On wall or speaker’s platform
• Above and behind the speaker• Blue field should be in the upper left-hand corner as the
audiences faces the flag
– Center and at the highest point if displayed with a group of flags or the position of honor (flag’s own right) the extreme left as the flags are viewed
6
Flag Smarts• Display
– With other flags against a wall from crossed staffs, should be on the U.S. flag’s own right, and its staff should be in front of the staff of the other flag.
– Outdoors with other flags, the position of honor for the U.S. flag is the U.S. flag’s own right, which is normally the extreme left position as the flags are most frequently viewed.
Flag Smarts• Display
– On a pole from a building, the union of the flag should be placed at the peak of the staff unless the flag is at half-mast.
– Suspended from a rope extending from the building on a pole, the flag should be hoisted out union first from the building.
Flag Smarts• Display
– With other nations’ flags:• Flown at same height in peace time• Equal size
– From the same halyard:• U S Flag is always at the peak• Hoisted first and lowered last• No flag may fly above or to the right of the U S flag
Flag Smarts• Display
– Half-mast (staff):• Hoisted to peak for a moment and then lowered• Raise to peak before lowered for the day
– Covering a casket:• Placed so the union is at the head and over the left
shoulder• Do not lower the flag into the grave or allow it to touch
the ground
Important Don’ts• It is generally not desirable to fly the flag
outdoors when the weather is particularly inclement because exposure to wind and rain may damage the flag or the pole on which it is displayed.
Important Don’ts• Never in any way should disrespect be
shown the U.S. flag. The U.S. flag should never be dipped to any person or thing.
• The flag should never be displayed with the union down except as a signal of distress in instances of extreme danger to life or property.
7
Important Don’ts• The flag should never touch anything
beneath it - ground, floor, water or merchandise.
• Always allow the flag to fall free.• Never use the flag as wearing apparel,
bedding or drapery.• Never use the flag as a covering or drape for
a ceiling.
Important Don’ts• Never place anything on the flag.• The flag should not be embroidered on such
articles as cushions, handkerchiefs, nor printed on anything that is designed for temporary use.
• Never use any part of the flag as a costume or athletic uniform.
Important Don’ts• A patch may be affixed to uniforms of
military personnel, firefighters, police officers and members of patriotic organizations.
• When the flag is in such condition that is no longer a fitting emblem for display, it should be destroyed in a dignified way, preferably by burning.
Important Don’ts• Never display the flag from a float except
from a staff or so suspended that its folds fall free as though staffed.
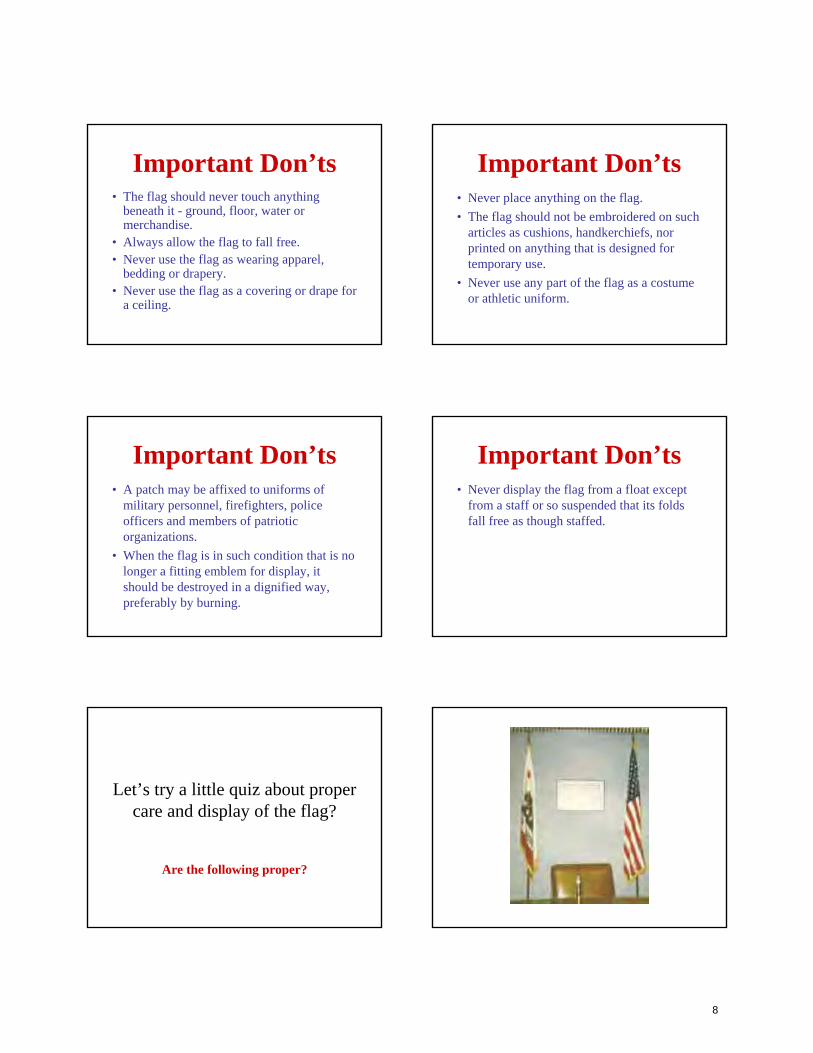
Let’s try a little quiz about proper care and display of the flag?
Are the following proper?
8
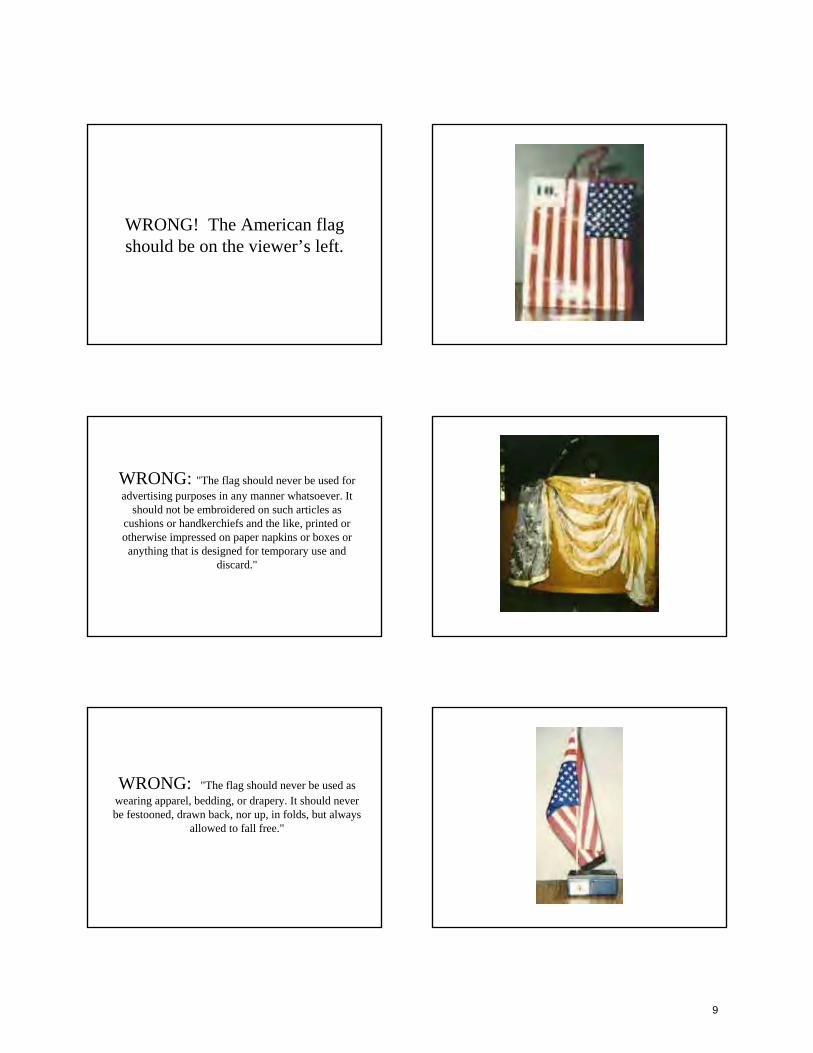
WRONG! The American flag should be on the viewer’s left.
WRONG: "The flag should never be used for advertising purposes in any manner whatsoever. It
should not be embroidered on such articles as cushions or handkerchiefs and the like, printed or otherwise impressed on paper napkins or boxes or anything that is designed for temporary use and
discard."
WRONG: "The flag should never be used as wearing apparel, bedding, or drapery. It should never be festooned, drawn back, nor up, in folds, but always
allowed to fall free."
9

WRONG: "The flag should never be displayed with the union down except as a signal of distress in
instance of extreme danger to life or property.”
CORRECT: When displayed with the flag of another country, both flags are at the same height.
WRONG: The American flag, when displayed with State flags,
as it is here, should be higher than and at the center of all other
flags.
10
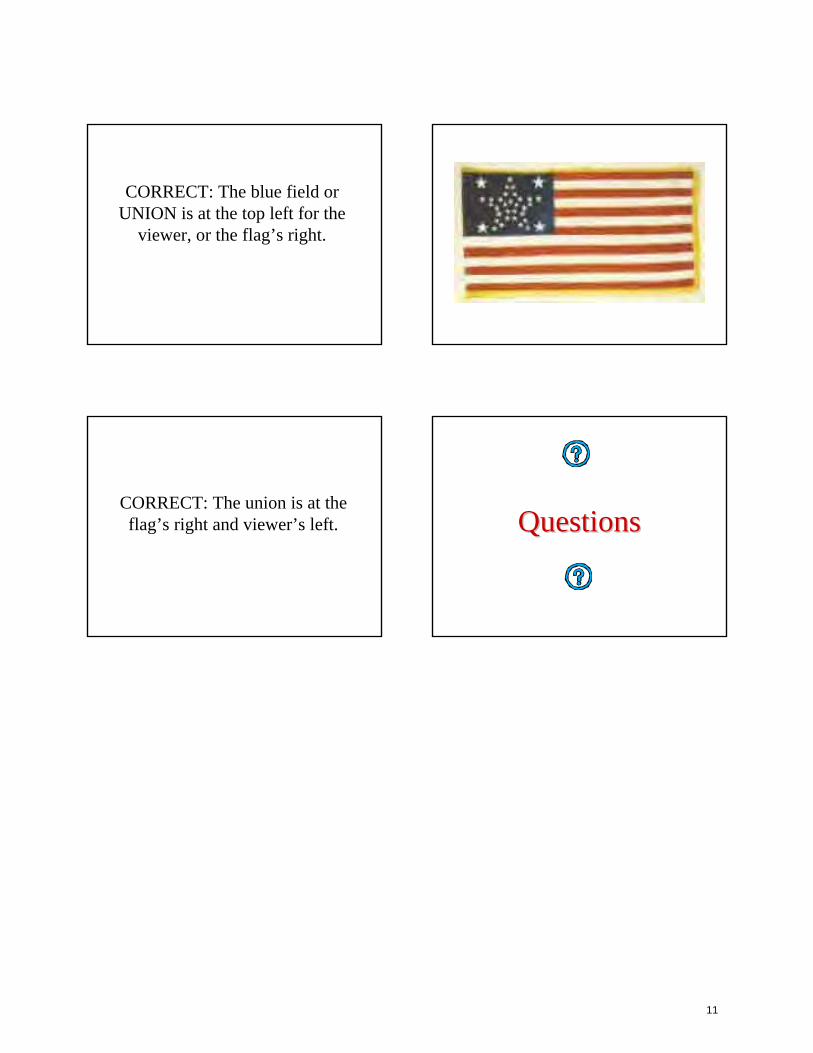
CORRECT: The blue field or UNION is at the top left for the
viewer, or the flag’s right.
CORRECT: The union is at the flag’s right and viewer’s left. QuestionsQuestions
11
Katharine Lee Bates wrote the original version in 1893. She wrote the 2nd version in 1904. Herfinal version was written in 1913.
Here is a note from Katharine Lee Bates:
"One day some of the other teachers and I decided to go on a trip to 14,000-foot Pikes Peak. Wehired a prairie wagon. Near the top we had to leave the wagon and go the rest of the way on mules.I was very tired. But when I saw the view, I felt great joy. All the wonder of America seemeddisplayed there, with the sea-like expanse."
America the Beautiful - 1913
O beautiful for spacious skies,For amber waves of grain,For purple mountain majestiesAbove the fruited plain!America! America!God shed his grace on theeAnd crown thy good with brotherhoodFrom sea to shining sea!
O beautiful for pilgrim feetWhose stern, impassioned stressA thoroughfare for freedom beatAcross the wilderness!America! America!God mend thine every flaw,Confirm thy soul in self-control,Thy liberty in law!
O beautiful for heroes proved in liberating strife.Who more than self the country lovedAnd mercy more than life!America! America!May God thy gold refineTill all success be noblenessAnd every gain divine!
O beautiful for patriot dreamThat sees beyond the yearsThine alabaster cities gleamUndimmed by human tears!America! America!God shed his grace on theeAnd crown thy good with brotherhoodFrom sea to shining sea!
O beautiful for halcyon skies,For amber waves of grain,For purple mountain majestiesAbove the enameled plain!America! America!God shed his grace on theeTill souls wax fair as earth and airAnd music-hearted sea!
O beautiful for pilgrims feet,Whose stern impassioned stressA thoroughfare for freedom beatAcross the wilderness!America ! America !God shed his grace on theeTill paths be wrought throughwilds of thoughtBy pilgrim foot and knee!
O beautiful for glory-taleOf liberating strifeWhen once and twice,for man's availMen lavished precious life !America! America!God shed his grace on theeTill selfish gain no longer stainThe banner of the free!
O beautiful for patriot dreamThat sees beyond the yearsThine alabaster cities gleamUndimmed by human tears!America! America!God shed his grace on theeTill nobler men keep once againThy whiter jubilee!
America the Beautiful
CACC Training Aid 7-H-4 Last Modified 6 Jan 06
CACC Standard 1B
12
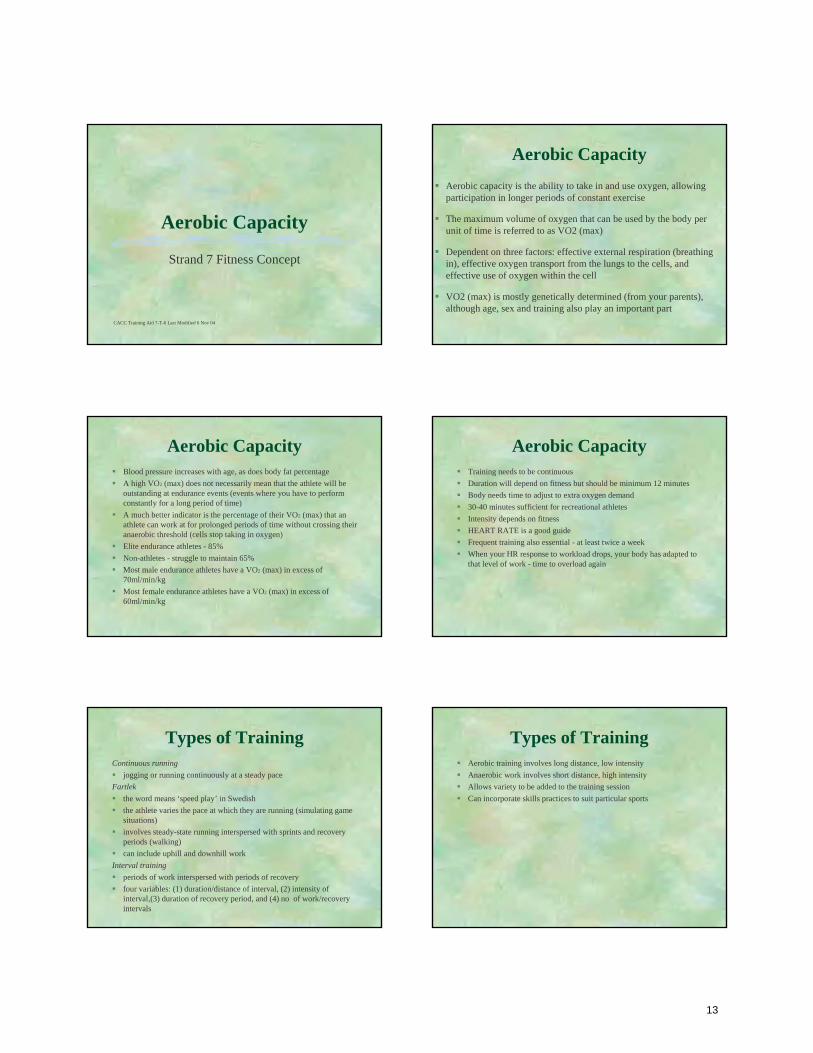
Aerobic Capacity
Strand 7 Fitness Concept
CACC Training Aid 7-T-6 Last Modified 6 Nov 04
Aerobic CapacityAerobic capacity is the ability to take in and use oxygen, allowing participation in longer periods of constant exercise
The maximum volume of oxygen that can be used by the body per unit of time is referred to as VO2 (max)
Dependent on three factors: effective external respiration (breathing in), effective oxygen transport from the lungs to the cells, andeffective use of oxygen within the cell
VO2 (max) is mostly genetically determined (from your parents), although age, sex and training also play an important part
Aerobic CapacityBlood pressure increases with age, as does body fat percentageA high VO2 (max) does not necessarily mean that the athlete will be outstanding at endurance events (events where you have to perform constantly for a long period of time)A much better indicator is the percentage of their VO2 (max) that an athlete can work at for prolonged periods of time without crossing their anaerobic threshold (cells stop taking in oxygen)Elite endurance athletes - 85%Non-athletes - struggle to maintain 65%Most male endurance athletes have a VO2 (max) in excess of 70ml/min/kgMost female endurance athletes have a VO2 (max) in excess of 60ml/min/kg
Aerobic CapacityTraining needs to be continuousDuration will depend on fitness but should be minimum 12 minutesBody needs time to adjust to extra oxygen demand30-40 minutes sufficient for recreational athletesIntensity depends on fitnessHEART RATE is a good guideFrequent training also essential - at least twice a weekWhen your HR response to workload drops, your body has adapted to that level of work - time to overload again
Types of TrainingContinuous running
jogging or running continuously at a steady paceFartlek
the word means ‘speed play’ in Swedish the athlete varies the pace at which they are running (simulating game situations)involves steady-state running interspersed with sprints and recovery periods (walking)can include uphill and downhill work
Interval trainingperiods of work interspersed with periods of recoveryfour variables: (1) duration/distance of interval, (2) intensity of interval,(3) duration of recovery period, and (4) no of work/recovery intervals
Types of TrainingAerobic training involves long distance, low intensityAnaerobic work involves short distance, high intensityAllows variety to be added to the training sessionCan incorporate skills practices to suit particular sports
13
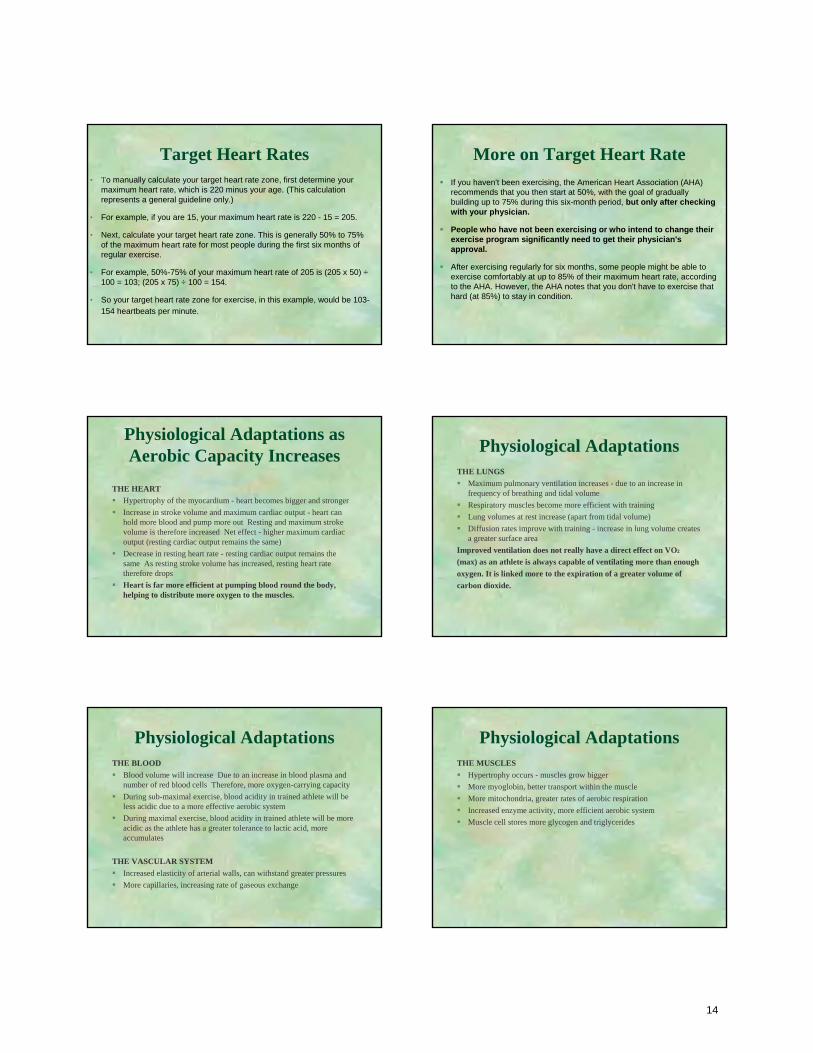
Target Heart Rates• To manually calculate your target heart rate zone, first determine your
maximum heart rate, which is 220 minus your age. (This calculation represents a general guideline only.)
• For example, if you are 15, your maximum heart rate is 220 - 15 = 205.
• Next, calculate your target heart rate zone. This is generally 50% to 75% of the maximum heart rate for most people during the first six months of regular exercise.
• For example, 50%-75% of your maximum heart rate of 205 is (205 x 50) ÷100 = 103; (205 x 75) ÷ 100 = 154.
• So your target heart rate zone for exercise, in this example, would be 103-154 heartbeats per minute.
More on Target Heart RateIf you haven't been exercising, the American Heart Association (AHA) recommends that you then start at 50%, with the goal of gradually building up to 75% during this six-month period, but only after checking with your physician.
People who have not been exercising or who intend to change their exercise program significantly need to get their physician's approval.
After exercising regularly for six months, some people might be able to exercise comfortably at up to 85% of their maximum heart rate, according to the AHA. However, the AHA notes that you don't have to exercise that hard (at 85%) to stay in condition.
Physiological Adaptations as Aerobic Capacity Increases
THE HEARTHypertrophy of the myocardium - heart becomes bigger and strongerIncrease in stroke volume and maximum cardiac output - heart can hold more blood and pump more out Resting and maximum stroke volume is therefore increased Net effect - higher maximum cardiac output (resting cardiac output remains the same)Decrease in resting heart rate - resting cardiac output remains the same As resting stroke volume has increased, resting heart ratetherefore dropsHeart is far more efficient at pumping blood round the body, helping to distribute more oxygen to the muscles.
Physiological AdaptationsTHE LUNGS
Maximum pulmonary ventilation increases - due to an increase in frequency of breathing and tidal volumeRespiratory muscles become more efficient with trainingLung volumes at rest increase (apart from tidal volume)Diffusion rates improve with training - increase in lung volume creates a greater surface area
Improved ventilation does not really have a direct effect on VO2
(max) as an athlete is always capable of ventilating more than enoughoxygen. It is linked more to the expiration of a greater volume of carbon dioxide.
Physiological AdaptationsTHE BLOOD
Blood volume will increase Due to an increase in blood plasma and number of red blood cells Therefore, more oxygen-carrying capacityDuring sub-maximal exercise, blood acidity in trained athlete will be less acidic due to a more effective aerobic systemDuring maximal exercise, blood acidity in trained athlete will be more acidic as the athlete has a greater tolerance to lactic acid, more accumulates
THE VASCULAR SYSTEMIncreased elasticity of arterial walls, can withstand greater pressuresMore capillaries, increasing rate of gaseous exchange
Physiological AdaptationsTHE MUSCLES
Hypertrophy occurs - muscles grow biggerMore myoglobin, better transport within the muscleMore mitochondria, greater rates of aerobic respirationIncreased enzyme activity, more efficient aerobic systemMuscle cell stores more glycogen and triglycerides
14
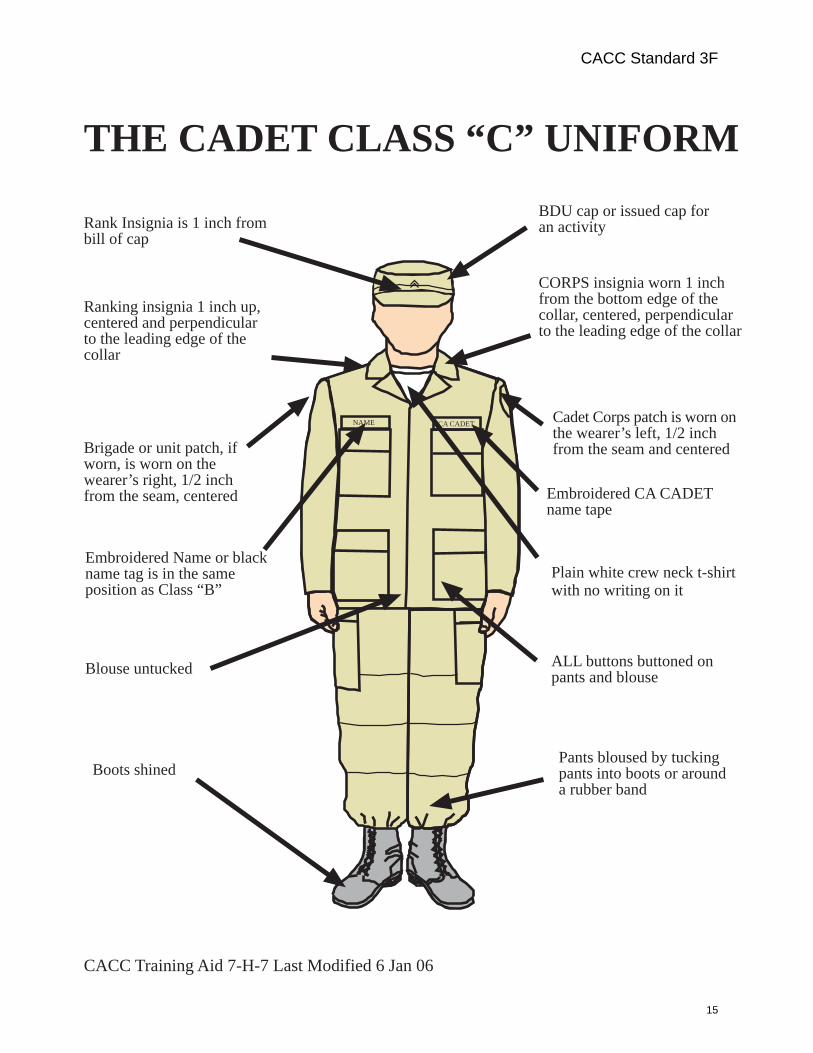
THE CADET CLASS “C” UNIFORM
CACC Training Aid 7-H-7 Last Modified 6 Jan 06
NAME CA CADET
Rank Insignia is 1 inch frombill of cap
BDU cap or issued cap foran activity
Plain white crew neck t-shirtwith no writing on it
CORPS insignia worn 1 inchfrom the bottom edge of thecollar, centered, perpendicularto the leading edge of the collar
Ranking insignia 1 inch up,centered and perpendicularto the leading edge of thecollar
Embroidered CA CADETname tape
ALL buttons buttoned onpants and blouseBlouse untucked
Pants bloused by tuckingpants into boots or arounda rubber band
Boots shined
Embroidered Name or blackname tag is in the sameposition as Class “B”
Cadet Corps patch is worn onthe wearer’s left, 1/2 inchfrom the seam and centeredBrigade or unit patch, if
worn, is worn on thewearer’s right, 1/2 inchfrom the seam, centered
CACC Standard 3F
15
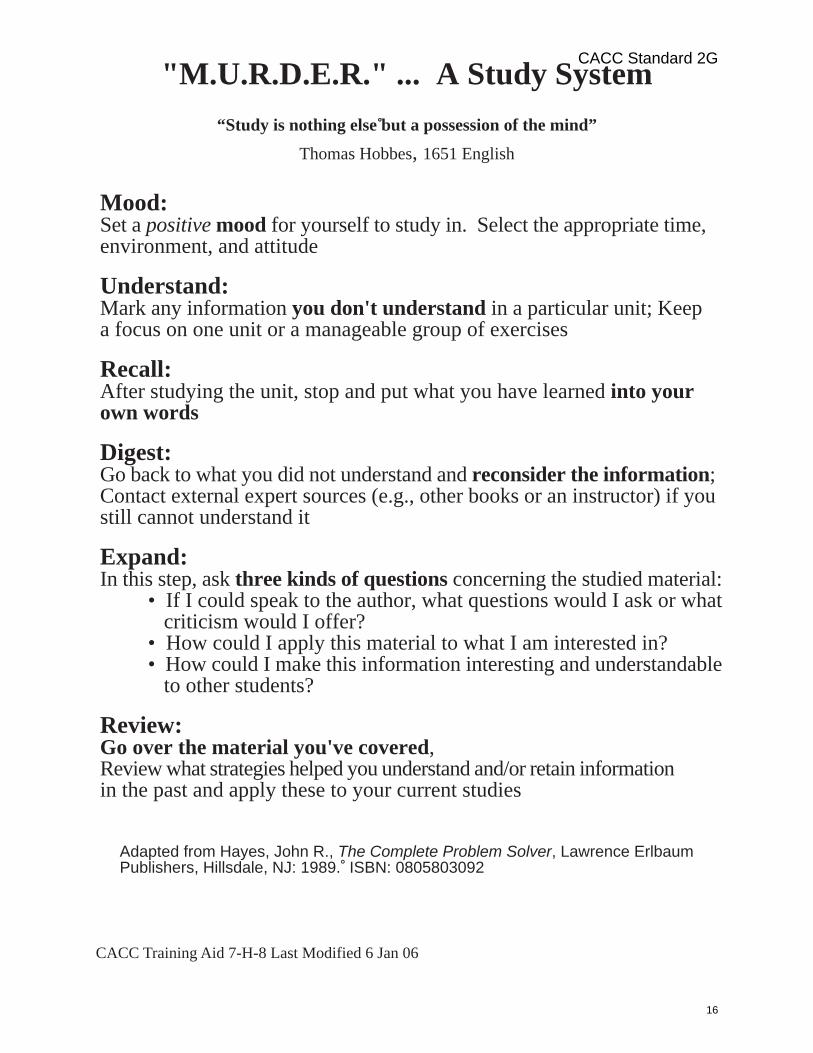
"M.U.R.D.E.R." ... A Study System“Study is nothing else but a possession of the mind”
Thomas Hobbes, 1651 English
Mood:Set a positive mood for yourself to study in. Select the appropriate time,environment, and attitude
Understand:Mark any information you don't understand in a particular unit; Keepa focus on one unit or a manageable group of exercises
Recall:After studying the unit, stop and put what you have learned into yourown words
Digest:Go back to what you did not understand and reconsider the information;Contact external expert sources (e.g., other books or an instructor) if youstill cannot understand it
Expand:In this step, ask three kinds of questions concerning the studied material:
• If I could speak to the author, what questions would I ask or what criticism would I offer?
• How could I apply this material to what I am interested in?• How could I make this information interesting and understandable to other students?
Review:Go over the material you've covered,Review what strategies helped you understand and/or retain informationin the past and apply these to your current studies
Adapted from Hayes, John R., The Complete Problem Solver, Lawrence ErlbaumPublishers, Hillsdale, NJ: 1989. ISBN: 0805803092
CACC Training Aid 7-H-8 Last Modified 6 Jan 06
CACC Standard 2G
16
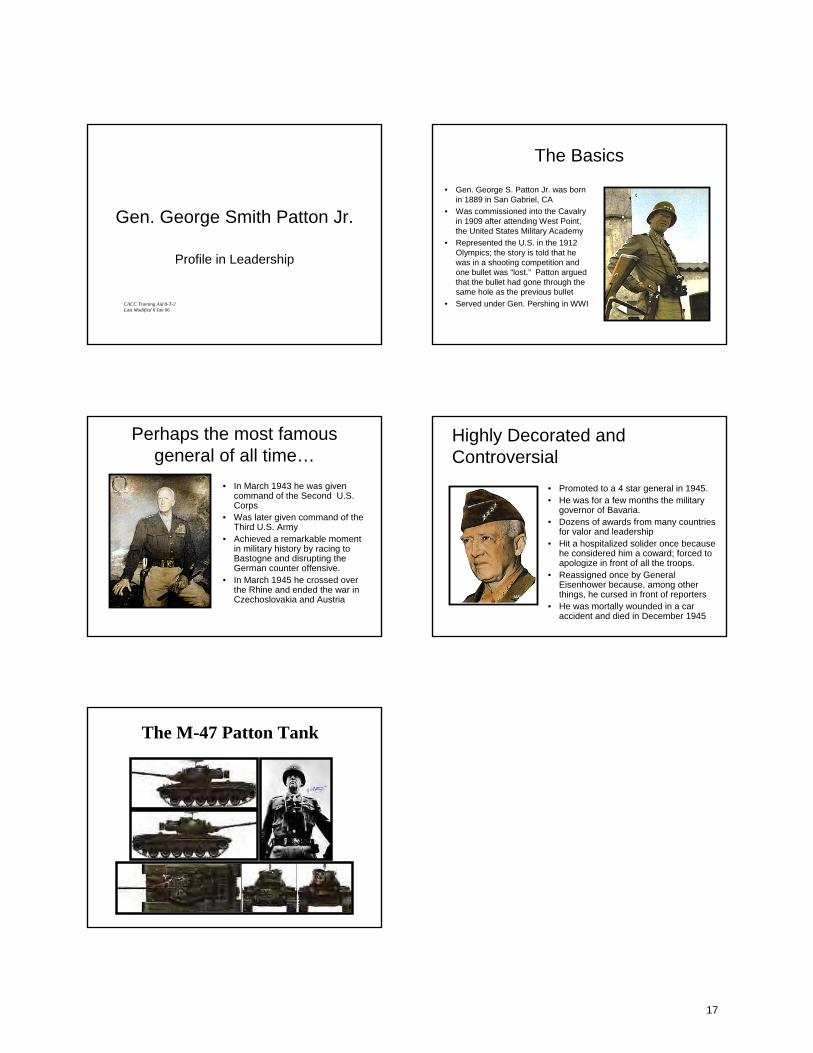
Gen. George Smith Patton Jr.
Profile in Leadership
CACC Training Aid 8-T-2 Last Modified 6 Jan 06
The Basics
• Gen. George S. Patton Jr. was born in 1889 in San Gabriel, CA
• Was commissioned into the Cavalry in 1909 after attending West Point, the United States Military Academy
• Represented the U.S. in the 1912 Olympics; the story is told that he was in a shooting competition and one bullet was “lost.” Patton argued that the bullet had gone through the same hole as the previous bullet
• Served under Gen. Pershing in WWI
Perhaps the most famous general of all time…
• In March 1943 he was given command of the Second U.S. Corps
• Was later given command of the Third U.S. Army
• Achieved a remarkable moment in military history by racing to Bastogne and disrupting the German counter offensive.
• In March 1945 he crossed over the Rhine and ended the war in Czechoslovakia and Austria
Highly Decorated and Controversial
• Promoted to a 4 star general in 1945.• He was for a few months the military
governor of Bavaria.• Dozens of awards from many countries
for valor and leadership• Hit a hospitalized solider once because
he considered him a coward; forced to apologize in front of all the troops.
• Reassigned once by General Eisenhower because, among other things, he cursed in front of reporters
• He was mortally wounded in a caraccident and died in December 1945
The M-47 Patton Tank
17
Prepare– Identify hazards– Create plans– Practice plans
Execute– During a disaster– After the disaster
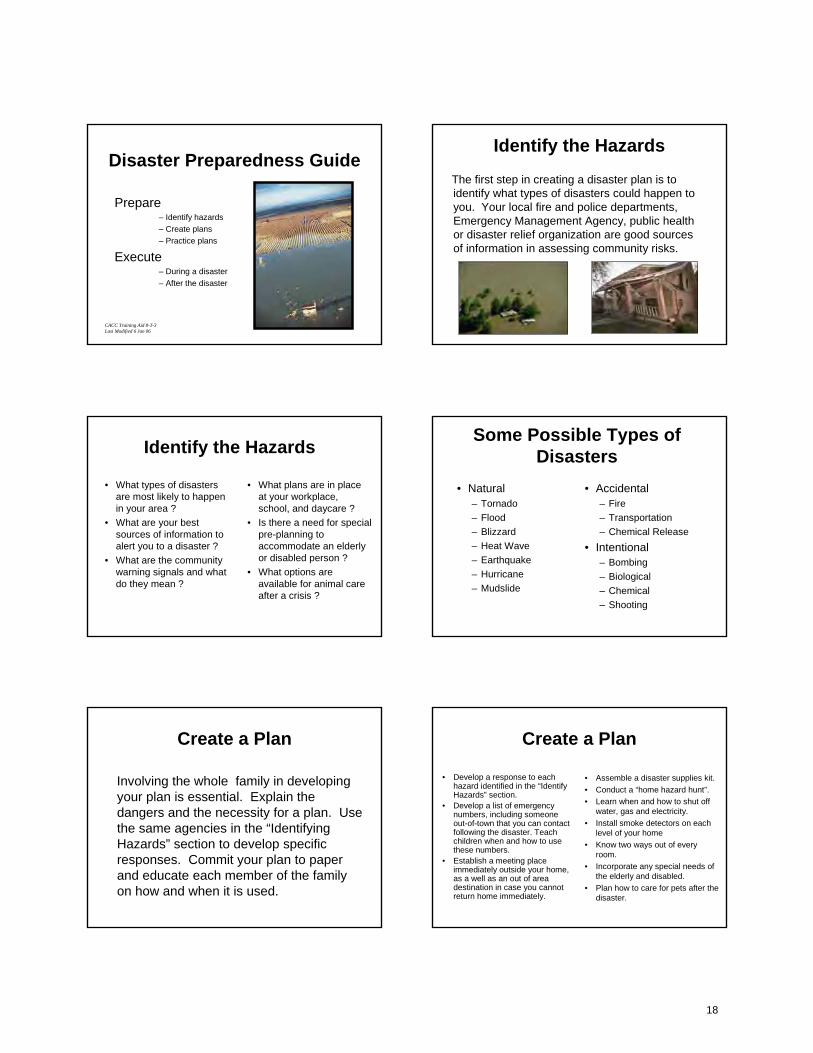
Disaster Preparedness Guide
CACC Training Aid 8-T-3 Last Modified 6 Jan 06
Identify the Hazards
The first step in creating a disaster plan is to identify what types of disasters could happen to you. Your local fire and police departments, Emergency Management Agency, public health or disaster relief organization are good sources of information in assessing community risks.
Identify the Hazards
• What types of disasters are most likely to happen in your area ?
• What are your best sources of information to alert you to a disaster ?
• What are the community warning signals and what do they mean ?
• What plans are in place at your workplace, school, and daycare ?
• Is there a need for special pre-planning to accommodate an elderly or disabled person ?
• What options are available for animal care after a crisis ?
Some Possible Types of Disasters
• Natural– Tornado– Flood – Blizzard– Heat Wave– Earthquake– Hurricane– Mudslide
• Accidental– Fire– Transportation– Chemical Release
• Intentional– Bombing– Biological– Chemical– Shooting
Create a Plan
Involving the whole family in developing your plan is essential. Explain the dangers and the necessity for a plan. Use the same agencies in the “Identifying Hazards” section to develop specific responses. Commit your plan to paper and educate each member of the family on how and when it is used.
Create a Plan
• Develop a response to each hazard identified in the “Identify Hazards” section.
• Develop a list of emergency numbers, including someone out-of-town that you can contact following the disaster. Teach children when and how to use these numbers.
• Establish a meeting place immediately outside your home, as a well as an out of area destination in case you cannot return home immediately.
• Assemble a disaster supplies kit.• Conduct a “home hazard hunt”.• Learn when and how to shut off
water, gas and electricity.• Install smoke detectors on each
level of your home• Know two ways out of every
room.• Incorporate any special needs of
the elderly and disabled.• Plan how to care for pets after the
disaster.
18
Disaster Supplies Kit(plan for three days)
• Water (1 gallon per person per day)
• Non-perishable foods– Canned meats, fruits,
vegetables, soups, juices; peanut butter, crackers, granola bars, trail mix
• First aid kit, include prescription medication.
• Clothing and bedding– One change of clothing and
footwear per person. Sleeping bags and blankets for every one.
• Sanitation items– Personal hygiene items,
plastic garbage bags and ties, bucket with lid, disinfectant, bleach.
• Tools– Flashlight & radio with extra
batteries, hand can opener, ABC type fire extinguisher, wrench , flare, duct tape
• Special items– Baby needs, extra eye
glasses, cash of travelers checks, books & games.
Practice PlanEven the best plan is useless unless it has been practiced and maintained. Routinely review, practice and update your plans.
During the Disaster
• The key to surviving a disaster is to calmly, yet quickly execute the specific plan for the disaster your are expecting.
• If disaster strikes:– Remain calm and patient– Put your disaster plan into action– Provide assistance for those who need it– Check for injuries– Listen to local news for information and
instructions
Quick Reference for Potential Hazards
• Fire– Only fight small fires not in
danger of blocking an exit– Use back of hand to check of
doors are hot– Crawl under smoke– If trapped, close door, hang a
sheet from the window– Meet at your designated spot– Never re-enter a burning
building– Call 911 from a neighbor’s
house
• Tornado– Take immediate shelter if
a warning is issued– Go to basement or
internal hallway– Avoid windows, glass or
potential flying objects– Leave windows closed– Hang onto a heavy object
with one hand– Use the other hand to
protect face and neck
Quick Reference
• Flood– During a watch. Prepare to
evacuate– During a warning, evacuate
immediately using primary or alternate evacuation route
– Fill bathtub with water in case of contamination
– Avoid flood waters and areas prone to flooding
– Shut off propane tanks at source
• Chemical release/Biological event– Listen to news for
instructions: FOLLOW THEM
– Prepare to evacuate and/or use disaster supply kit
– Stay away from victims until threat is identified
– Stay upwind, take shallow breaths through a towel
– Avoid possible contaminated food, water, and area
After the Disaster• The emotions in a disaster can be
devastating. It is crucial to the safety of your family to remain calm, listen for and then follow official instructions.
19
After the Disaster
• Follow the plan for specific disasters
• Listen to news reports for information and instructions
• Assess condition of house, using a flashlight, not an open flame
• Smell for gas leaks, starting with water heater
• Shut off any damaged utilities
• Clean up any hazardous or flammable spills
• Treat injuries• Notify local and out of
town contacts, then only use phone to report life threatening emergencies
• Document damage for insurance claims
Shelter in PlaceIn some emergencies, particularly with chemical, biological or terrorist incidents, local officials may advise you to shelter in place. If this is the case, gather your family and supply kit inside. Use a towel or damp cloth to provide some breathing protection. Close all windows and doors and fireplace dampers. Shut off all fans and heating and air conditioning systems. Unless otherwise directed move to an interior room and above ground level and seal any window and door cracks and vents with duct tape. Wait for instructions from authorities.
Practice Plan• Schedule
– Monthly• Check smoke detectors
– Every six months• Review and practice disaster
plans• Conduct fire drills• Replace batteries in smoke
detectors• Replace food and water in kit
– Annually• Check if fire extinguisher is fully
charged• Conduct a home hazard hunt
• Home hazard hunt– Maintain working smoke
detectors– Secure propane gas tanks– Keep heavy or breakable items
low– Keep exit routes clear– Avoid excess clutter/trash in and
near house– Secure mobile home foundation– Secure hanging items– Safely store poisonous or
hazardous items– Ensure utility connections are in
good shape– Check for fire hazards
20
BIOGRAPHY OF GENERAL GEORGE S. PATTON, JR. 1 2 One of the most complicated military men of all time, General George Smith 3 Patton, Jr. was born November 11, 1885 in San Gabriel, California. He was 4 known for carrying pistols with ivory handles and his intemperate manner, and is 5 regarded as one of the most successful United States field commanders of any 6 war. He continually strove to train his troops to the highest standard of 7 excellence. 8 9 Patton decided during childhood that his goal in life was to become a hero. His 10 ancestors had fought in the Revolutionary War, the Mexican War and the Civil 11 War, and he grew up listening to stories of their brave and successful endeavors. 12 He attended the Virginia Military Institute for one year and went on to graduate 13 from the United States Military Academy at West Point on June 11, 1909. He was 14 then commissioned a Second Lieutenant in the 15th cavalry Regiment. 15 16 Patton married Beatrice Ayer, whom he dated while at West Point, on May 26, 17 1910. In 1912 he represented the United States at the Stockholm Olympics in the 18 first Modern Pentathlon. Originally open only to military officers, it was 19 considered a rigorous test of the skills a soldier should possess. Twenty-six year 20 old Patton did remarkably well in the multi-event sport, consisting of pistol 21 shooting from 25 meters, sword fencing, a 300 meter free style swim, 800 meters 22 horse back riding and a 4-kilometer cross country run. He placed fifth overall, 23 despite a disappointing development in the shooting portion. While most chose 24 .22 revolvers, Patton felt the event's military roots garnered a more appropriate 25 weapon, the .38. During the competition Patton was docked for missing the 26 target, though he contended the lost bullet had simply passed through a large 27 opening created by previous rounds from the .38, which left considerably larger 28 holes. 29 30 After the Olympics, Patton kept busy taking lessons at the French cavalry School 31 and studying French sword drills. In the summer of 1913, Patton received orders 32 to report to the commandant of the Mounted Service School in Fort Riley, 33 Kansas, where he became the school's first Master of the Sword. He designed 34 and taught a course in swordsmanship while he was a student at the school. 35 36 Patton's first real exposure to battle occurred when he served as a member of 37 legendary General John J. Pershing's staff during the expedition to Mexico. In 38 1915, Patton was sent to Fort Bliss along the Mexican border where he led 39 routine cavalry patrols. A year later, he accompanied Pershing as an aide on his 40 expedition against Francisco "Pancho" Villa into Mexico. Patton gained 41 recognition from the press for his attacks on several of Villa's men. 42
43
CACC Standard 3J
CACC Training Aid 8-A-3 Last Modified 6 Jan 0621
Impressed by Patton's determination, Pershing promoted him to Captain and 43 asked him to command his Headquarters Troop upon their return from Mexico. 44 With the onset of World War I in 1914, tanks were not being widely used. In 45 1917, however, Patton became the first member of the newly established United 46 States Tank Corps, where he served until the Corps were abolished in 1920. He 47 took full command of the Corps, directing ideas, procedures and even the design 48 of their uniforms. Along with the British tankers, he and his men achieved victory 49 at Cambrai, France, during the world's first major tank battle in 1917. 50 51 Using his first-hand knowledge of tanks, Patton organized the American tank 52 school in Bourg, France and trained the first 500 American tankers. He had 345 53 tanks by the time he took the brigade into the Meuse-Argonne Operation in 54 September 1918. When they entered into battle, Patton had worked out a plan 55 where he could be in the front lines maintaining communications with his rear 56 command post by means of pigeons and a group of runners. Patton continually 57 exposed himself to gunfire and was shot once in the leg while he was directing 58 the tanks. His actions during that battle earned him the Distinguished Service 59 Cross for Heroism, one of the many medals he would collect during his lifetime. 60 61 An outspoken advocate for tanks, Patton saw them as the future of modern 62 combat. Congress, however, was not willing to appropriate funds to build a large 63 armored force. Even so, Patton studied, wrote extensively and carried out 64 experiments to improve radio communications between tanks. He also helped 65 invent the co-axial tank mount for cannons and machine guns. 66 67 After WWI, Patton held a variety of staff jobs in Hawaii and Washington, D.C. He 68 graduated from the Command and General Staff School in 1924, and completed 69 his military schooling as a distinguished graduate of the Army War College in 70 1932. 71 72 When the German Blitzkrieg began on Europe, Patton finally convinced 73 Congress that the United States needed a more powerful armored striking force. 74 With the formation of the Armored Force in 1940, he was transferred to the 75 Second Armored Division at Fort Benning, Georgia and named Commanding 76 General on April 11, 1941. Two months later, Patton appeared on the cover of 77 Life magazine. Also during this time, Patton began giving his famous "Blood and 78 Guts" speeches in an amphitheater he had built to accommodate the entire 79 division. 80 81 The United States officially entered World War II in December 1941, after the 82 attack on Pearl Harbor. By November 8, 1942, Patton was commanding the 83 Western Task Force, the only all-American force landing for Operation Torch, the 84 Allied invasion of North Africa. After succeeding there, Patton commanded the 85 Seventh Army during the invasion of Sicily in July 1943, and in conjunction with 86 the British Eighth Army restored Sicily to its citizens. 87
88
CACC Standard 3J
CACC Training Aid 8-A-3 Last Modified 6 Jan 0622
Patton commanded the Seventh Army until 1944, when he was given command 88 of the Third Army in France. Patton and his troops dashed across Europe after 89 the battle of Normandy and exploited German weaknesses with great success, 90 covering the 600 miles across France, Belgium, Luxembourg, Germany, Austria 91 and Czechoslovakia. When the Third Army liberated the Buchenwald 92 concentration camp, Patton slowed his pace. He instituted a policy, later adopted 93 by other commanders, of making local German civilians tour the camps. By the 94 time WWII was over, the Third Army had liberated or conquered 81,522 square 95 miles of territory. 96 97 In October 1945, Patton assumed command of the Fifteenth Army in American-98 occupied Germany. On December 9, he suffered injuries as the result of an 99 automobile accident. He died 12 days later, on December 21, 1945 and is buried 100 among the soldiers who died in the Battle of the Bulge in Hamm, Luxembourg. 101 102 Remembered for his fierce determination and ability to lead soldiers, Patton is 103 now considered one of the greatest military figures in history. The 1970 film, 104 "Patton," starring George C. Scott in the title role, provoked renewed interest in 105 Patton. The movie won seven Academy Awards, including Best Actor and Best 106 Picture, and immortalized General George Smith Patton, Jr. as one of the world's 107 most intriguing military men. 108 109 Courtesy of http://www.generalpatton.com/biography.html and used by permission. 110
CACC Standard 3J
CACC Training Aid 8-A-3 Last Modified 6 Jan 0623
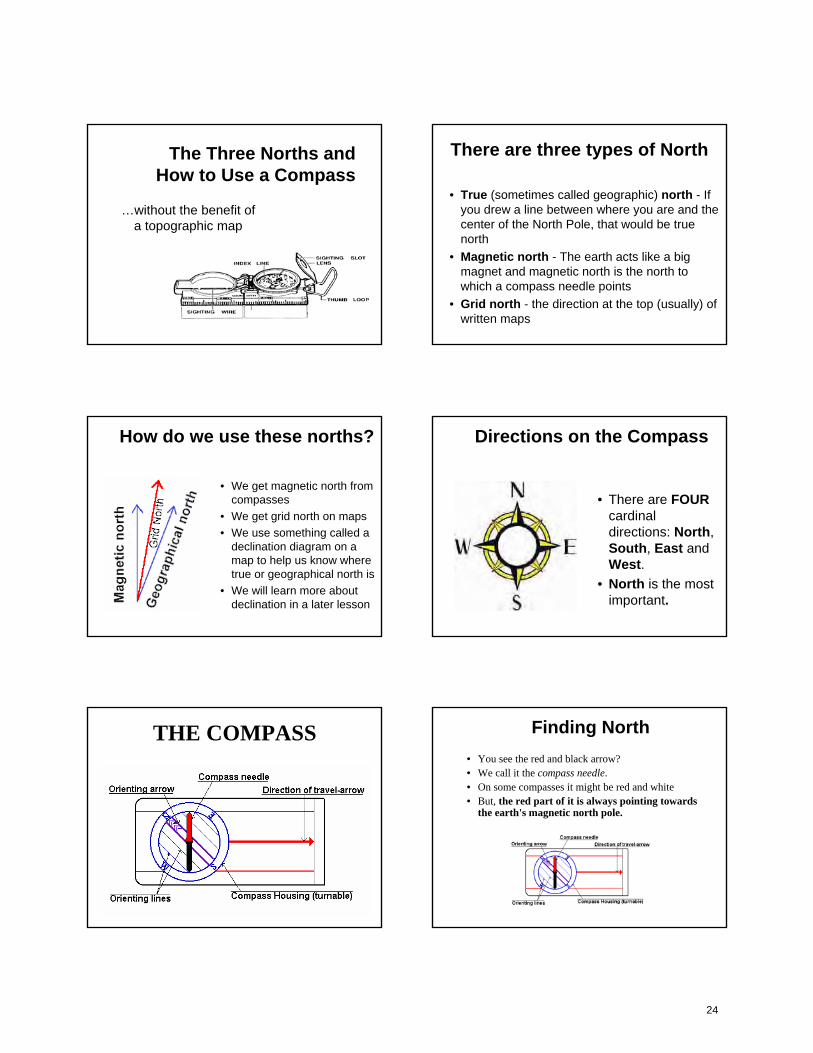
The Three Norths andHow to Use a Compass
…without the benefit of a topographic map
There are three types of North
• True (sometimes called geographic) north - If you drew a line between where you are and the center of the North Pole, that would be true north
• Magnetic north - The earth acts like a big magnet and magnetic north is the north to which a compass needle points
• Grid north - the direction at the top (usually) of written maps
How do we use these norths?
• We get magnetic north from compasses
• We get grid north on maps• We use something called a
declination diagram on a map to help us know where true or geographical north is
• We will learn more about declination in a later lesson
Directions on the Compass
• There are FOURcardinal directions: North, South, East and West.
• North is the most important.
THE COMPASS Finding North• You see the red and black arrow? • We call it the compass needle. • On some compasses it might be red and white • But, the red part of it is always pointing towards
the earth's magnetic north pole.
24
Finding other directions
• You've got a dial that turns on your compass We call it the Compass housing
• On the edge of the compass housing, you will probably have a scale from 0 to 360
• Those are the degrees or the azimuth (or you may also call it the bearing in some contexts)
• And you should have the letters N, S, W and E for North, South, West and East
• If you want to go in a direction between two of these, you wouldcombine them If you would like to go in a direction just between North and West, you simply say: "I would like to go Northwest "
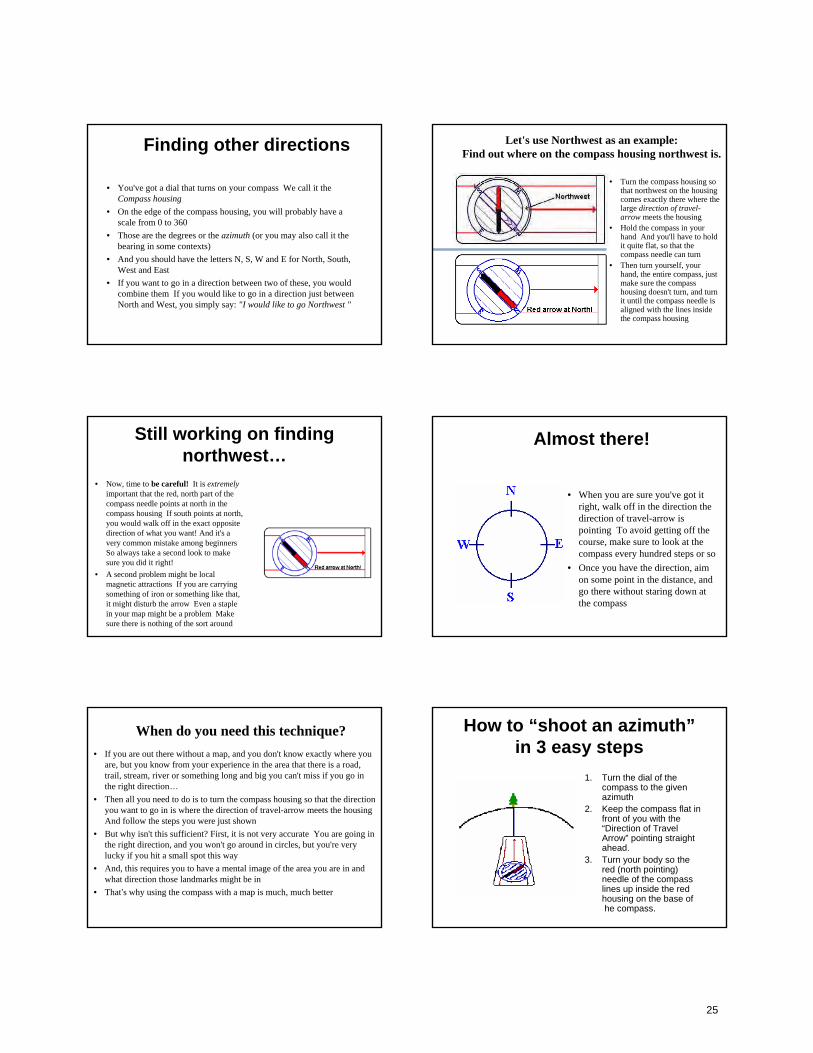
Let's use Northwest as an example:Find out where on the compass housing northwest is.
• Turn the compass housing so that northwest on the housing comes exactly there where the large direction of travel-arrow meets the housing
• Hold the compass in your hand And you'll have to hold it quite flat, so that the compass needle can turn
• Then turn yourself, your hand, the entire compass, just make sure the compass housing doesn't turn, and turn it until the compass needle is aligned with the lines inside the compass housing
Still working on finding northwest…
• Now, time to be careful! It is extremelyimportant that the red, north part of the compass needle points at north in the compass housing If south points at north, you would walk off in the exact opposite direction of what you want! And it's a very common mistake among beginners So always take a second look to make sure you did it right!
• A second problem might be local magnetic attractions If you are carrying something of iron or something like that, it might disturb the arrow Even a staple in your map might be a problem Make sure there is nothing of the sort around
Almost there!
• When you are sure you've got it right, walk off in the direction the direction of travel-arrow is pointing To avoid getting off the course, make sure to look at the compass every hundred steps or so
• Once you have the direction, aim on some point in the distance, and go there without staring down at the compass
When do you need this technique? • If you are out there without a map, and you don't know exactly where you
are, but you know from your experience in the area that there is a road, trail, stream, river or something long and big you can't miss if you go in the right direction…
• Then all you need to do is to turn the compass housing so that the direction you want to go in is where the direction of travel-arrow meets the housing And follow the steps you were just shown
• But why isn't this sufficient? First, it is not very accurate You are going in the right direction, and you won't go around in circles, but you're very lucky if you hit a small spot this way
• And, this requires you to have a mental image of the area you are in and what direction those landmarks might be in
• That’s why using the compass with a map is much, much better
How to “shoot an azimuth”in 3 easy steps
1. Turn the dial of the compass to the given azimuth
2. Keep the compass flat in front of you with the “Direction of Travel Arrow” pointing straight ahead.
3. Turn your body so the red (north pointing) needle of the compass lines up inside the red housing on the base of he compass.
25
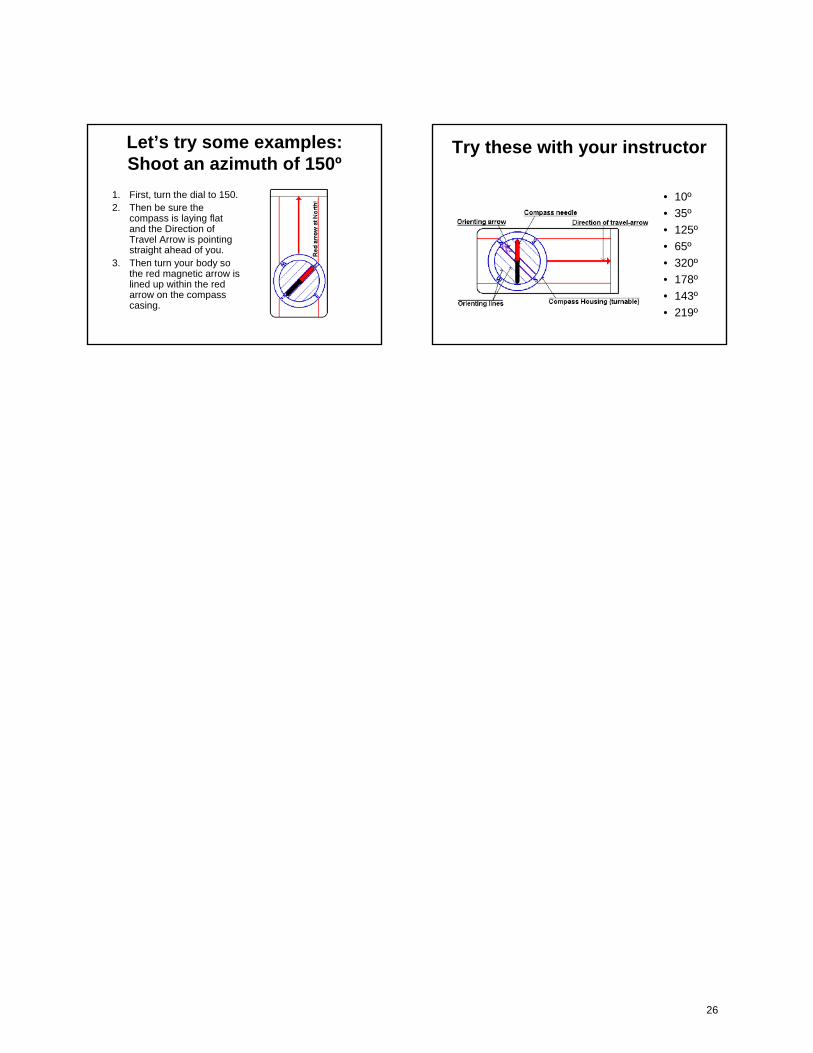
Let’s try some examples:Shoot an azimuth of 150º
1. First, turn the dial to 150.2. Then be sure the
compass is laying flat and the Direction of Travel Arrow is pointing straight ahead of you.
3. Then turn your body so the red magnetic arrow is lined up within the red arrow on the compass casing.
Try these with your instructor
• 10º• 35º• 125º• 65º• 320º• 178º• 143º• 219º
26
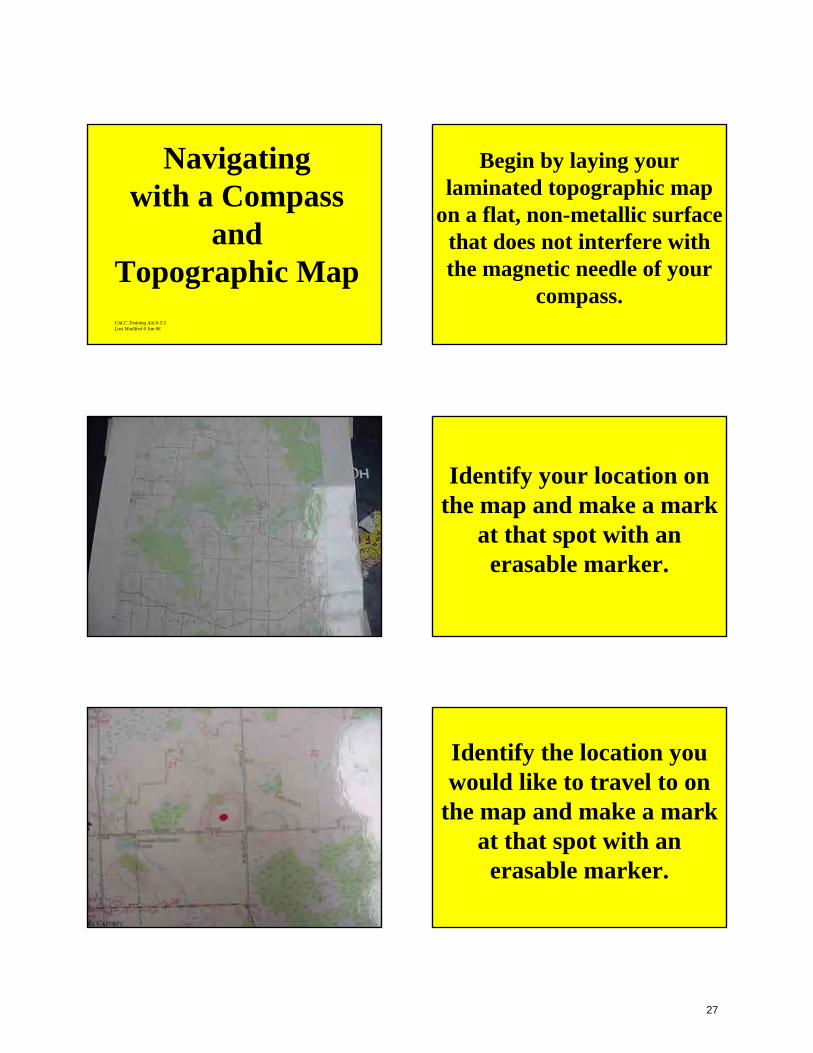
Navigatingwith a Compass
andTopographic MapCACC Training Aid 8-T-5 Last Modified 6 Jan 06
Begin by laying your laminated topographic map
on a flat, non-metallic surface that does not interfere with the magnetic needle of your
compass.
Identify your location on the map and make a mark
at that spot with an erasable marker.
Identify the location you would like to travel to on
the map and make a mark at that spot with an
erasable marker.
27
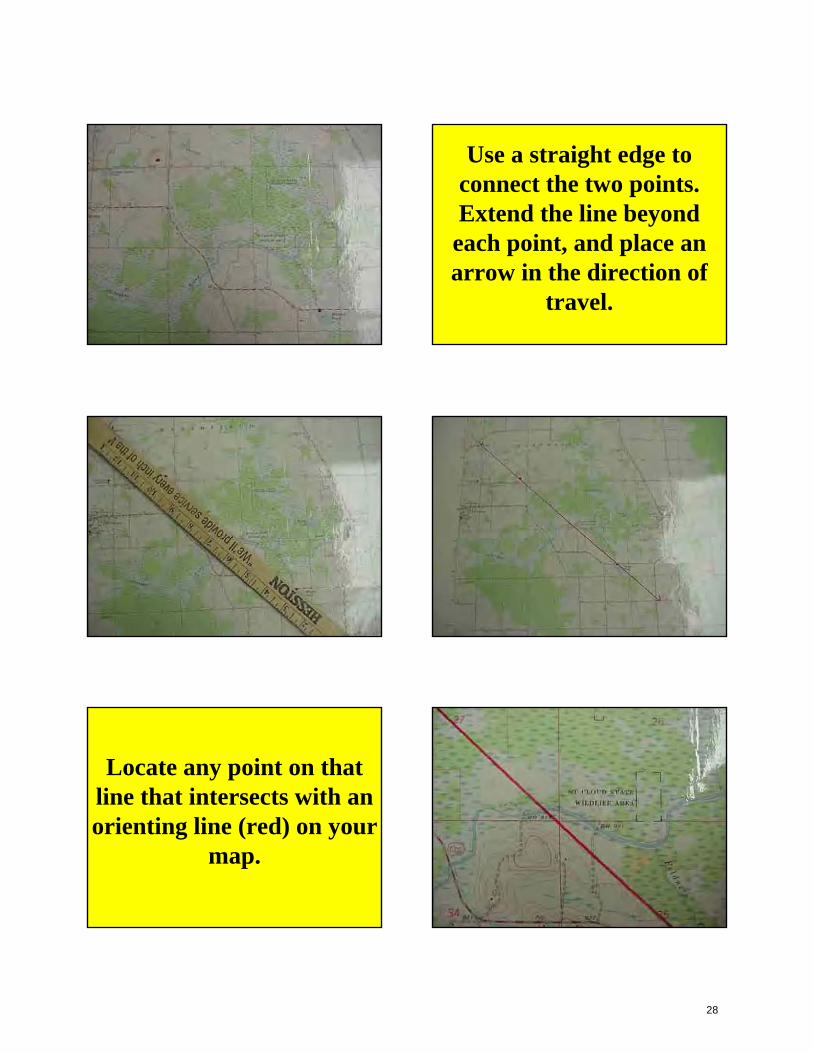
Use a straight edge to connect the two points. Extend the line beyond each point, and place an arrow in the direction of
travel.
Locate any point on that line that intersects with an orienting line (red) on your
map.
28
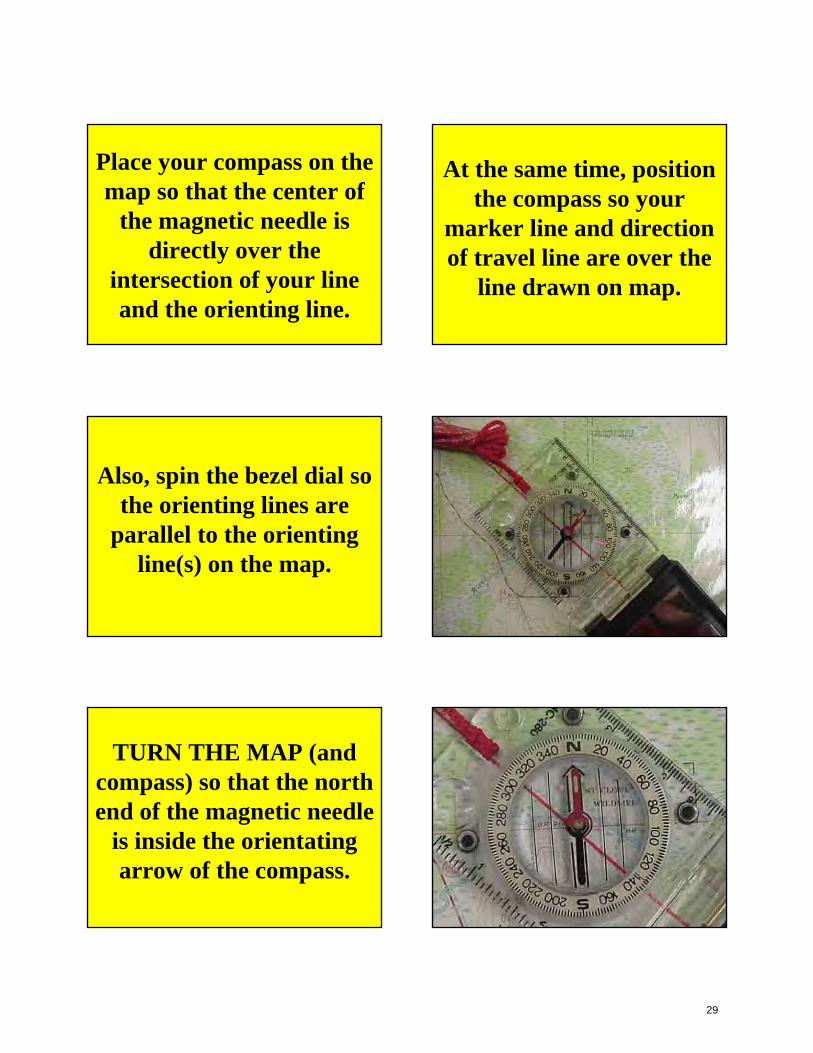
Place your compass on the map so that the center of
the magnetic needle is directly over the
intersection of your line and the orienting line.
At the same time, position the compass so your
marker line and direction of travel line are over the
line drawn on map.
Also, spin the bezel dial so the orienting lines are
parallel to the orienting line(s) on the map.
TURN THE MAP (and compass) so that the north end of the magnetic needle
is inside the orientating arrow of the compass.
29
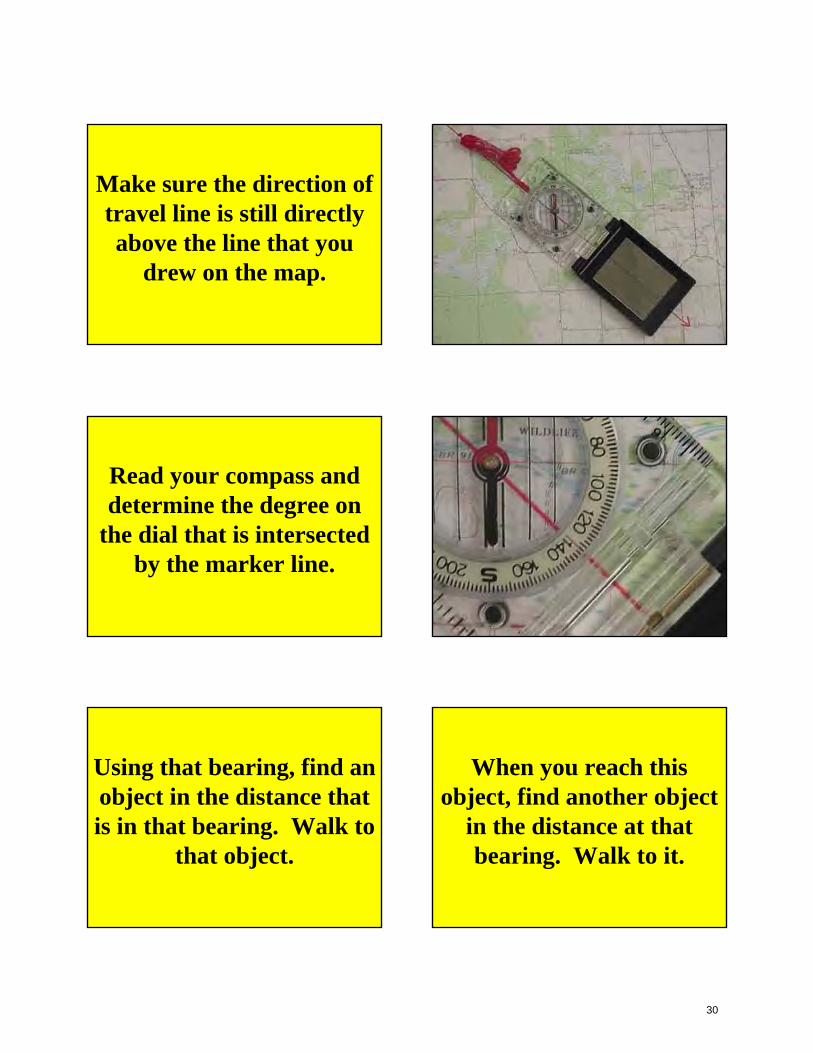
Make sure the direction of travel line is still directly above the line that you
drew on the map.
Read your compass and determine the degree on
the dial that is intersected by the marker line.
Using that bearing, find an object in the distance that is in that bearing. Walk to
that object.
When you reach this object, find another object
in the distance at that bearing. Walk to it.
30
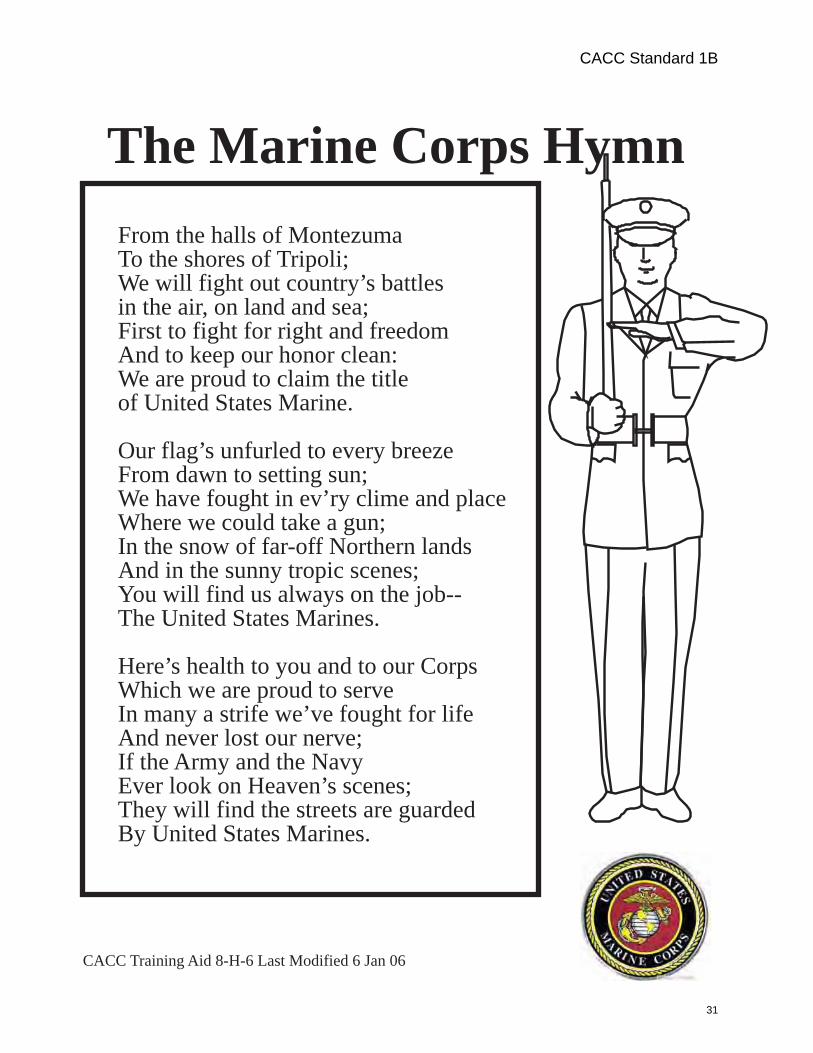
The Marine Corps Hymn
From the halls of MontezumaTo the shores of Tripoli;We will fight out country’s battlesin the air, on land and sea;First to fight for right and freedomAnd to keep our honor clean:We are proud to claim the titleof United States Marine.
Our flag’s unfurled to every breezeFrom dawn to setting sun;We have fought in ev’ry clime and placeWhere we could take a gun;In the snow of far-off Northern landsAnd in the sunny tropic scenes;You will find us always on the job--The United States Marines.
Here’s health to you and to our CorpsWhich we are proud to serveIn many a strife we’ve fought for lifeAnd never lost our nerve;If the Army and the NavyEver look on Heaven’s scenes;They will find the streets are guardedBy United States Marines.
CACC Training Aid 8-H-6 Last Modified 6 Jan 06
CACC Standard 1B
31
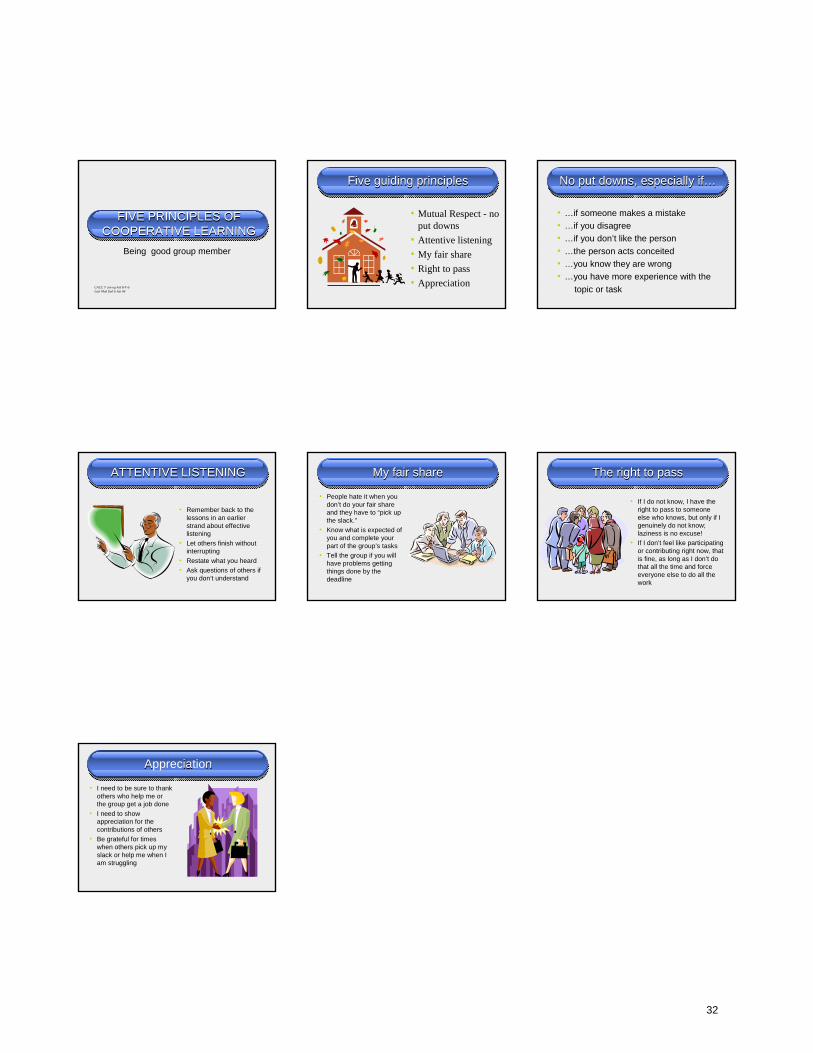
FIVE PRINCIPLES OF COOPERATIVE LEARNING
FIVE PRINCIPLES OF COOPERATIVE LEARNING
Being good group member
CACC T ain ng Aid 8-T-6 Last Mod fied 6 Jan 06
Five guiding principlesFive guiding principles
• Mutual Respect - no put downs
• Attentive listening • My fair share • Right to pass • Appreciation
No put downs, especially if…No put downs, especially if…
• …if someone makes a mistake• …if you disagree• …if you don’t like the person• …the person acts conceited• …you know they are wrong• …you have more experience with the
topic or task
ATTENTIVE LISTENINGATTENTIVE LISTENING
• Remember back to the lessons in an earlier strand about effective listening
• Let others finish without interrupting
• Restate what you heard• Ask questions of others if
you don’t understand
My fair shareMy fair share
• People hate it when you don’t do your fair share and they have to “pick up the slack.”
• Know what is expected of you and complete your part of the group’s tasks
• Tell the group if you will have problems getting things done by the deadline
The right to passThe right to pass
• If I do not know, I have the right to pass to someone else who knows, but only if I genuinely do not know; laziness is no excuse!
• If I don’t feel like participating or contributing right now, that is fine, as long as I don’t do that all the time and force everyone else to do all the work
A ia nAppreciation
• I need to be sure to thank others who help me or the group get a job done
• I need to show appreciation for the contributions of others
• Be grateful for times when others pick up my slack or help me when I am struggling
32
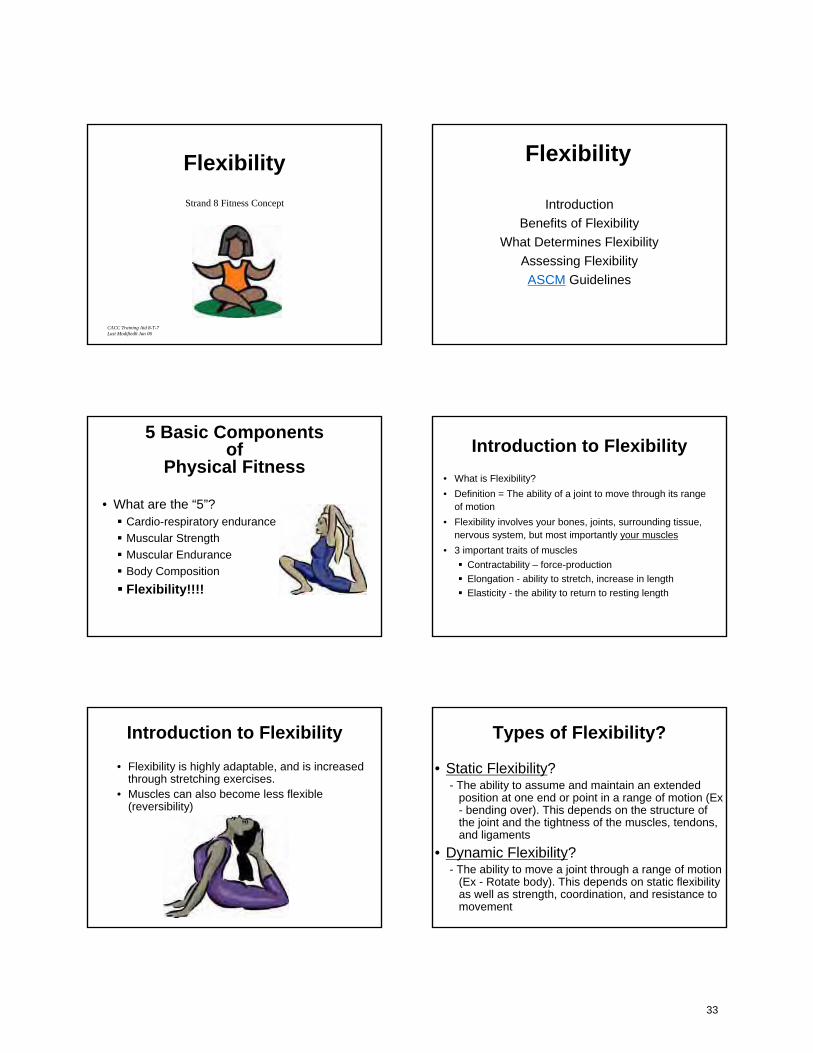
FlexibilityStrand 8 Fitness Concept
CACC Training Aid 8-T-7 Last Modified6 Jan 06
Flexibility
IntroductionBenefits of Flexibility
What Determines FlexibilityAssessing FlexibilityASCM Guidelines
5 Basic Componentsof
Physical Fitness
• What are the “5”?Cardio-respiratory enduranceMuscular StrengthMuscular EnduranceBody CompositionFlexibility!!!!
Introduction to Flexibility• What is Flexibility?• Definition = The ability of a joint to move through its range
of motion• Flexibility involves your bones, joints, surrounding tissue,
nervous system, but most importantly your muscles• 3 important traits of muscles
Contractability – force-productionElongation - ability to stretch, increase in lengthElasticity - the ability to return to resting length
Introduction to Flexibility
• Flexibility is highly adaptable, and is increased through stretching exercises.
• Muscles can also become less flexible (reversibility)
Types of Flexibility?
• Static Flexibility?- The ability to assume and maintain an extended
position at one end or point in a range of motion (Ex - bending over). This depends on the structure of the joint and the tightness of the muscles, tendons, and ligaments
• Dynamic Flexibility?- The ability to move a joint through a range of motion
(Ex - Rotate body). This depends on static flexibility as well as strength, coordination, and resistance to movement
33
Benefits of Flexibility and Stretching Exercises
• Can you identify some?Joint HealthProtection against low-back pain and injuriesReduction of post-exercise muscle sorenessPotential relief of aches and painsImproved body position Enhances range of motionRelaxationOther?
What Determines Flexibility?
1) Joint Structure and Surrounding Tissue2) Muscle Elasticity and Length3) Nervous System Activity
What Determines Flexibility?
1) Joint Structure and Surrounding tissue
Determined by the nature and structure of the jointType of JointsFlexibility of Joint CapsuleHeredity (genetics)
What Determines Flexibility?
2) Muscle Elasticity and Length
Muscle tissue is key to developing flexibility because it can be lengthened if regularly stretchedThe connective tissue that surrounds muscle is elastic, and it will lengthen if gently and regularly stretchedCollagen - white fibers that provide structure and supportElastin - yellow fibers that are elastic and flexible
What Determines Flexibility?
3) Nervous System Activity
Muscles contain stretch receptors that control their lengthIf a muscle is stretched suddenly, stretch receptors send signals to the spinal cord, which then sends a signal back to the same muscle, causing it to contractStretch receptors help the body know what the muscles are doing and allow for fine control of muscle length
Assessing Flexibility• Flexibility is specific to each joint• Therefore, there are no specific tests to measure
general flexibility• “Sit-and-reach” test is normally used • The Sit-and-reach measures flexibility
of muscles in the lower back and hamstrings
34
ACSM Stretching Guidelines• American College of Sports Medicine
• Stretch 2-3 days per week• Do flexibility training 3-5 days per week• Stretch your muscles after they are warm• Incorporate stretching into your cool-down following
exercise
Exercises to Improve Flexibility
• There are hundreds of exercises that can improve flexibility
• Your program should include exercises that work all the major joints of the body by stretching their associated muscles
• Search reputable texts and “web” sites for different types of stretches that you might use
• Be sure to use correct technique for each stretch, hold each stretch for 10-30 seconds, and perform at least 3-4 repetitions
Common Questions/Answers
• Is stretching the same as warming up?People often confuse stretching and pre-exercise warm-up. A warm-up involves light exercise that increases body temperature so that your muscles get warm. Stretch following 5-10 minutes of low-intensity exercise. Warmed muscles stretch better than cold ones.
• Does weight training limit my flexibility?Weight training, or any physical activity, will decrease flexibility if the exercises are not performed through a full range of motion. When done properly, weight training increases flexibility
Common Questions/Answers
• Can I stretch too far?Yes. As muscle tissue is progressively stretched, it reaches a point where it becomes damaged and may rupture. The greatest danger occurs during passive stretching when a partner is doing the stretching for you.
• Does jogging impair flexibility?Jogging, without incorporating regular flexibility exercises forthe hamstrings and quadriceps, might decrease flexibility due tothe limited range of motion used during the jogging stride
Summary• Flexibility is highly adaptable and specific to each joint• Benefits include reducing the risk of injury, and
preventing abnormal stresses that lead to joint deteriorations
• Range of motion can be limited by joint structure, muscle elasticity, and stretch receptor activity
• Developing flexibility depends on stretching the elastic tissues within muscles regularly
35
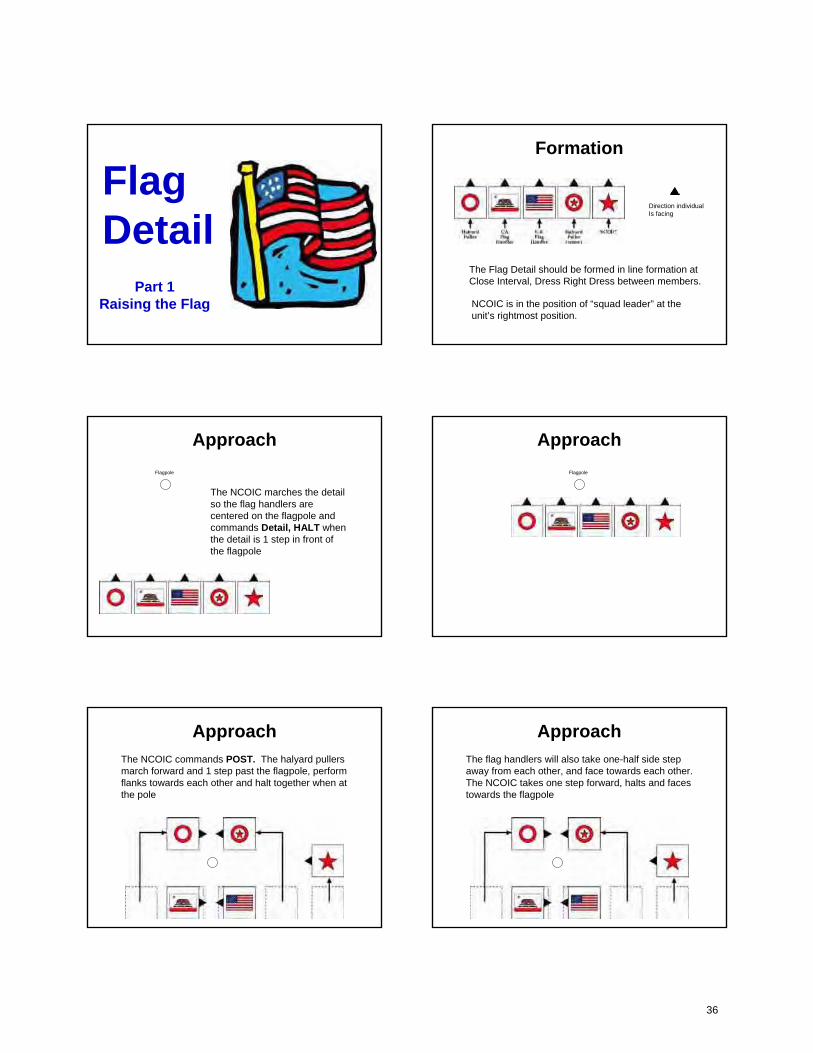
FlagDetail
Part 1Raising the Flag
Formation
NCOIC is in the position of “squad leader” at the unit’s rightmost position.
The Flag Detail should be formed in line formation at Close Interval, Dress Right Dress between members.
Direction individualIs facing
ApproachFlagpole
The NCOIC marches the detail so the flag handlers are centered on the flagpole and commands Detail, HALT when the detail is 1 step in front of the flagpole
ApproachFlagpole
ApproachThe NCOIC commands POST. The halyard pullers march forward and 1 step past the flagpole, perform flanks towards each other and halt together when at the pole
ApproachThe flag handlers will also take one-half side stepaway from each other, and face towards each other. The NCOIC takes one step forward, halts and faces towards the flagpole
36
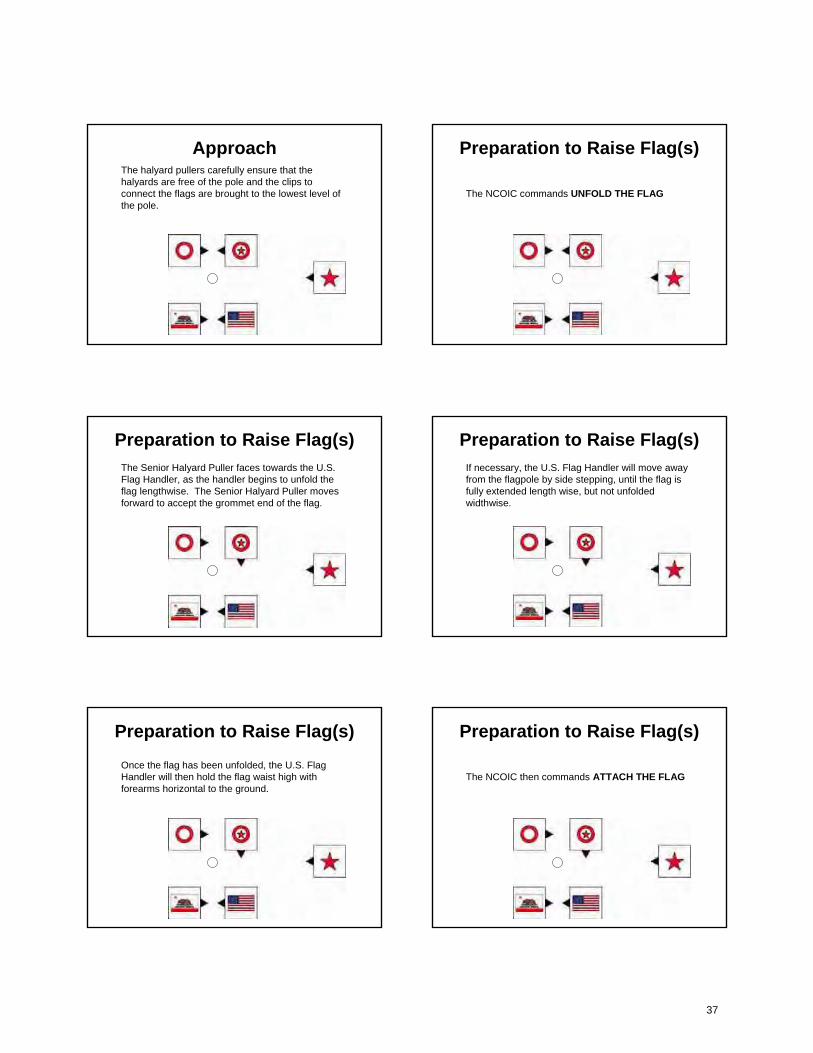
ApproachThe halyard pullers carefully ensure that the halyards are free of the pole and the clips to connect the flags are brought to the lowest level of the pole.
Preparation to Raise Flag(s)
The NCOIC commands UNFOLD THE FLAG
Preparation to Raise Flag(s)The Senior Halyard Puller faces towards the U.S. Flag Handler, as the handler begins to unfold the flag lengthwise. The Senior Halyard Puller movesforward to accept the grommet end of the flag.
Preparation to Raise Flag(s)If necessary, the U.S. Flag Handler will move away from the flagpole by side stepping, until the flag is fully extended length wise, but not unfolded widthwise.
Preparation to Raise Flag(s)Once the flag has been unfolded, the U.S. Flag Handler will then hold the flag waist high with forearms horizontal to the ground.
Preparation to Raise Flag(s)
The NCOIC then commands ATTACH THE FLAG
37
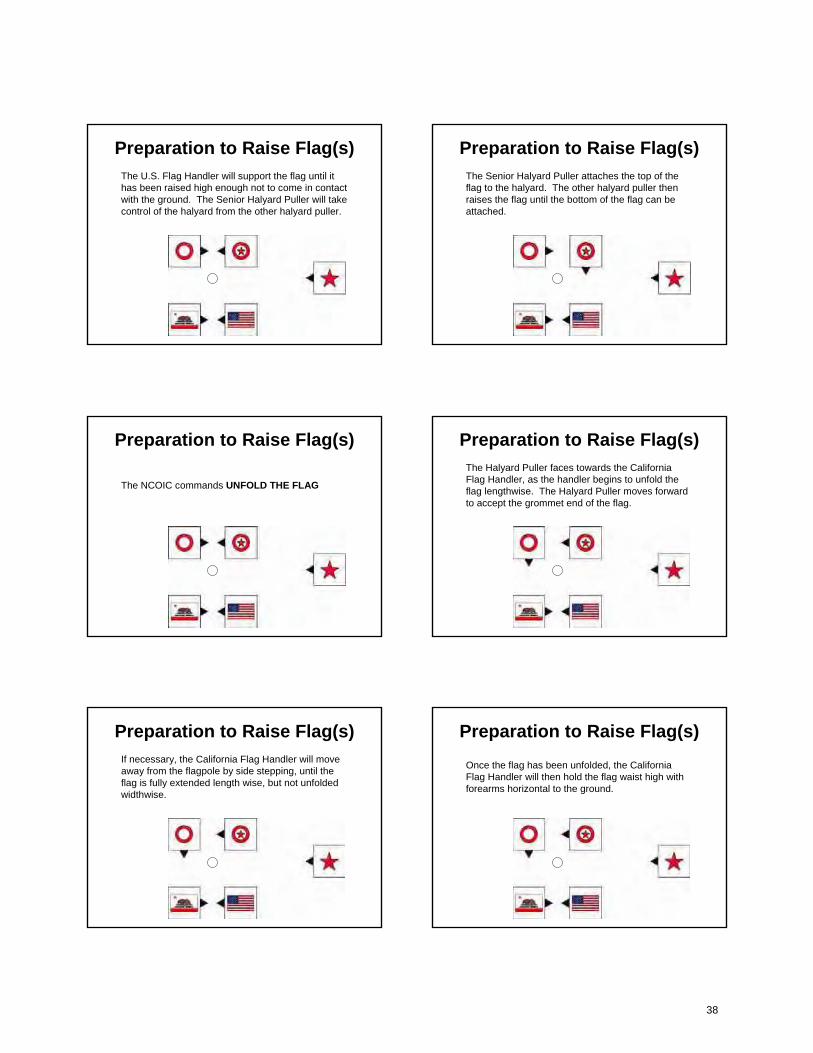
Preparation to Raise Flag(s)The U.S. Flag Handler will support the flag until it has been raised high enough not to come in contact with the ground. The Senior Halyard Puller will take control of the halyard from the other halyard puller.
Preparation to Raise Flag(s)The Senior Halyard Puller attaches the top of the flag to the halyard. The other halyard puller then raises the flag until the bottom of the flag can be attached.
Preparation to Raise Flag(s)
The NCOIC commands UNFOLD THE FLAG
Preparation to Raise Flag(s)The Halyard Puller faces towards the California Flag Handler, as the handler begins to unfold the flag lengthwise. The Halyard Puller moves forward to accept the grommet end of the flag.
Preparation to Raise Flag(s)If necessary, the California Flag Handler will move away from the flagpole by side stepping, until the flag is fully extended length wise, but not unfolded widthwise.
Preparation to Raise Flag(s)Once the flag has been unfolded, the California Flag Handler will then hold the flag waist high with forearms horizontal to the ground.
38
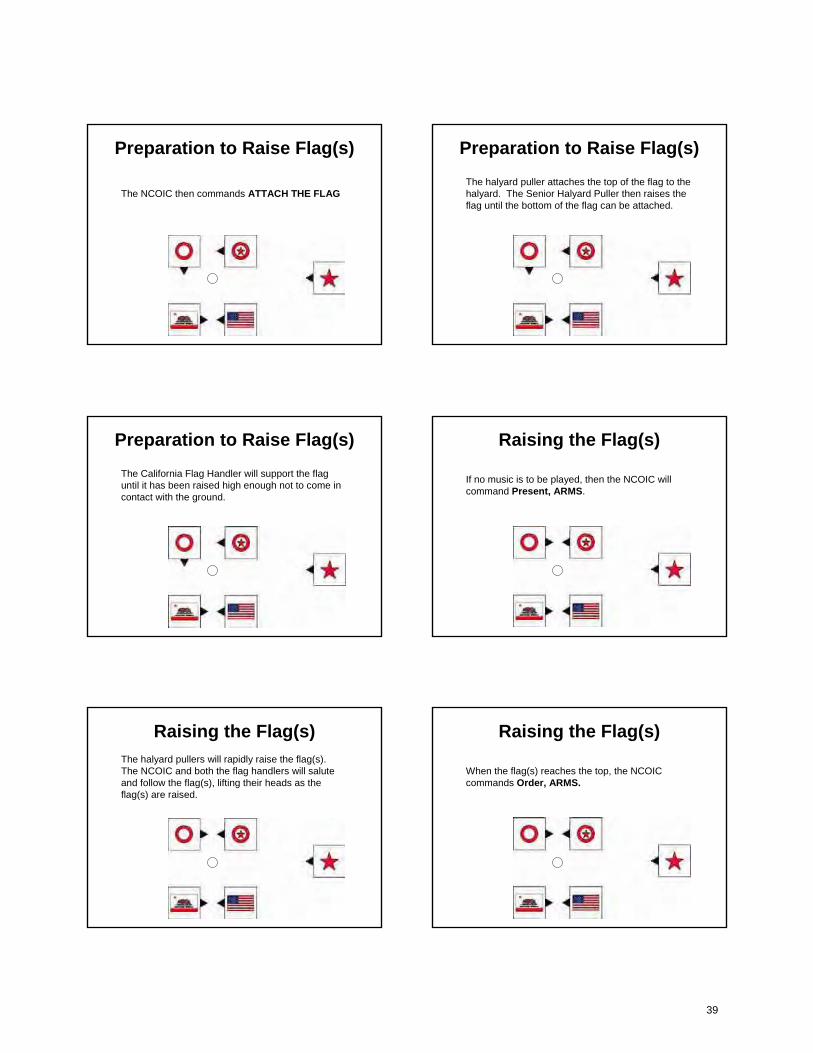
Preparation to Raise Flag(s)
The NCOIC then commands ATTACH THE FLAG
Preparation to Raise Flag(s)The halyard puller attaches the top of the flag to the halyard. The Senior Halyard Puller then raises the flag until the bottom of the flag can be attached.
Preparation to Raise Flag(s)The California Flag Handler will support the flag until it has been raised high enough not to come in contact with the ground.
Raising the Flag(s)
If no music is to be played, then the NCOIC will command Present, ARMS.
Raising the Flag(s)The halyard pullers will rapidly raise the flag(s). The NCOIC and both the flag handlers will salute and follow the flag(s), lifting their heads as the flag(s) are raised.
Raising the Flag(s)
When the flag(s) reaches the top, the NCOIC commands Order, ARMS.
39
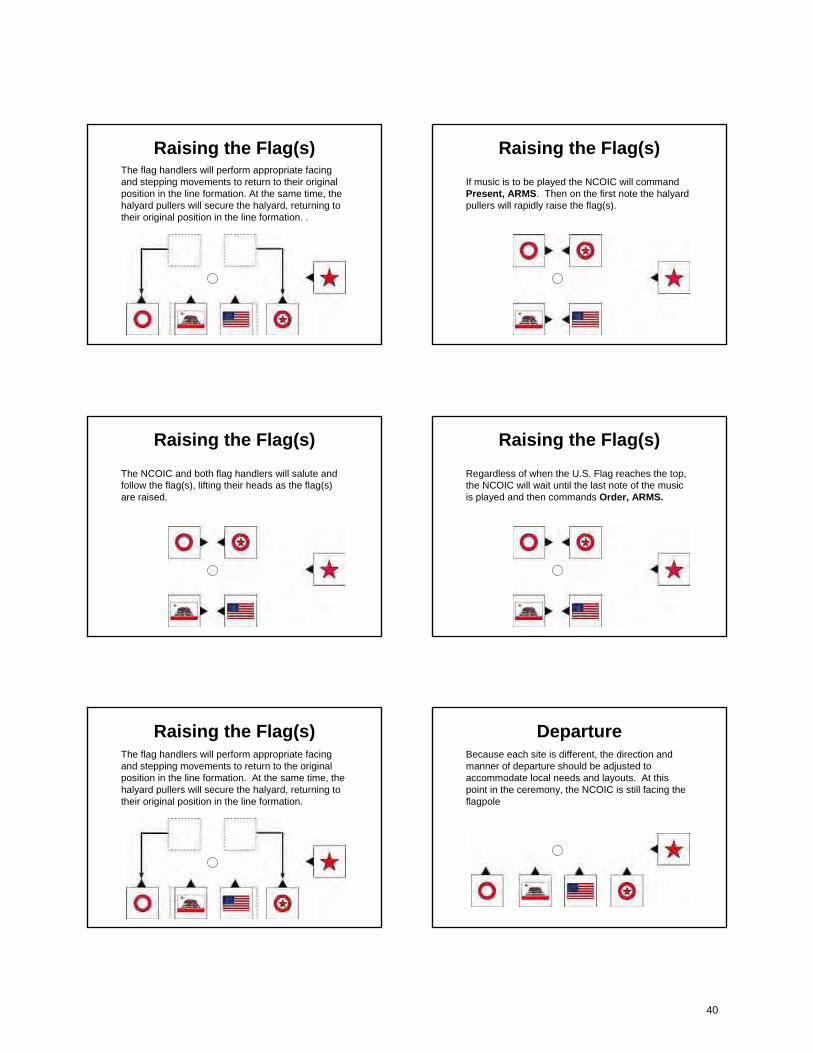
Raising the Flag(s)The flag handlers will perform appropriate facing and stepping movements to return to their original position in the line formation. At the same time, the halyard pullers will secure the halyard, returning to their original position in the line formation. .
Raising the Flag(s)If music is to be played the NCOIC will command Present, ARMS. Then on the first note the halyard pullers will rapidly raise the flag(s).
Raising the Flag(s)The NCOIC and both flag handlers will salute and follow the flag(s), lifting their heads as the flag(s) are raised.
Raising the Flag(s)Regardless of when the U.S. Flag reaches the top, the NCOIC will wait until the last note of the music is played and then commands Order, ARMS.
Raising the Flag(s)The flag handlers will perform appropriate facing and stepping movements to return to the original position in the line formation. At the same time, the halyard pullers will secure the halyard, returning to their original position in the line formation.
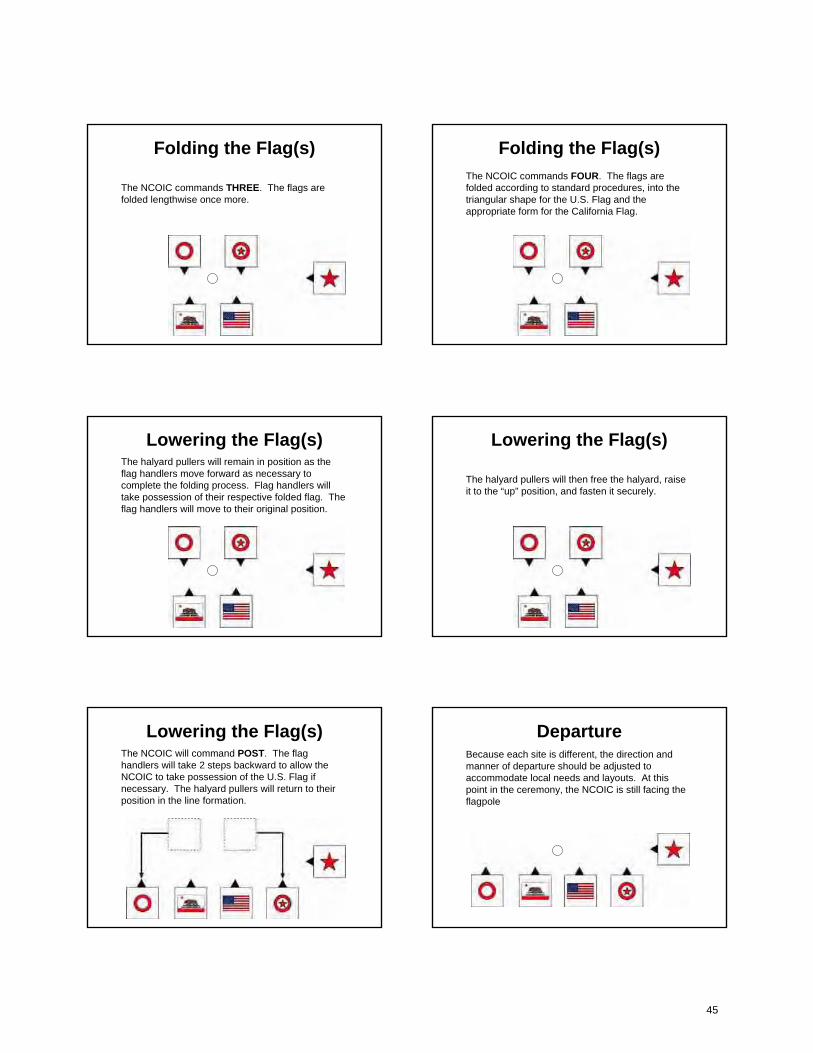
DepartureBecause each site is different, the direction and manner of departure should be adjusted to accommodate local needs and layouts. At this point in the ceremony, the NCOIC is still facing the flagpole
40
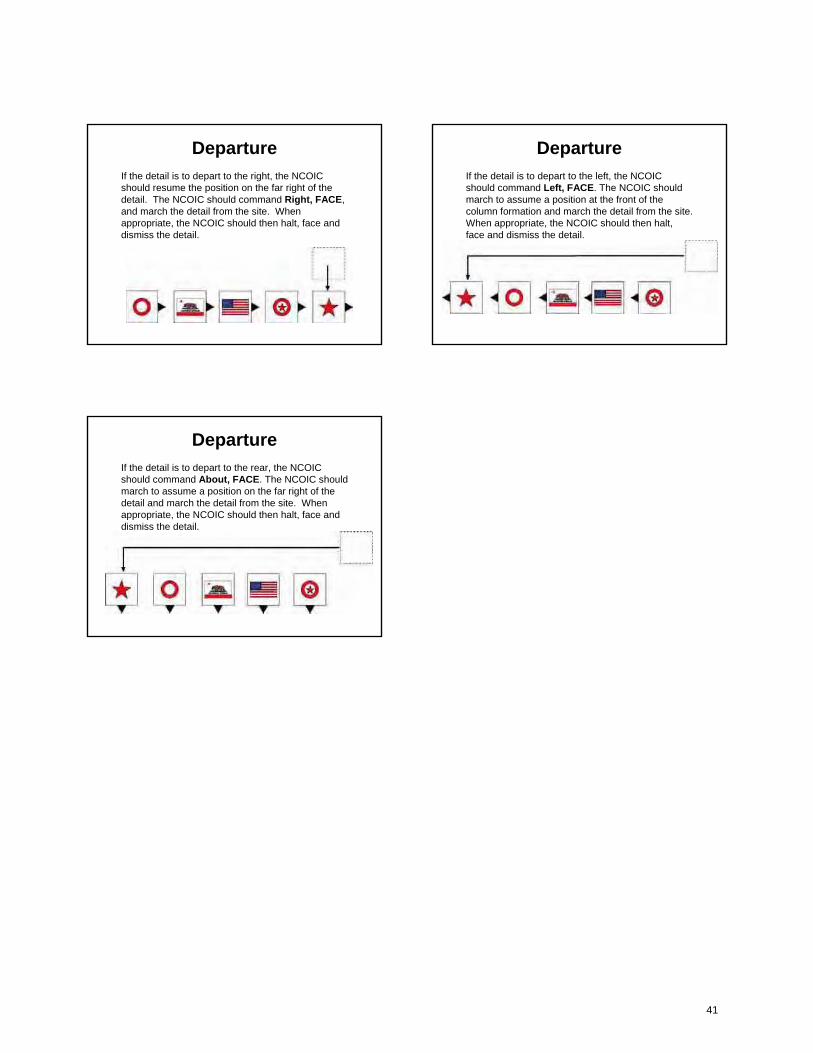
DepartureIf the detail is to depart to the right, the NCOIC should resume the position on the far right of the detail. The NCOIC should command Right, FACE, and march the detail from the site. When appropriate, the NCOIC should then halt, face and dismiss the detail.
DepartureIf the detail is to depart to the left, the NCOIC should command Left, FACE. The NCOIC should march to assume a position at the front of the column formation and march the detail from the site. When appropriate, the NCOIC should then halt, face and dismiss the detail.
DepartureIf the detail is to depart to the rear, the NCOIC should command About, FACE. The NCOIC should march to assume a position on the far right of the detail and march the detail from the site. When appropriate, the NCOIC should then halt, face and dismiss the detail.
41
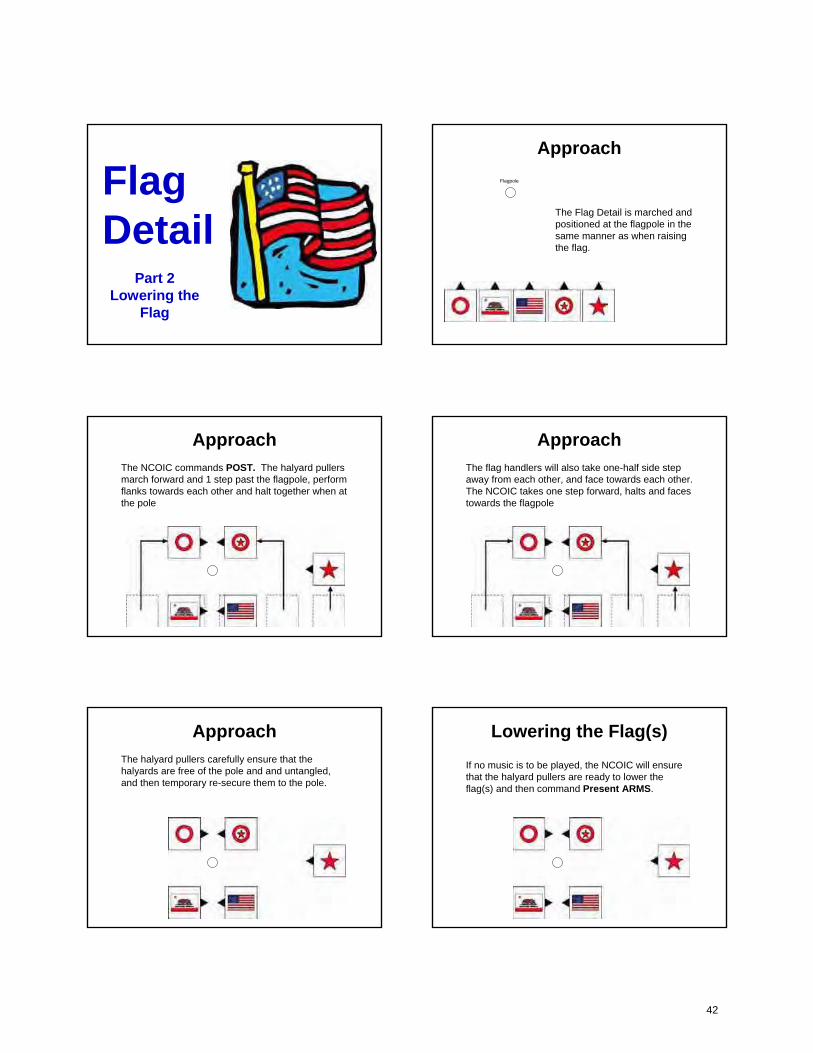
FlagDetail
Part 2Lowering the
Flag
ApproachFlagpole
The Flag Detail is marched and positioned at the flagpole in the same manner as when raising the flag.
ApproachThe NCOIC commands POST. The halyard pullers march forward and 1 step past the flagpole, perform flanks towards each other and halt together when at the pole
ApproachThe flag handlers will also take one-half side stepaway from each other, and face towards each other. The NCOIC takes one step forward, halts and faces towards the flagpole
ApproachThe halyard pullers carefully ensure that the halyards are free of the pole and and untangled, and then temporary re-secure them to the pole.
Lowering the Flag(s)If no music is to be played, the NCOIC will ensure that the halyard pullers are ready to lower the flag(s) and then command Present ARMS.
42
Lowering the Flag(s)
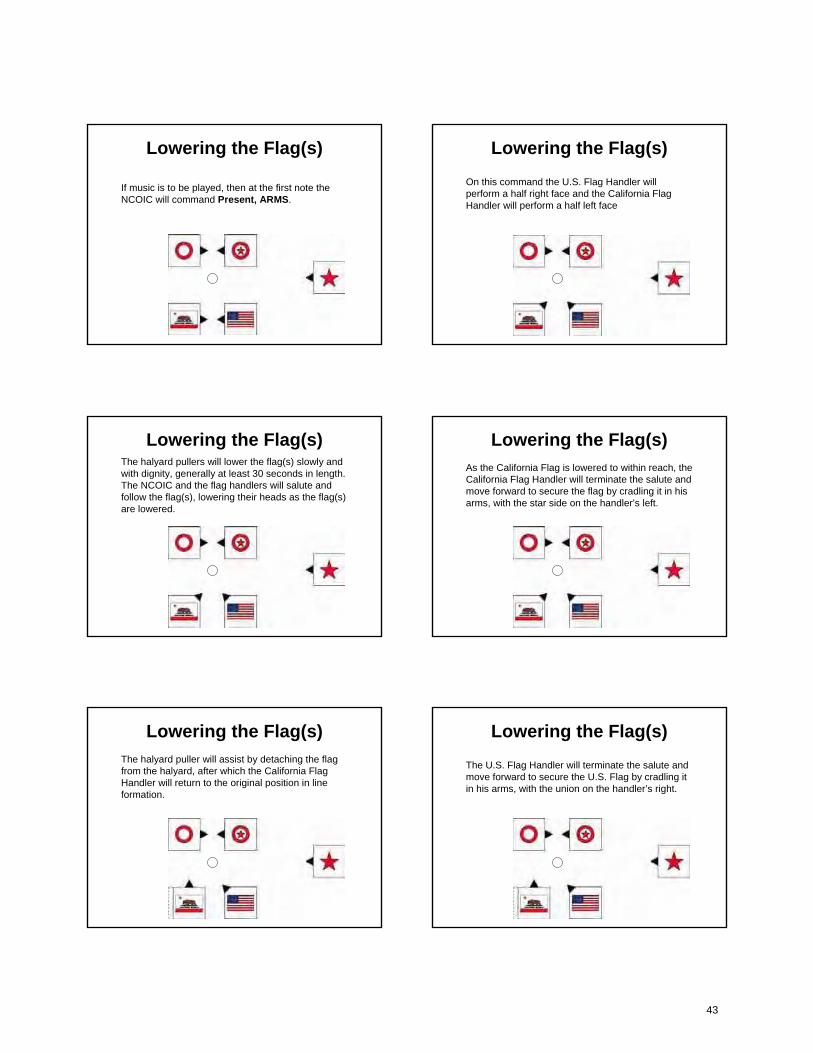
If music is to be played, then at the first note the NCOIC will command Present, ARMS.
Lowering the Flag(s)On this command the U.S. Flag Handler will perform a half right face and the California Flag Handler will perform a half left face
Lowering the Flag(s)The halyard pullers will lower the flag(s) slowly and with dignity, generally at least 30 seconds in length. The NCOIC and the flag handlers will salute and follow the flag(s), lowering their heads as the flag(s) are lowered.
Lowering the Flag(s)As the California Flag is lowered to within reach, the California Flag Handler will terminate the salute and move forward to secure the flag by cradling it in his arms, with the star side on the handler’s left.
Lowering the Flag(s)The halyard puller will assist by detaching the flag from the halyard, after which the California Flag Handler will return to the original position in line formation.
Lowering the Flag(s)The U.S. Flag Handler will terminate the salute and move forward to secure the U.S. Flag by cradling it in his arms, with the union on the handler’s right.
43
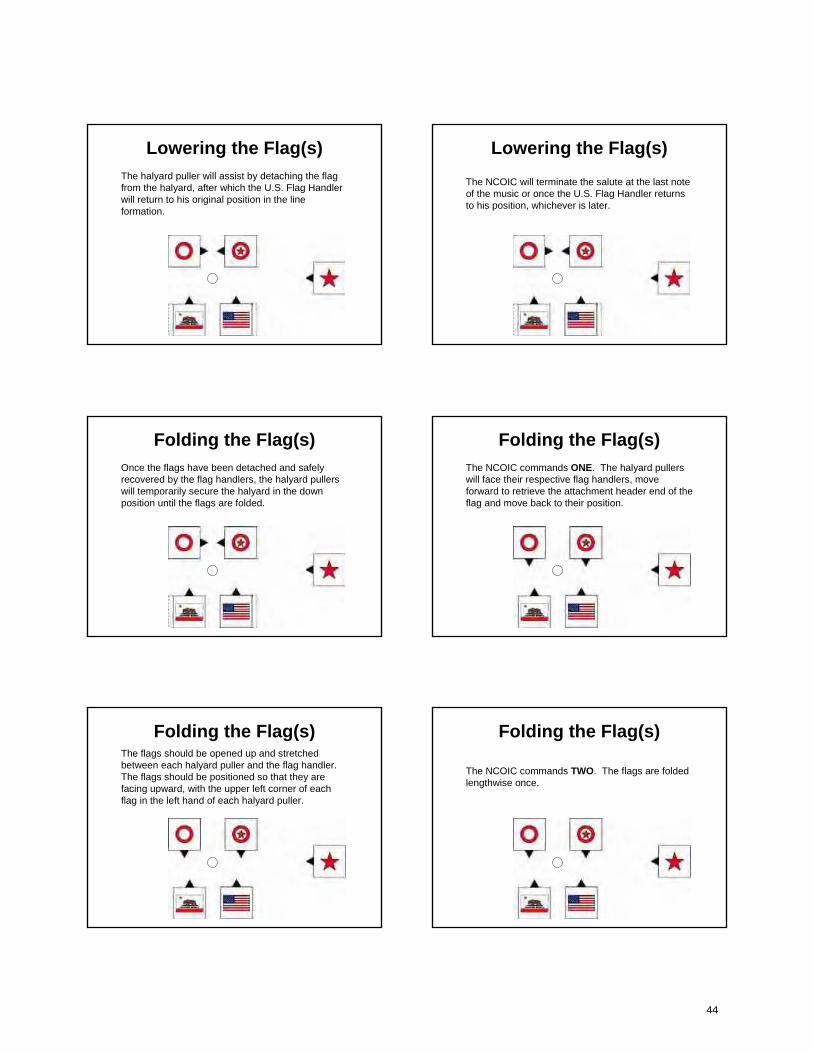
Lowering the Flag(s)The halyard puller will assist by detaching the flag from the halyard, after which the U.S. Flag Handler will return to his original position in the line formation.
Lowering the Flag(s)The NCOIC will terminate the salute at the last note of the music or once the U.S. Flag Handler returns to his position, whichever is later.
Folding the Flag(s)Once the flags have been detached and safely recovered by the flag handlers, the halyard pullers will temporarily secure the halyard in the down position until the flags are folded.
Folding the Flag(s)The NCOIC commands ONE. The halyard pullers will face their respective flag handlers, move forward to retrieve the attachment header end of the flag and move back to their position.
Folding the Flag(s)The flags should be opened up and stretched between each halyard puller and the flag handler. The flags should be positioned so that they are facing upward, with the upper left corner of each flag in the left hand of each halyard puller.
Folding the Flag(s)
The NCOIC commands TWO. The flags are folded lengthwise once.
44
Folding the Flag(s)
The NCOIC commands THREE. The flags are folded lengthwise once more.
Folding the Flag(s)The NCOIC commands FOUR. The flags are folded according to standard procedures, into the triangular shape for the U.S. Flag and the appropriate form for the California Flag.
Lowering the Flag(s)The halyard pullers will remain in position as the flag handlers move forward as necessary to complete the folding process. Flag handlers will take possession of their respective folded flag. The flag handlers will move to their original position.
Lowering the Flag(s)
The halyard pullers will then free the halyard, raise it to the “up” position, and fasten it securely.
Lowering the Flag(s)The NCOIC will command POST. The flag handlers will take 2 steps backward to allow the NCOIC to take possession of the U.S. Flag if necessary. The halyard pullers will return to their position in the line formation.
DepartureBecause each site is different, the direction and manner of departure should be adjusted to accommodate local needs and layouts. At this point in the ceremony, the NCOIC is still facing the flagpole
45
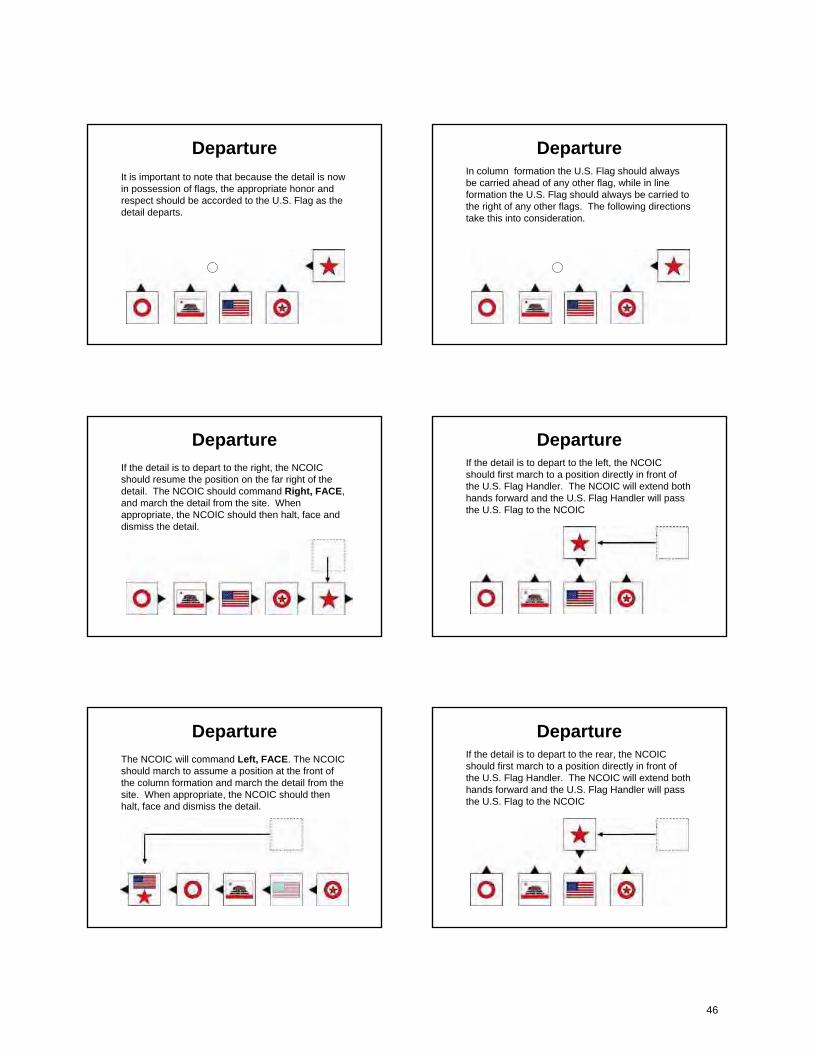
DepartureIt is important to note that because the detail is now in possession of flags, the appropriate honor and respect should be accorded to the U.S. Flag as the detail departs.
DepartureIn column formation the U.S. Flag should always be carried ahead of any other flag, while in line formation the U.S. Flag should always be carried to the right of any other flags. The following directions take this into consideration.
DepartureIf the detail is to depart to the right, the NCOIC should resume the position on the far right of the detail. The NCOIC should command Right, FACE, and march the detail from the site. When appropriate, the NCOIC should then halt, face and dismiss the detail.
DepartureIf the detail is to depart to the left, the NCOIC should first march to a position directly in front of the U.S. Flag Handler. The NCOIC will extend both hands forward and the U.S. Flag Handler will pass the U.S. Flag to the NCOIC
DepartureThe NCOIC will command Left, FACE. The NCOIC should march to assume a position at the front of the column formation and march the detail from the site. When appropriate, the NCOIC should then halt, face and dismiss the detail.
DepartureIf the detail is to depart to the rear, the NCOIC should first march to a position directly in front of the U.S. Flag Handler. The NCOIC will extend both hands forward and the U.S. Flag Handler will pass the U.S. Flag to the NCOIC
46
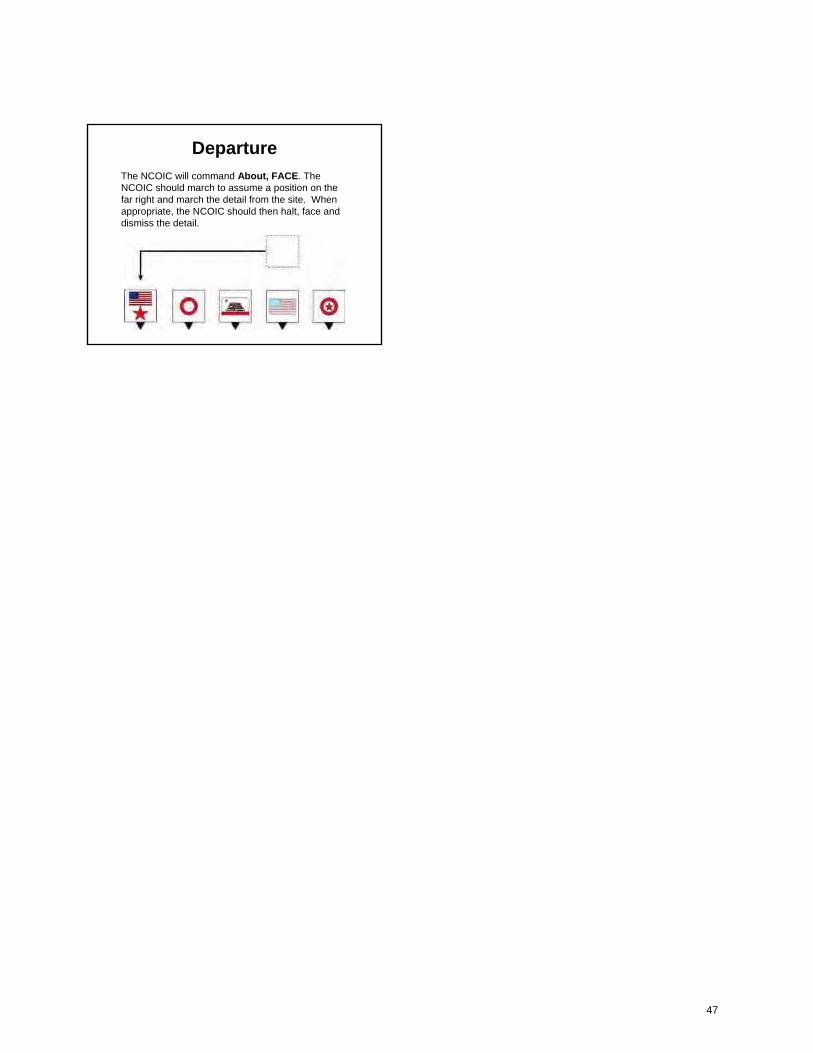
DepartureThe NCOIC will command About, FACE. The NCOIC should march to assume a position on the far right and march the detail from the site. When appropriate, the NCOIC should then halt, face and dismiss the detail.
47
Earthquake and Disaster Preparedness
For Schools
What you can do before adisaster?
Prepare the school and its contents• Much of the damage caused by earthquakes
is to the contents.• During the shaking, bookcases topple,
objects fall out of cabinets, windows shatter, and hanging or large objects fall.
• Damage and injuries can be reduced by removing, moving and fastening, or latching items that are likely to break, fall over or hurt people.
Go through the school room-by-room• Standing in the center of each room, look all
around and imagine which objects or pieces of furniture might fall over or fly through the air. – Move heavy objects to lower shelves – Attach heavy objects that can’t be moved to the
desk or table they’re sitting on with Velcro – Fasten bookcases and tall cabinets to the wall – Move desks away from windows– Secure suspended ceilings
Look for potential hazards outside the building
• Places where the main gas supply or electric current enters the building
• Overhead power lines• Covered walkways• Roofing or other material that may fall
down• Hazard material storage
Get Ready• Students and teachers should know how to
duck and cover under sturdy pieces of furniture (tables or desks) for protection during earthquake shaking
48
Have Frequent Drills
• To avoid or reduce physical injury, students must learn to respond almost automatically to a teacher’s commands.
• Have duck-cover-hold and/or evacuation drills at least once a month.
For a Successful Drill…
• Teachers must have the students’ attention and must give clear and distinct commands
• Teachers must speak in a calm voice.• At the command “drop” the students should:
– Duck under a desk or table. – Stay under cover until the shaking stops (at least
one minute). – If possible, hold on to the desk or table leg
Practice - Practice
• If there aren’t enough sturdy pieces of furniture to get under, practice taking cover next to inside walls, away from:– Windows– Overhead light fixtures– Tall pieces of furniture which might topple
over when the ground shakes.
• Practice duck-cover-hold drills outside.
Talk to Parents
• Share the emergency plans with your parents.
• They need to know what the plan is in case an earthquake or any other type of emergency.
• Ask them to make an earthquake plan for your home and to talk to the entire family about earthquake safety.
Prepare an emergency kit
• One for the entire school• One for each room
Room Kit• Food & water• Bottle• Diaper Wipes• Diapers• “Comfort letter”• Spare clothes
• Zip Lock bags• Small trash bags• A treat…• Anything special that
students may need– Specialized medicine– Food– Etc.
49
For the School• Supplies:
– Maintain a 3-day supply in these basic areas:• Water• Food• First-aid supplies• Clothing/bedding• Hygiene & sanitation supplies (toilet paper, paper towels, etc.)• Tools & emergency supplies (batteries & flashlights)
– Consider arranging for portable toilet, tarps/ canopies and some sort of temporary shelter
For the School (cont.)
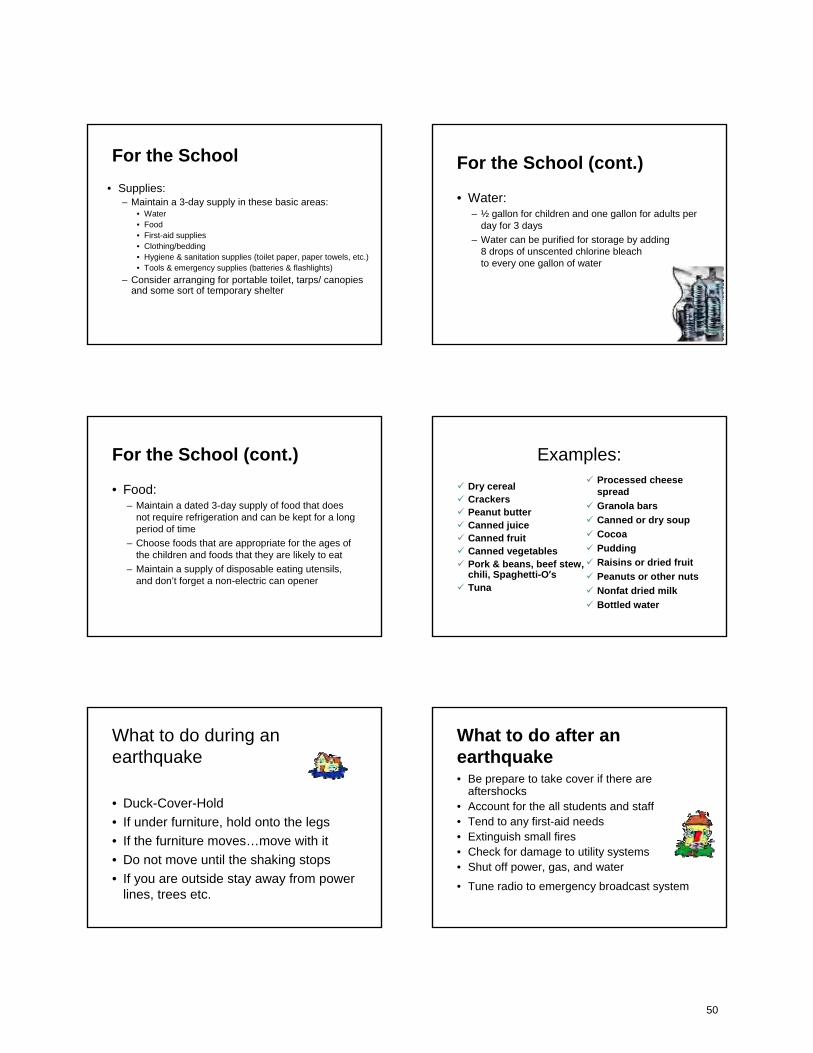
• Water:– ½ gallon for children and one gallon for adults per
day for 3 days– Water can be purified for storage by adding
8 drops of unscented chlorine bleach to every one gallon of water
For the School (cont.)
• Food:– Maintain a dated 3-day supply of food that does
not require refrigeration and can be kept for a long period of time
– Choose foods that are appropriate for the ages of the children and foods that they are likely to eat
– Maintain a supply of disposable eating utensils, and don’t forget a non-electric can opener
Examples:Dry cereal CrackersPeanut butterCanned juiceCanned fruitCanned vegetablesPork & beans, beef stew, chili, Spaghetti-O’sTuna
Processed cheese spreadGranola barsCanned or dry soupCocoaPuddingRaisins or dried fruitPeanuts or other nutsNonfat dried milkBottled water
What to do during an earthquake
• Duck-Cover-Hold• If under furniture, hold onto the legs• If the furniture moves…move with it• Do not move until the shaking stops• If you are outside stay away from power
lines, trees etc.
What to do after an earthquake• Be prepare to take cover if there are
aftershocks• Account for the all students and staff• Tend to any first-aid needs• Extinguish small fires• Check for damage to utility systems• Shut off power, gas, and water
• Tune radio to emergency broadcast system
50
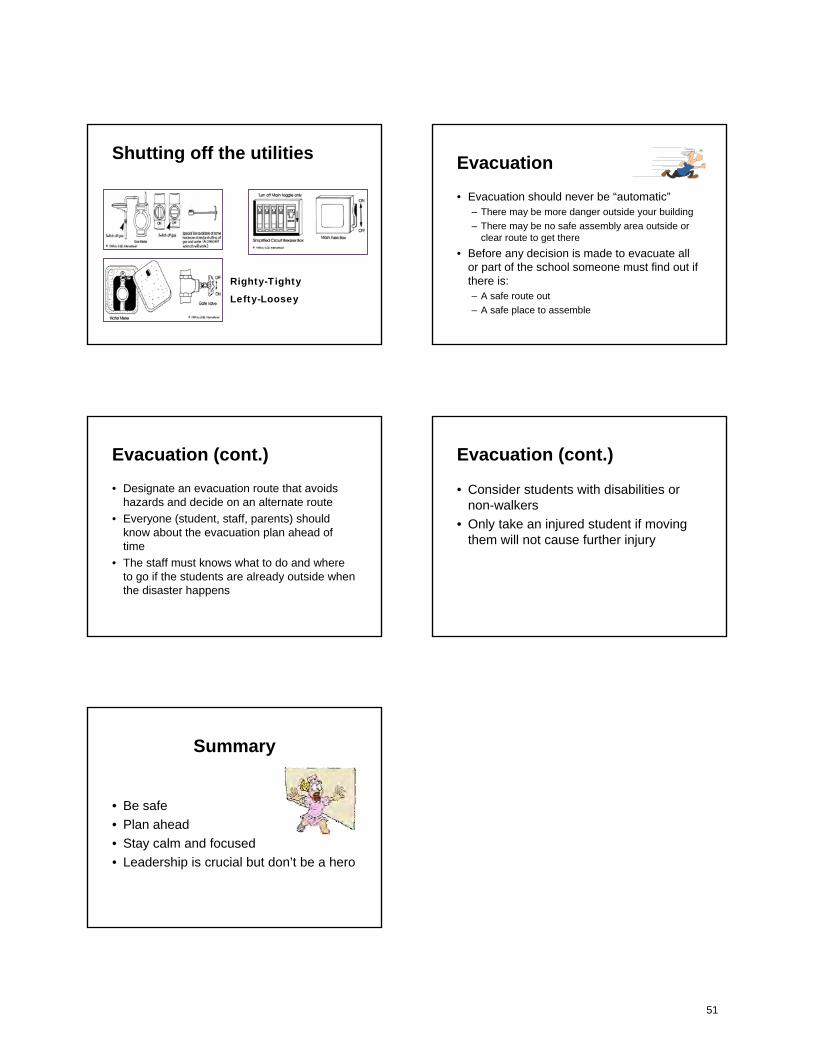
Shutting off the utilities
Righty-Tighty
Lefty-Loosey
Evacuation
• Evacuation should never be “automatic”– There may be more danger outside your building– There may be no safe assembly area outside or
clear route to get there• Before any decision is made to evacuate all
or part of the school someone must find out if there is:– A safe route out– A safe place to assemble
Evacuation (cont.)
• Designate an evacuation route that avoids hazards and decide on an alternate route
• Everyone (student, staff, parents) should know about the evacuation plan ahead of time
• The staff must knows what to do and where to go if the students are already outside when the disaster happens
Evacuation (cont.)
• Consider students with disabilities or non-walkers
• Only take an injured student if moving them will not cause further injury
Summary
• Be safe• Plan ahead• Stay calm and focused• Leadership is crucial but don’t be a hero
51
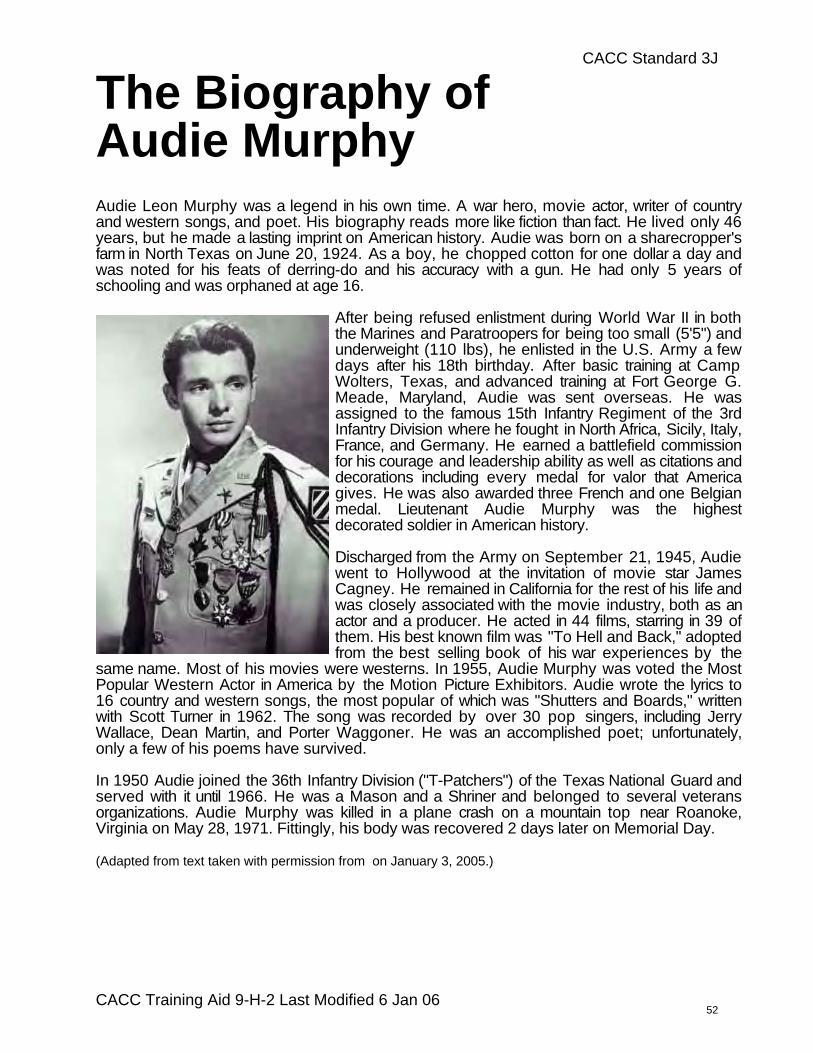
The Biography ofAudie MurphyAudie Leon Murphy was a legend in his own time. A war hero, movie actor, writer of country and western songs, and poet. His biography reads more like fiction than fact. He lived only 46 years, but he made a lasting imprint on American history. Audie was born on a sharecropper's farm in North Texas on June 20, 1924. As a boy, he chopped cotton for one dollar a day and was noted for his feats of derring-do and his accuracy with a gun. He had only 5 years of schooling and was orphaned at age 16.
After being refused enlistment during World War II in both the Marines and Paratroopers for being too small (5'5") and underweight (110 lbs), he enlisted in the U.S. Army a few days after his 18th birthday. After basic training at Camp Wolters, Texas, and advanced training at Fort George G. Meade, Maryland, Audie was sent overseas. He was assigned to the famous 15th Infantry Regiment of the 3rd Infantry Division where he fought in North Africa, Sicily, Italy, France, and Germany. He earned a battlefield commission for his courage and leadership ability as well as citations and decorations including every medal for valor that America gives. He was also awarded three French and one Belgian medal. Lieutenant Audie Murphy was the highest decorated soldier in American history.
Discharged from the Army on September 21, 1945, Audie went to Hollywood at the invitation of movie star James Cagney. He remained in California for the rest of his life and was closely associated with the movie industry, both as an actor and a producer. He acted in 44 films, starring in 39 of them. His best known film was "To Hell and Back," adopted from the best selling book of his war experiences by the
same name. Most of his movies were westerns. In 1955, Audie Murphy was voted the Most Popular Western Actor in America by the Motion Picture Exhibitors. Audie wrote the lyrics to 16 country and western songs, the most popular of which was "Shutters and Boards," written with Scott Turner in 1962. The song was recorded by over 30 pop singers, including Jerry Wallace, Dean Martin, and Porter Waggoner. He was an accomplished poet; unfortunately, only a few of his poems have survived.
In 1950 Audie joined the 36th Infantry Division ("T-Patchers") of the Texas National Guard and served with it until 1966. He was a Mason and a Shriner and belonged to several veterans organizations. Audie Murphy was killed in a plane crash on a mountain top near Roanoke, Virginia on May 28, 1971. Fittingly, his body was recovered 2 days later on Memorial Day.
(Adapted from text taken with permission from on January 3, 2005.)
CACC Standard 3J
CACC Training Aid 9-H-2 Last Modified 6 Jan 0652
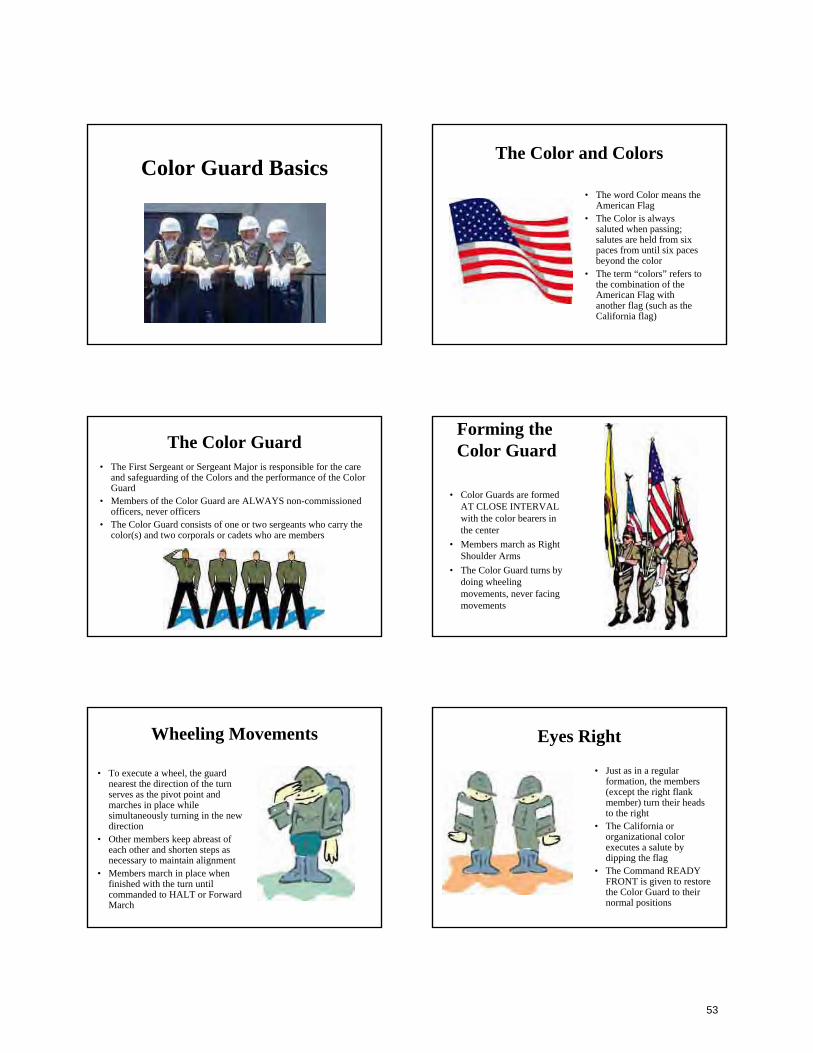
Color Guard BasicsThe Color and Colors
• The word Color means the American Flag
• The Color is always saluted when passing; salutes are held from six paces from until six paces beyond the color
• The term “colors” refers to the combination of the American Flag with another flag (such as the California flag)
The Color Guard• The First Sergeant or Sergeant Major is responsible for the care
and safeguarding of the Colors and the performance of the Color Guard
• Members of the Color Guard are ALWAYS non-commissioned officers, never officers
• The Color Guard consists of one or two sergeants who carry the color(s) and two corporals or cadets who are members
Forming the Color Guard
• Color Guards are formed AT CLOSE INTERVAL with the color bearers in the center
• Members march as Right Shoulder Arms
• The Color Guard turns by doing wheeling movements, never facing movements
Wheeling Movements
• To execute a wheel, the guard nearest the direction of the turn serves as the pivot point and marches in place while simultaneously turning in the new direction
• Other members keep abreast of each other and shorten steps as necessary to maintain alignment
• Members march in place when finished with the turn until commanded to HALT or Forward March
Eyes Right
• Just as in a regular formation, the members (except the right flank member) turn their heads to the right
• The California or organizational color executes a salute by dipping the flag
• The Command READY FRONT is given to restore the Color Guard to their normal positions
53
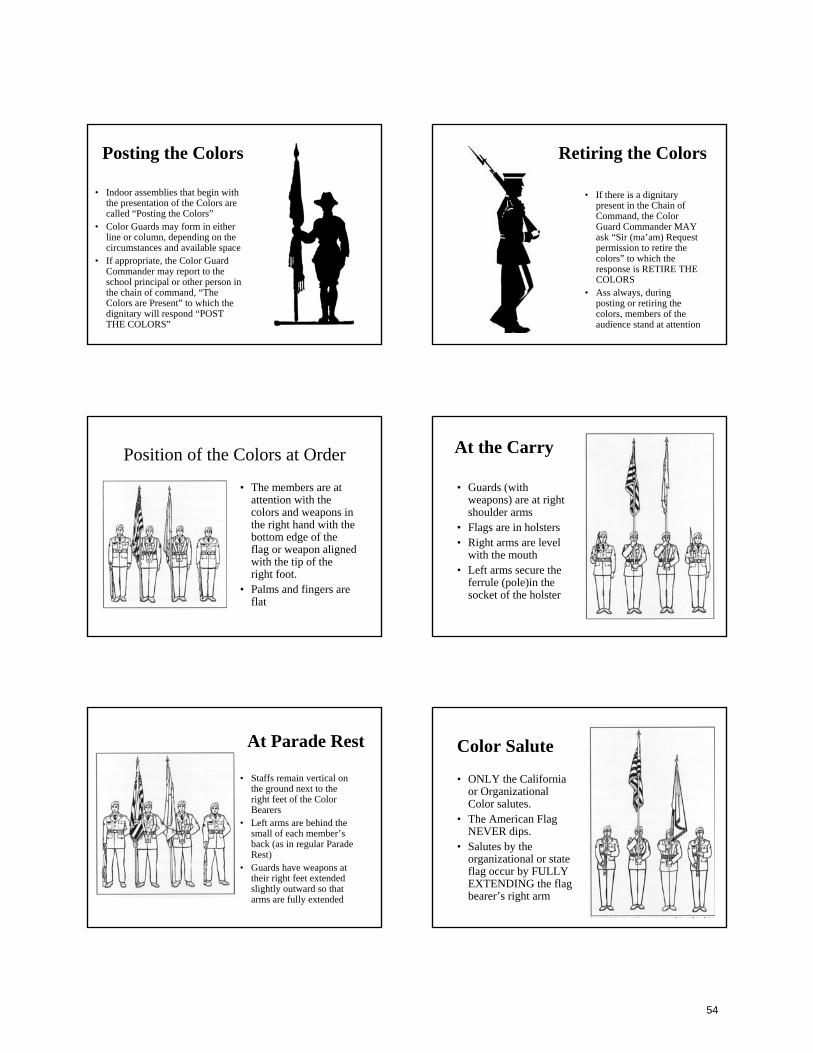
Posting the Colors
• Indoor assemblies that begin with the presentation of the Colors are called “Posting the Colors”
• Color Guards may form in either line or column, depending on the circumstances and available space
• If appropriate, the Color Guard Commander may report to the school principal or other person in the chain of command, “The Colors are Present” to which the dignitary will respond “POST THE COLORS”
Retiring the Colors
• If there is a dignitary present in the Chain of Command, the Color Guard Commander MAY ask “Sir (ma’am) Request permission to retire the colors” to which the response is RETIRE THE COLORS
• Ass always, during posting or retiring the colors, members of the audience stand at attention
Position of the Colors at Order
• The members are at attention with the colors and weapons in the right hand with the bottom edge of the flag or weapon aligned with the tip of the right foot.
• Palms and fingers are flat
At the Carry
• Guards (with weapons) are at right shoulder arms
• Flags are in holsters• Right arms are level
with the mouth• Left arms secure the
ferrule (pole)in the socket of the holster
At Parade Rest
• Staffs remain vertical on the ground next to the right feet of the Color Bearers
• Left arms are behind the small of each member’s back (as in regular Parade Rest)
• Guards have weapons at their right feet extended slightly outward so that arms are fully extended
Color Salute
• ONLY the California or Organizational Color salutes.
• The American Flag NEVER dips.
• Salutes by the organizational or state flag occur by FULLY EXTENDING the flag bearer’s right arm
54
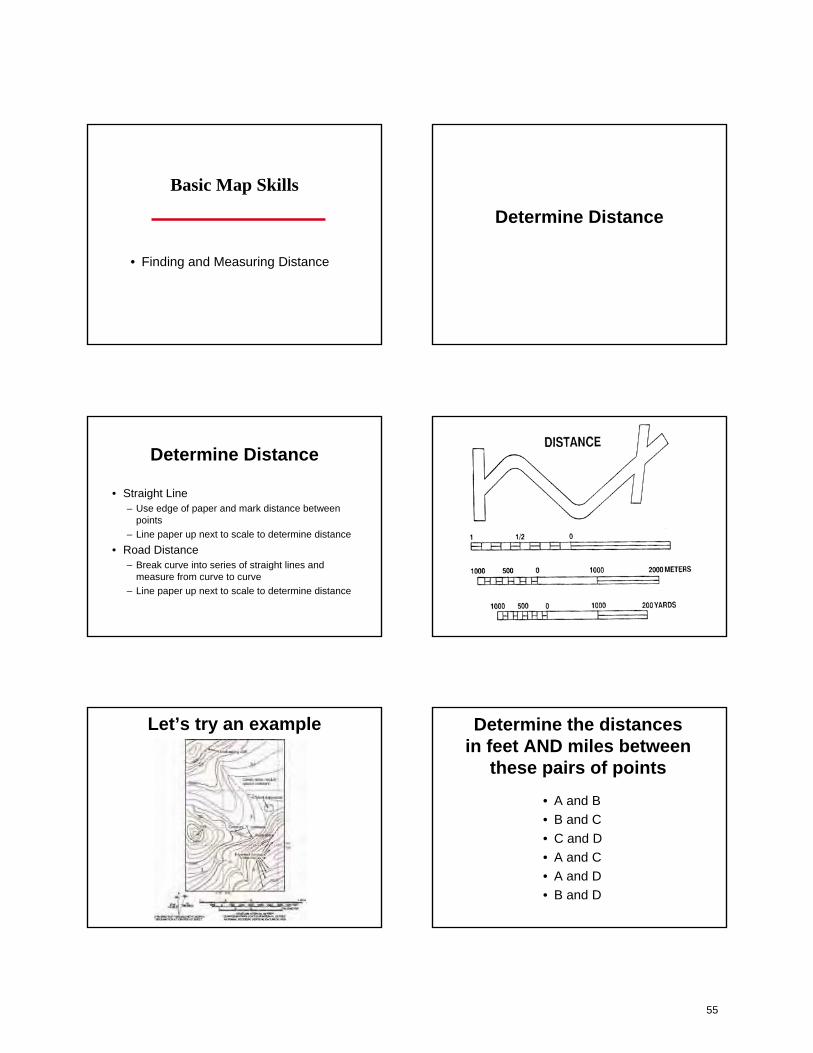
Basic Map Skills
• Finding and Measuring Distance
Determine Distance
Determine Distance
• Straight Line– Use edge of paper and mark distance between
points– Line paper up next to scale to determine distance
• Road Distance– Break curve into series of straight lines and
measure from curve to curve– Line paper up next to scale to determine distance
Let’s try an example Determine the distances in feet AND miles between
these pairs of points
• A and B• B and C• C and D• A and C• A and D• B and D
55
The Caisson SongMajor (later Brig. Gen.) Edmund L. Gruber, 1908
Over hill, over daleAs we hit the dusty trail,And those Caissons go rolling along.In and out, hear them shout,Counter march and right about,And the Caissons go rolling along.
Then it’s hi! hi! hee!In the field artillery,Shout out your numbers loud and strong,For where e’er you go,You will always knowThat those Caissons go rolling along.
In the storm, in the night,Action left or action rightSee those Caissons go rolling alongLimber front, limber rear,Prepare to mount your cannoneerAnd those Caissons go rolling along.
Then it’s hi! hi! hee!In the field artillery,Shout out your numbers loud and strong,For where e’er you go,You will always knowThat those Caissons go rolling along.
Was it high, was it low,Where the hell did that one go?As those Caissons go rolling alongWas it left, was it right,Now we won’t get home tonightAnd thos Caissons go rolling along.
Then it’s hi! hi! hee!In the field artillery,Shout out your numbers loud and strong,For where e’er you go,You will always knowThat those Caissons go rolling along.
CACC Standard 1B
CACC Training Aid 9-H-4 Last Modified 6 Jan 0656
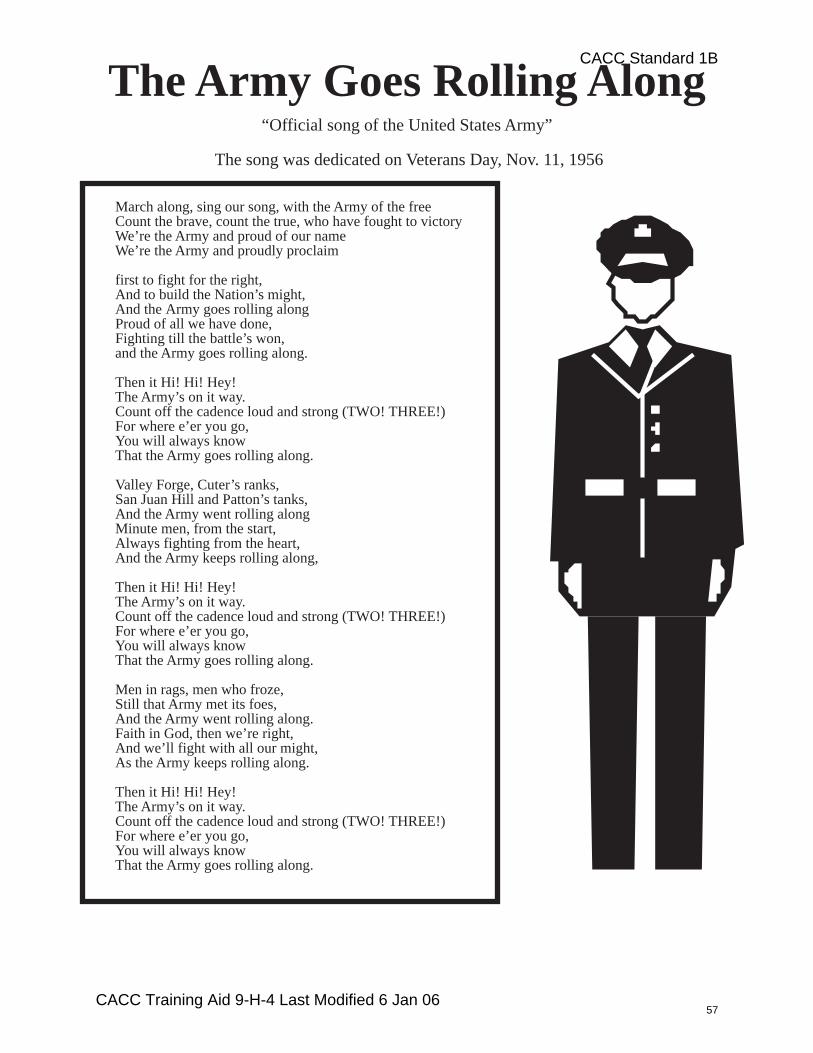
The Army Goes Rolling Along“Official song of the United States Army”
The song was dedicated on Veterans Day, Nov. 11, 1956
March along, sing our song, with the Army of the freeCount the brave, count the true, who have fought to victoryWe’re the Army and proud of our nameWe’re the Army and proudly proclaim
first to fight for the right,And to build the Nation’s might,And the Army goes rolling alongProud of all we have done,Fighting till the battle’s won,and the Army goes rolling along.
Then it Hi! Hi! Hey!The Army’s on it way.Count off the cadence loud and strong (TWO! THREE!)For where e’er you go,You will always knowThat the Army goes rolling along.
Valley Forge, Cuter’s ranks,San Juan Hill and Patton’s tanks,And the Army went rolling alongMinute men, from the start,Always fighting from the heart,And the Army keeps rolling along,
Then it Hi! Hi! Hey!The Army’s on it way.Count off the cadence loud and strong (TWO! THREE!)For where e’er you go,You will always knowThat the Army goes rolling along.
Men in rags, men who froze,Still that Army met its foes,And the Army went rolling along.Faith in God, then we’re right,And we’ll fight with all our might,As the Army keeps rolling along.
Then it Hi! Hi! Hey!The Army’s on it way.Count off the cadence loud and strong (TWO! THREE!)For where e’er you go,You will always knowThat the Army goes rolling along.
CACC Standard 1B
CACC Training Aid 9-H-4 Last Modified 6 Jan 0657
Abdominal Strength and Endurance
What are abdominals?• Abdominals are the
muscles in your stomach.
• You can improve your abdominal strength (how powerful your muscles are) and endurance (how long you can keep using those muscles without getting tired or losing form) by doing curl-ups.
Abdominal Strength and Endurance
• Abdominal strength and endurance are important in promoting good posture and correct pelvic alignment.
• Strength and endurance of the abdominal muscles are important in maintaining lower back health.
Abdominal curls• This test is used to measure abdominal strength and
endurance, which is important to low-back support and injury prevention.
• Participants lie on their backs with their knees bent and arms at their sides.
• A curl is counted each time the upper torso and shoulder blades are lifted off the floor.
• Participants do as many as they can without stopping until they break form or reach fatigue.
More about Curls• This IS NOT A SIT UP. It is a modified sit up.
• Students begin this test by lying on the floor with their feet approximately 12 inches away from their buttocks. Students must also extend heir arms so that the hands are on the thighs.
• Students have to contract their abdominals and raise themselves off the ground.
• A student is at the top of the par ial curl up when the shoulder blades/scapula are approximately 2 inches off the ground.
• A general key here is that the hands should be somewhere around the knee area when in the up position.
THINGS TO REMEMBER- hands can never leave the thighs or knees
- shoulders and head cannot touch the ground on the downward phase. It is suggested that students pretend there is a ball between their chin and chest and they are trying to hold it in place
- students must stay with the beat (1 5 seconds on the up phase, 1.5 seconds on the down phase)
- a student's score will be recorded when they perform two (2) curl ups incorrectly. For example, if a student completes 10 correct curl ups, but #'s 11 and 12 are incorrect, the student is done with the test and given a score of 10. Misses DO NOT have to be consecutive.
- The best way to practice is to do sit ups or curl ups. Age appropriate resistance training may also be beneficial, as well as leading aphysically active lifestyle.
58
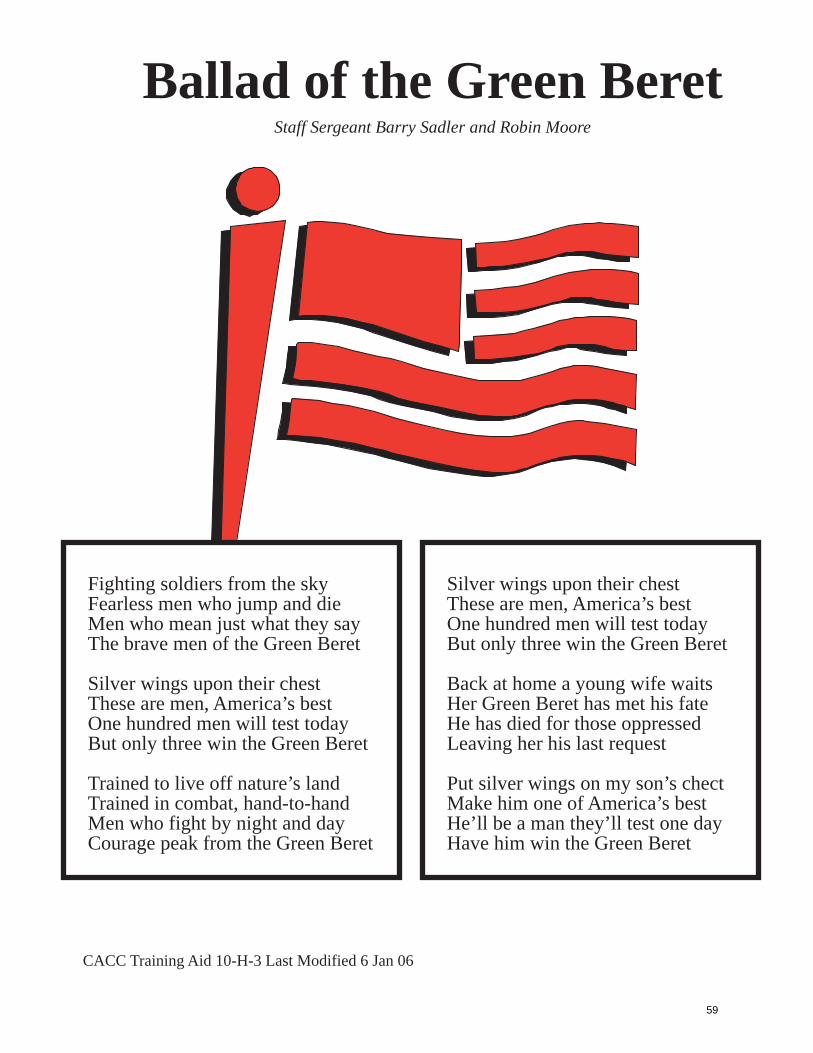
Ballad of the Green BeretStaff Sergeant Barry Sadler and Robin Moore
CACC Training Aid 10-H-3 Last Modified 6 Jan 06
Silver wings upon their chestThese are men, America’s bestOne hundred men will test todayBut only three win the Green Beret
Back at home a young wife waitsHer Green Beret has met his fateHe has died for those oppressedLeaving her his last request
Put silver wings on my son’s chectMake him one of America’s bestHe’ll be a man they’ll test one dayHave him win the Green Beret
Fighting soldiers from the skyFearless men who jump and dieMen who mean just what they sayThe brave men of the Green Beret
Silver wings upon their chestThese are men, America’s bestOne hundred men will test todayBut only three win the Green Beret
Trained to live off nature’s landTrained in combat, hand-to-handMen who fight by night and dayCourage peak from the Green Beret
59
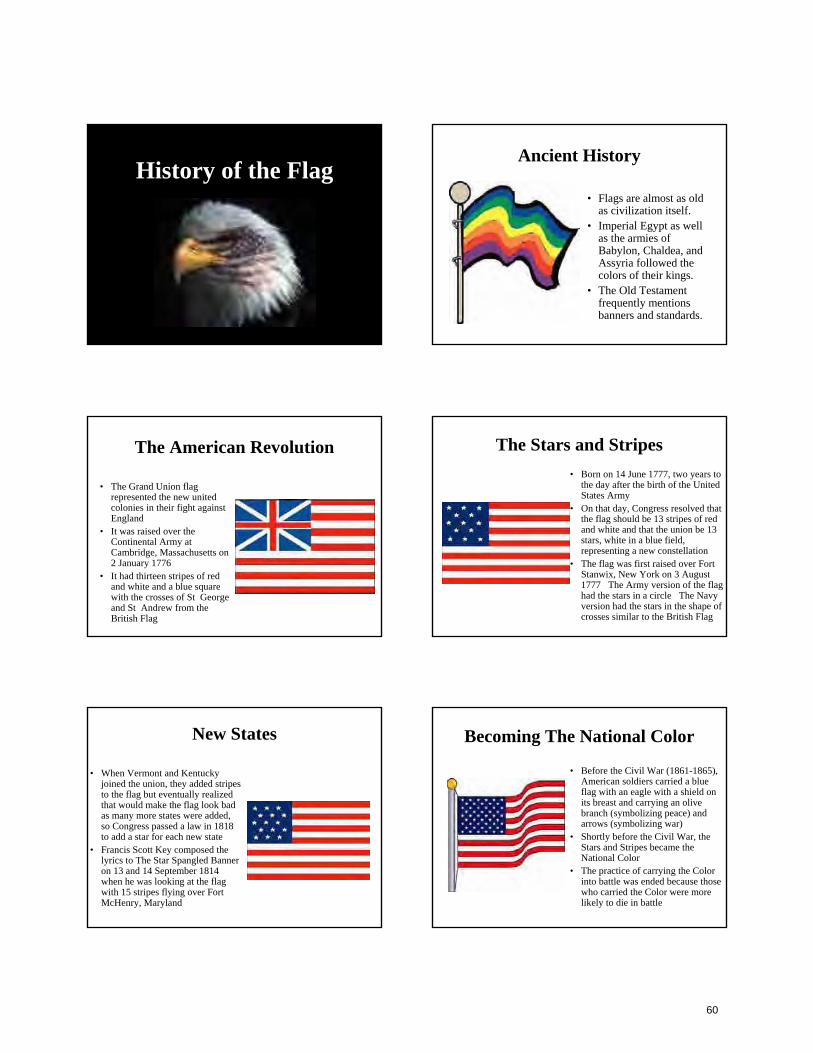
History of the FlagAncient History
• Flags are almost as old as civilization itself.
• Imperial Egypt as well as the armies of Babylon, Chaldea, and Assyria followed the colors of their kings.
• The Old Testament frequently mentions banners and standards.
The American Revolution
• The Grand Union flag represented the new united colonies in their fight against England
• It was raised over the Continental Army at Cambridge, Massachusetts on 2 January 1776
• It had thirteen stripes of red and white and a blue square with the crosses of St George and St Andrew from the British Flag
The Stars and Stripes• Born on 14 June 1777, two years to
the day after the birth of the United States Army
• On that day, Congress resolved that the flag should be 13 stripes of red and white and that the union be 13 stars, white in a blue field, representing a new constellation
• The flag was first raised over Fort Stanwix, New York on 3 August 1777 The Army version of the flag had the stars in a circle The Navy version had the stars in the shape of crosses similar to the British Flag
New States
• When Vermont and Kentucky joined the union, they added stripes to the flag but eventually realized that would make the flag look bad as many more states were added, so Congress passed a law in 1818 to add a star for each new state
• Francis Scott Key composed the lyrics to The Star Spangled Banner on 13 and 14 September 1814 when he was looking at the flag with 15 stripes flying over Fort McHenry, Maryland
Becoming The National Color
• Before the Civil War (1861-1865), American soldiers carried a blue flag with an eagle with a shield on its breast and carrying an olive branch (symbolizing peace) and arrows (symbolizing war)
• Shortly before the Civil War, the Stars and Stripes became the National Color
• The practice of carrying the Color into battle was ended because those who carried the Color were more likely to die in battle
60
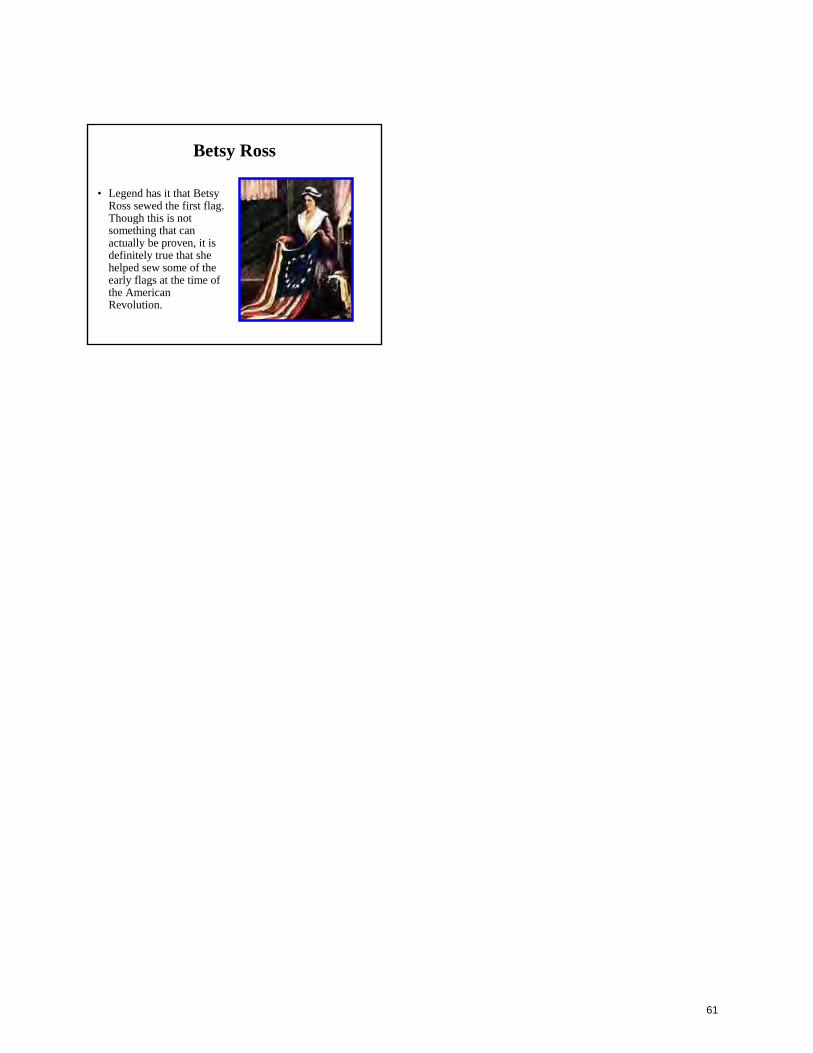
Betsy Ross
• Legend has it that Betsy Ross sewed the first flag. Though this is not something that can actually be proven, it is definitely true that she helped sew some of the early flags at the time of the American Revolution.
61
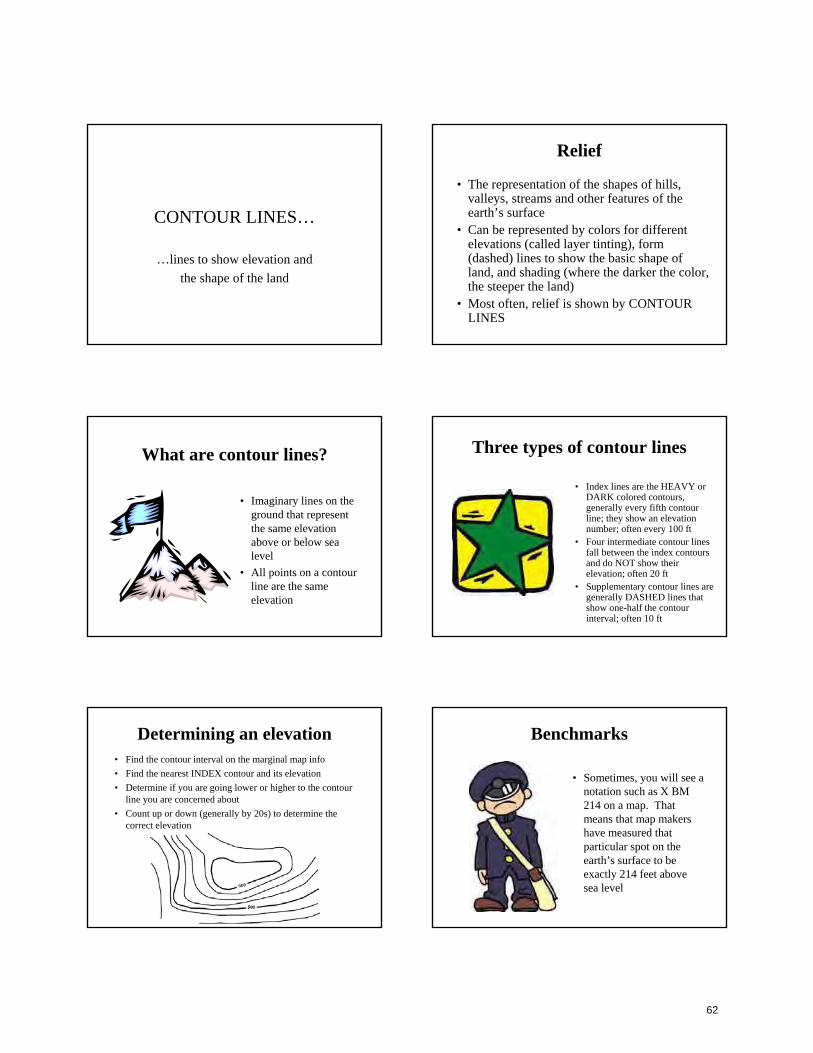
CONTOUR LINES…
…lines to show elevation and the shape of the land
Relief
• The representation of the shapes of hills, valleys, streams and other features of the earth’s surface
• Can be represented by colors for different elevations (called layer tinting), form (dashed) lines to show the basic shape of land, and shading (where the darker the color, the steeper the land)
• Most often, relief is shown by CONTOUR LINES
What are contour lines?
• Imaginary lines on the ground that represent the same elevation above or below sea level
• All points on a contour line are the same elevation
Three types of contour lines
• Index lines are the HEAVY or DARK colored contours, generally every fifth contour line; they show an elevation number; often every 100 ft
• Four intermediate contour lines fall between the index contours and do NOT show their elevation; often 20 ft
• Supplementary contour lines are generally DASHED lines that show one-half the contour interval; often 10 ft
Determining an elevation• Find the contour interval on the marginal map info• Find the nearest INDEX contour and its elevation• Determine if you are going lower or higher to the contour
line you are concerned about• Count up or down (generally by 20s) to determine the
correct elevation
Benchmarks
• Sometimes, you will see a notation such as X BM 214 on a map. That means that map makers have measured that particular spot on the earth’s surface to be exactly 214 feet above sea level
62
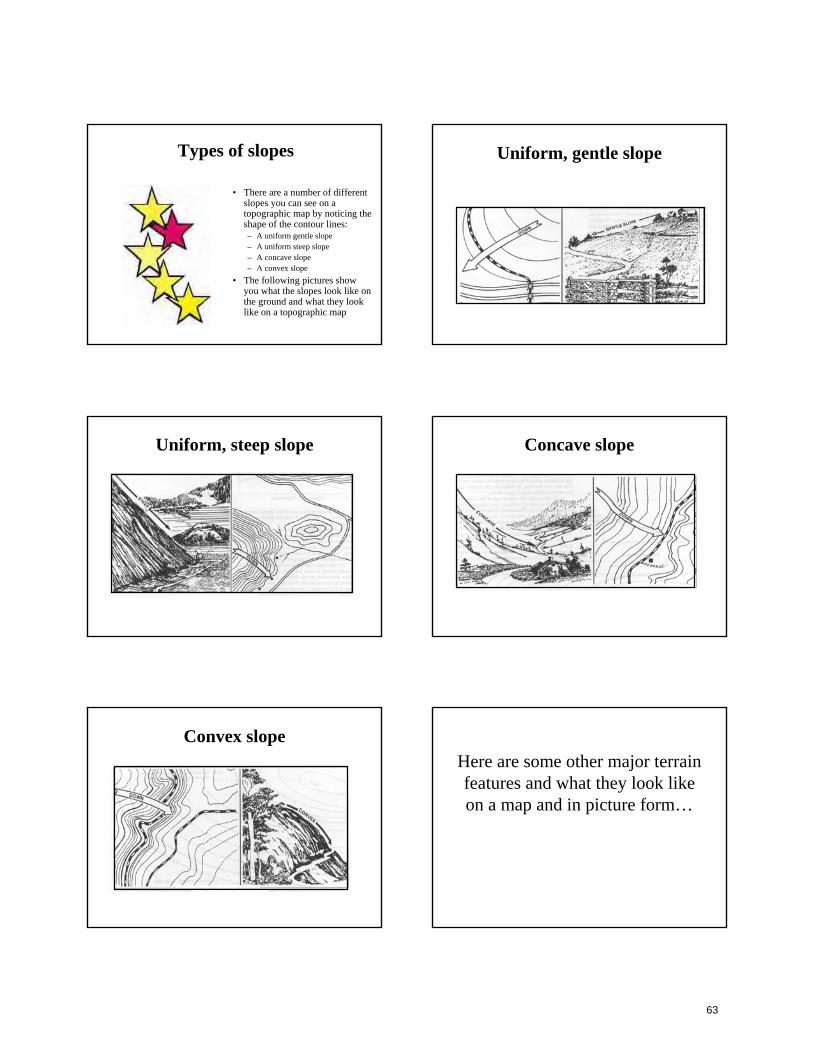
Types of slopes
• There are a number of different slopes you can see on a topographic map by noticing the shape of the contour lines:– A uniform gentle slope– A uniform steep slope– A concave slope– A convex slope
• The following pictures show you what the slopes look like on the ground and what they look like on a topographic map
Uniform, gentle slope
Uniform, steep slope Concave slope
Convex slopeHere are some other major terrain features and what they look like on a map and in picture form…
63
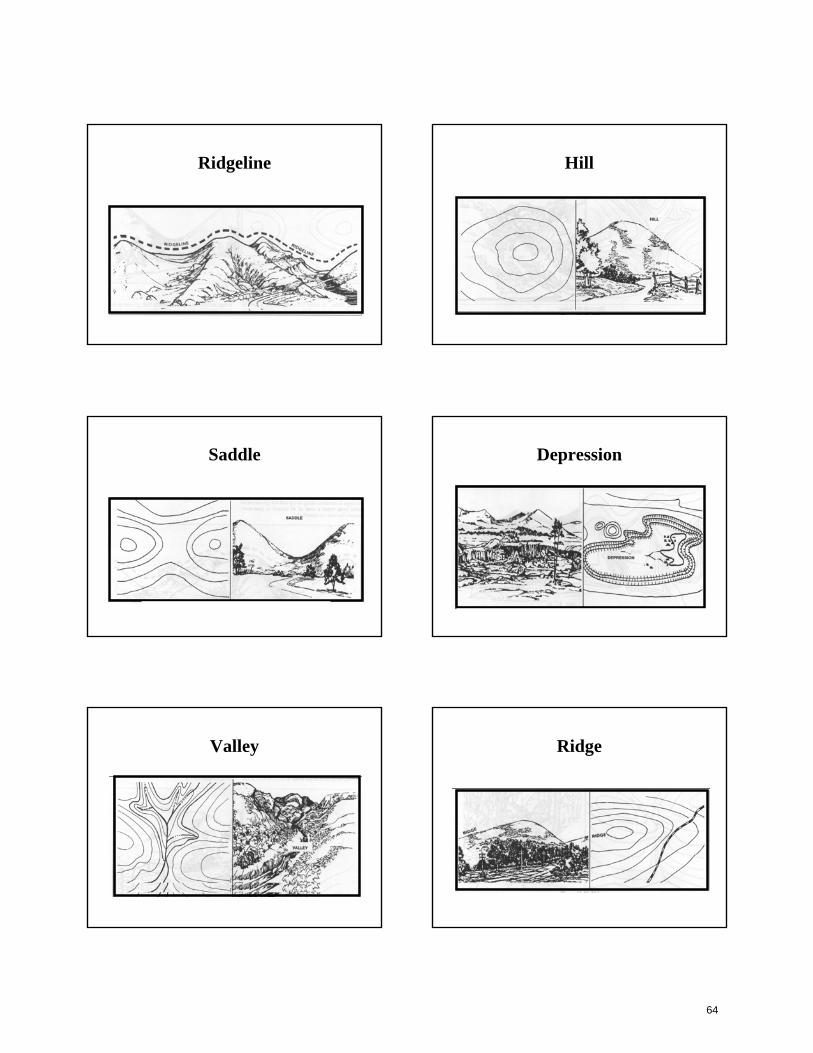
Ridgeline Hill
Saddle Depression
Valley Ridge
64
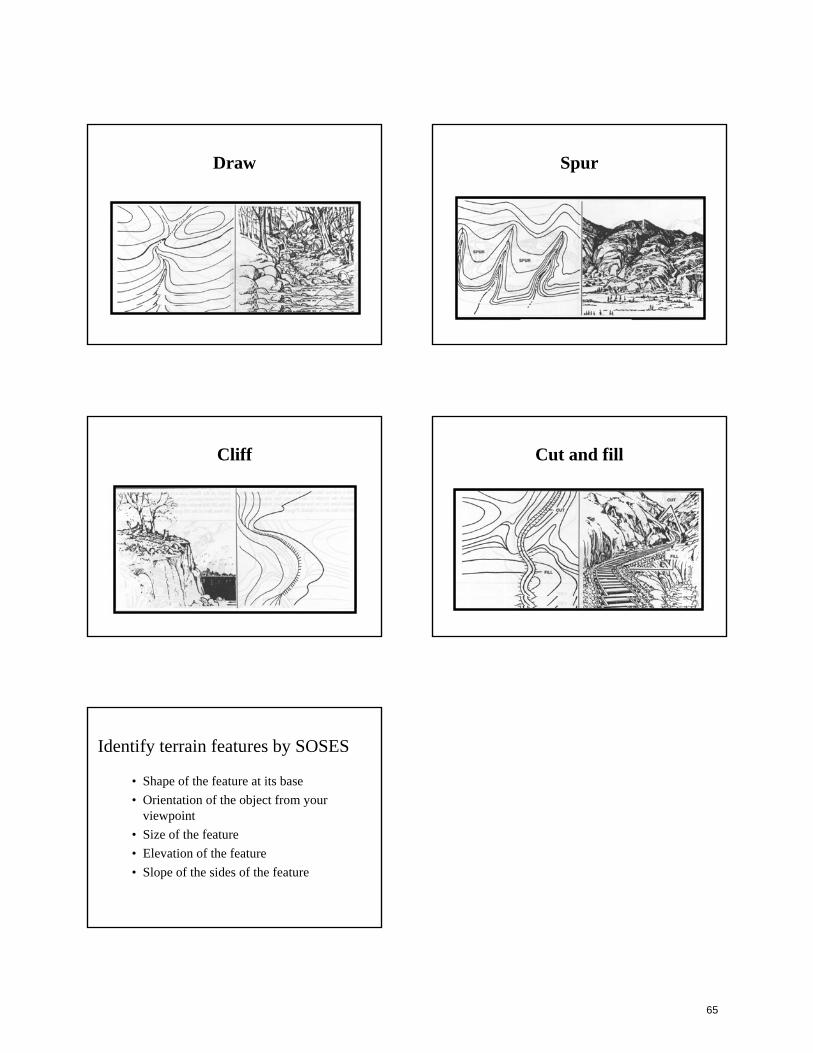
Draw Spur
Cliff Cut and fill
Identify terrain features by SOSES
• Shape of the feature at its base• Orientation of the object from your
viewpoint• Size of the feature• Elevation of the feature• Slope of the sides of the feature
65

Control Data and Monuments
Horizontal control: Third order or better, permanent mark........... With third order or better elevation................ Checked spot elevation................................. Coincident with section corner....................... Unmonumented.............................................
Vertical control (elevation): Third order or better, with tablet.................... Third order or better, recoverable mark......... Bench mark at found section corner............... Spot elevation...............................................
Boundary monument: With tablet.................................................... Without tablet............................................... With number and elevation............................ U.S. mineral or location monument...........
Boundaries
National........................................................ State or territorial.......................................... County or equivalent..................................... Civil township or equivalent........................... Incorporated city or equivalent...................... Park, reservation, or monument..................... Small park.....................................................
Land Survey Systems
U.S. Public Land Survey System: Township or range line................................. Location doubtful...................................... Section line.................................................. Location doubtful...................................... Found section corner; found closing corner... Witness corner; meander corner................... Other land surveys: Township or range line................................. Section line.................................................. Land grant or mining claim; monument............ Fence line......................................................
66
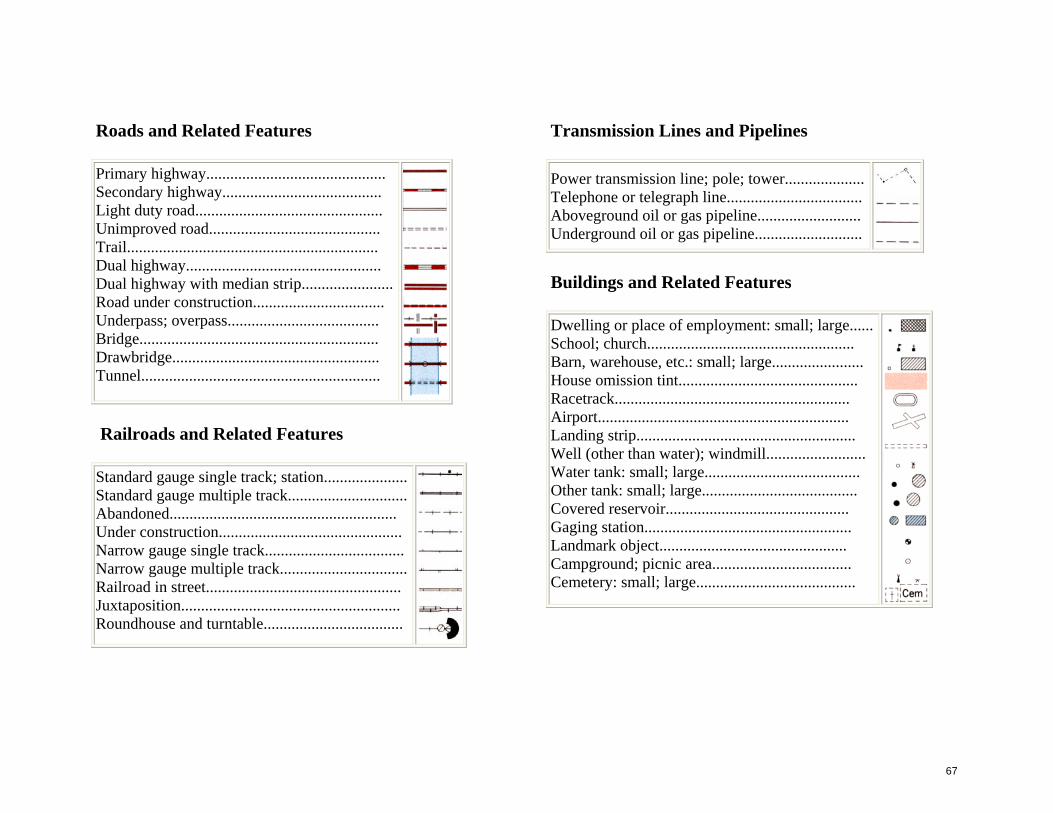
Roads and Related Features
Primary highway............................................. Secondary highway........................................ Light duty road............................................... Unimproved road........................................... Trail............................................................... Dual highway................................................. Dual highway with median strip....................... Road under construction................................. Underpass; overpass...................................... Bridge............................................................ Drawbridge.................................................... Tunnel............................................................
Railroads and Related Features
Standard gauge single track; station..................... Standard gauge multiple track.............................. Abandoned......................................................... Under construction.............................................. Narrow gauge single track................................... Narrow gauge multiple track................................ Railroad in street................................................. Juxtaposition....................................................... Roundhouse and turntable...................................
Transmission Lines and Pipelines
Power transmission line; pole; tower.................... Telephone or telegraph line.................................. Aboveground oil or gas pipeline.......................... Underground oil or gas pipeline...........................
Buildings and Related Features
Dwelling or place of employment: small; large...... School; church.................................................... Barn, warehouse, etc.: small; large....................... House omission tint............................................. Racetrack........................................................... Airport............................................................... Landing strip....................................................... Well (other than water); windmill......................... Water tank: small; large....................................... Other tank: small; large....................................... Covered reservoir.............................................. Gaging station.................................................... Landmark object............................................... Campground; picnic area................................... Cemetery: small; large........................................
67
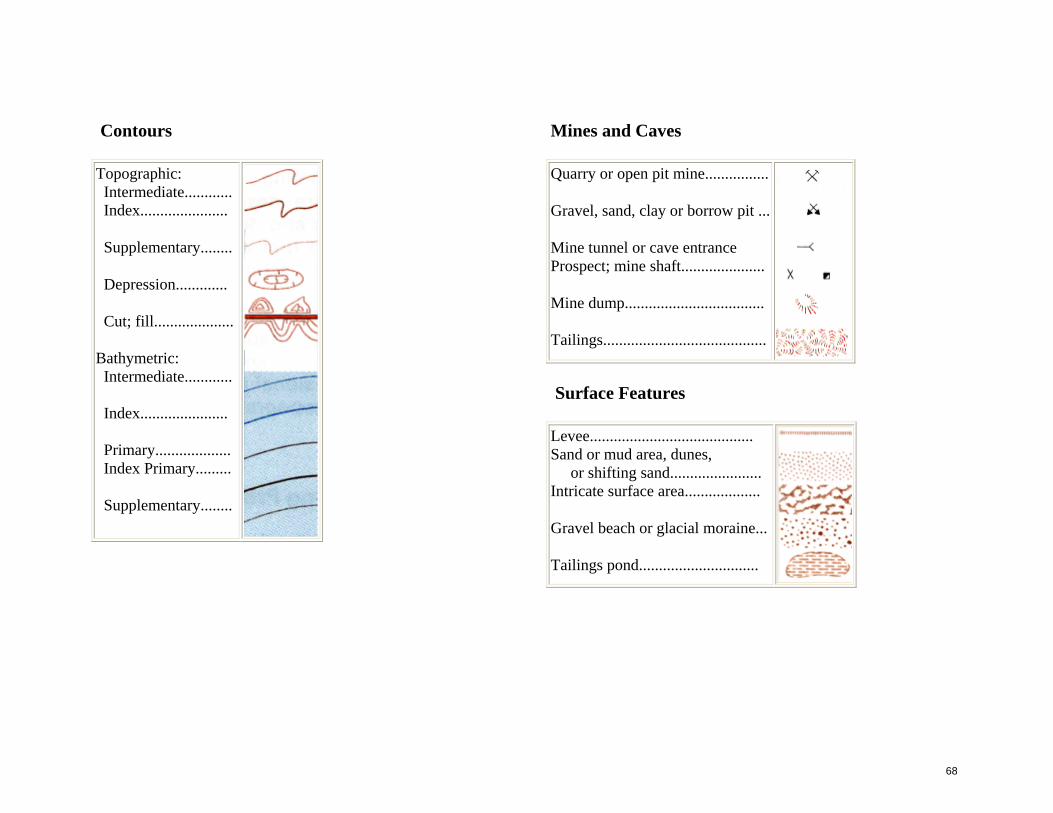
Contours
Topographic: Intermediate............ Index......................
Supplementary........
Depression.............
Cut; fill....................
Bathymetric: Intermediate............ Index...................... Primary................... Index Primary.........
Supplementary........
Mines and Caves
Quarry or open pit mine................
Gravel, sand, clay or borrow pit ...
Mine tunnel or cave entrance Prospect; mine shaft.....................
Mine dump...................................
Tailings.........................................
Surface Features
Levee......................................... Sand or mud area, dunes, or shifting sand....................... Intricate surface area...................
Gravel beach or glacial moraine...
Tailings pond..............................
68
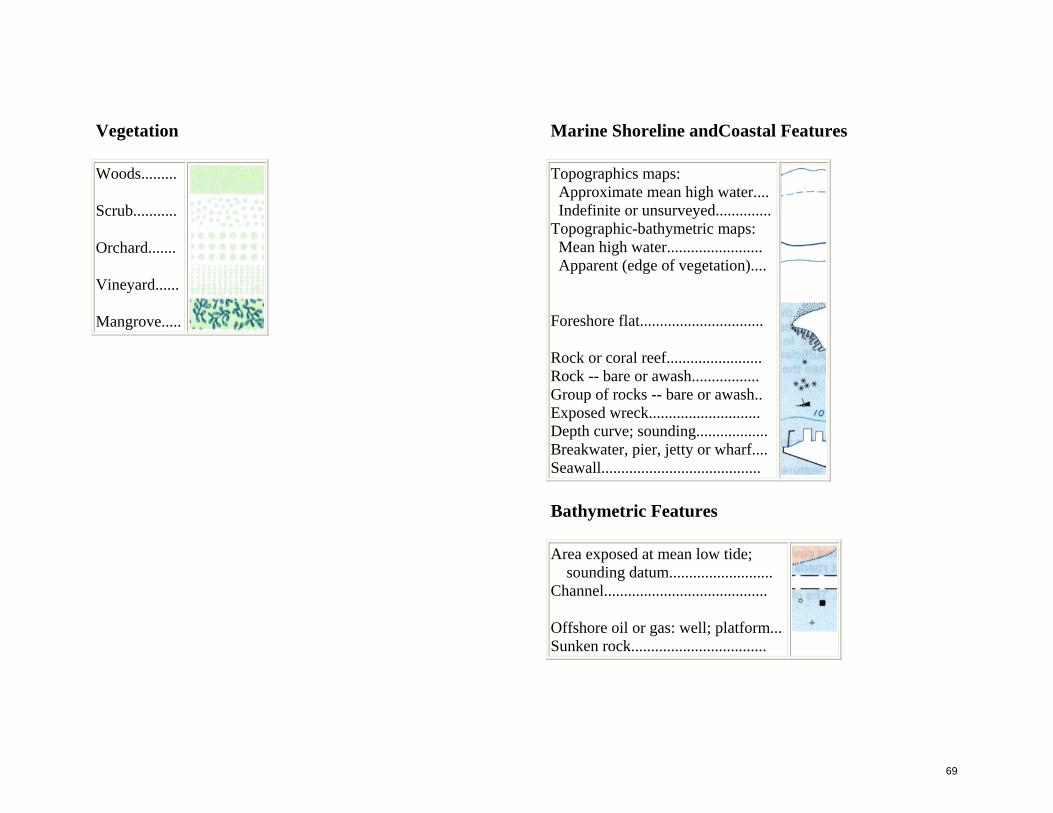
Vegetation
Woods.........
Scrub...........
Orchard.......
Vineyard......
Mangrove.....
Marine Shoreline andCoastal Features
Topographics maps: Approximate mean high water.... Indefinite or unsurveyed.............. Topographic-bathymetric maps: Mean high water........................ Apparent (edge of vegetation)....
Foreshore flat...............................
Rock or coral reef........................ Rock -- bare or awash................. Group of rocks -- bare or awash.. Exposed wreck............................ Depth curve; sounding.................. Breakwater, pier, jetty or wharf.... Seawall........................................
Bathymetric Features
Area exposed at mean low tide; sounding datum.......................... Channel.........................................
Offshore oil or gas: well; platform... Sunken rock..................................
69
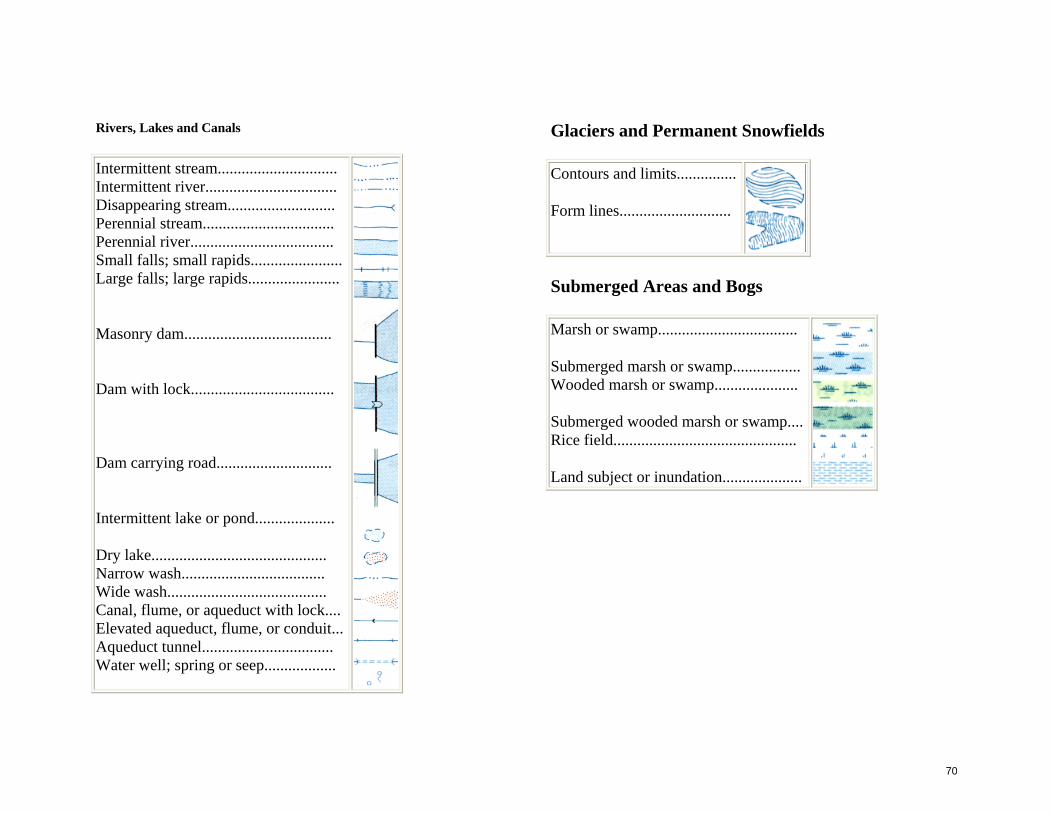
Rivers, Lakes and Canals
Intermittent stream.............................. Intermittent river................................. Disappearing stream........................... Perennial stream................................. Perennial river.................................... Small falls; small rapids....................... Large falls; large rapids.......................
Masonry dam.....................................
Dam with lock....................................
Dam carrying road.............................
Intermittent lake or pond....................
Dry lake............................................ Narrow wash.................................... Wide wash........................................ Canal, flume, or aqueduct with lock.... Elevated aqueduct, flume, or conduit... Aqueduct tunnel................................. Water well; spring or seep..................
Glaciers and Permanent Snowfields
Contours and limits...............
Form lines............................
Submerged Areas and Bogs
Marsh or swamp...................................
Submerged marsh or swamp................. Wooded marsh or swamp.....................
Submerged wooded marsh or swamp.... Rice field..............................................
Land subject or inundation....................
70
Proofreading
Why proofread?
• It allows us to catch our mistakes before we turn them in to the teacher.
• It helps us produce a higher quality work product.
• Proofreading shows others we care about our work and how it looks to others.
Ways to proofread• Have others check our work
before we turn it in• Go through a checklist
ourselves before we turn something in
• Take some time “away” from our work before we look at it with a “fresh eye” to see what mistakes we made and whether what we have written makes sense to us when we read it
A simple proofreading checklist
• Is every sentence started with a capital letter?
• Does every sentence end with punctuation?
• Have I spelled all words correctly?
• Do I have any run-on sentences (two or more sentences run together)?
• Do I have any sentence fragments (incomplete sentences)?
• Is my work legible? (Can others read it?)
• When I read out loud what I have written, does it make sense to me?
• Do I have a clear beginning (introduction)?
• Do I support my thesis or main idea with lots of good details or ideas?
• Do I have a conclusion in my writing that “sums up” my important points?
When should I not proofread my work?
• While you are writing a first draft
• In the middle of thoughts; while you are brainstorming
• Until after you have had some time “away”from your work
71
Conflict Resolution
A skill for all cadets and cadet leaders
Conflict styles
Aggressive
Passive
Problem solving
Characteristics
Aggressive - usually when a conflict situation arises - creates a win-lose situationPassive - avoids conflict; creates a win-lose situation Problem-solving - turns conflict into a win-win situation.
Conflict resolution
Define the problem objectively.Declare the need; why is this a problem?Describe the feelings.Discuss solutions. Brainstorm; weigh the pros and cons of each solution.Decide on a plan. Use the solution that makes the most sense.Determine the plan’s effectiveness--follow-up meeting.
Conflict resolutionwith difficult cadets
Stonewalling Behavior: Cadet refuses to respond verbally and look for a solutionSolution: leader can decide what’s next.
Verbal disrespectBehavior: cadet uses foul language to get a rise out of the leader.Solution: Stay cool; tell the cadet to treat you with respect or leave the room.
Conflict resolution with difficult cadets
Blaming others: Behavior: cadet blames others and takes no responsibilitySolution: Redirect the student to the issue at hand, saying “let’s find a solution.”
Unworkable solution:Behavior: cadet suggests an “off the wall” solution that is inappropriate.Solution: Ask the cadet to offer a more reasonable solution; brainstorm as necessary.
72
Cadet - Cadet Conflict Resolution
“Hi, my name is ___, and I’m trained to help resolve conflict.”“Do you want to solve the problem with me?”If yes, move to a different area to talk.“Will you agree to 4 rules?:”
Do not interruptNo name-calling or putdownsBe as honest as you canAgree to solve the problem.
Cadet - CadetConflict Resolution
Defining the problem
“Who will talk first?”Ask Person #1 “What happened?” RESTATEAsk Person #1 “How do you feel? Why?”Ask Person #2 “What happened?” RESTATEAsk Person #2 “How do you feel? Why?”
Cadet - CadetConflict Resolution
Finding solutionsAsk Person #1 “What can you do to resolve your part of the problem?Ask Person #2 “Do you agree?”Ask Person #2 “What can you do to resolve your part of the problem?”Ask Person #1 “Do you agree?”Ask each disputant “What could you do differently if this happened again?Ask “Is the problem solved?”Ask disputants “Please tell your friends the conflict is solved.“Congratulations on your hard work solving this dispute.”
73
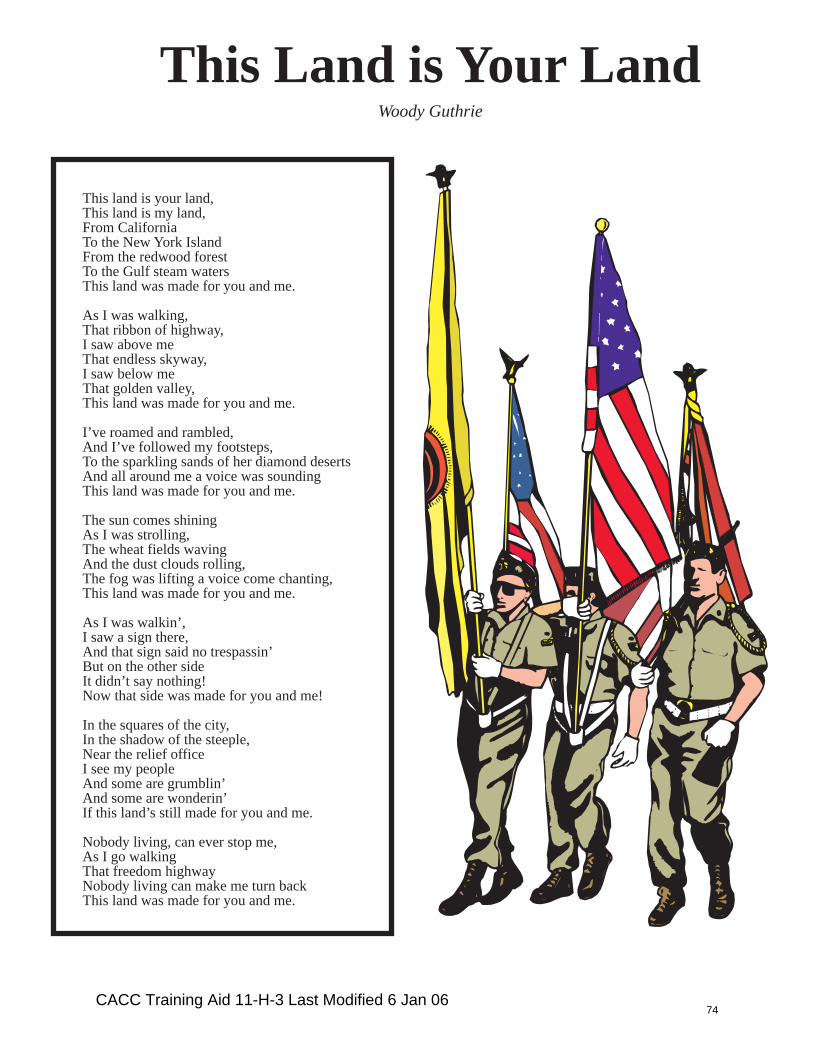
This Land is Your LandWoody Guthrie
This land is your land,This land is my land,From CaliforniaTo the New York IslandFrom the redwood forestTo the Gulf steam watersThis land was made for you and me.
As I was walking,That ribbon of highway,I saw above meThat endless skyway,I saw below meThat golden valley,This land was made for you and me.
I’ve roamed and rambled,And I’ve followed my footsteps,To the sparkling sands of her diamond desertsAnd all around me a voice was soundingThis land was made for you and me.
The sun comes shiningAs I was strolling,The wheat fields wavingAnd the dust clouds rolling,The fog was lifting a voice come chanting,This land was made for you and me.
As I was walkin’,I saw a sign there,And that sign said no trespassin’But on the other sideIt didn’t say nothing!Now that side was made for you and me!
In the squares of the city,In the shadow of the steeple,Near the relief officeI see my peopleAnd some are grumblin’And some are wonderin’If this land’s still made for you and me.
Nobody living, can ever stop me,As I go walkingThat freedom highwayNobody living can make me turn backThis land was made for you and me.
CACC Training Aid 11-H-3 Last Modified 6 Jan 0674

ANGER MANAGEMENT
Objectives
• To have a better understanding of the emotion of anger
• To have increased self-awareness of anger and its triggers
• To critically examine a range of anger management interventions
• To increase confidence in using a variety of anger management strategies and techniques
True or False
• Anger is natural?• Anger is uncontrollable?• Anger is an emotion?• It usually helps to give vent to anger?• Thought has little to do with anger?• Shopping or chocolate therapy are effective anger
management strategies?• Anger should never be repressed?• Anger is caused by circumstances?• Anger has one basic cause? • Anger should always be acted upon?
Understanding Anger – Key Points(1)
• Anger is natural-Anger is part of our natural inclination to fight!
• Anger is counterproductive- is negative, irrational, and we regret anger when we are calm after the fact!
• Anger has one basic cause- There is a gap between what we have and what we think we should have-money,relationships status or self –worth etc. Real or perceived threats that cause or widen the gap (real or perceived) will cause or increase ANGER
Understanding Anger-Key Points (2)
• Anger can be learned- People learn to get angry to get what they want!!? Anger is manipulation.
• Anger can be unlearned- Anger is perception-based and can become a bad habit that is hard to break. Reframing is a positive way to unlearn anger by changing perceptions.
• Anger is not improved by letting it all out -The person who kicks the pillow is practicing anger; this behavior condones the angry feelings and the violent action.
The management of my anger!
• What did you learn about anger from significant people in your life?
• Can you identify any connection between your temperament and early life experiences and your adult experiences of anger?
• Can you identify patterns in your feelings of anger and the patterns of anger management you tend to use?
75
Types of Anger Management
• Self- Aware- This person is able to recognize bad moods and get out of them quickly.
• Engulfed- This person is helpless; swamped; lost; over-whelmed.
• Accepting- This person understands their moods but is resistant to change them. For people who are disposed to bad moods this may lead to resignation, cynicism, sadness, and depression.
Dealing with your anger (1)
Emotionally unintelligent reactions:
• Letting it all out – Seems like it “clears the air” but it really creates fear and “fake” co-operation Anger may become the only way to get others to cooperate
• Locking it all in – Results in peace at a high cost of a person’s mental health; leads to manipulative tricks, sarcasm and tantrums
Dealing with your anger (2)
Emotionally intelligent reactions• Calming down without giving in!• Coping self-talk- Say things to yourself to help you calm down and
boost own self-worth• Communicating-Anger is infectious; Focus on solutions not
problems• Humour- Finding the things about the situation that are funny; focus
on WE and US• Purpose- Anger tends to go nowhere; find a specific plan to solve the
problem• Being assertive- Aggression minus anger creates a willingness to
cooperate
REFRAMING
• When you are overwhelmed with anger, “reframing” involves replacing it with some other, more positive thought
• Say to yourself, “I am not going to get angry about this; instead I will think about something positive that makes me happy ”
The Anatomy of Rage
• Road Rage is an example of anger gone terribly wrong• In your brain, when the Amygdala drives anger, it is pure
emotion and irrational• When anger is driven by the Neo-cortex, it is thought-
based and rational• Catecholamine is a chemical the brain produces in angry
situations; it contributes to the rush to fight• The adrenocortical system keeps the chemicals in the brain
for hours and even days if other thoughts do not replace the angry thoughts
Defusing Anger
There are two main ways to prevent the explosion!
Challenge the thoughts that trigger the surges of anger Don’t let these thoughts fan the flames Early intervention in the anger cycle!- Reframing
Cooling Down- Diversion-Go for a walk watch a film or T V, exercise,relaxation strategies (e g guided fantasy and self talk-down
76
The Pledge of Allegiance
...I promise to be true"I pledge allegiance"
The Pledge of Allegiance
...to the symbol of our country
"to the flag"
The Pledge of Allegiance
...each state that has joined tomake our country
"of the United States of America"
The Pledge of Allegiance
...a republic is a country where the people choose others tomake laws for them. The government is for the people
"and to the Republic"
The Pledge of Allegiance
...the flag means the country"for which it stands,"
The Pledge of Allegiance
...a single country"one Nation"
77
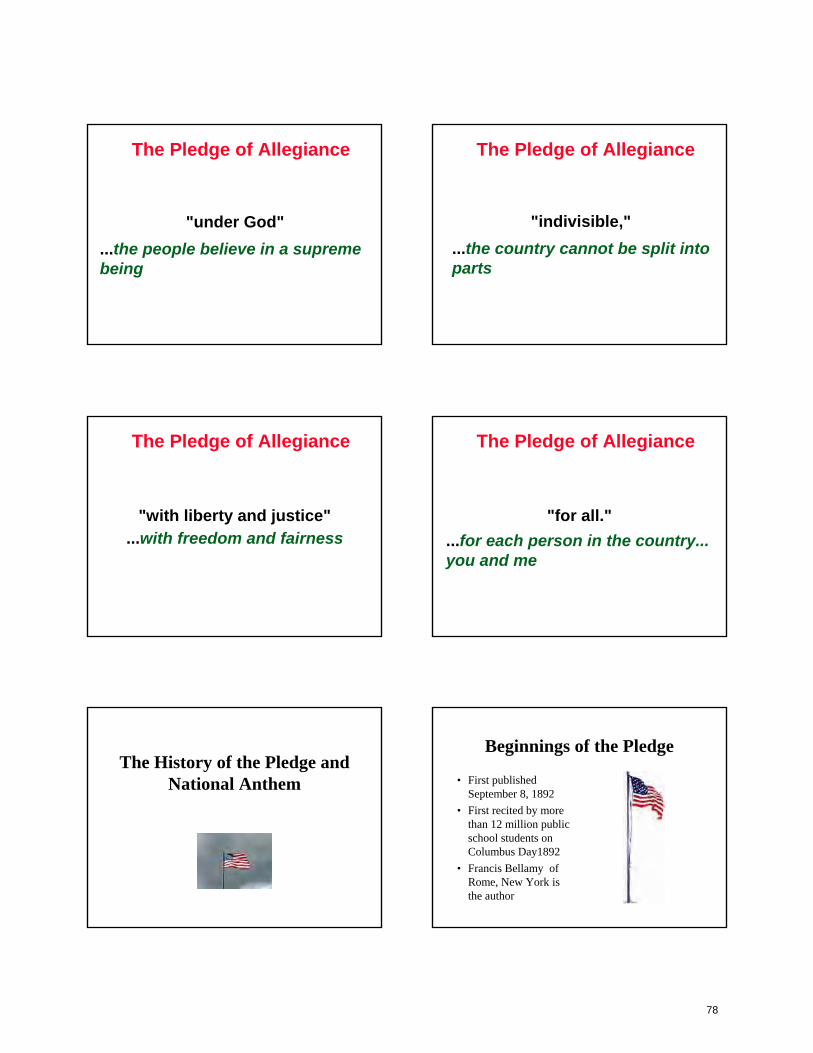
The Pledge of Allegiance
...the people believe in a supreme being
"under God"
The Pledge of Allegiance
...the country cannot be split into parts
"indivisible,"
The Pledge of Allegiance
...with freedom and fairness"with liberty and justice"
The Pledge of Allegiance
"for all."...for each person in the country...you and me
The History of the Pledge and National Anthem
Beginnings of the Pledge
• First published September 8, 1892
• First recited by more than 12 million public school students on Columbus Day1892
• Francis Bellamy of Rome, New York is the author
78
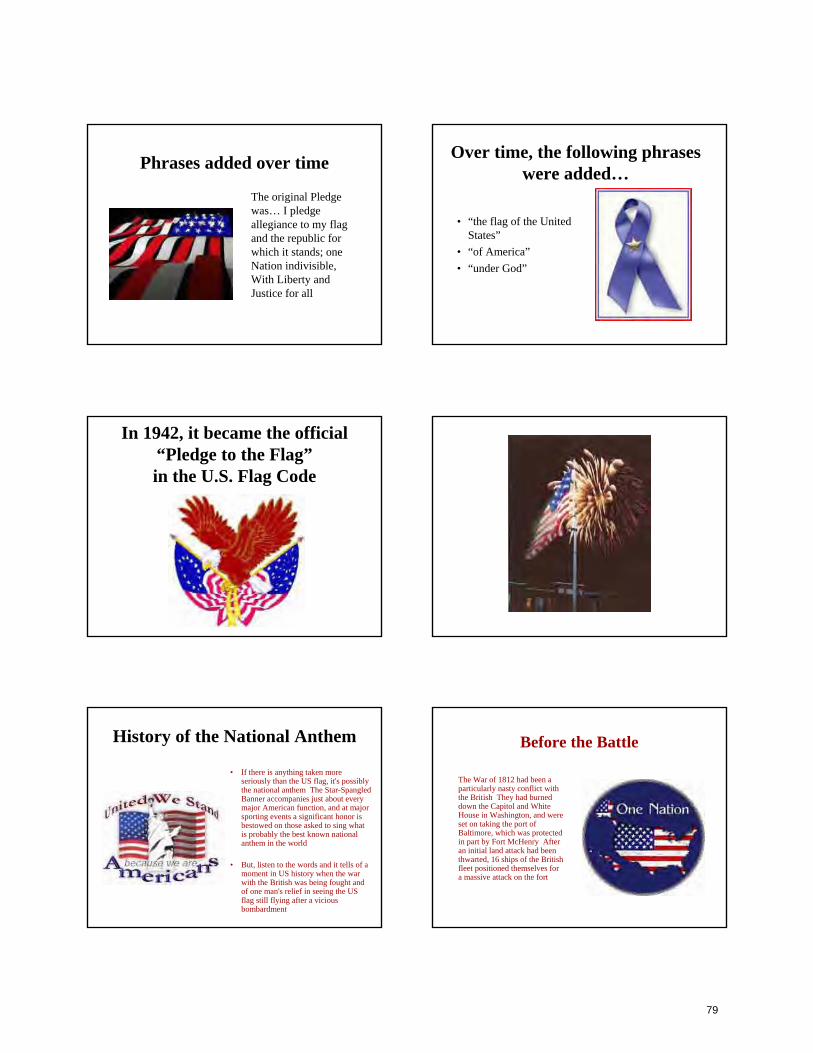
Phrases added over time
The original Pledge was… I pledge allegiance to my flag and the republic for which it stands; one Nation indivisible, With Liberty and Justice for all
Over time, the following phrases were added…
• “the flag of the United States”
• “of America”• “under God”
In 1942, it became the official “Pledge to the Flag”in the U.S. Flag Code
History of the National Anthem
• If there is anything taken more seriously than the US flag, it's possibly the national anthem The Star-Spangled Banner accompanies just about every major American function, and at major sporting events a significant honor is bestowed on those asked to sing what is probably the best known national anthem in the world
• But, listen to the words and it tells of a moment in US history when the war with the British was being fought and of one man's relief in seeing the US flag still flying after a vicious bombardment
Before the Battle
The War of 1812 had been a particularly nasty conflict with the British They had burned down the Capitol and White House in Washington, and were set on taking the port of Baltimore, which was protected in part by Fort McHenry After an initial land attack had been thwarted, 16 ships of the British fleet positioned themselves for a massive attack on the fort
79
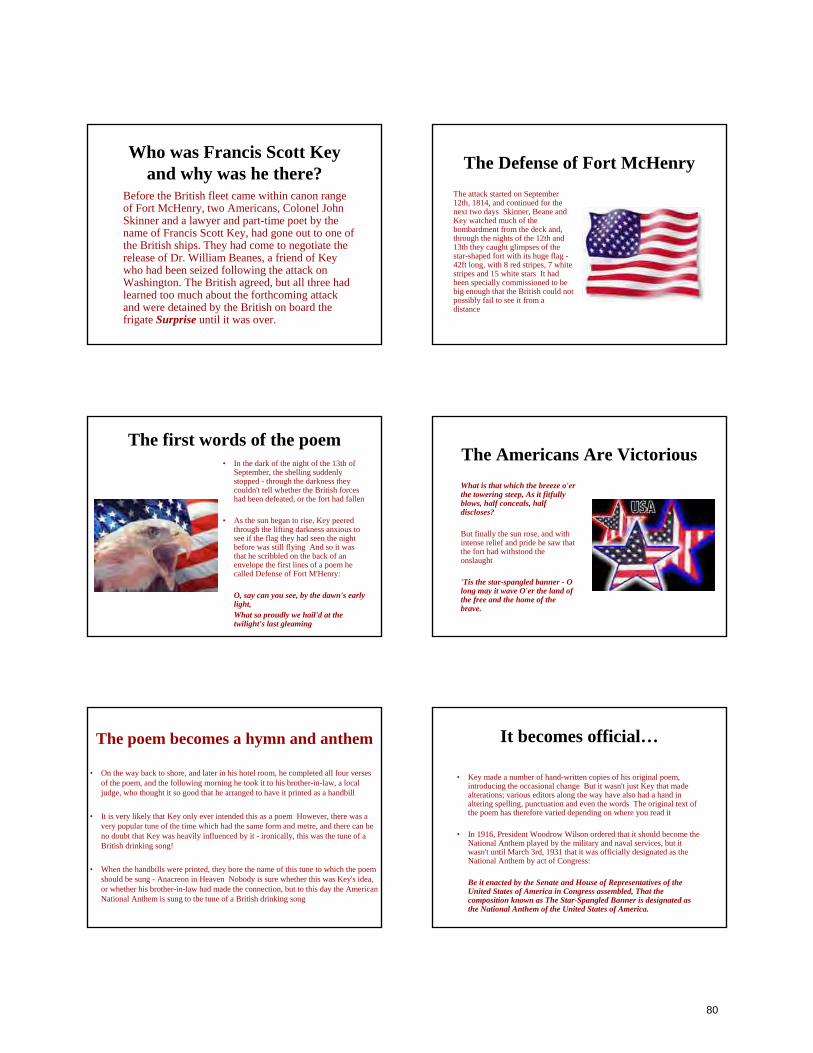
Who was Francis Scott Key and why was he there?
Before the British fleet came within canon range of Fort McHenry, two Americans, Colonel John Skinner and a lawyer and part-time poet by the name of Francis Scott Key, had gone out to one of the British ships. They had come to negotiate the release of Dr. William Beanes, a friend of Key who had been seized following the attack on Washington. The British agreed, but all three had learned too much about the forthcoming attack and were detained by the British on board the frigate Surprise until it was over.
The Defense of Fort McHenryThe attack started on September 12th, 1814, and continued for the next two days Skinner, Beane and Key watched much of the bombardment from the deck and, through the nights of the 12th and 13th they caught glimpses of the star-shaped fort with its huge flag -42ft long, with 8 red stripes, 7 white stripes and 15 white stars It had been specially commissioned to be big enough that the British could not possibly fail to see it from a distance
The first words of the poem• In the dark of the night of the 13th of
September, the shelling suddenly stopped - through the darkness they couldn't tell whether the British forces had been defeated, or the fort had fallen
• As the sun began to rise, Key peered through the lifting darkness anxious to see if the flag they had seen the night before was still flying And so it was that he scribbled on the back of an envelope the first lines of a poem he called Defense of Fort M'Henry:
O, say can you see, by the dawn's early light,What so proudly we hail'd at the twilight's last gleaming
The Americans Are VictoriousWhat is that which the breeze o'er the towering steep, As it fitfully blows, half conceals, half discloses?
But finally the sun rose, and with intense relief and pride he saw that the fort had withstood the onslaught
'Tis the star-spangled banner - O long may it wave O'er the land of the free and the home of the brave.
The poem becomes a hymn and anthem
• On the way back to shore, and later in his hotel room, he completed all four verses of the poem, and the following morning he took it to his brother-in-law, a local judge, who thought it so good that he arranged to have it printed as a handbill
• It is very likely that Key only ever intended this as a poem However, there was a very popular tune of the time which had the same form and metre, and there can be no doubt that Key was heavily influenced by it - ironically, this was the tune of a British drinking song!
• When the handbills were printed, they bore the name of this tune to which the poem should be sung - Anacreon in Heaven Nobody is sure whether this was Key's idea, or whether his brother-in-law had made the connection, but to this day the American National Anthem is sung to the tune of a British drinking song
It becomes official…
• Key made a number of hand-written copies of his original poem, introducing the occasional change But it wasn't just Key that made alterations; various editors along the way have also had a hand in altering spelling, punctuation and even the words The original text of the poem has therefore varied depending on where you read it
• In 1916, President Woodrow Wilson ordered that it should become the National Anthem played by the military and naval services, but it wasn't until March 3rd, 1931 that it was officially designated as the National Anthem by act of Congress:
Be it enacted by the Senate and House of Representatives of the United States of America in Congress assembled, That the composition known as The Star-Spangled Banner is designated as the National Anthem of the United States of America.
80
Introductionto
Orienteering
Agenda
Introduction to OrienteeringAn Orienteering CourseOrienteering MapsBasic TechniquesHow to get startedQuestions
What is Orienteering all about?
Navigate to a series of points (controls) shown on a specialized topo map, choosing routes - on or off trail - that will help you find all the controls and get to the finish.
How did Orienteering develop?
Began in Scandinavia around 1900- Exercises in land navigation for the military
Gradually spread throughout the world- Kjellstrom brothers (founders of Silva) exportedOrienteering to UK and USA
- Silva Holds the Trademark for OrienteeringNow practiced on six continents
- World championships held every year- Millions of competitors each year
Kids– Learning to read maps– Through Scouts, building team work and earning merit badge– Through School and through the Cadet Corps
• Families exploring a new (or familiar) park• Outdoors lovers looking for a change• Hikers looking to improve their navigational skills• Adventure Racers wanting to get a leg up on the competition• Seniors looking to stay healthy• Businesses looking for team building activities• Competi ive Orienteers addicted to the challenge
Who goes Orienteering Where are Orienteering events held?
• Forests• State and Regional Parks• City Parks• Suburban neighborhoods• School / University campuses
81
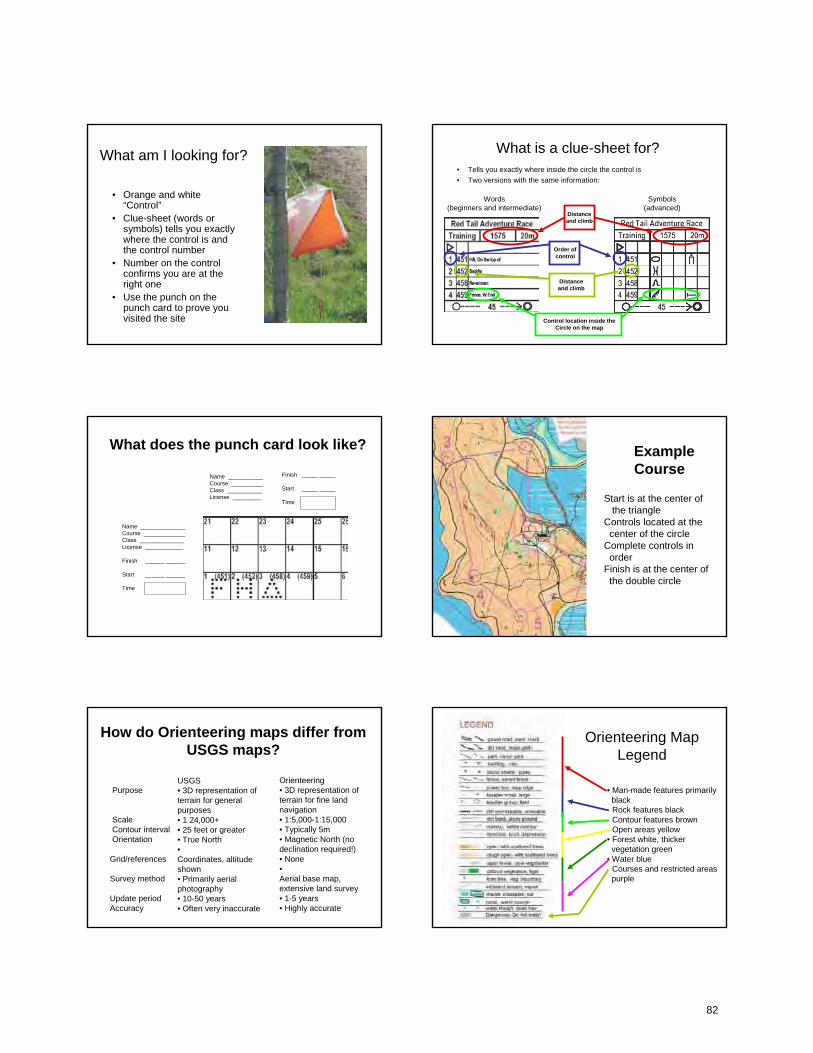
What am I looking for?
• Orange and white“Control”
• Clue-sheet (words or symbols) tells you exactly where the control is and the control number
• Number on the control confirms you are at the right one
• Use the punch on the punch card to prove you visited the site
What is a clue-sheet for?• Tells you exactly where inside the circle the control is• Two versions with the same information:
Words(beginners and intermediate)
Symbols(advanced)
Distanceand climb
Order ofcontrol
Distanceand climb
Control location inside theCircle on the map
What does the punch card look like?
Name ______________Course _____________Class ______________License ____________
Finish ______ ______
Start ______ ______
Time
Name ___________Course __________Class ___________License _________
Finish _____ _____
Start _____ _____
Time
ExampleCourse
Start is at the center ofthe triangle
Controls located at thecenter of the circle
Complete controls inorder
Finish is at the center ofthe double circle
How do Orienteering maps differ fromUSGS maps?
Grid/references
Survey method
Update periodAccuracy
USGS• 3D representation ofterrain for generalpurposes• 1 24,000+• 25 feet or greater• True North•Coordinates, altitudeshown• Primarily aerialphotography• 10-50 years• Often very inaccurate
Orienteering• 3D representation ofterrain for fine landnavigation• 1:5,000-1:15,000• Typically 5m• Magnetic North (nodeclination required!)• None•Aerial base map,extensive land survey• 1-5 years• Highly accurate
Purpose
ScaleContour intervalOrientation
Orienteering MapLegend
• Man-made features primarilyblackRock features blackContour features brownOpen areas yellow
• Forest white, thickervegetation green
• Water blueCourses and restricted areaspurple
82
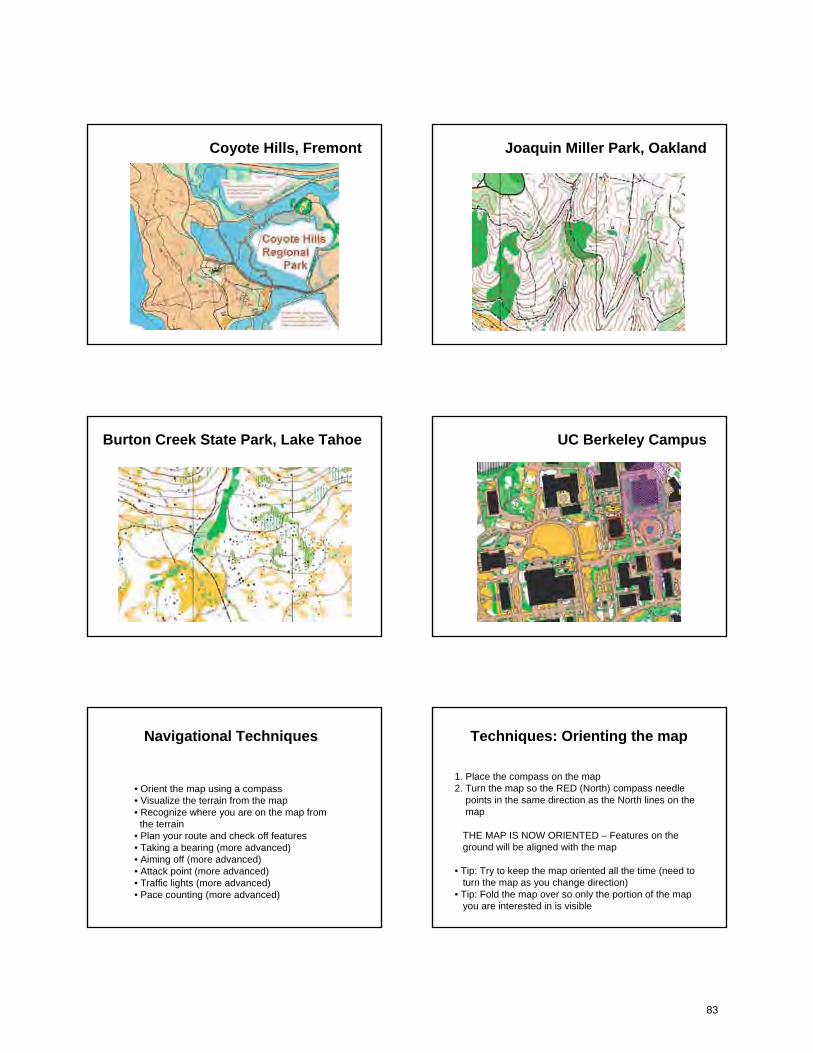
Coyote Hills, Fremont Joaquin Miller Park, Oakland
Burton Creek State Park, Lake Tahoe UC Berkeley Campus
Navigational Techniques
• Orient the map using a compass• Visualize the terrain from the map• Recognize where you are on the map fromthe terrain
• Plan your route and check off features• Taking a bearing (more advanced)• Aiming off (more advanced)• Attack point (more advanced)• Traffic lights (more advanced)• Pace counting (more advanced)
Techniques: Orienting the map
1. Place the compass on the map2. Turn the map so the RED (North) compass needle
points in the same direction as the North lines on themap
THE MAP IS NOW ORIENTED – Features on theground will be aligned with the map
• Tip: Try to keep the map oriented all the time (need toturn the map as you change direction)
• Tip: Fold the map over so only the portion of the mapyou are interested in is visible
83
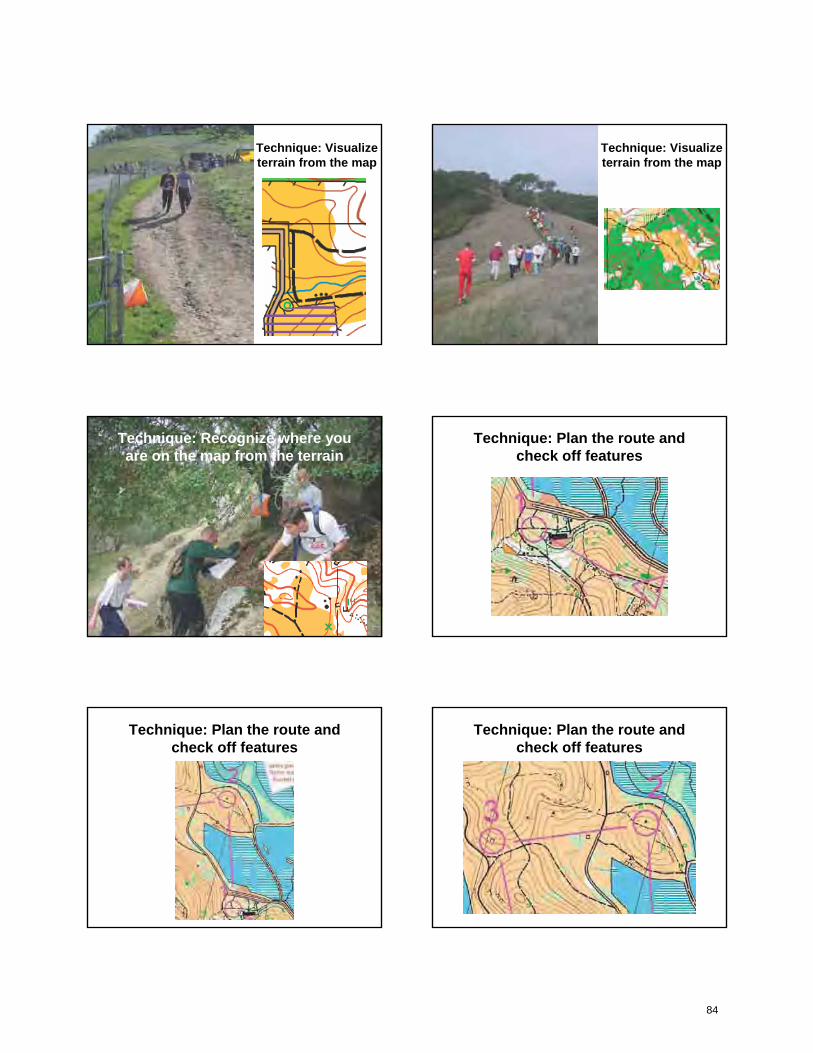
Technique: Visualizeterrain from the map
Technique: Visualizeterrain from the map
Technique: Recognize where you are on the map from the terrain
Technique: Plan the route and check off features
Technique: Plan the route and check off features
Technique: Plan the route and check off features
84
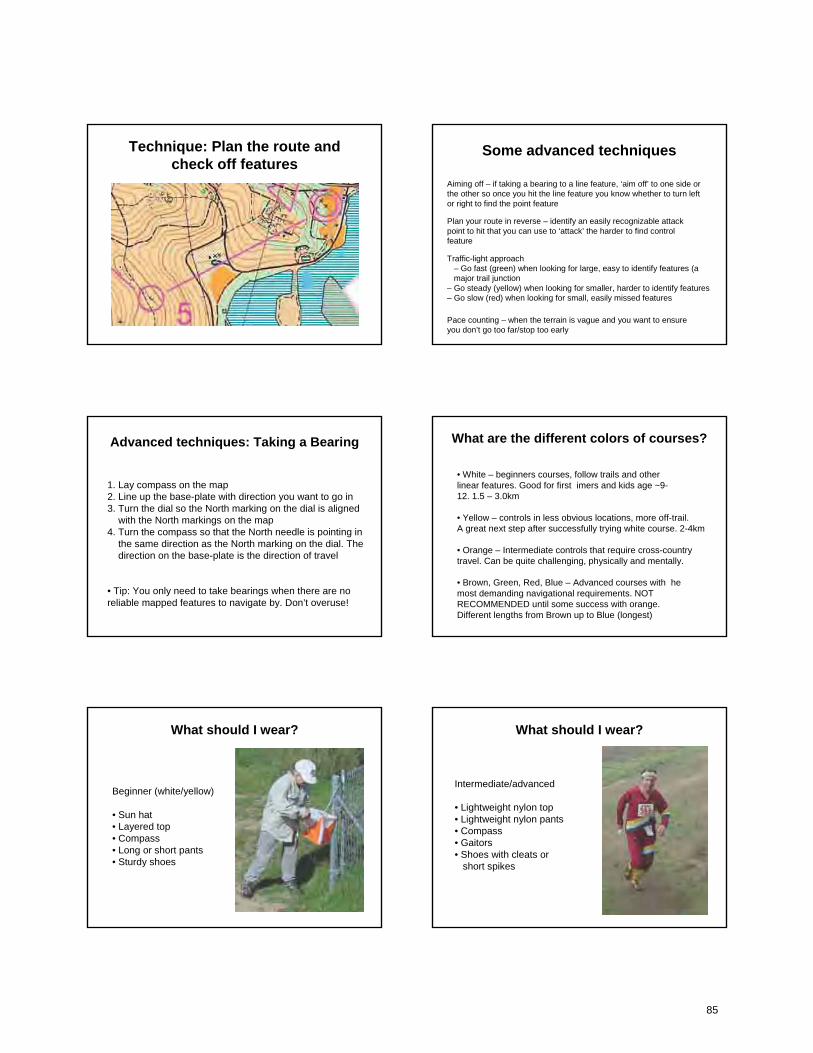
Technique: Plan the route and check off features
Some advanced techniques
Aiming off – if taking a bearing to a line feature, ‘aim off’ to one side or the other so once you hit the line feature you know whether to turn left or right to find the point feature
Plan your route in reverse – identify an easily recognizable attack point to hit that you can use to ‘attack’ the harder to find control feature
Traffic-light approach– Go fast (green) when looking for large, easy to identify features (amajor trail junction
– Go steady (yellow) when looking for smaller, harder to identify features– Go slow (red) when looking for small, easily missed features
Pace counting – when the terrain is vague and you want to ensure you don’t go too far/stop too early
Advanced techniques: Taking a Bearing
1. Lay compass on the map2. Line up the base-plate with direction you want to go in3. Turn the dial so the North marking on the dial is aligned
with the North markings on the map4. Turn the compass so that the North needle is pointing in
the same direction as the North marking on the dial. Thedirection on the base-plate is the direction of travel
• Tip: You only need to take bearings when there are noreliable mapped features to navigate by. Don’t overuse!
What are the different colors of courses?
• White – beginners courses, follow trails and otherlinear features. Good for first imers and kids age ~9-12. 1.5 – 3.0km
• Yellow – controls in less obvious locations, more off-trail.A great next step after successfully trying white course. 2-4km
• Orange – Intermediate controls that require cross-countrytravel. Can be quite challenging, physically and mentally.
• Brown, Green, Red, Blue – Advanced courses with hemost demanding navigational requirements. NOTRECOMMENDED until some success with orange.Different lengths from Brown up to Blue (longest)
What should I wear?
Beginner (white/yellow)
• Sun hat• Layered top• Compass• Long or short pants• Sturdy shoes
What should I wear?
Intermediate/advanced
• Lightweight nylon top• Lightweight nylon pants• Compass• Gaitors• Shoes with cleats or
short spikes
85
Does Orienteering damage the land?
• Orienteers go off trail, raising environmental concerns• We care deeply about the parks we use• Actual environmental impact is very low and short-lived
– Not using pristine wilderness areas– Work with park rangers to avoid sensitive areas– Courses visit different controls – dispersed impact– Affected areas recover within weeks at worst– Low impact confirmed by scientific studies
• Orienteering builds a tremendous love and respect forour environment
What about safety
• ALWAYS REPORT TO THE FINISH whether you completeyour course or not
• ALWAYS RETURN TO THE FINISH BEFORE THECOURSE CLOSING TIME whether you complete yourcourse or not
• Carry a whistle
• Know your limits (physical and navigational) and stay withinthem
• Take precautions if allergic to poison oak, bee stings, etc.
Are there different ‘flavors’ ofOrienteering?
• Point-to-point (standard)
• Score-O
• Rogaine (Adventure Orienteering)
• Ski-O
• Many other minor variations, but all involvemaps and navigation
What’s new in Orienteering?
• Computer mapping– Continuously updated maps– On-demand printing
• Electronic punching– Split times for each leg
• Tracking competitors in real-time– A few demonstrations so far
86
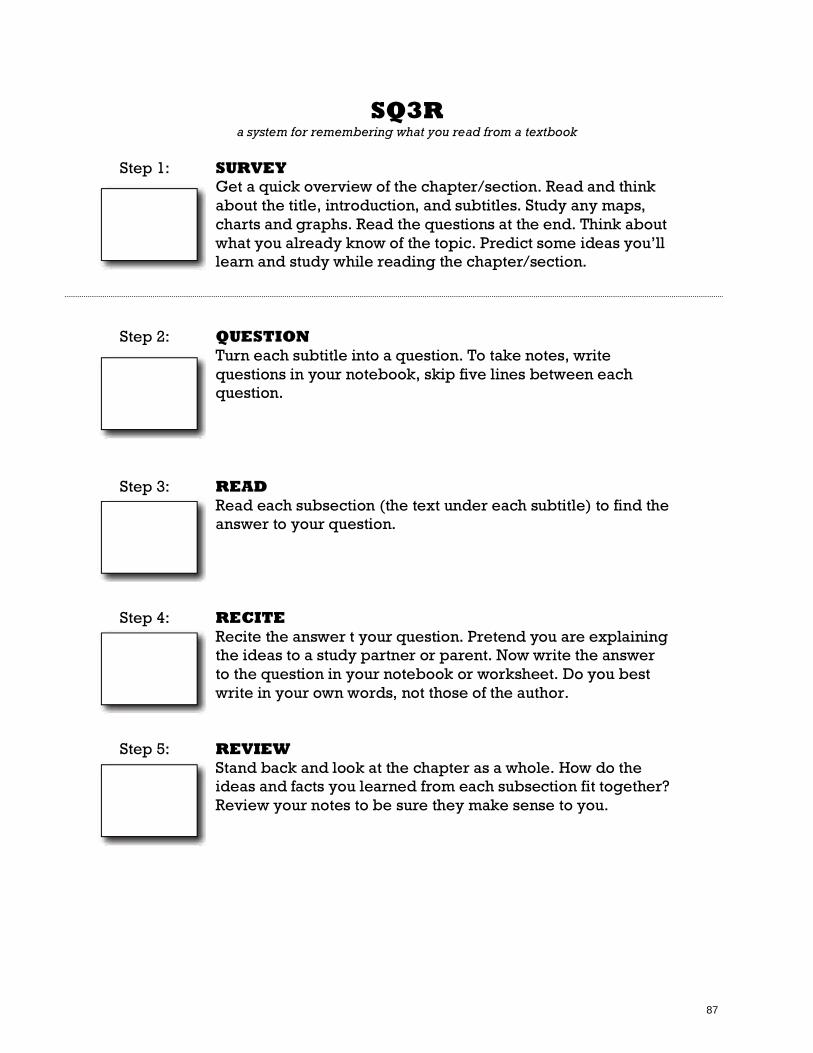
SQ3R a system for remembering what you read from a textbook
Step 1: SURVEY
Get a quick overview of the chapter/section. Read and think about the title, introduction, and subtitles. Study any maps, charts and graphs. Read the questions at the end. Think about what you already know of the topic. Predict some ideas you’ll learn and study while reading the chapter/section.
Step 2: QUESTION Turn each subtitle into a question. To take notes, write questions in your notebook, skip five lines between each question.
Step 3: READ Read each subsection (the text under each subtitle) to find the answer to your question.
Step 4: RECITE Recite the answer t your question. Pretend you are explaining the ideas to a study partner or parent. Now write the answer to the question in your notebook or worksheet. Do you best write in your own words, not those of the author.
Step 5: REVIEW Stand back and look at the chapter as a whole. How do the ideas and facts you learned from each subsection fit together? Review your notes to be sure they make sense to you.
87
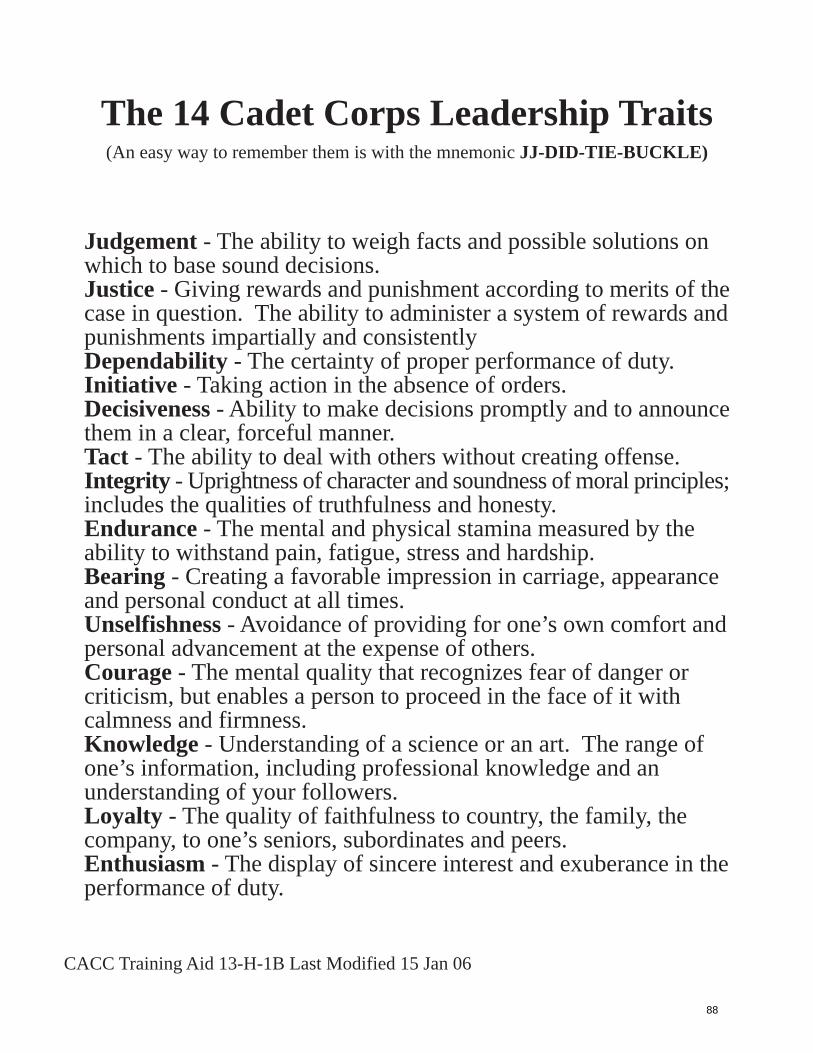
The 14 Cadet Corps Leadership Traits(An easy way to remember them is with the mnemonic JJ-DID-TIE-BUCKLE)
Judgement - The ability to weigh facts and possible solutions onwhich to base sound decisions.Justice - Giving rewards and punishment according to merits of thecase in question. The ability to administer a system of rewards andpunishments impartially and consistentlyDependability - The certainty of proper performance of duty.Initiative - Taking action in the absence of orders.Decisiveness - Ability to make decisions promptly and to announcethem in a clear, forceful manner.Tact - The ability to deal with others without creating offense.Integrity - Uprightness of character and soundness of moral principles;includes the qualities of truthfulness and honesty.Endurance - The mental and physical stamina measured by theability to withstand pain, fatigue, stress and hardship.Bearing - Creating a favorable impression in carriage, appearanceand personal conduct at all times.Unselfishness - Avoidance of providing for one’s own comfort andpersonal advancement at the expense of others.Courage - The mental quality that recognizes fear of danger orcriticism, but enables a person to proceed in the face of it withcalmness and firmness.Knowledge - Understanding of a science or an art. The range ofone’s information, including professional knowledge and anunderstanding of your followers.Loyalty - The quality of faithfulness to country, the family, thecompany, to one’s seniors, subordinates and peers.Enthusiasm - The display of sincere interest and exuberance in theperformance of duty.
CACC Training Aid 13-H-1B Last Modified 15 Jan 06
88