Embed Size (px)
Citation preview

CacheFlow® 600/700 Series Installation
Guide
Note For optimal graphics quality when displaying this file in Acrobat™, set your display to greater than 256 colors, and set the Acrobat Viewer zoom factor to 134% or 160%.

CacheFlow 600/700 Series Installation Guide
ii
CacheFlow Inc. (408) 220-2200 Voice
650 Almanor Avenue (408) 220-2250 FAX
Sunnyvale, California 94086 (888) 702-3569 Technical Support
[email protected] www.cacheflow.com
Information contained in this document is believed to be accurate and reliable. However, CacheFlow Inc. assumes no responsibility for its use nor for any infringements of patents or other rights of third parties which might result from its use. CacheFlow Inc. reserves the right to change product specifications at any time without notice.
Note This equipment has been tested and found to comply with the limits for a Class A digital device pursuant to Part 15 of the FCC Rules. These limits are designed to provide reasonable protection against harmful interference when the equipment is operated in a commercial environment. This equipment generates, uses and can radiate radio frequency energy and, if not installed and used in accordance with the instruction manual, might cause harmful interference to radio communications. Operation of this equipment in a residential area is likely to cause harmful interference in which case the user are required to correct the interference at their own expense.
CacheFlow is a registered trademark of CacheFlow Inc. All other product names and services identified in this documentation are trademarks or registered trademarks of their respective companies and are used throughout this documentation in editorial fashion only for the benefit of such companies. No such use, or the use of any trade name, is intended to convey an endorsement or other affiliation with CacheFlow Inc.
Copyright 1999 – 2000 CacheFlow Inc. All rights reserved worldwide. No part of this document might be reproduced by any means nor translated to any electronic medium without the written consent of CacheFlow Inc.
Printed in U.S.A.
Document Number: 231-01757
8/2000

iii
Contents CacheFlow® 600/700 Series Installation Guide ....................................... i
Contents .................................................................................................................... iii Document Conventions........................................................................................... vii
Graphics Quality Viewing .PDF Files................................................................ vii Chapter 1 - Key Features of CacheFlow 600/700 Series Content Accelerators ... 1
Serial Port ............................................................................................................ 2 Network Adapters ................................................................................................ 3 Front Panel Configuration ................................................................................... 4 CacheOS and CacheOS Server Edition Operating Systems ................................ 4
Chapter 2 - Installing CacheFlow 600/700 Series Content Accelerators.............. 5 Unpacking CacheFlow 600/700 Series Content Accelerators.............................. 5 Safety Instructions ............................................................................................... 6 Installing CacheFlow 600/700 Series Content Accelerators in an Equipment Rack..................................................................................................................... 6 Powering Content Accelerators On and Off ........................................................ 7
Using the Front Panel LCD and Joystick...................................................... 7 Viewing Disk Drive Activity ........................................................................ 8
Chapter 3 - First-Time Setup of CacheFlow 600/700 Series Content Accelerators.................................................................................................................................... 9
Connecting to Content Accelerators .................................................................... 9 Connecting to Content Accelerators Using a Serial Terminal .................... 10 Connecting to Content Accelerators Using a PC .........................................11
Initial Network Configuration Using a Direct Connection ............................... 12
CacheFlow 600/700 Series Installation Guide
iv
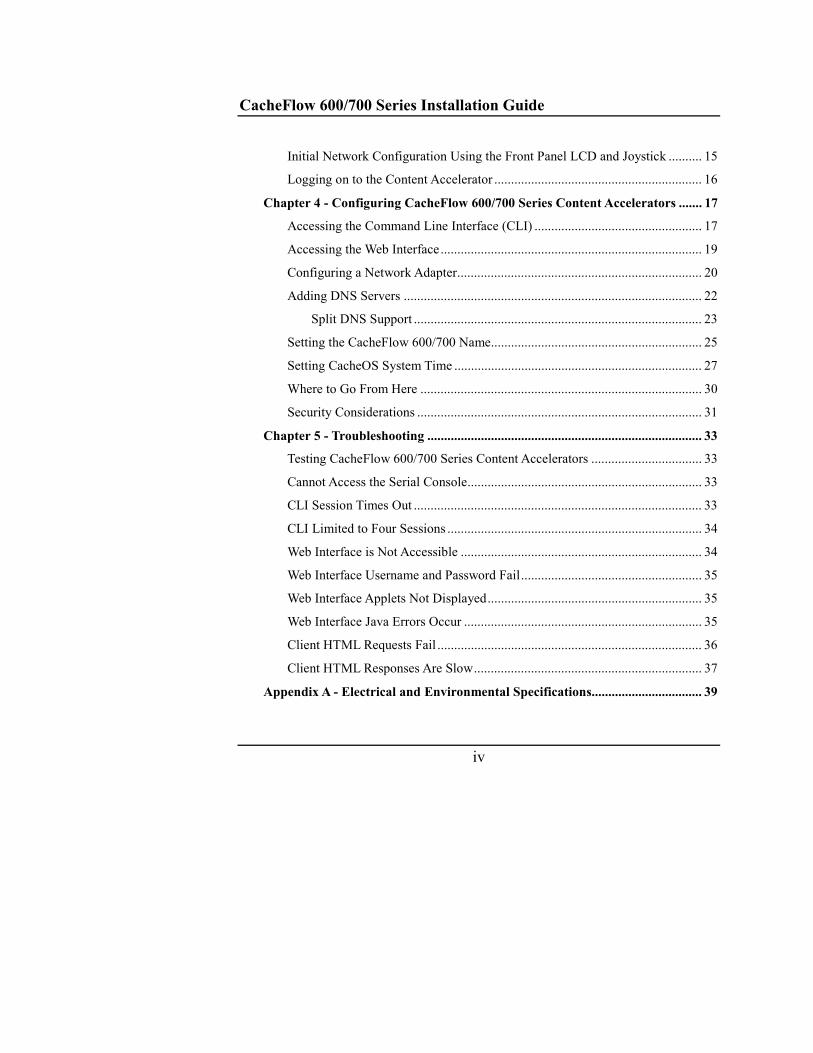
Initial Network Configuration Using the Front Panel LCD and Joystick .......... 15 Logging on to the Content Accelerator .............................................................. 16
Chapter 4 - Configuring CacheFlow 600/700 Series Content Accelerators ....... 17 Accessing the Command Line Interface (CLI) .................................................. 17 Accessing the Web Interface.............................................................................. 19 Configuring a Network Adapter......................................................................... 20 Adding DNS Servers ......................................................................................... 22
Split DNS Support ...................................................................................... 23 Setting the CacheFlow 600/700 Name............................................................... 25 Setting CacheOS System Time .......................................................................... 27 Where to Go From Here .................................................................................... 30 Security Considerations ..................................................................................... 31
Chapter 5 - Troubleshooting .................................................................................. 33 Testing CacheFlow 600/700 Series Content Accelerators ................................. 33 Cannot Access the Serial Console...................................................................... 33 CLI Session Times Out ...................................................................................... 33 CLI Limited to Four Sessions ............................................................................ 34 Web Interface is Not Accessible ........................................................................ 34 Web Interface Username and Password Fail...................................................... 35 Web Interface Applets Not Displayed................................................................ 35 Web Interface Java Errors Occur ....................................................................... 35 Client HTML Requests Fail ............................................................................... 36 Client HTML Responses Are Slow.................................................................... 37
Appendix A - Electrical and Environmental Specifications................................. 39

Table of Contents
v
Regulatory Statements ....................................................................................... 40 Index ........................................................................................................................ 49

CacheFlow 600/700 Series Installation Guide
vi
This page intentionally blank.

vii
Document Conventions The information in this manual conforms to several typographic conventions to make reading the material easier. The following table lists and explains the typographic styles used in this manual.
Typographic convention Description Monospace text Monospace text Bold monospace text Bold text indicates that the reader should
type the text exactly as shown. Bold and italic monospace text Bold and italic text indicates that the reader
should substitute information appropriate to their installation.
Blue Text (PDF files only) Blue text is a hyperjump to another location in this document or to an Internet location.
Italic text Italic text is a reference to another publication.
Bold sans serif text Bold sans serif text indicates that the paragraph is especially important and should be read.
* For readability, commands inside of command tables are not bolded, but italics are preserved.
Graphics Quality Viewing .PDF Files For optimal graphics quality when displaying this file in Acrobat, set your display to greater than 256 colors, and set the Acrobat Viewer zoom factor to 134% or 160%.

CacheFlow 600/700 Series Installation Guide
viii
This page intentionally blank.
1
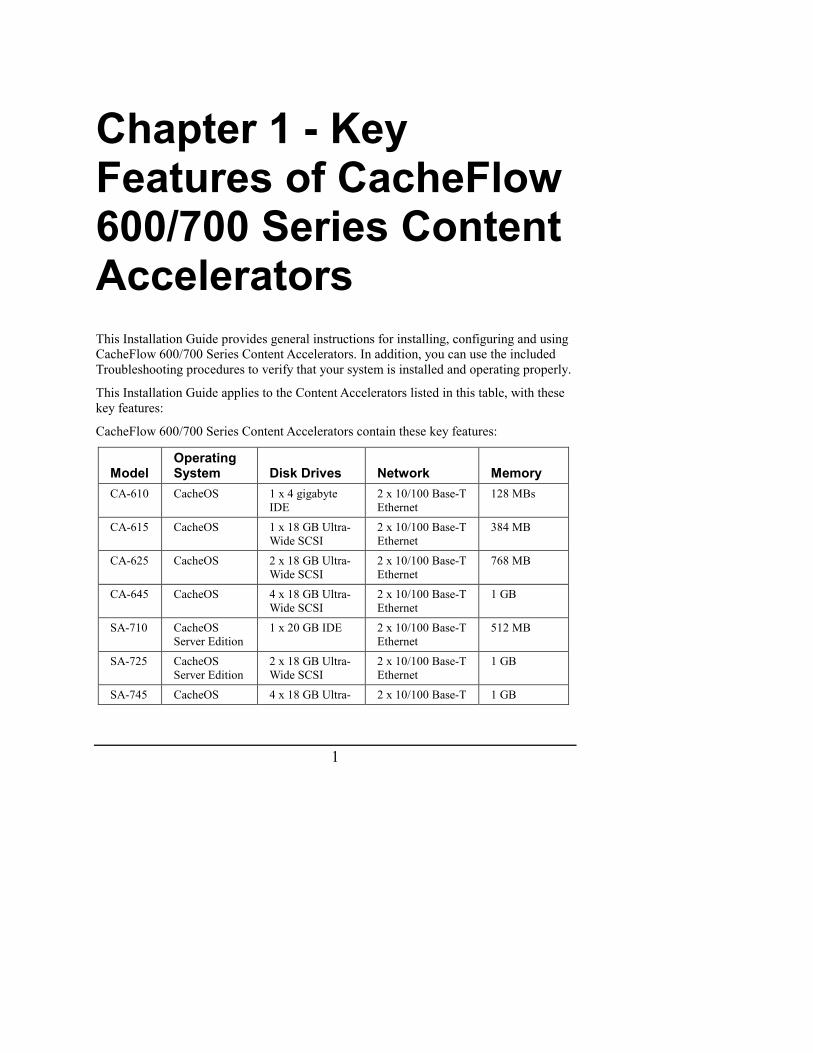
Chapter 1 - Key Features of CacheFlow 600/700 Series Content Accelerators This Installation Guide provides general instructions for installing, configuring and using CacheFlow 600/700 Series Content Accelerators. In addition, you can use the included Troubleshooting procedures to verify that your system is installed and operating properly.
This Installation Guide applies to the Content Accelerators listed in this table, with these key features:
CacheFlow 600/700 Series Content Accelerators contain these key features:
Model
Operating System
Disk Drives
Network
Memory
CA-610 CacheOS 1 x 4 gigabyte IDE
2 x 10/100 Base-T Ethernet
128 MBs
CA-615 CacheOS 1 x 18 GB Ultra-Wide SCSI
2 x 10/100 Base-T Ethernet
384 MB
CA-625 CacheOS 2 x 18 GB Ultra-Wide SCSI
2 x 10/100 Base-T Ethernet
768 MB
CA-645 CacheOS 4 x 18 GB Ultra-Wide SCSI
2 x 10/100 Base-T Ethernet
1 GB
SA-710 CacheOS Server Edition
1 x 20 GB IDE 2 x 10/100 Base-T Ethernet
512 MB
SA-725 CacheOS Server Edition
2 x 18 GB Ultra-Wide SCSI
2 x 10/100 Base-T Ethernet
1 GB
SA-745 CacheOS 4 x 18 GB Ultra- 2 x 10/100 Base-T 1 GB

CacheFlow 600/700 Series Installation Guide
2
Model
Operating System
Disk Drives
Network
Memory
Server Edition Wide SCSI Ethernet Visit the CacheFlow Web site for the latest support bulletins and technical notes.
CacheFlow 600/700 Series Content Accelerators are Web-caching appliances that accelerate Internet response performance time. CacheFlow 600/700 Series Content Accelerators support traffic loads of up to 45MB/s.
Figure 1-1 A CacheFlow 600/700 Series Content Accelerator
Serial Port You can use the serial port connector for the initial setup, if you choose to do so.

Key Features of CacheFlow 600/700 Series Content Accelerators
3
Figure 1-2 The serial port connector
Network Adapters CacheFlow 600/700 Series Content Accelerators have two full-duplex, auto-sensing Ethernet network adapters supporting 10/100 Base-T connections. The adapter to the left is Ethernet 0 and the adapter to the right is Ethernet 1.
Figure 1-3 Connectors for built-in network adapters

CacheFlow 600/700 Series Installation Guide
4
Front Panel Configuration Using the front panel LCD and joystick is the quickest method for setting the Content Accelerator’s initial network configuration and connecting it to the network.
Figure 1-4 Front panel configuration
CacheOS and CacheOS Server Edition Operating Systems CacheFlow 600 Series Content Accelerators run the CacheOS operating system. CacheFlow 700 Series Content Accelerators run the CacheOS Server Edition operating system. Refer to the CacheOS Management and Configuration Guide or to the CacheOS Server Edition Management and Configuration Guide for additional information.

5
Chapter 2 - Installing CacheFlow 600/700 Series Content Accelerators This chapter describes how to unpack, assemble, install and operate CacheFlow 600/700 Series Content Accelerators.
Unpacking CacheFlow 600/700 Series Content Accelerators CacheFlow 600/700 Series Content Accelerators are shipped fully assembled. When you receive your unit, verify that the following items are contained in the shipment:
Item Quantity CacheFlow 600/700 Series Content Accelerator 1
AC Power Cord 1
Serial Cable 1
CacheFlow 600/700 Series Installation Guide 1 If any of the items are missing or damaged, contact your CacheFlow Customer Service representative.

CacheFlow 600/700 Series Installation Guide
6
Safety Instructions Following these safety instructions will minimize the risk of personal injury or equipment damage.
General safety instructions • Follow all warnings and instructions marked on the product and included in this
manual.
Rack-mounting safety instructions • Verify that the rack is rated to support the installed equipment. • Ensure that the unit’s weight is distributed properly. • The rack must allow sufficient space to provide adequate air circulation. Allow a
minimum three-inch clearance in front of and behind the unit.
Installing CacheFlow 600/700 Series Content Accelerators in an Equipment Rack Depending upon the model type, CacheFlow 600/700 Series Content Accelerators weigh from 17.5 to 23 pounds. At a minimum, the Content Accelerator must be secured to the rack by using either the middle mounting holes or both the front and rear mounting holes on both the left and right sides. You can also use any of the unused mounting holes on the sides to further secure the unit to the equipment rack.

Chapter 2 - Installing the 600/700 Series Content Accelerators
7
Powering Content Accelerators On and Off Follow this procedure to power cycle CacheFlow 600/700 Series Content Accelerators.
To power on CacheFlow 600/700 Series Content Accelerators 1. Press the power supply switch on the rear of the unit to ON.
To power off CacheFlow 600/700 Series Content Accelerators 1. Press the power supply switch on the back of the unit to OFF, and verify that the unit
powers down.
Figure 2-2 Power switch for the CacheFlow 600/700 Series Content Accelerator
Using the Front Panel LCD and Joystick Using the front panel LCD and joystick is the quickest method for setting the Content Accelerator’s initial network configuration and connecting it to the network. This section details operation of the joystick for inputting configuration settings.
Note the following when using the joystick • Pressing the joystick inward for one second switches the system LCD between Edit
Mode and Review Mode. This is called “Joystick Enter”. • Pressing the joystick up or down in Edit Mode increments or decrements the numeric
value.

CacheFlow 600/700 Series Installation Guide
8
• Pressing the joystick to the left or to the right in Edit Mode moves the cursor between fields.
• Pressing the joystick up or down in Review Mode cycles the display through the list of current network settings.
Note When the system is in Edit Mode, the cursor blinks. When the system is in Review Mode, the cursor does not blink.
Once the machine completes its powering-on sequence, you’ll see a series of screens displaying various network system statistics.
Viewing Disk Drive Activity The Disk Drive LED flashes when a hard drive is accessed.
Figure 2-3 Disk Drive LED

9
Chapter 3 - First-Time Setup of CacheFlow 600/700 Series Content Accelerators CacheOS and CacheOS Server Edition have two user interfaces: a Graphical User Interface (GUI) and a Command Line Interface (CLI). Either interface can be used to perform management and maintenance tasks. Most tasks can be performed by using either the GUI or CLI. In this reference, tasks are described by using both interfaces, unless only one interface is available.
Connecting to Content Accelerators Because a new Content Accelerator does not yet have a network or administrator configuration, this initial configuration must be performed. The quickest and simplest way to set up the Content Accelerator’s initial network configuration and connect it to the network, because no additional equipment is required, is to use the front panel LCD and joystick. You can also perform this task by using a direct connection between the Content Accelerator and one of the following:
• Stand-alone serial terminal • PC with an available serial (COM) port After the initial network configuration has been accomplished, the Content Accelerator can be connected to the network.

CacheFlow 600/700 Series Installation Guide
10
Note When you connect the Content Accelerator to a PC serial port, use the serial cable supplied with the system. If you connect the Content Accelerator to a stand-alone serial terminal, use the cable connected to the serial terminal.
Connecting to Content Accelerators Using a Serial Terminal This method for performing initial system setup is straightforward, because no PC serial port issues become involved.
To connect using a stand-alone serial terminal 1. Connect the serial terminal’s cable to the Content Accelerator’s serial port. 2. Turn on the serial terminal and verify the terminal is set as follows
• Baud rate: 9600 bps • Data bits: 8 • Parity: none • Stop bits: 1 • Flow control: none • Smooth-scroll: disabled
3. Turn on the Content Accelerator 4. Once the system has finished booting, a configuration alert is displayed.
******************* CONFIGURATION ALERT *******************
One or more IP addresses have not been configured.
System startup cannot continue until the missing IP
addresses are provided.
********** SYSTEM STARTUP TEMPORARILY SUSPENDED **********
Press “enter” three times to activate the setup console 5. Press Enter three times to activate the setup console.
Chapter 3 - First-Time Setup of a Content Accelerator
11
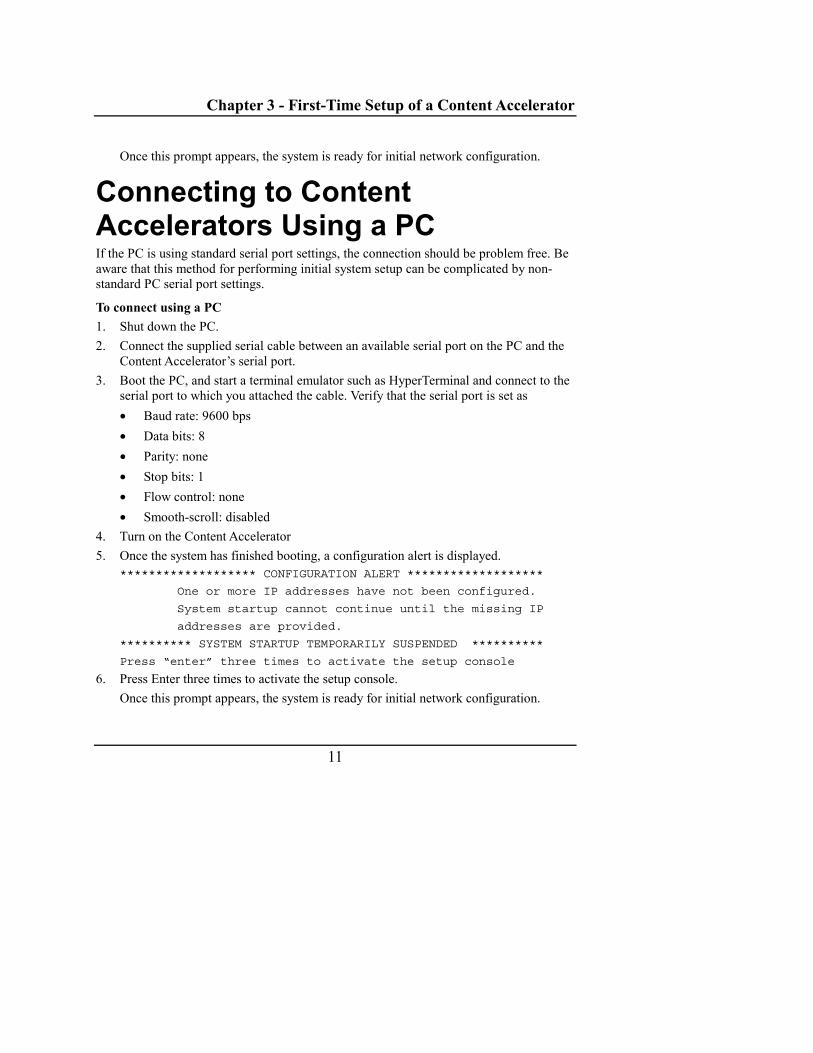
Once this prompt appears, the system is ready for initial network configuration.
Connecting to Content Accelerators Using a PC If the PC is using standard serial port settings, the connection should be problem free. Be aware that this method for performing initial system setup can be complicated by non-standard PC serial port settings.
To connect using a PC 1. Shut down the PC. 2. Connect the supplied serial cable between an available serial port on the PC and the
Content Accelerator’s serial port. 3. Boot the PC, and start a terminal emulator such as HyperTerminal and connect to the
serial port to which you attached the cable. Verify that the serial port is set as • Baud rate: 9600 bps • Data bits: 8 • Parity: none • Stop bits: 1 • Flow control: none • Smooth-scroll: disabled
4. Turn on the Content Accelerator 5. Once the system has finished booting, a configuration alert is displayed.
******************* CONFIGURATION ALERT *******************
One or more IP addresses have not been configured.
System startup cannot continue until the missing IP
addresses are provided.
********** SYSTEM STARTUP TEMPORARILY SUSPENDED **********
Press “enter” three times to activate the setup console
6. Press Enter three times to activate the setup console. Once this prompt appears, the system is ready for initial network configuration.

CacheFlow 600/700 Series Installation Guide
12
Initial Network Configuration Using a Direct Connection Once you have used one of the methods mentioned above to establish direct communication with the Content Accelerator, you can configure network and user account settings. After the initial configuration is completed, the Content Accelerator can be connected to the network.
To perform an initial network configuration 1. Establish communications with the Content Accelerator, detailed in the previous
section. 2. If you have more than one network adapter installed, a Configuring adapter
[0] prompt is displayed. Type the number of the adapter to configure. 3. At the IP address prompt, type the IP address reserved for the Content Accelerator. 4. At the IP subnet mask prompt, type the subnet mask for the IP address. 5. At the IP gateway prompt, type the address of the gateway on the network. 6. At the DNS server prompt, type the address of the DNS server on the network.
CacheOS displays a summary of the IP address information that has been entered. 7. At the prompt to change the Content Accelerator’s IP addresses, type y or n as
appropriate. If you type n, you are prompted to enter these values again.
8. At the prompt to create a console user account, type y. 9. Enter a console username and password, and the enable password as prompted.
Important To prevent unauthorized access to the Content Accelerator, the console username and passwords should be given only to those who will administer the Content Accelerator.
10. At the prompt to restrict access to an authorized workstation, type y or n, as appropriate. If you type y, you are prompted to enter information about the workstation(s) to which access should be restricted.

Chapter 3 - First-Time Setup of a Content Accelerator
13
The Initial Network Configuration is now complete.
Session Example ******************* CONFIGURATION ALERT *******************
One or more IP addresses have not been configured.
System startup cannot continue until the missing IP
addresses are provided.
********** SYSTEM STARTUP TEMPORARILY SUSPENDED **********
Press “enter” three times to activate the setup console
Welcome to the CacheOS Setup console
---------------------- (page 1 of 4) ---------------------
DIRECTIONS:
This setup console is used to assign IP addresses to
the CacheOS device. After assigning the IP addresses
you can connect to the command line interface or
Web interface to perform additional management tasks.
IP address [0.0.0.0]: 10.25.36.47
IP subnet mask [0.0.0.0]: 255.255.0.0
IP gateway [0.0.0.0]: 10.25.0.1
DNS server [0.0.0.0]: 10.25.0.2
You have entered the following IP addresses:
IP address: 10.25.36.47
IP subnet mask: 255.255.0.0
IP gateway: 10.25.0.1
DNS server: 10.25.0.2
Would you like to change any of them? Y/N [No]n
---------------------- (page 2 of 4) ---------------------
DIRECTIONS:
You can connect to the command line interface or
Web interface to perform additional management tasks.

CacheFlow 600/700 Series Installation Guide
14
WARNING - access to the CacheOS device is currently
unrestricted and it may be configured by unauthorized
persons.
Would you like to create a console user account now? Y/N [Yes]y
Enter console username: Admin
Enter console password: *****
Verify password: *****
Enter enable password: *****
Verify password: *****
---------------------- (page 3 of 4) ---------------------
DIRECTIONS:
Access to the command line interface and Web interface
can be restricted to specific workstations, identified
by their IP address.
This setup console allows you to add one IP address to the
list of authorized workstations (additional workstations
may be configured later from either the command line
interface or Web interface).
The CacheOS device can currently be accessed from
any workstation.
Would you like to restrict access to an authorized workstation?Y/N [No]n
---------------------- (page 4 of 4) ---------------------
The CacheOS device has been successfully configured
to use IP address: “10.25.36.47”
You can connect to the command line interface or
Web interface to perform additional management tasks.
To connect to the command line interface, open the
following location from your Telnet application:
10.25.36.47
To connect to the Web interface, go to the following
location with your Internet browser:

Chapter 3 - First-Time Setup of a Content Accelerator
15
http://10.25.36.47:8081/
The CacheOS device is password protected and may be
accessed from any workstation.
---------------- CONFIGURATION COMPLETE ------------------
Press Enter three times to activate the serial console
Initial Network Configuration Using the Front Panel LCD and Joystick Using the front panel LCD and joystick is the quickest method for setting the Content Accelerator’s initial network configuration and connecting it to the network. Note that front panel setup only allows configuration of basic network IP addresses.
To perform initial network configuration using the front panel LCD and joystick 1. Power the system on. 2. When the Push to configure prompt appears, press Joystick Enter. 3. At the PIN prompt, press Joystick Enter.
A PIN is not entered at this point because one has not yet been assigned to the Content Accelerator. A help screen appears.
Note When the system is in Edit Mode, the cursor blinks. When the system is in Review Mode, the cursor does not blink.
Note The PIN is set using the security command in the CLI. Once set, the PIN must be provided before any changes to the system configuration are allowed through the joystick interface.
4. Press the Joystick down to begin defining network settings.

CacheFlow 600/700 Series Installation Guide
16
5. Switch to Edit Mode by pressing Joystick Enter. Enter the requested information by pressing the joystick up, down or sideways, switching back to Review Mode when done.
6. Press the joystick down to display the next setting. Continue entering requested information, switching from Review Mode to Edit Mode and back as needed.
7. After all of your changes are made, confirm your entries by pressing the joystick as the system requests. If you choose to review your entries before confirming them, press the joystick in the direction the system indicates.
Logging on to the Content Accelerator After the Initial Network Configuration is complete and the Content Accelerator has been connected to the network, you can use a Telnet application or a serial terminal emulator, such as HyperTerminal, to access the CLI. If you connect by using Telnet, you are prompted for the console username and password entered when you initially configured the Content Accelerator. If you connect by using a serial terminal emulator, you are prompted for a password only after you issue the enable command.
The CLI uses two passwords: The CacheOS or CacheOS Server Edition console password is required to establish a connection to the interface, and the enable password can be set to restrict access to the privileged mode configuration options. If you have forgotten the username or password, you can reset them by using the Setup console.

17
Chapter 4 - Configuring CacheFlow 600/700 Series Content Accelerators This chapter describes how to configure CacheFlow 600/700 Series Content Accelerators for your environment by using CacheOS or CacheOS Server Edition.
Once the unit is installed through the Serial console and Setup console, you can use the CacheOS or CacheOS Server Edition Web interface or command line interface (CLI) to configure Content Accelerators.
When you initially configure CacheFlow 600/700 Series Content Accelerators, perform the following tasks • Configure the network adapters • Add DNS servers • Set the CacheFlow 600/700 Series Content Accelerators name • Set the CacheOS time
Accessing the Command Line Interface (CLI) The CLI allows you to manage and configure the Content Accelerator by using a Telnet connection or the Serial console. The Serial console allows you to access the Setup console. To access the Serial console, you must first connect a terminal to the Content Accelerator’s serial port.
CacheFlow 600/700 Series Installation Guide
18
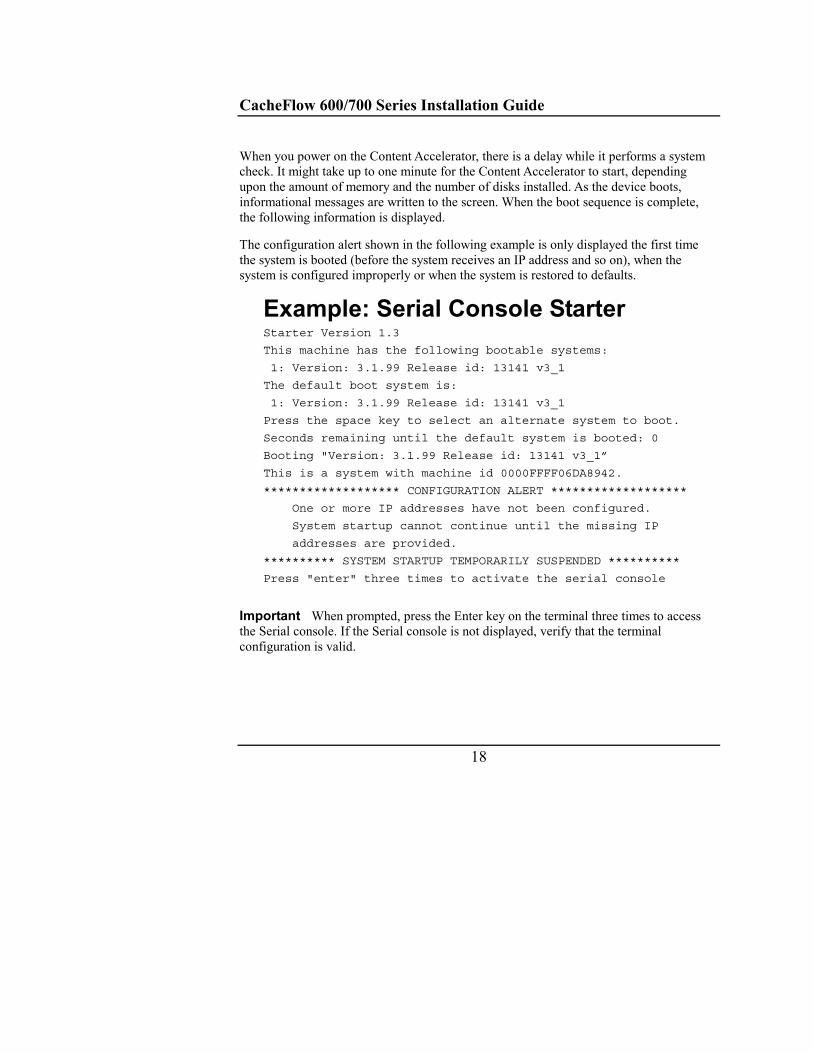
When you power on the Content Accelerator, there is a delay while it performs a system check. It might take up to one minute for the Content Accelerator to start, depending upon the amount of memory and the number of disks installed. As the device boots, informational messages are written to the screen. When the boot sequence is complete, the following information is displayed.
The configuration alert shown in the following example is only displayed the first time the system is booted (before the system receives an IP address and so on), when the system is configured improperly or when the system is restored to defaults.
Example: Serial Console Starter Starter Version 1.3
This machine has the following bootable systems:
1: Version: 3.1.99 Release id: 13141 v3_1
The default boot system is:
1: Version: 3.1.99 Release id: 13141 v3_1
Press the space key to select an alternate system to boot.
Seconds remaining until the default system is booted: 0
Booting "Version: 3.1.99 Release id: 13141 v3_1”
This is a system with machine id 0000FFFF06DA8942.
******************* CONFIGURATION ALERT *******************
One or more IP addresses have not been configured.
System startup cannot continue until the missing IP
addresses are provided.
********** SYSTEM STARTUP TEMPORARILY SUSPENDED **********
Press "enter" three times to activate the serial console
Important When prompted, press the Enter key on the terminal three times to access the Serial console. If the Serial console is not displayed, verify that the terminal configuration is valid.

Chapter 4 – Configuring 600/700 Series Content Accelerators
19
Accessing the Web Interface The Web interface is a powerful, Java-based application that allows you to manage, configure, monitor, and upgrade the Content Accelerator from any location.
Go to the IP address of the Content Accelerator by using your Web browser and specify port 8081. Port 8081 is the default management port. For example, if the IP address configured using the Serial console was 10.25.36.47, enter the URL http://10.25.36.47:8081 in your Web browser.
The Web interface is composed of a set of Web pages and Java applets stored on the Content Accelerator. CacheOS acts as a Web server on the management port to serve these pages and applets. From the home page, you can access the management applets, statistics applets and documentation. The Web interface is supported with a complete online help facility to assist you in defining the various configuration options. The Web interface is described in detail in the CacheOS or CacheOS Server Edition Management and Configuration Guide.
Figure 4-1 Web Interface Home Page
CacheFlow 600/700 Series Installation Guide
20
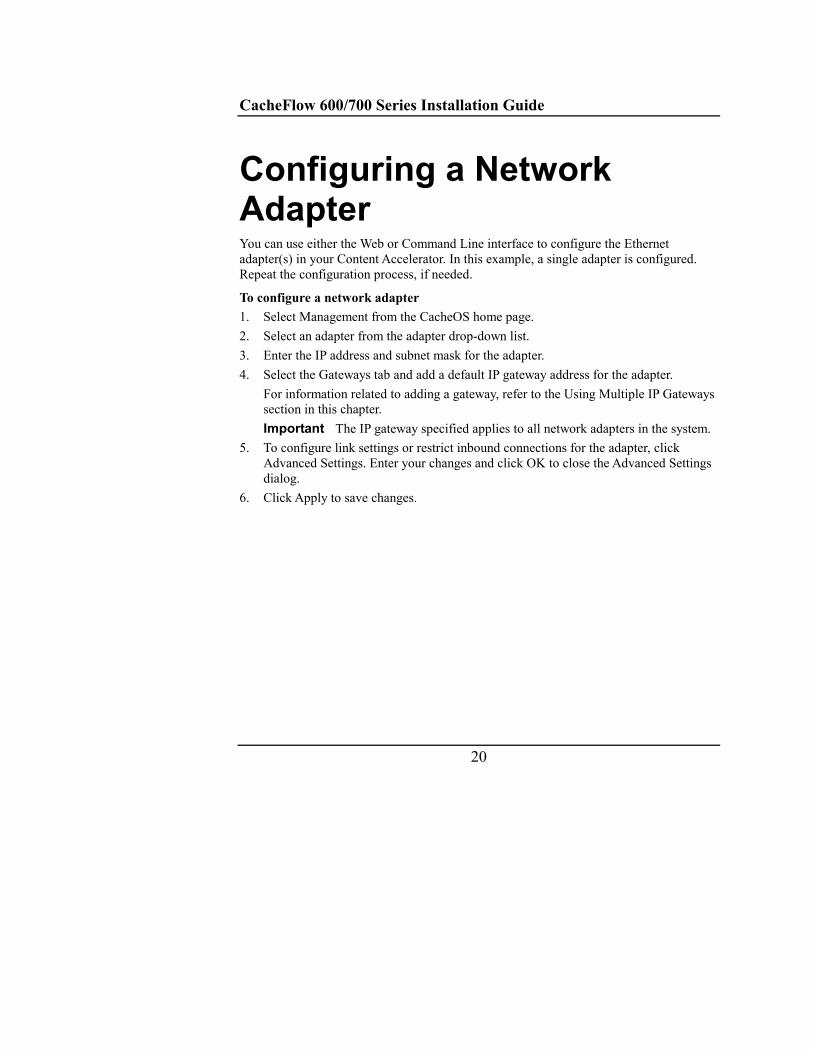
Configuring a Network Adapter You can use either the Web or Command Line interface to configure the Ethernet adapter(s) in your Content Accelerator. In this example, a single adapter is configured. Repeat the configuration process, if needed.
To configure a network adapter 1. Select Management from the CacheOS home page. 2. Select an adapter from the adapter drop-down list. 3. Enter the IP address and subnet mask for the adapter. 4. Select the Gateways tab and add a default IP gateway address for the adapter.
For information related to adding a gateway, refer to the Using Multiple IP Gateways section in this chapter. Important The IP gateway specified applies to all network adapters in the system.
5. To configure link settings or restrict inbound connections for the adapter, click Advanced Settings. Enter your changes and click OK to close the Advanced Settings dialog.
6. Click Apply to save changes.
Chapter 4 – Configuring 600/700 Series Content Accelerators
21
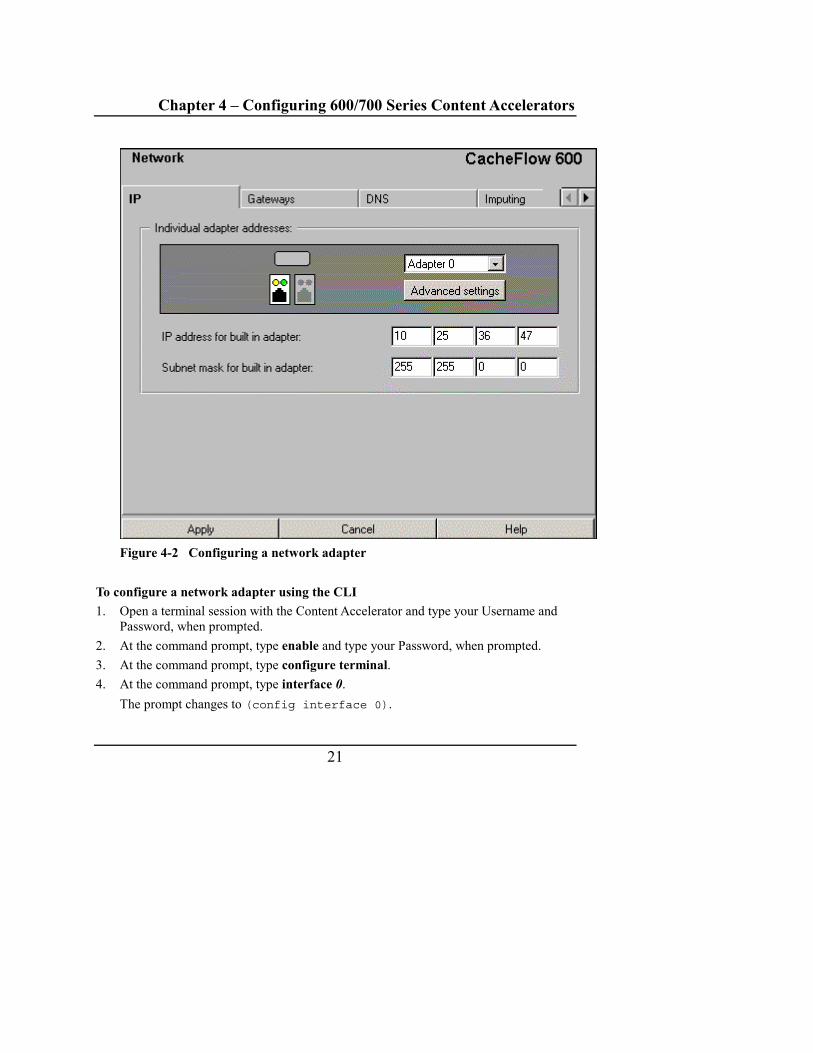
Figure 4-2 Configuring a network adapter
To configure a network adapter using the CLI 1. Open a terminal session with the Content Accelerator and type your Username and
Password, when prompted. 2. At the command prompt, type enable and type your Password, when prompted. 3. At the command prompt, type configure terminal. 4. At the command prompt, type interface 0.
The prompt changes to (config interface 0).

CacheFlow 600/700 Series Installation Guide
22
5. Type ip-address 10.25.36.47 to set the adapter IP address. 6. Type subnet-mask 255.255.0.0 to set the subnet in which the Content Accelerator’s
IP address is located. 7. Type exit to return to the (config) prompt.
Adding DNS Servers A single primary DNS server is entered by using the Setup console when initial system setup is performed. You can also define single or multiple additional primary and alternate DNS servers after initial setup is complete.
If you have more than one DNS server defined, the method CacheOS uses to determine when to failover to the next DNS server, or return an error to the client, is as follows:
The first primary DNS server is always tried first. When a valid connection is made, no further attempts are made to contact any other DNS server for the request.
If the response from the first primary DNS server is “Name not found”, CacheOS attempts to connect through the first alternate DNS server, if one is defined. If no alternate DNS servers have been defined, an error is returned after the first primary DNS server returns “Name not found.” If the first alternate DNS server also responds with “Name not found,” an error is returned to the client, and no other connections are attempted for the request.
If the response from the first primary DNS server is nothing, or anything other than “Name not found,” CacheOS attempts to connect through the list of primary DNS servers, and then alternate DNS servers, in the order defined in the Web or CLI Management console, until a connection is made, or the end of the DNS server list is reached. If the end of the DNS server list is reached without a connection, an error is returned to the client, and no other connections are attempted for the request. If at any time a “Name not found” response is received as CacheOS works its way through the DNS server list, CacheOS behaves as described in the preceding paragraph.

Chapter 4 – Configuring 600/700 Series Content Accelerators
23
Split DNS Support Customers with split DNS server configuration can choose to populate an Alternate DNS server list as well as the Primary DNS server list. This scheme is typically employed in environments that maintain private internal DNS servers containing organizational DNS naming information for intranet communications, and external DNS servers containing DNS naming information for the Internet. In CacheOS, the internal DNS servers would normally be placed in the Primary list, while external DNS servers would populate the Alternate list.
To enter an additional primary DNS server 1. Select Management from the CacheOS home page. 2. Select the DNS tab. 3. Click New. 4. Enter the IP address of the DNS server and click OK. 5. Click Apply to save changes.
To enter an additional primary DNS server using the CLI 1. Open a terminal session with the Content Accelerator and type your Username and
Password, when prompted. 2. At the command prompt, type enable and type your Password, when prompted. 3. At the command prompt, type configure terminal. 4. At the command prompt, type dns server 10.25.0.1. 5. Type exit to return to the (config) prompt.
To enter an alternate DNS server 1. Select Management from the CacheOS home page. 2. Select the DNS tab. 3. Select Alternate DNS in the drop down list. 4. Click New. 5. Enter the IP address of the DNS server and click OK. 6. Click Apply to save changes.

CacheFlow 600/700 Series Installation Guide
24
To enter an alternate DNS server using the CLI 1. Open a terminal session with the Content Accelerator and type your Username and
Password, when prompted. 2. At the command prompt, type enable and type your Password, when prompted. 3. At the command prompt, type configure terminal. 4. At the command prompt, type dns alternate 10.25.0.2. 5. Repeat step 4 until alternate DNS servers have been defined. 6. Type exit to return to the (config) prompt.

Chapter 4 – Configuring 600/700 Series Content Accelerators
25
Figure 4-3 Entering DNS servers
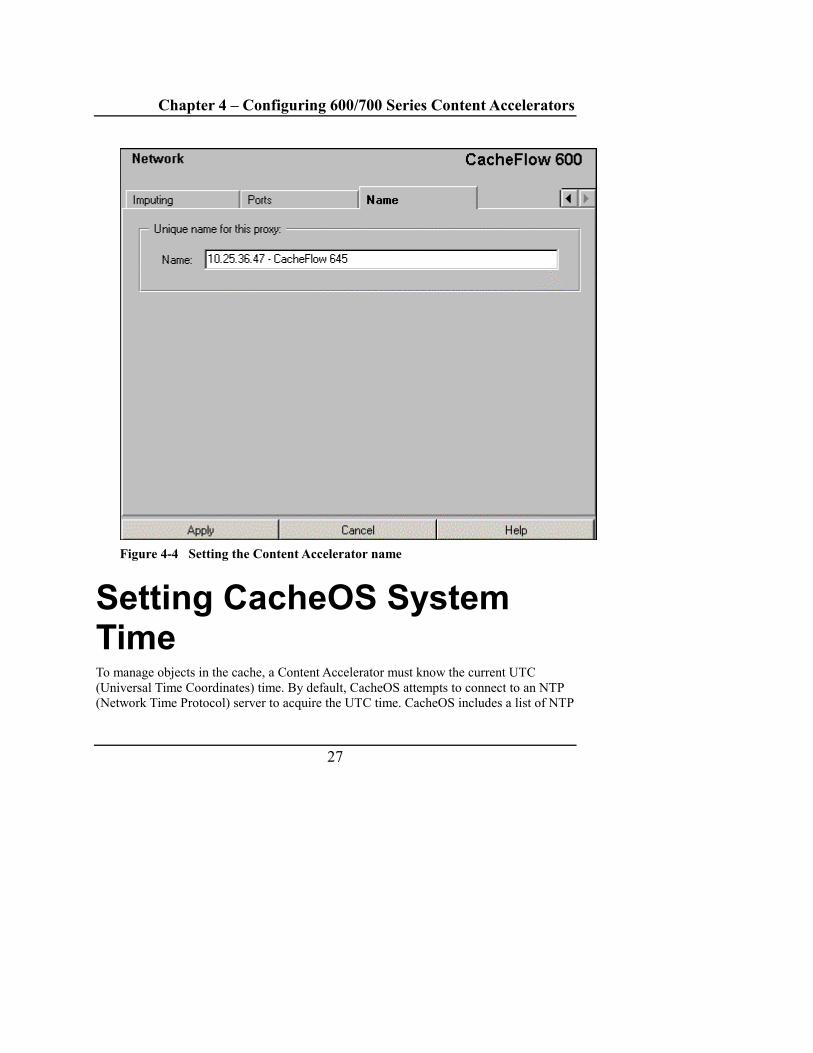
Setting the CacheFlow 600/700 Name You can assign a name to a Content Accelerator. Any descriptive name that helps identify the system will do.

CacheFlow 600/700 Series Installation Guide
26
To set the Content Accelerator name 1. Select Management from the CacheOS home page. 2. Select the Name tab. 3. Enter the Content Accelerator name in the name field. 4. Click Apply to save changes.
To set the Content Accelerator name using the CLI 1. Open a terminal session with the Content Accelerator and type your Username and
Password, when prompted. 2. At the command prompt, type enable and type your Password, when prompted. 3. At the command prompt, type configure terminal. 4. At the command prompt, type hostname name to set the Content Accelerator name. 5. Type exit to return to the (config) prompt.
Chapter 4 – Configuring 600/700 Series Content Accelerators
27
Figure 4-4 Setting the Content Accelerator name
Setting CacheOS System Time To manage objects in the cache, a Content Accelerator must know the current UTC (Universal Time Coordinates) time. By default, CacheOS attempts to connect to an NTP (Network Time Protocol) server to acquire the UTC time. CacheOS includes a list of NTP
CacheFlow 600/700 Series Installation Guide
28
servers available on the Internet, and attempts to connect to them in the order they appear in the NTP server list on the NTP tab. If the Content Accelerator cannot access any of the listed NTP servers, the UTC time must be set manually.
To acquire UTC time from an NTP server 1. Select Management from the CacheOS home page. 2. Select the Time applet. 3. Verify that the Enable NTP checkbox is enabled. 4. To set your local time, select a time zone from the Timezone drop-down list.
Once the local time zone is selected, event and access logs record the local time instead of GMT.
5. Click Acquire UTC time. 6. Click Apply to save changes.
To acquire UTC time from an NTP server using the CLI 1. Open a terminal session with the CacheFlow device and type your Username and
Password, when prompted. 2. At the command prompt, type enable and type your Password, when prompted. 3. At the command prompt, type acquire-utc.
If NTP is disabled, an error is displayed.
To set UTC time manually 1. Select Management from the CacheOS home page. 2. Select the Time applet. 3. Clear the Enable NTP checkbox.
The UTC time and date fields become editable when NTP is disabled. 4. To set your local time, select a time zone from the Timezone drop-down list.
Once the local time zone is selected, event and access logs record the local time instead of GMT.
5. Click Pause to stop the system clock. 6. Enter the current UTC time and date in the UTC time and date fields.

Chapter 4 – Configuring 600/700 Series Content Accelerators
29
7. Click Resume to start the system clock. 8. Click Apply to save changes.
To set UTC time manually using the CLI 1. Open a terminal session with the CacheFlow device and type your Username and
Password when prompted. 2. At the command prompt, type enable and type your Password when prompted. 3. At the command prompt, type configure terminal. 4. At the (config) prompt, type clock year # to set the year. Enter the year in four
digit format (e.g., 2000). 5. At the (config) prompt, type clock day # to set the day of the month. Valid values
are 1 – 31. 6. At the (config) prompt, type clock hour # to set the hour of the day. Valid values
are 0 – 23. 7. At the (config) prompt, type clock minute # to set the minutes. Valid values are 0
– 60. 8. At the (config) prompt, type clock seconds # to set the seconds. Valid values are 0
– 60. 9. At the (config) prompt, type show timezones to display a list of timezones and
their associated numbers. 10. At the (config) prompt, type timezone # to set the local timezone. 11. At the (config) prompt, type exit to exit configuration mode.

CacheFlow 600/700 Series Installation Guide
30
Figure 4-5 Setting the system time
Where to Go From Here Once the CacheFlow 600/700 series Content Accelerator is installed and configured, it begins to cache Web objects. As soon as the Content Accelerator is running, you will see disk and network activity as it begins maintaining the cache.

Chapter 4 – Configuring 600/700 Series Content Accelerators
31
Once the CacheFlow 600/700 Series Content Accelerators is operational, you can configure one of the following • Configure your routers or load-balancing switches to forward requests transparently
to the device. • Configure the client instructions and notify users that the Content Accelerator is
available. If you do not use transparent caching, each browser must be configured separately to use the Content Accelerator. The client instructions make it easy for your users to modify their configuration. Refer to the CacheOS Management and Configuration Guide or to the CacheOS Server Edition Management and Configuration Guide for more information.
Security Considerations Once CacheOS or CacheOS Server Edition is configured and running properly, secure the device to ensure that it is managed and used only as authorized.
You can restrict access to the device by using the following configuration options • You can limit management console access to specific IP addresses or subnets. To set
console restrictions by using the CLI, refer to the security command. To set console restrictions by using the Web interface, see Setting Access Restrictions in the CacheOS Management and Configuration Guide or in the CacheOS Server Edition Management and Configuration Guide.
• You can restrict user access to CacheOS by using the ACL (access control list) options of the filter list. To create an ACL by using the CLI, refer to the filter-list command. To create an ACL by using the Web interface, see Using a Filter List in the CacheOS Management and Configuration Guide or in the CacheOS Server Edition Management and Configuration Guide.
• You can disable proxy mode to prevent unauthorized use of the cache. To turn off the proxy mode, set the proxy port to zero. To change the proxy port by using the CLI, refer to the http-proxy-port command. To change the proxy port by using the Web interface, see Setting IP Ports in the CacheOS Management and Configuration Guide or in the CacheOS Server Edition Management and Configuration Guide.

CacheFlow 600/700 Series Installation Guide
32
There are numerous other management options, settings and statistics you can review. Refer to the CacheOS or CacheOS Server Edition Management and Configuration Guide for a complete list of basic and advanced configuration procedures by using both the CLI and the Web interface.
33
Chapter 5 - Troubleshooting This chapter describes how to locate and solve common problems during the installation by using the CacheFlow 600/700 Series Content Accelerator.
Testing CacheFlow 600/700 Series Content Accelerators If you suspect a problem with the CacheFlow device, you can test its operation and connection by using the CLI. You can use the ping and traceroute commands to test the network connection. From enable mode you can use the test command to retrieve an object by using CacheOS, or to run a loopback test to verify that the device is operational.
Cannot Access the Serial Console When connecting to the Serial console, you must configure the terminal emulator for the correct settings. You can connect to the Serial console by using a terminal, a terminal server or a computer running a terminal emulator. For detailed instructions on connecting the terminal, see Connecting CacheFlow 600/700 Series Content Accelerators to a Terminal.
CLI Session Times Out When you have a Telnet session to the CLI, that session will remain open as long as there is activity. If you leave the session idle, the connection will eventually timeout and you

CacheFlow 600/700 Series Installation Guide
34
will have to reconnect. The default timeout is five minutes. You can set the timeout by using the line-vty command-in-configure mode.
CLI Limited to Four Sessions The CLI is limited to four active Telnet sessions (and one Serial console session). When you try to connect a fifth Telnet session, you will receive a message saying that no more sessions are available. To connect, you will have to wait for one of the active sessions to close.
Web Interface is Not Accessible When you connect to the CacheFlow 600/700 Series Content Accelerator Web management port from a Web browser, the Web interface should be displayed. If the Web browser fails when attempting to connect to the Content Accelerator, follow these steps to help identify the problem:
• Verify that you have typed the correct IP address and port (the default port is 8081) for the Content Accelerator in the Web browser. The only way that you can verify that the address the Content Accelerator is using without the Web interface is to connect to the Serial console and display the network configuration. See Connecting CacheFlow 600/700 Series Content Accelerators to a Terminal.
• Verify that your workstation is configured and working properly by connecting to other Web sites (such as www.cacheflow.com). If your browser is configured to use the Content Accelerator as the proxy server and there is a problem with the Content Accelerator, this test might fail.
• If you are accessing a CacheFlow 600/700 Series Content Accelerator located on a remote network (any segment other than the segment where your workstation is attached), verify that other servers on that network are accessible.
Chapter 5 - Troubleshooting
35
• Try pinging the IP address to verify that the Content Accelerator is accessible from the workstation. If the Content Accelerator does not respond to the ping, verify that it is operational, as described earlier.
Web Interface Username and Password Fail The Web interface can be protected with a username and password. If the username and password fail, you can reset them by using the Serial console. See Initial Network Configuration for information on using the Serial console.
Web Interface Applets Not Displayed The Web interface requires Java and JavaScript. You must use a Web browser that supports Java and JavaScript, and the Web browser must have Java and JavaScript enabled. Netscape 4.0 and later, and Internet Explorer 4.0 and later are recommended browsers. If your browser encounters an error when loading an applet, restart the browser.
Web Interface Java Errors Occur When you upgrade the Web interface, you must clear the local cache and restart the browser to guarantee that the new Java components for the Web interface are loaded. Each Web browser handles Java applets in a different way. Some browsers do not reload applets until their cache is cleared or until the browser is restarted.

CacheFlow 600/700 Series Installation Guide
36
Client HTML Requests Fail When a request for a Web document fails, it indicates one of the following:
• The Web browser is not properly configured for the CacheFlow 600/700 series Content Accelerator
• The Content Accelerator cannot access the requested document • The Content Accelerator is not properly configured • The Content Accelerator is not functioning
To isolate client HTML request failures • If the Content Accelerator is used to access the Internet, and the Content Accelerator
has been working properly, the most likely cause of failed requests is the route between the Content Accelerator and the Internet or intranet. Before you spend time troubleshooting the Content Accelerator, verify that your connection to the Internet by using the ping and traceroute commands from the CLI. If you are able to ping the destination from the Content Accelerator, use the test command to verify that the device can get the object. For information on the ping, traceroute and test commands, refer to the CacheOS Management and Configuration Guide or to the CacheOS Server Edition Management and Configuration Guide. If the request fails, try other HTML requests to verify that all requests fail.
• The Content Accelerator can be configured to deny access to address groups. If the Content Accelerator is configured for forwarding or filtering, verify that the requested address does not match a denied subnet and mask. To configure deny settings in the Web interface, select Management from the home page and then ICP/Forwarding.
• If your network is not configured for transparency, check the Web browser to see if it is by using a PAC file for auto-configuration. If the Web browser is configured to use a PAC file, verify that the address of the PAC file is correct, and that the file is accessible. Refer to the CacheOS Management and Configuration Guide or to the CacheOS Server Edition Management and Configuration Guide for additional information. If auto-configuration is not being used, check the Web browser's proxy configuration. If you are not using transparency, the Web browser must be

Chapter 5 - Troubleshooting
37
configured for the Content Accelerator's IP address and port. Refer to the CacheOS Management and Configuration Guide or to the CacheOS Server Edition Management and Configuration Guide for information on configuring clients.
• If the correct IP address and port for the proxy server is specified in the Web browser, try pinging the IP address to verify that the Content Accelerator is accessible from the workstation. If it does not respond to the ping, verify that it is operational as described earlier. Also verify that you can ping other nodes on the network. If you can ping the Content Accelerator, try pinging the workstation from the Content Accelerator CLI.
• If the Content Accelerator responds to the ping, verify that the Content Accelerator's configuration is valid. If it is configured to forward requests, verify that the server to which the Content Accelerator forwards requests is working. If the Content Accelerator is not forwarding requests, check the default gateway address and DNS address.
• If the Content Accelerator's default gateway address and DNS addres are correct, try pinging each address from the CLI to verify that the servers are running. Be sure to ping the gateway and DNS server from the same network segment where the Content Accelerator is connected.
• If the default gateway is accessible, the problem most likely lies outside the local network. To verify that the problem is not associated with the Content Accelerator, you must configure your workstation for the same gateway address as the Content Accelerator, and configure the Web browser not to use a proxy server for HTTP requests.
Client HTML Responses Are Slow If every request from the client results in a slow response, there might be a problem accessing a PAC file or the Content Accelerator.
To isolate slow client HTML responses • Check the Web browser to see if it is by using a PAC file for auto-configuration. If
the Web browser is configured to use a PAC file, verify that the address of the PAC

CacheFlow 600/700 Series Installation Guide
38
file is correct, and the file is accessible. Refer to the CacheOS Management and Configuration Guide or to the CacheOS Server Edition Management and Configuration Guide for additional information on by using PAC files. If the PAC file is not accessible, the Web browser might attempt to access the PAC file, then wait for a timeout before retrieving the object directly.
• Check the Web browser's proxy address and port. The Web browser must be configured for the Content Accelerator's IP address and port. Refer to the CacheOS Management and Configuration Guide or to the CacheOS Server Edition Management and Configuration Guide for information on configuring the clients. If the address or port is not correct, the Web browser might attempt to access the Content Accelerator, then wait for a timeout before retrieving the object directly.
• If the correct IP address and port for the proxy server is specified in the Web browser, try pinging the IP address to verify that the Content Accelerator is accessible from the workstation. If the Content Accelerator does not respond to the ping, verify that it is operational.
39
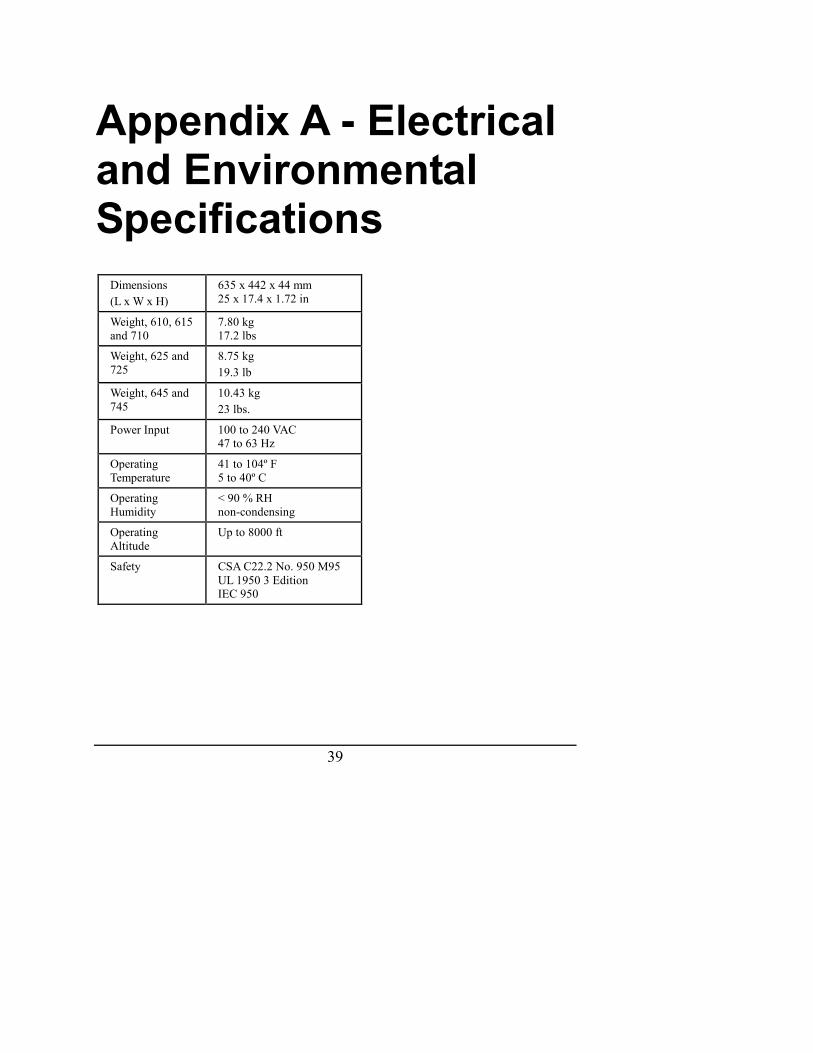
Appendix A - Electrical and Environmental Specifications
Dimensions (L x W x H)
635 x 442 x 44 mm 25 x 17.4 x 1.72 in
Weight, 610, 615 and 710
7.80 kg 17.2 lbs
Weight, 625 and 725
8.75 kg 19.3 lb
Weight, 645 and 745
10.43 kg 23 lbs.
Power Input 100 to 240 VAC 47 to 63 Hz
Operating Temperature
41 to 104º F 5 to 40º C
Operating Humidity
< 90 % RH non-condensing
Operating Altitude
Up to 8000 ft
Safety CSA C22.2 No. 950 M95 UL 1950 3 Edition IEC 950

CacheFlow 600/700 Series Installation Guide
40
Regulatory Statements IMPORTANT: Any modifications to the unit, unless expressly approved by CacheFlow, could void the user’s authority to operate the equipment.
Class A Digital Warning This equipment has been tested and found to comply with the limits for a Class A digital device, pursuant to Part 15 of the FCC rules. These limits are designed to provide reasonable protection against harmful interference when the equipment is operated in a commercial environment. This equipment generates, uses and can radiate radio frequency energy, and if not installed and used in accordance with the instruction manual, might cause harmful interference to radio communications. Operation of this equipment in a residential area is likely to cause harmful interference in which case the user are required to correct the interference at their own expense.
EC EMC Warning This is a Class A product. In a domestic environment this product might cause radio interference in which case the user might be required to take adequate measures.

Appendix A - Electrical and Environmental Specifications
41

CacheFlow 600/700 Series Installation Guide
42
Appendix A - Electrical and Environmental Specifications
43

CacheFlow 600/700 Series Installation Guide
44

Appendix A - Electrical and Environmental Specifications
45
CacheFlow 600/700 Series Installation Guide
46

Appendix A - Electrical and Environmental Specifications
47

CacheFlow 600/700 Series Installation Guide
48
This page intentionally blank.
49
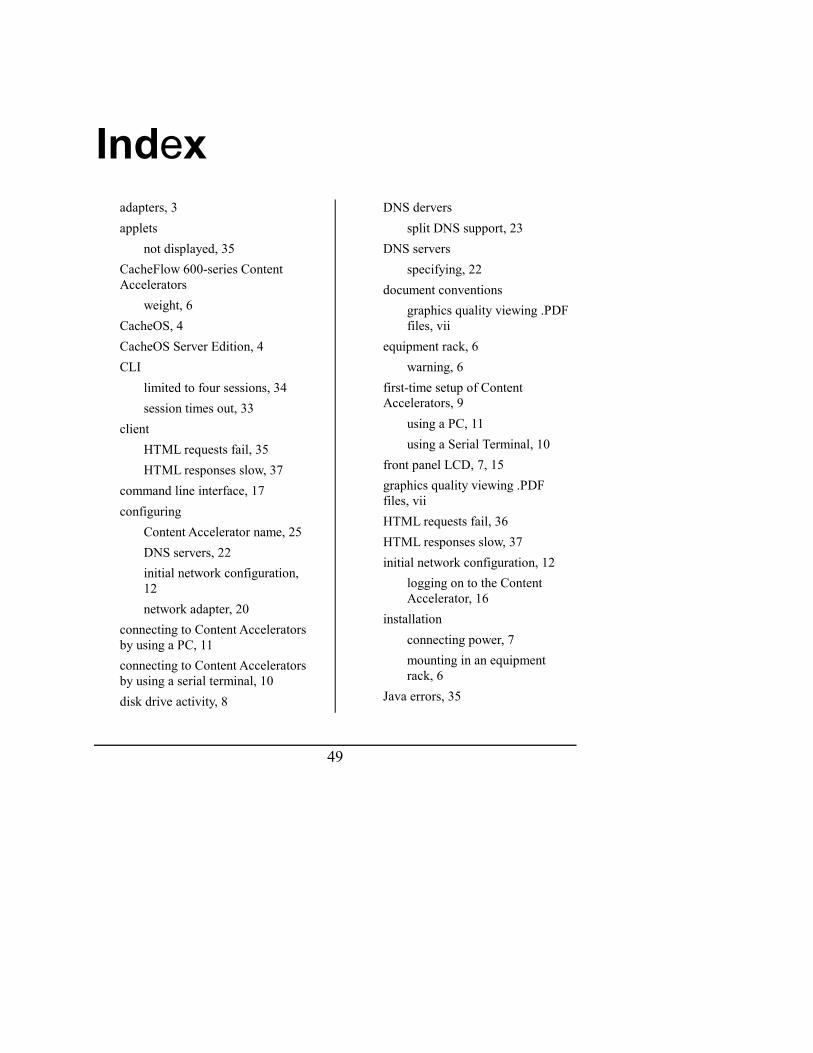
Index adapters, 3 applets
not displayed, 35 CacheFlow 600-series Content Accelerators
weight, 6 CacheOS, 4 CacheOS Server Edition, 4 CLI
limited to four sessions, 34 session times out, 33
client HTML requests fail, 35 HTML responses slow, 37
command line interface, 17 configuring
Content Accelerator name, 25 DNS servers, 22 initial network configuration, 12 network adapter, 20
connecting to Content Accelerators by using a PC, 11 connecting to Content Accelerators by using a serial terminal, 10 disk drive activity, 8
DNS dervers split DNS support, 23
DNS servers specifying, 22
document conventions graphics quality viewing .PDF files, vii
equipment rack, 6 warning, 6
first-time setup of Content Accelerators, 9
using a PC, 11 using a Serial Terminal, 10
front panel LCD, 7, 15 graphics quality viewing .PDF files, vii HTML requests fail, 36 HTML responses slow, 37 initial network configuration, 12
logging on to the Content Accelerator, 16
installation connecting power, 7 mounting in an equipment rack, 6
Java errors, 35

CacheFlow 600/700 Series Installation Guide
50
joystick, 7, 15 key features, 1 logging on to the Content Accelerator, 16 management console, 19 Management console
accessing Web interface, 19 Java applets, 35 not accessible, 34 password fails, 35
name of Content Accelerator, 25 network adapter
configuring, 20 network adapters, 3 NTP time server, 27 ON/OFF switch, 7 packing list, 5 password fails, 35 power cord, 7 power switch, 7 powering off, 7 safety instructions, 6 security considerations, 31 Serial Console
inaccessible, 33 setting up Content Accelerators for the first time, 9
using a PC, 11
using a Serial Terminal, 10 specifying DNS servers, 22 split DNS support, 23 testing CacheFlow 600/700 Series Content Accelerators, 33 time
setting, 27 unpacking, 5 username fails, 35 UTC time, 27 Web interface
not accessible, 34