Embed Size (px)
Citation preview

44075-01(10•98)
3 4 5 E n c i n a l S t r e e t
S a n t a C r u z
C A 9 5 0 6 0
T e l 1 . 8 0 0 . 5 4 4 . 4 6 6 0
w w w . p l a n t r o n i c s . c o m
Printed in USA© 1998 Plantronics, Inc.
HeadsetSwitcher ™
Mult imedia Ampl i f ier
MX10
U s e r ' s G u i d e
G u i d e d ’ U t i l i s a t i o n
SWITCHER CV.biling.10/98 11/4/98 8:08 PM Page 30

iii
Install in 5 easy steps.
Step 1: Plug into power source.
Step 2: Attach to phone and headset.
Step 3: Set default settings.
Step 4: Set telephone/amplifier compatibility switch.
Step 5: Connect to an audio device.
Make a test call.
Learn the basics.
Use advanced features.
ii
A m p l i f i e r F e a t u re s• Compatible with Sound Blaster™ sound cards, CD
players, tape recorders.
• SoundGuard® Plus™ Sound Compression protectsyou from harsh noises, such as fax tones.
• Call Clarity™ System improves incoming and outgoingsound.
• Switch easily between headset and handset, and between phone and audio device.
•Incoming volume adjustments.
• Mute
Advanced Features Enab le :• Speech recognition applications
• Training or music at the desktop
• Internet phone calls
• Record and play messages and music
• Call recording
welcometo the Headset Switcher™
Mult imedia Ampl i f ierfrom Plantronics®.
P A R T I
P A R T I I
P A R T I I I
P A R T I V
The Headset Switcher Multimedia Amplifier adapts your telephone and com-puter or external audio device to a Plantronics headset and provides controlof the sound through your headset.
This User Guide will help you install your Switcher amplifier, learn its basicoperations and take advantage of its more advanced features.
The Switcher amplifier is not designed to work on telephonesthat have the dial pad in the handset or on cordless telephones.
Switcher.biling.ii-25 11/4/98 7:58 PM Page ii

1 Amplifier to QD Coil Cable
2 AC Power Supply
3 External Audio Device Jack (Mini-DIN)
4 Telephone Jack
5 Screwdriver
6 Handset Jack
7 AC Power Supply Jack
8 Audio Device Cable
9 Amplifier to Telephone Coil Cable
iv e n g l i s h
Connect the Switcher Multimedia Amplifier to your telephone and computeror audio device as shown. Follow the five easy steps on the following pagesfor complete installation details.
If you are not using the Switcher Multimedia Amplifier with a computer orother external audio device, connect the Switcher amplifier to your telephoneas shown. Follow the first four easy steps on the following pages forcomplete installation details.
e n g l i s h
1 2 4 5 6 7 8 9
Headset Switcher ™
Ampl i f ier1 Battery Access Door
2 Telephone/AmplifierCompatibility Slide Switch
3 Telephone/AmplifierCompatibility Slide Switch Cover
4 Outgoing Volume Control
5 Incoming Volume Thumbwheel
6 Headset/Handset Selector
7 Telephone/Computer Audio(controls direction of incoming sound)
8 Microphone Selection(controls direction of microphone)
9 Headset Jack
10 External Audio Device Incoming Volume Control
installationoverv iew
+_
1
2
1
2
3
1
65
43
2
–+
65
43
1 2 3 4 5 6 7 8 9 10
v
Switcher.biling.ii-25 11/4/98 7:58 PM Page iv

vi 1
I N S T A L L A T I O N S T E P S
The AC power supply is shown installed andplugged in to a standard wall socket on theInstallation Overview (see page v).
The Switcher amplifier requires power to workwith most phones.
Power is not required for:• Lucent Merlin®, System 75/85 phones• Lucent Definity® and 8400 series phones
Installing batteries
We recommend an AC power supply (included).Two AA alkaline batteries (not included) mayalso be used, but batteries will need to bereplaced frequently.
1. Remove the Battery Access Door located on theside of the amplifier by placing your thumb on thedoor and pushing down.
2. Install two AA alkaline batteries and replace thedoor.
3. You will hear three “beeps“ through the head-set when the batteries are low.
e n g l i s h
inst
all
in 5
ea
sy s
tep
s
PLUG INTO POWER SOURCE
CONNECT TO PHONE ANDHEADSET
SET DEFAULT SETTINGS
SET TELEPHONE/AMPLIF IERCOMPATIBIL ITY SWITCH
CONNECT TO AN AUDIODEVICE
I
PA
RT
S T E P1 plug intopower source
Switcher.biling.ii-25 11/4/98 7:58 PM Page vi

I N S T A L L A T I O N S T E P S
1. Unplug your telephone’s handset cord from thetelephone base.
2. Plug your telephone’s handset cord into theSwitcher amplifier handset jack ( ).
3. Connect your telephone base to the Switcheramplifier telephone jack ( ) using the short curlycord. On your telephone base, plug the short curly cord into the outlet normally used for yourhandset.
4. Plug the headset cord into the Quick Disconnect™
(QD) module on the long curly cord coming from thefront of the amplifier.
The QD will allow you to disconnect the headsetfrom the amplifier when you are not using thephone, or need to move away from the amplifier,while leaving your headset in place.
I N S T A L L A T I O N S T E P S
These are the default settings for headset use.
1. Headset/Handset Selector is switched to Headset ( ).
2. Telephone/Computer Audio Switch is released (no colored indicator showing).
3. Microphone Switch is released (no colored indicator showing).
4. Incoming Volume Thumbwheel is set to 4.
5. The Outgoing Volume Control has been pre-set.You can adjust it when you place your first call(see page 6).
e n g l i s h2 3
S T E P2 attach tophone and headset
S T E P3 set defaultsett ings
432
56
432
56
432
56
Switcher.biling.ii-25 11/4/98 7:58 PM Page 2

I N S T A L L A T I O N S T E P S
1. Put on headset.
2. Lift the phone’s handset off the cradle and placeit on your desk.
3. If you don’t hear a dial tone, adjust theTelephone/Amplifier Compatibility Switch asindicated below:
1. Remove the Telephone Compatibility Switch AccessDoor by placing two fingers or thumbs on theraised bumps and pushing down.
2. Remove the flat, plastic screwdriver from the bottom of the amplifier by sliding it through thebraces holding it in place.
3. Make sure the amplifier is in the default settings,and your telephone handset is off of its cradle.
4. Using the screwdriver, slide the CompatibilitySwitch until you hear a clear dial tone.Experimenting with various switch settings will not harm the amplifier or your telephone.
I N S T A L L A T I O N S T E P S
1. Plug the single-jack end of the Audio Device Cable (mini-DIN) into theexternal audio device jack on the rearpanel of the amplifier.
2. Plug the twin jack end of the AudioDevice Cable into the audio device,matching the icons.
e n g l i s h e n g l i s h 5
S T E P4 set telephone/amplifierCompat ib i l i ty Switch
S T E P5 connect to an audio dev ice
65
4
3
1
65432
– +
43
5
6
1
65432
– +
43
5
6
MIC
Line Out
SPKR
4
Switcher.biling.ii-25 11/4/98 7:58 PM Page 4

M A K E A T E S T C A L L .
1. Put on headset. Refer to your headset’s User Guide to adjust themicrophone position for best performance.
2. Lift the phone’s handset off the cradle and place it on your desk.
3. Make sure your Switcher amplifier settings are in default. See page 3for details.
4. Call a friend or colleague.
5. Adjust the Incoming Volume using the Incoming Volume Thumbwheel.Refer to page 10 for more details.
6. Adjust the Outgoing Volume Control until the person on the other endcan hear your voice at an appropriate level. See page 11 for moredetails.
7. If your friend cannot hear you, or you hear a buzz or hum, try chang-ing the Compatibility Switch. See page 4 for more details.
8. Try activating the Mute function by depressing the MicrophoneSelection Switch (colored indicator showing). Release the MicrophoneSelection Switch (no colored indicator showing) to deactivate theMute function. See page 12 for more details.
9. If you plugged your Switcher amplifier into an AC power source, tryunplugging the Power Supply. If you lose power, your phone modelrequires AC power for your Switcher amplifier. Plug the amplifier intothe AC power source again.
e n g l i s h 7
mak
e a t
est
ca
ll
II
PA
RT
Switcher.biling.ii-25 11/4/98 7:58 PM Page 6

L E A R N T H E B A S I C S .
Default settings
These are the default settings for headset use:
1. Headset/Handset Switch on Headset ( ).
2. Microphone Switch is released (no coloredindicator showing).
3. Telephone/Computer Audio Switch isreleased (no colored indicator showing).
4. Incoming Volume Thumbwheel is set to 4.
Making and Receiving Calls with aHeadset
1. Put on headset.
2. Make sure the amplifier settings are indefault.
3. Lift the phone handset off the cradle andplace on your desk.
4. Make or receive your call. You will use thedial pad and/or other features of your tele-phone as you would normally.
5. To finish a call, place the phone handsetback on the cradle.
e n g l i s h 9
lear
n the
ba
sics
DEFAULT SETTINGS
MAKING AND RECEIVING CALLS WITH A HEADSET
ADJUSTING
MUTING A CALL
MAKING AND RECEIVING CALLS WHILE L ISTENING TOAN AUDIO DEVICE
SHUTTING OUT SOUND FROM AN AUDIO DEVICE
MAKING AND RECEIVING CALLS WITH A HANDSET
• H E A D S E T I N C O M I N G V O L U M E• H E A D S E T O U T G O I N G V O L U M E• A U D I O D E V I C E L I S T E N I N G V O L U M E
8
III
PA
RT
432
56
65
4
3
Switcher.biling.ii-25 11/4/98 7:58 PM Page 8

10
L E A R N T H E B A S I C S
Adjusting Headset Incoming Volume
1. Adjust the volume by turning the Thumbwheelon the top panel.
2. Try different volume settings. 1 is the quietest and 9 is the loudest.
3. “Make a Test Call” (see page 6) providesmore details about adjusting your incoming volume.
L E A R N T H E B A S I C S
Adjusting Headset Outgoing Volume
1. Outgoing Volume is pre-set. Try making a testcall before adjusting (see page 6).
2. Access the Outgoing Volume Control, removethe panel on the left-hand side of the amplifi-er. The same panel houses theTelephone/Amplifier Compatibility Switch.
3. Use the screwdriver attached to the bottom ofthe amplifier to adjust the Outgoing VolumeControl. Turn clockwise to make your voicelouder to the caller. Turn counter-clockwise tomake your voice quieter to the caller.
4. Replace the panel door and the screwdriver.
Adjusting Audio Device Listening Volume
1. Use the Audio Device Incoming VolumeControl on top of the Switcher amplifier.
2. The Telephone/Computer Audio Switch shouldbe depressed (colored indicator showing).The Microphone Selection Switch should be indefault position (no colored indicator showing).
e n g l i s h e n g l i s h10
432
56
11
1
65432
– +
43
5
6
432
56
Switcher.biling.ii-25 11/4/98 7:58 PM Page 10

12
L E A R N T H E B A S I C S
Making and Receiving Calls with a Handset
1. Switch the Headset/Handset Selector tohandset ( ).
2. Use the phone handset as you normallywould.
e n g l i s h 13
L E A R N T H E B A S I C S
Muting a Call
1. Activate the Mute function by depressing theMicrophone Selection Switch (colored indica-tor showing).
2. Deactivate the Mute function by releasing theMicrophone Selection Switch (no coloredindicator showing).
Note: Do not assume the caller cannothear you. Some soundcards have “localloop back,” which means that the callercan hear what you are saying through thecomputer. Try a test call first and checkthis feature with your soundcard.
Making and Receiving Calls while Listeningto an Audio Device
1. Depress the Telephone/Computer AudioSwitch (colored indicator showing).
2. Lift handset off your telephone base cradle.
Shutting Out Sound from an Audio Device
1. Release the Telephone/Computer AudioSwitch (no colored indicator showing).
e n g l i s h12
432
56
432
56
432
56
21
Switcher.biling.ii-25 11/4/98 7:58 PM Page 12

e n g l i s h 15
U S E A D V A N C E D F E A T U R E S
Using Computer-based SpeechRecognition Applications
To listen to both your telephone and yourcomputer, depress theTelephone/Computer Audio Switch (colored indicator showing).
To switch from talking to your telephoneto talking to your computer, depress theMicrophone Selection Switch (colored indi-cator showing).
Making an Internet Phone Call
1. Depress both the Telephone/ComputerAudio and the Microphone SelectionSwitches (colored indicator showing).
2. You may need to adjust your soundcardvolume settings for optimum performance.
1414
use
ad
van
ced
fe
atu
res
USING COMPUTER-BASED SPEECHRECOGNITION APPLICATIONS
MAKING AN INTERNET PHONE CALL
RECORDING AND PLAYING OUTGOINGMESSAGES AND MUSIC
RECORDING A CALL
IV
PA
RT
432
56
432
56
432
56
Switcher.biling.ii-25 11/4/98 7:58 PM Page 14

U S E A D V A N C E D F E A T U R E S
Recording and Playing Outgoing Messages andMusic
1. Switch the Headset/Handset selector to Headset.Depress the Telephone/Computer Audio Switch(colored indicator showing), and theMicrophone Selection Switch (colored indicatorshowing).
2 Use your audio device to control recording, play-back and volume.
3 To interrupt or take over the phone call, simplyrelease the Microphone Selection Switch (nocolored indicator showing).
Note: Some computer soundcards have“local loop back,” which means your callerscan hear what you’re saying. Do not assumethat your caller can not hear you.
Recording a Call
1. Depress the Telephone/Computer Audio Switch(colored indicator showing) and make sure therest of your settings are in default.
2. Record using your external audio device. Yourside of the conversation may be quiet depend-ing on the make and style of your phone.
Note:To control recording volume, consult youraudio device user manual.
e n g l i s h16 17
mai
nten
ance
a
nd
tro
ub
lesh
oo
tin
gA
SE
CT
ION
432
56
432
56
Switcher.biling.ii-25 11/4/98 7:58 PM Page 16

M A I N T E N A N C E A N DT R O U B L E S H O O T I N G
e n g l i s h18 19
M A I N T E N A N C E A N DT R O U B L E S H O O T I N G
e n g l i s h
PROBLEM ITEMS TO CHECK
MY CALLERS SAYTHAT THEY CAN’THEAR ME AT ALLOR THEY CAN’THEAR ME VERYWELL.
Make sure the microphone of your headset ispositioned in front or near your mouth. If youare using a “noise-cancelling” headset, theposition of the microphone is very important.You may need to adjust the “OutgoingVolume”. See “Adjusting Outgoing Volume” onpage 11.Confirm that the Telephone/AmplifierCompatibility Switch is in the correct setting foryour phone (see "Set the Telephone/AmplifierCompatibility Switch” on page 4). You maywant to try moving the switch through all of thepositions until your caller hears you clearly.Experimenting with various switch settings willnot harm the amplifier or your telephone.
Change the Telephone/Amplifier CompatibilitySwitch between position 5 and 6 to see if thehum goes away in either position. Use the posi-tion with no hum.Ensure the Audio Device Cable is routed awayfrom your monitor or other electrical device.
I GET A LOW PITCHHUM IN MY HEADSETSPEAKER AND/OR MYCALLERS COMPLAINTHEY CAN HEAR HUM.
Maintenance Hints
Trouble Shooting Guide
PROBLEM ITEMS TO CHECK
I DO NOT HEAR ADIAL TONE WHEN ITRY TO MAKE ORRECEIVE A PHONECALL.
If you are using an AC Power Supply, confirm that itis plugged in and the power outlet is turned on.If you are using batteries, confirm that they aregood and placed in the battery compartment cor-rectly.Confirm that the Headset/Handset Selector Switch isswitched to Headset ( ).Confirm that you have lifted the telephone handsetout of the cradle.Confirm that the telephone handset cable and theshort curly cord to the telephone are connected inthe correct jacks (see Part 1 of this guide).Confirm that the Telephone/Amplifier CompatibilitySwitch is in the correct setting for your phone (see"Set the Telephone/Amplifier Compatibility Switch”on page 4). You may want to try moving the switchthrough all of the positions until you hear a cleardial tone. Experimenting with various switchsettings will not harm the amplifier or your phone.
Trouble Shooting Guide
Maintenance Hints
Switcher.biling.ii-25 11/4/98 7:58 PM Page 18

21e n g l i s h20
M A I N T E N A N C E A N DT R O U B L E S H O O T I N G
PROBLEM ITEMS TO CHECK
THE MICROPHONELEVEL TO MY COM-PUTER IS TOO LOUD.
If you are using batteries to power the SwitcherAmplifier, the three ‘beeps’ are telling you that thebatteries are low and need to be replaced. See“Installing Batteries” on page 1.
Confirm that the green jack plug on the externalaudio device cord is plugged into the "Mic In" jackon the soundcard.Review your soundcard "Mixer" settings on thecomputer to adjust the microphone volume.
Plug the black jack plug on the external audiodevice cord into the "Line Out" jack and adjust theAudio Device Listening Volume (page 11) for com-fortable volume.
Move the Telephone/Amplifier Compatibility Switch toposition #5. Depress the Telephone/Computer AudioSwitch (colored indicator showing). Depress theMicrophone Selection Switch (colored indicator showing).The Plantronics Help Desk is ready to assist you!Monday through Friday 8:00 AM to 5:00 PM PST800 544-4660
THE SOUND FROMMY COMPUTER ISDISTORTED.
I AM USING MYSWITCHER AMPLIFI-ER WITH AN AUDIODEVICE AND NOTELEPHONE. I CAN-NOT HEAR THEAUDIO DEVICE.
Maintenance Hints
Trouble Shooting Guide
I HEAR THREE‘BEEPS’ IN THEHEADSET.
part
s a
nd
acc
ess
ori
es
B
SE
CT
ION
Switcher.biling.ii-25 11/4/98 7:58 PM Page 20

e n g l i s h22 e n g l i s h 23
R E P L A C E M E N T P A R T S A N D A C C E S S O R I E SF O R S W I T C H E R
For information on accessories and spare parts,call Plantronics at 1-800-544-4660, or visit thePlantronics web site at www.plantronics.com
AC Power Supply
ITEM PART #AC Power Supply 26503-01
Audio Device Cable
ITEM PART #Audio Device Cable 44119-01
Battery and Telephone / AmplifierCompatibility Slide Switch Doors
ITEM PART #Battery and Telephone/ 26609-01Amplifier CompatibilitySlide Switch Doors
Amplifier to Telephone Coil Cable
(male to male modular plugs)
ITEM PART #Amplifier to Telephone 40974-01Coil Cable
Amplifier to QD Coil Cable
(QD to male modular plug)
ITEM PART #Amplifier to QD 26716-01Coil Cable
R E P L A C E M E N T P A R T S A N DA C C E S S O R I E S F O R S W I T C H E R
Velcro® Amplifier Attachment Kit
ITEM PART #Velcro Amplifier 17521-01Attachment Kit
Amplifier Security Device
(attaches amplifier to desk.)
ITEM PART #Amplifier Security 40696-01Device
Plantronics Custom Cradle Mate
(holds handset “off-hook” and a flashing“BUSY” light indicates when headset is in use)
ITEM PART #Plantronics Custom 40715-01Cradle Mate
Cradle Mate only
(easy-to-use device that mechanically holdshandset “off-hook”)
ITEM PART #Cradle Mate only 40714-01
Switcher.biling.ii-25 11/4/98 7:58 PM Page 22

W A R R A N T Y A N D S E R V I C E
e n g l i s h 25
W A R R A N T Y A N D S E R V I C E
e n g l i s h24
WARRANTY AND SERVICE
The following warranty and service information applies only to the U.S. and Canada. For information inother countries, please contact your local distributor.
To obtain in or out of warranty service, please prepay shipment and return the unit to the appropriate facility listedbelow:
IN THE UNITED STATES IN CANADAPlantronics Service Center Plantronics Service Center345 Encinal Street 1455 Pitfield BoulevardSanta Cruz, CA 95060 Saint-Laurent, Quebec H4S 1G3Tel. (800) 544-4660 Tel. (800) 540-8363
(831) 426-5858 (514) 956-8363Fax (800) 279-0162 Fax (514) 956-1825
Please use the original container, or pack the unit(s) in a sturdy carton with sufficient packing material to preventdamage. Include the following information:
1. A proof-of-purchase indicating model number and date of purchase.2. Bill-to address3. Ship-to address4. Number and description of units shipped5. Name and telephone number of person to call, should contact be necessary6. Reason for return and description of the problem
Damage occurring during shipment is deemed the responsibility of the carrier, and claims should be made directly with the carrier.
The name Plantronics, the Plantronics logo and SoundGuard are registered trademarks of Plantronics, Inc.Headset Switcher, Quick Disconnect, Call Clarity and SoundGuard Plus are trademarks of Plantronics, Inc.Sound Blaster is a trademark of Creative Technology, Ltd.Merlin and Definity are registered trademarks of Lucent Technologies.Velcro is a registered trademark of Velcro USA.
FCC REGISTRATION INFORMATION
This equipment complies with Part 68 of the FCC rules. On the bottom of the modular adapter is a label that contains, among other information, the FCC registration number and ringer equivalence number(REN) for this equipment. If requested, this information must be provided to the telephone company.
The telephone company may make changes in its facilities, equipment, operation or procedures that could affectthe operation of the equipment. If this happens, the telephone company should provide you advance notice inorder for you to make the necessary modifications to maintain uninterrupted services.
If you experience problems with your headset, please refer to the warranty section for information on warranty andrepair service. If the problem is causing harm to the telephone network, the telephone company may request thatyou remove the equipment until the problem is resolved. In extreme cases, the telephone company may be forced todisconnect your service before notifying you of the problem.
AN IMPORTANT WORD ABOUT LISTENING LEVELS
In addition to providing telephone access, your Headset Switcher Amplifier lets you use your Plantronics headset tolisten to music from your computer or other audio source. This extra versatility carries with it the need to considerhow you set your listening level.
Plantronics headsets have always been designed to safely limit short duration loud inputs like clicks, pops or tonesthat infrequently occur during telephone conversations. The design of telephone systems helps to ensure that longterm listening presents a minimal risk of hearing harm.
This is not the case with external audio devices that can be turned up to very loud levels. Listening to music at highlevels for extended periods of time could be harmful to your hearing. Please take care to observe the following:
• Start with the volume control at a low setting• Increase the volume control until you can hear the sound clearly and comfortably• Do not increase the level beyond this point
We want you to get the best from your Switcher amplifier by listening to it at a safe level.
Switcher.biling.ii-25 11/4/98 7:58 PM Page 24

27
fran
çais
H
ea
dse
t S
wit
hch
er™
26
Switcher.biling.26-57 11/4/98 8:02 PM Page 26

29
Installation en 5 étapes faciles:
Step 1: Brancher dans une prise d’alimentation.
Step 2: Rattacher au téléphone et au casque.
Step 3: Régler les valeurs par défaut.
Step 4: Régler le commutateur de compatibilité téléphone/ampli.
Step 5: Relier à un appareil audio.
Placement d’un appel d’essai.
Apprentissage du fonctionnement de base.
Utilisation des fonctions sophistiquées.
C a r a c t é r i s t i q u e s d el ’ A m p l i f i c a t e u r• Compatible avec les cartes de son Sound Blaster™, les
lecteurs de CD et les magnétophones.
• SoundGuard® Plus™ protège contre les sons discordants,tels que les tonalités de fax.
• Call Clarity™ améliore les sons à l’arrivée et au départ.
• Commutation facile entre casque et combiné, et entretéléphone et appareil audio.
• Réglage du volume à l'arrivée.
• Fonction ‘Secret’.
Les fonct ions soph is t iquéesper met tent :• Les applications de reconnaissance
de voix
• La formation ou la musique sur ordinateur de bureau
• Les appels téléphoniques par l’Internet
• L’enregistrement et l’écoute des messages et de lamusique
• L’enregistrement des appels
Bienvenueà l’Ampl i f icateur Mult imédia Headset Switcher™ de Plantronics®.
S E C T I O N I
S E C T I O N I I
S E C T I O N I I I
S E C T I O N I V
L’Amplificateur Multimédia Headset Switcher adapte votre téléphone etvotre ordinateur ou équipement audio externe à un casque Plantronicset contrôle le son arrivant à votre casque.
Ce Guide d’Utilisation vous aidera à installer votre amplificateurSwitcher, à apprendre son opération de base et à utiliser ses fonctionsles plus sophistiquées.
L’amplificateur Switcher n’est pas conçu pour fonctionneravec des téléphones ayant leur clavier dans le combiné niavec les téléphones sans fil.
Switcher.biling.26-57 11/4/98 8:02 PM Page 28

1 Cordon extensible de l’amplificateur au Connecteur à Déconnexion Rapide™
2 Alimentation CA
3 Prise de l’appareil audio externe (Mini-DIN)
4 Prise téléphonique
5 Tournevis
6 Prise du combiné
7 Prise d’alimentation CA
8 Câble d’appareil audio
9 Cordon extensible de l’amplificateur au téléphone30
Brancher l’amplificateur multimédia Switcher sur votre téléphone et sur votreordinateur ou appareil audio, comme indiqué. Suivre les cinq étapes facilesindiquées aux pages suivantes qui donnent les détails complets d’installation.
Si vous n’utilisez pas l’amplificateur multimédia Switcher avec un ordinateurou appareil audio externe, brancher l’amplificateur Switcher sur votretéléphone comme indiqué. Suivre les quatre premières étapes facilesindiquées aux pages suivantes qui donnent les détails complets d’installation.
f r a n ç a i s
1 2 4 5 6 7 8 9
Headset Switcher ™
Ampl i f icateur1 Panneau d’accès aux piles
2 Commutateur coulissant de compatibilitéTéléphone/Amplificateur
3 Couvercle de commutateur de compatibilité Téléphone/Amplificateur
4 Contrôle du volume à l’émission
5 Molette de volume à l’arrivée
6 Sélecteur Casque/Combiné
7 Audio Téléphone/Ordinateur (contrôle la direction du son à l’arrivée)
8 Sélection de Microphone (contrôle la direction du microphone)
9 Prise de casque
10 Contrôle du volume à l’arrivée de l’appareil audio externe
installationaperçu généra l
+_
1
2
3
1
65
43
2
–+
65
43
1 2 3 4 5 6 7 8 9 10
1
2
31
Switcher.biling.26-57 11/4/98 8:02 PM Page 30

32 33
É T A P E S D ’ I N S T A L L A T I O N
L’alimentation CA est montrée installée et branchéedans une prise électrique murale standard, surl’aperçu général d’installation (voir page 31).
L’amplificateur Switcher nécessite une alimenta-tion électrique pour fonctionner avec la plupartdes téléphones.
Cette alimentation n’est pas nécessaire avec les téléphones:• Lucent Merlin®, Système 75/85• Lucent Definity® et Série 8400
Installation des piles
L’emploi d’une alimentation CA (fournie) est recommandée. On peut aussi utiliser deux piles alcalines AA (non fournies), mais il faudra lesremplacer souvent.
1. Retirer le panneau d’accès aux piles situé sur le côté del’amplificateur en plaçant le pouce sur le panneau et enpoussant vers le bas.
2. Installer deux piles alcalines AA et refermer le panneau.
3. On entendra trois ‘bips’ dans le casque lorsque lespiles seront faibles.
inst
alla
tion
en
5 é
tap
es
faci
les
BRANCHER DANS UNE PRISED’ALIMENTATION
RATTACHER AU TÉLÉPHONE ET AUCASQUE
RÉGLER LES VALEURS PAR DÉFAUT
RÉGLER LE COMMUTATEUR DECOMPATIBIL ITÉ TÉLÉPHONE/AMPLI
RELIER À UN APPAREIL AUDIO
I
SE
CT
ION
É T A P E 1 Brancherdans une pr ise d ’a l imentat ion
Switcher.biling.26-57 11/4/98 8:02 PM Page 32

É T A P E S D ’ I N S T A L L A T I O N
1. Débrancher le câble reliant le combiné de votretéléphone à sa base.
2. Brancher le câble du combiné de votre téléphonedans la prise de combiné ( ) de l’amplificateurSwitcher.
3. Brancher la base de votre téléphone dans la prisetéléphonique ( ) de l’amplificateur Switcher avecle cordon extensible court. Sur votre téléphone,brancher le cordon extensible court dans la priseservant normalement pour le combiné.
4. Brancher le cordon du casque dans le moduleQuick Disconnect™ (Connecteur à DéconnexionRapide™) sur le long cordon extensible venant del’avant de l’amplificateur.
Ce Connecteur à Déconnexion Rapide™ vouspermettra de débrancher le casque de l’amplifi-cateur lorsque le téléphone n’est pas en serviceou s’il est nécessaire de se déplacer loin de l’am-plificateur tout en conservant le casque en place.
É T A P E S D ’ I N S T A L L A T I O N
Voici les valeurs par défaut pour emploi aveccasque:
1. Le sélecteur Casque/Combiné est placé surCasque ( ).
2. Le commutateur audio Téléphone/Ordinateurest sorti (pas de voyant de couleur).
3. Le commutateur de Microphone n’est pasenclenché (pas de voyant de couleur).
4. La molette de Volume à l’Arrivée est réglée sur 4.
5. Le niveau du Volume à l’Émission est pré-réglé. Il peut être modifié lors du premierappel (voir page 38).
f r a n ç a i s34 35
432
56
432
56
432
56
É T A P E 2 Rattacherau té léphone et au casque
É T A P E 3 Réglerles va leurs par défaut
Switcher.biling.26-57 11/4/98 8:02 PM Page 34

36
É T A P E S D ’ I N S T A L L A T I O N
1. Mettre le casque sur la tête.
2. Décrocher le combiné du téléphone de son réceptacle et le poser sur le bureau.
3. S’il n’y a pas de tonalité, régler le commutateur de compatibilité téléphone/amplificateur commeindiqué ci-dessous:
1. Retirer le couvercle d’accès au commutateur de compatibilité téléphone/amplificateur en plaçant deux doigts ou les pouces sur les nervures enrelief et en poussant vers le bas.
2. Retirer le tournevis plat en plastique du bas de l’amplificateur en le faisant glisser dans les rainures le tenant en place.
3. S’assurer que l’amplificateur est réglé sur les valeurspar défaut, et que le téléphone est bien décroché.
4. Avec le tournevis, faire glisser le commutateur decompatibilité jusqu’à ce qu’une tonalité claire sefasse entendre. L’expérimentation avec différentsréglages du commutateur n’endommagera nil’amplificateur ni votre téléphone.
É T A P E S D ’ I N S T A L L A T I O N
1. Brancher l’extrémité à fiche unique du CâbleAudio (mini-DIN) dans la prise de l’appareilaudio externe sur le panneau arrière del’amplificateur.
2. Brancher l’extrémité à fiches doubles duCâble Audio (mini-DIN) dans l’appareil audioexterne, en s’assurant de bien fairecorrespondre les icônes.
f r a n ç a i s 37
1
65432
– +
43
5
6
1
65432
– +
43
5
6
MIC
Line Out
SPKR
É T A P E 4 Réglerle commutateur de compat ib i l i té
té léphone/ampl i f i cateur
É T A P E 5 Relier à un appare i l audio
65
4
3
Switcher.biling.26-57 11/4/98 8:02 PM Page 36
A P P E L D ’ E S S A I
1. Placer le casque sur la tête. Se référer au Guide d’Utilisation de votrecasque pour régler la position du micro afin d’obtenir les meilleuresperformances.
2. Décrocher le combiné du téléphone de son réceptacle et le poser sur lebureau.
3. S’assurer que l’amplificateur est bien réglé sur les valeurs par défaut.Voir les détails page 35.
4. Appeler un ami ou collègue.
5. Régler le Volume à l’Arrivée au moyen de sa molette. Voir plus dedétails page 42.
6. Régler le Volume au Départ jusqu’à ce que votre interlocuteur entendevotre voix à un niveau acceptable. Voir plus de détails page 43.
7. Si votre interlocuteur ne peut pas vous entendre, ou si vous entendezun bourdonnement, essayer de modifier le commutateur de compati-bilité. Voir plus de détails page 36.
8. Essayer de passer sur le mode ‘Secret’ en appuyant sur le bouton desélection de Micro (voyant de couleur visible). Relâcher le bouton desélection de Micro (pas de voyant de couleur) pour désactiver le mode‘Secret’. Voir plus de détails page 44.
9. Si l’amplificateur du Switcher est branché sur une alimentation CA,essayer de débrancher celle-ci. Si le courant est coupé, votre modèlede téléphone a besoin d’une alimentation CA pour l’amplificateur duSwitcher. Rebrancher l’amplificateur dans une alimentation CA.
f r a n ç a i s 39
Pla
cem
ent
d’
un
ap
pe
l d
’ess
ai
38
II
SE
CT
ION
Switcher.biling.26-57 11/4/98 8:02 PM Page 38

A P P R E N T I S S A G E
Valeurs par défaut
Voici les valeurs par défaut pour emploi avecun casque:
1. Le sélecteur Casque/Combiné est placé surCasque ( ).
2. Le commutateur de Microphone n’est pasenclenché (pas de voyant de couleur).
3. Le commutateur audio Téléphone/Ordinateurest sorti (pas de voyant de couleur).
4. La molette de Volume à l’Arrivée est régléesur 4.
Pour placer et recevoir des appels avecun casque
1. Mettre le casque sur la tête.
2. S’assurer que l’amplificateur est bien réglésur les valeurs par défaut.
3. Décrocher le combiné du téléphone de sonréceptacle et le poser sur le bureau.
4. Placer ou recevoir un appel. Servez-vous duclavier de composition et/ou des autres fonc-tions de votre téléphone tout commed’habitude.
5. Pour mettre fin à un appel, raccrocher lecombiné.
f r a n ç a i s 41
Appr
entis
sage
du
fonc
tio
nnem
ent
de
bas
e
VALEURS PAR DÉFAUT
POUR PLACER ET RECEVOIR DES APPELS AVEC UN CASQUE
RÉGLAGES
POUR PLACER UNE COMMUNICATION SUR ‘SECRET’
POUR PLACER ET RECEVOIR DES APPELS TOUT ENÉCOUTANT UN APPAREIL AUDIO
POUR COUPER LE SON D’UN APPAREIL AUDIO
POUR PLACER ET RECEVOIR DES APPELS AVEC UN COMBINÉ
• V O L U M E D U C A S Q U E À L’ A R R I V É E• V O L U M E D U C A S Q U E À L’ É M I S S I O N• V O L U M E D ’ É C O U T E D E L’ A P PA R E I L A U D I O
40
III
SE
CT
ION
432
56
65
4
3
Switcher.biling.26-57 11/4/98 8:02 PM Page 40

42
A P P R E N T I S S A G E
Réglage du volume du casque à l’Arrivée
1. Régler le volume en tournant la Molette surle dessus du panneau.
2. Essayer différents réglages : ‘1’ est le plusfaible, ‘9’ est le plus fort.
3. La rubrique “Placement d’un appel d’essai”(voir page 38) donne davantage de détailssur le réglage du volume.
A P P R E N T I S S A G E
Réglage du volume du casque à l’Émission
1. Ce volume est pré-réglé. Essayer de placer unappel d’essai avant de le régler à nouveau(voir page 39).
2. Pour accéder à la commande de volume ducasque à l’Émission, retirer le panneau sur lecôté gauche de l’amplificateur . Le même pan-neau abrite le commutateur de compatibilitétéléphone/amplificateur.
3. Pour régler le volume du casque à l’Émission,utiliser le tournevis fixé sous l’amplificateur :tourner dans le sens horaire pour augmenter levolume de votre voix, entendue par l’interlocu-teur; tourner dans le sens contraire pourdiminuer le volume de votre voix.
4. Remettre le couvercle et le tournevis.
Réglage du volume d’écoute de l’appareil audio
1. Utiliser la commande du volume d’écoute del’appareil audio sur le dessus de l’amplificateurdu Switcher.
2. Il faut appuyer sur le commutateur Téléphone/Ordinateur Audio (voyant de couleur visible).Le bouton de sélection du Micro doit être enposition par défaut (pas de voyant de couleur).
f r a n ç a i s 42
432
56
1
65432
– +
43
5
6
432
56
43
Switcher.biling.26-57 11/4/98 8:02 PM Page 42
44
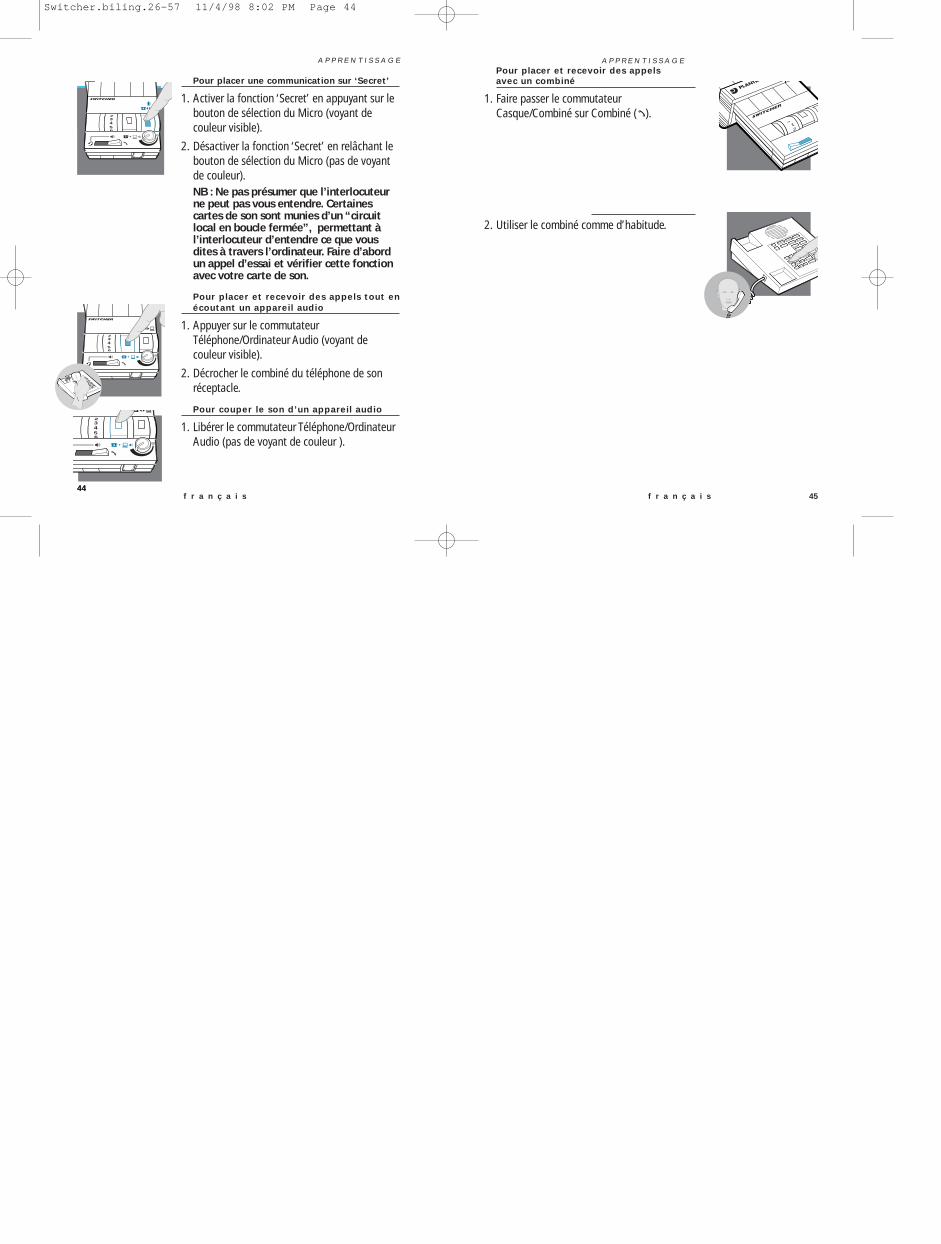
A P P R E N T I S S A G EPour placer et recevoir des appelsavec un combiné
1. Faire passer le commutateurCasque/Combiné sur Combiné ( ).
2. Utiliser le combiné comme d’habitude.
f r a n ç a i s 45
A P P R E N T I S S A G E
Pour placer une communication sur ‘Secret’
1. Activer la fonction ‘Secret’ en appuyant sur lebouton de sélection du Micro (voyant decouleur visible).
2. Désactiver la fonction ‘Secret’ en relâchant lebouton de sélection du Micro (pas de voyantde couleur).NB : Ne pas présumer que l’interlocuteurne peut pas vous entendre. Certainescartes de son sont munies d’un “circuitlocal en boucle fermée”, permettant àl’interlocuteur d’entendre ce que vousdites à travers l’ordinateur. Faire d’abordun appel d’essai et vérifier cette fonctionavec votre carte de son.
Pour placer et recevoir des appels tout enécoutant un appareil audio
1. Appuyer sur le commutateurTéléphone/Ordinateur Audio (voyant decouleur visible).
2. Décrocher le combiné du téléphone de sonréceptacle.
Pour couper le son d’un appareil audio
1. Libérer le commutateur Téléphone/OrdinateurAudio (pas de voyant de couleur ).
f r a n ç a i s 44
432
56
432
56
432
56
21
Switcher.biling.26-57 11/4/98 8:02 PM Page 44

f r a n ç a i s 47
F O N C T I O N S S O P H I S T I Q U É E S
Utilisation d’applications de reconnais-sance de voix sur un ordinateur
Pour écouter à la fois le téléphone et votreordinateur, appuyer sur le commutateurTéléphone/Ordinateur Audio (voyant decouleur visible).
Pour cesser de parler au téléphone et parlermaintenant à votre ordinateur, appuyer surle bouton de sélection du Micro (voyant decouleur visible).
Appel téléphonique par l’Internet
1. Appuyer à la fois sur le commutateurTéléphone/Ordinateur Audio et sur le bou-ton de sélection du Micro (voyant de couleurvisible).
2. Il peut s’avérer nécessaire de régler le vol-ume de votre carte de son pour obtenir uneperformance optimale.
4646
Uti
lisat
ion
de
s fo
nct
ion
s so
ph
isti
qu
ée
s
APPLICATIONS DE RECONNAISSANCEDE VOIX SUR UN ORDINATEUR
APPEL TÉLÉPHONIQUE PAR L’ INTERNET
ENREGISTREMENT ET ÉCOUTE DESMESSAGES ET DE LA MUSIQUE
ENREGISTREMENT DES APPELS
IV
432
56
432
56
432
56
SE
CT
ION
Switcher.biling.26-57 11/4/98 8:02 PM Page 46

F O N C T I O N S S O P H I S T I Q U É E S
Enregistrement et écoute des messages et de lamusique
1. Faire passer le commutateur Casque/Combiné surCasque.Appuyer sur le commutateurTéléphone/Ordinateur Audio (voyant de couleur visi-ble) et sur le bouton de sélection du Micro (voyant decouleur visible).
2 Utiliser votre appareil audio pour contrôler l’enreg-istrement, l’écoute et le volume.
3 Pour interrompre ou reprendre la communication,relâcher simplement le bouton de sélection du Micro(pas de voyant de couleur).NB : Certaines cartes de son sont munies d’un“circuit local en boucle fermée”, permettant àl’interlocuteur d’entendre ce que vous dites. Nepas présumer que l’interlocuteur ne peut pasvous entendre.
Enregistrement des appels
1. Appuyer sur le commutateur Téléphone/OrdinateurAudio (voyant de couleur visible) et s’assurer que lereste des réglages sont sur leur position par défaut.
2. Enregistrer avec l’appareil audio externe. Votreportion de la conversation peut être silencieuse,selon la marque et le style de votre téléphone.NB : Pour contrôler le volume d’enregistrement,consulter le manuel d’utilisation de l’appareilaudio.
f r a n ç a i s 48
432
56
432
56
49
Ent
reti
en
et
dé
pa
nn
ag
e
A
SE
CT
ION
Switcher.biling.26-57 11/4/98 8:02 PM Page 48

S’assurer que le micro du casque est bien placé enface de votre bouche. Si vous utilisez un casque “anti-bruit”, le positionnement du micro est trèsimportant.Il peut s’avérer nécessaire de régler le volume d’Émis-sion. Voir “Réglage du volume d’Émission” page 43.Confirmer que le commutateur de CompatibilitéTéléphone/Ampli est sur la bonne position pour votre télé-phone (voir “Réglage du commutateur de CompatibilitéTéléphone/Ampli” page 36).Vous pourriez essayer dedéplacer le commutateur sur toutes ses positions jusqu’àce que vos interlocuteurs vous entendent clairement.L’expérimentation avec différents réglages du commutateurn’endommagera ni l’ampli ni votre téléphone.
Changer la position du commutateur de CompatibilitéTéléphone/Ampli entre les positions 5 et 6 pour voir sile bourdonnement disparaît sur l’une ou l’autre posi-tion. Utiliser la position sans bourdonnement.S'assurer que le câble de l'appareil audio est achem-iné loin du moniteur ou de tout autre appareilélectrique.
E N T R E T I E N E T D É P A N N A G E
f r a n ç a i s 50 51
E N T R E T I E N E T D É P A N N A G E
f r a n ç a i s
PROBLÈME CHOSES À VÉRIFIER
MES INTERLOCU-TEURS DISENTQU’ILS NE M’EN-TENDENT PAS DUTOUT OU TRÈS MAL.
J’ENTENDS UN BOUR-DONNEMENT SOURDDANS MON ÉCOUTEURET/OU MES INTERLOCU-TEURS SE PLAIGNENTD’ENTENDRE UNBOURDONNEMENT
Conseils de dépannage
Guide de dépannage
PROBLÈME CHOSES À VÉRIFIER
PAS DE TONALITÉLORSQU’ONESSAIE DE PLACEROU DE RECEVOIRUN APPEL.
Si vous utilisez une Alimentation CA, vérifier quecelle-ci est bien branchée et que la prise est soustension.Si vous utilisez des piles, vérifier qu’elles sontbonnes et installées correctement dans le com-partiment de piles.Confirmer que le commutateur de sélectionCasque/Combiné est bien sur la position Casque( ).Confirmer que le combiné est bien décroché deson réceptacle.Confirmer que le câble du combiné et le cordonextensible court du téléphone sont bienbranchés dans les bonnes prises (voir Section Ide ce guide).Confirmer que le commutateur de CompatibilitéTéléphone/Ampli est sur la bonne position pourvotre téléphone (voir “Réglage du commutateurde Compatibilité Téléphone/Ampli” page 36).Vous pourriez essayer de déplacer le commuta-teur sur toutes ses positions jusqu’à ce qu’unetonalité claire soit entendue. L’expérimentationavec différents réglages du commutateur n’en-dommagera ni l’ampli ni votre téléphone.
Guide de dépannage
Conseils de dépannage
Switcher.biling.26-57 11/4/98 8:02 PM Page 50

5352 f r a n ç a i s
E N T R E T I E N E T D É P A N N A G E
PROBLÈME
LE NIVEAU DUMICRO ALLANT ÀMON ORDINATEUREST TROP FAIBLE.
Si vous utilisez des piles pour alimenter l’ampliSwitcher, les trois ‘bips’ indiquent que les piles sontfaibles et ont besoin d’être remplacées (Voir“Installation des piles” page 33).
Confirmer que la fiche verte sur le câble de l’appareilaudio est bien branché sur la prise “Mic deEntrée”de la carte de son. Revoir les réglages de “Mixage”de votre carte de son dans l’ordinateur pour régler levolume du micro.
Brancher la fiche noire du câble de l’appareil audiodans la prise “Mic d’ Sortie”, et régler le volume d’é-coute de l’appareil audio (page 43) pour obtenir unvolume confortable.
Déplacer le commutateur de CompatibilitéTéléphone/Ampli sur la position #5. Appuyer sur lecommutateur de Téléphone/Ordinateur Audio (voyantde couleur visible). Appuyer sur le commutateur desélection du Micro (voyant de couleur visible).Le Bureau d’Assistance de Plantronics est là pour vousvenir en aide du Lundi au Vendredi de 6h à 17h, heure duPacifique (PST) Composer le (1) 800-544-4660
LE SON VENANT DEMON ORDINATEUREST DÉFORMÉ.
J’UTILISE MONAMPLIFICATEURSWITCHER AVEC UNAPPAREIL AUDIO ETPAS DE TÉLÉPHONE.JE NE PEUX PASENTENDREL’APPAREIL AUDIO.
Conseils de dépannage
Guide de dépannage
J’ENTENDS TROIS‘BIPS’ DANS LECASQUE.
Rec
hang
es
et
acc
ess
oir
es
B
SE
CT
ION
CHOSES À VÉRIFIER
Switcher.biling.26-57 11/4/98 8:02 PM Page 52

54 f r a n ç a i s 55
R E C H A N G E S E T A C C E S S O I R E S P O U R L E S W I T C H E R
Pour toute information sur les accessoires et rechanges,appeler Plantronics au (1) 800-544-4660, ou visiteznotre site sur le web à: www.plantronics.com
Alimentation CA
RUBRIQUE Nº DE PIÈCEAlimentation CA 26503-01
Câble pour Appareil Audio
RUBRIQUE Nº DE PIÈCECâble pour Appareil Audio 44119-01
Couvercles de Compartiments de Piles et deCommutateur à glissière Téléphone/Ampli
RUBRIQUE Nº DE PIÈCECouvercles de 26609-01Compartiments de Piles et de Commutateur à glissière Téléphone/Ampli
Cordon extensible Amplificateur au Téléphone
(fiches modulaires mâle à mâle)
RUBRIQUE Nº DE PIÈCECordon extensible 40974-01Amplificateur au Téléphone
Cordon extensible Amplificateur à Connecteur à Déconnexion Rapide™
(Connecteur à Déconnexion Rapide™ à fiche modulairemâle)
RUBRIQUE Nº DE PIÈCECordon extensible 26716-01Amplificateur à QD
R E C H A N G E S E T A C C E S S O I R E S P O U R L E S W I T C H E R
Trousse d’attache en Velcro® pourAmplificateur
RUBRIQUE Nº DE PIÈCE
rousse d’attache en 17521-01Velcro pour Amplificateur
Dispositif de Sécurité pour Amplificateur
(attache l’ampli au bureau)
RUBRIQUE Nº DE PIÈCE
Dispositif de Sécurité 40696-01pour Amplificateur
Réceptacle complet spécial Plantronics
(le combiné “décroché” et un clignotant “OCCUPÉ”indique que le casque est en service)
RUBRIQUE Nº DE PIÈCE
Réceptacle complet 40715-01spécial Plantronics
Réceptacle sur mesure seul
(appareil qui décroche/raccrochemécaniquement le combiné)
RUBRIQUE Nº DE PIÈCE
Réceptacle sur 40714-01mesure seul
Switcher.biling.26-57 11/4/98 8:02 PM Page 54

R É P A R A T I O N S E T S E R V I C E
f r a n ç a i s 57
R É P A R A T I O N S E T S E R V I C E
f r a n ç a i s 56
RÉPARATIONS ET SERVICE
Les informations suivantes sur les réparations et le service ne s’appliquent qu’aux U.S.A et au Canada.Pour toute information dans d’autres pays, prière de s’adresser à votre distributeur local.
Pour obtenir les réparations sous/hors garantie, prière de renvoyer l'équipement, port payé, à l’adresse appropriéeindiquée ci-dessous:
AUX ÉTATS-UNIS IN CANADAPlantronics Service Center Centre de Service Plantronics345 Encinal Street 1455 Pitfield BoulevardSanta Cruz, CA 95060 Saint-Laurent, Quebec H4S 1G3Tel. (800) 544-4660 Tel. (800) 540-8363
(831) 426-5858 (514) 956-8363Fax (800) 279-0162 Fax (514) 956-1825
Prière d'utiliser l'emballage d'origine, ou d’emballer l'équipement dans un carton solide avec suffisamment d'embal-lage pour éviter les dégâts. Joindre les informations suivantes:
1. Preuve d'achat indiquant le numéro du modèle et la date d'achat2. Adresse à qui envoyer la facture3. Adresse à qui renvoyer l'équipement4. Quantité et description de l'équipement expédié5. Nom et téléphone de la personne à contacter, si nécessaire6. Raison du renvoi et description du problème
Les dégâts occasionnés lors du transport sont considérés être la responsabilité du transporteur, et toute revendica-tion doit être présentée directement à ce transporteur.
Le nom Plantronics, le sigle ponctuel, et SoundGuard sont des marques de fabrique de Plantronics, Inc.Headset Switcher, Quick Disconnect, Call Clarity et SoundGuard Plus sont des marques déposées de Plantronics, Inc.Sound Blaster est une marque déposée de Creative Technology, Ltd.Merlin et Definity sont des marques déposées de Lucent Technologies.Velcro est une marque déposée de velcro USA.
INFORMATIONS SUR L’HOMOLOGATION AUPRÈS DE LA FCC
Cet équipement est conforme à la Section 68 des Règlements de la FCC. Sur le dessous de l’adaptateur modulairese trouve une étiquette contenant, entre autres informations, le numéro d’homologation et le chiffre d’équivalencede sonnerie (REN) pour cet équipement. Si la Compagnie des Téléphones demande ces informations, elles doiventlui être fournies.
La Compagnie des Téléphones pourrait modifier ses installations, ses opérations ou ses procédures techniques quipourraient affecter le fonctionnement de l’équipement. Dans ce cas, la Compagnie des Téléphones est tenue devous fournir un préavis adéquat pour vous permettre d’apporter les modifications nécessaires pour maintenir unservice ininterrompu.
Si vous éprouvez des difficultés avec votre casque, prière de consulter la section concernant les garanties et le ser-vice de réparation. Si ce problème endommageait le réseau téléphonique, la Compagnie des Téléphones peut vousdemander d’enlever cet équipement jusqu’à ce que la source du problème soit déterminée. Dans des cas extrêmes,la Compagnie des Téléphones pourrait être forcée d’interrompre votre service avant de vous informer du problème.
NOTE IMPORTANTE CONCERNANT LES NIVEAUX D’ÉCOUTE
En plus de l’accès au téléphone, l’Amplificateur Headset Switcher vous permet d’utiliser votre casque Plantronicspour écouter la musique en provenance de votre ordinateur ou d’une autre source audio. Cette versatilité supplé-mentaire entraîne la considération du niveau d’écoute à établir.
Les casques Plantronics ont toujours été conçus pour limiter de façon sûre les bruits élevés de courte durée, tels queles ‘clics’, ‘pops’ ou fréquences qui se produisent peu fréquemment lors d’une conversation téléphonique. La con-ception des systèmes téléphoniques aide à assurer qu’une écoute prolongée présentera un risque minimal d’en-dommagement de l’ouïe.
Ceci n’est pas le cas avec des appareils audio externes dont le volume peut être réglé extrêmement fort. L’écoutede la musique à des niveaux très forts pendant longtemps pourrait endommager l’ouïe. Prière de respecter les con-signes suivantes.
• Commencer par un niveau de volume bas.• Augmenter le niveau de volume jusqu’à ce que vous puissiez entendre le son clairement et confortablement.• Ne pas augmenter le niveau au delà de ce point.
Nous voulons que vous obteniez les meilleurs résultats avec votre amplificateur Switcher en l’écoutant à un niveausûr.
Switcher.biling.26-57 11/4/98 8:02 PM Page 56