Embed Size (px)
Citation preview

(c) Copyright Acorn Computers l imi ted 1986 This apparatus is intended for use when supplied with power from theabove power supply. Other usage will invalidate any approval given to this
Neither the whole or any part of the information contained in, or the apparatus if, as a result, it ceases to comply with BS6301: 1982. Do not useproduct described in, this manual may he adapted or reproduced in any the supply in conditions of extreme heat, cold, humidity, dust orm form form . except with the prior written permission of Acorn vibration.Computers Limited (Acorn Computers).
There are no user-serviceable parts inside Communicator, which should Instructions for installing this apparatus are given in Appendix A of this not be disassembled.Guide.
For maintenancq and service on the Communicator, contact your The mains power supply supplied with the Communicator is specified to supplier.operate as follows:
The Acom Communicator is made in the United Kingdom by: Input 240 Volts a.c. 50Hz at 45W Output: 21 Volts a. c. 50Hz at 1.6A.
Acorn Computers LtdThe power supply should be disconnected from the mains supply when the Fulbourn Roadcomputer is not used for long periods. Cherry Hinton
Cambridge CB1 4JN IMPORTANT: The wires in the mains lead for the power supply unit arecoloured in accordance with the following code:
BLUE – NEUTRALB R O W N – L I V E
As the colours of the wires may not correspond with the coloured markings identifying the terminals in your plug, proceed as follows when replacingthe plug. The approval of this modem for connection to telephone networks is
INVALIDATED if the apparatus is subject to any modification in anyThe wire which is coloured blue must be connected to the terminal which
material way not authorised by BABT or is used with, or connected to:is marked with the letter N, or coloured black or blue (though nornecessarily the same shade of that colour). (0 internal software that had not been formally accepted by BART
The wire which is coloured brown must be connected to the terminal (ii) external control software Or external control apparatus which causes
which is marked with the letter L, or coloured red or brown (though not the operation of the modem of associated call set-up equipment tonecessarily the same shade of that colour). contravene the requirements of the standards set out in BABT/SITS/82/If the socket outlet available is not suitable for the plug supplied, the plug 005S/D.
should he cur off and the appropriate plug fitted and wired as previously All apparatus connected to this modem and thereby connected directly ornoted. The moulded plug which has been cut off must be disposed of as it indirectly to the British Telecom public switched telephone network mustwould he a potential shock hazard if it were to he plugged in with the cur he approved apparatus as defined in Section 16 of the Britishend of the mains cord exposed. Telecommunications Act 1981.The moulded plug must he used with the fuse, and fuse carrier firmly in Approval of this apparatus will he INVALIDATED by the use of any
place. The fuse carrier is of the same basic colour as the coloured insert in power supply that does not comply with BS6301. the base of the plug. Different manufacturers' plugs and fuse carriers arenot interchangeable. In the event of loss of the fuse carrier the moulded Please ensure that all stored numbers are correctly programmed.plug MUST NOT be used.
Within this publication the term 'BBC' is used as an abbreviation forEither replace the moulded plug with another conventional plug wired as (British Broadcasting Corporation'.previously described, or obtain a replacement fuse carrier from an
supplies the f the fuse blowing, should he Acorn is a trademark of Acorn Computers Limited. Econet is a registeredauthorised r. In e event o t e use owing, it s o u e Computers Limited.replaced, after clearing any faults, with a 3A fuse that is ASTA approved trademark of Acorn to BS 1362. Typeset by Interaction Systems Limited, CambridgeThis power supply is designed and manufactured to comply with BS415, Cover design by By Design, Newmarket
BS6301 and 1356484. In order to ensure the continued safety of this item it First published October 1986 should be returned to an authorised supplier for repair or replaced with anequivalent unit. Published by Acorn Computers Limited
CONTENTS
1 GETTING STARTED 1.1Switching onCommunicator applications 1.1Selecting a task 1.1Starting a task 1.2Opening another copy of a task 1.2Suspending a task 1.2Resuming a task 1.2Deleting a task 1.3Logging on to a Local Area Network 1.3Setting the time 1.3Switching off 1.3Loading and saving files 1.3Spooling 1.4
2 ECONET LOCAL AREA NETWORK 2.1Logging on 2.1
Logging off 2.1Changing your password 2.2Saving files 2.2Naming files 2.2Renaming files 2.2Getting information about files 2.3Loading files 2.3Deleting files 2.3Protecting your files 2.3File storage space 2.4Directories 2.4Pathnatnes 2.5To create a sub-directory 2.6Moving between directories 2.6To find out what's in a directory 2.6
3 THE BAS1C LANGUAGE 3.1Calling up BASIC 3.1
Working with BASIC 3.1
4 USING THE CALCULATOR 4.1Selecting the Calculator 4.1
Arithmetic 4.1Erasing a number 4.2Clearing a calculation 4.2Display 4.2The Tally 4.2Printing calculations 4.2Negative numbers 4.3Square roots 4. 3Percentages 4.3Memories 4.3Exponents 4.4
5 CONFIGURING YOUR COMMUN1CATOR 5.1Selecting configure mode 5.1
Centronics printer port 5. 3Econet 5.4Printing graphics 5.5Keypage 5.8Main menu 5.9Modem 5.10Netprint 5. 13Printer port 5.14R5423 port 5.15Printing text only 5.17
6 THE CAROUSEL DISPLAY 6.1Creating display screens 6.1
Looking at screens and changing them 6.2Copying and deleting screens 6.2
Setting up the carousel 6. 3Running the carousel 6.3
7 TELEPHONE CALLS 7.1Selecting Phone mode 7.1Dialling a directory number 7.2Manual dialling 7.2To redial last number 7.3Making a directory entry 7.3Copying a directory entry 7.4To delete an entry 7.4Looking up an entry 7.4Searching for an entry 7.5
8 VIDEOTEX 8.1Selecting Phone mode 8. 1
Dialling a listed number 8.2To redial last number 8.2Entering a number into the directory 8.3Copying a directory entry 8.6Keypage 8.6Saving screens 8.6Sending a page 8.7REVEAL and CONCEAL 8.7Sending a file 8.7Printing a screen 8.7Simultaneous printing 8.7Finishing a terminal session 8.7Videotex mode options 8.8Videotex technical specification 8.8
9 TERMINAL EMULATION 9.1Selecting Phone mode 9.1
Dialling a listed number . 9.2To redial last number 9.2Entering a number into the directory 9.3Copying a directory entry 9.6
Multiple data calls 9.6
Auto-answer mode 9.6Saving screens 9.7Sending a page 9.7Sending a file 9.7Printing a screen 9.7Simultaneous printing 9.7Application escape 9.8Session spooling 9.8Finishing a terminal session 9.8Emulation mode options 9.8TTY emulation technical specification 9.9BBC emulation technical specification 9. 10VT100 technical specification 9.11
10 VIEWSHEET 10.1Calling up ViewSheet 10.1
Working with ViewSheet 10.1
11 WORD PROCESS1NG W1TH V1EW 11.1Calling up VIEW 11. 1
Working with VIEW 11.1
Appendix A: INSTALLATION A.1What you will need A.1
Communicator checklist A.1Connecting the monitor A.2Connecting the printer A.2Connection to the telephone network A.2Connecting the mains transformer A. 4Peripherals A.4Connectors A. 5Setting the loudspeaker volume A. 6
Appendix B: TERMINAL EMULATION ERROR MESSAGES B.1Possible faults B.1

Appendix C: COMMAND STR]NG FORMATS C. 1View highlight commands C. 1View character translations C . 2
Appendix D: AUTO-LOGON CHARACTERS D.1
Variable pauses on output 1). 1
Wait for inputEscape character D. 1Send and receive control characters D.2
Part number 0452,001 Issue 3 ISBN 85250 029 8
Conventions In this guide, commands are shown in the following forms:
Computer typeface
Type in the command exactly as shown. Commands may be typed in either upper or lower case though in this manual they are shown in upper case.
Italic computer typeface
Type the appropriate name or number.
CAPITALS
Press the function key specified. Key functions are indicated on the screen.
Examples
LOAD filename [Return]
means type the word LOAD exactly as shown; type a filename of your choice; press the [Return] key.
MODE number [Return]
means type the word MODE; type a number; press [
Switching on
Communicator applications
Selecting a task
GETTING STARTEDYour Communicator should first have been set up as described in Appendix A.
Plug in and switch on at the mains socket.
Switch on the display (VDU).
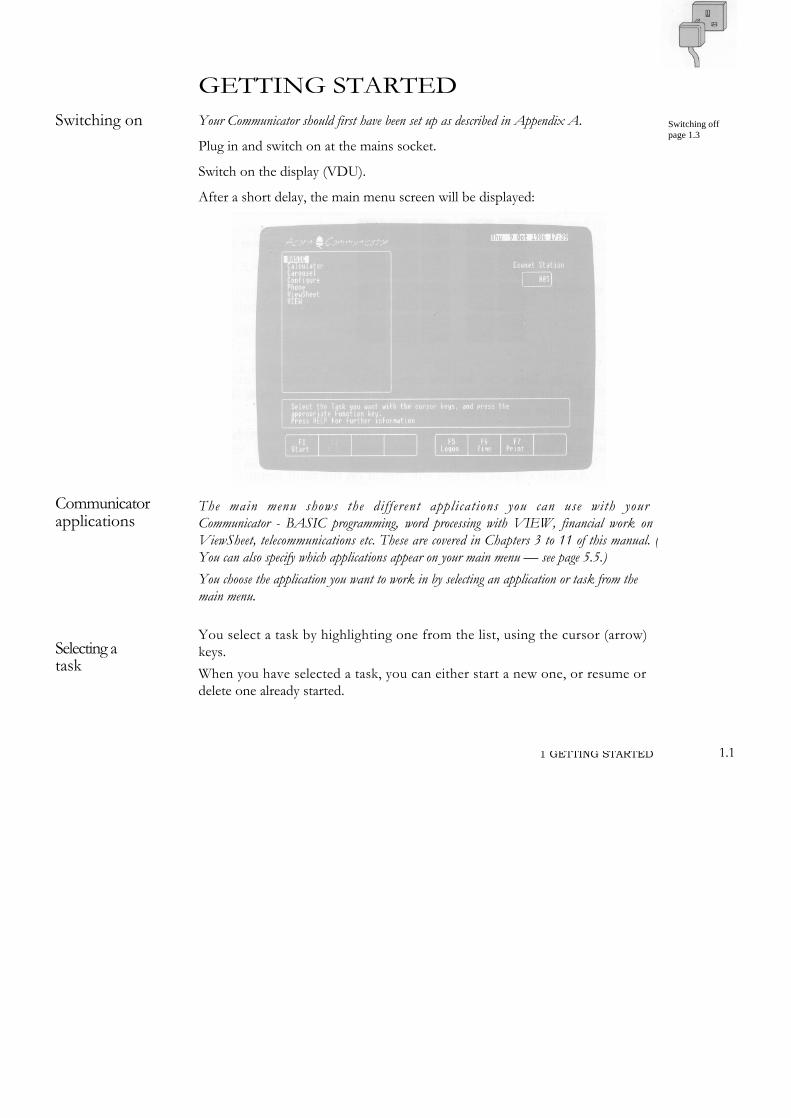
After a short delay, the main menu screen will be displayed:
The main menu shows the different applications you can use with your Communicator - BASIC programming, word processing with VIEW, financial work on ViewSheet, telecommunications etc. These are covered in Chapters 3 to 11 of this manual. (You can also specify which applications appear on your main menu — see page 5.5.)You choose the application you want to work in by selecting an application or task from the main menu.
You select a task by highlighting one from the list, using the cursor (arrow) keys.When you have selected a task, you can either start a new one, or resume or delete one already started.
Switching off page 1.3
1.11 GETTING STARTED
Starting a task
Select the task you want, and press START.
The task will come up on the screen.
When you go back to the main menu, the task will have Active against it.
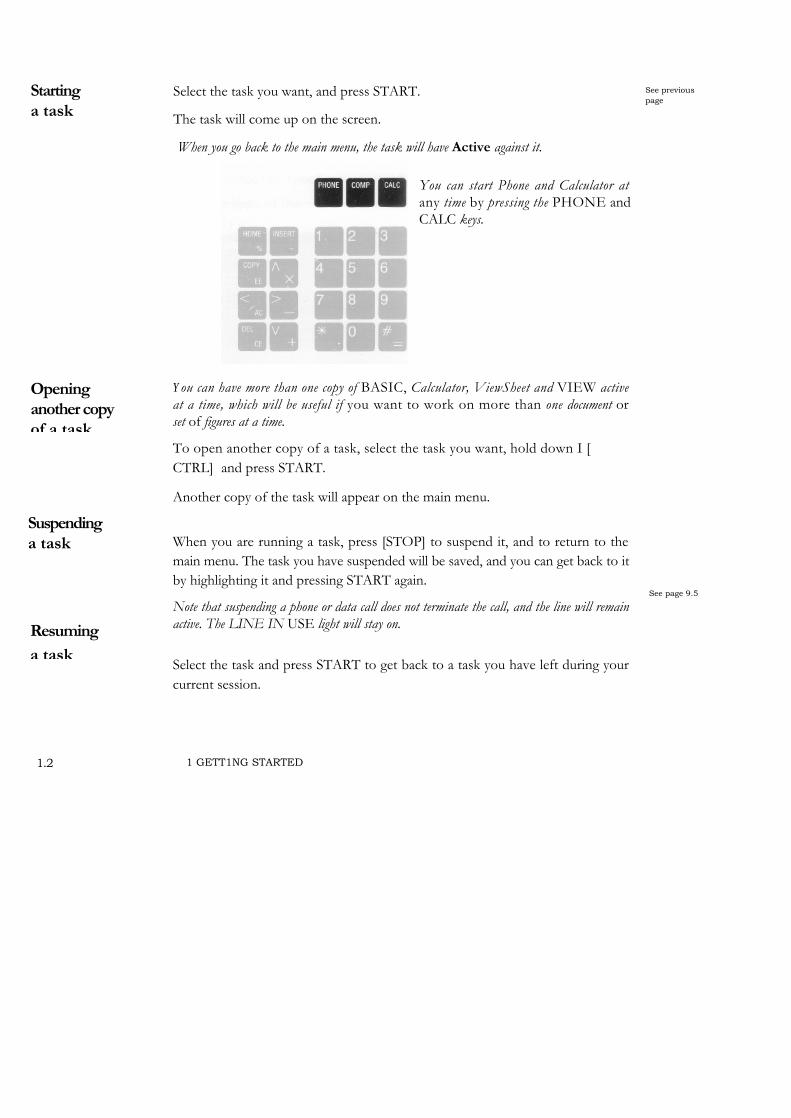
You can start Phone and Calculator at any time by pressing the PHONE and CALC keys.
Opening another copy of a task
Suspending a task
Resuminga task
You can have more than one copy of BASIC, Calculator, ViewSheet and VIEW active at a time, which will be useful if you want to work on more than one document or set of figures at a time.
To open another copy of a task, select the task you want, hold down I [CTRL] and press START.
Another copy of the task will appear on the main menu.
When you are running a task, press [STOP] to suspend it, and to return to the main menu. The task you have suspended will be saved, and you can get back to it by highlighting it and pressing START again.
Note that suspending a phone or data call does not terminate the call, and the line will remain active. The LINE IN USE light will stay on.
Select the task and press START to get back to a task you have left during your current session.
See previous page
See page 9.5
1.2 1 GETT1NG STARTED
Deleting a task
Logging onto a Local Area Network
Setting the time
Switching off
Loading and saving files
Get back to the main menu. Select the copy of the task you want to delete, and press KILL.
The Active note will disappear from the task. If you are deleting an additional copy of a task which you have created, it will disappear completely from the menu. Deleting tasks frees the Communicator's memory for other applications.
If your Communicator is part of an Econet Local Area Network, you will need to log on to the network before you can connect with other machines and resources (such as printers) in the network:
Press LOGON from the main menu.
The system will ask you to type in your user identification and password before connecting you to the network.
See Chapter 2 for more information on the Econet Local Area Network.
Get back to the main menu and press TIME.
You will be prompted to type in the date and the time. Press [Return] after each entry.
The Communicator's clock runs off an internal battery which is kept recharged by the mains. You should not normally need to set the time after your Communicator has been installed, unless it has been left switched off for several months.
Switch off at the mains.
Turn off the display.
If you need to save files locally, created from VIEW, ViewSheet, BASIC and terminal sessions, you will normally do this to a FileStore, if you are connected to one (see next chapter).However, Communicator also has an internal Random Access Memory (RAM) filing system, with a capacity of 64K, plus a CMOS RAM of 32K. The contents of RAM disappear when you switch off the machine, but CMOS RAM is maintained after switch-off by Communicator's own battery. The Carousel program saves screens automatically to CMOS RAM (see Chapter 6).
1 GETT1NG STARTED 1.3
Spoolin
g
To save a file to RAM, type SAVE RAM:filenameTo save a file to CMOS RAM, type SAVE RAM:!filename
You enter these commands from BASIC, or a VIEW or ViewSheet command screen.
To display the contents of both RAMS, type *. RAM:
You can spool , or copy, everything you enter on the screen during a session automatically to a file. This is useful, for example, for moving data between applications such as VIEW and ViewSheet. The command to start spooling is:
*SP0OL filename
This opens a new file and starts spooling to it. To spool to an existing file, type:
*SP00L0N filename
Information will continue to be spooled to the file until you enter *SP0OLagain (without the file name this time).
You can also spool from a terminal session. See page 9.8.
1.4 1 GETTING STARTED
2 ECONET LOCAL AREA NETWORK
Logging on
Logging off
This chapter will be of interest if your Communicator is connected to an Econet Local Area Network with a FileStore file server. The network provides storage for files created using a Communicator application (like VIEW or ViewSheet), and allows several Communicators to share information and resources such as printers.You will normally only use network facilities while you are working in such an application. You enter the network commands described in this chapter from the application command screen.
This chapter covers the tasks you are likely to need to carry out on a daily basis. These include saving and loading information, deleting old files, obtaining information on files saved, organising your files in a structured way, and preventing unauthorised access to information you wish to keep secure. More advanced functions are covered in the FileS tore Manager's Guide.
The network should be installed and set up as described in the FileStore Manager's Guide.
You need to log on to Econet before you can connect with other machines in the network:
Press LOGON from the main menu.
The system will ask you to type in your user identification and password before connecting you to the network (see your system manager if you don't know what these are).When you have done this, press the space bar to continue. You can then use the network facilities when you need them.
Get back to the main menu. Press:
LOGON [Return]
Press the space bar to continue.
2 ECONET LOCAL AREA NETWORK 2.1

Changing your password
Saving
files
Naming files
Renaming files
2.2
You can change your password as often as you like, which is a good idea if the security of your data is important.
From an application command screen, type:
*PASS oldpassword newpassword
You can save a copy of your work onto the FileStore disc, so that you can retrieve it later. Such a copy is called a file.The way you instruct Communicator to save a file will depend on the particular application you are working in at the time. See the application user guide for the appropriate command. You often have to type, for example:
SAVE filename
filename will be the name you give to the file so that you can identify it. When you press [Return], the file will be saved on the disc in the FileStore.
Note that if you already have a file with the same name on the network, this action will delete the earlier file and replace it by the new one.
File names can have up to ten characters, and can consist of any combination of letters, numbers and the following symbols:
! % = ~ \ @ { [ £ ; } ] < > ? / a n d _
Spaces and other symbols are not permitted.
You can change the name of a file by typing (from the command screen of the application in which you are working):
*RENAME existing new
existing here means the current file name;
new is for the new name you are giving it.
2 ECONET LOCAL AREA NETWORK
Getting information about files
Loading files
Deleting files
Protecting your files
To find out information about a file, such as its size, type:
*INF0 f i l e n a m e
The information will be displayed on the screen.
To list out the files in a directory, and to give you the same information on each file as *INFO, type:
*EX
The exact procedure for retrieving, or loading a file from FileStore will depend on the application you are working in (see the Application User Guide).The command you have to enter, once you have logged on and are working in the application, will be something like:
LOAD filename
The file will be loaded into Communicator's current memory for you to work on.
To delete a file, type:
*DELETE filename
The file will be permanently deleted from your directory.
You can protect a file from deletion by using the *ACCESS command. If you try to delete such a file, the message Entry cocked will appear on your screen.
To delete a directory, you first have to delete all the files it contains.
You can specify the rights of access you want other users to have to a file, and protect it from deletion, using the *ACCESS command. This is followed by the suffixes R, W and L (Read, Write and Locked), which specify the level of protection you want it to have:R means that the file can be read.W means that the file can be written to.L means that the file cannot be deleted.
See protecting
your files
2.32 ECONET LOCAL AREA NETWORK
File storage space
Directories
For each file you must specify the level of protection you want for yourself, followed by the level of protection from other users, separated by a /.
For example, if you want to be able to read and write to a file yourself, and not delete it accidentally, but only want others to be able to read it (not write to it and not delete it), you would type:
*ACCESS filename RWL/R
You can enter any combination of these characters, but you don't need to enter L after the /, as files are automatically locked to other users.
If you don't want anyone else to have any access at all to a file, don't make any entry after the /. For example, for a file you want to be able to read only, and no one else, type:
*ACCESS filename R/
The amount of space available to you for storing your files on is fixed by your system manager.
To -find out how much space you have left, type:
*READFREE
The space left to you will be displayed, in bytes (characters).
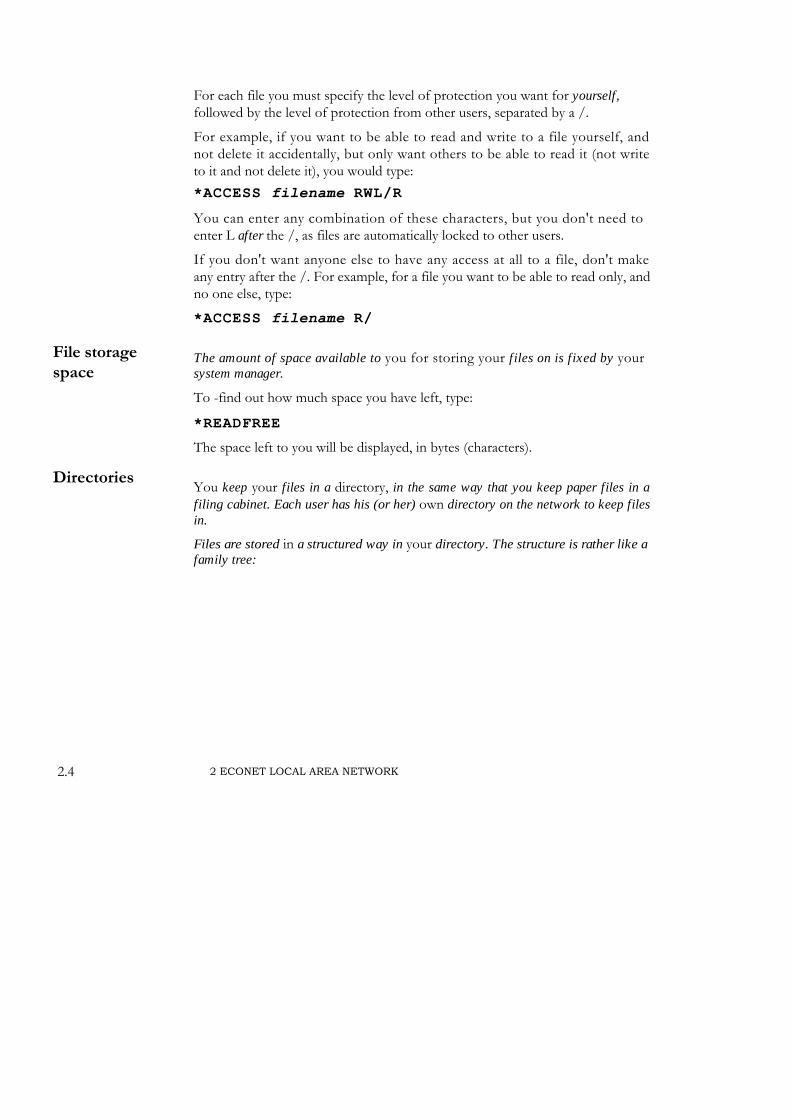
You keep your files in a directory, in the same way that you keep paper files in a filing cabinet. Each user has his (or her) own directory on the network to keep files in.
Files are stored in a structured way in your directory. The structure is rather like a family tree:
2.4 2 ECONET LOCAL AREA NETWORK
at the top is the main, or root directory (referred to as $)
the next level is foruser directories
(pathname $. PJONES etc.)the lower level is for files within
user directoriesand for sub-directories
(pathname $.PJ0NES.memos etc.)the bottom level is for
files within sub-directories(pathname $.PJONES.memos .expend etc.)
See pathnames below
To continue the filing cabinet analogy, the root directory is like the cabinet itself, the user directories are like the drawers in the cabinet, and the sub-directories are like the folders in a drawer, each one of which might hold a number of files.The file expend shown above would be in the section memo in the drawer marked PJONES.
There is no limit to the number of levels of directories and sub-directories you can create.
You refer to a file by using its pathname, or location. When you first log on, you are in your user directory, and can call up directories and files in that directory. If you want to address a file in another directory (for example, for loading or saving it), you have either to move to the directory yourself or to specify its location. In the example above, while you are in PJONES user directory, the location of the file expend is PJ0NES.memos.expend (each directory level is separated from the next, and from the filename, by a full stop).
Pathnameses
See moving between directories
2.52 ECONET LOCAL AREA NETWORK
To create a sub-directory
Moving between directories
To find out what's in a directory
To create a sub-directory within your main directory, type:
*CDIR directory name
You can also create lower levels of directory by using this command from the sub-directory itself.
You select the directory you want to work in by using the command *DIR, followed by the name of the directory. For example, if you have just logged on and want to go to a main directory in the root directory, type:
*DIR directory name
If you want a directory at a different level altogether, you will have to specify a pathname as well as the directory name.
To return to your own user directory, type:
* D I R
To check the contents of a directory, type:
*CAT
The contents of the directory will be displayed.
This is also a good way of checking which directory level you are at.
See pathname on previous page
2.6 2 ECONET LOCAL AREA NETWORK

3 THE BASIC LANGUAGE
Calling up BASIC
Working with BASIC
Get back to the main menu, select BASIC and press START to start a new session, or to resume an existing one.
If you want to have more than one session in BASIC active at a time, see Opening another copy of a task in Chapter 1.
See the BASIC Reference Manual, supplied with the Communicator, for information on using BASIC.
3. 13 THE BASIC LANGUAGE
Selecting the
Calculator
Arithmetic
4 USING THE CALCULATOR
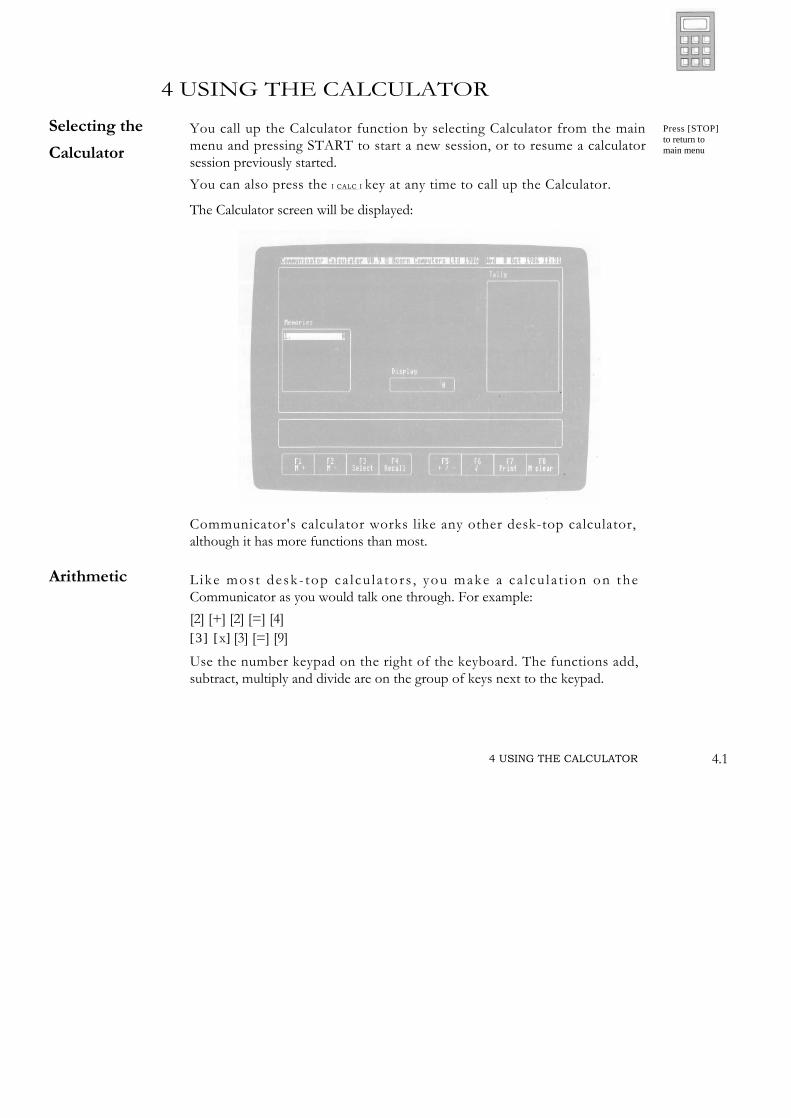
You call up the Calculator function by selecting Calculator from the main menu and pressing START to start a new session, or to resume a calculator session previously started.
You can also press the I CALC I key at any time to call up the Calculator.
The Calculator screen will be displayed:
Communicator's calculator works like any other desk-top calculator, although it has more functions than most.
L ike mos t desk - top ca l cu l a to r s , you make a ca l cu l a t ion on the Communicator as you would talk one through. For example:
[2] [+] [2] [=] [4][3] [x] [3] [=] [9]
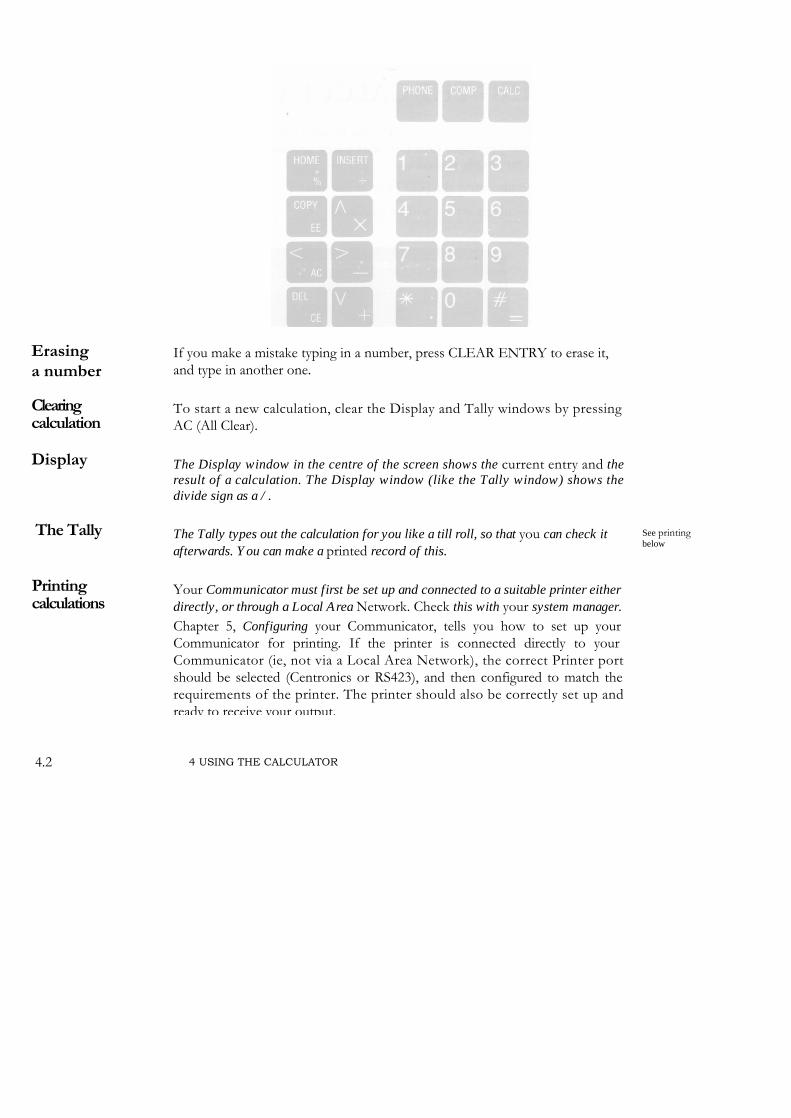
Use the number keypad on the right of the keyboard. The functions add, subtract, multiply and divide are on the group of keys next to the keypad.
Press [STOP] to return to main menu
4.14 USING THE CALCULATOR
Erasinga number
Clearing calculation
Display
The Tally
Printing calculations
If you make a mistake typing in a number, press CLEAR ENTRY to erase it, and type in another one.
To start a new calculation, clear the Display and Tally windows by pressing AC (All Clear).
The Display window in the centre of the screen shows the current entry and the result of a calculation. The Display window (like the Tally window) shows the divide sign as a / .
The Tally types out the calculation for you like a till roll, so that you can check it afterwards. You can make a printed record of this.
Your Communicator must first be set up and connected to a suitable printer either directly, or through a Local Area Network. Check this with your system manager.
Chapter 5, Configuring your Communicator, tells you how to set up your Communicator for printing. If the printer is connected directly to your Communicator (ie, not via a Local Area Network), the correct Printer port should be selected (Centronics or RS423), and then configured to match the requirements of the printer. The printer should also be correctly set up and ready to receive your output.
See printing below
4.2 4 USING THE CALCULATOR

Negative numbers
Square roots
Percentages
Memories
Press PRINT.
The contents of the screen will be printed out.
Enter a positive number into the Display, then press the +/— key to turn it into a negative amount. Press the key again to change it back to a positive number.
Enter a number in the Display, then press the V key. The square root will appear in the Display window.
To find a certain percentage of a number, enter the number, times the percentage you want, then press % rather than =.
For example, to find 15% of 250 enter:
250 X 15 %
and the answer (37.5) will appear in the Display and Tally windows.
There is also a quick method of adding and subtracting a percentage of a number to or from that number. This is useful for VAT and commission calculations.
For example, to calculate 250 plus 15% enter:
250 + 15 %
and the answer (287.5) is displayed on the screen.
Communicator has eight memory slots to store numbers.
To enter a number into memory, type the number in the Display window (or the number you want may be there already as the result of a calculation), and press M+. The number will appear in memory slot 1.To enter another number into memory, press SELECT, and, in response to the prompt, type in the number of the memory slot where you want to keep the number (number 2 to 8). Get the number into the Display, then press M+.
To recall a number from memory, select the memory slot where it is located (SELECT, followed by the number), and press RECALL.
4 US1NG THE CALCULATOR 4.3
Exponents
To add the Display to the memory selected, press M+.
To subtract the Display from the memory selected, press M-.
To clear a memory slot, select the slot (SELECT, followed by the number), then press M CLEAR.
You can use Communicator's Exponent function to enter very large or very small numbers:
First type in the mantissa, followed by [EE], then the power of ten by which the mantissa is to be multiplied.
For example, to enter 1,200,000, type:
1.2 [EE] 6
The answer will be shown as 1.2E6, and printed out in full after the next step in the calculation.
You can enter decimal fractions by typing a negative exponent. You do this the same way, pressing the +/- key to make it a negative power.
For example, to enter 0.00012, type:
1.2 [EE] 4 +/-
You use the ^ key to raise a number to a power of another
number. For example, to raise 45 by the power of 5 enter:
45 ^5
4.4 4 USING THE CALCULATOR
CONFIGURING YOUR COMMUNICATOR
Selecting configure mode
This section describes how to set up, or configure, your Communicator to suit the different data communications tasks it may be required to perform. The devices which can be configured are the Centronics parallel printer port, the RS423 serial port, the modem, the printer interface, and Econet station parameters. You can also select which tasks appear on the main menu at power-up, and enter the viewdata abbreviated page codes.The values you choose for the modem and the RS423 serial port will depend on the requirements of the remote system. You may need to contact the supervisor of the remote system to find out what these are.
Configuration is normally only necessary at the time of installation, and when additional facilities are added to the system. It will therefore be of most interest to system managers.Configuration parameters are held in non-volatile RAM, so that they are retained by Communicator even when it is switched off at the mains. If your Communicator is not used for some months, and the battery becomes discharged, it may be necessary to re-configure it. Check this with your system manager.
Get back to the main menu and select Configure from the list of task names.
Press START.
You will see the following screen, which lists the devices you can configure:
5.15 CONFIGUR1NG YOUR COMMUNICATOR
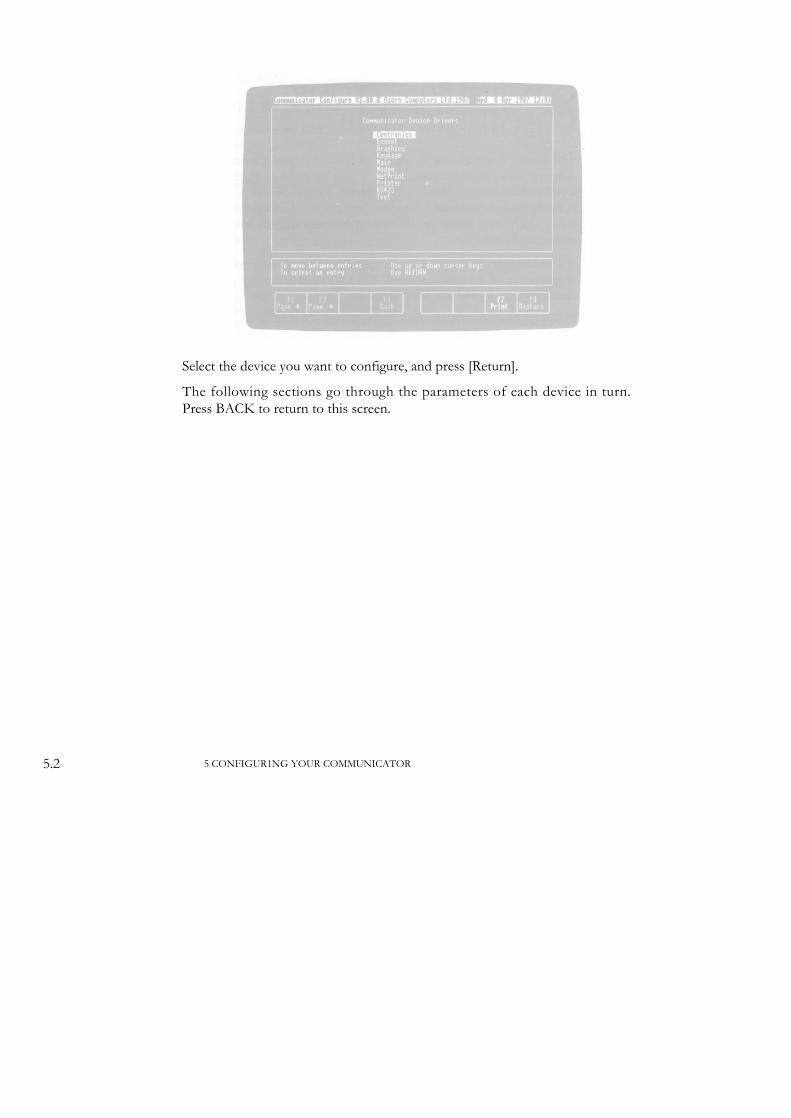
Select the device you want to configure, and press [Return].
The following sections go through the parameters of each device in turn. Press BACK to return to this screen.
5.2 5 CONFIGUR1NG YOUR COMMUNICATOR
Centronics printer port
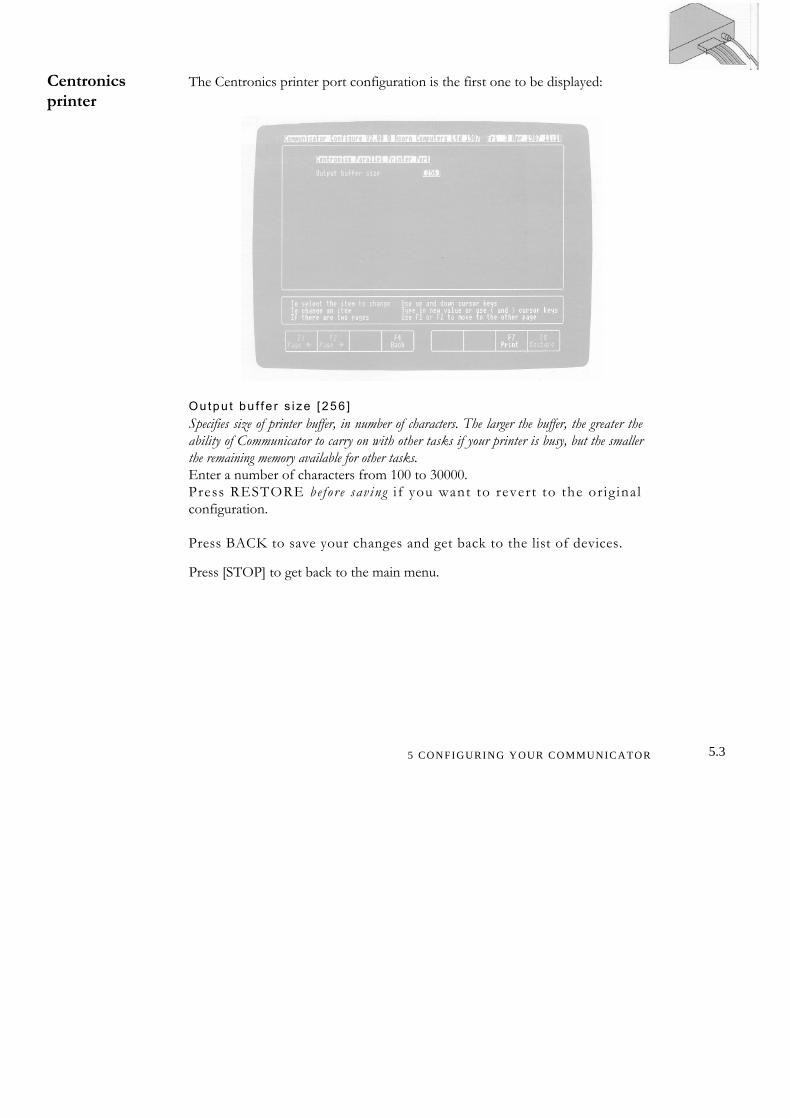
The Centronics printer port configuration is the first one to be displayed:
Outpu t bu f fe r s i ze [ 256 ]Specifies size of printer buffer, in number of characters. The larger the buffer, the greater the ability of Communicator to carry on with other tasks if your printer is busy, but the smaller the remaining memory available for other tasks.Enter a number of characters from 100 to 30000.Press RESTORE be fo r e sav ing i f you want to revert to the or ig ina l configuration.
Press BACK to save your changes and get back to the list of devices.
Press [STOP] to get back to the main menu.
5 CONFIGURING YOUR COMMUNICATOR 5.3
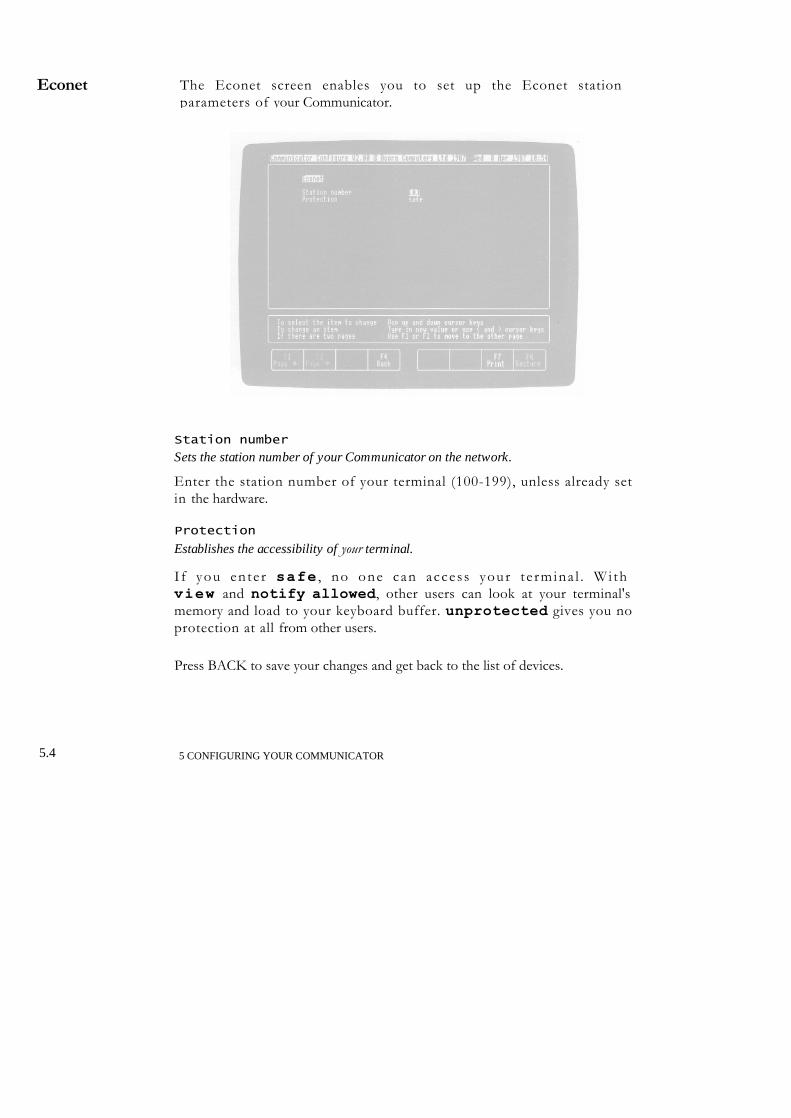
The Econet screen enables you to set up the Econet station parameters of your Communicator.
Econet
5.4
Station number
Sets the station number of your Communicator on the network.
Enter the station number of your terminal (100-199), unless already set in the hardware.
Protection
Establishes the accessibility of your terminal.
I f you en te r safe , no one can acces s your t e rmina l . Wi th view and notify allowed, other users can look at your terminal's memory and load to your keyboard buffer. unprotected gives you no protection at all from other users.
Press BACK to save your changes and get back to the list of devices.
5 CONFIGURING YOUR COMMUNICATOR
Printing graphics
Press RESTORE before saving if you want to revert to the original configuration.
Press [STOP] to get back to the main menu.
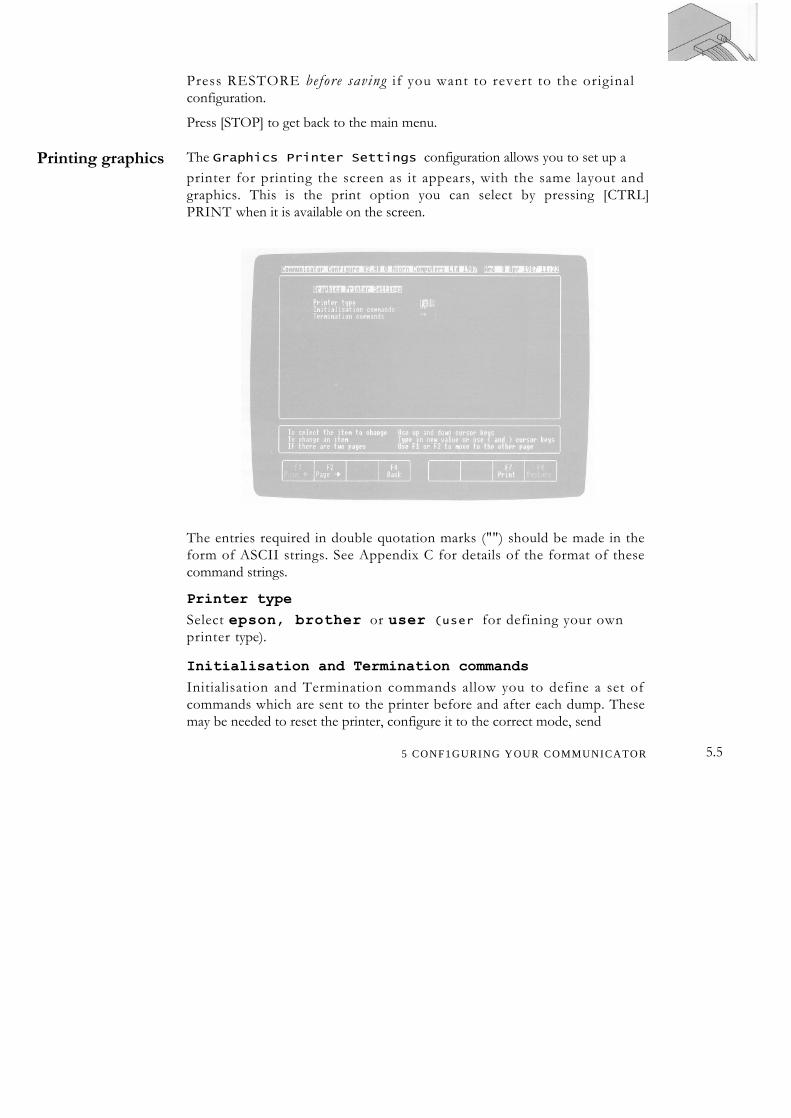
The Graphics Printer Settings configuration allows you to set up aprinter for printing the screen as it appears, with the same layout and graphics. This is the print option you can select by pressing [CTRL]PRINT when it is available on the screen.
The entries required in double quotation marks ("") should be made in the form of ASCII strings. See Appendix C for details of the format of these command strings.
Printer type
Select epson, brother or user (user for defining your own printer type).
Initialisation and Termination commands
Initialisation and Termination commands allow you to define a set of commands which are sent to the printer before and after each dump. These may be needed to reset the printer, configure it to the correct mode, send
5 CONF1GURING YOUR COMMUNICATOR 5.5
5.6
form-feeds before or after, or to restore the printer to the local default mode after printing.
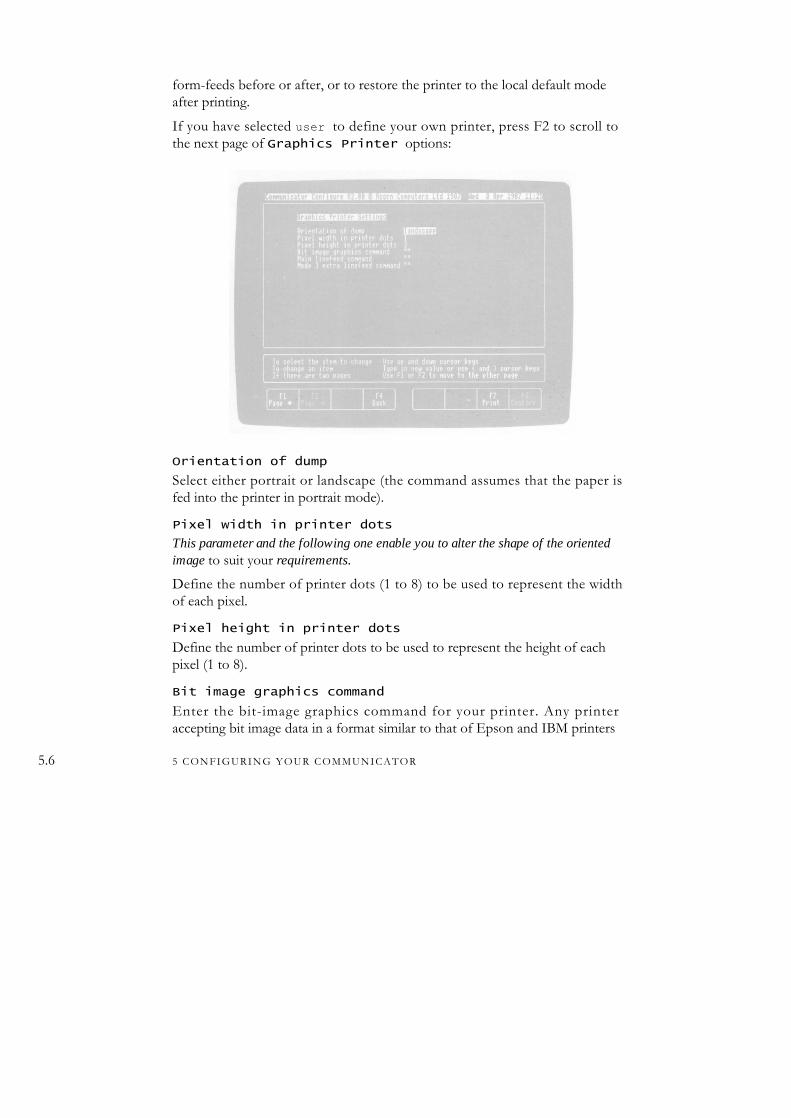
If you have selected user to define your own printer, press F2 to scroll to the next page of Graphics Printer options:
Orientation of dump
Select either portrait or landscape (the command assumes that the paper is fed into the printer in portrait mode).
Pixel width in printer dots
This parameter and the following one enable you to alter the shape of the oriented image to suit your requirements.
Define the number of printer dots (1 to 8) to be used to represent the width of each pixel.
Pixel height in printer dots
Define the number of printer dots to be used to represent the height of each pixel (1 to 8).
Bit image graphics command
Enter the bit-image graphics command for your printer. Any printer accepting bit image data in a format similar to that of Epson and IBM printers
5 CONFIGURING YOUR COMMUNICATOR
can be supported. Each line of data is output to the printer in the following format:
1. The bit-image graphics command.
2. The byte count (a two-byte number, sent least significant bit first), representing the number of data bytes to follow.
3. The data bytes, each byte representing a column of eight printer dots, with the least significant bit representing the lowest dot in the column.
Note that certain ink-jet printers use forms of raster-scan graphics, which is not at present supported by Communicator, nor are PostScript printers which require data in an ASCII form.
Main linefeed command
Sets the linefeed depth after every carriage return, so that successive lines of print appear without breaks between them. If your printer will not accept fractional linefeeds, you may be able to set the linefeed depth with the initialisation commands (see below).
Mode 3 extra linefeed command
Inserts extra linefeeds between lines of text when mode 3 and mode 6 screens are printed out.
For portrait mode, enter an extra fractional linefeed between lines.
For landscape mode, leave this option blank (the gaps are inserted as extra data bytes in the bit-image data).
Press RESTORE before saving if you want to revert to the original configuration.
Press BACK to save your changes and get back to the list of devices.
Press [STOP ] to get back to the main menu.
5 CONFIGURING YOUR COMMUN1CATOR 5.7
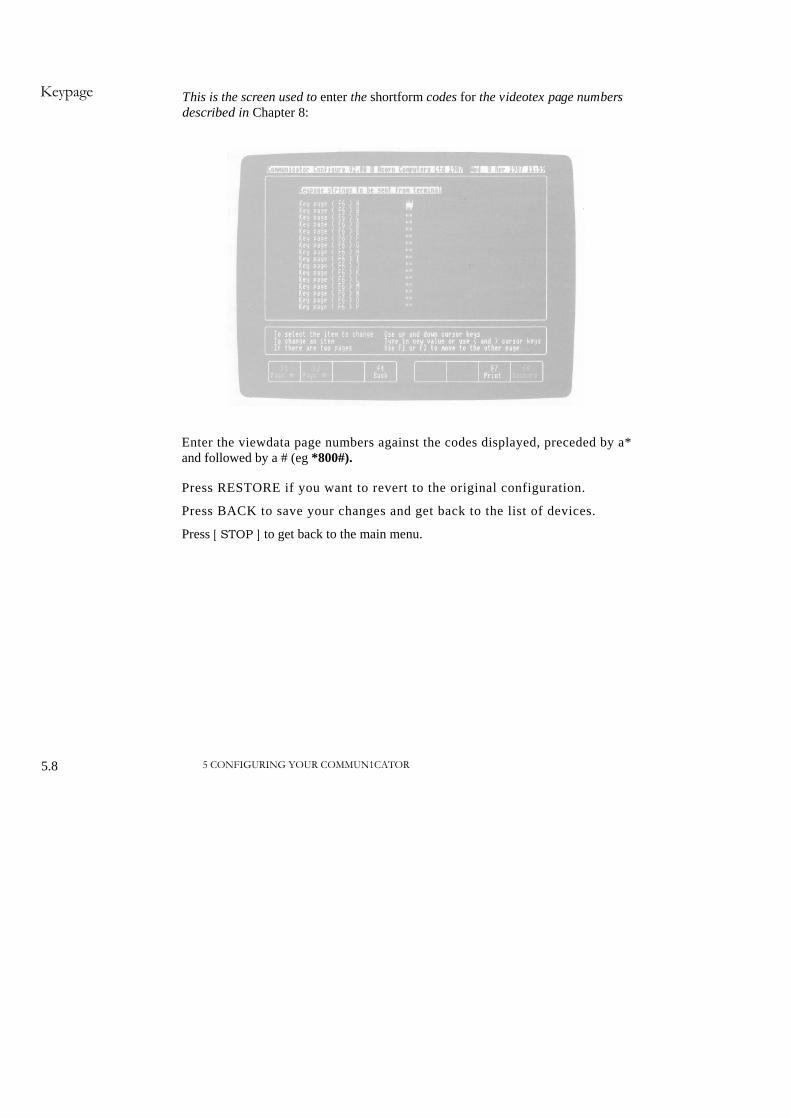
This is the screen used to enter the shortform codes for the videotex page numbers described in Chapter 8:
Keypage
Enter the viewdata page numbers against the codes displayed, preceded by a* and followed by a # (eg *800#).
Press RESTORE if you want to revert to the original configuration.
Press BACK to save your changes and get back to the list of devices.
Press [ STOP ] to get back to the main menu.
5.8 5 CONFIGURING YOUR COMMUN1CATOR
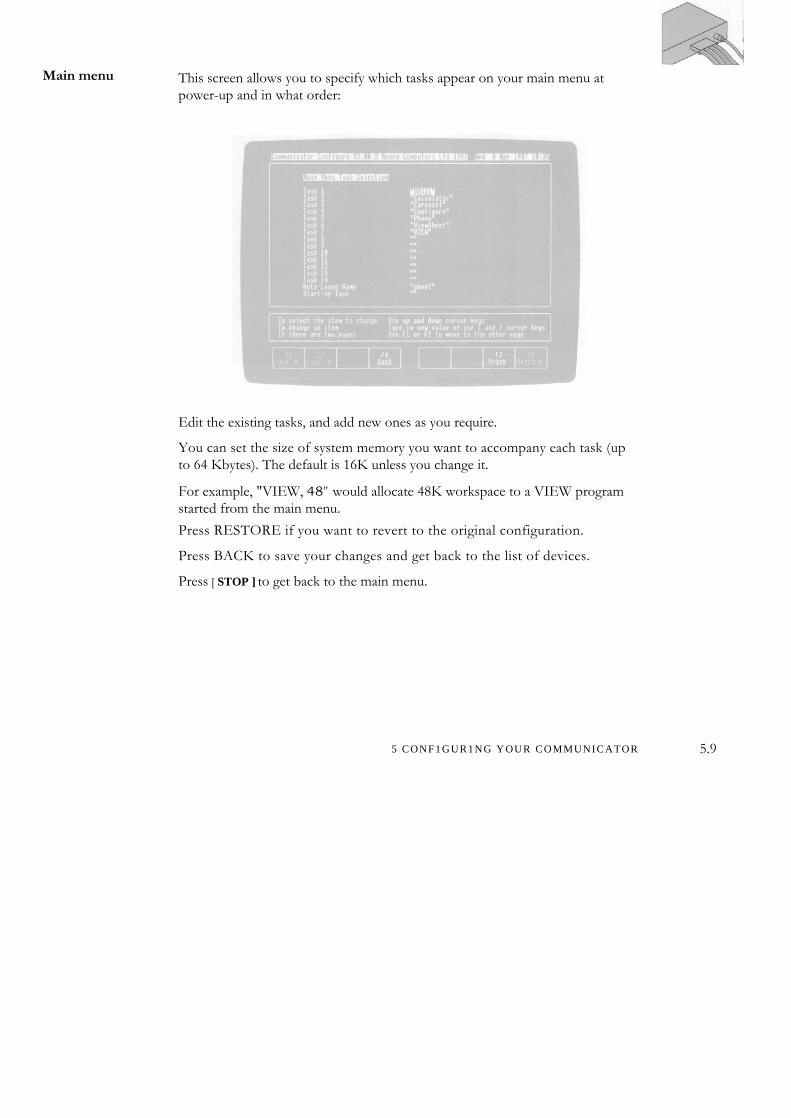
Main menu This screen allows you to specify which tasks appear on your main menu at power-up and in what order:
Edit the existing tasks, and add new ones as you require.
You can set the size of system memory you want to accompany each task (up to 64 Kbytes). The default is 16K unless you change it.
For example, "VIEW, 48" would allocate 48K workspace to a VIEW program started from the main menu.
Press RESTORE if you want to revert to the original configuration.
Press BACK to save your changes and get back to the list of devices.
Press [ STOP ] to get back to the main menu.
5 CONF1GUR1NG YOUR COMMUNICATOR 5.9
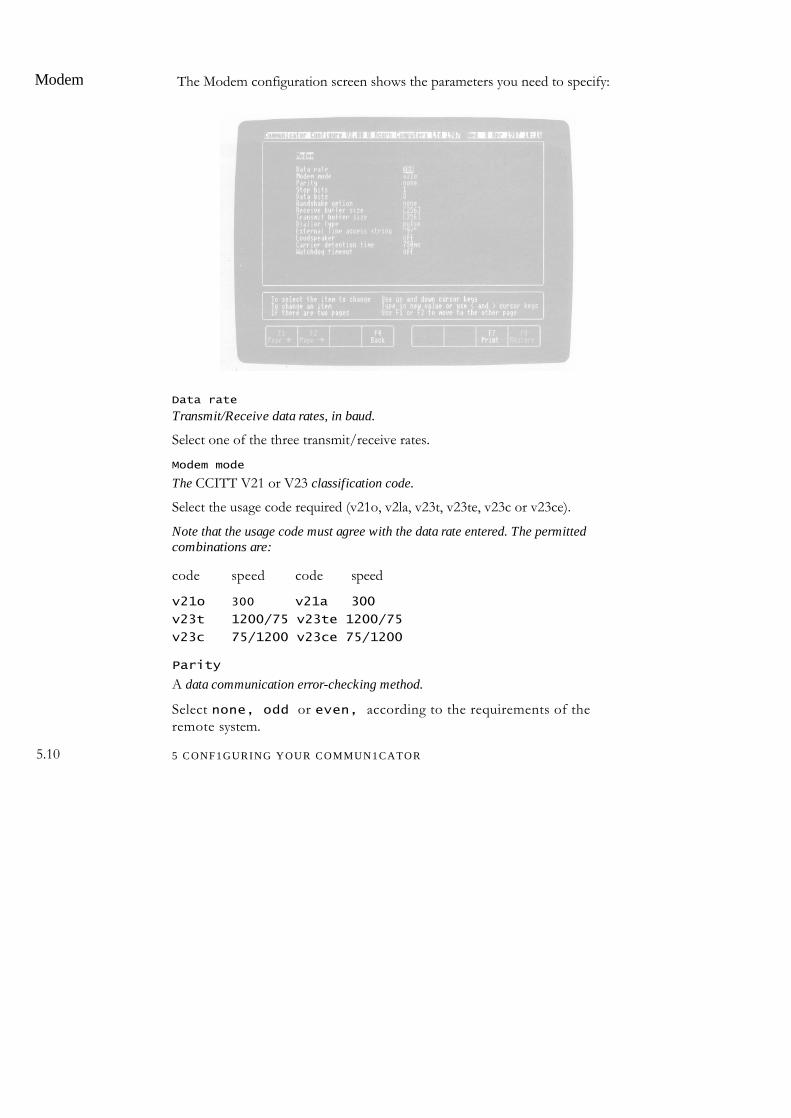
The Modem configuration screen shows the parameters you need to specify:Modem
5.10
Data rate
Transmit/Receive data rates, in baud.
Select one of the three transmit/receive rates.
Modem mode
The CCITT V21 or V23 classification code.
Select the usage code required (v21o, v2la, v23t, v23te, v23c or v23ce).
Note that the usage code must agree with the data rate entered. The permitted combinations are:
code speed code speed
v21o 300 v21a 300
v23t 1200/75 v23te 1200/75
v23c 75/1200 v23ce 75/1200
Parity
A data communication error-checking method.
Select none, odd or even, according to the requirements of the remote system.
5 CONF1GURING YOUR COMMUN1CATOR
Stop bits
The number of stop bits transmitted after each character.
Select 1 or 2
Data bits
The number of bits transmitted in a character.
Select either 8 or 7
Handshake option
The exchange of signals when a connection is made.
Select either none or xon/xoff
Receive buffer size
The size of the receive buffer, in characters.
Specify the number of characters the buffer can contain (100-30000). The larger the buffer, the more efficiently you will be able to receive data, but the more likely the danger of getting 'out of step' with the remote terminal, and the less space available for other tasks.
Transmit buffer size
The size of the transmit buffer, in characters.
Specify the number of characters the buffer can contain (100-30000). The larger the buffer, the more efficiently you will be able to transmit data, but the more likely the danger of getting 'out of step' with the remote terminal, and the less space available for other tasks.
Dialler type
The type of dialling required by the exchange.
Select pulse (Loop Disconnect) when you are connected directly to the telephone network, tone (Multi Frequency) when you are connected via a modern PBX (private exchange).External line access string
(If you have a PBX) the prefix you dial to get an outside line. Enter
any combination of the characters 0123456789ABCD* .
You can follow the prefix by a character which introduces a delay before dialling the main number, to suit different types of PBX ("–" for 800ms, "." for 2 seconds and "/" for 4 seconds delay). If you have to wait for an outside
5 CONF1GURING YOUR COMMUNICATOR 5.11
dial tone, the prefix must be followed by a "/". The default is "9/" (ie, dial 9, then wait 4 seconds before dialling main number).
If you are connected directly to the public telephone network, type a space.
Loudspeaker
Enables you to monitor the progress of a call.
Select off to hear a call ring and connect only, on to follow the complete progress of a call.
Carrier detection time
Sets the minimum time for which the carrier must be present at the start or absent at the end of a call, for Communicator's modem to detect it.
Select 15, 75, 250, 750 or 2500 ms. The time should be 250ms or greater on V25.The voice entry should be used for voice calls only and gives no carrier detection delay.
Watchdog
This disconnects the call if no data is detected on the line for a specific period of time.
Select off, 1 min, 5 min, 15 min or 60 min.Press RESTORE if you want to revert to the original configuration.
Press BACK to save your changes and get back to the list of devices.
Press [ STOP ] to get back to the main menu.
5.12 5 CONFIGURING YOUR COMMUNICATOR
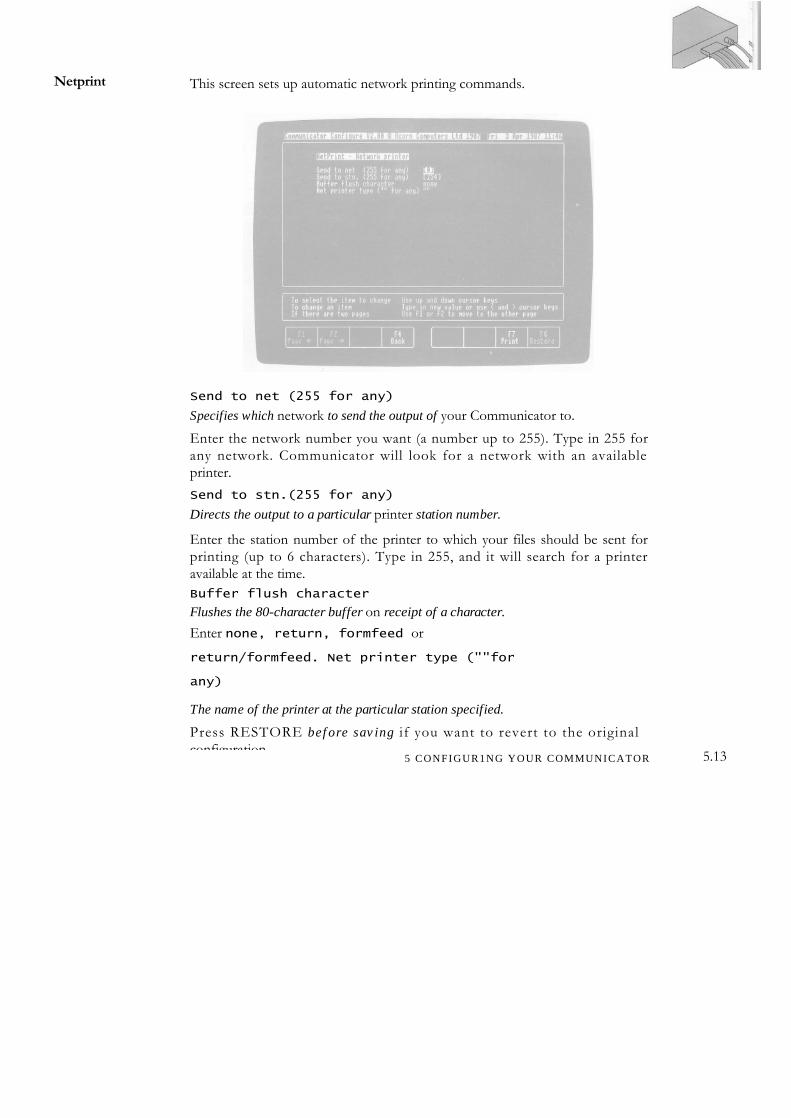
Netprint This screen sets up automatic network printing commands.
Send to net (255 for any)
Specifies which network to send the output of your Communicator to.
Enter the network number you want (a number up to 255). Type in 255 for any network. Communicator will look for a network with an available printer.
Send to stn.(255 for any)
Directs the output to a particular printer station number.
Enter the station number of the printer to which your files should be sent for printing (up to 6 characters). Type in 255, and it will search for a printer available at the time.Buffer flush character
Flushes the 80-character buffer on receipt of a character.
Enter none, return, formfeed or
return/formfeed. Net printer type (""for
any)
The name of the printer at the particular station specified.
Press RESTORE before saving if you want to revert to the original configuration.
5 CONFIGUR1NG YOUR COMMUNICATOR 5.13
Printer port
5.14
Press BACK to save your changes and get back to the list of devices.
Press [ STOP ] to get back to the main menu.
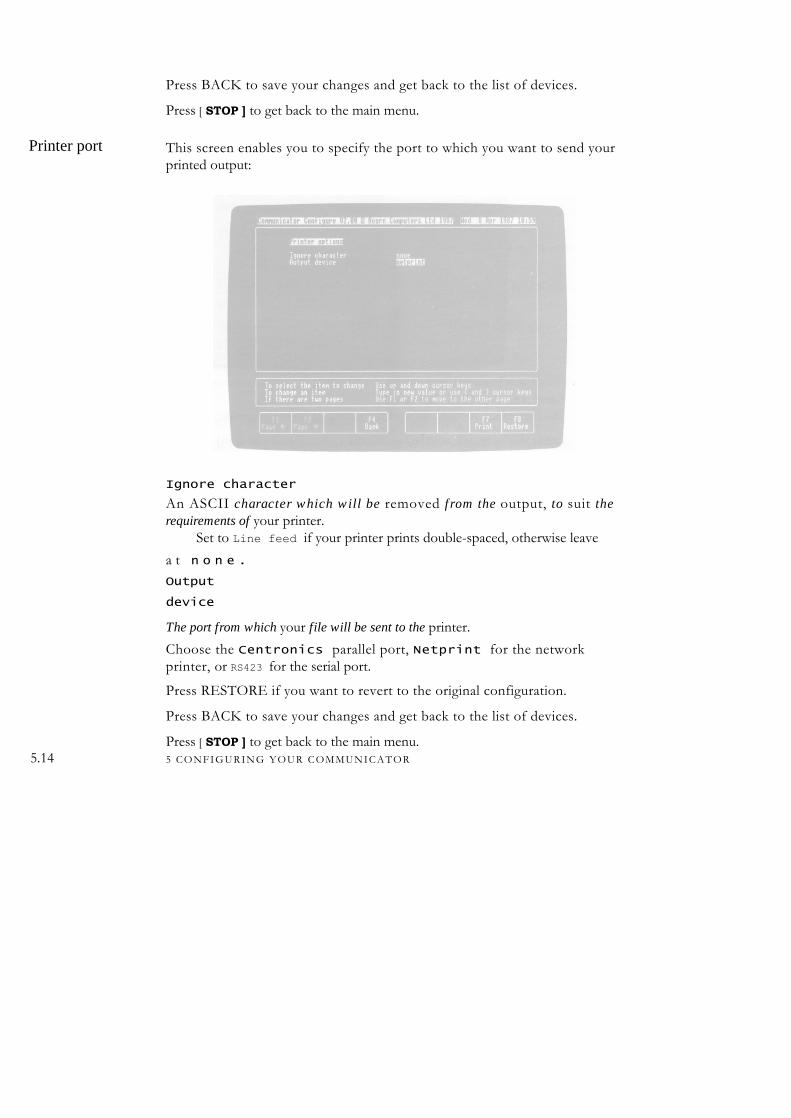
This screen enables you to specify the port to which you want to send your printed output:
Ignore character
An ASCII character which will be removed from the output, to suit the requirements of your printer.
Set to Line feed if your printer prints double-spaced, otherwise leave
a t n o n e .
Output
device
The port from which your file will be sent to the printer.
Choose the Centronics parallel port, Netprint for the network printer, or RS423 for the serial port.
Press RESTORE if you want to revert to the original configuration.
Press BACK to save your changes and get back to the list of devices.
Press [ STOP ] to get back to the main menu.5 CONFIGURING YOUR COMMUNICATOR
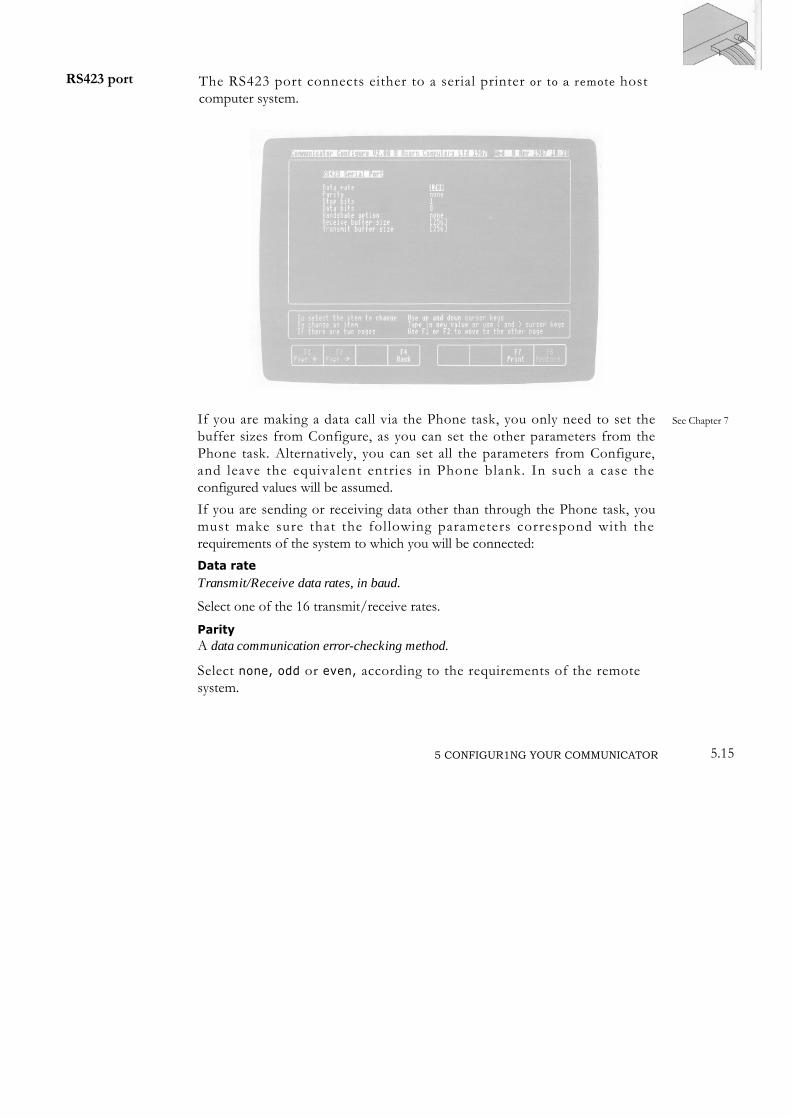
RS423 port The RS423 port connects either to a serial printer or to a remote host computer system.
If you are making a data call via the Phone task, you only need to set the buffer sizes from Configure, as you can set the other parameters from the Phone task. Alternatively, you can set all the parameters from Configure, and leave the equivalent entries in Phone blank. In such a case the configured values will be assumed.If you are sending or receiving data other than through the Phone task, you must make sure that the following parameters correspond with the requirements of the system to which you will be connected:
Data rateTransmit/Receive data rates, in baud.
Select one of the 16 transmit/receive rates.
ParityA data communication error-checking method.
Select none, odd or even, according to the requirements of the remote system.
5 CONFIGUR1NG YOUR COMMUNICATOR
See Chapter 7
5.15
Stop bits
The number of stop bits transmitted after each character.
Select 1, 1.5 or 2
Data bits
The number of bits transmitted in a character.
Select either 5, 6, 7 or 8
Handshake option
The exchange of signals when a connection is made.
Select either none, rts/cts, xon/xoff or dtr. Receive buffer size
The size of the receive buffer, in characters.
Specify the number of characters the buffer can contain (100-30000). The larger the buffer, the more efficiently you will be able to receive data, but the more likely the danger of getting 'out of step' with the remote terminal, and the less space available for other tasks.
Transmit buffer size
The size of the transmit buffer, in characters.
Specify the number of characters the buffer can contain (100-30000). The larger the buffer, the more efficiently you will be able to transmit data, but the more likely the danger of getting 'out of step' with the remote terminal, and the less space available for other tasks.
Press RESTORE if you want to revert to the original configuration.
Press BACK to save your changes and get back to the list of devices.
Press [ STOP ] to get back to the main menu.
5.16 5 CONF1GURING YOUR COMMUNICATOR
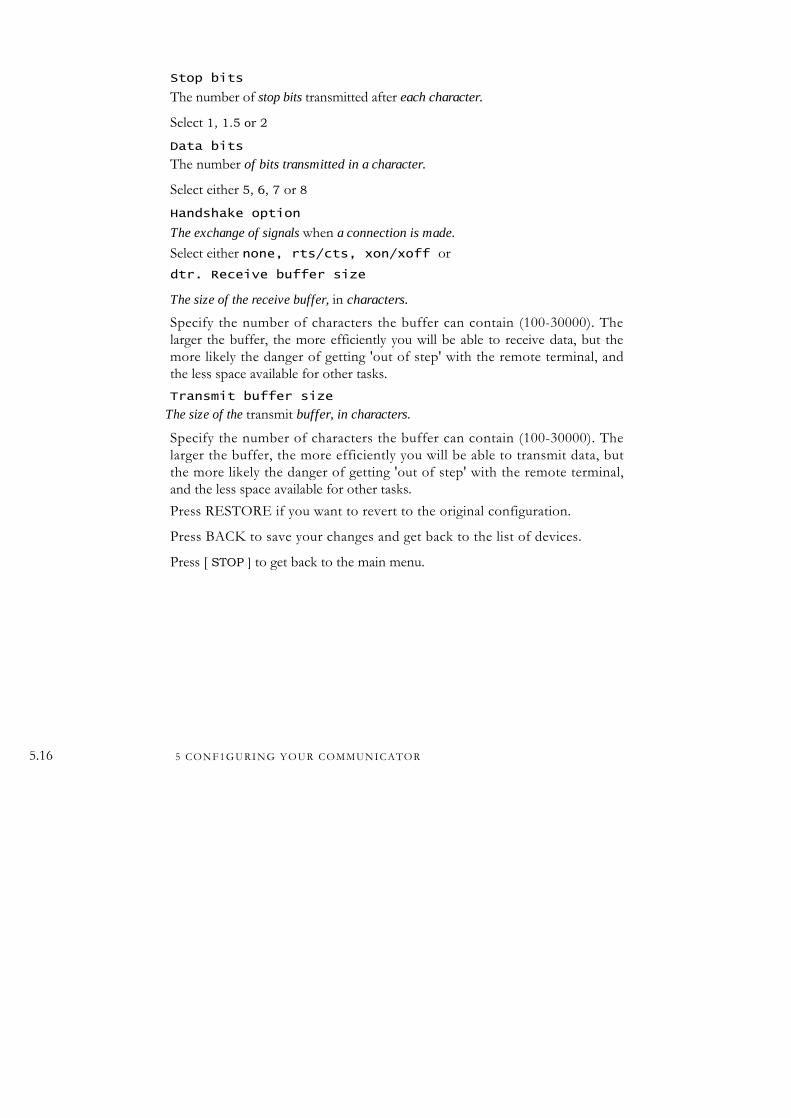
Printing text only You can print plain text from the Communicator with three different printers — the Epson, Diablo and Brother. You can also define your own printer, as long as it is similar to these types.You use the Text Printer Settings page to configure yourCommunicator:
The entries required in double quotation marks ("") should be made in the form of ASCII strings. See Appendix C for details of the format of these command strings.
Printer type
Scroll through and select epson, diablo, brother or user (user for defining your own printer type).
Initialisation and TerminationInitialisation and Termination commands allow you to define a set of commands which are sent to the printer before and after each dump. These may be needed to reset the printer, configure it to the correct mode, send form-feeds before or after, or to restore the printer to the local default mode after printing.
5 CONFIGURING YOUR COMMUNICATOR 5.17

5.18
If you select user, to define your own printer, press F2 to scroll to the next page of Text Printer options:
VIEW high lights
The first eight options allow you to turn on and turn off different highlight effects on your printer. The first five correspond to the five highlight modes used in VIEW, and there are three extra ones which you can use to define other highlight modes which your printer may support, such as font changes or special characters. See Appendix C for details of the command string formats for VIEW highlights.
End of page
This option allows you to define the command sequence your own printer may need at the end of every page.
HMI command
If your printer supports HMI (Horizontal Movement Increment), VIEW can produce justified output by generating spaces between words, in multiples of 120th of an inch.
This feature of your printer can be defined from within VIEW using the MICROSPACE command (see the VIEW User Guide).
For most printers all that is required is that you enter the HMI command for your printer according to the command string format outlined in Appendix
5 CONF1GUR1NG YOUR COMMUNICATOR
C. To verify that the command has worked, try printing some microspaced text from VIEW.
Some printers require a correction to be applied to the spacings which VIEW calculates, in order to generate properly justified text. If required this may be specified as a second sub-string followed by a | separator. This correction should be in the range 0 to 255.If your VIEW microspaced output is not correctly justified then this correction is needed. If the letter spacing is less than expected and all the lines appear too short, try a low number such as 1 or 2. If the letter spacing is too great and lines too long, try a high number such as 254 or 255.A few printers require further command codes to follow the microspacing
value. If needed, these should be specified as a third substring, separated from the second by a | separator. Again these strings should be in standard command format, (see Appendix C).
Character Translations
The final lines of the screen may be used for character translations, ie characters which must be replaced by a specified string for output to the printer.
Enter one or more translations on each line of the screen. See Appendix C for information on command string formats.
Press RESTORE before saving if you want to revert to the original configuration.
Press BACK to save your changes and get back to the list of devices.
Press [STOP}to return to the main menu.
5.195 CONFIGURING YOUR COMMUNICATOR
6 THE CAROUSEL DISPLAY
Creating display screens
The Carousel Display program enables you to save and edit viewdata and terminal screens, and to show a sequence of them in a continuous loop.
Display screens are normally downloaded from a remote computer or from a videotex (viewdata) service. Chapter 8 tells you how to use Communicator as a videotex terminal and Chapter 9 as a terminal to a remote computer.When you have a screen you want to use displayed on your VDU, press FEATURES, then SAVESCREEN.
You will he asked to provide a name for the screen. Type this in and press [Return]
The contents of the screen will be saved. You may save up to 16 screens at a time, depending on the available memory.
Meturn to the main menu and select Carousel.
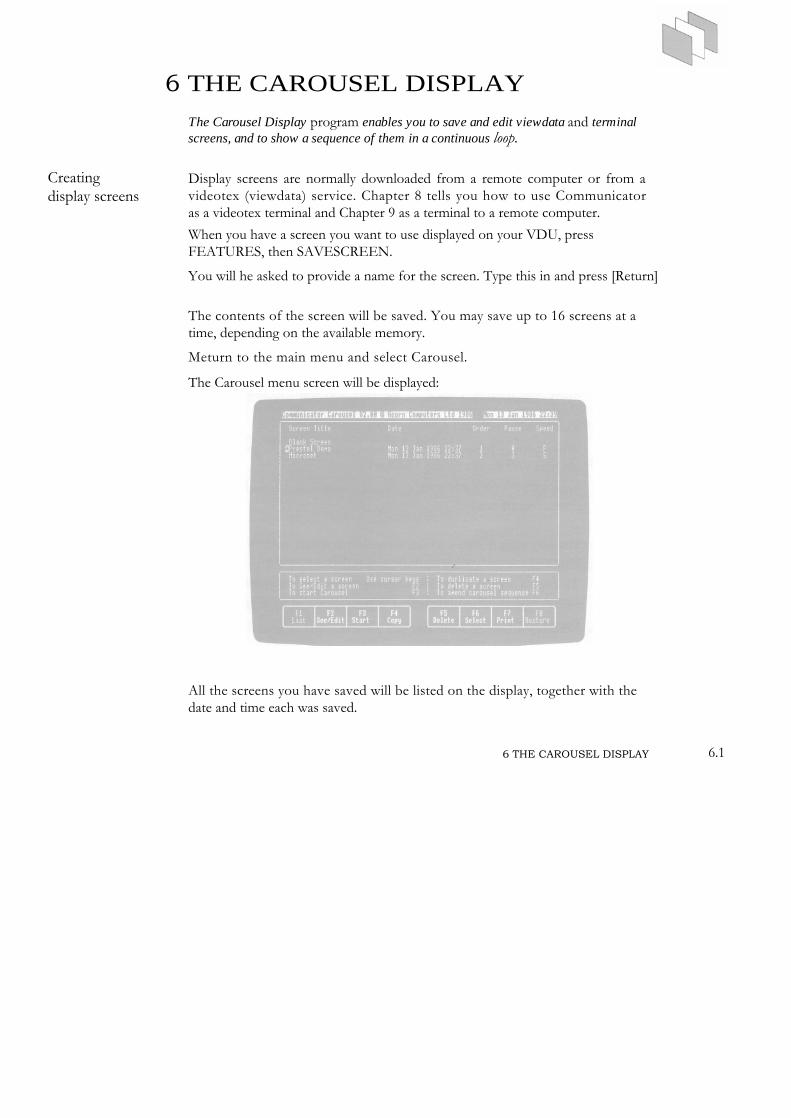
The Carousel menu screen will be displayed:
All the screens you have saved will be listed on the display, together with the date and time each was saved.
6 THE CAROUSEL DISPLAY 6.1
Looking at screens and changing them
Copying and deleting screens
Alternatively, you can create your own screens. Select Blank Screen and press COPY.
You will be asked for the screen mode and a name for the screen. Type these in and pres s Jus t p re s s ing [Re turn ] in r e sponse to sc reen mode automatically selects Videotex screen mode. The new (blank) screen will appear in the list of screens.To compose the new screen, select it and press SEE/EDIT. A blank screen will be displayed. Type in the text you want to display.
The HELP menu tells you how to specify Videotex colours and special effects.
Select the screen you want to look at, using the up and down cursor keys which control the pointer.
Press SEE/EDIT.
The screen requested will be displayed.To edit a screenMove the flashing cursor to the part you want to alter, and type in any changes you want to make. The HELP menu tells you how to specify Videotex colours and special effects.
When you are happy with the changes you have made, press LIST to save the changes and return to the Carousel menu.
Press REVEAL/CONCEAL to reveal or conceal data hidden by conceal data characters (if any).
You may want to copy a screen to enable it to appear twice in a Carousel sequence, or in order to edit one copy to provide a different version.
To copy a screen, select the screen you want to copy, using the up and down cursor keys which control the pointer.
Press COPY.
You will be asked to give a new name to the copied screen. Type this in and press [Return].
The new copy will appear in the list of screens.
F8 restores old screen
6.2 6 THE CAROUSEL DISPLAY
Setting up the Carousel
Running the Carousel
To delete a screen, select the screen, then press DELETE.
Deleting screens makes room in the memory for other screens. Take care not to delete a screen you may need later, as you cannot get it back once you've deleted it.
You need to specify which screens you want, and in what order you want them to appear:
Select a screen from the list on the main Carousel menu, using the up and down cursor keys to move the pointer.
Press SELECT.
You will be asked to say where you want this screen to appear in the sequence. Type in the position, and press [Return].
The screen's position in the sequence will appear against its name in the list.
You can insert a screen into an existing sequence this way, and the other screens will adjust their positions accordingly.
You can take a screen out of the sequence by selecting it with the pointer, and pressing SELECT. This de-selects the screen, but does not delete it. The other screens will change their positions automatically to compensate.
Say how long you want each sc reen to be d i sp layed , by se t t ing the Pause number (seconds, from 0 to 99).A l so s e t the Speed a t wh i ch each s c r een i s d r awn , to F ( f a s t ), M (medium) or S (slow). The default is M.
Set up the Carousel program as explained in the previous section. Press
START.
The screens will be displayed sequentially for the time specified, going back to the first once the last has been shown.
Press SPACE to move on to the next screen at anytime.
Press LIST to stop the Carousel and return to the main Carousel menu.
See opposite for deleting
6.36 THE CAROUSEL DISPLAY
Selecting Phone mode
7 TELEPHONE CALLS
As well being as a powerful microcomputer, your Communicator is both a data communications terminal, and when fitted with the optional handset, a sophisticated telephone. This chapter tells you how to use Communicator as a telephone.
Select Phone from the main menu, and press START.
Or, press the [PHONE] key on the top right-hand corner of the keyboard wherever you are.
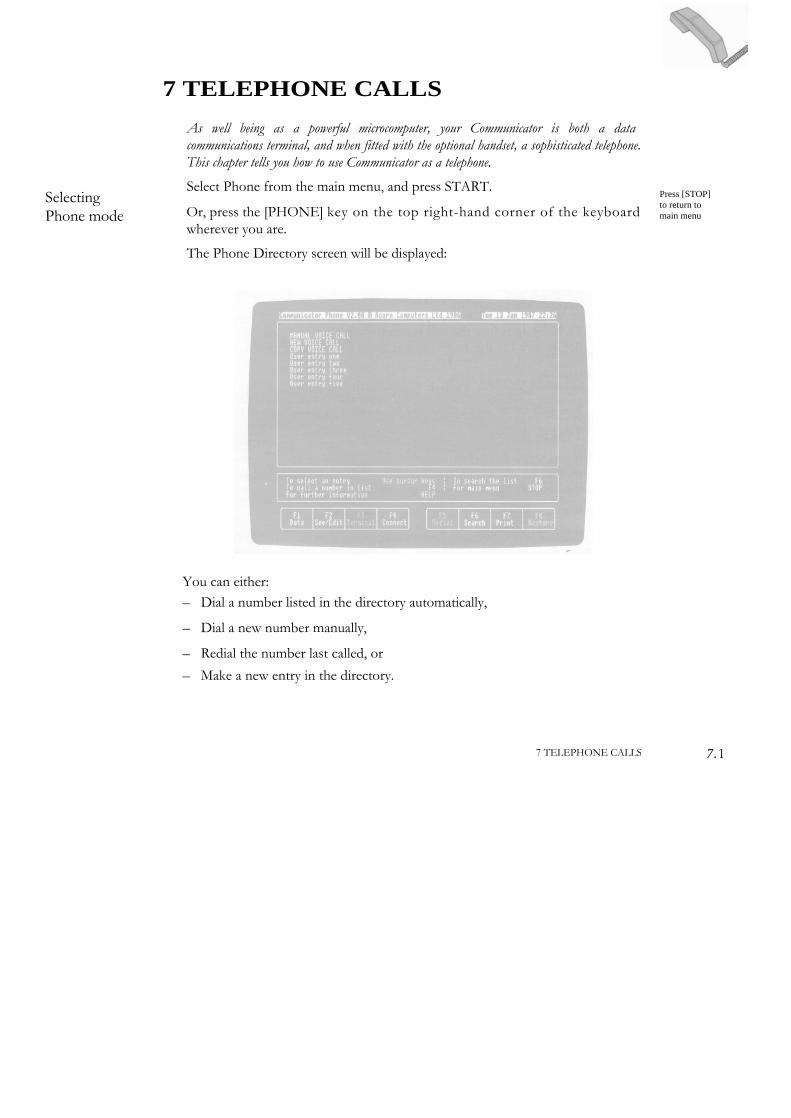
The Phone Directory screen will be displayed:
Press [STOP] to return to main menu
You can either:– Dial a number listed in the directory automatically,
– Dial a new number manually,
– Redial the number last called, or
– Make a new entry in the directory.
7 TELEPHONE CALLS 7 . 1
Dialling a directory number
Manual dialling
Use the cursor keys to move the pointer to the directory entry you want to dial.
Press CONNECT.
You will hear Communicator establish a line and dial out. The LINE IN USE light will flicker (a constant light with tone dialling), and then stay on.
To speakLitt the receiver and press CONNECT again.
You can earn on using Communicator for other tasks while the call is in progress. You can, for example, bring up information from ViewSheet or Calculator onto the screen for discussion during your conversation.
To end the call Replace the receiver.
To hang up before the call is connectedBefore you lift the receiver, just press CONNECT again.
Select MANUAL VOICE CALL with the pointer and press
CONNECT. You will he asked to type in the number you want to dial.
Type in the number.
If you have a PBX (private telephone exchange), you will need to prefix the number with an E, which calls up the external line access code which should be entered in the Configure program.
When you are happy with your entry, press [Return].
You will hear Communicator establish a line and dial out. The LINE IN USE light will flicker (constant light with tone dialling), and then star on.
To speakLift the receiver and press CONNECT again.
You can carry on using Communicator for other tasks while the call is in progress. You can, for example, bring up information from ViewSheet or Calculator onto the screen for discussion during your conversation.
To end the callReplace the receiver and press CONNECT again.
New entries see opposite page
the [DEL] toerase errors
See page 5.11
7.2 7 TELEPHONE CALLS
To redial last number
Making a directory entry
To hang up before the call is connectedBefore you lift the receiver, just press CONNECT again.
To redial the last number you dialled(For example, when you can't get through first time) press REDIAL.
Communicator will redial the last number you called. The call follows the same procedure as for Dialling a directory number above.
To check what the last number dialled wasHold down [CTRL] and press REDIAL. The number will be displayed. Press RESTORE to delete the number and return to the Phone menu.
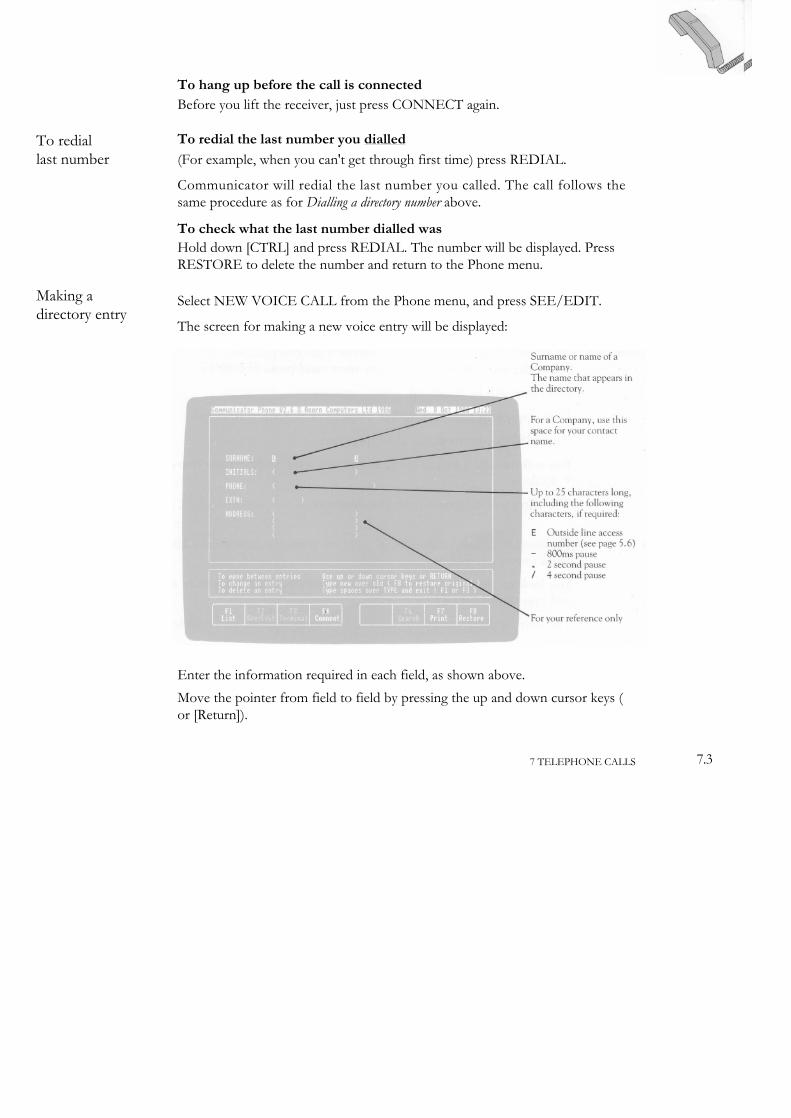
Select NEW VOICE CALL from the Phone menu, and press SEE/EDIT.
The screen for making a new voice entry will be displayed:
Enter the information required in each field, as shown above.
Move the pointer from field to field by pressing the up and down cursor keys (or [Return]).
7 TELEPHONE CALLS 7.3
Copying a directory entry
To delete an entry
Looking up an entry
7.4
When you are happy with your entry, press LIST to get hack to the Phone
menu.
Your new entry will he displayed in the directory.
To abandon an entryType a space in the TYPE field.
Press LIST to get back to the directory menu.
You will be asked to confirm that you do want to delete the entry. Type aY to do so.
Select COPY VOICE CALL and press SEE/EDIT.
You will be prompted to select the entry you want to copy. Select the entry and press SEE/EDIT again. The existing entry will he displayed. Make any changes you want to the entry, following the procedure in the previous section.
Select the entry from the directory menu and press SEE/EDIT.
The entry will be displayed.
Type a space in the SURNAME (Voice) or NAME (Data) field.
Press LIST to return to the directory menu.
You will then he asked to confirm that you want to delete the entry. Type a Y to do so.
The entry will disappear from the directory.
The directory is more than a list of telephone numbers. It provides addresses and contact names as well.
You look up the details of your directory entry by selecting it from the menu and pressing SEE/EDIT.
The entry is displayed on the screen, for you to consult, edit or delete as you wish.
Press LIST to get back to the directory menu.
7 TELEPHONE CALLS
Searching for an entry
You can find a directory entry quickly by using Communicator's p owe r fu l Search facility
Press SEARCH.
You will he asked to give a clue to the name you want to find.
Enter whatever information you can give the directory, and press [
Return]. Just the entries with this name will be displayed on the screen.
Select the entry you want from this list, and dial it or interrogate it as you wish.
You can give Communicator just a few letters of a name, or even of the address to search for if you like, and the Search program will come up with one or more entries matching that description. For example, if you know which town the company is in, you can call up all the entries for that town. However, the less information you give, the greater may be the number of answers it will come up with.
You can also carry out a second search after the first one, giving more information for the Search program to go on.
7.57 TELEPHONE CALLS
Selecting Phone mode
8 VIDEOTEX
Communicator gives you the capability to access videotex or viewdata information services, and to save, edit and send information received from these services.
Communicator connects with these services via the public telephone network, using its built-in modem. Connection procedure is very similar to making an ordinary voice telephone call, and you use the same task, Phone, to connect both voice and data calls.
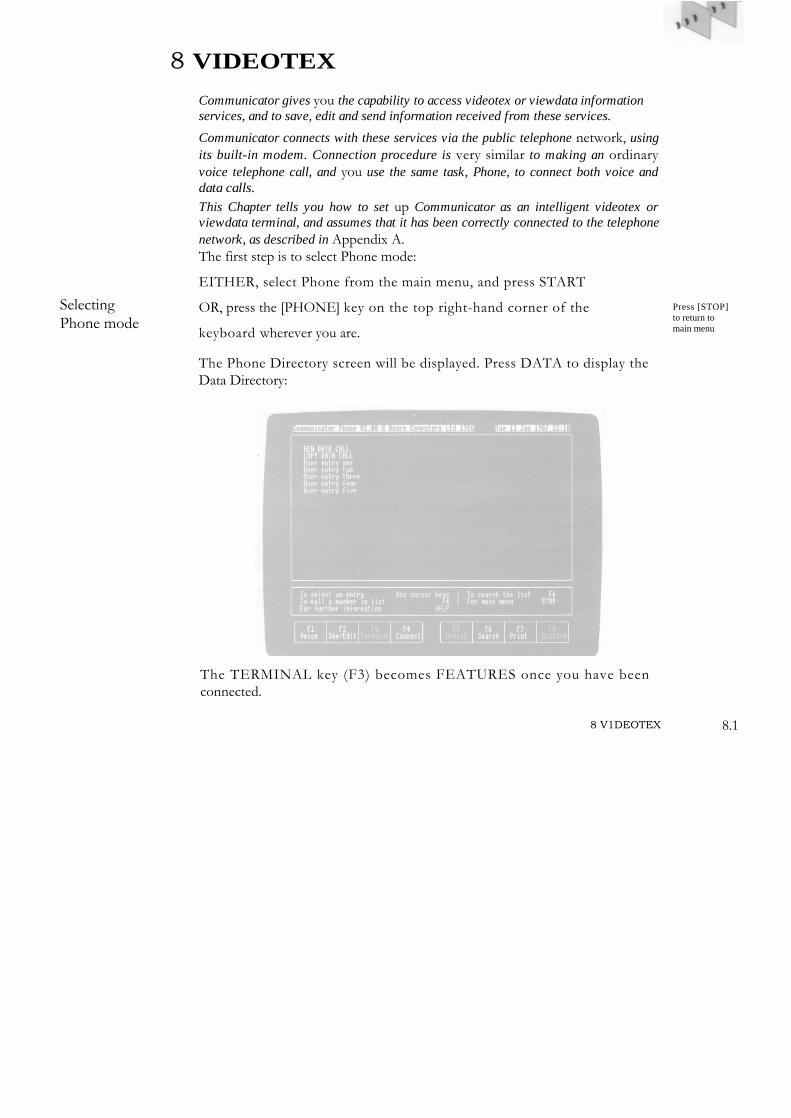
This Chapter tells you how to set up Communicator as an intelligent videotex or viewdata terminal, and assumes that it has been correctly connected to the telephone network, as described in Appendix A.The first step is to select Phone mode:
EITHER, select Phone from the main menu, and press START
OR, press the [PHONE] key on the top right-hand corner of the
keyboard wherever you are.
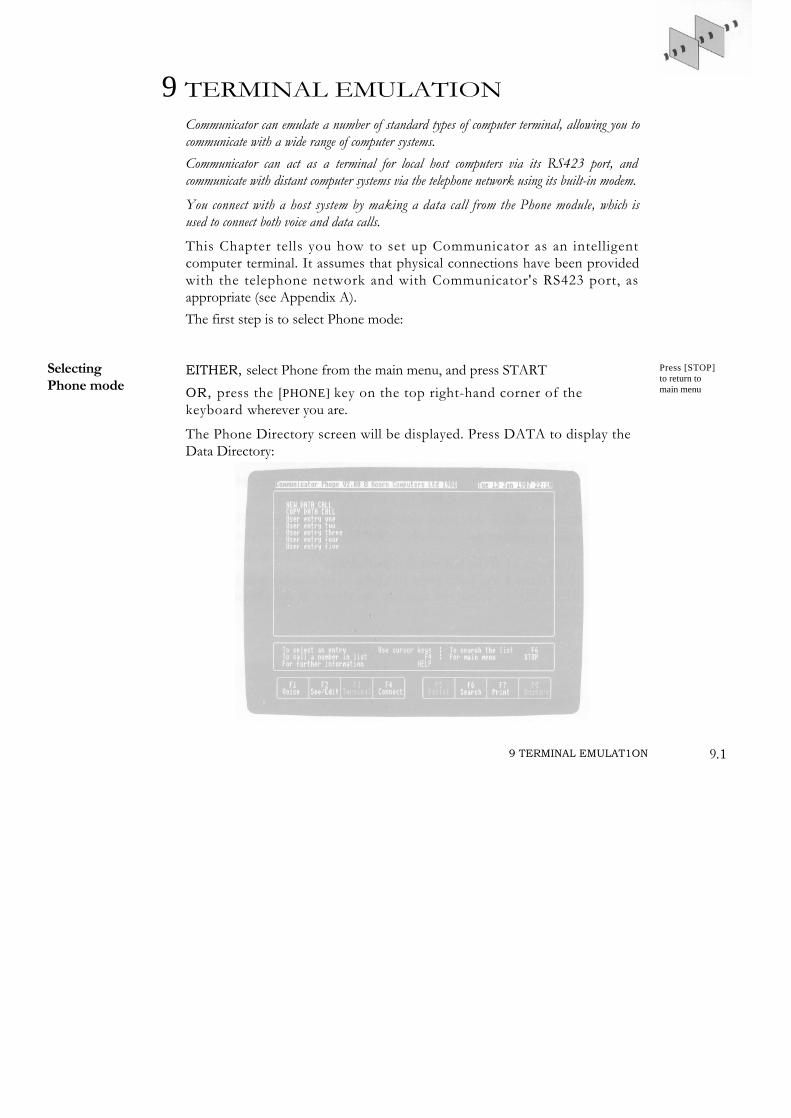
The Phone Directory screen will be displayed. Press DATA to display the Data Directory:
Press [STOP] to return to main menu
The TERMINAL key (F3) becomes FEATURES once you have been connected.
8 V1DEOTEX 8.1
Dialling a listed number
To redial last number
You can:
— Dial a terminal already listed in the directory,
— Redial the number last called, or
— Make a new entry in the directory.
Use the cursor keys to move the pointer to the entry in the directory you want to call.
Press CONNECT.
You will hear Communicator establish a line and dial out. The LINE IN USE light will come on.
Screen prompts will inform you of the progress of the call.
When the connection has been made, the screen will go blank, then you will normally be prompted to enter your user identity, with a message such as:
P R E S T E L
DERWENT C0MPUTER
Please enter below your Customer Identity (Key **
if you make a mistake)
CUSTOMER IDENTITY - - - - - - - -
Enter the customer identity you have been given.
Depending on the viewdata service you have dialled, you may also be asked to give a personal password before you are connected.
To redial the last number you dialled, (for example, when you can't get through to the service first time) press REDIAL.
Communicator will redial the last number you called. The call follows the same procedure described above for dialling a listed number.To check what the last number dialled was, hold down [CTRL] and press REDIAL. The number will be displayed. Press RESTORE to delete the number and return to the Phone menu.
New entries see opposite page
8.2 8 VIDEOTEX
Entering a number into the directory
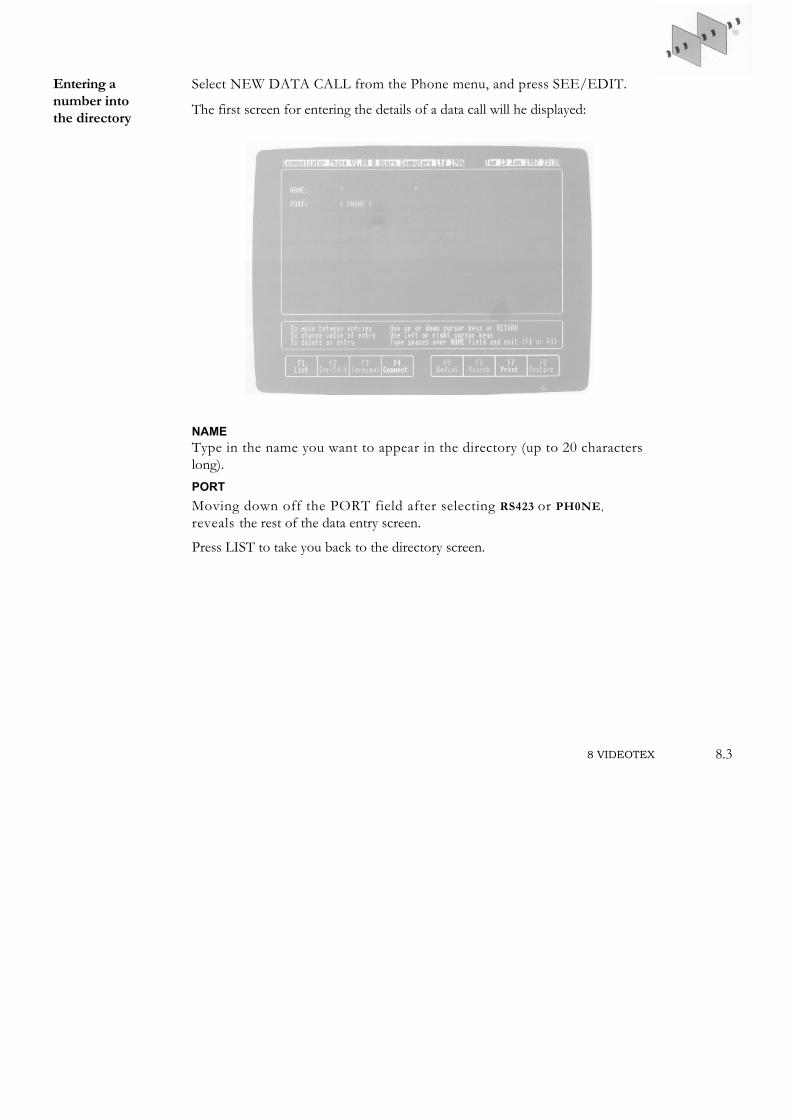
Select NEW DATA CALL from the Phone menu, and press SEE/EDIT.
The first screen for entering the details of a data call will he displayed:
NAMEType in the name you want to appear in the directory (up to 20 characters long).
PORTMoving down off the PORT field after selecting RS423 or PH0NE,
reveals the rest of the data entry screen.
Press LIST to take you back to the directory screen.
8 VIDEOTEX 8.3

PhoneIf you select Phone as the port, the following screen will be displayed:
8.4 8 VIDEOTEX
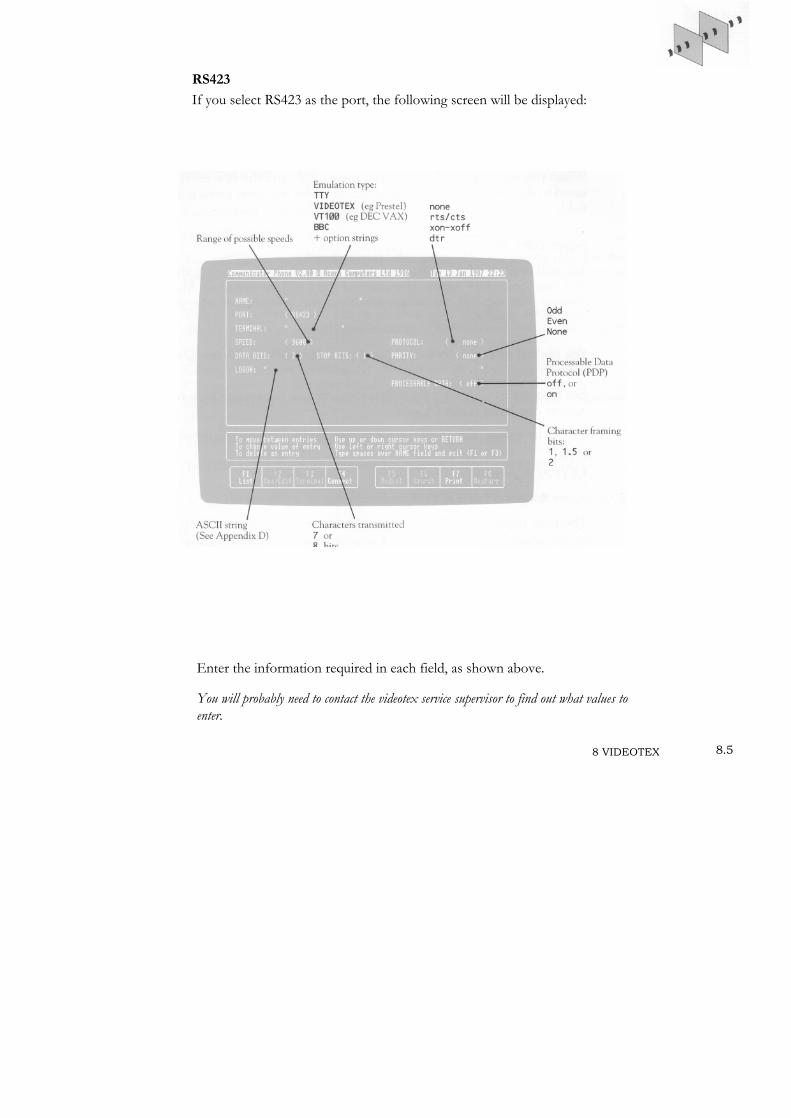
RS423If you select RS423 as the port, the following screen will be displayed:
Enter the information required in each field, as shown above.
You will probably need to contact the videotex service supervisor to find out what values to enter.
8 VIDEOTEX 8.5
Copying a directory entry
Keypage
Saving screens
You must provide entries for NAME, TERMINAL and SPEED, and for PHONE (except where the call is manually dialled). Communicator may provide suitable defaults for the remaining values.
Move the cursor from field to field by pressing the up and down cursor keys(or [Return]).
When you are happy with your entry, press LIST, and the new entry will he saved to the Directory, appearing in the list under the name given in the first field.
Select COPY DATA CALL and press SEE/EDIT.
You will he prompted to select the entry you want to copy. Select the entry and press SEE/EDIT again. The existing entry will be displayed. Make any changes you want to the entry, following the procedure in the previous section.
You can call up frequently-used pages of a viewdata service with two keystrokes, using Keypage.
See Keypage in Chapter 5 for information on how to program page numbers against one-letter codes (A to P).
To call up a page, wait until you are connected to the viewdata service, then press:
KEYPAGE code
where code is a letter from A to P referring to a page number. The
page requested will come up on the screen.
You can save screens received from a viewdata service. They are stored in the Carousel program and can also he edited there if required.
To save the screen displayed, press FEATURES, then SAVESCRN.
Before the screen is saved, you will be asked to give the screen a name, so that it can be identified later.
Type in the name, followed by [Return]
The screen will have been saved, and you can continue your terminal session.
See Chapter 6
8.6 8 V1DEOTEX
Sending a Page
REVEAL and CONCEAL
Sending a file
Printing a screen
Simultaneous printing
Finishing a terminal session
You can send a page of viewdata, which may previously have been edited, by pressing the FEATURES key, followed by SENDPAGE.
Follow the prompts to identify the screen and send it to its destination.
Press REVEAL/CONCEAL to reveal and conceal data hidden by conceal data characters (if any).
You can send a file in a similar way to sending a page.
Press FEATURES, then SENDFILE.
You will be prompted to type in the file name. The file can be called up from the non-volatile RAM, or from the Econet file server if you are logged on.
Your Communicator must first be set up and connected to a suitable printer either directly, or through a Local Area Network. Check this with your system manager.
Chapter 5 (Configuring your Communicator) tells you how to set up your Communicator for printing. If the printer is connected directly to your Communicator (ie, not via a Local Area Network), the correct Printer port should be selected (Centronics or RS423), and then configured to match the requirements of the printer.
To print a text only version of the screen, press PRINT.
To print a full graphics version, hold down [CTRL] and press PRINT.
A suitable printer should he connected and set up, as described in the previous section.
Press FEATURES, then P, which toggles the connection to the printer on and off.
Press END CALL (F4) to disconnect the line between Communicator and the viewdata host computer.Note that when you leave the host computer screen during a session to enter a Communicator application, such as Calculator, VIEW or directory, you still remain connected to the host computer, and will do so until you press CONNECT again to disconnect the line. If this is overlooked it could cost you expensive line and computer time.
Logon see Chapter 2
8 VIDEOTEX 8.7
Videotex mode options
Videotex technical specification
When you enter the videotex name in the Phone task, you can specify certain emulation options as follows:
Newline modeCarriage Return (CR) and Line Feed (LF) commands are sent to the line when you type CR, if you add N+ after the emulation name.
Line Feed modeCR and LF are sent to your screen when CR is received from the line, if you add L+ after the emulation name.
The codes should be entered after the emulation name, preceded by a colon, and separated by a semi-colon.
This emulation puts the screen in mode 7 (teletext).
CommandsThe only locally-acting commands available in videotex emulation are the keys,
[HELP] , [STOP], [COMP] and [CALC].
ScreenReceived characters are vetted to ensure only valid videotex characters and sequences.
Keyboard
All typed characters are forwarded unchanged.
Most keys transmit the ASCII code implied by their keytops. The special keys transmit the following codes:
Key ASCII Code Key ASCII Code
[TAB] 9 09 Phone pad:
[HOME] 30 1E * 42 2A[INSERT] # 95 5F–[COPY]
[up] 11 OB[left] 8 08[right] 9 09[down] 10 OA[DEL] 127 7F
8.8 8 VIDEOTEX
Selecting Phone mode
9 TERMINAL EMULATIONCommunicator can emulate a number of standard types of computer terminal, allowing you to communicate with a wide range of computer systems.Communicator can act as a terminal for local host computers via its RS423 port, and communicate with distant computer systems via the telephone network using its built-in modem.
You connect with a host system by making a data call from the Phone module, which is used to connect both voice and data calls.
This Chapter tells you how to set up Communicator as an intelligent computer terminal. It assumes that physical connections have been provided with the telephone network and with Communicator's RS423 port, as appropriate (see Appendix A).
The first step is to select Phone mode:
EITHER, select Phone from the main menu, and press START
OR, press the [PHONE] key on the top right-hand corner of the keyboard wherever you are.
The Phone Directory screen will be displayed. Press DATA to display the Data Directory:
Press [STOP] to return to main menu
9 TERMINAL EMULAT1ON 9.1
Dialling a listed number
To redial last number
The TERMINAL key (F3) becomes FEATURES once you have been connected.
You can:
— Dial a terminal already listed in the directory,
— Redial the number last called, or
— Make a new entry in the directory.
Use the cursor keys to move the pointer to the entry in the directory you want to call.
Press CONNECT.
If the call is via the telephone network, you will hear Communicator establish a line and dial out. The LINE IN USE light will come on.
Screen prompts will inform you of the progress of the call.
When the connection has been made, the screen will go blank, then you will normally be prompted to log on, with a message such as:
XANADU DATA SYSTEMSlogin:
Your host computer supervisor will tell you what to enter next.
To redial the last number you dialled (for example, when you can't get through to the service first time), press REDIAL.
Communicator will redial the last number you called. The call follows the same procedure described above for dialling a listed number.
To check what the last number dialled wasHold down [CTRL] and press REDIAL. The number will be displayed. Press RESTORE to delete the number and return to the Phone menu.
New entries see opposite page
9.2 9 TERMINAL EMULATION
Entering a number into the directory
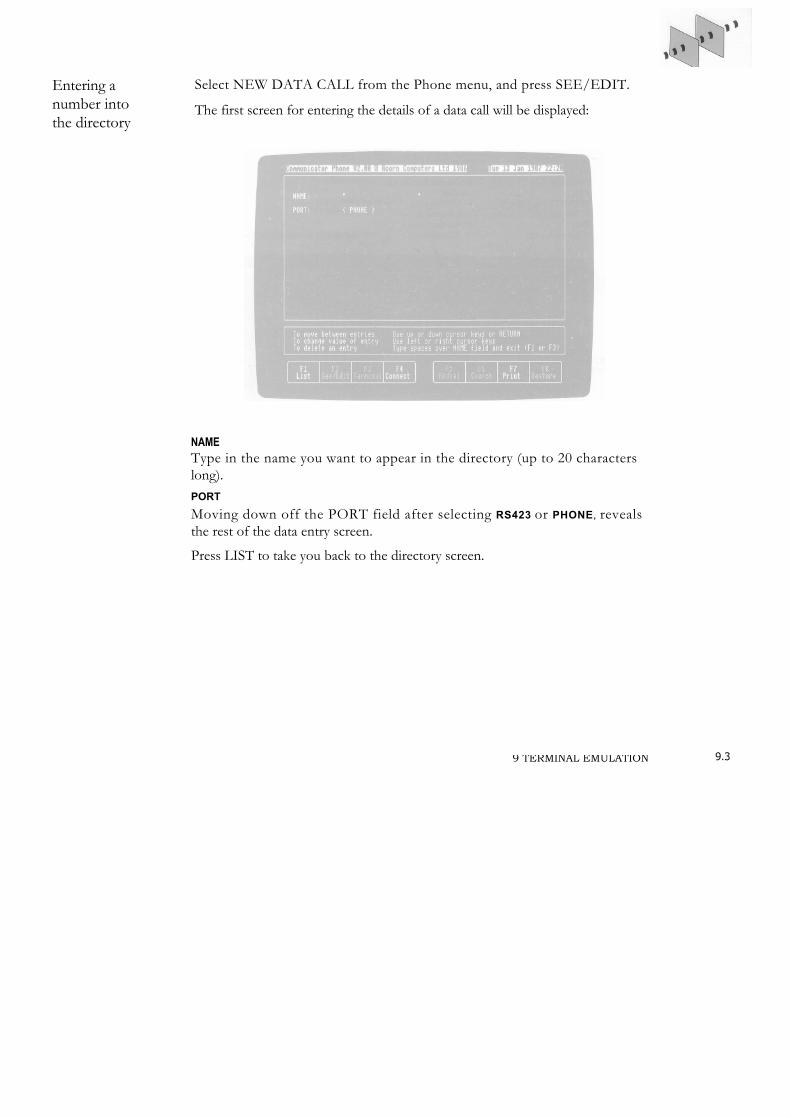
Select NEW DATA CALL from the Phone menu, and press SEE/EDIT.
The first screen for entering the details of a data call will be displayed:
NAMEType in the name you want to appear in the directory (up to 20 characters long).PORTMoving down off the PORT field after selecting RS423 or PHONE, reveals the rest of the data entry screen.
Press LIST to take you back to the directory screen.
9.39 TERMINAL EMULATION
9.4
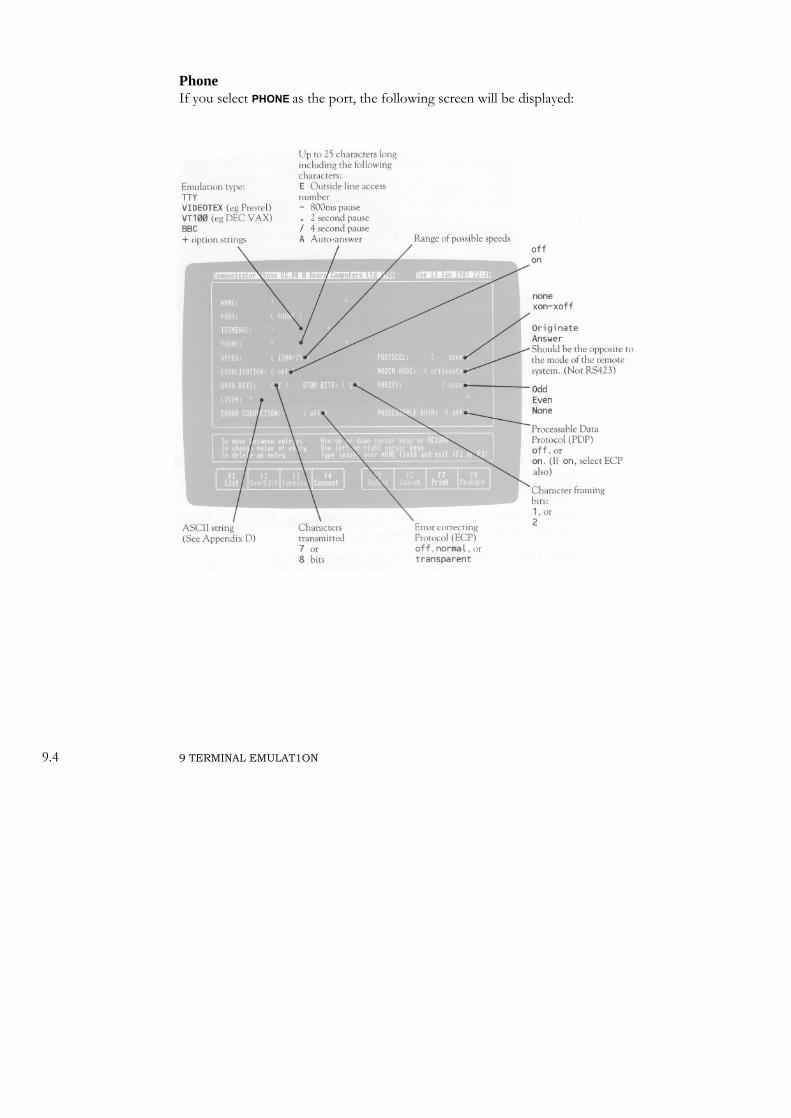
PhoneIf you select PHONE as the port, the following screen will be displayed:
9 TERMINAL EMULAT1ON
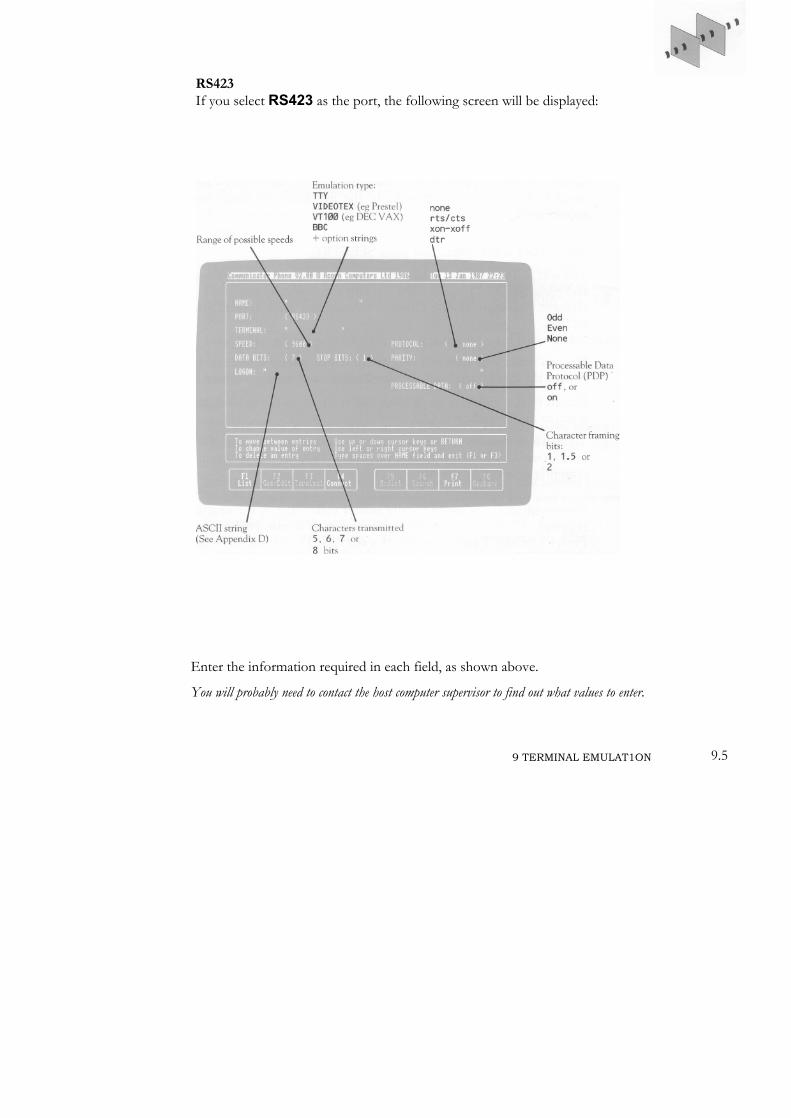
RS423If you select RS423 as the port, the following screen will be displayed:
Enter the information required in each field, as shown above.
You will probably need to contact the host computer supervisor to find out what values to enter.
9 TERMINAL EMULAT1ON 9.5
Copying a directory entry
Multiple data calls
Auto-answer mode
9.6
You must provide entries for NAME, TERMINAL and SPEED, and for PHONE (except where the call is manually dialled or via RS423). Communicator may provide suitable defaults for the remaining values.
Move the cursor from field to field by pressing the up and down cursor keys (or [Return]).
When you are happy with your entry, press LIST, and the new entry will be saved to the directory, appearing in the list under the name given in the second field.
Select COPY DATA CALL and press SEE/EDIT.
You will be prompted to select the entry you want to copy. Select the entry and press SEE/EDIT again. The existing entry will be displayed. Make any changes you want to the entry, following the procedure in the previous section.
You can make more than one data call at a time, provided that one is connected through the RS423 port, and the other is connected via the telephone line.
Return to the directory by pressing LIST. Point to the second data call you want to make, and press CONNECT.
To alternate between two calls, press TEMMINAL to return to the emulation you last used, or hold down [CTRL] and press TEMMINAL to return to the call (currently selected in the directory list.
Communicator can automatically answer calls. Specify the emulation mode required on a data entry screen, entering an A in the PHONE number field. Press CONNECT to start waiting for the call. To stop the auto-answer, press CONNECT again.
To keep auto-answer waiting and go to another task, press STOP and make a selection from the main menu. An auto-answer call will generate a ringing tone.
Press PHONE to pick up the incoming call.
If nothing is typed into Communicator within the first 50 seconds, a timeout will automatically disconnect the line.
To end an auto-answer call, press CONNECT.
9 TERMINAL EMULAT1ON
Saving screens
Sending a page
Sending a file
Printing a screen
Simultaneous printing
See Chapter 6
You can save screens received from a host computer. They are stored in the Carousel program and can also be edited there if required.
To save the screen displayed, press FEATURES, then SAVESCRN.
Before the screen is saved, you will be asked to give the screen a name, so that it can be identified later.
Type in the name, followed by [Return]
The screen will have been saved, and you can continue your terminal session.
This feature is of most use when connected to a videotex service, but is nevertheless available in terminal emulation mode as well. You can send a page of data, which you can have previously edited, by pressing the FEATURES key, followed by SENDPAGE.
Follow the prompts to identify the screen and send it to its destination.
You can send a file in a similar way to sending a page.
Press FEATURES, then SENDFILE.
You will be prompted to type in the file name. The file can be called up from the non-volatile RAM, or from the Econet file server if you are logged on.
Your Communicator must first be set up and connected to a suitable printer either directly, or through a Local Area Network. Check this with your system manager.
Chapter 5 (Configuring your Communicator) tells you how to set up your Communicator for printing. If the printer is connected directly to your Communicator (ie, not via a Local Area Network), the correct Printer port should be selected (Centronics or RS423), and then configured to match the requirements of the printer.To print a text only version of the screen, press PRINT.
To print a full graphics version, hold down [CTRL] and press PRINT.
A suitable printer should be connected and set up, as described in the previous section.
Logon see Chapter 2
9.79 TERM1NAL EMULATION
Application escape
Session spooling
Finishing a terminal session
Emulation mode options
9.8
Press FEATURES, then P, which toggles the connection to the printer on and off.
Your Communicator may be set up so that while remaining online to the host computer, you can enter an application program to carry out another task, before returning to the terminal session. In such a case, you press LEAVE to enter the application program.
The application escape method described for terminal emulation works equally well under videotex emulation if provided by your user site.
You can save all the characters received during a terminal session in a spool file in Communicator's Random Access Memory (RAM).
Press FEATURES, then S, which toggles session spooling on and off.
When you toggle off spooling and leave your session, you will he asked to give a filename in which to save the spool file permanently.
Press ENDCALL (F4) to disconnect the line between Communicator and the host computer.Note that when you leave the host computer screen during a session to enter a Communicator application, such as Calculator, VIEW or directory, you still remain connected to the host computer, and will do so until you press CONNECT again to disconnect the line. If this is overlooked it could cost you expensive line and computer time.
When you enter the emulation name in the Phone task, you can specify certain emulation options as follows:
Newline modeCarriage Return (CR) and Line Feed (LF) commands are sent to the line when you type CR, if you add N+ after the emulation name.
Line Feed mode — VT100CR and LF are sent to your screen when LF is received from the line, if you add L+ after VT100:
Line Feed mode — other emulationsCR and LF are sent to your screen when CR is received from the line, if you add L+ after the emulation name.
9 TERMINAL EMULATION
TTY emulation technical specification
Echo modeTyped characters can be echoed (displayed) on your screen, if you add E+ after the emulation name. Not available on videotex emulation.
Wrap modeLines longer than 80 columns will be wrapped to the next line down, if W+ is added, characters after the 80th column are discarded. Available on VT100 only.
Hash/Pound modeMeceived &23 codes are displayed as a hash sign if #+ is added to the emulation name. If #— is specified, &23 codes display a pound sign. Default is #+ . Available on VT100 only.The codes should be entered after the emulation name, preceded by a colon, and separated by a semi-colon.
This emulates the teletype specification.
CommandsThe only locally-acting commands available in TTY emulation are the keys[ELPp], [STOP], [COMP] , and [CALC].
ScreenThe following characters only are accepted from the remote system:
Character Effect
BEL (07) Sound a bleepBS (08) Move cursor leftLF (10) Move cursor downCM (13) Move cursor to start of line" " (32) Spaceto- (126) Tilde
note that DEL (127) is ignored
9 TERM1NAL EMULATION 9.9
The special keys transmit the following codes:
Key A S C I I C o d e
[TAB] 9 09[HOME] 30 1E[INSERT] –[COPY] –[up] 11 OB[left] 8 08[right] 9 09[down] 10 OA[DEL] 127 7FPhone pad:
46 2E61 3D
BBC emulation technical specification
9.10
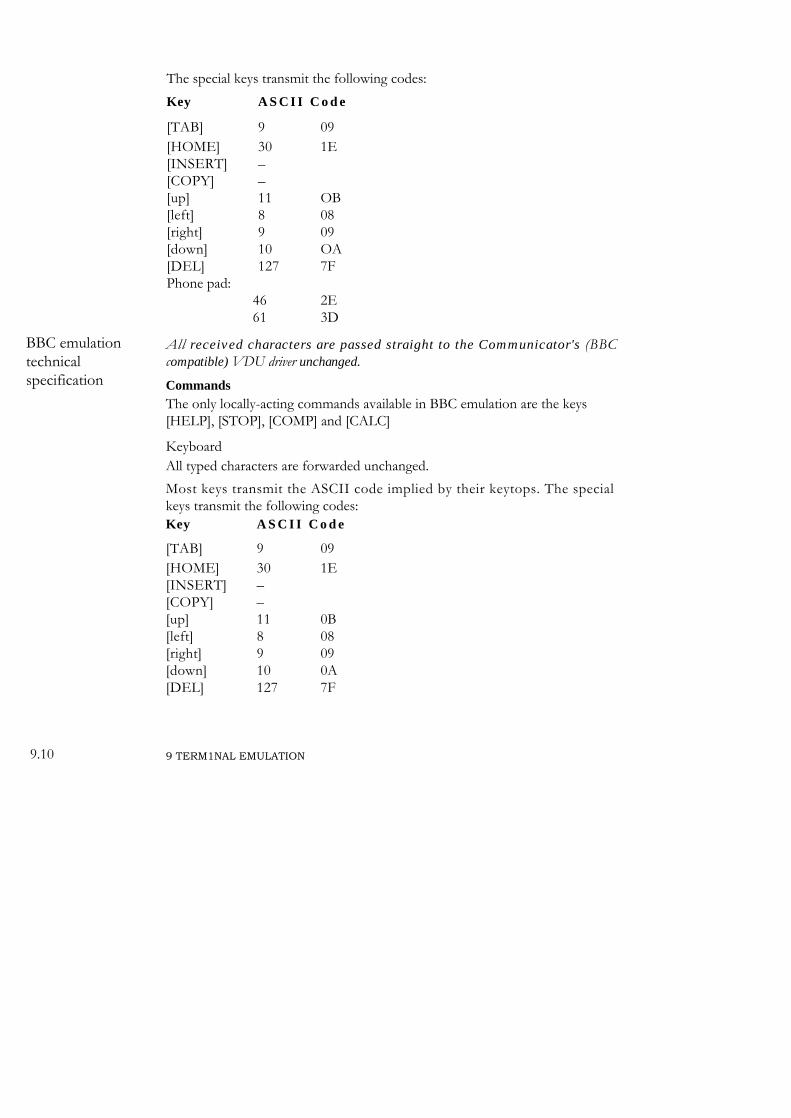
All received characters are passed straight to the Communicator's (BBC compatible) VDU driver unchanged.
CommandsThe only locally-acting commands available in BBC emulation are the keys[HELP], [STOP], [COMP] and [CALC]
KeyboardAll typed characters are forwarded unchanged.
Most keys transmit the ASCII code implied by their keytops. The special keys transmit the following codes:Key A S C I I C o d e
[TAB] 9 09[HOME] 30 1E[INSERT] –[COPY] –[up] 11 0B[left] 8 08[right] 9 09[down] 10 0A[DEL] 127 7F
9 TERM1NAL EMULATION
VT100technical
s p e c i f i c a t i o n
Phone pad:* 46 2E# 61 3D
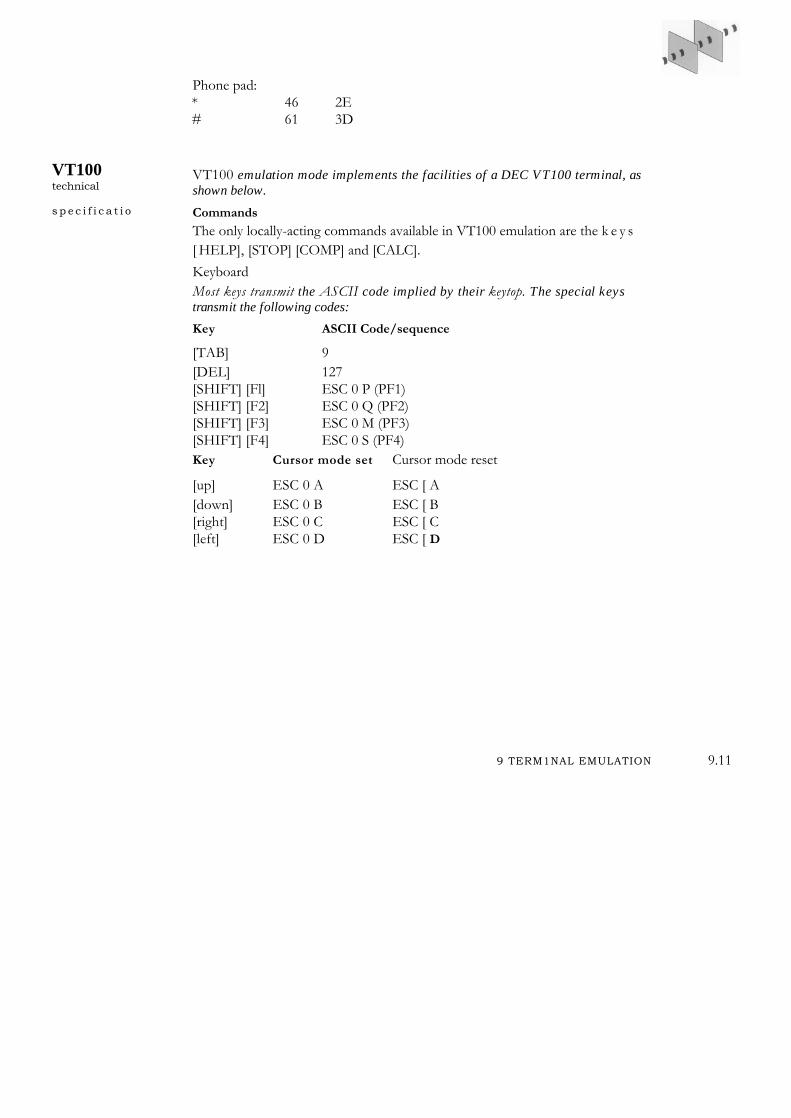
VT100 emulation mode implements the facilities of a DEC VT100 terminal, as shown below.
CommandsThe only locally-acting commands available in VT100 emulation are the k e y s[ HELP], [STOP] [COMP] and [CALC].KeyboardMost keys transmit the ASCII code implied by their keytop. The special keys transmit the following codes:
Key ASCII Code/sequence
[TAB] 9[DEL] 127[SHIFT] [Fl] ESC 0 P (PF1)[SHIFT] [F2] ESC 0 Q (PF2)[SHIFT] [F3] ESC 0 M (PF3)[SHIFT] [F4] ESC 0 S (PF4)Key Cursor mode set Cursor mode reset
[up] ESC 0 A ESC [ A[down] ESC 0 B ESC [ B[right] ESC 0 C ESC [ C[left] ESC 0 D ESC [ D
9 TERM1NAL EMULATION 9.11

Keypad key Numeric mode0 "0"1 "1"2 "2"3 "3"4 "4"5 "5"6 "6"7 "7"8 "8"9 "9"* 46# 61[HOME] "—"[COPY] ","
9.12 9 TERMINAL EMULATION

10 VIEWSHEETCalling up ViewSheet
Working with ViewSheet
Get back to the main menu, select ViewSheet and press START to start a new session, or to resume one already started.
See the ViewSheet reference manual, supplied with the Communicator, for information on using ViewSheet.
10 VIEWSHEET in 1

11 WORD PROCESSING WITH VIEWCalling up VIEW
Working with VIEW
Get back to the main menu. Select VIEW and press START to start a new session, or to resume a session already started.
See the VIEW User Guide, supplied with the Communicator, for information on word processing with VIEW.
11 WORD PROCESSING WITH VIEW 11. 1
Appendix
What you will need
Communicator checklist
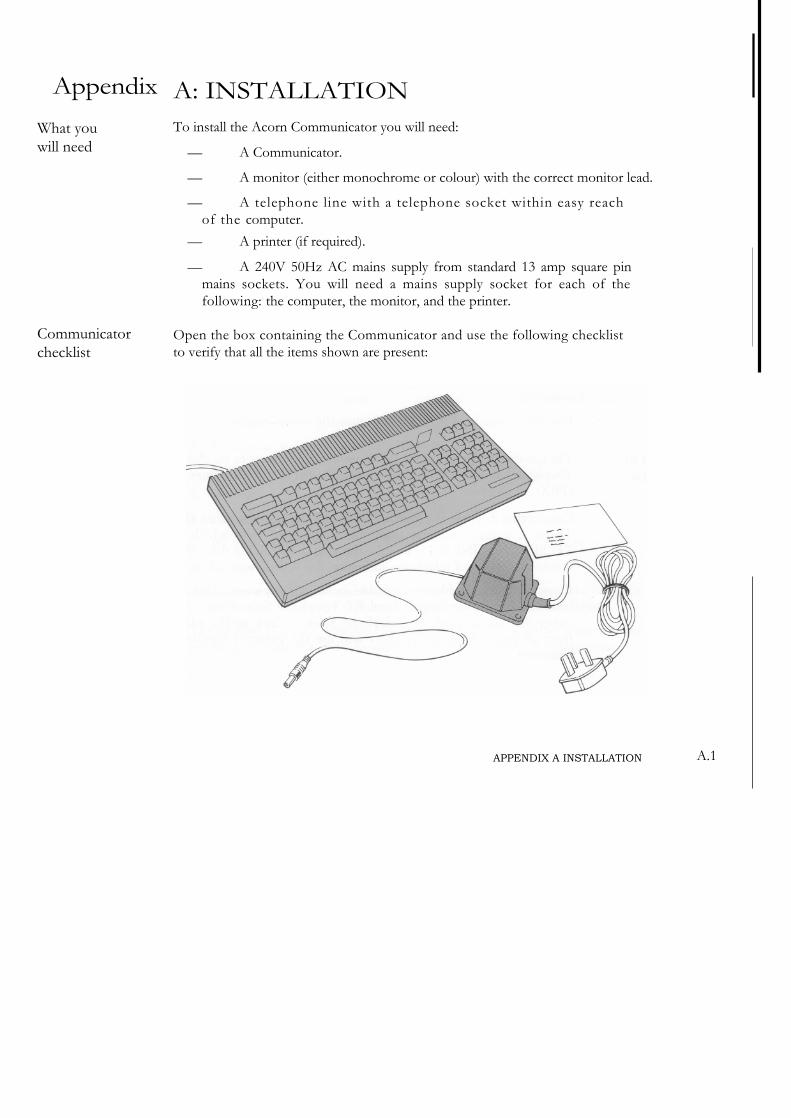
A: INSTALLATIONTo install the Acorn Communicator you will need:
— A Communicator.
— A monitor (either monochrome or colour) with the correct monitor lead.
— A telephone line with a telephone socket within easy reach of the computer.
— A printer (if required).
— A 240V 50Hz AC mains supply from standard 13 amp square pin mains sockets. You will need a mains supply socket for each of the following: the computer, the monitor, and the printer.
Open the box containing the Communicator and use the following checklist to verify that all the items shown are present:
APPENDIX A INSTALLATION A.1
Connecting the monitor
Connecting the printer
Connection to the telephone network
— The computer.
— Mains transformer and cable.
— Card to apply to British Telecom (BT) for a suitable telephone socket to be fitted.
If any of these items are missing then contact your supplier.
Connect e i ther an RGB (co lour ) moni tor or a compos i te v ideo (monochrome) monitor, using a suitable monitor lead, to the DIN socket marked DISPLAY OUTPUT on the back of the unit.
Plug the mains lead of the monitor into the mains supply.
You may, or may not, require a printer. Check with your supplier which printers are suitable for your Communicator.
Connect a Centronics compatible printer to the connector labelled PRINTER on the rear of the computer.
Connect a serial printer to the socket labelled SERIAL on the rear of the computer.
Plug the mains lead of the printer into the mains supply.
The Communicator is suitable for connection either direct to the Public Switched Telephone Network (PSTN), or as an extension to a Private Branch Exchange (PBX).
Connection direct to the Public Switched Telephone Network (PSTN) There is a cable coming from the rear of the unit which is marked TELEPHONE LINE INPUT. Take the plug on the end of this cable and plug it into the standard telephone socket on the wall of your office.If your line does not have a suitable socket, or you want additional sockets installed, then contact your local BT Telephone Sales Office. To do this, either dial 100 and ask for Telephone Sales, or look up the address in the front of your telephone directory and use the postcard supplied with the computer.
A.2 APPENDIX A INSTALLATION
The apparatus must not be connected to coinbox or shared service (party) lines.The apparatus will work with all common types of PSTN line: direct exchange lines which use 'loop disconnect' (LD) signalling and which have a suitable standard socket fitted.
The apparatus MUST NOT be used as an auto-answer modem on lines listed in BT directories, nor in answering mode for full duplex operation over echo-suppressed routes.
Note: The unit has a REN of 1.5.REN is the Ringer Equivalence Number, which is a relative measure of the power required to make a telephone ring. A single line of the BT system will drive a telephone or telephones with a combined REN of 4.0. Any standard BT telephone has a REN of 1.0, so the unit may therefore be accompanied by up to 2 standard BT telephones on the same line before the maximum REN of the line is exceeded.
Connection to a Private Branch Exchange (PBX)This apparatus has been approved for the use of the following facilities:
1. Storage of telephone numbers for retrieval by a predetermined code.
2. Operation in the absence of Proceed Indication.
3. Automatic dialling.
4. Automatic storage of last number dialled.
5. Modem.
6. Call progress monitor.
7. MF signalling.
8: LD signalling.
Any other usage will invalidate the approval of the apparatus if as a result, it ceases to conform to the standards against which approval was gained.The apparatus is only approved for compatible PBXs. Contact your supplier for an up-to-date list of PBXs with which this apparatus is compatible.
APPEND1X A 1NSTALLATION A.3
Connecting the mains transformer
Peripherals
There is no guarantee of correct working in all circumstances. Any difficulties should be referred to your supplier.
There is a cable coming from the rear of the unit which is marked TELEPHONE LINE INPUT. Take the plug on the end of this cable and plug it into the standard telephone socket of your PBX system (this may be on the wall or under the floorboards etc).
If your PBX does not have a suitable socket, or you want additional sockets installed, then contact your PBX system administrator. You only need to apply to BT if the wiring is owned by them.
The apparatus does not require any initial or secondary Proceed Indications when used with a PBX (it uses fixed delays instead), nor does it require special low-frequency circuits.The apparatus will work with PBX lines which can use 'loop disconnect' (LD) signalling, or 'multi-frequency' (MF) signalling.
The line must allow nominal 2280Hz signalling and provide call arrival indication, which are both usual. (Multipoint and omnibus circuits are not suitable.)
Take the mains transformer and connect the jack plug to the jack socket marked POWER INPUT on the back of the computer.
Connect the moulded 13 amp square pin mains plug to the mains supply and switch on.
The following peripherals can be used with the Communicator if required:
1. Econet Local Area Network with disc file server (FileStore).
2. Centronics compatible printer.
3. Serial devices (plotters, printers etc).
Installation instructions for the Econet Local Area Network are included in the FileStore Manager's Guide supplied with FileStore.
A.4 APPENDIX A 1NSTALLAT1ON
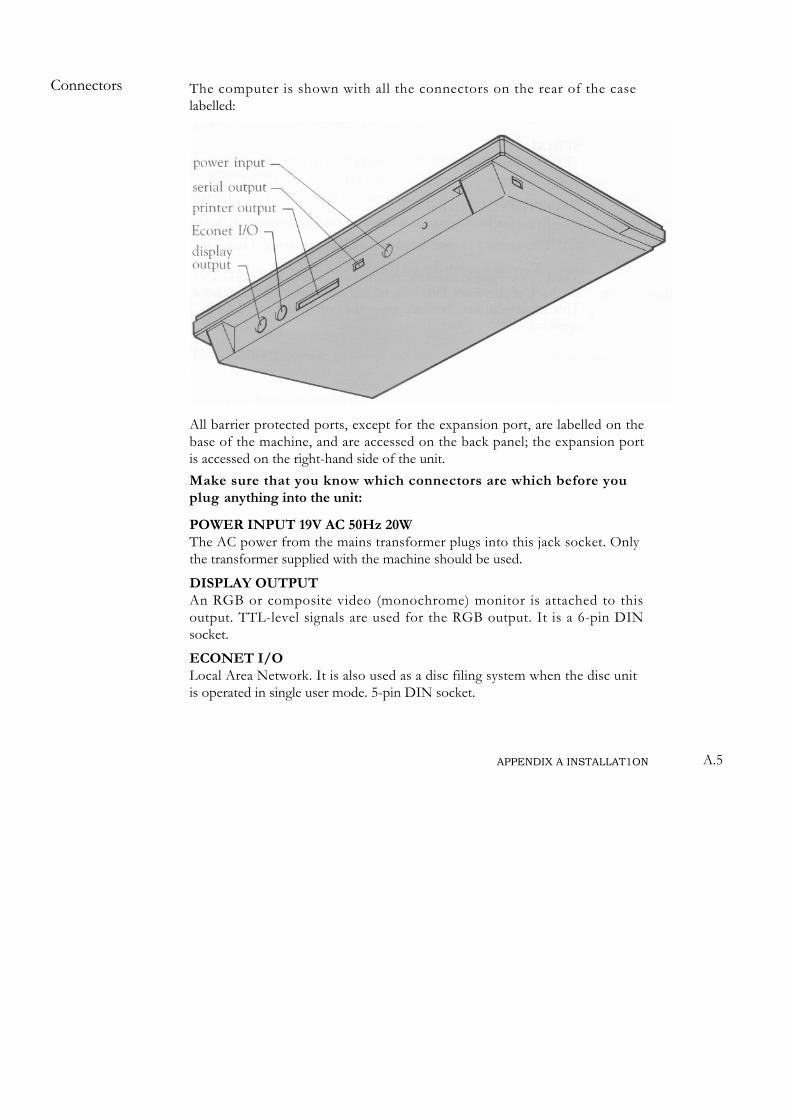
Connectors The computer is shown with all the connectors on the rear of the case labelled:
All barrier protected ports, except for the expansion port, are labelled on the base of the machine, and are accessed on the back panel; the expansion port is accessed on the right-hand side of the unit.Make sure that you know which connectors are which before you plug anything into the unit:
POWER INPUT 19V AC 50Hz 20WThe AC power from the mains transformer plugs into this jack socket. Only the transformer supplied with the machine should be used.
DISPLAY OUTPUTAn RGB or composite video (monochrome) monitor is attached to this output. TTL-level signals are used for the RGB output. It is a 6-pin DIN socket.
ECONET I/OLocal Area Network. It is also used as a disc filing system when the disc unit is operated in single user mode. 5-pin DIN socket.
APPENDIX A INSTALLAT1ON A.5
PRINTER OUTPUTA Centronics compatible parallel printer may be attached to this interface. The connector is a 26-way DIL IDC header.
SERIAL I/OThis provides RS423 (RS232-compatible) serial port. The connector is a 6-way, left-handed, W polarised socket.
TELEPHONE LINE INPUTThis flying lead connects the unit to the telephone network, see section 5 for details.
Setting the loudspeaker volume
There is a volume control for the internal loudspeaker marked VOLUME on the back of the unit. This may be adjusted using a flat-headed screwdriver. This adjustment may be made when the unit is being used, eg by dialling the speaking clock.
A. 6 APPENDIX A INSTALLATION
Appendix B: TERMINAL EMULATIONERROR MESSAGES
Possible faults
The following are the main error messages you may receive from the Communicator.
Data call terminated by request
You have pressed CONNECT again to end the call.
Data call terminated due to data connection being lost
The line has become disconnected for whatever reason. Try again.
Data call terminated due to unknown error
Report this to your system manager.
The following problems, which are not indicated by error messages, may occur during terminal operation.
Received characters garbledEither the number of data bits, stop bits or the parity has been set incorrectly, or the line has bad noise on it. Terminate the call, and use SEE/EDIT to check how Communicator has been configured for this call. Try again.
Parts of text missing
Communicator's receive buffer is being filled up before transmission from the remote computer can be halted. Terminate the call. If the remote computer can recognise the handshaking (such as CTS/RTS on RS423) or flow control protocol (XON/XOFF) provided by the Communicator, select one of these from the Directory data entry screen, accessible by pressing SEE/EDIT.If the remote system does not provide these facilities, you can increase the size of the Communicator's receive buffer instead (Select the modem or RS423 configure screens, as appropriate, from the Configure program). Try the call again. -
APPENDIX B TERM1NAL EMULAT1ON ERROR MESSAGES B.1
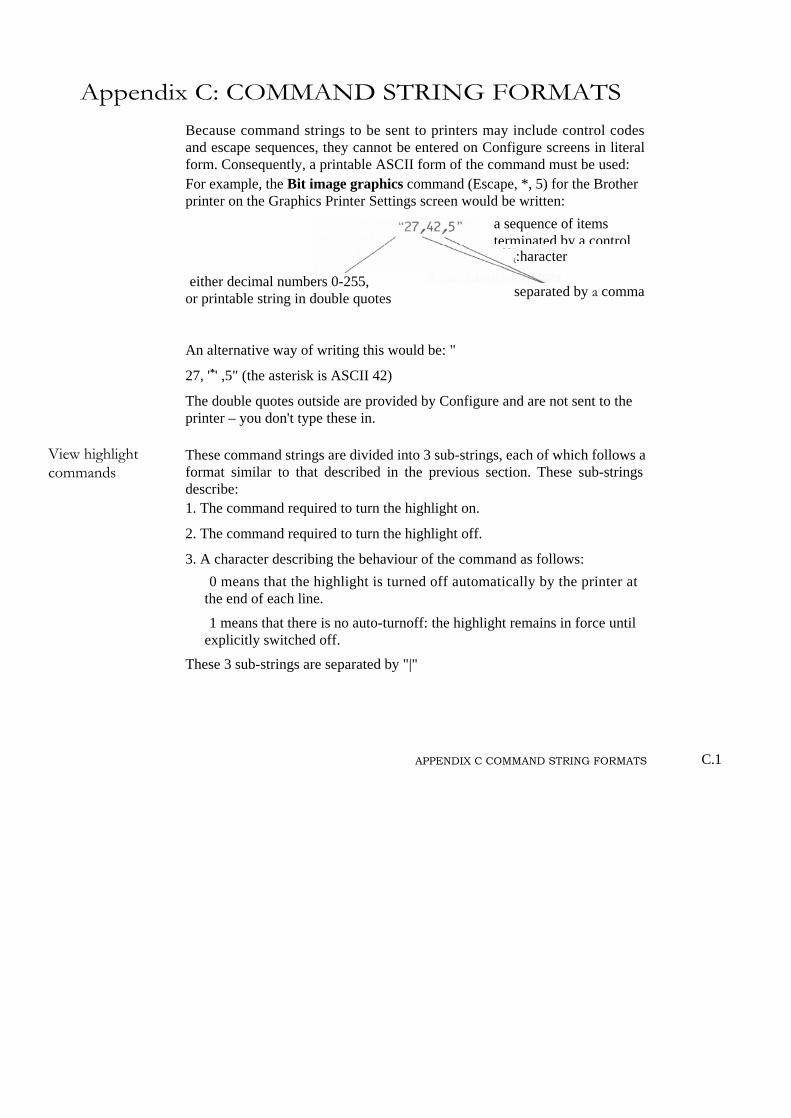
Appendix C: COMMAND STRING FORMATS
View highlight commands
Because command strings to be sent to printers may include control codes and escape sequences, they cannot be entered on Configure screens in literal form. Consequently, a printable ASCII form of the command must be used:For example, the Bit image graphics command (Escape, *, 5) for the Brother printer on the Graphics Printer Settings screen would be written:
An alternative way of writing this would be: "
27, '*' ,5" (the asterisk is ASCII 42)
The double quotes outside are provided by Configure and are not sent to the printer – you don't type these in.
These command strings are divided into 3 sub-strings, each of which follows a format similar to that described in the previous section. These sub-strings describe:1. The command required to turn the highlight on.
2. The command required to turn the highlight off.
3. A character describing the behaviour of the command as follows:
0 means that the highlight is turned off automatically by the printer at the end of each line.
1 means that there is no auto-turnoff: the highlight remains in force until explicitly switched off.
These 3 sub-strings are separated by "|"
APPENDIX C COMMAND STRING FORMATS
either decimal numbers 0-255,or printable string in double quotes separated by a comma
a sequence of items terminated by a control
:haracter
C.1

Thus to define the commands to set and clear italic mode on a Brother printer, the relevant line on the Configure page should appear as follows:
Italic "27,'4'|27,'5'|1"
In other words, escape 4 selects italic mode, and escape 5 cancels it. Italic mode is not cancelled by end of line.
View character Character translations may be defined using the character translation linestranslat ions on the Configure page. The f irst character of each str ing
represents the character to be replaced, while the remainder specifies the sequence to replace it.Several translations may be defined on a single line, using the | character as a separator of the sub-strings.
C.2 APPENDIX C COMMAND STRING FORMATS
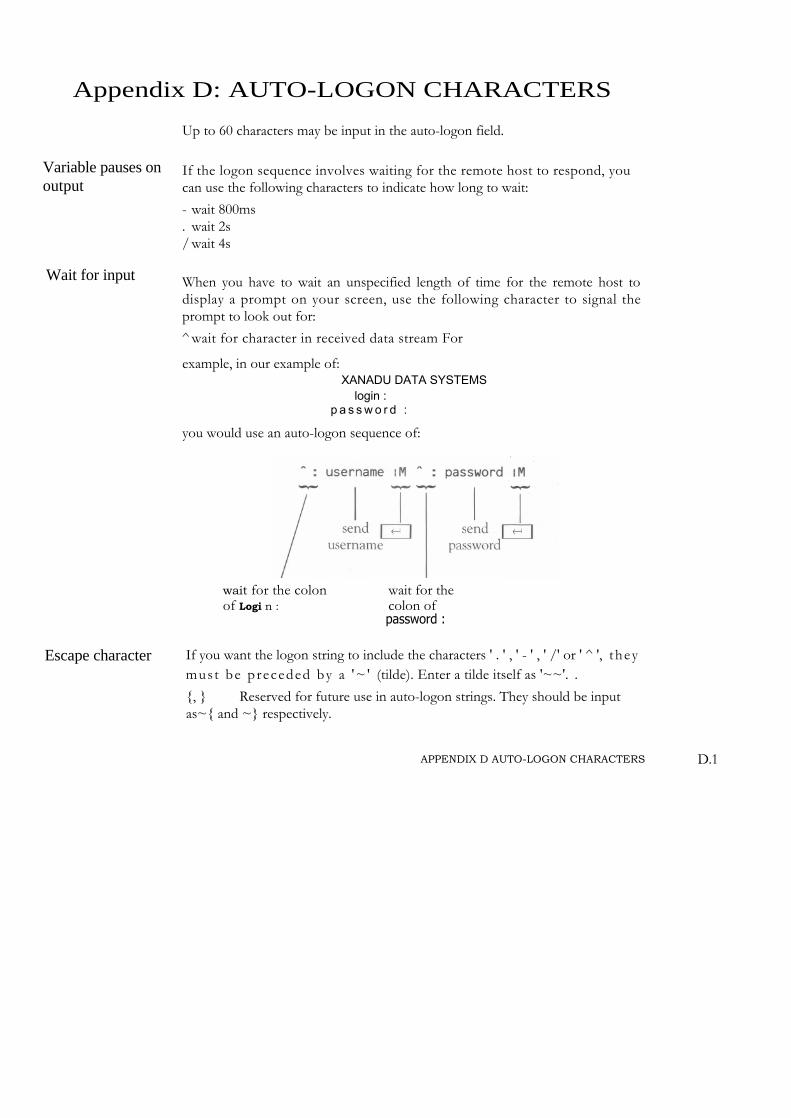
Appendix D: AUTO-LOGON CHARACTERS
Variable pauses on output
Wait for input
Up to 60 characters may be input in the auto-logon field.
If the logon sequence involves waiting for the remote host to respond, you can use the following characters to indicate how long to wait:- wait 800ms. wait 2s/ wait 4s
When you have to wait an unspecified length of time for the remote host to display a prompt on your screen, use the following character to signal the prompt to look out for:
^ wait for character in received data stream For
example, in our example of:XANADU DATA SYSTEMS
login : p a s s w o r d :
you would use an auto-logon sequence of:
wait for the colon wait for theof Logi n : colon of
password :
Escape character If you want the logon string to include the characters ' . ' , ' - ' , ' /' or ' ^ ', they must be preceded by a '~ ' (tilde). Enter a tilde itself as '~~'. .
{, } Reserved for future use in auto-logon strings. They should be input as~{ and ~} respectively.
APPENDIX D AUTO-LOGON CHARACTERS D.1

APPENDIX D AUTO-LOGON CHARACTERSD.2
Send and receive control characters