Embed Size (px)
Citation preview
www.northcott.comNorthcott Canada 101 Courtland Avenue Vaughan, Ontario L4K 3T5
Northcott USA 1099 Wall St. West, Suite 354 Lyndhurst, NJ 07071
by Linda Ludovico and Deborah Edwards In support of Quilts of Valour Canada
FREE PATTERN • Oh Canada • 60” x 72 3/4” • by Elaine Theriault for Northcott
Oh Canada (Quilts of Valour size)
Finished Size: 60 by 72 inches
wof = width of fabric
Fabric requirements Meters Cutting Instructions
Fabric A - #20865-24 Canadian flag panel
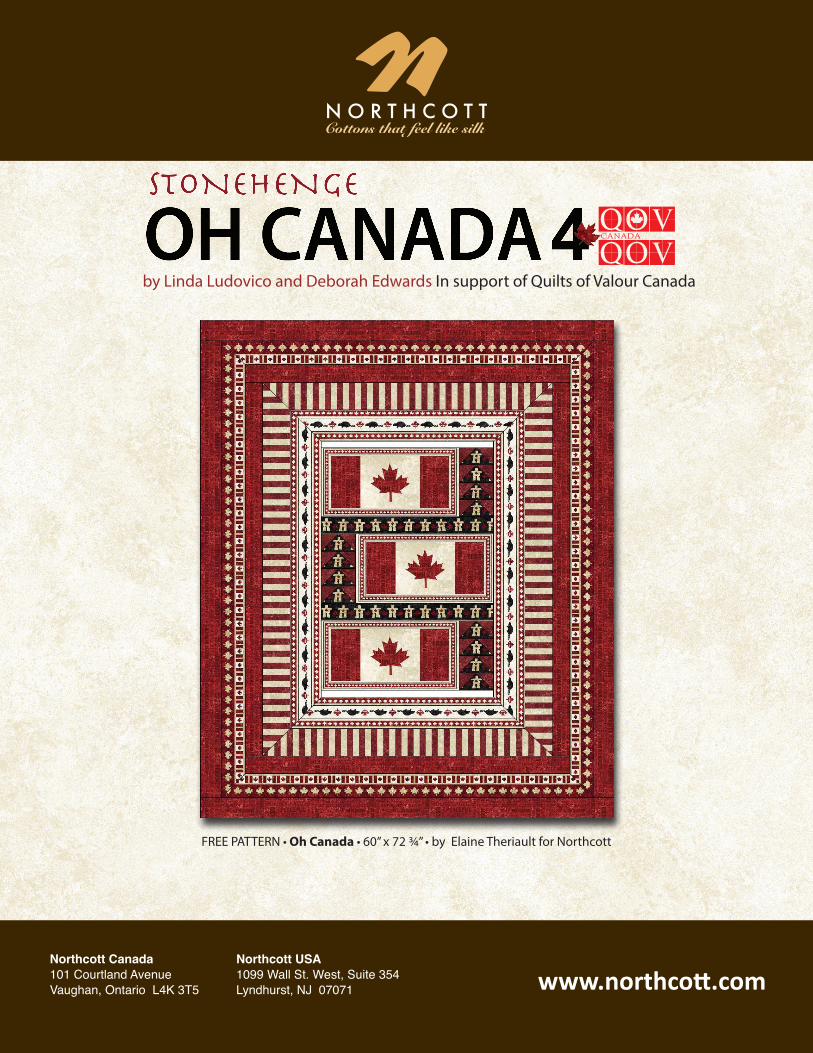
1 panel Fussy cut three Canadian flag panels 10 ½” by 20 ½”
Fabric B - #3954-190 Red Stonehenge
.3 M Cut 2 strips 3” by wof. Sub-cut into (24) 3” squares.
Cut 2 strips 1 1/2” by wof. Sub-cut (2) piece 1 1/2” by 25 ½”.
Fabric C - #20453-24 Inukshuk/flag border print
1.8 M From the Inukshuk border print, cut 2 strips of Inukshuks 3” by ~70”.
o Sub cut (2) pieces measuring 3” by 25 ½”. From the remainder of the 2 strips, cut (12) rectangles measuring 3” by 5 ½”. If you prefer, fussy cut these units centering the Inukshuk.
CUTTING NOTES: When cutting the Inukshuk border, cut the print so that a scant ¼” extends beyond the edge of the black at the bottom of the Inukshuk images. When you piece this print into the quilt, you will be sewing right along the line between the black and the cream so no cream will be visible in the quilt. After you have cut the two pieces that measure 3 by 25 ½” – trim off the top part of these strips so that you have a scant ¼” beyond the edge of the black. Again when you sew this strip to the quilt, you will use this line as the sewing line. This will ensure that no cream shows up along that border. You are trimming a very thin slice away. The unfinished width of the 25 ½” pieces will be close to 3”.
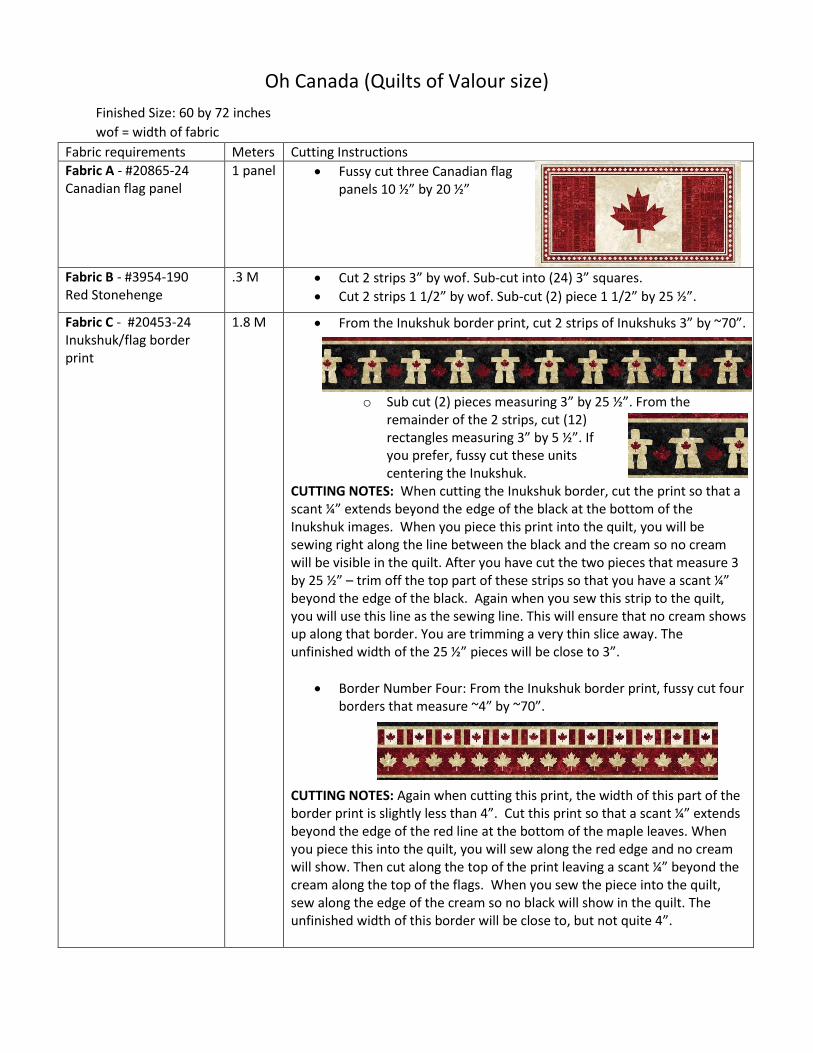
Border Number Four: From the Inukshuk border print, fussy cut four borders that measure ~4” by ~70”.
CUTTING NOTES: Again when cutting this print, the width of this part of the border print is slightly less than 4”. Cut this print so that a scant ¼” extends beyond the edge of the red line at the bottom of the maple leaves. When you piece this into the quilt, you will sew along the red edge and no cream will show. Then cut along the top of the print leaving a scant ¼” beyond the cream along the top of the flags. When you sew the piece into the quilt, sew along the edge of the cream so no black will show in the quilt. The unfinished width of this border will be close to, but not quite 4”.
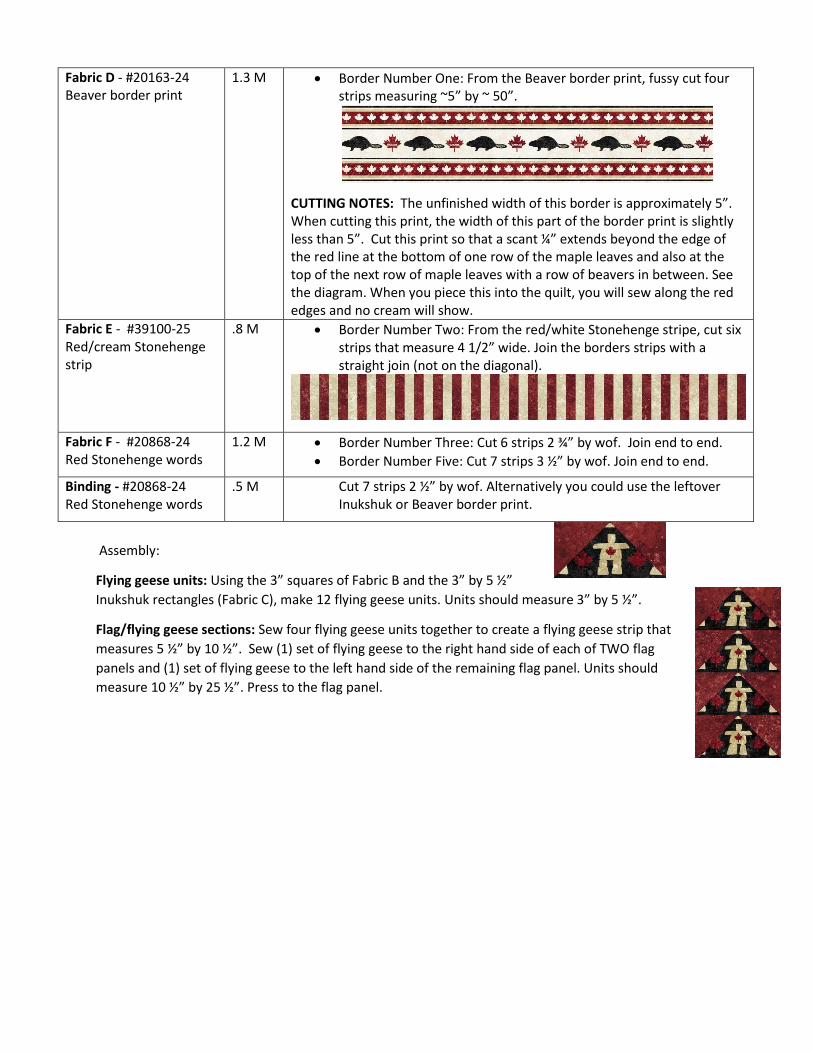
Fabric D - #20163-24 Beaver border print
1.3 M Border Number One: From the Beaver border print, fussy cut four strips measuring ~5” by ~ 50”.
CUTTING NOTES: The unfinished width of this border is approximately 5”. When cutting this print, the width of this part of the border print is slightly less than 5”. Cut this print so that a scant ¼” extends beyond the edge of the red line at the bottom of one row of the maple leaves and also at the top of the next row of maple leaves with a row of beavers in between. See the diagram. When you piece this into the quilt, you will sew along the red edges and no cream will show.
Fabric E - #39100-25 Red/cream Stonehenge strip
.8 M Border Number Two: From the red/white Stonehenge stripe, cut six strips that measure 4 1/2” wide. Join the borders strips with a straight join (not on the diagonal).
Fabric F - #20868-24 Red Stonehenge words
1.2 M Border Number Three: Cut 6 strips 2 ¾” by wof. Join end to end.
Border Number Five: Cut 7 strips 3 ½” by wof. Join end to end.
Binding - #20868-24 Red Stonehenge words
.5 M Cut 7 strips 2 ½” by wof. Alternatively you could use the leftover Inukshuk or Beaver border print.
Assembly:
Flying geese units: Using the 3” squares of Fabric B and the 3” by 5 ½”
Inukshuk rectangles (Fabric C), make 12 flying geese units. Units should measure 3” by 5 ½”.
Flag/flying geese sections: Sew four flying geese units together to create a flying geese strip that
measures 5 ½” by 10 ½”. Sew (1) set of flying geese to the right hand side of each of TWO flag
panels and (1) set of flying geese to the left hand side of the remaining flag panel. Units should
measure 10 ½” by 25 ½”. Press to the flag panel.
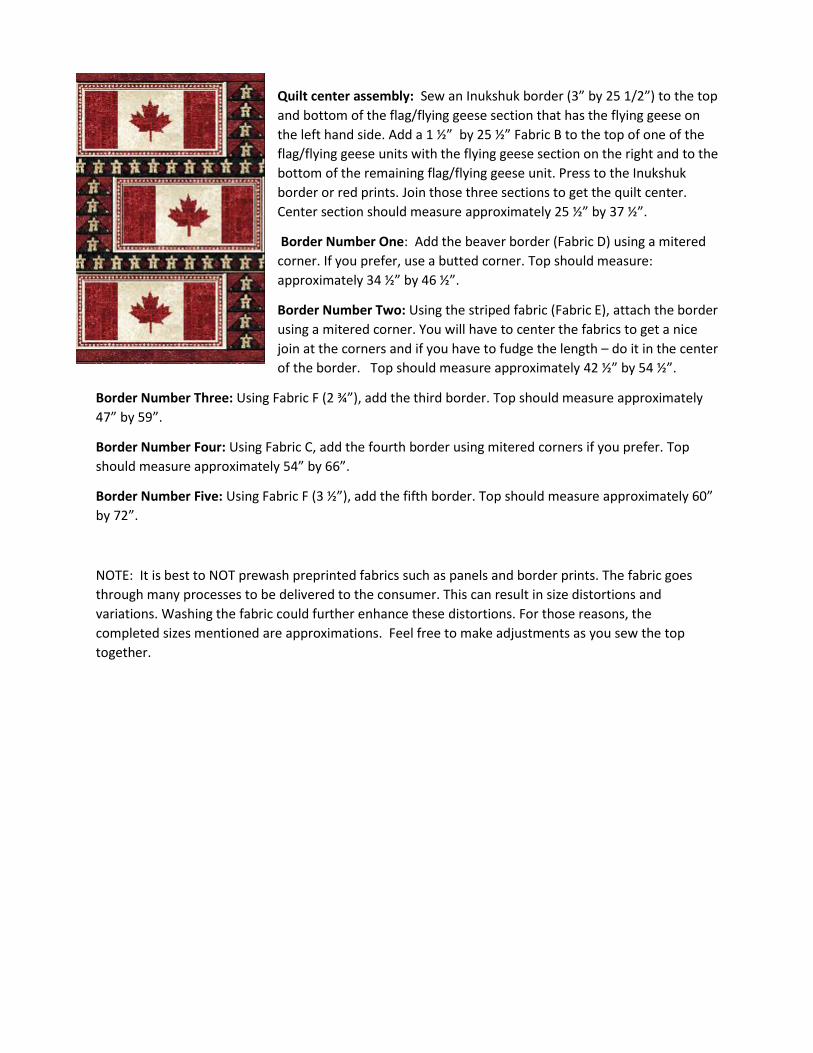
Quilt center assembly: Sew an Inukshuk border (3” by 25 1/2”) to the top
and bottom of the flag/flying geese section that has the flying geese on
the left hand side. Add a 1 ½” by 25 ½” Fabric B to the top of one of the
flag/flying geese units with the flying geese section on the right and to the
bottom of the remaining flag/flying geese unit. Press to the Inukshuk
border or red prints. Join those three sections to get the quilt center.
Center section should measure approximately 25 ½” by 37 ½”.
Border Number One: Add the beaver border (Fabric D) using a mitered
corner. If you prefer, use a butted corner. Top should measure:
approximately 34 ½” by 46 ½”.
Border Number Two: Using the striped fabric (Fabric E), attach the border
using a mitered corner. You will have to center the fabrics to get a nice
join at the corners and if you have to fudge the length – do it in the center
of the border. Top should measure approximately 42 ½” by 54 ½”.
Border Number Three: Using Fabric F (2 ¾”), add the third border. Top should measure approximately
47” by 59”.
Border Number Four: Using Fabric C, add the fourth border using mitered corners if you prefer. Top
should measure approximately 54” by 66”.
Border Number Five: Using Fabric F (3 ½”), add the fifth border. Top should measure approximately 60”
by 72”.
NOTE: It is best to NOT prewash preprinted fabrics such as panels and border prints. The fabric goes
through many processes to be delivered to the consumer. This can result in size distortions and
variations. Washing the fabric could further enhance these distortions. For those reasons, the
completed sizes mentioned are approximations. Feel free to make adjustments as you sew the top
together.