Embed Size (px)
Citation preview

2
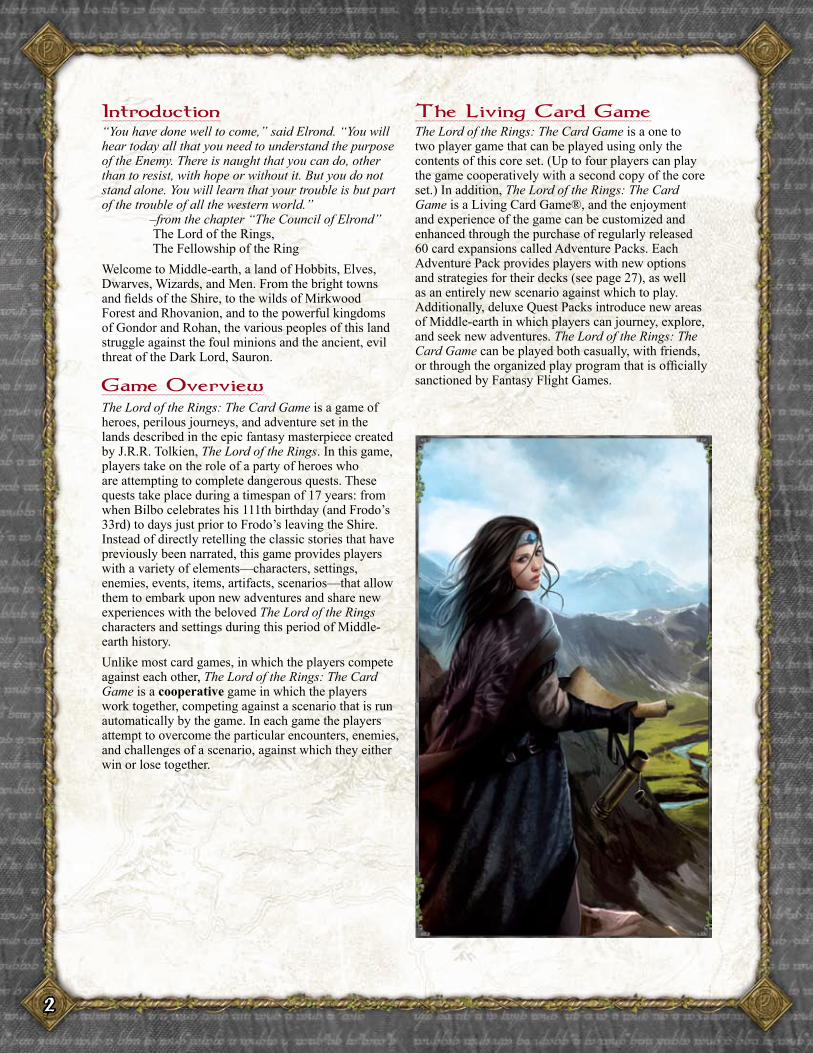
“You have done well to come,” said Elrond. “You will hear today all that you need to understand the purpose of the Enemy. There is naught that you can do, other than to resist, with hope or without it. But you do not stand alone. You will learn that your trouble is but part of the trouble of all the western world.” –from the chapter “The Council of Elrond” The Lord of the Rings, The Fellowship of the RingWelcome to Middle-earth, a land of Hobbits, Elves, Dwarves, Wizards, and Men. From the bright towns and fields of the Shire, to the wilds of Mirkwood Forest and Rhovanion, and to the powerful kingdoms of Gondor and Rohan, the various peoples of this land struggle against the foul minions and the ancient, evil threat of the Dark Lord, Sauron.
The Lord of the Rings: The Card Game is a game of heroes, perilous journeys, and adventure set in the lands described in the epic fantasy masterpiece created by J.R.R. Tolkien, The Lord of the Rings. In this game, players take on the role of a party of heroes who are attempting to complete dangerous quests. These quests take place during a timespan of 17 years: from when Bilbo celebrates his 111th birthday (and Frodo’s 33rd) to days just prior to Frodo’s leaving the Shire. Instead of directly retelling the classic stories that have previously been narrated, this game provides players with a variety of elements—characters, settings, enemies, events, items, artifacts, scenarios—that allow them to embark upon new adventures and share new experiences with the beloved The Lord of the Rings characters and settings during this period of Middle-earth history.Unlike most card games, in which the players compete against each other, The Lord of the Rings: The Card Game is a cooperative game in which the players work together, competing against a scenario that is run automatically by the game. In each game the players attempt to overcome the particular encounters, enemies, and challenges of a scenario, against which they either win or lose together.
The Lord of the Rings: The Card Game is a one to two player game that can be played using only the contents of this core set. (Up to four players can play the game cooperatively with a second copy of the core set.) In addition, The Lord of the Rings: The Card Game is a Living Card Game®, and the enjoyment and experience of the game can be customized and enhanced through the purchase of regularly released 60 card expansions called Adventure Packs. Each Adventure Pack provides players with new options and strategies for their decks (see page 27), as well as an entirely new scenario against which to play. Additionally, deluxe Quest Packs introduce new areas of Middle-earth in which players can journey, explore, and seek new adventures. The Lord of the Rings: The Card Game can be played both casually, with friends, or through the organized play program that is officially sanctioned by Fantasy Flight Games.
3
The Lord of the Rings: The Card Game core set includes the following components:
This Rulebook•
226 cards, consisting of:•
12 Hero Cards•
120 Player Cards•
84 Encounter Cards•
10 Quest Cards•
2 Threat Trackers (each consisting of 1 faceplate, 2 •dials, and 4 plastic dial connectors)
40 Damage Tokens•
26 Progress Tokens•
30 Resource Tokens•
1 First Player Token•
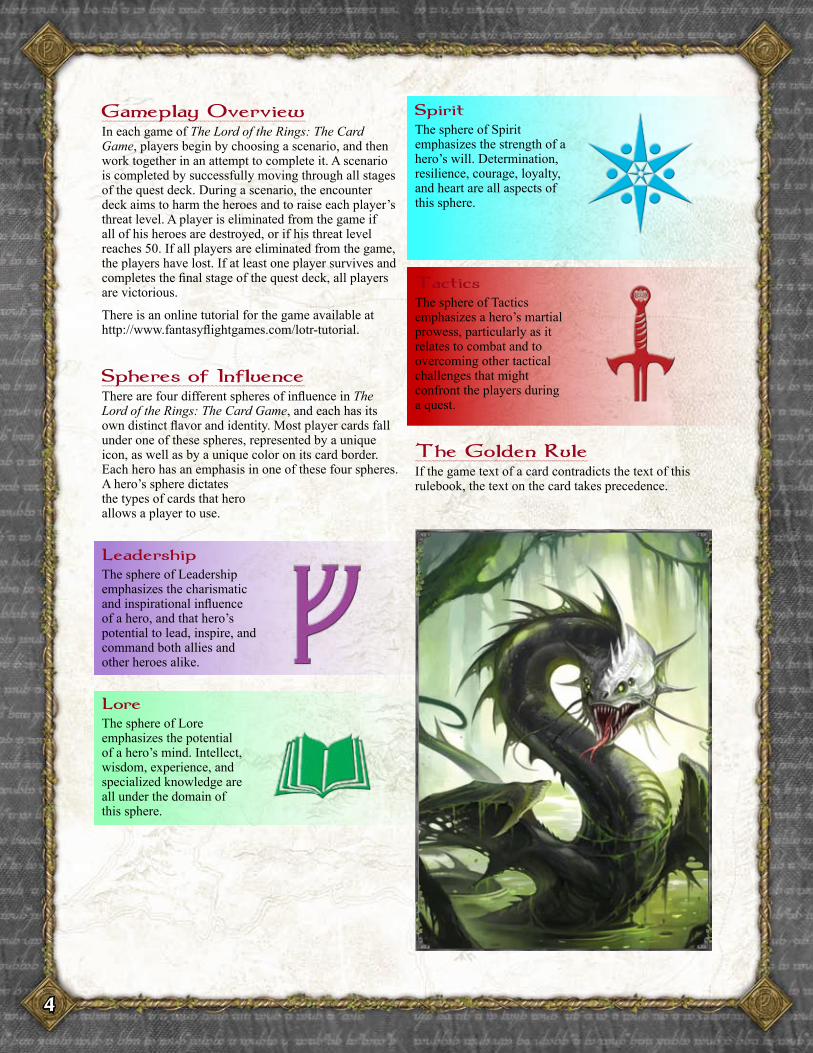
The Lord of the Rings: The Card Game core set features 226 cards. Four starter decks, each built around a distinct sphere of influence (Leadership, Lore, Spirit, and Tactics), can be played right out of the box in the introductory game, or the cards in these decks can be combined together to create tournament legal decks. Also included in this set are 3 scenarios and 84 encounter cards for the players to compete against. For a complete explanation of each card type, see pages 5-9.
Threat trackers are used to track a player’s threat level throughout the game. Threat represents the level of risk a player has taken on during a scenario. If a player’s threat level reaches a certain threshold, that player is eliminated from the game. A player’s threat level can also draw out enemy encounters and set off unfortunate circumstances throughout the course of the game.
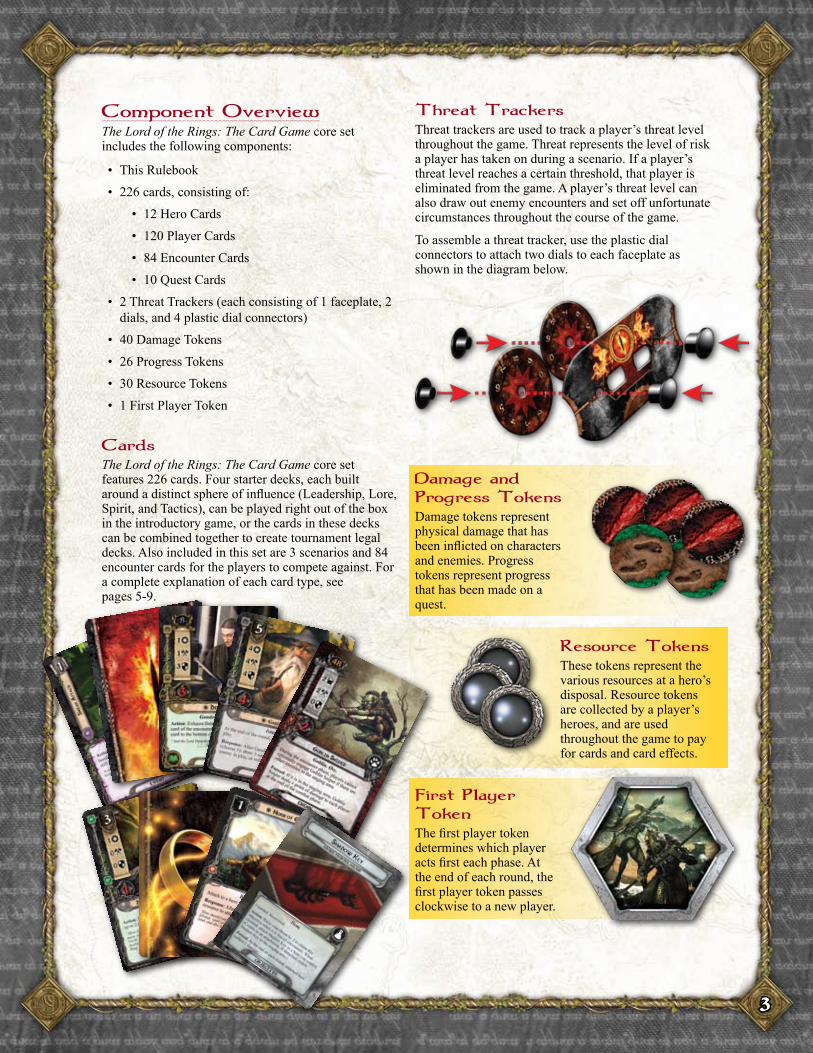
To assemble a threat tracker, use the plastic dial connectors to attach two dials to each faceplate as shown in the diagram below.
Damage tokens represent physical damage that has been inflicted on characters and enemies. Progress tokens represent progress that has been made on a quest.
These tokens represent the various resources at a hero’s disposal. Resource tokens are collected by a player’s heroes, and are used throughout the game to pay for cards and card effects.
The first player token determines which player acts first each phase. At the end of each round, the first player token passes clockwise to a new player.
4
In each game of The Lord of the Rings: The Card Game, players begin by choosing a scenario, and then work together in an attempt to complete it. A scenario is completed by successfully moving through all stages of the quest deck. During a scenario, the encounter deck aims to harm the heroes and to raise each player’s threat level. A player is eliminated from the game if all of his heroes are destroyed, or if his threat level reaches 50. If all players are eliminated from the game, the players have lost. If at least one player survives and completes the final stage of the quest deck, all players are victorious.
There is an online tutorial for the game available at http://www.fantasyflightgames.com/lotr-tutorial.
There are four different spheres of influence in The Lord of the Rings: The Card Game, and each has its own distinct flavor and identity. Most player cards fall under one of these spheres, represented by a unique icon, as well as by a unique color on its card border. Each hero has an emphasis in one of these four spheres. A hero’s sphere dictates the types of cards that hero allows a player to use.
The sphere of Leadership emphasizes the charismatic and inspirational influence of a hero, and that hero’s potential to lead, inspire, and command both allies and other heroes alike.
The sphere of Lore emphasizes the potential of a hero’s mind. Intellect, wisdom, experience, and specialized knowledge are all under the domain of this sphere.
The sphere of Spirit emphasizes the strength of a hero’s will. Determination, resilience, courage, loyalty, and heart are all aspects of this sphere.
The sphere of Tactics emphasizes a hero’s martial prowess, particularly as it relates to combat and to overcoming other tactical challenges that might confront the players during a quest.
If the game text of a card contradicts the text of this rulebook, the text on the card takes precedence.
5
There are three different types of decks in The Lord of the Rings: The Card Game: the quest deck, the encounter deck, and the player deck. There are also hero cards, which do not belong to any deck. Each deck has its own function and its own set of card types, as described below. In the game, each player plays one player deck, and the players work together to move through a fixed quest deck. A randomized encounter deck operates in conjunction with the quest deck in each scenario to challenge the players as they play against the game.
Each scenario represents a quest that the players are attempting to complete. At the beginning of a game, the players must choose which scenario they wish to play against for that game. A scenario consists of a sequential deck of quest cards (referred to as “the quest deck”) and a randomized encounter deck of enemy, location, treachery, and objective cards. For more information on the scenarios in this core set, see page 26.
Each quest card represents one of the various stages of the quest the players are pursuing in a scenario. Each quest card is a numbered step in a fixed, sequential order. These cards have their sequential information printed on both sides, so they can be placed in the correct order without spoiling the contents of the latter stages in the scenario. Side A is the back of the card, and provides story and setup information. After reading and following any instructions on Side A, players flip the card to Side B. Side B contains the information necessary to move to the next stage of the quest.
1. Card Title: The name of this card. Each sequential stage in a scenario has its own unique name.
2. Scenario Symbol: A visual icon that identifies this scenario, matching it to a subset of encounter cards.
3. Sequence: This number determines the order in which the scenario deck is stacked at the beginning of the game. When setting up, card 1A is placed on top, followed by 2A, 3A, and so forth. Players proceed from side A to side B on each stage of a scenario.
4. Encounter Information: A group of icons that, along with the scenario symbol, identify which encounter cards should be shuffled into the encounter deck when playing this scenario.
5. Scenario Title: The name of this scenario.
6. Game Text: Story, setup instruction, special effects, or conditions that apply during this stage of the scenario.
7. Set Information: Every card has an icon denoting the set it belongs to, as well as a unique identification number within the set.
8. Quest Points: The number of progress tokens that must be placed on this card in order to proceed to the next stage of the scenario.
1
2
3
5
6
7
8
1
2
3
45
6
7
6
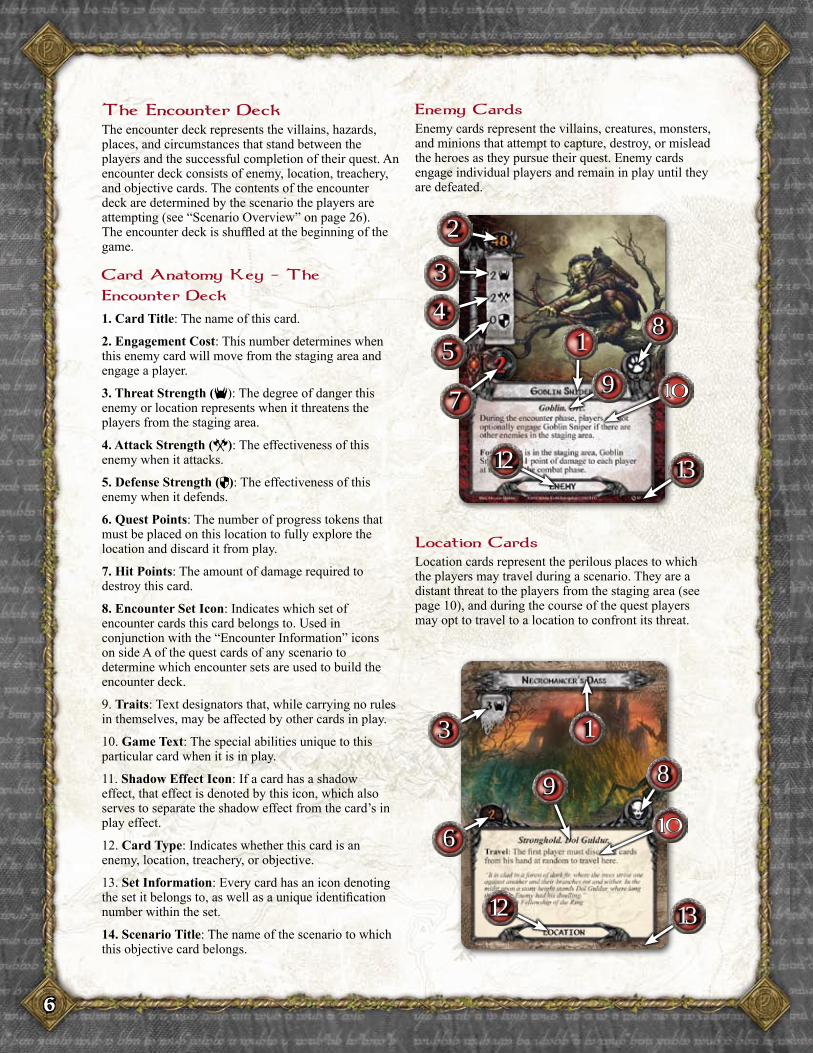
The encounter deck represents the villains, hazards, places, and circumstances that stand between the players and the successful completion of their quest. An encounter deck consists of enemy, location, treachery, and objective cards. The contents of the encounter deck are determined by the scenario the players are attempting (see “Scenario Overview” on page 26). The encounter deck is shuffled at the beginning of the game.
1. Card Title: The name of this card.
2. Engagement Cost: This number determines when this enemy card will move from the staging area and engage a player.
3. Threat Strength ($): The degree of danger this enemy or location represents when it threatens the players from the staging area.
4. Attack Strength (Û): The effectiveness of this enemy when it attacks.
5. Defense Strength (Ú): The effectiveness of this enemy when it defends.
6. Quest Points: The number of progress tokens that must be placed on this location to fully explore the location and discard it from play.
7. Hit Points: The amount of damage required to destroy this card.
8. Encounter Set Icon: Indicates which set of encounter cards this card belongs to. Used in conjunction with the “Encounter Information” icons on side A of the quest cards of any scenario to determine which encounter sets are used to build the encounter deck.
9. Traits: Text designators that, while carrying no rules in themselves, may be affected by other cards in play.
10. Game Text: The special abilities unique to this particular card when it is in play.
11. Shadow Effect Icon: If a card has a shadow effect, that effect is denoted by this icon, which also serves to separate the shadow effect from the card’s in play effect.
12. Card Type: Indicates whether this card is an enemy, location, treachery, or objective.
13. Set Information: Every card has an icon denoting the set it belongs to, as well as a unique identification number within the set.
14. Scenario Title: The name of the scenario to which this objective card belongs.
Enemy cards represent the villains, creatures, monsters, and minions that attempt to capture, destroy, or mislead the heroes as they pursue their quest. Enemy cards engage individual players and remain in play until they are defeated.
Location cards represent the perilous places to which the players may travel during a scenario. They are a distant threat to the players from the staging area (see page 10), and during the course of the quest players may opt to travel to a location to confront its threat.
1
2
3
4
5
7
8
9
12 13
13
6
89
12 13

7
Treachery cards represent traps, curses, maneuvers, pitfalls, and other surprises the players might confront during a scenario. When a treachery card is revealed from the encounter deck, its text effects are resolved immediately, and it is then placed in the encounter discard pile.
Depending on the scenario, objective cards can represent a number of different elements, ranging from the goals of a scenario, to allies who assist the players, to keys that allow the players to advance to the next stage of a quest, to artifacts that are necessary to defeat a difficult enemy or overcome a particular challenge. Unless otherwise specified, objective cards are shuffled into the encounter deck when setting up a scenario.
18
11
12 13
1
89
12 13
14
8
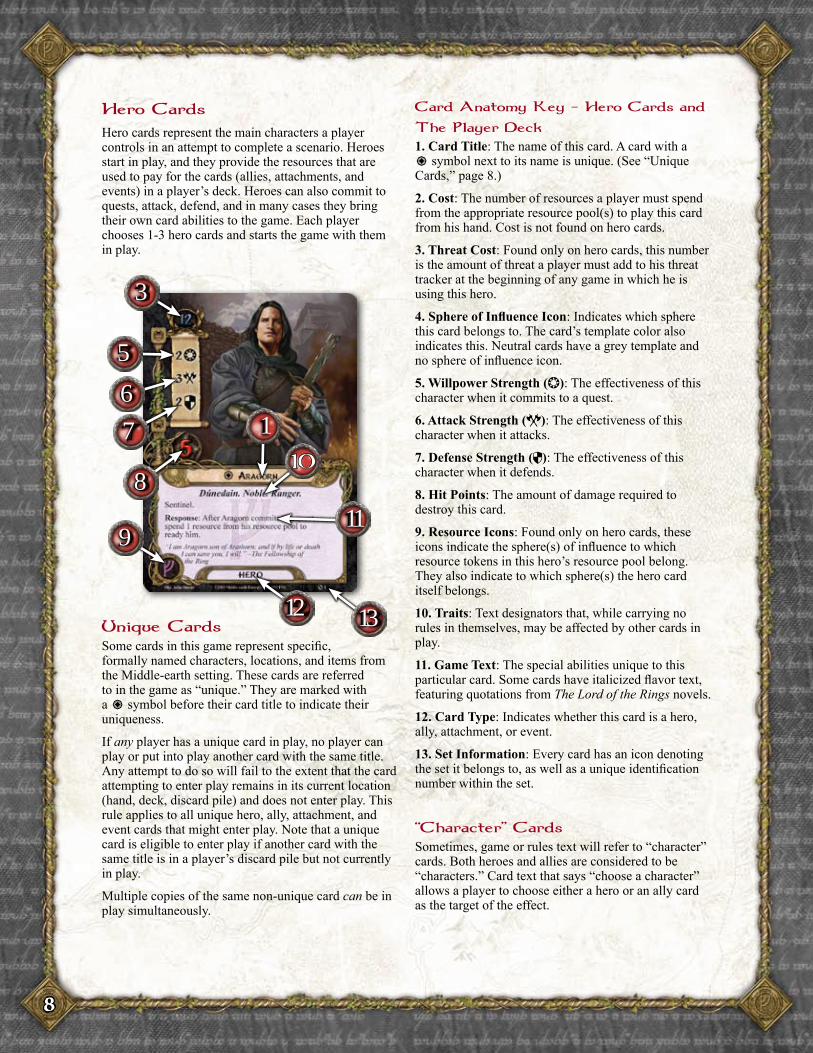
Hero cards represent the main characters a player controls in an attempt to complete a scenario. Heroes start in play, and they provide the resources that are used to pay for the cards (allies, attachments, and events) in a player’s deck. Heroes can also commit to quests, attack, defend, and in many cases they bring their own card abilities to the game. Each player chooses 1-3 hero cards and starts the game with them in play.
Some cards in this game represent specific, formally named characters, locations, and items from the Middle-earth setting. These cards are referred to in the game as “unique.” They are marked with a ‰ symbol before their card title to indicate their uniqueness.
If any player has a unique card in play, no player can play or put into play another card with the same title. Any attempt to do so will fail to the extent that the card attempting to enter play remains in its current location (hand, deck, discard pile) and does not enter play. This rule applies to all unique hero, ally, attachment, and event cards that might enter play. Note that a unique card is eligible to enter play if another card with the same title is in a player’s discard pile but not currently in play.
Multiple copies of the same non-unique card can be in play simultaneously.
1. Card Title: The name of this card. A card with a ‰ symbol next to its name is unique. (See “Unique Cards,” page 8.)
2. Cost: The number of resources a player must spend from the appropriate resource pool(s) to play this card from his hand. Cost is not found on hero cards.
3. Threat Cost: Found only on hero cards, this number is the amount of threat a player must add to his threat tracker at the beginning of any game in which he is using this hero.
4. Sphere of Influence Icon: Indicates which sphere this card belongs to. The card’s template color also indicates this. Neutral cards have a grey template and no sphere of influence icon.
5. Willpower Strength (Ò): The effectiveness of this character when it commits to a quest.
6. Attack Strength (Û): The effectiveness of this character when it attacks.
7. Defense Strength (Ú): The effectiveness of this character when it defends.
8. Hit Points: The amount of damage required to destroy this card.
9. Resource Icons: Found only on hero cards, these icons indicate the sphere(s) of influence to which resource tokens in this hero’s resource pool belong. They also indicate to which sphere(s) the hero card itself belongs.
10. Traits: Text designators that, while carrying no rules in themselves, may be affected by other cards in play.
11. Game Text: The special abilities unique to this particular card. Some cards have italicized flavor text, featuring quotations from The Lord of the Rings novels.
12. Card Type: Indicates whether this card is a hero, ally, attachment, or event.
13. Set Information: Every card has an icon denoting the set it belongs to, as well as a unique identification number within the set.
Sometimes, game or rules text will refer to “character” cards. Both heroes and allies are considered to be “characters.” Card text that says “choose a character” allows a player to choose either a hero or an ally card as the target of the effect.
1
3
5
6
7
8
911
12 13
9
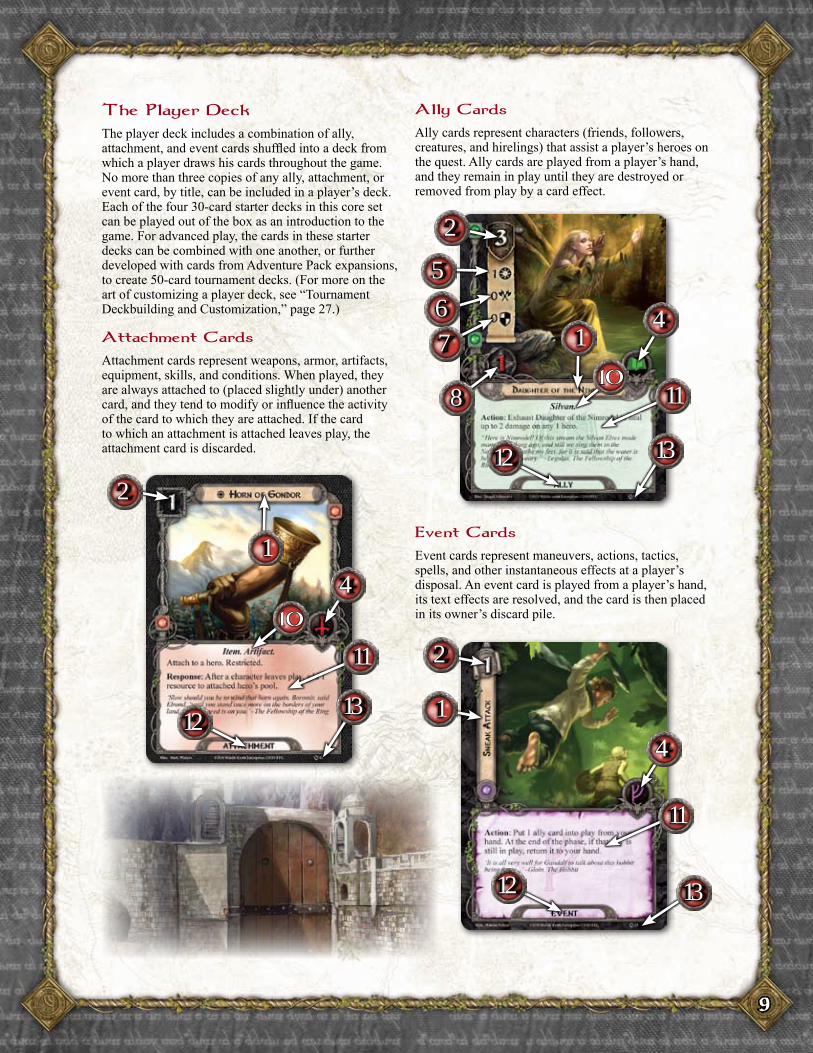
The player deck includes a combination of ally, attachment, and event cards shuffled into a deck from which a player draws his cards throughout the game. No more than three copies of any ally, attachment, or event card, by title, can be included in a player’s deck. Each of the four 30-card starter decks in this core set can be played out of the box as an introduction to the game. For advanced play, the cards in these starter decks can be combined with one another, or further developed with cards from Adventure Pack expansions, to create 50-card tournament decks. (For more on the art of customizing a player deck, see “Tournament Deckbuilding and Customization,” page 27.)
Attachment cards represent weapons, armor, artifacts, equipment, skills, and conditions. When played, they are always attached to (placed slightly under) another card, and they tend to modify or influence the activity of the card to which they are attached. If the card to which an attachment is attached leaves play, the attachment card is discarded.
Ally cards represent characters (friends, followers, creatures, and hirelings) that assist a player’s heroes on the quest. Ally cards are played from a player’s hand, and they remain in play until they are destroyed or removed from play by a card effect.
Event cards represent maneuvers, actions, tactics, spells, and other instantaneous effects at a player’s disposal. An event card is played from a player’s hand, its text effects are resolved, and the card is then placed in its owner’s discard pile.
1
2
4
5
6
7
8 11
12 13
1
2
4
11
1213 1
2
4
11
12 13
10
For the first game, each player chooses one of the four spheres of influence and uses the starter deck for that sphere. The card numbers of each of the four spheres are listed below. Each sphere is also listed with the three heroes that should be used with that starter deck.
Leadership (cards 13-27; heroes Aragorn, Glóin, Théodred)
Tactics (cards 28-42; heroes Legolas, Gimli, Thalin)
Spirit (cards 43-57; heroes Éowyn, Dunhere, Eleanor)
Lore (cards 58-72; heroes Glorfindel, Denethor, Beravor)
Each starter deck should also include 1 copy of the neutral ally card, Gandalf (card 73).
Next, the players select a scenario they would like to play. For the first game, players should try the “Passage Through Mirkwood” scenario, which was designed as an introductory scenario. Separate the cards for this scenario (see page 26). These consist of the quest cards (numbered 120-123), and the encounter cards marked with the Passage Through Mirkwood, Spiders of Mirkwood, and Dol Guldur Orcs symbols (see page 26).
For tournament deckbuilding rules, see page 27.
Before playing The Lord of the Rings: The Card Game, follow these quick steps in order.
1. Shuffle Decks
As with a deck of playing cards, shuffle all player decks and the encounter deck separately until they are randomized. Do not shuffle the quest cards into the encounter deck, and do not shuffle the hero cards into the player decks.
2. Place Heroes and Set Initial Threat Levels
Each player places his heroes in front of him, adds up the threat cost of the heroes he controls, and sets his threat tracker at the same value. This value is that player’s starting threat level for the game.
3. Setup Token Bank
Place the damage tokens, progress tokens, and resource tokens in a pile next to the encounter deck. All players take tokens from this bank as needed throughout the game.
4. Determine First Player
The players determine a first player based on a majority group decision. If this proves impossible, determine a first player at random. Once determined, the first player takes the first player token and places it in front of him as reference.
5. Draw Setup Hand
Each player draws 6 cards from the top of his player deck. If a player does not wish to keep his starting hand, he may take a single mulligan, by shuffling these 6 cards back into his deck and drawing 6 new cards. A player who takes a mulligan must keep his second hand.
6. Set Quest Cards
Arrange the quest cards in sequential order, based off the numbers on the back of each card. Stage 1A should be on top, with the numbers increasing in sequence moving down the stack. Place the quest deck near the encounter deck, in the center of the play area.
7. Follow Scenario Setup Instruction
The back of the first quest card sometimes provides setup instructions for a scenario. Follow these instructions before flipping the quest card.
Players then begin the game starting with the first game round.
The staging area is a unique element of the game’s playing field. It represents the potential dangers the players might face as they progress on their quest.
During the quest phase, enemy and location cards are revealed from the encounter deck and placed in the staging area. Cards in the staging area are imminent threats to the players, including enemies that need to be defeated and locations that need to be explored. While a location is in the staging area, the players are not considered at that location; instead it represents a distant threat. Players have the option of traveling to a location during the travel phase. Similarly, enemies in the staging area are not yet engaged with any of the players. Enemies engage players when a player’s threat level is high enough to draw out that enemy. Players also have the option to voluntarily engage enemies during the encounter phase. (For more on engaging enemies and traveling to locations, see pages 15-16).
Each player has his own discard pile, and the encounter deck also has its own discard pile. Whenever a card is discarded, it goes to the discard pile belonging to the card’s originating deck.
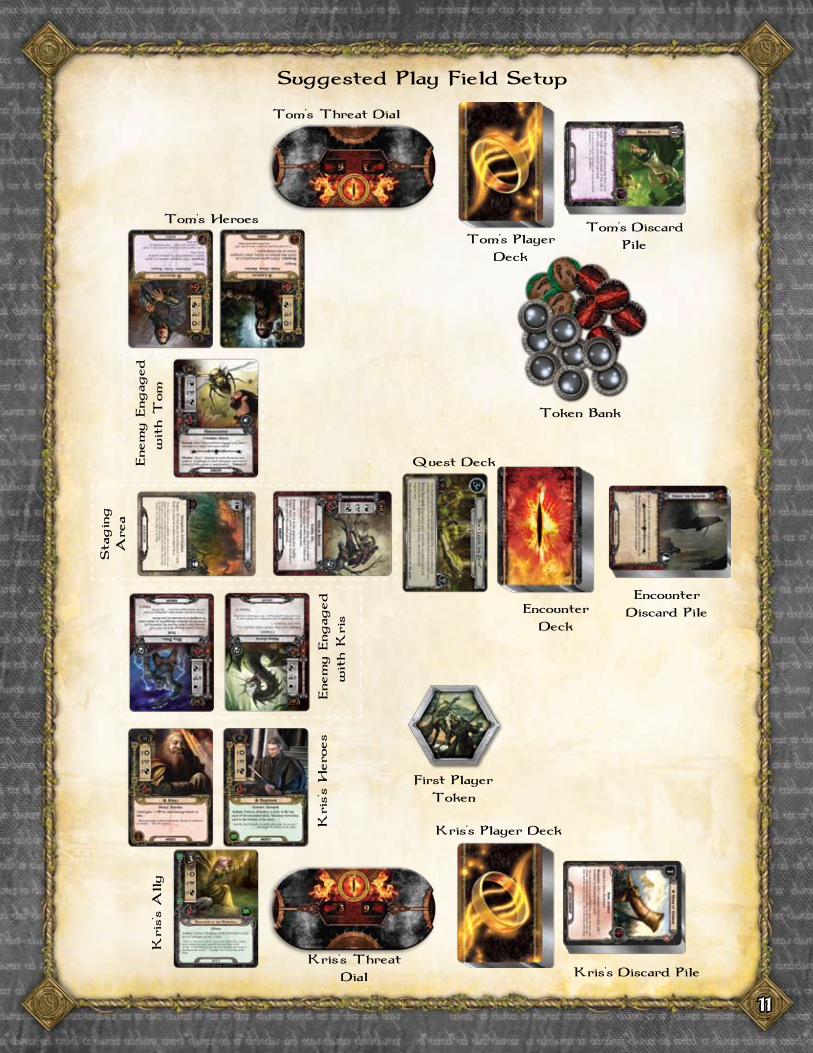
11
12
The Lord of the Rings: The Card Game is played over a series of rounds. Each round is divided into 7 phases. Some phases are played simultaneously by all players, while in other phases the players act separately, with the first player acting first and play proceeding clockwise around the table.
The 7 phases are, in order:
1. Resource
2. Planning
3. Quest
4. Travel
5. Encounter
6. Combat
7. Refresh
Once all 7 phases are complete, the round is over, and play proceeds to the resource phase of the next round. A turn sequence diagram of all the phases, and the game events that occur during each phase, can be found on pages 30-31 of this rulebook.
Each player simultaneously adds 1 resource token to each of his heroes’ resource pools. A resource pool is a collection of resource tokens stored near a hero card. These tokens belong to that hero’s pool, and can be used to pay for cards that belong to that hero’s sphere of influence. Each hero has 1 resource pool.
After collecting resources, each player draws 1 card from his player deck and adds it to his hand.
When a player is instructed to draw one or more cards, he always draws those cards from the top of his own player deck. If a player has no cards remaining in his player deck, he does not draw.
This is the only phase in which a player can play ally and attachment cards from his hand. The first player plays any and all ally and attachment cards he wishes to play first. The opportunity to play cards then proceeds clockwise around the table.
In order for a player to play a card from his hand (or to activate certain card effects), he must pay for it by spending resource tokens from the resource pool of a hero who has a resource icon that matches the card’s sphere of influence. This is called a resource match. Resources that are spent to pay for cards or card effects are taken from their hero’s resource pool and placed in the general token bank.
If a hero is exhausted (see page 14), resources may still be spent from that hero’s resource pool.
Cards with a cost of zero do not require a resource to be spent in order to pay their cost, but they do require at least one hero under that player’s control to have a resource icon that matches the card’s sphere.
After a player plays an ally or attachment card from his hand, he places it faceup and ready in his play area. Attachment cards should be placed partially overlapping, either above or below, the card to which they are attached.
If a player has multiple heroes with similar resource icons, he may use resources from multiple pools of the same sphere to pay for a single card or effect.
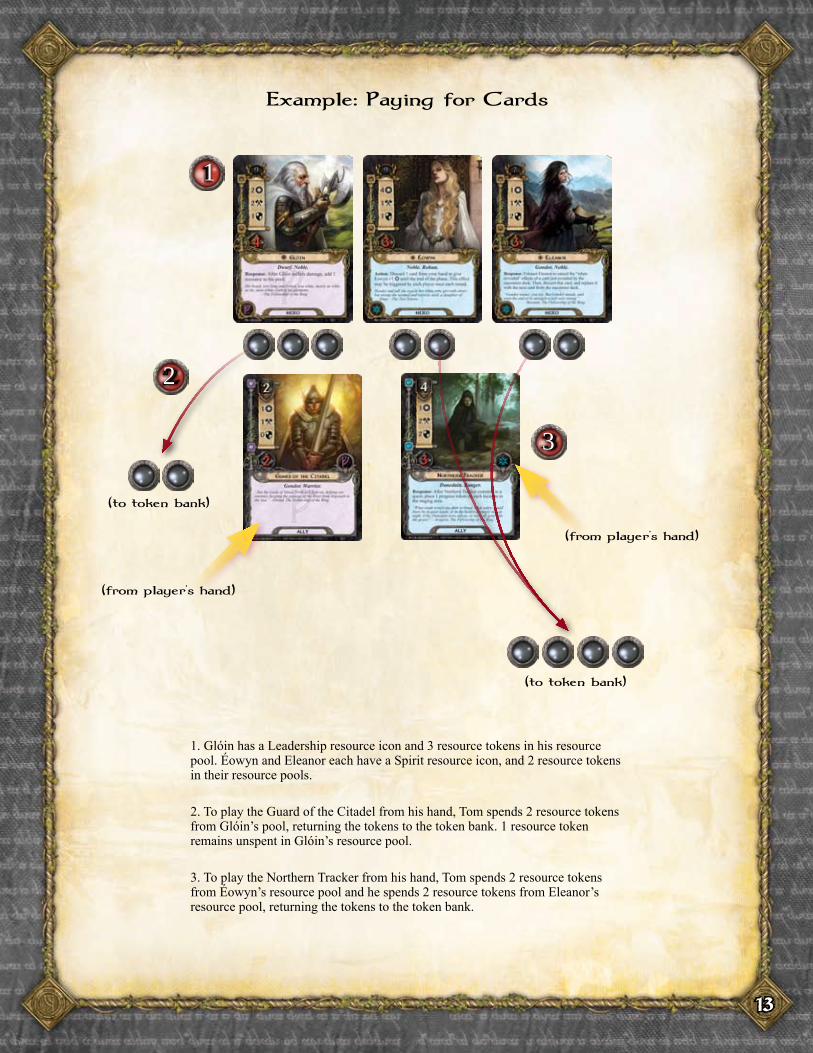
Example: Tom has 3 heroes: Glóin (who has a Leadership resource icon and 3 resources in his pool), Éowyn (who has a Spirit resource icon and 2 resources in her pool), and Eleanor (who has a Spirit resource icon and 2 resources in her pool). Tom wishes to play the Guard of the Citadel card from his hand. The Guard of the Citadel belongs to the Leadership sphere, so Tom must spend resources from Glóin’s pool to play this card. Since the Guard of the Citadel has a cost of 2, Tom moves 2 resources from Glóin’s pool to the token bank and places the Guard of the Citadel into his play area. Tom also wishes to play the Northern Tracker card from his hand, which belongs to the sphere of Spirit, and has a cost of 4. To play this card, Tom takes 2 resources from Éowyn’s pool, and 2 resources from Eleanor’s pool, for a total of 4. He can do this because both Éowyn and Eleanor have Spirit resource icons. Tom spends these tokens and places them in the token bank, and then places the Northern Tracker in his play area. (See diagram on page 13.)
Neutralcards,whichbelongtonosphereofinfluence,require no resource match to play. This means that they can be payed for with resources from any hero’s pool. Also, when paying for a neutral card, a player may combine resources from heroes with different resource icons. Gandalf is the only neutral card in the core set.
Some cards have abilities that can be triggered from play, but still require the triggering player to pay resources. Triggering a card ability from a card already in play requires no resource match, unless otherwise specified by the ability.
13
1. Glóin has a Leadership resource icon and 3 resource tokens in his resource pool. Éowyn and Eleanor each have a Spirit resource icon, and 2 resource tokens in their resource pools.
2. To play the Guard of the Citadel from his hand, Tom spends 2 resource tokens from Glóin’s pool, returning the tokens to the token bank. 1 resource token remains unspent in Glóin’s resource pool.
3. To play the Northern Tracker from his hand, Tom spends 2 resource tokens from Éowyn’s resource pool and he spends 2 resource tokens from Eleanor’s resource pool, returning the tokens to the token bank.
1
3
2
14
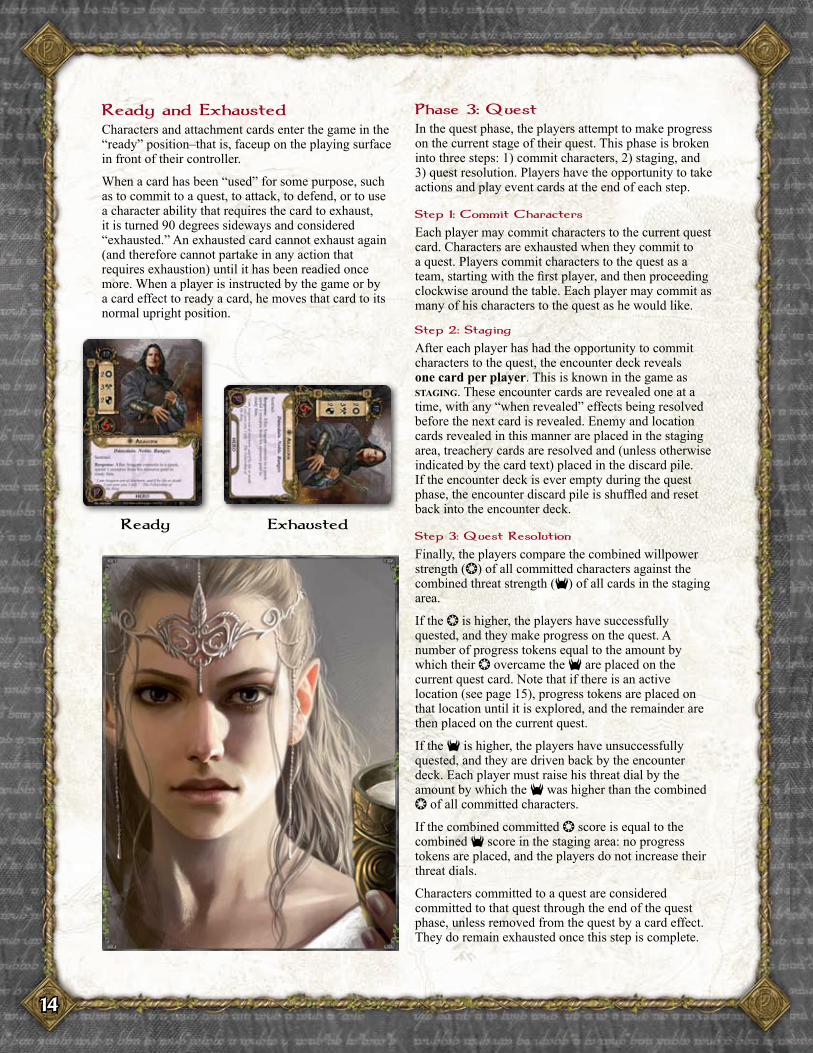
Characters and attachment cards enter the game in the “ready” position–that is, faceup on the playing surface in front of their controller.
When a card has been “used” for some purpose, such as to commit to a quest, to attack, to defend, or to use a character ability that requires the card to exhaust, it is turned 90 degrees sideways and considered “exhausted.” An exhausted card cannot exhaust again (and therefore cannot partake in any action that requires exhaustion) until it has been readied once more. When a player is instructed by the game or by a card effect to ready a card, he moves that card to its normal upright position.
In the quest phase, the players attempt to make progress on the current stage of their quest. This phase is broken into three steps: 1) commit characters, 2) staging, and 3) quest resolution. Players have the opportunity to take actions and play event cards at the end of each step.
Each player may commit characters to the current quest card. Characters are exhausted when they commit to a quest. Players commit characters to the quest as a team, starting with the first player, and then proceeding clockwise around the table. Each player may commit as many of his characters to the quest as he would like.
After each player has had the opportunity to commit characters to the quest, the encounter deck reveals one card per player. This is known in the game as staging. These encounter cards are revealed one at a time, with any “when revealed” effects being resolved before the next card is revealed. Enemy and location cards revealed in this manner are placed in the staging area, treachery cards are resolved and (unless otherwise indicated by the card text) placed in the discard pile. If the encounter deck is ever empty during the quest phase, the encounter discard pile is shuffled and reset back into the encounter deck.
Finally, the players compare the combined willpower strength (Ò) of all committed characters against the combined threat strength ($) of all cards in the staging area.
If the Ò is higher, the players have successfully quested, and they make progress on the quest. A number of progress tokens equal to the amount by which their Ò overcame the $ are placed on the current quest card. Note that if there is an active location (see page 15), progress tokens are placed on that location until it is explored, and the remainder are then placed on the current quest.
If the $ is higher, the players have unsuccessfully quested, and they are driven back by the encounter deck. Each player must raise his threat dial by the amount by which the $ was higher than the combined Ò of all committed characters.
If the combined committed Ò score is equal to the combined $ score in the staging area: no progress tokens are placed, and the players do not increase their threat dials.
Characters committed to a quest are considered committed to that quest through the end of the quest phase, unless removed from the quest by a card effect. They do remain exhausted once this step is complete.

15
Example: Tom commits Éowyn (4 Ò), and Kris commits both Aragorn (2 Ò) and a Guard of the Citadel (1 Ò) to the current quest. A Gladden Fields location card (3 $) is in the staging area. After all players have committed their characters, the encounter deck reveals 1 card per player: an East Bight Patrol (3 $) and a Hummerhorns (1 $). The players have a combined Ò of 7, and the quest deck has a combined $ of 7. As it stands, this quest attempt will end in a draw. However, Tom decides to use Éowyn’s ability, which allows him to discard 1 card from his hand to increase her Ò by 1, taking the player’s combined committed Ò to 8, so the players place 1 progress token on the current quest card. (See diagram above.)
During the travel phase, the players may travel as a group to any one location in the staging area by moving it from the staging area and placing it alongside the current quest card, causing it to become the active location. The players can only travel to one location at a time. The first player makes the final decision on whether and where to travel.
While in the staging area, location cards add to the encounter deck’s $. Once the players have traveled to a location, that location no longer contributes its $, as the players are considered to have traveled to the location and are confronting its threat.
Instead, an active location acts as a buffer for the currently revealed quest card. Any progress tokens that would be placed on a quest card are instead placed on the active location. If a location ever has as many progress tokens as it has quest points, that location is considered explored and is discarded from play.
Players cannot travel to a new location if another location card is active; the players must explore the active location before traveling elsewhere. Some locations have a travel effect, which is an additional cost that must be payed when the players travel there (see “Travel Effects,” page 23).
Example: Tom and Kris have just scored 3 progress tokens against the current quest card. The Enchanted Stream location, which has 2 quest points, is active. 2 progress tokens are placed on the Enchanted Stream card, discarding it from play. The other progress token is then placed on the current quest card.
1. Tom exhausts Éowyn to commit her to the quest. Kris exhausts both Aragorn and the Guard of the Citadel to commit them to the quest. A Gladden Fields location card is already in the staging area.
2. The players reveal 1 card per player from the encounter deck, and add them to the staging area.
3. The players add up the total committed Ò and compare it to the total $ in the staging area. This results in a 7 Ò to 7 $ stalemate. Tom uses Éowyn's card ability to give the players an additional point of Ò, which allows them to place 1 progress token on the current quest card.
13
2
16
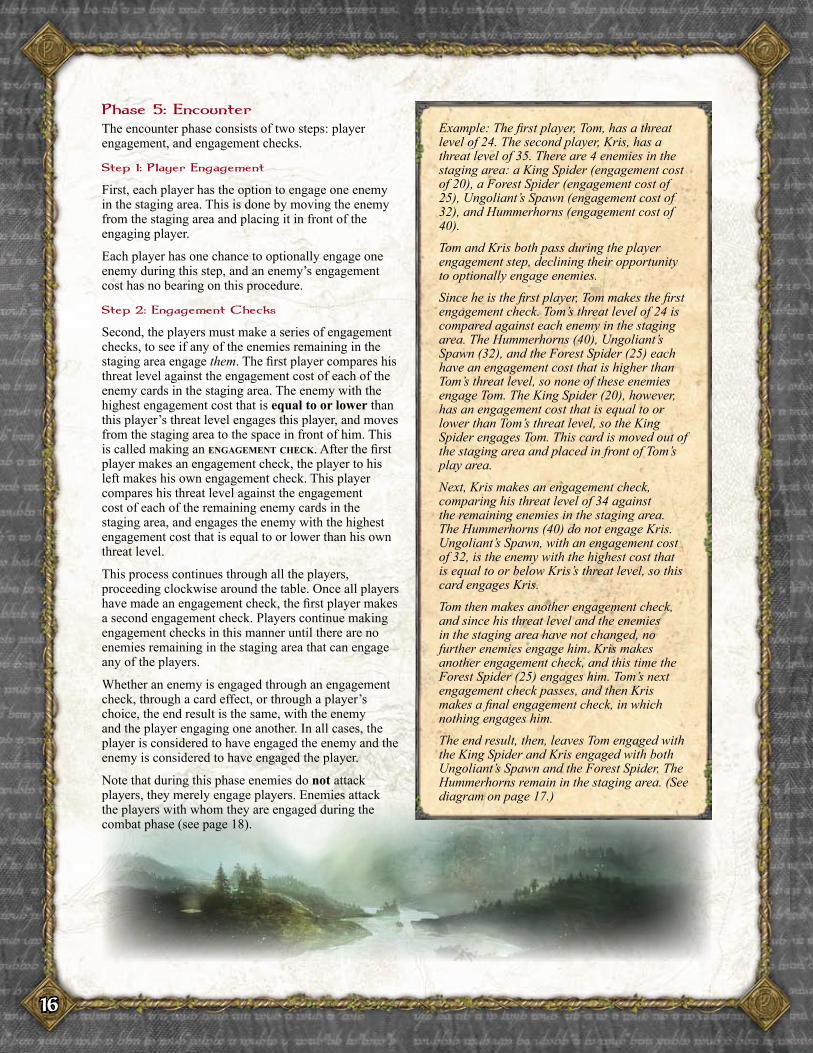
The encounter phase consists of two steps: player engagement, and engagement checks.
First, each player has the option to engage one enemy in the staging area. This is done by moving the enemy from the staging area and placing it in front of the engaging player.
Each player has one chance to optionally engage one enemy during this step, and an enemy’s engagement cost has no bearing on this procedure.
Second, the players must make a series of engagement checks, to see if any of the enemies remaining in the staging area engage them. The first player compares his threat level against the engagement cost of each of the enemy cards in the staging area. The enemy with the highest engagement cost that is equal to or lower than this player’s threat level engages this player, and moves from the staging area to the space in front of him. This is called making an engagement check. After the first player makes an engagement check, the player to his left makes his own engagement check. This player compares his threat level against the engagement cost of each of the remaining enemy cards in the staging area, and engages the enemy with the highest engagement cost that is equal to or lower than his own threat level.
This process continues through all the players, proceeding clockwise around the table. Once all players have made an engagement check, the first player makes a second engagement check. Players continue making engagement checks in this manner until there are no enemies remaining in the staging area that can engage any of the players.
Whether an enemy is engaged through an engagement check, through a card effect, or through a player’s choice, the end result is the same, with the enemy and the player engaging one another. In all cases, the player is considered to have engaged the enemy and the enemy is considered to have engaged the player.
Note that during this phase enemies do not attack players, they merely engage players. Enemies attack the players with whom they are engaged during the combat phase (see page 18).
Example: The first player, Tom, has a threat level of 24. The second player, Kris, has a threat level of 35. There are 4 enemies in the staging area: a King Spider (engagement cost of 20), a Forest Spider (engagement cost of 25), Ungoliant’s Spawn (engagement cost of 32), and Hummerhorns (engagement cost of 40). Tom and Kris both pass during the player engagement step, declining their opportunity to optionally engage enemies. Since he is the first player, Tom makes the first engagement check. Tom’s threat level of 24 is compared against each enemy in the staging area. The Hummerhorns (40), Ungoliant’s Spawn (32), and the Forest Spider (25) each have an engagement cost that is higher than Tom’s threat level, so none of these enemies engage Tom. The King Spider (20), however, has an engagement cost that is equal to or lower than Tom’s threat level, so the King Spider engages Tom. This card is moved out of the staging area and placed in front of Tom’s play area. Next, Kris makes an engagement check, comparing his threat level of 34 against the remaining enemies in the staging area. The Hummerhorns (40) do not engage Kris. Ungoliant’s Spawn, with an engagement cost of 32, is the enemy with the highest cost that is equal to or below Kris’s threat level, so this card engages Kris. Tom then makes another engagement check, and since his threat level and the enemies in the staging area have not changed, no further enemies engage him. Kris makes another engagement check, and this time the Forest Spider (25) engages him. Tom’s next engagement check passes, and then Kris makes a final engagement check, in which nothing engages him. The end result, then, leaves Tom engaged with the King Spider and Kris engaged with both Ungoliant’s Spawn and the Forest Spider. The Hummerhorns remain in the staging area. (See diagram on page 17.)
17
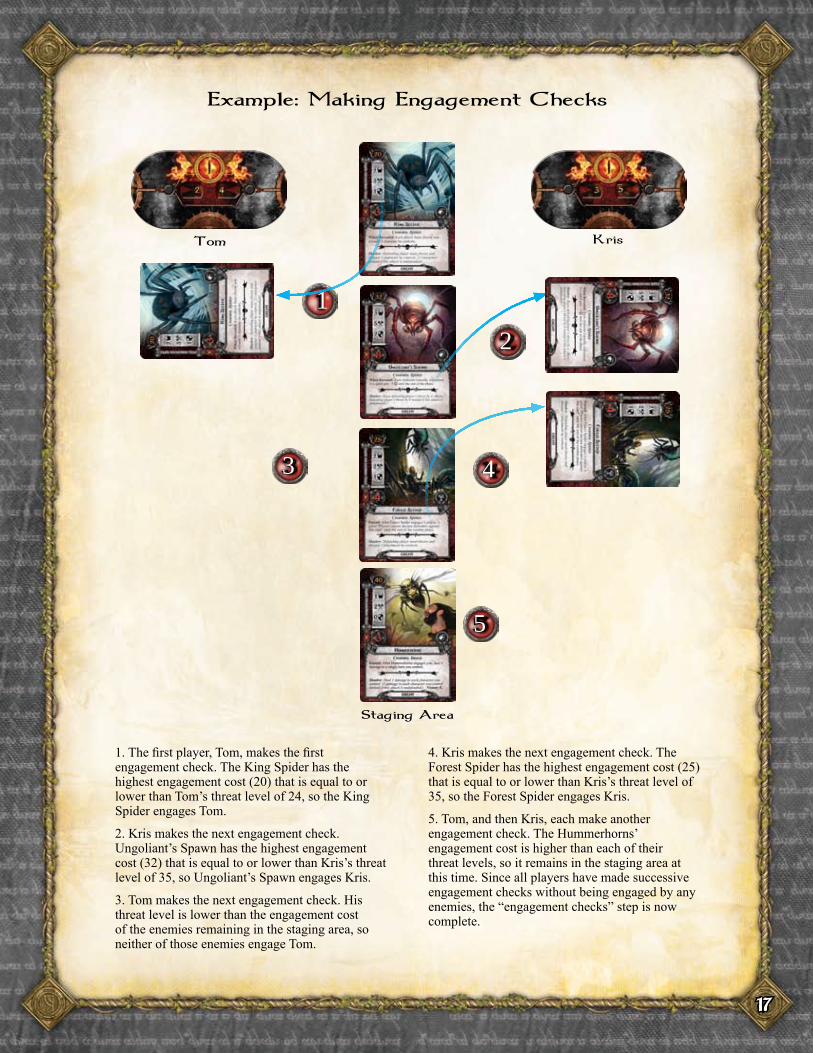
1. The first player, Tom, makes the first engagement check. The King Spider has the highest engagement cost (20) that is equal to or lower than Tom’s threat level of 24, so the King Spider engages Tom.
2. Kris makes the next engagement check. Ungoliant’s Spawn has the highest engagement cost (32) that is equal to or lower than Kris’s threat level of 35, so Ungoliant’s Spawn engages Kris.
3. Tom makes the next engagement check. His threat level is lower than the engagement cost of the enemies remaining in the staging area, so neither of those enemies engage Tom.
4. Kris makes the next engagement check. The Forest Spider has the highest engagement cost (25) that is equal to or lower than Kris’s threat level of 35, so the Forest Spider engages Kris.
5. Tom, and then Kris, each make another engagement check. The Hummerhorns’ engagement cost is higher than each of their threat levels, so it remains in the staging area at this time. Since all players have made successive engagement checks without being engaged by any enemies, the “engagement checks” step is now complete.
1
5
3
2
4
18
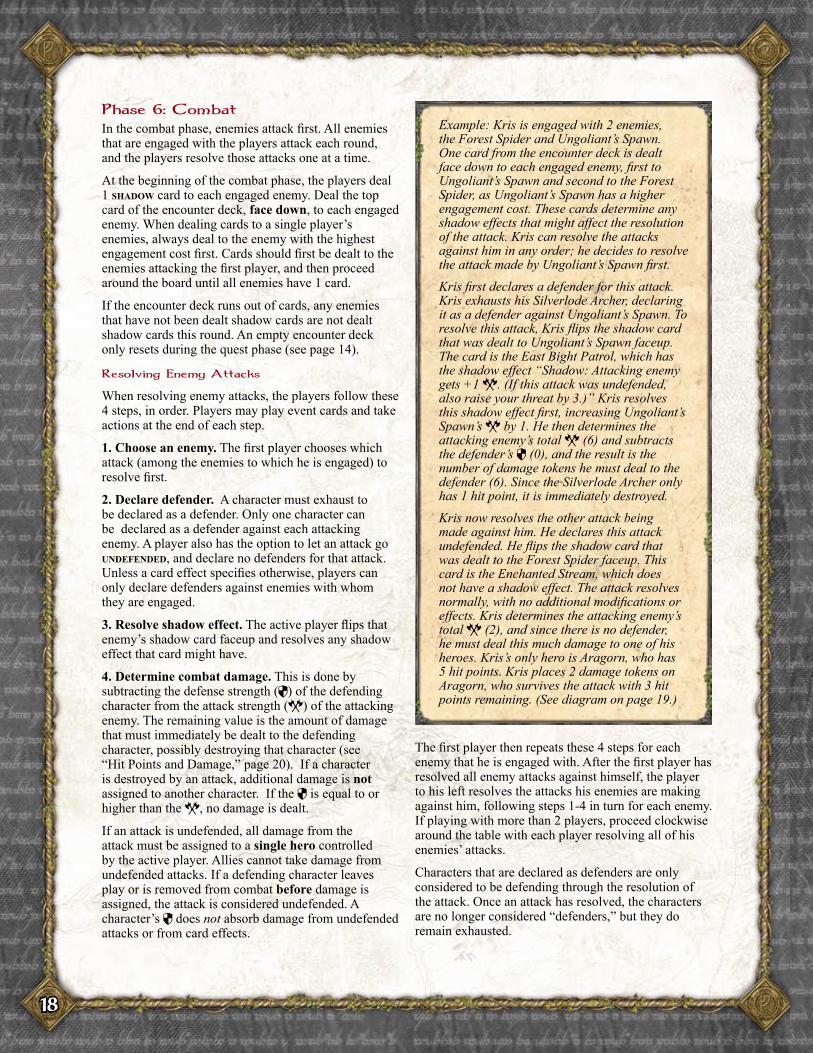
In the combat phase, enemies attack first. All enemies that are engaged with the players attack each round, and the players resolve those attacks one at a time.
At the beginning of the combat phase, the players deal 1 shadow card to each engaged enemy. Deal the top card of the encounter deck, face down, to each engaged enemy. When dealing cards to a single player’s enemies, always deal to the enemy with the highest engagement cost first. Cards should first be dealt to the enemies attacking the first player, and then proceed around the board until all enemies have 1 card.
If the encounter deck runs out of cards, any enemies that have not been dealt shadow cards are not dealt shadow cards this round. An empty encounter deck only resets during the quest phase (see page 14).
When resolving enemy attacks, the players follow these 4 steps, in order. Players may play event cards and take actions at the end of each step.
1. Choose an enemy. The first player chooses which attack (among the enemies to which he is engaged) to resolve first.
2. Declare defender. A character must exhaust to be declared as a defender. Only one character can be declared as a defender against each attacking enemy. A player also has the option to let an attack go undefended, and declare no defenders for that attack. Unless a card effect specifies otherwise, players can only declare defenders against enemies with whom they are engaged.
3. Resolve shadow effect. The active player flips that enemy’s shadow card faceup and resolves any shadow effect that card might have.
4. Determine combat damage. This is done by subtracting the defense strength (Ú) of the defending character from the attack strength (Û) of the attacking enemy. The remaining value is the amount of damage that must immediately be dealt to the defending character, possibly destroying that character (see “Hit Points and Damage,” page 20). If a character is destroyed by an attack, additional damage is not assigned to another character. If the Ú is equal to or higher than the Û, no damage is dealt.
If an attack is undefended, all damage from the attack must be assigned to a single hero controlled by the active player. Allies cannot take damage from undefended attacks. If a defending character leaves play or is removed from combat before damage is assigned, the attack is considered undefended. A character’s Ú does not absorb damage from undefended attacks or from card effects.
Example: Kris is engaged with 2 enemies, the Forest Spider and Ungoliant’s Spawn. One card from the encounter deck is dealt face down to each engaged enemy, first to Ungoliant’s Spawn and second to the Forest Spider, as Ungoliant’s Spawn has a higher engagement cost. These cards determine any shadow effects that might affect the resolution of the attack. Kris can resolve the attacks against him in any order; he decides to resolve the attack made by Ungoliant’s Spawn first.Kris first declares a defender for this attack. Kris exhausts his Silverlode Archer, declaring it as a defender against Ungoliant’s Spawn. To resolve this attack, Kris flips the shadow card that was dealt to Ungoliant’s Spawn faceup. The card is the East Bight Patrol, which has the shadow effect “Shadow: Attacking enemy gets +1 Û. (If this attack was undefended, also raise your threat by 3.)” Kris resolves this shadow effect first, increasing Ungoliant’s Spawn’s Û by 1. He then determines the attacking enemy’s total Û (6) and subtracts the defender’s Ú (0), and the result is the number of damage tokens he must deal to the defender (6). Since the Silverlode Archer only has 1 hit point, it is immediately destroyed. Kris now resolves the other attack being made against him. He declares this attack undefended. He flips the shadow card that was dealt to the Forest Spider faceup. This card is the Enchanted Stream, which does not have a shadow effect. The attack resolves normally, with no additional modifications or effects. Kris determines the attacking enemy’s total Û (2), and since there is no defender, he must deal this much damage to one of his heroes. Kris’s only hero is Aragorn, who has 5 hit points. Kris places 2 damage tokens on Aragorn, who survives the attack with 3 hit points remaining. (See diagram on page 19.)
The first player then repeats these 4 steps for each enemy that he is engaged with. After the first player has resolved all enemy attacks against himself, the player to his left resolves the attacks his enemies are making against him, following steps 1-4 in turn for each enemy. If playing with more than 2 players, proceed clockwise around the table with each player resolving all of his enemies’ attacks.
Characters that are declared as defenders are only considered to be defending through the resolution of the attack. Once an attack has resolved, the characters are no longer considered “defenders,” but they do remain exhausted.
19
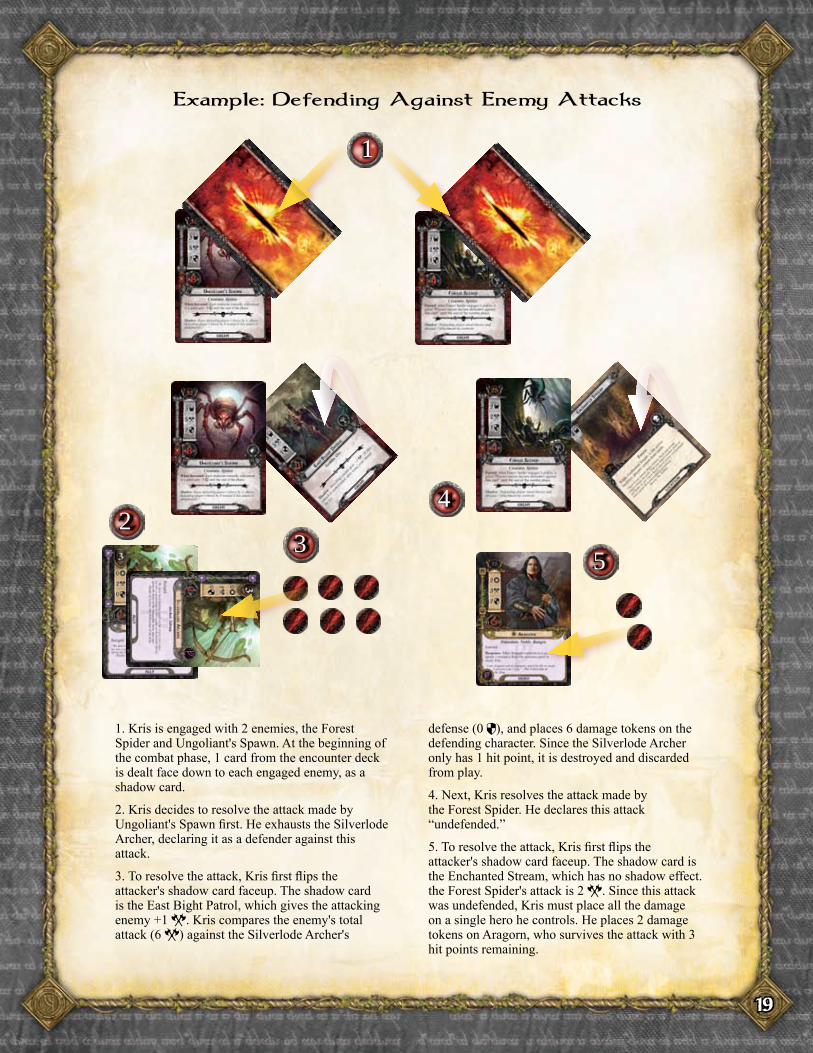
1. Kris is engaged with 2 enemies, the Forest Spider and Ungoliant's Spawn. At the beginning of the combat phase, 1 card from the encounter deck is dealt face down to each engaged enemy, as a shadow card.
2. Kris decides to resolve the attack made by Ungoliant's Spawn first. He exhausts the Silverlode Archer, declaring it as a defender against this attack.
3. To resolve the attack, Kris first flips the attacker's shadow card faceup. The shadow card is the East Bight Patrol, which gives the attacking enemy +1 Û. Kris compares the enemy's total attack (6 Û) against the Silverlode Archer's
defense (0 Ú), and places 6 damage tokens on the defending character. Since the Silverlode Archer only has 1 hit point, it is destroyed and discarded from play.
4. Next, Kris resolves the attack made by the Forest Spider. He declares this attack “undefended.”
5. To resolve the attack, Kris first flips the attacker's shadow card faceup. The shadow card is the Enchanted Stream, which has no shadow effect. the Forest Spider's attack is 2 Û. Since this attack was undefended, Kris must place all the damage on a single hero he controls. He places 2 damage tokens on Aragorn, who survives the attack with 3 hit points remaining.
1
4
5
23
20
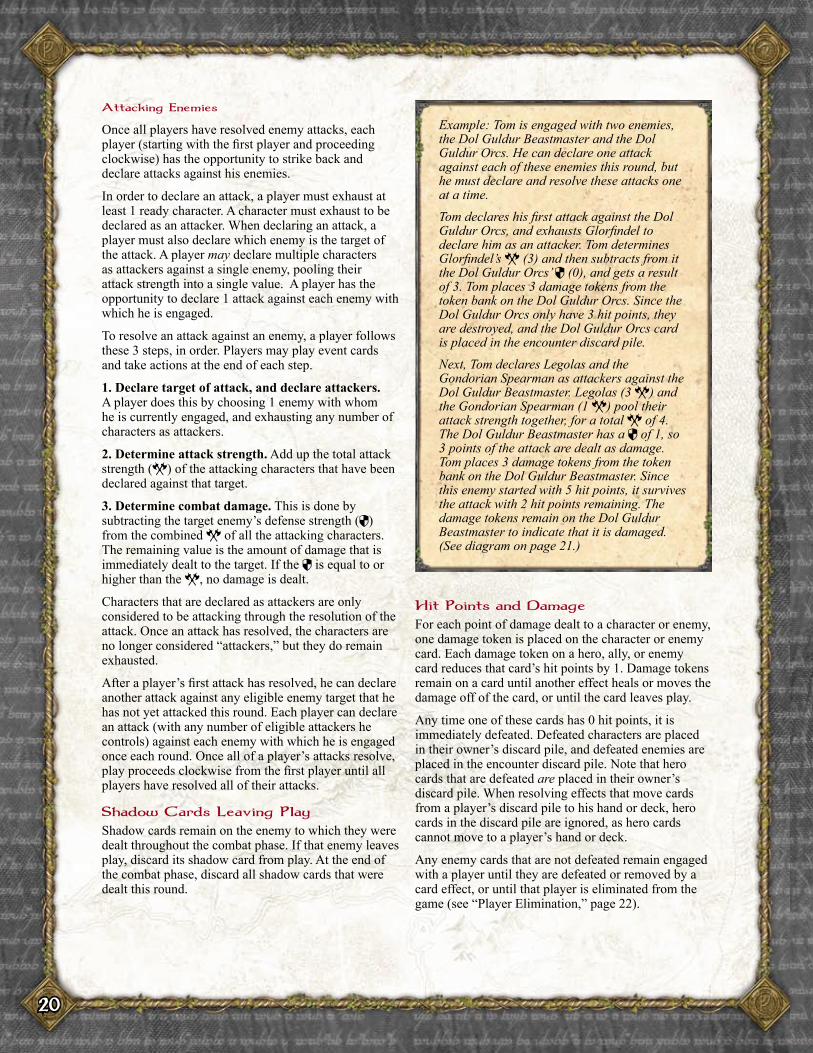
Once all players have resolved enemy attacks, each player (starting with the first player and proceeding clockwise) has the opportunity to strike back and declare attacks against his enemies.
In order to declare an attack, a player must exhaust at least 1 ready character. A character must exhaust to be declared as an attacker. When declaring an attack, a player must also declare which enemy is the target of the attack. A player may declare multiple characters as attackers against a single enemy, pooling their attack strength into a single value. A player has the opportunity to declare 1 attack against each enemy with which he is engaged.
To resolve an attack against an enemy, a player follows these 3 steps, in order. Players may play event cards and take actions at the end of each step.
1. Declare target of attack, and declare attackers. A player does this by choosing 1 enemy with whom he is currently engaged, and exhausting any number of characters as attackers.
2. Determine attack strength. Add up the total attack strength (Û) of the attacking characters that have been declared against that target.
3. Determine combat damage. This is done by subtracting the target enemy’s defense strength (Ú) from the combined Û of all the attacking characters. The remaining value is the amount of damage that is immediately dealt to the target. If the Ú is equal to or higher than the Û, no damage is dealt.
Characters that are declared as attackers are only considered to be attacking through the resolution of the attack. Once an attack has resolved, the characters are no longer considered “attackers,” but they do remain exhausted.
After a player’s first attack has resolved, he can declare another attack against any eligible enemy target that he has not yet attacked this round. Each player can declare an attack (with any number of eligible attackers he controls) against each enemy with which he is engaged once each round. Once all of a player’s attacks resolve, play proceeds clockwise from the first player until all players have resolved all of their attacks.
Shadow cards remain on the enemy to which they were dealt throughout the combat phase. If that enemy leaves play, discard its shadow card from play. At the end of the combat phase, discard all shadow cards that were dealt this round.
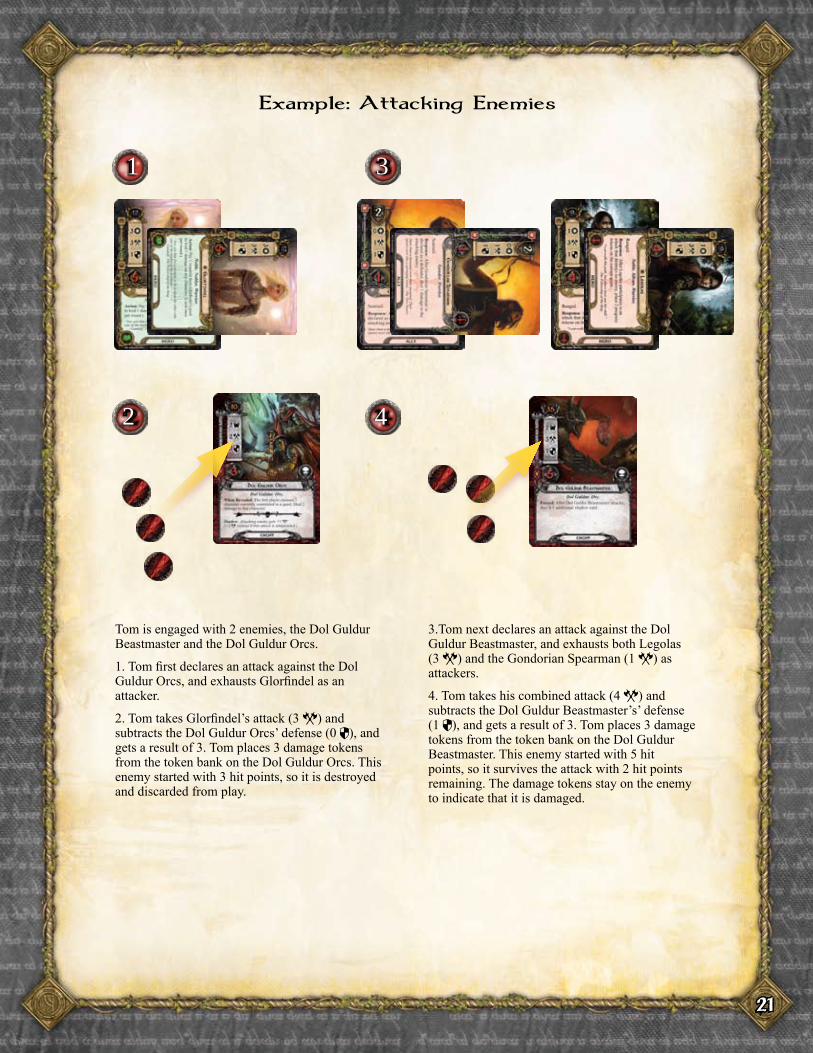
Example: Tom is engaged with two enemies, the Dol Guldur Beastmaster and the Dol Guldur Orcs. He can declare one attack against each of these enemies this round, but he must declare and resolve these attacks one at a time. Tom declares his first attack against the Dol Guldur Orcs, and exhausts Glorfindel to declare him as an attacker. Tom determines Glorfindel’s Û (3) and then subtracts from it the Dol Guldur Orcs’ Ú (0), and gets a result of 3. Tom places 3 damage tokens from the token bank on the Dol Guldur Orcs. Since the Dol Guldur Orcs only have 3 hit points, they are destroyed, and the Dol Guldur Orcs card is placed in the encounter discard pile.Next, Tom declares Legolas and the Gondorian Spearman as attackers against the Dol Guldur Beastmaster. Legolas (3 Û) and the Gondorian Spearman (1 Û) pool their attack strength together, for a total Û of 4. The Dol Guldur Beastmaster has a Ú of 1, so 3 points of the attack are dealt as damage. Tom places 3 damage tokens from the token bank on the Dol Guldur Beastmaster. Since this enemy started with 5 hit points, it survives the attack with 2 hit points remaining. The damage tokens remain on the Dol Guldur Beastmaster to indicate that it is damaged. (See diagram on page 21.)
For each point of damage dealt to a character or enemy, one damage token is placed on the character or enemy card. Each damage token on a hero, ally, or enemy card reduces that card’s hit points by 1. Damage tokens remain on a card until another effect heals or moves the damage off of the card, or until the card leaves play.
Any time one of these cards has 0 hit points, it is immediately defeated. Defeated characters are placed in their owner’s discard pile, and defeated enemies are placed in the encounter discard pile. Note that hero cards that are defeated are placed in their owner’s discard pile. When resolving effects that move cards from a player’s discard pile to his hand or deck, hero cards in the discard pile are ignored, as hero cards cannot move to a player’s hand or deck.
Any enemy cards that are not defeated remain engaged with a player until they are defeated or removed by a card effect, or until that player is eliminated from the game (see “Player Elimination,” page 22).
21
Tom is engaged with 2 enemies, the Dol Guldur Beastmaster and the Dol Guldur Orcs.
1. Tom first declares an attack against the Dol Guldur Orcs, and exhausts Glorfindel as an attacker.
2. Tom takes Glorfindel’s attack (3 Û) and subtracts the Dol Guldur Orcs’ defense (0 Ú), and gets a result of 3. Tom places 3 damage tokens from the token bank on the Dol Guldur Orcs. This enemy started with 3 hit points, so it is destroyed and discarded from play.
3.Tom next declares an attack against the Dol Guldur Beastmaster, and exhausts both Legolas (3 Û) and the Gondorian Spearman (1 Û) as attackers.
4. Tom takes his combined attack (4 Û) and subtracts the Dol Guldur Beastmaster’s’ defense (1 Ú), and gets a result of 3. Tom places 3 damage tokens from the token bank on the Dol Guldur Beastmaster. This enemy started with 5 hit points, so it survives the attack with 2 hit points remaining. The damage tokens stay on the enemy to indicate that it is damaged.
1
42
3
22
During the refresh phase, all exhausted cards ready, each player increases his threat by 1, and the first player passes the first player token to the next player clockwise on his left. That player becomes the new first player. Play then proceeds to the resource phase of the next round.
The game ends in one of two ways, with the players either winning or losing as a team. The players are considered to have lost if all players are eliminated before the completion of the final stage of the scenario deck. The players are considered to have won if at least one player survives through the completion of the final stage of the scenario.
A player is eliminated from the game if all of his heroes are killed, if his threat level reaches 50, or if a card effect forces his elimination. (Future expansion scenarios may have threat elimination levels at values other than 50; for all of the scenarios included in the core set, a player is eliminated when his threat level reaches 50.)
When a player is eliminated, his hand, all of the cards he controls, and his deck are placed in their owners’ discard piles. Any encounter cards with which that player was engaged are returned to the staging area, retaining any wound tokens that have been placed on them. The remaining players continue to play the game. Note that after a player is eliminated, one less card is revealed from the encounter deck during the staging step of the quest phase, as there is now one less player involved in the game.
If all players are eliminated, the game ends in a loss for the players.
Players immediately advance to the next stage of a quest as soon as they place a number of progress tokens equal to or greater than the number of quest points the current quest card has. Additional progress tokens earned against the quest do not carry over to the next stage. All progress tokens on the quest are returned to the token bank when players advance to the next stage. Players follow any instructions on the newly revealed quest card as it is revealed.
The game state of other cards does not change; cards in the staging area remain in the staging area, cards engaged with players remain engaged, exhausted characters remain exhausted, damage tokens and resources remain as they are placed, and the round sequence is not interrupted.
If at least one player survives through the completion of the final stage of the scenario, the game ends in a victory for the players.
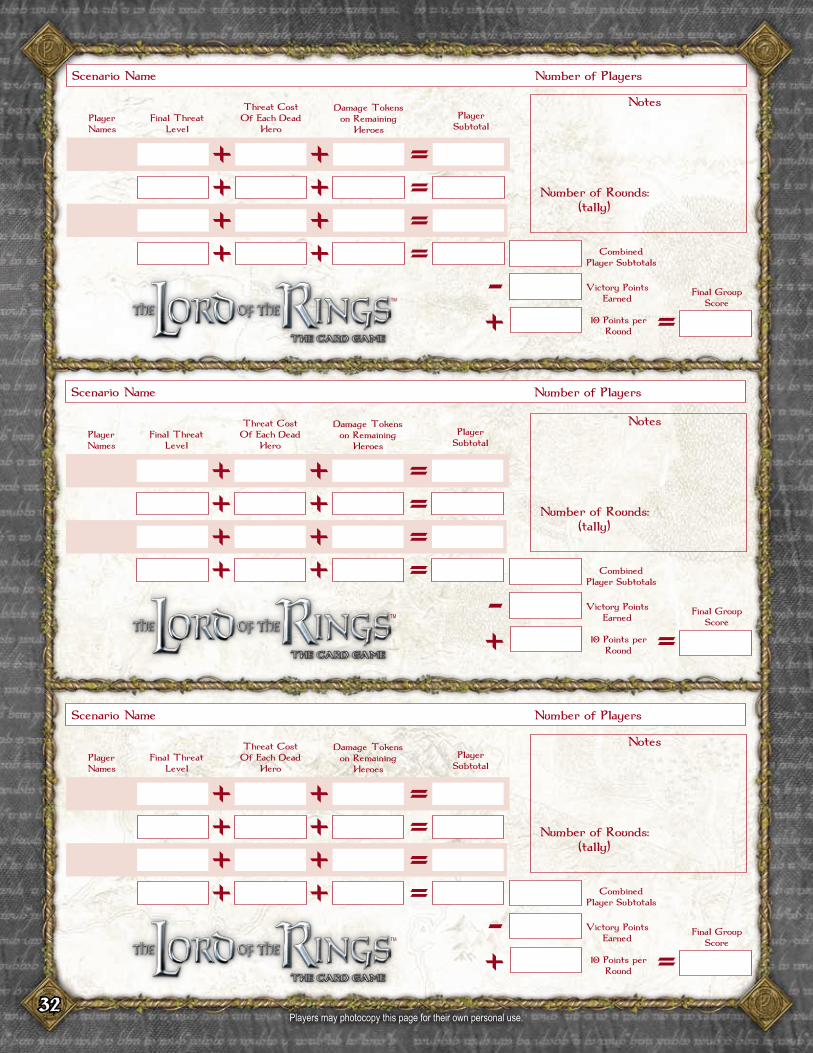
If the players win the game, use this process to determine their group’s score for the game. A group’s score is determined by adding together four undesirable elements (the final threat level of each player, the threat penalty on all dead heroes, the number of damage tokens on all surviving heroes, and the number of rounds taken to defeat the scenario multiplied by 10), and then subtracting any victory points that have been collected. Players collect victory points by defeating enemies and exploring locations that grant victory points (see page 24). Players tally each round for their score at the end of the refresh phase.
When a player is eliminated, his threat is considered to be 50, and all of his heroes are considered dead. Note that an eliminated player’s threat does not, however, increase beyond his threat elimination level (50, unless otherwise specified by the quest rules or by a card effect).
With this scoring system, a victory with a low score is more desirable than a victory with a high score.
Scoring is a useful tool in evaluating the performance of a deck or a party over time, or in comparing one deck or group of decks to another. This enables players to play the same scenario multiple times with different hero and deck combinations, evaluating their effectiveness in each game. A scoresheet is provided on the back cover of this rulebook.
Example: Tom, playing a solo game, has defeated the “Passage Through Mirkwood” quest in 7 rounds, with a threat level of 43, one dead hero (with a threat cost of 8), 6 damage on his remaining heroes, and 5 victory points. His final score is calculated in the following manner: Final Threat Level (43) + Threat Cost of Each Dead Hero (8) + Damage Tokens on Heroes (6) + Rounds Taken to Defeat Scenario x10 (70) – Number of Victory Points Earned (5) Tom’s Final Score (122)
23
This section details some of the more advanced concepts players might encounter as they delve deeper into the The Lord of the Rings: The Card Game.
There are several kinds of card effects in The Lord of the Rings: The Card Game. On the hero and player cards, card effects fall into one of 5 categories: constant effects, actions, responses, forced effects, and keywords. On the cards found in the quest and encounter decks, card effects fall into one of 6 categories: constant effects, forced effects, when revealed effects, shadow effects, travel effects, and keywords. Each of these card effect types is explained below.
Constant effects continually affect the game state as long as the card is in play and any other specified conditions are met. These effects have no bold trigger, as they are always active.
The location card Enchanted Stream provides an example of a constant effect.
Actions are denoted by a bold “Action:” trigger on a card. Actions are always optional, and can be triggered by their controller during any action window in the game sequence. In order to trigger an action on a hero, ally, or attachment card, the card on which the action is printed must be in play, unless the action specifies that it can be triggered from an out of play state. Event cards are actions that are played directly from a player’s hand.
Some action triggers are preceded by a specific phase of the game. This type of trigger means that the following action can only be triggered during the specified phase. For example, an effect with the trigger “Quest Action:” can only be triggered during an action window of the quest phase. Actions without a specified phase can be triggered during any action window throughout the round. (See the “Turn Sequence” chart on pages 30-31.)
The hero card Glorfindel provides an example of an action that can be used during any player action window. The event card Radagast’s Cunning provides an example of an action that can only be used during the quest phase.
Responses are denoted by a bold “Response:” trigger on a card. Responses are always optional, and can be triggered by their controller in response to (i.e. immediately after) a specified game occurrence. In order to trigger a response on a hero, ally, or attachment card, the card on which the response is printed must be in play, unless the response specifies that it can be triggered from an out of play state. Event cards with “Response:” effects are responses that are played from a player’s hand.
The ally card Son of Arnor provides an example of a response effect that can be triggered (at a player’s discretion) whenever its specified trigger (“after Son of Arnor enters play”) is met.
Forced effects are initiated by specific occurrences throughout a game, and they occur automatically, whether the card’s controller wants them to or not. They are denoted by a bold “Forced:” trigger on a card. These effects initiate and resolve immediately, whenever their specified prerequisite occurs. The enemy card Marsh Adder provides an example of a forced effect that must be triggered whenever its specified trigger (“each time Marsh Adder attacks”) is met.
When revealed effects are a special case of forced effects, that occur automatically as soon as the encounter card is revealed. They are denoted by a bold “When Revealed:” trigger on a card. When revealed effects do not resolve when the card is revealed as a shadow effect.
Some of the cards in the encounter deck have a secondary effect that is known as a shadow effect. These effects are offset from a card’s non-shadow game effects by the graphic shown above, and they are formatted in italic type. Shadow effects are also denoted by a bold and italic “Shadow:” trigger on the card. Shadow effects only resolve when the card is dealt to an attacking enemy during combat.
The enemy card Dol Guldur Orcs provides an example of a shadow effect that triggers whenever the card is dealt to an attacking enemy as a shadow card.
Some location cards have travel effects, which are denoted by a bold “Travel:” trigger on a card. Travel effects are costs or restrictions that some or all players must pay or meet in order to travel to that location. If the players cannot fulfill the requirement of a location’s travel effect, the players cannot travel to that location.
24
Keywords are used as shorthand for common game effects that appear on a number of cards. The keywords and their role in the game are explained below. Keywords are denoted textually, usually at the beginning of a card’s rules text.
If an encounter card with the doomed keyword is revealed during the staging step of the quest phase or in setup, each player must raise his threat level by the specified value.
The guarded keyword is a reminder on some objective cards to reveal and attach the next card of the encounter deck to the objective when it enters the staging area from the encounter deck, and place them both in the staging area. The objective cannot be claimed as long as any encounter card is attached. Once that encounter is dealt with, the objective remains in the staging area until it is claimed. If another objective card comes up while attaching a card for the guarded keyword, place the second objective in the staging area, and use the next card of the encounter deck to fulfill the original keyword effect.
Enemy and location cards attached to guarded objectives do still count their threat while the enemy or location is in the staging area. An encounter card attached to a guarded objective is dealt with in the following method, depending on its card type:
Enemy: The enemy leaves play, either by being defeated or as the result of a card effect.
Location: The location leaves play, either by being fully explored or as the result of a card effect.
Treachery: The treachery’s effects resolve, or are canceled. (Treachery cards are immediately triggered when they are revealed.)
Once all encounter cards attached to a guarded objective are dealt with, the players can claim the objective in the manner specified by its card text.
A character with the ranged keyword can be declared by its controller as an attacker against enemies that are engaged with other players. A character can declare ranged attacks against these targets while its owner is declaring attacks, or it can participate in attacks that are declared by other players. In either case, the character must exhaust and meet any other requirements necessary to make the attack.
Some attachments have the restricted keyword. A character can never have more than two attachments with the restricted keyword attached. If a third restricted attachment is ever attached to a character, one of the restricted attachments must immediately be moved to its owner’s discard pile.
A character with the sentinel keyword can be declared by its controller as a defender during enemy attacks that are made against other players. A character can declare sentinel defense after the player engaged with the enemy making the attack declares “no defenders.” The defending sentinel character must exhaust and meet any other requirements necessary to defend the attack.
When an encounter card with the surge keyword is revealed during the staging step of the quest phase or in setup, reveal 1 additional card from the encounter deck. Resolve the surge keyword immediately after resolving any when revealed effects on the card.
Some enemy and location cards award victory points when they are defeated. When such a card leaves play, one player should place it near his threat dial to remind the players of the victory points when they are scoring at the end of the game. It is recommended that one player collects all the victory cards the players earn during the scenario, as victory points are applied to the score of the entire group. (See “Scoring,” page 22.)
25
Many effects last only for the duration of one action (immediately after being triggered), but some effects last for a set period of time, or even indefinitely. Effects that last for longer than a single action are called lasting effects.
Multiple lasting effects may affect the same card at the same time. The order in which the lasting effects take place is irrelevant, since the net sum of all lasting effects is applied to the card.
If one of a hero’s, ally’s, enemy’s, or location’s statistics (Û, Ú, $, or Ò) is ever lower than 0 after all effects are applied, that statistic is rounded up to 0. Any time a new effect is applied to a card, the net sum of all active effects should be recalculated.
Many cards are written in a “pay or exhaust X to do Y” manner. When confronted with such a construct, everything before the word “to” is considered the cost, and everything after the word “to” is considered an effect.
Costs can only be payed with cards or resources that a player controls. If an effect is canceled, the cost is still considered to have been paid.
A player “owns” his heroes and the cards that he has chosen for the player deck he is playing. A player “controls” all cards that he owns, unless another player or the encounter deck takes control of the card through a game effect. Any time a card leaves play, it reverts to its owner’s hand, deck, or discard pile (as directed by the effect forcing the card out of play).
When a player plays an ally card, it comes into play under his control and is placed in his play area. If another player takes control of that ally, it is moved to the controlling player's play area. Ally cards cannot be played under the control of another player, they can only change control through card effects.
When a player plays an attachment card, he has the option of giving control of that card to another player by attaching the card to one of that player’s characters. Players always assume control of attachments that have been played on their characters. If control of that character changes, so does the control of any attachments on that character.
“In play” refers to cards that have been played or put into play (in a player’s play area), to cards that are waiting in the staging area, to the currently revealed quest card, and to encounter cards that are engaged with that player. “Out of play” states are “in a player’s hand,” “in a deck,” or “in a discard pile.” Card effects do not interact with cards in an out of play state unless the effect specifically refers to that state.
If a player runs out of cards in his player deck, he continues to play the game with the cards he has in play and in his hand. He does not reshuffle his discard pile.
If the encounter deck is ever out of cards during the quest phase, the encounter discard pile is shuffled and reset back into the encounter deck.
Players are permitted and encouraged to talk to one another during play, and to work as a team to plan and execute the best course of action. Players can discuss anything they would like, but they cannot name or read out loud directly from cards in their hand, or from cards that they have seen but the rest of the players have not.
26
There are 3 unique scenarios included in this core set. Each is introduced, along with a list of encounter sets for that scenario’s encounter deck, below.
Difficulty level = 1
Mirkwood has long been a dangerous place, and recently one of King Thranduil’s patrols has uncovered disconcerting signs of a gathering menace in the vicinity of Dol Guldur. A party of heroes, controlled by the players, has been assembled to carry a message through Mirkwood, down the Anduin, and eventually to Lórien, to warn Lady Galadriel of the imminent danger.
The Passage Through Mirkwood encounter deck is built with all the cards from the following encounter sets: Passage Through Mirkwood, Spiders of Mirkwood, and Dol Guldur Orcs. These sets are indicated by the following icons:
Difficulty level = 4
Having survived the dangers of Mirkwood Forest, the heroes continue their journey along the banks of the Anduin river, toward Lórien, with dire news of a gathering threat in Southern Mirkwood.
The Journey Down the Anduin encounter deck is built with all the cards from the following encounter sets: Journey Down the Anduin, Sauron’s Reach, Dol Guldur Orcs, and Wilderlands. These sets are indicated by the following icons:
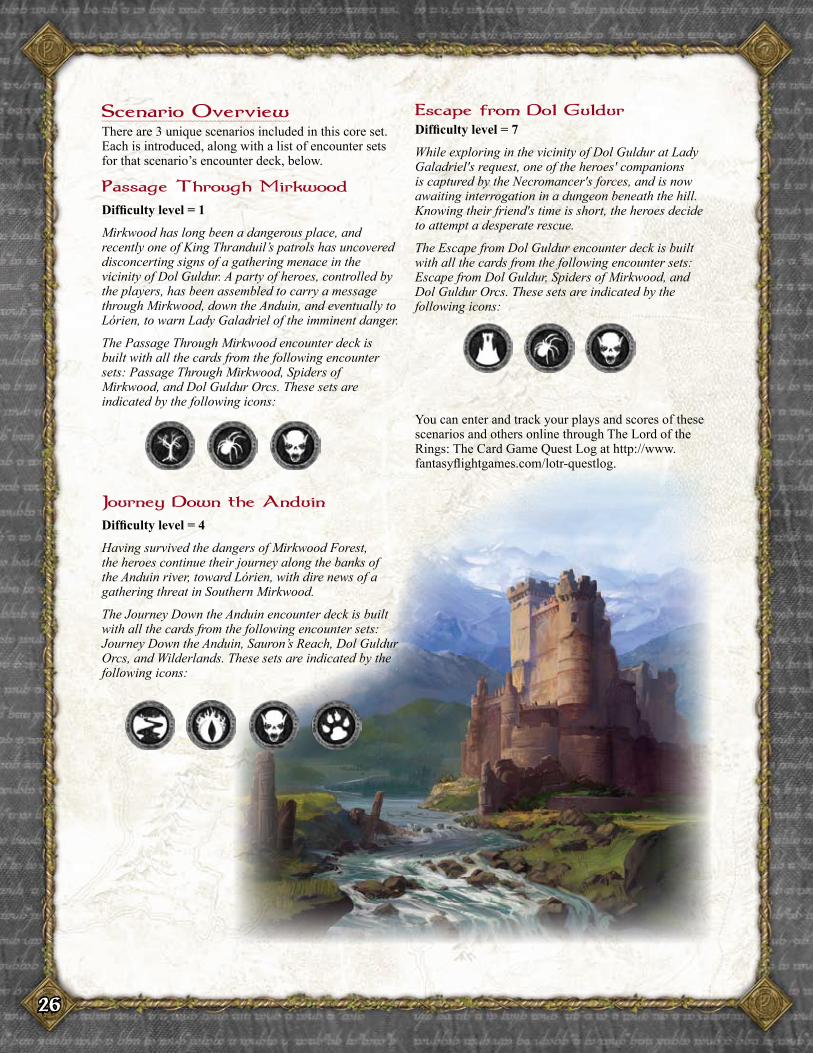
Difficulty level = 7
While exploring in the vicinity of Dol Guldur at Lady Galadriel's request, one of the heroes' companions is captured by the Necromancer's forces, and is now awaiting interrogation in a dungeon beneath the hill. Knowing their friend's time is short, the heroes decide to attempt a desperate rescue.
The Escape from Dol Guldur encounter deck is built with all the cards from the following encounter sets: Escape from Dol Guldur, Spiders of Mirkwood, and Dol Guldur Orcs. These sets are indicated by the following icons:
You can enter and track your plays and scores of these scenarios and others online through The Lord of the Rings: The Card Game Quest Log at http://www.fantasyflightgames.com/lotr-questlog.
27
Much of the depth and fun of The Lord of the Rings: The Card Game comes when players conceive and construct original decks, using the cards of this core set and those found in Adventure Pack expansions. A tournament deck must contain a minimum of 50 cards. Additionally, no more than three copies of any card, by title, can be included in a player’s deck. Within these guidelines any combination of allies, attachments, and events can be used in the player deck.
Each player also starts the game with 1-3 heroes. Players may confer together before each game to select the heroes they would each like to use during that game. If more than one player desires to use the same hero, they must decide among themselves before the game begins, and the other player(s) must choose different heroes. In such situations, if the players cannot decide who will control a certain hero, a random method should be used to determine control of that hero.
When building a deck, it is important for a player to consider how he intends to pay for the cards he is including in his deck. It may be tempting to use the most powerful trio of heroes available, but is it worth starting the game with the high threat level those heroes would bring? Similarly, a deck full of high cost cards and effects might look powerful on paper, but the time it takes to build up the resources to play those cards could become rather problematic as the enemies mount their assault. A player should also make sure that all the cards in his deck belong to a sphere that matches at least one of his heroes’ resource icons, lest he find himself with a dead card he cannot hope to play.
Each sphere of influence has a distinct flavor, which can be used to a player’s advantage when building a deck around that sphere. For instance, a deck could be built around the sphere of tactics to support its heroes with an impressive array of armor and weaponry, and then take the fight directly to the enemies that emerge from the encounter deck. As the card pool grows with Adventure Pack expansions, each of the four basic starter decks in this core set can be developed into fully playable tournament decks.
It is also possible to focus on multiple spheres when building a deck. A deck built around both the sphere of spirit and around the sphere of lore could focus on self-preservation, with numerous effects that heal hit points and reduce threat. The trick to building around multiple spheres is resource management; having the right type of resource available at the right time becomes more difficult when a deck is built around two or three different spheres.
Another useful approach when building decks is to follow the cohesion that can be discovered by building around a trait. For instance, if a player wants to run a deck built around three different spheres, it might make sense to use Dwarf cards from all three spheres to take advantage of Dwarf synergies and card interactions.
Newer players or players who want a more basic experience can play and enjoy the game by not dealing shadow cards during the combat phase. This eliminates an element of surprise that could make the game too challenging for a beginner. Once players are comfortable with this experience, they can then add the shadow effects to make combat less predictable and more exciting.
For an expert level challenge, players can attempt to defeat all 3 scenarios using the same combination of players, decks, and heroes. The score from each scenario can then be added together to get a single score measuring overall success on the entire campaign. For a “nightmare” level challenge, do not reset threat, hit points, or player decks at the beginning of each scenario. When playing such a campaign, the players should start with the “Passage through Mirkwood” scenario, follow with the “Journey Down the Anduin” scenario, and finish with the “Escape from Dol Guldur” scenario.
28
Game Design: Nate French
Graphic Design: Kevin Childress
Additional Graphic Design: Brian Schomburg, Andrew Navaro, and Michael Silsby
Art Administration: Kyle Hough
Art Direction: Zoë Robinson
Creative Content Development: Jason Walden
Rules: Nate French
Editing: Kevin Tomczyk
Proofreading: Patricia Meredith and Mark Pollard
Cover Art: Daryl Mandryk
Production Manager: Eric Knight
Producer: Mike David
FFG Lead Game Designer: Corey Konieczka
FFG Lead Game Producer: Michael Hurley
Publisher: Christian T. Petersen
Special thanks to Joe Mandragona, Fredrica Drotos, and Sam Benson at Middle-earth Enterprises for their patience and feedback. To a wonderful team of core playtesters: Damon Stone, Jonathan Pechon, Jerry Warwick, Kathy Warwick, Kat Pealsey, Denise Shepler, Jonathan Benton, Tony Sullivan, Nathan Bradley, Chris Perry, Rob Jones, Marius Hartland, Eric F. Huigen, Martijn Ketelaars, James Black, Jason Hawthorne, Ninno Canonico, Jared Duffy, Steve Zamborsky, Cesare Ciccarelli, Will Lentz, Francesco Moggia, John Goodenough, Jason Walden, Adam Sadler, and Brady Sadler. And to everyone who demoed an early version of the game at GenCon 2010. Thank you, thank you, thank you.© 2012 Fantasy Flight Publishing, Inc. All Rights Reserved. No part of this product may be reproduced without specific permission. “The Hobbit,” “The Fellowship of the Ring,” “The Two Towers,” “The Return of the King,” “The Lord of the Rings,” and the characters, events, items and places therein, are trademarks of The Saul Zaentz Company d/b/a Middle-earth Enterprises and are used, under license, by Fantasy Flight Games. Fantasy Flight Games, Fantasy Flight Supply, the FFG logo, Living Card Game, LCG, and the LCG logo are trademarks or registered trademarks of Fantasy Flight Publishing, Inc. Fantasy Flight Games is located at 1975 West County Road B2, Suite 1, Roseville, Minnesota, 55113, USA, and can be reached by telephone at 651-639-1905. Retain this information for your records. Warning! Not suitable for children under 3 years due to small parts. Choking hazard. Actual components may vary from those shown. Made in China. THIS PRODUCT IS NOT A TOY. NOT INTENDED FOR USE OF PERSONS 13 YEARS OF AGE OR YOUNGER.
®
TM
29
Actions 23 Advanced Concepts 23 Ally Cards 9 Attachment Cards 9 Attacking Enemies 20 Attacking Enemies (diagram) 21 Basic Game 27 Card Effects 23 "Character" Cards 8 Component Overview 3 Constant Effects 23 Control and Ownership 25 Credits 28 Decks and Card Types 5 Defeating an Encounter Card 25 Defending Against Enemy Attacks (diagram) 19 Discard Piles 10 Doomed X 24 Ending the Game 22 Enemy Cards 6 Escape From Dol Guldur 26 Event Cards 9 Expert Game 27 Forced and When Revealed Effects 23 For the First Game 10 Game Overview 2 Gameplay Overview 4 Guarded 24 Hero Cards 8 Hit Points and Damage 20 “In Play” and “Out of Play” 25 Introduction 2 Journey Down the Anduin 26 Keywords 24 Lasting Effects 25 Location Cards 6 Making Engagement Checks (diagram) 17 Objective Cards 7 Passage Through Mikwood 26 Paying Costs 25 Paying for Card Abilities 12 Paying for Cards (diagram) 13 Paying for Neutral Cards 12
Phase 1: Resource 12 Phase 2: Planning 12 Phase 3: Quest 14 Phase 4: Travel 15 Phase 5: Encounter 16 Phase 6: Combat 18 Phase 7: Refresh 22 Player Elimination 22 Playing the Game 10 Quest Advancement 22 Quest Cards 5 Ranged 24 Ready and Exhausted 14 Resolving a Quest (diagram) 15 Resolving Enemy Attacks 18 Responses 23 Restricted 24 Round Sequence 12 Running Out of Cards 25 Scenario Overview 26 Scoresheet 32 Scoring 22 Section Index 29 Sentinel 24 Setup 10 Shadow Cards Leaving Play 20 Shadow Effects 23 Spheres of Influence 4 Suggested Play Field Setup (diagram) 11 Surge 24 Table Talk 25 The Encounter Deck 6 The Golden Rule 4 The Living Card Game 2 The Player Deck 9 The Quest Deck 5 The Staging Area 10 Tournament Deckbuilding and Customization 27 Travel Effects 23 Treachery Cards 7 Turn Sequence (chart) 30-31 Unique Cards 8 Victory X 24 Winning the Game 22

30
This chart provides a detailed structure of the phases and steps involved in play. Items presented in red are known as framework events, as they are mandatory occurences dictated by the structure of the game. Action windows in which players are free to take actions are presented in green.
• Player actions.
• Each player adds 1 resource to each of his heroes’ resource pools, and draws 1 card.
• Player actions.
• Player actions.
• First player plays ally and attachment cards.
• Player actions.
• Next player plays ally and attachment cards, etc.
• Encounter deck reveals 1 card per player.
• Players commit characters to quest.
•Resolve questing.
• Player actions.
• Player actions.
• Players may travel to 1 location if there is no currently active location.
• Red – Players cannot interrupt with actions. Responses can be played if their conditions are met.
• Green – Any player can take actions generally, or between the game steps stated in the rules.
31
•Player actions.
• Each player may choose and engage 1 enemy from the staging area.
• Engagement checks are made.
•Player actions.
• Player actions.
• Deal 1 shadow card to each enemy.
• Next player resolves attacks made by his enemies against him, etc.
• First player resolves attacks made by enemies against him. (See page 18.)
• First player declares and resolves attacks against his enemies. (See page 20.)
• Next player declares and resolves attacks against his enemies, etc.
• Player actions.
• Each player refreshes all cards he controls.
• Player actions.
• First player token passes to the next player on the left.
• Each player raises his threat by 1.
32Players may photocopy this page for their own personal use.
TM
TM
TM


![J.R.R. Tolkien - Middle-Earth Glossary [v2.1b].txt](https://img.pdfslide.us/doc/110x75/577c7d1f1a28abe0549d7a8e/jrr-tolkien-middle-earth-glossary-v21btxt.jpg)