Embed Size (px)
Citation preview
Building instruction'Springer Tug' Wooden Parts-Set by RC-Onkel.de
Out of this wooden parts-set a 'Springer' Tug can be assembled. The initial development of this model comes from the The North West R/C Ship Modelers, Seattle/USA and was intended to provide young modelers a cheap and easy entry into model-boating with little effort. It provides ample opportunities to incorporate own design ideas.
The model was originally designed as a pure hobby project, based on the international-standardized dimensions . Most parts are made of 4 mm plywood. Completion of the model should be very easy - even for the inexperienced modeler. Because of the sophisticated design it is nearly impossible to assemble incorrectly. It requires only a little wood glue (eg Ponal). We recommend not to use cyano-superglue, as this will not provide adequate adhesionon at the laser-cut edges.
To complete the model you will need the following parts: (not supplied)
● Propshaft 18 - 20cm with coupling● 3-blade marine propeller 35-40mm diameter ● Electric motor (540 size) ● Electronic Speed control● Rudder ● Steering servo● RC system minimum 2 channels ● Battery (ideally 2x 6V lead acid battery or 2x 7.2 V stick battery, each connected in parallel with Y-cable
For questions regarding the construction and the model you can contact us at [email protected]. The model is subject to constant development. Changes are therefore reserved.
Diameters of the model: length approx 455mm, width approx 200mm. Scale approx 1:25
These parts make up the boat's stand And this is how it should look like.
These parts make up the inner skeleton It is recommended to only check-fit the battery-braces and not glue them before painting the inside of the boat with moisture-protection later.
This is how the skeleton should look after assembly.
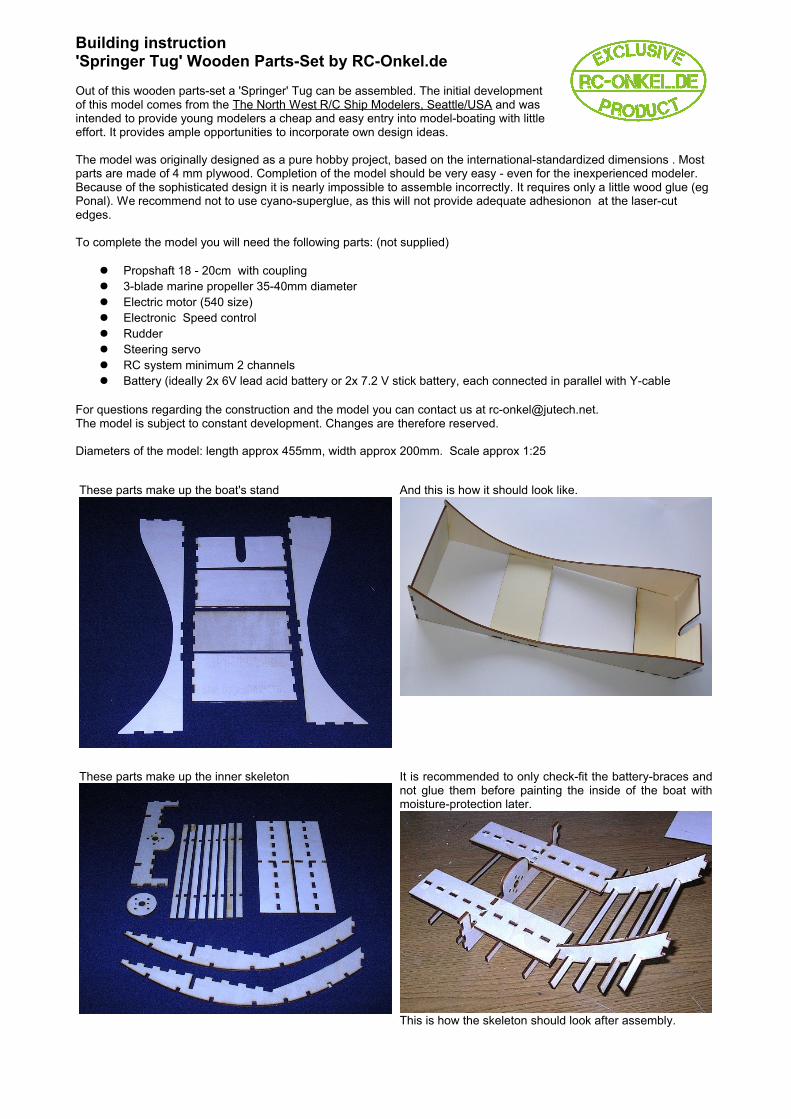
Now these are the parts of the main-body.
Start by glueing the side-plates 'A' to the skeleton, followed by the bow and the stern 'B'.
The 'E'-parts are the deck's supports. The deck ('C'-part)should sit level with the side-plates. The deck's opening should be in the anterior part of the hull.
The 'F'-Parts are used to keep the wheelhouse in place and also to prevent the ingress of water.
The 'D'-part can be used as a lid for the decks-opening.
This is how the assembly should look by now.
The bottom, made of 1mm plywood can be glued now. Use the glue generously to close any possible gaps.
If you lay the assembly upside down you can use the boats-stand to hold it all in place. You can put some weight on to keep a firm fit while the glue dries.
We used a heavy too-box on this picture.
Now glue the deck's support parts 'E' exactly 4mm below the top.
Now is the time to paint the inside with clear varnish or something similar for moisture-protection. After that glue the battery braces.
It should look like this when ready.
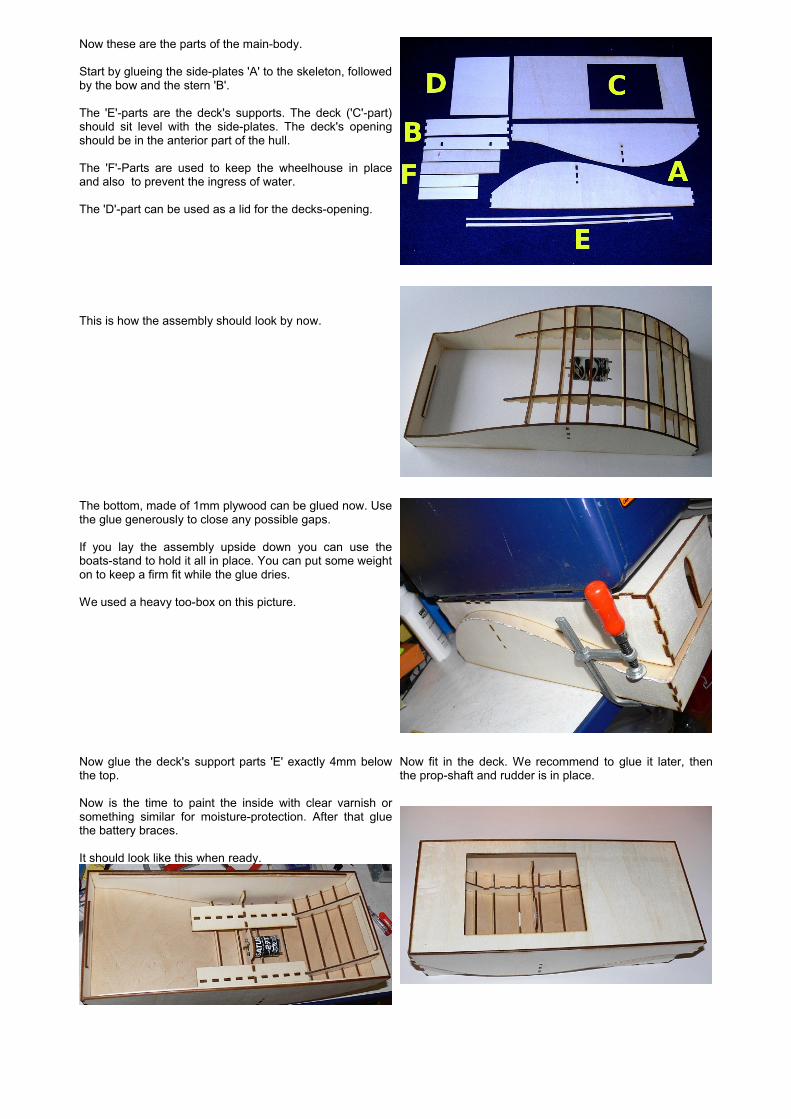
Now fit in the deck. We recommend to glue it later, then the prop-shaft and rudder is in place.
The inner rim of the wheelhouse consisting of the 'F'-parts should look like this when finished.
Now the first part of building your springer is completed.
Look out for any leaks in the hull now and close them with putty. While you have the putty at hand you may smooth out all the bumps and marks to prepare the hull for the paint to be applied later.
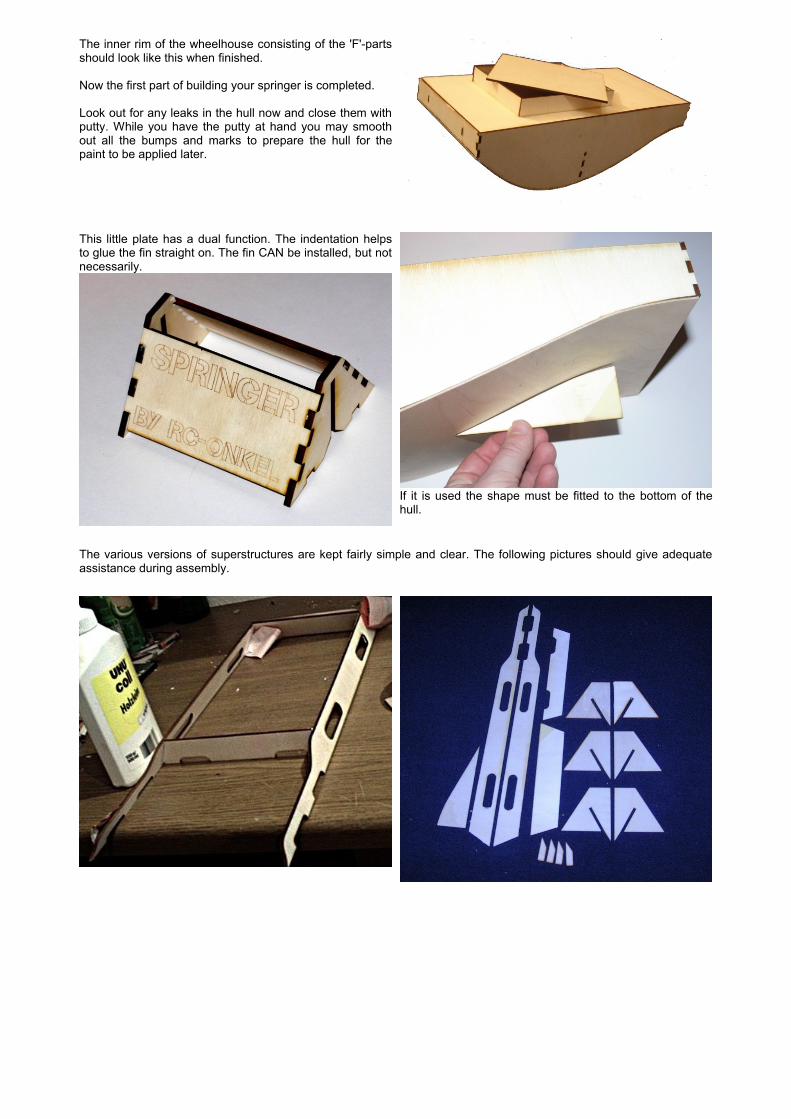
This little plate has a dual function. The indentation helps to glue the fin straight on. The fin CAN be installed, but not necessarily.
If it is used the shape must be fitted to the bottom of the hull.
The various versions of superstructures are kept fairly simple and clear. The following pictures should give adequate assistance during assembly.
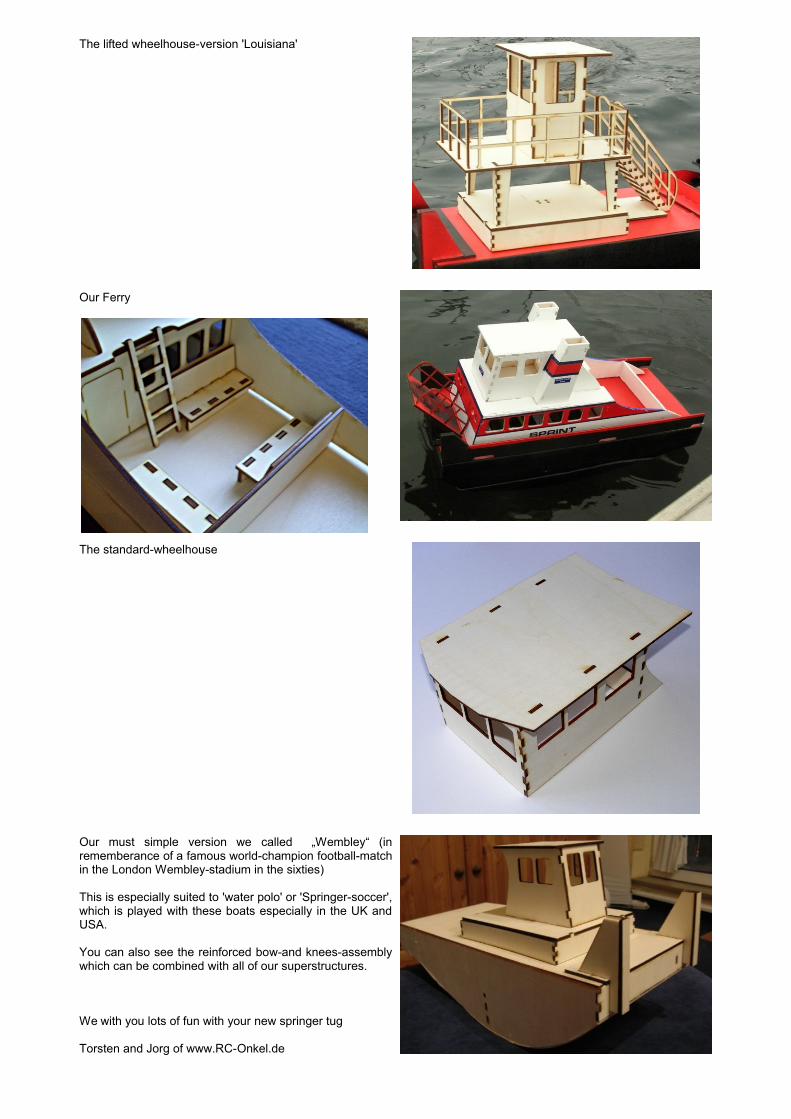
The lifted wheelhouse-version 'Louisiana'
Our Ferry
The standard-wheelhouse
Our must simple version we called „Wembley“ (in rememberance of a famous world-champion football-match in the London Wembley-stadium in the sixties)
This is especially suited to 'water polo' or 'Springer-soccer', which is played with these boats especially in the UK and USA.
You can also see the reinforced bow-and knees-assembly which can be combined with all of our superstructures.
We with you lots of fun with your new springer tug
Torsten and Jorg of www.RC-Onkel.de