Embed Size (px)
Citation preview

Brought to you by
The HomeMaker’s Mentor

Brought to you by
The HomeMaker’s Mentor
www.TheHomeMakersMentor.com
ALL RIGHTS RESERVED
Martha H. Greene © 2010
PRINTED IN THE USA
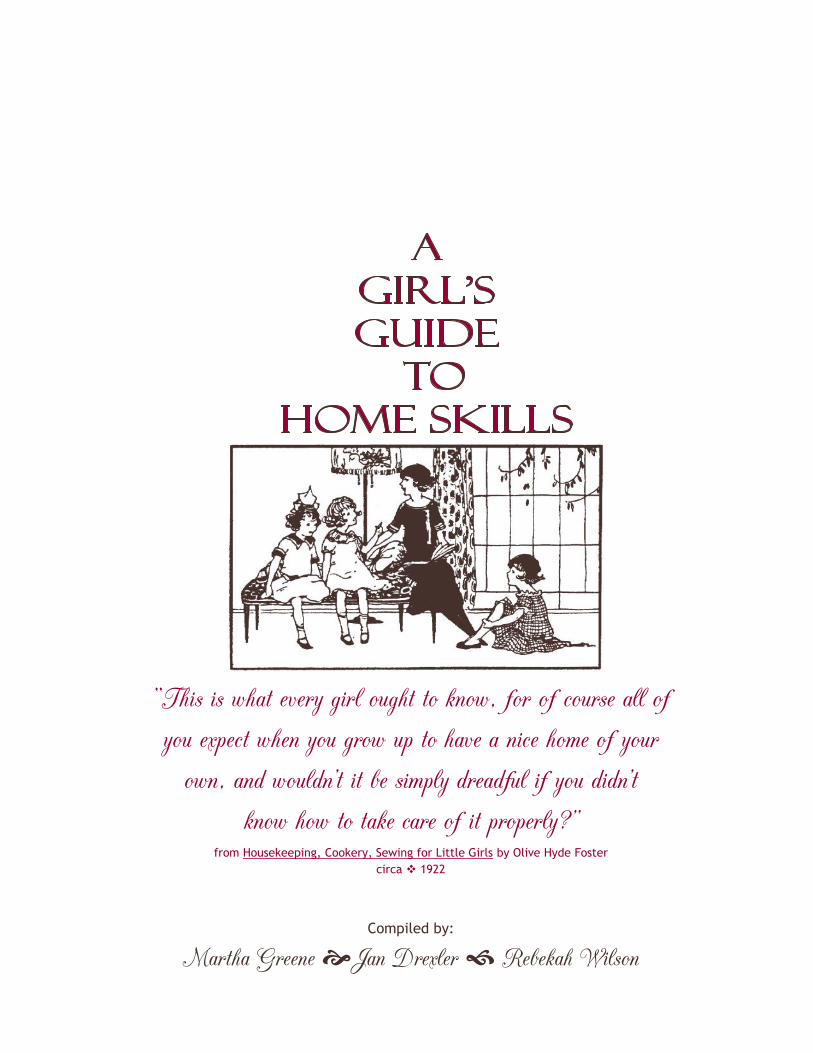
“This is what every girl ought to know, for of course all of you expect when you grow up to have a nice home of your
own, and wouldn’t it be simply dreadful if you didn’t know how to take care of it properly?”
from Housekeeping, Cookery, Sewing for Little Girls by Olive Hyde Foster
circa 1922
Compiled by: Martha Greene Jan Drexler Rebekah Wilson


My Dear Girls ~ You are embarking on a most wonderful and honorable quest: to learn how to keep a home for your family! What you will learn in the following pages will be of such help to your MotherDear now as you are a daughter in your family’s home. In the future, the lessons learned will be invaluable to you when you are a young wife and the keeper of your own home.
Within these pages you will learn that there are three major elements to home skills. The first is to have a plan. Without a plan in mind when you start a task, you will never be able to finish it successfully. The second is to know which tools to use for each task, and to have them on hand. The third is routine. Once you have a routine in place, each task then has its appointed time. You’ll find this and much more in this complete guide for girls that I have to share with you. I’d encourage you to always be ready to learn from MotherDear as you work by her side and enjoy all the bits of wisdom found tucked in the pages from Grandmother Foster.
Keeping a home is not a difficult thing to learn, but is a necessary part of a happy home life. As you learn to keep your home clean, to order your tasks well, and to economize both your money and your time, you will be learning the skills you need to take your place as a young woman at home. I hope “Home” will be where your heart is. . .
- Aunt Sophie


A Girl’s Guide to Home Skills
Each section will take you through the areas of a home giving you
checklists, scheduling charts, along with detailed instructions to
learn the necessary skills for housekeeping
and making it home-sweet-home.
Section 1
SPARKLING CLEAN BATHROOMS
Section 2
KOZY & INVITING KITCHENS
Section 3
LOVELY LIVING AREAS
Section 4
PROVIDENT PANTRIES
Section 5
GENUINE HOSPITALITY
Section 6
COMFORTABLE & TIDY BEDROOMS
Section 7
ORGANIZED CLOSETS
Section 8
TIDY YARDS & PORCHES


A Girl’s Complete Guide
Cleaning & Maintaining Bathrooms in the Home
Spa
rk
lin
g C
lea
n!
Spa
rk
lin
g C
lea
n!

My dear girls ~ The bathroom may not be the best loved room in the home, or the one you want to clean first, but it is certainly the most used room in the house! One of our goals as homemakers is to keep each room in the house clean, orderly and inviting. It isn’t hard to do this in the bathroom, but it takes consistent attention. On the next page you will find a checklist of home skills you can learn to do well and become a capable keeper of a home. As you become confident through practice of these skills, MotherDear can sign the checklist to show your accomplishments. I hope you will learn to love having a clean bathroom as much as I do!
Aunt Sophie
The Home Skills Checklist found on the next page may be photocopied to
accommodate copies for all the daughters in your family.
~ For personal use only ~
ALL RIGHTS RESEVED - The HomeMaker’s Mentor
Martha H. Greene © 2010

Ho
me S
kil
ls
A
Gir
l’s
Com
ple
te G
uid
e
B
at
hr
oo
ms
“It is well for you, however, to notice the way your mother does, and learn the reason she has for her method.”
Housekeeping for Little Girls circa 1922
I can confidently do a good and thorough job in a bathroom by
knowing the skills needed in the home regarding:
___ How to clean a sink
___ How to unclog a drain
___ How to clean a tub or shower stall
___ How to clean a toilet
___ How to clean the flooring in the bathroom
___ How to make bathroom mirrors clean and sparkling
___ How to fold towels and washcloths
___ How to properly care for the trash & trash containers
___ Supplies needed for the bathrooms
___ Proper hygiene
___ Bathroom etiquette
___ Procedure for an overflowing or clogged toilet
___ Procedure for the emergency of broken water pipes
NAME: ________________________________________
has passed the requirements for our home listed above and has
proven herself a capable keeper of a home.
Signed: MotherDear
Home Skills Checklist
ALL RIGHTS RESEVED - The HomeMaker’s Mentor

The Scheduling Chart on the next page may be photocopied and placed in an
area for your own convenience and reference.
~ For personal use only ~
ALL RIGHTS RESEVED - The HomeMaker’s Mentor
Martha H. Greene © 2010
I’m sure most of you have faced a dirty bathroom with a helpless feeling. Sometimes trying to decide just where to start first can be overwhelming! There are many details involved in a bathroom, and it must be kept not just neat, but clean – germs and soap scum aren’t allowed! Here is Aunt Sophie’s scheduling chart for a bathroom. Notice that the daily tasks are quite easy and can be done in just a few minutes. And if the daily tasks are kept up, then the weekly ones become much easier. Make these tasks part of your daily, weekly and monthly routines, and you’ll find that you’ll never again have to face a dirty bathroom! Make a copy of this checklist for each bathroom in your house, and tape it to the inside of one of the cupboard doors. Refer to it often as you develop the habit of keeping your bathrooms clean.

Ho
me S
kil
ls
A
Gir
l’s
Com
ple
te G
uid
e
B
at
hr
oo
ms
DAILY
• Check toilet and wipe down lid and rim with disinfectant
• Take any soiled towels, or dirty clothes to the laundry area
• Wipe sink surface countertop
• Check trashcan
WEEKLY
• Clean toilet thoroughly
• Clean tub and shower
• Clean sink and countertop
• Clean mirror
• Clean toothbrush holder
• Sweep and mop floor
• Empty trash and replace liner
MONTHLY
• Clean out bathroom cupboards and tidy up shelves
• Dust corners and ceilings
• Wipe down cupboard doors & shelves
• Wash shower curtain if needed
• Clean drains with soda and vinegar
SEASONALLY
Restock cupboards with needed toiletries and supplies
Add a pretty new touch to the room or a fresh coat of paint
Home Skills Scheduling Chart
ALL RIGHTS RESEVED - The HomeMaker’s Mentor

It is helpful to have the cleaners and supplies you use daily stored in each bathroom. A small container, such as a plastic bucket, can hold rags and a spray bottle of cleaner and will fit easily under the sink or in another out of the way place. If there is no place in your bathroom, then find a place somewhere nearby where it will be handy. There are four items on Aunt Sophie’s daily chart: • Check toilet and wipe down lid and rim with disinfectant • Take any soiled towels or dirty clothes to the laundry area • Wipe sink and countertop • Check trashcan Check toilet and wipe down lid and rim with disinfectant: The toilet can easily be the grimiest spot in the whole house, and the least appetizing to clean. But those facts also make it one of the most important places to clean daily. This is where paper towels come in handy, but you can also use a supply of small towels or old washcloths that you replace daily. First, spray some disinfectant or all-purpose cleaner on your towel. Then wipe the toilet tank, the cover, the bottom of the cover, the seat, the bottom of the seat, the toilet rim, the outside of the toilet bowl and the floor around it. Aunt Sophie works in this order so that she is cleaning from the least to most dirty areas. Now take the toilet brush and swish around the inside of the toilet bowl along the water line and under the rim of the toilet. Rinse the brush, flush the toilet, and place the handle of the brush on the rim of the toilet with the wet brush dangling over the water. Place the toilet seat down to hold the brush in place. This will let it air dry. Ask the next person using the bathroom to put the brush away.
Take any soiled towels or dirty clothes to the laundry area: Replace the hand towel with a clean one, straighten any other towels that are hanging crook-edly, and pick up any clothes that might be on the floor.
Wipe sink and countertop: Clean off the countertop next to the sink, and spray the sink, faucets and countertop with disinfectant or all-purpose spray cleaner. Using a clean rag or paper towel wipe down all of the surfaces, leaving them clean and shiny. If you want the faucets to be extra nice, use glass cleaner when you wipe them.
Check trashcan: Empty the trashcan and replace the liner if it is your regular trash day. Otherwise, check it to make sure it isn’t smelly or too full. If it is, go ahead and empty it.
Skills for Daily Cleaning

Ho
me S
kil
ls
A
Gir
l’s
Com
ple
te G
uid
e
B
at
hr
oo
ms
Since Aunt Sophie keeps up with her daily cleaning, the weekly cleaning in the bathroom is a breeze. It takes a bit longer than the daily cleaning because there are more tasks, but you won’t be facing a dirty, grimy mountain of clean-ing! Before starting, it’s a good idea to open the bathroom window and prop open the door to get the best ventilation that you can. It will help keep you from breathing too many chemical fumes and freshen up the air in the bath-room. Even in the coldest weather Aunt Sophie will open the window an inch or so to get some fresh air into this small room! Here are the items in Aunt Sophie’s chart for weekly cleaning: • Clean toilet thoroughly • Clean tub and shower • Clean sink and countertop • Clean mirror & toothbrush holder • Put our fresh towels and washcloths • Sweep and mop floor • Empty trash and replace liner Clean Toilet Thoroughly: Clean the toilet the same way you do every day, but this time when you swish the bowl with your brush, add about ½ cup of white vinegar to the water or use a commercial toilet bowl cleanser. Scrub thoroughly with your brush making sure you reach under the rim, and pay special attention to the water line. Rinse off your brush completely in running water – you can do it by flushing the toilet and holding the brush in the swirling water – and let the brush
dry as usual. Clean Tub and Shower: Spray the walls of your tub or shower with your cleaning agent. You’ll want one that dissolves soap scum, or use the homemade soap scum remover or the homemade basic all-purpose cleaner. After spraying the shower walls, let the cleaner sit for a few minutes to soften up the dirt. While you’re waiting, use your time well! This is a good time to take the rug outside to shake it, or remove items
from the counter next to the sink. Next take a rag, sponge or soft brush to scrub the walls. What you choose to use depends on what your tub or shower walls are made of.
For fiberglass: use a sponge, rag or soft cloth. For tile or porcelain: use a sponge, rag or soft plastic bristled brush For plastic surfaces: use a plastic bristled brush
Skills for Weekly Cleaning

Aunt Sophie never forgets to wipe the top edge of the shower or tub surround, as that is a place we seldom see, but where dust collects. If you have a shower door, be sure to wipe the tracks for a sliding door, or the frame of a swinging door. After scrubbing the walls of your shower, fill a large plastic cup with clean water and pour it carefully down the walls to rinse them. Now that the walls are rinsed you can let them air dry, or you can wipe the walls with a clean towel to dry them. Next, spray the sides and bottom of your tub or the floor of your shower with your cleaner. Scrub with your sponge, rag or soft plastic bristled brush like you did on the walls. You may run into stubborn bathtub rings or dirt on the floor on your shower, and be sure to scrub those with your cleansing powder or gel. Rinse, using your plastic cup.
Clean Sink and Countertop: Remove everything from the countertop so you are able to clean it thoroughly. Spray the counter with an all-purpose or disinfecting cleaner and wipe it down. Then use a cleansing powder or gel to clean the sink. Rinse both areas thoroughly. Clean Mirror and Toothbrush Holder: Remove the toothbrushes from the toothbrush holder and clean it with soap and water or with your disinfecting cleaner. Rinse it well, dry it, and replace the toothbrushes. For the mirror, spray it with glass cleaner and wipe it well with an old, crumpled newspaper. Be sure to wipe it thoroughly so that you don’t leave any streaks. Before you leave this area, spray the sink and faucets with the glass cleaner and wipe them with a soft cloth. It will really make your sink shine!
Put Out Fresh Towels and Washcloths: Replace all of the towels on the towel racks. Take pride in how you place the towels on the racks! Ask yourself: Are they hanging neatly with the edges even? Are the colors pleasing to-gether? Are there enough towels and washcloths for everyone who uses this bathroom?
Skills for weekly Cleaning
FOLD 1
FOLD 2
Bath Towel
FO
LD
3
FO
LD
4
Folded Towel & Washcloth
FOLD WASHCLOTHS in HALF AND HALF AGAIN
It works very
nicely in some storage areas
for a convenient fit and for a tidy
appearance, to roll towels and
washcloths. Use fold 1 & 2, then roll up
tightly and stack towel rolls.
3 on the bottom - 2 on the next row and
then 1 on top. Fold washcloths only once
and then roll - these fit nicely in small
baskets kept handy near
the sinks and tubs.
Rolled Towels

Ho
me S
kil
ls
A
Gir
l’s
Com
ple
te G
uid
e
B
at
hr
oo
ms
Sweep and Mop Floor: First, take out the rugs and shake them if you didn’t do this earlier. Then sweep the floor. Aunt Sophie’s favorite way to sweep a bathroom floor is to use the hose attachment on her vacuum cleaner because it can reach into all of the small spaces, but you can also use a broom and dust pan. Once the floor is swept, then it’s time to mop it. You can mop the floor using plain water or a floor cleaner. Aunt Sophie likes to spray the floor around the toilet with the disinfecting or all-purpose cleaner before mopping. Be care-ful not to just move dirt around while you mop! You don’t want to have a ring of dirt around the edges of the room when you’re finished cleaning. Rinse your mop often, and be sure to clean along the edges and floorboards as you go. Replace the rugs after the floor is dry.
Empty Trash and Replace Liner: This is the time when you go ahead and empty the trash whether you think it needs it or not. You want to leave the whole bathroom fresh and clean! Before you leave the bathroom, Aunt Sophie takes a last look. Does it look clean, fresh and inviting? Spritz the room with a scented air freshener if you like, close the window if needed, and you’re done!
Skills for weekly Cleaning
To prevent a build up of dust, grime and bacteria the trash container should be cleaned out every month at least. To clean the trash can, remove the trash bag and tie closed. Set aside. Place the trash can under the bathtub facet and fill 1/4 full with hot water. Add a few tablespoons of laundry detergent and allow to dissolve by swishing the water and detergent around in the trash can. Once dissolved, use a scrub brush to clean the inside and outside of the trash can. If there was a strong odor in the trash can, allow to soak with the detergent water for 30 minutes before emptying in bathtub and rinsing well. Dry completely. Place an empty, folded trash bag in the bottom of the
trash can and then place a trash bag into the trash can, open and ready to be used. In a pinch, you can quickly exchange the used bag for the new if visitors are arriving. This extra bag also can help make easier clean up for next time. Aunt Sophie has used another little trick you may try: Lay a paper towel folded to fit the bottom of your can as a liner to the container and then sprinkle it liberally with baking soda. The baking soda absorbs odors and small amounts of liquid and the next time you clean the can just discard the paper liner and wash the container as directed above.
Caring for the Trash Container

There are some things that need to be cleaned regularly, but not as often as your weekly tasks. These are the things that take much longer than a week to start getting dirty or out of order, but you certainly don’t want them to get to the point of actually being dirty. Here are the things on Aunt Sophie’s Monthly Checklist: • Clean out bathroom cupboards and tidy up shelves • Dust corners and ceilings • Wipe down cupboard doors and other surfaces • Wash shower curtain (if you have one) • Clean drains Clean out bathroom cupboards and tidy up shelves: This could be a big job or a small one depending on how much storage space you have in your bathroom. Your bathroom could have a lot of storage space – a linen closet and drawers as well as a cupboard or two under the sink – or it could have very little. For your monthly tasks it’s important to clean the cupboards and drawers where you store toiletries, paper products and cleaning supplies. Do one shelf or drawer at a time. First, take everything out of the drawer or off the shelf. Using your all purpose cleaner, wipe out the inside of the drawer or shelf. As you replace the items, discard anything that might be old or broken, or find another place for anything that doesn’t belong there. Be sure to put the items back neatly, so that everyone in your family can find what they’re looking for.
Aunt Sophie likes to use small baskets or boxes to hold some of the smaller things. Pretty baskets with items together and tidy will bring a smile to your face
when you open the cupboard door! Dust Corners and Ceilings: This is a fun task! Take your broom and wrap a clean cloth around the bristle end of it. Aunt Sophie uses an old towel and fastens it with a safety pin to hold it on. Now gently sweep along the corners of the room where the walls meet the ceiling and where they meet each other. Your cloth will pick up any dust or cobwebs before you can even see them!
Wipe Down Cupboard Doors and Other Surfaces: Using a cloth and a spray bottle of all-purpose cleaner, spray the outside of your cupboard doors then wipe. Try to get all of the surfaces you can reach. Aunt Sophie always wipes the light switch cover while doing this task, and don’t forget the walls that are easily splashed next to the sink and toilet. Start at the door of your bathroom and work your way around the room, wiping anything that might gather dust and dirt.
Skills for Monthly Cleaning

Ho
me S
kil
ls
A
Gir
l’s
Com
ple
te G
uid
e
B
at
hr
oo
ms
Wash Shower Curtain: Not every shower has a curtain; yours may have a shower door that you wash weekly when you clean your shower. To wash your shower curtain take it down from the rings or hooks and put it in your washing machine. Wash it with a little laundry soap. If mildew is a prob-lem you can add bleach or vinegar to the rinse. After the washer is finished, hang the cur-tain back up to dry. Clean Drains: Pour several big spoonfuls of baking soda into the drains of your bathtub and your sink. Pour white vinegar into the drain until you see it begin to foam. Allow it to sit for 20-30 minutes, and then run clean water down the drain. This removes the built-up scum in your pipes and deodorizes it also. Aunt Sophie does this for each of her drains every month to keep them draining well and smelling sweet. Seasonal tasks for the bathroom can be simple or more thorough: every three months, while doing monthly cleaning, she makes sure that all the bathroom supplies are stocked. Are there rolls of toilet paper that are easily accessible? Are there new bars of soap, tubes of toothpaste, and bottles of shampoo to replace ones that will be used up in the next few months? Aunt Sophie keeps all these supplies on a shelf in the bathroom so that whenever anyone needs something, it’s right there. Each season attempt to add a new touch to the room to beautify or brighten it up -like a new candle or some new hand tow-els? Possibly it is time for a fresh coat of paint to the walls in a new color?
Skills for Monthly Cleaning
SEASONAL Cleaning
Bathroom Supply List
Shampoo
Bar Soap
Liquid Soap
Washcloths
Bath Towels
Hand Towels
Air Freshener
Baking Soda
Toothpaste
Toothbrushes
Mouthwash
Dental Floss
Pumice Stone
Toilet Brush
First Aid Kit
Sponges
Scrub Brushes
Mop
Broom
Cleaning Rags
Paper Towels
Cotton Tips
Cotton Balls
Deodorant
Small Cups
Disinfectant Cleaners
Razors
Combs
Brushes
Talcum powder
Lotions
Toilet Tissue
Kleenex
Trash bags
Plunger
Small Scissors
Peroxide
Rubbing Alcohol
Facial Cosmetics

I hope you remember that one of the three elements to successful homemaking is to have the proper tools and know how to use them. In the bathroom Aunt Sophie’s most valuable tools are the cleaners used to get rid of the grime and germs that like to live in this well-used room. It is important to know what cleaners you need and what you can expect them to do. You can either buy chemical or green eco-friendly cleaners at the store, or you can make your own cleaners using the recipes found at the end of this section. Both work well, and making your own cleaners can help save on the household budget. Here are the types of cleaners you will need to clean your bathroom:
Soap scum remover—removes build-up soap scum that has dried on the shower or
tub walls and floor. Glass cleaner—used for washing mirrors, windows, glass shower doors and to make
chrome sparkle. Drain cleaner—removes build-up gunk and deodorizes the bathroom drains.
Cleansing powder or gel—used to scrub smooth surfaces to remove built-up grime.
Mineral deposit remover—removes built-up mineral deposits without scratching.
Basic disinfectant—kills bacteria, viruses, mold, and mildew.
Mold and mildew remover—kills and helps dissolve mold and mildew.
Basic bathroom or All-Purpose cleaner—basic cleaning agent that can be used on
any surface.
Toilet cleaner—cleans, disinfects, and some remove mineral build-up.
Tile Cleaner—used specifically on tiles to remove build-up and polish the tile.
Air freshener—used to remove airborne odors and leave the bathroom smelling fresh.
With this list of cleaning agents, you can clean any bathroom and leave it fresh, sparkling and sanitized with a minimum of effort and time. Knowing how best to use the products depends on which form you will use: chemical, green eco-friendly, or homemade. For chemical cleaning agents, follow the direc-tions on the container or bottle for best results. NEVER mix chemical agents as toxic, even deadly, fumes can occur. Always read the directions before using a chemical agent. Some cleaning agents need to be sprayed on and left to set for minutes or even hours for the best results. Others may need to be diluted or can not be used on specific surfaces such as fiberglass or plastic. Green clean-ing agents are health-friendly and easy to use. You should read the directions prior to using to make sure you are aware of anything unusual regarding the product. Green cleaning agents do not offer as wide a selection so you may need to incorporate homemade agents as well. The two work well together and most homemade cleaning agents are eco-friendly anyway.
LESSON on Bathroom CleanERS
Ho
me S
kil
ls
A
Gir
l’s
Com
ple
te G
uid
e
B
at
hr
oo
ms
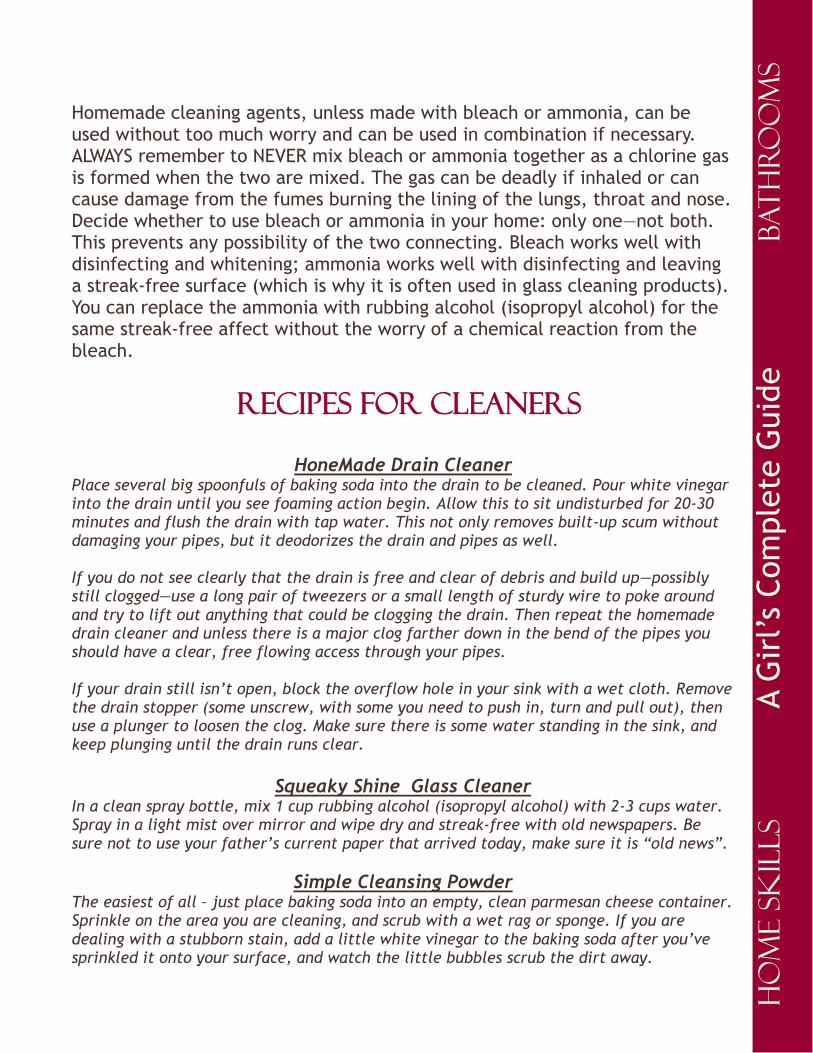
Homemade cleaning agents, unless made with bleach or ammonia, can be used without too much worry and can be used in combination if necessary. ALWAYS remember to NEVER mix bleach or ammonia together as a chlorine gas is formed when the two are mixed. The gas can be deadly if inhaled or can cause damage from the fumes burning the lining of the lungs, throat and nose. Decide whether to use bleach or ammonia in your home: only one—not both. This prevents any possibility of the two connecting. Bleach works well with disinfecting and whitening; ammonia works well with disinfecting and leaving a streak-free surface (which is why it is often used in glass cleaning products). You can replace the ammonia with rubbing alcohol (isopropyl alcohol) for the same streak-free affect without the worry of a chemical reaction from the bleach.
HoneMade Drain Cleaner Place several big spoonfuls of baking soda into the drain to be cleaned. Pour white vinegar into the drain until you see foaming action begin. Allow this to sit undisturbed for 20-30 minutes and flush the drain with tap water. This not only removes built-up scum without damaging your pipes, but it deodorizes the drain and pipes as well. If you do not see clearly that the drain is free and clear of debris and build up—possibly still clogged—use a long pair of tweezers or a small length of sturdy wire to poke around and try to lift out anything that could be clogging the drain. Then repeat the homemade drain cleaner and unless there is a major clog farther down in the bend of the pipes you should have a clear, free flowing access through your pipes. If your drain still isn’t open, block the overflow hole in your sink with a wet cloth. Remove the drain stopper (some unscrew, with some you need to push in, turn and pull out), then use a plunger to loosen the clog. Make sure there is some water standing in the sink, and keep plunging until the drain runs clear.
Squeaky Shine Glass Cleaner
In a clean spray bottle, mix 1 cup rubbing alcohol (isopropyl alcohol) with 2-3 cups water. Spray in a light mist over mirror and wipe dry and streak-free with old newspapers. Be sure not to use your father’s current paper that arrived today, make sure it is “old news”.
Simple Cleansing Powder The easiest of all – just place baking soda into an empty, clean parmesan cheese container. Sprinkle on the area you are cleaning, and scrub with a wet rag or sponge. If you are dealing with a stubborn stain, add a little white vinegar to the baking soda after you’ve sprinkled it onto your surface, and watch the little bubbles scrub the dirt away.
Recipes for CleanERs

Soap Scum Remover Using a 32 oz. squirt bottle, place ¼ cup powdered or liquid laundry detergent into the bot-tle using a funnel. Pour in VERY hot water (not hot enough to melt the plastic!) until filled half full. Swish around until the detergent is completely dissolved in the water. If there are any chunks it will plug your spray nozzle. Spray the walls of your shower or sides of your tub, scrub with a wet rag or sponge, then rinse. Always use great caution with HOT water!
Basic All-Purpose Cleaner Mix together 2 Tablespoons baking soda and ¼ cup white vinegar. Add 2 quarts warm water. Put in a clean, empty spray bottle and use as needed. This cleaner can be used on everything from the tub to the sink to the toilet surfaces.
HomeMade Freshener for Towels Mix 1 cup liquid fabric softener with 3 cups water. Place in a clean spray bottle and use as
desired. Sprayed lightly on folded towels with freshen them up with a nice scent. This also
can be used to lightly freshen the room’s air. NOTE: Never try to use a freshener to cover up
odors caused by dirt and such. Keep a clean and tidy bathroom!
Before starting to clean the bathroom, make sure you have these supplies handy:
Broom, dust pan, mop and bucket - to use in cleaning the floor, ceiling and walls. Trash bags – to refill the bathroom trash can. Scrubbing brushes – I like to use an old toothbrush for small corners, and a larger one for
stubborn dirt. Cleaning rags or sponges – rags are easier to wash and keep clean, since bacteria grow
quickly! Be sure to have separate rags for the toilet area. Paper towels come in handy for the really dirty jobs and can be disposed of quickly for big messies.
Pumice stone – used in removing mineral deposits. Rubber gloves – either disposable or reusable. Gloves are important as you handle chemi-
cals or clean very dirty areas. Small bucket – useful for adding water to concentrated cleaning solutions. You can also
use it between cleanings to store your other tools. Large plastic cup – to rinse shower and tub walls.
Cleaning Tools & Supplies
One More Thing – Aunt Sophie has mentioned “mineral deposits” a couple times already, and she wants to make sure you know what they are. Some areas of the country have what is called “hard water”, meaning that the water has many dissolved minerals in it. This gives each part of the country a distinctive taste to the water, but if the water is very hard, it can also leave min-eral deposits on sinks and tubs. They usually form where the water drips out of a faucet. When the water dries, it leaves traces of minerals behind. These deposits can build up over time, but regular cleaning will help keep them at bay. Whether they are a problem in your bathroom or not depends on the water where you live.

Ho
me S
kil
ls
A
Gir
l’s
Com
ple
te G
uid
e
B
at
hr
oo
ms
So if unexpected visitors suddenly arrive, this is the minimum needed to freshen the
bathroom and have it ready if needed. Remember—keeping extra supplies, including extra
clean towels in the bathroom makes this job quick! Here is how to give it
“A lick & A promise” . . . .
1) Place fresh towels out.
2) Wipe down the toilet seat, rim of toilet and where the seat is bolted to the toilet.
3) Check toilet paper supply and soap.
4) Clean mirror if it is spotted or streaked.
5) Spritz the room with air freshener.
A Lick & A PROMISE
There are old-fashioned sayings you may have heard from Grandmother like: “She won’t hit a lick at a snake”=meaning=she won’t do her duties but shirks them. “Just give it a lick and a promise”=meaning=quickly tidy something up and promise
to come back and do a thorough cleaning at your earliest opportunity.
Little Projects
If you have accomplished some simple sewing skills and can sew with a straight stitch sewing
machine you will want to try these little projects that can be made at home.
Ribbon Trimmed Towels ~
Take any new hand towels or bath towels and purchase trims like wide ribbons and or lace
and add them as a pretty trimmed edge to towels. Small ribbon rosebuds & bows, or flowers
made from ribbon can readily be purchased at any place that sells ribbons and such. Lay
your towel flat and cut the length of trim the width of the towel + a little extra. Carefully
pin it on the end of the towel and if you are using lace and ribbon—tuck the lace under the
ribbon. Stitch both edges of the ribbon on with a straight stitch, quite close to the edge,
carefully and slowly, removing the pins as you go along. Hand stitch on little extras like
ribbon rosettes or bows. Fold your towel neatly and hang on the rod so the ribbon trimmed
edge is visible.
Towel Robes for Boys ~ Take 2 bath towels (use big beach-sized towels for big boys)
and lay them on top of each other. Sew one inch from the towel’s
finished edge as shown in the diagram on the dotted lines—towels together.
Leave all the other areas open. Boys just slip it over their heads and use the
side openings for armholes and it makes a perfect after “bath” robe!
Leave 11” opening
for head
Leave 9” opening
for armholes
ONE BATH
TOWEL
ON TOP OF
ANOTHER BATH
TOWEL

EMERGENCY! — What’s a girl to do?
Sometimes emergencies happen in the bathroom, and you need to know how to handle them!
The most common occurrence is a toilet that is overflowing. When you press down the handle
to flush the toilet and water starts filling the bowl instead of going down, don’t panic! The
most common reaction, and the worst one, is to try to flush the toilet again, hoping that a
second flush will get rid of whatever is clogging the drain – but don’t do that! It will just send
more water into an already flooded bowl.
• First, if water is running out of the bowl and onto the floor, that is a real emergency and
has to be taken care of right away. Grab several old towels (It is a good idea to have some of
these in the bathroom just for times like this as they happen to everyone one time or an-
other) and mop up the water as soon as possible.
• Once the flood is under control you can address the clogged toilet. Most of the time the
clog is caused by too much toilet paper and other waste, but sometimes it can be caused by
a foreign object dropping into the bowl. Either way, the procedure is the same.
• Keep a plunger, or “plumber’s helper” handy for each bathroom. This is a rubber or plastic
cone shape on the end of a handle. When used properly, it forces air into the drain when you
push it in and causes suction when you pull it up. This two way action loosens the clog.
• Place the cone over the hole in the middle of the toilet bowl and methodically push on it
to force air and water into the drain. Repeat this action several times.
• As the clog loosens, you will see the water level in the toilet bowl going down. At this point
you can push the plunger up and down a little faster until the clog is completely cleared.
• Flush the toilet again, rinse the plunger in the clear water in the bowl, and take the towels
to the laundry. Your job is done!
• If the clog isn’t removed by using the plunger, you may need to use a “snake”. This is a
long, flexible tool that goes into the drain and pushes the clog through. This is usually a big-
ger job for the Mr.Fix-It of your home.
Aunt Sophie’s advice is to keep the toilet flushing properly
is to prevent clogs in the first place. Keep the toilet lid closed
between uses to prevent foreign objects from falling into it. If
the overflows are caused mainly by waste, ask each family
member to make sure the toilet flushes completely before
they leave the bathroom.

Peek inside the tank
“Let ignorance talk as it will, learning has its value.” ~ A wise old saying
Large Main Pipe to Toilet Bowl
Water supply pipe and
CUT-OFF valve
Flush Valve Seal
Float Ball
Here you will find a diagram featuring the inside of a modern toilet tank. These tanks located
behind the toilet are filled with water that makes the modern convenience of automatic flushing
possible. If you actually peek inside, you can find a maze of interesting workings as the sketch be-
low is not completely detailed. Occasionally some parts wear out and can be replaced to have the
toilet working again as good as new. In emergencies where the water is not running to the home -
the tank can be manually filled with water from a bucket and flushed as usual.
Overflow Tube
Float Arm
Tank Ball
Lift Wire
Ho
me S
kil
ls
A
Gir
l’s
Com
ple
te G
uid
e
B
at
hr
oo
ms

If you have pipes that are leaking, or a mysterious puddle of water appears inside your
bathroom cabinet or on the floor, it is wise to take steps immediately to stop the problem
before it gets worse. MotherDear will not always be at hand so be prepared by knowing
what should be done and you will be glad you prepared ahead of time for such time as this.
The first step is to find the source of the leak. There are a few possibilities to look for –
• A faucet may be leaking – you can usually identify this by the dripping that continues out
of a faucet even when it is turned off all the way.
• The connection between two pipes may be loose or corroded – this kind of leak may go on
for several days before you find it, since pipes are usually hidden inside cupboards and un-
der sinks.
• The supply pipe for your toilet, or the toilet tank itself may be leaking – you can tell this
if the water is mainly on the floor behind the toilet.
The next step is to stop the leak by turning off the water supply.
• Faucets usually have shut off valves underneath the sink.
• The supply pipe for your toilet also often has its own shut off valve.
• If you can’t find a shut off valve, or if the leak is in the pipes themselves, then you will
need to find the main shut off valve for your house’s water supply.
• If you live in town, your house will probably have a valve in the basement that shuts off
the supply from the city water. It often looks like a faucet on a pipe coming through the
basement wall. Closing this valve will turn off the water to your whole house.
• If you don’t have a shut off valve on the lower level of the home, you may need to turn
off the water at the water meter during an emergency. If the water meter isn’t inside your
house, it may be in the yard with a metal cover over it, like a manhole cover. The valve
probably needs a special tool to turn it off.
• If you have a well, you will need to find out how to turn off the water coming into your
house.
Be sure you know how to turn off your water before an emergency occurs!
Once you have identified the source of the problem and stopped more water from leaking,
then it is time to repair the leak. Aunt Sophie reminds you that you should be quick to ask
for help – your father may be able to manage the repairs, or perhaps an uncle or neighbor
does well with simple plumbing repairs and will be summoned. If there is no other help
available, or if the problem is a large one, a plumber may need to do the repairs.
Help! Water Pipes are Leaking

Since we share the bathroom with other members of our family and with guests who come to our home, it’s important to use proper etiquette in the bathroom.
Here are Aunt Sophie’s rules for good bathroom manners: Aunt Sophie would like to remind you that one way discord can make its way into a family is for family members to complain about each other – and the bathroom is a common place for complaints! If the person before you didn’t use consideration, don’t complain about it. Use this opportunity to serve your family! Go ahead and replace the toilet paper, or wipe down the counter. If it is something that occurs often, you can bring it to MotherDear’s attention privately – but don’t make an issue of it.
Bible Memory Verses for the Family
“Be ye kind one to another, tenderhearted, forgiving one another, even as God for Christ’s sake hath forgiven you.”
Ephesians 4:32 KJV HOLY BIBLE
“Not with eyeservice, as menpleasers; but as the servants of Christ,
doing the will of God from the heart;” Ephesians 6:6 KJV HOLY BIBLE
“For this is thankworthy, if a man for conscience toward God endure grief,
suffering wrongfully. For what glory is it, if, when ye be buffeted for your faults, ye shall take it patiently? But if, when ye do well, and suffer for it, ye
take it patiently, this is acceptable with God.” I Peter 2:19 & 20 KJV HOLY BIBLE
Considering others
After using the bathroom, do a quick wipe down of the sink, counter top and toilet to clean up any splashes of water.
If you empty a roll of toilet paper, replace it.
After taking a shower or bath, put any toiletries you got out away
and hang your towel on the towel rack neatly.
While you’re in the bathroom, have consideration that others may be waiting to use the facilities, especially if your home
only has one bathroom.
Ho
me S
kil
ls
A
Gir
l’s
Com
ple
te G
uid
e
B
at
hr
oo
ms

Regular cleaning and washing keeps germs at bay, and help keep our appearance beautiful. No matter what your age or what you look like, proper hygiene is one of the ways to keep our body as a healthy and attractive temple of the Lord. Teeth – Keeping our teeth clean requires daily attention. Daily brushing Daily flossing Regular Dental checkups Hair – It’s important for a young lady to know how to care for her hair properly. Different people have different types of hair – yours may be long or short, curly, very curly, or straight. Your hair could be very thick, thin, fine or heavy. But sometimes our hair can be a source of discontentment. You may admire how your friend wears her hair, but find it impos-sible to do the same with your own hair – and all because your hair is different than hers. It seems that if we have long, thick hair we wish for short sleek hair, or if we have curly hair we wish for straight, or if we have fine hair we wish that it was heavier. One of the best things you can do to be content with your own hair is to learn to care for it so that it is attractive and enhancing to your God-given beauty.
Keep your hair clean Keep your hair tidy Style your hair in a way that is becoming to you It is wise not to share your comb, brush or hat with others
Skin – Your skin can be one of the biggest problem areas in your personal hygiene. A girl’s skin changes constantly – with age, from season to season, and from week to week during the month. Some days your skin may be very oily and prone to blemishes, and other days it may be dry and smooth all day. There are many products on the market for keeping your skin “blemish free”, and you might try some of them to see if they work for you. But again, just like for your teeth and hair, there are some basic steps to take to keep your skin healthy. Keep your skin clean Keep your skin soft Keep your skin protected from the harsh sun Shower or bathe often
For lovely lips, speak words of kindness - For a lovely face, that shines with grace, walk with the knowledge that God is the Lord. ~ A Wise Old Proverb.
PERSONAL CARE

.
TOILET ARTICLES
Of course my girls will take especial pride in the care of the washstand and dresser. Wash
the toilet articles every morning after using, clean and dry the bowl, wipe out the soap
dish, and carry out the slop-jar when you go after fresh water, if you have not a bath-room.
Straighten up the top of the dresser, put pins, needles and hairpins in cushions, lay collars
and ribbons in boxes, (for I am sure you all delight in keeping your drawers in beautiful
order), set toilet bottles, manicure articles, brushes, etc., in place, and wipe away every
particle of dust. Also use the dusting cloth on every other piece of furniture, and wipe off
all the woodwork. Pull all the window shades down the same distance, and straighten up
any books, pictures and magazines you may have about. Then step to the door, just as if
you were a stranger, take a look about you and unless I am greatly mistaken you will be
surprised to see how much improvement you have made in your room.
THE BATH-ROOM
If your house has running water, you certainly must learn how to clean the bathroom! First
of all, remove the rug, sweep up the dust, and wipe the floor with a damp cloth. Take the
scouring soap and wash out the bath-tub, being sure to get off the ring that settles around
the edge if the water is at all hard. When all nice and white, rinse out with fresh water
and wipe dry. Next scour the top of the washstand and the faucets, wipe off any particles
of soap, wash out the bowl and wipe it dry. If the toilet needs attention, make a stiff roll
of an old newspaper and clean it with the end of that, flushing frequently so that you can
see your are getting it clean. You do not need to even wet your hands by doing it this way,
but when it is done wrap up the paper in dry piece, and take it downstairs to be burned or
carried away. Polish the bath-room mirror and window, remove all soiled and wet linen,
put out fresh towels, wipe the dust from the molding, and after shaking and sweeping the
mat outside, spread it down in front of the bath tub.
Excerpted from Housekeeping, Cookery, Sewing for Little Girls by Olive H. Foster
circa 1922
From Martha Greene’s private collection of rare vintage books
Ho
me S
kil
ls
A
Gir
l’s
Com
ple
te G
uid
e
B
at
hr
oo
ms
From the quaint and treasured pages of a book from yesteryear, written to girls regarding “keeping house”, we find methods that were taught to young girls and bits about how the home was kept long ago. Read on for snippets of wisdom from Grandmother Foster. .

_____________________________________________________________________________________________________________________________________________________________________________________________________________________________________________________________________________________________________________________________________________________________________________________________________________________________________________________________________________________________________________________________________________________________________________________________________________________________
____________________________________________________________________________________________________________________________________________________________________________________________________________________________ _______________________________________________________
Grandmother Foster says: “Our home is for the comfort and convenience of the family
and it should suggest cleanliness, orderliness & simplicity”.
Notes from MotherDear _______________________________________________________________________________________________________________________________________________________________________________________________________________________________________