Embed Size (px)
Citation preview

Design Document | Final-v08
Broadband-Hamnet Microwave Communication System
Submitted to:
Professor Brian Thompson
Senior Design Project II
Temple University
College of Engineering
1947 North 12th Street
Philadelphia, Pennsylvania 19122
4/17/2016
Prepared by:
Robert Irwin;Tyler Olivieri;Devin Trejo
Faculty Advisor(s): Professor Dennis Silage
Industrial Advisor(s): N/a
TOI Group
Temple University
College of Engineering
1947 North 12th Street
Philadelphia, Pennsylvania 19122
For further information, please contact team lead Devin Trejo (email: [email protected])
COLLEGE OF ENGINEERING

This page is intentionally blank.

Team SD-27
Team Members Robert Irwin;Tyler Olivieri;Devin Trejo
Advisor(s) Professor Dennis Silage
Coordinator Professor Brian Thomson
Department(s) Electrical and Computer Engineering
Project Title Broadband-Hamnet Microwave Communication System
Abstract Our Broadband-Hamnet Microwave Communication System (BHMCS) is an inexpensive
alternative to traditional HAM radio equipment that is still reliable to use in emergency
situations. We will use readily available Linksys WRT54G routers to setup a long distance
communication network that is self-configuring allowing users to easily find one another. In
the process of creating a self-configuring network we create a new network protocol termed
remote machine discovery protocol (RMDP). At the heart of the project is a Raspberry Pi 2
processor, which will handle all half-duplex/full duplex communications. Knowledge of data
communication and transmission, statistical bit error correction, antenna design, and network
programing are required to complete project. We hope our project will successfully supplement
the Amateur Radio community’s radio network in the Philadelphia Area.
URL https://sites.google.com/a/temple.edu/broadband-mcomm/
EXECUTIVE SUMMARY
Broadband-Hamnet Microwave Communication System aims to provide long-distance emergency
communications using low-power, portable, and inexpensive equipment. In an environment where cell
reception and internet access becomes unavailable, it is important to maintain a means of communication
to an area outside the area in distress. This project will also be useful in places where there is a lack of an
Internet Service Provider (ISP). These countries can use this project to communicate wirelessly within their
borders, as well as internationally. This project aims to be a low-cost, and reliable solution to this issue.
In order for this project to be successful, the hardware needs to be readily available and inexpensive, and
the software must be user-friendly. In an environment where power may become unavailable, the equipment
must consume a small amount of power, provided from an external battery or backup generator. The system
must also automatically and dynamically re-configure itself due to the possibility of pre-existing nodes
becoming unavailable in emergency situations and new nodes becoming available. The communication
protocol implemented in the design must also have sequencing, error detection/correction, and automatic
repeat request functionality.
For the reasons described above, the system will consist of a Raspberry Pi model 2, and a Linksys WRT54G
wireless router. The routers will be programmed, (flashed) with a custom firmware known as Broadband
Hamnet. The Broadband Hamnet firmware takes care of configuring the mesh network, which includes an
optimized link state routing (OLSR) protocol, digi-peating, and discovering new nodes (new routers that
come one the air). The firmware does not account for devices connected to LAN network of the nodes.
Because of this, communication cannot be made between two users of the network. Therefore, it is
necessary to design an application that automatically finds the IPv4 addresses of remote machines
connected to the mesh network. The routers run a bare-bones Linux operating system, allowing the use of
existing tools such as the address resolution protocol (ARP) and networking utility netcat as the basis for
the new remote machine discovery protocol (RMDP). In order to ensure that there is not a single point-of-
failure in the mesh network, each Raspberry Pi will act as a server and client. It allows every single machine
on the network to know how to contact any other machine on the network. The machines will communicate
using Transmission Control Protocol/Internet Protocol (TCP/IP) as the underlying protocol. It is necessary
to design an application protocol so that each machine can process and reply to different types of messages.
The different types of messages include new node discovery, network information requests, peer-to-peer
communication requests and priority messages. The application protocol will be developed using Google’s
protocol buffer (Protobuf) encoder. To increase maximum distance between nodes, a Yagi antenna will be
connected to the Linksys WRT54G through a coaxial cable. A Yagi antenna is a unidirectional antenna that
redirects most of the signal energy in one direction. This concept increases transmission distance without
any additional power requirements.
This project is very likely to be completed in its entirety within the allotted time period. The success of the
Broadband Hamnet Microwave Communication System relies heavily on the community because multiple
nodes are required for a successful mesh network. If successful, this project could supplement emergency
communications in the Philadelphia area. Because the project is open source, only the initial investment of
under $100 is required to set up a node in the mesh. In order for the mesh to be effective, the network needs
to span a large area. Covering a large geographical area is possible, especially because a Raspberry Pi 2 is
not needed at every mesh node. The Linksys WRT54G flashed with the Broadband Hamnet firmware can
act as a repeater station, which simply forwards messages for other nodes. Because the Linksys WRT54G
is only around $40, nodes can be installed to cover a large geographical area, without the help of large
power amplifiers and antennas. The Broadband Hamnet Microwave Communication System also has the
ability to provide underprivileged areas with an inexpensive way to communicate with family and friends
because the equipment is so inexpensive and accessible.
Table of Contents
Table of Contents .......................................................................................................................................... 5
Table of Figures ............................................................................................................................................ 7
Table of Tables ............................................................................................................................................. 9
Table of Code Listings ................................................................................................................................ 10
1. PROBLEM STATEMENT ................................................................................................................... 1
1.1. Overall Objectives ............................................................................................................................. 1
1.2. Historical and Economic Perspective ................................................................................................ 1
1.3. Design Concept .................................................................................................................................. 1
1.3.1. Hardware ............................................................................................................................... 1
1.3.2. Software ................................................................................................................................ 2
1.4. Major Design and Implementation Challenges .................................................................................. 2
1.4.1. Hardware ............................................................................................................................... 2
1.4.2. Software ................................................................................................................................ 3
1.5. Implications of Project Success ......................................................................................................... 3
2. DESIGN REQUIREMENTS ................................................................................................................ 3
2.1.1. Hardware ............................................................................................................................... 3
2.1.2. Software ................................................................................................................................ 3
3. APPROACH ......................................................................................................................................... 4
3.1. Hardware Design ............................................................................................................................... 4
3.1.1. Long Length Coaxial Cable Performance ............................................................................. 6
3.1.2. Power Amplification ............................................................................................................. 7
3.1.3. Path loss ................................................................................................................................ 9
3.1.4. Link Budget .......................................................................................................................... 9
3.1.5. Powering the Amplifier ....................................................................................................... 10
3.1.6. Theory of Yagi-Uda Antenna Design ................................................................................. 12
3.2. Software Design ............................................................................................................................... 13
3.2.1. Theory of TCP/IP Networking Stack .................................................................................. 13
3.2.2. Theory of Socket Programming .......................................................................................... 17
3.2.3. Creating the Remote Machine Discovery Protocol (RMDP) .............................................. 21
3.2.4. TOIChat – Backend Development ...................................................................................... 23
3.2.5. TOIChat - Front-End Development .................................................................................... 27
4. EVALUATION ................................................................................................................................... 34
4.1. Test Methods .................................................................................................................................... 34
4.1.1. Simulation ........................................................................................................................... 34
4.1.2. Hardware ............................................................................................................................. 35
4.1.3. Software .............................................................................................................................. 36
4.2. Results .............................................................................................................................................. 37
4.2.1. Simulation ........................................................................................................................... 37
4.2.2. Hardware ............................................................................................................................. 40
4.2.3. Software .............................................................................................................................. 42
5. SUMMARY AND FUTURE WORK ................................................................................................. 47
6. ACKNOWLEDGEMENTS ................................................................................................................ 48
7. References ........................................................................................................................................... 48
APPENDIX A – Project Site and GitHub Source Code ............................................................................. 50
APPENDIX B – Project Contact ................................................................................................................ 50
APPENDIX C – Project Code .................................................................................................................... 50

Table of Figures
Figure 3.1.1: Solution 1 -- Router and Raspberry Pi on 7th Floor ................................................................ 5 Figure 3.1.2: Solution 2 -- Router and Raspberry Pi on Roof ....................................................................... 5 Figure 3.1.3: Solution 3 -- Router on Roof and Pi on 7th Floor ................................................................... 5 Figure 3.1.4: Attenuation of 2.4 GHz signal of Coaxial Cable ..................................................................... 7 Figure 3.1.5: 2.4 GHz Power Amplifier A .................................................................................................... 7 Figure 3.1.6: Power Amplifier 2 Specs ......................................................................................................... 8 Figure 3.1.7: 2.4 GHz Power Amplifier B .................................................................................................... 8 Figure 3.1.8: Power Amplifier 2 Transmission Power ................................................................................. 8 Figure 3.1.9: GPS coordinates of sending point ........................................................................................... 9 Figure 3.1.10: GPS coordinates of receiving point ....................................................................................... 9 Figure 3.1.11: Distance between two GPS coordinates ................................................................................ 9 Figure 3.1.12: Communication Performance with Proposed Broadband Hamnet Equipment ................... 10 Figure 3.1.13: Schematic to power the amplifier from the 7th floor .......................................................... 11 Figure 3.1.14: Simulating Power and RF down coaxial cable ................................................................... 12 Figure 3.2.1: TCP Header (Stallings, 2014, p. 42) ...................................................................................... 14 Figure 3.2.2: IPv4 Header (Stallings, 2014, p. 43) ..................................................................................... 14 Figure 3.2.3: Data Packet from Wireshark ................................................................................................. 14 Figure 3.2.4: TCP Protocol Flags ............................................................................................................... 16 Figure 3.2.5: rec_TCP.py (v00) .................................................................................................................. 18 Figure 3.2.6: send_TCP.py (v00) ................................................................................................................ 18 Figure 3.2.7: Half Duplex One Message Send -- Waiting .......................................................................... 19 Figure 3.2.8: Half Duplex One Message Send – Terminated ..................................................................... 19 Figure 3.2.9: send_TCP.py (v01) ................................................................................................................ 20 Figure 3.2.10: Full Duplex One Message Send – Terminated .................................................................... 20 Figure 3.2.11: Full Duplex Communication ............................................................................................... 21 Figure 3.2.12 Remote Machine Discovery Protocol (RMDP) .................................................................... 22 Figure 3.2.13: Internet Control Message Protocol (ICMP) Ping Packets ................................................... 23 Figure 3.2.14: toiChatNameServer - UML Sketch ..................................................................................... 24 Figure 3.2.15: Google Protobuf Compared against other Popular Encoders (Epaminondas, 2016) ........... 24 Figure 3.2.16: Server Multithreaded Client Handling ................................................................................ 25 Figure 3.2.17: toiChatServer and toiChatter - UML Sketch ....................................................................... 26 Figure 3.2.18: toiChatClient - UML Sketch ............................................................................................... 26 Figure 3.2.19: toiChatShell - Startup .......................................................................................................... 27 Figure 3.2.20: toiChatShell – Connection to TOIChat Network and Chat Messaging ............................... 28 Figure 3.2.21: toiChatShell – Chat Environment ........................................................................................ 28 Figure 3.2.22. GUI login screen .................................................................................................................. 29 Figure 3.2.23: ToiChatGui - Login Screen Error Message ......................................................................... 30 Figure 3.2.24: ToiChatGui - Choose Chatter Screen .................................................................................. 30 Figure 3.2.25: ToiChatGui - GUI Chat Window ........................................................................................ 31 Figure 3.2.26: ToiChatGui - Sending Message ........................................................................................... 31 Figure 3.2.27: ToiChatGui - Multiple Chat Windows Open Simultaneously ............................................ 32 Figure 3.2.28: ToiChatGui - High Level Software Architecture - UML Sketch ....................................... 33 Figure 3.2.29: ToiChatGui and ChatWindow – UML Sketch .................................................................... 33 Figure 4.1.1: Com Setup inside Faraday Cage ............................................................................................ 35 Figure 4.1.2: Broadband-Hamnet Web Portal ............................................................................................ 36 Figure 4.1.3: GitHub Issue Tracker ............................................................................................................ 37 Figure 4.2.1: Performance Test Station 1 ................................................................................................... 38 Figure 4.2.2: Performance Test Station 2 ................................................................................................... 38 Figure 4.2.3: Effective Data Rate vs Simulated Distance ........................................................................... 39

Figure 4.2.4: SNR vs Simulated Distance ................................................................................................... 39 Figure 4.2.5: Speed Test, Cage Open.......................................................................................................... 40 Figure 4.2.6: Speed Test, Cage Closed ....................................................................................................... 40 Figure 4.2.7: Transmission Frequency ........................................................................................................ 40 Figure 4.2.8: IEEE 802.11 2.4GHz channel spacing .................................................................................. 41 Figure 4.2.9: Broadband-Hamnet Web Portal – Configuration Settings .................................................... 41 Figure 4.2.10: Power of WRT54G (Frequency Range: 2.22GHz→2.62Ghz) ............................................ 42 Figure 4.2.11: TOIChat.log - TOIChatShell.py Startup.............................................................................. 43 Figure 4.2.12: TOIChat.log – New Client Connect .................................................................................... 44 Figure 4.2.13: TOIChat.log – Database Synchronization ........................................................................... 45 Figure 4.2.14: TOIChat.log – Chat Messages ............................................................................................. 46 Figure 4.2.15: TOIChat.log – Failed Ping and Node Removal ................................................................... 47
Table of Tables
Table 1.3.1 Proposed Hardware Solution Comparison ................................................................................. 2 Table 1.3.2 Comparison of Viable Transport Layer Communication Protocols .......................................... 2 Table 3.2.1: TCP Header ............................................................................................................................ 15 Table 4.1.1: Required Power to Simulate Long Distance Communication ................................................ 34

Table of Code Listings
Code Listing 1: router_request_arpinfo.sh .................................................................................................. 50 Code Listing 2: router_tx_arpinfo.sh .......................................................................................................... 50 Code Listing 3: conn_router.py .................................................................................................................. 51 Code Listing 4: gatewayIP.py ..................................................................................................................... 53 Code Listing 5: listen_router.py.................................................................................................................. 53 Code Listing 6: testSSH.py ......................................................................................................................... 53 Code Listing 7: toiChatClient.py ................................................................................................................ 54 Code Listing 8: toiChatNameServer.py ...................................................................................................... 59 Code Listing 9: toiChatPing.py ................................................................................................................... 72 Code Listing 10: toiChatServer.py.............................................................................................................. 73 Code Listing 11: toiChatter.py .................................................................................................................... 83 Code Listing 12: toiChatShell.py ................................................................................................................ 86 Code Listing 12: ToiChatProtocol.proto ..................................................................................................... 90 Code Listing 13: guiRunner.py ................................................................................................................... 90
Broadband-Hamnet Microwave Communication System Page 1 of 97
Senior Design Project II | Final-v08 4/17/2016
1. PROBLEM STATEMENT
1.1. Overall Objectives
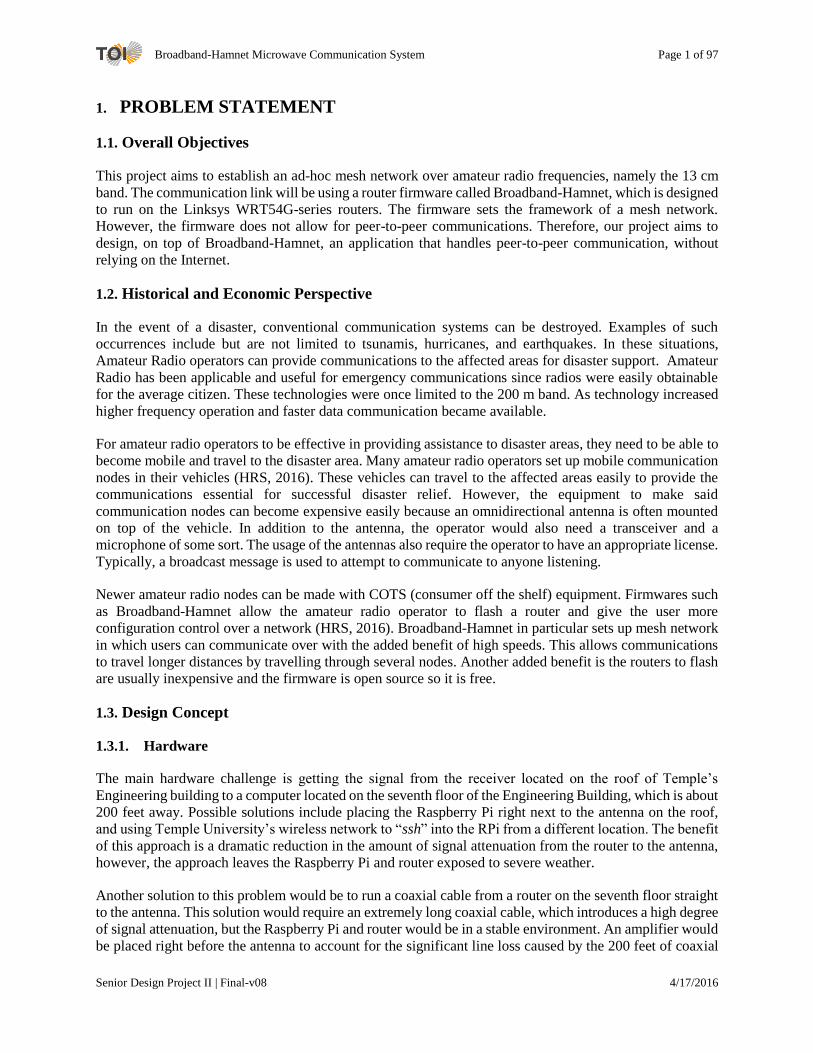
This project aims to establish an ad-hoc mesh network over amateur radio frequencies, namely the 13 cm
band. The communication link will be using a router firmware called Broadband-Hamnet, which is designed
to run on the Linksys WRT54G-series routers. The firmware sets the framework of a mesh network.
However, the firmware does not allow for peer-to-peer communications. Therefore, our project aims to
design, on top of Broadband-Hamnet, an application that handles peer-to-peer communication, without
relying on the Internet.
1.2. Historical and Economic Perspective
In the event of a disaster, conventional communication systems can be destroyed. Examples of such
occurrences include but are not limited to tsunamis, hurricanes, and earthquakes. In these situations,
Amateur Radio operators can provide communications to the affected areas for disaster support. Amateur
Radio has been applicable and useful for emergency communications since radios were easily obtainable
for the average citizen. These technologies were once limited to the 200 m band. As technology increased
higher frequency operation and faster data communication became available.
For amateur radio operators to be effective in providing assistance to disaster areas, they need to be able to
become mobile and travel to the disaster area. Many amateur radio operators set up mobile communication
nodes in their vehicles (HRS, 2016). These vehicles can travel to the affected areas easily to provide the
communications essential for successful disaster relief. However, the equipment to make said
communication nodes can become expensive easily because an omnidirectional antenna is often mounted
on top of the vehicle. In addition to the antenna, the operator would also need a transceiver and a
microphone of some sort. The usage of the antennas also require the operator to have an appropriate license.
Typically, a broadcast message is used to attempt to communicate to anyone listening.
Newer amateur radio nodes can be made with COTS (consumer off the shelf) equipment. Firmwares such
as Broadband-Hamnet allow the amateur radio operator to flash a router and give the user more
configuration control over a network (HRS, 2016). Broadband-Hamnet in particular sets up mesh network
in which users can communicate over with the added benefit of high speeds. This allows communications
to travel longer distances by travelling through several nodes. Another added benefit is the routers to flash
are usually inexpensive and the firmware is open source so it is free.
1.3. Design Concept
1.3.1. Hardware
The main hardware challenge is getting the signal from the receiver located on the roof of Temple’s
Engineering building to a computer located on the seventh floor of the Engineering Building, which is about
200 feet away. Possible solutions include placing the Raspberry Pi right next to the antenna on the roof,
and using Temple University’s wireless network to “ssh” into the RPi from a different location. The benefit
of this approach is a dramatic reduction in the amount of signal attenuation from the router to the antenna,
however, the approach leaves the Raspberry Pi and router exposed to severe weather.
Another solution to this problem would be to run a coaxial cable from a router on the seventh floor straight
to the antenna. This solution would require an extremely long coaxial cable, which introduces a high degree
of signal attenuation, but the Raspberry Pi and router would be in a stable environment. An amplifier would
be placed right before the antenna to account for the significant line loss caused by the 200 feet of coaxial

Broadband-Hamnet Microwave Communication System Page 2 of 97
Senior Design Project II | Final-v08 4/17/2016
cable. The coaxial cable is already installed, but another piece of hardware, the amplifier, is required for
this solution to remain viable.
The final proposed solution places the Linksys WRT54G on the roof and the RPi on the seventh floor. The
two machines would be connected by a 200 ft Ethernet cable. Ethernet is better than coaxial cable with
respect to signal attenuation, but there is no pre-existing Ethernet cable installed in the building. This
approach would remove environmental concerns for the RPi, but Linksys router is still exposed to the
weather.
Table 1.3.1 Proposed Hardware Solution Comparison
Hardware Safety Line Loss Reliability Accessibility
SSH Approach - + - +
Coxial Approach + - + +
Ethernet Approach - + + -
1.3.2. Software
The software design calls for a communication protocol backbone. There are two viable transport layer
protocols, namely Transmission Control Protocol (TCP), and User Datagram Protocol (UDP). The
advantages of TCP include automatic packet sequencing functionality, and the transmission of the packets
is guaranteed. TCP is a large protocol, however, which means increased overhead in packet size and thus
reduction in transmission speeds. UDP on the other hand does not have automatic packet sequencing
functionality, and does not guarantee delivery. However, sequencing packets is not difficult, and UDP is an
extremely lightweight protocol, allowing for faster theoretical data rates.
Table 1.3.2 Comparison of Viable Transport Layer Communication Protocols
Reliability Size Built-in-Functionality
TCP + - +
UDP - + -
1.4. Major Design and Implementation Challenges
1.4.1. Hardware
Setting up the hardware communication system comes with its own set of challenges. In our particular
communication system, a directional antenna (Yagi) will be placed on the roof while the operator of the
communication system will be on the 7th floor of the Temple Engineering building. The antenna has to be
connected to a router (Linksys WRT54G) and to our machine (Raspberry Pi). One possible solution is to
have the Raspberry Pi and Linksys WRT54G on the roof connected to a monitor in the radio station. This
solution would require environmental protection for both the Raspberry Pi and Linksys WRT54G. A second
possible solution is to have the Raspberry Pi on the 7th floor connected to the router on the roof through
Broadband-Hamnet Microwave Communication System Page 3 of 97
Senior Design Project II | Final-v08 4/17/2016
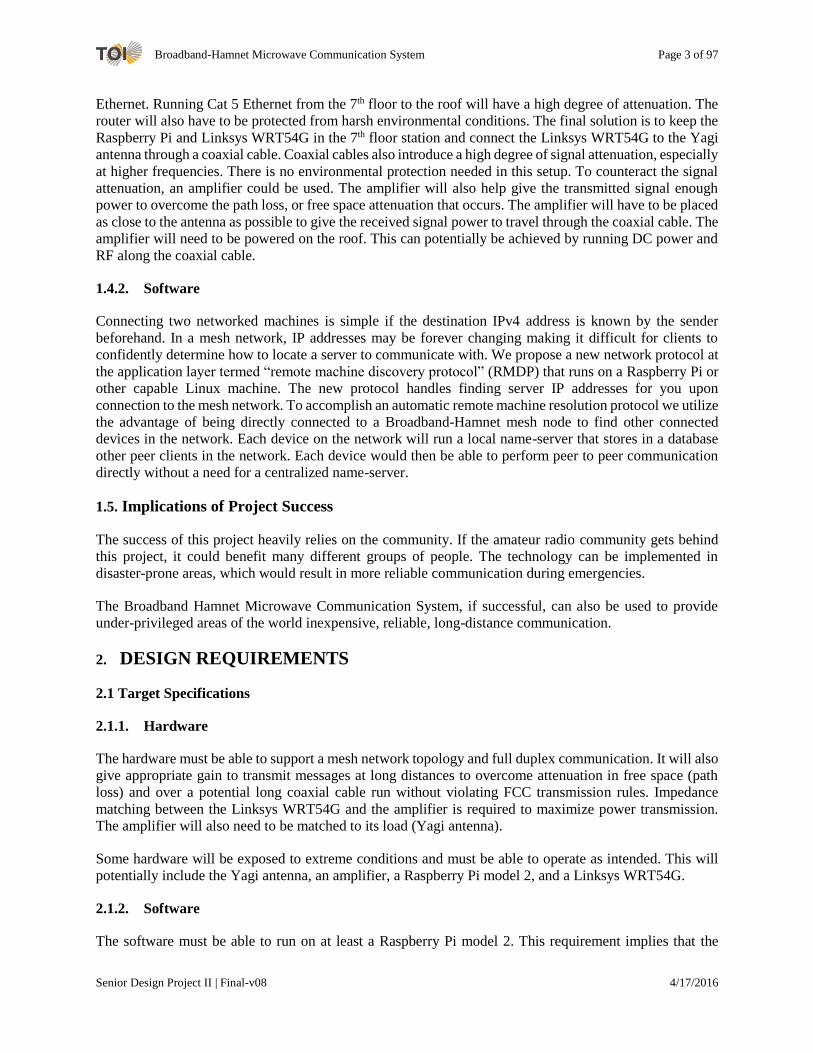
Ethernet. Running Cat 5 Ethernet from the 7th floor to the roof will have a high degree of attenuation. The
router will also have to be protected from harsh environmental conditions. The final solution is to keep the
Raspberry Pi and Linksys WRT54G in the 7th floor station and connect the Linksys WRT54G to the Yagi
antenna through a coaxial cable. Coaxial cables also introduce a high degree of signal attenuation, especially
at higher frequencies. There is no environmental protection needed in this setup. To counteract the signal
attenuation, an amplifier could be used. The amplifier will also help give the transmitted signal enough
power to overcome the path loss, or free space attenuation that occurs. The amplifier will have to be placed
as close to the antenna as possible to give the received signal power to travel through the coaxial cable. The
amplifier will need to be powered on the roof. This can potentially be achieved by running DC power and
RF along the coaxial cable.
1.4.2. Software
Connecting two networked machines is simple if the destination IPv4 address is known by the sender
beforehand. In a mesh network, IP addresses may be forever changing making it difficult for clients to
confidently determine how to locate a server to communicate with. We propose a new network protocol at
the application layer termed “remote machine discovery protocol” (RMDP) that runs on a Raspberry Pi or
other capable Linux machine. The new protocol handles finding server IP addresses for you upon
connection to the mesh network. To accomplish an automatic remote machine resolution protocol we utilize
the advantage of being directly connected to a Broadband-Hamnet mesh node to find other connected
devices in the network. Each device on the network will run a local name-server that stores in a database
other peer clients in the network. Each device would then be able to perform peer to peer communication
directly without a need for a centralized name-server.
1.5. Implications of Project Success
The success of this project heavily relies on the community. If the amateur radio community gets behind
this project, it could benefit many different groups of people. The technology can be implemented in
disaster-prone areas, which would result in more reliable communication during emergencies.
The Broadband Hamnet Microwave Communication System, if successful, can also be used to provide
under-privileged areas of the world inexpensive, reliable, long-distance communication.
2. DESIGN REQUIREMENTS
2.1 Target Specifications
2.1.1. Hardware
The hardware must be able to support a mesh network topology and full duplex communication. It will also
give appropriate gain to transmit messages at long distances to overcome attenuation in free space (path
loss) and over a potential long coaxial cable run without violating FCC transmission rules. Impedance
matching between the Linksys WRT54G and the amplifier is required to maximize power transmission.
The amplifier will also need to be matched to its load (Yagi antenna).
Some hardware will be exposed to extreme conditions and must be able to operate as intended. This will
potentially include the Yagi antenna, an amplifier, a Raspberry Pi model 2, and a Linksys WRT54G.
2.1.2. Software
The software must be able to run on at least a Raspberry Pi model 2. This requirement implies that the

Broadband-Hamnet Microwave Communication System Page 4 of 97
Senior Design Project II | Final-v08 4/17/2016
software be geared toward a Linux-based operating system.
The software must be able to automatically discover devices on the Local Area Network (LAN) of each
node. The LAN information of each node has to be shared with every other machine in the network.
Every machine in the mesh network must keep an up to date database of machine names paired with IPv4
addresses.
Every machine running this software must be able to handle multiple types of requests from any other
machine in the mesh network. These requests include adding new machines, information requests, and chat
services.
All machines must be able to communicate full duplex with any machine in the network.
3. APPROACH
3.1. Hardware Design
For creating a link between the roof of the Temple University’s engineering building and the Amateur
Radio Station located on the 7th floor, we propose three solutions. Solution 1 is to have the Raspberry Pi
and WRT54G router situated in the radio station with a coaxial connection to the Yagi antenna on the roof.
The coaxial run would be over 200ft in length with the transmission being analog at a frequency of 2.4 GHz.
A second proposed solution is to have two machines. A Raspberry Pi and router situated on the roof of the
building with a wireless connection to a separate desktop. The Raspberry Pi would communicate over the
Wi-Fi connection and translate the information to the router to repeat into the mesh network. The last
proposed solution is to have the Raspberry Pi in the radio station with an Ethernet connection to the router.
The Ethernet like the coaxial would be over 200ft in length however it would be a digital signal. A digital
signal would have less attenuation over such a long length of cable.

Broadband-Hamnet Microwave Communication System Page 5 of 97
Senior Design Project II | Final-v08 4/17/2016
Figure 3.1.1: Solution 1 -- Router and Raspberry
Pi on 7th Floor
Figure 3.1.2: Solution 2 -- Router and Raspberry
Pi on Roof
Figure 3.1.3: Solution 3 -- Router on Roof and Pi on 7th Floor
Our team chose solution 1 seen in Figure 3.1.1 for the hardware design of the communication system. It
was chosen because it eliminates the need to protect both the Raspberry Pi and Linksys WRT54G from
harsh environmental conditions. The Yagi antenna and amplifier can withstand these conditions without
modification. A small box may be constructed to surround the amplifier to protect it from water if needed.
This setup also comes with its own set of problems. A long coaxial run is needed to connect the Linksys
WRT54G to the amplifier, which introduces transmit and receive attenuation problems. The amplifier is
going to be attached to the antenna on the roof to give small received signals sufficient power for the
Linksys WRT54G to receive.
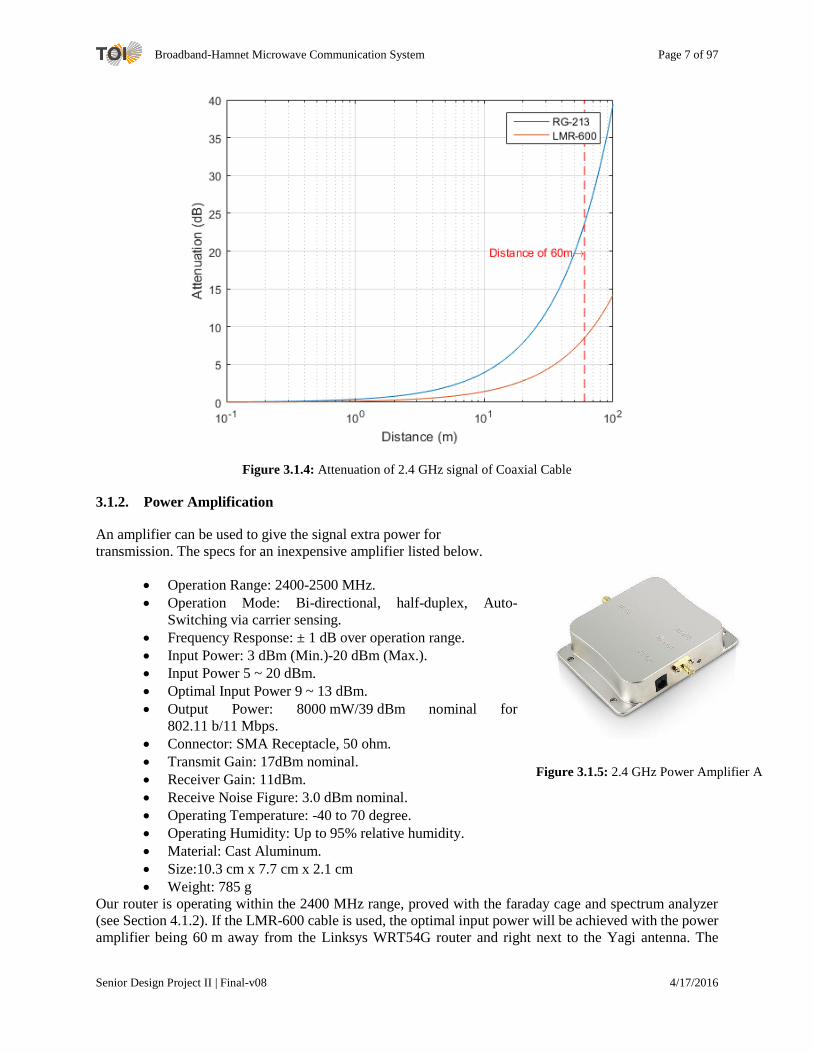
There are two cables available to transmit a 2.4 GHz signal at a distance of 60 m which would connect the
Linksys WRT54G to the amplifier. These cables are the LMR-600 and RG213. Both the LMR-600 and
RG213 are coaxial cables. The cable attenuation is found in dB/100m and is taken from standard
manufacturing standards set for coaxial cables. It is also important to note the Linksys WRT54G can output
power at 19 dBm (0.079 W) seen from the router firmware page.
Broadband-Hamnet Microwave Communication System Page 6 of 97
Senior Design Project II | Final-v08 4/17/2016
3.1.1. Long Length Coaxial Cable Performance
Test with LMR-600
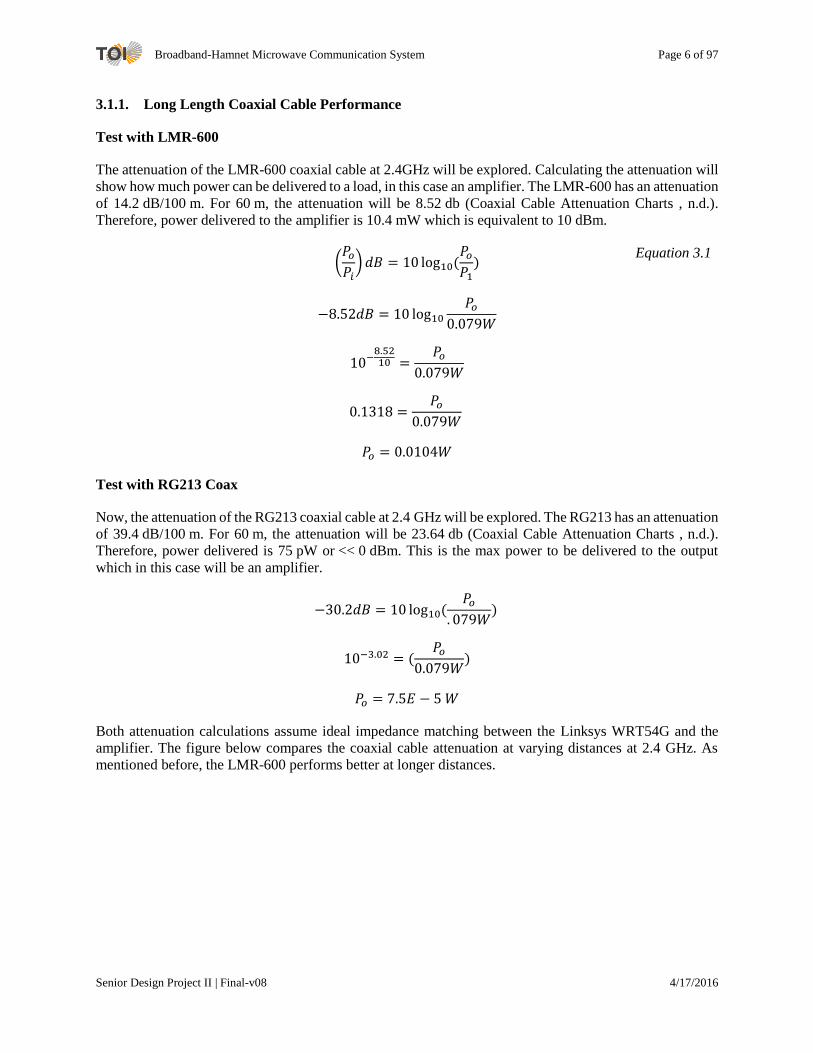
The attenuation of the LMR-600 coaxial cable at 2.4GHz will be explored. Calculating the attenuation will
show how much power can be delivered to a load, in this case an amplifier. The LMR-600 has an attenuation
of 14.2 dB/100 m. For 60 m, the attenuation will be 8.52 db (Coaxial Cable Attenuation Charts , n.d.).
Therefore, power delivered to the amplifier is 10.4 mW which is equivalent to 10 dBm.
(𝑃𝑜𝑃𝑖)𝑑𝐵 = 10log10(
𝑃𝑜𝑃1)
Equation 3.1
−8.52𝑑𝐵 = 10 log10𝑃𝑜
0.079𝑊
10−8.5210 =
𝑃𝑜0.079𝑊
0.1318 =𝑃𝑜
0.079𝑊
𝑃𝑜 = 0.0104𝑊
Test with RG213 Coax
Now, the attenuation of the RG213 coaxial cable at 2.4 GHz will be explored. The RG213 has an attenuation
of 39.4 dB/100 m. For 60 m, the attenuation will be 23.64 db (Coaxial Cable Attenuation Charts , n.d.).
Therefore, power delivered is 75 pW or << 0 dBm. This is the max power to be delivered to the output
which in this case will be an amplifier.
−30.2𝑑𝐵 = 10 log10(𝑃𝑜
. 079𝑊)
10−3.02 = (𝑃𝑜
0.079𝑊)
𝑃𝑜 = 7.5𝐸 − 5𝑊
Both attenuation calculations assume ideal impedance matching between the Linksys WRT54G and the
amplifier. The figure below compares the coaxial cable attenuation at varying distances at 2.4 GHz. As
mentioned before, the LMR-600 performs better at longer distances.
Broadband-Hamnet Microwave Communication System Page 7 of 97
Senior Design Project II | Final-v08 4/17/2016
Figure 3.1.4: Attenuation of 2.4 GHz signal of Coaxial Cable
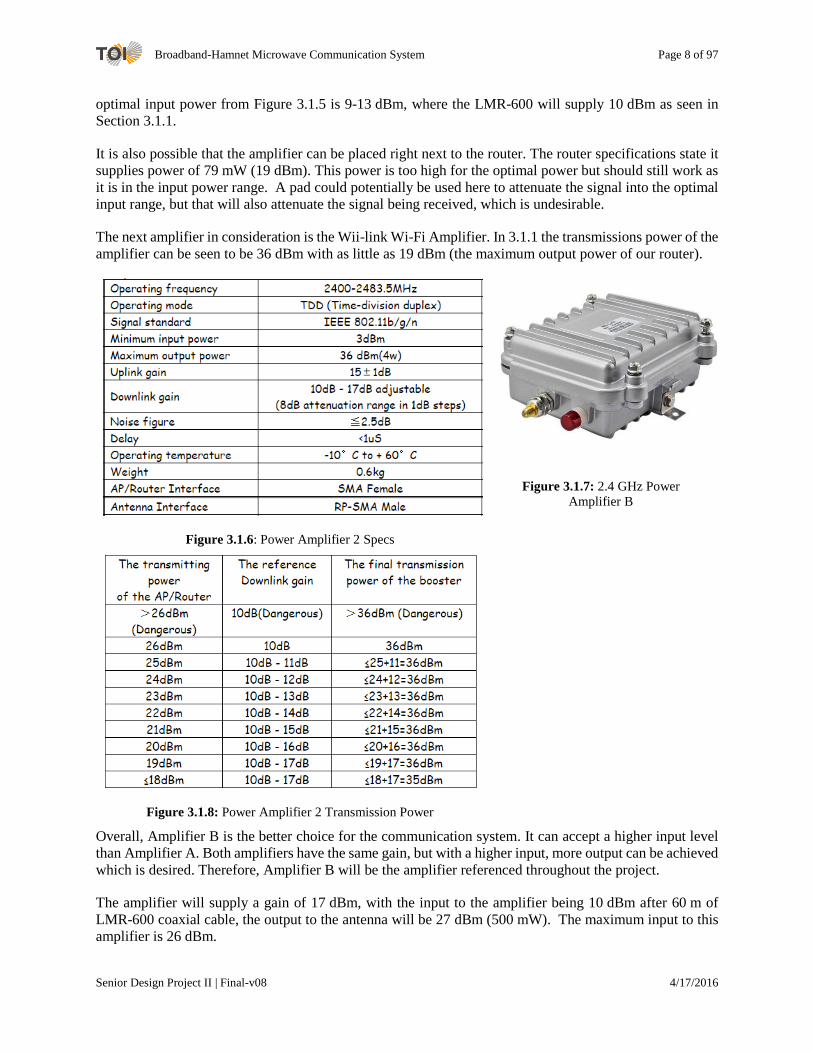
3.1.2. Power Amplification
An amplifier can be used to give the signal extra power for
transmission. The specs for an inexpensive amplifier listed below.
Operation Range: 2400-2500 MHz.
Operation Mode: Bi-directional, half-duplex, Auto-
Switching via carrier sensing.
Frequency Response: ± 1 dB over operation range.
Input Power: 3 dBm (Min.)-20 dBm (Max.).
Input Power 5 ~ 20 dBm.
Optimal Input Power 9 ~ 13 dBm.
Output Power: 8000 mW/39 dBm nominal for
802.11 b/11 Mbps.
Connector: SMA Receptacle, 50 ohm.
Transmit Gain: 17dBm nominal.
Receiver Gain: 11dBm.
Receive Noise Figure: 3.0 dBm nominal.
Operating Temperature: -40 to 70 degree.
Operating Humidity: Up to 95% relative humidity.
Material: Cast Aluminum.
Size:10.3 cm x 7.7 cm x 2.1 cm
Weight: 785 g
Our router is operating within the 2400 MHz range, proved with the faraday cage and spectrum analyzer
(see Section 4.1.2). If the LMR-600 cable is used, the optimal input power will be achieved with the power
amplifier being 60 m away from the Linksys WRT54G router and right next to the Yagi antenna. The
Figure 3.1.5: 2.4 GHz Power Amplifier A
Broadband-Hamnet Microwave Communication System Page 8 of 97
Senior Design Project II | Final-v08 4/17/2016
optimal input power from Figure 3.1.5 is 9-13 dBm, where the LMR-600 will supply 10 dBm as seen in
Section 3.1.1.
It is also possible that the amplifier can be placed right next to the router. The router specifications state it
supplies power of 79 mW (19 dBm). This power is too high for the optimal power but should still work as
it is in the input power range. A pad could potentially be used here to attenuate the signal into the optimal
input range, but that will also attenuate the signal being received, which is undesirable.
The next amplifier in consideration is the Wii-link Wi-Fi Amplifier. In 3.1.1 the transmissions power of the
amplifier can be seen to be 36 dBm with as little as 19 dBm (the maximum output power of our router).
Figure 3.1.6: Power Amplifier 2 Specs
Figure 3.1.7: 2.4 GHz Power
Amplifier B
Figure 3.1.8: Power Amplifier 2 Transmission Power
Overall, Amplifier B is the better choice for the communication system. It can accept a higher input level
than Amplifier A. Both amplifiers have the same gain, but with a higher input, more output can be achieved
which is desired. Therefore, Amplifier B will be the amplifier referenced throughout the project.
The amplifier will supply a gain of 17 dBm, with the input to the amplifier being 10 dBm after 60 m of
LMR-600 coaxial cable, the output to the antenna will be 27 dBm (500 mW). The maximum input to this
amplifier is 26 dBm.

Broadband-Hamnet Microwave Communication System Page 9 of 97
Senior Design Project II | Final-v08 4/17/2016
3.1.3. Path loss
The next item of concern is the loss in free air the signal will have; commonly referred to as the path loss
or path attenuation. Path loss can be defined as:
𝑃𝑎𝑡ℎ𝑙𝑜𝑠𝑠(𝑑𝐵) = 𝐾𝑢 + 20 log(𝑓𝑅) − 𝐺1(𝑑𝐵) − 𝐺2(𝑑𝐵)1 Equation 3.2
𝐾𝑈 is a constant depending on what units the distance R is, f is the frequency in MHz, and 𝐺1, 𝐺2 is the gain
of the receiving and transmitting antenna. The gain of the Yagi antenna in our communication system is
13 dBi. The distance was calculated as a straight line distance measurement using GPS coordinates and
Google maps.
Figure 3.1.9: GPS coordinates of sending point
Figure 3.1.10: GPS coordinates of receiving point
Figure 3.1.11: Distance between two GPS coordinates
Using the straight line distance, we find the loss in free space from the output of our amplifier to the output
of the receiving antenna.
𝐾𝑢 = 32.45𝑓𝑜𝑟𝑘𝑚, 𝐺1 = 𝐺2 = 13𝑑𝐵𝑖, 𝑓 = 2400𝑀𝐻𝑧, 𝑅 ≅ 25𝑘𝑚
𝑃𝑎𝑡ℎ𝑙𝑜𝑠𝑠(𝑑𝐵) = 32.45 + 20log(2400𝑀𝐻𝑧 ∗ 25𝑘𝑚) − 13 − 13 = 102.01𝑑𝐵
3.1.4. Link Budget
The link budget of a system is the total attenuation or gain of a communication system. Link budget
accounts for the gain or attenuation of the transmitter, through the medium, line loss, antenna gain, receiver
gain, etc.
In our communication link, the amplifier will supply a gain of 17 dBm, with the input of the amplifier being
10 dBm after 60 m of LMR-600 coax, the output to the antenna will be 27 dBm. The maximum input for
1 (MILLIGAN, 2005)

Broadband-Hamnet Microwave Communication System Page 10 of 97
Senior Design Project II | Final-v08 4/17/2016
our amplifier is 26 dBm.
The power seen by the receiver after experiencing the path loss of 102.01 dB, assuming it is directly
connected to the output antenna can be seen as follows.
𝑅𝑥𝑃𝑜𝑤𝑒𝑟 = 𝑇𝑥𝑃𝑜𝑤𝑒𝑟 − 𝑃𝑎𝑡ℎ𝐿𝑜𝑠𝑠 Equation 3.3
𝑅𝑥𝑃𝑜𝑤𝑒𝑟 = 27𝑑𝐵𝑚 − 102.01𝑑𝐵 = −75.01𝑑𝐵𝑚
This output assumes ideal, matching impedance connections, so no signal power is reflected back onto the
transmission line.
The receive sensitivity of the Linksys WRT54G is around -80 dBm, so the received power of -75.01 dBm
is within the demodulating capabilities of the router.
Figure 3.1.12: Communication Performance with Proposed Broadband Hamnet Equipment
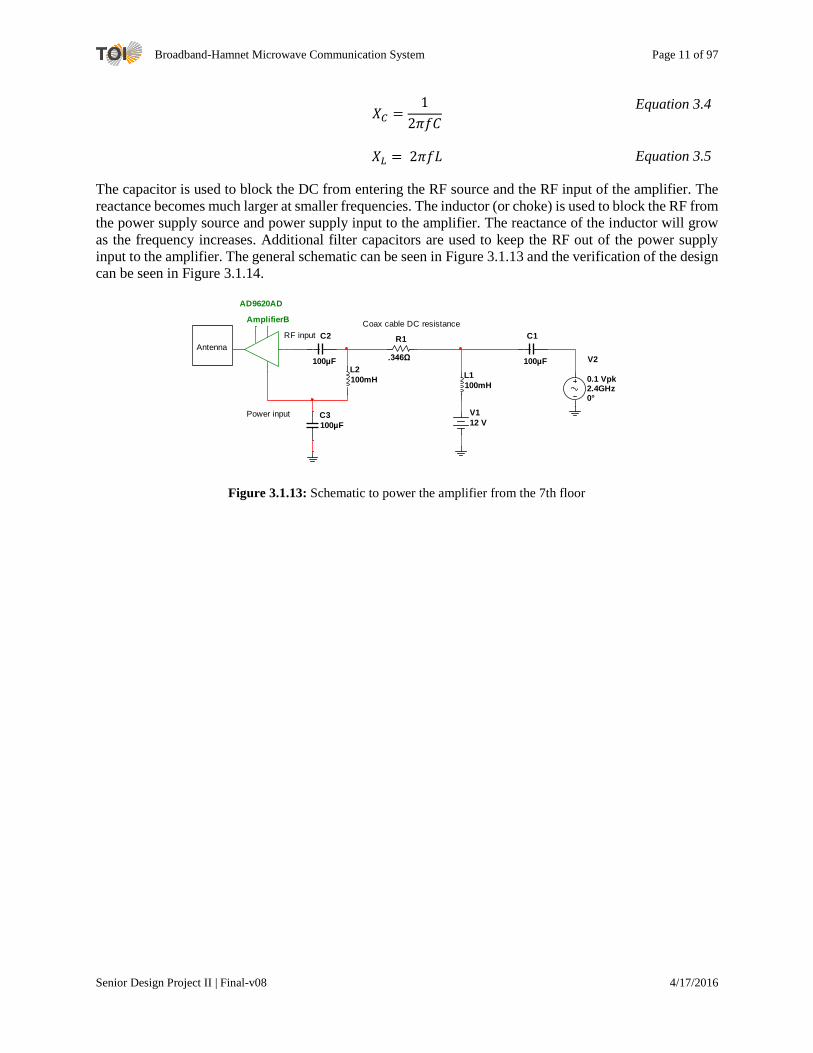
3.1.5. Powering the Amplifier
The amplifier will need sufficient power to be able to give transmitting and receiving gain. The amplifier
comes with a standard DC power cord however there is no AC mains outlet on the roof. Therefore, a method
has to be devised to power the amplifier from elsewhere. Since the coaxial cable is connecting the roof and
the 7th floor, power will be delivered across the coaxial cable along with the RF signal. First, the DC
resistance of the coaxial cable (LMR-600) is 1.73 Ω/1000 ft (Systems). The DC will travel along 200 ft
over the LMR-600. Therefore, there is a total DC resistance of 0.346 Ω. Using the reactance of both the
inductor and capacitor, the DC and RF frequencies can get blocked from the amplifier input and amplifier
power respectfully. The reactance can be thought as the frequency dependent resistance of a component.
Broadband-Hamnet Microwave Communication System Page 11 of 97
Senior Design Project II | Final-v08 4/17/2016
𝑋𝐶 =
1
2𝜋𝑓𝐶
Equation 3.4
𝑋𝐿 = 2𝜋𝑓𝐿 Equation 3.5
The capacitor is used to block the DC from entering the RF source and the RF input of the amplifier. The
reactance becomes much larger at smaller frequencies. The inductor (or choke) is used to block the RF from
the power supply source and power supply input to the amplifier. The reactance of the inductor will grow
as the frequency increases. Additional filter capacitors are used to keep the RF out of the power supply
input to the amplifier. The general schematic can be seen in Figure 3.1.13 and the verification of the design
can be seen in Figure 3.1.14.
Figure 3.1.13: Schematic to power the amplifier from the 7th floor
V1
12 V
C1
100µF
L1
100mH
R1
.346Ω V2
0.1 Vpk 2.4GHz 0°
AmplifierB
AD9620AD
L2
100mH
C2
100µF
C3
100µF
Coax cable DC resistance
Antenna
Power input
RF input

Broadband-Hamnet Microwave Communication System Page 12 of 97
Senior Design Project II | Final-v08 4/17/2016
Figure 3.1.14: Simulating Power and RF down coaxial cable
3.1.6. Theory of Yagi-Uda Antenna Design
A Yagi-Uda antenna uses mutual coupling between standing-wave current elements to produce a
unidirectional radiation pattern. The Yagi antenna consists of n elements, one of which is driven, while the
other n-1 are parasitic elements. The driven element is the element that is fed with the signal to be
transmitted, while the parasitic elements act as either reflectors or directors. Whether a parasitic element
acts as a reflector or a director depends on the spacing of the individual elements from the driven element,
and is determined by Equation 3.6. The equation describes the power pattern difference between the
radiation pattern at =0 and =180˚ with respect to the driven element. Whether a parasitic element acts
as a reflector or director also depends on the length of the element. In general, a reflector is shorter than
both the director and driven element.
|∆𝐸|2 =−2𝐼𝑟 sin(𝜕) sin(𝑘𝑑) Equation 3.6
In Equation 3.6 ∆E is the normalized pattern response, and 𝐼𝑟𝑒𝑗(𝑘𝑑𝑐𝑜𝑠(𝜃)+𝜕) is the current of the parasitic
element relative to the driven element. This means that 𝐼𝑟𝑒𝑗(𝑘𝑑𝑐𝑜𝑠(𝜃)+𝜕) =
𝐼2
𝐼1, and I2 and I1 can be found
from the matrix equation show in Equation 3.7.
V1
12 V
C1
100nF
L1
100nH
R1
.346Ω V2
0.1 Vpk 2.4GHz 0°
L2
100nH
C2
100nF
C3
100nF
Coax cable DC resistance
Power input
RF input
R2
1kΩ
R3
1kΩ
Probe1
V: 27.9 mV V(p-p): 199 mV V(rms): 70.7 mV V(dc): 8.61 uV I: -27.9 uA I(p-p): 199 uA I(rms): 70.7 uA I(dc): -8.61 nA Freq.: 2.40 GHz
Probe2
V: 12.0 V V(p-p): 85.2 nV V(rms): 12.0 V V(dc): 12.0 V I: -12.0 mA I(p-p): 103 pA I(rms): 12.0 mA I(dc): -12.0 mA Freq.: 2.40 GHz
Probe4
V: 27.9 mV V(p-p): 199 mV V(rms): 70.7 mV V(dc): 8.61 uV I: -154 uA I(p-p): 329 uA I(rms): 116 uA I(dc): 11.0 nA Freq.: 2.40 GHz
Probe3
V: V(p-p): V(rms): V(dc): I: I(p-p): I(rms): I(dc): Freq.:

Broadband-Hamnet Microwave Communication System Page 13 of 97
Senior Design Project II | Final-v08 4/17/2016
[𝑉] = [𝐼][𝑍] Equation 3.7
Z is the matrix describing the mutual impedance between each of the elements on the antenna. In Equation
3.7, there is only one nonzero element in [V], and it is the voltage applied to the driven element. It is
important to note that the current in each element is assumed to be sinusoidal (Milligan, 2005).
With a known element spacing d, and after solving Equation 3.7 for [I], we can determine whether the
element is a reflector or a director by solving Equation 3.6 for ∆E. There are three possible outcomes and
they are described below.
Case 1. ∂ = 180˚ and ∆E = 0. Equal pattern levels in both directions.
Case 2. 180˚ < ∂ < 360˚ and ∆E > 0. The parasitic element is a director because the radiation
pattern is greater in its direction with respect to the driven element.
Case 3. 0˚ < ∂ < 180˚ and ∆E < 0. The parasitic element is a reflector because the pattern in
the direction of the driven element is greater than the pattern in the direction away from the
driven element. (Milligan, 2005)
It has been proven that an element spacing of about 20𝜆, where 𝜆 is the wavelength of the driving signal,
is one of the criteria describing Yagi design that yields the maximum directional gain.
3.2. Software Design
The software design begins with the version of the Broadband-Hamnet firmware that is flashed on the
router. The firmware used during our time with this project is Broadband-Hamnet_v03.1. This firmware is
chosen because it is the latest stable release of the firmware.
The software developed in this project is an application that provides peer-to-peer communication for users
by utilizing the ad-hoc mesh framework provided by Broadband-Hamnet. When multiple machines begin
to share data with one another, a protocol becomes essential. The communication protocol ensures that each
side of the communication link understands what is being sent and how to respond accordingly.
There are multiple protocols implemented and developed in this project. We design a protocol that our
application must adhere to and a protocol that the Linksys WRT54G routers utilize to register remote
machines to the network. We also take advantage of the TCP/IP infrastructure, commonly referred to as the
TCP/IP stack, which is standard on all computers.
3.2.1. Theory of TCP/IP Networking Stack
A typical protocol architecture consists of multiple layers, with each layer performing different functions.
The standard architecture contains the following layers; Physical, Network Access/Data Link, Internet,
Transport, Application. The Physical layer takes care of the interactions between the computer’s hardware
and the transmission medium. It reports data rates, signal characteristics, traffic on the medium and other
related matters. The Network access/data link layer is responsible for routing functions the direct packets
between two machines on the same network. The Internet layer performs similar tasks to the Network layer,
however the routing functions are concerned with routing information across multiple networks. The
Transport layer provides the end-to-end protocol between two computers. The application layer contains
the logic that supports decoding of messages for use with a particular application (Stallings, 2014).
For this application, the Transmission Control Protocol (TCP) is the best transport layer protocol. TCP
guarantees message delivery and has error detection/correction and packet sequencing built in. User
Datagram Protocol (UDP) was also considered, but was not chosen because UDP does not guarantee

Broadband-Hamnet Microwave Communication System Page 14 of 97
Senior Design Project II | Final-v08 4/17/2016
message delivery and does not have a packet sequence functionality (Stallings, 2014) (Touch, 2016). The
TCP header as well as the IPv4, which is the Internet layer protocol commonly used with TCP is shown
and explained below.
Figure 3.2.1: TCP Header (Stallings, 2014, p. 42)
Figure 3.2.2: IPv4 Header (Stallings, 2014, p. 43)
In order to understand how the TCP header is used in an actual data transfer, an actual data packet
intercepted by the packet sniffing program, Wireshark, will now be analyzed.
Figure 3.2.3: Data Packet from Wireshark
The 34th byte in the packet seen above marks the beginning of the TCP packet. Everything preceding the
34th byte is the IP protocol header and physical layer protocol. Those headers are out of the scope of this
analysis and are ignored. The TCP packet displayed in Figure 3.2.3 is decoded in Table 3.2.1.

Broadband-Hamnet Microwave Communication System Page 15 of 97
Senior Design Project II | Final-v08 4/17/2016
Table 3.2.1: TCP Header
BYTE # Meaning HEX Rep. Dec. Rep.
34-35 (1-2) Source Port c0 4e 49230
36-37 (3-4) Destination Port 19 fd 6653
38-41 (5-8) Sequence Number cc 6e 6d f7 3429789175
42-45 (9-12) Acknowledgment Number 00 00 00 00 0
46 (13) Header Length 8 8
47 (14) Flags 0000 0010 (binary) 02 (hex)
48-49 (15-16) Window 2000 8192
50-51 (17-18) Checksum 86 46 34374
52-53 (19-20) Urgent Pointer 00 00 0
54-57 (21-24) Max Segment Length 02 04 05 b4 33818036
58 (25) No-Op 01 1
59-61 (26-28) Window Scale 03 03 08 197384
62 (29) No-Op 01 1
63 (30) No-Op 01 1
64-65 (31-32) TCP SACK Permitted 04 02 1026
In Table 3.2.1, the TCP packet is broken down byte-by-byte. The first two bytes indicate the source port.
All ports ranging from 49152–65535 are used for private or temporary services, as well as automatic
allocation of ephemeral ports (Touch, 2016). An ephemeral port is a short-lived transport protocol port
allocated automatically by the Internet protocol software. It is used by various transport protocols, including
TCP as the client-side port of client-server applications.
The next two bytes indicate the port the receiving machine is listening on. The port 6653 is the port bound
to the socket. Ports and sockets will be discussed in more detail later in this section.
The next four bytes indicate the sequence number. It is important to note that the sequence number does
not start at 0. This is a relative sequence number, which is initially assigned randomly, but incremented
after the initialization of the communication link between the client and server.
The next four bytes indicate the acknowledgement number. The acknowledgement number contains the
sequence number of the next data octet that the TCP entity expects to receive.
The 13th byte serves two purposes. The 4 most significant bits represent the header length. It is important

Broadband-Hamnet Microwave Communication System Page 16 of 97
Senior Design Project II | Final-v08 4/17/2016
to note that the header length actually represents the number of 32-bit words in the header. Therefore, in
order to calculate the number of the bytes in the header, multiply the decimal representation of these 4 bits
by 4. The packet shown in Figure 3.2.4 shows an 8 in its header length. 8*4=32, which is the correct number
of bytes in the header. The 4 least significant bits of the 13th byte are reserved.
The reserved bits from the 13th byte and the 14th byte are set aside for flags. Each of these twelve bits
represent a different flag. The flags are shown in Figure 3.2.4.
Figure 3.2.4: TCP Protocol Flags
Figure 3.2.4 requires further explanation. The Nonce flag is for ECN concealment protection. The
congestion window reduced flag is set when it receives a packet with the ECN-Echo flag set. It also
indicates that it responded in congestion control mechanism (Cerf & Khan, 1974). The ECN-ECHO flag is
used for explicit network congestion notification. The urgent flag is for quality of service (QOS) or priority
packets. The acknowledgement flag indicates that the acknowledgement flag is significant. All flags after
the initial SYN packet should have this flag set. The PUSH flag, when set, asks to push the data to the
receiving application. The Reset flag resets the connections. This flag is often set when a receiver blocks
an incoming connection. Hackers often use this flag to search for open ports. The SYN flag is used to
synchronize sequence numbers. Only the first packet sent from each end should have this flag set. The FIN
flag indicates that there is no more data from the sender (Stallings, 2014) .
The 15th and 16th byte indicate the window length. The window length is for flow control credit allocations.
It contains the number of octets, starting with the sequence number indicated in the acknowledgement field
that the sender is willing to accept (Stallings, 2014).
The 17th and 18th bytes indicate the checksum, which is used for error checking.
The 19th and 20th bytes contain the urgent pointer. This value, when added to the segment sequence number,
contains the sequence number of the last octet in a sequence of urgent data. This allows the receiver to
know how much urgent data to expect (Stallings, 2014).
The 21st-32nd bytes of the packet are options and padding and the number of bytes included in this section
is variable. Bytes 21-24 represent the maximum segment length able to be received. The most significant
byte indicates that it is a maximum segment length option. The next byte indicates how many bytes the
option takes up, and the final two bytes indicate the MSS, which in this case is 1460.
The 25th, 29th, and 30th bytes are No-Op bytes.
Bytes 26-28 indicate a window scaling option. This option is used to increase TCP’s maximum receive
window size of 65,535 bytes.
Broadband-Hamnet Microwave Communication System Page 17 of 97
Senior Design Project II | Final-v08 4/17/2016
The 31st and 32nd bytes are the TCP SACK option. It stands for TCP Selective Acknowledgement. This flag
allows receivers to tell the sender what packet it received, so the sender can retransmit the missing packets
(Mathis, 1996).
3.2.2. Theory of Socket Programming
The start of the application design consists of two programs. One program sends a message termed a client
and the other program receives the message termed a server. These programs each run on a Raspberry Pi.
Half Duplex Socket Programing – One Message Limit
We introduce socket programing with a simple send and receive (half duplex) example. Half duplex means
that each machine can only send or receive at any given time. The example receiving program can be seen
in Figure 3.2.5, while a compatible sending program can be seen in Figure 3.2.6. The receiving code must
be run first to create a socket. Sockets are a high level networking programing interface that allows a
programmer to send and receive data at the transport level layer of the TCP/IP stack. To create a TCP
datagram we first create a socket with the predefined ‘socket.AF_INET’ and ‘socket.AF.SOCK_STREAM’
data types (Socket - Linux socket interface, 2015). ‘AF_INET’ tells the socket we are using the IPv4
addressing protocol. ‘AF.SOCK_STREAM’ is the predefined name instructing the socket to use the TCP
communication protocol. The Raspberry Pi acting as the server is bound to a port and IP address creating a
listening socket. The port and IP address are declared in the beginning of the PI’s program. The receiving
code listens for up to one client trying to connect to it that will ultimately establish the communication link.
Now, the client sending information is free to a message to the server. In the example, shown below our
server will simply echo the message sent by the client to stdout.

Broadband-Hamnet Microwave Communication System Page 18 of 97
Senior Design Project II | Final-v08 4/17/2016
Figure 3.2.5: rec_TCP.py (v00)
Figure 3.2.6: send_TCP.py (v00)
After we have bounded the connection you will see the ‘listen’ instruction on the sever side. The listen
command limits the number of concurrent connections the server will maintain (Python, 2016). In the
simple test provided we will only allow one client to connect to the server causing all other incoming
connections to be refused. Lastly, the ‘socket’ instruction is where our server waits for clients to connect to
it. When a new client connects the server the listen function will create a new socket referenced by the
‘conn’ variable from the IPv4 address referenced by the ‘addr’ variable. We can now use this new socket
to the client to ‘recv’ or receive the message being sent by the client.
On the client side we ignore the ‘listen’ and ‘accept’ instructions and instead jump straight to the ‘connect’
instruction. ‘connect’ is a built in function in the socket class that establishes a link to the tuple object
containing the server IPv4 address and port you wish to connect to (Python, 2016). Any failure to
successfully connect to a server will throw an exception such as “connection refused”. A “connection
refused” exception is commonly seen when the server object is not initiated to accept connections or has
reached its upper limit of number of connected clients defined in the ‘listen’ instruction.
Running the above code demonstrates the user interaction. We are prompted with an “Enter Message:”
prompt on the client side. The sever side sits idle waiting for the client to create and send a message to it.

Broadband-Hamnet Microwave Communication System Page 19 of 97
Senior Design Project II | Final-v08 4/17/2016
Figure 3.2.7: Half Duplex One Message Send -- Waiting
Upon entering the message our client then proceeds to send the message over the socket. A successful
completion of the program can be seen in Figure 3.2.8. The program received the message, and closed the
socket, terminating any further communication between server and client.
Figure 3.2.8: Half Duplex One Message Send – Terminated
Half Duplex Socket Programing – Multiple Messages
In the previous example our socket program can send and receive one message. The next step is to send
and receive multiple messages on the same connection. The receiving program did not change for this step
as the ‘recv’ instruction is already nested inside a never ending while loop. The new sending program can
be seen in Figure 3.2.9. A while loop was used around the ‘send’ instruction so that multiple messages can
be sent to a server. Since the send program is also nested inside a never ending while loop, we program in
a key phrase that when detected will cause the program to break out of the loop. In the example below any
message entered ‘EXIT’ will cause the socket to close on the client side. Subsequently when the server
knows the client socket (‘conn’) is closed when when it runs its ‘recv’ function and the received message
length is less than zero. After the client socket is closed the server will know no further messages will be
sent over the socket by the client so it will exit.
Broadband-Hamnet Microwave Communication System Page 20 of 97
Senior Design Project II | Final-v08 4/17/2016
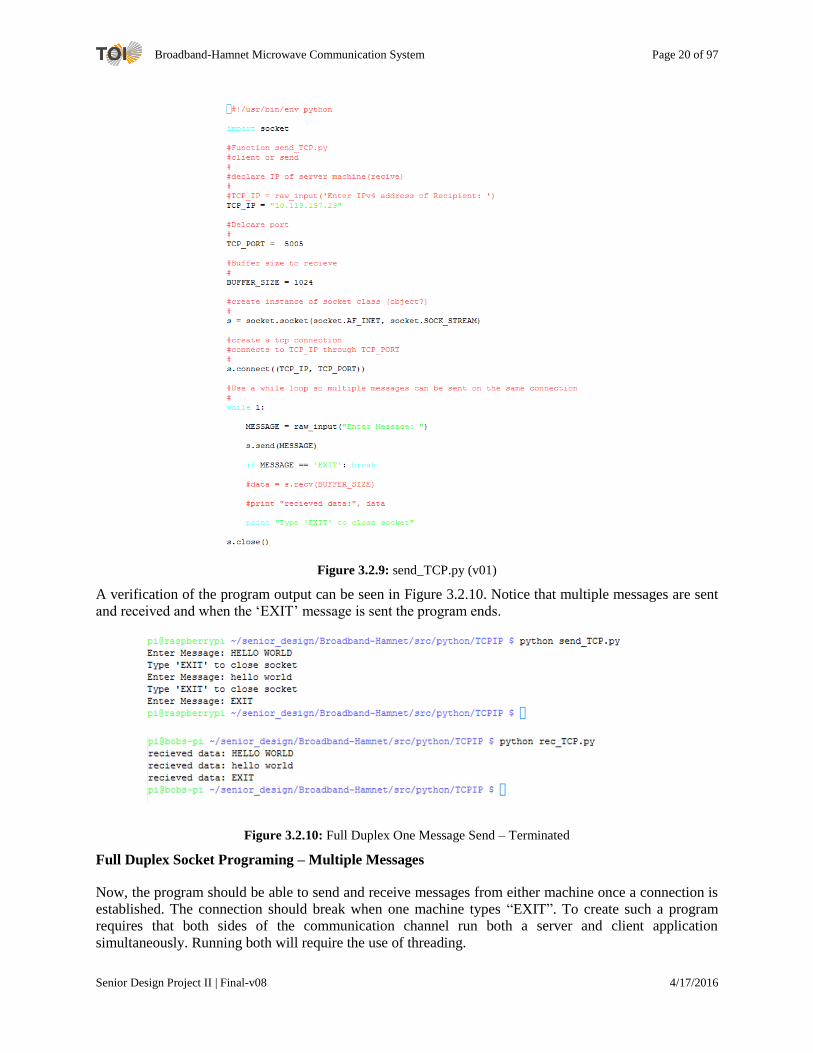
Figure 3.2.9: send_TCP.py (v01)
A verification of the program output can be seen in Figure 3.2.10. Notice that multiple messages are sent
and received and when the ‘EXIT’ message is sent the program ends.
Figure 3.2.10: Full Duplex One Message Send – Terminated
Full Duplex Socket Programing – Multiple Messages
Now, the program should be able to send and receive messages from either machine once a connection is
established. The connection should break when one machine types “EXIT”. To create such a program
requires that both sides of the communication channel run both a server and client application
simultaneously. Running both will require the use of threading.
Broadband-Hamnet Microwave Communication System Page 21 of 97
Senior Design Project II | Final-v08 4/17/2016
A threaded application allows for a complier to run two instructions or in our Python code two functions in
parallel (Zograf, n.d.). Python gives programmers a threading class to help aid in creating thread safe code.
Thread safe code ensures that one thread does not modify the memory blocks being actively worked upon
by another thread. The end goal is to have one thread run the server code in the background while our main
program thread runs our client-send program we created before. To create the threads, we create a thread
object with a parameter of what function the thread is to run (Python, 2016). We can set the thread to be a
daemon thread which informs the complier to exit the thread if all other non-daemon threads have closed.
Lastly we start a thread by referencing the threading object by name and running the ‘start()’ instruction
(Python, 2016). An example of threaded socket programming can be seen in the final project example code
(see APPENDIX).
Now we need to be able to communicate between threads within the running application so that the client
and know when the other each is sending or receiving a message. To communicate between threads we
introduce a Python data structure called a ‘queue’. A ‘queue’ object allows for one thread to put information
into a buffer that can be retrieved by a separate thread when it is ready. Queues are a unique data structure
in that follows the standard of first in first out (FIFO). Items put into the queue will be processed in the
order in which they were place into the queue. When a thread needs to send data to another thread it queues
the information and the second thread can then pull items from the front of the queue. ‘queue’ objects are
a standard thread safe communication medium.
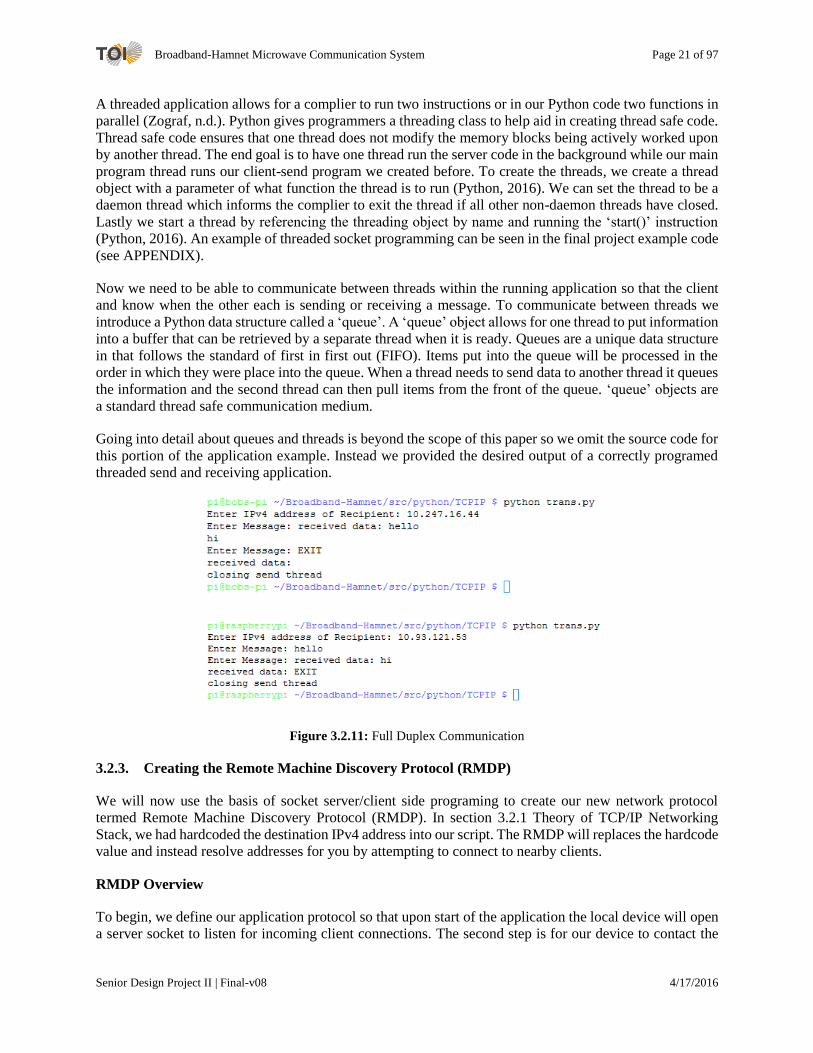
Going into detail about queues and threads is beyond the scope of this paper so we omit the source code for
this portion of the application example. Instead we provided the desired output of a correctly programed
threaded send and receiving application.
Figure 3.2.11: Full Duplex Communication
3.2.3. Creating the Remote Machine Discovery Protocol (RMDP)
We will now use the basis of socket server/client side programing to create our new network protocol
termed Remote Machine Discovery Protocol (RMDP). In section 3.2.1 Theory of TCP/IP Networking
Stack, we had hardcoded the destination IPv4 address into our script. The RMDP will replaces the hardcode
value and instead resolve addresses for you by attempting to connect to nearby clients.
RMDP Overview
To begin, we define our application protocol so that upon start of the application the local device will open
a server socket to listen for incoming client connections. The second step is for our device to contact the

Broadband-Hamnet Microwave Communication System Page 22 of 97
Senior Design Project II | Final-v08 4/17/2016
local Broadband Hamnet router to begin finding other possible servers running our application. The
application sends a command to the local router that informs it to contact all other routers within its vicinity,
and requests the ARP table from the nearby routers. The ARP table provides a listing of all attached LAN
devices attached the respective node. Compiling a listing of all ARP tables provides a status of the all
connected devices in the mesh network. The local router gathers this list of potential devices which it then
sends back down to our local device. After the RPi receives this listing of potential existing servers within
the mesh network, it proceeds to contact each device to try and gather the most up to date information about
the TOIChat network. It is important to note the distinction between the overlaying Ad-Hoc mesh network
and the TOIChat network. The Ad-Hoc mesh network is the framework provided after installing
Broadband-Hamnet. The TOIChat network is our project specific network or application that allows for
direct autonomous peer-to-peer communications.
Once our local device has found another device running an instance of the TOIChat application, we will
send a message asking for the database of other client/servers in the network. We will then use that
information to setup and or update newly connected local application’s NameServer database.
RMDP Implementation
To begin our discussion on RMDP implementation, an understanding of Broadband-Hamnet is required.
The Broadband-Hamnet firmware looks for another mesh nodes by scanning the surrounding wireless
network for a common Service Set Identifier (SSID). The SSID is the name of the wireless network
broadcasted by a router, which Broadband-Hamnet setups up to uniquely define the mesh network. An
example of a Broadband-Hamnet SSID is BroadbandHamnet-20-v3. Once two routers with the preset
Broadband-Hamnet SSID come in each other, the mesh network is established. IPv4 addresses across both
nodes can now be connected to each other as the routing tables are updated to contain the domain present
at each node. This process of updating, adding, and removing nodes from the mesh-network is done
automatically in the Broadband-Hamnet firmware.
Figure 3.2.12 Remote Machine Discovery Protocol (RMDP)
The RMDP operates on the assumption that at least two routers are in contact with each other. The first step
of the protocol involves one router sending a request to the other router asking for the IPv4 addresses of the
machines connected to the router’s LAN. The router responds to the other router’s request appropriately,
and sends back its LAN information. Once the router gets a response, the information is forwarded to the
machine connected to the LAN, which in the scope of this project, is a Raspberry Pi. Finally, once the
Raspberry Pi has the IPv4 addresses of the all remote LAN devices, it sorts the list by shortest Internet
Control Message Protocol (ICMP) travel time, and proceeds to try and establish a socket connection over
the TOIChat specified port 5005.
The RDMP protocol is run on the router which send requests and responses using the Linux utility netcat
Broadband-Hamnet Microwave Communication System Page 23 of 97
Senior Design Project II | Final-v08 4/17/2016
(“nc”). The netcat utility allows communications between machines utilizing a TCP or UDP protocol
running the Unix environment. Netcat is used in this case as opposed to the Berkeley Socket API used in
the rest of the project because of the limited memory available on the Linksys WRT54G. Since netcat is a
standard utility found on Unix environments over the past few decades, it is already pre-installed on the
WRT54G, so there is no need to install a C complier or an interpretive programming language such as
Python.
The implementation of the RMDP can be found at our GitHub page referenced in the APPENDIX.
3.2.4. TOIChat – Backend Development
Layout of the project starts by listing the desirable features for the application. First and foremost we require
an internal database to store the clients and overall state of the TOIChat network. Secondly we need a server
application that is continuously running in the background listening for new client connections. We need
code that interacts with the Remote Machine Discovery Protocol (RMDP). We want functionality that
allows users to interact with each other using text messaging similar to what you would find when using
Skype or WhatsApp. A client side application is required that will send messages out onto the network to
listening server objects. Finally the end user needs some user interface to interact with all the previously
mentioned functionality.
toiChatNameServer
The final class design is broken up into multiple parts. The toiChatNameServer is at the heart of the
application, in that it stores the state of network. In the traditional sense, Nameservers are centralized servers
running on the internet that translate domain names such as http://www.google.com to IP addresses. A
string such as google.com is easier to remember than an IPv4 address. For example google.com resolves to
an IPv4 address of 172.217.4.78. Our Nameserver object will contain a lookup table for resolving call-signs
to IPv4 address. The table is constructed using the Python dictionary data structure that allows for fast entry
lookups (O(1)) since it is implemented as a hash table (Python, 2016). Functionality for this object also
include the need to be able to add and remove entries from the dictionary in a thread safe manner. We use
the lock object from the Python Threading library to lock that internal Python dictionary for when it is being
used by various threads inside the class. The lock object provides for a thread safe environment.
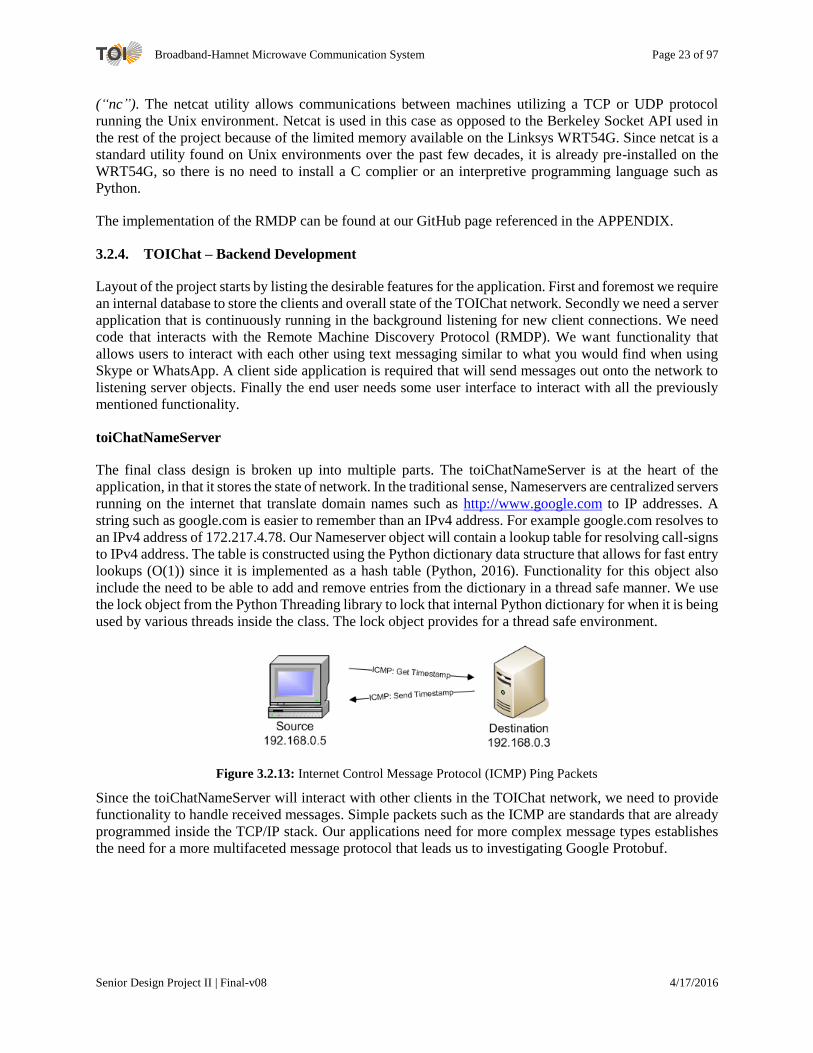
Figure 3.2.13: Internet Control Message Protocol (ICMP) Ping Packets
Since the toiChatNameServer will interact with other clients in the TOIChat network, we need to provide
functionality to handle received messages. Simple packets such as the ICMP are standards that are already
programmed inside the TCP/IP stack. Our applications need for more complex message types establishes
the need for a more multifaceted message protocol that leads us to investigating Google Protobuf.
Broadband-Hamnet Microwave Communication System Page 24 of 97
Senior Design Project II | Final-v08 4/17/2016
toiChatNameServer
- DNS_PING_INTERVAL: int = 20- toiChatClient: toiChatClient
+ printDNSTable()+ printClients()+ getMyIP(String iface): String myIPv4+ addToDNS(String clientName, String clientIPv4, String dateAdded, String description)+ removeDNSByHostname(String clientName)+ updateMyName(String oldName, String newName)+ lookupIPByHostname(String hostname): String clientIPv4+ lookupHostnameByIP(String clientIPv4): String hostname+ lookupAddedByHostname(String hostname): String dateAdded+ lookupUpdateByIP(String clientIPv4): String hostname+ lookupDNSLegnth(): int+ lookupDescByHostname(String hostname): String description+ syncDNS(String clientIPv4): Boolean+ attemptFindServer(String toiServerPort): Boolean+ handleDnsMessage(DnsMessage): Boolean+ handleRegisterDNS(DnsMessage)- handleRequestDNS(DnsMessage)- createRegisterDnsMessage(): DnsMessage- createRequestDnsMessage(): DnsMessage- __loopPingDNS__()- __pingDNSAvaliable__()
Figure 3.2.14: toiChatNameServer - UML Sketch
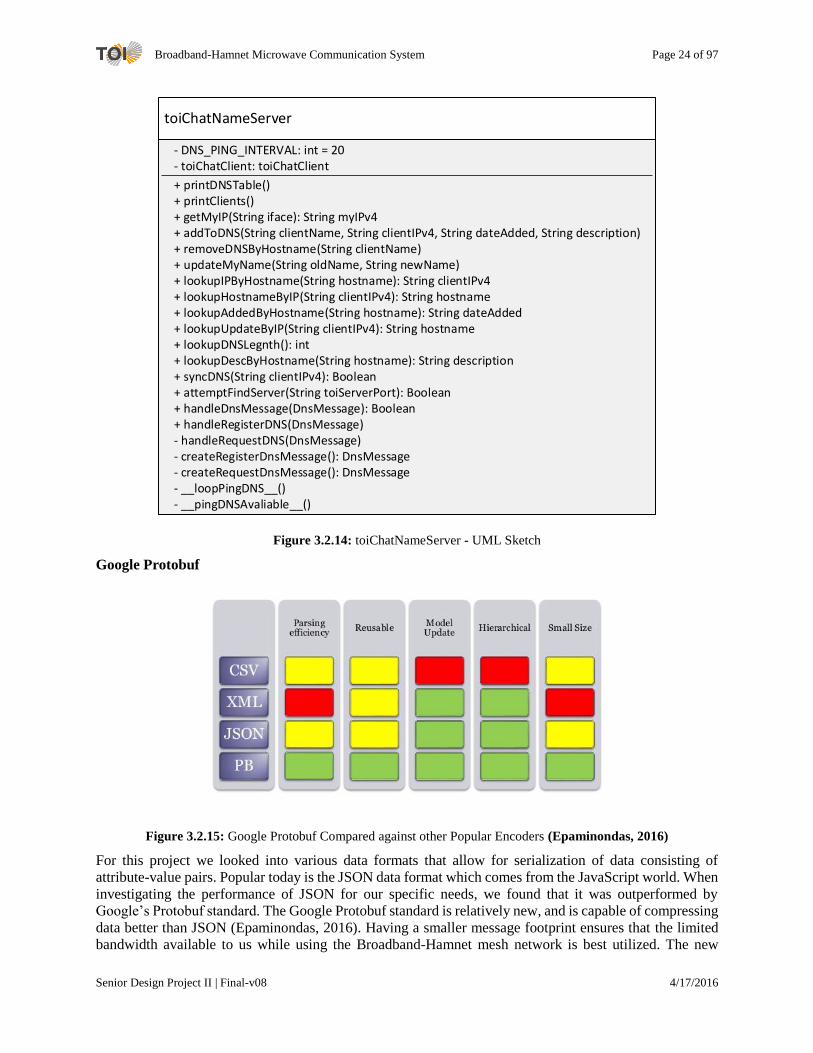
Google Protobuf
Figure 3.2.15: Google Protobuf Compared against other Popular Encoders (Epaminondas, 2016)
For this project we looked into various data formats that allow for serialization of data consisting of
attribute-value pairs. Popular today is the JSON data format which comes from the JavaScript world. When
investigating the performance of JSON for our specific needs, we found that it was outperformed by
Google’s Protobuf standard. The Google Protobuf standard is relatively new, and is capable of compressing
data better than JSON (Epaminondas, 2016). Having a smaller message footprint ensures that the limited
bandwidth available to us while using the Broadband-Hamnet mesh network is best utilized. The new

Broadband-Hamnet Microwave Communication System Page 25 of 97
Senior Design Project II | Final-v08 4/17/2016
Protobuf standard also allows for upgrading of the message protocol in the future if needed. Since the
software we are developing may have many unforeseen applications, having the flexibility of updating the
protocol is vital for its success. A summary of the Protobuf versus other popular tools is provided via Figure
3.2.15.
The Protobuf encoder is used as the basis for all message delivered via back-end TOIChat operations. Each
individual class object will have an associated Protobuf message type that it will be able to detect and handle
appropriately.
toiChatServer
Figure 3.2.16: Server Multithreaded Client Handling
Next we define the toiChatServer, which processes any listens and process any incoming connections to
the local node. The toiChatServer contains two threads: a ServerListener and a MessageProcessor. The
SeverListener is a thread running solely to listen for new client connections from the overlaying
BroadBand-Hamnet network. After a client has connected to the server, the server hands off message
processing to the MessageProcessor thread. The MessageProcessor thread takes in a socket, receives the
full message from the connected client, and outputs the message (constructed using Protobuf) to the
appropriate class for message decoding and handling.
The toiChatSever has an aggregation relationship with every toiChat object referenced in this paper expect
for the toiChatter object. The toiChatter object has a composition relationship (is owned) with the
toiChatServer object. For every received message seen across the server socket, the toiChatServer uses a
toiChatter object to handle the message for that specific client. If no toiChatter object is found, the
toiChatServer creates a new toiChatter object to handle the message.

Broadband-Hamnet Microwave Communication System Page 26 of 97
Senior Design Project II | Final-v08 4/17/2016
toiChatServer
- toiChatNameServer: toiChatNameServer- PORT_TOICHAT: int = 5005
- __init__()- __del__()+ startServer(): Boolean+ stopServer(): Boolean+ statusServer(): Boolean+ updateServerPort(int=5005): Boolean+ addToiChatter(toiChatter): Boolean+ removeToiChatter(toiChatter): Boolean- __toiChatListener__()- __communicate__()- __recvall__(Socket, String clientIPv4, int MSGLEN): String- __messageProcess__(Socket, String rawMSG): Boolean- __printToUserNow__()
toiChatter
- toiChatClient: toiChatClient- recipient: String
+ startInstantMessage()+ handleChatMessage(ChatMessage)+ getRecipient(): String- sendOneChatMessage(String MSG)
Figure 3.2.17: toiChatServer and toiChatter - UML Sketch
toiChatter
The toiChatter object implements a specific Protobuf message type containing text a client has sent and a
field defining who the message is for. The toiChatter object is capable of detecting who a message is from
displays it tagged with the text message.
toiChatClient
The final core object in the TOIChat application is the toiChatClient. The toiChatClient is a simple class
object that interacts with any application object that desires to send a message. We force the use of sending
messages with the toiChatClient as it appends a header to each message it pushes out. The header contains
vital information of who originally sent the message and stamps the message as a TOIChat specific
message. The stamping of the sent message is parsed by the toiChatServer object and allows for it to
appropriately send the message to the correct message handler.
toiChatClient
- hostname: String- description: String = ""- toiChatNameServer: toiChatNameServer = None
- __init__()+ updateNameServer(toiChatNameServer): Boolean+ getDescription(): String+ getName(): String+ updateName(String): Boolean+ sendMessage(String, String, int): Boolean+ createTemplateIdentifierMessage(String): ToiChatMessage
Figure 3.2.18: toiChatClient - UML Sketch

Broadband-Hamnet Microwave Communication System Page 27 of 97
Senior Design Project II | Final-v08 4/17/2016
3.2.5. TOIChat - Front-End Development
Creating a Command Line Interface - toiChatShell
Once the back end of the chat software is complete, a supporting front-end is needed for user interaction.
Development started with a command line interface (CLI) that brings together all back-end components.
Our CLI starts by prompting the user for call-sign they wish to use when registering themselves onto the
TOIChat network. We also allow for an alternative miscellaneous field that can be used by users to provide
supplemental information such as their GPS location. A prompt for your Broadband-Hamnet’s router
password is necessary to start the RMDP scripts.
A built-in help menu is provided for users new to the program. All expected command line features are
included such as tab auto-complete, proper keyboard interrupt handling, command syntax error handling,
and command history. The toiChatShell extends the standard Python cmd module (Python, 2016).
Figure 3.2.19: toiChatShell - Startup
At this point in the shell startup we still have not started up the TOIChat network interface. To begin the
connection to the TOIChat network we need to start the local toiChatServer instance. Trying to start a chat
before starting your toiChatServer will produce error messages. By default the toiChatServer uses port 5005
to communicate with the TOIChat network. If desired, users can specify the specific port they wish to use
allowing for creating two entirely separate TOIChat network running off different ports all on one
Broadband-Hamnet network.

Broadband-Hamnet Microwave Communication System Page 28 of 97
Senior Design Project II | Final-v08 4/17/2016
Figure 3.2.20: toiChatShell – Connection to TOIChat Network and Chat Messaging
Running the forceupdatedns function will force a toiChatNameServer sync with the closest client in the
TOIChat network. After which, a user can run the printdns function to print the console the current state of
the TOIChat network.
Now if a user is running the toiChatShell, and a message comes in from a client they will be prompted in
real-time that they have a message from a TOIChat user. It displays the call-sign of the user that attempt to
contact them and a recommendation to start a toiChatter instance for that user. As seen in Figure 3.2.10
KC3GIG attempt to contact us before we started a chat with the user.
Figure 3.2.21: toiChatShell – Chat Environment

Broadband-Hamnet Microwave Communication System Page 29 of 97
Senior Design Project II | Final-v08 4/17/2016
We can start a chat instance with KC3GIG by issuing the CLI startchat command. The application will
prompt you with available TOIChat users in the active network, which you will be able to communicate
with. Upon opening a chat instance with a user, a special environment opens up that allows you to have
peer-to-peer communications with the selected user. After communication has ended with the user, the
keyboard control sequence CTRL+C will exit you out of the chat environment. A second CTRL+C interrupt
will close the toiChatShell application.
The implementation of TOIChat can be found at our GitHub page referenced in the APPENDIX.
Creating a Graphical User Interface (GUI) - ToiChatGui
An alternative environment is provided for users who prefer a simpler graphical user interface (GUI). Note
the GUI implementation of TOIChat is fully compatible with the toiChatShell as they use the same back-
end resources.
The GUI is created in Python using a third-party module named Gtk. To aid in rapid GUI development, a
program Glade aids in the construction and layout of the application. With Glade, a GUI can be created
graphically with some handy features so that it does not have to be explicitly programmed. Glade generates
an XML file that can be parsed and used with Gtk. With glade and Gtk, buttons and textboxes are referenced
as objects. Gtk has an Application Program Interface (API) that allows the programmer to easily interact
with built in functions. Examples include getting text from an entry box, writing text to a textbox, or
connecting a button click to an event handler.
The GUI was split into several sections: a login screen, a display of available chatters, and a chat window
for every chatter. The login page consists of several text boxes that prompt the user to enter their username,
router’s password, and optional miscellaneous information. A quaternary text box also exists to display
error messages to the user. The user has the option to Quit the program if it was opened by mistake.
Figure 3.2.22. GUI login screen
Once the login button is clicked, the backend of TOIChat operations start. This process can take a few
seconds to complete as the application is actively scanning the network for available TOIChat clients. The
user can visually see the program working with a spinner.
The GUI and backend software must be in separate threads. If it is not run in threads, the GUI will freeze
and not update when the backend software is running. The program will also check if the user did not enter
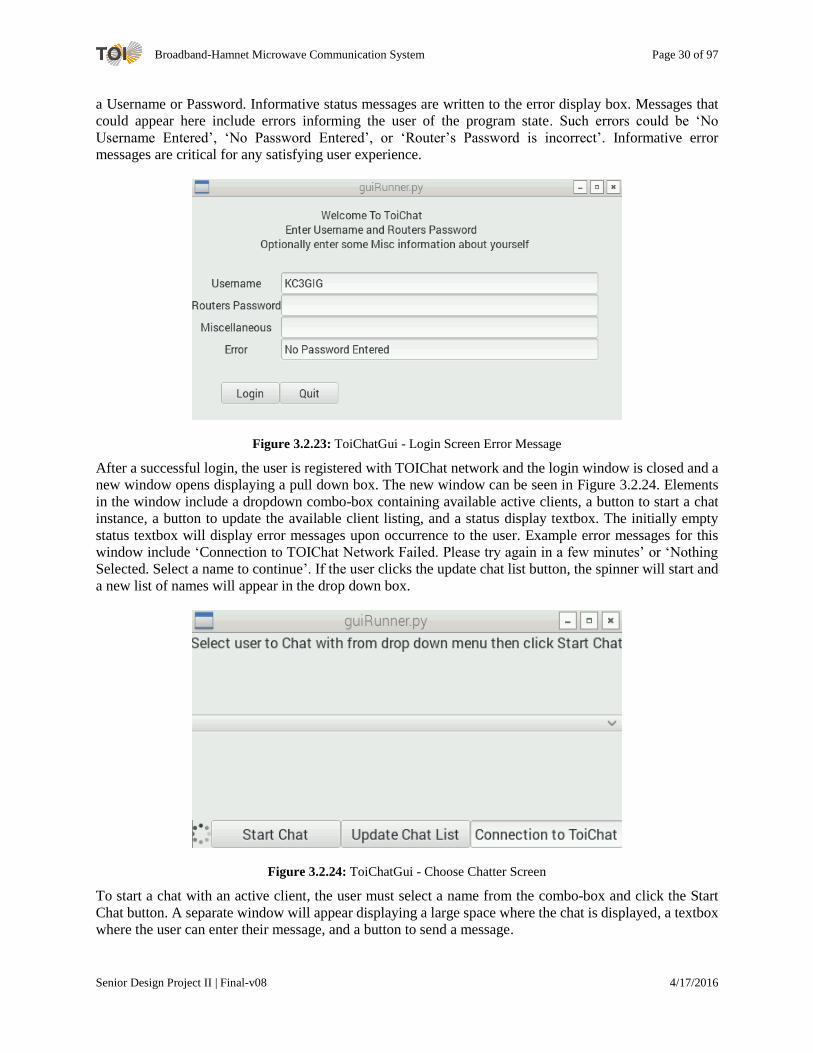
Broadband-Hamnet Microwave Communication System Page 30 of 97
Senior Design Project II | Final-v08 4/17/2016
a Username or Password. Informative status messages are written to the error display box. Messages that
could appear here include errors informing the user of the program state. Such errors could be ‘No
Username Entered’, ‘No Password Entered’, or ‘Router’s Password is incorrect’. Informative error
messages are critical for any satisfying user experience.
Figure 3.2.23: ToiChatGui - Login Screen Error Message
After a successful login, the user is registered with TOIChat network and the login window is closed and a
new window opens displaying a pull down box. The new window can be seen in Figure 3.2.24. Elements
in the window include a dropdown combo-box containing available active clients, a button to start a chat
instance, a button to update the available client listing, and a status display textbox. The initially empty
status textbox will display error messages upon occurrence to the user. Example error messages for this
window include ‘Connection to TOIChat Network Failed. Please try again in a few minutes’ or ‘Nothing
Selected. Select a name to continue’. If the user clicks the update chat list button, the spinner will start and
a new list of names will appear in the drop down box.
Figure 3.2.24: ToiChatGui - Choose Chatter Screen
To start a chat with an active client, the user must select a name from the combo-box and click the Start
Chat button. A separate window will appear displaying a large space where the chat is displayed, a textbox
where the user can enter their message, and a button to send a message.

Broadband-Hamnet Microwave Communication System Page 31 of 97
Senior Design Project II | Final-v08 4/17/2016
Figure 3.2.25: ToiChatGui - GUI Chat Window
The user can send a message by entering a string into the textbox and clicking the send message button.
The message the user sent will appear in the display window tagged with the corresponding username
(‘Username : message’). Any received messages will also be displayed inside the window.
Figure 3.2.26: ToiChatGui - Sending Message
The TOIChat software support communication to multiple users at once. The TOIChat GUI’s display
window is capable of scrolling allowing the users to enjoy longer chat sessions. As expected, closing the
chat window will not close the program. However, closing the login window or the choose chatter window
will exit the program.
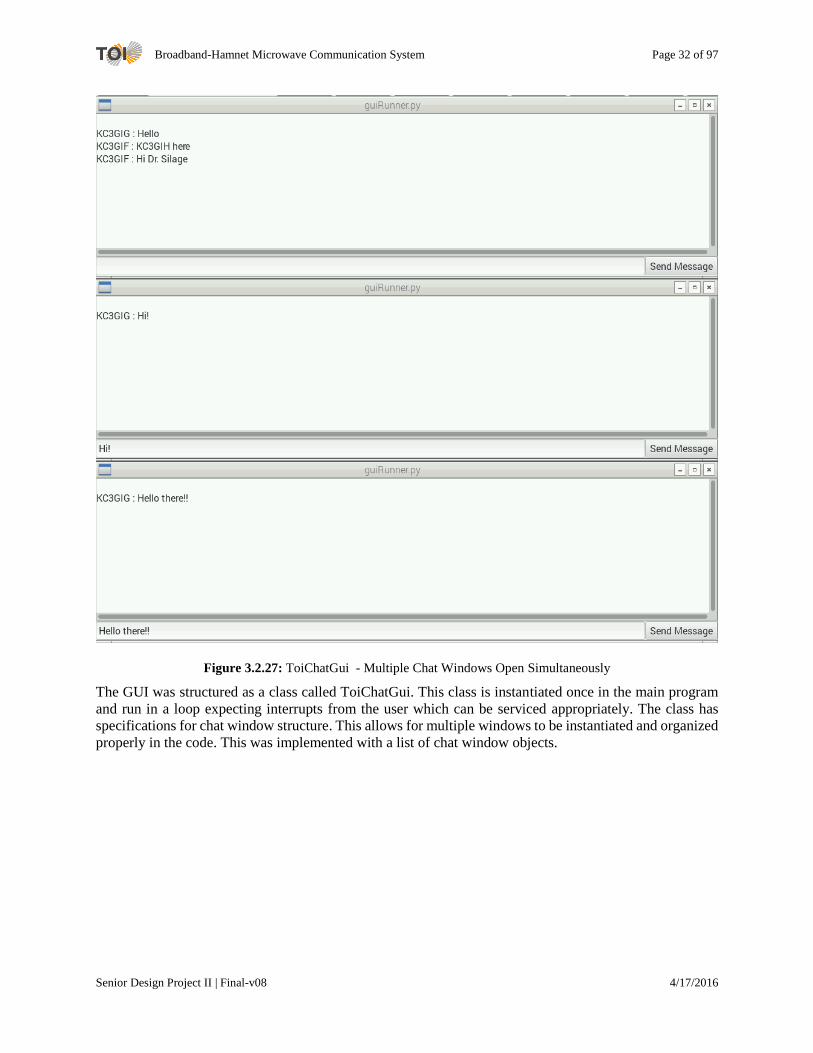
Broadband-Hamnet Microwave Communication System Page 32 of 97
Senior Design Project II | Final-v08 4/17/2016
Figure 3.2.27: ToiChatGui - Multiple Chat Windows Open Simultaneously
The GUI was structured as a class called ToiChatGui. This class is instantiated once in the main program
and run in a loop expecting interrupts from the user which can be serviced appropriately. The class has
specifications for chat window structure. This allows for multiple windows to be instantiated and organized
properly in the code. This was implemented with a list of chat window objects.
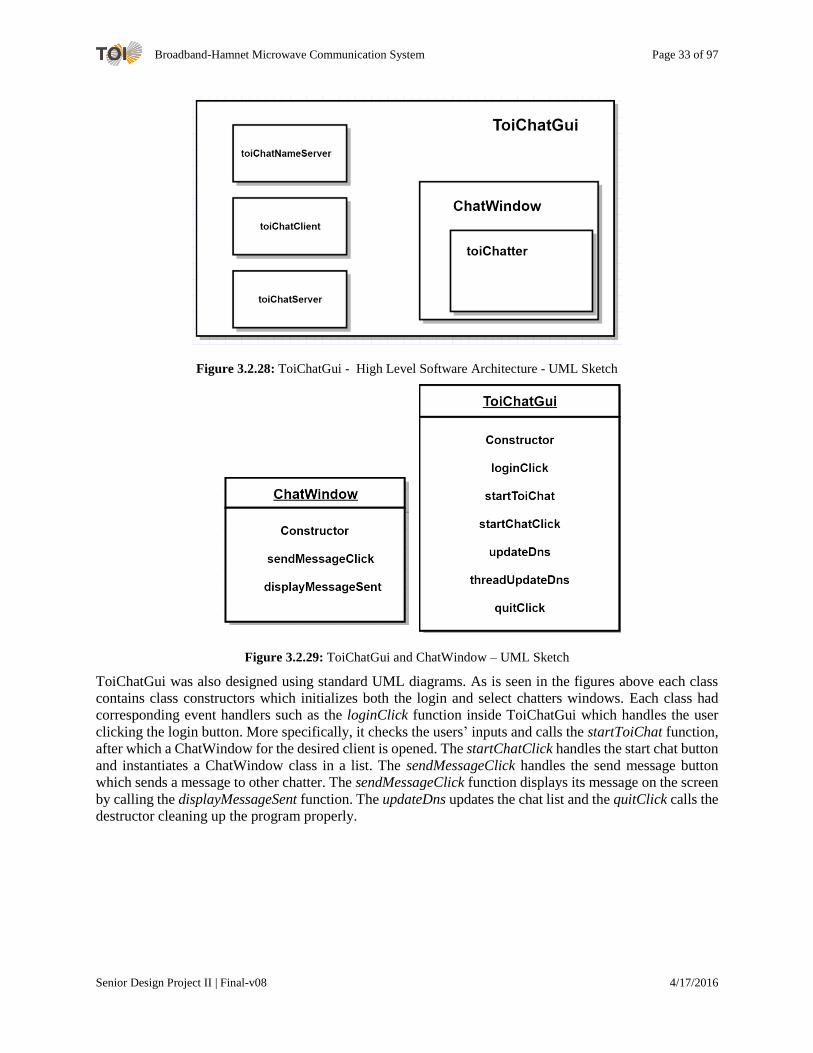
Broadband-Hamnet Microwave Communication System Page 33 of 97
Senior Design Project II | Final-v08 4/17/2016
Figure 3.2.28: ToiChatGui - High Level Software Architecture - UML Sketch
Figure 3.2.29: ToiChatGui and ChatWindow – UML Sketch
ToiChatGui was also designed using standard UML diagrams. As is seen in the figures above each class
contains class constructors which initializes both the login and select chatters windows. Each class had
corresponding event handlers such as the loginClick function inside ToiChatGui which handles the user
clicking the login button. More specifically, it checks the users’ inputs and calls the startToiChat function,
after which a ChatWindow for the desired client is opened. The startChatClick handles the start chat button
and instantiates a ChatWindow class in a list. The sendMessageClick handles the send message button
which sends a message to other chatter. The sendMessageClick function displays its message on the screen
by calling the displayMessageSent function. The updateDns updates the chat list and the quitClick calls the
destructor cleaning up the program properly.

Broadband-Hamnet Microwave Communication System Page 34 of 97
Senior Design Project II | Final-v08 4/17/2016
4. EVALUATION
4.1. Test Methods
4.1.1. Simulation
Network Stability and Performance Testing at Various Ranges
The entire setup would be placed on the roof of the engineering building, and the system would be tested
by transmitting to Montgomery County Emergency Center, which is about 25 km from the College of
Engineering at Temple University. Due to administrative constraints, it is impossible to install the system
on the roof. Therefore, we will have to simulate the 25 km path.
It is possible to simulate the 25 km path by dropping the output power of the router, and removing the
amplifier and Yagi antenna from the system. By making use of the path loss and link budget equations in
section 3.1 Hardware Design, it is possible to calculate a distance the transmitter and receiver need to be
separated by to obtained the received power calculated in section 3.1.4 Link Budget. Recall our calculated
received power is:
𝑅𝑥𝑝𝑜𝑤𝑒𝑟 = −75.01𝑑𝐵𝑚
Referencing Equation 3.3 we can find the a simulation distance (R) required that mimics a longer distance
with the desired 𝑅𝑥𝑝𝑜𝑤𝑒𝑟.
𝑅𝑥𝑝𝑜𝑤𝑒𝑟 = 𝑇𝑥𝑝𝑜𝑤𝑒𝑟 − 𝑃𝑎𝑡ℎ𝐿𝑜𝑠𝑠(𝑑𝐵),
Recall from Equation 3.2 Path Loss is:
𝑃𝑎𝑡ℎ𝐿𝑜𝑠𝑠(𝑑𝐵) = 𝐾𝑢 + 20 log(𝑓𝑅) − 𝐺1(𝑑𝐵) − 𝐺2(𝑑𝐵)
The 𝑇𝑥𝑝𝑜𝑤𝑒𝑟will be set to the minimum possible WRT54G power output, which is 1dBm. To solve for the
distance that will effectively simulate the 25km link, the above equations are rearranged as follows,
𝑇𝑥𝑝𝑜𝑤𝑒𝑟 − 𝑅𝑥𝑝𝑜𝑤𝑒𝑟 = 𝑃𝑎𝑡ℎ𝐿𝑜𝑠𝑠(𝑑𝐵),
Substituting appropriate values and solving for simulated distance (R) reveals that separating the routers by
a distance of 62.8 m will simulate a larger distance of 25 km. Again this simulated distance is with power
output of the Linksys WRT54G set to 1dBm, and removing the 2.4GHz amplifier and Yagi-Uda antennas.
1 + 75.01 = 32.45 + 20 log(2400 ∗ 𝑅) − 0 − 0
𝑅 =102.178
2400= .0628𝑘𝑚 = 62.8𝑚
We are not limited to testing only the 25 km range. There is interest in obtaining the performance metrics
as a function of distance. We can simulate different distances by keeping the routers 62.8m apart, and
increasing the power output on the routers. Utilizing the same equations above, we test performance at the
simulated distances of 20km, 16km, 10km, and 3.1km with the results tabulated in Table 4.1.1.
Table 4.1.1: Required Power to Simulate Long Distance Communication

Broadband-Hamnet Microwave Communication System Page 35 of 97
Senior Design Project II | Final-v08 4/17/2016
Distance (km) Tx Power (dBm)
25 1
20 3
16 5
10 9
3.1 19
We will use the Linux utility Data Description (“dd”) along with netcat (“nc”) to test the effective data
rates at each of the aforementioned distances as well as connectivity stability (Linux/Unix, n.d.). The actual
data speed transmission script will be provided in the example directory section referenced by the project
GitHub page seen in the APPENDIX. For quick reference, the Unix command seen below sends 100
packets, each containing 1000 zeros, which is a total of 100kB of data.
$ dd if=/dev/zero b=1k count=100 | nc –vvn $RECEIVEIP $RECIEVEPORT
4.1.2. Hardware
WRT54G Spectrum Test
As the amateur radio band is 2.4 GHz, it is imperative the WRTG54G is transmitting at 2.4 GHz. Testing
the transmission frequency is often done inside a Faraday cage, which keeps the WRTG54’s signal in, and
noise signals, such as Wi-Fi, out. A Faraday cage is an enclosure surrounded by an electrical conductor.
The theory behind the Faraday cage states that an externally applied electric field causes a current on the
conductor of the cage that rearranges the charge carriers in a way that cancels the applied field inside the
cage. Once the field inside the cage is cancelled, the current stops which reduces noise signals inside the
cage (Zakaria, Sudirman, & Jamaluddin, 2008).
For this test, the WRT54G router was flashed with the custom
firmware Broadband-Hamnet_v1.0.0. To test the transmission
frequency, the communication system was set up in a Faraday
cage with the probes of a spectrum analyzer inside the cage. The
Faraday cage is necessary for this test to ensure that the
spectrum analyzer is picking up our signal, as opposed to a stray
Wi-Fi signal. The cage is shown here in Figure 4.1.1. The
communication protocol was executed and the results were
recorded. To test the effectiveness of the Faraday cage, a speed
test was run from an Android device with the spectrum
analyzer’s probes outside the cage, followed by the same test
with the probes inside the cage.
WRT54G Output Power Test
To ensure we will we are actually seeing 19dBm outputting from the router, we hook up the output terminal
of the router to the spectrum analyzer. The spectrum analyzer power measurement tool will allow us to set
a frequency range and reports the power output in dBm. Before performing the test we ensure we have the
router set to output the maximum possible output via the Broadband-Hamnet web portal interface.
Figure 4.1.1: Com Setup inside Faraday
Cage

Broadband-Hamnet Microwave Communication System Page 36 of 97
Senior Design Project II | Final-v08 4/17/2016
Figure 4.1.2: Broadband-Hamnet Web Portal
4.1.3. Software
Software testing is accomplished by ensuring the application is setup to be easily installed on any RPI2.
Installation instructions are provided on the GitHub homepage. Project dependencies to install the project
are mostly handled by the Python module “SetupTools”, but includes:
Root privileges on your PI for utilizing raw sockets. ICMP messages are implemented directly
in Python.
Router scripts router_request_arpinfo.sh, and router_tx_arpinfo.sh need to be preloaded onto
your router.
Python 3.2 or Greater.
Google Protocol Buffers 3
Requires ‘sshpass’ for recurring ssh communications with Broadband-Hamnet router.
python3-gi installed via the Raspbian Package Manager
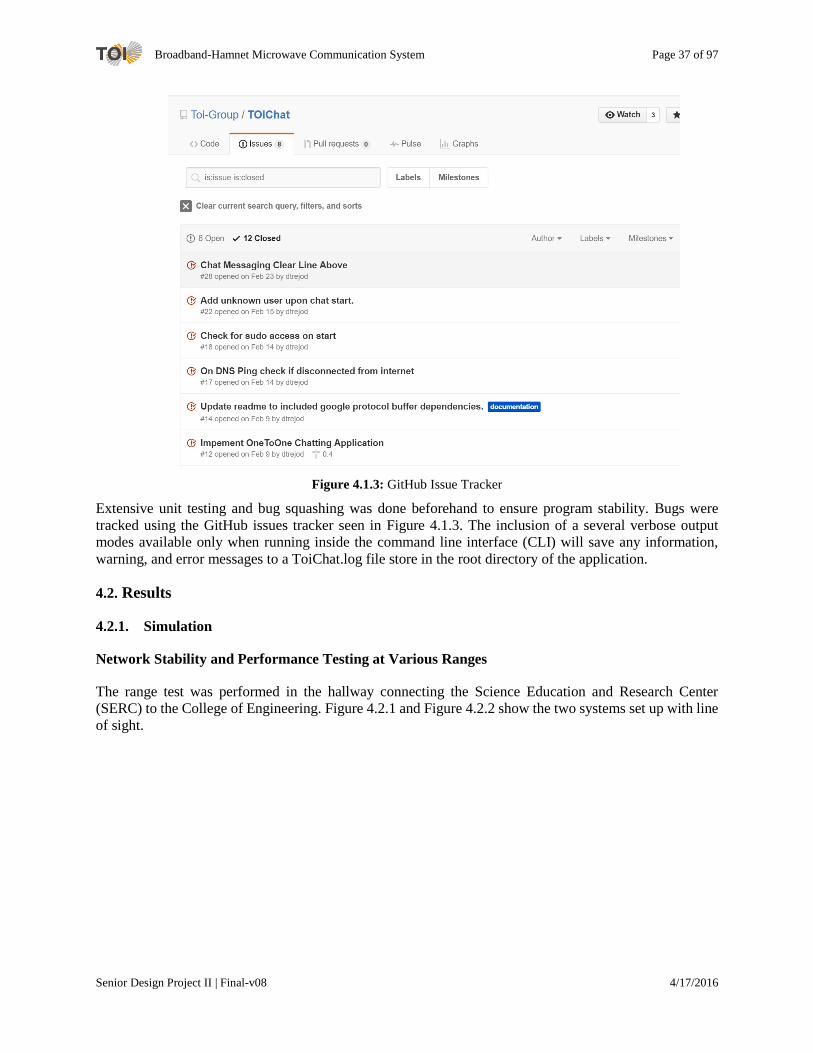
Broadband-Hamnet Microwave Communication System Page 37 of 97
Senior Design Project II | Final-v08 4/17/2016
Figure 4.1.3: GitHub Issue Tracker
Extensive unit testing and bug squashing was done beforehand to ensure program stability. Bugs were
tracked using the GitHub issues tracker seen in Figure 4.1.3. The inclusion of a several verbose output
modes available only when running inside the command line interface (CLI) will save any information,
warning, and error messages to a ToiChat.log file store in the root directory of the application.
4.2. Results
4.2.1. Simulation
Network Stability and Performance Testing at Various Ranges
The range test was performed in the hallway connecting the Science Education and Research Center
(SERC) to the College of Engineering. Figure 4.2.1 and Figure 4.2.2 show the two systems set up with line
of sight.

Broadband-Hamnet Microwave Communication System Page 38 of 97
Senior Design Project II | Final-v08 4/17/2016
Figure 4.2.1: Performance Test Station 1
Figure 4.2.2: Performance Test Station 2
As predicted in Section 4.1.1, by dropping the power output of the routers to 1dBm, we were able to
simulate a communication link of 25 km, 20 km, 16 km, 10 km, and 3.1 km by separating the routers by an
actual distance of 62.8 m and adjusting the power output on the routers accordingly.
The results in Figure 4.2.3 and Figure 4.2.4 are expected for this experiment. The signal to noise ratio
decreases as a function of distance, which in the case of this experiment directly relates to the output power
of the Linksys WRT54G. The same is true for the effective data rate, which ranges from about 21 Mbps to
6 Mbps. The decrease in data rate directly relates to the signal to noise ratio because the probability of bit
error increases as the signal to noise ratio decreases (Nguyen & Shwedyk, 2009). Therefore, due to the
functionality of TCP, the data rate is reduced due to more frequent retransmissions caused by erroneous
packets.

Broadband-Hamnet Microwave Communication System Page 39 of 97
Senior Design Project II | Final-v08 4/17/2016
Figure 4.2.3: Effective Data Rate vs Simulated Distance
Figure 4.2.4: SNR vs Simulated Distance
Figure 4.2.3 shows lower data rates than those predicted in Figure 3.1.12. The data rates predicted in Figure
3.1.12 assume error free transmissions, or an infinite signal to noise ratio. In the experiment proposed to
test the data rates in Section 4.1.1, there is not an infinite signal to noise ratio which means errors will occur,

Broadband-Hamnet Microwave Communication System Page 40 of 97
Senior Design Project II | Final-v08 4/17/2016
and retransmissions cause the data rates to drop. Another reason the actual data rates are lower than the
projected data rates is a technology implemented by the Broadband-Hamnet firmware called carrier sense
multiple access (CSMA). A communication system utilizing CSMA must wait for the channel to be clear
before transmitting data (Popiel). Because the amateur bands that Broadband-Hamnet utilizes for
transmission are the same bands as standard Part 15 wireless devices, the Linksys WRT54G sense WiFi
signals on the channel, making them wait to transmit. This is especially likely because we tested the system
inside the College of Engineering, a place where there a multiple access points throughout the building.
4.2.2. Hardware
WRT54G Spectrum Test
For our spectrum test we found that indeed our router was operating in the expected 2.4 GHz range. The
spectrum analyzer picked up a lot of activity when the Faraday cage was open, and picked up a mere fraction
of that signal with the cage closed. These results are shown in Figure 4.2.5 and Figure 4.2.6.
Figure 4.2.5: Speed Test, Cage Open
Figure 4.2.6: Speed Test, Cage Closed
Because it is evident that the Faraday cage would block stray signals, the transmission frequency of the
router could be properly tested. The transmission frequency was in the 2.4 GHz band and the spectrum
analyzer seen in Figure 4.2.7 depicts this.
Figure 4.2.7: Transmission Frequency
WRT54G Output Power Test
For the spectrum test we used an antenna to pick up the 2.4 GHz signal put out by our router. For the power
test we needed a direction connection to our router so we picked up an adapter cable to take power straight
from the RF terminal of the router to the spectrum analyzer. Thus, what we are measuring is the full output
power of the router.
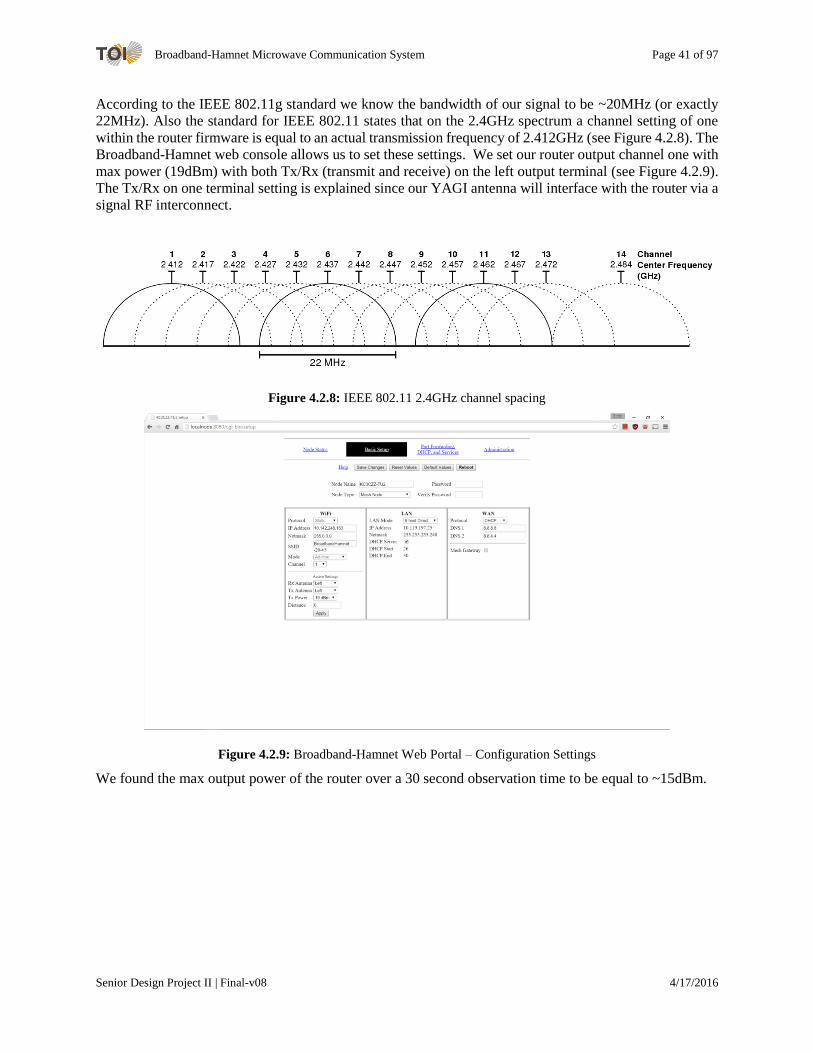
Broadband-Hamnet Microwave Communication System Page 41 of 97
Senior Design Project II | Final-v08 4/17/2016
According to the IEEE 802.11g standard we know the bandwidth of our signal to be ~20MHz (or exactly
22MHz). Also the standard for IEEE 802.11 states that on the 2.4GHz spectrum a channel setting of one
within the router firmware is equal to an actual transmission frequency of 2.412GHz (see Figure 4.2.8). The
Broadband-Hamnet web console allows us to set these settings. We set our router output channel one with
max power (19dBm) with both Tx/Rx (transmit and receive) on the left output terminal (see Figure 4.2.9).
The Tx/Rx on one terminal setting is explained since our YAGI antenna will interface with the router via a
signal RF interconnect.
Figure 4.2.8: IEEE 802.11 2.4GHz channel spacing
Figure 4.2.9: Broadband-Hamnet Web Portal – Configuration Settings
We found the max output power of the router over a 30 second observation time to be equal to ~15dBm.
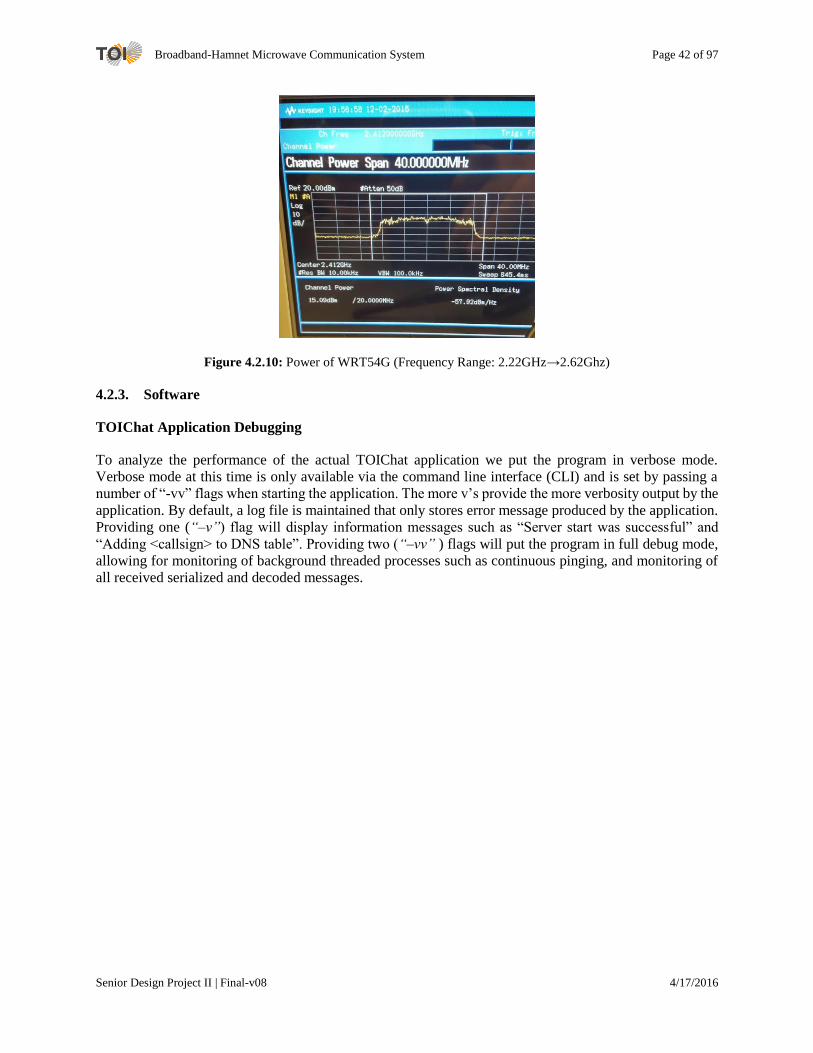
Broadband-Hamnet Microwave Communication System Page 42 of 97
Senior Design Project II | Final-v08 4/17/2016
Figure 4.2.10: Power of WRT54G (Frequency Range: 2.22GHz→2.62Ghz)
4.2.3. Software
TOIChat Application Debugging
To analyze the performance of the actual TOIChat application we put the program in verbose mode.
Verbose mode at this time is only available via the command line interface (CLI) and is set by passing a
number of “-vv” flags when starting the application. The more v’s provide the more verbosity output by the
application. By default, a log file is maintained that only stores error message produced by the application.
Providing one (“–v”) flag will display information messages such as “Server start was successful” and
“Adding <callsign> to DNS table”. Providing two (“–vv” ) flags will put the program in full debug mode,
allowing for monitoring of background threaded processes such as continuous pinging, and monitoring of
all received serialized and decoded messages.
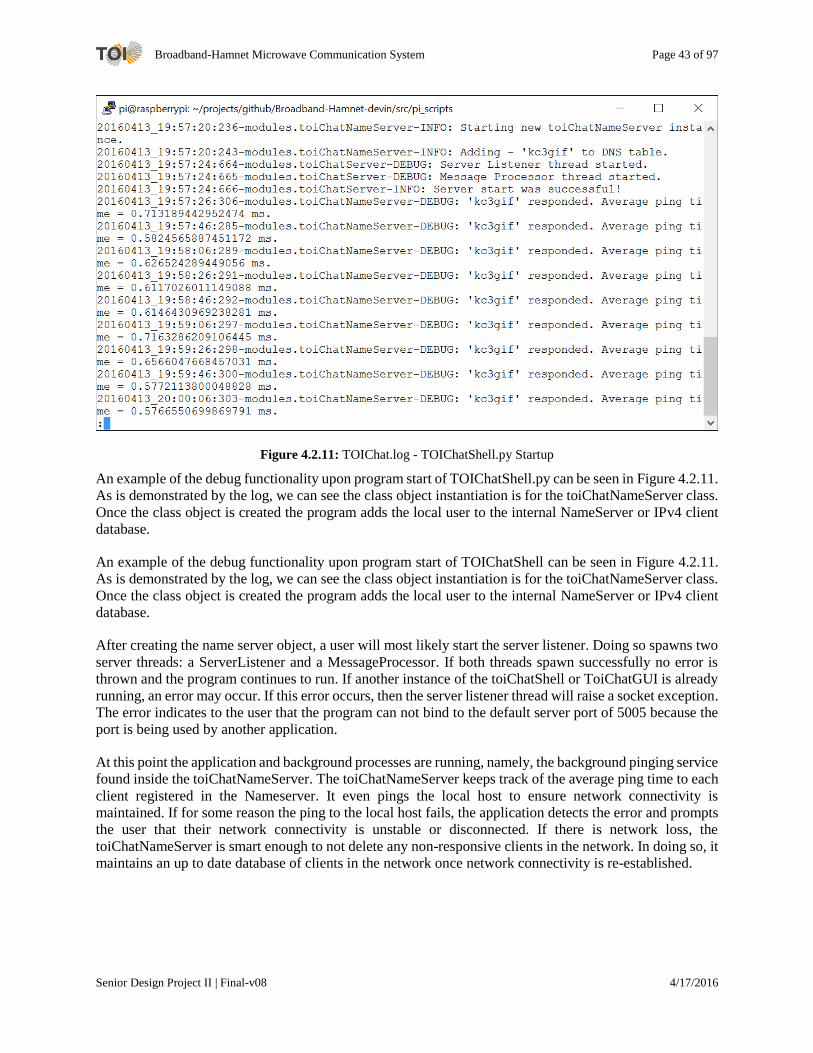
Broadband-Hamnet Microwave Communication System Page 43 of 97
Senior Design Project II | Final-v08 4/17/2016
Figure 4.2.11: TOIChat.log - TOIChatShell.py Startup
An example of the debug functionality upon program start of TOIChatShell.py can be seen in Figure 4.2.11.
As is demonstrated by the log, we can see the class object instantiation is for the toiChatNameServer class.
Once the class object is created the program adds the local user to the internal NameServer or IPv4 client
database.
An example of the debug functionality upon program start of TOIChatShell can be seen in Figure 4.2.11.
As is demonstrated by the log, we can see the class object instantiation is for the toiChatNameServer class.
Once the class object is created the program adds the local user to the internal NameServer or IPv4 client
database.
After creating the name server object, a user will most likely start the server listener. Doing so spawns two
server threads: a ServerListener and a MessageProcessor. If both threads spawn successfully no error is
thrown and the program continues to run. If another instance of the toiChatShell or ToiChatGUI is already
running, an error may occur. If this error occurs, then the server listener thread will raise a socket exception.
The error indicates to the user that the program can not bind to the default server port of 5005 because the
port is being used by another application.
At this point the application and background processes are running, namely, the background pinging service
found inside the toiChatNameServer. The toiChatNameServer keeps track of the average ping time to each
client registered in the Nameserver. It even pings the local host to ensure network connectivity is
maintained. If for some reason the ping to the local host fails, the application detects the error and prompts
the user that their network connectivity is unstable or disconnected. If there is network loss, the
toiChatNameServer is smart enough to not delete any non-responsive clients in the network. In doing so, it
maintains an up to date database of clients in the network once network connectivity is re-established.

Broadband-Hamnet Microwave Communication System Page 44 of 97
Senior Design Project II | Final-v08 4/17/2016
Figure 4.2.12: TOIChat.log – New Client Connect
When a new client connects (KC3GIH) to the TOIChat network, we can see the exact process taken by the
application. First, we see a new client connecting from the toiChatServer ServerListener thread. The server
hands the connection to the new client referenced by an open socket to the MessageProcessor thread. Recall
from 3.2.2 Theory of Socket Programming section that communication between threads is handled by
putting the item into a queue data structure. A perfect demonstration of this functionality is seen here when
our ServerListener thread puts the socket connected to the new client on an internal class queue which is
monitored by the MessageProcessor thread. It allows for the ServerListener thread to continue listening for
new client connections while messages are being decoded, and processed in a separate thread.
The MessageProcessor takes the new client socket and begins receiving data from the client. We can see
from Figure 4.2.11 both the RAW Google Protobuf encoded serialized version of the message and the
decoded version of the message. When a new client connects to the network it pushes a toiChatNameServer
bound “request” message. A “request” message is the new client telling the existing client that it is just
connecting to the network and needs to pull a database of known devices from this pre-existing client. The
local client detects the message successfully and passes the message to the toiChatNameServer class for
handling. The toiChatNameServer message handler is capable of detecting the message type and responding
with the appropriate requested information. It uses the toiChatClient to open a new socket to the connected
client’s toiChatServer class for responding to the message it sent before.
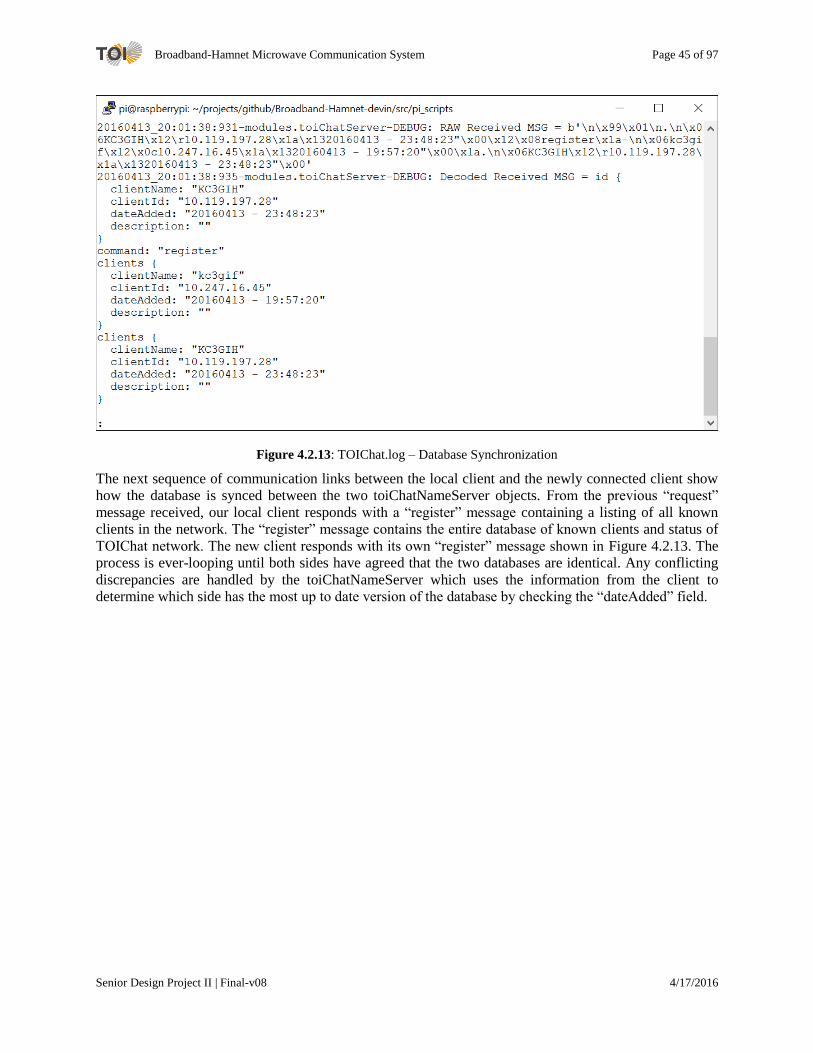
Broadband-Hamnet Microwave Communication System Page 45 of 97
Senior Design Project II | Final-v08 4/17/2016
Figure 4.2.13: TOIChat.log – Database Synchronization
The next sequence of communication links between the local client and the newly connected client show
how the database is synced between the two toiChatNameServer objects. From the previous “request”
message received, our local client responds with a “register” message containing a listing of all known
clients in the network. The “register” message contains the entire database of known clients and status of
TOIChat network. The new client responds with its own “register” message shown in Figure 4.2.13. The
process is ever-looping until both sides have agreed that the two databases are identical. Any conflicting
discrepancies are handled by the toiChatNameServer which uses the information from the client to
determine which side has the most up to date version of the database by checking the “dateAdded” field.
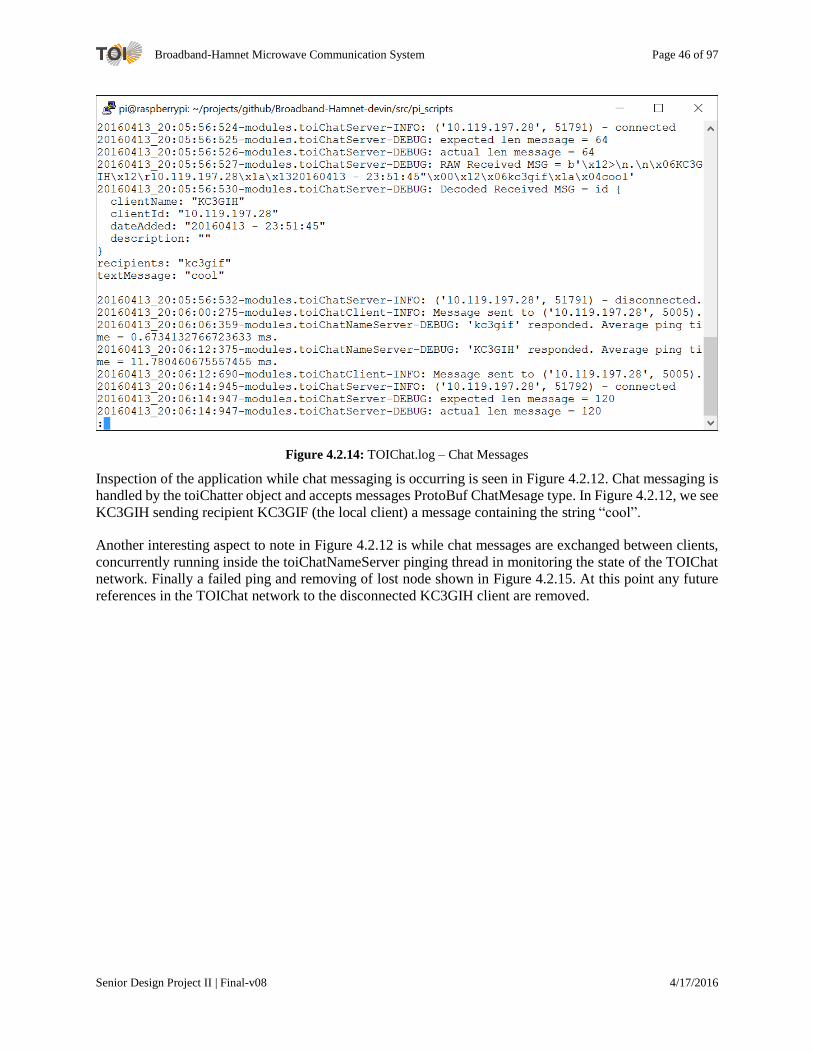
Broadband-Hamnet Microwave Communication System Page 46 of 97
Senior Design Project II | Final-v08 4/17/2016
Figure 4.2.14: TOIChat.log – Chat Messages
Inspection of the application while chat messaging is occurring is seen in Figure 4.2.12. Chat messaging is
handled by the toiChatter object and accepts messages ProtoBuf ChatMesage type. In Figure 4.2.12, we see
KC3GIH sending recipient KC3GIF (the local client) a message containing the string “cool”.
Another interesting aspect to note in Figure 4.2.12 is while chat messages are exchanged between clients,
concurrently running inside the toiChatNameServer pinging thread in monitoring the state of the TOIChat
network. Finally a failed ping and removing of lost node shown in Figure 4.2.15. At this point any future
references in the TOIChat network to the disconnected KC3GIH client are removed.
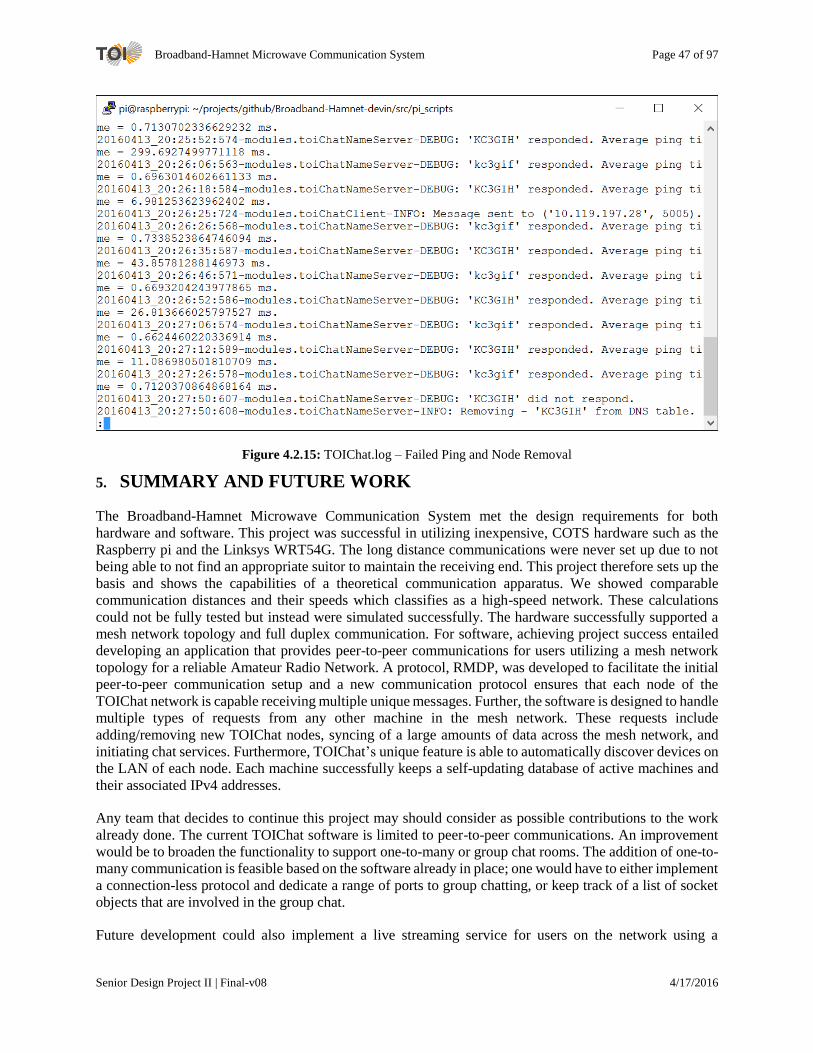
Broadband-Hamnet Microwave Communication System Page 47 of 97
Senior Design Project II | Final-v08 4/17/2016
Figure 4.2.15: TOIChat.log – Failed Ping and Node Removal
5. SUMMARY AND FUTURE WORK
The Broadband-Hamnet Microwave Communication System met the design requirements for both
hardware and software. This project was successful in utilizing inexpensive, COTS hardware such as the
Raspberry pi and the Linksys WRT54G. The long distance communications were never set up due to not
being able to not find an appropriate suitor to maintain the receiving end. This project therefore sets up the
basis and shows the capabilities of a theoretical communication apparatus. We showed comparable
communication distances and their speeds which classifies as a high-speed network. These calculations
could not be fully tested but instead were simulated successfully. The hardware successfully supported a
mesh network topology and full duplex communication. For software, achieving project success entailed
developing an application that provides peer-to-peer communications for users utilizing a mesh network
topology for a reliable Amateur Radio Network. A protocol, RMDP, was developed to facilitate the initial
peer-to-peer communication setup and a new communication protocol ensures that each node of the
TOIChat network is capable receiving multiple unique messages. Further, the software is designed to handle
multiple types of requests from any other machine in the mesh network. These requests include
adding/removing new TOIChat nodes, syncing of a large amounts of data across the mesh network, and
initiating chat services. Furthermore, TOIChat’s unique feature is able to automatically discover devices on
the LAN of each node. Each machine successfully keeps a self-updating database of active machines and
their associated IPv4 addresses.
Any team that decides to continue this project may should consider as possible contributions to the work
already done. The current TOIChat software is limited to peer-to-peer communications. An improvement
would be to broaden the functionality to support one-to-many or group chat rooms. The addition of one-to-
many communication is feasible based on the software already in place; one would have to either implement
a connection-less protocol and dedicate a range of ports to group chatting, or keep track of a list of socket
objects that are involved in the group chat.
Future development could also implement a live streaming service for users on the network using a

Broadband-Hamnet Microwave Communication System Page 48 of 97
Senior Design Project II | Final-v08 4/17/2016
PiCamera or some attached USB camera. Video streaming is a feasible task based off of the infrastructure
already in place. The streaming service could effortlessly support high-definition video, as the data rate of
1080p video is 8Mbps, and we have reported data rates well above this standard (YouTube, n.d.).
The third area for improvement is improving the data rate of the system. It is possible to accomplish faster
data rates by fully converting to a connection-less based protocol such as UDP. Implementing UDP would
increase the data rate because of less overhead in the transport protocol header. A team pursuing this
direction would then have to incorporate acknowledgement functionality and error detection/correction
coding themselves. We would encourage anyone pursuing this direction to consult Stallings’s Data and
Computer Communications textbook which contains in depth analysis on cyclic codes, linear block codes
(LBCs) and various other implementations of error detection and correction.
The final area for improvement would be to improve the hardware used in this project. While the Linksys
WRT54Gs are good routers, there are currently more powerful routers on the market capable of running
similar firmware to Broadband-Hamnet. The AREDN firmware is a continuation of Broadband-Hamnet
and is compatible with Ubiquiti wireless routers (Popiel). The Ubiquiti routers have more flash memory,
higher output power ratings, and are weather resistant. The weather resistance is a major improvement over
the Linksys WRT54G due to the fact that it simplifies the overall design of the system by eliminating long
coaxial runs from the router to amplifiers and antennas. In a future release, AREDN also plans to support
communication in the 0,-1, and -2 channels in the 2.4GHz band (Popiel). Support on these channels would
inherently increase data rates because the operation of the mesh network would be separate from standard
WiFi signals.
6. ACKNOWLEDGEMENTS
Thanks to Dennis Silage, PhD, our project advisor for taking on the project. Also thanks to Temple
University’s System Chip Design Laboratory (SCDL) and Amateur Radio Station (K3TU) for providing us
with hardware and space to conduct our experiments.
Special appreciation is in order for Dr. Biswas who gave our team a place to work after unforeseen
circumstances removed us from the SCDL.
Note the TOIChat project contains a reference to GitHub Project: “python-ping” which is distributed under
the GNU General Public License (GPL) License.
7. REFERENCES
Cerf, V. G., & Khan, R. E. (1974). A Protocol for Packet Network Intercommunication. IEEE Transactions
on Communications.
Coaxial Cable Attenuation Charts . (n.d.). Retrieved from rfelektronik:
http://rfelektronik.se/manuals/Datasheets/Coaxial_Cable_Attenuation_Chart.pdf
Epaminondas, F. (2016). COMPAL Electronics / Embedded Lab (UFCG). Retrieved from Protocol Buffers
Overview.
HRS. (2016). Retrieved from Ham Radio School: http://www.hamradioschool.com
Linux/Unix. (n.d.). arp(8) - Linux man page. Retrieved from linux.die.net: http://linux.die.net/man/8/arp
Linux/Unix. (n.d.). dd(1)-Linux Man Page. Retrieved from linux.die.net: http://linux.die.net/man/1/dd
Broadband-Hamnet Microwave Communication System Page 49 of 97
Senior Design Project II | Final-v08 4/17/2016
Linux/Unix. (n.d.). nc(1) - Linux man page. Retrieved from linux.die.net: http://linux.die.net/man/1/nc
Linux/Unix. (n.d.). ping(8) - Linux man page. Retrieved from linux.die.net: http://linux.die.net/man/8/ping
Mathis, M. (1996, 10). TCP Selective Acknowledgment Options. Retrieved 1 6, 2016, from ietf.org:
https://tools.ietf.org/html/rfc2018
Milligan, T. A. (2005). Modern Antenna Design (Vol. 2). Hoboken, New Jersey, USA: John Wiley & Sons,
Inc.
MILLIGAN, T. A. (2005). MODERN ANTENNA DESIGN. John Wiley & Sons, Inc.
Nguyen, H. H., & Shwedyk, E. (2009). A First Course in Digital Communications. Cambridge, NY, US:
Cambridge University Press.
Popiel, G. (n.d.). High Speed Multimedia for Amateur Radio. USA: The American Radio League, Inc.
Python. (2016, February 07). The Python Language Reference. Retrieved from Python:
https://docs.python.org/3.5/reference/
Sathananthan, K., & Tellambura, C. (2001, 11). Probability of Error Calculation of OFDM Systems With
Frequency Offset. 1884 IEEE Transactions on Communications, 49(11).
Socket - Linux socket interface. (2015, February 07). Retrieved from Die: http://linux.die.net/man/7/socket
Stallings, W. (2014). Data and Computer Communications - 10th Edition. Upper Saddle River: Pearson
Education Inc.
Systems, T. M. (n.d.). LMR-600 Flexible Low Loss Communications Coax.
Touch, J. (2016, 04 14). Service Name and Transport Protocol Port Number Registry . Retrieved February
12, 2016, from iana.org: http://www.iana.org/assignments/service-names-port-numbers/service-
names-port-numbers.xhtml
YouTube. (n.d.). Recommended Upload Encoding Settings. Retrieved from YouTube:
https://support.google.com/youtube/answer/1722171?hl=en
Zakaria, N. A., Sudirman, R., & Jamaluddin, M. N. (2008, Dec). Electromagnetic Interference Effect from
Power Line Noise in Electrocardiograph Signal using Faraday Cage. Power and Energy Confernce,
IEEE 2nd International, 666-671.
Zograf, B. (n.d.). Threaded Code. Retrieved from Institute of Computer Languages Programming Research:
http://www.complang.tuwien.ac.at/forth/threaded-code.html

Broadband-Hamnet Microwave Communication System Page 50 of 97
Senior Design Project II | Final-v08 4/17/2016
APPENDIX A – Project Site and GitHub Source Code
For further project information we encourage you to check out our project and GitHub site:
Official Project Site -- https://sites.google.com/a/temple.edu/broadband-mcomm/
Official Project GitHub -- https://github.com/TOI-Group
Our GitHub contains example code for getting started with half-duplex, and full-duplex socket
programming. It also contains our most recent release of the TOIChat application. Instructions for setting
up and installing the software yourself are provided via the GitHub README. Lastly, the GitHub contains
MATLAB code that uses the equations throughout this paper to simulate and produce the theoretical results
proposed by this paper.
APPENDIX B – Project Contact
Any further questions or concerns should be directed towards team lead Devin Trejo (email:
APPENDIX C – Project Code
Project code listed below is up to date as of 20160417.
Code Listing 1: router_request_arpinfo.sh
#!/bin/bash # Define port toi-chat uses to communicate between routers # toiPort=5005 toiPort2=5006 # Find the IP addreess of the local router # myIP="$(ifconfig | grep -A 8 eth0.0 | grep -Eo 'inet (addr:)?([0-9]*\.){3}[0-9]*' | grep -Eo '([0-9]*\.){3}[0-9]*')" # Construct message to send to other routers # sendMsg="toi-chatTx myIP=($myIP)" # Get a list of all mesh-nodes local router can see and request infomation # from them over what devices are connected to them. # for i in $( arp -i wl0 | grep -oE '\(([^)]+)\)' | tr -d '()' ); do rtrn=$( { echo $sendMsg | nc $i $toiPort; } 2>&1 ) if [ -z "$rtrn" ] then rx="$(nc -lp $toiPort2)" echo $rx
fi done
Code Listing 2: router_tx_arpinfo.sh #!/bin/bash

Broadband-Hamnet Microwave Communication System Page 51 of 97
Senior Design Project II | Final-v08 4/17/2016
# Define port toi-chat uses to communicate between routers # toiPort=5005 toiPort2=5006 # Ensure no netcat ports are currently listening # # Grep for the netcat port # foundchild="$(ps | grep '[n]c -lp 5005' | wc -l)" foundparent="$(ps | grep '[s]h router_tx_arpinfo.sh' | wc -l)" # Did the process exist? # if [ $foundparent -eq 1 ] then grep_out1="$(ps | grep '[s]h router_tx_arpinfo.sh')" proc_ID="$(echo $grep_out1 | awk '{print $1;}')" kill -9 $proc_ID fi if [ $foundchild -eq 1 ] then #if the process existed, get the PID and kill the process # grep_out="$(ps | grep '[n]c -lp 5005')" proc_ID="$(echo $grep_out | awk '{print $1;}')" kill -9 $proc_ID fi # Loop forever (always be listening) while [ 1 ] do # Start listening to traffic over network specifically port 5010 # rx_mess="$(nc -lp $toiPort)" # Check if message is from TOI-Chat # val="$(echo $rx_mess | grep "toi-chatTx" | wc -l)" if [ $val = 1 ] then # Find the IP of the requesting router # rx_IP="$(echo $rx_mess | grep -oE '\(([^)]+)\)' | tr -d '()')" # Output this routers ARP table to the requesting router # arp -i eth0.0 | grep -oE '\(([^)]+)\)' | tr -d '()' | nc $rx_IP $toiPort2 fi done
Code Listing 3: conn_router.py
#!/usr/bin/env python3 import os # Used for testing the location to the router script is valid import socket # Used for testing IP validity. import subprocess # Used for running shell commands import re # Used for parsing router output
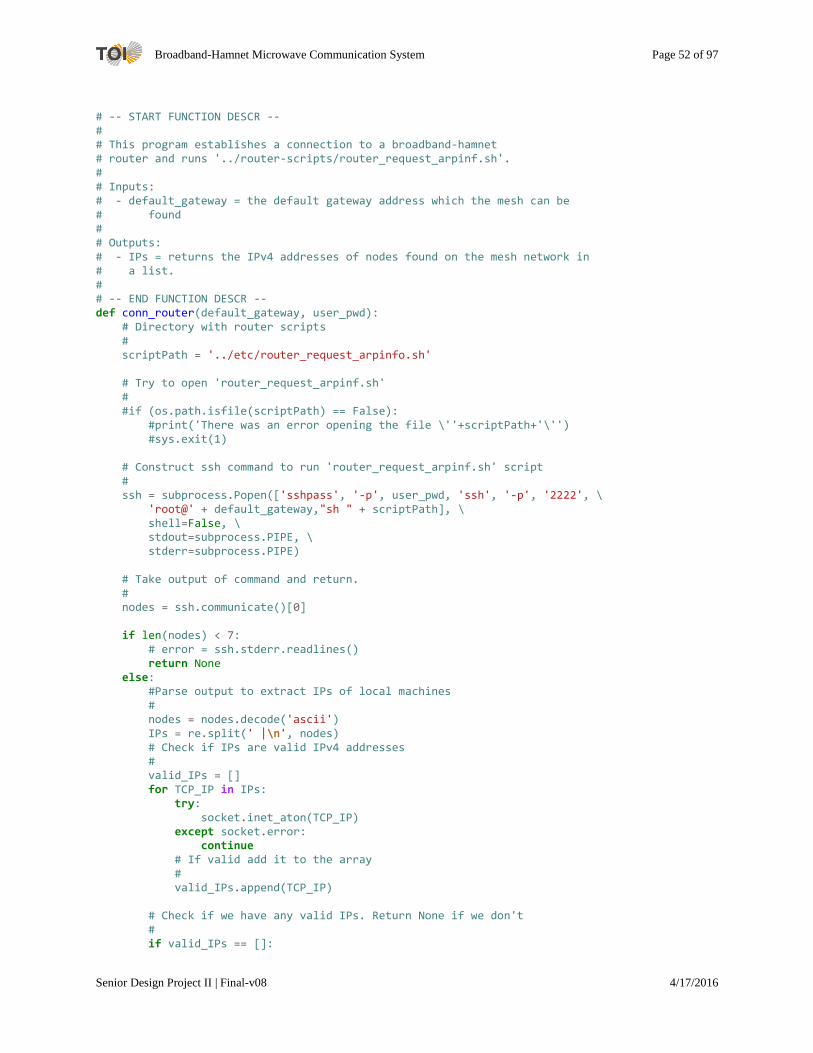
Broadband-Hamnet Microwave Communication System Page 52 of 97
Senior Design Project II | Final-v08 4/17/2016
# -- START FUNCTION DESCR -- # # This program establishes a connection to a broadband-hamnet # router and runs '../router-scripts/router_request_arpinf.sh'. # # Inputs: # - default_gateway = the default gateway address which the mesh can be # found # # Outputs: # - IPs = returns the IPv4 addresses of nodes found on the mesh network in # a list. # # -- END FUNCTION DESCR -- def conn_router(default_gateway, user_pwd): # Directory with router scripts # scriptPath = '../etc/router_request_arpinfo.sh' # Try to open 'router_request_arpinf.sh' # #if (os.path.isfile(scriptPath) == False): #print('There was an error opening the file \''+scriptPath+'\'') #sys.exit(1) # Construct ssh command to run 'router_request_arpinf.sh' script # ssh = subprocess.Popen(['sshpass', '-p', user_pwd, 'ssh', '-p', '2222', \ 'root@' + default_gateway,"sh " + scriptPath], \ shell=False, \ stdout=subprocess.PIPE, \ stderr=subprocess.PIPE) # Take output of command and return. # nodes = ssh.communicate()[0] if len(nodes) < 7: # error = ssh.stderr.readlines() return None else: #Parse output to extract IPs of local machines # nodes = nodes.decode('ascii') IPs = re.split(' |\n', nodes) # Check if IPs are valid IPv4 addresses # valid_IPs = [] for TCP_IP in IPs: try: socket.inet_aton(TCP_IP) except socket.error: continue # If valid add it to the array # valid_IPs.append(TCP_IP) # Check if we have any valid IPs. Return None if we don't # if valid_IPs == []:

Broadband-Hamnet Microwave Communication System Page 53 of 97
Senior Design Project II | Final-v08 4/17/2016
return None #Return a list of IPs found on the mesh network # return valid_IPs
Code Listing 4: gatewayIP.py
#!/usr/bin/env python3 import subprocess # Used for running shell commands # -- START FUNCTION DESCR -- # # Example Usage: # - routerIP = gatewayIP() # # Get IP of default gateway # # Inputs: # None # Outputs: # - routerIP = IP of local router connected to machine # # -- END FUNCTION DESCR -- def gatewayIP(): cmd = "route -n | grep 'UG'" route = subprocess.Popen(cmd, shell=True, stdout=subprocess.PIPE, stderr=subprocess.STDOUT) routerIP = route.communicate()[0] routerIP = str(routerIP).split() # print("Default Gateway Found: \n\t" + routerIP[1]) return routerIP[1]
Code Listing 5: listen_router.py # Import Modules import os, sys import subprocess from modules.gatewayIP import gatewayIP def listen_router(user_pwd): # Find the default gateway # default_gateway = gatewayIP() scriptPath = "../etc/router_tx_arpinfo.sh" # Run '../router-scripts/router_tx_arpinf.sh' on local router # ssh = subprocess.Popen(['sshpass', '-p', user_pwd, \ 'ssh', '-p', '2222', \ 'root@' + default_gateway, "sh " + scriptPath, '&'], \ shell=False, \ stdout=subprocess.PIPE, stderr=subprocess.PIPE)
Code Listing 6: testSSH.py #!/usr/bin/env python3 from modules.gatewayIP import gatewayIP from subprocess import call import getpass

Broadband-Hamnet Microwave Communication System Page 54 of 97
Senior Design Project II | Final-v08 4/17/2016
def testSSH(): #find the default gateway # default_gateway = gatewayIP() rtrn = 7 while(rtrn != 0): # prompt user for password # user_pwd = getpass.getpass("\nRouter Password >> ") # save to a file for sshpass # #with open("user_pwd.txt", "wt") as f: # f.write(user_pwd) # validate the password # rtrn = call(['sshpass', '-p', user_pwd, \ 'ssh', '-p', '2222', \ 'root@' + default_gateway, "exit"]) if ( rtrn == 5 ): print("Authentication Failed. Re-enter Password for Router.") elif ( rtrn == 6 ): print("RSA Fingerprint not verified. Please Try Again.") rtrn = call(['ssh', '-p', '2222', 'root@' +default_gateway, "exit 1"]) return (user_pwd)
Code Listing 7: toiChatClient.py #!/usr/bin/env python3 # # Python toiChatClient Class: # # Created on: 02/04/2016 # Author: Toi-Group # from modules.protobuf import ToiChatProtocol_pb2 # Used for encoding # ToiChatMessage import socket # Used for sending information to a server import struct, sys # Used to append the length of a message to the beginning # of the message import logging # toiChatClient sends messages to a toiChatServer in network # class toiChatClient(): # Types of messages to expect as defined in ToiChatProtocol # getType={ 0:"dnsMessage", 1:"chatMessage" } # -- START CLASS CONSTRUCTOR -- #

Broadband-Hamnet Microwave Communication System Page 55 of 97
Senior Design Project II | Final-v08 4/17/2016
# ToiChat class handling client side communication # # -- END CLASS CONSTRUCTOR -- def __init__(self, xHostname, xDescription="", xtoiChatNameServer=None): # Logging instance where should we save client logs to # self.logger = logging.getLogger(__name__) # Populate the client information # self.myName = xHostname self.myDescription = xDescription # Store ToiChatNameServer to use # self.myToiChatNameServer = xtoiChatNameServer # -- START FUNCTION DESCR -- # # Update Name-server Instance # # Inputs: # A Name Server Instance # # Outputs: # Updated internal name-server instance variable # # -- END FUNCTION DESCR -- def updateNameServer(self, xtoiChatNameServer): self.myToiChatNameServer = xtoiChatNameServer return 1 # -- START FUNCTION DESCR -- # # Return this client's associated description # # Inputs: # None # # Outputs: # self.myDescription # # -- END FUNCTION DESCR -- def getDescription(self): return self.myDescription # -- START FUNCTION DESCR -- # # Return this clients communication name # # Inputs: # None # # Outputs: # self.myName # # -- END FUNCTION DESCR -- def getName(self): return self.myName # -- START FUNCTION DESCR --
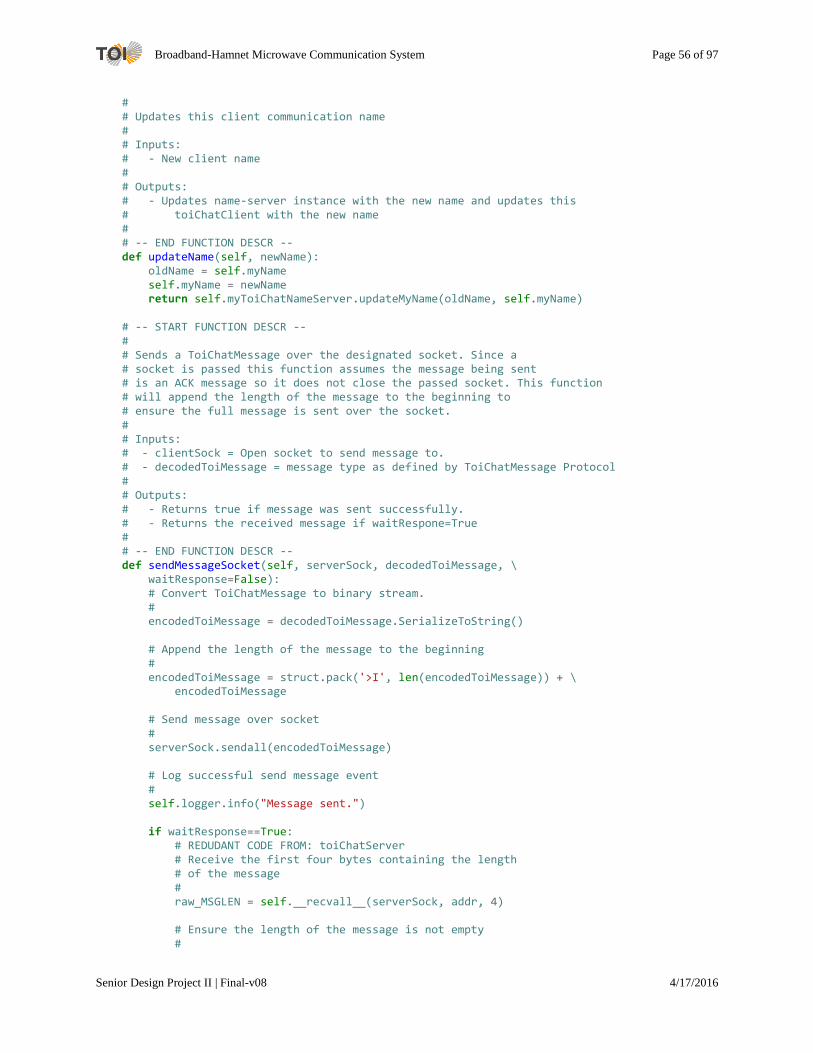
Broadband-Hamnet Microwave Communication System Page 56 of 97
Senior Design Project II | Final-v08 4/17/2016
# # Updates this client communication name # # Inputs: # - New client name # # Outputs: # - Updates name-server instance with the new name and updates this # toiChatClient with the new name # # -- END FUNCTION DESCR -- def updateName(self, newName): oldName = self.myName self.myName = newName return self.myToiChatNameServer.updateMyName(oldName, self.myName) # -- START FUNCTION DESCR -- # # Sends a ToiChatMessage over the designated socket. Since a # socket is passed this function assumes the message being sent # is an ACK message so it does not close the passed socket. This function # will append the length of the message to the beginning to # ensure the full message is sent over the socket. # # Inputs: # - clientSock = Open socket to send message to. # - decodedToiMessage = message type as defined by ToiChatMessage Protocol # # Outputs: # - Returns true if message was sent successfully. # - Returns the received message if waitRespone=True # # -- END FUNCTION DESCR -- def sendMessageSocket(self, serverSock, decodedToiMessage, \ waitResponse=False): # Convert ToiChatMessage to binary stream. # encodedToiMessage = decodedToiMessage.SerializeToString() # Append the length of the message to the beginning # encodedToiMessage = struct.pack('>I', len(encodedToiMessage)) + \ encodedToiMessage # Send message over socket # serverSock.sendall(encodedToiMessage) # Log successful send message event # self.logger.info("Message sent.") if waitResponse==True: # REDUDANT CODE FROM: toiChatServer # Receive the first four bytes containing the length # of the message # raw_MSGLEN = self.__recvall__(serverSock, addr, 4) # Ensure the length of the message is not empty #
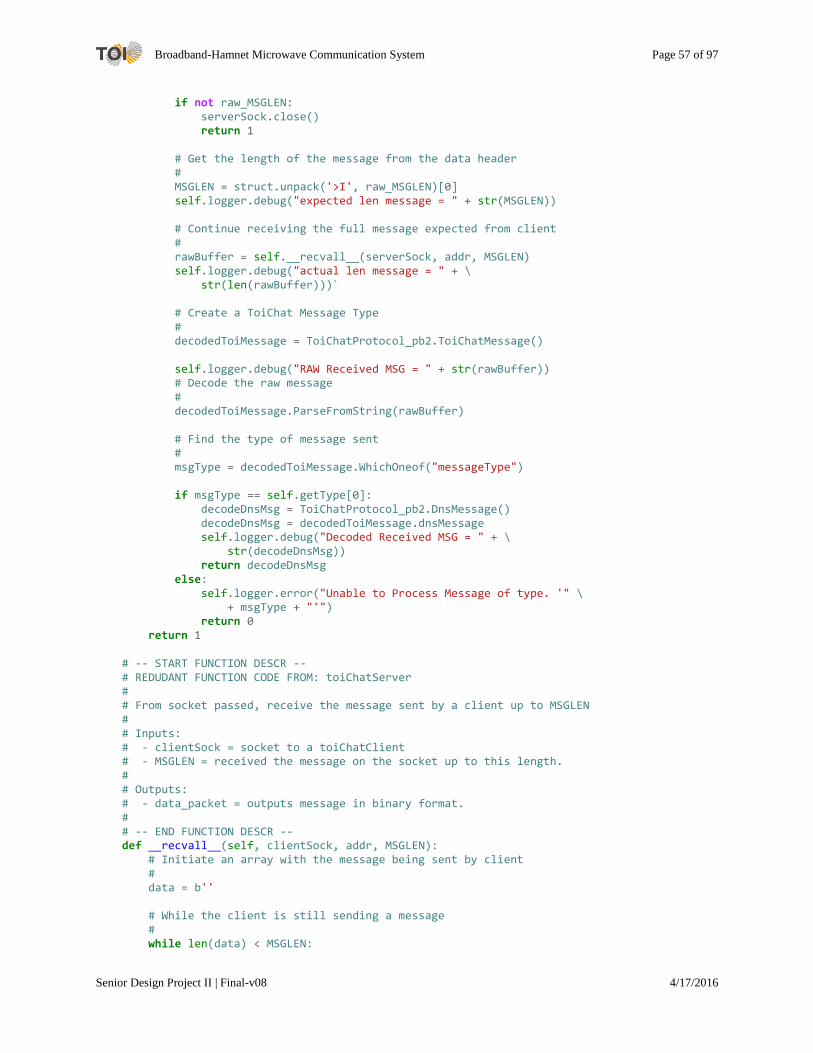
Broadband-Hamnet Microwave Communication System Page 57 of 97
Senior Design Project II | Final-v08 4/17/2016
if not raw_MSGLEN: serverSock.close() return 1 # Get the length of the message from the data header # MSGLEN = struct.unpack('>I', raw_MSGLEN)[0] self.logger.debug("expected len message = " + str(MSGLEN)) # Continue receiving the full message expected from client # rawBuffer = self.__recvall__(serverSock, addr, MSGLEN) self.logger.debug("actual len message = " + \ str(len(rawBuffer)))` # Create a ToiChat Message Type # decodedToiMessage = ToiChatProtocol_pb2.ToiChatMessage() self.logger.debug("RAW Received MSG = " + str(rawBuffer)) # Decode the raw message # decodedToiMessage.ParseFromString(rawBuffer) # Find the type of message sent # msgType = decodedToiMessage.WhichOneof("messageType") if msgType == self.getType[0]: decodeDnsMsg = ToiChatProtocol_pb2.DnsMessage() decodeDnsMsg = decodedToiMessage.dnsMessage self.logger.debug("Decoded Received MSG = " + \ str(decodeDnsMsg)) return decodeDnsMsg else: self.logger.error("Unable to Process Message of type. '" \ + msgType + "'") return 0 return 1 # -- START FUNCTION DESCR -- # REDUDANT FUNCTION CODE FROM: toiChatServer # # From socket passed, receive the message sent by a client up to MSGLEN # # Inputs: # - clientSock = socket to a toiChatClient # - MSGLEN = received the message on the socket up to this length. # # Outputs: # - data_packet = outputs message in binary format. # # -- END FUNCTION DESCR -- def __recvall__(self, clientSock, addr, MSGLEN): # Initiate an array with the message being sent by client # data = b'' # While the client is still sending a message # while len(data) < MSGLEN:

Broadband-Hamnet Microwave Communication System Page 58 of 97
Senior Design Project II | Final-v08 4/17/2016
# Keep reading message from client # data_packet = clientSock.recv(MSGLEN - len(data)) if not data_packet: self.logger.info("Connection to '" + \ str(addr) + "' lost.") return 0 # Append the data to the overall message # data += data_packet # Return the full message received # return data # -- START FUNCTION DESCR -- # # Sends a ToiChatMessage over a to a ToiChatSever. This function will # append the length of the message to the beginning to # ensure the full message is sent over the socket. # # Inputs: # - toiServerIP = ToiChat server you wish to connect to # - decodedToiMessage = message type as defined by ToiChatMessage Protocol # - toiServerPort = The port which we will attempt to contact other # toiChatServers. # # Outputs: # - Returns true if message was sent successfully. # # -- END FUNCTION DESCR -- def sendMessage(self, toiServerIP, decodedToiMessage, \ toiServerPORT=5005, waitResponse=False): # Create a new socket to the server # serverSock = socket.socket(socket.AF_INET, socket.SOCK_STREAM) # Set socket serverSockection timeout. If server doesn't respond # if five seconds say the server can not be contacted. # serverSock.settimeout(5.0) # Try to connect to passed IP # serverSock.connect((toiServerIP, toiServerPORT)) # # Log successful send message event # self.logger.info("Connection to ('" + str(toiServerIP) + \ "', " + str(toiServerPORT) + ") established.") # Send over socket # response = self.sendMessageSocket(clientSock, decodedToiMessage, \ waitResponse) # Close socket to server # serverSock.close() return response

Broadband-Hamnet Microwave Communication System Page 59 of 97
Senior Design Project II | Final-v08 4/17/2016
# -- START FUNCTION DESCR -- # # Sends a ToiChatMessage over a to a ToiChatSever. This function will # call the default sendMessage function with the exception being it # first does a name-server lookup # # Inputs: # - toiServerHostname = ToiChat server you wish to connect to (by name) # - decodedToiMessage = message type as defined by ToiChatMessage Protocol # - toiServerPort = The port which we will attempt to contact other # toiChatServers. # # Outputs: # - Returns true if message was sent successfully. # # -- END FUNCTION DESCR -- def sendMessageByHostname(self, toiServerHostname, decodedToiMessage, \ toiServerPORT=5005, waitResponse=False): return self.sendMessage(\ self.myToiChatNameServer.lookupIPByHostname(toiServerHostname), decodedToiMessage, toiServerPORT, waitResponse) # Create a message populating the headers of the DnsMessage type # with this client information. # def createTemplateIdentifierMessage(self, messageType): # Create new ToiChatMessage # myMessage = ToiChatProtocol_pb2.ToiChatMessage() # Get the client name # myName = self.getName() # Create message based on type and fill myMessage message with # my information # if messageType == self.getType[0]: # Fill myMessage message with my information # myMessage.dnsMessage.id.clientName = myName myMessage.dnsMessage.id.clientId = \ self.myToiChatNameServer.lookupIPByHostname(myName) myMessage.dnsMessage.id.dateAdded = \ self.myToiChatNameServer.lookupAddedByHostname(myName) myMessage.dnsMessage.id.description = \ self.myToiChatNameServer.lookupDescByHostname(myName) elif messageType == self.getType[1]: myMessage.chatMessage.id.clientName = myName myMessage.chatMessage.id.clientId = \ self.myToiChatNameServer.lookupIPByHostname(myName) myMessage.chatMessage.id.dateAdded = \ self.myToiChatNameServer.lookupAddedByHostname(myName) myMessage.chatMessage.id.description = \ self.myToiChatNameServer.lookupDescByHostname(myName) else: return None return myMessage
Code Listing 8: toiChatNameServer.py #!/usr/bin/env python3

Broadband-Hamnet Microwave Communication System Page 60 of 97
Senior Design Project II | Final-v08 4/17/2016
# # Python toiChatNameServer # Script interacts with background services such as toiChatServer and # toiChatClient. # # # Created on: 02/07/2016 # Author: Toi-Group # from modules.testSSH import testSSH # Used to automate SSH login from modules.listen_router import listen_router # Used for accepting ARP # requests from modules.protobuf import ToiChatProtocol_pb2 # Used for DnsMessage # Protocol from modules.toiChatClient import toiChatClient # Used for replying to # received messages import time # Used for documenting the local time of the DNS register from threading import Timer, Lock, Thread # Used for pining servers every # interval. import pprint # for printing dns tables nicely import socket, struct, fcntl # Used for resolving local IP address from modules.conn_router import conn_router # Used for sending a request # mesh network lan info to # local broadband hamnet router from modules.gatewayIP import gatewayIP # Used for finding the address # of the local broadband hamnet # router from modules.toiChatPing import * # Used for pinging machines in # the network. import readline # Used for reading in stdout to print to console now. import logging # Used for logging NameServer activities class toiChatNameServer(): # Types of commands to expect # getCommand={ 0:"register", 1:"request", 2:"login", 3:"ACK" } DNS_PING_INTERVAL = 20 # In seconds # -- START CLASS CONSTRUCTOR -- # # Upon instantiation adds its own name, ipv4 address, # and description to the dns lookup table # # -- END CLASS CONSTRUCTOR -- def __init__(self, toiChatClient): # Logging instance where should we save nameserver logs to # self.logger = logging.getLogger(__name__) # Prompt for Router's root password # self.user_pwd = testSSH()

Broadband-Hamnet Microwave Communication System Page 61 of 97
Senior Design Project II | Final-v08 4/17/2016
# Make router listen for ARP requests # listen_router(self.user_pwd) # Store ToiChatClient to used to send dns messages # self.myToiChatClient = toiChatClient # Variable to tell wait until next thread # self.stopDNSPing = False self.dnsTableLock = Lock() # Define dictionary to hold values of user name # and key pairing of IP and other relevant information # User name will be keys of the dictionary while the values # will be the IPs of the user # # DICTIONARY FORMAT: # self.dns = { # clientname0 = { # clientId = IPv4 address # dateAdded = <DATE CLIENT FIRST CONNECTED> # description = <MISC INFOMATION OF CLIENT> # lastPingVal = <PING VALUE> # Does not transmit in DNS Reg # } # clientname1 = { # clientId = IPv4 address # dateAdded = <DATE CLIENT FIRST CONNECTED> # description = <MISC INFOMATION OF CLIENT> # } # clientname2 = { # clientId = IPv4 address # dateAdded = <DATE CLIENT FIRST CONNECTED> # description = <MISC INFOMATION OF CLIENT> # } # ... LIST CAN GROW ... # } # # # self.dns = {} self.logger.info("Starting new toiChatNameServer instance.") # Register local machine in DNS replacing any old values # self.addToDNS(self.myToiChatClient.getName(), self.getMyIP(), \ time.strftime("%Y%m%d - %H:%M:%S"), \ self.myToiChatClient.getDescription()) # Create thread to loop DNS Ping every 3 mins. # self.S = Thread(target=self.__loopPingDNS__) self.S.daemon = True self.S.start() # Print the current dns lookup table to the console # def printDNSTable(self): pp = pprint.PrettyPrinter(width=41)

Broadband-Hamnet Microwave Communication System Page 62 of 97
Senior Design Project II | Final-v08 4/17/2016
pp.pprint(self.dns) return 1 # Print the current clients in the DNS table # def printClients(self): pp = pprint.PrettyPrinter(width=41) # To print all clients we first have to remove our name from the # dns table # myName = self.myToiChatClient.getName() clientList = [] for key in self.dns.keys(): if not key == myName: clientList.append(key) pp.pprint(clientList) return 1 # Returns the IPv4 address of the local machine for the given interface # # Sourced from: http://stackoverflow.com/questions/166506/finding-local-ip-addresses-using-pythons-stdlib def getMyIP(self, iface = 'eth0'): sock = socket.socket(socket.AF_INET, socket.SOCK_STREAM) sockfd = sock.fileno() SIOCGIFADDR = 0x8915 ifreq = struct.pack('16sH14s', iface.encode('utf-8'), \ socket.AF_INET, b'\x00'*14) try: res = fcntl.ioctl(sockfd, SIOCGIFADDR, ifreq) except: return None ip = struct.unpack('16sH2x4s8x', res)[2] return socket.inet_ntoa(ip) # Adds one client to the internal dictionary # def addToDNS(self, clientName, clientId, dateAdded, description): # Inform DNS ping thread to kill # self.stopDNSPing = True # Acquire DNS table manipulate lock # self.dnsTableLock.acquire() # Print to log file we are adding a new entry # self.logger.info("Adding - '" + str(clientName) + "' to " + \ "DNS table.") # Update dictionary with passed information # self.dns[clientName] = {} self.dns[clientName]['clientId'] = clientId self.dns[clientName]['dateAdded'] = dateAdded self.dns[clientName]['description'] = description # Release manipulating the DNS table to other threads # self.dnsTableLock.release()

Broadband-Hamnet Microwave Communication System Page 63 of 97
Senior Design Project II | Final-v08 4/17/2016
# Inform DNS ping thread to kill # self.stopDNSPing = False return 1 # Removes one client to the internal dictionary # def removeDNSByHostname(self, clientName): # Inform DNS ping thread to kill # self.stopDNSPing = True # Acquire DNS table manipulate lock # self.dnsTableLock.acquire() # Print to log file we are removing a new entry # self.logger.info("Removing - '" + str(clientName) + "' from " + \ "DNS table.") # Update dictionary with passed information # del self.dns[clientName] # Release manipulating the DNS table to other threads # self.dnsTableLock.release() # Inform DNS ping thread to kill # self.stopDNSPing = False return 1 # Updates the current machines hostname entry in the internal dictionary # def updateMyName(self, oldName, newName): userDesc = self.lookupDescByHostname(oldName) removeDNSByHostname(oldName) return self.addToDNS(newName, self.getMyIP(), \ time.strftime("%Y%m%d - %H:%M:%S"), userDesc) # method to return IP of user the client is attempting to contact # returns 'None' if IP does not exist # def lookupIPByHostname(self, userHostname): try: IP = self.dns[userHostname]['clientId'] except KeyError: return None return IP # method to return IP of user the client is attempting to contact # returns 'None' if IP does not exist # def lookupHostnameByIP(self, userIP): # Inform DNS ping thread to kill # self.stopDNSPing = True # Acquire DNS table manipulate lock

Broadband-Hamnet Microwave Communication System Page 64 of 97
Senior Design Project II | Final-v08 4/17/2016
# self.dnsTableLock.acquire() for hostname in self.dns: if self.dns[hostname]['clientId'] == userIP: return hostname # Release manipulating the DNS table to other threads # self.dnsTableLock.release() # Inform DNS ping thread to kill # self.stopDNSPing = False return None # method to IP of the closest toiChatServer in DNS table. If only # one entry it points to that toiChatServer # def lookupNearestToiChatServer(self): # Closest Server not ourselves # return min((self.dns[key]['lastPingVal'], key) \ [key for key in self.dns.keys() \ if key not self.myToiChatClient.getName()])[1] #result = min(dnsEntires, key=lambda x:self.dns[x]['lastPingVal']) # method to return last update of passedIP # def lookupAddedByHostname(self, userHostname): try: update = self.dns[userHostname]['dateAdded'] except KeyError: return None return update # method to return last update of passed hostname # def lookupUpdateByIP(self, userIP): return self.lookupAddedByHostname(userHostname) # Return number of entries in our table # def lookupDnsLegnth(self): return len(self.dns) # Return number of entries in our table # def lookupDescByHostname(self, userHostname): try: update = self.dns[userHostname]['description'] except KeyError: return None return update # -- START FUNCTION DESCR -- # # Initiates a DNS table sync with designated client # # Inputs: # - toiServerIP = The server we should sync with # # Outputs:

Broadband-Hamnet Microwave Communication System Page 65 of 97
Senior Design Project II | Final-v08 4/17/2016
# None # # -- END FUNCTION DESCR -- def forceSyncDNS(self, toiServerIP=None): # If toiServerIP field is empty then connect to nearest toiServer # if toiServerIP: try: toiServerIP = self.lookupNearestToiChatServer() except Exception as e: return 0 requestDNS = self.createRequestDnsMessage() self.myToiChatClient.sendMessage(toiServerIP, requestDNS) return 1 # -- START FUNCTION DESCR -- # # Message locates the local Broadband Hamnet router and will # send a command asking it to find all attached devices in the # mesh network. It will then attempt to contact each device in the # network to see if any are running an instance of toiChatServer # # Inputs: # - toiServerPort = The port which we will attempt to contact other # toiChatServers. # # Outputs: # - Upon successful connection to another toiChatServer we will update # our current DNS table with its # - Upon failure to find another toiChatServer we will return an error # # -- END FUNCTION DESCR -- def attemptFindServer(self, toiServerPORT=5005): # Get a list of IPs running Toi-Chat software on the mesh network # listIPs = conn_router(gatewayIP(), self.user_pwd) self.logger.debug("List of returned IPs: " + str(listIPs)) # Check to see if there are any IPs in the returned ARP list # if listIPs == None: return 0 # Sort the list of IPs be increasing distance # sortIPs = pingIPSort(listIPs)[0] self.logger.debug("List of potential TOIChat Hosts:" + \ str(sortIPs)) for toiServerIP in sortIPs: # Print to stdout what we are trying to connect to # self.logger.debug("Trying to connect to '" + \ str.strip(toiServerIP) + "'.") try: response = self.myToiChatClient.sendMessage(toiServerIP, loginDNS, \ toiServerPORT, waitResponse=True) # Did not fail to connect. Connection to server successful # if self.handleDnsMessage(response) == True: # Break out of for loop

Broadband-Hamnet Microwave Communication System Page 66 of 97
Senior Design Project II | Final-v08 4/17/2016
# # Sync our DNS table with the found server # self.forceSyncDNS(toiServerIP) break # Failed to login # return 0 except Exception as e: if toiServerIP == sortIPs[len(sortIPs)-1]: # We tried all IPs in the list and could not connect to # any. Return error to stdout informing the user self.logger.warning("Could not connect to '" + \ str.strip(toiServerIP) + "'. Exited with status: " + \ str(e) + ". Exhausted known list of hosts.") return 0 else: self.logger.info("Could not connect to '" + \ str.strip(toiServerIP) + "'... Exited with status: " + \ str(e) + "Trying next IP in list.") continue return 1 # -------------------------------------------------------------------- # ------------------- START OF MSG HANDLING FUNCTIONS ---------------- # -------------------------------------------------------------------- # Handle DnsMessage type received from a toiChatServer instance. # Message type is already known to be DNS message # def handleDnsMessage(self, myDnsMessage, clientSock=None): if myDnsMessage.command == self.getCommand[0]: self.logger.info("Received a '" + \ str(self.getCommand[0]) + "' DNS message from '" + \ myDnsMessage.id.clientId + "'.") return self.handleRegisterDNS(myDnsMessage) elif myDnsMessage.command == self.getCommand[1]: self.logger.info("Received a '" + \ str(self.getCommand[1]) + "' DNS message from '" + \ myDnsMessage.id.clientId + "'.") return self.handleRequestDNS(myDnsMessage) elif myDnsMessage.command == self.getCommand[2]: self.logger.info("Received a '" + \ str(self.getCommand[2]) + "' DNS message from '" + \ myDnsMessage.id.clientId + "'.") return self.handleLoginDNS(myDnsMessage, clientSock) elif myDnsMessage.command == self.getCommand[3]: self.logger.info("Received a '" + \ str(self.getCommand[3]) + "' DNS message from '" + \ myDnsMessage.id.clientId + "'.") return self.handleACKDNS(myDnsMessage) self.logger.warning("Unknown DNSMessage Command: '" + \ str(myDnsMessage.command) + "' received from '" + \ myDnsMessage.id.clientId + "'.") return 0 # Extract the name, ipv4 address, last update, and misc information from # DNS message and register into local DNS # def handleRegisterDNS(self, registerDNSMessage): # We started thinking we have a more updated table #

Broadband-Hamnet Microwave Communication System Page 67 of 97
Senior Design Project II | Final-v08 4/17/2016
moreUpdated = False # Keep track of number of clients we add to our table # counter = 0 # Loop through all repeated clients in DnsMessage # for newClient in registerDNSMessage.clients: # Check if user is in the DNS already # if newClient.clientName in self.dns: # If user is already in DNS check if receiver has updated # client information # if self.lookupAddedByHostname(newClient.clientName) > \ newClient.dateAdded: # We skip adding since our dns has a more updated # entry. We also need to reply to the client noting # we have a more updated entry # moreUpdated = True continue # The two tables are in sync for this client so we continue # elif self.lookupAddedByHostname(newClient.clientName) == \ newClient.dateAdded: continue # The sender has a more updated dns entry for this client # so we update our table # self.addToDNS(newClient.clientName, newClient.clientId, \ newClient.dateAdded, newClient.description) counter += 1 # Our dns table was more updated compared to the sender so # we reply with our table # if (moreUpdated == True) or \ (len(registerDNSMessage.clients)-counter < self.lookupDnsLegnth()): # We send a register dns message back to the sender # self.handleRequestDNS(registerDNSMessage) return 1 # Handles a DnsMessage from a client who is requesting our DNS table. # Returns a registerDNS message to the client # def handleRequestDNS(self, requestDNSMessage): # Get the information about the client requesting DNS information # returnAddress = requestDNSMessage.id.clientId # Create a new Register DNS Message # myRequestDNS = self.createRegisterDnsMessage() self.logger.info("Sending a '" + str(self.getCommand[1]) + \ "' message to '" + str(returnAddress) +"'.") # Send message back to requester

Broadband-Hamnet Microwave Communication System Page 68 of 97
Senior Design Project II | Final-v08 4/17/2016
# self.myToiChatClient.sendMessage(returnAddress, myRequestDNS) return 1 # Handles a Login Message type. The login message checks against this # DNS instance to see if username is already in use. # def handleLoginDNS(self, loginDNSMessage, clientSock): # Get the information about the client requesting DNS information # returnHostname = requestDNSMessage.id.clientName # Lookup in our DNS table to see who is associate with the # returnHostname (if any) # ipAssociatedInTable = lookupIPByHostname(returnHostname) # If client is not in our DNS table we will send a OK message back # to the client # if ipAssociatedInTable: # Create a ACK message signifying the clientname is not in use #: myACKDNS = self.createACKDnsMessage(True) else: # Create error message # errorMsg = "Login Failed. Name already in use by " + \ ipAssociatedInTable # Create a ACK message signifying the clientname is already in # use. Send the client what IP the client is already in use in. # myACKDNS = self.createACKDnsMessage(False, errorMsg) # Send message back to requester # self.myToiChatClient.sendMessageSocket(clientSock, myACKDNS) return 1 # Handles response message receives after a request message #s def handleACKDNS(self, ackDNSMessage): self.logger.info("ACK Received from: '" + \ ackDNSMessage.id.clientName + \ "' with status: '" + \ ackDNSMessage.status + "'") if ackDNSMessage.status == "ok": return 1 else: return 0 # Send our DNS table to another machine # Populate a DnsMessage Register message type with information about # each client in our DNS table. # def createRegisterDnsMessage(self): # Inform DNS ping thread to kill # self.stopDNSPing = True
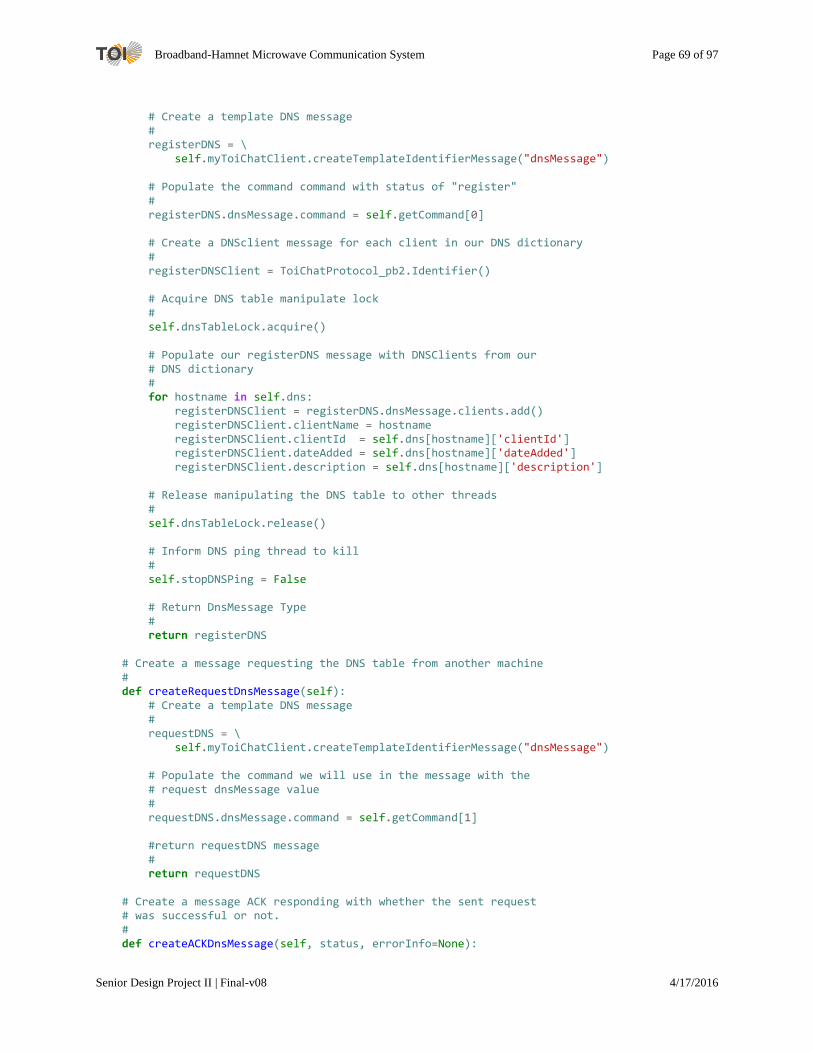
Broadband-Hamnet Microwave Communication System Page 69 of 97
Senior Design Project II | Final-v08 4/17/2016
# Create a template DNS message # registerDNS = \ self.myToiChatClient.createTemplateIdentifierMessage("dnsMessage") # Populate the command command with status of "register" # registerDNS.dnsMessage.command = self.getCommand[0] # Create a DNSclient message for each client in our DNS dictionary # registerDNSClient = ToiChatProtocol_pb2.Identifier() # Acquire DNS table manipulate lock # self.dnsTableLock.acquire() # Populate our registerDNS message with DNSClients from our # DNS dictionary # for hostname in self.dns: registerDNSClient = registerDNS.dnsMessage.clients.add() registerDNSClient.clientName = hostname registerDNSClient.clientId = self.dns[hostname]['clientId'] registerDNSClient.dateAdded = self.dns[hostname]['dateAdded'] registerDNSClient.description = self.dns[hostname]['description'] # Release manipulating the DNS table to other threads # self.dnsTableLock.release() # Inform DNS ping thread to kill # self.stopDNSPing = False # Return DnsMessage Type # return registerDNS # Create a message requesting the DNS table from another machine # def createRequestDnsMessage(self): # Create a template DNS message # requestDNS = \ self.myToiChatClient.createTemplateIdentifierMessage("dnsMessage") # Populate the command we will use in the message with the # request dnsMessage value # requestDNS.dnsMessage.command = self.getCommand[1] #return requestDNS message # return requestDNS # Create a message ACK responding with whether the sent request # was successful or not. # def createACKDnsMessage(self, status, errorInfo=None):

Broadband-Hamnet Microwave Communication System Page 70 of 97
Senior Design Project II | Final-v08 4/17/2016
# Create a template DNS message # ackDNS = \ self.myToiChatClient.createTemplateIdentifierMessage("dnsMessage") # Populate the command we will use in the message with the # request dnsMessage value # ackDNS.dnsMessage.command = self.getCommand[4] # Check what status to append to the message # if status == True: ackDNS.DnsMessage.status("ok") else: ackDNS.DnsMessage.status("ERROR: " + errorInfo) #return requestDNS message # return ackDNS # Create a message attempting to login to a toiChatNetwork # by checking if the desired username is already in use. # def createLoginDnsMessage(self): # Create a template DNS message # loginDNS = \ self.myToiChatClient.createTemplateIdentifierMessage("dnsMessage") # Populate the command we will use in the message with the # request dnsMessage value # loginDNS.dnsMessage.command = self.getCommand[3] #return requestDNS message # return loginDNS # ----------------------------------------------------------------- # ------------------- START OF AUTO PING FUNCTIONS ---------------- # ----------------------------------------------------------------- # -- START FUNCTION DESCR -- # # Will periodically create a thread to ping servers in our dns table # # Inputs: # - None # # Outputs: # - Will update the DNS table with ping times to other servers # - May delete entries from internal DNS dictionary. # # -- END FUNCTION DESCR -- def __loopPingDNS__(self): # Loop every 3 mins # Timer(self.DNS_PING_INTERVAL,self.__loopPingDNS__).start() self.__pingDNSAvaliable__() # -- START FUNCTION DESCR --

Broadband-Hamnet Microwave Communication System Page 71 of 97
Senior Design Project II | Final-v08 4/17/2016
# # Update DNS table in background by pinging different machines in our # DNS table # # Inputs: # - None # # Outputs: # - Will update the DNS table with ping times to other servers # - May delete entries from internal DNS dictionary. # # -- END FUNCTION DESCR -- def __pingDNSAvaliable__(self): # Determine how large the dns table is and send a dynamic number # of ICMP packets depending if there are many clients or not. # dnsLegnth = self.lookupDnsLegnth() if dnsLegnth > 10: icmpPcks = 2 elif dnsLegnth > 5: icmpPcks = 4 else: icmpPcks = 6 # Gain DNS table manipulation lock # self.dnsTableLock.acquire() # Create a list to contain IPs we could not reach # listToDelete = [] # Loop through each entry in the internal DNS # for hostname in self.dns.keys(): # Get if stopDNSPing status. Stop thread if true. # if self.stopDNSPing == True: # Log we quit pinging # self.logger.debug("Pinging stopped due to interrupt.") # Check to see if we should quit pinging # break # Ping user # avgPing = pingOne(self.lookupIPByHostname(hostname), icmpPcks) # If the Pi can not ping the client in its DNS table # assume the client went off-line. Delete it from our table # if avgPing == None: # Delete entry from DNS # listToDelete.append(hostname) self.logger.debug("'" + str(hostname) + "' did not " + \ "respond.") continue
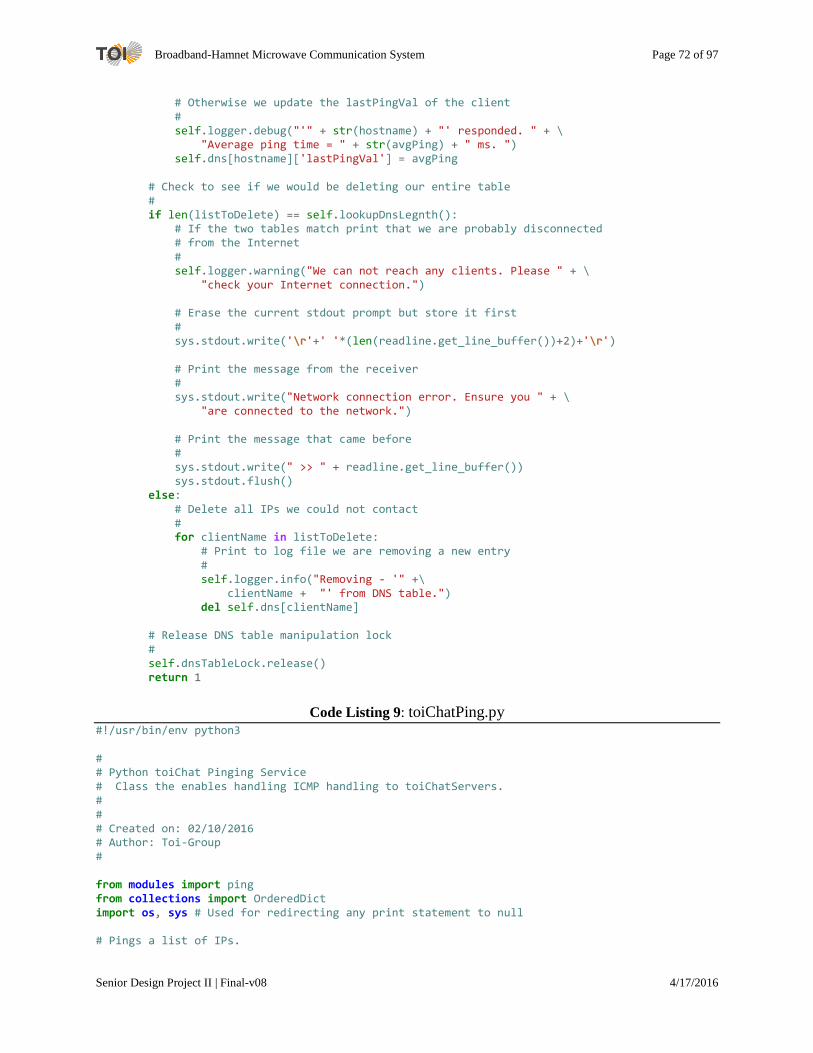
Broadband-Hamnet Microwave Communication System Page 72 of 97
Senior Design Project II | Final-v08 4/17/2016
# Otherwise we update the lastPingVal of the client # self.logger.debug("'" + str(hostname) + "' responded. " + \ "Average ping time = " + str(avgPing) + " ms. ") self.dns[hostname]['lastPingVal'] = avgPing # Check to see if we would be deleting our entire table # if len(listToDelete) == self.lookupDnsLegnth(): # If the two tables match print that we are probably disconnected # from the Internet # self.logger.warning("We can not reach any clients. Please " + \ "check your Internet connection.") # Erase the current stdout prompt but store it first # sys.stdout.write('\r'+' '*(len(readline.get_line_buffer())+2)+'\r') # Print the message from the receiver # sys.stdout.write("Network connection error. Ensure you " + \ "are connected to the network.") # Print the message that came before # sys.stdout.write(" >> " + readline.get_line_buffer()) sys.stdout.flush() else: # Delete all IPs we could not contact # for clientName in listToDelete: # Print to log file we are removing a new entry # self.logger.info("Removing - '" +\ clientName + "' from DNS table.") del self.dns[clientName] # Release DNS table manipulation lock # self.dnsTableLock.release() return 1
Code Listing 9: toiChatPing.py #!/usr/bin/env python3 # # Python toiChat Pinging Service # Class the enables handling ICMP handling to toiChatServers. # # # Created on: 02/10/2016 # Author: Toi-Group # from modules import ping from collections import OrderedDict import os, sys # Used for redirecting any print statement to null # Pings a list of IPs.
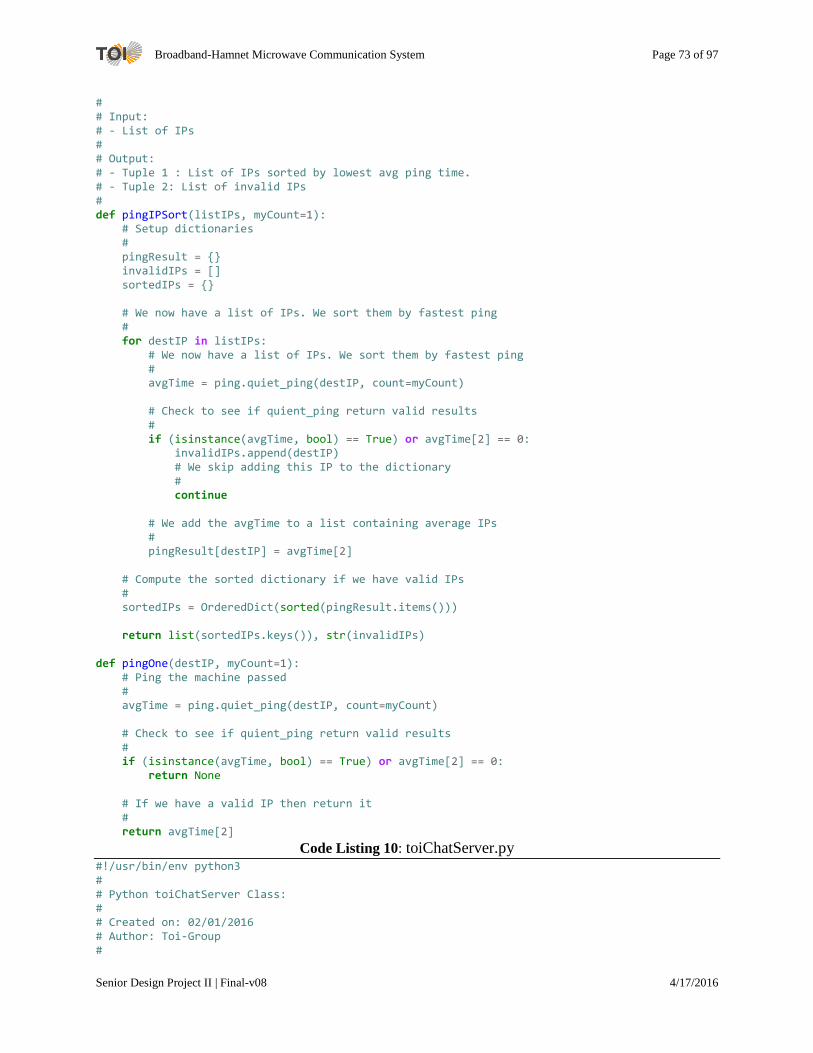
Broadband-Hamnet Microwave Communication System Page 73 of 97
Senior Design Project II | Final-v08 4/17/2016
# # Input: # - List of IPs # # Output: # - Tuple 1 : List of IPs sorted by lowest avg ping time. # - Tuple 2: List of invalid IPs # def pingIPSort(listIPs, myCount=1): # Setup dictionaries # pingResult = {} invalidIPs = [] sortedIPs = {} # We now have a list of IPs. We sort them by fastest ping # for destIP in listIPs: # We now have a list of IPs. We sort them by fastest ping # avgTime = ping.quiet_ping(destIP, count=myCount) # Check to see if quient_ping return valid results # if (isinstance(avgTime, bool) == True) or avgTime[2] == 0: invalidIPs.append(destIP) # We skip adding this IP to the dictionary # continue # We add the avgTime to a list containing average IPs # pingResult[destIP] = avgTime[2] # Compute the sorted dictionary if we have valid IPs # sortedIPs = OrderedDict(sorted(pingResult.items())) return list(sortedIPs.keys()), str(invalidIPs) def pingOne(destIP, myCount=1): # Ping the machine passed # avgTime = ping.quiet_ping(destIP, count=myCount) # Check to see if quient_ping return valid results # if (isinstance(avgTime, bool) == True) or avgTime[2] == 0: return None # If we have a valid IP then return it # return avgTime[2]
Code Listing 10: toiChatServer.py #!/usr/bin/env python3 # # Python toiChatServer Class: # # Created on: 02/01/2016 # Author: Toi-Group #

Broadband-Hamnet Microwave Communication System Page 74 of 97
Senior Design Project II | Final-v08 4/17/2016
from modules.protobuf import ToiChatProtocol_pb2 # Used for decoding # and finding message type # of a ToiChatMessage import socket # Used for receiving information from a toiChatClient from threading import Thread # Used for separating listener with server # full message receiver. import queue # Used for communication between server listener, receiver, # and printer import struct, sys, fcntl, termios # Used for finding the full message length of a received # message. import readline # Used for reading in stdout to print to console now. import logging # Used for logging server status. # ToiChatServer listener and ToiChatMessage handler # class toiChatServer(): # String constant to send to queues when they should quit # CONST_EXIT_QUEUE = "EXITTHREAD" # Types of messages to expect as defined in ToiChatProtocol # getType={ 0:"dnsMessage", 1:"chatMessage" } # -- START CLASS CONSTRUCTOR -- # # ToiChat class handling server side communication # - Defaults to port = 5005 # # -- END CLASS CONSTRUCTOR -- def __init__(self, toiChatNameServer, PORT_TOICHAT=5005): # Store Logging file where should we save server logs to # self.logger = logging.getLogger(__name__) # Store ToiChatNameServer to use # self.myToiChatNameServer = toiChatNameServer # Define port ToiChat uses to communicate # self.PORT_TOICHAT = PORT_TOICHAT; # Handle multiple chat instances # self.myToiChatters = [] # Server is by default set to disabled # self.stopServerVar = False # Create a communication handler thread queue # self.communicateQueue = queue.Queue() # Create a print to file queue

Broadband-Hamnet Microwave Communication System Page 75 of 97
Senior Design Project II | Final-v08 4/17/2016
# self.printQueue = queue.Queue() # Create a print to stdout Now queue # self.printQueueNow = queue.Queue() # Create the client recv connection handler thread # self.S = Thread(target=self.__toiChatListener__) # Create the communication handler thread # self.C = Thread(target=self.__communicate__) # Print server output to user Now thread # self.N = Thread(target=self.__printToUserNow__) self.N.daemon = True self.N.start() # -- START CLASS DESTRUCTOR -- # # ToiChat class destructor stops background threads upon class delete # # -- END CLASS DESTRUCTOR -- def __del__(self): self.stopServer() # -- START FUNCTION DESCR -- # # Starts a thread listening on PORT_TOICHAT for incoming socket # clientSockections. # # Inputs: # None # # Outputs: # - A thread running server listen serverMsg.operations running # # -- END FUNCTION DESCR -- def startServer(self): # Reset stop server boolean # self.stopServerVar = False # Check to see if server listener thread has already started # if (self.S.is_alive() == False): self.stopServerVar = False # Attempt to start the server listener # try: self.S.start() except RuntimeError as e: self.logger.error("ToiChatServer server listener " + \ "thread failed to start! - " + str(e), True) raise Exception("ERROR: ToiChatServer server listener " + \ "thread failed to start! - " + str(e)) return 0 self.logger.debug("Server Listener " + \

Broadband-Hamnet Microwave Communication System Page 76 of 97
Senior Design Project II | Final-v08 4/17/2016
"thread started.") # Check to see if message processor thread has already started # if (self.C.is_alive() == False): try: # Attempt to start the message processor thread # self.C.start() except RuntimeError as e: self.logger.error("ToiChatServer message " + \ "processor thread failed to start! - " + str(e)) raise Exception("ERROR: ToiChatServer message processor " + \ "thread failed to start! - " + str(e)) return 0 self.logger.debug("Message Processor " + \ "thread started.") # Server dependencies started successfully. # self.logger.info("Server start was successful!") return 1 # -- START FUNCTION DESCR -- # # Stop all threads created by startServer # # Inputs: # - A thread running server listen operations running # # Outputs: # - A thread running server listen operations stopped # # -- END FUNCTION DESCR -- def stopServer(self): # If break out of loop print we are closing the server # self.logger.debug("Attempting to stop ToiChat server...") if (self.S.is_alive() == True): # Tell the server listener thread to break accepting connections # self.stopServerVar = True # Connect to this toiChatServer instance to break out of # accept statement in server listener thread # serverSock = socket.socket(socket.AF_INET, socket.SOCK_STREAM) serverSock.connect(('', self.PORT_TOICHAT)) serverSock.close() # Wait for server thread to close # self.S.join(3.0) if (self.C.is_alive() == True): # Stop the communicateQueue thread handler # self.communicateQueue.put([None, self.CONST_EXIT_QUEUE]) # Wait for server thread to close

Broadband-Hamnet Microwave Communication System Page 77 of 97
Senior Design Project II | Final-v08 4/17/2016
# self.C.join(3.0) # Determine if server listener thread stopped correctly # if (self.S.is_alive() == True and self.C.is_alive() == False): self.logger.error("Attempt to stop server listener failed.") del self.C # Create the communication handler thread # self.C = Thread(target=self.__communicate__) # Restart server to ensure all threads are running correctly # self.startServer() return 0 elif (self.S.is_alive() == False and self.C.is_alive == True): del self.S self.logger.error("Attempt to stop message handler failed.") # Create the client recv connection handler thread # self.S = Thread(target=self.__toiChatListener__) # Restart server to ensure all threads are running correctly # self.startServer() return 0 self.logger.info("Server stop was successful!") # Create new instances of the threads del self.C del self.S # Create the client recv connection handler thread # self.S = Thread(target=self.__toiChatListener__) # Create the communication handler thread # self.C = Thread(target=self.__communicate__) return 1 # -- START FUNCTION DESCR -- # # Returns the server status. # # Inputs: # None # # Outputs: # - Returns true if server is running else false. # # -- END FUNCTION DESCR -- def statusServer(self): if (self.S.is_alive() and self.S.is_alive()) == True: return 1 else: return 0 # -- START FUNCTION DESCR -- # # Updates the port the server listener work on. # # Inputs:

Broadband-Hamnet Microwave Communication System Page 78 of 97
Senior Design Project II | Final-v08 4/17/2016
# None # # Outputs: # - Returns true if server is running else fase. # # -- END FUNCTION DESCR -- def updateServerPort(self, PORT_TOICHAT=5005): # Define port ToiChat uses to communicate # self.PORT_TOICHAT = PORT_TOICHAT # Print that we are restarting the server # self.logger.debug("Restarting Server Threads") self.stopServer() self.startServer() return 1 # -- START FUNCTION DESCR -- # # Update Chat Message Handler array # # Inputs: # A toiChatter Instance # # Outputs: # Updated internal toiChatter handler with inputted toiChatter Instance # added to handler array # # -- END FUNCTION DESCR -- def addToiChatter(self, toiChatter): self.myToiChatters.append(toiChatter) return 1 # -- START FUNCTION DESCR -- # # Update Chat Message Handler array # # Inputs: # A toiChatter Instance # # Outputs: # Updated internal toiChatter handler with inputted toiChatter Instance # removed from handler array # # -- END FUNCTION DESCR -- def removeToiChatter(self, toiChatter): try: self.myToiChatters.remove(toiChatter) except ValueError: pass return 1 # -------------------------------------------------------------------- # ------------------- START OF PRIVATE FUNCTIONS --------------------- # -------------------------------------------------------------------- # -- START FUNCTION DESCR -- # # Open a port on the PI to act as the ToiChat server listener. # # Inputs:
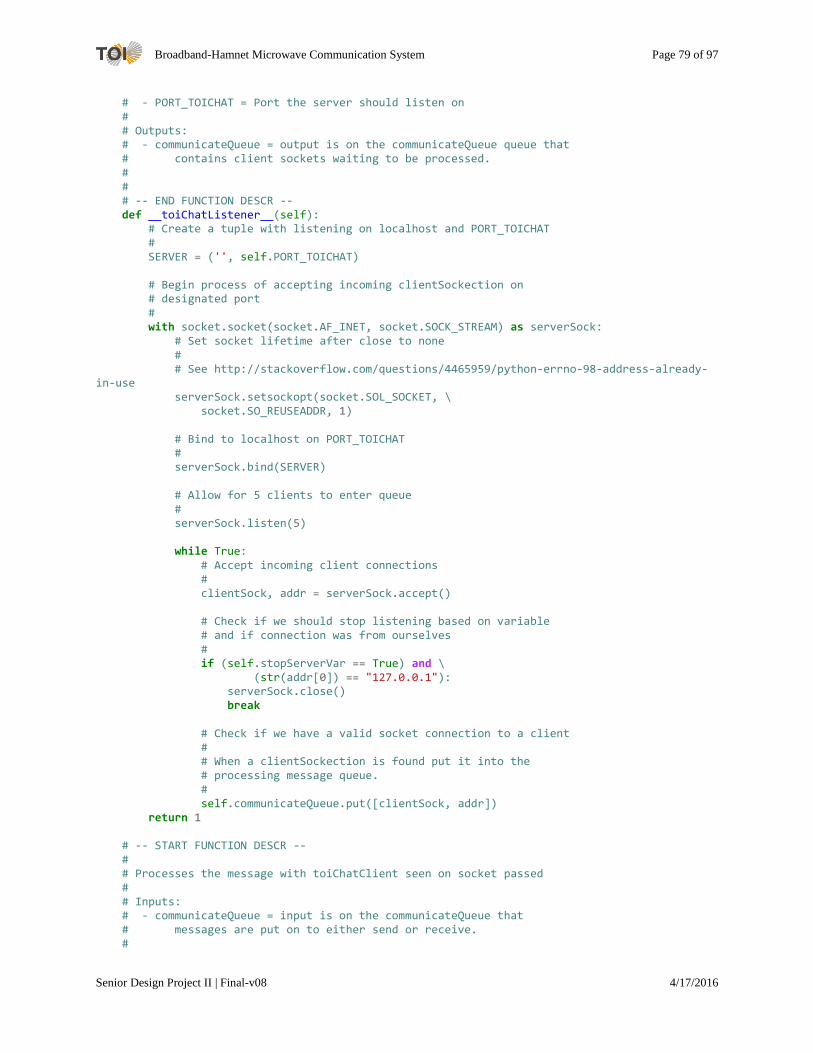
Broadband-Hamnet Microwave Communication System Page 79 of 97
Senior Design Project II | Final-v08 4/17/2016
# - PORT_TOICHAT = Port the server should listen on # # Outputs: # - communicateQueue = output is on the communicateQueue queue that # contains client sockets waiting to be processed. # # # -- END FUNCTION DESCR -- def __toiChatListener__(self): # Create a tuple with listening on localhost and PORT_TOICHAT # SERVER = ('', self.PORT_TOICHAT) # Begin process of accepting incoming clientSockection on # designated port # with socket.socket(socket.AF_INET, socket.SOCK_STREAM) as serverSock: # Set socket lifetime after close to none # # See http://stackoverflow.com/questions/4465959/python-errno-98-address-already-in-use serverSock.setsockopt(socket.SOL_SOCKET, \ socket.SO_REUSEADDR, 1) # Bind to localhost on PORT_TOICHAT # serverSock.bind(SERVER) # Allow for 5 clients to enter queue # serverSock.listen(5) while True: # Accept incoming client connections # clientSock, addr = serverSock.accept() # Check if we should stop listening based on variable # and if connection was from ourselves # if (self.stopServerVar == True) and \ (str(addr[0]) == "127.0.0.1"): serverSock.close() break # Check if we have a valid socket connection to a client # # When a clientSockection is found put it into the # processing message queue. # self.communicateQueue.put([clientSock, addr]) return 1 # -- START FUNCTION DESCR -- # # Processes the message with toiChatClient seen on socket passed # # Inputs: # - communicateQueue = input is on the communicateQueue that # messages are put on to either send or receive. #

Broadband-Hamnet Microwave Communication System Page 80 of 97
Senior Design Project II | Final-v08 4/17/2016
# Outputs: # - Either sends a message or receive a message that # # -- END FUNCTION DESCR -- def __communicate__(self): while True: # Get a client socket clientSockection from server listen # thread # [clientSock, addr] = self.communicateQueue.get() # Get if queueEXIT STATUS is true. Stop thread if true. # if addr == self.CONST_EXIT_QUEUE: self.communicateQueue.task_done() break # Check if socket is still open? # # Print to log we are receiving a message # self.logger.info(str(addr) + " - connected") # Receive the first four bytes containing the length # of the message # raw_MSGLEN = self.__recvall__(clientSock, addr, 4) # Ensure the length of the message is not empty # if not raw_MSGLEN: clientSock.close() continue # Get the length of the message from the data header # MSGLEN = struct.unpack('>I', raw_MSGLEN)[0] self.logger.debug("expected len message = " + str(MSGLEN)) # Continue receiving the full message expected from client # rawBuffer = self.__recvall__(clientSock, addr, MSGLEN) self.logger.debug("actual len message = " + \ str(len(rawBuffer))) # Process RAW MESSAGE # self.__messageProcess__(clientSock, rawBuffer) # Close socket to client. # self.logger.info(str(addr) + " - disconnected.") clientSock.close() # Indicate we finished processing the enqueued socket # self.communicateQueue.task_done() return 1 # -- START FUNCTION DESCR --

Broadband-Hamnet Microwave Communication System Page 81 of 97
Senior Design Project II | Final-v08 4/17/2016
# # From socket passed, receive the message sent by a client up to MSGLEN # # Inputs: # - clientSock = socket to a toiChatClient # - MSGLEN = received the message on the socket up to this length. # # Outputs: # - data_packet = outputs message in binary format. # # -- END FUNCTION DESCR -- def __recvall__(self, clientSock, addr, MSGLEN): # Initiate an array with the message being sent by client # data = b'' # While the client is still sending a message # while len(data) < MSGLEN: # Keep reading message from client # data_packet = clientSock.recv(MSGLEN - len(data)) if not data_packet: self.logger.info("Connection to '" + \ str(addr) + "' lost.") return 0 # Append the data to the overall message # data += data_packet # Return the full message received # return data # -- START FUNCTION DESCR -- # # Decodes message based on its type # # Inputs: # - clientSocket = A live connection to a toiChatClient that # sent a message # - rawBuffer = A message of type ToiChatProtocol received from client # # Outputs: # - Hands off message to appropriate handler. # # -- END FUNCTION DESCR -- def __messageProcess__(self, clientSock, rawBuffer): # Create a ToiChat Message Type # decodedToiMessage = ToiChatProtocol_pb2.ToiChatMessage() self.logger.debug("RAW Received MSG = " + str(rawBuffer)) # Decode the raw message # decodedToiMessage.ParseFromString(rawBuffer) # Find the type of message sent # msgType = decodedToiMessage.WhichOneof("messageType") if msgType == self.getType[0]:

Broadband-Hamnet Microwave Communication System Page 82 of 97
Senior Design Project II | Final-v08 4/17/2016
decodeDnsMsg = ToiChatProtocol_pb2.DnsMessage() decodeDnsMsg = decodedToiMessage.dnsMessage self.logger.debug("Decoded Received MSG = " + \ str(decodeDnsMsg)) self.myToiChatNameServer.handleDnsMessage(decodeDnsMsg, clientSock) return 1 elif msgType == self.getType[1]: decodeChatMsg = ToiChatProtocol_pb2.ChatMessage() decodeChatMsg = decodedToiMessage.chatMessage self.logger.debug("Decoded Received MSG = " + \ str(decodeChatMsg)) # We check what toiChatter message belongs to # if self.myToiChatters: # Loop over each toiChatter the server has access to # for chatter in self.myToiChatters: # Check to see if chatter recipient matches sender id # if chatter.getRecipient() == \ str(decodeChatMsg.id.clientName): chatter.handleChatMessage(decodeChatMsg) return 1 # If after loop we still don't know who message is from # prompt user that he has a new message # # Check to see if this chatter exists in our DNS table # if self.myToiChatNameServer.lookupHostnameByIP(\ decodeChatMsg.id.clientId) == None: # If client Doesn't exists sync tables # self.myToiChatNameServer.syncDNS(decodeChatMsg.id.clientId) self.printQueueNow.put("You have a new message from : " + \ str(decodeChatMsg.id.clientName) + ". Open a chat " + \ "window to talk back.") return 1 self.logger.error("Unable to Process Message of type. '" \ + msgType + "'") return 0 # -- START __FUNCTION DESCR -- # # Processes print statement for server function and prints them # to a file. # # Inputs: # - A string seen on printQueueNow # # Outputs: # - Prints to stdout # # -- END FUNCTION DESCR -- def __printToUserNow__(self): while True: # Get an item to print # text = self.printQueueNow.get() if text == self.CONST_EXIT_QUEUE: self.printQueue.task_done()

Broadband-Hamnet Microwave Communication System Page 83 of 97
Senior Design Project II | Final-v08 4/17/2016
break # Following lines sourced from stackoverflow # # http://stackoverflow.com/questions/2082387/reading-input-from-raw-input-without-having-the-prompt-overwritten-by-other-th # Next line said to be reasonably portable for various Unixes (rows,cols) = struct.unpack('hh', fcntl.ioctl(sys.stdout, termios.TIOCGWINSZ,'1234')) text_len = len(readline.get_line_buffer())+2 # ANSI escape sequences (All VT100 except ESC[0G) sys.stdout.write('\x1b[2K') # Clear current line sys.stdout.write('\x1b[1A\x1b[2K'*int(text_len/cols)) # Move cursor up and clear line sys.stdout.write('\x1b[0G') # Move to start of line print(text) sys.stdout.write(' >> ' + readline.get_line_buffer()) sys.stdout.flush() # Indicate we finished processing the enqueued print request # self.printQueueNow.task_done() return 0
Code Listing 11: toiChatter.py #!/usr/bin/env python3 # # Python toiChatter # Setups a communication channel for a user to talk to other users running # the application # # # Created on: 02/14/2016 # Author: Toi-Group # from modules.protobuf import ToiChatProtocol_pb2 # Used for ChatMessage # Protocol from modules.toiChatClient import toiChatClient # Used for replying to # received messages import sys, readline, struct,fcntl,termios # Used for overwriting current # stdout line class toiChatter(): # Types of messages to expect as defined in ToiChatProtocol # getType={ 0:"one", 1:"group" } # -- START CLASS CONSTRUCTOR -- # # Upon start put user in chatting program # # -- END CLASS CONSTRUCTOR -- def __init__(self, toiChatClient, recipient): # Store ToiChatClient to used to send chat messages

Broadband-Hamnet Microwave Communication System Page 84 of 97
Senior Design Project II | Final-v08 4/17/2016
# self.myToiChatClient = toiChatClient # Store who we are talking to # self.recipient = recipient def startInstantMessage(self): # Clear the console # print(chr(27) + "[2J") # Print connection info # print("Start Chatting with : '" + str(self.recipient) + "'.\n" + "(Escape Sequence: Ctrl+c)") # Print line separator # print('-'*78 + "\n") while True: # Wait for the user to send a message or keyboard interrupt # try: message = input(" >> ") except KeyboardInterrupt: break # Following lines sourced from stackoverflow # # http://stackoverflow.com/questions/2082387/reading-input-from-raw-input-without-having-the-prompt-overwritten-by-other-th # Next line said to be reasonably portable for various Unixes (rows,cols) = struct.unpack('hh', fcntl.ioctl(sys.stdout, \ termios.TIOCGWINSZ,'1234')) text_len = len(message)+2 # ANSI escape sequences (All VT100 except ESC[0G) # Move up cursor to previous line # sys.stdout.write("\033[F") # Clear current line # sys.stdout.write('\x1b[2K') # Move cursor up and clear line # sys.stdout.write('\x1b[1A\x1b[2K'*int(text_len/cols)) # Move to start of line # sys.stdout.write('\x1b[0G') sys.stdout.flush() # Print message you sent to the console # print(str(self.myToiChatClient.getName()) + ": " + \ message)
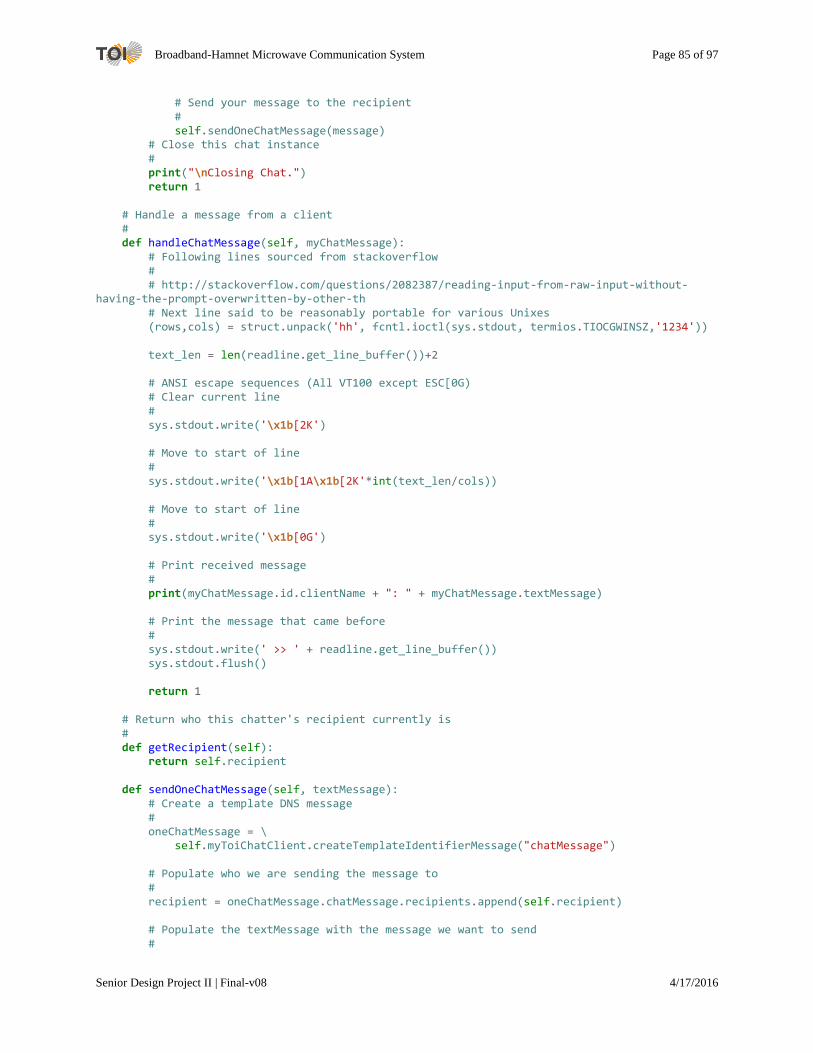
Broadband-Hamnet Microwave Communication System Page 85 of 97
Senior Design Project II | Final-v08 4/17/2016
# Send your message to the recipient # self.sendOneChatMessage(message) # Close this chat instance # print("\nClosing Chat.") return 1 # Handle a message from a client # def handleChatMessage(self, myChatMessage): # Following lines sourced from stackoverflow # # http://stackoverflow.com/questions/2082387/reading-input-from-raw-input-without-having-the-prompt-overwritten-by-other-th # Next line said to be reasonably portable for various Unixes (rows,cols) = struct.unpack('hh', fcntl.ioctl(sys.stdout, termios.TIOCGWINSZ,'1234')) text_len = len(readline.get_line_buffer())+2 # ANSI escape sequences (All VT100 except ESC[0G) # Clear current line # sys.stdout.write('\x1b[2K') # Move to start of line # sys.stdout.write('\x1b[1A\x1b[2K'*int(text_len/cols)) # Move to start of line # sys.stdout.write('\x1b[0G') # Print received message # print(myChatMessage.id.clientName + ": " + myChatMessage.textMessage) # Print the message that came before # sys.stdout.write(' >> ' + readline.get_line_buffer()) sys.stdout.flush() return 1 # Return who this chatter's recipient currently is # def getRecipient(self): return self.recipient def sendOneChatMessage(self, textMessage): # Create a template DNS message # oneChatMessage = \ self.myToiChatClient.createTemplateIdentifierMessage("chatMessage") # Populate who we are sending the message to # recipient = oneChatMessage.chatMessage.recipients.append(self.recipient) # Populate the textMessage with the message we want to send #
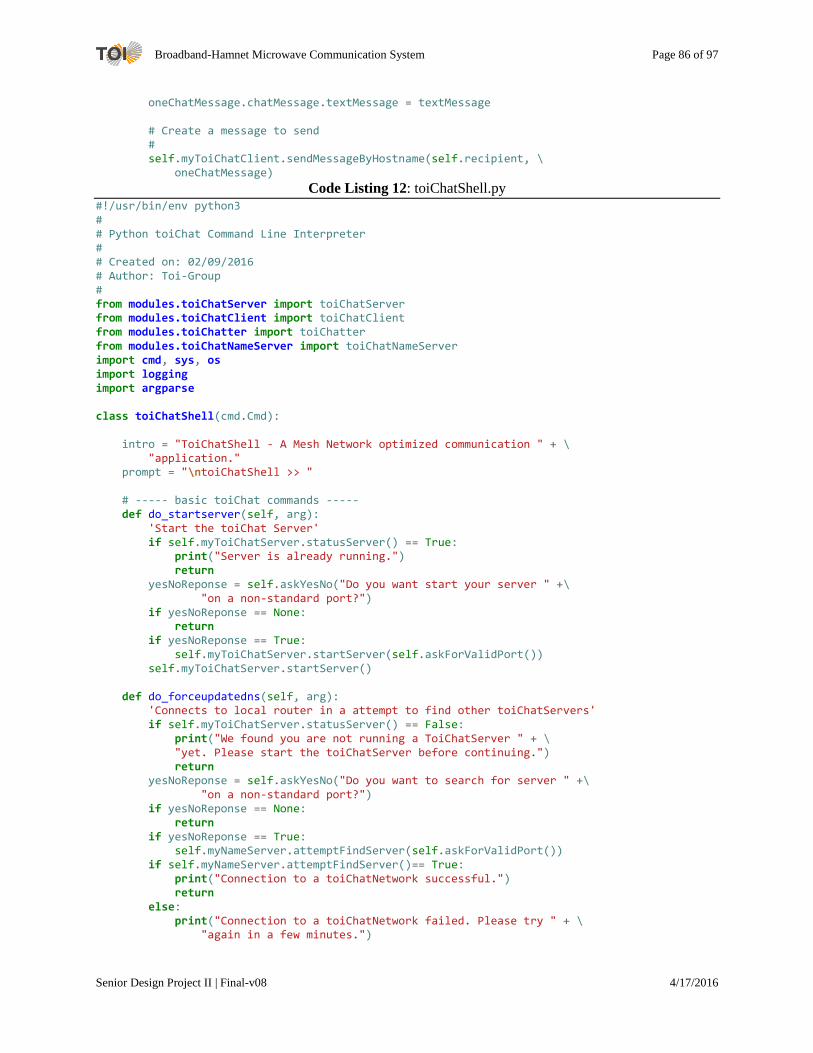
Broadband-Hamnet Microwave Communication System Page 86 of 97
Senior Design Project II | Final-v08 4/17/2016
oneChatMessage.chatMessage.textMessage = textMessage # Create a message to send # self.myToiChatClient.sendMessageByHostname(self.recipient, \ oneChatMessage)
Code Listing 12: toiChatShell.py #!/usr/bin/env python3 # # Python toiChat Command Line Interpreter # # Created on: 02/09/2016 # Author: Toi-Group # from modules.toiChatServer import toiChatServer from modules.toiChatClient import toiChatClient from modules.toiChatter import toiChatter from modules.toiChatNameServer import toiChatNameServer import cmd, sys, os import logging import argparse class toiChatShell(cmd.Cmd): intro = "ToiChatShell - A Mesh Network optimized communication " + \ "application." prompt = "\ntoiChatShell >> " # ----- basic toiChat commands ----- def do_startserver(self, arg): 'Start the toiChat Server' if self.myToiChatServer.statusServer() == True: print("Server is already running.") return yesNoReponse = self.askYesNo("Do you want start your server " +\ "on a non-standard port?") if yesNoReponse == None: return if yesNoReponse == True: self.myToiChatServer.startServer(self.askForValidPort()) self.myToiChatServer.startServer() def do_forceupdatedns(self, arg): 'Connects to local router in a attempt to find other toiChatServers' if self.myToiChatServer.statusServer() == False: print("We found you are not running a ToiChatServer " + \ "yet. Please start the toiChatServer before continuing.") return yesNoReponse = self.askYesNo("Do you want to search for server " +\ "on a non-standard port?") if yesNoReponse == None: return if yesNoReponse == True: self.myNameServer.attemptFindServer(self.askForValidPort()) if self.myNameServer.attemptFindServer()== True: print("Connection to a toiChatNetwork successful.") return else: print("Connection to a toiChatNetwork failed. Please try " + \ "again in a few minutes.")

Broadband-Hamnet Microwave Communication System Page 87 of 97
Senior Design Project II | Final-v08 4/17/2016
def do_stopserver(self, arg): 'Stop the toiChat Server' if self.myToiChatServer.statusServer() == False: print("Server is not running.") return if self.myToiChatServer.stopServer() == False: print("Attempt to stop server failed. Please try again") return print("Attempt to stop server was successful!") return def do_statusserver(self, arg): 'Returns status of the ToiChatServer instance.' if self.myToiChatServer.statusServer() == False: print("Server is not running.") elif self.myToiChatServer.statusServer() == True: print("Server is running.") return def do_printdns(self, arg): 'Print Current DNS Table' self.myNameServer.printDNSTable() def do_startchat(self, arg): 'Start a instant message with another user' if self.myToiChatServer.statusServer() == False: print("We found you are not running a ToiChatServer " + \ "yet. Please start the toiChatServer before continuing.") return if self.myNameServer.lookupDnsLegnth() == 1: print("We see your DNS table is empty. Try running '" + \ "forceupdatedns' to look for other people in the network.") return print("Available users to Chat: ") self.myNameServer.printClients() while True: try: recipient = input("Who do you want to talk to? \n >> ") except KeyboardInterrupt: return if not self.myNameServer.lookupIPByHostname(recipient) == None: break else: print(str(recipient) + " is not a valid name. " + \ "Please enter a valid name.") self.myToiChatter = toiChatter(self.myToiChatClient, recipient) self.myToiChatServer.addToiChatter(self.myToiChatter) self.myToiChatter.startInstantMessage() self.myToiChatServer.removeToiChatter(self.myToiChatter) return def do_bye(self, arg): 'Close the toiChat shell, and exit program.' if self.myToiChatServer.statusServer() == True: print("Toi-Chat server is running in the " + \ "background.\n") if self.askYesNo("Are you sure you want to quit?") == True: if self.myToiChatServer.stopServer() == False: print("Attempt to stop server failed. Please try again") return self.close()

Broadband-Hamnet Microwave Communication System Page 88 of 97
Senior Design Project II | Final-v08 4/17/2016
# ----- record and playback ----- def close(self): logging.shutdown() print('\nThank you for using TOIChat!') sys.exit(1) def start(self): while True: # Initialize client, server and name-server # Prompt user for their unique name input # while True: try: callSign = str(input("What is your host-name " + \ "(call sign)?:\n >> ")).lower() except KeyboardInterrupt: self.close() if not callSign == "": break else: print("Error: You need to enter a call sign.") # Prompt user for call sign input # yesNoReponse = self.askYesNo("Do you want to register any misc " + \ "information? (optional)") if yesNoReponse == None: sys.stdout.write("\033[K") # Clear the current line print("\n") continue elif yesNoReponse == True: myDesc = str(input("Enter misc information now?:\n >> ")) self.myToiChatClient = toiChatClient(callSign, myDesc) break self.myToiChatClient = toiChatClient(callSign) break self.myNameServer = toiChatNameServer(self.myToiChatClient) self.myToiChatClient.updateNameServer(self.myNameServer) self.myToiChatServer = toiChatServer(self.myNameServer) # Start toiChat shell # self.cmdloop() # ---- Internal ---- def askYesNo(self, question): while True: try: yesNoQ = input(question + " (yes|no):\n >> ") except KeyboardInterrupt: return None if str.lower(yesNoQ) == "yes": return True elif str.lower(yesNoQ) == "no": return False else: print("Please specify yes or no.") def askForValidPort(self): # Loop until user provides a valid port
Broadband-Hamnet Microwave Communication System Page 89 of 97
Senior Design Project II | Final-v08 4/17/2016
# while True: try: myPort = int(input("What Port do you want to " + \ "use? (Default=5005):\n >> ") or '5005') except KeyboardInterrupt: return None except ValueError: print("You need to type in a valid PORT number!") continue else: if myPort in range(65535): return myPort else: print("Port must be in range 0-65535!") continue # Catch keyboard interrupt # def cmdloop(self): try: cmd.Cmd.cmdloop(self) except KeyboardInterrupt as e: print("\n") # Upon interrupt on main console shut down server and close # self.myToiChatServer.stopServer() self.close() def main(argv): # Check to make sure the program is ran as root # if not os.geteuid() == 0: print("You need to run this program with administrative privileges.") sys.exit(0) # Parse for verbose information # parser = argparse.ArgumentParser(prog="toiChatShell.py", \ description="ToiChat - A Mesh Network " + \ "optimized communication application.") parser.add_argument('--verbosity', '-v', action='count', default=0, help='increase output verbosity') # Parse args for debug level # args = parser.parse_args() if args.verbosity == 2: print('Debuglevel set to DEBUG') debuglevel = logging.DEBUG elif args.verbosity == 1: print('Debuglevel set to INFO') debuglevel = logging.INFO else: debuglevel = logging.WARNING # Create logging object. # logging.basicConfig(filename='TOIChat.log', \ format='%(asctime)s:%(msecs)d-%(name)s-%(levelname)s: %(message)s', \ datefmt='%Y%m%d_%H:%M:%S', level=debuglevel)

Broadband-Hamnet Microwave Communication System Page 90 of 97
Senior Design Project II | Final-v08 4/17/2016
# Start toiChatShell # toiChatShell().start() if __name__ == '__main__': main(sys.argv)
Code Listing 13: ToiChatProtocol.proto // ToiChat Buffer Protocol // Messages // // Created on: 02/01/2016 // Author: Toi-Group // package ToiChatProtocol; message ToiChatMessage { oneof messageType { DnsMessage dnsMessage = 1; ChatMessage chatMessage = 2; } } message Identifier { // Gather message about client sending a new message // required string clientName = 1; // Hostname/CallSign required string clientId = 2; // IPaddress required string dateAdded = 3; optional string description = 4 [default = "NONE"]; // Misc Info. } message DnsMessage { required Identifier id = 1; required string command = 2; optional string status = 3; repeated Identifier clients = 4; } message ChatMessage { required Identifier id = 1; repeated string recipients = 2; required string textMessage = 3; } message AckMessage{ required Identifier id = 1; required bool status = 2; }
Code Listing 14: guiRunner.py #!/usr/bin/env python3 # #Python toiChat GUI # interfaces with all back-end chat program for ease of use with user # # Created on: 03/30/16 # Author: Toi-Group #
Broadband-Hamnet Microwave Communication System Page 91 of 97
Senior Design Project II | Final-v08 4/17/2016
import sys #used for exiting the program import threading #used for threading instances to update gui graphics and run backend software in sudo-parallel from modules.toiChatServer import toiChatServer #Backend server software from modules.toiChatClient import toiChatClient #backend client software from modules.toiChatter import toiChatter #backend chat software to allow chat messaging from modules.toiChatNameServer import toiChatNameServer #backend DNS software from modules.testSSH import * #script to load router scripts from python execution to implement toiChat-RMDP (Remote Machine Discovery Protocol) from gi.repository import Gtk, GObject #GUI and threading library class ToiChatGui(): # -- START CLASS CONSTRUCTOR -- # # Upon instantiation parses glade XML file # and connects signals to functions # also shows main login window # # -- END CLASS CONSTRUCTOR -- def __init__(self): #Load glade file for login window #initilize all buttons and entry boxes #Login window # self.builder = Gtk.Builder() self.builder.add_from_file('toiTest.glade') self.login_window = self.builder.get_object('mainWindow') self.userName = self.builder.get_object('user_name') self.passWord = self.builder.get_object('pass_word') self.miscellaneous = self.builder.get_object('misc') self.errorMessage = self.builder.get_object('errorLogin') self.login = self.builder.get_object('Login') self.quit = self.builder.get_object('quit') #dns window # self.window_dns = self.builder.get_object('dnsWindow') self.menubar_dns = self.builder.get_object('menubar1') self.comboBox_dns = self.builder.get_object('comboboxtext1') self.spinner = self.builder.get_object('spinner2') self.start_chat_button = self.builder.get_object('start_Chat') self.update_dns_button = self.builder.get_object('update_dns') self.error_dns_textbox = self.builder.get_object('errorDns') #Chat window list # self.chatWindowList = [] #model to create strings for the combo box #will be filled later # self.dns_chatters = Gtk.ListStore(str) #close program if windows below are destroyed, they can still be hidden # if(self.login_window):

Broadband-Hamnet Microwave Communication System Page 92 of 97
Senior Design Project II | Final-v08 4/17/2016
self.login_window.connect('destroy',Gtk.main_quit) if(self.window_dns): self.window_dns.connect('destroy',Gtk.main_quit) #connect objects that have reactions to functions defined later in class # self.dic = { "on_Login_clicked" : self.loginClick, "on_quit_clicked" : self.quitClick, #"on_comboboxtext1_changed" : self.comboChanged, "on_start_Chat_clicked" : self.startChatClick, "on_update_dns_clicked" : self.updateDns #"on_sendMessage_clicked" : self.sendMessageClick } self.builder.connect_signals(self.dic) #show login window # self.login_window.show() # -- CLASS ChatWindow -- # # creates a chat window and handles all functionality of the chat # with a specific recipient # class ChatWindow(): # -- START CLASS CONSTRUCTOR -- # # input - Toi chat client to send messges, the recipient callsign # and users callsign # create a builder object to make a chat window for each # instantiated object # connect buttons to methods defined in the ChatWindow class # instantiate a toiChatter object for each chat window # show the chat window # # -- END CLASS CONSTRUCTOR -- def __init__(self, myToiChatClient, myToiChatServer, recipient, callSign): #create bulder object and load glade file to get chat window definitions # self.chat_builder = Gtk.Builder() self.chat_builder.add_from_file('toiTest.glade') #chat box # self.window_chatbox = self.chat_builder.get_object('chatBox') self.scrollDisplay_chatbox = self.chat_builder.get_object('scrollDisplay') self.viewDisplay_chatbox = self.chat_builder.get_object('viewDisplay') self.enterMessage_chatbox = self.chat_builder.get_object('enterMessage') self.textView_chatbox = self.chat_builder.get_object('textView') self.sendMessage_button = self.chat_builder.get_object('sendMessage') #connect the signals from the chat window box to methods in the class # self.chat_dic = {"on_sendMessage_clicked" : self.sendMessageClick} self.chat_builder.connect_signals(self.chat_dic) #grab command line inputs and make them local variables

Broadband-Hamnet Microwave Communication System Page 93 of 97
Senior Design Project II | Final-v08 4/17/2016
#not sure if this is needed # self.currentRecipient = recipient self.currentCallSign = callSign self.currentToiChatClient = myToiChatClient self.currentToiChatServer = myToiChatServer #instantiate toiChatter object # self.myToiChatter = toiChatter(self.currentToiChatClient, recipient, self.textView_chatbox) #pass the ToiChatter instance to the server # self.currentToiChatServer.addToiChatter(self.myToiChatter) #show the window # self.window_chatbox.show() # -- START FUNCTION DESCRIPTION -- # # function to handle 'Send Message' button clicks # grabs text inputed, calls function to handle putting message in chatbox # # -- END FUNCTION DESCRIPTION -- def sendMessageClick(self, widget): #get current buffer # self.buffer = self.textView_chatbox.get_buffer() #get message input # self.newMessage = self.enterMessage_chatbox.get_text() #check if message input is valid # if not self.newMessage: self.error_dns_textbox.set_text('No Message Entered.') #display the sent message in the chat window # self.displayMessageSent(self.newMessage) #send the message to the other user # self.myToiChatter.sendOneChatMessage(self.newMessage) # -- START FUNCTION DESCRIPTION -- # # display sent message in the chatBox # start a new line for each message and add the username # # -- START FUNCTION DESCRIPTION -- def displayMessageSent(self, message): #get the current buffer # self.buffer = self.textView_chatbox.get_buffer() #set position of the buffer to be the very end #

Broadband-Hamnet Microwave Communication System Page 94 of 97
Senior Design Project II | Final-v08 4/17/2016
self.iter = self.buffer.get_iter_at_offset(-1) #insert new message into the buffer by moving it to a new line #and concatenating callsign # self.buffer.insert(self.iter,("\n" + self.currentCallSign + " : " + message)) #place updated buffer back into the chat window # self.textView_chatbox.set_buffer(self.buffer) # -- START FUNCTION DESCRIPTION -- # # login button clicked # grab username, password, and misc information # check if given information is valid # start DNS window # start thread to run backround information # # -- END FUNCTION DESCRIPTION -- def loginClick(self,widget): #Get text from the user # self.callSign = self.userName.get_text() self.routerPassword = self.passWord.get_text() miscInformation = self.miscellaneous.get_text() #Check if information is valid # if not self.routerPassword: self.errorMessage.set_text('No Password Entered') elif not self.callSign: self.errorMessage.set_text('No Username Entered') #Start toiChatclient # else: if not miscInformation: self.myToiChatClient = toiChatClient(self.callSign) else: self.myToiChatClient = toiChatClient(self.callSign,miscInformation) #Verify if password given is correct # try: self.verified_routerPassword = testSSH(self.routerPassword) except Exception as e: self.errorMessage.set_text(str(e)) return #All information needed is set, open next window # self.login_window.hide() self.window_dns.show() #start the spinner #can't block from here on out or spinner won't update #
Broadband-Hamnet Microwave Communication System Page 95 of 97
Senior Design Project II | Final-v08 4/17/2016
self.spinner.start() #create thread to start server when the spinner is spinning # start_ToiChat_thread = threading.Thread(target=self.startToiChat) start_ToiChat_thread.daemon = True start_ToiChat_thread.start() # -- START FUNCTION DESCRIPTION -- # # Start the server and do a forcednsupdate # This must be threaded as it executes blocking operations # populate combo box with current dns # # -- END FUNCTION DESCRIPTION -- def startToiChat(self): #intstantiate major backbone objects that wil handle chatting # self.myNameServer = toiChatNameServer(self.myToiChatClient,self.verified_routerPassword) self.myToiChatClient.updateNameServer(self.myNameServer) self.myToiChatServer = toiChatServer(self.myNameServer, self.error_dns_textbox) self.myToiChatServer.startServer() #attempt to connect to a server, if unsuccessful exit program # if self.myNameServer.attemptFindServer() == True: print('sucess') else: self.error_dns_textbox.set_text('Connection to ToiChat Network Failed. Please Try again in a few minutes') #get clients #this needs to be in a while loop because it can take away for the client list to populate # self.clientList = []; while(self.clientList == []): #try: self.clientList = self.myNameServer.getClients() #except Exception as e: # self.error_dns_textbox.set_text('Error finding Clients. Please try again') #add clients to liststore object attached to comboBox # for client in self.clientList: self.dns_chatters.append([str(client)]) #display clients in the gui # self.comboBox_dns.set_model(self.dns_chatters) #operation complete stop spinner # self.spinner.stop() # -- START FUNCTION DESCRIPTION -- # # on Start Chat button clicked grab the name from the combo box

Broadband-Hamnet Microwave Communication System Page 96 of 97
Senior Design Project II | Final-v08 4/17/2016
# and start a chat # # -- END FUNCTION DESCRIPTION -- def startChatClick(self, widget): #retrieve current selection from combo box # chatter = self.comboBox_dns.get_active_text() #check to see if user actually selected an entry or if box is empty # if(chatter == None): self.error_dns_textbox.set_text('Nothing Selected. Select a Name to Continue.') else: #self.chatBox(chatter) self.chatWindowList.append(self.ChatWindow(self.myToiChatClient, self.myToiChatServer, chatter, self.callSign)) # -- START FUNCTION DESCRIPTION -- # # when update chatters button is clicked, # this function starts and starts a spinner to indicate program is working # calls another function in thread so spinner can work while background operations are running # # -- END FUNCTION DESCRIPTION -- def updateDns(self, widget): #clear error box in case connection is unsuccessful again # self.error_dns_textbox.set_text(' ') #start the spinner # self.spinner.start() #start a thread to update dns so the operation will not block spinner # start_Update_Dns_thread = threading.Thread(target=self.threadUpdateDns) start_Update_Dns_thread.daemon = True start_Update_Dns_thread.start() # -- START FUNCTION DESCRIPTION -- # # in this thread the DNS is updated # gui is also graphically updated # ListStore must be cleared beforehand or some names will be duplicated # # -- END FUNCTION DESCRIPTION -- def threadUpdateDns(self): #update dns by attempting to find a server #display error messages if needed # if self.myNameServer.attemptFindServer() == True: print('conn success') else: self.error_dns_textbox.set_text('Connection to ToiChat Network Failed. Please Try Again Later') #populate a list of clients #

Broadband-Hamnet Microwave Communication System Page 97 of 97
Senior Design Project II | Final-v08 4/17/2016
self.clientList = [] while(self.clientList == []): self.clientList = self.myNameServer.getClients() #clear the liststore before filling it or things will be duplicated # self.dns_chatters.clear() #populate the liststore # for client in self.clientList: self.dns_chatters.append([str(client)]) #populate combo box with liststore # self.comboBox_dns.set_model(self.dns_chatters) #stop spinner to indicate that operation is complete # self.spinner.stop() # -- START FUNCTION DESCRIPTION -- # # quit program if quit is presed on login screen # # -- END FUNCTION DESCRIPTION -- def quitClick(self, widget): sys.exit(0) # -- MAIN -- # # intialize threading # start gui # wait in main loop to recieve interrupts or signals # if __name__ == "__main__": GObject.threads_init() toichatGui = ToiChatGui() Gtk.main()