Embed Size (px)
Citation preview
BrainHoney Student OverviewThe Student Guide helps students navigate through courses and complete course work, such as assignments and tests.
This table provides an overview of the topics inside the Student Guide. You will find corresponding topics along the menu to the left.
Topic Description
Home PageUpon logging in the student is brought to this page. Here, the student gets an overview of everything going on with their courses, including the Due Soon list, course links, and announcements.
Calendar The calendar helps both the student and the teacher stay on track with course assignments, due dates, and grading schedules.
Courses Students can navigate through their individual courses to view content, as well as complete any assignments or tests that are assigned.
Grades Students can view their overall grades for current and past courses, as well as view grades on individual assignments and tests.
Communication Here you will find information on contacting teachers through BrainHoney communication features.
Account Settings
Turn here for information on changing your password, uploading a picture, configuring email settings and more.
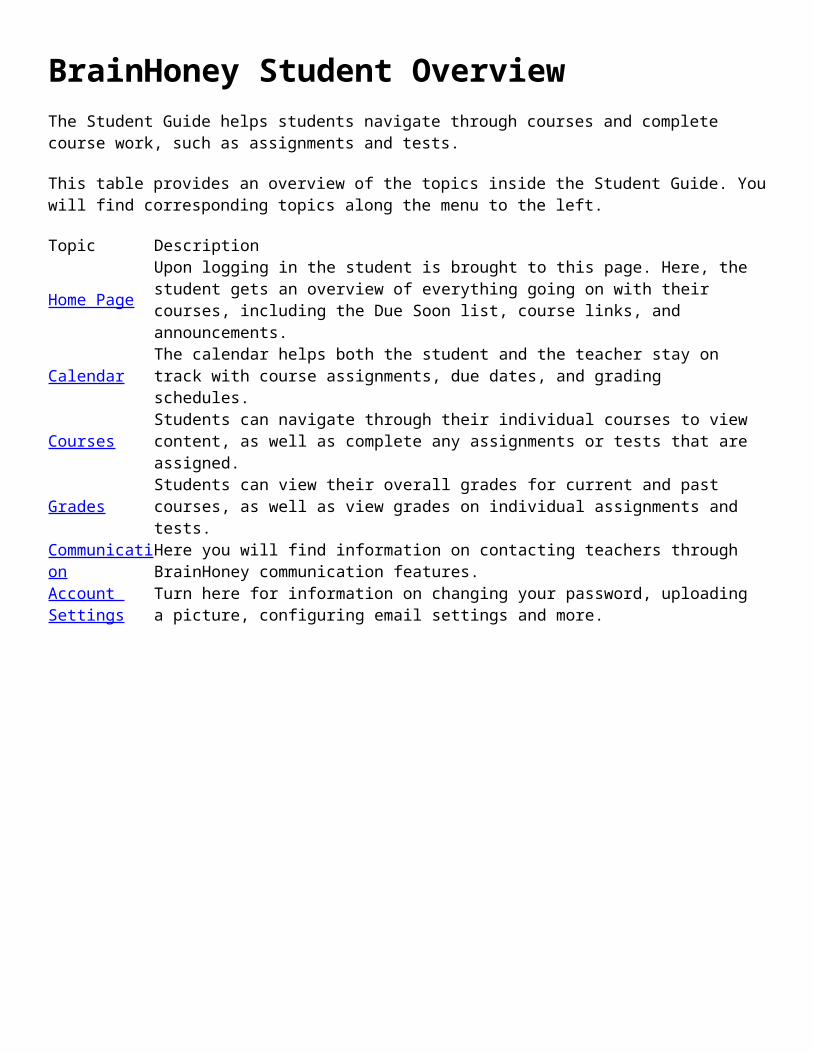
Home Page
The BrainHoney Home Page provides you with everything you need to start taking your courses, keep up with your assignments, and keep track of your grades.
Navigating through the Home Page
The Due Soon pane lists assignments and assessments that are due within the next 7 days. Click the assignment title to open it. The My Courses pane lists the coursesin which you are enrolled. You can View course content, view a detailed Grades report, see your progress with mastering course Objectives, and view the History of your course activity. Click on an instructor's announcement in the Announcements pane to view its full text.
Navigate to all BrainHoney Tools
Links to the major BrainHoney functions display on the toolbar at the top of the screen. Use these to:
Access your course content to view learning materials, submit assignments, or take tests or quizzes View detailed grade reports for each course View learning objective mastery reports to see how well you are doing Communicate with your instructors
Viewing a Course
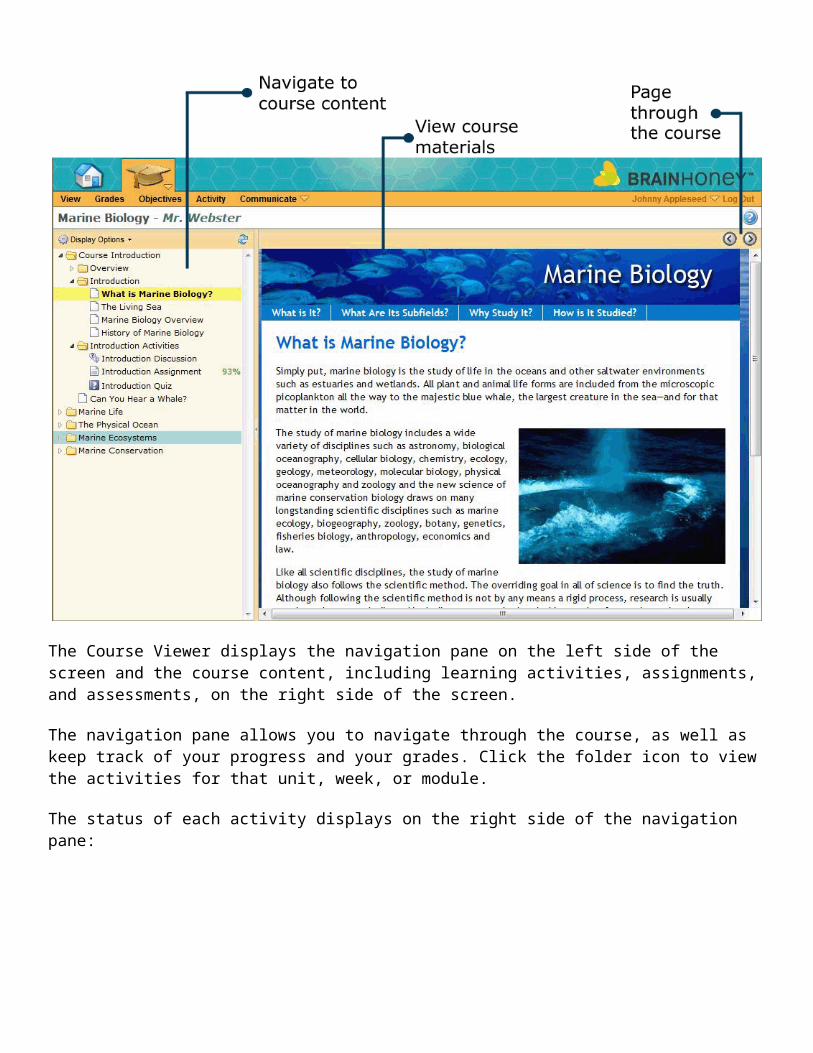
The Course Viewer displays the navigation pane on the left side of the screen and the course content, including learning activities, assignments, and assessments, on the right side of the screen.
The navigation pane allows you to navigate through the course, as well as keep track of your progress and your grades. Click the folder icon to view the activities for that unit, week, or module.
The status of each activity displays on the right side of the navigation pane:
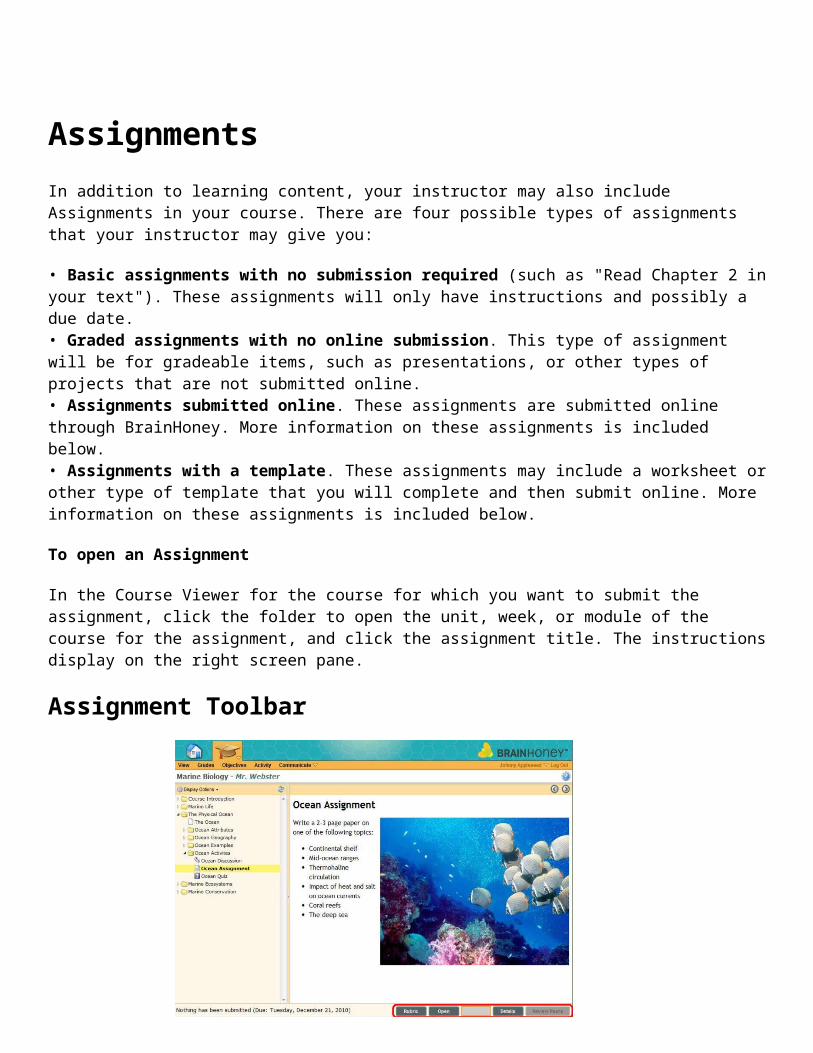
AssignmentsIn addition to learning content, your instructor may also include Assignments in your course. There are four possible types of assignments that your instructor may give you:
• Basic assignments with no submission required (such as "Read Chapter 2 in your text"). These assignments will only have instructions and possibly a due date. • Graded assignments with no online submission. This type of assignment will be for gradeable items, such as presentations, or other types of projects that are not submitted online. • Assignments submitted online. These assignments are submitted online through BrainHoney. More information on these assignments is included below. • Assignments with a template. These assignments may include a worksheet or other type of template that you will complete and then submit online. More information on these assignments is included below.
To open an Assignment
In the Course Viewer for the course for which you want to submit the assignment, click the folder to open the unit, week, or module of the course for the assignment, and click the assignment title. The instructions display on the right screen pane.
Assignment Toolbar
The buttons on the Assignment toolbar at the bottom right of the Assignment window will vary depending upon the type of assignment and are very useful in helping you work through an assignment.
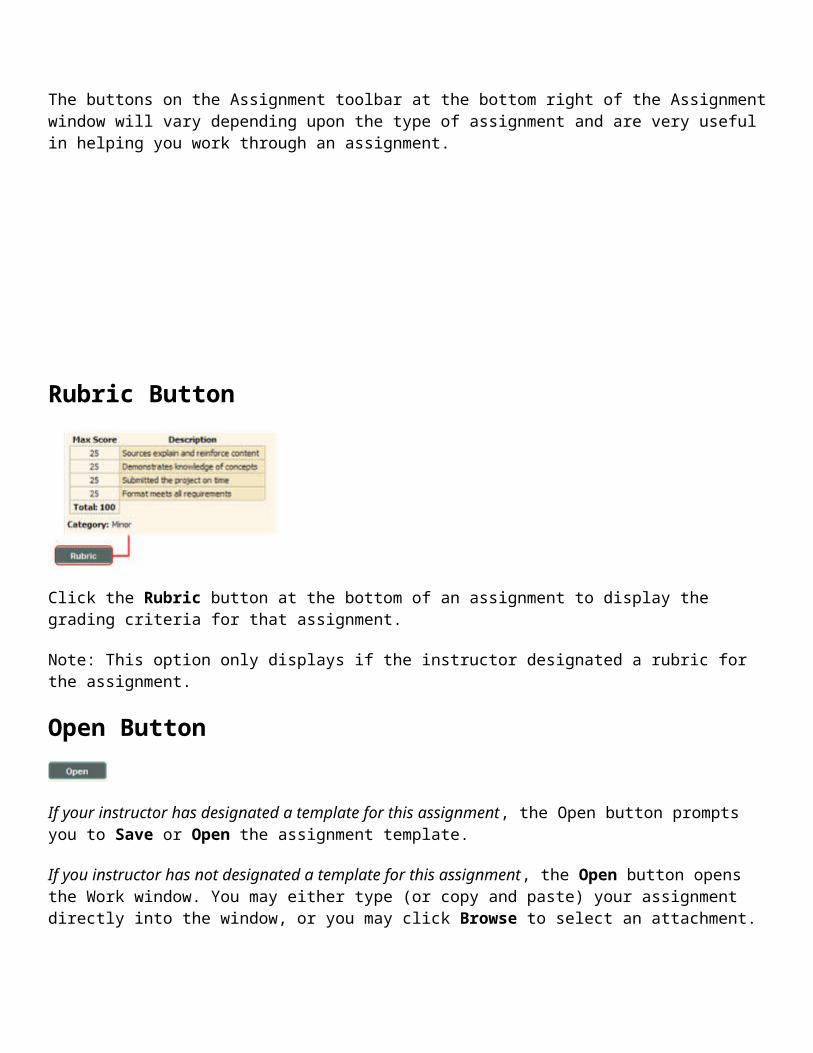
Rubric Button
Click the Rubric button at the bottom of an assignment to display the grading criteria for that assignment.
Note: This option only displays if the instructor designated a rubric for the assignment.
Open Button
If your instructor has designated a template for this assignment, the Open button prompts you to Save or Open the assignment template.
If you instructor has not designated a template for this assignment, the Open button opens the Work window. You may either type (or copy and paste) your assignment directly into the window, or you may click Browse to select an attachment.
Once the assignment has been submitted, the Open button allows you to view either the original template (if there was one) or the assignment that you submitted.
Note: This option only displays if the assignment is to be submitted online.
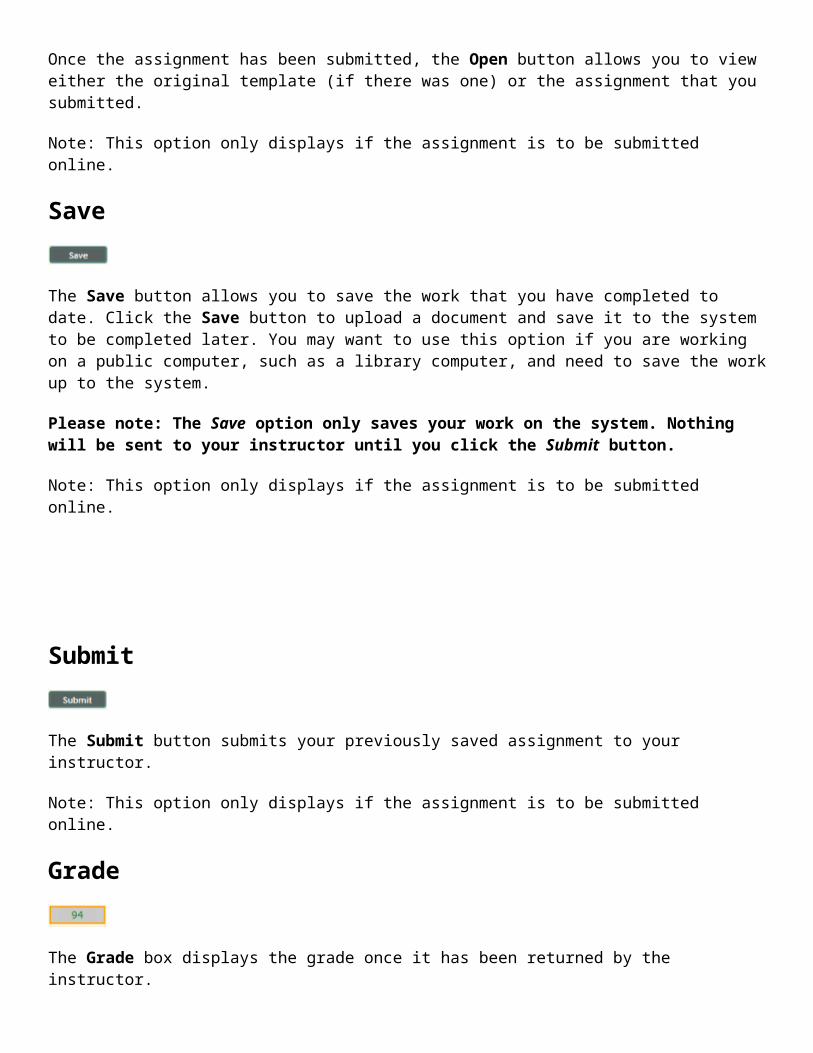
Save
The Save button allows you to save the work that you have completed to date. Click the Save button to upload a document and save it to the system to be completed later. You may want to use this option if you are working on a public computer, such as a library computer, and need to save the work up to the system.
Please note: The Save option only saves your work on the system. Nothing will be sent to your instructor until you click the Submit button.
Note: This option only displays if the assignment is to be submitted online.
Submit
The Submit button submits your previously saved assignment to your instructor.
Note: This option only displays if the assignment is to be submitted online.
Grade
The Grade box displays the grade once it has been returned by the instructor.
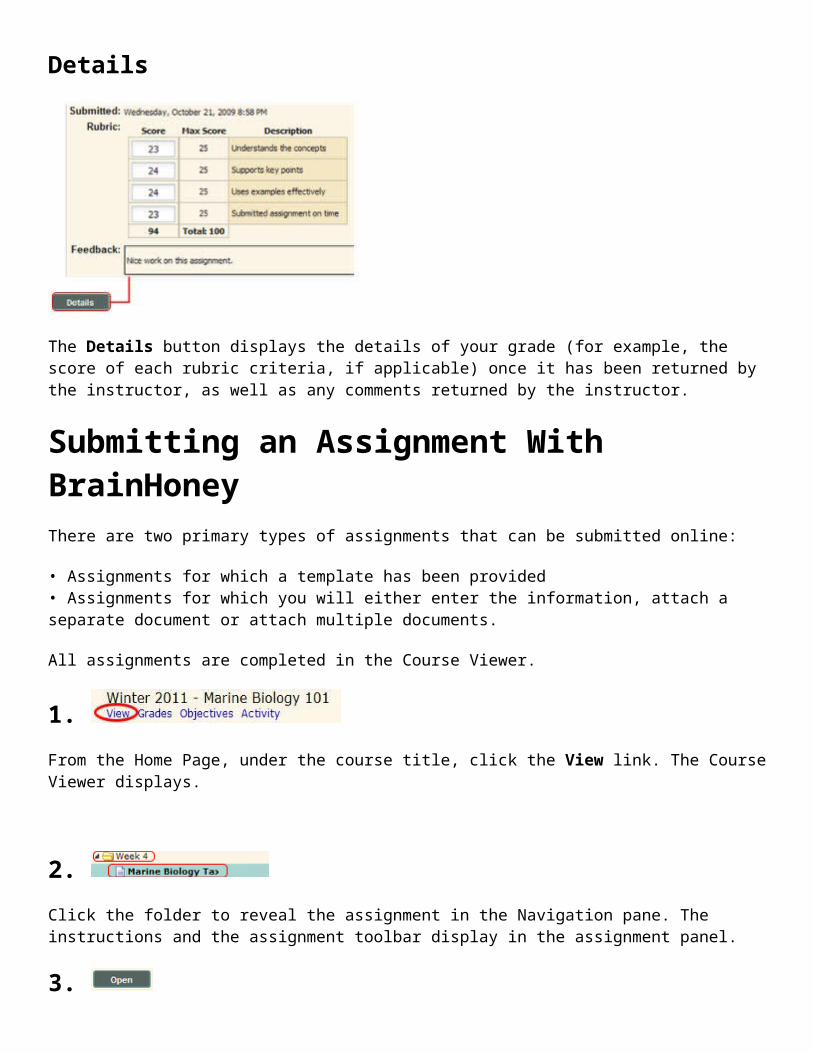
Details
The Details button displays the details of your grade (for example, the score of each rubric criteria, if applicable) once it has been returned by the instructor, as well as any comments returned by the instructor.
Submitting an Assignment With BrainHoneyThere are two primary types of assignments that can be submitted online:
• Assignments for which a template has been provided• Assignments for which you will either enter the information, attach a separate document or attach multiple documents.
All assignments are completed in the Course Viewer.
1. From the Home Page, under the course title, click the View link. The Course Viewer displays.
2.
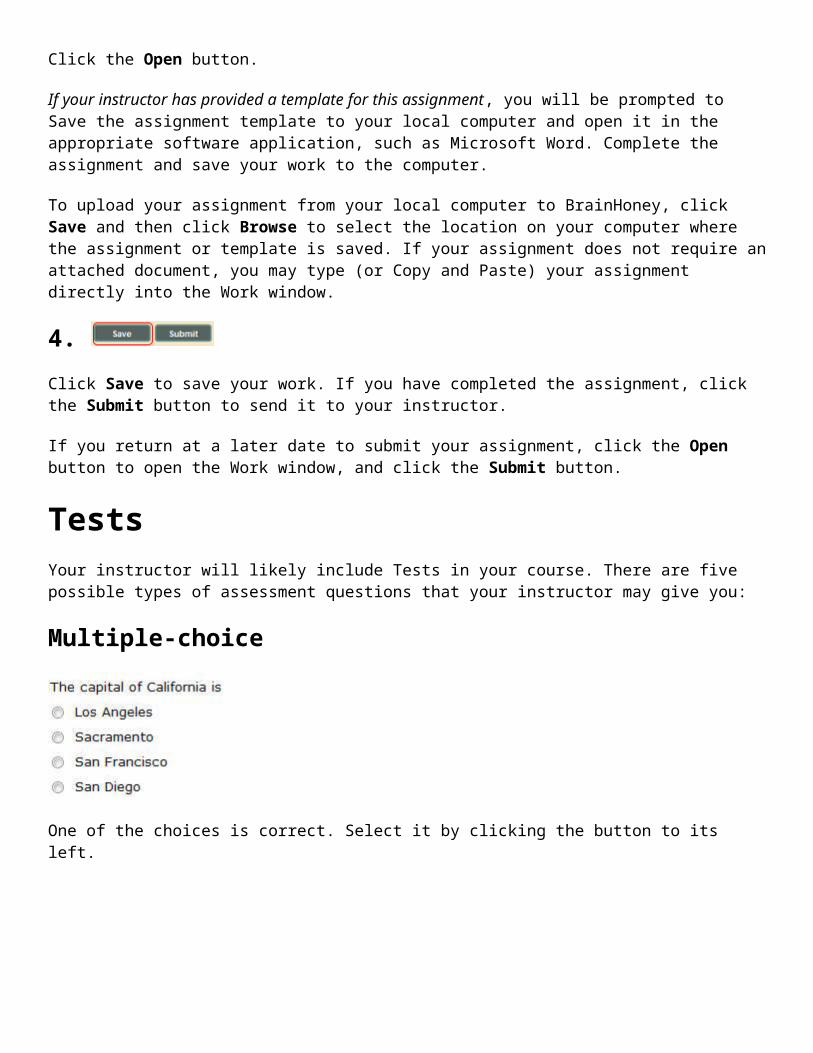
Click the folder to reveal the assignment in the Navigation pane. The instructions and the assignment toolbar display in the assignment panel.
3. Click the Open button.
If your instructor has provided a template for this assignment, you will be prompted to Save the assignment template to your local computer and open it in the appropriate software application, such as Microsoft Word. Complete the assignment and save your work to the computer.
To upload your assignment from your local computer to BrainHoney, click Save and then click Browse to select the location on your computer where the assignment or template is saved. If your assignment does not require an attached document, you may type (or Copy and Paste) your assignment directly into the Work window.
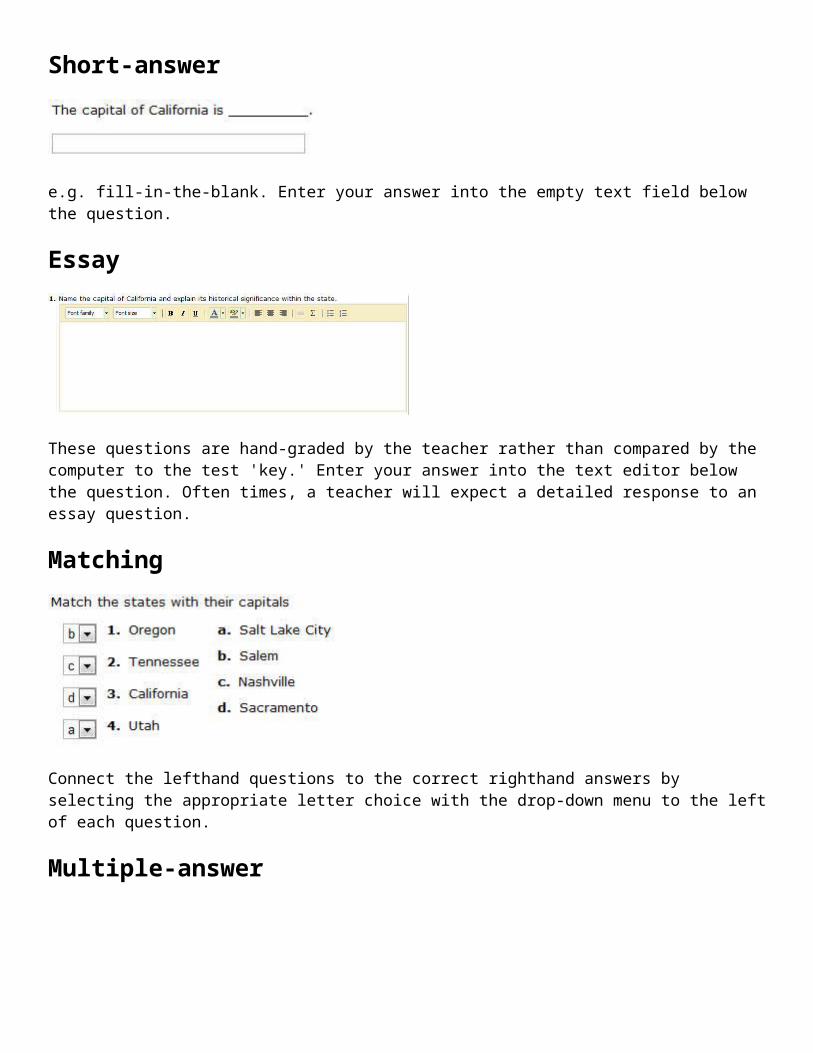
4. Click Save to save your work. If you have completed the assignment, click the Submit button to send it to your instructor.
If you return at a later date to submit your assignment, click the Open button to open the Work window, and click the Submit button.
TestsYour instructor will likely include Tests in your course. There are five possible types of assessment questions that your instructor may give you:
Multiple-choice
One of the choices is correct. Select it by clicking the button to its left.
Short-answer
e.g. fill-in-the-blank. Enter your answer into the empty text field below the question.
Essay
These questions are hand-graded by the teacher rather than compared by the computer to the test 'key.' Enter your answer into the text editor below the question. Often times, a teacher will expect a detailed response to an essay question.
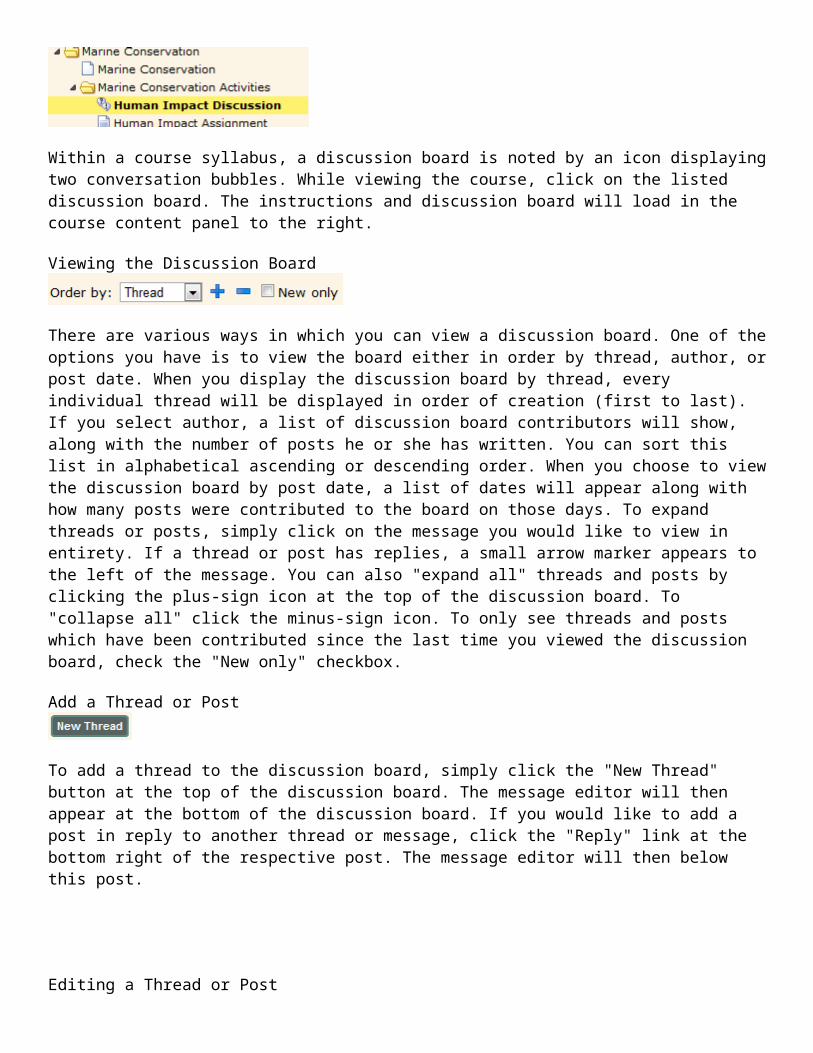
Matching
Connect the lefthand questions to the correct righthand answers by selecting the appropriate letter choice with the drop-down menu to the left of each question.
Multiple-answer
There may be more than one correct answer. Select every correct answer by clicking the button to its left.
Taking a TestTests are part of nearly every course. Once you have taken the test, you may receive the results immediately (unless there are essay questions) or you may receive the results when all students have taken the test or the deadline was met and the teacher has completed reviewing the results.
Some tests may be taken more than one time. If this option is available, a Retake button will display in the Test window.
Tests are taken in the Course Viewer. Instructions, including the Due Date and the Time Limit (if applicable) display in the right side of the Course Viewer when you have selected the test. If the test has a time limit, you may monitor your remaining time in the lower left corner of the screen. Once you have started a test, you must complete it. Any questions that are not answered will be marked as incorrect.
Note: Your instructor may choose not to make the test available until a certain date to ensure that all students have the same amount of time to start and complete the test. In this case, the Start button will not be active until the test is available.
1. From the Home Page, under the course title, click the View link. The Course Viewer displays.
2. Click the folder to reveal the activities. Click the Test title. The instructions for the test display on the right side of the Course Viewer.
3. Read the instructions for the test. When you are ready to begin, click the Start button. Please remember that once you begin the exam, you must complete it in one sitting. Click Yes to confirm that you are ready to begin the test. If the test is timed, the remaining time will display in the lower left corner of the screen.
4. You can see the directions for the test at any time while taking the test by clicking the Directions button. The directions will pop up in a new window so that you can keep it open while taking the test.
5. When you have answered all of the questions, click the Submit button one time. Click Yes to confirm that you want to submit the test. Depending upon the options specified for the test when it was created, your results, the correct answers, and your responses may be visible immediately after you click the Yes button. If they are not immediately visible, you will have to wait until the instructor reviews and returns the test results. At this time, your grade will be returned, and your responses as well as the correct answers may be visible, depending upon how the test was configured.
6. If your instructor has specified that you may take the test multiple times, a Retake button will display on the assessment instruction screen.
Discussion Boards
Many teachers choose to include Discussion Boards in their course. Within a discussion board the entire class or a teacher-designated group can communicate through "threads" and "posts." A thread is a series of posts on a particular topic, and each post is an individual contribution to a conversation. Discussion board posts are often graded for completeness as they relate to a particular assignment.
Go to Discussion Board
Within a course syllabus, a discussion board is noted by an icon displaying two conversation bubbles. While viewing the course, click on the listed discussion board. The instructions and discussion board will load in the course content panel to the right.
Viewing the Discussion Board
There are various ways in which you can view a discussion board. One of the options you have is to view the board either in order by thread, author, or post date. When you display the discussion board by thread, every individual thread will be displayed in order of creation (first to last). If you select author, a list of discussion board contributors will show, along with the number of posts he or she has written. You can sort this list in alphabetical ascending or descending order. When you choose to view the discussion board by post date, a list of dates will appear along with how many posts were contributed to the board on those days. To expand threads or posts, simply click on the message you would like to view in entirety. If a thread or post has replies, a small arrow marker appears to the left of the message. You can also "expand all" threads and posts by clicking the plus-sign icon at the top of the discussion board. To "collapse all" click the minus-sign icon. To only see threads and posts which have been contributed since the last time you viewed the discussion board, check the "New only" checkbox.
Add a Thread or Post
To add a thread to the discussion board, simply click the "New Thread" button at the top of the discussion board. The message editor will then appear at the bottom of the discussion board. If you would like to add a post in reply to another thread or message, click the "Reply" link at the bottom right of the respective post. The message editor will then below this post.

Editing a Thread or Post
The message editor is much like a standard word processor. You are given font type, size, style, color, and alignment options, as well as the ability to add links, images, equations, bullets and numbering, and outside files. Once you are finished editing your message click the "Post" link at the top right. If you change your mind and don't want to publish a post, click "Cancel."
Your published post will appear like the above post. If you would like to go back and make changes to a post you contributed, simply click the "Edit" link at the bottom right of the post, and you will be brought back to the message editor.

Student Grades
Viewing Your GradesStudents often want to know how they're doing in a class:
• What items they've completed• What score they've received• How much work remains to be done
BrainHoney puts all this information at your fingertips and keeps it up-to-date so you can see it at any time.
From the Home Page
Click the Grades link beneath the course for which you want to view grades.
From the Toolbar
From the Grades menu, click the course name for which you want to view grades. You may do this from any screen in BrainHoney.
Send an Email Message through BrainHoneyWhen a student sends an email it is sent to all of the teachers and graders in the class. The email will be sent to the email address stored in the user profile.
Note: if no email address is stored, nothing will be sent to the user.
1. From the Communicate menu, point to Send Mail, then click the section containing the intended recipients.
2. The To field will automatically have selected the recipients of the email as "All teachers and graders in this class."
3. Type the subject and the message. Click Send to send the message.