Embed Size (px)
Citation preview
1 of 22
Warning:
As of 1-15-2015, Verizon won’t allow PagePlus to activate
any non-Verizon phones, like this BOOST Moto G.
So, this document is NOT GOING TO WORK FOR YOU, as
the phone WILL NOT ACTIVATE! That time has come and
gone!!!!!
NOW, you have a couple choices. 1. Buy a used VERIZON BRAND Moto G for use on Pageplus(It HAS TO have
been activated for 6 months and then is allowed on Pageplus.) Useful if you
want to be on the $12 or less plan with 3g. Haven’t tried, but that is what I
read.
2. Buy a Verizon MotoX (2013) Still a great phone! Or any other used Verizon
4g phone. Lots of used Droid HDs out there. As a 4g phone, it can go on
Pageplus easily on the $29 or higher plan. PRO: Easy to do. CON: Can’t use
on the cheapest plans.
3. Go to a different provider. My experience with Pageplus since they sold to
the owner of TracPhone last year is WAY worse than before! Phone gets
deactivated, tech support can barely be understood and has no idea why.
Activations take WAY longer because of language problems on their side,
etc. NOT the Pageplus of a year ago. Sad.
AGAIN: THIS PROCESS WILL NOT WORK AFTER 1-15-
2015. KEEPING UP FOR REFERENCE ONLY, BUT NOT
RECOMMENDED TO DO THIS!
YOU HAVE BEEN WARNED!!!!!!!!!!!!!!!!!!!!!!!!
-----------------------------------------------------------------

2 of 22
BOOST MOBILE 8GB Moto G to Verizon ROM for use on
Page Plus Cellular (PPC)
For Verizon 4.4.2 Kit Kat rom:
By BobPhone, Rev 1.13 ( 4.4.4 stuff and use Titanium free, step 4 unplug phone once done) 8-25-2014
Rev 1.14 (Warning that is won’t work anymore, thanks Verizon!) 1-15-2015
Based on http://forum.xda-developers.com/showthread.php?t=2681166, with pictures and notes by
ME. I did NOT invent this and take NO responsibility for bricking or ruining your phone. I have done two
phone and flash to CM11, Original BOOST ROM and back to Verizon multiple times. Charge the battery
before starting and moto phones are pretty hard to really HARD BRICK, but if you do it, I’m not
responsible. USE THIS GUIDE AT YOUR OWN RISK
NOTE: This guide uses a Boost branded G and moves it to VERIZON ROM
VERSION 4.4.2. Since this guide was initially written, the Verizon ROM 4.4.4
undate has come out, but NOT a BOOST rom for 4.4.4
- Everything in this guide assumes you are on the Stock Boost 4.4.2 and
flash the Verizon 4.4.2 ROMs. - If you take the Verizon 4.4.4 Over The Air (called OTA) update, you cannot easily go back to a
4.4.2 ROM!!! Maybe it can be done, but Google/Moto changed some low level formatting and
going back to hard. VERY HARD.
- If you let the phone sit on wi-fi once you flash the Verizon 4.4.2 it will start downloading the
4.4.4 Rom. You can POSTPONE that update and then disable the Update process later using
this document.
- Be sure you want 4.4.4 and ARE DONE WITH THE GUIDE before applying the 4.4.4 update. This
guide has you DISABLE the OTAs, so you won’t have to worry about it if you don’t want.
- Also all 4.4.4 adds some security stuff that screws with app permissions on the SD card (some
people hate that anyway) and a couple bug fixes. If you don’t apply the 4.4.4 update, you
aren’t missing much. Staying with 4.4.2 right now is NOT a big crime. But OTAing to 4.4.4
seems to work fine once phone is on Pageplus properly.
ALSO, requesting an UNLOCK CODE will VOID YOUR WARRANTY WITH MOTOROLA!!!!!!
Step 1, Prep PC and CHARGE THE PHONE BATTERY BEFORE FLASHING!!!
- You need 1)fastboot and 2)Motorola drivers.
________________________________________________________________________________
1. Get the Verizon ROM and it includes a WINDOWS and LINUX directory that has a version of
‘fastboot’ Motorola says to use. I now recommend using the version of ‘fastboot’ in the ROM.
Download Verizon 4.4.2 ROM Verizon 4.4.2 Rom Download Link

3 of 22
Unzip the .zip file to a folder to have Moto G Verizon _XXXX_XXXX.xml as the folder name
2. Need Motorola drivers for phone. Note, Even if you HAVE moto drivers for say a Bionic grab the
newest ones. Moto Drivers download . Install drivers to PC.
Step 2, Unlock Phone, and Get ESN (MEID) if don’t have original box.
Do NOT need to activate phone with Boost Mobile.
- Power up phone.
- Skip ‘Hands Free Activation’ with cancel
- Choose language
- About Privacy – Accept and continue
- Google Account – sign in, as need to get ES FILE EXPLORER from the play store
- Make it Google – Not Now
- Your all set, migration – Maybe later
- YEA!!!, should be in to a normal running phone w/o phone service.
NOTE: If you are in an area w/o Sprint/Boost service but only Verizon service, the signal strength on the
phone at this point will be SEARCHING FOR SIGNAL. This is normal and once flashed to the Verizon ROM
later in this doc, it will find the Verizon tower, so don’t worry.
Step 2a, In phone, go to ->SETTINGS -> About Phone -> Status, GET THE MEID (Called ESN also)
and WRITE it DOWN NOW! _______________________________Will need this for Pageplus
activation and harder to get once phone is flashed to Verizon rom before activated (and can’t activate
w/o this number)
Step 2b Get Unlock code
Go to Motorola site, register and follow directions.
Motorola Unlock Code Site Follow directions on that site,
-Tip 1: PCs and directory with fastboot in it: When you are in a DOS (command) window, the fastboot.exe and
adb***.dll files must be in the current directory the DOS window is displaying OR part of the PATH command. Copy
them to the directory you are in, using explorer, or set the PATH(Google and learn about setting PATH, as I did this
so it doesn’t matter WHAT dir my DOS window is on, fastboot always runs)
-To enter FASTBOOT on phone, this is the order I use and it works %100
Power off, USB disconnected or phone will auto boot
press and hold VOL-,
press Power ON for two seconds,
release power on,
release Vol-
phone will boot to fastboot screen and stop there
connect USB
TIP

4 of 22
Follow Moto web site and once have the initial unlock code from the phone showing on PC, it
is a LONG number. Use the following tip so you don’t have to type into the browser for
Motorola:
-Right click on the DOS window.
-Left Click on MARK in the drop down menu

5 of 22
-Use the mouse and left mouse button, highlight the code and release button so the code is
in white.
-Press ENTER KEY to copy this text the clipboard.
-Use a text editor, like Notepad to put all the numbers into 1 straight string, (be sure
wordwrap is OFF!!!!)
-Copy that string and paste into the Motorola web page where it asks for the unlock code. Be
sure there is no blank space at the end of what you copy or it won’t work.
-Note: Motorola Unlocking site seems to go down a lot. If it doesn’t work and send email
code, try again hours later…
-Unlock code AND INSTRUCTIONS come to the email address you provided Motorola. Look
for it in your email inbox.
-There is no secret copying the code BACK from Motorola to the COMMAND window, but
that one is shorter. Type it back into the DOS windows by hand.

6 of 22
On the next boot, you will see this if you were successful. Note, we will write the original ‘M’
logo graphic back later in this document if you like so you don’t have to see this silly warning.
NOTE: First boot will take MINUTES. Be patient…

7 of 22
Step 3, Use DFS to change the SPC to 000000, as Verizon OTA programming requires this.
Step 3a, First, Get the existing SPC code.
Boot the phone normally on BOOST. Get a utility from here Link to SPCUtility.apk
Get this program on the phone by:
1. Copy to phone using USB cable and windows and then install on the phone with a file manager
(Will need to get on the playstore and install something like ESFILE EXPLORER first, then install
the apk from ES FILE EXPLORER)
-When try to install from ES FILE EXPLORER, a window will pop up saying it is from an unsecure
source. Follow the window to get to SECURITY and scroll down and check UNKNOWN SOURCES
to allow this to be installed on the phone.
-Click back arrow and try again from within ES FILE, this time MSL UTILITY will install (accept and
give access to whatever it asks for)
2. Run MSL UTILITY on phone that gets installed by SPCUtility.apk and get the current Boost Mobile
SPC. (Must be connected to Wi-Fi to find it)
WRITE IT DOWN__________________________

8 of 22
Step 3b Prep phone and load DFS on the PC
Boot to Fast boot again, but going to get to BP TOOLS at bottom of FASTBOOT menu
Power off, USB disconnected
press and hold VOL-,
press Power ON for a couple seconds,
release power on,
release Vol-
connect USB
Press Vol- to scroll. VOL UP, NOT POWER selects!!!! In CWM, Power
is select, but not here!!!!!!!! Scroll down to BP Tools and press VOL+ (NOTE: If you press button power accidentally, the screen goes
blank and the phone shuts off…)
Phone will boot up and look normal, but the modem drivers get loaded on the phone in the
background (plus you have USB DEGUGGING enabled) so the PC can talk to it with DFS
9 of 22
Now need to get the PC to SEE the modem. Even with the Motorola Drivers properly installed, My
Windows 7 x64 did NOT load the device properly. The original post on this describes how to get
windows to load the driver, so I will quote here,
“If the drivers fail to install automatically you’ll need to manually install them by going into
Device Manager, finding the one with the red X called “Motorola QC Diagnostic Interface”,
right-clicking and selecting “Update Driver Software…”, clicking “Browse my computer for
driver software” then “Let me pick…”, choose the device type “Ports (COM & LPT)” and
click next, then selecting the manufacturer “Motorola” and the driver “Motorola QC Diag
Port” from the list. This is the only one we actually need so if there are others with a red X
you can leave them as they are.” Heranthius
Also, when change rom to Verizon, had to REDO this step or PC didn’t have right driver
again.
Now load DFS demo on the PC (LINK to DFS demo program) (When it asked for email and suck, simply
close that window to continue to DFS DEMO program)
-Press PORTS (A) on upper left of main window, will get window in front as shown
-This screen shot is from when I did a Bionic, the Moto G ONLY showed the Motorola QC Diag Port (COM
X) If don’t have diagnostics as shown, try connecting phone to a different USB port on the PC and reopen
PORTS or check device manager in windows for unknown devices and get the driver loaded.
-Double click on The Motorla QC Diag Port (Com X)(B). Will show info on the bottom (C)
Close this window. (This screen shot was of a Motorola BIONIC, so the device name may be different
for a Moto G)

10 of 22
1. Send SPC XXXXXX obtained before from SPCUtility for the BOOST MOBILE, by clicking on
green/blue arrow (A) after entering code into SPC box, should see DEVICE UNLOCKED in log
window if you have that open (B) (MUST always UNLOCK DEVICE when connecting with DFS or
changes won’t stick)
2. On the PROGRAMMING TAB shown, in the box a bit below PORTS(A), for Unlock: SPC: There is a
STR: and HEX (C).
- Press READ.
- Will see the SPC you just entered from BOOST
- Enter 000000 over the existing Boost code and press WRITE to set the SPC to the 000000 for
Verizon OTA programming.
3. Press RESET (D) in far right to reboot phone or changes won’t stick

11 of 22
Step 4, Flash Verizon KK 4.4.2 ROM. Why go to 4.3, when this works from Boost 4.3 or 4.4?
This goes really quick as long as the bat file has a pause in the right place. The link on the OP is for 4.3
flash, but the files for 4.4 are slightly different and there needs to be a PAUSE in the batch file to allow
the phone to reboot after a couple files are flashed.
1. Download Verizon 4.4.2 ROM Verizon 4.4.2 Rom Download Link. (Was downloaded in step 1 to
get fastboot.)
2. Unzip the file to a folder to have Moto G Verizon _XXXX_XXXX.xml as the folder name (done
already in step 1.)
3. Go into that folder.
4. Create a text file and name it install.bat
5. Place the following text in that file
SET fastboot=fastboot.exe
%fastboot% flash aboot emmc_appsboot.mbn
%fastboot% reboot-bootloader
@echo
@echo -----------------------------------------------------------
@echo Phone will self-reboot back into FastBoot.
@echo Once done, press Enter on PC to Continue.
@echo (May be done already, as phone is FAST at this reboot, 2-3 seconds)
@echo -----------------------------------------------------------
pause
%fastboot% flash partition gpt.bin
%fastboot% flash motoboot motoboot.img
%fastboot% flash logo logo.bin
%fastboot% flash boot boot.img
%fastboot% flash recovery recovery.img
%fastboot% flash system system.img_sparsechunk1
%fastboot% flash system system.img_sparsechunk2
%fastboot% flash system system.img_sparsechunk3
%fastboot% flash system system.img_sparsechunk4
%fastboot% flash modem NON-HLOS.bin
%fastboot% erase modemst1
%fastboot% erase modemst2
%fastboot% flash fsg fsg.mbn
%fastboot% erase cache
%fastboot% erase userdata
pause
or, here is a link to this already done: install.bat download link
12 of 22
6. Boot phone to FASTBOOT and leave there, don’t go into BPTools.
7. As long as fastboot is in your path, you can run this new install.bat from a DOS window.(see
image right below for how to “Open Command Promt Here” easily)
If not, copy the fastboot files from the WINDOWS directory in the .xml folder “up” one level
from the WINDOWS directory to be with all the rom files and run install.bat from a DOS window.
Will End up this THIS;

13 of 22
- Type install.bat, press ENTER on the PC
You will get some errors on the phone. This is perfectly normal. On the PC there is an error about a
checksum, but that is OK also.
Here is my phone when the flash was going on.
-PC will finish and leave phone in Fastboot.
-Once done, before turning phone OFF, UNPLUG USB cable from phone, or when turn off, it will turn
right back ON!
-Turn Phone off.

14 of 22
Step 5, Call PagePlusCellular (PPC) or live chat and get ESN (MEID from above in step 2a) associated to
this phone on their system. Can port an existing number or get a new one. Not 4g, so don’t have to do
anything special.

15 of 22
Step 6 Activate Phone
Power up normally. Will take a LONG time after this rom flash, about 4 minutes, so let it go.
-Pick a language on the first screen.
-The Verizon Auto activate will fail. So do NOT tap ACTIVATE in the lower right. Rather press “here” in
the middle to get a standard activation call out.
-When voice prompt asks, Press 1 to activate. Takes 45 seconds the first time to, I assume, download
the PRL. (It will say “Welcome to VERIZON over the air programming”… This is right)
(If you do activate, you need to kill the activation. I DID use this the first time I did this from an XDA
member:
16 of 22
“The stock activation app does not work, it errors out. Bypass it by swiping down from the top (to get
the notifications tab) then hit the application switcher (lower right soft button), then swipe away the
activation. From there, phone - dialer - *228 worked great.”
This is similar to bypassing activation: I had to press EMERGENCY CALL. Gets a dialer and then open
application switcher (lower right) and swipe away dialer.
Step 7, Make first call out if new line or will have NO data.
If this is a new number, you have to make a new call. Note, PPC gives you $2 to do this, so just use that.
Call anyone and listen to the thing about setting up voice mail.

17 of 22
Step 8, Get 3g Working via DFS
-Disconnect USB from phone and reboot (needed to keep from auto booting back up)
-Boot into fastboot and select BP TOOLS, (See step 3b above)
-Reconnect USB
- Click Ports and click QC DIAG just like before. (NOTE, with Verizon ROM freshly installed, may need to
go to Device Manager and re-add QC Diag Port like above as Win7x64 did NOT have this with the
Verizon ROM)
-NOW, Put 000000 into SPC and click blue arrow to left to send SPC and UNLOCK. Should See Device
Unlocked in log window if check.
-Goto PROGRAMMING- MOBILE IP and PRESS BLUE “READ” in lower left. (you person said the changes
won’t stick if you don’t READ first, and I believe I did a read also, so do a READ.
-Then enter data to be set as shown:
(-your [email protected] in NAI
-Prim HA and Sec HA to 255.255.255.255
-MIN HA = 300
-MN AAA = 2)
-CLICK WRITE CURRENT PROFILE SETTINGS (A)
-Reboot? (I didn’t but probably should.)

18 of 22
-Had 1 guy report had to do ANOTHER voice call out for 3g to stick. He also did a ESN reset (call PPC and
tell the do ESN reset) but that should not really be necessary.
IF THIS IS A NEW NUMBER MAKE AN OUTGOING CALL OR DATA POSSIBLY WON’T WORK UNTIL YOU DO.

19 of 22
Step 8 Disable OTA Updates
Necessary? Maybe, but in the future new OTAs could kill phone flash…
2 ways.
EASY:
8.1 Get FREE version of Titanium Backup, then get PAID version of Titanium backup as it is an add-
on to the free version. Get ROOT from below in this document. Simply goto: BACKUP/RESTORE
in Titanium
-Scroll down to MotorlaOTA 1.0 and click on it.
-Click FREEZE!
-To take updates in the future, go back here and click UNFREEZE!
OR
Not Quite as easy, still need root, but cheaper, no paid Titianium needed…
8.2 Get Minimal ADB installed. Grab Minimal ADB and fastboot get from here
XDA forum link to discuss and read about Minimal ADB to read about or directly grab from Link
from above XDA to Windows v1.1.3
Step 8.2a, Become a DEVELOPER on phone.
-Swipe down, Settings-> About Phone ->Tap “Build Number” at bottom 7 times. Will get a count
down as get close to 7 taps…
- Back key once
-Enter into the DEVELOPER OPTIONS that is now available. Turn DEV. OPTIONS ON at top if not
already,
-Add check to USB DEBUGGING.
Step 8.2b, Need to run some adb commands from the DOS window on the PC From johnior on
page 17 of the Moto G ->PPC thread, here is what he did. See post #166 link to post shown here
He had the adb installed in the MotoG-Tools directory.
Must for ROOT access on phone already(see step 9 below) or su below will fail.
You type what is underlined and italic. The rest is what the PC should return with.
NOTE, must accept SU alert on phone to allow adb to become superuser after type su and press
enter…
1. Type: Adb devcies
2. If devices come back as missing, turn on USB DEBUGGING on the phone in Dev Options.
-If devices is LOCKED, on phone must accept the computer connection for security reasons.
3. Then:
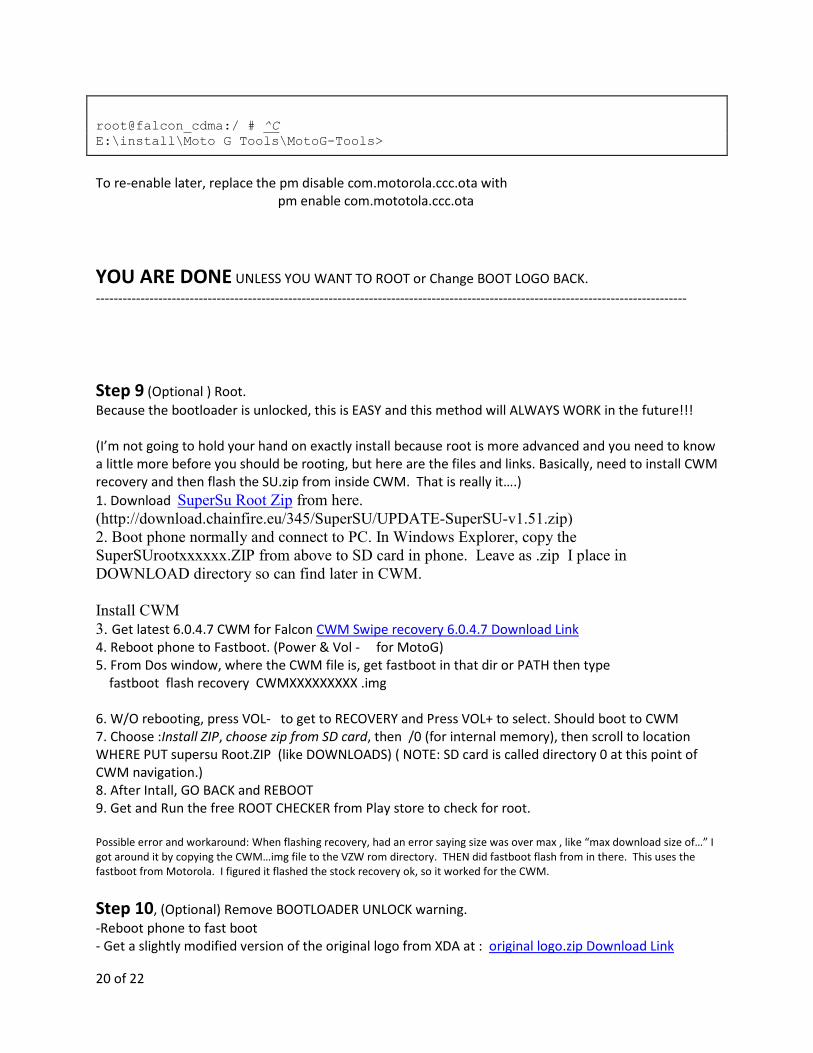
E:\install\Moto G Tools\MotoG-Tools> E:\install\Moto G Tools\MotoG-Tools>adb shell (ENTER KEY) shell@falcon_cdma:/ $ su su root@falcon_cdma:/ # pm disable com.motorola.ccc.ota (ENTER LEY) pm disable com.motorola.ccc.ota Package com.motorola.ccc.ota new state: disabled root@falcon_cdma:/ #
20 of 22
root@falcon_cdma:/ # ^C E:\install\Moto G Tools\MotoG-Tools>
To re-enable later, replace the pm disable com.motorola.ccc.ota with
pm enable com.mototola.ccc.ota
YOU ARE DONE UNLESS YOU WANT TO ROOT or Change BOOT LOGO BACK.
------------------------------------------------------------------------------------------------------------------------------------
Step 9 (Optional ) Root.
Because the bootloader is unlocked, this is EASY and this method will ALWAYS WORK in the future!!!
(I’m not going to hold your hand on exactly install because root is more advanced and you need to know
a little more before you should be rooting, but here are the files and links. Basically, need to install CWM
recovery and then flash the SU.zip from inside CWM. That is really it….)
1. Download SuperSu Root Zip from here.
(http://download.chainfire.eu/345/SuperSU/UPDATE-SuperSU-v1.51.zip)
2. Boot phone normally and connect to PC. In Windows Explorer, copy the
SuperSUrootxxxxxx.ZIP from above to SD card in phone. Leave as .zip I place in
DOWNLOAD directory so can find later in CWM.
Install CWM
3. Get latest 6.0.4.7 CWM for Falcon CWM Swipe recovery 6.0.4.7 Download Link 4. Reboot phone to Fastboot. (Power & Vol - for MotoG)
5. From Dos window, where the CWM file is, get fastboot in that dir or PATH then type
fastboot flash recovery CWMXXXXXXXXX .img
6. W/O rebooting, press VOL- to get to RECOVERY and Press VOL+ to select. Should boot to CWM
7. Choose :Install ZIP, choose zip from SD card, then /0 (for internal memory), then scroll to location
WHERE PUT supersu Root.ZIP (like DOWNLOADS) ( NOTE: SD card is called directory 0 at this point of
CWM navigation.)
8. After Intall, GO BACK and REBOOT
9. Get and Run the free ROOT CHECKER from Play store to check for root.
Possible error and workaround: When flashing recovery, had an error saying size was over max , like “max download size of…” I
got around it by copying the CWM…img file to the VZW rom directory. THEN did fastboot flash from in there. This uses the
fastboot from Motorola. I figured it flashed the stock recovery ok, so it worked for the CWM.
Step 10, (Optional) Remove BOOTLOADER UNLOCK warning.
-Reboot phone to fast boot
- Get a slightly modified version of the original logo from XDA at : original logo.zip Download Link

21 of 22
-Open the downloaded .zip and extract the logo.bin to somewhere
From a command window, type
fastboot flash logo logo.bin from the directory with the new logo.bin
or STEP 10a (Optional) Or Why limit to original logo?
There is a thread with a bunch of CWM flashable .zip logos at XDA. xda logo download link
Or you can pull the logo.bin out and flash like step 10, with fastboot.
4.4.4 Update.
I am ROOTED with CWM recovery installed. I allowed the OverTheAir update to go.
-Allow to take. Then when reboot with Android heart being replaced, and CWM comes up, ALLOW
UNTRUSTED ZIP needs to be accepted part way through.
-Tell to reboot, and choose FIX ROOT when asked before powers down.
-CWM and ROOT were maintained through the update.
-Will loose boot image, (will go back to the warning about being unlocked. This is normal). Can re-
install.

22 of 22
APPENDIX This will NOT apply to 99% of people, so STOP READING, YOU ARE DONE!!!!!
-----------------------------------------------------------------------------------------------------
I however tried to port over to a Sprint Moto X (for the added space) and it went BAD!
There is a link on the internet on getting the X on PPC, but I couldn’t get ANY DATA, not 1X not 3G.
I tried multiple flashes back to Original Rom, an ESN reset, nothing.
So I ported the number back to the G. But after doing a *228 to activate, I had NO DATA, not 1x,
nothing!
So I did an ESN reset, no help.
-Flashed back to Boost Rom (Still on VZW 4.4.2, so used Boost 4.4.2) then flashed forward to Verizon
ROM, *228, voice and text, no data.
-ESN reset, no help
-Flashed to Boost, Went to BPTools, send SPC in DFS
DFFS-Mobile IP TAB, on left “Mobile IP main Setting” window, READ, click on PROFILE on the top
(boost will be green on the SECOND radio button down, Verizon uses the first, PROFILE 0 for its info.
- Clear the “ Current User Profile” from [email protected] to blank,
- Clear the Prim HA ADRESS” from 255.255.255.255 to 0.0.0.0.
- Clear the “SEC HA ADRESS” from 255.255.255.255 to 0.0.0.0.
- Set HA SPI SET form 300 to 0
- Set MIN AAA SPI SET from 2 to 0
- At bottom, clear DETAIL, RM NAI from [email protected] to blank
- WRITE CURRENT PROFILE SETTINGS.
-Flash to Verizon 4.4.2 rom
-Booted into Stock to RECOVERY and did FACTORY RESET. (THIS may have been what did it????)
-Reboot.
-Activate with hitting center of screen, as described in this doc.
Had 1X!
-Reboot, had 3g!(But still haven’t entered data into DFS for that to work!?!?!?!?!), Rebooted to
BPTools and checked in DFS, Mobile IP TAB, all [email protected] was right, but missing
255.255.255.255 in the two locations. Set then to 255.255.255.255 and WRITE, then reboot.
-Complete.
(WTF?????)
…………………………………………..END…………………………………………………….…………………………………….