Embed Size (px)
DESCRIPTION
Roof top tent owner's manual for the Adventurer and Expedition roof top tents.
Citation preview
Roof Top Tent Owner’s Manual
Adventurer and Expedition Sizes
2
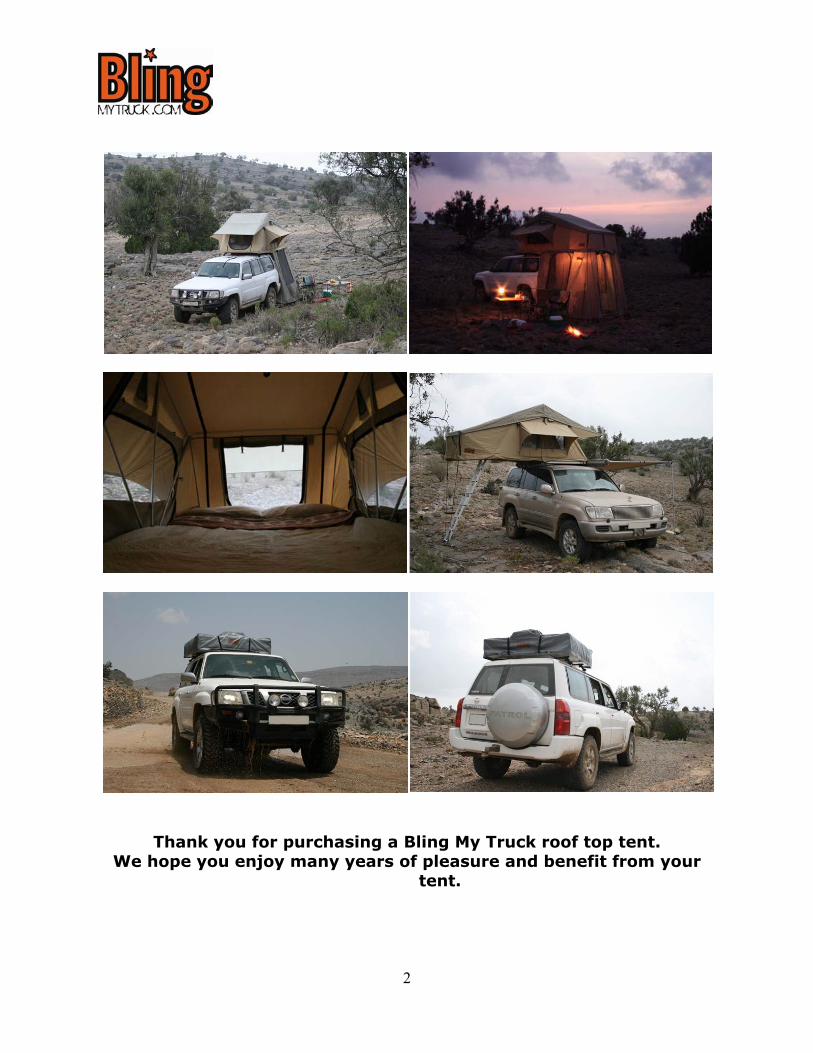
Thank you for purchasing a Bling My Truck roof top tent. We hope you enjoy many years of pleasure and benefit from your
tent.
3
Contents 1. Components .....................................................................................................................4
2. Mounting options ............................................................................................................5
3. Fitting the tent to open sideways ............................................................................6
4. Fitting the tent to open lengthways ........................................................................7
5. Mounting the aluminium rails to the base of the tent .....................................9
6. Fitting the ladder ..........................................................................................................11
7. Fitting the tent to the vehicle’s roof rack or bars ............................................12
8. Fitting the heavy duty cover ....................................................................................13
9. Opening the tent ..........................................................................................................14
10. Fitting the annex / changing room ........................................................................16
11. Closing the tent .............................................................................................................17
12. Cautions ...........................................................................................................................18
13. Specifications .................................................................................................................19
14. Appendix: Choosing a roof rack or roof bars ....................................................20
14.1 Roof bars ..........................................................................................................................20
14.2 Roof racks ........................................................................................................................21
4
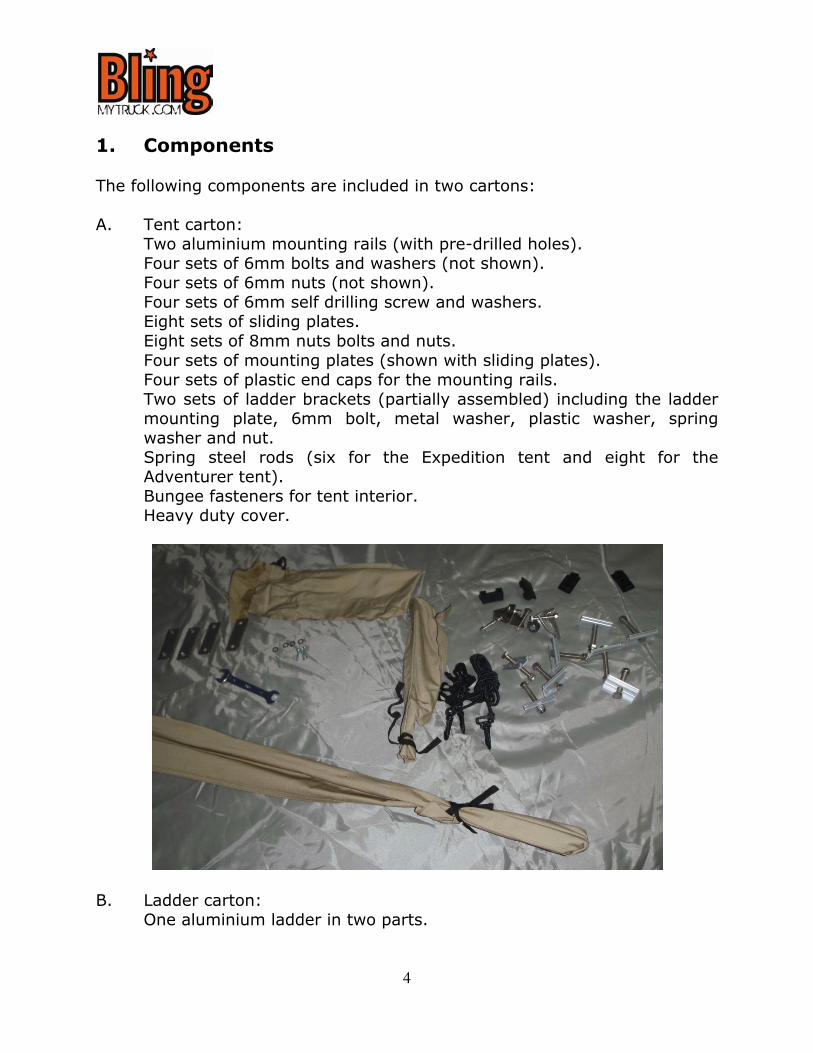
1. Components The following components are included in two cartons: A. Tent carton:
Two aluminium mounting rails (with pre-drilled holes). Four sets of 6mm bolts and washers (not shown). Four sets of 6mm nuts (not shown). Four sets of 6mm self drilling screw and washers. Eight sets of sliding plates. Eight sets of 8mm nuts bolts and nuts. Four sets of mounting plates (shown with sliding plates). Four sets of plastic end caps for the mounting rails. Two sets of ladder brackets (partially assembled) including the ladder mounting plate, 6mm bolt, metal washer, plastic washer, spring washer and nut. Spring steel rods (six for the Expedition tent and eight for the Adventurer tent). Bungee fasteners for tent interior. Heavy duty cover.
B. Ladder carton:
One aluminium ladder in two parts.
5
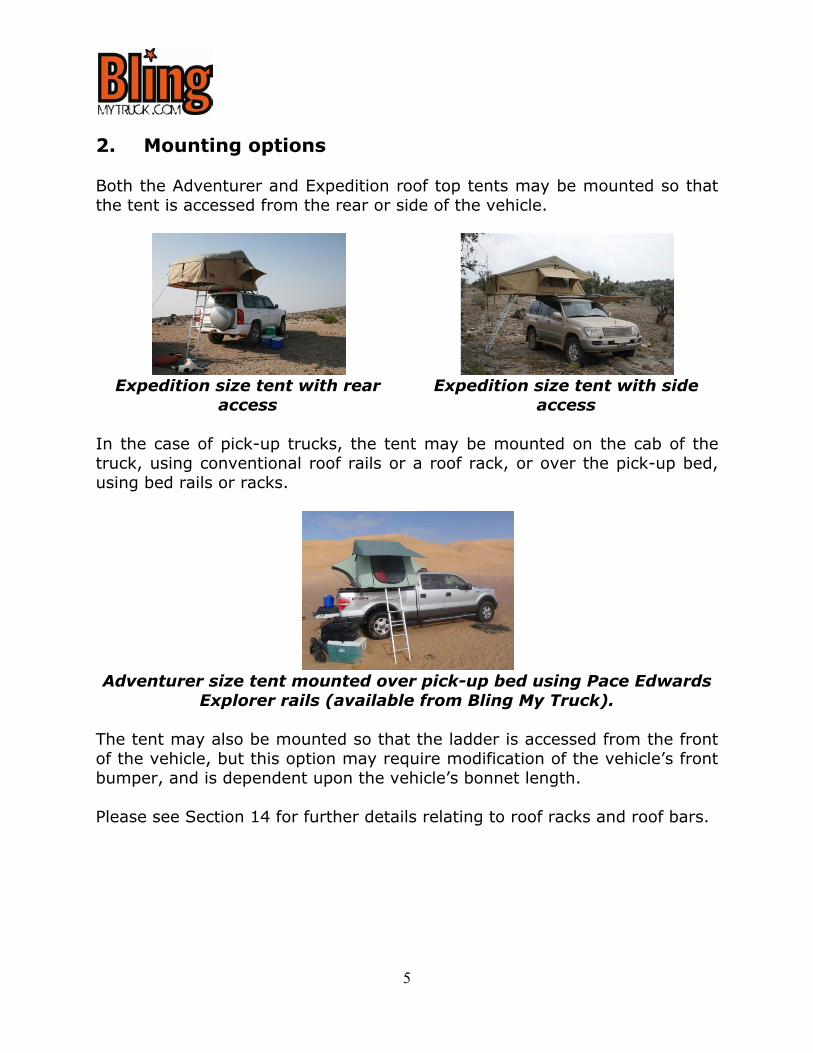
2. Mounting options Both the Adventurer and Expedition roof top tents may be mounted so that the tent is accessed from the rear or side of the vehicle.
Expedition size tent with rear
access Expedition size tent with side
access In the case of pick-up trucks, the tent may be mounted on the cab of the truck, using conventional roof rails or a roof rack, or over the pick-up bed, using bed rails or racks.
Adventurer size tent mounted over pick-up bed using Pace Edwards
Explorer rails (available from Bling My Truck). The tent may also be mounted so that the ladder is accessed from the front of the vehicle, but this option may require modification of the vehicle’s front bumper, and is dependent upon the vehicle’s bonnet length. Please see Section 14 for further details relating to roof racks and roof bars.
6
3. Fitting the tent to open sideways The orientation of the aluminium mounting rails will depend on whether the tent will be mounted to open sideways (across the car) or lengthways (usually over the rear of the car). Fitting the tent to open sideways is usually best if the car’s luggage compartment access is a tailgate which may not open fully if the tent is mounted lengthways.
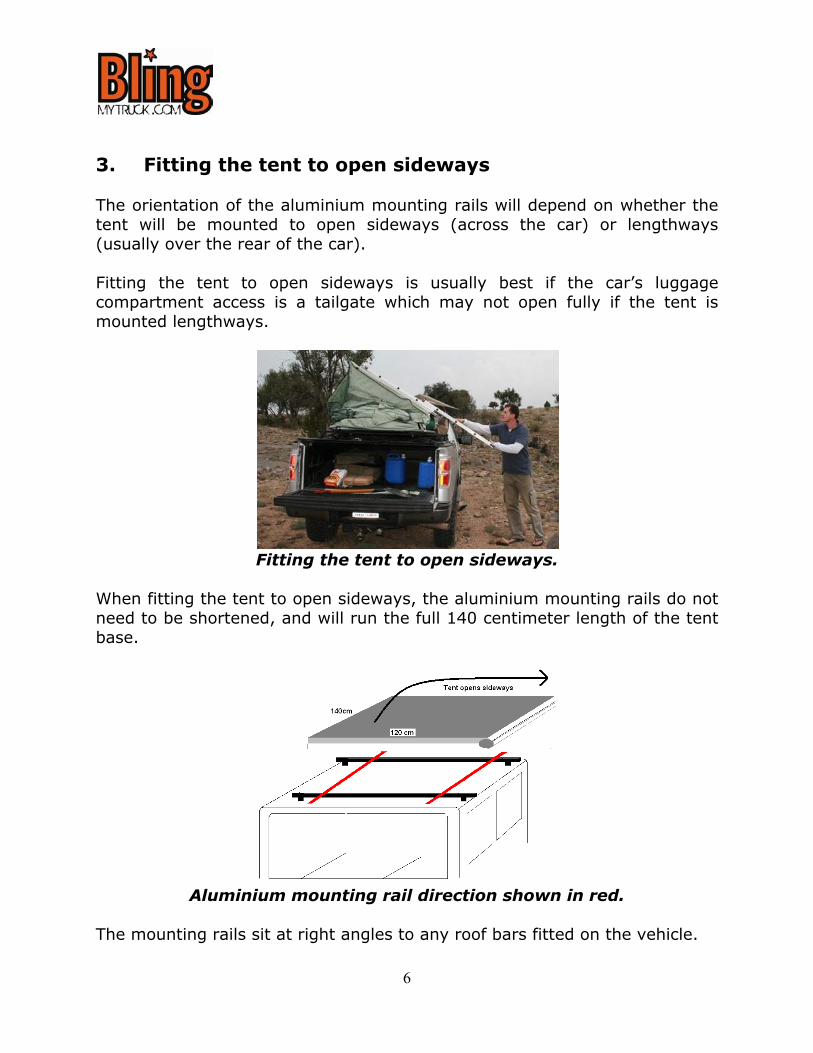
Fitting the tent to open sideways.
When fitting the tent to open sideways, the aluminium mounting rails do not need to be shortened, and will run the full 140 centimeter length of the tent base.
Aluminium mounting rail direction shown in red.
The mounting rails sit at right angles to any roof bars fitted on the vehicle.
7
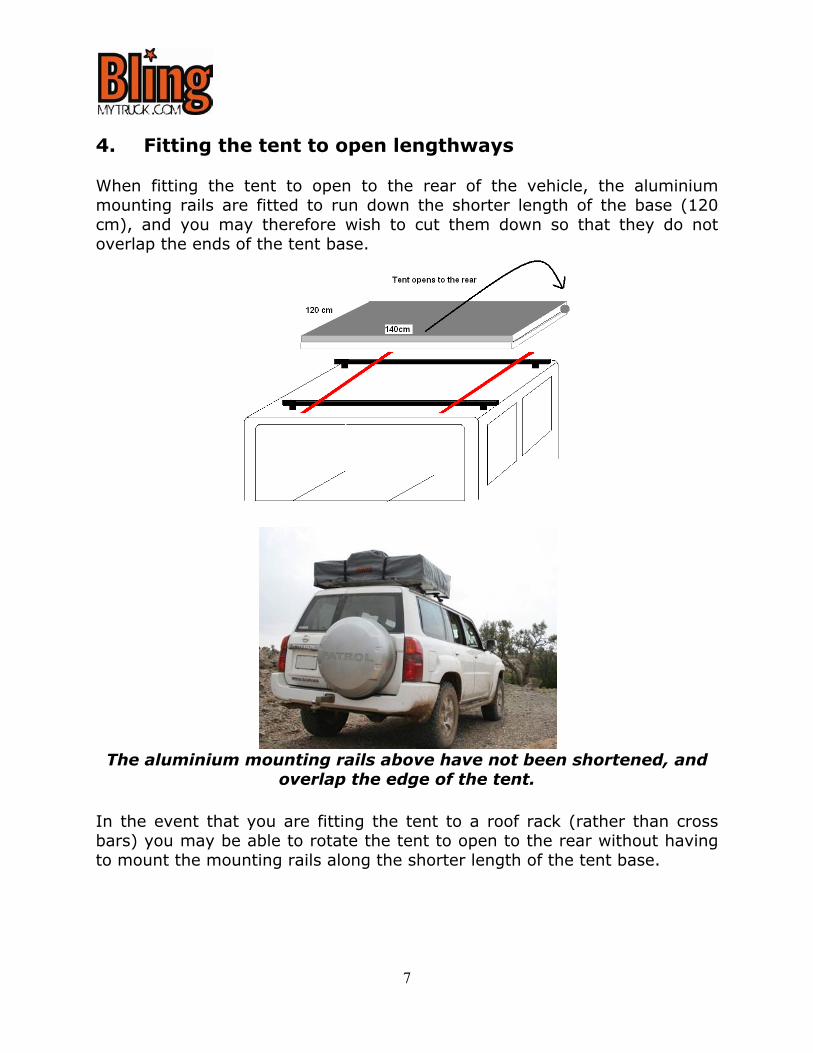
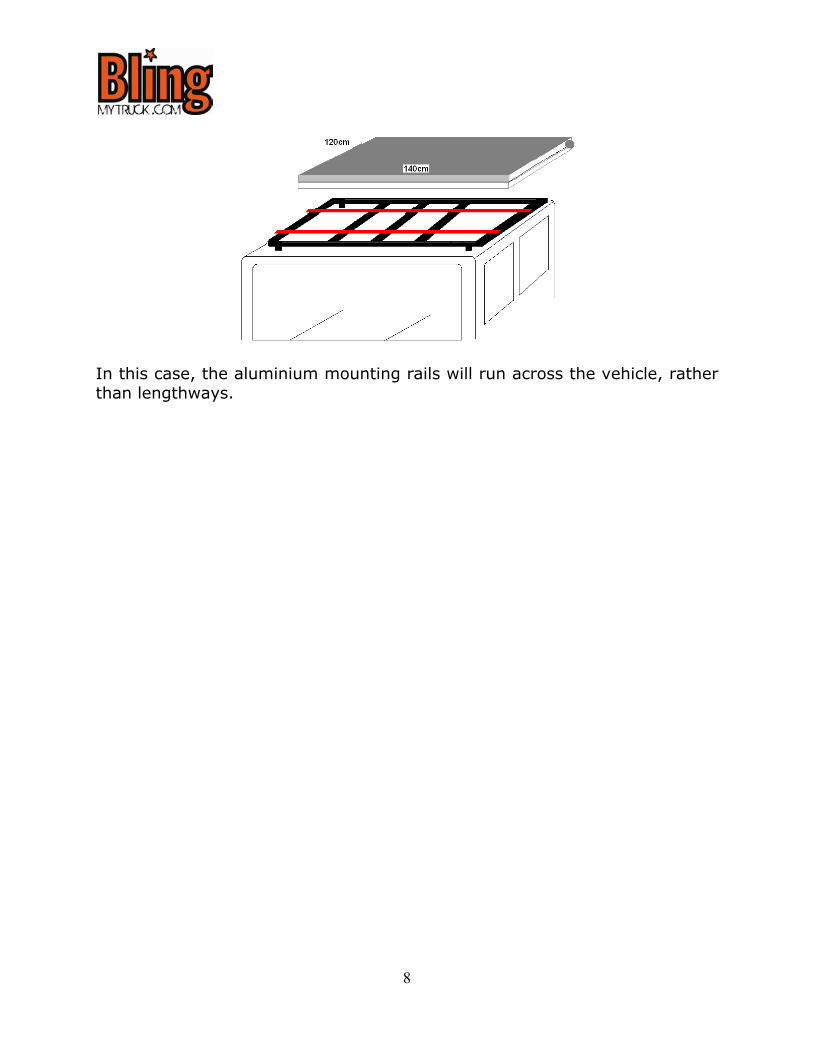
4. Fitting the tent to open lengthways When fitting the tent to open to the rear of the vehicle, the aluminium mounting rails are fitted to run down the shorter length of the base (120 cm), and you may therefore wish to cut them down so that they do not overlap the ends of the tent base.
The aluminium mounting rails above have not been shortened, and
overlap the edge of the tent. In the event that you are fitting the tent to a roof rack (rather than cross bars) you may be able to rotate the tent to open to the rear without having to mount the mounting rails along the shorter length of the tent base.
8
In this case, the aluminium mounting rails will run across the vehicle, rather than lengthways.
9
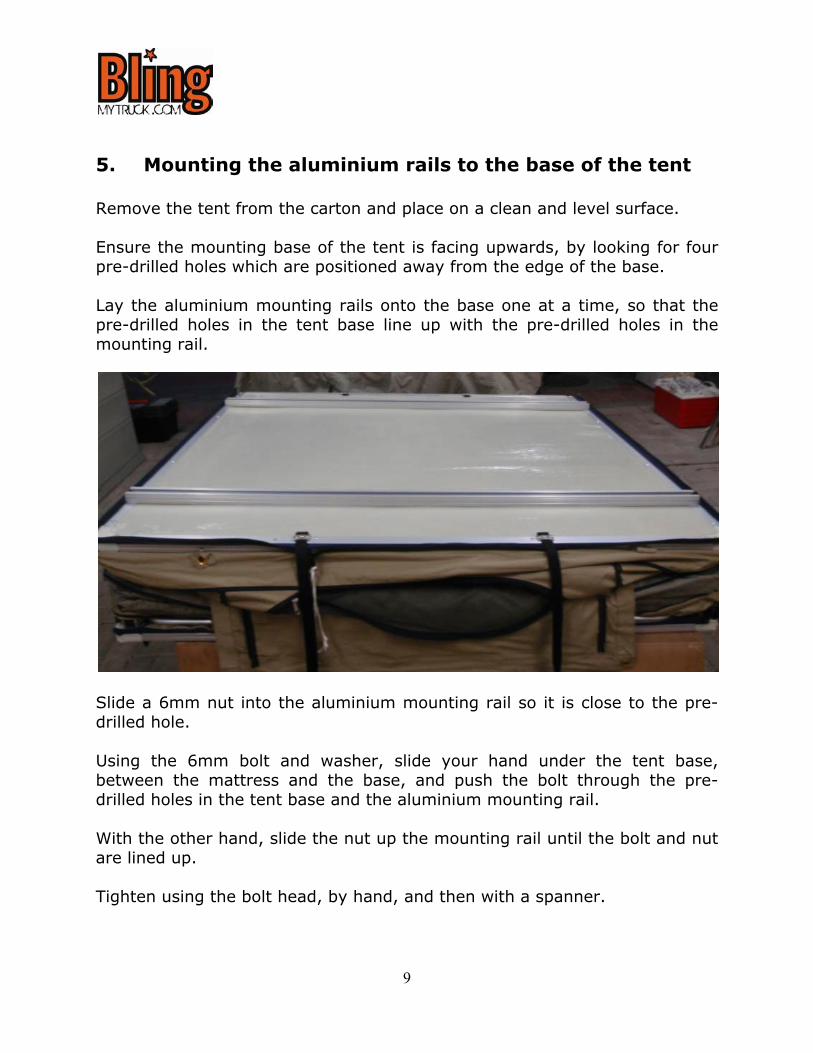
5. Mounting the aluminium rails to the base of the tent Remove the tent from the carton and place on a clean and level surface. Ensure the mounting base of the tent is facing upwards, by looking for four pre-drilled holes which are positioned away from the edge of the base. Lay the aluminium mounting rails onto the base one at a time, so that the pre-drilled holes in the tent base line up with the pre-drilled holes in the mounting rail.
Slide a 6mm nut into the aluminium mounting rail so it is close to the pre-drilled hole. Using the 6mm bolt and washer, slide your hand under the tent base, between the mattress and the base, and push the bolt through the pre-drilled holes in the tent base and the aluminium mounting rail. With the other hand, slide the nut up the mounting rail until the bolt and nut are lined up. Tighten using the bolt head, by hand, and then with a spanner.
10
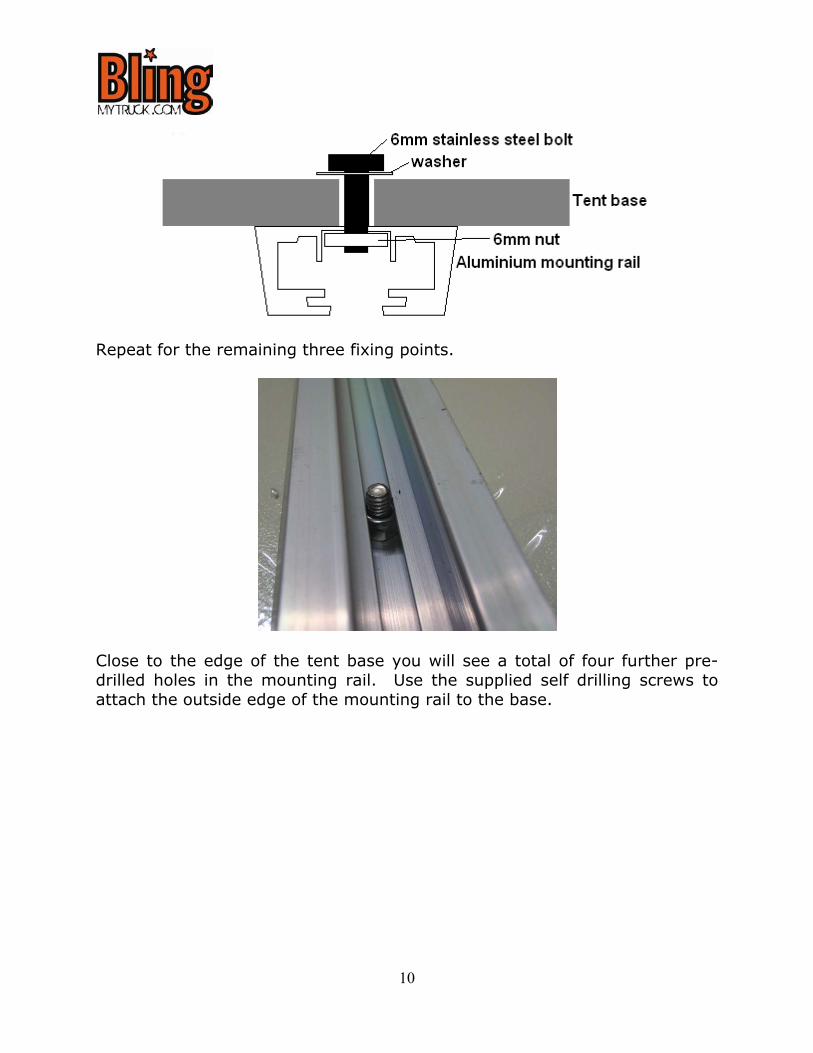
Repeat for the remaining three fixing points.
Close to the edge of the tent base you will see a total of four further pre-drilled holes in the mounting rail. Use the supplied self drilling screws to attach the outside edge of the mounting rail to the base.
11
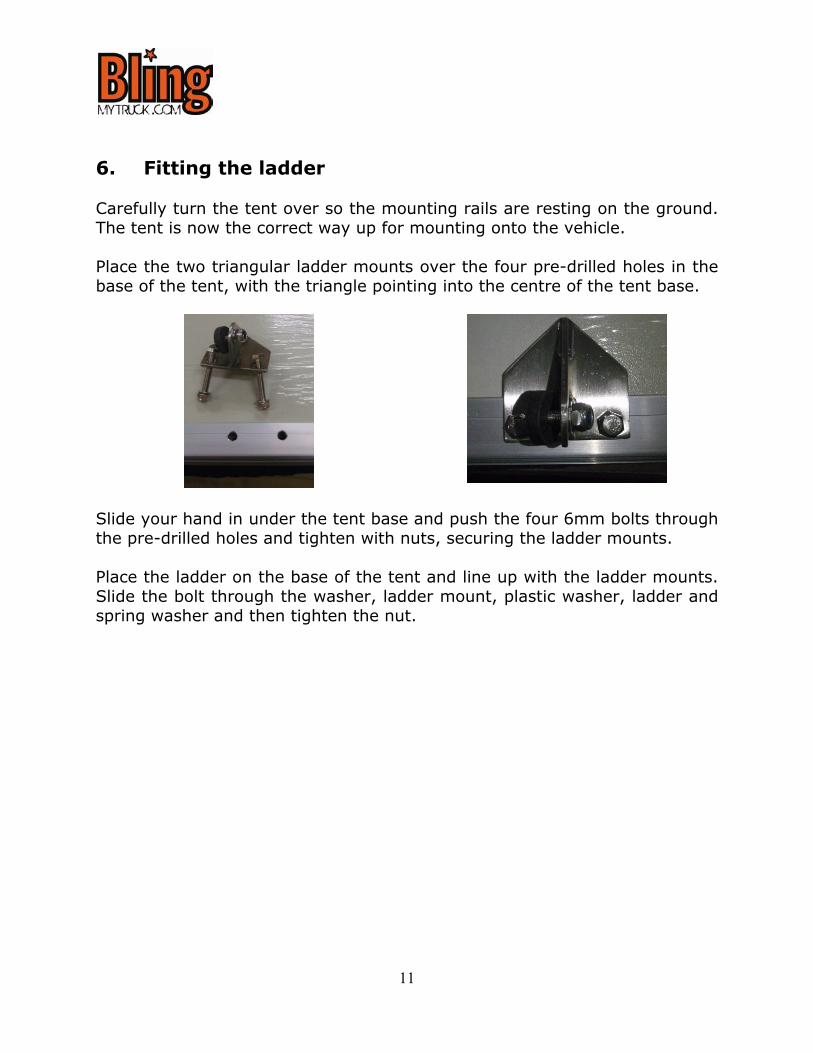
6. Fitting the ladder Carefully turn the tent over so the mounting rails are resting on the ground. The tent is now the correct way up for mounting onto the vehicle. Place the two triangular ladder mounts over the four pre-drilled holes in the base of the tent, with the triangle pointing into the centre of the tent base.
Slide your hand in under the tent base and push the four 6mm bolts through the pre-drilled holes and tighten with nuts, securing the ladder mounts. Place the ladder on the base of the tent and line up with the ladder mounts. Slide the bolt through the washer, ladder mount, plastic washer, ladder and spring washer and then tighten the nut.
12
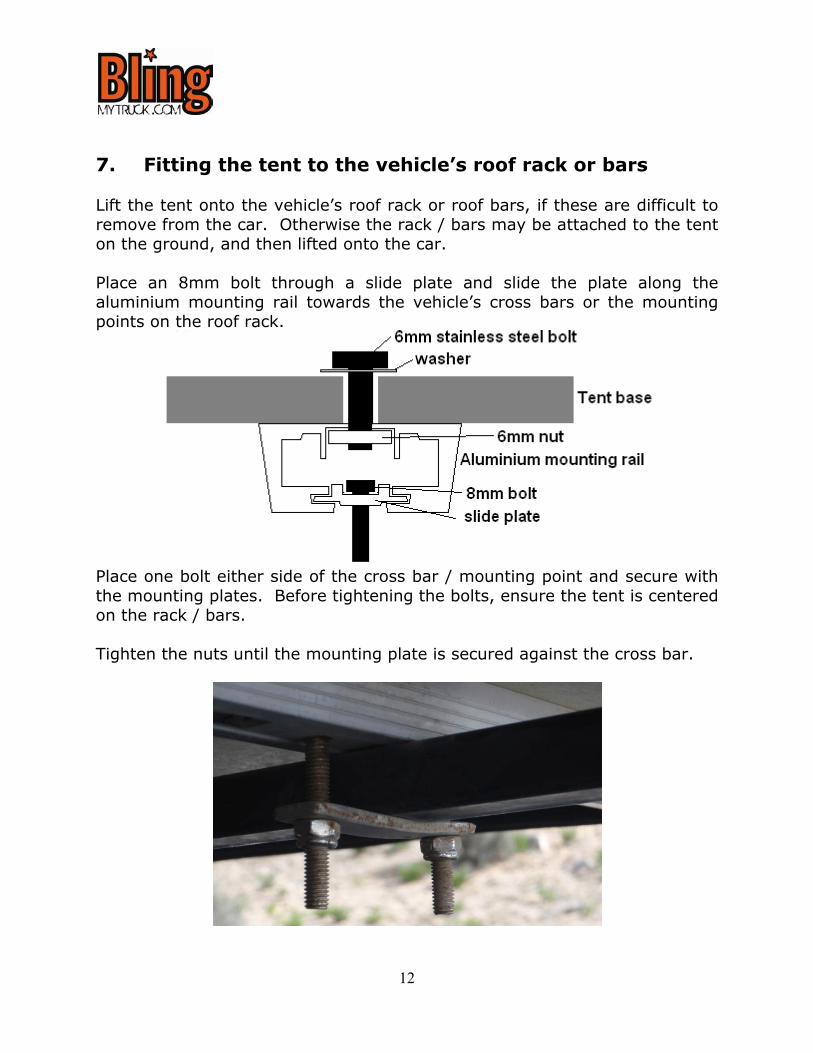
7. Fitting the tent to the vehicle’s roof rack or bars Lift the tent onto the vehicle’s roof rack or roof bars, if these are difficult to remove from the car. Otherwise the rack / bars may be attached to the tent on the ground, and then lifted onto the car. Place an 8mm bolt through a slide plate and slide the plate along the aluminium mounting rail towards the vehicle’s cross bars or the mounting points on the roof rack.
Place one bolt either side of the cross bar / mounting point and secure with the mounting plates. Before tightening the bolts, ensure the tent is centered on the rack / bars. Tighten the nuts until the mounting plate is secured against the cross bar.
13
8. Fitting the heavy duty cover The tent is supplied with a heavy duty pvc cover, which you will find stored inside the tent the first time you open it. The pvc cover has a think beading along one side, with a zip running along the other three sides. Stand next to the tent hinges, and you will see a groove running along the base of the tent. Thread the beaded section of the cover into this groove, ensuring that the exterior of the cover hangs down against the side of the vehicle. Once fixed into the groove, pull the cover over the top of the tent, so that the interior of the cover is now lying on the tent, and then zip the tent closed on the remaining three sides. Pull the tightening straps over the cover and secure with the Velcro closures.
14
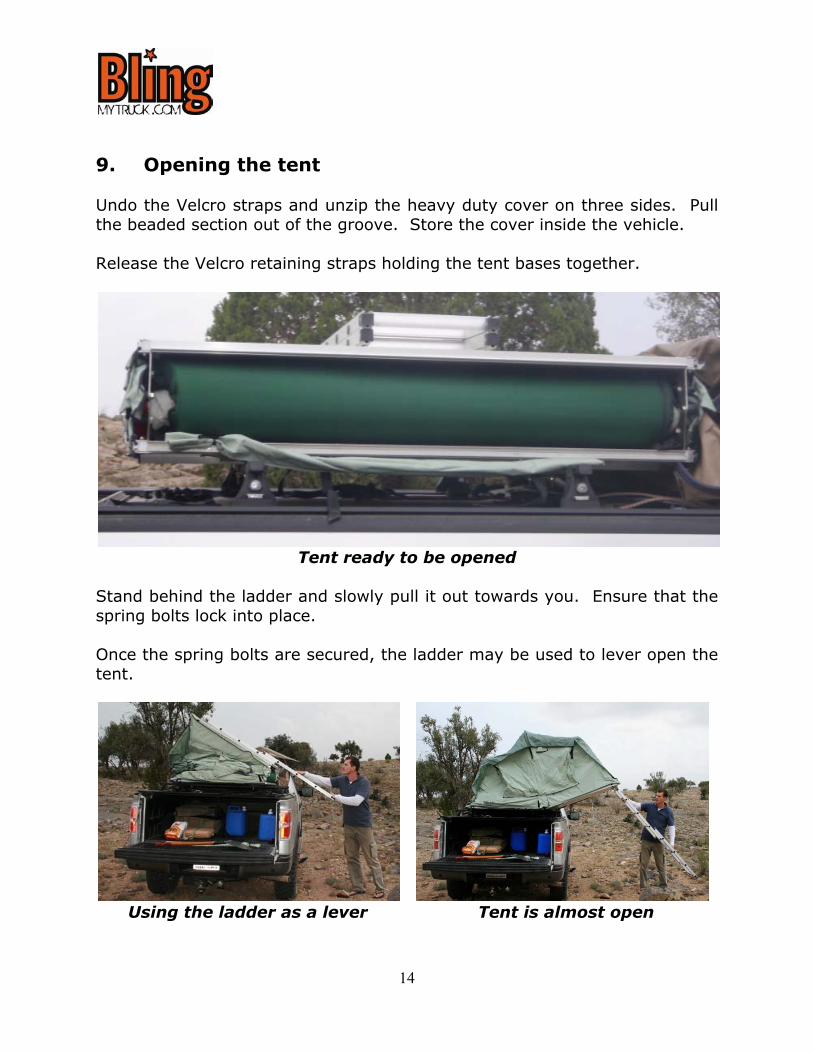
9. Opening the tent Undo the Velcro straps and unzip the heavy duty cover on three sides. Pull the beaded section out of the groove. Store the cover inside the vehicle. Release the Velcro retaining straps holding the tent bases together.
Tent ready to be opened
Stand behind the ladder and slowly pull it out towards you. Ensure that the spring bolts lock into place. Once the spring bolts are secured, the ladder may be used to lever open the tent.
Using the ladder as a lever Tent is almost open

15
Rest the ladder feet on the ground once the tent base is horizontal. Note: If you have a very tall car, and the ladder is very vertical as a result, you may require a ladder extension. If you have mounted the tent to a small car or pick-up truck bed, you may wish to drill extra holes for the spring bolts in order to shorten the ladder. In order to open up the window awnings, undo the toggles holding down the window awnings and push the eight spring steel rods through the ready made eye in the tent material into the holes in the base of the tent. Then hook the window awning over the hook at the end of the rod.
16
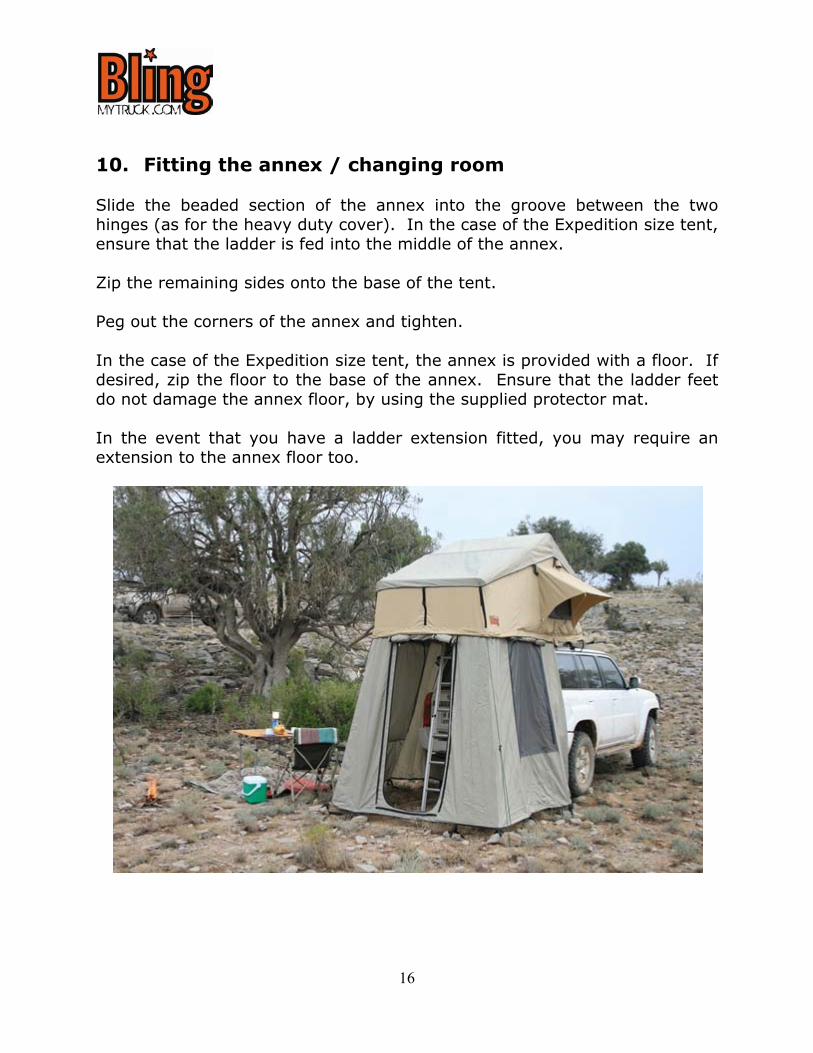
10. Fitting the annex / changing room Slide the beaded section of the annex into the groove between the two hinges (as for the heavy duty cover). In the case of the Expedition size tent, ensure that the ladder is fed into the middle of the annex. Zip the remaining sides onto the base of the tent. Peg out the corners of the annex and tighten. In the case of the Expedition size tent, the annex is provided with a floor. If desired, zip the floor to the base of the annex. Ensure that the ladder feet do not damage the annex floor, by using the supplied protector mat. In the event that you have a ladder extension fitted, you may require an extension to the annex floor too.
17
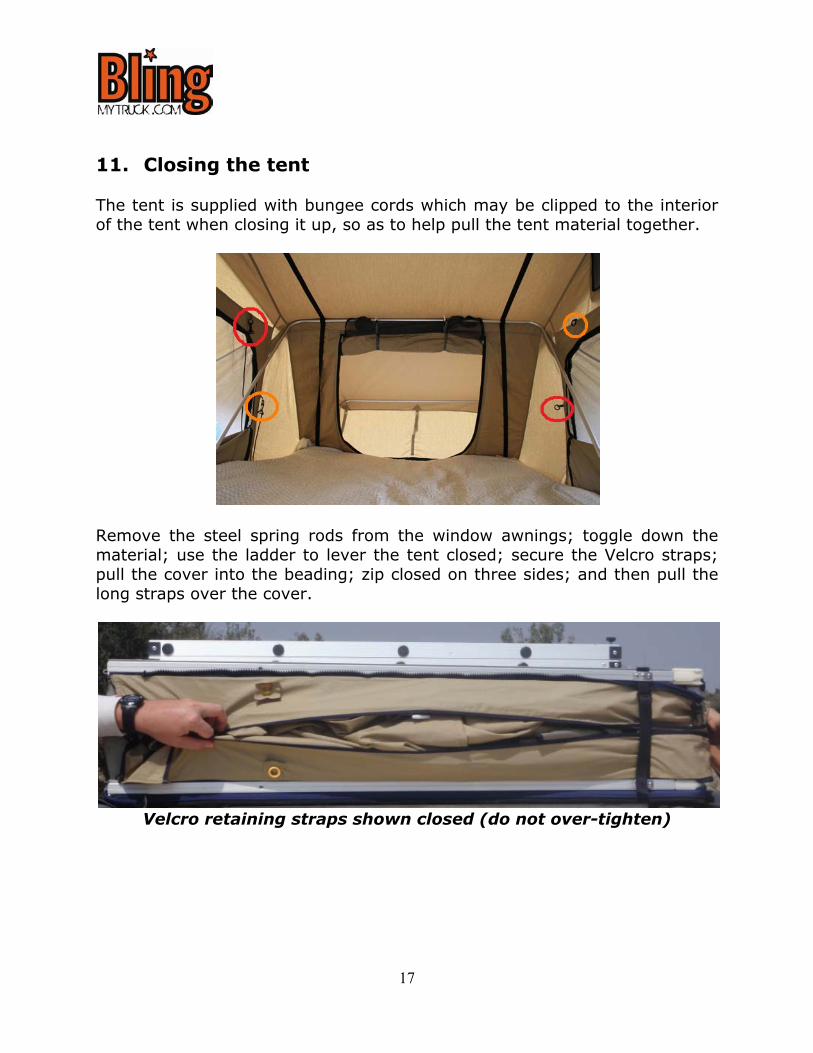
11. Closing the tent The tent is supplied with bungee cords which may be clipped to the interior of the tent when closing it up, so as to help pull the tent material together.
Remove the steel spring rods from the window awnings; toggle down the material; use the ladder to lever the tent closed; secure the Velcro straps; pull the cover into the beading; zip closed on three sides; and then pull the long straps over the cover.
Velcro retaining straps shown closed (do not over-tighten)
18
12. Cautions We hope you use and enjoy the tent, and would recommend the following to prevent injury to yourself and damage to the tent or vehicle: • Your car is now taller than it used to be! Take extreme car when
driving, particularly in relation to low hanging objects, underground garages, signposts, trees, etc. The car may also corner differently and has a higher center of gravity. Be careful on slopes and gradients.
• Do not store the tent wet. If the tent must be packed away damp, then close all windows and open the tent for drying at the first opportunity.
• Do not store the tent directly on a concrete floor and ensure it is kept
away from damp walls / drains.
• Do not over-tighten the Velcro retaining straps as they may tear or come loose from the tent. If the tent is very full of bedding, then either remove some items or take hold of the top base and pull it down, then tighten with the Velcro straps.
• Regularly check all bolts and fittings. On- and off-road driving may
loosen these. You may wish to put a drop of super glue or Loctite on nuts which are likely to rattle loose.
• Do not drill extra locking holes below the existing holes on the ladder,
as this will weaken the ladder. It is safer to use a ladder extension.
• The mattress is removable and can be vacuum cleaned. Wipe stains on the tent with a damp cloth, but avoid detergents. Petrol, oil and solvents will also damage your tent.

19
13. Specifications
Adventurer Tent Expedition Tent Sleeping area: 140cm wide x 240cm long
55” wide x 94.5” long
140cm wide x 240cm long 55” wide x 94.5” long
Closed dimensions:
38cm high x 140cm wide x 120cm long 15” high x 55” wide x 47” long
38cm high x 140cm wide x 120cm long 15” high x 55” wide x 47” long
Weight (empty):
54kg 120lbs
58kg 128lbs
20
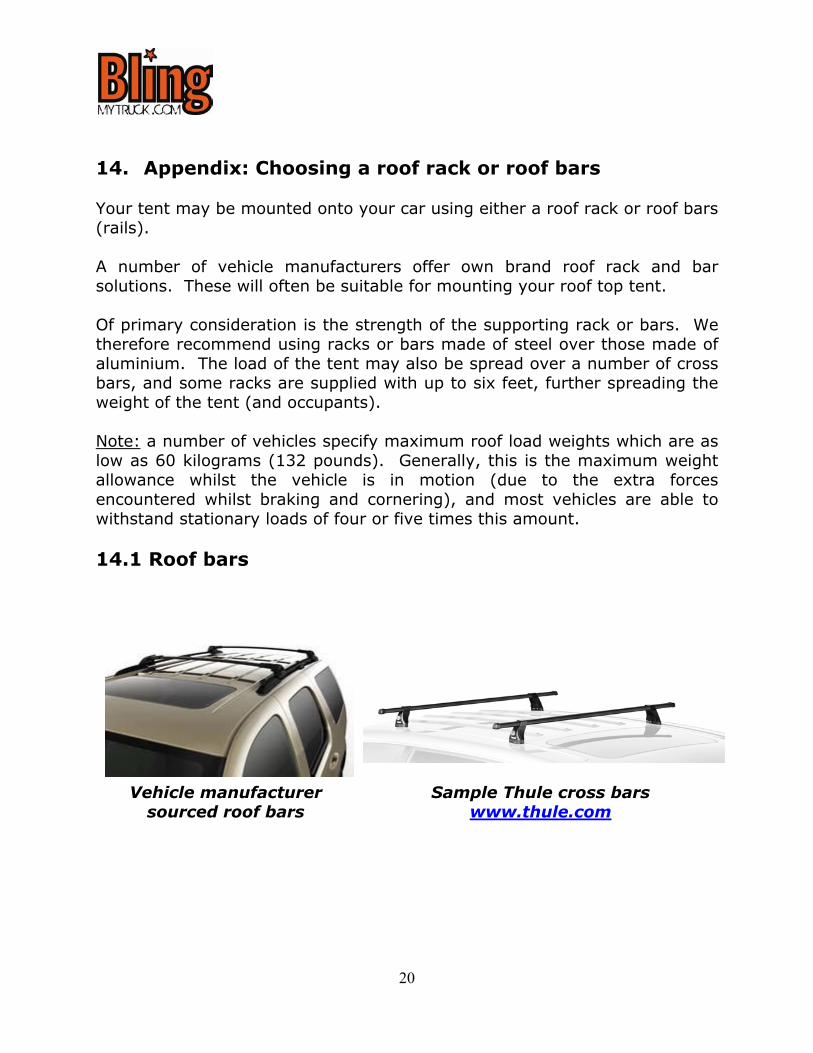
14. Appendix: Choosing a roof rack or roof bars Your tent may be mounted onto your car using either a roof rack or roof bars (rails). A number of vehicle manufacturers offer own brand roof rack and bar solutions. These will often be suitable for mounting your roof top tent. Of primary consideration is the strength of the supporting rack or bars. We therefore recommend using racks or bars made of steel over those made of aluminium. The load of the tent may also be spread over a number of cross bars, and some racks are supplied with up to six feet, further spreading the weight of the tent (and occupants). Note: a number of vehicles specify maximum roof load weights which are as low as 60 kilograms (132 pounds). Generally, this is the maximum weight allowance whilst the vehicle is in motion (due to the extra forces encountered whilst braking and cornering), and most vehicles are able to withstand stationary loads of four or five times this amount. 14.1 Roof bars
Vehicle manufacturer
sourced roof bars Sample Thule cross bars
www.thule.com
21
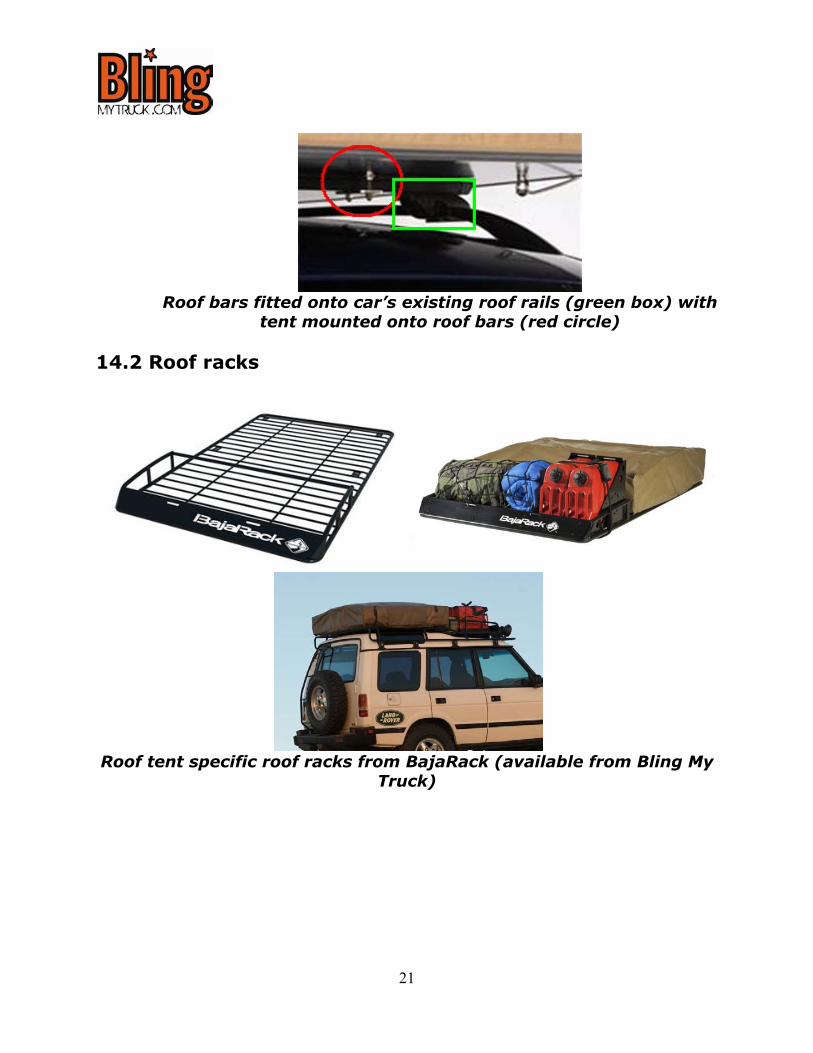
Roof bars fitted onto car’s existing roof rails (green box) with
tent mounted onto roof bars (red circle) 14.2 Roof racks
Roof tent specific roof racks from BajaRack (available from Bling My
Truck)

22
Roof tent mounted on BajaRack standard “basket” type rack.
Maggiolina roof tent mounted on BajaRack standard “basket” type
rack with cross bars from Thule.