Embed Size (px)
Citation preview

Bitrix Intranet Portal Introduction To The Extranet Module
2
Contents Introduction...............................................................................................................................3 Chapter 1. Introducing The Extranet Module .......................................................................4
General Principles Of Extranet Space.....................................................................................4 About The Extranet Module.....................................................................................................4
Restricting The Access .................................................................................................................... 4 The Extranet Site Features .............................................................................................................. 5
Chapter 2. Installing And Configuring The Module .............................................................6 Installing The Module ..............................................................................................................6 The Extranet Site Wizard ........................................................................................................6
Step 1.............................................................................................................................................. 7 Step 2.............................................................................................................................................. 8 Step 3.............................................................................................................................................. 8 Step 4.............................................................................................................................................. 9 Step 5............................................................................................................................................ 11 Step 6............................................................................................................................................ 11
Configuring The Module........................................................................................................12 Configuring User Access Permission ....................................................................................13 Accessing The Extranet Site From The Internet ....................................................................14
Chapter 3. Vieweing The Extranet Site...............................................................................15 Chapter 4. Using Workgroups ............................................................................................16
How Extranet And Intranet Workgroups Differ.......................................................................16 Creating A Workgroup And Inviting Users .............................................................................16 Closing A Workgroup ............................................................................................................20
Chapter 5. Public Employees..............................................................................................21 Chapter 6. The Extranet Module Gadgets ..........................................................................22
The “Contacts” Gadget..........................................................................................................22 The “My Tickets” Gadget.......................................................................................................23
Final Notes ..............................................................................................................................24
3
Introduction
Bitrix Intranet Portal implements special interface enabling unregistered persons to access the portal via the Internet.
This mechanism is based upon the Extranet module, which is included in two senior editions: Bitrix Intranet Portal: Extranet and Bitrix Intranet Portal: Enterprise. There are no restriction on the number of external users, irrespective of the number of licenses purchased.
The purpose of this manual is to give users and developers an insight of features of this module.
This manual is for users and developers of Intranet portals powered by Bitrix Intranet Portal. This documents presumes that the readers are well acquainted with the vocabulary and notions used in Bitrix software.
4
Chapter 1. Introducing The Extranet Module
General Principles Of Extranet Space Information space can be imaginably divided into two zones: the Internet and the Intranet. The Internet is an external area accessible by anyone. The Intranet is an intrinsic, private space that can be accessed by authorized persons only.
Bitrix Site Manager is aimed at giving people an exposure to the company’s activity via the Internet. Bitrix Intranet Portal covers the company’s needs in the internal communication and information space, which is the Intranet.
However, a problem arises when it comes to find a means of communication with users that are external towards the company: partners, clients, supplier etc. – especially when a portion of confidential information is to be made available to these users. Even the trusted partners should not be admitted to the company’s Intranet for security reasons. A solution is simple: Extranet.
The Extranet module is the extension of the Intranet Portal allowing the company to establish confidential communication with suppliers, distributors and other external users without granting them an access to the internal information. The major advantages are client service cost reduction and simple, safe and manageable collaboration space.
About The Extranet Module The Extranet module grants third party users a limited access to the company information. Technically, the module is implemented as a separate restricted site in the context of Bitrix Intranet Portal.
Functionally, the Extranet module is an add-on that is layered upon the Social Network and the Intranet modules enriching the system with special permissions for content and functions of the Intranet portal.
Restricting The Access
Access restrictions apply to the company staff (i.e. the users registered as members of the company structural departments) as well as the external users.
If a user is not a company employee (not bound to any department), the system redirects them to the extranet site. If a visitor is not even an external user, the system prevents them from viewing the extranet site.
5
The employees and the users may be granted different permissions for the extranet site (see Configuring User Access Permission).
The Extranet Site Features
The extranet web site is functionally limited when compared to the Intranet portal web site.
The workplace in extranet is concentrated in a workgroup. An extranet workgroup possesses virtually the same functions as an Intranet portal workgoup; however, there are differences (see Using Workgroups).
The Contacts section: shows available contacts (external users and the company employees); the absence graphs; the birthdays chart; the blog feed showing only the posts available to a given extranet user. This section also takes advantage of a new user property: public employee.
The Documents section contains a common document library configured to display and handle only the extranet documents. The members of the Extranet Users group is granted read permission to the document library.
The Company section contains the subscription features in addition to the conventional company information.
The Help section, among short explanation of the extranet features, offers user interface to communicate with the technical support service. This interface is based on the Wizard - extranet information block of the Services type.
The Microsoft Outlook data exchange protocol is also affected by the Extranet module. Only the available contacts will be exported to Outlook.
The extranet infrastructure is broadened using the new desktop gadgets: My Tickets and Contacts (see The Extranet Module Gadgets). Some of the standard Intranet portal gadgets are unavailable on the extranet site.
6
Chapter 2. Installing And Configuring The Module
The Extranet module does not install automatically when Bitrix Intranet Portal is being installed.
Installing The Module
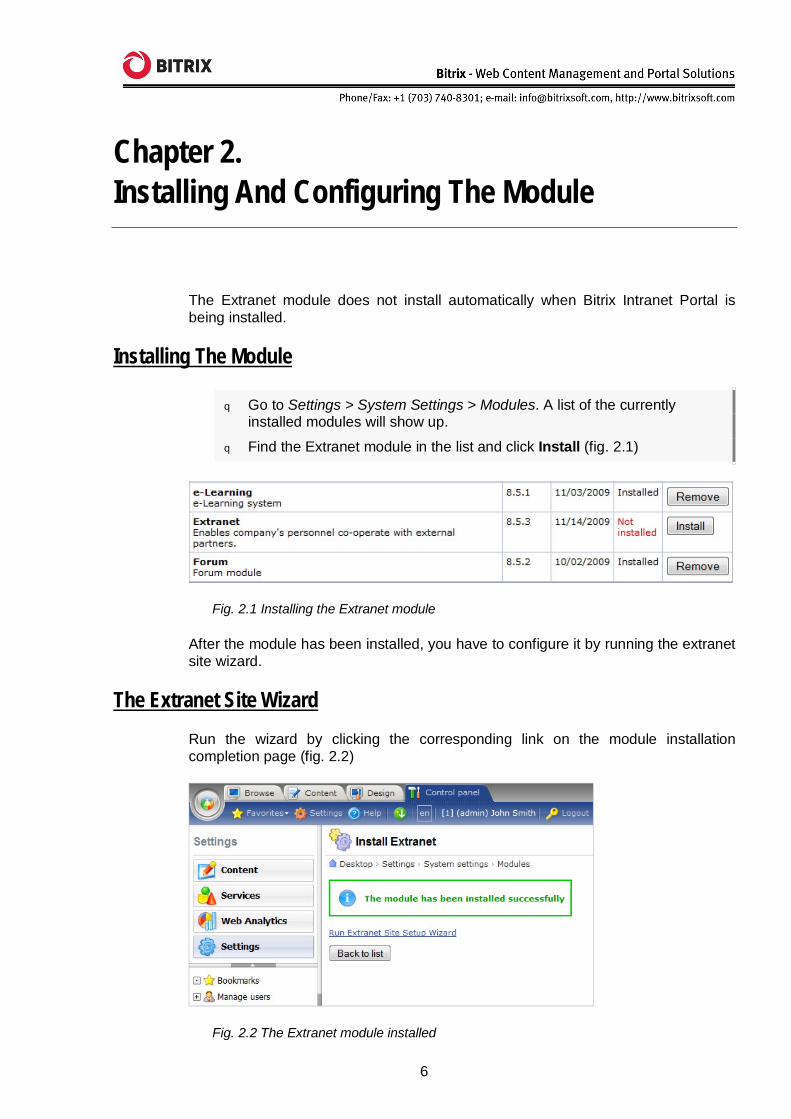
q Go to Settings > System Settings > Modules. A list of the currently installed modules will show up.
q Find the Extranet module in the list and click Install (fig. 2.1)
Fig. 2.1 Installing the Extranet module
After the module has been installed, you have to configure it by running the extranet site wizard.
The Extranet Site Wizard Run the wizard by clicking the corresponding link on the module installation completion page (fig. 2.2)
Fig. 2.2 The Extranet module installed
7
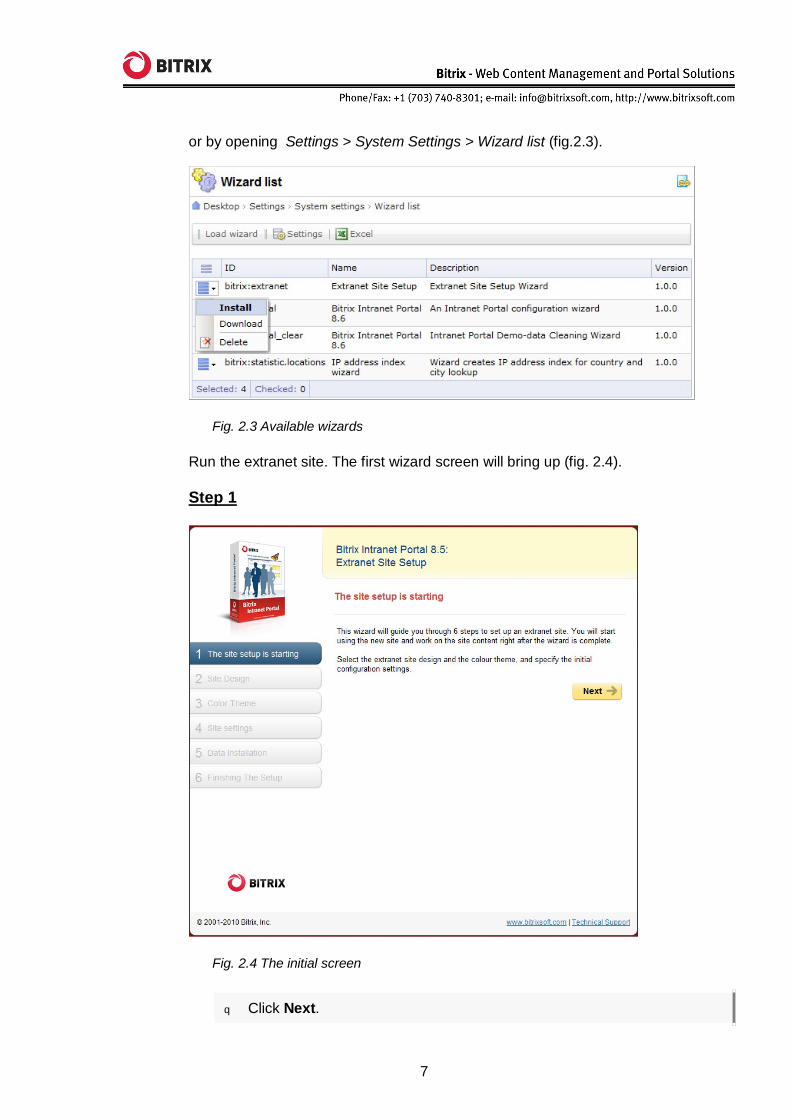
or by opening Settings > System Settings > Wizard list (fig.2.3).
Fig. 2.3 Available wizards
Run the extranet site. The first wizard screen will bring up (fig. 2.4).
Step 1
Fig. 2.4 The initial screen
q Click Next.
8
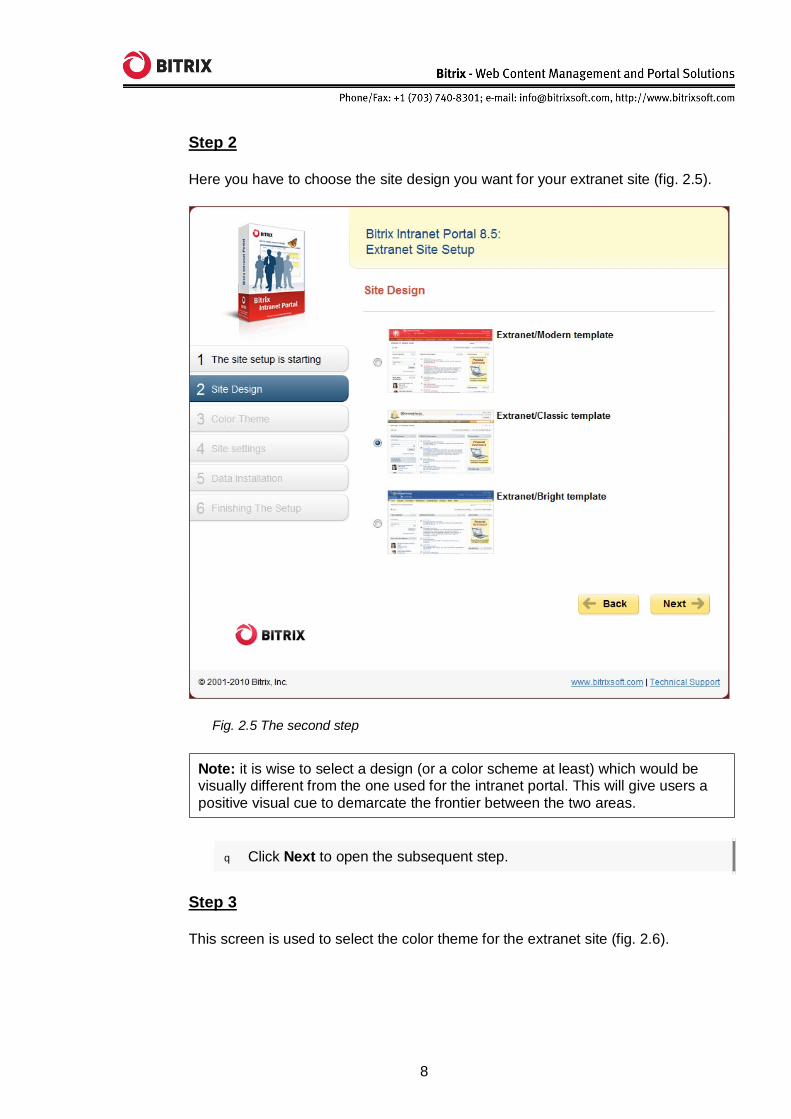
Step 2
Here you have to choose the site design you want for your extranet site (fig. 2.5).
Fig. 2.5 The second step
Note: it is wise to select a design (or a color scheme at least) which would be visually different from the one used for the intranet portal. This will give users a positive visual cue to demarcate the frontier between the two areas.
q Click Next to open the subsequent step.
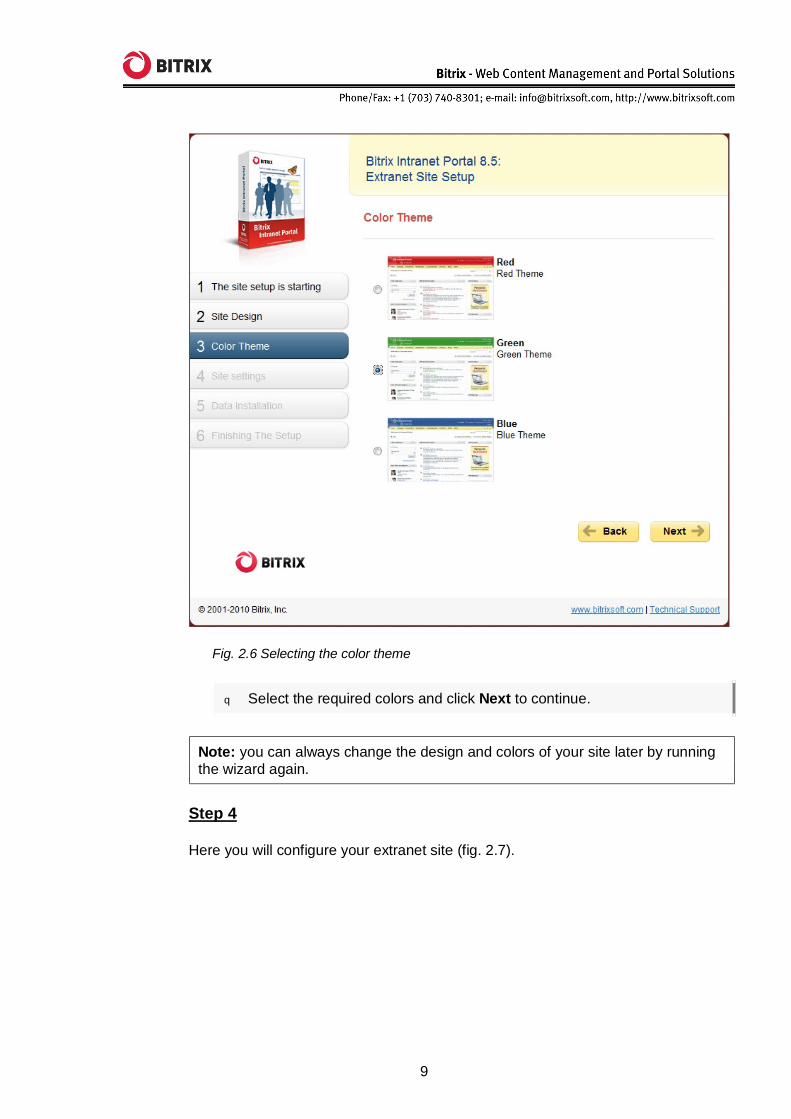
Step 3
This screen is used to select the color theme for the extranet site (fig. 2.6).
9
Fig. 2.6 Selecting the color theme
q Select the required colors and click Next to continue.
Note: you can always change the design and colors of your site later by running the wizard again.
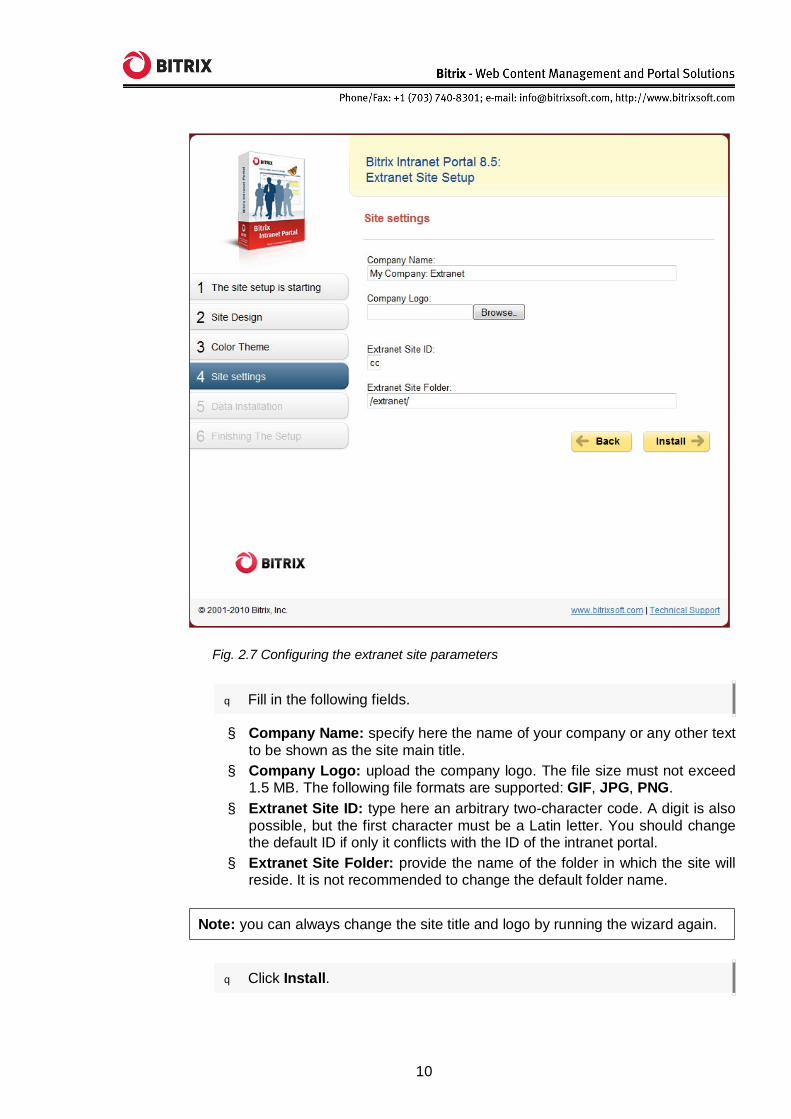
Step 4
Here you will configure your extranet site (fig. 2.7).
10
Fig. 2.7 Configuring the extranet site parameters
q Fill in the following fields.
§ Company Name: specify here the name of your company or any other text to be shown as the site main title.
§ Company Logo: upload the company logo. The file size must not exceed 1.5 MB. The following file formats are supported: GIF, JPG, PNG.
§ Extranet Site ID: type here an arbitrary two-character code. A digit is also possible, but the first character must be a Latin letter. You should change the default ID if only it conflicts with the ID of the intranet portal.
§ Extranet Site Folder: provide the name of the folder in which the site will reside. It is not recommended to change the default folder name.
Note: you can always change the site title and logo by running the wizard again.
q Click Install.
11
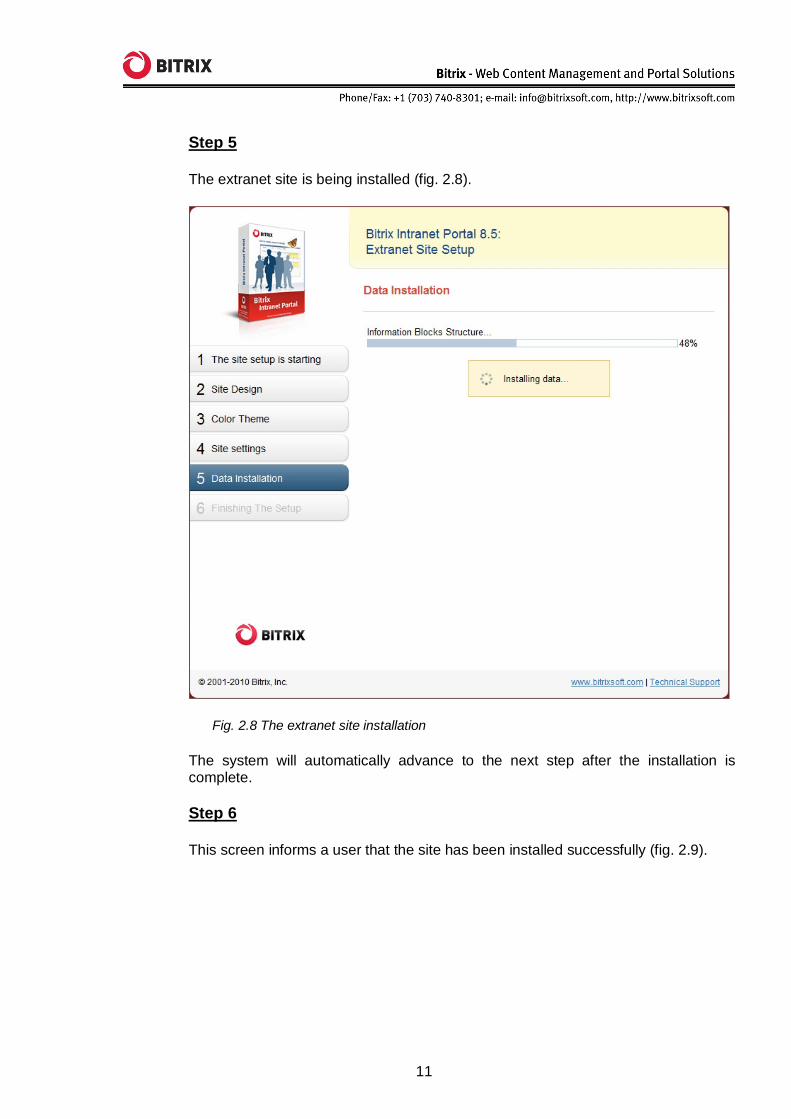
Step 5
The extranet site is being installed (fig. 2.8).
Fig. 2.8 The extranet site installation
The system will automatically advance to the next step after the installation is complete.
Step 6
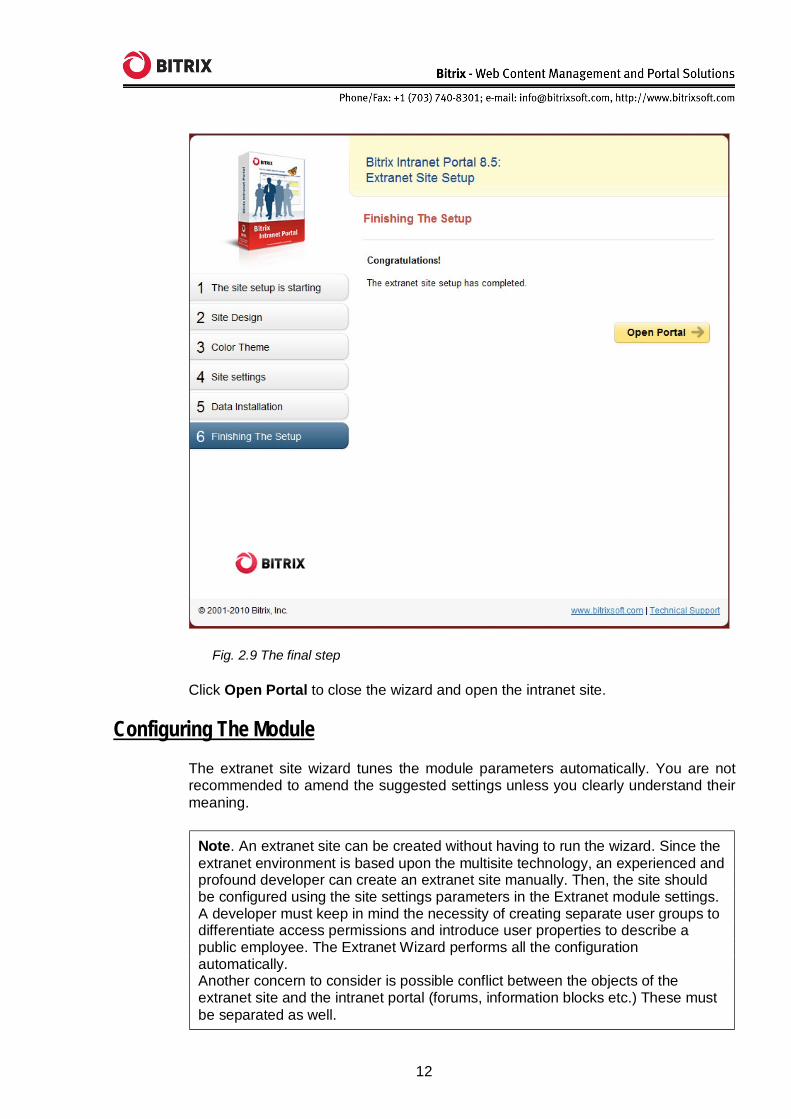
This screen informs a user that the site has been installed successfully (fig. 2.9).
12
Fig. 2.9 The final step
Click Open Portal to close the wizard and open the intranet site.
Configuring The Module The extranet site wizard tunes the module parameters automatically. You are not recommended to amend the suggested settings unless you clearly understand their meaning.
Note. An extranet site can be created without having to run the wizard. Since the extranet environment is based upon the multisite technology, an experienced and profound developer can create an extranet site manually. Then, the site should be configured using the site settings parameters in the Extranet module settings. A developer must keep in mind the necessity of creating separate user groups to differentiate access permissions and introduce user properties to describe a public employee. The Extranet Wizard performs all the configuration automatically. Another concern to consider is possible conflict between the objects of the extranet site and the intranet portal (forums, information blocks etc.) These must be separated as well.
13
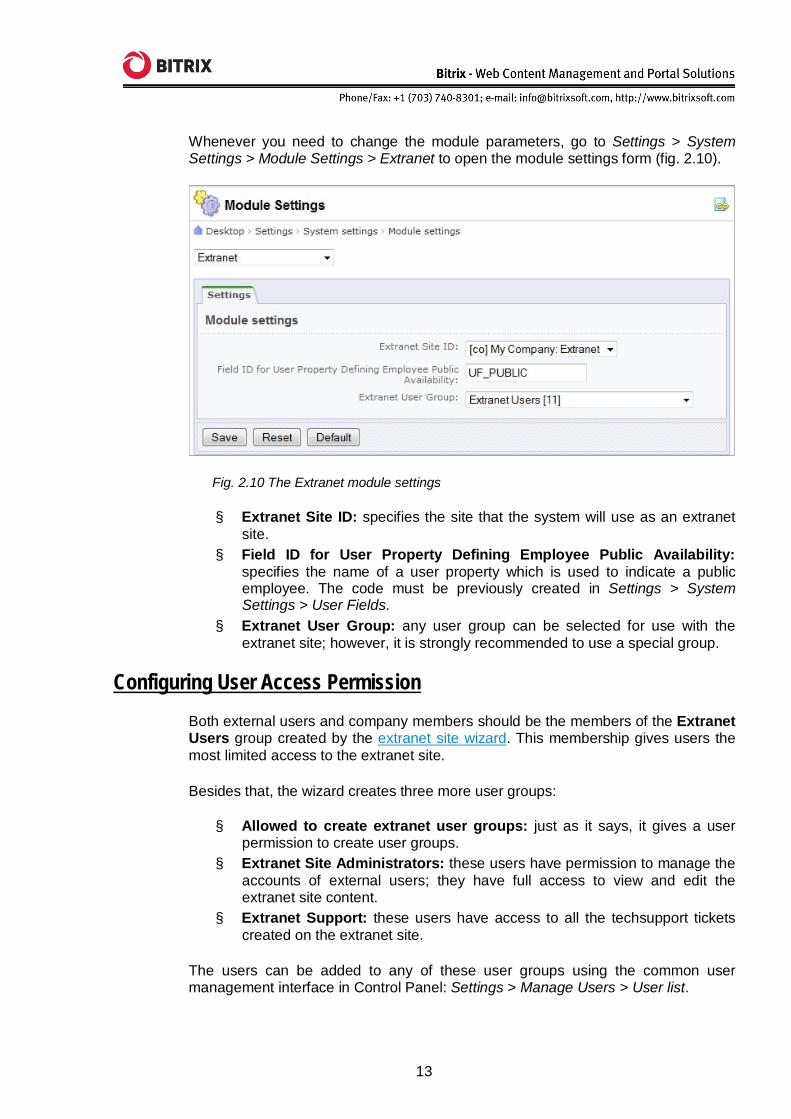
Whenever you need to change the module parameters, go to Settings > System Settings > Module Settings > Extranet to open the module settings form (fig. 2.10).
Fig. 2.10 The Extranet module settings
§ Extranet Site ID: specifies the site that the system will use as an extranet site.
§ Field ID for User Property Defining Employee Public Availability: specifies the name of a user property which is used to indicate a public employee. The code must be previously created in Settings > System Settings > User Fields.
§ Extranet User Group: any user group can be selected for use with the extranet site; however, it is strongly recommended to use a special group.
Configuring User Access Permission Both external users and company members should be the members of the Extranet Users group created by the extranet site wizard. This membership gives users the most limited access to the extranet site.
Besides that, the wizard creates three more user groups:
§ Allowed to create extranet user groups: just as it says, it gives a user permission to create user groups.
§ Extranet Site Administrators: these users have permission to manage the accounts of external users; they have full access to view and edit the extranet site content.
§ Extranet Support: these users have access to all the techsupport tickets created on the extranet site.
The users can be added to any of these user groups using the common user management interface in Control Panel: Settings > Manage Users > User list.

14
Accessing The Extranet Site From The Internet Accessing the intranet portal from the Internet is usually prohibited for security reasons. The system administrators (or other persons responsible for maintenance of the web infrastructure) close such access when installing the intranet portal by unchecking the Allow Unauthorized Visitors option (step 4 of the Intranet Portal Wizard).
The architecture of the extranet site is based on the intranet portal methodology, hence the way to allow or disallow external access is similar in this case.
In order to enable external visitors to access the extranet site:
q open Settings > System Settings > Wizards;
q run Intranet Portal Wizard and repeat all the actions you have previously performed. Remember to check the Allow Unauthorized Visitors option.
15
Chapter 3. Viewing The Extranet Site
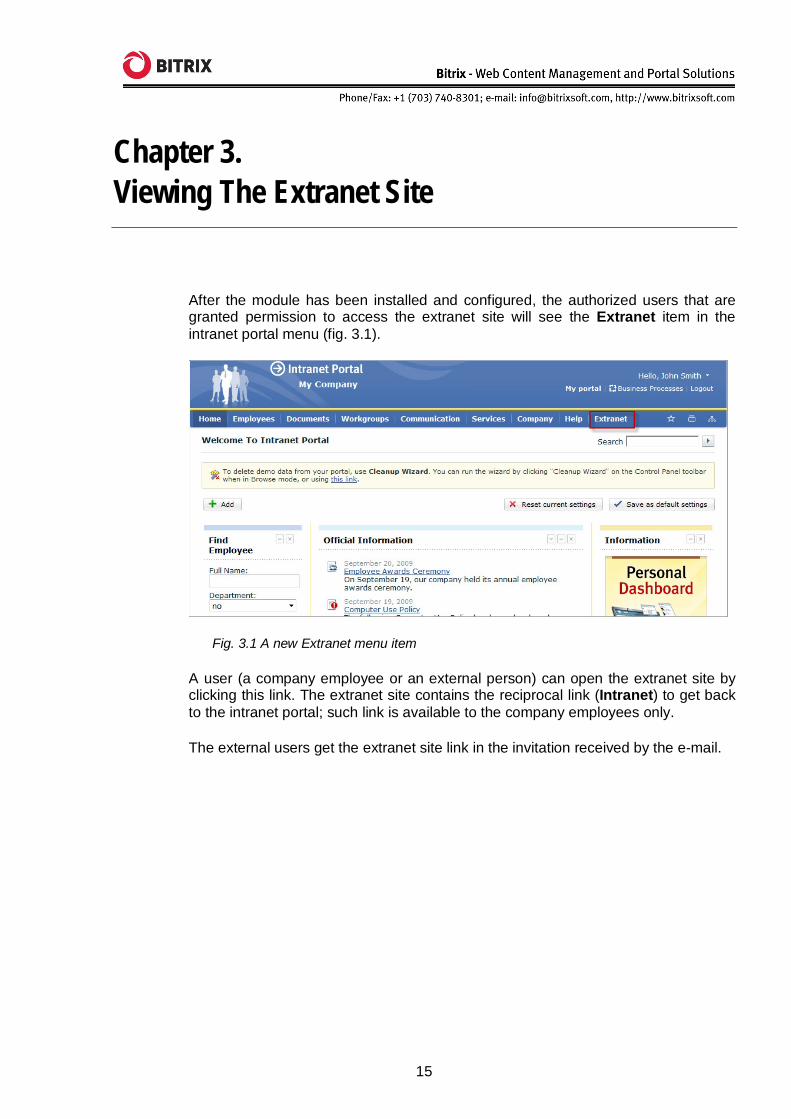
After the module has been installed and configured, the authorized users that are granted permission to access the extranet site will see the Extranet item in the intranet portal menu (fig. 3.1).
Fig. 3.1 A new Extranet menu item
A user (a company employee or an external person) can open the extranet site by clicking this link. The extranet site contains the reciprocal link (Intranet) to get back to the intranet portal; such link is available to the company employees only.
The external users get the extranet site link in the invitation received by the e-mail.
16
Chapter 4. Using Workgroups
Functionally, the scope of extranet workgroups features is almost the same as in the intranet portal.
How Extranet And Intranet Workgroups Differ § An extranet workgroup is visible to its members only. § The procedure of the workgroup creation is slightly different due to the fact
that an external user is not a company employee and is unable to authorize at the intranet portal. The same applies to the workgroup membership confirmation.
§ Different default permissions for the photo gallery, the calendar, files and blogs. A new status introduced to grant write access to all registered users.
Creating A Workgroup And Inviting Users In the extranet environment, the workgroup creation is a two-step procedure: first, a workgroup object is created; then, the invitations are sent to the employees and external users.
Note: it is a good idea to create the workgroup topics before creating a workgroup. For more information about topics, see the training course: https://www.bitrixsoft.com/support/training/course/lesson.php?COURSE_ID=26&ID=1435.
Perform the following actions to create a workgroup.
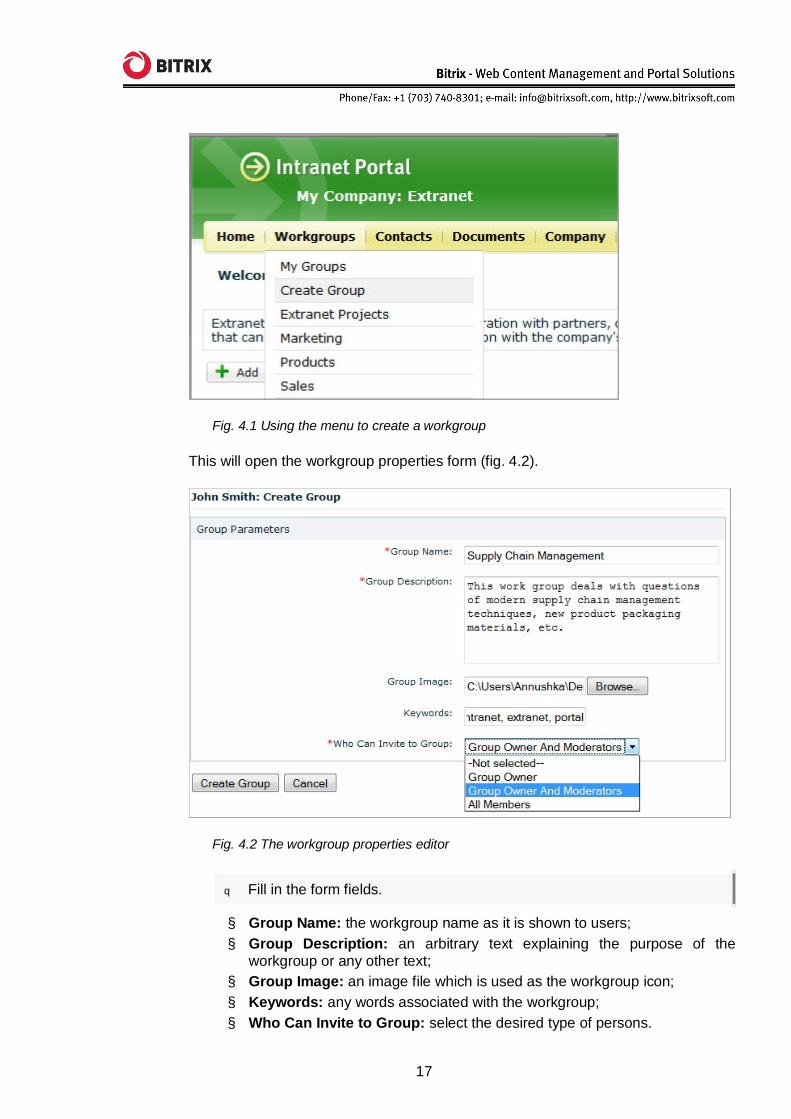
q Select Create Group in the Workgroups menu (fig. 4.1).
17
Fig. 4.1 Using the menu to create a workgroup
This will open the workgroup properties form (fig. 4.2).
Fig. 4.2 The workgroup properties editor
q Fill in the form fields.
§ Group Name: the workgroup name as it is shown to users; § Group Description: an arbitrary text explaining the purpose of the
workgroup or any other text; § Group Image: an image file which is used as the workgroup icon; § Keywords: any words associated with the workgroup; § Who Can Invite to Group: select the desired type of persons.
18
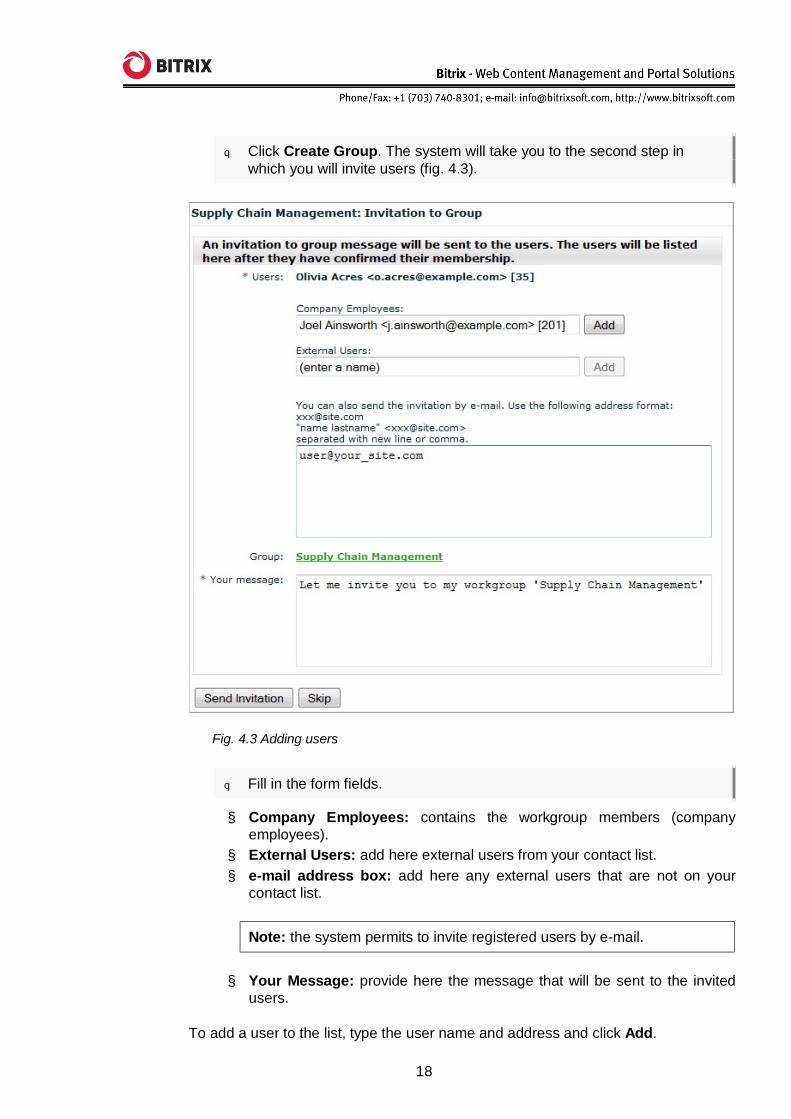
q Click Create Group. The system will take you to the second step in which you will invite users (fig. 4.3).
Fig. 4.3 Adding users
q Fill in the form fields.
§ Company Employees: contains the workgroup members (company employees).
§ External Users: add here external users from your contact list. § e-mail address box: add here any external users that are not on your
contact list.
Note: the system permits to invite registered users by e-mail.
§ Your Message: provide here the message that will be sent to the invited users.
To add a user to the list, type the user name and address and click Add.
19
q Click Send Invitation.
The specified company employees and the registered external users will receive the standard workgroup membership invitation.
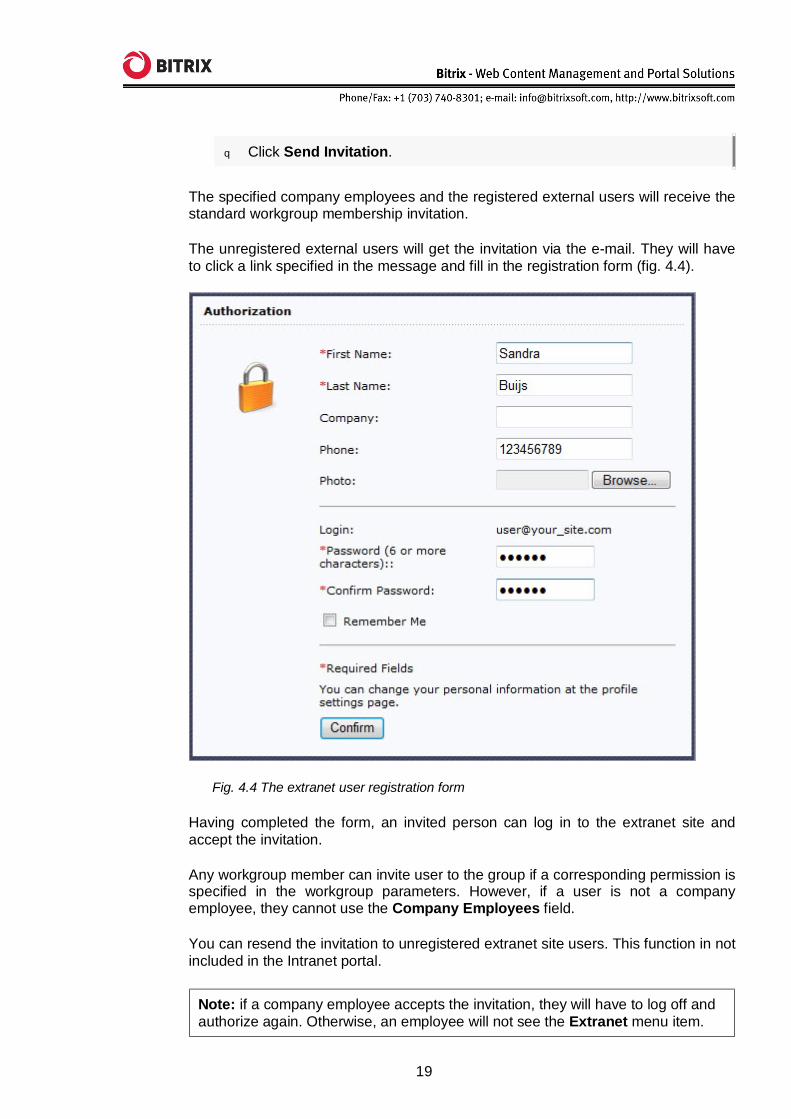
The unregistered external users will get the invitation via the e-mail. They will have to click a link specified in the message and fill in the registration form (fig. 4.4).
Fig. 4.4 The extranet user registration form
Having completed the form, an invited person can log in to the extranet site and accept the invitation.
Any workgroup member can invite user to the group if a corresponding permission is specified in the workgroup parameters. However, if a user is not a company employee, they cannot use the Company Employees field.
You can resend the invitation to unregistered extranet site users. This function in not included in the Intranet portal.
Note: if a company employee accepts the invitation, they will have to log off and authorize again. Otherwise, an employee will not see the Extranet menu item.
20
Closing A Workgroup After all the tasks assigned to a workgroup has been completed, it is recommended to archive the workgroup. This will prevent making unwanted changes to the workgroup and sending unpremeditated invitations.
Note: the external extranet workgroup users will have access to the extranet site until they are removed from the extranet user group. This can be done by the Administrators extranet user group members.
21
Chapter 5. Public Employees
An extranet site introduces a notion of a public employee which is not used in the Intranet portal. This feature is necessitated by the involvement of external users in the extranet infrastructure.
A public employee is always available for communication and inclusion in any workgroup. In essence, such person is an extranet assistant. A public employee must always be an person of the company to which the extranet site belongs.
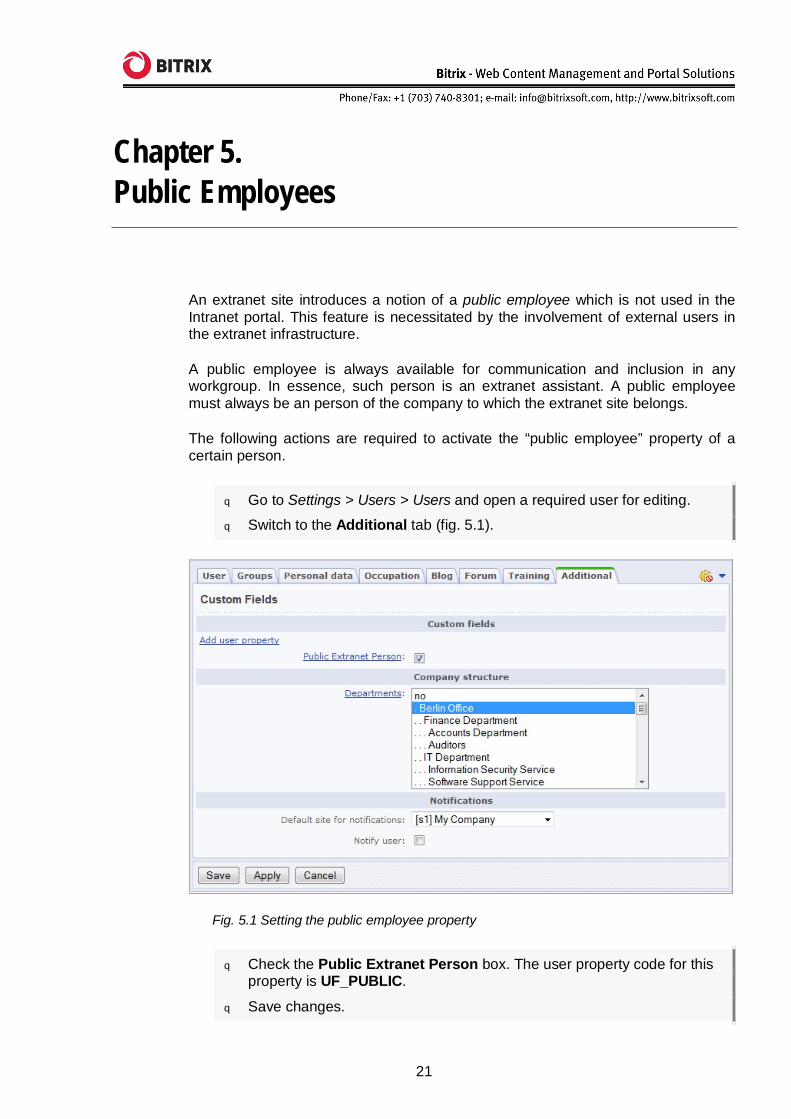
The following actions are required to activate the “public employee” property of a certain person.
q Go to Settings > Users > Users and open a required user for editing.
q Switch to the Additional tab (fig. 5.1).
Fig. 5.1 Setting the public employee property
q Check the Public Extranet Person box. The user property code for this property is UF_PUBLIC.
q Save changes.
22
Chapter 6. The Extranet Module Gadgets
The extranet gadgets (My Tickets and Contacts) are not included in the Intranet portal distribution package. You can add the gadgets just in the same way as you do it for the Intranet portal desktop, after the installation of the Extranet module.
The “Contacts” Gadget Another notion introduced in the Extranet module is contact. A contact is an external user with whom a user communicates in the context of a workgroup.
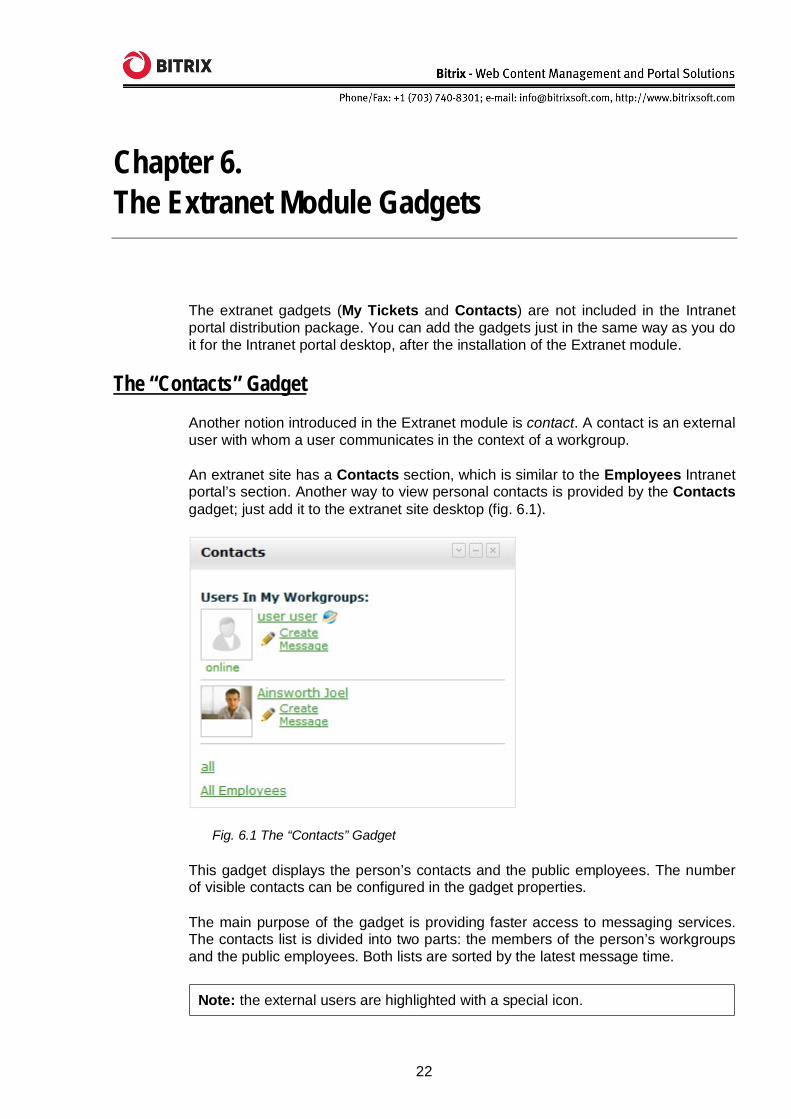
An extranet site has a Contacts section, which is similar to the Employees Intranet portal’s section. Another way to view personal contacts is provided by the Contacts gadget; just add it to the extranet site desktop (fig. 6.1).
Fig. 6.1 The “Contacts” Gadget
This gadget displays the person’s contacts and the public employees. The number of visible contacts can be configured in the gadget properties.
The main purpose of the gadget is providing faster access to messaging services. The contacts list is divided into two parts: the members of the person’s workgroups and the public employees. Both lists are sorted by the latest message time.
Note: the external users are highlighted with a special icon.
23
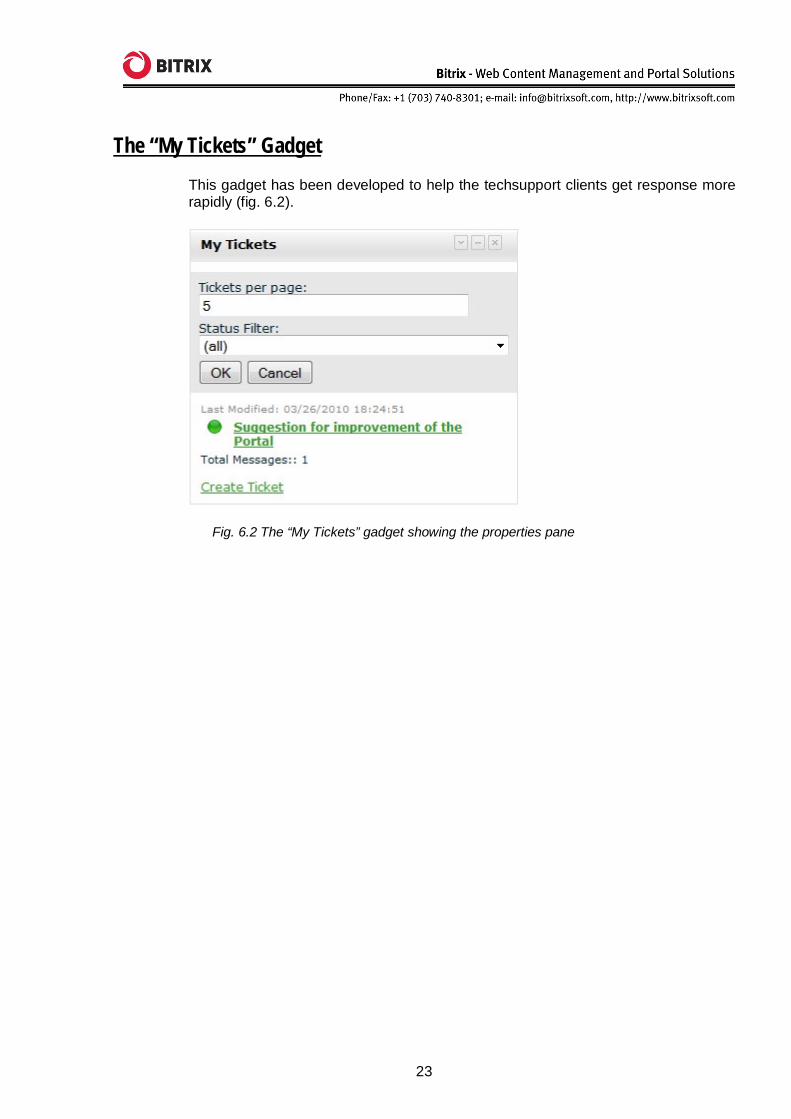
The “My Tickets” Gadget This gadget has been developed to help the techsupport clients get response more rapidly (fig. 6.2).
Fig. 6.2 The “My Tickets” gadget showing the properties pane
24
Final Notes
This document has touched upon main steps required to set up and maintain the extranet site within the Intranet portal.
You can ask your questions at the Bitrix corporate forum:
https://www.bitrixsoft.com/support/forums.php
Should you have any difficulty using Bitrix software, do not hesitate to send a request to the technical support service:
https://www.bitrixsoft.com/support/index.php