Embed Size (px)
Citation preview


BIOLOGY PROJECTS FOR HIGH SCHOOL STUDENTS
JEN McCOMB
(EDITOR)
SCHOOL OF ENVIRONMENTAL AND LIFE SCIENCES
MURDOCH UNIVERSITY
MURDOCH W.A. 6155
This book is available from : The Services Division, Science Teachers Association, Box Sl50l, G.P.O. Perth, W.A.

l.
INDEX
Introduction ......................
SECTION A PROJECTS
l. Fungi
1-1 Dung fungi . . . . . • . . . . . • . . . . . 1-2 Fungi that break down hair, nails and insect 1-3 Isolation of fungi from the soil
skins
l-4 Nematode-trapping fungi l-5 Freshwater fungi . . . . . . . .
2. Algae
2-l 2-2
3. 'Mosses
3-l 3-2
Growth of algae Liquid seaweed extracts
Life cycle of mosses • . . . . . . . . Germination and,growth of moss spores
4. Flowering plants
4-1 4-2 4-3 4-4 4-5 4-6 4-7 4-8 4-9 4-10 4-11 4-12 4-13 4-14 4-15 4-16 4-1'7 4-18 4-19 4-20 4-21 4-22 4-23 4-24 4-25 4-26
4-27 4-28 4-29
Real and fake food . • . . Bulbs that pull themselves down into the soil Root responses to gravity Root parasitism by Christmas trees Rooting of cuttings . . . • Tolerance to waterlogging Effect of seawater and/or detergents on plants Effect of different types of water on plant growth Movement of plant stems Floral clocks Wind borne pollen Pollen calendar Pollen in honey Beetles as pollinators • What causes the death of annual plants?. Collection of seeds by ants Seed survival after ingestion Seed germination . • . . . . . Dispersal of plants in clothes, towels, rugs etc .. Dispersal of plants by vehicles . . . . . . . Germination and establishment of mistletoe . Competition between weeds and desirable plants Growth of weeds . . . . . Ecological effect of plant chemicals . . . Litter decomposition .......... . Decomposition of plant material in aquatic and marine environments . . . Litter under trees Growth of isolated roots Plant callus culture ..
in sterile culture
PAGE NO.
4
6 7 8
10 ll
13 15
16 17
19 20 21 22 23 24 25 26 27 28 29 30 31 32 33 34 35 36 38 39 40 41 42 43 44
45 46 47 49
5.
6.
7.
8.
9.
10.
ll.
12.
13.

2.
5. General Invertebrates PAGE NO.
5-1 5-2 5-3 5-4
Invertebrates of soil samples . . . . . . . . . . . . Benthic fauna of fresh water lakes, ponds or rivers Fouling organisms . Culturing nematodes
6. Molluscs
51 52 53 54
6-1 Garden snails . . . . . . . . . . . . . . . • . . . . . . 56
7. Insects
7-1 Number and diversity of aDthropods in different habitats. 7-2 Insects in rotting seaweed 7-3 Burrowing bees and wasps 7-4 Bee behaviour . . . . . 7-5 Honey flovv . . . . . . . 7-6 Landing sites of flies 7-7 Territoriality of dragonflies and damselflies • 7-8 Jarrah leaf miners . . . . • 7-9 Parasites of jarrah leaf miner 7-10 Spitfires . . . . . . . . . . . 7-11 Time of hatching of silkworm eggs 7-12 Habitat preference of blow flies See also 4-14 and 4-16.
8. Spiders
8-l
9. Fish
9-l 9-2
Wolf spiders .. "' .. .. 0 .. .. • • .. • .. .. • • .. • • .. • .. •
Ecological impact of the introduction of mosquito fish Schooling behav~our in fish . • . . . . . . . . .
10. Reptiles
10-1 Population study of a lizard 10-2 Tortoises in suburban lakes .
11. Birds
57 58 59 60 61 62 63 64 65 66 67 68
70
71 73
74 75
11-1 Pecking order in fowls. . . . . . . . . . . . . . . . . . 76 11-2 Numbers of species of birds found in different habitats . 77 ll-3 Territoriality in magpies . . . • . . . . . . . . . . . 78
12. Mammals
12-1 Sense of smell 12-2 12-3 12-4 12-5
Sensation of size . . Effect of temperature Effect of environment Urine marking by male
13. General
on nest building in mice on learning behaviour in ~ice mice
13-1 13-2 13-3
Effect of household detergents on fresh water organisms Digestive enzymes . . . . . . • • . . . . . . . . . . Effect on the ecosystem of altering plant communities .
79 80 81 82 84
85 87 88

SECTION B
SECTION C
SECTION D
SECTION E
SECTION F
SECTION G
3.
PAGE NO.
SOURCES OF INFORMATION ON WESTERN AUSTRALIAN PLANTS .. • . . 89
SOURCES OF INFORMATION ON WESTERN AUSTRALIAN ANIMALS 96
DESIGN OF EXPERIMENTS . . • • . . . . . . . . . . 102
WRITING A REPORT ON A BIOLOGY PROJECT . . . . . . 104
LAWS PROTECTING THE WESTERN AUSTRALIAN PLANTS AND ANIMALS . . 107
STERILE TECHNIQUES AT HOME OR AT SCHOOL . . • • . 109
OJ
a pl 0~
t< ar ir m] pj
or
Wl: Uf yc re e:ll
on

l
4.
INTRODUCTION
Experiment orientated project work is good fun and an important part of a science education. The aim of this book is to provide you with a range of topics in biology that are worth investigating for class projects, for entry into the Science Talent Search, or simply for your own enjoyment, particularly during the holidays. As you read each topic you will see that there are several ways to approach a problem and a range of different species or different localities can be investigated. This means that several groups of students or individuals might tackle the same topic, but end up doing an essentially different piece of research. Of course you must not feel restricted to investigate only topics in this book, you will probably have many good ideas yourself.
Whether you do one of these projects or tackle one you have thought up yourself, you will find the general sections of this book useful and you should read these when planning your project. There are some general reference lists on W.A. plants and animals, suggestions on how to design experiments and write up the results, and most importantly, a section on the laws protecting our native W.A. plants and animals.
The projects described were contributed by staff and students of the School of Environmental and Life Sciences, Murdoch University, including myself, D. Backshall, M. Bamford, D. Bird, M. Brock, M. Calver, c. Chubb E. Davison, L. Leon, R. Lethbridge, P. McFadden, J. Wallace and R. Wooller. I am also pleased to acknowledge helpful discussions with Mr. R. Bartholemeusz and Mr. R. Forma of the W.A. Science Teachers Association, and with biologists in various State Government departments and C.S.I.R.O. It is hoped to produce a supplementary series of new projects every 3 years. Students and teachers are welcome to write to me with comments and ideas for new projects.
Dr. Jen McComb Senior Lecturer in Plant Biology August, 1980
Any part of this book can be photocopied or reproduced providing the original source is acknowledged.

I
S.L:J:3:.CO'l:Id V. NOI.L:J:3:S

-
6.
PROJECT 1-l DUNG FUNGI
PROBLEM
Fungi play an important role in decomposing animal dung and recycling the nutrients it contains. The spores of these 'coprophilous' fungi are eaten along with the animals food, the fungal hyphae grow in the dung and fruiting bodies are produced on the surface of the pellet. Various fungi appear in succession. You might investigate the succession observed on different kinds of dung. Alternatively, the fungi that grow on dung from a free running animal could be compared with those from a caged animal fed with pellets. You might wish to determine which of the fungi are phototrophic (i.e. shoot their spores towards the light) or how far the spores of various fungi can be shot.
INFORMATION
1. Fresh dung is best and rabbit and horse are particularly good. It would be interesting however to find out what grows on dung of less well known animals such as kangaroos or koalas.
2. Dung is placed in a glass or plastic dish with a cover. It should be kept moist but not soaking wet. Small pellets can be placed on damp filter paper, larger pieces such as horse can be sprinkled with water directly. Insects should be excluded as many larvae feed on fungi.
3. Incubate the dish at room temperature and examine it daily. Some species may not appear for three to four weeks and may then continue to be active for several days.
4. A dissecting microscope or hand lens should be used to examine the fungi. For some it may be necessary to break open the fruiting body and mount it in water for examination under the microscope.
5. The fungi can be grouped into ClaSses using the classification in "Web of Life".
DESIGN OF EXPERIMENT
l. Is the succession fruiting of fungi ation of the dung?
of fruiting a reflection of the rate of growth and already in the dung or is it a progressive coloniz
How would you test this?
2. How will you determine if some fungi are phototrophic?
3. How will you determine how far the spores can be shot?
REFERENCES
Australian Academy of Science (1973) Biological Science : the Web of Life (AAS: Canberra.
Dade, H.A. and Gunnell, J. (1969). Class work with fungi. (Commonwealth Mycological Institute, Kew, England).
Hudson, H.. J. (1972) . Fungal saprophytism (Studies in Biology No. 32) . (Edward Arnold : London) .

7.
PROJECT 1-2 FUNGI THAT BREAK DOWN HAIR AND NAILS AND INSECT SKINS
PROBLEM
Things like sheep horns, wool and hair, bird feathers, animal nails, insect skins etc., are of keratin and chitin. These are rotted away by fungi called keratinolytic and chitinolytic and you can study the abundance and rate of breakdown of such fungi in your local soils. Alternatively, you might want to study how fish scales rot away and do some experiments in fresh or seawater with aquatic sediments.
INFORMATION
1. You can start with rather exotic material like owl or hawk dung. Place it on soil and proceed as for Project 1-1.
2. Alternatively, you can start with any of the substances mentioned above, sterilized with alcohol and cut into small pieces. Collect soil in a covered glass dish, mix some material into the soil and scatter the rest over the surface. Keep soil damp, preferably using boiled sterile water.
3.
4.
You should observe a succession of various fungi so observe the material with a dissecting microscope regularly and sample pieces, mount in water on a slide and use a coverslip for microscopic examination.
Using substrates like the sand from the bottom of your budgie's cage or brushing up dust from the dog kennel or shaking out dust from birds' nests might give interesting results.
IMPORTANT NOTE : Keratinolytic fungi may cause diseases like ringworm in people, so handle your material carefully, keeping it under cover as much as possible. Burn material when you have finished and wash your hands after making observations.
DESIGN OF EXPERIMENT
1. How might you actually measure the rate of breakdown.
2. How will you score the frequency of the various fungi so you can compare the different sources of soil.
REFERENCES
Hudson, H.J. (1977). Fungal Saprophytism (Studies in Biology No. 32). (Edward Arnold : London) .
PF
PF
ca fr
IN
1.
2.
3.
4.
DE
1.
2.
3.
Place
8.
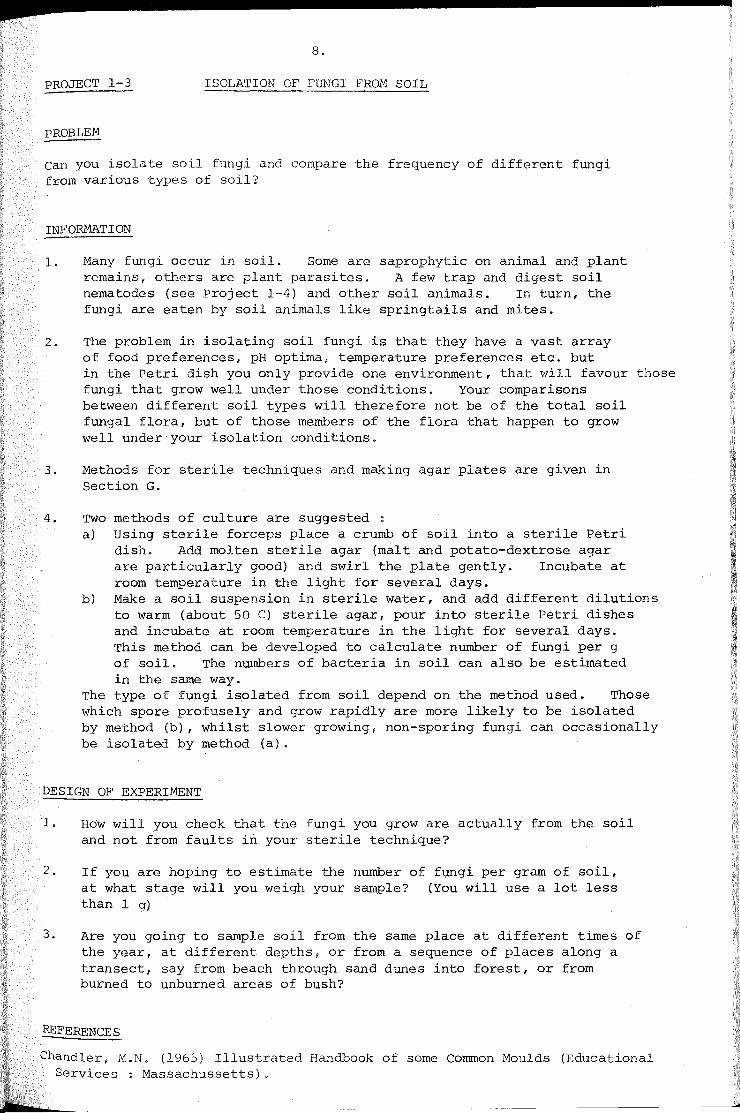
PROJECT 1-3 ISOLATION OF FUNGI FROM SOIL
PROBLEM
can you isolate soil fungi and compare the frequency of different fungi from various types of soil?
INFORMATION
l. Many fungi occur in soil. Some are saprophytic on animal and plant remains, others are plant parasites. A few trap and digest soil nematodes (see Project 1-4) and other soil animals. In turn, the fungi are eaten by soil animals like springtails and mites.
2. The problem in isolating soil fungi is that they have a vast array of food preferences, pH optima, temperature preferences etc. but in the Petri dish you only provide one environment, that will favour those fungi that grow well under those conditions. Your comparisons between different soil types will therefore not be of the total soil fungal flora, but of those members of the flora that happen to grow well under your isolation conditions.
3. Methods for sterile techniques and making agar plates are given in Section G.
4. Two methods of culture are suggested : a) Using sterile forceps place a crumb of soil into a sterile Petri
dish. Add molten sterile agar (malt and potato-dextrose agar are particularly good) and swirl the plate gently. Incubate at room temperature in the light for several days.
b) Make a soil suspension in sterile water, and add different dilutions to warm (about 50 C) sterile agar, pour into sterile Petri dishes and incubate at room temperature in the light for several days. This method can be developed to calculate number of fungi per g of soil. The numbers of bacteria in soil can also be estimated in the same way.
The type of fungi isolated from soil depend on the method used. Those which spore profusely and grow rapidly are more likely to be isolated by method (b), whilst slower growing, non-sporing fungi can occasionally be isolated by method (a) .
DESIGN OF EXPERIMENT
1. How will you check that the fungi you grow are actually from the soil and not from faults in your sterile technique?
2. If you are hoping to estimate the number of fungi per gram of soil, at what stage will you weigh your sample? (You will use a lot less than 1 g)
3. Are you going to sample soil from the same place at different times of the year, at different depths, or from a sequence of places along a transect, say from beach through sand dunes into forest, or from burned to unburned areas of bush?
REFERENCES
Chandler, M.N. (1965) Illustrated Handbook of some Common Moulds (Educational Services : Massachussetts).

9.
REFERENCES ( Contd)
Griffin, D.M. (1972). Ecology of Soil Fungi (Chapman and Hall (advanced reading) .
London)
Hudson, A.J. (1977). Fungal Saprophytism (Studies in Biology No. 32). (Edward Arnold : London) .
Jackson, R.M. and Raw, F. (1972). Life in the Soil (Edward Arnold London).
Pl
Pl
SE
pl
PE or yc
1.
2.
3.
4.
5.
1.
2.

10.
PROJECT l-4 NEMATODE TRAPPING FUNGI
PROBLEM
several fungi in soil can trap and digest nematodes. Some of these fungi produce sticky hyphae or spores which become attached to, and eventually penetrate passing nematodes; other fungi produce ring traps that inflate on contact, or coiled hyphae in which the nematodes become entangled. Can you grow nematode-trapping fungi and see them catch the nematodes?
INFORMATION
1. Use cornmeal nematode agar. Read Section G on sterile techniques.
2. culture nematodes on potato slices (Project 5-4) then wipe a piece of infected potato over a cornmeal agar plate. Allow nematodes to grow for a few days before adding soil.
3. Sprinkle a crumb of soil over the plate and watch the fungal hyphae grow out. They only produce traps in the presence of nematodes. Examine plates once a week. Nematode trapping fungi may appear after one week, or 2-3 months (for the constricting-ring type).
4. Do drawings to record the different types of nematode traps you see.
5. This is a difficult project as you have to be able to grow both the fungi and the nematodes and either can give a lot of problems with undesirable contaminants.
DESIGN OF EXPERIMENT
1. Are you going to examine one soil type in detail or look at different soil types; sand, compost, mud from gutters, mud squeezed out from mosses, rotting wood?
2. Do you want to do some experiments on why the traps are only produced when there are nematodes present? Will dead nematodes stimulate development; will the liquid in which the nematodes have been growing stimulate development etc.?
REFERENCES
Barron, G.L. (1977). The Nematode Destroying Fungi (Canadian Biological Publications - Topics in Mycobiology No. 1, Box 214, Guelph, Ontario). (an advanced handbook but illustrations, introduction and methods section would be of interest) .
Goldstein, P. (1970). Animals and Plants that Trap (Holliday House New York) Chp. 13.
Maio, J.J. (1958). Predatory Fungi. Scientific American, July 1958 199 67-72 (Offprint No. 1094).

ll.
PROJECT 1-5 FRESHWATER FUNGI
PROBLEM
Some mould fungi live on submerged decaying dicot leaves and produce non-motile spores (conidia) underwater. These fungi (aquatic hypomycetes) have been extensively studied in Europe and America but little is known about them in Western Australia. Once you have discovered a source of these fungi you might look at their seasonal abundance and their occurrence on different kinds of leaves. Alternatively, you might compare their abundance in different sorts of habitats - fast flowing streams with tree lined banks (Eucalypts + native plants or introduced willows etc.) swampy areas with some water flow (plants like Typha-bullrush and Juncus-rush) , or stagnant ponds.
INFORMATION
1. Aquatic hypomycetes are expected to be most abundant in fast flowing streams with tree lined banks at cooler times of the year. They can be distinguished from terrestrial fungi which have spherical or ovoid shaped spores, because they produce conidia of a distinctive shape - large, several cells, commonly with four or more radiating arms. Some are long and worm-like. Students in cool southern areas of W.A. are more likely to be successful in finding these fungi.
2. Partly decayed, almost skeletonised leaves can be collected, washed free from mud and debris and placed in distilled water in a Petri dish in the lab., in a cool place (preferably below 20 C) in light. In 1-7 days hyphae grow out from the petiole and veins and spores are produced
1,11 underwater.
I ! ' j ' ~ ',i 3. Spores can be trapped in large numbers in the bubbles of foam that form
at the bottom of rapids, waterfalls, etc. Spoon foam into a clean jar and when it breaks down into a few mL of liquid, fix immediately by adding an equal volume of F.A.A. (5 mL glacial acetic acid,90 mL 70% alcohol,5 mL 40% formaldehyde). The surface scum that forms behind barriers of twigs and leaves may also be a spore trap.
4. Another way of collecting spores is to filter a known volume of river water ~-1 litre collecting the spores on a millipore filter (B;um pore size) . To do this in the field use a bike pump on the outlet arm of the filter flask. Dry filter and add a few drops of 0.1% cotton blue in lactic acid to kill the spores. Back in the lab. place filter in a glass Petri dish, flood with 0.1% cotton blue in lactic acid and heat to 50-60 C for 45-55 mins to make it go clear. Cut in two and mount on a slide. Add a coverslip and scan several fields under low power. (Cotton blue can also be called Methyl Blue or Aniline blue-water soluble.
A Gurr or BDH product, it is available from Selby's, 21 Glassford Road Kewdale, W.A.
5. Species can be indicated by drawings of spore shape. It is difficult to name them as even if you obtain the book by Ingold you can't be sure the W.A. ones will be included.
6. Another group of fungi called aero-aquatic hypomycetes may be encountered. These grow on decaying leaves in more anaerobic conditions. Place rotting leaves on wet filter paper in a Petri dish (do not submerge them) in cool lighted conditions. Spores may be produced on the leaf surface. They are tightly coiled and float rather than being underwater. Again identify your findings by drawings of spores - naming is difficult being based on accurate measurements of spore size, coil and cell number, and characteristics in pure culture.

be
7 ced
orm ar
r
ton er
ile
d
mount
luble. ad
t ure
tered.
t.hem) ace. in eing and
12.
DESIGN OF EXPERIMENT
1. How will you figure out from which plants your decaying messy leaves came?
2.
3.
4.
5.
6.
How will you distinguish aquatic hypomycete conidia from conidia of terrestrial fungi, moss and fern spores, pollen, etc.?
Is it possible to determine spore concentration in water by collecting foam or do you need running water for this?
If you count spore numbers how will you back calculate to the volume of river water originally sampled?
Of what functional significance is the branched structure of the conidia?
How are you going to tell the difference between the fungi and other organisms present such as blue green al.gae, protozoa diatoms etc.?
"Y
typical spore shapes
REFERENCES
Hudson, H. (1972). Fungal Saprophytism (Edward Arnold : London) (Studies in Biology No. 32).
Ingold, C.T. (1975). An Illustrated Guide to Aquatic and Water Borne Hypomycetes (Fungi Imperfecti) with Notes on their Biology. Freshwater Biological Association Scientific Publication No. 30 ( 1). Available from the Supply Dept., The Ferry House, Ambleside, Cumbria LA220LP, U.K.

Iii''
13.
PROJECT 2·-1 GROWTH OF ALGAE
PROBLEM
To examine the algal flora of various lakes or rivers and to look at the growth at different depths, or at different times of the year etc.
INFORMATION
1. The algae present in lakes depends on whether the water is fresh or salty and whether it is poor in nutrients or rich in nutrients.
2.
3.
You can grow cultures of algae on glass slides tied to floats at different depths as shown in the diagram. Some people like to use more 'natural' substrates like autoclaved oyster shells etc. but these are harder to examine.
Leave slides in position 1-2 weeks then examine. Slides should be transported back to the lab. in water without unnecessary shaking which will dislodge the algae. Examine as soon as possible. Slides will keep O.K. in the frig. for 1-2 days. Wipe undersurface, add a coverslip to the top and examine under the micro-scope. About five transverse scans of the slide will usually be sufficient. Adjust time of exposure and number of scans in initial experiments. Score type of algae present and their relative abundance as this will give an indication of whether the lake is rich or poor in nutrients.
4. If you want to examine the succession of algae colonizing a slide you might have to examine the slide wet without a coverslip and return it to the lake as soon as possible.
---cord
5. Similar experiments can be done in the sea but it is more difficult to find your material again.
DESIGN OF EXPERIMENT
1. Think clearly about the comparisons you want to make; is it between depths in the one lake; at similar depths in different lakes; between areas with different flow rates; upstream and downstream from effluent entry; between different times of the year in the same lake? It is better to do one or two comparisons well, than lots badly.
2. If you want to do 5 replicates at a certain depth - will you put 5 slides on the same float, or set up 5 different floats in various places:
3. How will you relocate your material?
4. What. other features of the water could you measure?

the
or
~rd
1lt to
~een
)etween :nuent :t is
5
14.
REFERENCES
Boney, A.D. (1975). Phytoplankton (Studies in Biology No. 52) (Edward Arnold : London) (the algae you will grow are periphyton not phytoplankton.)
Belcher, H and Swale, E. (1976). A Beginners Guide to Freshwater Algae (Institute of Terrestrial Ecology NERC London HMSO).
Nuffield Foundation (1966). Keys to small organisms in soil, litter and water troughs (Longmans : London) .
Prescott, G.W. (1954). How to Know the Freshwater Algae (W. Brown Dubuque) (not as easy to use as you might hope) .

15.
PROJECT 2-2 LIQUID SEAWEED EXTRACTS
PROBLEM
Scientific opinion on the beneficial effects of seaweed extracts on plants range from dismissal as "muck and magic" to cautious acceptance (Abetz, 1980) . Unscientific opinion is often wildly enthusiastic and claims all sorts of wonderful effects.
INFORMATION
1. Liquid seaweed extracts are sold in garden shops under weedy names like Seasol, Marinure, Maxicrop, Alinure, Algistim.
2. Scientific analysis has shown that the beneficial effects are unlikely to be from the mineral nutrients in the extracts but possibly come from hormones or other organic substances included in the extract.
3.
4.
Claims are made that seaweed extracts affect plants in the following ways a) increase frost resistance, b) increase resistance to fungal disease c) increase resistance to insect attack, d) result in higher yield, e) deeper root penetration, f) increased nutrient uptake, g) better shelf life of fruit and vegetables. It would not be possible for you to investigate a) , b) or f) in an acceptable way but other features are open to home experimentation. Alternatively, you might try something new like the effect on keeping qualities of cut flowers.
Different batches of extract are known to vary in effectiveness so keep careful notes of which bottles you use for particular experiments.
DESIGN OF EXPERIMENT
1. Carefully read Section D on design of experiments.
2. How will you quantify and record the results of your experiment so that any wishful thinking on your part that the seaweed does or doesn't have an effect, will not influence the measurements.
REFERENCES
Abetz, P. (1979) . (available from Vic. 3153).
An abridged review of liquid seaweed fertilizers RA Bell-Booth and Co., 4/375 Bayswater Road, Bayswater
Abetz, P. (1980). Seaweed extracts : have they a place in Australian agriculture or horticulture? J. Aust. Inst. Agri. Sci. 46, 23-9.
Chapman, V.J. (1970) . Seaweeds and their uses (Methuen : London).
3
2

all
so :iments.
ter
16.
PROJECT 3-1 LIFE CYCLE OF MOSSES
PROBLEM
Little is known about the relative importance and timing of the parts of the life cycle of most Australian mosses. The sort of details that are required are the times of spore discharge, growth of the protonema, leafy gametophyte production, sex organ production (archegonia and antheridia), fertilization, growth of sporophyte, relative importance of reproduction by spores or gemmae and tubers.
INFORMATION
1. Mosses can be identified using the book by Scott and Stone but if you are dismayed by the complexity of the terminology, identification is not essential and "voucher specimens" of the species used can be submitted.
2. Growing clumps of moss away from their natural habitat is not as easy as you might expect. Imitate the natural surroundings as closely
3.
4.
as possible. Collect tufts and pack them into small porous pots using the natural substratum. Place the pot in a large plastic icecream container with about 1" or so of water. Cover top with glass or plastic. Keep in a sheltered position with diffuse light. Water with rainwater or distilled water. Allow to die down in summer.
The day length to which gametophytes are exposed may influence the timing of the production of S and d" gametes. Day length can be experimentally altered by shining a light on the plants to extend the length of the natural day or by covering them with a box or bag some hours before sun set.
Moss spores can be grown. See Project 3-2.
5. The tips of plants should be dissected to find the antheridia and archegonia. Several individuals in several different clumps should be examined as some clumps may be of juvenile plants.
DESIGN OF PROJECT
1. Decide how much time you want to spend in the four possible areas of activity - field observations, spore culture, cultivation of gametophytes, experimental investigation of spore and leafy gametophyte growth.
2. Where are you going to get information on local temperatures, day length, rainfall etc. to relate to your life cycle observations?
REFERENCES
See Project 3-2.

l,li:
l ~ I •
PROJECT 3-2 GERMINATION AND GROWTH OF MOSS SPORES
PROBLEM
It is fairly simple to grow moss spores under sterile conditions. In time, leafy gametophyte may grow from the protonoma. You might like to try to grow spores of various Australian mosses about which little is known. Alternatively, you could pick one that is easy to grow like Funaria hygrometrica and conduct experiments to determine what controls germination, growth, differentiation of leafy gametophytes etc.
INFORMATION
1. Ripe unopened capsules can be stored dry in clean containers in cool conditions for at least some species.
2. Read Section G on sterile techniques.
3. A suitable medium for spore growth is Knops.
Solution A Magnesium sulphate l g Potassium nitrate 1 g Potassium phosphate 1 g Water (distilled) 1 litre
Solution B Calcium nitrate 4 g Water (distilled) 1 litre
Combine solutions A and B, bring to boil, add 0.8% agar (or l% if this proves too sloppy) and stir until clear. Cool slightly then pour into jars and sterilize in the pressure cooker. Pour into sterile Petri dishes, about 25 ml per dish. Solutions A and B need not be all used at once and can be stored in the refrigerator.
4. Ripe capsules with a short stalk to use as a handle are treated as follows - sterilize a small tube or jar with a lid and a small volume of sterile water in a separate bottle.
Shake capsule in a non-sterile container of water with l drop of detergent per litre.
Remove to second container and fill this with freshly made 2% sodium hypochlorite or undiluted Milton solution. Shake for 2-4 mins. From here on use sterile forceps. Transfer capsules to the sterile container - add water - shake for l minute then pour off water -repeat the wash - remove capsules to a sterile Petri dish - crush capsule in a small drop of water and then smear the spore suspension onto the surface of the agar. A couple of brown streaks per dish is plenty - seal edges of dish with gladwrap and place culture in dim light. For Funaria hygrometrica, germination might occur within 24 hours and leafy gametophytes can be seen after about 3 weeks. For some mosses it is not known how to induce formation of leafy gametophytes in culture so you might well discover something new.
5. When you want to look at the cultures place the dishes upside down on the microscope stage and use low power. You can see through the bottom of the Petri dish and the agar to the spores but the lid of the dish is usually too fogged with condensation to see through.
J I

1
pour .e 1e all
.ume
"urn From
Lon 1 is n
n. the f the
18.
6. Factors that might affect spore germination and growth and leafy gametophyte differentiation are light and dark, temperature, light of different wavelengths (wrap plates in coloured cellophane) , the age of the spores etc. To create different light conditions you can use cellophane or coloured filters from a theatrical lighting supplier. Check absorbance using a spectrophotometer if possible.
7. See Project 3-l for further information on mosses.
DESIGN OF PROJECT
l. Mature spore filled capsules are mostly available in the latter half of the year and ones collected in February, March often are hard to sterilize. Glasshouses etc. may be a source of 'out of season' capsules.
2. What will you look for as an early sign of leafy gametophyte development?
3. How might you count the numbers of spores per capsule, per culture, or the number of leafy gametophytes that form.
REFERENCES
Conrad, H.S. (1956). How to know mosses and liverworts (Brown : Dubuque Iowa). (useful for identification but deals mainly with N. American and European material.)
Doyle, W.T. (1970). The Biology of Higher Cryptogams (Macmillan : London)
Doyle, W.T. (1973) Non-Seed Plants - Form and Function (Macmillan : London)
Ingold, C.T. (1974). Spore liberation in Cryptogams (Oxford Biology Reader No. 49) (Oxford University Press).
Scott, G.A.M. and Stone, I.G. (1976). The Mosses of Southern Australia. (Academic Press : London) (expensive and advanced reading) .
Watson, E.V. (1971). The structure and Life of the Bryophytes (3rd Ed.) (Hutchinson : London) (advanced reading).
Watson, E.V. (1972). Mosses (Oxford Biology Readers No. 29) (Oxford University Press).

r--·· 19.
PROJECT 4-1 REAL AND FAKE FOOD
PROBLEM
Some items of our food are faked by manufacturers to cut costs or speed cooking. With a knowledge of plant anatomy you could find out if the red bits in nougat, rocky road etc. are real cherries or bits of tough jelly. Which bought fruit cakes, plum puddings, or mixed fruit has real cherries? Is all the rice in Rice-a-Riso real? Are deep frozen potato chips real potato slices or mashed potato formed into chip-shapes? Is dried mint purely mint leaves, etc. etc.? Many other food stuffs might give some surprises.
INFORMATION
1. You should start by investigating the anatomy of the real object carefully and take into consideration the effect that preservation or part cooking might have on its appearance.
2. It is a great way of making sure you get the cherries out of the pudding but remember that items that have been used in a laboratory in contact with lab. instruments and glassware etc., should never be eaten.
3. Thin sections will be required. Always use a sharp hard backed razor blade and embed the object in a piece of carrot if it is too wobbly to hold. A lot of practice is necessary to cut thin sections.
4. It is instructive to read the carefully worded labels on packets after drawing your conclusions about the nature of the contents.
DESIGN OF PROJECT
1. You should describe the feature of the foodstuffs investigated that made you suspect it may not be real.
2. To avoid the possibility of libel, use code numbers to identify manufacturers in your report.
REFERENCES
Clegg, C.J. and Cox, G. (1978). Anatomy and Activities of Plants (Murray London).
Cutter, D.F. (1978). Applied Plant Anatomy (Longman : London) .
Esau, K.E. (1977) . Anatomy of Seed Plants (2nd Ed) . (Wiley : New York) .
~ ~ "!jl
PF
PF
So Ox an ca
IN
1.
2.
3.
4.
5.
6.
DE
1.
2.

s?
care-
be
'0 :ions.
tat
trray
Irk).
20.
PROJECT 4-2 BULBS THAT PULL THEMSELVES DOWN INTO THE SOIL
PROBLEM
some plants have contractile roots that pull the bulb down into the soil. oxalis (sour sob) does this, but the published work is on American species and it would be of interest to know how the local weed species (Oxalis pes caprae) behaves before designing eradication programmes.
INFORMATION
1. Oxalis does not grow like the text book daffodil. Make sure you understand it's production of an underground shoot with feeder roots and the position of the contractile root.
2. An interesting point is that in the American study of Oxalis cernua the contractile root pulled bulbs down into the soil when they were too shallow and grew sideways to distribute new bulbs horizontally if bulbs were deep in soil. By planting bulbs at different depths (l em - 20 em), you could examine this for Q· pes caprae.
·,old bulb scales 3. If you want to measure the rate of movement you need to be
able to examine some bulbs without disturbing them. Use He a deep box of soil with a sheet of glass against one side or cut large plastic pots in half and glue them to sheets of glass. Fill with soil and plant bulbs at required depth next to the glass. Cover glass with black plastic.
4. Examine bulbs at intervals of about 3 days. When does the shoot emerge? When does the contractile root develop? When does it contract? At what angle does it form?
5.
6.
Vegetative reproduction appears to be less vigorous in the shade than in the full sun. Can you show this experimentally?
Other native or introduced weeds that might be worth examining include guildford grass or belladonna lilies for which you might start with both seeds and bulbs. Destroy weeds at the end of your experiment.
DESIGN OF EXPERIMENT
1. Are you going to use bulbs of one particular size or compare burial rate/final depth of bulbs of different size classes?
2. How does the final burial depth and switch over from vertical to horizontal contractile roots compare with depth of bulbs in the field?
REFERENCES
Esau, K (1977) Anatomy of Seed Plants (2nd ed.) (Wiley : New York). Chp. 14)
Leopold, C.A. and P.E. Kriedemann (1975). Plant Growth and Development 2nd Ed. (McGraw Hill : New York) (pg. 214 on contractile roots is not too heavy) .
Peirce, J.R. (1973). Sour sob (Oxalis pes caprae L.) in Western Australia. Its life history, distribution, morphological variation and weed potential. Department of Agriculture, W.A. Technical Bulletin No. 20.
l.
2.

21.
PROJECT 4-3 ROOT RESPONSES TO GRAVITY
PROBLEM
As you know roots grow downwards and if tipped sideways will curve over to point downwards again. This is called geotropism. There are lots of fairly conventional experiments you can do to find out which part of the root bends, if bending occurs if the root tip is cut off, the relationship between centrifugal force and gravity etc. However you may wish to do something more difficult.
It is known that the first root that comes out of a seed (the radicle) is strongly geotropic. Lateral roots must be less so. Can you measure the strength of geotropism in a radicle and compare it with that seen in lst order, 2nd order laterals? Is there any difference between plants that have a taproot compared to a fibrous root system? If you cut off the tip of the radicle when it is about 2 em long is the strength of geotropism altered in the side roots if you measure it about a week later?
INFORMATION
1. Corn, radish, peas and beans are often used.
2. To get nice straight radicles, soak seeds overnight then place in a row in the bottom of a Petri dish with micropyles all pointing to one side. Cut out blotting paper (several layers) or a wad of cotton wool to fit over the seeds, moisten it and hold it in place by putting on the lid. Stand the dish upright so micropyles point down and place it in the dark until roots are 1~-2cm long. Select uniform seedlings for your experiments. You may have to grow seeds in large jars stuck to the glass and kept moist with cylinders of wet paper to get suitable material for experiments on lateral roots.
3. In your reading you will find that auxin is involved in root curving. Experiments with auxin and root bending are not often successful.
DESIGN OF EXPERIMENT
1. How will you measure curvature?
2. How are you going to measure "strength" of geotropism?
3. How are you going to hold the seedlings vertical till you're ready to start the experiment?
REFERENCES
Weier, T.E., Stocking, C.R. and Barbour, M.G. (1974). Botany. An Introduction to Plant Biology (5th ed.) (Wiley : New York) Chp. 20.
I

r?
)tS.
J.
22.
PROJECT 4-4 ROOT PARASITISM BY THE CHRISTMAS TREE
PROBLEM
The West Australian Christmas tree Nuytsia floribunda is a "hemiparasite". Although it has green leaves and apparently normal roots it is unable to live unless it makes connections with the roots of other plants from which it sucks nourishment. The connections are called haustoria and the problem is to discover what stimulates the Christmas tree roots to make haustoria. Trees are apparently not very selective as they have been known to latch hopefully onto underground electric cables.
INFORMATION
1. Nuytsia seed collected fresh from trees in January-February should be dried until it changes in colour from yellow to light brown. Rub off wings, put in container and pour over hot (not boiling) water. Leave stand overnight, plant about ~ em deep with stalk end downwards. Germination occurs in about 3 weeks.
2. It might be better to do field trials as well as pot trials as plants in pots may be slow to form haustoria.
3. Use a variety of test objects - living plant roots; dead plant roots; rods of various diameters of glass, metals, plastic; rods circular, square or triangular in cross section etc. At least a year in the field may be necessary.
4.
5.
Seedlings will grow for a year or so without a host. Other root parasites like Santalum will survive for longer if leaves are sprayed with chelated iron (1/8 teaspoon per 3" pot). Will Nuytsia?
Similar experiments could be done with other root parasites like Santalum spicatum (sandalwood) ~· acuminatus (quandong) or Exocarpus. The seeds of these may be reluctant to germinate however.
DESIGN OF EXPERIMENT
1. How will you select the place in the field to bury your objects? How will you find the stuff you bury in several month's time? Are you going to have one harvest or several?
2. Think carefully about your experimental design so that you will distinguish between substance, shape in cross section and diameter of your test objects.
REFERENCES
Anon (1978) Growing quandongs. Rural Research CSIRO No. 94. Grant, W.J.R. and Buttrose, M.S. (1978). Santalum fruit, domestication
of the quandong Santalum acuminatum. Australian Plants ~ 316-9. Herbert, D.A. (1918). The Western Australian Christmas Tree. Nuytsia floribunda
(The Christmas Tree) - its structure and parasitism. Journal of the Royal Society of W.A. ~ 72-88 (good stuff, easy to read).
Herbert, D.A. (1924) Root parasitism of Western Australian Santalaceae. Journal of Royal Society of W.A. 11 127-49
Kuijt, J. (1969). The Biology of Parasitic Flowering Plants (University of California Press : Berkely) (interesting to read even if you don't do this project) .

23.
PROJECT 4-5 ROOTING OF CUTTINGS
PROBLEM
Propagation of plants from cuttings is important in the horticultural industry and there is a continual search for compounds that will improve the success rate when rooting cuttings. Auxin hormones which induce root formation are available commercially. It has been found that commonly used fungicides may have a stimulatory effect or a depressing effect on root production when used along with the rooting powder. You might like to examine the effect of these chemicals on some exotic and native plant species.
INFORMATION
1. Choose at least one plant that is easy to propagate from cuttings such as tomato, bean, Chrysanthemum etc. and some others that are more difficult e.g. bottle brushes, geraldton wax, Grevillea etc. Read up on how to take cuttings before starting.
2. Choose a rooting powder appropriate for the type of cutting you are using i.e. soft or woody, and note the hormones they contain Indol butyric acid -(IBA) is good.
3. Select fungicides, Thiram, Captan and Benlate are commonly used. cuttings are usually treated first with the rooting hormone and then the wet stems dipped in the fungicide powder and the excess shaken off. This may have to be modified according to the sort of treatment suggested on the rooting powder packet. Fungicide is usually diluted by weight to percentages of between 2% and 30% using talc powder for the remaining percentage.
4. Place treated cuttings in peat/vermiculite 1:1 or peat/coarse river sand 1:1 or some other loose mixture. Cover trays or pots with plastic bags to keep up humidity.
5. Handle toxic compounds with care.
DESIGN OF EXPERIMENT
1. For interaction experiments like these you have to be extra careful about your design. There may be several 'control' treatments necessary.
2. How are you going to score rooting? Can you devise a quantitative scheme that will convert observations like 'poorly rooted' and 'many vigorous roots' to numerical values allowing a mean to be made of all cuttings for one treatment?
3. Will you put cuttings from different treatments in the same trays/pots or in separate containers?
REFERENCES
Hammett, K.R.W. (1973) Plant Propagation (David and Charles : Devon) guide).
Hartman, H.T. and Kester, D.E. (Prentice Hall : New Jersey)
Rogers, F.J.C. (1971). Growing
(1975). Plant Propagation - Principles and (the classic text book) . Australian Native Plants (Nelson : Melbourne)

rer
ul
ve any all
t
/pots
a practi
and Prac
ourne)
24.
PROJECT 4-6 TOLERANCE TO ~\IATERLOGGING
PROBLEM
Plants vary in their ability to survive periods of waterlogging. Species differ, and within species some strains or cultivars are superior to others. Observe which p.lants have survived in waterlogged areas in your district, and those that are abundant on well drained sites. Design an experiment to show whether or not species found in waterlogged conditions can in fact survive waterlogging better than
others.
INFORMATION
1. Use annual species for which abundant seed with high germination is available. Alternatively you might like to use perennials and compare say seedlings and one year old plants.
2. Set up plants in pots for which you can, when necessary, plug up the drain holes and flood the plants to about 1 em above soil level. Unplug drain holes after set times. Alternatively, use a free draining pot and set the whole pot in a large tub and fill that with water to the required depth.
DESIGN OF EXPERIMENT
1. At what stage of growth are you going to flood the plants; to what
depth? for how long?
2. How are you going to measure recovery, growth, yield etc. a plant has both above and below ground parts.
3. How many harvests are you going to make?
Remember
4. What other soil or water parameters might you measure during your
experiment.
REFERENCES
Kramer, P.J. (1951). causes of injuries to plants resulting from flooding of soil. Plant Physiology 26 : 722-36 (heavy going).
Weier, T.E., Stocking, C.R. and Barbour, M.G. (1974). Botany. An Introduction to Plant Biology (5th ed.) (Wiley : New York) Chp. ll and 12.
Wilson, E.O. and others (1973). Life on Earth (Sinaver Assoc : Staniford) pgs 437-47 (for a general understanding of root structure and function).

25.
PROJECT 4-7 EFFECT OF SEAWATER AND/OR DETERGENTS ON PLANTS
PROBLEM
Plants that grow along the blows onto their leaves. if any detergent gets into to your local beach plants
beach can tolerate the salty ocean spray that They may however be severely damaged or killed the water. The question is what would happen if the sea water was polluted with detergent?
INFORMATION
1. The beautiful Norfolk Island Pines around Sydney beaches like Bondi and Marouba were killed as a result of the detergents in sewerage released in the ocean (see account by Pitman, 1977) .
2. Plants that grow around river estuaries that go salty in summer could also be investigated.
3. Having observed the effects of an experimental salty spray and which plants are most sensitive you might check out plants near your local ocean sewerage outlet. It is important to know how the sewerage is treated as different treatment methods reduce the amount of detergents that remain.
DESIGN OF EXPERIMENT
1.
2.
3.
4.
Will you treat the plants with detergent in straight sea water or diluted sea water? How often will you treat? How will you mark the treated leaves, prevent spray drift, score the damage?
What will be your control?
Is there any way of measuring the salt the plants get in the field in addition to your experimental sprays?
If you use plants in the field make sure you have the owner's permission as you may damage the plants.
REFERENCES
Jones, C. Gadler, S.J. and Engstrom P.H. (1972). Pollution of the Earth (Dent : London) .
the Waters
Pitman, M.G. and others (1977). The outfall connection. Australian Natural History 19 (3) 74-8.
p
D
c
I
l
2
3
DI
l.
2.
3.
4.
5
6

k
d
rs
26.
PROJECT 4-8 EFFECT OF DIFFERENT TYPES OF WATER ON PLANT GROWTH
PROBLEM
Different water supplies affect the growth of plants and this can be of great concern for commercial nurserymen.
INFORMATION
1. Water could be used frcm the mains, a bore, a tank, distilled water, sea water, brackish river water, outflow from a sewerage farm etc.
2. If it is necessary to store water, put it in a cool dark place in a well washed plastic container (do not use galvanized bins or watering cans for storage) .
3. Choose species that germinate well and maybe compare a native and introduced species.
DESIGN OF EXPERIMENT
1. How are you going to provide fertilizer to the plants.
2. Think carefully about your control pots.
3. How will you decide how much and how often to water. time of day will you water?
At what
4. Do you think it matters if you water so the leaves get wet or should you wet only the soil?
5. When will you harvest and how will you measure growth?
6. What features of water quality do you think are important?
REFERENCES.
Hartmann, H.T. and Kester, D.E. (1975). Plant Propagation (Prentice Hall : New Jersey) Chp 2.

IIIII
-------------
27.
PROJECT 4-9 MOVEMENT OF PLANT STEMS
PROBLEM
The growing tip of a stem does not grow directly vertically but moves upwards in a helical path. The problem is whether there is a difference in the magnitude of the movement (called circumnutation) in shrub plants and twining climbers. What environmental factors affect the movement e.g. will it continue in complete darkness? What happens if a piece of vertical fencing wire is placed in the path of a twining stem or leaf tendril?
INFORMATION
1. Young fast growing seedlings in pots are best for this experiment.
2.
3.
Darwin's method of examining circumnutation works well even though it is 100 years old! The idea is to mount a sneet of glass about 10 em above the plants and to line up the apex and put a spot on
7-30
b·30
the glass. Doing this every couple of hours gives you a record like that in the diagram of the plant's movement. For some plants it is easy to line up the apex, for others like peas, placing a piece of glass rod vertically at the apex is a help. To do this, thread a 3 em fine capillary tube through a triangular piece of paper and insert it into the apical region (don't stab it into the apex itself!) where it is held by the stipules of the youngest leaves. Sight down the length of the capillary and put a spot on the glass where the line of sight passes through the glass plate.
A comparison of tall and dwarf peas or beans would be of interest. Other plants that have bush and climbing forms or related species could also be used e.g. Thysanotus species (fringed lilies).
4. Plants in the dark can be examined using a torch covered with layers of green cellophane.
DESIGN OF EXPERIMENT
1. What do you think causes the movement of the tip?
2. How will you be sure wind, drought etc. are not affecting your plants?
3. How are you going to quantify the magnitude of the movement?
4. How will you be sure that phototropism is not affecting your experiment?
REFERENCES
Allan, M. (1977) Darwin and His Flowers (Faber & Faber : London) Chp. 12. Darwin, C. (1875). The Movements and Habits of Climbing Plants (John Murray Darwin, C. (1880). The Power of Movements in Plants (John Murray : London). Phillips, E.A. (1971). Basic Ideas in Biology (Macmillan : New York) Chp. 1.
f =r

s of
'it res. ~ut
1rs
nts?
iment?
. 2. 1rray . on). .p. 1.
PROJECT 4-10 FLORAL CLOCKS
PROBLEM
The timing of flowers opening and closing, and of pollen shed etc. is well known for European and horticultural plants. In fact Linnaeus in 1748 made a floral clock in his garden so that you could roughly tell the time of day by seeing which flowers were out! Similar information is not available for most W. Australian wildflowers.
INFORMATION
1. It is important to record the date and weather conditions when you make your observations.
2. Some species have flowers open only once, others several times.
3.
Do learn about the structure of a daisy "flower" before tackling these.
For some species like Hakeas and Banksias with spikes of flowers the number of newly open flowers as well as the time of opening is of interest.
4. You may also wish to record time of pollen shed and nectar production.
5. You may wish to experiment with some flowers to see if you can modify the time of opening by artificially increasing the day length or altering the temperature. Will they continue to open and close under constant environmental conditions?
DESIGN OF PROJECT
l. What might control time of flower opening and pollen shed? Do you expect differences in opening time on cooler days, wet days overcast days?
2. Do you expect any difference in time of pollen shed between flowers pollinated by bees or moths, or wind?
3. For species with a long flowering period do you expect any difference in the time of opening at the beginning and end of the flowering season?
REFERENCES
Faegri, K. and van der Pijl, L (1971) Principles of Pollination Ecology (Pergamon Press : Oxford) (2nd ed) .
Knox, R.B. (1979). Pollen and Allergy (Studies in Biology No. 107) (Edward Arnold : London) .
Proctor, M. and Yeo, P (1973). The Pollination of Flowers (Collins : London)

29.
PROJECT 4-11 WIND BORNE POLLEN
PROBLEM
Pollen carried by wind can be taken to very high altitudes or hundreds of miles out to sea. However the distance from the parent plant that most of the pollen actually gets may be surprisingly small.
INFORMATION
l.
2.
Select your pollen source and expose vaseline coated slides at various distances from the plant. Further information is found in Project 4-12, 4-13.
Selecting a pollen source is the difficult bit. It must be a plant that sheds lots of pollen and the pollen must have a distinctive shape. There must be no other plants of this species in the area. Neither can there be plants of another species with a similar sort of pollen in the area. A suitable plant would be a pine tree (an introduced plant) on a farm with no other pines around; a patch of Juncus (rush) in a wet spot with_no other rushes (or bullrushes) around etc.
3. A hand tally counter is a help in counting pollen grains.
DESIGN OF EXPERIMENT
l. Are you going to expose slides only on the windward side of the tree or on all sides. How are you going to arrange to have slides exposed all at the same time? For how long will you expose slides? Will you shut down your experiment if the direction of the wind changes?
2. What environmental factors will you monitor while the slides are exposed?
3. Are you going to count all the pollen or just random fields on each slide?
4. What evidence are you going to present to show that other plants in flower are not contributing similar looking pollen?
REFERENCES
Knox,R.B. (l979)Pollen and Allergy (Studies in Biology No. 107) (Edward
Pl
Pl
P< ii n a~
aJ
wj
n
1.
2.
3.
4.
5.
6.
7.
l.
2.
3.
Arnold, London) . RE

on
ch
30.
PROJECT 4-12 A POLLEN CALENDAR
PROBLEM
Pollen in the air may cause hay fever in susceptible people. For this reason in spring and early summer, daily pollen counts are carried out and the results published in the West Australian on Saturdays. Data are only available for Perth and students from the hills district or distant country areas might find it interesting to compare the Perth data with what they can collect in their own district.
INFORMATION
1. Pollen can be collected by the gravity method -expose slides coated with vaseline for one day. Place slide about "nose height" in an exposed position away from any massive source of pollen (like a pine tree) . Protect slide from rain with a shield about 20 em above.
2. To observe pollen add a drop of Calberlas' fluid (Project 4-13) and add a long coverslip.
3. Pollen will be most abundant in spring, least common in summer and autumn. \slide
4. Abundance is scored as 10 grains per sq. em over 20 = severe.
low, 10-20 moderate,
5. A microscope with a mechanical stage is helpful for scoring. Score at least 5 random transects across each slide.
6. Don't overestimate how much you can score. An expert takes ~ hour per slide. Carefully labelled slides can be stored for later scoring.
7. Don't try to differentiate between closely related pollens - i.e. score "grass pollen" rather than trying to figure out which belongs to a particular grass.
DESIGN OF EXPERIMENT
l. What other "objects" apart from pollen might you expect on your slides?
2. How are you going to identify the pollen you find?
3. Could a local doctor or hospital give you data on frequency of onset of asthma to correlate with your pollen counts?
REFERENCES
Asthma Foundation of W.A., 89 St. George's Terrace, Perth for general information.
Knox, R.B. (1979). Pollen and Allergy (Studies in Biology No. 107). (Edward Arnold : London) .

3L
PROJECT 4-13 POLLEN IN HONEY
PROBLEM
Honey is sometimes sold with the different flavours kept separate (e.g. karri, white clover etc.) but more often as a blend. Honey contains a little pollen and the question is whether different sorts of honey have a distinct range of pollen types.
INFORMATION
To extract pollen from honey weigh out 10 g, dissolve in 20 mL water at 30-40 C. Centrifuge at low speed for 10 mins. Pipette off supernatant leaving l-2 em above the sediment. Place a drop of sediment on a slide and add a drop of Calberla's fluid, mix and add coverslip. Pollen from stamens can be dissected straight into the stain.
Calberla' s fluid - 5 mL glycerol, 10 mL 95% ethanol or methylated spirit, l5mL distilled water, 3 drops of saturated solution of basic fuchsin in water (don't make much, it's expensive) and 3 drops glycerine jelly.
fuchsin (a Gurr or BDH product) is available from Selby's 21 Glassford Rd Glycerine jelly - Gelatine 10 g, distilled water 60 mL. Mix and leave for 2 hours. Add glycerol 70 mL and phenol (crystalline) 0.25 g (take care, phenol is corrosive). Warm and stir for 15 mins until flakes produced by phenol have disappeared.
Store slides flat. Pollen will stain red. Slides will keep well if sealed with clear nail polish.
DESIGN OF EXPERIMENT
1. Are you going to score just presence or absence of various sorts of pollen or are you going to estimate frequency as well.
2. How are you going to identify the sort of pollen that you find? (it may be impossible, in which case good drawings should be made)
3. Are you going to "stick" to local pollen or look at some from overseas as well e.g. "Heather Honey".
REFERENCES
Crane, E. (1976) Honey - A Comprehensive Survey (Morrison and Gibb : London)
Knox, R.B. (1979). Pollen and Allergy (Studies in Biology No. 107). (Edward Arnold : London) .
Faegri, K. and van der Pigl, L. (1971). The Principles of Pollination Ecology (2nd ed) . (Pergamon Press : Oxford) .
r '

ve
at t
:>f
ndon)
dward
32.
PROJECT 4-14 BEETLES AS POLLINATORS
PROBLEM
some insects like bees usually collect pollen or nectar from only one species on a particular collecting trip, or even over a period of several days. consequently, they are very good pollinators as they go from flower to flower of the same species. Other insects like beetles have the reputation of being less selective and of travelling to flowers of different species; they are thus less efficient as pollinators. You might like to investigate just what range of flowers a particular beetle visits and consequently the range of pollen it carries.
INFORMATION
1. You can watch beetles carefully to see which plants they visit in sequence but this has limitations as it is fairly easy to lose the insect as it goes from plant to plant.
2. Another way is to capture beetles and get all the pollen off them and examine it to see how many different types there are. Hold beetle with clean forceps over a slide coated with vaseline and vigorously brush the insect all over with a clean mascara brush. Keep slides well covered before and after use or you will get contamination of aerial pollen. See Project 4-12, 4-13 for information on pollen staining and scoring.
3. You will need a reference collection of slides of pollen of plants in flower at the time you make your observations.
4. You might attempt to identify your plants and beetles but for the difficult ones naming them ABC etc and submitting voucher specimens is adequate.
DESIGN OF EXPERIMENT
1. How are you going to keep a watch on the beetle as well as recording the plants it visits in sequence?
2. How are you going to catch your beetle without showering it completely with the pollen of the flower it happens to be on?
3.
4.
How will you clean your brush between beetles?
What are the floral adaptations for beetle pollination and thus on which flowers are you most likely to find beetles?
5. The abundance of flowering plants of a particular species might influence the animal's behaviour. How will you include this variable in your experiment?
REFERENCES
Faegri, K. and van der Pijl (1971). The Principles of Pollination Ecology (Pergamon Press : Oxford) 2nd ed.
Morcombe, M. (1968). Australias Western Wildflowers (Landsdowne Press Proctor, J and s (1978) Nature's Use of Colour in Plants and Their
Flowers (Peter Lowe : London) Proctor, M. and Yeo, P. (1973). The Pollination of Flowers (Collins
Melbourne) Chp. 3
London).

I -------
111111,
lll!li!' ':!1!:: '1:1:, 1111''
l!llil :!iii ,,1'1
ill
33.
PROJECT 4-15 WHAT CAUSES THE DEATH OF ANNUAL PLANTS?
PROBLEM
Some trees live for thousands of years but at the other end of the scale annual plants die after a year or less - why? It is not fully understood but it is known that you can extend the life of annual plants by removing the f:;cuits. You might like to investigate how long you can extend the life of the plant if you remove the flower buds; the flowers after pollen is shed, the young developing fruit, the immature fruits, the mature fruits? As a related issue you might compare the total yield of fruit from your plant if you remove fruit as it matures rather than do one harvest when the plan-t dies.
INFORMATION
1. Plants like legumes or tomatoes which flower on side branches are suitable to use, but you might also like to include something like sunflower in which the top growing point is "used up" in producing the inflorescence.
2. Sugar snap peas in which you can eat pod as well as seeds from your "immature" harvest might be a useful plant to include but it grows very tall.
DESIGN OF EXPERIMENT
l. How will you record "growth" of plants?
2. How will you record death of the plants?
3. How will you measure yield?
4. Read Section D on experimental design carefully and then decide how many plants you will have in each treatment.
REFERENCES
Greulach, V.A. (1973). Plant Structure and Function (Collier Macmillan) Chp. (advanced)
Leopold, A.C. (1961). Senescence in plant development. Science 134 1727 (not too hard to read)
Waring, P.F. and Phillips, D.J. (1970). The Control of Growth and Differentiation in Plants (Pergamon : Oxford). Chp. 12.
Woolhouse, H.W. (1972). The Ageing Process in Higher Plants (Oxford Biology Reader No. 30).

how
n) Chp.
1727
'
34.
PROJECT 4-16 COLLECTION OF SEEDS BY ANTS
PROBLEM
It has been estimated that there are about 1,500 species of Australian plants that are regularly dispersed by ants. The ants are attracted to the seed because it has a firm fleshy appendage (called an elaiosome) and carry the seeds back to their nests. Only a little is known about the local W.A. plants and one of the experts on the subject lives in Norway and only worked in W.A. for less than a year!
INFORMATION
1. Ant dispersed plants (dubbed myrmecochorous if you can pronounce it) are woody shrubs in sclerophyll vegetation. Species in families Rhamnaceae, Fabaceae, Sterculiaceae are commonly ant dispersed as are members of the genera Acacia, Hibbertia, Goodenia. Look up these groups so you can recognize them in the bush. Many species shed their seeds in summer.
2. The standard test to see if ants are attracted to seeds is to scatter 10 seeds of the species to be tested in a small area near an ant trail about 1-2 m from the nest. Depending on how excited the ants get, score the number of remaining seeds after 10 to 30 minute intervals (up to 1 day)
3. Not all ants collect seeds. Ant identification is difficult so collect specimens and call them A, B, C if necessary.
4.
clllAUDria
Record how the ants get the relatively huge seeds back to the nests and what happens then. Watch out for seeds (minus the elaiosome) being brought up out of the nest to be dumped.
5. Some species without elaiosomes are sometimes collected e.g. some grasses, daisies and eucalypts.
DESIGN OF EXPERIMENT
l. What other notes should you make about the habitat, the environmental conditions and the ants activity on days you do your experiments?
2. How will you score your results if ants of several species appear on the scene unexpectedly and a brawl ensues?
3. Are you going to study foraging only during the day or at night as well?
REFERENCES
Berg, R.Y. (1975). Myrmecochorous plants in Australia and their dispersal by ants. Australian Journal of Botany 23, 475-508. (good stuff if you can survive the terminology that hits you in the first few pages) .
van der Pijl, L. (1972). Principles of Dispersal in Higher Plants {Springer Verlag : Berlin) .

35.
PROJECT 4~17 SEED SURVIVAL AFTER INGESTION
PROBLEM
To find out what proportion of seeds eaten by animals survive the passage through the alimentary canal and which seeds are distributed in dung. The experiment will reL2.te seed size and structure with survival in animals with different types of digestive systems.
INFORMATION
1. You should select your seeds from those normally eaten by the animals e.g. oats, clover, medic, ryegrass, etc. and possibly include tomato which has a great reputation for survival. If the animals normally eat pellets you can make a mash of pellets and seeds and include these in the animal's food.
2. It would be interesting to include 2 animals with a contrasting alimentary canal e.g. hens and rats, sheep and horses.
3. A large animal like a horse produces a vast amount of manure, all of which will have to be washed and sieved so use a small animal unless you are very keen!
4. Rather than feeding animals you might like to collect pellets in the wild and see if they contain any seeds and if so, whether the seeds will grow. Almost nothing is known about the possible seed by kangaroos, emus, bungarras etc. Emus are thought to be important.
DESIGN OF EXPERIMENT
l. How will you incorporate seed into the animal's food?
2. How are you going to compare live seeds in inital samples (before ingestion) with material which has passed through the animal?
3. How are you going to measure seed survival?
4. How long does it take for food to get through the animal you are on. How will you know when the material in which you are interested has come through?
5. How do you get rid of viable seeds in the food the animal normally
6. How much seed are you going to feed the animals, is the seed addition to be the same for all animals?
7. How are you going to know how much of the seed addition the animal has eaten?
8. How are you going to be sure you collect all the animal's droppings?
REFERENCES
Keeton, W. T. ( 1972) . "Biological Science" (Worton & Co : New York) . pgs. Morton, J. (1967) Guts (Studies in Biology No. 7) (Edward Arnold : London) Ridley, H.N. (1939?). The Dispersal of Plants Throughout the World. (Reeve &
Kent) Van der Pijl (1972). Principles of Dispersal in Higher Plants (Springer
Verlag : Berlin)
f ' I i

s
se
of
ds
working sted
Y eats?
tion
1 has
gs?
rer
36.
PROJECT 4-18 SEED GERMINATION
PROBLEM
The environmental conditions that stimulate seed germination are poorly understood for many Australian native plants. You might like to investigate the conditions needed for germination of several related species, particularly those with horticultural value.
INFORMATION
1.
2.
3.
Select species for which you can obtain large numbers of seeds so that you can have a good experimental design. Try and find out when the seeds germinate in the field as this might help you determine the most likely treatments to use. Avoid using orchids as they may have very special requirements like a suitable fungus being present.
Factors to investigate include
a) Hard seed coats (common in legumes) . An impermeable seed coat prevents water uptake. Try nicking the seed coat with a sharp blade or rubbing it with sand paper (don't damage embryo part), or dropping seed into boiling water for l, 2, 3 .... etc minutes and then immediately into very cold water. If you have 'softened' seeds they will swell up within 24 hours. They may or may not then germinate ... !
b) Germination inhibitor causing dormancy. Some seeds contain substances that prevent germination. These inhibitors are leached out over a period of time (maybe years). This can be hastened by washing seeds in running water. Place them in a cheese cloth bag and tie so they are continually washed for 1 hr, 1 day ... etc. (think hard before you do this in a year with water restrictions!). Other seeds have the inhibitors in the fleshy layers or dry bracts around the outside of the seeds.
c)
d)
Test seeds with and without these layers.
Temperature requirement. Many seeds will germinate only at a particular temperature. You might be lucky and have a range of growth chambers or incubators to use, but if not try germinating seeds out of doors at different times of the year.
Light requirement. Some seeds require light to germinate (often fairly small ones) or just the opposite - they won't grow except in the dark. Wrapping some dishes in aluminium foil and leaving others exposed to light is a good treatment here.
A useful way to germinate seeds is to place 10-100 depending on size on filter paper wrapped around a watch glass in a petri dish as in the diagram. Seal edges of dish with a gladwrap strip.
gtadwrap ,. seeds '',,(_L: s-----jtilter pape
'·water \ivatchglass
Other methods are to use sand in seed boxes or put seeds between 2 layers of capillary matting in a seed box.

37.
4. Examine seeds at frequent intervals and top up water. Remove germinated seeds, i.e. seeds in which the seedling roots (radicle) has emerged. Test to see if remaining seeds are still firm and alive. If they're squelchy they're dead.
5. If necessary, to prevent fungi growing on seeds either t.reat with a fungicide or drop seeds in 2% sodium hypochlorite for 5 mins. then wash well. Keep good records as these treatments might themselves stimulate germination.
DESIGN OF EXPERIMENT
1. Think carefully about how many factors you can test with the number of seeds you have in hand.
2. Do you think it important to know the source and age of your seeds?
3. If you are doing an experiment over a period of a year how might you distinguish between an ageing of the seed (and possible change in internal inhibitors) , and the effect of your various experimental treatments.
4. If you do an experiment and nothing germinates do you think it is O.K. to wash and dry those seeds and try something else?
REFERENCES
Black, M. (1972) Control Processes in Germination and Dormancy (Oxford Readers No. 20) (Oxford University Press).
Koller, D. (1970). Germination. In Janick et al "Plant Agriculture". from Scientific American.
Mayes, A.M. and Poljakoff-Mayber, A. (1975). The Germination of Seeds Press : Oxford) (advanced reading) .
Rogers, F.J.C. (1971) Growing Australian Native Plants (Nelson : Melbourne) Chp. 2.
Villiers, T.A. (1975). Dormancy and Survival of Plants (Edward Arnold : London) (advanced reading).
ALSO
1. Various issues of "Australian Plants" have hints on how to germinate seeds of native plants.
2. The horticultural advisor at Kings Park, Mr. Bob Dixon will give advice to home gardeners.
r f

s
Biology
mrne)
seeds
ice
38.
PROJECT 4-19 DISPERSAL OF PLANTS IN CLOTHING, TOWELS AND RUGS
PROBLEM
Humans may unknowingly carry around weed seeds. friends to examine their seed load.
INFORMATION
Use your family and
1. The sorts of places to look are in or on shoes and boots, stuck in tread or on shoe laces; in socks, trouser cuffs and pockets, on coats (particularly sheep skin coats), beach towels, travel and picnic rugs etc.
2. Other places that collect seeds are door mats and car carpets. Shake and vacuum these using a new clean bag. Maybe a friend living in a country area will clean his door mat for you and send you the specimen (it is illegal to send soil specimens interstate) .
3. You can count and classify seeds you collect and also see if they will grow. To do this use sterilized soil (to kill other weeds).
4. In the case of "mud and dirt" samples - examine under the microscope for seeds but plant the lot as there are many very tiny seeds that you could miss.
5. Not all seeds will be "weeds", but pasture crops and garden plants may be carried too.
DESIGN OF EXPERIMENT
1. You may wish to do a general survey, or to closely examine clothes b~fore and after a picnic in the bush or a water skiing outing etc.
2. How will you identify what grows; how will you know if everything has germinated; how long will you wait for things to germinate?
REFERENCES
Lamp, C. and Collet, F. (1976). A Field Guide to Weeds of Western Australia (Inkata Press : Melbourne) .
Meadly, G.R.W. (1976). Weeds of Western Australia (Department of Agriculture W.A.).
Van der Pij 1 (1972) . Principles of Dispersal in Higher Plants. (SpringerVerlag : Berlin)

PROJECT 4-20 DISPERSAL OF PLANTS BY VEHICLES
PROBLEM
Vehicles may carry seeds in cracks or in mud and provide a threat to quarantine barriers. For example, cars brought in from overseas are steam cleaned before being delivered to their owners. You could survey the seeds/plant material carried by a range of vehicles.
INFORMATION
l. Almost any vehicle can be used - bikes, cars, buses, trains, aeroplanes, trucks, earthmoving equipment.
2. You could compare what is caught in say tyre tread of different vehicles or you could deliberately wash a vehicle thoroughly before a long journey, or a journey through a scrubby area and then wash it again afterwards.
3. You will need to get under the vehicle to do a thorough job. If stand the vehicle on a sheet of plastic so you can collect all the run off. Drain run off through a fine sieve. Dry half the sample and examine it under the microscope for seeds, and plant the other half.
4. Mud from tanks at the local car wash would be of interest.
5. To "plant" mud, mix it with the top 1 em of a pot of sterilized soil.
DESIGN OF EXPERIMENT
l. At what time of year will you do your survey?
2.
3.
How will you identify what grows? How will you know if everything has germinated? How long will you wait for things to germinate?
Do you think your sampling method misses any particular type of seeds?
REFERENCES as for Project 4-19
Wace, N. (1977). Assessment of dispersal of plant species - the car-borne flora of Canberra. In Proceedings of the Ecological Society of Vol. 10 (editor D. Anderson).

s,
cles
ssible
has
s?
ne tralia
40.
PROJECT 4-21 GERMINATION AND ESTABLISHMENT OF MISTLETOE
PROBLEM
Mistletoe seeds are easy to germinate but adult plants occur on a restricted range of hosts. Is this because seeds never get deposited on other plants? Or if seeds do arrive on other plants, how big does the hopeful mistletoe grow before it .is prevented from attaching?
INFORMATION
l. The common mistletoe Amyema preissii is found mainly on Acacia but also on Cassia and Eucalyptus.
2. Seed can be collected from March-July and will not germinate if the fruit remains intact with a small stalk.
3. To stimulate germination, separate seeds and dissolve the sticky layer by shaking in water.
4. You can damage the fruit coat and place seeds on branches of different sizes or of different species. You can either leave the seeds alone or water them. It is not known how quickly they will grow.
5. This project is particularly suitable for students living in the wheatbelt of W.A. where heavy infestations of Acacia acuminata occur
DESIGN OF EXPERIMENT
l.
2.
3"
How do the seeds normally get lodged on a branch? Will this method affect the size of the branch they usually land on.
Observe normal distribution carefully - do any seeds get onto species other than those they usually parasitize?
Will you look at behaviour of seeds on species, branches of different ages? inanimate objects, soil?
branches/leaves of different Will they grow on gymnosperms,
REFERENCES
Kuijt, J. (1969). The Biology of Parasitic Flowering Plants (University of California Press : Berkeley) .

PROJECT 4-22 COMPETITION BETWEEN WEEDS AND DESIRABLE PLANTS
PROBLEM
Everyone hates v;eeding the garden. It is known that weeding vegetables during the early weeks of their growth gives a big increase in final yield, but that weeds established after a certain time have little effect on yield. Can you find out when you can hope to stop weeding your vegetables?
INFORMATION
1. There are two ways of tackling this. You might plant the vegetable seeds and let the local weeds do their thing, or you might start in weed free soil and deliberately plant weed seeds at a certain density at specific times. The second approach gives a better experimental approach as you can control density of weeds.
2. If planting weed seeds make sure you have plenty on hand and that they will germinate when you want them to.
r---------------------------. 3. Despite the apparent simplicity of planting growing harvesting the problem you will need lots of
""al!lllllllllllllllllllllll.a.al!llll!llllllll.a.alllllllllllllllllllllllllllllllllllllll.alllllllllllll•lllllllllllllllt l\ime treatments and of course a number of replicates of each treatment. In one suggested design shown, the time that plants are exposed to is shown by shading.
4. The aggressiveness of weeds depends on what they are competing against i.e. wild oats are very aggressive against barley but less so against mustard.
DESIGN OF EXPERIMENT
l. Read Section D on experimental design carefully before deciding on how many vegetables, how many weeds and how many treatment times you can handle.
2. What density of weeds will you use?
3. How will you measure yield of vegetables? any useful information?
Will yield of weeds give
4. Pick a vegetable that will grow fast and one. that your family like to eat as by the time you plant enough replicates they will certainly get lots of it.
5. While the experimental design suggested above might be fine for some things, in other cases it might be better to have weekly treatments for the early stages and then.treatmertts wider spaced later on.
REFERENCES
As for Project 4-23.
t I i f

les yield, yield.
e
t
the to weeds
how an
ve
to get
me s
42.
PROJECT 4-23 GROWTH OF WEEDS
PROBLEM
Many persistent weeds owe their nasty reputation to their ability to regenerate from either seeds or from vegetative structures and to their ability to grow up from considerable depths. You might investigate for example the depth from which bulbs of Oxalis (sour sob) or runners of Kikuya, etc. will emerge. Alternatively, you might investigate how small a piece of couch, veldt or crab grass is sufficient to establish a new plant.
INFORMATION
1. A neat way of investigating emergence from different depths is to use different lengths of plastic drain pipe placed upright in plant pots of somewhat wider diameter as in the diagram.
2. Although weeds are very successful in your garden, for experimental purposes it is better to grow them in pots or seed trays so you can control the experimental conditions more easily.
DESIGN OF EXPERIMENT
1.
2.
3.
How are you going to standardize the material you start with - bulb weight, size, number of nodes on a runner, its length? Are you going to leave existing roots and leaves on or cut them off etc.? If taking small bits off a runner it may be important to note the physiological age i.e. how far back from the apex a particular piece is taken.
How will you avoid competition from weeds in the soil you use for your experiments!!
How will you talk your parents or school gardener into letting you grow weeds and convince them you will not let any out from your experiment and will destroy them when you finish?
REFERENCES
Chancellor, R.J. (1966). The Identification of Weed Seedlings of Farm and Garden (Blackwell : Oxford) .
Hill, T.A. (1977). The Biology of Weeds. (Studies in Biology No. 79) (Edward Arnold : London) .
Lamp, C. and Collet, F (1976) A Field Guide to Weeds of Australia (Inkata Press : Melbourne) .
Meadley, G.R.W. (1976) Weeds of Western Australia (W.A. Department of Agriculture)

r--------------- ·-
Iiiii
43.
PROJECT 4-24 ECOLOGICAL EFFECTS OF PLANT CHEMICALS
PROBLEM
To find whether there is a scientific basis for the observation that various species of plants can inhibit the growth of other plants.
INFORMATION
1. It has been known for a long time that some plants grow well together while in other cases one plant seems to prevent the growth of another by the chemicals it produces. This is termed allelopathy. Organic and inorganic substances including growth regulators,can be leached from ·the leaves or roots of plants by rain, influencing the growth of nearby plants of the same or different species. Volatile substances are also known to be effective. Plants that are affected can be of the same species and/or different species. Insects too can be repelled,
2. There is much non scientific literature on companion plants,and some of these observations might be explained by allelopathy.
3. This is a very difficult area to research as you have to distinguish carefully between allelopathy and the possibility that one species is shading another, or it is competing more effectively for available water and nutrients.
4. When root exudates are suspected, test plants can be watered with water draining from the pots of other plants or grown in aqua-culture using water in which another species is or was growing.
5. Seed germination is used as a measure of extract toxicity - ones like lettuce that give a reliable germination are often used.
6. Amongst the many local examples you might investigate are the following: a) Kalanchoe daigremontiana produces plantlets from notches on its leaves but those that fall onto soil below the mother plant grow very slowly due to a toxin produced by mother plant roots. Does the local Kalanchoe (mother of millions) or other plants that reproduce in a similar vegetative way have any method of inhibiting the growth of the new plantlets? b) Aqueous extracts from eucalypt leaves and litter may inhibit seed germination. Do the gum trees in the bush near you have lots or only a few seedlings under them? c) Can you get morning glory to grow on jacaranda?
DESIGN OF EXPERIMENT
1. How will you first prove that allelopathy exists in your system?
2. How will you then find out where the toxin is coming from?
3. How are you going to measure "growth" of your plants?
4. Think very carefully about your "controls".
REFERENCES (all advanced reading) Rice, E.L. (1974). Allelopathy (Academic Press : New York) Atsatl, P.R. and D.J. O'Dowd (1976). Plant defence guilds. Science 193 : 24 Muller, C.H., Muller, W.H., Haines, B.L. (1964). Volatile growth inhibition
produced by aromatic shrubs. Science 143 : 471-3

ious
ther r
Hke
Lowing: :s rery Local ~
: the
;eed only
: 24 tion
44.
PROJECT 4-25 LITTER DECOMPOSITION
PROBLEM
The breakdown of leaf litter is an important part of the cycling of nutrients in the ecosystem. You could do some experiments to relate the rate of decay of leaf litter to the nature of the plant tissue involved, the soil
organisms present and the soil water supply.
INFORMATION
1. It is suggested that you use leaf tissue of contrasting types - Eucalypts) pines, Banksias, and herbaceous plants like cape weed, clovers, grasses
etc.
2. It is conventional to place leaf material in nylon mesh bags at marked spots so that the material can be recovered for examination at the end of the experiment. Nylon bags with different mesh size will exclude different classes of soil organisms. Bags need to be sewn with nylon thread, cotton will rot.
3. Study two or more contrasting sites e.g. pasture, household compost heap, jarrah woodland, swamp etc. You may vary the water supply to
different areas by regular watering.
4. If you wish to examine soil organisms present see Project 5-l.
5. Measured squares of cellophane will also give you an estimate of the rate of decomposition of_ cellulose in various situations.
DESIGN OF EXPERIMENT
l.
2.
3.
How will you study the "nature" i.e. hardness of the plant tissue
involved?
How will you get comparable initial samples of different species which
have different shaped leaves?
How much tissue should be used?
4. How will you make a quantitative measurement of decay?
5. Will you measure any other soil characters such as pH, particle size etc.?
6. How long should the bags be left in the soil?
REFERENCES
Brown, A.L. (1978). Ecology of Soil Organisms. (Heinemann : London) (advanced
reading) . Couldsley-Thompson, J.L. (1967) Microecology (Studies in Biology No. 6) (Edward
Arnold : London) . Dickenson, C.H. and Pugh, G.J.F. (1974). Biology of Plant Litter Decomposition
Vols. 1 and 2. (Academic Press : London) (advanced reading) Jackson, R.M. and Raw. R. (1973). Life in the Soil. (Ed. Arnold : London)

45.
PROJECT 4-26 DECOMPOSITION OF PLANT MATERIAL IN AQUATIC AND MARINE ENVIRONMENTS
PROBLEM
Each year many tonnes of leaves and wood from terrestrial plants are deposited in lakes and rivers and eventually carried out to sea. You might wish to study the rate of decay of various types of plant material under water.
INFORMATION
l. Look up Project 4-25 for some general suggestions.
2. Mesh bags of leaves of different plants can be placed in streams, lakes or the ocean firmly tied with nylon fishing line to something heavy like a brick or attached to a jetty pile etc. Don't forget to make detailed notes on exactly where you place your material.
3. You may wish to compare the rate of decay of material submerged at different depths or buried in the substratum.
4. It might be of interest to compare the rate of decay in an anaerobic stagnant swamp mud and a fast flowing clear stream.
DESIGN OF EXPERIMENT
l. Refer to Project 4-25.
2. How might the decay organisms in the aquatic and marine situations differ from those in a terrestrial situation?
REFERENCES
As Project 4-25.
Sieburth, J. MeN (1979) Sea Microbes (Oxford University Press New York) •

s
() .
46.
PROJECT 4-27 LITTER UNDER TREES
PROBLEM
Many people hate raking leaves off lawns so they plant evergreen eucalypt trees rather than deciduous trees in their gardens. It seems however, that eucalypts drop leaves, twigs, bark, flower parts and fruits in vast amounts and the gardener hasn't solved his problem. The problem is even greater when all the litter falls into a swimming pool and blocks the filter.
You might like to compare the seasonal occurrence of litter beneath eucalypt and deciduous trees. You may also compare pines.
INFORMATION
1. Litter is collected by placing trays about 75 em square with fly wire bottoms under the trees.
2. Collect litter regularly, especially if wind is likely to affect your collection. Sort litter into categories - leaf, stem, bark, flower parts and fruit and weigh it. It is conventional to dry it out at 100 C before weighing.
3. Branches that crash off in storms are unlikely to land on your trays so keep separate records of these.
4. You must be prepared to work over the summer holiday period to get good information on the eucalypts.
DESIGN OF EXPERIMENT
•,.._ \
1. How many replicate trays should be used?
2. Are you going to work in a garden situation or a native stand of eucalypts?
3. Are you going to bulk up your collections into weekly or monthly lots for presentation of results?
4. What environmental factors do you think are inducing leaf drop in the eucalypts and deciduous trees?
REFERENCES
Penfold, A.R. and Willis, J.L. (1961). The Eucalypts -Botany, Cultivation, ~
Chemistry and Utilization. (World Crop Books) (Leon and Hill : London).
Pryor, L.D. (1976). Biology of Eucalypts (Studies in Biology No. 61). (Edward Arnold) (General information on eucalypts rather than specifically good for this project in both the above books) .
Weier, T.E., Stocking, C.R. and Barbour, M.G. {1974). Botany - An Introduction to Plant Biology (5th ed.) (Wiley : New York) Chp. 10, 20.

II,'
47.
PROJECT 4-28 GROWTH OF ISOLATED ROOTS IN STERILE CULTURE
PROBLEM
Various parts of a plant are normally linked together - leaves, stems, roots, etc. but by growing the parts separately under sterile conditions it is possible to find out if each can grow independently, or whether it is dependent on material passed from other parts of the plant. You might like to try and get tomato roots to grow cut off from the top of the plant.
INFORMATION
1. Read Section G on sterile techniques at home.
2. Tomato cultivar Grosse Lisse is a good plant to start with as seeds germinate easily and isolated roots grow well.
3. Prepare sterile Petri dishes each with 3-4 pieces of sterile filter paper in the bottom or with a watch glass wrapped in filter paper (Project 4-18). Add enough sterile water to wet the paper.
4. Sterilize seed by placing in a sterile jar and adding about 100 mL undiluted Miltons and 1 small drop of detergent. Leave for 35-40 minutes swirling gently about once a minute. Pour off Miltons and shake the seeds in 3 lots of sterile water. This sounds easy but the seeds escape when you try to pour off the solutions. While you sterilize the seeds also sterilize in undiluted Miltons, the bowl of a small plastic tea strainer and use this to catch the seeds.
5. usin~ sterile forceps transfer good looking seeds to Petri dishes (about 15 per dish) , discard broken and abnormal ones . Seal edges with Gladwrap and place in the dark. They germinate within a week or so.
6. When roots are about 1~ em long, using sterile instruments cut off the lcm tip and place 1 in each flask of liquid medium. Take precautions when you do this - don't leave the flask or Petri dish wide open to the air and contamination.
7. The medium in which you grow the roots is made up of minerals which the plant normally get from the soil, vitamins and sugar which are normally transported from the leave.
8. You can make up your own medium using the recipe given by Butcher and Ingram but it is complicated to prepare. You can buy it in powder form from Medos Scientific Supplies 90 Goodwood Pde Rivervale, W.A. You require a Gibco medium - "Murashige and Skoog salts with organics including sugar but without agar". This is about $4.50 for 1 L.
9. Dispense medium 50 mL per 100 mL flask. and cover tops with alfoil. Sterilize in refrigerator until ready to use.
Insert cotton wool plugs in pressure cooker and store
10. All glassware should be Pyrex and well washed and rinsed in 2 changes of distilled water before use.

ons
f
and ;tt
~s
lges 1ek
e sh
ich
r
vale, :h for
)re
11.
48.
. h 0 Cultures grow best 1n t e dark at 25 C. Not all roots grow well. After 10 days select the best ones and transfer them to a sterile Petri dish with some of the liquid medium. Cut into pieces as shown in diagram below and subculture into new media. Pieces grow well for a number of subcultures.
DESIGN OF EXPERIMENT
1. Even to get the initial cultures growing well is an achievement but having mastered this you might like to investigate which tomato cultivars grow best, or to try using other plants.
2. You could also compare growth in the complete medium compared with growth in distilled water, or water with 20% sucrose. If you are preparing your own media you could investigate the effect of different levels of sucrose, or of leaving out the vitamins.
3. How are you going to compare growth in different treatments? Total root length? Number of laterals?
4. If you are unsuccessful you should try to analyse the reason (a), is your medium contaminated (i.e. gone milky - bacteria; with floating or submerged mats of fluffy stuff - fungi) (b), did you dry out the root and kill it while cutting it off and transferring it? (c), maybe the strain of tomato you are using doesn't grow well.
5. Consider the cost of this experiment before starting. Many of your cultures will be contaminated so you may use several litres of medium.
REFERENCES
Butcher, D.N. and Ingram, D.S. (1976). Plant Tissue Culture (Studies in Biology No. 65). (Edward Arnold : London).
deFossard, R.A. (1979) . Tissue Culture for Plant Propagators (University of New England Press : available from Department of Continuing Education, U.N.E. Armidale, N.S.W. 2351, $15).

49.
PROJECT 4-29 PLANT CALLUS CULTURE
PROBLEM
As a plan·t grows the cells in various organs mature and stop dividing. However, under certain conditions such as wounding, some cells can be stimulated to divide and form a mass of disorganised (= undifferentiated) cells called a callus. This can be used in studies of plant biochemistry, mutation, regeneration of shoots and roots from the callus and plant breeding. You might attempt to grow a callus from the stems or roots of some plants in sterile culture.
INFORMATION
1. Carrot root is a good tissue to start with. The method involves sterilizing the outside of the carrot then cutting out small pieces and placing them on a medium similar to that used for isolated roots (Project 4-28) but also containing hormones that cause cells, particularly parenchyma and cambial regions to start dividing.
2. Select a carrot about l-1~ em diam, home grown ones are best. Wash gently. CUt into 4 em segments discarding top and bottom. Place in sterile jar in undiluted Miltons for 30 mins or 5% sodium hypochlorite for 10 mins, swirling every minute or so. Using sterile forceps transfer to 3 changes of sterile water in sterile jars. Place on sterile Petri dish. Make a shallow cut about 1 em from each end then break (rather than cut) off the ends and discard. Cut out 5 em cubes from the cambium region and place these horizontally, half embedded in the agar medium.
3. Grow in dark at about 25°C. Within 2 weeks you should see a callus developing and at 6 weeks the callus should have developed to a size that you can cut up and subculture.
4. You may wish to examine the effects of leaving out the auxin or the cytokinin, or both, and of culturing the callus in the light.
5. You may wish to extend your experiments to other tissues. Choose material that is thick and solid and likely to be sterile inside e.g. potato, artichoke, turnip.
6. You can prepare your own medium using the recipe given in Butcher and Ingram or you can buy one that only needs the hormones added. Gibco media are supplied in W.A. by Medos Scientific Suppliers
Auxin
(90 Goodwood Parade, Rivervale) . A suitable medium for callus would be their "Murashige and Skoog salts with organics and agar". This is about $5 for enough for 1 litre. You will still need to add the hormones. Buying pure hormones is expensive but they are also available from Medos.
Buy 2,4-D(=2,4-dichlorophenoxyacetic acid). Make up a solution of 0.04 g in 100 mL by first dissolving the powder in a 2-3 mL of absolute alcohol then pouring in all the water at once. Store in the refrigerator and use 5 mL per 1 L of medium to give you a final concentration of 2 mgL-1 which is about 9 ~M.

g
50.
The cytokinin to use is Kinetin =(6-Fur furylaminopurine).
Make up a solution of 0.04 g in 100 mL by first dissolving the powder in 2-3 mL of lN HCl then pouring in the water all at once. Store in refrigerator. If it precipitates out try pressure cooking for 20 minutes. -tdd 5 mL to 1 L of medium to give you a final concentration of 2 mg L which is about 9 f.l M.
DESIGN OF EXPERIMENT
1. Why do you need to sterilize the outside of the carrot and use sterile instruments to cut out your segments?
2. How might you measure the growth of the callus.
3. Which cells in your segment do you think give rise to the callus cells?
4. What effect are the hormones in the medium having on the tissue?
5. Think about whether you can afford to do this project as while you get 100 tubes each of 10 ml media from the 1 L many of your initial cultures will be contaminated and you will use several litres of medium.
REFERENCES
As for Project 4-28
Weier, T.E., Stocking, C.R. and Barbour, M.G. {1974). Botany an Introduction of Plant Biology (5th ed.). {Wiley : New York). Chp. 20.

51.
PROJECT 5-l INVERTEBRATES OF SOIL SAMPLES
PROBLEM
How does the abundance and numbers of different types of invertebrates in the soil compare from different sites and/or at different times of the year.
INFORMATION
l.
2.
The conventional way to study soil invertebrates is to take a small sample (about 30 em sq2 ) and to place it in a "Tullgren" funnel.
Your sites could be along a transect from the beach inland, or from an area of burned bush to an unburned area or from a crop to a roadside verge with native vegetation etc.
3. Identify the animals as far as possible but don't worry if you can't get them down to species. It is the number and diversity that is of interest.
DESIGN OF EXPERIMENT
he~~~ ~u~
lfe
1. What other features of the soil might it be useful to measure?
2. How will you make comparable samples from areas with and without a surface litter?
3. At what time of day will you sample? consistent?
REFERENCES
Will you need to keep this
Cloudsley-Thompson, J.L. (1967). Microecology (Studies in Biology No 6) (Edward Arnold : London) •
Forests Dept. W.A. Fauna of the Forest Floor in the south west of Western Australia. (Information Sheet No. 27.)
Jackson, R.M. and Raw, F. (1973). Life in the soil. Edward Arnold: London. Nuffield Foundation (1966). Keys to small organisms in soil litter and
water troughs. (Longmans : London) Robinson, D.E., Ford-Robertson, J. deC. and Godbert, F.D. (1978). Organisms
2. (Longmans : Auckland.) Chp. 28. Springett, J.A. (1979). The Underground Movement- Soil. In Reche, H.F.
et al., ed. 'A Natural Legacy- Ecology in Australia'. (Pergamon Press, Sydney.)

a
) )
:ern
,ondon.
lnisms
F. ,ss,
52.
PROJECT 5-2 BENTHIC FAUNA OF FRESHWATER LAKES, PONDS OR RIVERS
PROBLEM
The composition and abundance of the animal communities of bodies of freshwater are determined by the physical characteristics of the body of water and of the bottom sediment. Although information about the bottom communities of Australian freshwater lakes and rivers is not very extensive, it is an important aspect of the freshwater ecosystem as these organisms provide food for fish and birds and can be an index of pollination.
INFORMATION
l. Animals may live on or in the bottom sediment, or attached to plants, logs or rocks on the bottom.
2. Wash collected sediment through a seive with large holes (chicken wire with ±1 em diam. holes). Collect the water and retain any shells or organisms that do not pass through the seive. Wash large nodes thoroughly then discard. Take water and sludge from your first wash and pour it through a finer seive (flywire) - collect the water, retain organisms. Finally put the water through a 1 rom seive (kitchen seive) and discard the water. Bulk organisms, fix them if you are not going to examine them straight away.
3. The actual names of the organisms are not important but you should be able to put them in major groups.
4. The fauna may change with time, as the season changes.
5. Bottom faunas vary considerably with depth and nature of sediment.
6. To estimate abundance, you will need to collect a known volume (or area) of sediment.
DESIGN OF EXPERIMENT
1. How will you collect bottom samples, transport them back to the lab., sort them, analyse them?
2. How often will you sample?
3. How will you estimate diversity?
4. Will you estimate relative abundance or total numbers, or total weight?
5. Do you want to study one locality intensively and get an idea of seasonal change or do you want to study a couple of contrasting places on fewer occasions?
REFERENCES
Bayley, I.A.E. and Williams, W.D. (1973). (Longroans : Melbourne) •
Inland waters and their Ecology.
Macan, T.T. (1974). Freshwater Ecology. 2nd Ed. (Especially Chp. 14.)
Williams, W.D. (1980). Australian Freshwater Life. Australian Inland Waters (Macmillan :Melbourne).
Longmans : London.
The Invertebrates of (2nd ed.)

53.
PROJECT 5-3 FOULING ORG&qiSMS (MARINE AND ESTUARINE)
PROBLEM
Some plant and animals species attach to aquatic structures where they may cause damage (bridge supports) or reduce efficiency (boat hulls) . A knowledge of the organisms involved and their seasonal abundance is important in preventing fouling.
INFORMATION
1. Plant and animal species may show preferences for the type of surface/ structure they colonize. They may attach to, or bore into, the structure.
2. They may vary with season. They are mostly sedentary and new individuals arrive after the breeding season.
3. The rate of growth between different species may vary.
4. The types of organisms attaching to surfaces varies with depth of water.
5. Abundance of organisms may be estimated on an area basis. should be classified to at least major groups.
They
DESIGN OF EXPERIMENT
1. How will you collect these organisms: will you sample existing structures or place out various types of "settling" boards, pipes, fibre glass sheets etc.
2. Sampling at depths greater than 1 m on existing structures may pose a problem; how can you overcome this?
3. How often will you sample?
4. Do you want to examine the organisms of one area, or compare the rate of growth of organisms in different areas.
5. Are you going to study only the animals, or the plants as well? (see Project 2-1 ) •
REFERENCES
Dakin, W.J. (1960). Australian sea shores. (Angus and Robertson Sydney.)

ace/
r'
;e
ney.)
54.
PROJECT 5-4 CULTURING NEMATODES
PROBLEM
From what kinds of places can you find nematodes? them.
Is it possible to culture
INFORMATION
1.
2.
3.
An easy method of culturing nematodes is to take a pinch of good garden soil and sprinkle it on a 1 em thick slice of washed, unpeeled potato. In about a month the potato should be covered with nematodes. Transfer the least contaminated portions to new slices,, or grow on agar medium.
A more sophisticated method utilizes a "Baermann funnel". First prepare a glass funnel with a collecting tube that holds about 5-6 mL, attached by a piece of rubber.~Select a tin foil dish that fits into the funnel. Cut out bottom of dish leaving a 1 em rim and replace it with a disc of wire mesh. Otherwise punch lots of holes in the tin foil. Line the tin foil dish with 2 Kleenex tissues and place 10-100 g soil on top. cover with a watch glass or petri dish lid. Fill the funnel with distilled water to a level just below the tin foil dish. The nematodes should wriggle through the Kleenex, fall in the water, and settle in the calle::t:irg tube. After about 3hrs clamp_rub;ber and remove collecting tube. Carefully pipette off all but 1 mL of liquid. You can examine a drop of this liquid on a slide with a coverslip to see what you have isolated, and/or you can culture the animals further to build up their numbers. To do this pour the 1 m~ from the collecting tube over a tap water agar plate (see Section G) • After about a week select out best non-contaminated areas for subculture onto new plates. These can be improved by sprinkling over the nematodes about ~ g dried green pea soup (buy pea (without ham) in tin foil packets - place packet in screw cap jar and sterilize in pressure cooker. Powder it before use if it goes hard).
~7
~ "tuM .. ~
~'t~ 1-...
•
. ·;M-.-rdiih , ,
4. A few drops of l% methylene blue added to the 1 ml of water and nematodes stains the cutin of the nematodes and makes it easier to distinguish the three types -
a) plant parasitic - have a spear in the head region; b) carnivorous (on other nematodes and soil organisms) - a
wide open cup-shaped structure in the head region; c) detritous or backsoil feeders - a narrow tube shaped
structure in the head region (pictures in Jackson and Raw) .
5. You may wish to use your cultures in the project on nematode trapping fungi (Project l-4).
6. The range of places in which you might search for nematodes is vast -farm soil, from rye grass toxicity areas, roof gutters, old dried bracket fungi, mud from dried rock pools, etc.
;::li: 11,111
I~!!

55.
DESIGN OF EXPERIMENT
1. How might you get a quantitative estimation of numbers and types of nematodes present in different samples?
2. Do you think there will be any difference between the types you collect in your collecting tube and what you find in your cultures some time later? How might you check on this?
3. You might like to look at the proportions of plant parasitic nematodes compared with free living ones in contrasting areas such as a market garden, potato farm or vegetable patch and native bush areas. How can you tell the difference between the 2 sorts?
REFERENCES
Croll, N.A. and Matthews, B. (1977). Biology of Nematodes (Blackie: London.) Crofton, H.D. (1968). Nematodes (Hutchinson : London.) Goodey, T. (revised- Goodey, J.B.) (1963). Soil and freshwater nematodes
(Methuen : London.) Jackson, R.M. and Raw, R. (1973). Life in Soil (Edward Arnold: London). Russel-Hunter, W.D. (1979). A life of invertebrates (Macmillan : New York.) Southey, J.F. (1970). Laboratory methods for work with plant and soil
nematodes. (London, Ministry of Agriculture, Fisheries and Food.)
4
5
6
7
f
ollect ime
des t
56.
PROJECT 6-l GARDEN SNAILS
PROBLEM
The estimation of the numbers in a population of a species is a fundamental problem of field biology, as is also the plotting of movements to deter.mine the area in which an individual lives. Attempt to estimate the population of the common garden snail Helix aspersa in a given area, and to follow the movements of marked individuals.
INFORMATION
L Snails can be marked with nail varnish - individual numbers or a code can be appiied.
2. You can estimate the population size by making and releasing all the snails you can find on one night. Then on a second occasion catch all you can find and record how many are marked. Apply the following formula
A Ml M2 A N = N = estimate of population
Y2 size M1 = number caught and marked
on the first occasion M2 = number caught on the
second occasion r 2 = the number that were
marked in the second catch.
3. Snails tend to be nocturnally active, and seek cover during the day. They will make use of shelter provided - a flat board or sheet of metal placed on the ground will attract snails.
DESIGN OF EXPERIMENT
1. How will you collect snails - over what area?
2. Where will you release them?
3. What marking code will you use?
4. How will you estimate movements?
5. How will you allow for, or measure, immigration or emigration?
6. When and how often will you look for marked snails?
7. Your estimate of the size of the population will only be accurate if your marked snails have enough time to mingle with all the others. How long will you wait?
REFERENCES
Begon, M. (1978). Investigating Animal Abundance. Captive-Recapture for Biologists (Edward Arnold : London) (horendous mathematics but with useful general practicalities section) ·
Richards, J. (1974). The Hidden Country (Carousel Books: Lond) {Chap. 9) Robinson, D.E., Ford-Robertson, J deC, Godbert, F.D. (1978). Organisms. 1.
(Read Education : Wellington) Chp 10. · Southwood, T.R.E. (1966). Ecological Methods (Methuen : London).
1111,

PROJECT 7-1
PROBLEM
57.
NUMBER OF SPECIES AND DENSITY OF ARTHROPODS IN DIFFERENT HABITATS
As explained in Project 11-2, it is thought that the more diverse the habitat, the greater the number of species that will live there. You can find out if this is true for Arthropod communitie.s (i.e. insects and spiders) that live in nearby habitats.
INFORMATION
1. Choose contrasting sites that seem to you rather different, one with a few uniform sorts of plants and one that is diverse.
2. You will have to sample both areas using a standard method. Try walking through the area on ± a straight line for a set period of time, sweeping the bushes on either side with an insect net (38 em diam.) as you go along. Do about 100 sweeps in 100m. Sweep bushes between 20-200 em high. You may think that this won't catch anything
but try it.
3. Drop your animals into preservative and identify them at least to order. Actual species names are not necessary for you to answer the probelm about diversity and abundance. Simply name them ABC etc.
4. You might like to extend your sampling to include pit fall traps for
the surface living insects, or using umbrellas held upside down to catch animals that fall from bushes and trees when they are shaken. Don't get carried away with your sampling before you find out how long the identification is going to take.
DESIGN OF EXPERIMENT
1. How will your sampling take into account that arthropods activity varies with time of day and weather conditions?
2. How many sample sweeps will you take through each habitat? you pool the animals or keep each "run" separate?
Will
3. How are you going to sample the vegetation and describe the diversity of vegetation in each habitat?
4. How are you going to express "diversity" of the arthropods?
REFERENCES
Abbot, I. (1976). Comparisons of habitat structure and plant, arthropod and diversity between mainland and island sites near Perth, Western Australia. Aust. J. Ecology 1 : 275-80.
Cox, C.B. Healey, I.N.Moore, P.D. (1976) Biogeography (Blackwell : Oxford) C'.S.T .R.O. (1974). Insects of Australia. Melbourne University Press, (heavy Gregg, J. (1':)77). Science Field Guides - Insects (Reed Education) Hughes, R.D. (1974). Living Insects. Collins , Sydney.

i
s ing
r
fang
ty
and .lia.
d) avy
58.
PROJECT 7-2 INSECT LIFE IN ROTTING SEAWEED
PROBLEM
Decaying seaweed provides a home for a small range of insects that have the unusual adaptation of being able to survive exposure to salt water, and which sometimes build to such large numbers that they are most annoying. You might like to examine the "wrack insect fauna" of your local beaches. A knowledge of insect life cycles is necessary before effective control measures can be introduced.
INFORMATION
1. Insects of groups Diptera, Coleoptera,Hemiptera are the most likely to be found. Identification to family or even genus may sometimes be possible because of the limited number of species likely to be present.
2. You could try to separate out larvae by washing and tearing apart rotting seaweed in a tray and exarnining the debris. (A dissecting microscope may be useful) . Others might be collected using a tullgren funnel (See Project 5-l) .
3. Small delicate insects and insect larvae can be mounted for microscopic examination as follows : Drop into 70% alcohol. Mount in a drop of Berlese's fluid, cover and seal with clear nail varnish. Ask your teacher to help you make up Berlese's fluid.
Berlese's fluid Acetic acid (glacial) Chloral hydrate Glucose syrup Gum arabic Distilled water
5 mt 40-160 g 10 mL (made by dissolving Sg glucose in 5 mL water) 15 g 20 mL
1. Dissolve gum arabic in distilled water. 2. Add glucose syrup 3. Add chloral hydrate to saturation 4. Heat slowly and stir gently 5. Filter through a small quantity of glass wool.
DESIGN OF EXPERIMENT
1. How are you going to distinguish the insects from things like nematodes annelids and crustacea that are likely to be present?
2. How are you going to link the various larvae with the adult forrr,s?
3.
4.
Are you going to simply score presence/absence or are you going to score abundance?
Will you look at marine seaweed drift beds only, or also compare these with drifts of sea grass, or drifts of things like Cladophora on estuarine beaches?
REFERENCES
C.S.I.R.O. (1970). Insects of Australia (Melbourne University Press) pg. 113. Marks, E.N. (1971) Australian Marine insec·ts. Australian Natural History 17 (4)
134-8 (note these are marine rat.her than wrack fauna)

59.
PROJECT 7 ·-3 BURROWING BEES AND WASPS
PROBLEM
Many native Australian bees and wasps are solitary and nest in burrows in soft wood, pithy stems, sand, sandstone or even mortar between bricks. In America (and sometimes in New Zealand and Queensland) a burrowing solitary bee, the leaf cutter bee is cultivated to pollinate alfalfa as these bees will happily use artificial homes provided for them. In W.A. there is an ing range of carpenter bees, mason wasps, crickets e·tc. that might nest in artificial homes where it could be easy for you to study their life history.
INFORMATION
1. Insects are most active in spring and summer and artificial homes should be placed in the bush at this time. Place these, protected from rain, in trees such as sheoaks, near blackboys, under bushes etc.
2. Pieces of balsa wood (10 em cube) would be suitable. Drill holes 2 em - 7 em deep and about 5-6 mm diam. (= 7/32" drill bit). A range of hole depths and sizes should be tried. Blocks of polystyrene foam can be used but are not as good as they are poorly ventilated. Boxes or cylinders packed with paper drinking straws (10 em long) are similar to what is used commercially for the leaf cutting bee. Plastic ones are good as you can see through them, but are poorly ventillated and sometimes too small in diameter.
3. watch out for spiders, they might set up a home too!
4. The sort of information you should try to collect includes - does the insect enlarge the hole provided? Line it with leaf pieces, mud or resin? Lay one or several eggs? Construct one or several chambers? What foodstuff does it provide? How is the entrance sealed? What is the timing of the life cycle stages?
5. Watch out for insect parasites on the developing larvae and pupae.
6. Nobody seems to have tried m~cing artificial nests for our local species so you might get disappointing results or find out something new and interesting.
DESIGN OF EXPERIMENT
1. Are you going to also make observations on the insects natural nesting sites? (Hopefully without damaging the native vegetation unnecessarily).
2. You might like to experiment to see if an insect is capable of "backtracking" when building a nest - i.e. if you remove the stored food will the insect keep blindly to the sequence - lay egg - seal entrance etc. or will it repair the damage?
REFERENCES Aston, 0 (1975) Bee and Wasp (Blackwell : Oxford) Evans, H.E. and Matthews, R.W. (1975). The sand wasps of Australia. ScientifiC
American 233 : 108-155. Lorenz, K.Z. (1971) King Solomons Ring (Methuen : London). McKeown, K.C. (1944). Insect Wonders of Australia (Angus and Robertson SydneY McKeown, K.C. (1945) c Australian Insects. (Royal Zoological Society of NSW) ChP
Stark, A.H. (1975). Bees' role in lucerne pollination. New Zealand Journal of Agriculture 131 (1): 27, 29, 57,59 (easy to read)

s
In
in ry.
should rain,
, the /Or bers? hat is
lng
sting >sarily) ·
!d
Lentific
60.
PROJECT 7-4 BEE BEHAVIOUR
PROBLEM
Bees can be trained to recognize a particular scent, colour or shape. While it is fascinating to repeat some of Von Frisch's experiments it is perhaps more interesting to use native Australian flowers in similar experiments. For example, you could use flowers with a good nectar cup like eucalypts. Dry out the existing nectar and add water or sugar solutions to fill the cups. Teach the bees that in a set of flowers, say, the pink one has sugar, the white ones water. Will the bees recognise the pink flower if its position in the set is shifted? Can they distinguish between pink, yellow and red flowers of similar size? How well do they remember size if flowers of the same colour but different sizes are used? You might use Geraldton wax or ti-tree flowers in your experiments or any bee pollinated plants.
INFORMATION
1. Training bees takes considerable patience and they are more likely to go to a "feeding table" when a honey flow is slackening. Start early in the morning and help them find the feeding table by a trail of tiny drops of sugar solution leading from the hive entrance. Start with table about 2m from hive entrance and gradually move the table further away until you are 10 m from the hive.
2. Carniolan bees are easier to train than Italian bees.
3. Bees can be marked while feeding at the table with tiny spots of paint.
4. Approach the hive carefully, do not obstruct the flight path in front of the hive, or the bees may get upset.
IMPORTANT NOTE - See project 7-5 for advice on stings.
DESIGN OF EXPERIMENT
1. How will you know when bees are trained and when you can start shifting the experimental material?
2. How will you find out if the flowers that you are using are normally pollinated by bees?
REFERENCES
earthy, J.D. (1971). An Introduction to the Behaviour of Invertebrates (Hafner : New York)
Chapman, R.F. (1969). The Insects, structure and function (University Press : London) .
Free, J.B. (1977). The Social Organization of Honeybees. (Studies in Biology No. 81). (Edward Arnold : London).
Proctor, J. and S (1978) Natures' Use of Colour in Plants and their Flowers (Peter Lowe : London) .
Von Frisch, R. (1967). The Dance Language and Orientation of Bees. (Oxford University Press : London).

61.
PROJECT 7-5 MEASURE~ffiNT OF HONEY FLOW
PROBLEM
To measure the daily collection of pollen and nectar by bees and to correlate this with the flowering time of local plants.
INFORMATION
1. Mount a hive on a platform scale and weigh it at least each morning and evening. This will indicate daily honey flow. On some days take measurements at short intervals throughout the day for information on the timing of the workers leaving for the field and their return loaded with supplies.
2. A pollen collector to strip pollen balls from returning bees will allow an estimate of how much of the weight increase is from nectar rather than pollen. Examination of the pollen will indicate the main plants being worked.
3. Choose a very vigorous hive for your experiment, the gain per day can be between ~-10 kg.
IMPORTANT NOTE Do not attempt any project involving bees unless you know you are not allergic to stings. If during the project your reaction appears more severe than previously, discontinue at once. In all cases it is wise to wear a veil and gloves.
DESIGN OF EXPERIMENT
Think about the following before star-ting.
l. Where will you get local weather information to correlate with the bees activity?
2. You might find the hive's weight decreases overnight -how would you explain this?
3. How will you select the most likely local flowers to be worked by the bees for which to record flowering time, pollen shape and size etc?
REFERENCES
Crane, E (1976). Honey -A Comprehensive Survey (Morrison & Gibb : London) Blake, S.T. and Roff, C. (1972). The Honey Flora of Queensland (Department of
Primary Industries : Queensland) Smith, F.G. (1969). Honey Plants in Western Australia (W.A. Department of
Agriculture Bulletin No. 3618). General information on Beekeeping - not especially good for this project. Smith, F.G. (1966). The Hive (D epartment of Agriculture, South Perth,
Bulletin 3464) . N.S.W. Department of Agriculture, Division of Animal Industry (1966) "Bees
and Honey". Root, A. I. (1966). The ABC and XYZ of Bee Culture (Root Co : Ohio U.S.A.)

s
'OU
on) ent of
of
t.
ees
. )
62.
PROJ'ECT 7-6 LANDING SITES OF FLIES
PROBLEM
Flies seem to land more thickly on some people's backs than others. Do they smell nicer (to the flies!) or is it maybe because they are wearing clothes of a certain colour? If the smell is attractive enough will the
flies worry about colours?
INFORMATION
1. To standardize your experiment you will need some cooperative friends to have a swim then to sunbake and work up a nice sweat. To compare between people simply count numbers of flies in a marked area on their
backs at set times.
2. To compare between colours lay over their backs a patchwork of coloured squares of thin cotton materal, 4 primaries and black and white for a start. Record the number of landings in each square over a set period of time. Also use a patchwork of colours on the ground rather than on
a person.
3. Many men sweat more than women so keep the records for your individuals
separate.
4. If you can't talk your friends into it use a horse, cow or a sleeping
dog.
5. To see if they worry about colour when there is a fantastic smell about try putting rotten liver or damp chook manure in containers and cover the tops with your squares of colour.
DESIGN OF EXPERIMENT
1. How will you make sure all the bits of cloth smell the same at the
beginning of the experiment?
2. How many repeat scorings will you do?
3. For your between person comparison it may be necessary to use a statistical test. Consult your maths teacher.
4. How will you bribe your friends not to use deodorant, suntan lotion
or fly repellent?
5. Will the time of day and temperature affect your results?
REFERENCES earthy, J.D. (1971). Introduction to the behaviour of invertebrates
(Hafner : New York) . Chapman, R.F. (1969). The Insectsr Structure and Function (University
Press : London) . Dethier, V.G. (1962). To Know a Fly (Holden Day : San Francisco) .

63.
PROJECT 7-7 TERRITORIALITY IN DRAGONFLIES AND DAMSELFLIES
PROBLEM
To investigate whether dragonflies and damselflies occupy individual territories, and if so, to establish their size and the insects behaviour in defending them.
INFORMATION
1. Dragonflies are very hard to catch and mark without damaging their fragile wings and bodies. Net from behind and below. They are easier to catch early in the morning or late in the evening when the air is cooler. Nail polish as a small strip on a wing is a convenient way of marking them.
2. You will need to use binoculars and lots of patience to observe their behaviour in the field. The main period of activity is September to March.
3. Dragonflies can tell which are males and which are females and it will be important for you to be able to do so too.
4. To introduce an intruder of the same or different species and/or sex into a patrolled territory try dangling a dead fly on a fine fishing line from a rod, and observe the behaviour of the patrolling fly.
DESIGN OF EXPERIMENT
1. How will you map the insects territory? vary from time to time?
Does the size and shape
2. What sorts of stimuli will you use to observe the insects behaviour in defending its territory?
3. How will you check whether environmental factors like temperature affect the insects behaviour?
REFERENCES (See also references under Project 11-3, 12-5)
earthy, J.D. (1971). Introduction to the behaviour of invertebrates (Hafner New York) .
Corbet, P.S. (1962). A Biology of Dragonflies (Witherby : London). Fraser, F.C. (1960). A Handbook of the Dragonflies of Australia with keys
identification of all species. (Royal Zoological Society N.S.W. : Sydney) Imms, A.O. (1971). Insect Natural History. 3rd ed. Collins : London. Simon, H. (1973). Dragonflies (Muller : London) Watson, J.A.L. (1962). The Dragonflies (Odonata) of South-western Australia.
W. Australian Naturalist 7 : 1-71 (very good for local material) (Also as WA Naturalist Club Handbook No. 7).
Wigglesworth, Sir. V.B. (1964). The life of insects. Universe Books : New. York.

easier is
r
:l.fner
ceys for 1ney)
ralia. 30
: New
64.
PROJECT 7-8 JARRAH LEAF MINER
PROBLEM
Larvae of the jarrah leaf miner moth Perthida glyphopa do a lot of damage to the leaves of jarrah and flooded gum both from their tunnelling and from the oval holes they cut out of the leaves. About August (for Perth area) the larvae fall to the ground in the oval pieces they cut from the leaves (called cells) and bury themselves. They remain as larvae until the end of February when they pupate and the new adults emerge. The problem is, what is the stimulus that induces the pupation - soil temperature and moisture seem worth testing, also day length. In addition you might determine the survival rate of buried insects under different conditions.
INFORMATION
1. Larvae can be collected by placing sheets of plastic under infected trees in August, cells fall out at night.
2. Soil moisture can be controlled by lining pots with plastic bags and weighing them full of dry soil. Add set volumes of water and re-weigh pots. Top up with more water at ± daily intervals to keep pots at the desired weight.
3. Use soil similar to that under the trees but from an area not likely to be already inhabited with buried miners, preferably sterilize
4.
soil with heat before starting. Place the desired number of minersin-cells 'on the surface of each pot and allow them to bury themselves. Shining a strong light on the pots causes them to bury themselves.
If you get mites in your cultures they will kill the larvae. soil with a miticide (Kelthane = Dicofol)
Treat
DESIGN OF EXPERIMENT
1. How will you prevent escape of your hatched adults?
2. How will you keep predatory insects out of your experimental plots?
3. Do you think it important to have a layer of litter on the soil surface? Will you keep insects in sun or shade?
REFERENCES
Batini, F.E. The Jarrah Leaf Miner (W.A. Forests Department Information Sheet No. 8.
Ebling, J. and Highnam, K.C. (1969). Chemical Communication (Studies in Biology No. 19). Chp 7.
Wallace, M.M.H. (1970). The biology of the jarrah leaf miner,Perthida glyphora Common (Lepidoptera : incurvariidae). Australian Journal of Zoology 18 91-104.

65.
PROJEC'l' 7-9 PARP.SITES OF JARRAH LEAF MINERS
PROBLEM
Jarrah leaf miners, parasites on jarrah and flooded gum are themselves parasitized by wasps. In turn, these wasps may also be parasitized by wasps (this is called hyperparasitism). You might like to study the interactions between these insects and work out the frequency of occurrence, the timing of the parasites life cycle and the seasonal timing of parasitism and hyperparasitism.
INFORMATION
1. Wasps parasitize the tunnelling larvae which can be found about July/ August (in the Perth area). The wasp larvae eat the miners. Leaves with insects can be kept alive in the laboratory for ease of examination and for easy capture of the parasite adults. A dissecting microscope or hand lens will be necessary for observations.
2. Hyperparasitism is when you find other wasp larvae eating wasp larvae -again material can be easily studied in the laboratory.
3. A further wasp parasitizes the larvae in their cells in the ground, particularly those that have not buried very deeply. This is more difficult to study as you have to find parasitized material buried in the field.
DESIGN OF EXPERIMENT
1. What environmental factors might control the timing of the life cycle stages in the field? How will you approximate these conditions in the material you are studying indoors?
2. How will you get an estimate of frequency of occurrence of parasitism and hyperparasitism.
3. What factors do you think control the frequency of parasitism and hyperparasitism?
REFERENCES
C.S.I.R.O. (1970). The Insects of Australia (Melbourne University Press) pgs 124-7.
Evans, H.E. (1963). Predatory Wasps In Readings from Scientific American "The Insects" ed. Eisner, T. and E.O. Wilson.
Hughes, R.D. (1975). Living Insects (Collins : Sydney) Klots, A.B. and Klots, E.B. (1959). Living Insects of the World (Hamish
Hamilton : London).

s
' i.Ycle !in
Ltism I
ss)
·ican
tish I
66.
PROJECT 7-10 SPITFIRES
PROBLEM
A mass of sawfly larvae present a "ferocious" sight and appears to be a confusing mess. Are the sawflies confused? Do they regroup at random after feeding amd move at random to new feeding places or do they have leaders and followers etc. Their relations in the Hymenoptera - bees and ants, have a complex social structure. When do they decide to stop feeding and rest?
INFORMATION
1. It will be necessary to mark the larvae so that you can recognize individuals and if necessary break them up into groups of manageable size. Mark with small colour spots of nail varnish/paint etc.
2. Either leave them in a tree of suitable height or provide them with branches "in captivity".
3. They eat a lot so don't put them on your parents prize specimen flowering gum.
4. They eat and move around at night so be prepared to work at night or to try to experimentally reverse their day/night cycle for your convenience.
5.
6.
They have a great reputation for exuding poisonous fluid but this is mainly to protect them from parasitic wasps and birds. It may be a good idea to wear glasses or swimming goggles if you're going to make them spitting mad.
When fully grown, they move to the bottom of the tree and pupate in the ground. Consequently, masses of insects found on the ground may be either moving to another tree or ready to pupate in which case they will be uninterested in helping in your experiment.
DESIGN OF EXPERIMENT
1.
2.
3.
4.
What are you going to do if they shed their skins (and their markings) half way through your experiment?
How are you going to record the "structure" of the mass?
Are you going to make additional observations like preferred food source, amount eaten per day, distance travelled etc.?
What environmental factor do you think causes them to regroup? Will they follow a pattern of dispersal and regrouping in constant light or constant dark?
5. How could you design an experiment to find out how they find one another -does sight, gravity, smell, have effect?
REFERENCES
Hughes, R.D. (1975). Living Insects (Collins : Sydney) Klots, A.B. and Klots E.B. (1959) Living Insects of the World (Hamish Hamilton: Lon McKeown, K. (1944). Insect wonders of Australia (Angus & Robertson : Sydney)
McKeown, K. (1945) . Australian Insects - an introductory Handbook. (Royal Zoological Society of N.S.W. : Sydney)
Selsam, M.E. (1967). How Animals Tell the Time (William Clowes : London)
.11':
111'1
1!!'':1
l!l:i

67.
PROJECT 7-11 TIME OF HATCHING OF SILKWORM EGGS
PROBLEM
Australian "pet" silkworms seem to go through one generation each year i.e. they hatch in spring, pupate in early summer, the moths emerge and lay eggs in summer and the eggs "rest" until the next spring. According to books, silkworms from temperate regions like China have the following cycle Eggs hatch early spring and caterpillars pupate in early summer, moths emerge and lay eggs mid-summer. These hatch straight away (9-12 days) and a second generation of caterpillars grow, pupate, moths emerge fix and lay eggs in autumn which rest until the next spring.
Thus, ·there are two types of eggs and it is thought that the day length under which the caterpillars are reared determines whether the eggs the adults lay will hatch immediately or go into a "rest" phase.
The problem is - Are Australian pet silkworms really different and maybe from tropical rather than temperate regions, or is their behaviour due to the fact that most kids keep the caterpillars in dark shoe boxes etc.?
INFORMATION
1. You should aim to get about 20 surviving caterpillars under each of your experimental day length conditions. Handle newly hatched caterpillars with a paint brush to transfer them to new leaves at least daily (In China they are fed 4-6 times daily with fresh leaves) Early deaths are high so start off with 50 or more per treatment and thin them later.
2. From hatching keep the caterpillars under different conditions -continuous light, natural daylength and continual dark are the minimum number of treatments. Transparent shirt boxes are good containers.
3. This is not a good project unless you can get masses of mulberry leaves as they eat an awful lot. Leaves can be stored in a sealed plastic bag in the refrigerator for 3-4 days.
4. The adults hatch, mate, lay eggs and die, they do not feed.
DESIGN OF EXPERIMENT
1. Where will you place your experiment so that the caterpillars get different day lengths but the same temperature, exposure to noise and so on?
2. How will you compare results between treatments if you get differen~ numbers of ~ and ~ moths and different numbers of eggs laid in each treatment?
REFERENCES
Ebling, J. and Highnam, K.C. (1969). Chemical Communication (Studies in Biology No. 19) Chp 7.
Selsam, M.E. (1967). How Animals Tell the time (William Clowes : London) Wigglesworth, V (1974). Insect Hormones (Oxford Biology Readers No. 70)
(Oxford U niversity Press).

.e.
the cle.
and ay
~ s)
.mum
aves c
t-_
68.
PROJECT 7-12 HABITAT PREFERENCE OF BLOWFLIES
PROBLEM
Both native and introduced sr>ccies of blowflies occur in W.A. In any area (habitat) a variety of food sources are available for breeding.and to introduce control methods it is necessary to know which species use each sort of food. Do the native and introduced species differ? i.e. one preferring food or habitats created by European man (an introduced species) and his animals? You might compare the blowfly populations in a bushland area and an urban area.
INFORMATION
1. Blowflies require a protein meal for their ovaries to mature, and the larvae feed on animal carcasses and dung in bush areas. In urban areas man has made other food sources available, e.g. rubbish bins.
2. It seems possible that the larvae of introduced species can breed using smaller amounts of food than the native ones.
3. Male blowflies feed on nectar and other sugary liquids.
4. Flies can be hand netted or trapped. A trap design is shown. Use large opaque plastic bottles, margarine or icecream containers, plastic
buckets, etc.
____ ..,... ______ ::. ...... mesh
,. .. -1.escape hole
,.,- ,... an mesh cone
hole-·;. .. ··jgauze over '-..;a F -z bait
......
water to deter ants /
5. To make a quantitative comparison over the various seasons a constant effort under similar conditions should be used.
DESIGN OF EXPERIMENT
1. What will you use as bait? Will the size and age of the bait have an effect?
2. How will weather affect fly activity?
REFERENCES
Hughes, R.D. (1975). Living Insects (Collins : Sydney) Monzu, N. (1978). Some basic facts about primary blowflies. Journal
of the WA Department of Agriculture 19 No. 3.
!·I

69.
REFERENCES (Contd)
Monzu, N. (1979). Fly strike in sheep. Journal of the W.A. Department of Agriculture 20 No. 2.
Oldroyd, H. (1964). The Natural History of Flies. (William Clowes :London).
Southwood, T.R.E. (1978). Ecological Methods (Chapman and Hall : London).

t
on).
70.
PROJECT 8-1 DISTRIBUTION AND BEHAVIOUR OF WOLF SPIDERS
PROBLEM
To investigate the~ distribution of wolf spider burrows make observations on some aspects of the spider's behaviour and ecology.
INFORMATION
1. Wolf spiders hunt on the ground at night, they do not make webs but live in burrows which often have a wall of twigs or other material around the opening.
2. It is possible to keep spiders in aquaria in the lab, and you may like to investigate burrowing behaviour.
3. A solution of plaster of Paris poured down the burrow will give you a mould of its shape and usually traps its unfortunate occupant at the bottom.
4. A small mirror can be used to check if a spider is at home.
5. The spiders can be spotted at night by the reflections from their eyes in a torch beam.
DESIGN OF EXPERIMENT
There are some initial things to find out about your local wolf spiders before you proceed i.e.
1. Is more than one species in your area and do Q's and ~·s look different?
2. How will you describe things like a) the type of topography, substrate and vegetation with which wolf spiders occur and b) the size, shape and construction of their burrows?
3. How will you measure the density and distribution of the burrows?
4. How will you record the times of activity of the spiders, their foraging range and their food preferences?
REFERENCES
Barrington, E.J.W. (1967). Invertebrate structure and Function. Nelson : London.
Barnes, R.D. (1974). Invertebrate zoology. 3rd Edition. W.B. Saunders Philadelphia.
Main, B.Y. (1976). Spiders. Australian Naturalist Library, Collins : London.

PROJECT 9-l
PROBLEM
71.
ECOLOGICAL IMPACT OF THE INTRODUCTION OF THE MOSQUITOFISH (GAMBUSIA AFFINIS)
The mosquitofish, an exotic species, was first introduced into Australia in 1925 and into Western Australia in 1934 in an effort to reduce the mosquito nuisance by some form of biological control. Since there was no data relating to the impact that the introduction of these fish would have in Australian rivers and lakes, the attempt was made in ignorance and is considered to have failed. Many authors are of the opinion that Gambusia have had little or no effect in controlling mosquitoes but indeed, due to its voracious feeding habits, the mosquitofish has probably altered the natural ecosystems once found in our lakes and rivers. You cm1ld investigate the ecology of a nearby lake to ascertain the impact that the mosquitofish has had there.
INFORMATION
1. Gambusia are found in fresh and brackish waters throughout the southwest of Western Australia and can tolerate salinities up to about 20 parts per thousand (
0/oo) (sea water ~ 35.5°/oo) and a wide range of
water temperatures and oxygen concentrations. The species lives in and around aquatic vegetation and is most abundant in still or gently flowing waters. Gambusia does not like low winter temp~ratures and does not inhabit fast flowing waters.
2. The male and female look different - the female grows to about 60 mm, the male only 35 mm.
3. Fertilization of the eggs is internal and the female gives birth to 30-50 live young during the warmer months. The animal breeds several times during a season and the young become mature in approximately 2 months. Populations of Gambusia may thus increase rapidly.
4. The name mosquitofish would seem to imply that the species dines solely on mosquitoes. This is not true as Gambusia feeds on a wide range of aquatic invertebrates and their larvae including mosquitoes. Gut analysis will reveal remains of animals that can be matched up with the living invertebrates in the water.
5. You should try and work out the food preference of the fish from different areas and possibly check this experimentally. If there is is difference between say Lake A and Lake B, is it because one sort of food is not present in Lake B as it has already been eaten out?
DESIGN OF EXPERIMENT
1. How will you collect samples of Gambusia that are representative of the population you are studying?
2. How will you establish what aquatic invertebrates are present in the lake?l
3. How will you know if there is a difference between the feeding habits of adult males and females (and juveniles which will be the most difficult to study)?
4. Do you consider it necessary to know about the population structure and growth of Gambusia in your lake?
E

TO FISH
0
eral
ing
olely e of
h the
is t of
f the
he lake?
its of icult
:! and
5.
72.
How will you establish small "natural ecosystems" representative of the area you are working in and stock it with a range of food. How many fish will you add?
6. How will you study the effect of Gambusia on your "natural ecosystems" and compare it to the lake situation? Is there a need for experimental
controls without fish?
REFERENCES (See also references under Project 13-3)
Andrews, W.A. (1972). Freshwater Ecology (Prentice Hall New Jersey)
Bagenal, T.B. (Ed.) (1978) I.B.P. Handbook No. 3. Methods for Assessment of Fish Production in Freshwaters. (Third Edition) (Blackwell : Oxford).
Child, J. (1969). Australian Pond and Stream Life (Lansdowne : Melbourne)
Lake, J.S. (1971). Freshwater Fishes and Rivers of Australia (Nelson : Melbourne)
McDowall, R.M. (Ed.) (1980). Freshwater Fishes of South-Eastern Australia (Reed : Sydney)
Mees, G.F. (1977). The status of Gambusia affinis (Baird and Girard) in South-Western Australia. Records of the Western Australian Museum 6 : 27-31.
Weatherley, A.H. (Ed.) (1967). Australian Inland Waters and their Fauna (Australian National University Press : Canberra) .
Williams, W.D. (1980). Australian Freshwater Life. Australian Inland Waters (MacMillan : Melbourne)
The Invertebrates of (2nd ed.).

73.
PROJECT 9-2 SCHOOLING BEHAVIOUR OF FISH
PROBLEM
Many small fish show a tendency to school but it is not always clear whether they are responding to each other or to a common external factor. You can test some of the factors that influence schooling using an aquarium.
INFORMATION
1. Place 2 jars in an aquarium and set up your alternative choices in them (e.g. one large and one small group). Place your test fish in the middle of the tank and observe its behaviour.
010 oc c:::>r.t
0.,
d 9'0 ~
~
':::::::::::"-
2. Although this sort of work has mainly been done using freshwater "tropical" fish, it is equally feasible to use coldwater, estuarine or marine fish - as long as they are small enough.
DESIGN OF EXPERIMENT
1. How will you make sure that the fish is responding to the two alternatives and does not just prefer one end of the tank to the other?
2. How will you measure the response of the fish?
3. Does the test fish prefer a large school or a small one?
4. Does the test fish prefer its own species to another species?
5. Does the test fish prefer a school of larger fish to one consisting of smaller fish?
6. Will you use the same test fish for all trials?
7. How many times will you repeat each set of alternatives?
REFERENCES
Shaw, E. (1962). The schooling of fishes. Scientific American 202 (6) 128-38. Offprint 124.

in
or
~rn-
lg
74.
PROJECT 10-1 POPULATION STUDY OF A LIZARD
PROBLEM
To study the population biology of a lizard you would need to know when the animal reproduces - (time of egg laying, time of hatching), how fast they grow, where the animals live and what is its home range, what do they eat and so on.
INFORMATION
1. To work on lizards you need a permit from Fisheries and Wildlife. Your teacher should write to the Director of Fisheries and Wildlife using school letterhead paper, outlining your project (see Section F).
2. You should select an accessible population of a small lizard (a few acres of vacant land in a suburb, or even the school grounds) and be prepared to study them over the summer.
3. To study home range and population size use pit fall traps (i.e. jam jars or plastic pipe stuck in the ground) set for 2 days each week would be suitable. (N.B. Always cover traps when not in use). Refer to Project 6-1 for information on how to calculate population size.
4. Captured lizards should be marked with paint. Remark when you see the lizard start to shed its skin.
5. Captured animals· should be weighed and measured. Watch for newly hatched lizards towards the end of summer. Recaptures later in the year will give growth data.
6. Other observations should be made on things like the time of day the animals are active, how they behave, what they eat (look at their faeces under a dissecting microscope, what sort of insects are present?)
7. Lizard identification is difficult and you may need to go to a museum for help. Be careful when emptying traps that you haven't caught any snakes.
DESIGN OF PROJECT
l. How will you lay out the traps to give you an estimate of the home range?
2. Think carefully about the best measurements to take as many lizards drop their tails.
3. How are you going to weigh a lively lizard? good balance when the school is closed?
REFERENCES
Can you get to use a
Avery, R.A. No. 109)
(1979). Lizards - A study in Thermoregulation (Studies in Biology (Edward Arnold : London) .
Reptile list in Section c.

75.
PROJECT 10-2 BIOLOGY OF TORTOISES IN SUBURBAN LAKES
PROBLEM
Many permanent freshwater suburban lakes support populations of the long-necked tortoise Chelodina oblonga. They are most often seen around June when they venture out to lay their eggs, and they also spend a considerable time basking on logs during the warmer months. Apart from this they are shy and retiring animals and little is known about their ecology and behaviour.
You could make observations on where they lay their eggs or investigate their patterns of behaviour. How long do they spend basking each day? Can you measure the activity of the turtles in a small swamp by counting the number of heads you see coming up for air? Do they take food from the edge or surfa~ of the water?
INFORMATION
1. For egg laying projects a lot of night work will be involved and it will be wet and cold. Explain to the local residents what you are doing in their backyards at night with a torch or you might find yourself explaining it to the police.
2. Many animals get killed on the road at night (make sure you are not one of them) . If you find a recently killed female it may be possible to dissect out the eggs, count them and incubate them for studies on the growth rate of the embryos. Hatching time varies from 78-360 days in different species
]
3. You may not keep, trap or mark tortoises without permission of the Fisheries ? and Wildlife, but there are many studies that involve detailed regular observations that will not disturb the animals. You should be able to identify individuals from marks or particular patterns of algae on their
4. Tortoises like sardines.
DESIGN OF EXPERIMENT
1. What environmental factors do you think are important in regulating the adults behaviour and in the hatching of the eggs?
2. How might you map the area surrounding the lake to show the sites of egg deposition?
3. How will you observe the turtles behaviour without your presence disturbing
REFERENCES
Nicholson, D. (1975). Observations on the breeding of the long necked tortoise, Chelodina oblonga. West Australian Naturalist 13 : 42-43.
Reptile list in Section C.
4
5
1
2
3

r surface
of
ies
, I
heir sheU
the
egg
turbing
76.
PROJECT 11--1 PECKING ORDER IN FOWLS
PROBLEM
As you know,in a flock of hens there is a pecking order. You could work out the pecking order oi: various sets of backyard fowls and then do some experiments to see what happens when birds are transferred from one yard to another. What happens when top bird from yard A is introduced into yard B? Does the result depend on whether top bird in yard A was dominant over a large or a small number of hens? What happens to the relationship between top bird and bottom bird of yard A if transferred together to yard B? What happens to newly introduced chicks. Do they eventually dominate the older hens if they are physically superior? How long can top bird be removed from her subjects then return to immediately assume her dominant position? etc.
INFORMATION
l. You may find a continuous pecking order or it may be a little inconsistent i.e. A pecks BCDEF or A pecks BCDEF B pecks CDEF B pecks CDEF C pecks DEF C pecks DEF D pecks EF D pecks CEF E pecks F E pecks F F pecks no-one F pecks no-one
2. A triangular pecking order can occur too B pecks C C pecks D D pecks B
3. If you hc.ve a cock in the run he will dominate the hens but may modify his behaviour in mating season
4.
5.
Chicks are friendly to one another for the first few weeks then start trying to dominate one another. The hens initially dominate all the chicks.
Mark hens with coloured leg bands and with coloured marks on feathers in addition if necessary.
DESIGN OF EXP'ERI'MENT
1. How long will you observe the hens to be sure you have the initial hierarchy right?
2. What other features of the birds might you record to relate to your recorded pecking order?
3. After doing an experiment how long will you leave the flock to settle down before doing another experiment?
REFERENCES
Katz, D. (1953) Animals and Man (Pelican.)
Kikkawa, J. and Thorne, M.J. (1971) The Behaviour of Animals (Jacaranda Press Queensland) Chp 8.

r
I --
77.
PROJECT 11-2 NUMBERS OF SPECIES OF BIRDS FOUND IN DIFFERENT HABITATS :
PROBLEM
It is thought that as a general rule, the more diverse the habitat (i.e. the more different sorts of places there are for organisms to live in) the more diverse the community of organisms. You can test this idea by examining two markedly different areas and examining the number of bird species found in each.
INFORMATION
1. Choose contrasting areas like pine forest and jarrah/marri woodland, or pasture/crop and native heathland etc.
2. You will need a pair of binoculars and a good bird book.
3. Two of the most important feat,ures of the habitat as far as birds are concerned are what it has to offer in the way of shelter and food. Keep this in mind as you observe the birds behaviour and try to explain how different species exist together in the same habitat.
4. A similar project on arthropods is described in Project 7-1.
DESIGN OF PROJECT
l.
2.
3.
4.
How will you sample the vegetation and describe its diversity in the two study areas?
What sampling procedure will you follow and when will you sample? What actual area will you cover?
How will you find the birds? Walk after them or sit and wait?
If you make a year-long study how will you compare the two areas if some species are seasonal visitors rather than permanent residents?
REFERENCES Bird books listed in Section c.
Abbot, I. (1975). Density and species diversity of bird populations in Eucalyptus forests in Victoria, Bass Strait Islands and Tasmania. Proc. R. Soc. Victoria. ~ : 187-96.
Abbot, I. (1976). Comparisons of habitat structure and plant, arthropod and bird diversity between mainland and island sites near Perth, Western Australia. Australian Journal of Ecology~ : 275-80.
Cox, C.B., Healey, I.N., Moore, P.D. (1976). Biogeography (Blackwell : Oxford 1976) .
Recher, H.F. (1979). So many kinds of animals : the study of communities. In Recher, H.F. and others (eds). "A Natural Legacy : Ecology in Australia" (Pergamon : Sydney).

lain
IC.
and
78.
PROJECT 11-3 TERRITORIALITY IN MAGPIES
PROBLEM
Magpies are a very common bird throughout Australia but little is known about their biology. You could answer specific questions about the territorial habits of these birds by making careful and systematic observations.
INFORMATION
1. Most magpies live in groups and defend a communal territory.
2. On average, magpies live for ten years (twenty in captivity).
3. Adult males have a white back. Adult females have a black back with white edgings to the feathers, and a white collar behind the head. Young birds resemble females but are browner. Males do not assume the full white back until four years old. With practice it is possible to recognise many individuals by their patterns of marking.
4. Magpies breed from August to October and most young are flying by November. Clutches of three or four eggs (sometimes five) are laid but only about half produce young.
5. Magpies feed mainly on insects.
DESIGN OF PROJECT
Which of the following questions will you attempt to answer?
1. Do larger groups have larger territories?
2. Do all groups have similar proportions of males and females, adults and young?
3. How do magpies defend their territories?
4. Do all individuals in the group produce all types of calls?
5. What is the effect of playing back different types of calls within their territories? (Use a tape recorder from a hiding place).
6. What is the effect of placing a model magpie in their territories? Do models of males and females elicit the same response?
REFERENCES
Ardrey, R. (1967). The Territorial Imperative (Collins : London) (advanced reading) .
Kikkawa, J. and Thorne, Queensland.
Recher, H.F. and others Sydney).
Rowley, I. (1975). Bird
M.J. (1971). The Behaviour of Animals. (Jacaranda Press
(eds) . "A Natural Legacy Ecology in Australia" Pergamon
Life (Chp 8) (Australian Naturalist Library : Collins).

I,'.;,
r: PI! tl I ;t~!i Lf,ll
79.
PROJECT 12-1 SENSATION OF SMELL AND TASTE
PROBLEM
It is often said that heavy smokers can't taste and smell things as well as non-smokers. Can you conduct experiments· to show if this is so? Can you relate your findings to the length of time the people have been smoking and/or the number of cigarettes they have each day?
INFORMATION
1. Easiest substances to use are ones that you can measure and dilute accurately so you can find out what is the lowest concentration of a substance your tester can smell or taste (a few suggestions -vinegar, honey , sesame seed oil, chilli sauce etc - don't use anything poisonous or substances that will evaporate very fast).
2. Some people are "odour" blind or "taste" blind to. certain substances.
3. Many of the things we think we taste, we really smell, and there are only 4 basic taste sensations, sweet, acid, salty and bitter.
DESIGN OF EXPERIMENTS
l.
2.
3.
4.
You will need to label your diluted substances carefully. How can you be sure your test subject doesn't just read the labels'?
Will you present substances in a graded sequence from water up, or at random? How many times should each concentration be tested?
Will you tell the person what they are supposed to smell first or wait till they find out for themselves?
Will it matter if the person has a cold?
REFERENCES
Burton, R. (1976). The Language of Smell (Routledge & Keegan Paul : London)
Fitch, K. and Johnson, P. (1977). Human Life Science (Holt, Rinehart and Winston New York) Chp 22.
Strand, F.L. (1978). Physiology New York) Chp 22.
a regulatory systems approach (Macmillan :

?
) .
don)
1 Winston
lan
PROJECT 12-2 SENSATION OF SIZE
PROBLEM
You all know that a hole in your tooth feels gigantic and a stone in your shoe enormous compared with its real size. The problem is to find out the degree of difference between size estimated by tongue, fingers, eyes etc. and an object's real size.
INFORMATION
1. There are many combinations of senses that you can test : holes -tongue vs fingers; tongue vs eyes: spheres- feet vs fingers; feet vs eyes. E.g. present the test subject (your friend who doesn't know what your experiment is all about) with a hole drilled in a thin sheet and ask him/her to say which is the same sized hole given a range of sizes to see, or to fee1 with the fingers.
2. If you do "spheres" and use different size ball bearings and lead shot you'd better not poison your friends by getting them to put them in their mouths.
3. Rods of different diameter would also be interesting to test.
4. Blind people who read Braille are tremendously good at feeling small spots. Do they score better than 'ordinary' testers. Be tactful here and back off if there is any hint that the blind person objects to being in your experiment.
DESIGN OF EXPERIMENT
1. Will you present your test person with the objects in a graded sequence or in a random sequence? How many times will you test objects of a particular size?
2.
3.
If using combinations of tongue/feet/fingers etc. how will you prevent the test person using their eyes.
What other records will you keep - age, sex, race, how often the person goes barefoot etc?
REFERENCES
Gregory, R.L. (1973). Visual Perception (Oxford Biology Readers No. 40). (Oxford University Press).
Strand, F.L. (1978). Physiology New York) Chp. 22.
a regulatory systems approach (Macmillan

.. I. '
~ .. ..
81.
PROJECT 12-3 THE EFFECT OF TEMPERATURE ON NEST-BUILDING BY MICE<
PROBLEM
Domestic mice will construct a "nest" if given the material to do so. These nests may be for protection of the animals and its young or they may serve a thermoregulatory function. It is suggested that you investigate the effects of temperature on nests built by different types of mice.
INFORMATION
L
2.
Mice will build nests using paper, cloth, cotton wool, wool shavings and many other materials. These all have different insulation properties.
Male and female mice (whether or not pregnant) may build nests of different sizes or shapes. It may be better to use non-pregnant females if you wish to avoid the possibility of cannibalism or mutilation of the young under stress conditions.
3. Mice of different strains may also differ in their nest-building.
4 . Mice kept in high temperatures need to be provided with plenty of water, and those in the cold need plenty of food.
DESIGN OF EXPERIMENT
1. How many different temperature regimes can you maintain?
2. Will you keep your mice singly or in groups?
3 • How many mice should be kept in each temperature?
4. How will you measure the final size and form of the nest?
5. Does it matter how quickly the nest was built?
6. Will you provide more than one type of material for each mouse?
7. How will you measure the insulating properties of the materials supplied and the nests constructed?
REFERENCES
earthy, J.D. (1966). The Study of Behaviour (Studies in Biology No. 3). (Edward Arnold : London) .
Kikkawa, J. and Thorne, M.J. (1971). The Behaviour of Animals. (Jacaranda Press : Queensland) .
Scott, J.P. (1972). Animal Behaviour (University of Chicago Press : Chicago) .
(References under Project 12-4 on keeping and handling mice) .
Important note
Check that your tetanus protection is up to date before risking mouse bites. However, if correctly handled mice rarely bite.
p
p
'I
a e i s
I
l
2
3

may te
gs
) .
anda
Ltes.
82.
PROJECT 12-4 EFFECT OF ENVIRONMENT ON LEARNING BEHAVIOUR IN MICE
PROBLEM
There has been considerable debate as to whether intelligence and learning ability are inherited qualities, or largely a product of environment. If environment is shown to be a vital factor, it will have widespread significance in our appreciation of education, child-rearing, and social inequalities. Some simple aspects of this major problem can be studied using mice.
INFORMATION
1. It is suggested that you test the differences in learning behaviour between your animals by using a maze more complex than a simple T.
2. Previous studies suggest that the following factors may influence learning : presence or absence of companions.
size of animal cage presence or absence of toys (e.g. ramps, bells, hollow pipes, exercise wheels) •
3. To minimise the influence of previous environments, mice should be placed in the experimental conditions when they are weaned.
4. Handling influences mouse behaviour.
5. Individual mice will vary in learning ability.
DESIGN OF EXPERIMENT
Before starting, think about these points.
1. How many mice will you test?
2. What factors will you investigate?
3. How long will you leave the mice in each environment? be before you start your tests?
How old will they
4. How will you measure performance in the maze i.e. learning?
5. Will sex differences influence your results?
6. What controls will you use?
7. Will you attempt to reverse any influences which you find?
REFERENCES
Australian Academy of Science (1973) . Biological Science (2nd ed). Chp. 23.
The Web of Life
earthy, J.D. (1966). The Study of Behaviour (Studies in Biology No. 3). (Edward Arnold : London) .
Kikkawa, J. and Thorne, M.J. (1971). The Behaviour of Animals (Jacaranda Press : Queensland) Chp. 7.
,,,
I
I ~ ,i, li!lii •IIIII

83.
REFERENCES (Contd)
Rosenzweig, M.H., Bennett, E.L. and Diamond, M.C. (1972). in response to experience. Scientific American 226 (2)
Brain changes 22-29.
Scott, J.P. (1972). Animal Behaviour (University of Chicago Press : Chicago).
W.A. Gould League "Keeping Live Animals" (pamphlet).
Wray, J.D. (1974). Small Mammals (English Universities Press (for hints on keeping mice).
Important note
London)
Check that your tetanus protection is up to date before risking mouse bites.

s
84.
PROJECT 12-5 URINE MARKING BY MALE MICE
PROBLEM
Male mice forced to live together at close quarters set up a dominance hierarchy. Some element in the urine may act as a chemical signal (pheromone) and tell other mice the dominance rank of the individual. You could investigate whether this is true and try to establish the role of urinemarking in dominance-submission relationships in mice.
INFORMATION
l. Patterns of urination can be observed by using absorbent paper on the floor of a cage and developing the marks with a ninhydrin spray. Ninhydrin (= idanetrione hydrate) is a BDH chemical available from Selby's, 21 Glassford Road, Kewdale, W.A. Make up a 0.1% solution in 95% ethanol. Use as a spray or dip. Dry paper at 70 C for 5 minutes. Also available from Selby's, but more expensive, are aerosol containers of ninhydrin (each 120 mL container is enough for about 25 pieces of paper 25 em x 2 em.
2. A cage with a removable partition can be used to keep two males separate and then allow them a brief period of interaction during which dominance-submission behaviour can be observed.
DESIGN OF EXPERIMENT
l. Will you keep your male mice together or in isolation before testing them in pairs?
2. How long will you keep the two males separated before removing the partition?
3. How long will you allow the males to interact.
4.
5.
How often will you test each male?
Will the partition be transparent or opaque? Will it allow sound or smell to travel from one compartment to the other?
REFERENCES (See Project 12-4)
Ebling, J. and Highnam, K.C. (1969). Biology No. 19). (Edward Arnold
Chemical Communication (Studies in London).
Payne, A. (1976). Social Behaviour in Vertebrates (Heinemann : London).
Robinson, D.E., Ford-Robertson, J deC, and Godbert, F.D. (1978). Organisms Chp. 12.
Important note
Check that your tetanus protection is up to date before risking mouse bites.
·11:
illil Ill

85.
PROJECT 13-1 EFFECT OF HOUSEHOLD DETERGENTS ON FRESHWATER ORGANISMS
PROBLEM
Although many detergents are now what is called "biodegradable", degradation takes a finite time, and detergents which by one means or another find their way into rivers, lakes, swamps etc. could be quite harmful before they are degraded. In particular, detergents affect the permeability of biological membranes. You could investigate the tolerance of certain freshwater organisms to various concentrations of detergents.
INFORMATION
1. Organisms easily available in sufficient numbers for testing include :
Mosquito larvae, small arthropods such as Daphnia, freshwater snails, fish, the plant Lerona, tadpoles.
As you will be killing animals you may find it less upsetting to knock offinvertebrates rather than vertebrates. Problems to remember are that it is very difficult to measure when a plant is "dead" compared to an animal, and that some animals like mosquito larvae go through developmental stages during the experiment.
2. There are various types of household detergent, some of which are coloured, scented.
3. The aim of properly designed experiments on the tolerance of animals for lethal conditions is to determine the level of a lethal factor that can be tolerated by a given percentage of the animals for a given period of time~ Another way of tackling it is to measure the length of time a given percentage of the animals can tolerate a given level of a lethal factor.
4. Individuals of a species will differ in tolerance.
DESIGN OF EXPERIMENT
1. Will you maintain the organisms in the lab. for testing, or collect from the "wild" each time?
2. Which animals and/or plants will you test?
3. How will you measure tolerance limits and survival times?
4. How many individuals of a species will you test?
5. How many detergents will you use and at what concentrations?
6. Will you use pond water or tap water as your basal solution?
7. What will be the control in each experiment?
8. How will you be sure that the organisms are dying from the detergent and not some other factor like lack of oxygen.

s
t
86.
REFERENCES
Bayley, I.A. and Williams, W.D. (1973). Inland Waters and their Ecology (Longmans : Melbourne) .
Jones, C., Gadler, S.J. and Engstrom, P.H. (1972). Pollution of the Earth (Dent : London) .
the Waters
warren, c.E. (1971). Biology and Water Pollution Control. W.B. Saunders (Philadelphia) .
Williams, W.D. (1980). Australian Freshwater Life. (Macmillan, Melbourne) (2nd ed.) .
Ill, I
ilili! ,1:11

Iii 'I
i! il
• .,.I
87.
PROJECT 13-2 DIGESTIVE ENZYMES
PROBLEM
To relate the kinds of digestive enzymes present in animals to different regions of their digestive tract.
INFORMATION
1. As animals have become increasingly complex, they have specialized certain regions of their digestive tract (from mouth to anus) for the secretion of different kinds of enzymes.
2. You might examine the presence of proteases, carbohydrases and lipases by dissecting out regions of the digestive tract, grinding them up in a little 0.7% saline and testing the juice as follows .
A. Prepare agar plates containing protein, carbohydrate and fat. Prepare plates under non sterile conditions and do not store them. Protease substrate : Mix 2 g caesin (or any instant milk powder) with 100 mL saline (0.7% sodium chloride) and dissolve by heating with stirring to 100 c. Add 2 g agar and when dissolved cool to 50-60 C and pour into Petri dishes. Carbohydrase substrate : Mix 0.2 g soluble starch to 100 mL saline and diss" olve by heating to 100 C. Stir in 2 g agar and when dissolved add 2-5 drops of iodine solution (0.2 g I and 2 g KI in 100 mL). Cool and pour into Petri dishes. Lipase substrate : Add 2 g agar to 100 mL saline and heat to l00°C to dissolve. Add 1 mL glycerol tributyrate or 1-2 mL of any salad cream (containing glycerates and vegetable oils). Pour into Petri dishes ..
B. Setting up experiments. 0.5 em diam. cork borer, and of gut regions to the wells. Leave 24 hours.
When agar has set, cut out wells with a add equal quantities of the saline extracts
Label wells to indicate gut region.
c. Reading results With casein and starch plates a clear area around the wells indicates enzyme activity. With the lipase plate flood it with 10% copper sulphate solution - fatty acids released from the substrates stain blue green after ± 30 minutes.
3. You might like to try different regions of the gut of the same animal (mouse, cockroach, earthworm, garden snail etc). or, using one particular animal or enzyme, try varying the pH of the saline extraction medium and substrate, or try different temperatures, starved and well fed animals etc.
DESIGN OF EXPERIMENT
1. How will you determine how much gut tissue you use?
2. How can you compare the amount of enzyme activity around different wells?
3. How can you measure, and change the pH of the substrate and enzyme?
REFERENCES .
Morton, J. (1967). Guts (Studies in Biology No. 7) (Edward Arnold : London) McMinn, R.M.H. (1974). The Human Gut (Oxford Biology Readers No. 56) (Oxford
University Press) .
Phillips, E.A. (1971) Basic Idea~> in Biology (Macmillan : New York) Chp. 49.

a acts
11nd t
l ::ular and
ls etc.
~lls?
1)
)rd
19.
88.
PROJECT 13-3 EFFECT ON THE ECOSYSTEM OF ALTERING PLANT COMMUNITIES
PROBLEM
Since settlement in Western Australia, European man has altered the local flora by burning too frequently, introducing nutrients, exotic plant and animal species, spreading disease, etc. Alterations of plant communities would be expected to change the resources available for animals (e.g. food, shelter, egg-laying sites). You might investigate the impact of disturbance by comparing communities in similar ecological positions, one of which has been invaded by exotic weeds, and the other of which is of native plants.
INFORMATION
1. Communities of organisms to observe could include litter dwelling invertebrates, reptiles (lizards and skinks), or small omnivorous birds.
2. Observations may be from collections from pitfall traps, direct counts of species per area, or number. of individual sightings per area for more mobile species.
3. Community properties which can be compared between sites are number of species/area, eveness of distribution of individuals/species (dominance, diversity).
4. Less mobile organisms are generally more reliable indicators for small areas.
DESIGN OF EXPERIMENT
1. Select sites which initially supported similar natural vegetation, but now show obvious differences in the ratio of exotic to natural plant species, or alternatively exotic plant biomass. How will you collect data to illustrate the differences between sites, and support your idea that both sites once had a similar flora?
2. Information regarding time of last burn will be useful in site selection.
3.
4.
Consider topographic and soil factors carefully when comparing invertebrate communities.
Seasonal factors will have considerable influence on results.
REFERENCES
Fox, M.D. and Adamson, D~ (1979). The ecology of invasion. In Recher, H.F. and others (eds) "A Natural Legacy : Ecology in Australia" (Pergamon Sydney) .
Silverstein A and V (1974) "Animal Invaders", Story of Imported Wildlife" (Altheum : New York).
Southwood, T.R.E. (1978). Ecological Methods (Chapman & Hall : London).
I. II,
l1l! l:il:::::l

89.
S.ECTION B
SOURCES OF INFORMATION ON WESTERN AUSTRALIAN PLANTS
The list of books below has been compiled by Mr. N.S. Lander, a Botanist at the W.A. State Herbarium. In this list you will find books on identification of W.A. wildflowers, weeds, information on plant distributions, ecology and on the horticultural use of native plants.
The most useful book to identify native plants is Blackall and Grieve, "How to know W.A. Wildflowers" which is in 4 volumes. The key to families in later volumes is easier to use than the one in the first volume. However, if you know very little about plant identification you might prefer to take a short cut and use Erickson and others "Flowers and Plants of Western Australia". In this book the plants are grouped into areas (i.e. jarrah fore and there are lots of pictures so that you may spot something that looks similar and you can probably check that your specimen belongs to the same family at least. For people who live in Perth, there is another option. Take a walk around the botanic garden in Kings Park and you will find many of the plants labelled. More details are given in the "Guide to Kings Park Botanic Garden" .
The W.A. State Herbarium at the Agriculture Department is primarily a research establishment and does not encourage school children to bring in specimens for identification. Although they wish to foster an interest in the flora they do not have sufficient staff to run an identification service. Anyway, it is your project so why not have a go at identifying your specimens yourself. Remember that for many purposes a complete name is unnecessary; knowing that a plant is a member of a particular family or of a certain genus is sufficient.
rf
/
Kings Park Botanic Garden
A
A
A
AJ
AI
A1
Al
At
Be
Bl
Bl
Br

!arden
SOURCES OF INFORMATION ON THE VEGETATION AND FLORA OF WESTERN AUSTRALIA
Compiled by Nicholas S. Lander
Aplin, T.E.H. (1967-71). Poison Plants of Western Australia. Bulletin 3772, W.A. Dept. Agric., South Perth, (Reprinted from Journal of Agriculture, W. Australia).
Aplin, T.E.H. (1976). to Man in Australia. Perth.
Poisonous Garden Plants and other Plants Harmful Bulletin 3964, W.A. Dept. Agric., South
Aplin, T.E.H. (1979). The Vegetation of Western Australia. In Year Book of W. Australia. (Govt. Printer : Perth).
Aplin, T.E.H. (1977). A Check List of Eucalypts of Western Australia. Technical Bulletin 33, W.A. Dept. Agric., South Perth.
Aston, H.I. (1973). Aquatic Plants of Australia (Melbourne Univ. Press carlton).
Australian Journal of Botany - Continuing series.
Australian Plants. Society for Growing Australian Plants, Sydney, 1963 -continuing.
Austrobaileya (formerly Contrib. Qld. Herb.) - continuing series. Queensland Herbarium, Indooroopilly, Qld.
Beard, J.S. (1969). Vegetation Survey of Western Australia 1:250,000 series. Vegmap Publications, Sydney - continuing.
Beard, J.S. (ed.) (1970). West Australian Plants. (2nd ed.) Society for Growing Australian Plants, Sydney.
Beard, J.S. (1974). Vegetation Survey of Western Australia 1:1,000,000 series. (Univ. W.A. Press : Nedlands) - continuing.
Beard, ,J. s. undated. Wildflowers of the Northwest. (Westviews Productions Perth) .
Bentham, G. (1863-78) Flora Australiensis. (Reeve : London) (reprinted 1967).
Black, J.M. (1943-1.957). Flora of South Australia. 2nd ed. (Govt. Printer : Adelaide.
Black, J.M. (1978). Flora of South Australia. 3rd ed. revised J. Jessop. (Govt. Printer : Adelaide) - continuing.
Blackall, W.E. and Grieve, B.J. (1956-65) How to Know Western Australian Wildflowers. Parts 1-3 (Univ. W.A. Press : Nedlands). reprinted 1974.
maackall, W.E. and Grieve, B.J. (1980). How to Know Western Australian Wildflowers Part 3a. (Univ. WA Press : Nedlands).
Blakeley, W.F. (1965). A Key to the Eucalypts. 3rd ed. (Commonwealth Forestry & Timber Bureau : Canberra) .
Brunonia (formerly Contrib. Herb. Austral.) - continuing series. Herbarium Australiense, Division of Plant Industry, C.S.I.R.O., Canberra, A.C.T.

91.
Burbidge, N.T. (1963). Dictionary of Australian Plant Genera. (Angus and Robertson : Sydney) .
Chippendale, G.M. (1968). Eucalyptus Buds and Fruit. (Commonwealth Forestry and Timber Bureau : Canberra) .
Chippendale, G.M. (1971). Check List of Northern Territ?ry Plants. Proceedings Linnean Society N.S.W. i971.
Chippendale, G.M. (1973). Eucalypts of the Western Australian Goldfields -(and adjacent wheatbel t) • (Aust. Govt. Publ. Serv. Canberra) .
Cribb, A.B. and J.W. (1975). Wild Food in Australia. (Fontana : Sydney).
Dempster, H. (1978). Flora in the Karri Forest. (Manjimup Nat. Hist. Soc.)
Education and Lands and Surveys Department of Western Australia. Western Australia. An Atlas of Human Endeavour 1829-1979. Govt. Pr., Perth, 1979.
Eichler, H.J. (1965). Supplement to Black's Flora of South Australia. (Govt. Printer : Adelaide)
Erickson, R. (1958) . Triggerplants (Paterson Brokensha : Perth) .
Erickson, R. (1965) Orchids of the West. 2nd ed. (Paterson Brokensha Perth).
Erickson, R. (1968). Plants of Prey in Australia. (Lamb, Paterson : Perth).
Erickson, R., George, A.S., Marchant, N.G. and Morcombe, M.K. (1973). Flowers and Plants of Western Australia (Reed : Sydney). Revised 1979.
Everist, S.L. (1974). Poisonous Plants of Australia. (Angus and Robertson Sydney)
Forest Focus. Forests Dept. W. Austral., Perth- continuing series. Available from 54 Barrack Street, Perth, W.A. 6000.
Forestry and Timber Bureau (1968). Growing Trees on Australian Farms. (Comm. Gov. Printer : Canberra).
Gardner, C.A. (1930). Enumerato Plantarurn Australiae Occidentalis. A systematic census of the plants occurring in Western Australia (Govt. Printer : Perth) .
Gardner, C.A. (1944). The Vegetation of Western Australia. Journal Royal Society of W.A. 28 : xi-lxxxvii.
Gardner, C.A. (1952). Flora of Western Australia, vol. 1, part 1 - Gramineae. (Govt. Printer : Perth).
Gardner, C.A. (1973). Wildflowers of Western Australia. 11th ed. (West Australian Newspapers : Perth) .
Gardner, C.A. (1979). Eucalypts of Western Australia. Compiled, ed. & rev. T.E.H. Aplin. (Govt. Printer : Perth) (and Bulletin 4013, W. Austral. Dept. Agric., South Perth).

. )
th).
owers I
n
:mun.
1eae.
tl.
92.
Gardner, C.A. & Bennetts, H.W. (1956). The Toxic Plants of Western Australia. (West Australian Newspapers : Perth).
Gentilli, J. (ed.) (1979). Western Landscapes. (Univ. W.A. Press, Nedlands).
George, A.S. & Foote, H.E. (undated) Orchids of Western Australia (Westviews Productions : Perth) .
Grieve, B.J. 1900-1971.
(1975). Botany in Western Australia, a survey of progress Journal of the Royal Society of W.A. 58 (2) : 33-53.
Grieve, B.J. & Blackall, W.E. (1975). How to know Western Australian Wildflowers Part IV. (Univ. W.A. Press : Nedlands) .
Growing Native Plants (1968) . (Canberra Botanic Gardens) - continuing series.
Hall, N., Johnston, R.D. & Chippendale, G.M. (1970). Australia. (Commonwealth Forestry & Timber Bureau
Forest Trees of Canberra).
Harmer, J. (undated) North Australian Plants. Pt. l - Top End Wildflowers. (Society for Growing Australian Plants : Sydney) .
Holliday, I. & Watton, G. (1975). Field Guide to Banksias. (Rigby Adelaide) .
Hussey, B.M.H. (1977) Wildflowers of the Stirling Range. (National Parks Authority W.A. : Perth).
Heywood, U.H. (1978). Flowering Plants of the World (Oxford University Press).
Journal of the Adelaide Botanic Gardens - continuing series. Adelaide Botanic Gardens, Adelaide, S.A.
Journal of Agriculture W. Australia - continuing series. weeds and poison plants of W. Australia.
Pasture plants,
Jones, D.L. & Clemesha, S.C. (1976). Australian Ferns and Fern Allies. (Reed : Sydney) .
Kelly, s. (1969). Eucalypts l. (Nelson : Melbourne) reprinted 1977.
Kelly, s. (1978) Eucalypts 2. (Nelson : Melbourne).
Kenneally, K.F. (co-ordinator) (1978) The Natural History of the Wongan Hills. (Handbook 11, W.A. Naturalists Club, Perth).
Lamp, c. & Collet, F. (1976). A Field Guide to Weeds in Australia (Inkata Press : Melbourne) .
Land Research series. C.S.I.R.O., Melbourne, 1952- continuing series.
Lazarides, M. (1970). The Grasses of Central Australia (Aust. Nat. Univ. Press : Canberra) .
Lear, R. & Turner, T. (1977) Mangroves of Australia. (Univ. Qld. Press Brisbane) .
Maiden, J.H. (1889) The Useful Native Plants of Australia (Compendium Melbourne) (Facsimile 1975).

•..
93.
McComb, A.J. (ed.) (1973) -The South-West of Western Australia. Repr. from Journal of the Royal Society, W.A. 56 (1-2).
Meadly, G.R.W. (1976). Weeds of Western Australia. (W.A. Dept. Agric. South Perth) .
Missingham, H. (1978). Blackboys and Black Gins. Grass Trees of Western Australia. (Fremantle Arts Centre Press : Fremantle).
Morcombe, M.K. (1968). Australia's Western Wildflowers. Landfall : Perth.
Morcombe, M.K. and Morcombe, I (1970). Wildflowers of Western Australia (Landsdowne Press : Melbourne) .
Morcombe, I. & Morcombe, M. (1977). The Karri Forest (Rigby).
Mosley, J.G. (ed) (1974). Conservation in western Australia. Australian Journal of Botany Suppleme~tary Series No. 7 : 519-590).
Muelleria - continuing series. National Herbarium of Victoria, South Yarra, Vic .
. Mullins, B. & Eaglin, D. (1978). Western Australian Wildflowers in Colour (Reed : Sydney) .
Newbey, K. (1968 and 1972) West Australian Wildflowers for Horticulture -Vols. 1 & 2. (Society for Growing Australian Plants : Sydney).
Nichols, W.H. (1969). Orchids of Australia (Nelson : Melbourne).
Nuytsia (1970). W.A. Herbarium (W.A. Dept. Agric. : South Perth) - continuing series .
O'Brien, B.J. (ed.) (1979) -Environment and Science. (Univ. W~A. Press, Nedlands).
Paterson, J.G. (1977). Grasses in South Western Australia. Bulletin 4007, (W.A. Dept. Agric. : South Perth).
Penfold, A.R. & Willis, J.L. (1961). The Eucalypts, botany, cultivation, chemistry and utilization (Leonard Hill : London) .
Pocock, M. (1972). Ground Orchids of Australia (Jacaranda : Milton).
Powell, R. & Emberson, J. (1978). An Old Look at Trees, Vegetation of Southwestern Australia in Old Photographs (Campaign to Save Native Forests, (W.A.), Perth).
Reid, E. (1977). The Records of Western Australian Plants used by Aboriginals as Medicinal Agents. Pharmacy Dept. W. Austral. Inst. Tech., Bentley, Unpublished thesis.
Research Notes. W.A. Herbarium, W.A. Dept. Agric., South Perth, 1978-continuing series.
Ride, W.D.L. and others (1966). National Parks and Nature Reserves in Western Australia. (Govt. Printer : Perth).
Royce, R.D. (undated). Wildflowers of Western Australia (Westviews Productions : Perth) .
s
s
s

uing
7,
Jth-
Lnals
94.
Seddon, G. (1972). Sense of Place, A Response to an Environment: The Swan Coastal Plain, Western Australia (Univ. W.A. Press : Nedlands).
Semeniuk, V., Kenneally, K.F. & Wilson, P.G. (1978). Mangroves of Western Australia. (Handbook 12, W.A. Naturalists Club : Perth).
Sharr, F. Glossary.
(1978). Western Aust•:alian Plant Names and their Meanings - A (Univ. of W.A. Press).
Simon, B.K. (1978). A Preliminary Checklist of Australian Grasses. Tech. Bull. 3, Botany Branch, Qld. Dept. Primary Industries, Brisbane.
Smith, F.G. (1969). Honey Plants in Western Australia. Bulletin 3618, W.A. Dept. Agric. : South Perth).
Smith, F.G. (1972) Vegetation Survey of Western Australia. Pemberton/Irwin Inlet (W.A. Dept. Agric.).
smith, F.G. (1973). Vegetation Survey of Western Australia : Busselton/ Augusta. (W.A. Dept. Agric.)
Smith, F.G. (1974). Vegetation Survey of Western Australia: Collie. (W.A. Dept. Agric. )
smith, G.G. (1973) A Guide to the Coastal Flora of South-Western Australia (Handbook 10, W.A. Nat. Club : Perth).
Smith, G.G. & Marchant, N.G. (1961). A Census of Aquatic Plants of Western Australia. W.A. Naturalist 8 (1) : 5-17.
S.W.A.N.S. Dept. Fish. & Wildl., Perth, 1970 continuing series.
Telopea (formerly Contrib. N.S.W. Nat. Herb.). National Herbarium of N.S.W. Sydney, N.S.W.
Wildlife Research Bulletin. Dept. Fish. & Wildl., Perth- continuing series.
Wallace, W.R. (undated) Selected Flowering Eucalypts of Western Australia (Forests Dept. W.A. : Perth).
BOOKS ON LOWER PLANTS
Bold, H.C. & Wynne, M.J. (1978). An Introduction to the Algae (Prentice Hall : New Jersey) (An advanced text dealing with all algae but there is no good book on W.A. sea weeds).
Conrad, H.S. (1956). How to know the mosses and liverworts (Brown : Dubaque Iowa). (Useful but mainly N. American and European material).
Filson, R.B. & R.W. Rogers (1979). Lichens of South Australia (Govt. Printer S.A.).

95.
Hale, M.E. (1974). How to Know the Lichens (Brown (Useful but mostly N. American).
Dubaque Iowa)
Lucas, A.H.S. (1936-47). Seaweeds of South Australia (Govt. Printer Adelaide) .
Prescott, G.W. (1954). How to Know the Freshwater Algae (Brown Dubaque Iowa) (American, but many algae are world-wide).
Scott, G.A.M., Stone, I. & Rosser, C. (1976). The Mosses of Southern Australia (Academic Press : London) .
Smith, G.G. (undated) Seaweeds of our coast (Gould League Bulletin No. 2).
BOOKS ON GARDEN PLANTS
Bailey, L.H. (1971). Manual of Cultivated Plants (Macmillan : New York) .
Bailey, L.H. & Bailey, E. (1972). Hortus Second (Macmillan : New York). (A dictionary of cultivated plants, mostly N. American but covers most W.A. material)
Hellyer, A. (1976). Encyclopedia of Gardening (Chartwell Books : New Jersey) Macoboy, S. (1969). What Flower is that (Hamlyn : Sydney) (Australian
garden plants) .
Macoboy, S. & Blomberg, A. (1975). Australian Complete Book of Flowers. (Paul Hamlyn : Sydney) (garden and native plants) .
E
* ~
*

) .
y)
96.
SECTION C
SOURCES OF INFORMATION ON WESTERN AUSTRALIAN ANIMALS
Most books on animals deal with the whole of Australia rather than only those species in Western Australia. In a few cases general books dealing with a group on a world wide basis have been included. In each section a range of books is included from the simple picture book to the complex scientific text. The books that you will find most useful for identification of project material are marked with an asterisk (*).
You should attempt to identify your own material as this is an important part of your project. Staff at the W.A. Museum will assist with identification of specimens if you feel this is essential. Phone first to arrange a time, and be reasonable in what you ask them to do for you i.e. don't expect too much enthusiasm if you front up with a huge number of insects or shells.
General - invertebrates
Buchsbaum, R. (1964). Animals without backbones Vols 1 and 2. (Pelican) .
Macan, T.T. (1959). A guide to Freshwater Invertebrate Animals (Longman London).
* Main, A.R. (1968). A Guide to Naturalists (Handbook No. 4 Club : Perth).
W.A. Naturalists
Williams, W.D. (1980). Australian Freshwater life. The Invertebrates of Australian Inland Waters (.Macmillan : Melbourne) (2nd ed.) .
Molluscs (see also General Section)
Allan, J. (1959). Australian Shells (Georgian House : Melbourne) .
Allan, J. (1969). Cowry Shells of the World Seas (Georgian House Melbourne) .
Coleman, N. (1976). Shell Collecting in Australia (Reed : Sydney) .
Child, J. and CUrrey, J. (1972). Shells and Seashore (Lansdowne Melbourne).
Deas, W. (1971). Seashells of Australia (Rigby : Adelaide) •
Hinton, A.G. (1978). Guide to Australian Shells (Robert Brown :Pt. Moresby).
*Hodgkin, E.P., Marsh, L., Kendrick, G. and Slacksmith, S. Shelled Gastropoda of South Western Australia. W.A. Naturalist Club).
(1966). The (Handbook No. 9,
McMichael, D.F. (1962). Some common shells of the Australian sea shore (Jacaranda Press : Queensland) .
Slacksmith, S.M. (undated) Dangerous Cone Shells (W.A. Museum Information Series) .
Wilson, B.R. and Gillett, K. (1971). Australian Shells (Reed Sydney).

• l.i
97.
Spiders
Child, J. (1968). Australian Spiders (Lansdowne : Melbourne).
Clyne, D. (1969). A Guide to Australian Spiders, their Collection and Identification (Nelson: Melbourne).
Cloudsley-Thompson, J.L. (1968). Spiders, Scorpions, Centipedes and Oxford) . Mites (Pergamon Press
Densey, c. (1969). A Guide to Australian Spiders (Nelson : Melbourne
Mescord, R. (1970). Australian Spiders in Colour (Reed : Sydney) .
*Main, B.Y. (1964). Spiders of Australia (Jacaranda : Brisbane) .
*Main, B.Y. (1976). Spiders (Collins : Sydney) .
McKeown, K.C. (1952). Australian Spiders - their Lives and Habits (Angus and Robertson : Sydney) .
INSECTS
Abrera, B.D. (1974). Moths of Australia (Lansdowne : Melbourne).
Burns, A. (1969). Australian Butterflies in Colour (Reed : Sydney) .
Barrett, C. and Burns, A.N. (1951). Butterflies of Australia and New Guinea (Seward : Melbourne) .
Child, J. (1968). Australian Insects (Periwinkle Books) .
I
Child, J. and Currey, J. (1971) . Australia's Insects (Lansdowne Press Melbourne) .
Common, I.F.B. (1964). Australian Butterflies (Jacaranda Press :Brisbane).
Common, I.F.B. (1966). Australian Moths (Jacaranda Press : Brisbane) .
* C.S.I.R.O. (1970). The Insects of Australia (Melbourne University Press Melbourne) .
* C.S.I.R.O. (1974). Supplement to The Insects of Australia (Melbourne University Press : Melbourne).
* Gregg, J . ( 19 77) . Science Field Guides - Insects (Reed Education)
Healy, A. and Smithers, C. (1971). Australian Insects in Colour (Reed Sydney) .
Hughes, R.D. (1975). Living Insects (Collins : Sydney).
McKeown, K. (1944). Insect Wonders of Australia (Angus and Robertson Sydney).
* McKeown, K. (1945). Australian Insects - An Introductory Handbook (Royal Zoological Society of N.S.W.).
*
*
*
*'
*
*

ane).
ss
l
98.
* Norris, K.R. and M.S. Upton (1974). The Collection and Preservation of Insects (Australian Entomological Society : Brisbane).
Riek, E.F. (1972). Insects of Australia (Jacaranda Press : Brisbane).
watson, J.A.L. (1962). The Dragonflies (Odonata) of South Western Australia (W. Australia Naturalist Club Handbook No. 7).
Reptiles and Amphibians
Barker, J. and Grigg, G. (1977). A field guide to Australian Frogs (Rigby Melbourne.
Bustard, R. (1970). Australian Lizards (Collins : Sydney).
Bustard, R. (1972). Sea Turtles (Collins : London).
cann, J. (1978). Tortoises of Australia (Angus & Robertson : Sydney)
Cogger, H.G. (1967). Australian Reptiles in Colour (Reed : Sydney)
* Cogger, H.G. (1975). Reptiles and Amphibians of Australia (Reed : Sydney).
Davey, K. (1970). Australian Lizards (Periwinkle : Melbourne).
* Glauert, L. (1961). A Handbook of the Lizards of Western Australia (Handbook No. 6, W.A. Naturalists Club).
* Glauert, L. (1967) . A Handbook of the Snakes of Western Australia (Handbook No. 1, W.A. Naturalists Club, Perth).
Goode, J. (1967). Freshwater tortoises of Australia and New Guinea (Lansdowne : Melbourne) .
Gow, G.R. and Swanson, s. (1977). Snakes and Lizards of Australia (AngusRobertson : London) .
Heatwole, H. (1976). Reptile Ecology (University of Queensland Press : St. Lucia).
* Main, A.R. (1965). Frogs of Southern Western Australia (Handbook No. 8, W.A. Naturalists Club, Perth).
McPhee, D.R. (1963). Some Common Snakes of Western Australia (W.A. Museum Press: Perth).
Storr, G. (1975). Dangerous Snakes of Western Australia (W.A. Museum Press
swanson, s. (1976). Lizards of Australia (Angus and Robertson : Sydney).
Tyler, M.J. (1976) Frogs (Collins : Sydney).
Worrell, E. (1958). Song of the Snake (Angus and Robertson : Sydney)
Worrell, E. (1963). Reptiles of Australia (Angus and Robertson : Sydney).
Fish
Deas, w. (1971). Australian Fish in Colour (Rigby : Melbourne).
Goadby, P. (1968). Sharks and other Predatory Fish of Australia (Jacaranda Press : Brisbane)
Perth)
* Hutchins, B. (1979). The Fishes of Rottnest Island (Creative Research Perth) .

~--------------------------------------------------------------
99.
Lake, J.S. (1971). Freshwater Fishes and Rivers of Australia (Nelson Sydney).
McDowell, R.M. (1980). Freshwater Fishes of South-Eastern Australia (Reed Sydney).
Roughley, T.C. (1971). Fish and Fisheries of Australia (Angus and Robertson
s
s
Sydney) * s * Scott, T.D. (1962). The Marine and Freshwater Fishes of South Australia
(Govt. Printer : Adelaide).
Stead, D.G. (?1950) Fishes of Australia (William Brooks : Sydney).
Thomson, J.A. (1974). Fish of the Ocean and Shore (Collins : Sydney).
Whitley, G.P. (1966). Marine Fishes of Australia Vols. 1 and 2 (Jacaranda Press : Brisbane)
Whitley, G.P. (1966). Freshwater Fishes of Australia (Jacaranda: Brisbane).
Whiteley, G. and J. Allan, (1958). The Sea Horse and its Relatives (Georgian House Melbourne)
Birds
Barrett, c. (1949). Parrots of Australasia (Seward : Melbourne).
Chapman, G. (1969). Common City Birds of Australia (Lansdowne Press : Me
Edwards, B. (undated) Kookaburras and Kingfishers (Lansdowne Press : Melbourne
Forshaw, J.M. (1969). Australian Parrots (Lansdowne Press : Melbourne).
Frith, H.J. (1962). The Mallee Fowl (Angus and Robertson :Sydney).
Frith, H.J. (1967). Waterfowl in Australia (Angus and Robertson : Sydney).
* Frith, H.J. (1976). Complete Book of Australian Birds (Readers Digest : Sydney)
* Hill, R. (1967). Australian Birds (Nelson : Sydney).
McGill, A. (1970). Australian Warblers (Bird Observers Club
Macdonald, J.D. (1978). Birds of Australia (Reed : Sydney)
Melbourne).
Morcombe, M. (1971). Birds of Australia (Lansdowne Press : Melbourne)
Morris, F.T. (1976). Birds of Prey of Australia : a fie~d guide (Lansdowne Melbourne) .
Officer, H.R. (1965). Australian Honeyeaters (Bird Observers Club : Melbourne).
Officer, H.R. (1969). Australian Fly Catchers and their Allies (Bird Observers Club : Melbourne) .
Parry, V.A. (1970). Kookaburras (Lansdowne Press : Melbourne).
Robinson, L. (1970). Australian Parrots in Colour (Rigby : Sydney)
Rowley, I.C.R. (1974) Bird Life (Collins Sydney).
Serventy, D.L., Serventy, V., and Warham, J. (1971). The Handbook of Australian Sea-birds (Reed : Sydney) .
* s
s
s
s
M
B
D
F
G
*
*

ed
) .
Me
lrY>. Sydney)
1e) •
.owne
100.
Serventy, D.L. and Whittell, H.M. (1967). Birds of Western Australia (Lamb Publications : Perth) .
Slater, P. (1967). Western Australian Birds (Hercantile Press : Fremantle) .
* Slater, P. (1970). A Field Guide to Australian Birds. (Rigby : Adelaide) .
Vol. l. Non-passerihes
* Slater, P. (1974). A Field Guide to Australian Birds Vol. II. Passerines. (Rigby : Adelaide) .
Slater, P. (1978) . Rare and Vanishing Australian Birds (Rigby : Sydney).
Storr, G. (1980) Birds of the Kimberly Division, Western Australia (W.A. Museum Special Publications No. ll).
Storr, G. and Johnston, R.E. (1979). Field Guide to the Birds of Western Australia (W.A. Museum Publication).
Mammals
Breedon, s. and K. (1970). Living Marsupials (Collins : Sydney) .
Davey, K. (1970) . Australian Marsupials (Lansdowne Press Melbourne) .
Frith, H.J. and Calaby, J.H. (1969). Kangaroos (Cheshire Melbourne) •
Gould, J. (1804-81). Gould's Australia - Selections from "Mammals of Australia" Vols l-3. (MacMillan - 1977).
Griffiths, M. (1968). Echidnas (Pergamon Press : London) .
Hunsaker, D. ( 1977) . The Biology of Marsupials (Academic Press)
Lyne, G. (1967). Marsupials and Monotremes of Australia (Angus and Robertson : Sydney) .
*Marlow, B.J. (1962). Marsupials of Australia (Jacaranda Pocket Guide Brisbane).
Morcombe, M.K. (1972). Australian Marsupials and other native Animals (Lansdowne Press : Melbourne) .
* Ride, W.D.L. (1970). A Guide to the Native Mammals of Australia (Oxford University Press : Melbourne).
Stonehouse, B. and Gilmore, D. (1977). The Biology of Marsupials (Macmillan London).
Troughton, E. (1973). Furred animals of Australia (Angus and Robertson Sydney).
Tyndale-Biscoe, C.H. (1973). The Life of Marsupials (Edward Arnold London).
General
Bennett, I. (1966). The Fringe of the Sea (Rigby : Adelaide) .
Bennett, I. (1969). On the Seashore (Rigby : Adelaide).
101.
Child, J. (1962). Australian Seashore Life (Lansdowne : Melbourne).
Child, J. (1969). Australian Pond-Stream Life. (Lansdowne : Melbourne).
Dakin, W.J. (1960). Australian Seashores (Angus and Robertson : Sydney).
Douglas, A.M. (1980). Our Dying Fauna (Creative Research : Perth).
Members of the Club (1961) Natural History Specimens : Their Collection and Preservation (Handbook No. 2, W.A. Naturalists Club).
Messel, H. & Butler, S.T. (1977). Australian Animals and their Environment (Shakespeare Head Press : Sydney).
Serventy, v. (1973-75). Australia's Wildlife Heritage Vols. 1-7. (Paul
Hamlyn : N.S.W.).
Serventy, V. (1977). Wildlife of Australia (Nelson : Melbourne).
Slater, P. and Lindgren, E. (1966). Wildlife of Western Australia (West Australian Newspapers : Perth) .
Stackhouse, J. (1970). Australia's Venemous Wildlife (Hamlyn : London).
weatherley, A.H. (1967). Australian Inland waters and their Fauna (A.N.U. Press : Canberra).
Journals
"The western Australian Naturalist" (Publ. by W.A. Naturalists Club).
"Australian Natural History" (Publ. by The Australian Museum : Sydney).
']
I ll
1
2
4

t
102.
SECTION D
DESIGN OF EXPERIMENTS
There are certain rules that must be followed when planning an experiment. Let us suppose for example that you want to find out if a certain factor has an effect on growth of plants or animals.
1. Your starting material should be as even as possible. If you are using seeds the very big and very small ones should be discarded. If possible you should raise more organisms than you actually need, all under the same conditions and at the beginning of the experiment select a uniform lot of material.
For animals the size, weight, sex and age, past history, are important to consider when selecting material for an experiment. Organisms should be randomly placed in groups to become either the controls or the treated material.
2. Every experiment must have an untreated control set. If you need to do several experiments, one after the other, then each experiment must include a control set, not just the first. You might think the controls are uninteresting but they're not, they're vital so don't skimp on the number you put in the control group. It should be at least equal to the number in the treated group.
3. Each treatment should include an. adequate number of plants or animals. What's adequate? Unfortunately, the rules on what's adequate are rather vague as it depends somewhat on how variable you expect your material to be - for example for seeds of a crop plant in which you expect high and uniform germination, 50 seeds might be adequate but for seeds of a species collected from the wild and in which a low and eratic germination is possible it would be wise to have 100 or more in each treatment. The idea is to include enough organisms so that if at the end you do get a difference between your control and treated material you can be fairly sure its real, not just a lucky selection of a few individuals showing one end of the range of variation possible in the controls.
4. All factors except the one being experimentally studied should be kept constant. For plants, important factors are temperature, light, soil, pot size, exposure to wind, water, fertilizers. For animals, important features to keep constant are temperature, food and water supply, day length, shelter and so on. It is pretty difficult to find an area to lay out an experiment where you can be sure every spot on that area has exactly the same conditions - even in a glasshouse the afternoon shade might reach some pots before others and slow the growth of these plants. So don't lay out your experiment in neat rows with controls on one side and treated ones on the other - randomize the position of your organisms over the area you are using.

.I'
103.
5. Think carefully about the best measurements to make on your organisms and keepresults for individuals separately. If you end up with a huge mass of data you might leave this in an appendix and just present the summarized material in your account.
6. Photographs are useful but be honest. If you state it is a picture of "typical results" make sure it is. It is very tempting to photograph the very worst control and the very best treated plant or animal depending on what you are hoping to show.
7. Finally, if time permits, your experiment should be repeated. This is a real drag but it is scientifically far better to repeat an experiment and be sure of the results rather than to press on to the next one and base it on what could be incorrect assumptions.
8. Don't be depressed by failure or a negative result. A good write up of a failed experiment is just as valid as one with perfect results. In your discussion you would include your ideas on why your results were different from the expected ones, and make suggestions for future modifications of the experimental technique.
REFERENCES
Heath, O.V.S. (1970). Investigation by Experiment. (Studies in Biology No. 23) (Edward Arnold : London).

104.
SECTION E
WRITING A REPORT ON A BIOLOGY PROJECT
RELATIVE IMPORTANCE OF THE REPORT
To be able to communicate your results and ideas is just as important as being able to do lots of experimental work. In addition, your biology project will be evaluated from your report so it is clearly important to budget sufficient time to write up a good report. Some scientists follow a rule of thumb that for any investigation l/3 of the time should be spent on planning, l/3 on actual experimentation and l/3 on the write up. It may require considerable self discipline for you to spend as much time on less agreeable tasks such as writing up, as on the actual experimentation.
WHEN TO PLAN THE REPORT
It may seem crazy, but in fact it is a good idea to rough out the plan of your final report as soon as your project is underway. Doing this will help you see the relative importance of various aspects of your work, and you may even realize the necessity of collecting a particular piece of information during your experiment that you might otherwise have missed. Always write up sections of your work as you go along. Sitting down and trying to write up maybe a year's information from notes is rather daunting.
CONVENTIONAL FORMAT
Most projects can be written in a conventional format as described below. However, some that are more descriptive or observational may not fitJso do not feel obliged to force your project into this format. The sections used are
Introduction Materials and Methods Results Discussion Summary Acknowledgements References.
Sometimes, if you do a sequence of experiments that depend on one another you may need to have a layout like so
General Introduction Section 1 - Introduction
Materials and Methods Results
Section 2
etc.
Discussion Introduction Materials and Methods Results Discussion
Final Discussion etc.
Introduction
In this section state why the project was worth investigating and give a brief summary of the information you have gathered from books. Take great care in writing yoocaim as once you have stated this you can't go off at a tangent describing sqme other interesting observations not covered by your stated

,,
f
II i i I
t I
105.
aim. Don't steal your own thunder by saying what your results were in the aim (i.e. don't say 'In this project we showed that dogs lose their fur if they eat soursob' - rather keep your reader interested by saying 'In this project we studied the effect on dogs that accidentally ate soursob'.
Materials and Methods
State exactly what kind of plants and animals you used, where you got them from and so on. It may be necessary to describe the location of the area you studied, the time of day, or of the year, that you worked. Methods should be given only in sufficient detail for some one else to be able to repeat your work, don't get bogged down by listing every last rubber band and notebook you used.
Results
Just because it was hard work collecting information doesn't mean you have to make your reader go through it all. Often your mass of individual readings (= raw data) can be put in an appendix to the report and the average values given in the results section. Results are described in the text and presented in tables and figures (= graphs, histograms and photographs). It is not usual to give the same information twice (i.e. in both a table and a graph). Huge fold out graphs and tables are indigestible, try to present the information on an A4 page wherever possible. All tables and figures should be numbered and should have a caption that gives enough information for the reader to understand that particular table. Sometimes it seems impossible to separate out the Results and Discussion sections. If so, combine them.
Discussion
Here you summarize the results and relate them back to your stated aim in the Introduction. The results are compared with the information you mentioned from books in the Introduction and with other published information it is now relevant to mention.
summary (Sometimes called abstract)
Simply state briefly what you have concluded. If necessary list the points as Nos. l-3 etc. This section should never be more that a short paragraph and should not contain any new ideas or information not already dealt with in the discussion section.
Acknowledgements
Here is your chance to thank people who have given you material or help with your work. Be brief, don't gush.
References
In a proper scientific paper every time an idea or piece of information is used that comes from somewhere else you must state your source of information. Then in the References section you list all those books and papers alphabetically by author. Thus if you read 57 books but only mention 5 in the final report you only list those 5 at the end.
You may find it better to have a list "Sources of Information". Here list all the books from which you got useful information. It is considered plagiarism (i.e. cheating) if you use great slabs of information from a book and make it look as though it is your own work, rather, show where it came from.
The way you should write out references is seen in the lists at the end of each project.

from
d your
rate
~ the ~ed ; now
.nts lph :h
lith
.s ttion.
te
.st
>OOk
1e
>f
STYLE, PRESENTATION AND LEVEL 106.
Everyone has their own style of writing and this style should show through even though your material has been pounded into a conventional format. Convey to your reader your enthusiasm for your investigation without using colloquial phrases and without using unnecessary scientific jargon. Write clearly and simply. Try reading it out aloud; if your sentences are such a mouthful that you stumble over them they're no good. Some of the books listed at the end of this section may be helpful in writing your report.
One worry is that your report may be read by your friends, parents, teachers and maybe a professional biologist. Where do you pitch it? How much explanation is necessary? The best idea is to write it for your colleagues who are also doing biology so you don't need to go into lots of detail about things that are well known to biology students, but you do need to explain unusual methods or new information that you alone know about.
A typed report looks nice but it is not essential. If you do get it typed, be double sure to proof read it carefully for spelling mistakes as many of the words will be new for the typist. A final check should always be made on
a) typographical and spelling errors in the text. b) mathematical or typographical errors in tables and graphs. c) omissions of headings and captions on tables etc. d) errors in the references
Writing well isn't easy. Even great authors find it difficult
"One fusses about style. One tries to write better. One takes pains to be simple, clear and succinct. One aims at rhythm and balance. One reads a sentence aloud to see that it sounds well. One sweats one's guts out"
- W. Somerset Maugham.
REFERENCES ON SCIENTIFIC WRITING
Woodford, F.P. (1969). "Scientific Writing for Graduate Students" (Rockefeller V.P. New York).
Fowler, H.W. (1966). "A Dictionary of Modern English Usage (Oxford University Press).

107.
SECTION F
LAWS PROTECTING W.A. PLANTS AND ANIMALS
PLANTS
If you want to do a project on native plants you must know that the native flora of W.A. is "protected". This means that you can't damage a plant, dig it up, or pick off flowers or seeds etc. When you are just starting in Biology it is hard to know what is native and what is an introduced weed that you can pull up. Until you are sure, assume you can't damage anything.
To get permission to carry out a scientific project you must get a license from the Department of Fisheries and Wildlife. Ask your teacher to write to the Department at 108 Adelaide Terrace, Perth. A license costs $2 and will permit you to work on vacant crown land and possibly on nature reserves. If the area in which you want to work is controlled by another Government authority, having got your permit from Fisheries and Wildlife, you must write to them as well for permission. This is usually easily obtained for Water Supply Reserves and Forestry Department land (bearing in mind the quarantine restrictions because of die-back) • It may be very difficult to get permission to work on National Parks or Kings Park.
On private land you need the owner's permission to take any of the plants or parts of them. It is not completely straight forward though, as some species are so very rare they are likely to become extinct if they are not protected everywhere they grow, including private land. Thus, for plants considered rare and endangered you can't pick them even on private land. Better not choose anything this rare to work on for a project!
The wording of the laws covering the native flora means that they include flowering plants, gymnosperms and ferns. Introduced plants are not protected. Mosses, liverworts, algae and lichens are not protected. Thus, you may collect this material without a permit (except in National Parks and Kings Park) but of course as Biologists you realise that all living organisms are part of the ecosystem and collection should do minimal damage to the ecosystem.
ANIMALS
If your project involves native or migratory animals you should understand the laws protecting these. Basically all the native animals that are vertebrates are protected (mammals, birds, reptiles and frogs), and you cannot catch them, keep them as pets or harm them in any way. This protection covers animals found anywhere, crown land, national parks, even on private land. The protected fauna does not include introduced animals like wild domestic cats or foxes, but it does include three - the white swan and the peafowl and pheasants of Rottnest. Also there are two invertebrate groups included - the jewel beetles (Buprestidae) and the ants of the genus Nothomyrrnecia.
If you want to do a project on protected animals on crown land or nature reserves ask your teacher to write to the Department of Fisheries and Wildlife (108 Adelaide Terrace, Perth), and apply for a permit. These are usually given for well designed scientific investigations. Additional permits are required for work on any animals in National Parks or Kings Park and such permits are difficult to obtain. Some animals are so rare they are considered "endangered" and you are unlikely to get permission to work on these.
--

j
'ction land.
::
l.l
108.
Animals that are not protected include all the invertebrates (except the two mentioned above), most of the venemous snakes (who'd want to work on these!), the dingo and the fish. However, you need appropriate permits for duck and quail shooting and inland fishing (for trout bream and marron) in season. Some native birds can be purchased commercially and kept but again a license must be obtained.
All the red tape about flora and fauna sound pretty off putting but it is not meant to discourage the genuine biology student. Rather, it protects our valuable plants and animals from wanton damage by unthinking collectors or damage by greedy commercial exploiters.

109.
SECTION G
STERILE TECHNIQUE AT HOME OR AT SCHOOL
A. Preparing agar plates
Equipment Domestic pressure cooker Agar and other ingredients listed in Recipes section Disposable plastic petri dishes Damp tea towel Fairly small, clean, draught free room Methylated spirit Spirit lamp or bunsen burner.
1. Agar medium can be prepared in small quantities in medicine bottles or soft drink bottles with metal caps.
2. Weigh (or measure by equivalent volume) the required amount of agar into the bottle and add the water. Never fill bottles more than 2/3 full and always leave caps loosely on during sterilization. Make sure there is 2 em clearance between the top of the bottles and the lid of the pressure cooker.
3. Put bottles into pressure cooker with about 4 em of water. Put on lid and heat till steam is hissing strongly from the vent. Add the heavy weight (15 lb or 100 K Pa) and continue heating until the steam is escaping from the valve which indicates pressure has been reached. TUrn down heat to keep it snorting gently and sterilise for 20 minutes. Turn off heat and allow to cool slowly.
4. Pour agar into plates in a small draught free room. Wipe down a table with methylated spirit then place a clean damp tea towel on the table and arrange the sterile petri dishes on it.
5.
6.
Remove the cap from the bottle of agar and flame the neck then pour 15-20 mL into each plate, trying to avoid removing the lids completely. Keep the bottle held at about 45° to prevent drips running up and down. Leave Petri dish lids slightly ajar till the steam stops condensing on the lids then shut them. Leave plates till agar has set then wrap dishes in "Gladwrap" until needed.
Wash out bottles immediately after use. Never down the sink - it sets and blocks the drains. diluted agar away with plenty of hot water.
pour undiluted agar Always wash well
B. Setting up cultures
To do this you may need to use sterile forceps, Pasteur pipettes or sterile filter papers etc. Things like these can be sterilized by enclosing them in a screw top jar and sterilizing in a pressure cooker as for the
agar.
C. Subculturing
Equipment As for A. but you will also need a wire inoculating loop and/or a mounted needle.
-

Ly.
le
110.
1. Working on a swabbed down table and a wet tea towel as before, heat the mounted needle or inoculating loop until red hot and leave to cool (it takes quite a while - have an initial test run using your fingers to see when it is cool).
2. When cool, transfer to a small portion of the fungal or bacterial colony from one Petri dish to a fresh one taking care not to completely remove the lids of the dishes. Re-sterilize inoculating wire.
D. Recipes
1. Malt extract Agar
Malt extract agar water
20 g (sticky malt from brewing shops) 20 g
1 litre
2. Potato dextrose Agar
a)
potato dextrose agar water
200 g 20 g 20 g
1 litre
Scrub potatoes but do not peel, cut into 10 em cubes. out 200 g.
Weigh
b) Rinse rapidly in running water then place in 1 litre water and boil until very soft (l hour).
c) Mash roughly with remaining water and strain through a sieve. You need the liquid and a little sediment. Add agar and dextrose, make up to l litre, with water, sterilize.
3. Tap water or plain Agar
4.
agar water
15 g 1 litre
Rabbit dung agar (for dung fungi - Project 1-l)
Sterilize rabbit pellets, in a screw top jar. dish, cover with tap water agar.
Add 6 to each petri
5. Cornmeal Agar (for nematode trapping fungi- Project 1-4)
maize-meal (Polenta) tap water agar
20 g 1 litre
20 g
a) Mix water and maize-meal and heat to 70 C for l hour. Allow to stand and pour off the clear solution. Make up to l'litre.
b) Add agar and autoclave.
General Note - If you cannot weigh out ingredients at home, weigh them out at school in test tubes and carefully mark the levels on the tubes. Then for later work at home you can use these marked tubes and use equivalent volumes rather than weighed amounts.
Disposal - sterilize used cultures in glass petri dishes using a pressure cooker, or 1nc1nerate cultures in disposable plastic petri dishes.