Embed Size (px)
Citation preview

Berry Crop Soil and Nutrient Management – The Basics
Utility of Soil and Tissue Testing…• Pre-plant
• Maximize soil health maximize plant establishment and longevity
• Identification and remedy of soil constraints• Soil pH adjustment• Addition and incorporation of required nutrient inputs
• Post-plant• Optimize profitability
• Avoid costly over or under fertilization• Optimize crop yield and quality• Protect the environment
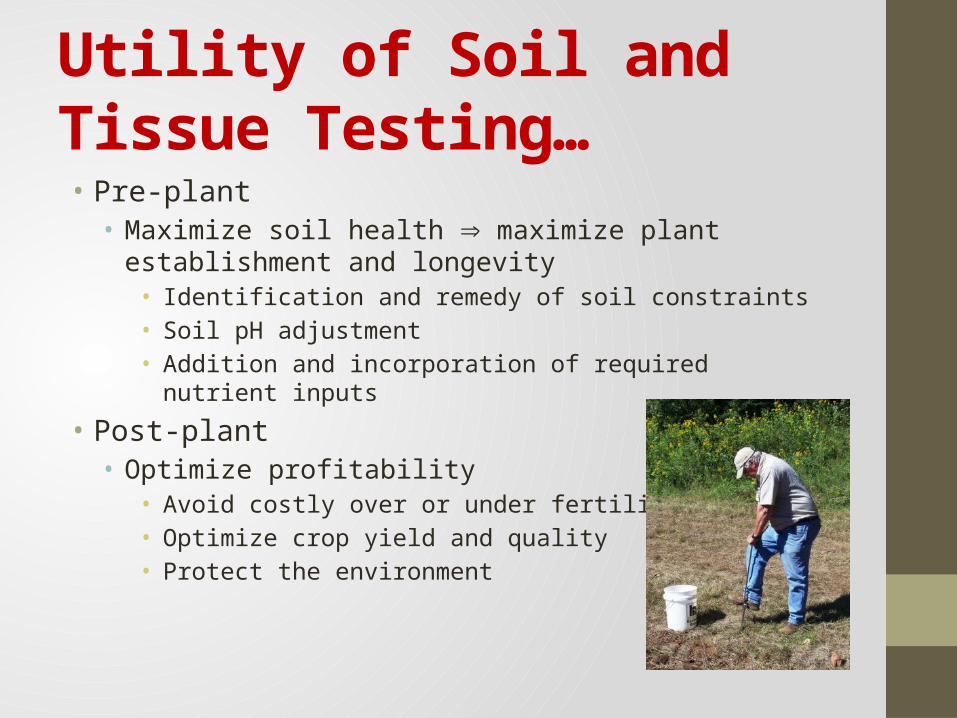
Types of Soil and Tissue Testing• Standard Soil Test
• Used in established plantings in concert with tissue analysis to determine nutrient status of plants
• Used in established plantings for diagnostic testing when nutrient imbalances are suspected
• Cornell Soil Health Test• Used pre-plant to identify soil health constraints
• Includes standard soil test • Used in established plantings for diagnostic testing when soil
health issues are suspected• Tissue Analysis
• Used in established plantings in concert with standard soil test or soil health test to determine nutrient status of plants.
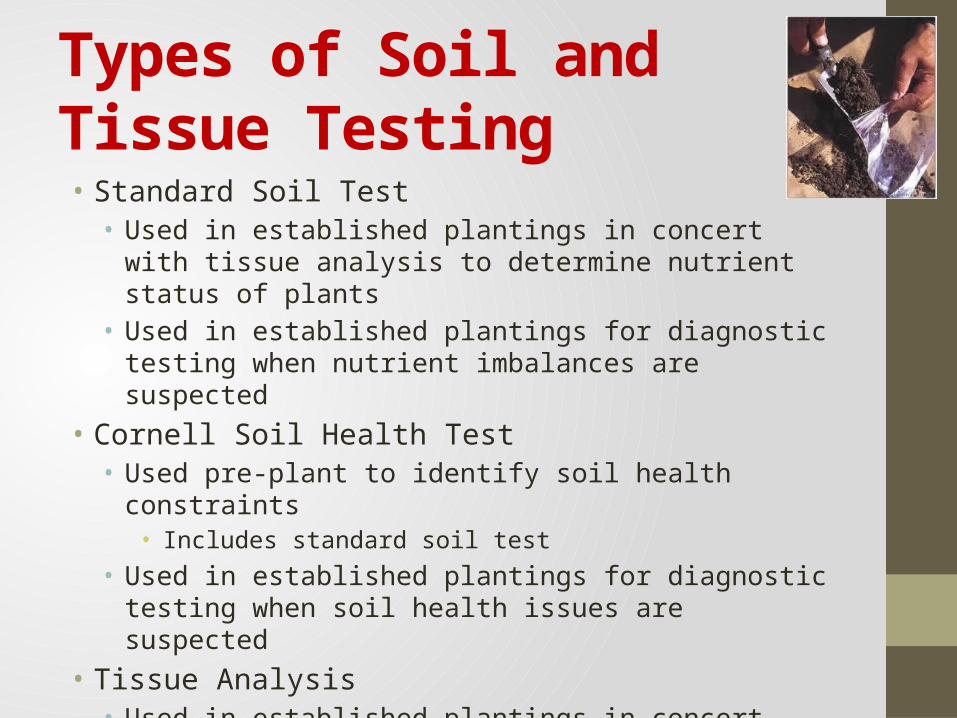
Routine vs. Diagnostic TestingRoutine
• Lime and fertilizer recommendations for plant maintenance
• No known history of fertility or soil health problems
Diagnostic• Suspected nutrient
imbalance or soil health issue• Use paired samples,
“good” and “bad” areas to confirm problem.
• Consider adding soluble salts package if marginal leaf burning/necrosis is present
• Use plant tissue analysis to further assist in diagnosis
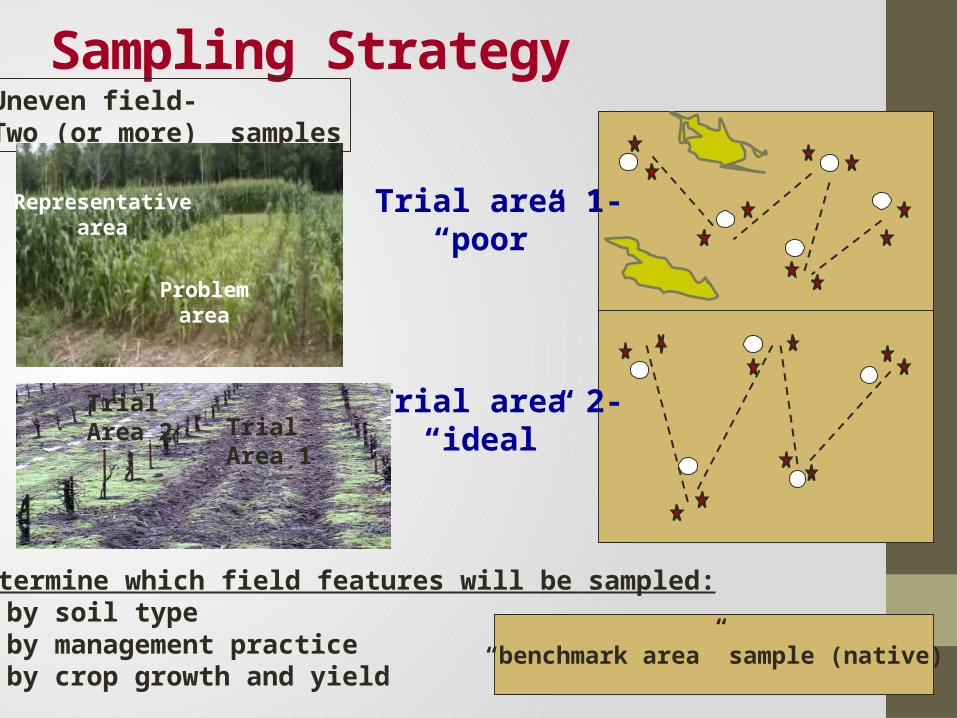
Sampling StrategyUneven field-Two (or more) samples
Trial area 2-“ideal”
Trial area 1-“poor”
Determine which field features will be sampled:• by soil type• by management practice• by crop growth and yield
Representativearea
Problemarea
“benchmark area” sample (native)
Trial Area 1
Trial Area 2
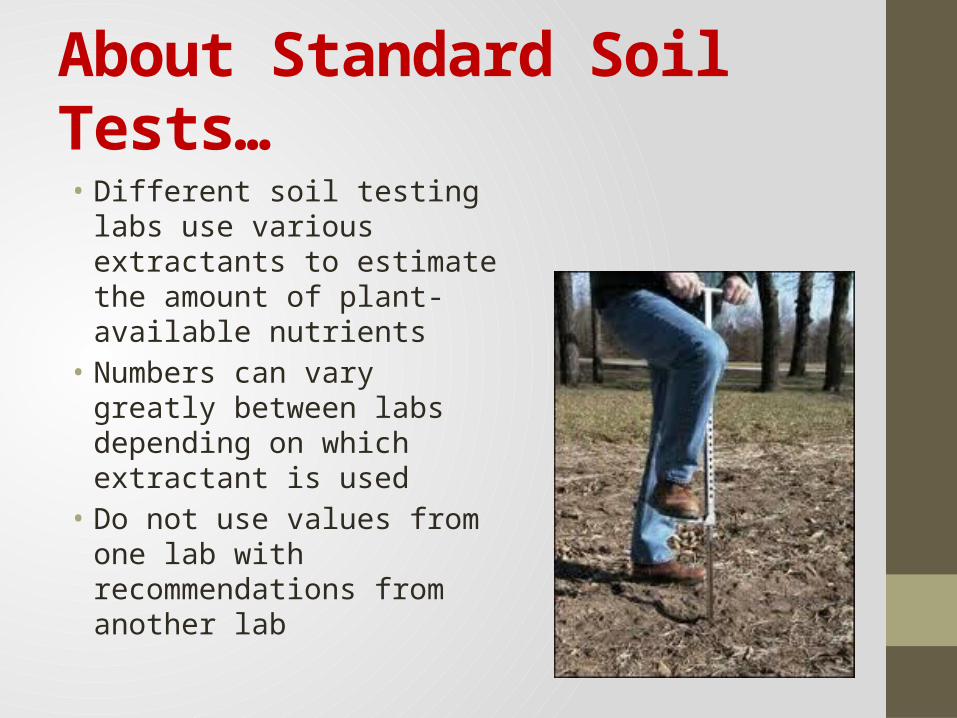
About Standard Soil Tests…• Different soil testing labs use
various extractants to estimate the amount of plant-available nutrients
• Numbers can vary greatly between labs depending on which extractant is used
• Do not use values from one lab with recommendations from another lab

Agro-One Standard Soil Test
• Soil test packages and nutrient guidelines for the Northeast• Maryland, New Hampshire, New York, Pennsylvania, and Vermont
• New York customers also have the option of an Agro-One analysis with Cornell recommendations*
*Cornell recommendations are based on a modified Morgan extractant and have been developed for each berry crop.
Agro-One Soils Laboratory 730 Warren Road, Ithaca NY 14850
Phone: 800-344-2697 • Fax: 607-257-1350 [email protected] www.dairyone.com
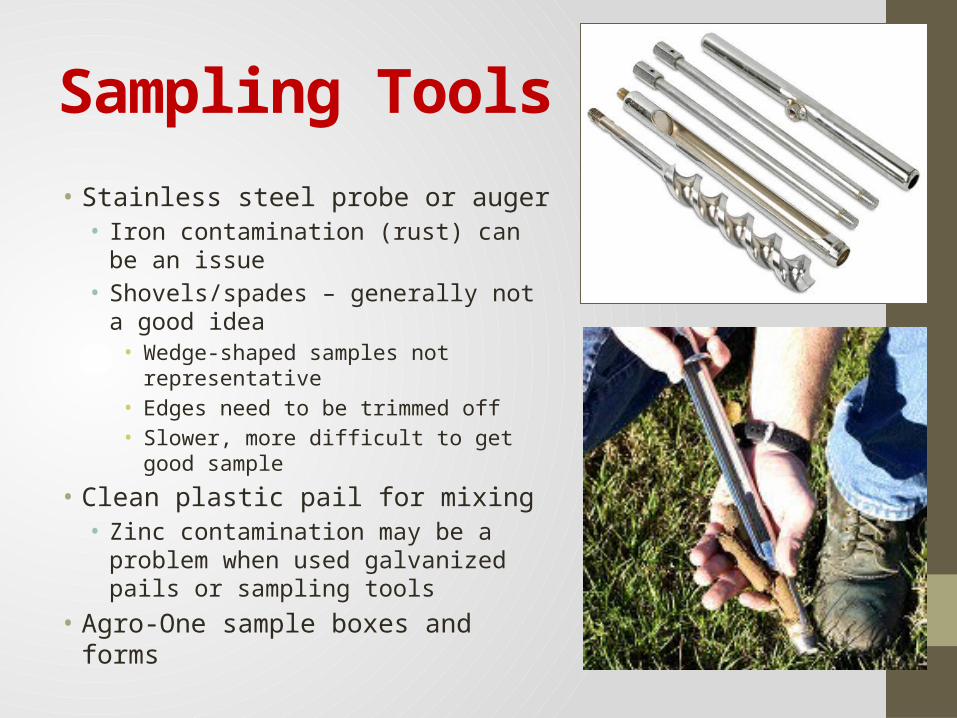
Sampling Tools
• Stainless steel probe or auger• Iron contamination (rust) can be an
issue• Shovels/spades – generally not a good
idea• Wedge-shaped samples not
representative• Edges need to be trimmed off• Slower, more difficult to get good sample
• Clean plastic pail for mixing• Zinc contamination may be a problem
when used galvanized pails or sampling tools
• Agro-One sample boxes and forms

Probe…• Probes for dry soils with few
rocks• Collect a continuous core
through the entire sampling depth
• Minimum disturbance of the soil• Faster in good conditions• Easier on your back• May use lubricant to prevent
plugging of probe • WD 40, PAM, Dove dish soap,
Silicone• Do not use if micronutrient
deficiency suspected• Prices range from $50 to $1,000
for standard soil test probes/kits
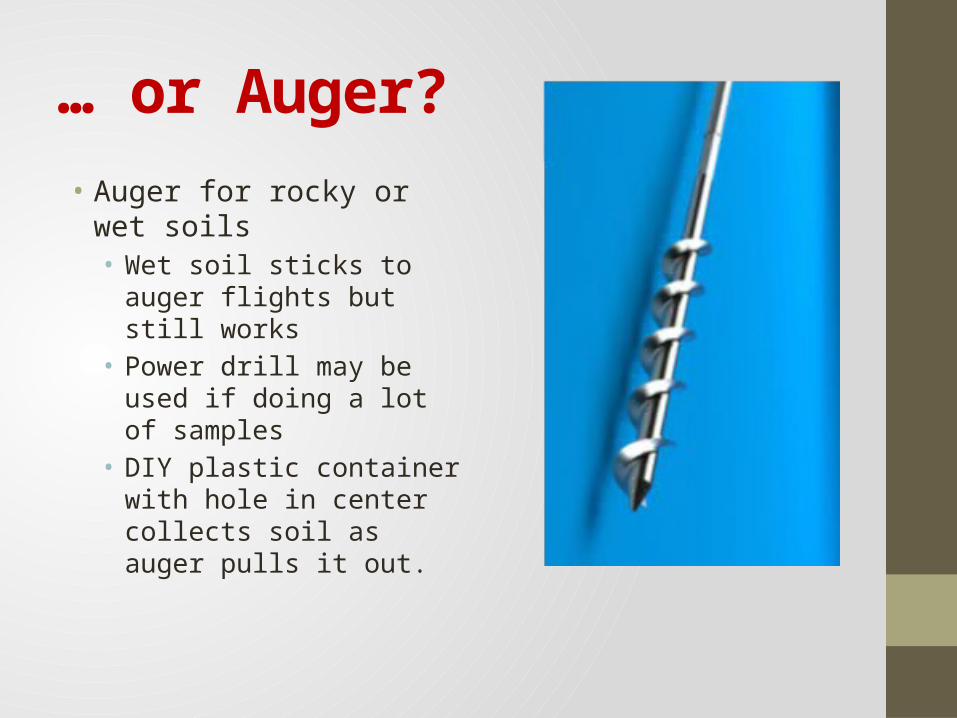
… or Auger?• Auger for rocky or wet soils
• Wet soil sticks to auger flights but still works
• Power drill may be used if doing a lot of samples
• DIY plastic container with hole in center collects soil as auger pulls it out.
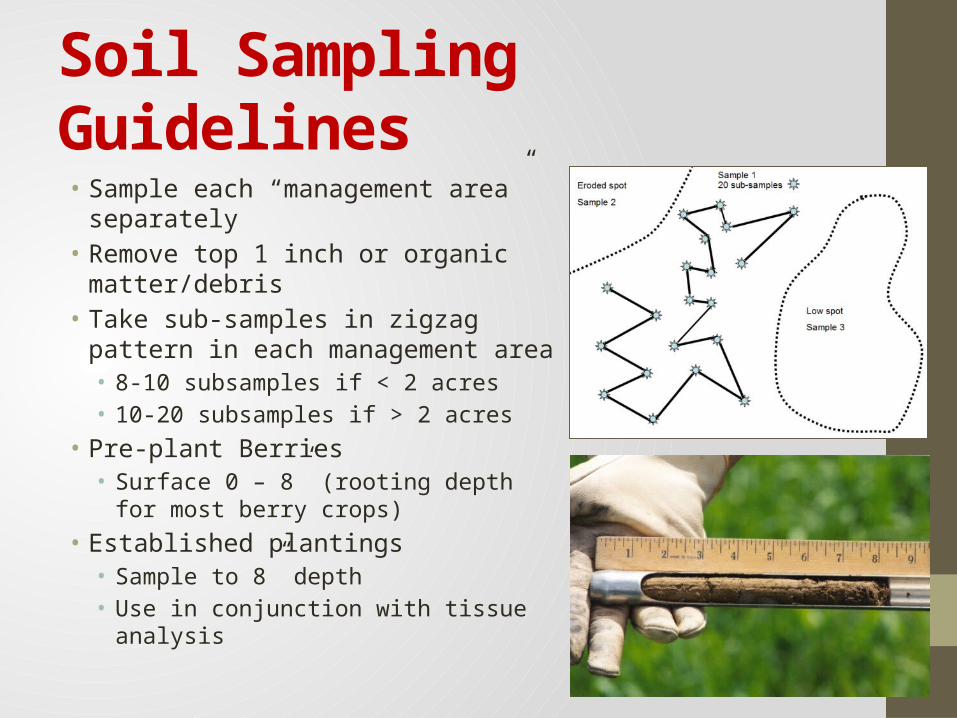
Soil Sampling Guidelines• Sample each “management area”
separately• Remove top 1 inch or organic
matter/debris• Take sub-samples in zigzag pattern in
each management area• 8-10 subsamples if < 2 acres• 10-20 subsamples if > 2 acres
• Pre-plant Berries• Surface 0 – 8” (rooting depth for most
berry crops)• Established plantings
• Sample to 8” depth• Use in conjunction with tissue analysis
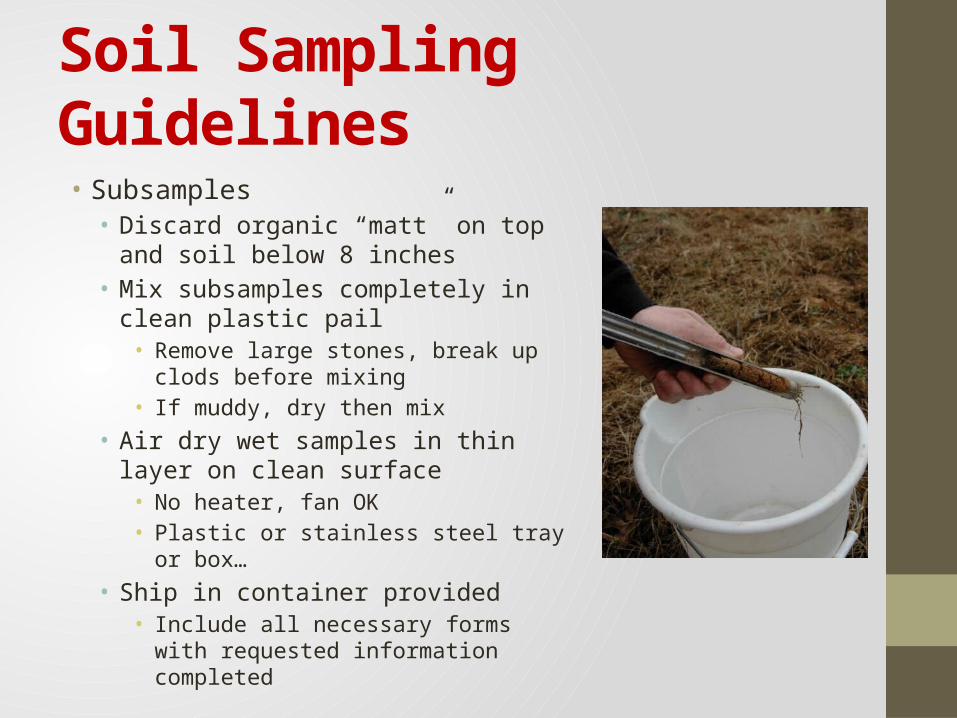
Soil Sampling Guidelines
• Subsamples• Discard organic “matt” on top and soil
below 8 inches• Mix subsamples completely in clean
plastic pail• Remove large stones, break up clods
before mixing• If muddy, dry then mix
• Air dry wet samples in thin layer on clean surface
• No heater, fan OK• Plastic or stainless steel tray or box…
• Ship in container provided• Include all necessary forms with
requested information completed

How to Find Soil Series Names• Soil Series Name is required for Agro-One nutrient
guidelines in NY• Use mapping tools to identify soil series
• http://websoilsurvey.nrcs.usda.gov/app/HomePage.htm
• iPhone app! • http://itunes.apple.com/us/app/soil-web-for-the-iphone/id354911787?mt=8
• County soil map• No longer in print• Local CCE offices often have copies on hand…
Interpreting Soil Test Results• Check your soil pH – is it right for the berry crop you’re growing?
• Strawberries and Raspberries – 6.2 to 6.5• Blueberries - 4.2 to 4.5
• Do your macro-nutrient levels (N, P and K) fall in medium range or above?
• What’s your soil organic matter content? (3% or higher best for berry crops)
• Soil calcium• Should be 2,000 lb/A or less for blueberries
• Soil aluminum• high levels (> than 300 lb/A) of this nutrient are toxic to berries• The problem is greater in acid soils• Do not use aluminum based fertilizers i.e. aluminum sulfate
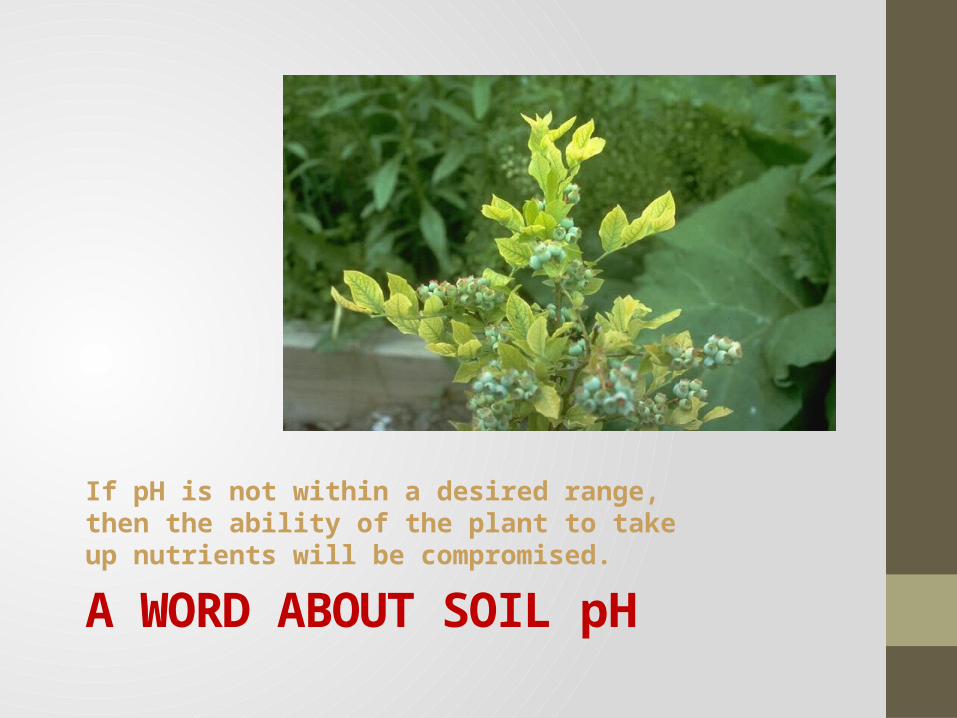
A WORD ABOUT SOIL pH
If pH is not within a desired range, then the ability of the plant to take up nutrients will be compromised.
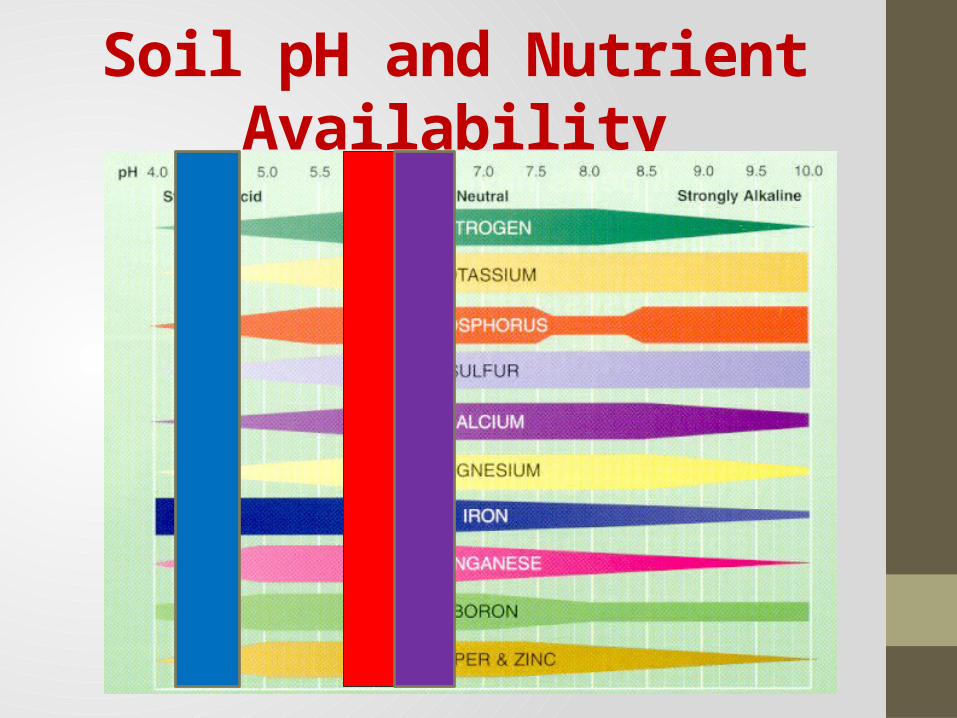
Soil pH and Nutrient Availability
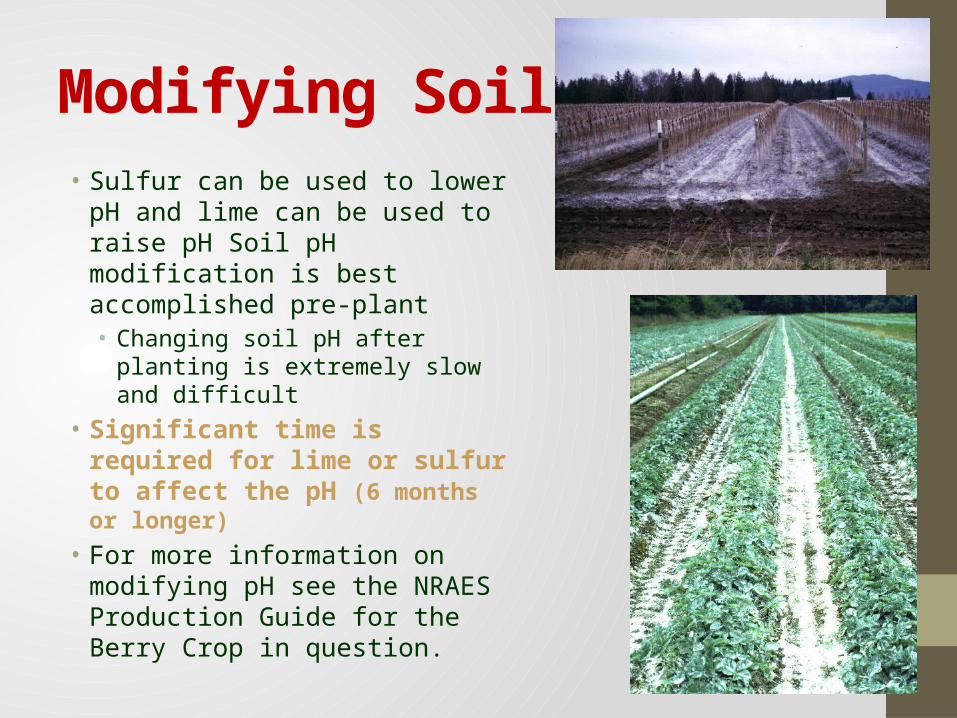
Modifying Soil pH• Sulfur can be used to lower pH and
lime can be used to raise pH Soil pH modification is best accomplished pre-plant• Changing soil pH after planting is
extremely slow and difficult• Significant time is required for
lime or sulfur to affect the pH (6 months or longer)
• For more information on modifying pH see the NRAES Production Guide for the Berry Crop in question.

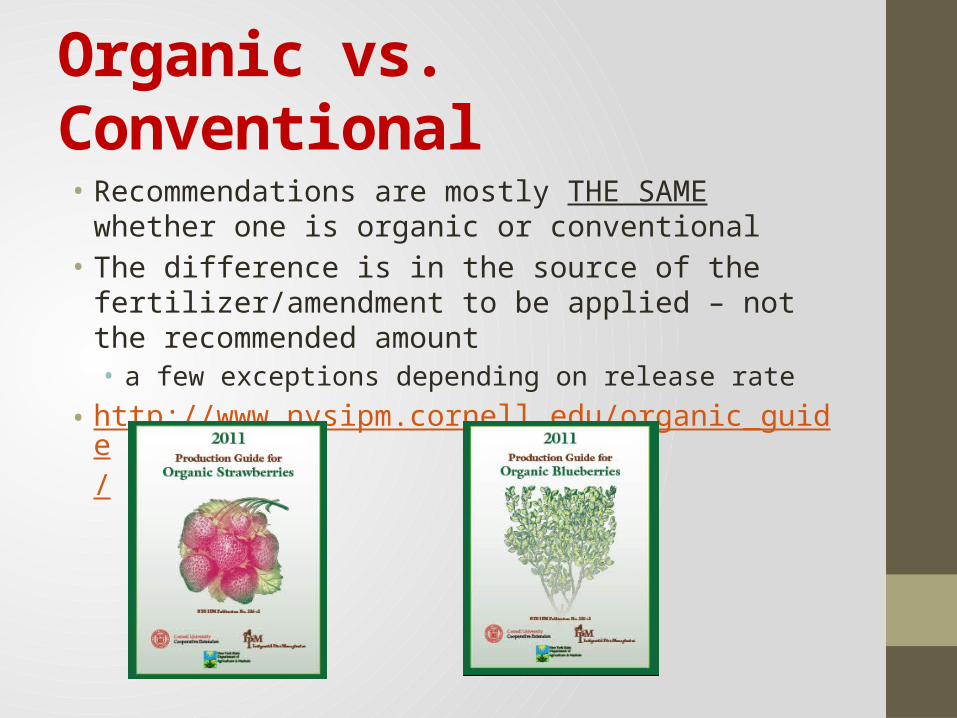
Organic vs. Conventional• Recommendations are mostly THE SAME whether one is
organic or conventional• The difference is in the source of the fertilizer/amendment to
be applied – not the recommended amount • a few exceptions depending on release rate
• http://www.nysipm.cornell.edu/organic_guide/
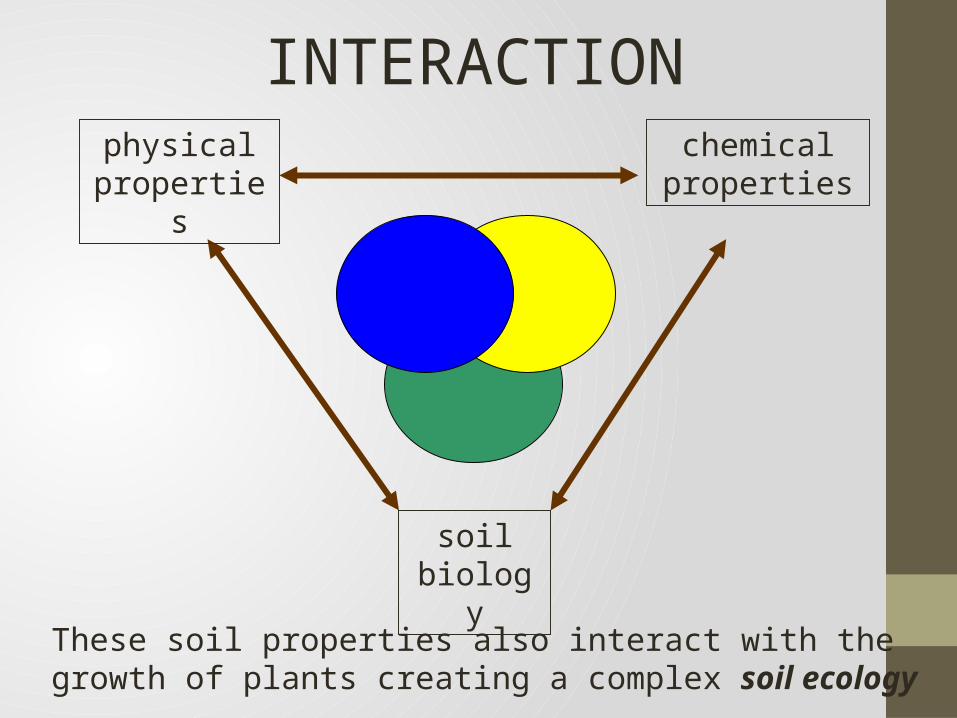
INTERACTIONphysical
properties
soil biology
chemical properties
These soil properties also interact with the growth of plants creating a complex soil ecology
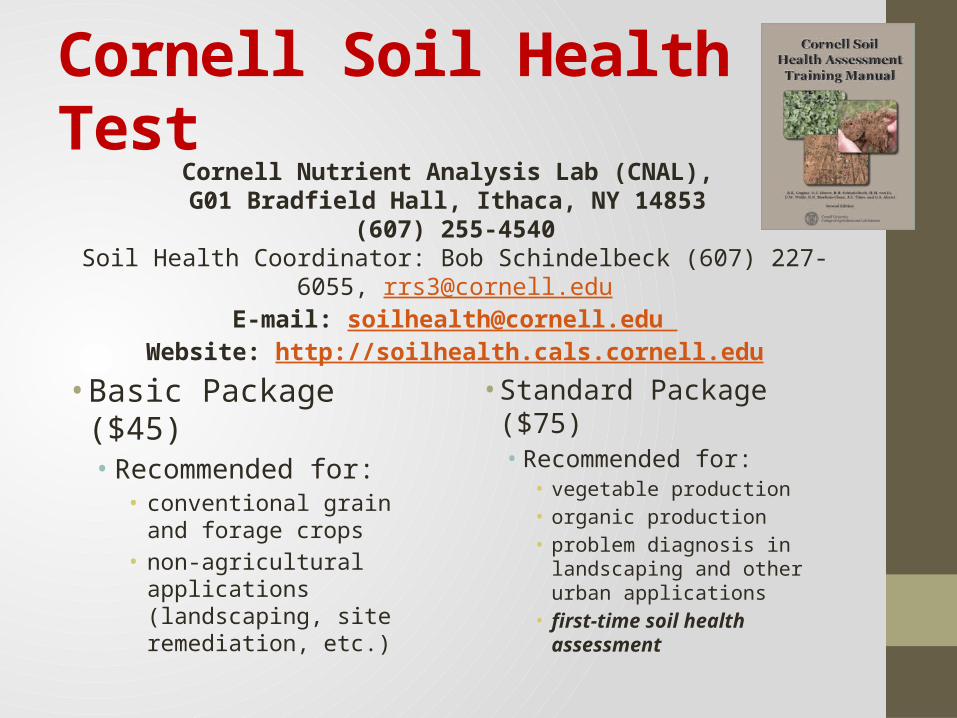
Cornell Soil Health Test
• Basic Package ($45)• Recommended for :
• conventional grain and forage crops
• non-agricultural applications (landscaping, site remediation, etc.)
• Standard Package ($75)• Recommended for:
• vegetable production• organic production• problem diagnosis in
landscaping and other urban applications
• first-time soil health assessment
Cornell Nutrient Analysis Lab (CNAL), G01 Bradfield Hall, Ithaca, NY 14853
(607) 255-4540Soil Health Coordinator: Bob Schindelbeck (607) 227-6055, [email protected]
E-mail: [email protected] Website: http://soilhealth.cals.cornell.edu
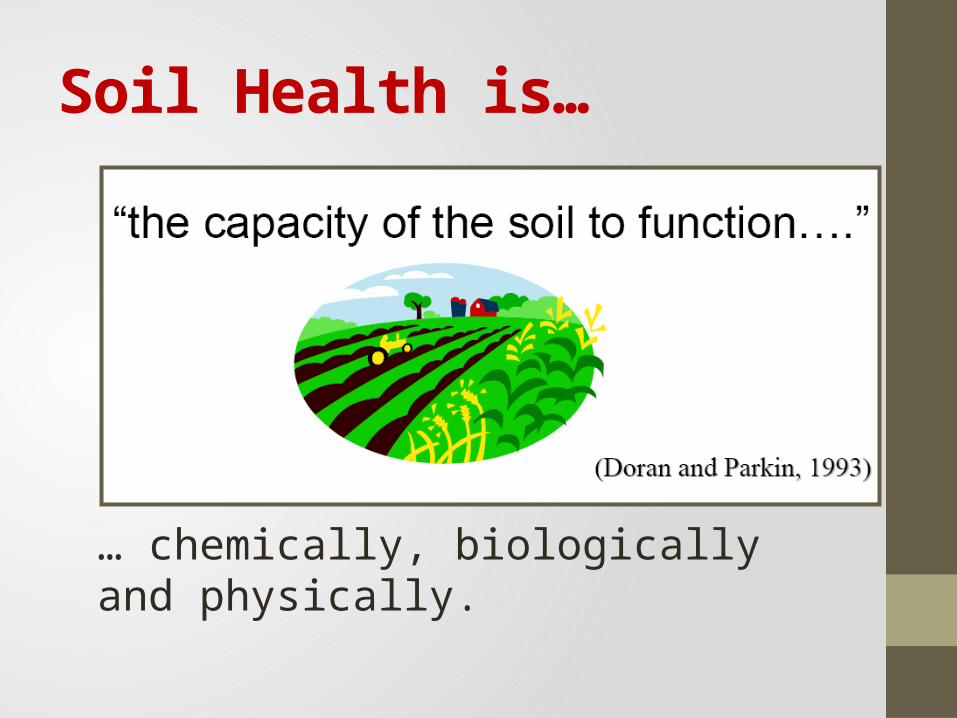
Soil Health is…
… chemically, biologically and physically.
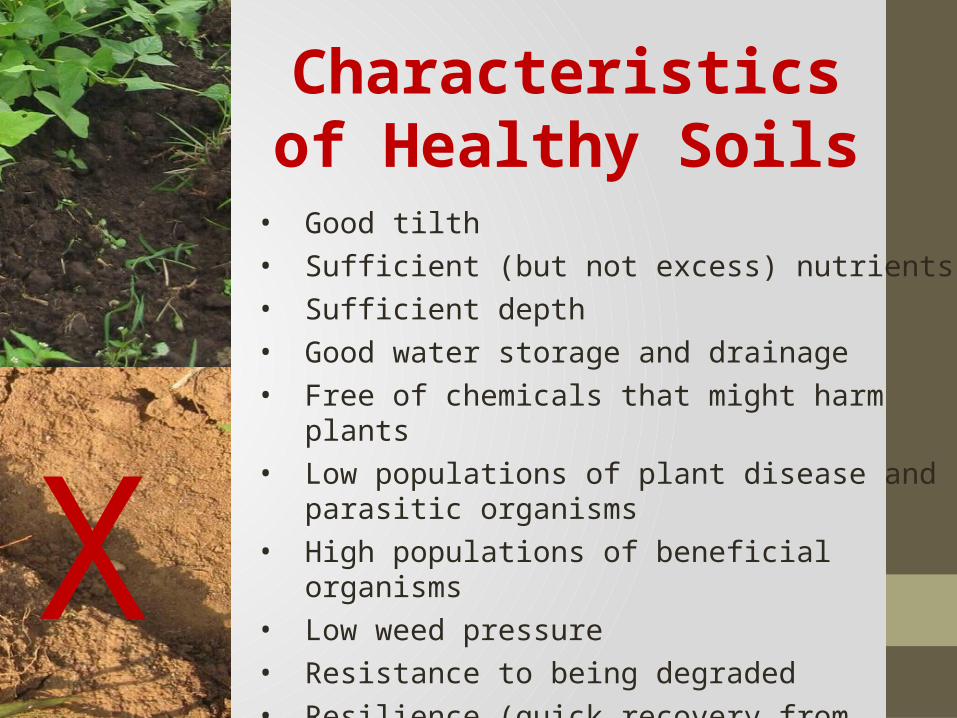
Characteristics of Healthy Soils
• Good tilth• Sufficient (but not excess) nutrients• Sufficient depth• Good water storage and drainage • Free of chemicals that might harm plants• Low populations of plant disease and parasitic
organisms• High populations of beneficial organisms • Low weed pressure• Resistance to being degraded• Resilience (quick recovery from adverse events)
X

General Signs of Poor Soil Health• Plowing up cloddy soil and
poor seedbeds• Hard soil (at planting, etc.)• Rapid onset of stress or
stunted growth during dry or wet periods
• Poor growth of plants• Declining yields• High disease pressure• Signs of runoff and erosion
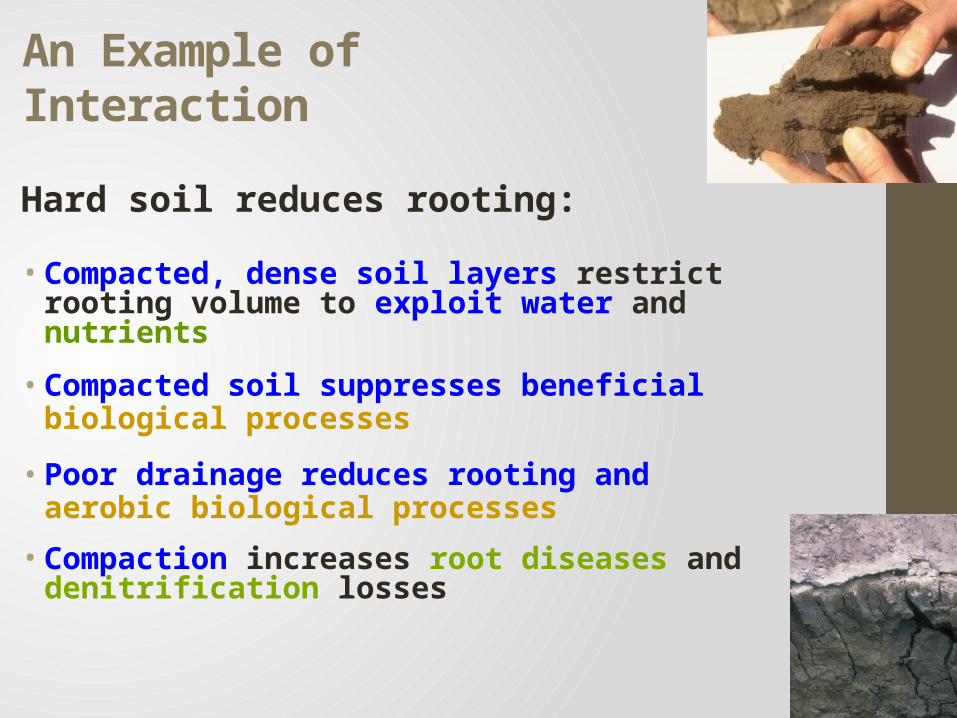
An Example of Interaction
Hard soil reduces rooting:
• Compacted, dense soil layers restrict rooting volume to exploit water and nutrients
• Compacted soil suppresses beneficial biological processes
• Poor drainage reduces rooting and aerobic biological processes
• Compaction increases root diseases and denitrification losses
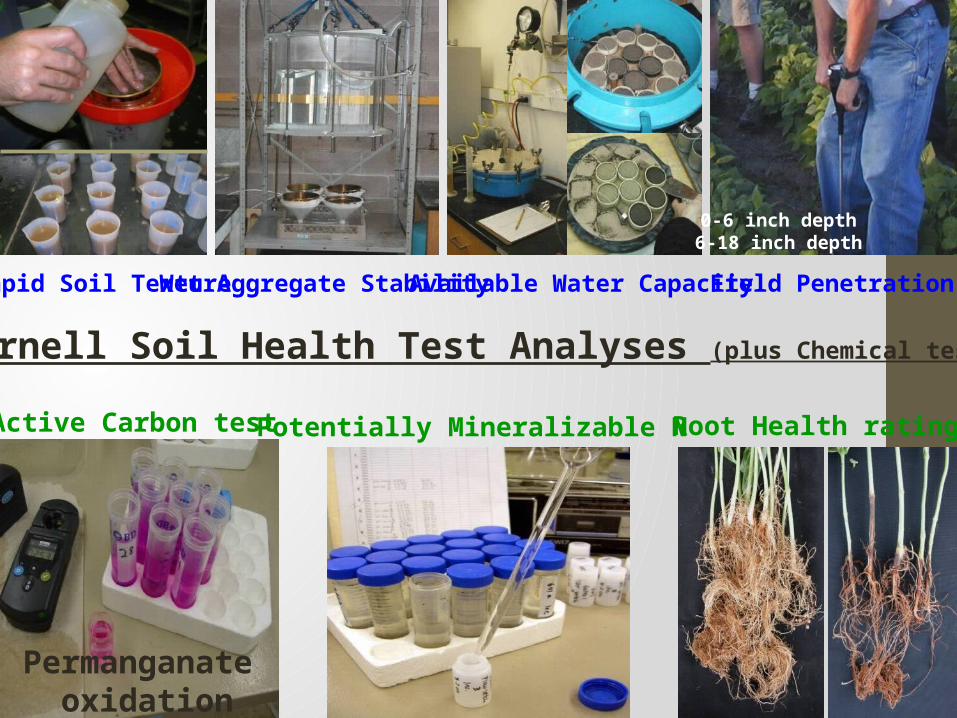
Wet Aggregate Stability Available Water Capacity Field Penetration
Active Carbon test Potentially Mineralizable N Root Health rating
Cornell Soil Health Test Analyses (plus Chemical tests)
Permanganate oxidation
0-6 inch depth6-18 inch depth
Rapid Soil Texture

Cornell Soil Health Test Guidelines• You will need:
• 2 5-gallon buckets/containers (one for soil, one for supplies)
• 1 zip-loc bag (large 1-gallon)• 1 600 ml plastic beaker (3 cup capacity)• Permanent marker and pen• Trowel or spade• Penetrometer• Grower and field information sheet• Clipboard (if desired)
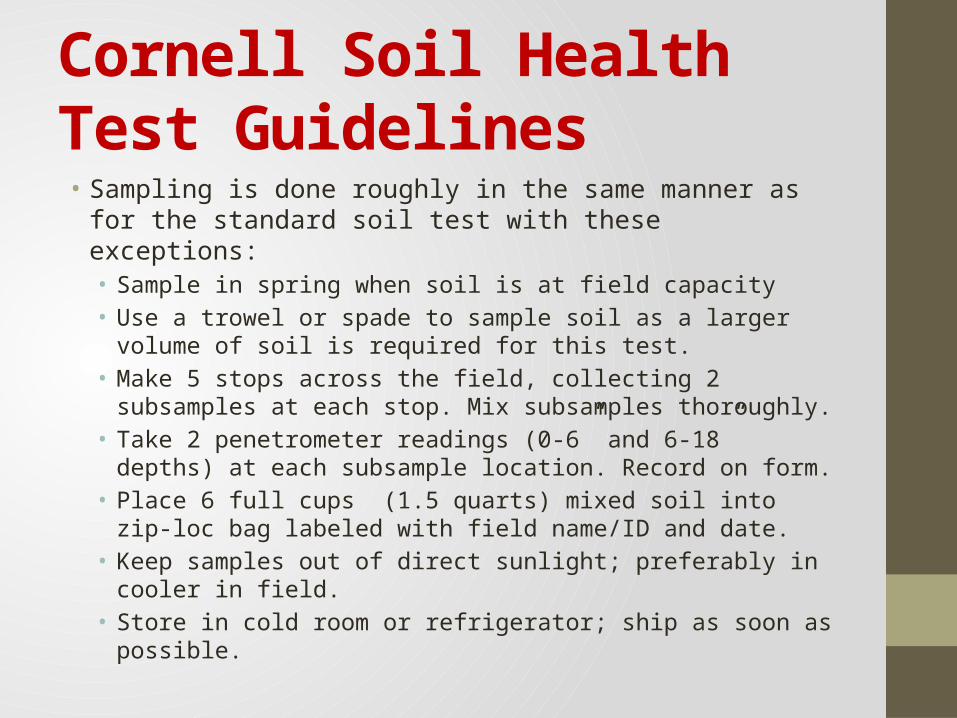
Cornell Soil Health Test Guidelines• Sampling is done roughly in the same manner as for the
standard soil test with these exceptions:• Sample in spring when soil is at field capacity• Use a trowel or spade to sample soil as a larger volume of soil is
required for this test.• Make 5 stops across the field, collecting 2 subsamples at each
stop. Mix subsamples thoroughly.• Take 2 penetrometer readings (0-6” and 6-18” depths) at each
subsample location. Record on form.• Place 6 full cups (1.5 quarts) mixed soil into zip-loc bag labeled
with field name/ID and date.• Keep samples out of direct sunlight; preferably in cooler in field.• Store in cold room or refrigerator; ship as soon as possible.

Interpreting Soil Health Test Results• The report is a management
guide, not a prescription. • Different management
approaches can be used to mitigate the same problem.
• In addressing some soil constraints, management practices can affect multiple indicators.
• Soil health changes slowly over time.
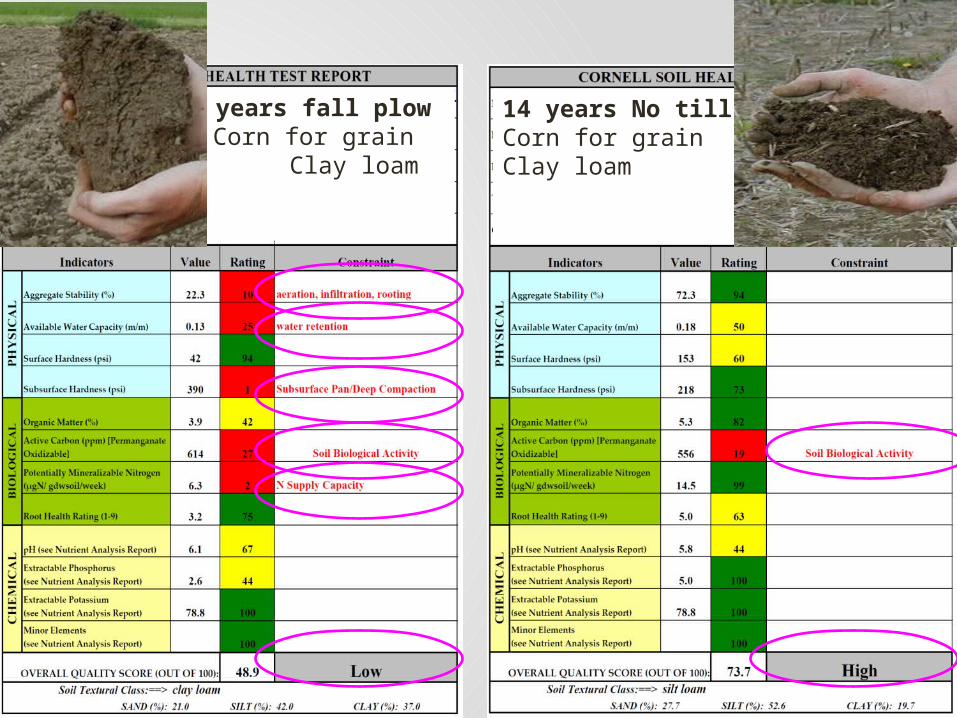
14 years fall plow Corn for grain
Clay loam
14 years No tillCorn for grainClay loam
Approach for a Successful Soil Management Strategy
• Assess your soil’s health to identify constraints
• Make changes in management strategies that work for your farm, and that address specific constraints
• Experiment on your farm to see what works in your situation… (start small)
• Adapt many resources of information to your farm
• Build healthy soils to increase resiliency to extremes
About Tissue Analysis…• Directly measures amount of nutrients in leaves• Sufficiency ranges known or estimated from other crops• Alerts grower when nutrient levels are approaching
sufficiency/deficiency• Corrective action may be taken before symptoms occur• Used to fine tune annual nitrogen application rates• Used to rule out possible nutritional causes of poor plant
performance
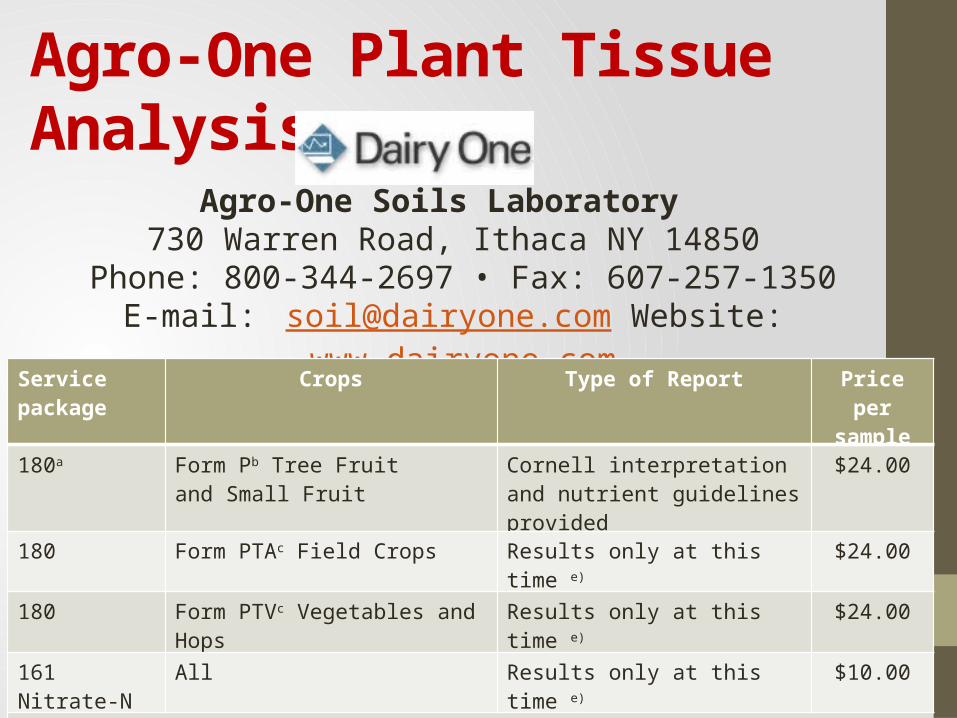
Agro-One Plant Tissue Analysis
Agro-One Soils Laboratory 730 Warren Road, Ithaca NY 14850
Phone: 800-344-2697 • Fax: 607-257-1350 E-mail: [email protected] Website: www.dairyone.com
Service package
Crops Type of Report Price per sample
180a Form Pb Tree Fruit and Small Fruit
Cornell interpretation and nutrient guidelines provided
$24.00
180 Form PTAc Field Crops Results only at this time e) $24.00
180 Form PTVc Vegetables and Hops Results only at this time e) $24.00
161 Nitrate-N All Results only at this time e) $10.00a) Service Package 180 includes total N, K, P, Ca, Mg, Mn, Fe, Cu, B, Zn and Sb) Cornell plant tissue analysis interpretation & guidelines are available for Fruit only at this time.c) Plant tissue analysis reports for vegetables, hops & field crops show results only. No interpretation or nutrient guidelines available at this time.d) Go to http://www.uvm.edu/extension/cropsoil/wp-content/uploads/HopFertilityManagementNE.pdf for more information on Hopse) Interpretive nutrient levels for plant analysis are available for many agronomic and horticultural crops at http://www.aasl.psu.edu/Plt_nutrients.htm
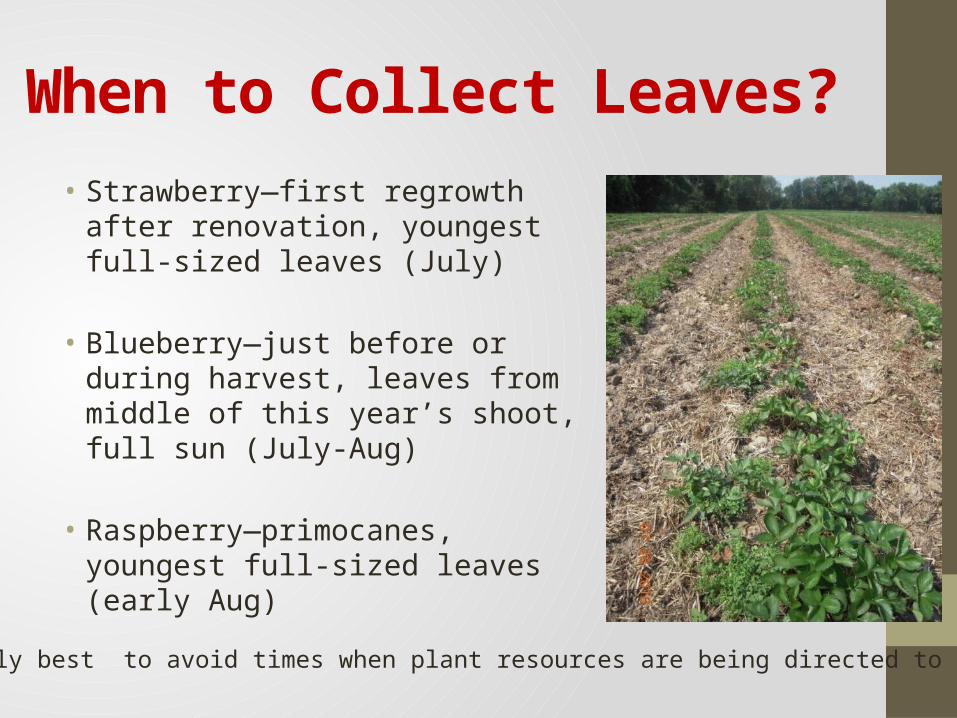
When to Collect Leaves?• Strawberry—first regrowth after
renovation, youngest full-sized leaves (July)
• Blueberry—just before or during harvest, leaves from middle of this year’s shoot, full sun (July-Aug)
• Raspberry—primocanes, youngest full-sized leaves (early Aug)
Generally best to avoid times when plant resources are being directed to fruit

How to Collect a Leaves?• Sample healthy leaves that are well exposed to light.• Leaves should represent the average condition of the planting
and should not be damaged by: disease; insects; weather or mechanical injury.
• AVOID mixing leaves from different cultivars.• DO NOT mix leaves from plants of different ages.• A minimum of 50 grams (~ 2 oz) fresh weight from a
minimum of 30 leaves are needed per sample. • If possible, each leaf should be taken from a different plant
within the sampled area• Process for analysis as soon as possible
Preparing Leaves for Analysis• Use distilled water for washing and rinsing the samples. • Gently and lightly scrub the leaves together in distilled water.• Change the water if it becomes dirty or after 8 to 10 samples
(whichever occurs first). • Shake to remove excess water and immediately rinse the
sample in clean distilled water. • Rinse again and shake. • Transfer sample to paper bag, with top open and dry at room
temperature until the leaves are brittle.• NOTE: DO NOT let leaves to stand in water – complete the
washing and rinsing process in one minute or less.
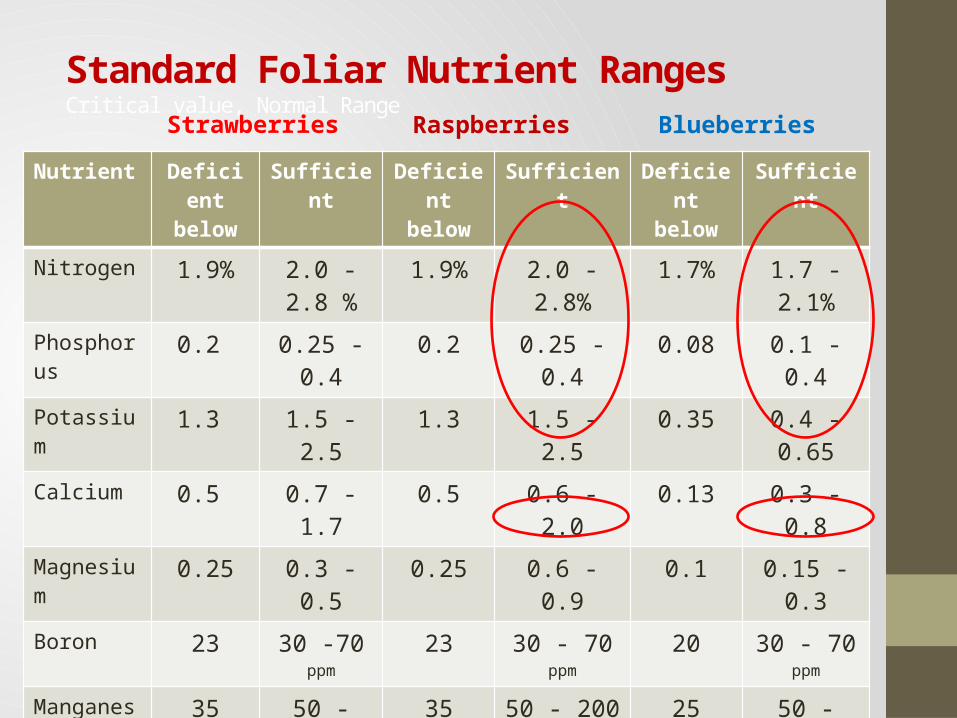
Standard Foliar Nutrient RangesCritical value, Normal Range
Nutrient Deficient below
Sufficient Deficient below
Sufficient Deficient below
Sufficient
Nitrogen 1.9% 2.0 - 2.8 % 1.9% 2.0 - 2.8% 1.7% 1.7 - 2.1%
Phosphorus 0.2 0.25 - 0.4 0.2 0.25 - 0.4 0.08 0.1 - 0.4
Potassium 1.3 1.5 - 2.5 1.3 1.5 - 2.5 0.35 0.4 - 0.65
Calcium 0.5 0.7 -1.7 0.5 0.6 - 2.0 0.13 0.3 - 0.8
Magnesium 0.25 0.3 - 0.5 0.25 0.6 - 0.9 0.1 0.15 - 0.3
Boron 23 30 -70 ppm 23 30 - 70 ppm 20 30 - 70 ppm
Manganese 35 50 - 200 35 50 - 200 25 50 - 350
Iron 40 60 - 250 40 60 - 250 60 60 - 200
Copper 3 6 - 20 3 6 - 20 5 5 - 20
Zinc 10 20 - 50 10 20 - 50 8 8 - 30
Strawberries Raspberries Blueberries

*Corresponding soil test: (lb/A)Soil pH = 5.2Phosphorus (P) low ( 2)Potassium (K) high ( 254)Calcium (Ca) high (4,233)Magnesium (Mg) high ( 465)Iron (Fe) ( 46)Manganese (Mn) ( 193)Zinc (Zn) ( 3)Aluminium (Al) ( 126)Organic Matter 6%*Morgan
Recommendations: - Apply 50 lb Mg/A as sulfates of Mg. - Apply 200 lb sulfur early spring and again late fall for next 3 years. - Foliar iron may be needed until desired pH range is reached.
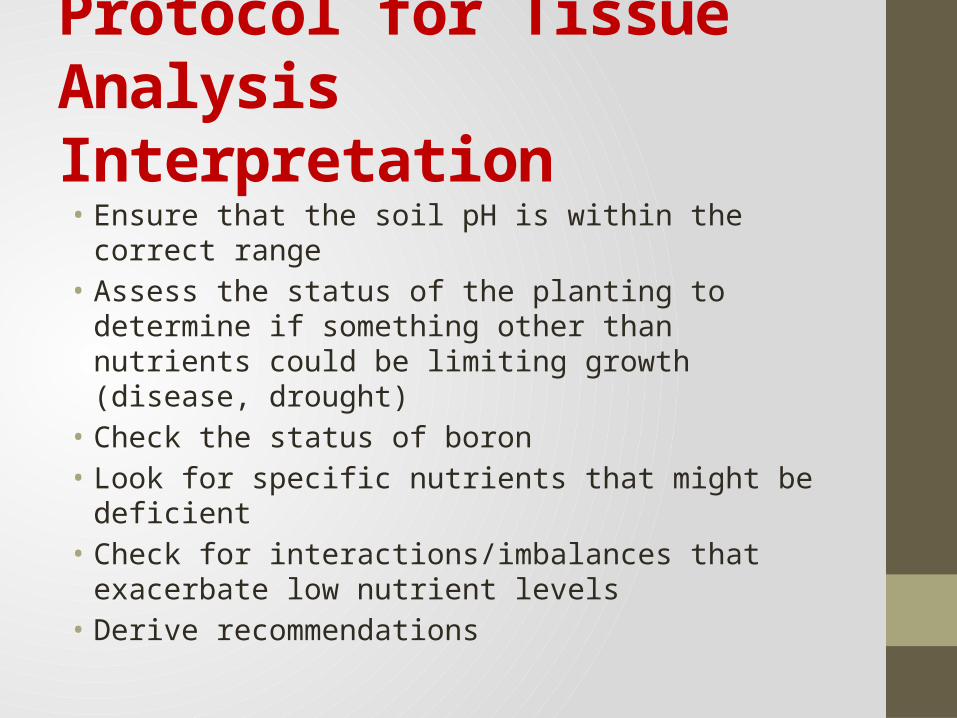
Protocol for Tissue Analysis Interpretation• Ensure that the soil pH is within the correct range• Assess the status of the planting to determine if something
other than nutrients could be limiting growth (disease, drought)
• Check the status of boron• Look for specific nutrients that might be deficient• Check for interactions/imbalances that exacerbate low
nutrient levels• Derive recommendations
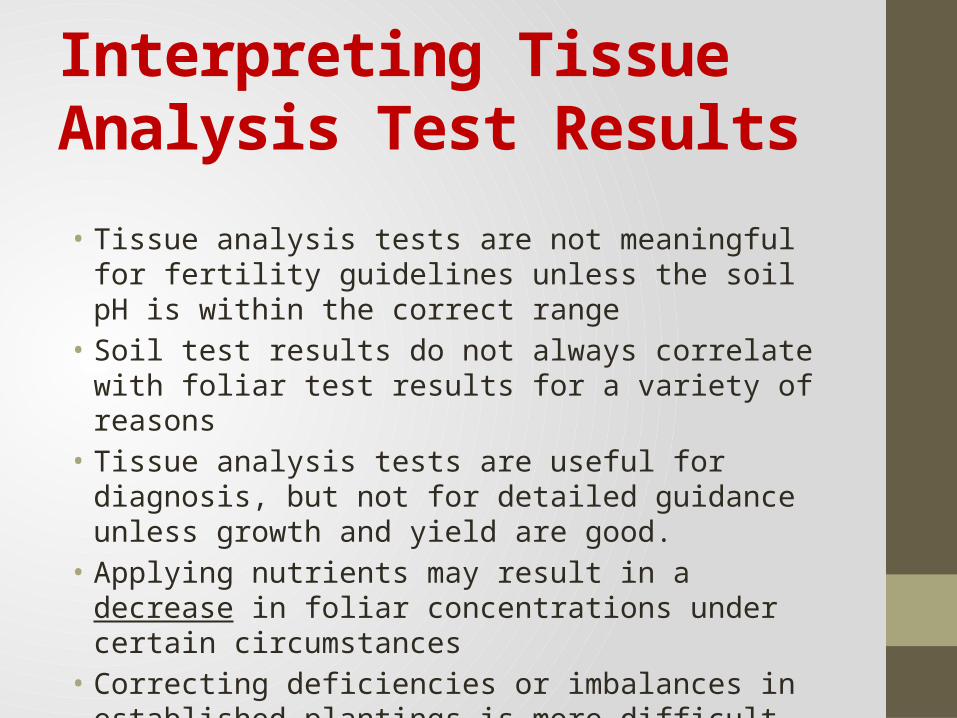
Interpreting Tissue Analysis Test Results
• Tissue analysis tests are not meaningful for fertility guidelines unless the soil pH is within the correct range
• Soil test results do not always correlate with foliar test results for a variety of reasons
• Tissue analysis tests are useful for diagnosis, but not for detailed guidance unless growth and yield are good.
• Applying nutrients may result in a decrease in foliar concentrations under certain circumstances
• Correcting deficiencies or imbalances in established plantings is more difficult than amending soils prior to planting
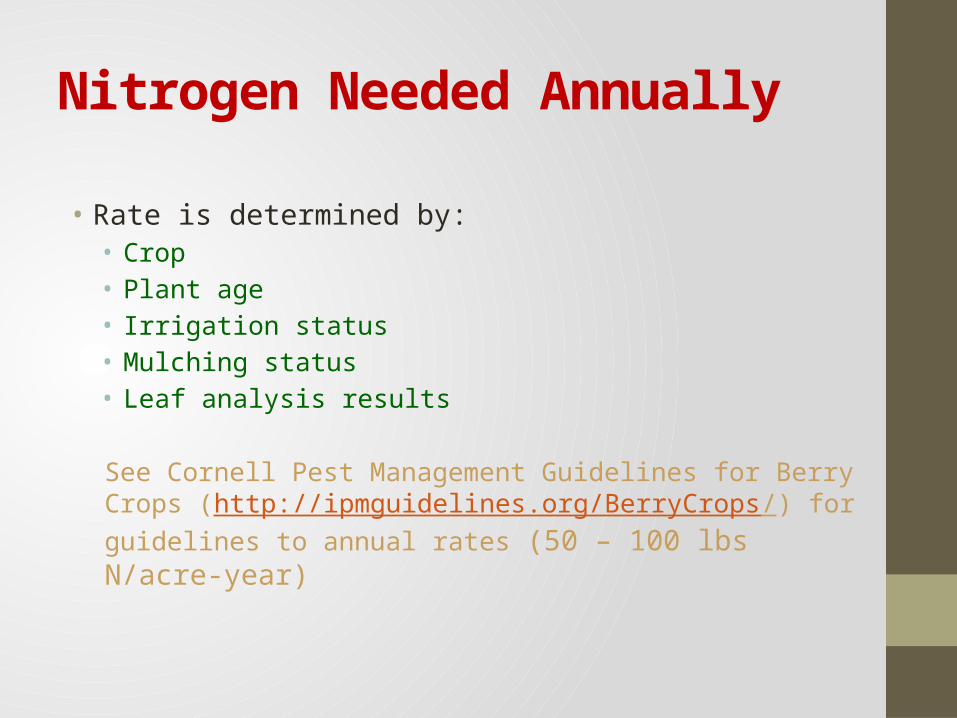
Nitrogen Needed Annually
• Rate is determined by:• Crop• Plant age• Irrigation status• Mulching status• Leaf analysis results
See Cornell Pest Management Guidelines for Berry Crops (http://ipmguidelines.org/BerryCrops/) for guidelines to annual rates (50 – 100 lbs N/acre-year)
Nutrients Required after Establishment• In many cases, no additional P, K, Mg or Ca will be required if
the soil test recommendations were followed.• Supplemental K and B may be required on sandier soils.• Small amounts of sulfur may be required to maintain a low pH
in some soils where blueberries are grown.
A leaf analysis will provide guidance on supplemental fertilizers after the planting is established.
Do not rely on the soil test for post-plant recommendations that do not involve soil pH.
Let’s Review…
• Prior to planting• Cornell soil health test
• Includes Agro-one standard soil analysis and more!
• After plants are established• Annual tissue (leaf) analysis • Additional soil testing as needed every 2-3 years
Don’t rely on visual symptoms or what you’ve always done in the past . . .
Acknowledgements• Dr. Marvin Pritts, Project Leader, Professor and Chair, Cornell University
Department of Horticulture• Ms. Cathy Heidenreich, Project Coordinator, Berry Extension Support
Specialist, Cornell University Department of Horticulture• Ms. Laura McDermott, Project Team Member, Regional Specialist, Cornell
Cooperative Extension Capital District Vegetable and Fruit Program • Mr. Jeff Miller, Project Team Member, Agriculture Issues Leader, Cornell
Cooperative Extension Oneida County• Mr. Mario Miranda Sazo, Project Team Member, Tree Fruit and Berry Fruit
Extension Specialist, Cornell Cooperative Extension Lake Ontario Fruit Team• Mr. Dan Welch, Project Team Member, Extension Resource Educator,
Cornell Cooperative Extension, Cayuga County• Dr. Harold van Es, Collaborator, Professor, Cornell University Department of
Crop And Soil Sciences• Mr. Robert Schindelbeck, Collaborator, Extension Associate, Cornell
University Department of Crop and Soil Sciences
Special thanks to Ms. Janet Fallon, Certified Crop Advisor, Agro-One.
Questions?Ms. Cathy Heidenreich, Project Coordinator,
Berry Extension Support Specialist, Cornell University Department of Horticulture,
[email protected]://www.fruit.cornell.edu/berry/
Laura McDermottCCE CDVSFP
[email protected], 518-791-5038