Embed Size (px)
Citation preview

Beginning
Beep…beep…Auriga makes a sound with dazzling light, waking Mark from sweet dream andscaring him out of his bed.
In the year of 2098:
It has been over 80 years since the Maker Movement first hit the world. People now are usingfantastic products with various unusual functions developed by numerous makerspaces all overthe world.
Mark, among those people, just received a “toy” called Auriga. It is well-known as a detector thatcan detect and receive information from the whole universe. Actually, Mark always wonders whythe things developed by IDA (Interstellar Development Association) exist in this world and he onlybelieve things that are transformed by him…
Learning Objectives
Me Auriga is a new mainboard developed by Makeblock after mCore. It is specially designed forusers who love Arduino open hardware products. Me Auriga not only includes expansion ports fordriving motors and sensors, but also integrates a dual encoder motor driver, allowing you tospecify the motor speed in order to create more accurate applications. This chapter is to help youfully understand electronic modules and mechanical parts used in mBot Ranger Robot Kit.

Encyclopedia of Terms
Makers are a group of people who love technology and practice, who have fun in sharingtechnology and discussing idea. MakerSpace (also referred to as Hackerspace) is a tie to linkindividual maker, as well as a platform for the makers to practice, create, exchange, and share.The popularization of MakerSpace is of great significance to develop the maker campaign.
Makers mainly focus on engineering field, such as electronics, machinery, robots, 3D printing, etc.They are familiar with the digital tools (e.g. CNC, laser engraver) and can even apply thosetechniques to the casting and handicraft works. They are good at developing new technologies,encouraging innovations and prototyping. Makers are turning their ideas into real works and arealways keen to combine knowledge and practice.

Getting Prepared
mBot Ranger Robot Kit

Learning Tasks
Learning Task 1 - Get to KnowMe Auriga (the mainboard of mBot Ranger)
Based on Arduino Mega 2560, Me Auriga includes 10 easy-to-use RJ25 ports and 12 RGB LEDs. Itintegrates various sensors, such as gyro sensor, temperature sensor, light sensor and sound sensor.
mBot Ranger Robot Kit also comes with two additional sensors: an ultrasonic sensor and a linefollower sensor. These two sensors can be connected to the expansion ports of Me Auriga via RJ25port, allowing mBot Ranger to move freely in various scenes.
The Bluetooth module in this kit enables you to connect Ranger with smartphones, tablets orcomputers. You can also add a 2.4G module to realize wireless control over mBot Ranger, which isvery suitable for teaching in classroom.

Power Switch: turn on/off the power supply
Power Jack: can be connected with an external 6-12V power supply
USB Connector: can be used for data communication with computer or downloadingprograms from computer
Reset Button: restart the program on mainboard
Wireless Communication Module: can be used for data communication with computer or beconnected with smart devices e.g. smart phones, tablets
Motor Expansion Port: can be connected with all kinds of motors, e.g. stepper motor driver
Sensor Expansion Port: can be connected with various sensors, e.g. ultrasonic sensor
Sound Sensor: convert sound vibration to data of voltage variation through a microphone.
Light Sensor: convert light variation to data of voltage variation through a transistor.
Temperature Sensor: convert temperature variation to data of voltage variation through athermistor
Ultrasonic Sensor: detect distance between the sensor and the objects in front of it
Line Follower Sensor: detect reflected infrared light from objects
Me 3-Axis Accelerometer and Gyro Sensor:measure the angular rate and the accelerationinformation
Buzzer: an electronic module that emits a sound via vibration produced by the varying voltage
RGB LED: every RGB LED can be programmed to combine three colors (red, green and blue) toproduce various colors of light
Hardware Serial Port: can be connected with Bluetooth module or 2.4G module

Learning Task 2 - Get to Know mBot Ranger Robot Kit
Building Form I: Land Raider
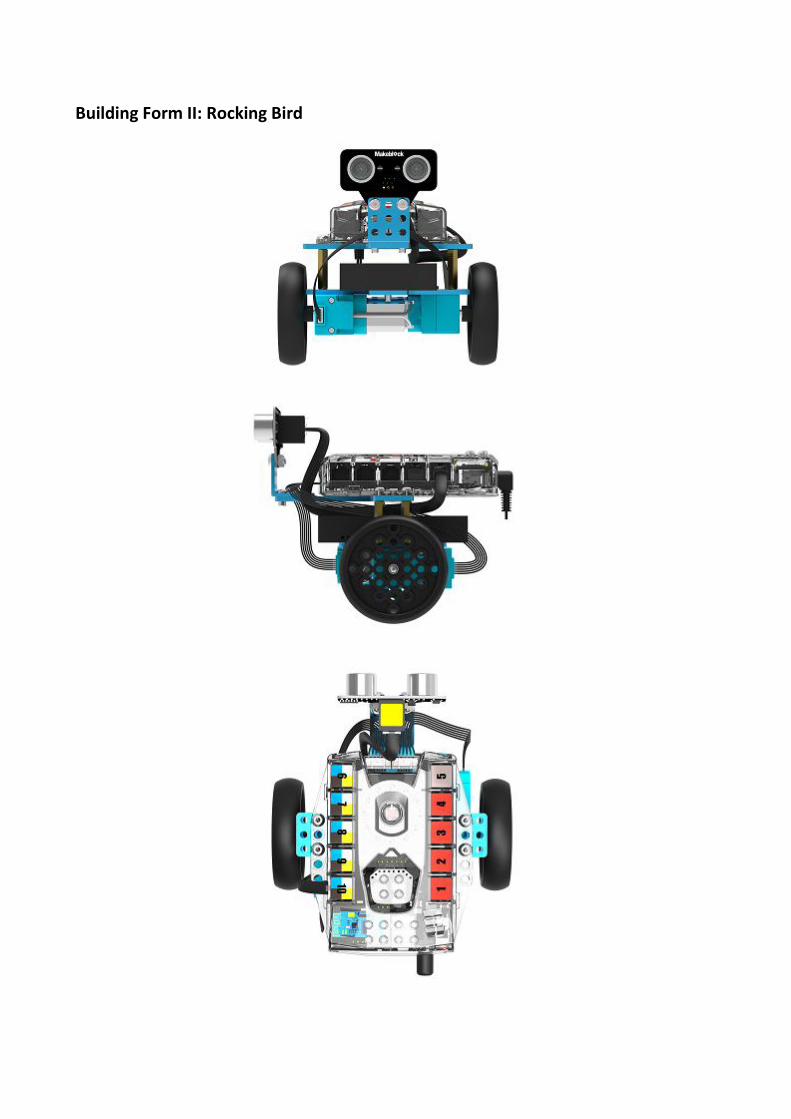
Building Form II: Rocking Bird

Building Form III: Dashing Raptor


Task 1 - Turn on/off the Power Supply of Me Auriga
Start Me Auriga

USB power supply:
We can connect the mainboard with the computer via USB when the mainboard is not drivingmotors. After connecting with computer, the 5V LED indicator on the mainboard will light up.
External power supply:
If you want the robot working on its own (without connecting with computer), or you want to usemotors or 1~4 ports in the operation, please make sure you use an external power supply. Afterconnecting with external power supply, press the power switch (the one in the middle of the RGBLED ring or the one next to the power jack). At this time, the Power LED Indicator on themainboard will light up.
Turn off the power supply of Me Auriga (Mainboard)
You can press the power switch for 3~8 seconds to turn off the power supply. If the mainboard isstill connected with the computer, turning off the power supply will stop the operation of motorsand 1~4 ports, but the program in the mainboard will continue working.
Challenging Task
Challenging Task 1 - What is the mainboard of mBot Ranger Robot Kit?
The Name of the mainboard: ( )
Do you remember the names and functions of the objects indicated by arrows?

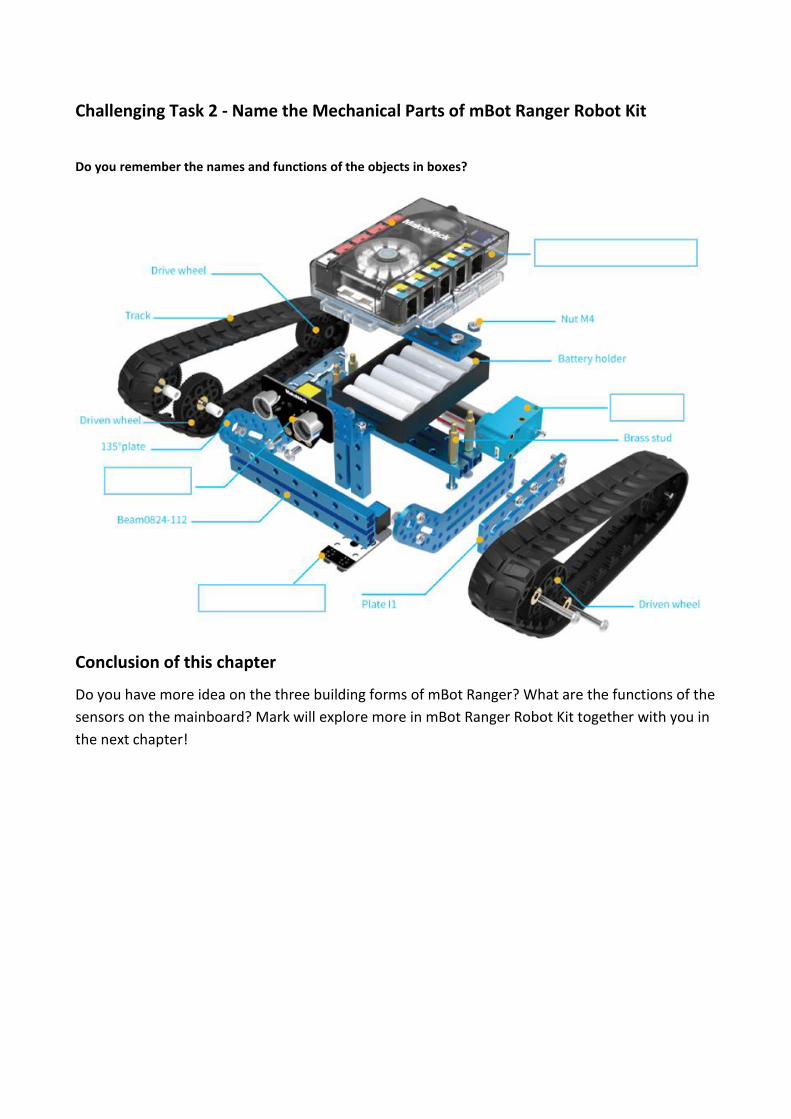
Challenging Task 2 - Name the Mechanical Parts of mBot Ranger Robot Kit
Do you remember the names and functions of the objects in boxes?
Conclusion of this chapter
Do you have more idea on the three building forms of mBot Ranger? What are the functions of thesensors on the mainboard? Mark will explore more in mBot Ranger Robot Kit together with you inthe next chapter!

Sitting on the floor, Mark is staring at the Auriga that IDA entrusted him to test, and suddenly heseems to find that the Auriga received information that indicates a certain location…
(To be continued)