Embed Size (px)
Citation preview

BEGINNER’S GUIDE4WDTO

CONTENTS4WDING FOR BEGINNERS 1COMMON MISCONCEPTIONS 1BASIC OFF ROAD DRIVING TECHNIQUES 2DRIVING ON DIRT & CORRUGATIONS 3DRIVING IN MUD 4DRIVING ROCKY TERRAIN 5DRIVING ON THE BEACH & SAND 6DRIVING A WATER CROSSING 8DRIVING A HILL ASCENT 12DRIVING A HILL DESCENT 13RECOVERY SAFETY 14SNATCH STRAP RECOVERY 16JACK RECOVERY 17WINCH RECOVERY 18SAND TRACKS & LADDERS 20TYRE REPAIR 21DAILY MAINTENANCE AND CHECK-UPS 23TYRE PRESSURE RECOMMENDATIONS 23
Disclaimer
The content contained in this guide is for general information purposes only.
The information is provided by Tough Toys and while we endeavour to keep the information up to date and correct, we make no representations or warranties of any kind, express or implied, about the completeness, accuracy, reliability, suitability or availability with respect to this guide or the information, products, services or related graphics contained in this guide for any purpose. Any reliance you place on such information is therefore strictly at your own risk. In no event will we be liable for any loss or damage including without limitation, indirect or consequential loss or damage, or any loss or damage whatsoever arising out of, or in connection with, the use of this guide.
We have made every effort to ensure the information contained within this guide is correct, and we expressly disclaim any liability or responsibility for the accuracy of the information in this book or for any loss, injury or inconvenience by any person using this book.
It is your responsibility to confirm the currency, validity and suitability of all information offered.
1
4WDING FOR BEGINNERSYour 4x4 is your ticket to seeing some of the most beautiful countryside Australia has to offer. You might be thinking, how far can I actually get in my 4x4?
It is very important to know the limits of your 4x4 before you set off into the wilderness or onto the beach, especially if you’re travelling with only one vehicle.
This guide shares the essential driving skills and recovery techniques unique to 4wding.
COMMON MISCONCEPTIONSMy car will get damaged if I take it off road
There are many people that are unwilling to take their 4wd off road for fear of causing damage to it. This is a common misconception that makes a lot of people not use their 4wd for it’s intended purpose.
The truth is, if you’re careful, you can have a lot of off road fun without damaging your vehicle. If you’re afraid of scratching the paint on your car, steer clear of trees and scrub that may drag along the side of the vehicle. Bring a hatchet or small axe along so you can cut limbs off trees that will damage your vehicle when the track becomes narrow. Avoid areas with large rocks and boulders or ask a passenger to get out and help spot your vehicle.
If your vehicle does not have enough clearance, you can take the high route on ruts and deep tracks and you can avoid under body damage completely.
If I take my car on the beach, it will rust
The secret to avoiding rust on your 4wd when sand driving is - as always - preparation. Have the car sprayed with rust proofing spray, make sure there is no exposed metal and try to spray paint any exposed under body areas.
When you are out on the beach, avoid driving in salt water conditions. Try to only drive in fresh water areas and move further up the beach in order to cross in a fresh water area. After you have finished your beach trip, as soon as possible you must get under the vehicle with a high pressure hose.
This is very important for rust prevention. Make sure you hose as much of the under body of the vehicle as possible. Be sure to hose areas such as the suspension, body mounts and chassis rails as well as under the engine and drive train. Remove as much sand as possible as any sand left stuck to the car can cause rust.
2
BASIC OFF ROAD DRIVING TECHNIQUESGo slow
Often, new drivers think hitting the gas hard will get you out of trouble. While additional throttle can help in some situations, it can also get you into a lot of trouble... fast.
It is also easier on your vehicle to go slow and take your time. When you go slow it helps to keep traction and traction is your friend. When you’re spinning your tyres, you have decreased traction. Go slow and let the tyres do the work for you.
Traction & momentum
Momentum will help you get over some ledges, up hills, and through mud holes. This means starting farther back from an obstacle. Knowing when to use momentum and how much to use will come with experience.
Knowing how much momentum you need without going too fast depends on the obstacle. When in doubt watch someone else and learn from their mistakes or experience. Try hitting it with a little momentum and then decide if you need a little more if that doesn’t work.
Know your limits
When travelling alone, it is very important to know the limits of your 4wd and your own abilities. It is best to only test your limits when travelling with other vehicles. Before heading out, always tell others where you plan to go.
If your vehicle won’t clear an obstacle, hitting it harder is just going to damage the truck and give other people something to laugh about. Don’t try to bite off more than you can chew.
Steering your vehicle
When travelling off road, hold the steering wheel with your THUMBS OUT. That is, do not grab the wheel like a baseball bat. Why? If your rig hits a rut, rock, or other obstacle just the right way, your wheel could spin too fast for you to react, possibly breaking your thumbs.
Courtesy & pollution
Try to keep the noise and dust coming from your vehicle to a minimum. Respect others who may also be using the tracks around you.
Practise common courtesy, give way to bikers, hikers and horse riders. Be especially careful around animals and their habitats.
3
DRIVING ON DIRT & CORRUGATIONSQuick tips
• Watch your speed. Be sure you can still stop in time for obstacles or slow for a corner.
• Lower tyre pressures for bumpy and corrugated roads.• Engage 4wd high range for additional traction.
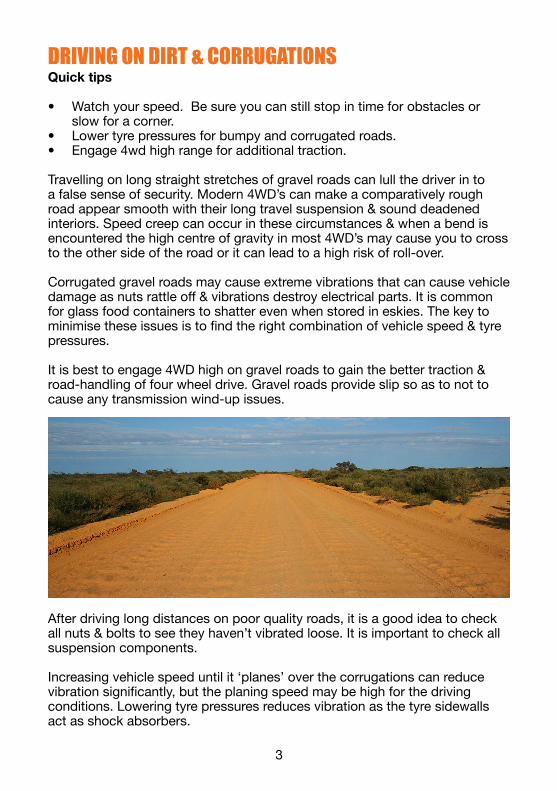
Travelling on long straight stretches of gravel roads can lull the driver in to a false sense of security. Modern 4WD’s can make a comparatively rough road appear smooth with their long travel suspension & sound deadened interiors. Speed creep can occur in these circumstances & when a bend is encountered the high centre of gravity in most 4WD’s may cause you to cross to the other side of the road or it can lead to a high risk of roll-over.
Corrugated gravel roads may cause extreme vibrations that can cause vehicle damage as nuts rattle off & vibrations destroy electrical parts. It is common for glass food containers to shatter even when stored in eskies. The key to minimise these issues is to find the right combination of vehicle speed & tyre pressures.
It is best to engage 4WD high on gravel roads to gain the better traction & road-handling of four wheel drive. Gravel roads provide slip so as to not to cause any transmission wind-up issues.
After driving long distances on poor quality roads, it is a good idea to check all nuts & bolts to see they haven’t vibrated loose. It is important to check all suspension components.
Increasing vehicle speed until it ‘planes’ over the corrugations can reduce vibration significantly, but the planing speed may be high for the driving conditions. Lowering tyre pressures reduces vibration as the tyre sidewalls act as shock absorbers.
4
DRIVING IN MUDQuick tips
• It is best to be equipped with mud tyres that self clean the tread.• Test muddy sections with a stick to check the depth before crossing.• Engage 4wd low range for additional traction in stretches of muddy
ground.• Gain momentum before crossing muddy stretches to avoid getting stuck.• Sometimes lower tyre pressures can help with traction.
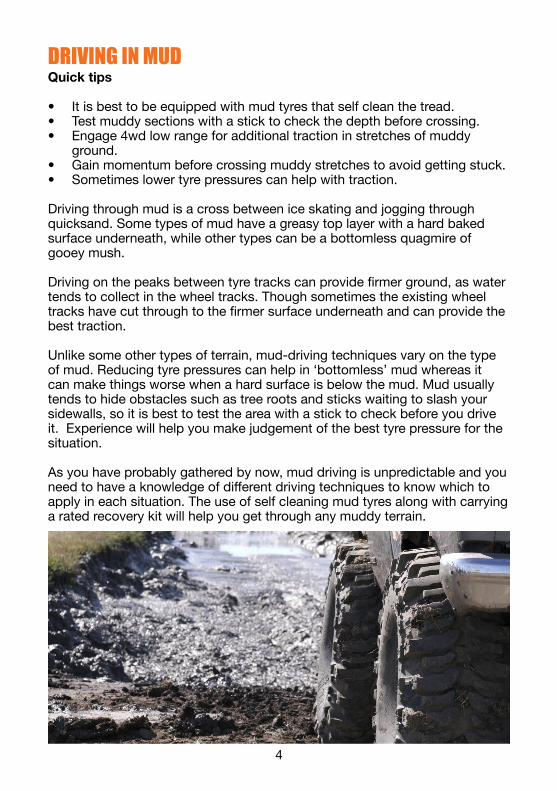
Driving through mud is a cross between ice skating and jogging through quicksand. Some types of mud have a greasy top layer with a hard baked surface underneath, while other types can be a bottomless quagmire of gooey mush.
Driving on the peaks between tyre tracks can provide firmer ground, as water tends to collect in the wheel tracks. Though sometimes the existing wheel tracks have cut through to the firmer surface underneath and can provide the best traction.
Unlike some other types of terrain, mud-driving techniques vary on the type of mud. Reducing tyre pressures can help in ‘bottomless’ mud whereas it can make things worse when a hard surface is below the mud. Mud usually tends to hide obstacles such as tree roots and sticks waiting to slash your sidewalls, so it is best to test the area with a stick to check before you drive it. Experience will help you make judgement of the best tyre pressure for the situation.
As you have probably gathered by now, mud driving is unpredictable and you need to have a knowledge of different driving techniques to know which to apply in each situation. The use of self cleaning mud tyres along with carrying a rated recovery kit will help you get through any muddy terrain.

5
DRIVING ROCKY TERRAINQuick tips
• Walk the terrain before driving it.• Have a spotter available to tell you where to drive.• Pick your best line to avoid damaging diffs and the underbody of your
vehicle.• Engage first gear, low range 4wd for slow crawling over rocks.• Lower your tyre pressures for better traction and less punctures.
Rocky terrain is one of the most challenging surfaces you can cross in a 4wd vehicle, but it can also be a lot of fun. Whether you just need to negotiate a patch of boulders or fancy trying a spot of rock crawling, getting across is satisfying. It’s also not all that hard, and by following a few simple tips you’ll be able to do it safely.
First, as usual, you need to make sure your vehicle is up for it. Rocks can be hard on the underside, and if you’ve been thinking about fitting bash plates now would be a good time to do it.
Before moving into the rocks lower your tyre pressure. That will give you better grip by putting more rubber in contact with the rocks.
Now you have to pick a route through the rocks. Don’t wing it; plan exactly where you’re going to go, looking for possible hazards well in advance, then follow the route you’ve chosen. Look for high points, and make sure you’re not straddling them. If a lot of people drive through the area they might leave signs of problem areas – scrape marks on the rocks, or black marks where somebody’s spun their tyres, indicate places you might get stuck.
It’s important to use the controls smoothly. Suddenly revving isn’t a good idea, always apply power steadily until you find the right amount. Aim to keep a steady pace instead of stopping and starting. If there are steep slopes, or your vehicle’s belly is scraping on the rocks, you might not be able to get moving again if you stop. Having some momentum is key, but don’t get up so much speed that you can’t stop by smooth braking – that’s just asking for trouble. A lower gear will also give you better grip.

6
DRIVING ON THE BEACH & SANDQuick tips
• Reduce your tyre pressures to reduce track erosion and greatly improve grip.
• Drive carefully and be aware of beach washouts.• Ensure wheels are pointing straight ahead when taking off.• Avoid the soft sand at the base of dunes and gullies.• Make turns as wide as possible.• ONLY travel straight up or down dunes.• Follow in others tyre tracks to drive on compressed ground.• Avoid braking by coasting to a stop.• Do not floor the accelerator if you are bogging down.• When bogged, try to reverse on your own tracks.• Thoroughly hose down your vehicle after a beach trip.
Conserving momentum is the fundamental principal of sand driving. Traction is very difficult in sand and any increase in speed may cause you to become stuck. You do not want to lose any momentum, as you may not be able to regain it.

7
Sand Driving Techniques
When travelling on sand, you ought to endeavour to follow in the tyre tracks of the vehicle in front as they have already compressed the sand to form a firmer surface than untravelled ground. Never drive on vegetation as this will damage it and lead to erosion and environmental damage.
You ought to keep away from rapid changes in speed when accelerating or braking. Braking on sand will cause a mound to build up in front of all wheels and possibly prevent your vehicle from taking off. Rapid acceleration basically digs the wheels in and can actually lead to slower take off speeds.
Take-off ought to be performed as smoothly as feasible with gear changes completed at high revs. Sand driving requires plenty of engine power to get your vehicle “planing” on the sand. It is advisable to make use of low range as this multiplies the amount of engine torque available and will provide that additional gear in the event you encounter a soft patch of sand. Check that your tyres are pointing straight ahead when taking off to reduce the amount of work required to get moving again.
When stopping on sand, depress the clutch and permit the vehicle to coast to a stop. This will minimise any sand build-up in front of the wheels. If the terrain permits, coast to a stop, rather than braking, with the vehicle pointing downhill as this will aid take off. Avoid the soft sand at the base of most dunes and gullies when stopping.
When turning, make the turn as wide as feasible to reduce the chance of bogging. Your front wheels act more like a rudder in sand and turning sharp has a similar effect to applying the brakes.
Steep sand dunes can be traversed only straight up or down. In the event you drive even on a slight angle, the weight transfer is to the downhill side wheels. If the vehicle starts to slip, the downhill wheels tend to dig in and make the angle of the dune even worse, leading to a possible roll-over situation.
If travelling up a dune and you fail to reach the top, reverse down the dune in gear, NEVER coast down the dune and NEVER attempt a U turn.
In the event you are travelling straight down a steep dune and the back end starts to slip sideways, it is best to speed up slightly to try and straighten the vehicle. Never use the brake, as this will cause weight transfer to the front wheels and can increase the chance of roll-over.
When you return home after a beach trip, it is important to wash your vehicle to remove all traces of sand and salt. Pay special attention to areas like the mudguards where sand is sprayed around and tends to get trapped.
8
DRIVING A WATER CROSSINGQuick tips
• Walk the crossing to check its depth.• Make note of obstacles such as deep ruts or large rocks found in the
water. Avoid these when driving through.• Don’t attempt to cross if water is too deep for your vehicle.• Don’t cross fast flowing water.• Place markers at hidden obstacles.• Place a water crossing bra across the front of the vehicle.• Disconnect the fan belt if a viscous coupling fan is not fitted.• Spray water repellent on distributor and ignition wires.• Temporarily tape door seals with duct tape if water is very deep.• Pack recovery gear outside vehicle, ready for use.
Driving technique
• Take off seat belt and wind down window.• Use low range 2nd gear (in most situations). 1st gear can be used in
situations where a slower crossing is required.• Enter the water and a slow steady pace to avoid large splashes.• Maintain momentum through the water crossing avoiding obstacles in the
water.• Drive at a steady speed to create a bow wave.• Avoid using the clutch.• Do not over-rev engine if you lose traction.• If engine stalls, place in neutral without using clutch to restart. Then take
off in 1st gear low rage.• Check diffs etc. for water if depth above axles.• Check winches if fitted• Stop at the exit of water crossing to allow water to drain from the vehicle
underbody without causing erosion.
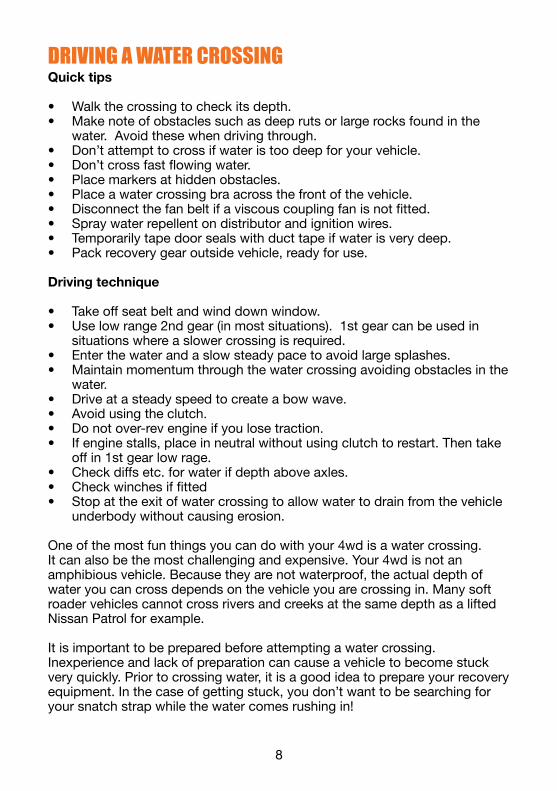
One of the most fun things you can do with your 4wd is a water crossing. It can also be the most challenging and expensive. Your 4wd is not an amphibious vehicle. Because they are not waterproof, the actual depth of water you can cross depends on the vehicle you are crossing in. Many soft roader vehicles cannot cross rivers and creeks at the same depth as a lifted Nissan Patrol for example.
It is important to be prepared before attempting a water crossing. Inexperience and lack of preparation can cause a vehicle to become stuck very quickly. Prior to crossing water, it is a good idea to prepare your recovery equipment. In the case of getting stuck, you don’t want to be searching for your snatch strap while the water comes rushing in!
9
Water crossing preparation
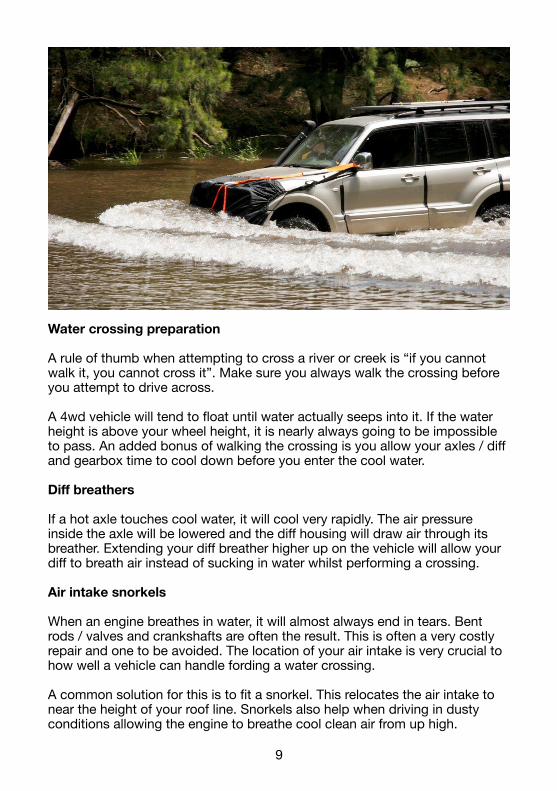
A rule of thumb when attempting to cross a river or creek is “if you cannot walk it, you cannot cross it”. Make sure you always walk the crossing before you attempt to drive across.
A 4wd vehicle will tend to float until water actually seeps into it. If the water height is above your wheel height, it is nearly always going to be impossible to pass. An added bonus of walking the crossing is you allow your axles / diff and gearbox time to cool down before you enter the cool water.
Diff breathers
If a hot axle touches cool water, it will cool very rapidly. The air pressure inside the axle will be lowered and the diff housing will draw air through its breather. Extending your diff breather higher up on the vehicle will allow your diff to breath air instead of sucking in water whilst performing a crossing.
Air intake snorkels
When an engine breathes in water, it will almost always end in tears. Bent rods / valves and crankshafts are often the result. This is often a very costly repair and one to be avoided. The location of your air intake is very crucial to how well a vehicle can handle fording a water crossing.
A common solution for this is to fit a snorkel. This relocates the air intake to near the height of your roof line. Snorkels also help when driving in dusty conditions allowing the engine to breathe cool clean air from up high.
10
Protecting your engine
Using a “water crossing bra” across the front of the 4wd will create a bow wave at the front of the car as long as you maintain momentum. The result will be less water in the engine bay and the radiator fan will not spray it over the ignition leads and spark plugs. It is also less likely the fan will try to propel its way into your radiator.
A diesel vehicle is known to be better for water crossings as they have no ignition system. It is still advisable to proceed with caution in a diesel vehicle however.
If you do become stuck in the middle of a crossing, it is recommended to climb out of the window rather than open the door and flood your interior. It is a good idea to spray the engine bay electrics and ignition with a water repelling agent such as WD40 before entering the water.
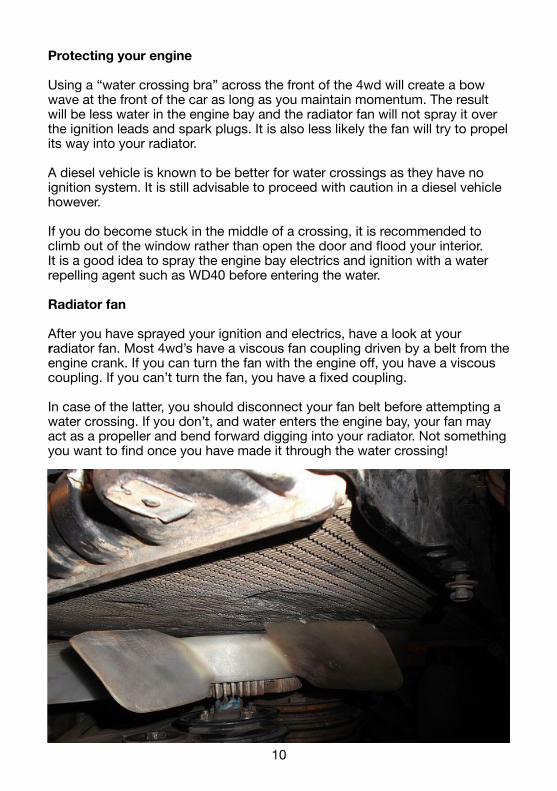
Radiator fan
After you have sprayed your ignition and electrics, have a look at your radiator fan. Most 4wd’s have a viscous fan coupling driven by a belt from the engine crank. If you can turn the fan with the engine off, you have a viscous coupling. If you can’t turn the fan, you have a fixed coupling.
In case of the latter, you should disconnect your fan belt before attempting a water crossing. If you don’t, and water enters the engine bay, your fan may act as a propeller and bend forward digging into your radiator. Not something you want to find once you have made it through the water crossing!

11
Walking a water crossing
It is always recommended to walk a water crossing before attempting to drive it. When walking through the river or creek crossing, make sure you walk where you intend to place your wheels so you can feel for hidden rocks or potholes. This will aide you in checking the depth of water in the crossing.
Potholes (caused by others attempting the crossing and getting stuck) are an indication of the difficulty of the crossing and should be avoided when attempting to cross. If you can, it is a good idea to place markers or have passengers stand in place of pot holes or large rocks in the crossing so as the driver can avoid them.
Water Crossing Driving Techniques
Visualise the path you wish to take through the water, remember where you walked and put the vehicle in low range. First or Second gear is good for creating just the right bow wave as well as allowing you the torque you need should the vehicle bog down.
Speed is a very important factor when crossing a water crossing. Make sure you do not go too fast as it will send water straight into the engine bay and may flood the engine. Avoid using the clutch if possible as this may allow water to come between the friction plate and the flywheel.
If you do start to feel a loss of traction, make sure you do not over-rev the engine. It is better to back off the accelerator and try to regain traction. If the engine stalls, put the vehicle in neutral with a minimum of clutch usage and attempt to escape the water in first gear low range.
Maintaining Your Car After A Water Crossing
When you are at the other side of the water crossing, and you’re back at home. Be sure to check the diff oil for water. This is a relatively simple job since oil floats on top of water.
Simply release your diff oil drain bolt and allow a small amount of oil to drain into a container. You will be able to see the water in the oil as a milky white mixture. If you have water in your oil, make sure you drain the diff oil and replace it. It is also possible to flush the diff oil to remove all traces of water.
Gearboxes, transfer cases and engine oil can also become contaminated with water after a water crossing. This usually will only occur if you become stationary in deep water.
Check your other exterior mounted accessories such as winches, as these can seize up unless maintained.
12
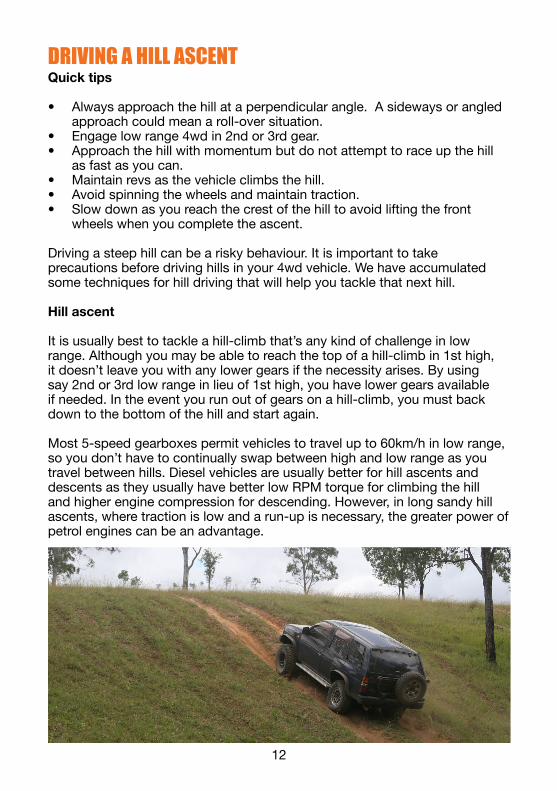
DRIVING A HILL ASCENTQuick tips
• Always approach the hill at a perpendicular angle. A sideways or angled approach could mean a roll-over situation.
• Engage low range 4wd in 2nd or 3rd gear.• Approach the hill with momentum but do not attempt to race up the hill
as fast as you can.• Maintain revs as the vehicle climbs the hill.• Avoid spinning the wheels and maintain traction.• Slow down as you reach the crest of the hill to avoid lifting the front
wheels when you complete the ascent.
Driving a steep hill can be a risky behaviour. It is important to take precautions before driving hills in your 4wd vehicle. We have accumulated some techniques for hill driving that will help you tackle that next hill.
Hill ascent
It is usually best to tackle a hill-climb that’s any kind of challenge in low range. Although you may be able to reach the top of a hill-climb in 1st high, it doesn’t leave you with any lower gears if the necessity arises. By using say 2nd or 3rd low range in lieu of 1st high, you have lower gears available if needed. In the event you run out of gears on a hill-climb, you must back down to the bottom of the hill and start again.
Most 5-speed gearboxes permit vehicles to travel up to 60km/h in low range, so you don’t have to continually swap between high and low range as you travel between hills. Diesel vehicles are usually better for hill ascents and descents as they usually have better low RPM torque for climbing the hill and higher engine compression for descending. However, in long sandy hill ascents, where traction is low and a run-up is necessary, the greater power of petrol engines can be an advantage.
13
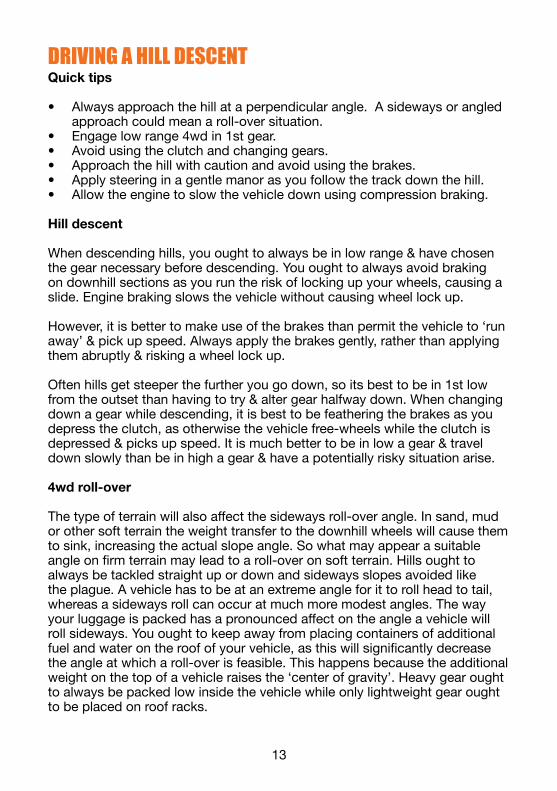
DRIVING A HILL DESCENTQuick tips
• Always approach the hill at a perpendicular angle. A sideways or angled approach could mean a roll-over situation.
• Engage low range 4wd in 1st gear.• Avoid using the clutch and changing gears.• Approach the hill with caution and avoid using the brakes.• Apply steering in a gentle manor as you follow the track down the hill.• Allow the engine to slow the vehicle down using compression braking.
Hill descent
When descending hills, you ought to always be in low range & have chosen the gear necessary before descending. You ought to always avoid braking on downhill sections as you run the risk of locking up your wheels, causing a slide. Engine braking slows the vehicle without causing wheel lock up.
However, it is better to make use of the brakes than permit the vehicle to ‘run away’ & pick up speed. Always apply the brakes gently, rather than applying them abruptly & risking a wheel lock up.
Often hills get steeper the further you go down, so its best to be in 1st low from the outset than having to try & alter gear halfway down. When changing down a gear while descending, it is best to be feathering the brakes as you depress the clutch, as otherwise the vehicle free-wheels while the clutch is depressed & picks up speed. It is much better to be in low a gear & travel down slowly than be in high a gear & have a potentially risky situation arise.
4wd roll-over
The type of terrain will also affect the sideways roll-over angle. In sand, mud or other soft terrain the weight transfer to the downhill wheels will cause them to sink, increasing the actual slope angle. So what may appear a suitable angle on firm terrain may lead to a roll-over on soft terrain. Hills ought to always be tackled straight up or down and sideways slopes avoided like the plague. A vehicle has to be at an extreme angle for it to roll head to tail, whereas a sideways roll can occur at much more modest angles. The way your luggage is packed has a pronounced affect on the angle a vehicle will roll sideways. You ought to keep away from placing containers of additional fuel and water on the roof of your vehicle, as this will significantly decrease the angle at which a roll-over is feasible. This happens because the additional weight on the top of a vehicle raises the ‘center of gravity’. Heavy gear ought to always be packed low inside the vehicle while only lightweight gear ought to be placed on roof racks.
14
RECOVERY SAFETYQuick tips
• Learn to use your equipment. If in doubt ask your local 4x4 store or read more on www.toughtoys.com.au
• Find the recovery points on your vehicle. Do not use tow balls or tie down points on the vehicle as recovery attachments.
• Use a damper over cables and straps when in use.• Do not get under a vehicle at any time.• Find the jacking points under your vehicle.• Use only rated recovery equipment including straps and shackles.• Keep all bystanders well away from the recovery operation.• Pull the stuck vehicle out straight on if possible. Do not attempt to pull
vehicles sideways.• Follow all safety information provided with the recovery equipment.
Most of us have at least some recovery gear in our off road vehicle, even if it’s only a jack. Some carry a lot more (we do). Snatch straps, shovels and sand tracks are all good kit to have when you’re faced with an unscheduled stop in the outback. Having a winch mounted on your vehicle is a great feeling at those times, too. A properly equipped 4x4 has all the gear you need to extract yourself from almost any situation.
The next question is, can you use it all safely? A recovery operation on a big, heavy vehicle can be dangerous. There are heavy weights and huge forces involved and if you get in their way the results can be serious, even fatal. Before you head off anywhere that could involve self-recovery you need to know the safe way to use all your equipment. That applies to everything of course, but recovery gear most of all.
The first thing to be aware of is the locations on your vehicle that are safe for recovery use. That mainly applies to two things – safe places for a jack and suitable locations for attaching tow straps or cables. Jacking points will be listed in the owner’s handbook for your vehicle and you shouldn’t use a standard jack anywhere else.
When it comes to attaching cables and straps it’s vital you only use proper recovery points. Your vehicle’s recovery points or properly installed after market recovery fittings will do. Anything else, no matter how solid it seems, won’t. Even bumpers and bull bars can rip loose if you try and haul yourself out with them, so stick with recovery points. If the point you’re using needs a shackle make sure you use a properly rated one. When fastening shackles tighten the pin fully then loosen it one half turn to prevent it seizing when a load goes on it.
15
Snatch straps and winch cables are dangerous. They can store an immense amount of energy and if they snap it’s released instantly. The first step in avoiding that is making sure your strap or cable is strong enough. Aim for a rating at least twice the weight of the lightest vehicle involved in the recovery. The same applies to any fittings you’re using. Hang a damper over the strap before applying tension – a heavy blanket will help, but a purpose made damper is better. That will reduce the hazard if it snaps. If at all possible never cross a tensioned strap, Keep anyone who’s not involved in the recovery inside a vehicle or at least one and a half times the length of the strap away from the action.
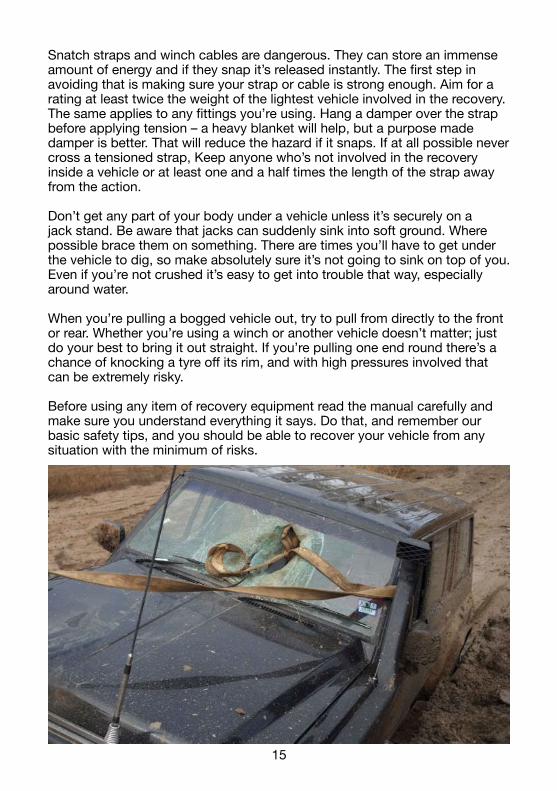
Don’t get any part of your body under a vehicle unless it’s securely on a jack stand. Be aware that jacks can suddenly sink into soft ground. Where possible brace them on something. There are times you’ll have to get under the vehicle to dig, so make absolutely sure it’s not going to sink on top of you. Even if you’re not crushed it’s easy to get into trouble that way, especially around water.
When you’re pulling a bogged vehicle out, try to pull from directly to the front or rear. Whether you’re using a winch or another vehicle doesn’t matter; just do your best to bring it out straight. If you’re pulling one end round there’s a chance of knocking a tyre off its rim, and with high pressures involved that can be extremely risky.
Before using any item of recovery equipment read the manual carefully and make sure you understand everything it says. Do that, and remember our basic safety tips, and you should be able to recover your vehicle from any situation with the minimum of risks.
16
SNATCH STRAP RECOVERYQuick tips
• Attach straps to rated recovery points. Do not attach straps to tow balls.• Only use rated recovery equipment and snatch strap during the recovery.• Position vehicles as straight as possible. • Avoid twists in the strap between the vehicles.• Use a recovery damper over the snatch strap.• Drive the tow vehicle at a steady pace in a low gear in order to tension
the strap like a rubber band. The stuck vehicle will be snatched free.
A stuck vehicle can be recovered using a product called a snatch strap. The strap is used to pull the bogged vehicle free. The strap is not tensioned before the recovery takes place. Instead the strap is laid loose and the tow vehicle is used to tension the strap like a rubber band. The stuck vehicle is “snatched” free and pulled to safety.
When snatching, the vehicles are positioned to allow a little slack in the strap. The vehicles should be as straight as possible and the strap should not have any twists in it. The strap needs to be attached to a suitable recovery point. If shackles are required, they must be rated to at least 3 tonnes. Snatch straps should never be attached to a tow ball. Tow balls can cause fatal injuries and often break. Tow balls are not rated for the stresses required to recover a vehicle. A recovery hitch can be used in place of a tow ball.
It is recommended to place a blanket or towel over the snatch strap once it is connected at both ends. This acts as a dampener to prevent the snatch strap storing energy and potentially hurting someone if it breaks. Once the vehicles are connected and bystanders are out of the way, the bogged driver may signal he is ready. The tow vehicle should drive at a steady pace (not too fast) in a low gear. The driver of the bogged vehicle should be in a low gear and once the jerk of the strap is felt the driver may start to accellerate and hopefully drive out.
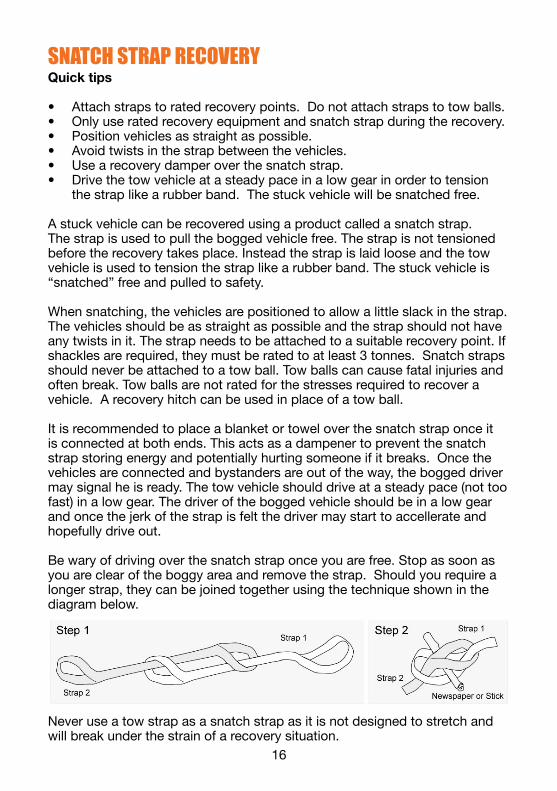
Be wary of driving over the snatch strap once you are free. Stop as soon as you are clear of the boggy area and remove the strap. Should you require a longer strap, they can be joined together using the technique shown in the diagram below.
Never use a tow strap as a snatch strap as it is not designed to stretch and will break under the strain of a recovery situation.
17
JACK RECOVERYUsing a jack to recover a vehicle is done when a wheel is able to removed from a rut if the car is stuck on its underbody. Often the vehicle will be jacked up and lifted out of the holes it is in. Once lifted, the holes under the wheels can be filled with dirt / sand / logs etc. in order to enable the car to drive out of the bog.
Jacks can also be used to break suction in mud if a snatch strap is not working. Jacks can be used to lift the entire end of a vehicle and then pushed sideways in order to move a vehicle out of a rut or soft section. Safety precautions must be taken to avoid the jack from springing out from under the vehicle and hurting someone.
The jack can be placed under the middle of the front or rear of the vehicle then the lifted end is pushed until it topples off the jack. This can be repeated at both ends to walk the car sideways. Be aware that cars are very unstable with 2 wheels off the ground. Onlookers should be well clear of the car before this procedure is attempted.
High lift jack
High Lift Jacks or Farm Jacks can be used with 4wd vehicles to lift it well above the height of a standard vehicle jack or scissor jack. Most factory supplied jacks can only lift the car enough to be able to change a tyre on a hard surface. They rely on placing the jack in special positions in order to lift the car.
High lift jacks can be used in most suitable places on the vehicle and can lift a lot higher than a standard jack. Some cars don’t have the ability to use a high lift jack due to their curved bodies and lack of recovery points. There are adaptors available to utilise the bullbar or rims to jack from.
It is recommended to carry a jacking plate in order to prevent the jack from burying itself on soft surfaces. Pieces of plywood or steel can be used as suitable jacking plates also.
Exhaust bag jack
The exhaust powered bag type of jack is very simple and easy to use, provided it can be placed under part of the vehicle. It is quite effective, especially in sand where, if necessary, a small area can be dug away to accommodate it.
Once in position, connect the pipe to the vehicle exhaust and start the engine (in neutral). When the wheel is clear stop the engine and simply fill in the hole or rut with whatever is available or dig away any sand that has built up.
18
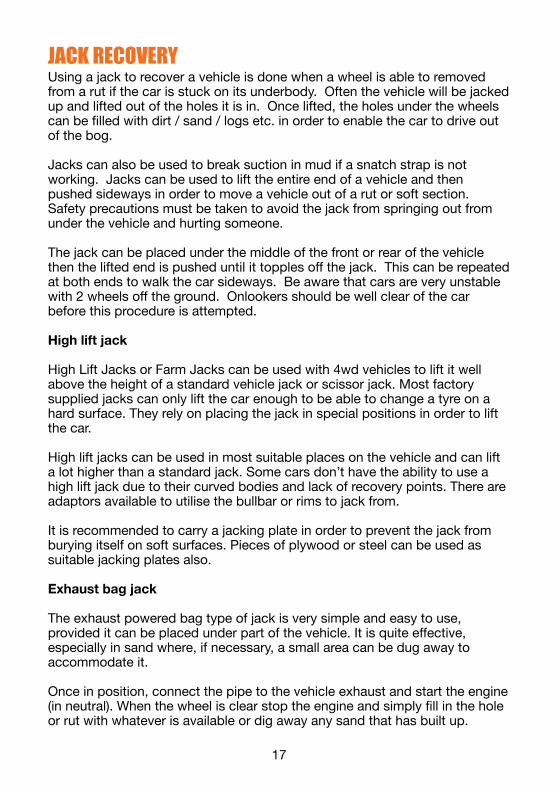
WINCH RECOVERYSometimes a snatch recovery is not practical or could prove too dangerous in the event the car may roll or become damaged during the recovery. Often a more controlled and slower approach is required.
Winches are perfect for recovery when there is an available anchor or tree that can be used.
A winch will allow you to slowly pull your vehicle to safety however they have their own dangers. It is recommended to use a winch cable dampener over the winch cable to prevent the cable sorting energy and flinging around should it break.
Winches can also be used with the aid of pulley blocks. A pulley block allows you to double the power of your winch which will halve its speed. Multiple pulley blocks can be used to redirect the winch direction or speed load across different parts of a vehicle. Winching
There are two types of winches. Hand Winches are a mechanical ratcheting device operated by hand using a large lever to wind on the winch rope manually. Electric winches are a drum shaped device driven by an electric motor through low gearing.
Hand winch
Operating a hand winch involves a lot of manual labour, but if you’re out bush by yourself, it is recommended you at least take this type of winch with you. Hand winches are simply a ratchet with a very long handle.

19
Electric winch
Electric winches utilise an electric motor connected directly to your car battery. The motor is heavily geared to provide a large amount of torque at a relatively slow speed.
An electric winch will have a large drum which either a steel or synthetic cable is wound. Winches feature a hand controller which allows you to operate the winch at a safe distance in case the winch rope breaks.
The winch rope is attached via a shackle or hook to an anchor point. The winch is then operated by the hand controller to pull the vehicle free of the bog.
Winches can be used to rescue other vehicles by straight pulling the vehicle free, or used with a snatch block and anchor point to pull a stuck vehicle in a number of different ways.
Winch safety
Operating a winch can be a rewarding yet dangerous experience. In the hands of an experienced operator, winching can be safe and enjoyable and the recovery of the vehicle can be achieved.
When winching, the winch cable is put under extreme tension. The winch cable is a zero stretch spun wire construction or woven nylon construction depending on the winch. As the cable is put under tension, there is a likelihood of the cable breaking if it comes into contact with a sharp rock on the ground or is weakened in any way.
When winching, the use of a winch damper is recommended. Weighted winch dampers are placed over the winch cable in a central location. In order to prevent the cable from damaging property or hurting anyone in the case where the winch cable may fail, the damper is weighted to reduce the kinetic energy stored in the cable.
20
SAND TRACKS & LADDERSSand ladder history
People have been making home made sand recovery devices since the development of the first motor vehicle. The first commercially available sand ladder, called Marsden Matting, was invented by the U.S. Army and commenced manufacture in 1941.
Traction
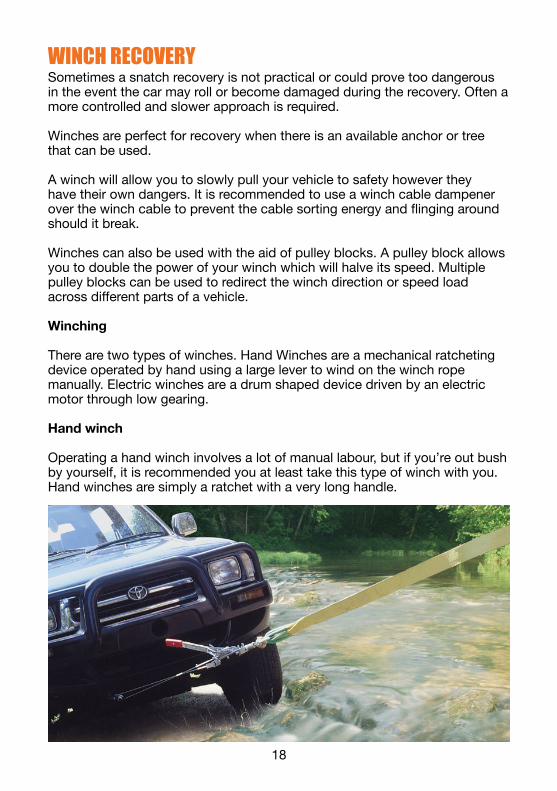
Sand Ladders provide grip and level crossing for a 4wd vehicle in soft, sandy / snowy or muddy terrain. The device works by creating a much larger surface than the tyres can provide. Grip is then provided by perforations or lugs in the ladder surface so the tyres can latch onto them. Surface grip of the sand ladder is most important when in wet conditions where the tyre’s adhesion properties are reduced. Do not spin the tyres when using a sand ladder. Take off slowly and allow the car to crawl out of the hole.
Bridging
If the sand ladder is rigid enough, it can be used as a bridging device to allow the vehicle to cross a deep rut or ledge. Bridging capability is desirable in a sand ladder and improves it safety. Being able to traverse washouts and ruts of considerable depth is an important feature of sand ladders.
Ramps
Using a sand ladder as a ramp is not recommended as most will not be capable of supporting the weight of the vehicle as it climbs up the embankment. Often Sand Ladders are required to be doubled up in order to be used for ramps.
21
TYRE REPAIRTyre repair equipment is not often thought of when packing for a trip. Often people will think the old spare tyre on the back of the truck will do the job and get them out of trouble, and in many cases it will. However, tyre repair equipment is as essential as a snatch strap when it comes to four wheel driving.
Repairing a damaged tyre
Knowing when a tyre can be safely repaired and when it is damaged beyond repair is key to recovering your 4wd vehicle out in the bush. If you mistake a tyre to be safely repaired, you may find yourself in more trouble with a tyre blow-out resulting in a possibly fatal accident.
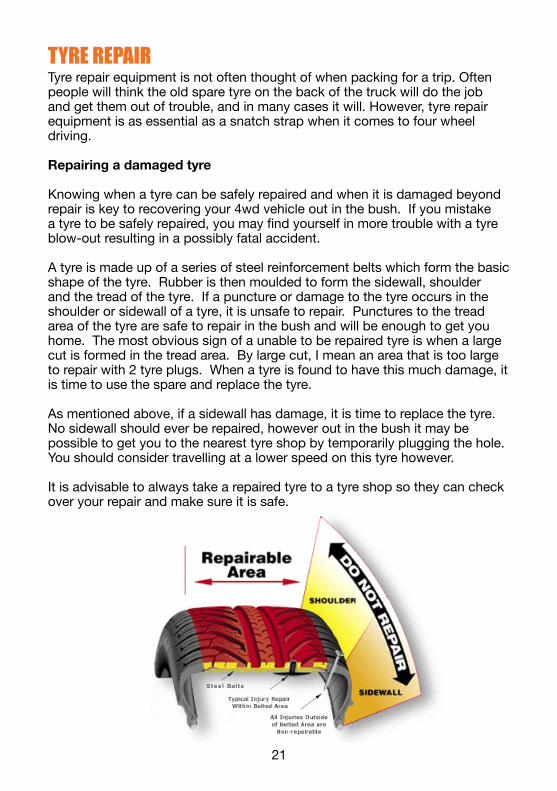
A tyre is made up of a series of steel reinforcement belts which form the basic shape of the tyre. Rubber is then moulded to form the sidewall, shoulder and the tread of the tyre. If a puncture or damage to the tyre occurs in the shoulder or sidewall of a tyre, it is unsafe to repair. Punctures to the tread area of the tyre are safe to repair in the bush and will be enough to get you home. The most obvious sign of a unable to be repaired tyre is when a large cut is formed in the tread area. By large cut, I mean an area that is too large to repair with 2 tyre plugs. When a tyre is found to have this much damage, it is time to use the spare and replace the tyre.
As mentioned above, if a sidewall has damage, it is time to replace the tyre. No sidewall should ever be repaired, however out in the bush it may be possible to get you to the nearest tyre shop by temporarily plugging the hole. You should consider travelling at a lower speed on this tyre however.
It is advisable to always take a repaired tyre to a tyre shop so they can check over your repair and make sure it is safe.
22
Tyre repair kits
Tyre repair kits like the ones available from toughtoys.com.au are designed for vehicles with tubeless tyres. They are a compact kit providing plenty of repair strings and the reaming and needle tools to apply them. They are also supplied with application lube, glue and a digital tyre pressure gauge.
Most repairs can be performed without removing the tyre from the rim. Simply plug the damage and re-inflate your tyre. Easily repair punctures caused by rocks, nails or other debris off road without having to remove the tyre from the rim. Always check the amount of repair cords, valves and lubricant you have before departing for your trip.
Repairing a puncture on the go is as easy as following these simple steps:
1. Remove the puncture material - clear the nail or puncture causing material from the tyre using pliers or grips.
2. Use the reaming tool supplied in the tyre repair kit to enlarge the puncture hole.
3. Insert a self vulcanising cord into the needle handle and apply lubricant to the needle.
4. Push the cord into the tyre puncture hole and twist.5. Pull the handle out while holding the base in order to release the cord
inside the tyre.6. The tyre is now repaired and is ready for inflation.
Tyre pliers, bead cheaters & tyre levers
The outback is not a daunting place if you are well prepared and have bothered to do your research and learn a few skills along the way. Most tyre related issues can be fixed with a simple tyre repair kit, however sometimes you may find yourself with a tear in your tyre bigger than what can be repaired with one of these kits.
Tyre pliers are very quick to use and operate on the simple lever principal. They allow you to remove the tyre from the rim quickly and easily to install a much larger plug from the back.
Bead cheaters are suitable for use on any rim type & size, but may mark alloy rims. They operate on a combination of clamp or screw designs and once set up are very quick and easy to use. Ideal for use where a large variety of tyre sizes & tyres will be used (i.e. Trucks & Tractors).
Tyre levers have curved & tapered ends to suit different shaped rims. Ideally, two levers are used in conjunction with a bead breaker to successfully remove and refit the tyre to the rim.

23
DAILY MAINTENANCE AND CHECK-UPSYou should perform a routine check over the vehicle each day that you will be driving off road. This will allow you to pre-empt any issues that may cause the vehicle to break down in the middle of a difficult track or somewhere a mechanic or tow truck cannot easily reach.
Each day’s preparation should involve the following vehicle checks:
• Check the vehicle’s tyre pressures including your spare to make sure you have not had a puncture causing a slow leak.
• Check under the vehicle for leaks or signs of damage to suspension and underbody components. Check the tightness of suspension bolts with the appropriate sized spanner.
• Check the engine oil level by removing the dip stick, wiping it clean with a rag, then inserting it all the way back into the engine. Remove the dip stick once more and check the level is close to the top marker and not below the bottom marker.
• Check the vehicle transmission oil (if it is an automatic there will be another dip stick to check the level.
• Check the brake fluid and coolant levels to make sure you do not have a leak.
• Check that the vehicle lighting is working including indicators, headlights and driving lights.
• Check the status of your winch (if installed) to make sure it operates smoothly and the electrics are working.
• Check the condition of your recovery gear. If there is damage to a strap, do not continue to use it. Always replace damaged gear.
TYRE PRESSURE RECOMMENDATIONSTyre pressures are always a hotly debated camp fire subject. We have put together a general guide for tyre pressures when travelling off road.
Sand 18-26 PSILower tyre pressures on sand will allow a bigger footprint and more flotation.
Gravel / Dirt Roads 32-36 PSIReduced pressure will give a smoother ride. Driving with tyre pressures too low will cause a poor steering response.
Rocky Ground 22-28 PSIGoing should be very slow with low range crawling over rocks.
Mud 22-28 PSIDepending on the situation you may want to reduce pressures for traction.
Tyre pressure recommendations are based on light truck tyre use. Tyres must be inflated to proper levels once your vehicle is returned to normal road applications.


BEGINNER’S GUIDE4WDTO
Keep this guide in the glove-box of your 4wd for those times when you might find yourself needing some advice to tackle that next obstacle off road.
To purchase any of the products mentioned in this guide, please visit Tough Toys online or in store.
www.toughtoys.com.au


![the birthdayshoes.com [beginner’s guide] to Vibram FiveFingersimg2.timg.co.il/forums/1_142523900.pdf · [beginner’s guide] to VFFs the birthdayshoes.com [beginner’s guide] to](https://img.pdfslide.us/doc/110x75/5f31c0e74c5d41162d54cd63/the-beginneras-guide-to-vibram-fivefingersimg2timgcoilforums1142523900pdf.jpg)