Embed Size (px)
Citation preview
BEACH APPARATUS DRILL DEMONSTRATION
Part I: INTRODUCTION Maritime trade in the United States increased rapidly in the 18th and 19th centuries; however, large sections of the eastern seaboard, as well as many areas around the Great Lakes, remained sparsely populated. Shipwrecked crews could expect little, if any, help. Humane societies were formed, but formal efforts to make our coasts and lakeshores safe did not occur in the 1870’s. The U. S. Life-Saving Service (USLSS) was established as a federal agency under the Treasury Department in 1878. Sumner I. Kimball was selected to be the General Superintendent. The stations of the Service were categorized as: lifesaving, lifeboat, and houses of refuge. Full-time crews manned life-saving stations during the period when wrecks were most likely to occur. On the East Coast this was usually from November to April but, by the turn of the 19th century, was year-round. The USLSS had two means of rescuing people on board ships stranded near shore: by boat and by strong line stretched from the beach to the wrecked vessel. When a ship wrecked close to shore and the seas were too rough for boats, then the Service could use a method to reach the stranded mariner by stringing a strong hawser (line) from the shore to the ship. To propel the line to the ship, a Lyle gun was used. This shot a projectile up to 600 yards carrying a small messenger line by which the shipwrecked sailors were able to pull out the heavier hawser. Once the line was secure, a breeches buoy (lifesaving ring with canvas pants sewn onto it) was attached and, one-by-one, people could be pulled safely to land. A beach apparatus cart carried all the equipment needed to rig the breeches buoy and could be pulled by the crew, or sometimes a horse, to the wreck site. Proficiency with the equipment was important. For that reason, drill was part of the surfmen’s routine, as prescribed in the federal regulations. Every Thursday, the beach apparatus drill was rehearsed on land using a stationary drill pole to simulate the mast of a shipwrecked vessel. Surfmen were required to recite their particular duties in addition to performing them. The public was usually invited to watch the weekly drills and often provided large audiences. The surfmen’s traditional motto stated that “you have to go out, but you don’t have to come back!” Their dedication to service unwavered through hurricanes, snowstorms and their never-ending attempt to save the lives of people of all nationalities against the raging sea. Today, National Park Service interpreters and volunteers use the Lyle gun and the Beach Apparatus Drill to demonstrate the efforts of the United States Life-Saving Service who braved storms to assist those “in peril upon the seas. These living history demonstrations help visitors to understand and appreciate the impact the USLSS had upon this crucial period of our nation’s development and it’s contribution to today’s United States Coast Guard.
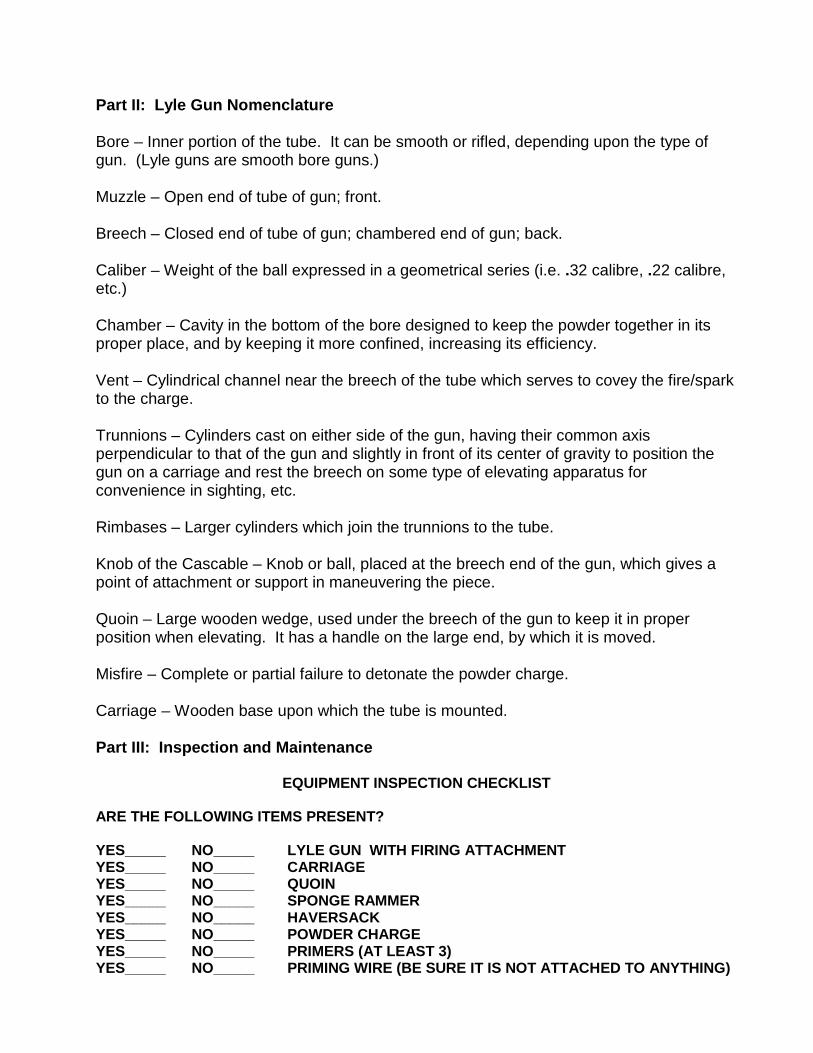
Part II: Lyle Gun Nomenclature Bore – Inner portion of the tube. It can be smooth or rifled, depending upon the type of gun. (Lyle guns are smooth bore guns.) Muzzle – Open end of tube of gun; front. Breech – Closed end of tube of gun; chambered end of gun; back. Caliber – Weight of the ball expressed in a geometrical series (i.e. .32 calibre, .22 calibre, etc.) Chamber – Cavity in the bottom of the bore designed to keep the powder together in its proper place, and by keeping it more confined, increasing its efficiency. Vent – Cylindrical channel near the breech of the tube which serves to covey the fire/spark to the charge. Trunnions – Cylinders cast on either side of the gun, having their common axis perpendicular to that of the gun and slightly in front of its center of gravity to position the gun on a carriage and rest the breech on some type of elevating apparatus for convenience in sighting, etc. Rimbases – Larger cylinders which join the trunnions to the tube. Knob of the Cascable – Knob or ball, placed at the breech end of the gun, which gives a point of attachment or support in maneuvering the piece. Quoin – Large wooden wedge, used under the breech of the gun to keep it in proper position when elevating. It has a handle on the large end, by which it is moved. Misfire – Complete or partial failure to detonate the powder charge. Carriage – Wooden base upon which the tube is mounted. Part III: Inspection and Maintenance
EQUIPMENT INSPECTION CHECKLIST ARE THE FOLLOWING ITEMS PRESENT? YES_____ NO_____ LYLE GUN WITH FIRING ATTACHMENT YES_____ NO_____ CARRIAGE YES_____ NO_____ QUOIN YES_____ NO_____ SPONGE RAMMER YES_____ NO_____ HAVERSACK YES_____ NO_____ POWDER CHARGE YES_____ NO_____ PRIMERS (AT LEAST 3) YES_____ NO_____ PRIMING WIRE (BE SURE IT IS NOT ATTACHED TO ANYTHING)
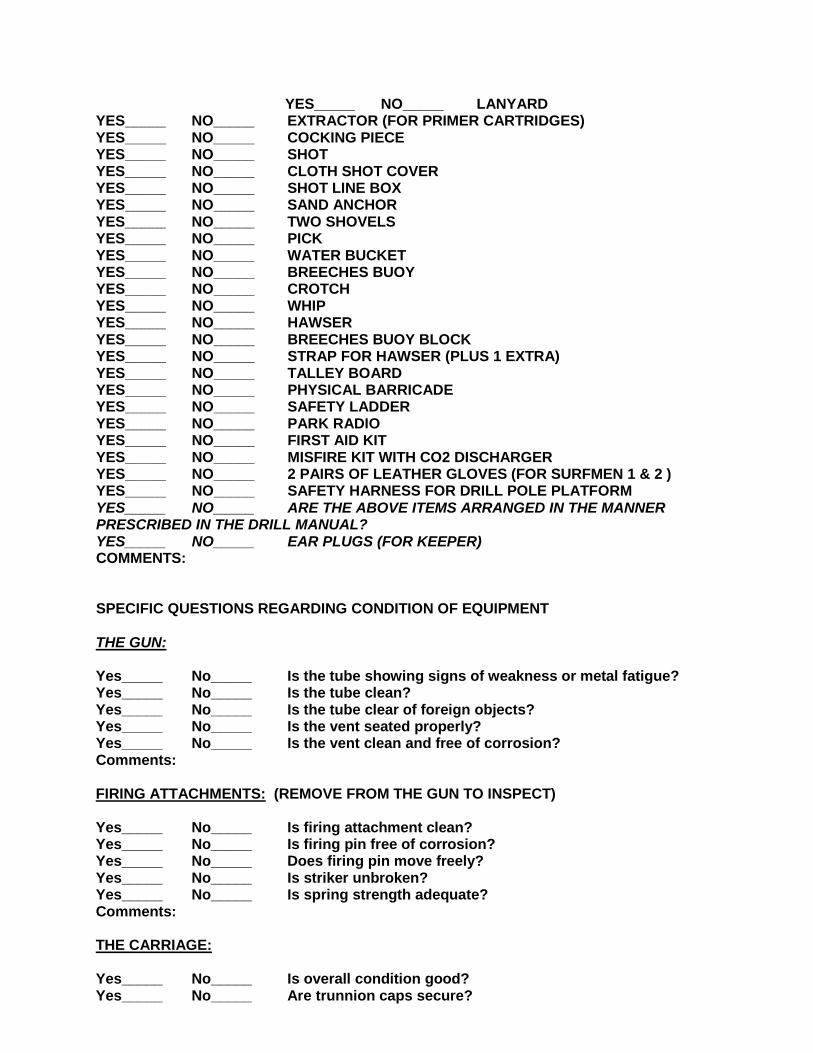
YES_____ NO_____ LANYARD YES_____ NO_____ EXTRACTOR (FOR PRIMER CARTRIDGES) YES_____ NO_____ COCKING PIECE YES_____ NO_____ SHOT YES_____ NO_____ CLOTH SHOT COVER YES_____ NO_____ SHOT LINE BOX YES_____ NO_____ SAND ANCHOR YES_____ NO_____ TWO SHOVELS YES_____ NO_____ PICK YES_____ NO_____ WATER BUCKET YES_____ NO_____ BREECHES BUOY YES_____ NO_____ CROTCH YES_____ NO_____ WHIP YES_____ NO_____ HAWSER YES_____ NO_____ BREECHES BUOY BLOCK YES_____ NO_____ STRAP FOR HAWSER (PLUS 1 EXTRA) YES_____ NO_____ TALLEY BOARD YES_____ NO_____ PHYSICAL BARRICADE YES_____ NO_____ SAFETY LADDER YES_____ NO_____ PARK RADIO YES_____ NO_____ FIRST AID KIT YES_____ NO_____ MISFIRE KIT WITH CO2 DISCHARGER YES_____ NO_____ 2 PAIRS OF LEATHER GLOVES (FOR SURFMEN 1 & 2 ) YES_____ NO_____ SAFETY HARNESS FOR DRILL POLE PLATFORM YES_____ NO_____ ARE THE ABOVE ITEMS ARRANGED IN THE MANNER PRESCRIBED IN THE DRILL MANUAL? YES_____ NO_____ EAR PLUGS (FOR KEEPER) COMMENTS: SPECIFIC QUESTIONS REGARDING CONDITION OF EQUIPMENT THE GUN: Yes_____ No_____ Is the tube showing signs of weakness or metal fatigue? Yes_____ No_____ Is the tube clean? Yes_____ No_____ Is the tube clear of foreign objects? Yes_____ No_____ Is the vent seated properly? Yes_____ No_____ Is the vent clean and free of corrosion? Comments: FIRING ATTACHMENTS: (REMOVE FROM THE GUN TO INSPECT) Yes_____ No_____ Is firing attachment clean? Yes_____ No_____ Is firing pin free of corrosion? Yes_____ No_____ Does firing pin move freely? Yes_____ No_____ Is striker unbroken? Yes_____ No_____ Is spring strength adequate? Comments: THE CARRIAGE: Yes_____ No_____ Is overall condition good? Yes_____ No_____ Are trunnion caps secure?
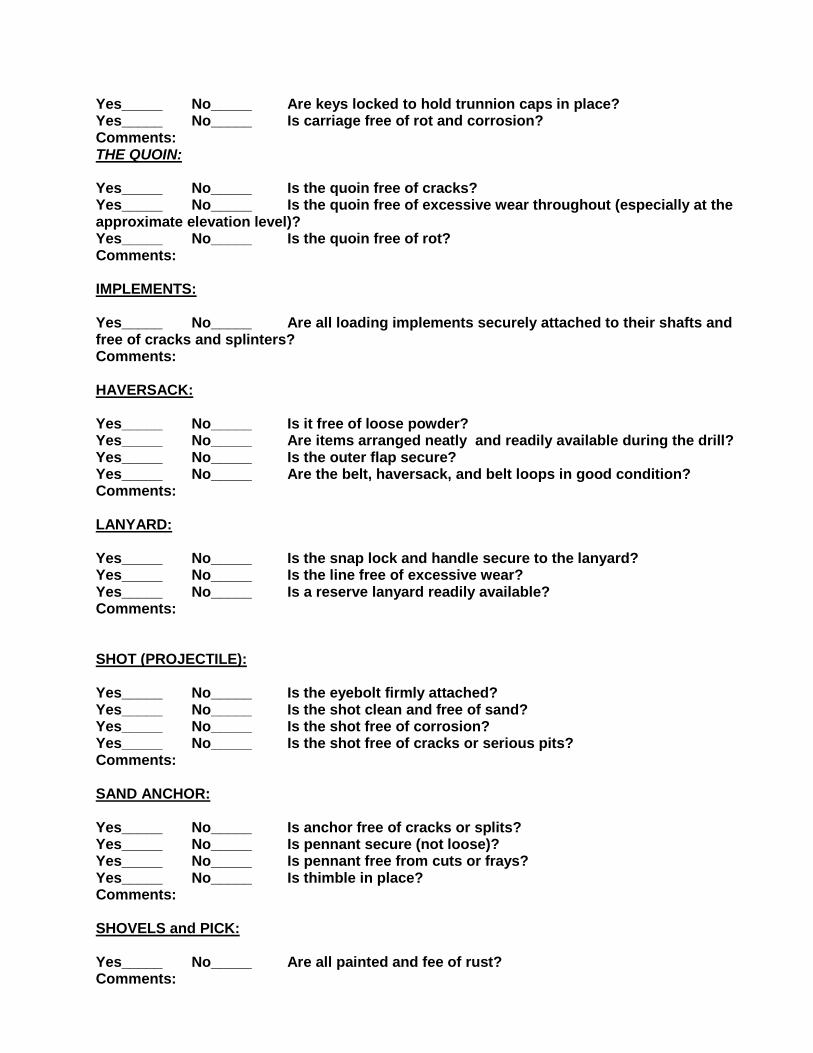
Yes_____ No_____ Are keys locked to hold trunnion caps in place? Yes_____ No_____ Is carriage free of rot and corrosion? Comments: THE QUOIN: Yes_____ No_____ Is the quoin free of cracks? Yes_____ No_____ Is the quoin free of excessive wear throughout (especially at the approximate elevation level)? Yes_____ No_____ Is the quoin free of rot? Comments: IMPLEMENTS: Yes_____ No_____ Are all loading implements securely attached to their shafts and free of cracks and splinters? Comments: HAVERSACK: Yes_____ No_____ Is it free of loose powder? Yes_____ No_____ Are items arranged neatly and readily available during the drill? Yes_____ No_____ Is the outer flap secure? Yes_____ No_____ Are the belt, haversack, and belt loops in good condition? Comments: LANYARD: Yes_____ No_____ Is the snap lock and handle secure to the lanyard? Yes_____ No_____ Is the line free of excessive wear? Yes_____ No_____ Is a reserve lanyard readily available? Comments: SHOT (PROJECTILE): Yes_____ No_____ Is the eyebolt firmly attached? Yes_____ No_____ Is the shot clean and free of sand? Yes_____ No_____ Is the shot free of corrosion? Yes_____ No_____ Is the shot free of cracks or serious pits? Comments: SAND ANCHOR: Yes_____ No_____ Is anchor free of cracks or splits? Yes_____ No_____ Is pennant secure (not loose)? Yes_____ No_____ Is pennant free from cuts or frays? Yes_____ No_____ Is thimble in place? Comments: SHOVELS and PICK: Yes_____ No_____ Are all painted and fee of rust? Comments:
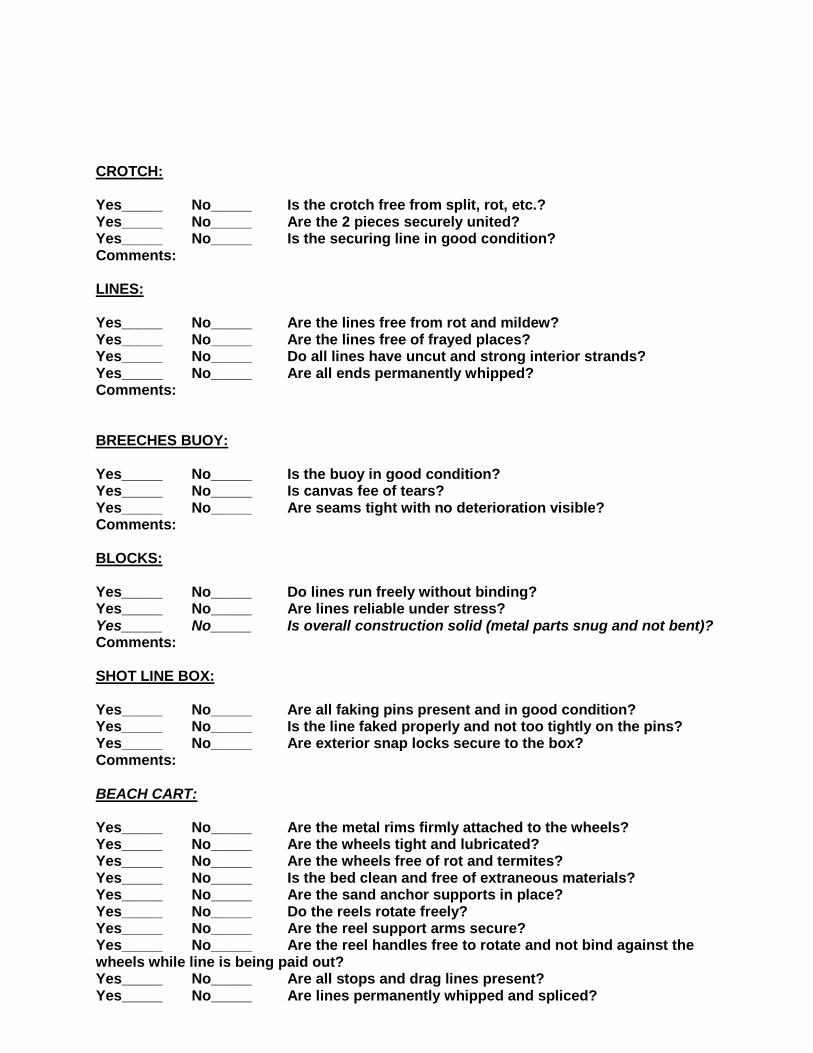
CROTCH: Yes_____ No_____ Is the crotch free from split, rot, etc.? Yes_____ No_____ Are the 2 pieces securely united? Yes_____ No_____ Is the securing line in good condition? Comments: LINES: Yes_____ No_____ Are the lines free from rot and mildew? Yes_____ No_____ Are the lines free of frayed places? Yes_____ No_____ Do all lines have uncut and strong interior strands? Yes_____ No_____ Are all ends permanently whipped? Comments: BREECHES BUOY: Yes_____ No_____ Is the buoy in good condition? Yes_____ No_____ Is canvas fee of tears? Yes_____ No_____ Are seams tight with no deterioration visible? Comments: BLOCKS: Yes_____ No_____ Do lines run freely without binding? Yes_____ No_____ Are lines reliable under stress? Yes_____ No_____ Is overall construction solid (metal parts snug and not bent)? Comments: SHOT LINE BOX: Yes_____ No_____ Are all faking pins present and in good condition? Yes_____ No_____ Is the line faked properly and not too tightly on the pins? Yes_____ No_____ Are exterior snap locks secure to the box? Comments: BEACH CART: Yes_____ No_____ Are the metal rims firmly attached to the wheels? Yes_____ No_____ Are the wheels tight and lubricated? Yes_____ No_____ Are the wheels free of rot and termites? Yes_____ No_____ Is the bed clean and free of extraneous materials? Yes_____ No_____ Are the sand anchor supports in place? Yes_____ No_____ Do the reels rotate freely? Yes_____ No_____ Are the reel support arms secure? Yes_____ No_____ Are the reel handles free to rotate and not bind against the wheels while line is being paid out? Yes_____ No_____ Are all stops and drag lines present? Yes_____ No_____ Are lines permanently whipped and spliced?
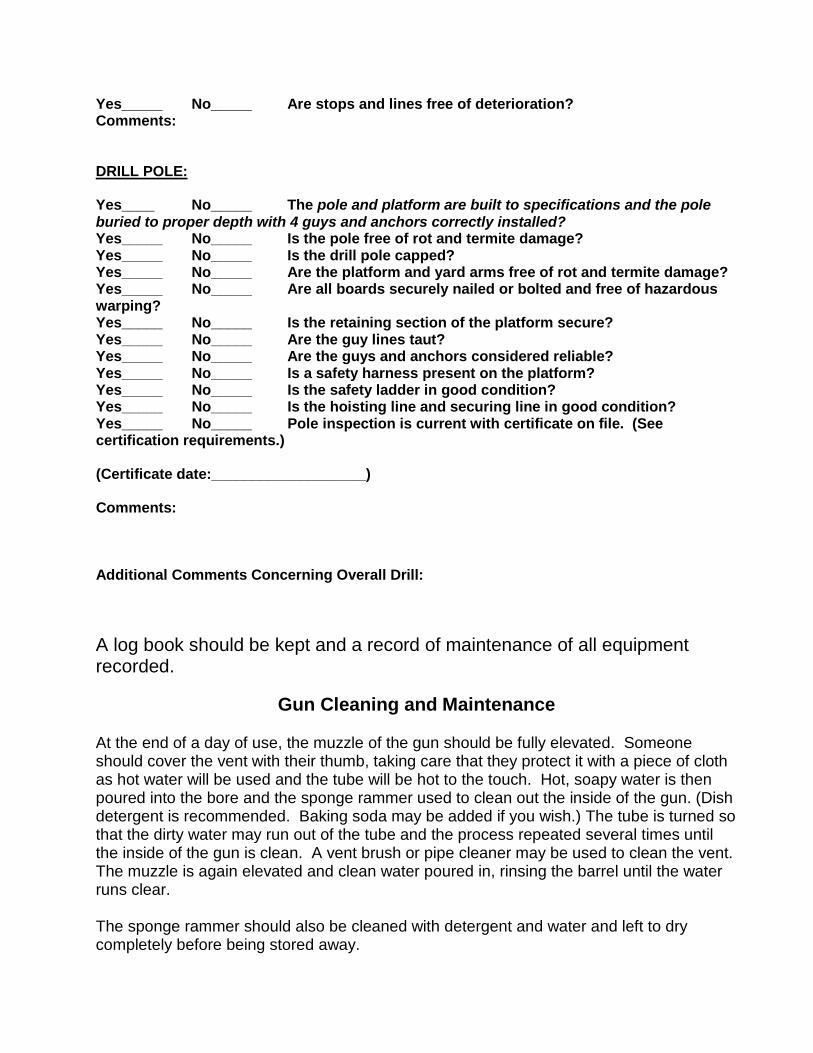
Yes_____ No_____ Are stops and lines free of deterioration? Comments: DRILL POLE: Yes____ No_____ The pole and platform are built to specifications and the pole buried to proper depth with 4 guys and anchors correctly installed? Yes_____ No_____ Is the pole free of rot and termite damage? Yes_____ No_____ Is the drill pole capped? Yes_____ No_____ Are the platform and yard arms free of rot and termite damage? Yes_____ No_____ Are all boards securely nailed or bolted and free of hazardous warping? Yes_____ No_____ Is the retaining section of the platform secure? Yes_____ No_____ Are the guy lines taut? Yes_____ No_____ Are the guys and anchors considered reliable? Yes_____ No_____ Is a safety harness present on the platform? Yes_____ No_____ Is the safety ladder in good condition? Yes_____ No_____ Is the hoisting line and securing line in good condition? Yes_____ No_____ Pole inspection is current with certificate on file. (See certification requirements.) (Certificate date:___________________) Comments: Additional Comments Concerning Overall Drill: A log book should be kept and a record of maintenance of all equipment recorded.
Gun Cleaning and Maintenance At the end of a day of use, the muzzle of the gun should be fully elevated. Someone should cover the vent with their thumb, taking care that they protect it with a piece of cloth as hot water will be used and the tube will be hot to the touch. Hot, soapy water is then poured into the bore and the sponge rammer used to clean out the inside of the gun. (Dish detergent is recommended. Baking soda may be added if you wish.) The tube is turned so that the dirty water may run out of the tube and the process repeated several times until the inside of the gun is clean. A vent brush or pipe cleaner may be used to clean the vent. The muzzle is again elevated and clean water poured in, rinsing the barrel until the water runs clear. The sponge rammer should also be cleaned with detergent and water and left to dry completely before being stored away.
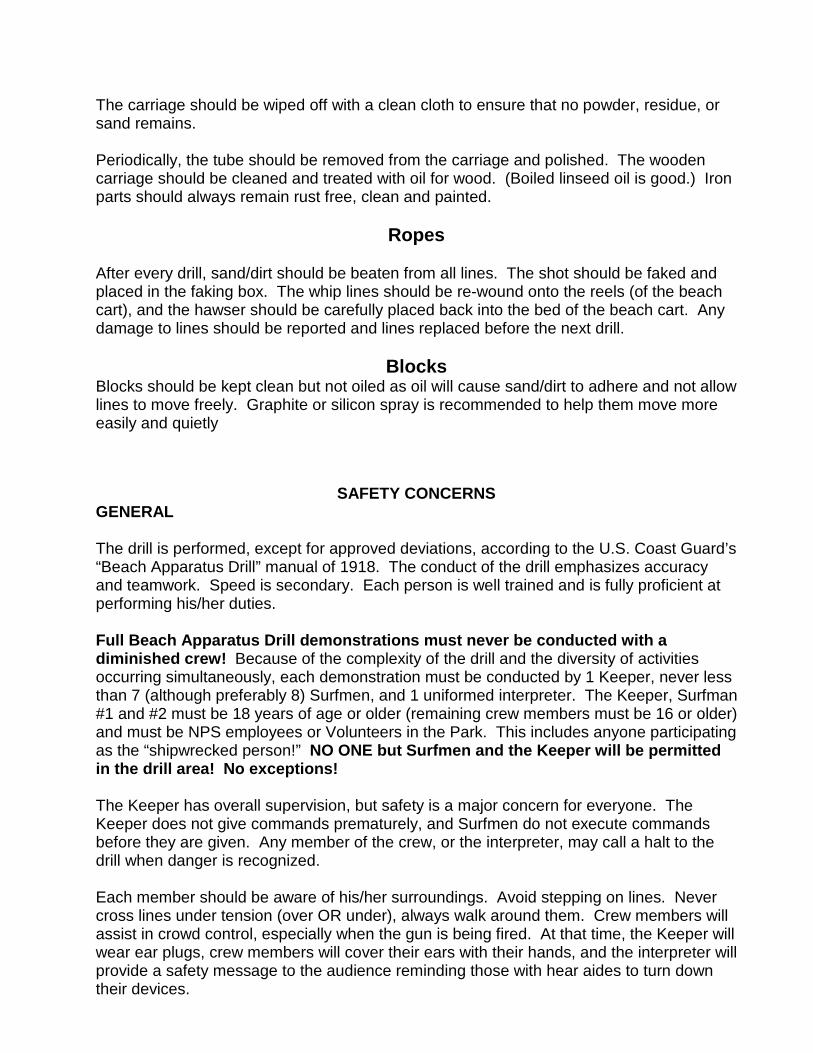
The carriage should be wiped off with a clean cloth to ensure that no powder, residue, or sand remains. Periodically, the tube should be removed from the carriage and polished. The wooden carriage should be cleaned and treated with oil for wood. (Boiled linseed oil is good.) Iron parts should always remain rust free, clean and painted.
Ropes
After every drill, sand/dirt should be beaten from all lines. The shot should be faked and placed in the faking box. The whip lines should be re-wound onto the reels (of the beach cart), and the hawser should be carefully placed back into the bed of the beach cart. Any damage to lines should be reported and lines replaced before the next drill.
Blocks Blocks should be kept clean but not oiled as oil will cause sand/dirt to adhere and not allow lines to move freely. Graphite or silicon spray is recommended to help them move more easily and quietly
SAFETY CONCERNS
GENERAL The drill is performed, except for approved deviations, according to the U.S. Coast Guard’s “Beach Apparatus Drill” manual of 1918. The conduct of the drill emphasizes accuracy and teamwork. Speed is secondary. Each person is well trained and is fully proficient at performing his/her duties. Full Beach Apparatus Drill demonstrations must never be conducted with a diminished crew! Because of the complexity of the drill and the diversity of activities occurring simultaneously, each demonstration must be conducted by 1 Keeper, never less than 7 (although preferably 8) Surfmen, and 1 uniformed interpreter. The Keeper, Surfman #1 and #2 must be 18 years of age or older (remaining crew members must be 16 or older) and must be NPS employees or Volunteers in the Park. This includes anyone participating as the “shipwrecked person!” NO ONE but Surfmen and the Keeper will be permitted in the drill area! No exceptions! The Keeper has overall supervision, but safety is a major concern for everyone. The Keeper does not give commands prematurely, and Surfmen do not execute commands before they are given. Any member of the crew, or the interpreter, may call a halt to the drill when danger is recognized. Each member should be aware of his/her surroundings. Avoid stepping on lines. Never cross lines under tension (over OR under), always walk around them. Crew members will assist in crowd control, especially when the gun is being fired. At that time, the Keeper will wear ear plugs, crew members will cover their ears with their hands, and the interpreter will provide a safety message to the audience reminding those with hear aides to turn down their devices.
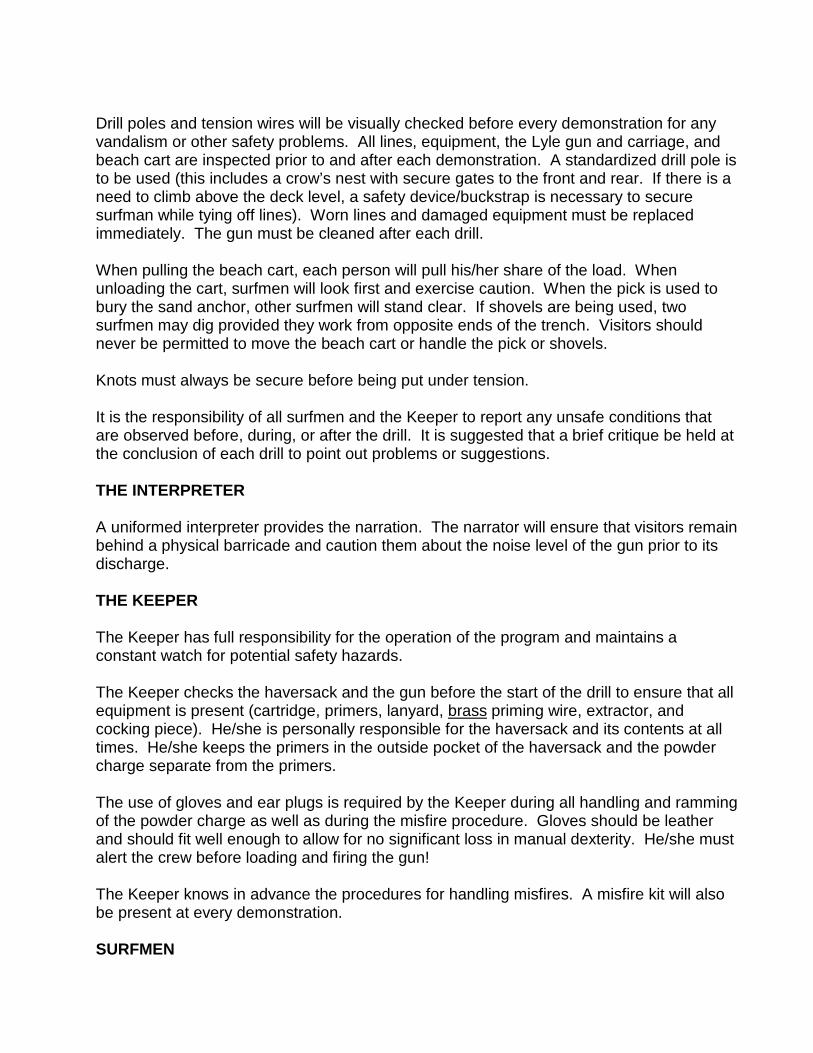
Drill poles and tension wires will be visually checked before every demonstration for any vandalism or other safety problems. All lines, equipment, the Lyle gun and carriage, and beach cart are inspected prior to and after each demonstration. A standardized drill pole is to be used (this includes a crow’s nest with secure gates to the front and rear. If there is a need to climb above the deck level, a safety device/buckstrap is necessary to secure surfman while tying off lines). Worn lines and damaged equipment must be replaced immediately. The gun must be cleaned after each drill. When pulling the beach cart, each person will pull his/her share of the load. When unloading the cart, surfmen will look first and exercise caution. When the pick is used to bury the sand anchor, other surfmen will stand clear. If shovels are being used, two surfmen may dig provided they work from opposite ends of the trench. Visitors should never be permitted to move the beach cart or handle the pick or shovels. Knots must always be secure before being put under tension. It is the responsibility of all surfmen and the Keeper to report any unsafe conditions that are observed before, during, or after the drill. It is suggested that a brief critique be held at the conclusion of each drill to point out problems or suggestions. THE INTERPRETER A uniformed interpreter provides the narration. The narrator will ensure that visitors remain behind a physical barricade and caution them about the noise level of the gun prior to its discharge. THE KEEPER The Keeper has full responsibility for the operation of the program and maintains a constant watch for potential safety hazards. The Keeper checks the haversack and the gun before the start of the drill to ensure that all equipment is present (cartridge, primers, lanyard, brass priming wire, extractor, and cocking piece). He/she is personally responsible for the haversack and its contents at all times. He/she keeps the primers in the outside pocket of the haversack and the powder charge separate from the primers. The use of gloves and ear plugs is required by the Keeper during all handling and ramming of the powder charge as well as during the misfire procedure. Gloves should be leather and should fit well enough to allow for no significant loss in manual dexterity. He/she must alert the crew before loading and firing the gun! The Keeper knows in advance the procedures for handling misfires. A misfire kit will also be present at every demonstration. SURFMEN
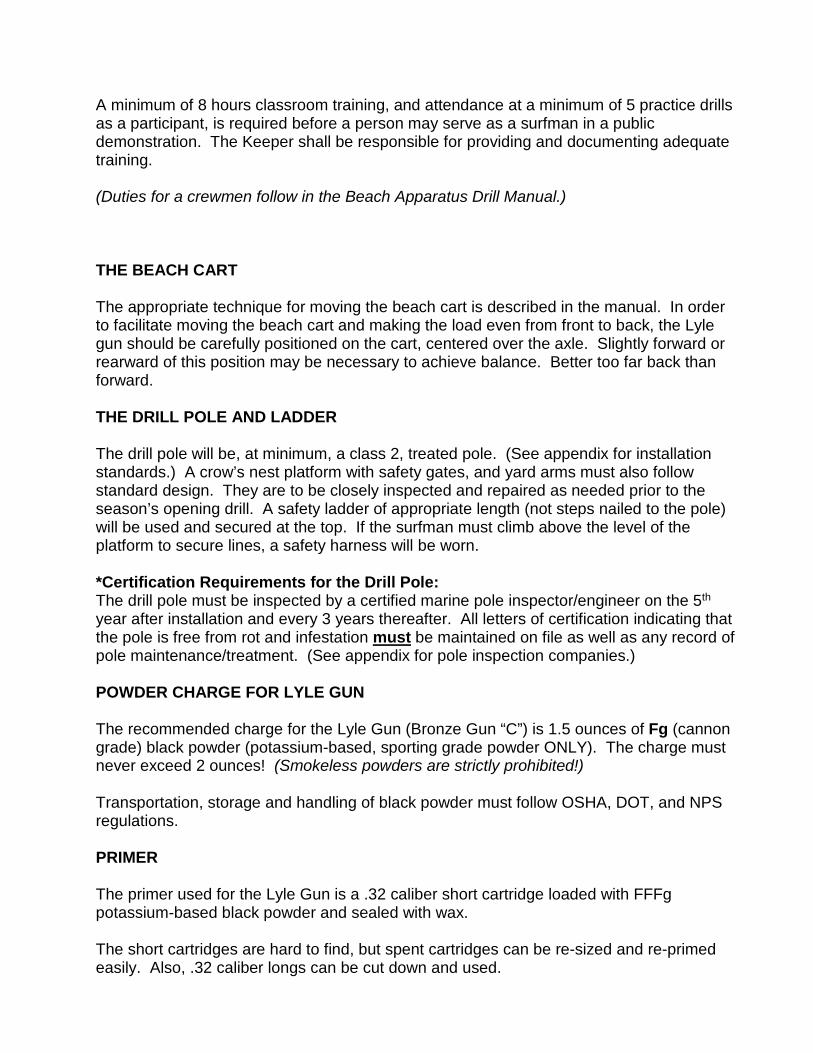
A minimum of 8 hours classroom training, and attendance at a minimum of 5 practice drills as a participant, is required before a person may serve as a surfman in a public demonstration. The Keeper shall be responsible for providing and documenting adequate training. (Duties for a crewmen follow in the Beach Apparatus Drill Manual.) THE BEACH CART The appropriate technique for moving the beach cart is described in the manual. In order to facilitate moving the beach cart and making the load even from front to back, the Lyle gun should be carefully positioned on the cart, centered over the axle. Slightly forward or rearward of this position may be necessary to achieve balance. Better too far back than forward. THE DRILL POLE AND LADDER The drill pole will be, at minimum, a class 2, treated pole. (See appendix for installation standards.) A crow’s nest platform with safety gates, and yard arms must also follow standard design. They are to be closely inspected and repaired as needed prior to the season’s opening drill. A safety ladder of appropriate length (not steps nailed to the pole) will be used and secured at the top. If the surfman must climb above the level of the platform to secure lines, a safety harness will be worn. *Certification Requirements for the Drill Pole: The drill pole must be inspected by a certified marine pole inspector/engineer on the 5th year after installation and every 3 years thereafter. All letters of certification indicating that the pole is free from rot and infestation must be maintained on file as well as any record of pole maintenance/treatment. (See appendix for pole inspection companies.) POWDER CHARGE FOR LYLE GUN The recommended charge for the Lyle Gun (Bronze Gun “C”) is 1.5 ounces of Fg (cannon grade) black powder (potassium-based, sporting grade powder ONLY). The charge must never exceed 2 ounces! (Smokeless powders are strictly prohibited!) Transportation, storage and handling of black powder must follow OSHA, DOT, and NPS regulations. PRIMER The primer used for the Lyle Gun is a .32 caliber short cartridge loaded with FFFg potassium-based black powder and sealed with wax. The short cartridges are hard to find, but spent cartridges can be re-sized and re-primed easily. Also, .32 caliber longs can be cut down and used.
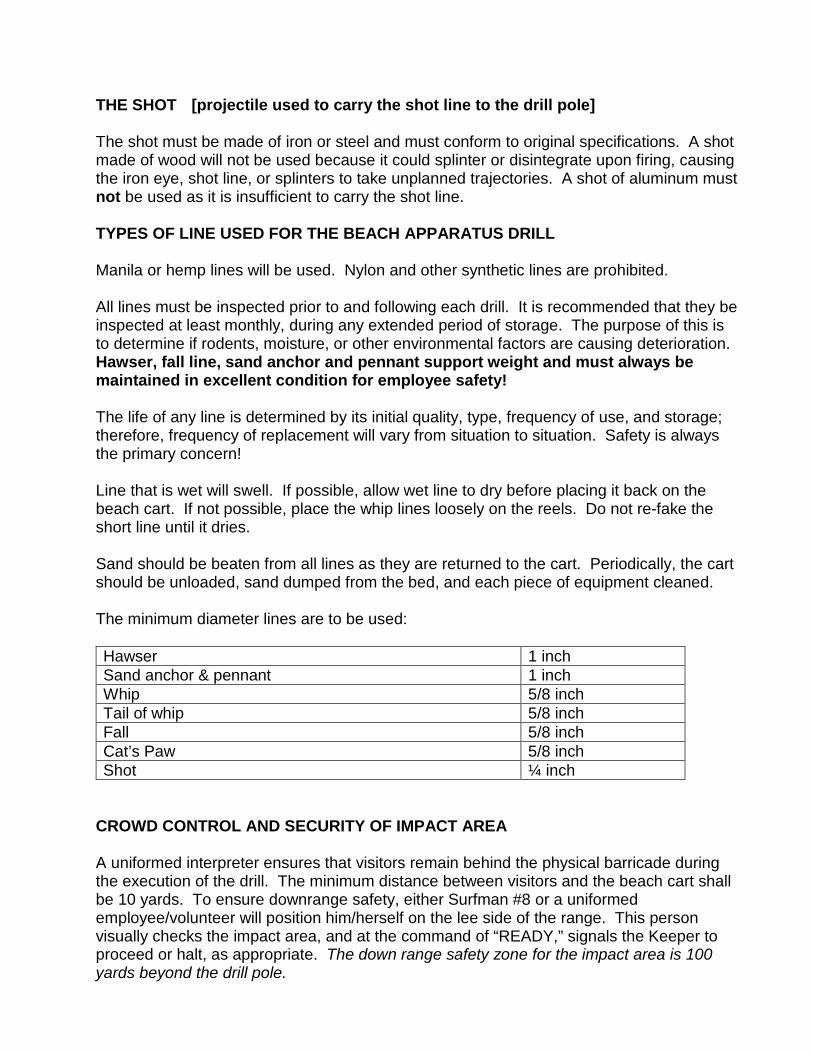
THE SHOT [projectile used to carry the shot line to the drill pole] The shot must be made of iron or steel and must conform to original specifications. A shot made of wood will not be used because it could splinter or disintegrate upon firing, causing the iron eye, shot line, or splinters to take unplanned trajectories. A shot of aluminum must not be used as it is insufficient to carry the shot line. TYPES OF LINE USED FOR THE BEACH APPARATUS DRILL Manila or hemp lines will be used. Nylon and other synthetic lines are prohibited. All lines must be inspected prior to and following each drill. It is recommended that they be inspected at least monthly, during any extended period of storage. The purpose of this is to determine if rodents, moisture, or other environmental factors are causing deterioration. Hawser, fall line, sand anchor and pennant support weight and must always be maintained in excellent condition for employee safety! The life of any line is determined by its initial quality, type, frequency of use, and storage; therefore, frequency of replacement will vary from situation to situation. Safety is always the primary concern! Line that is wet will swell. If possible, allow wet line to dry before placing it back on the beach cart. If not possible, place the whip lines loosely on the reels. Do not re-fake the short line until it dries. Sand should be beaten from all lines as they are returned to the cart. Periodically, the cart should be unloaded, sand dumped from the bed, and each piece of equipment cleaned. The minimum diameter lines are to be used: Hawser 1 inch Sand anchor & pennant 1 inch Whip 5/8 inch Tail of whip 5/8 inch Fall 5/8 inch Cat’s Paw 5/8 inch Shot ¼ inch
CROWD CONTROL AND SECURITY OF IMPACT AREA A uniformed interpreter ensures that visitors remain behind the physical barricade during the execution of the drill. The minimum distance between visitors and the beach cart shall be 10 yards. To ensure downrange safety, either Surfman #8 or a uniformed employee/volunteer will position him/herself on the lee side of the range. This person visually checks the impact area, and at the command of “READY,” signals the Keeper to proceed or halt, as appropriate. The down range safety zone for the impact area is 100 yards beyond the drill pole.
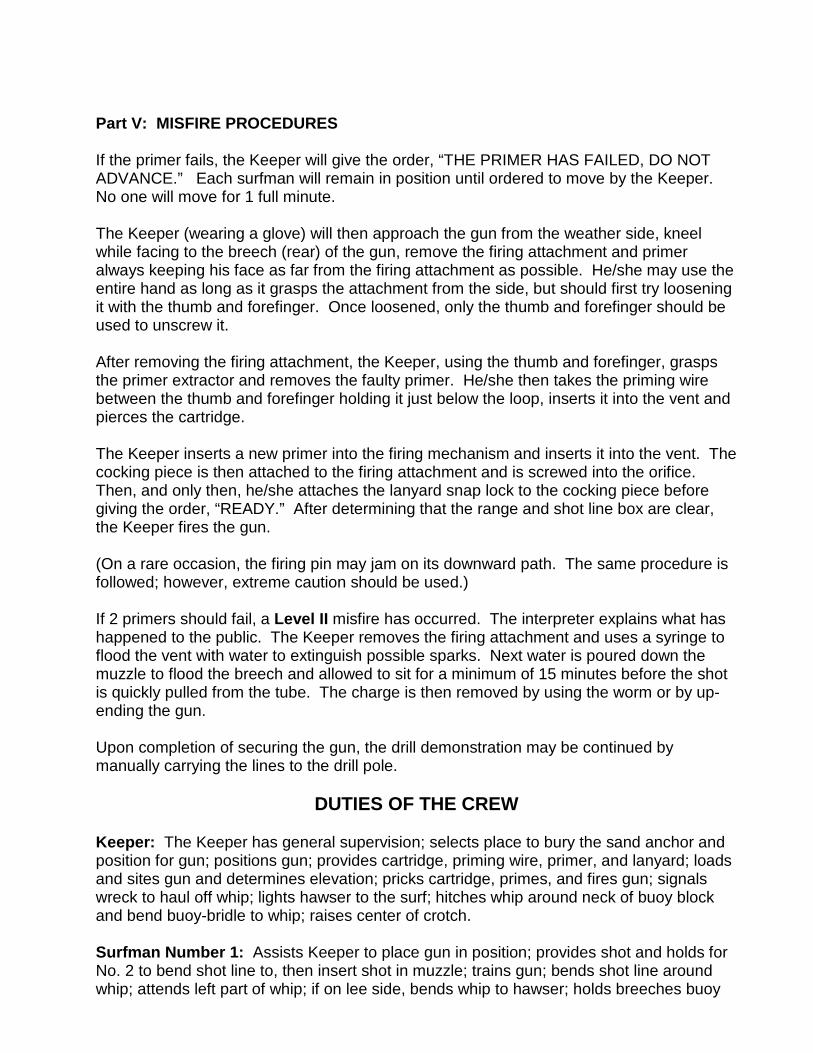
Part V: MISFIRE PROCEDURES If the primer fails, the Keeper will give the order, “THE PRIMER HAS FAILED, DO NOT ADVANCE.” Each surfman will remain in position until ordered to move by the Keeper. No one will move for 1 full minute. The Keeper (wearing a glove) will then approach the gun from the weather side, kneel while facing to the breech (rear) of the gun, remove the firing attachment and primer always keeping his face as far from the firing attachment as possible. He/she may use the entire hand as long as it grasps the attachment from the side, but should first try loosening it with the thumb and forefinger. Once loosened, only the thumb and forefinger should be used to unscrew it. After removing the firing attachment, the Keeper, using the thumb and forefinger, grasps the primer extractor and removes the faulty primer. He/she then takes the priming wire between the thumb and forefinger holding it just below the loop, inserts it into the vent and pierces the cartridge. The Keeper inserts a new primer into the firing mechanism and inserts it into the vent. The cocking piece is then attached to the firing attachment and is screwed into the orifice. Then, and only then, he/she attaches the lanyard snap lock to the cocking piece before giving the order, “READY.” After determining that the range and shot line box are clear, the Keeper fires the gun. (On a rare occasion, the firing pin may jam on its downward path. The same procedure is followed; however, extreme caution should be used.) If 2 primers should fail, a Level II misfire has occurred. The interpreter explains what has happened to the public. The Keeper removes the firing attachment and uses a syringe to flood the vent with water to extinguish possible sparks. Next water is poured down the muzzle to flood the breech and allowed to sit for a minimum of 15 minutes before the shot is quickly pulled from the tube. The charge is then removed by using the worm or by up-ending the gun. Upon completion of securing the gun, the drill demonstration may be continued by manually carrying the lines to the drill pole.
DUTIES OF THE CREW Keeper: The Keeper has general supervision; selects place to bury the sand anchor and position for gun; positions gun; provides cartridge, priming wire, primer, and lanyard; loads and sites gun and determines elevation; pricks cartridge, primes, and fires gun; signals wreck to haul off whip; lights hawser to the surf; hitches whip around neck of buoy block and bend buoy-bridle to whip; raises center of crotch. Surfman Number 1: Assists Keeper to place gun in position; provides shot and holds for No. 2 to bend shot line to, then insert shot in muzzle; trains gun; bends shot line around whip; attends left part of whip; if on lee side, bends whip to hawser; holds breeches buoy
block while Keeper bends on whip, then snaps block on hawser; mans fall and left leg of crotch. *Although not part of the original drill, the Keeper and Surfman Number 1 will wear gloves when loading the gun. Surfman Number 2: Places shot line box in position; bends shot line into shot; train gun; takes a half-hitch with shot line over tail of whip block; attends right part of whip; if on lee side, bends whip to hawser; holds breeches buoy block while Keeper bends on whip, then snaps block on hawser; mans fall and right leg of crotch. Surfman Number 3: Places shot line box in position; stretches tackle (outer block); hauls whip from reel while it is being hauled off to the wreck and, if on lee side, does the same while hawser is being hauled off; hauls in slack of hawser; bends strap for outer block of tackle; mans fall and left leg of crotch; is shifting person on whip. Surfman Number 4: Unloads buoy from cart; places crotch, hawser, and buoy in position; stretches tackle and hooks inner block into sand anchor pennant; hauls whip from reel while it is being hauled off to the wreck and, if on lee side, does the same while hawser is being hauled off; hauls in slack of hawser; hooks outer block of tackle; mans fall and right leg of crotch; is shifting person on whip. Surfman Number 5: Opens and secures boat room doors; unloads sand anchor, shovels, pick, and buries sand anchor; mans weather part of whip when hauling off hawser; hauls in slack of hawser, hooks inner block if pennant block is used; mans and belays fall; is shifting person on whip. Surfman Number 6: Opens and secures boat room doors; unloads sand anchor, shovels, pick, and buries sand anchor; mans weather part of whip when hauling off hawser; hauls in slack of hawser, snatches hawser, and make cat’s paw if pennant block is used; mans fall and center of crotch; is shifting person on whip. Surfman Number 7: In drill, goes to wreck pole; in service, unloads shovels and pick and assists in burying sand anchor; mans weather part of whip when hauling off hawser; hauls in slack of hawser; mans fall and center of crotch; is shifting person on whip. Surfman Number 8: In drill, goes to wreck pole; in service, unloads shovels and pick, and assists in burying sand anchor; mans weather part of whip when hauling off hawser; hauls in slack of hawser; mans fall and center of crotch; is shifting person on whip. Part IV: BEACH APPARATUS DRILL WORDS OF COMMAND: Open and Secure Boat Room Doors Man the Beach Cart Forward
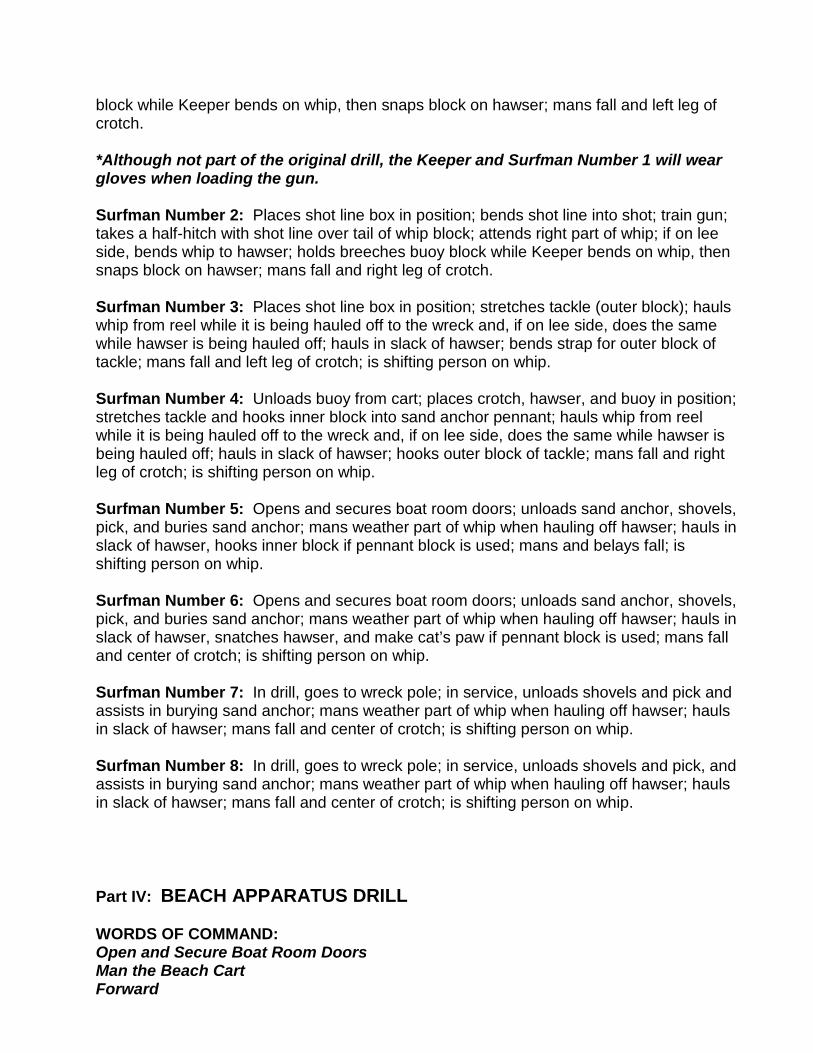
Halt Upon the command Man the Beach Cart, surfmen take their positions at the beach cart, facing to the front with drag ropes over their shoulders. Odd numbers are on the left, even numbers are on the right when stationed at the beach cart. Throughout the exercise, when two numbers work in company, as in training the gun, tending the whip, etc., the odd number is on the left, the even number on the right.
Man the beach cart
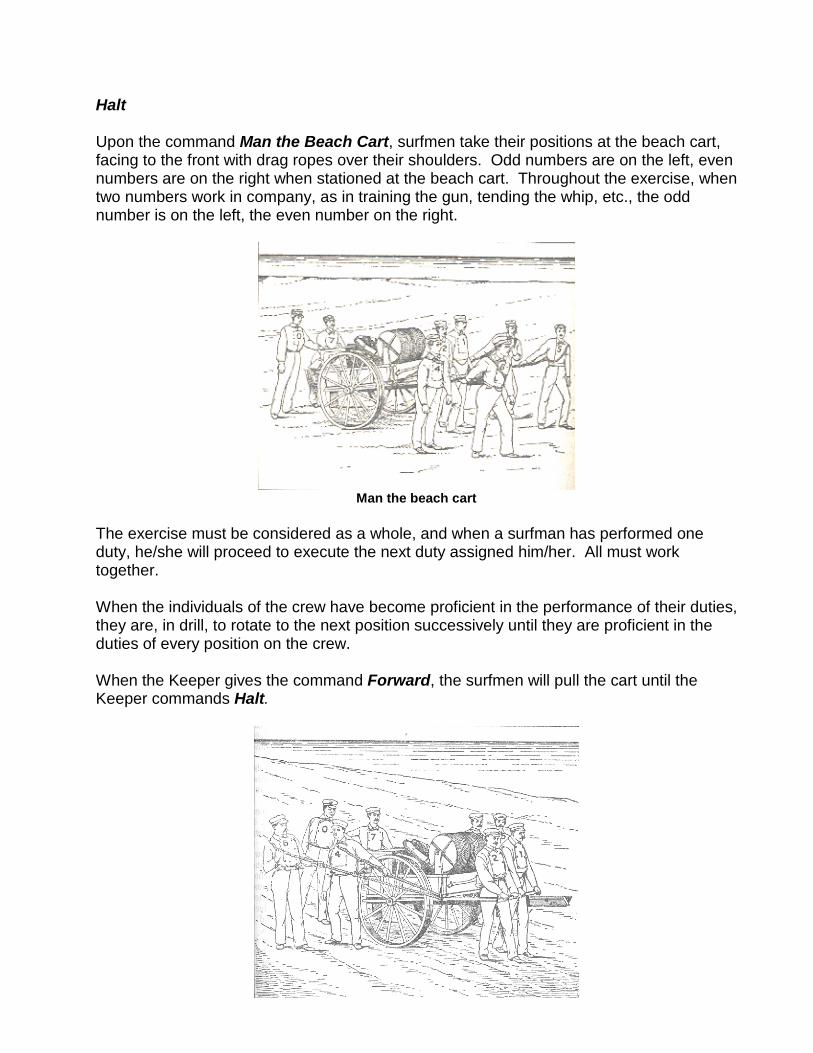
The exercise must be considered as a whole, and when a surfman has performed one duty, he/she will proceed to execute the next duty assigned him/her. All must work together. When the individuals of the crew have become proficient in the performance of their duties, they are, in drill, to rotate to the next position successively until they are proficient in the duties of every position on the crew. When the Keeper gives the command Forward, the surfmen will pull the cart until the Keeper commands Halt.
Halting the beach cart
THE DRILL The direction of the wind determines which side of the beach will be the weather side (usually the ocean side) and the lee side (usually the land side). Action (Phase I) KEEPER: After commanding Halt, the Keeper commands Action. The Keeper puts on the haversack, then points to the spot where the sand anchor is to be buried. He/she then removes the Lyle gun off the beach cart, using the proper lifting technique, and places it on the beach. SURFMAN #1: Assists Keeper in removing Lyle gun from beach cart, using the proper lifting technique, and placing it on the beach. SURFMAN #2: Takes the shot line box off the beach cart and unships it. SURFMAN #3: Takes the shot line box off the beach cart and unships it. SURFMAN #4: Throws the breeches buoy out in front of the beach cart. SURFMAN #5: Unloads shovels, pick and sand anchor off rear of beach cart. When the pick is not in use, it should be taken at least 15 feet behind the location of the sand anchor and spiked into the ground to ensure its visibility to all crew members. Shovels can be hook over the pick after burying the sand anchor. SURFMAN #6: Unties bucket off rear of beach cart and places it next to the shot line box for use by #2. SURFMAN #7: Unloads shovels, pick and sand anchor off rear of cart. SURFMAN #8: Unloads shovels, pick and sand anchor off rear of cart. Action (Phase II) KEEPER: Puts on gloves and inserts his/her earplugs to protect hearing; adjusts quoin (wooden elevation block) for proper elevation and loads Lyle gun with cartridge; Informs the crew that the gun is being loaded so that no one steps in front of the muzzle. SURFMAN #1: Puts on gloves and provides the shot for #2 to bend the shot line to; wipes it free of sand and inserts the shot into the muzzle from the side of the gun, sliding it gently but firmly down upon the charge without any slack line between the gun and the shot line box. SURFMAN #2: Fills pail with water; Wets a fathom (6+ ft.) of the shot line and bends it into the shank of the shot with 3 half hitches prior to introducing it into the barrel. SURFMAN #3: Stretches out the fall line (2 blocks and tackle with the blue block toward the wreck and the white block toward the sand anchor).

SURFMAN #4: Unloads and carries crotch to a point on a line between the sand anchor and wreck pole and lays it there, unwrapped of line. SURFMAN # 5 & #6: Dig hole for sand anchor. SURFMAN #7 & #8: Assist numbers 5 & 6 in digging the sand anchor hole or assists numbers 3 & 4 with placing the fall line, crotch, and breeches buoy.
Note: The breeches buoy is attached to the traveler block that “travels” (rolls) along the hawser line back and forth between the shipwreck and shore. The crotch will hold the hawser line up over the beach. A ¾ inch line, 3 fathoms long, spans through both legs of the crotch for added support. The fall line is used by the crew to put tension on the hawser line (the hawser has the traveler block breeches buoy). The sand anchor is buried about 3 feet deep, but the attached pennant line’s loose cleated end must be left exposed above the surface of the beach after the sand anchor is buried in the sand. Surfmen burying the sand anchor should take special care not to hit the wooden boards or pennant line while burying it or while digging it up at the end of the demonstration.
Relative positions of crew while placing apparatus
Action (Phase III) KEEPER: Steps back 5 yards to the rear of the Lyle gun, sights over the gun, commands RIGHT, LEFT, or WELL, as required. SURFMAN #1 & #2: Take position on their knees on the left and right sides of the gun respectively; train the gun to the right or left by the carriage’s sides using the palms of the hands (never by the handles); make certain that the trunnion caps are locked in position. After the gun is trained, #1 & #2 fall back several yards behind the right and left sides of the Lyle gun.

SURFMAN #3 & #4: Stretch the fall line from the sand anchor toward the crotch, leaving it clear and ready to be placed upon the hawser line (thick line in the bottom of the beach cart). SURFMAN #5 & #6: Continue digging hole for sand anchor (at least 3 feet deep). SURFMAN #7 & # 8: Assist #5 & #6 in digging the sand anchor hole. Keep an eye on beach apparatus equipment and help to ensure clear range. Ready - Fire KEEPER: Pricks the cartridge using the priming wire; places primer cartridge with extractor ring over vent plug; then, cocks firing attachment with cocking piece and screws attachment onto vent plug; Keeper turns cocking piece toward himself/herself and attaches lanyard clip onto cocking piece; faces down range to ensure that it is clear (in areas where sand dunes are part of the landscape, range spotters may also be used to ensure that the range is completely clear before this proceeding), stands to the side of the gun while extending the lanyard, pauses to again check for a clear range, commands READY; then fires the gun by giving the lanyard a straight quick backward jerk. If, at any time, any crewmember notices a safety emergency or range violation, they may call out STOP DRILL! Upon firing, the shot will reverse itself in flight. This is due to the weight of the attached shot line. The shot will sail over the drill pole (wreck) and beyond. Hopefully, the shot line will drift down onto one of the pole’s yardarms.
Note: Upon the loading of powder and shot, no one is to stand in front of the Lyle gun or the shot box, nor is anyone to stand directly behind the gun as it recoils 6+ feet. Always stay clear of the gun when it is charged (has powder in it) or during firing!
Communication Being Made With the Drill Pole (representing the wreck) KEEPER: Supervises and hold the endless whip line block for Surfman #1.
SURFMAN #1: Take a bight of line, makes a round turn and 2 half hitches with the shot line around both parts of the whip line immediately behind the whip line tail block. SURFMAN #2: Makes a clove hitch over the end of the whip line tail with the bight of the shot line.

Manner in which shot line is bent to whip and tail
SURFMAN #3 & #4: Haul the whip line from the reels as fast as is needed. SURFMAN #5 & #6: Continue digging hole for sand anchor. SURFMAN #7 & #8: Run to drill pole; retrieve the shot line if it has missed the yardarm, and climb up the pole to the platform to act as crew on a shipwreck. RANGE OFFICER: Retrieves shot and carries it to the base of the drill pole.
Haul Off the Whip Line KEEPER: Makes signal to the drill pole to haul whip line on board the pole. SURFMAN #1 & #2: Always have charge of the left and right side of the whip, respectively, with a minimum distance of 50 yards between them to minimize the chance of the left or right whip lines fouling around the shot line.
Positions when shot line is bent to whip
SURFMAN #3 & #4: Haul the whip line from the reels as fast as is needed by surfmen #1 and #2. SURFMAN #5 & #6: Bury the sand anchor and cover securely with sand. Hook the inner (white) block of the fall to the pennant.
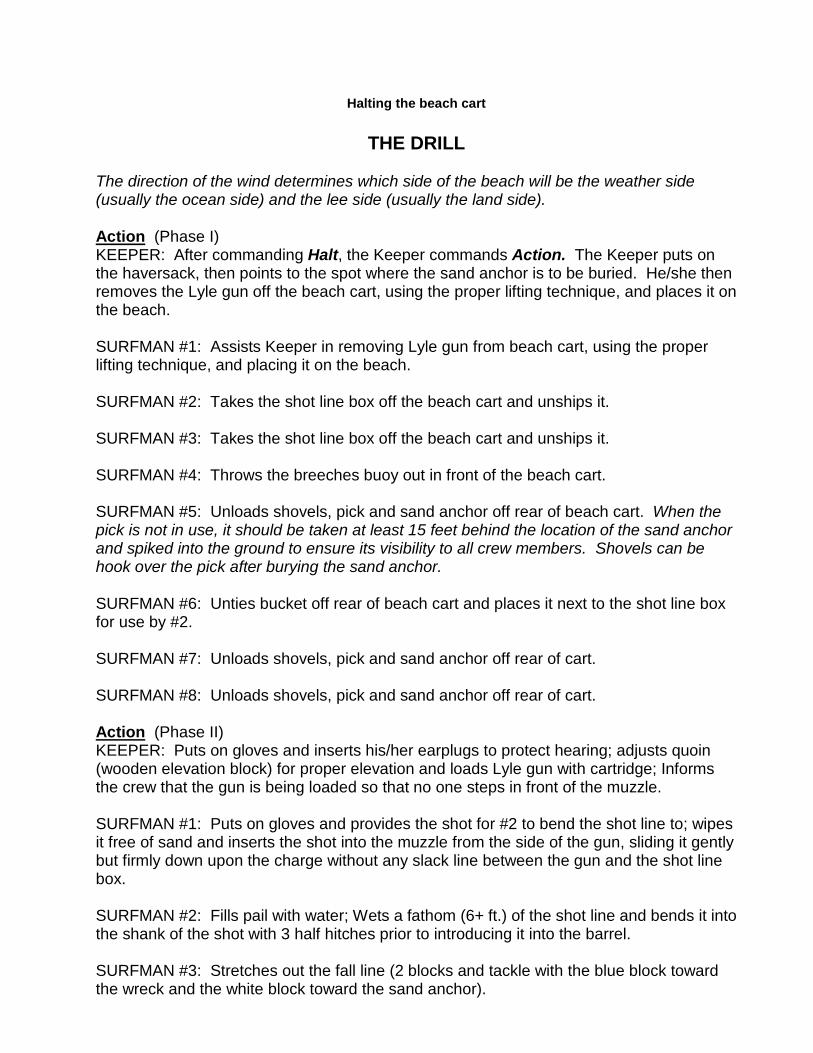
Hauling off whip
SURFMAN #7 & #8: Using the shot line, hauls the whip line in; make the whip line tail block fast on board the drill pole with a clove hitch and 2 to 3 half hitches or 3 round turns and 2 to 3 half hitches.
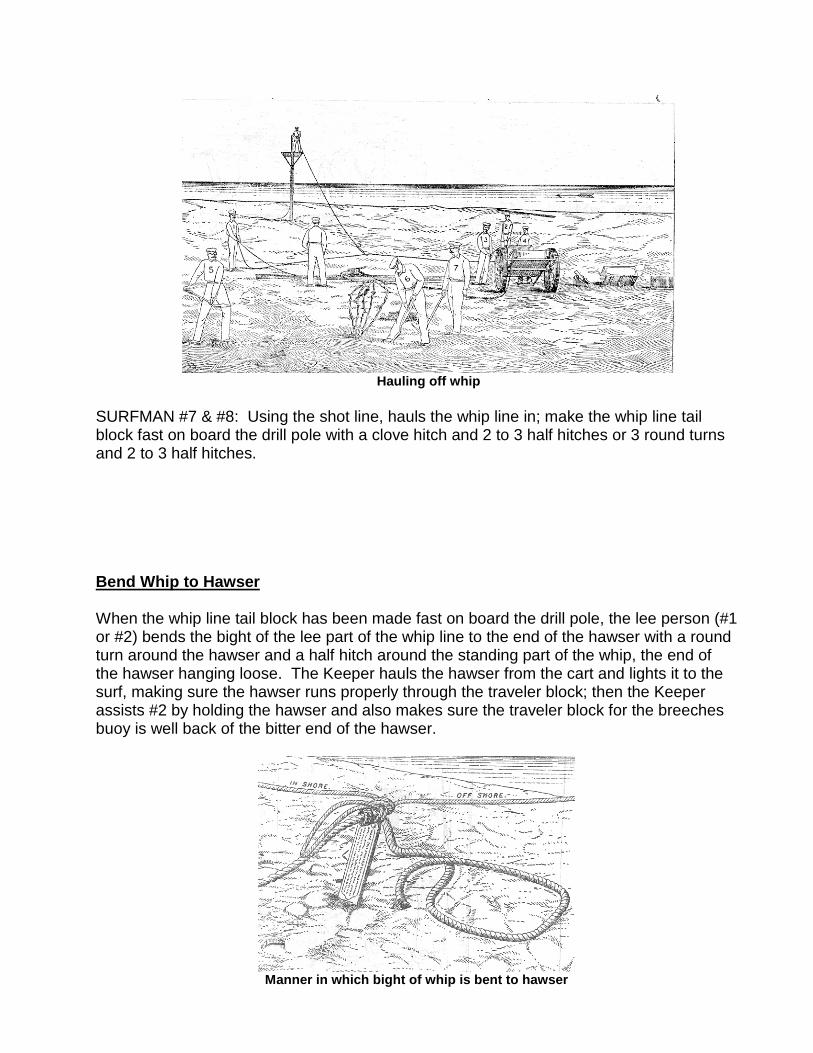
Bend Whip to Hawser
When the whip line tail block has been made fast on board the drill pole, the lee person (#1 or #2) bends the bight of the lee part of the whip line to the end of the hawser with a round turn around the hawser and a half hitch around the standing part of the whip, the end of the hawser hanging loose. The Keeper hauls the hawser from the cart and lights it to the surf, making sure the hawser runs properly through the traveler block; then the Keeper assists #2 by holding the hawser and also makes sure the traveler block for the breeches buoy is well back of the bitter end of the hawser.
Manner in which bight of whip is bent to hawser

Man Weather Whip – Haul Off
The crew man the weather part of the whip line, except for #1 or #2 (whichever one is tending the lee part of the whip), keeping it clear of the hawser, which will drift to leeward of it, and the lee person (#3 or #4) hauls the whip from the reel. The keeper watches that the hawser does not foul in, or carry away, the traveler block.
Hauling off hawser
Attaching Strap & Breeches Buoy to Hawser The hawser having reached and been made fast to the drill pole, the surfman on the weather side brings in the weather whip while the lee surfman (#1 or #2) holds the traveler block. The Keeper then throws over the traveler block’s sister hooks a clove hitch with the bight of the weather part of the whip, and hauls it snug around the neck of the block. The Keeper bends the buoy bridle into the weather whip, inshore of the buoy, with a bowline knot or a sheet bend knot.
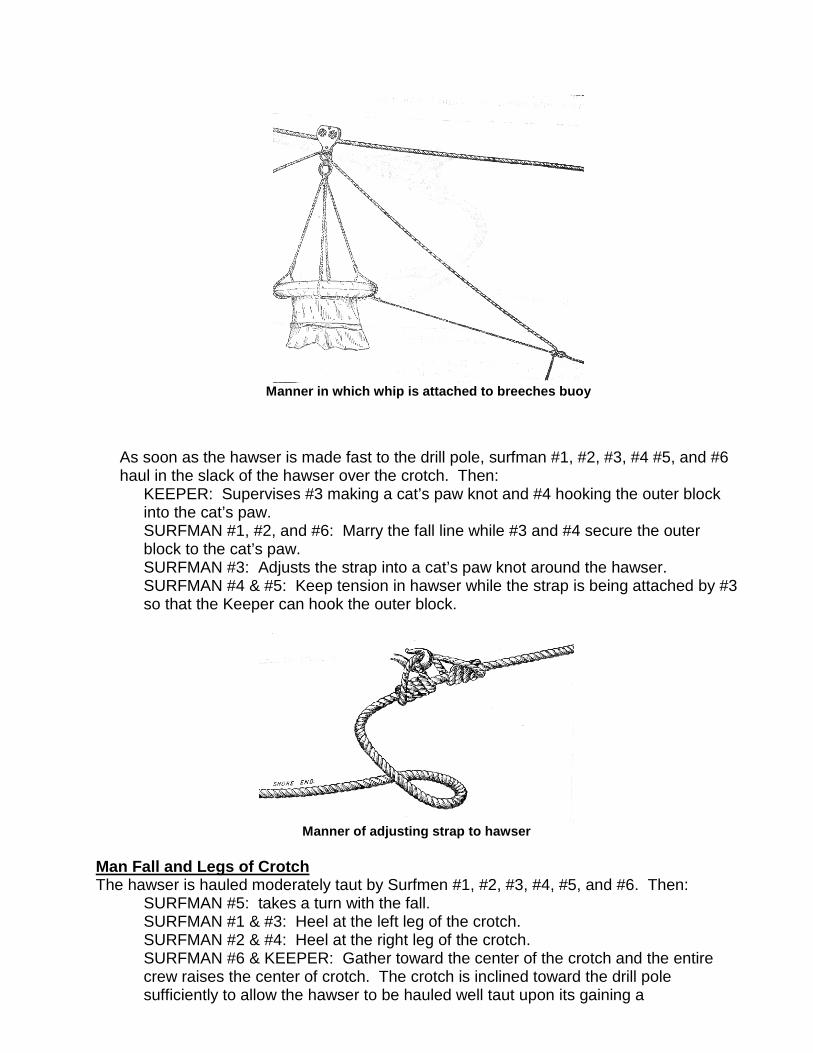
Manner in which whip is attached to breeches buoy
As soon as the hawser is made fast to the drill pole, surfman #1, #2, #3, #4 #5, and #6 haul in the slack of the hawser over the crotch. Then:
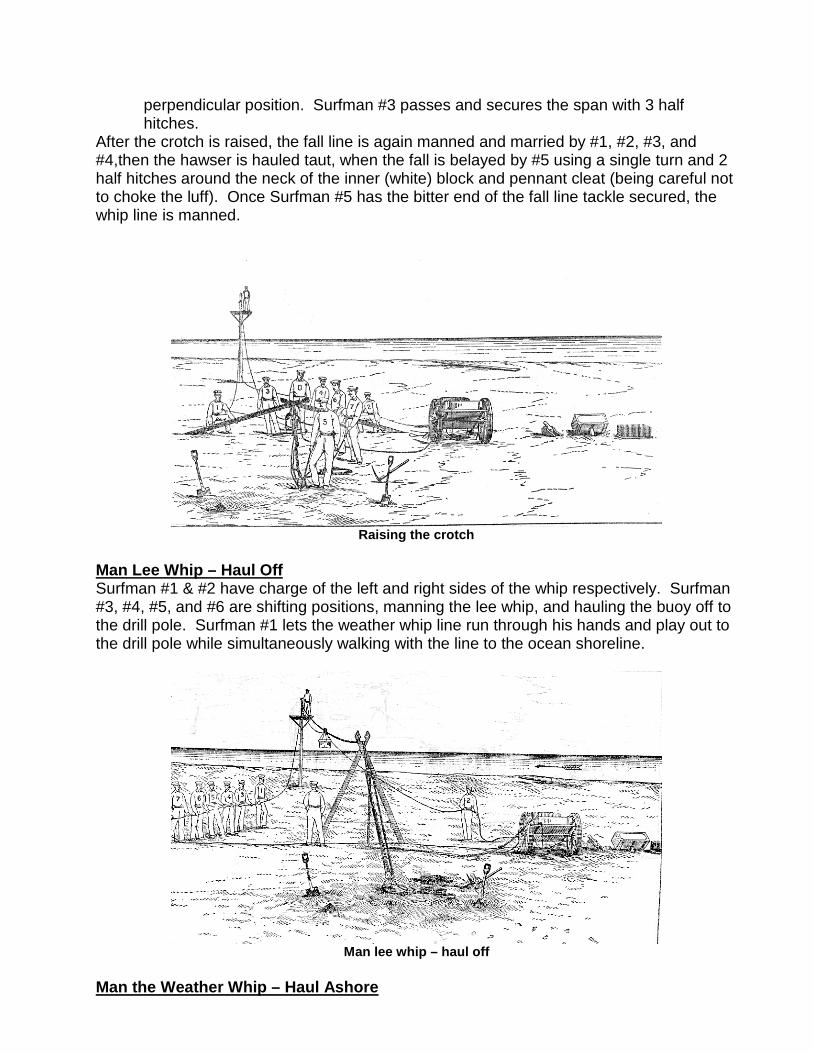
KEEPER: Supervises #3 making a cat’s paw knot and #4 hooking the outer block into the cat’s paw. SURFMAN #1, #2, and #6: Marry the fall line while #3 and #4 secure the outer block to the cat’s paw. SURFMAN #3: Adjusts the strap into a cat’s paw knot around the hawser. SURFMAN #4 & #5: Keep tension in hawser while the strap is being attached by #3 so that the Keeper can hook the outer block.
Manner of adjusting strap to hawser
Man Fall and Legs of Crotch The hawser is hauled moderately taut by Surfmen #1, #2, #3, #4, #5, and #6. Then:
SURFMAN #5: takes a turn with the fall. SURFMAN #1 & #3: Heel at the left leg of the crotch. SURFMAN #2 & #4: Heel at the right leg of the crotch. SURFMAN #6 & KEEPER: Gather toward the center of the crotch and the entire crew raises the center of crotch. The crotch is inclined toward the drill pole sufficiently to allow the hawser to be hauled well taut upon its gaining a
perpendicular position. Surfman #3 passes and secures the span with 3 half hitches.
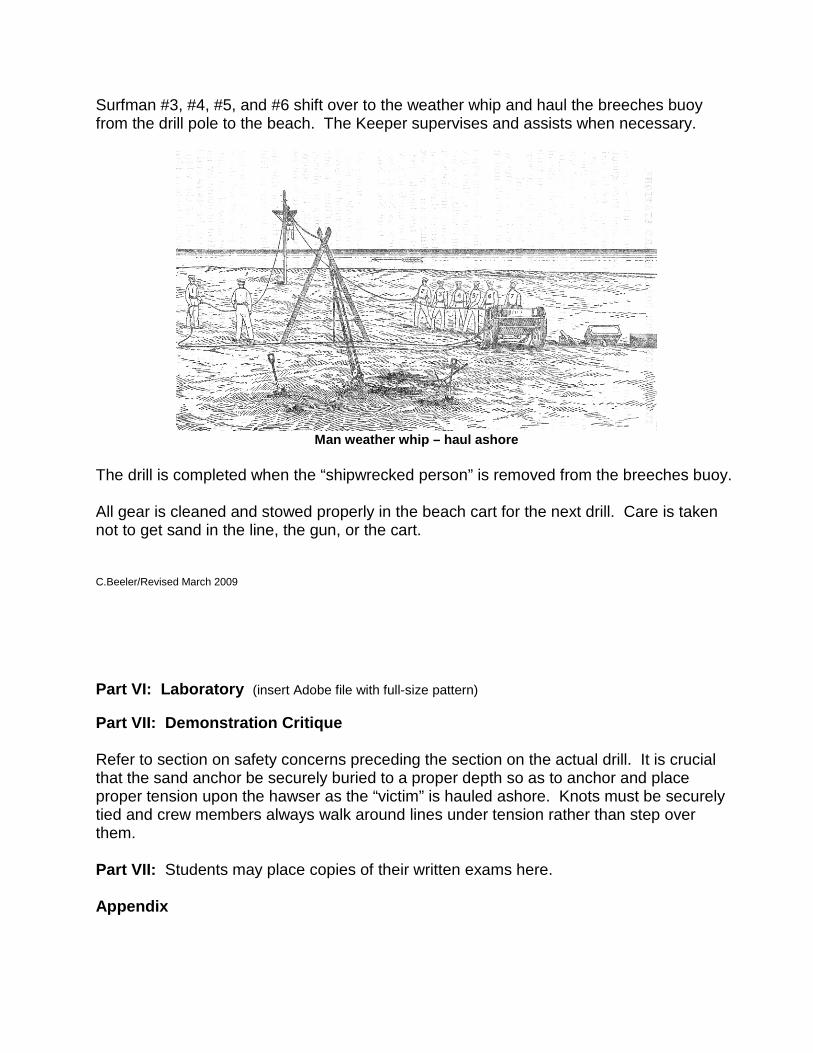
After the crotch is raised, the fall line is again manned and married by #1, #2, #3, and #4,then the hawser is hauled taut, when the fall is belayed by #5 using a single turn and 2 half hitches around the neck of the inner (white) block and pennant cleat (being careful not to choke the luff). Once Surfman #5 has the bitter end of the fall line tackle secured, the whip line is manned.
Raising the crotch
Man Lee Whip – Haul Off Surfman #1 & #2 have charge of the left and right sides of the whip respectively. Surfman #3, #4, #5, and #6 are shifting positions, manning the lee whip, and hauling the buoy off to the drill pole. Surfman #1 lets the weather whip line run through his hands and play out to the drill pole while simultaneously walking with the line to the ocean shoreline.
Man lee whip – haul off
Man the Weather Whip – Haul Ashore
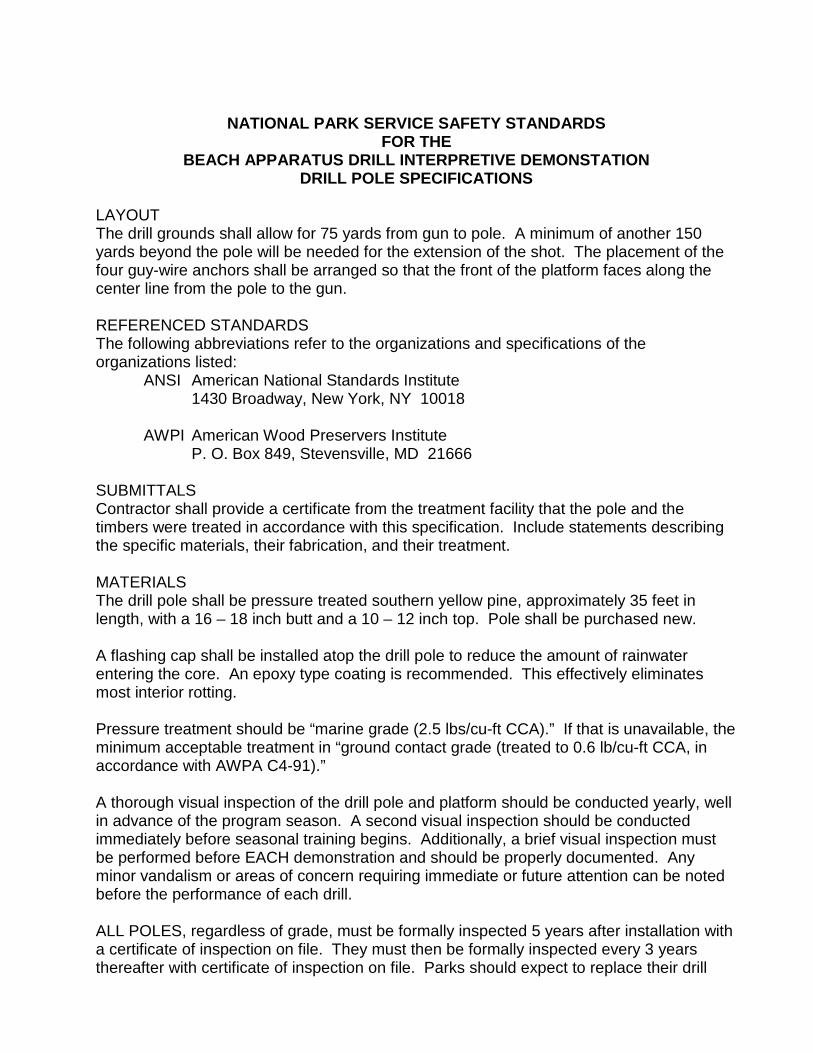
Surfman #3, #4, #5, and #6 shift over to the weather whip and haul the breeches buoy from the drill pole to the beach. The Keeper supervises and assists when necessary.
Man weather whip – haul ashore
The drill is completed when the “shipwrecked person” is removed from the breeches buoy. All gear is cleaned and stowed properly in the beach cart for the next drill. Care is taken not to get sand in the line, the gun, or the cart. C.Beeler/Revised March 2009
Part VI: Laboratory (insert Adobe file with full-size pattern) Part VII: Demonstration Critique Refer to section on safety concerns preceding the section on the actual drill. It is crucial that the sand anchor be securely buried to a proper depth so as to anchor and place proper tension upon the hawser as the “victim” is hauled ashore. Knots must be securely tied and crew members always walk around lines under tension rather than step over them. Part VII: Students may place copies of their written exams here. Appendix
NATIONAL PARK SERVICE SAFETY STANDARDS
FOR THE BEACH APPARATUS DRILL INTERPRETIVE DEMONSTATION
DRILL POLE SPECIFICATIONS
LAYOUT The drill grounds shall allow for 75 yards from gun to pole. A minimum of another 150 yards beyond the pole will be needed for the extension of the shot. The placement of the four guy-wire anchors shall be arranged so that the front of the platform faces along the center line from the pole to the gun. REFERENCED STANDARDS The following abbreviations refer to the organizations and specifications of the organizations listed: ANSI American National Standards Institute 1430 Broadway, New York, NY 10018 AWPI American Wood Preservers Institute P. O. Box 849, Stevensville, MD 21666 SUBMITTALS Contractor shall provide a certificate from the treatment facility that the pole and the timbers were treated in accordance with this specification. Include statements describing the specific materials, their fabrication, and their treatment. MATERIALS The drill pole shall be pressure treated southern yellow pine, approximately 35 feet in length, with a 16 – 18 inch butt and a 10 – 12 inch top. Pole shall be purchased new. A flashing cap shall be installed atop the drill pole to reduce the amount of rainwater entering the core. An epoxy type coating is recommended. This effectively eliminates most interior rotting. Pressure treatment should be “marine grade (2.5 lbs/cu-ft CCA).” If that is unavailable, the minimum acceptable treatment in “ground contact grade (treated to 0.6 lb/cu-ft CCA, in accordance with AWPA C4-91).” A thorough visual inspection of the drill pole and platform should be conducted yearly, well in advance of the program season. A second visual inspection should be conducted immediately before seasonal training begins. Additionally, a brief visual inspection must be performed before EACH demonstration and should be properly documented. Any minor vandalism or areas of concern requiring immediate or future attention can be noted before the performance of each drill. ALL POLES, regardless of grade, must be formally inspected 5 years after installation with a certificate of inspection on file. They must then be formally inspected every 3 years thereafter with certificate of inspection on file. Parks should expect to replace their drill
poles upon signs of infestation or deterioration that would, in any way, compromise physical safety. All cut and drilled surfaces must be field dressed with a 2% copper naphthalate solution. Drilled holes should be filled and plugged for several hours to soak the interior areas with the solution. TIMBERS 4 buried stay timbers, 1 buried sill plate, 1 platform back support, 2 platform front supports: 3 inch nominal, No. 1 southern yellow pine pressure treated to 0.6 lb/cu-ft for buried timbers. All other lumber, posts, railing, frame, and planks; CCA pressure treated to 0.4 lb/cu-ft. 2”x4” and 2”x6” lumber is construction grade or better southern yellow pine. 5/4”x6” pressure treated decking planks instead of plywood for platform deck. All guy hardware should be hot dipped galvanized and suitable for power line work. (A.B. Chance Company 314-682-5521 or Joslyn Manufacturing Company 312-625-1508 are possible sources) Guy screw anchor … 10 inch screw diameter with 8 foot shaft. Wire … 3/8 inch multiple strand, with breaking strength of >6000 lbs.
Turnbuckles … proper sized turnbuckles with closed end eyes at each end should be included in the guy hardware to allow for ease of tension adjustment. Proper sized shackles shall be used to attach turnbuckles to guy wires. Guy pole anchors… Hog-nose cable anchors bolted to pole. Cable ends … pre-formed cable eyes. Gate hinge … 3 inch, galvanized, fixed pin type. Handle … Galvanized steel or malleable iron, heavy duty, minimum 4 fasteners and 8 inches long.
PLATFORM Cut the ends of the front platform supports so that the angles match the platform and the pole bolt holes. Field treat the newly exposed ends. Be sure that the front supports fully bear against the back support. Install the top strap, 12 inches on top, using a nail in each hole. Drill all bolt holes true to the lines of the materials to ensure proper support and no breakout. Install bolts with nuts hidden under platform and with washers under both the bolt head and the nut. Install framing anchors at all top rail connections and at the front platform support connection to the 2x6 frame. Delete the framing anchor at front gate and install a plywood gusset each side using six #10 x 2 wood screws for each gusset. Cut out the decking planks to allow for the pole and the hand rail posts. Screw the deck planks to all supporting members with #8 x 2 ½” deck screws.
POLE Excavate the pole hole 8 feet below existing ground level and place the sill plate level in the bottom of the hole. Center the pole over the sill plate and backfill to the level of the stay timbers. Install the stay timbers with ¾ inch bolts and plate washers. Align the pole so it is vertical and facing the Lyle gun site. Backfill excavated material around pole and mound excess material. Shape into a natural dome. GUY SYSTEM Screw anchors (or excavate and bury) into the ground so the shaft aligns with the direction of the guy wire and so that the eye is flush with the ground. Install a hog-nose cable anchor at each pole anchor point. Use ¾ inch bolts on the guy hog-nose anchors with the nuts on the back side. The rear guy hog-nose anchor should have a bolt long enough to add a second nut to lock the system, and a square galvanized plate washers inset into the pole in the front. This rear guy system will be the one that takes the most strain when tension is applied to the hawser during the drill. Install the wires taut and maintain the vertical alignment of the pole. FINISH Install the handle on the pole with four screws to match the handle. Install the front gate using #10 x 1 wood screws in the hinge. Round all rough edges of the platform and sand to control splinters. The structure should be painted after a year of exposure to the weather to age the pressure treated surfaces. (Insert Adobe file showing drill pole drawings) Pole Inspection Companies: Osmose Utilities Services Utility Pole Technologies Or check with your local utility company to see if they use a different licensed service. Registered professional engineers with experience inspecting docks, pilings, marine structures, etc. may also be used. Bibliography: Government Printing Office, Washington, D.C.
United States Coast Guard: Beach Apparatus Drill, 1918 Treasury Department, United States Coast Guard: Instructions for United States Coast Guard Stations, 1921
Shanks, Ralph, Wick York and Lisa Woo Shanks editor. The U.S. Life-Saving Service: Heroes, Rescues and Architecture of the Early Coast Guard, California: Costano Books, 2000. Gibbon, John, The Artillerist Manual, 2nd edition, D. VanNostrand, New York, 1863. Reprinted by the Bohemian Brigade Bookshop and Publishers, Knoxville, 2000.