Embed Size (px)
Citation preview

FRIGIDAIRE
[be
TABLE OF CONTENTS
Important Safety Instructions ........................... 3-6
Features at a Glance ......................................... 7
Before Setting Oven Controls ........................... 8-9
Before Setting Surface Controls ........................ 10
Setting Surface Controls ................................... 11
Oven Control Functions (330/3300 .................... 12
www.frigidaire.com USA 1-800-944-9044 w_r_v.frigidaire.ca
Setting Oven Controls .................................. 13-19
Self-Cleaning .............................................. 20-21
Care & Cleaning .......................................... 22-24
Before You Call ............................................ 25-26
Major Appliance Warranty ................................ 27
Canada 1-800-265-8352
O_kOo
£,3OkO
c
OOkO
Contents
Product Registration ...................................................... 2Important Safety Instructions ............................ 3-6Features at a Glance .............................................. 7
Before Setting Oven Controls ............................... 8-9Removing, replacing & arranging the oven racks ........... 8Effortless T" Oven Rack system and assembly ................ 9
Before Setting Surface Controls ............................ 10Cookware material types .......................................... 10
Setting Surface Controls ....................................... 11Setting a surface burner ........................................... 11Home canning ......................................................... 11
Oven Controls Functions ........................................ 12
Setting Oven Controls ...................................... 13=19Setting the clock ...................................................... 13Changing between continuous bake or 12-HourEnergy Saving features ............................................ 13Changing temperature display (F° or C°) .................... 13Setting silent control feature ..................................... 13Setting oven lockout feature ..................................... 14Setting minute timer ................................................ 14Setting bake ........................................................... 15Setting timed bake and delayed timed bake ............ 15-16Setting Quick Bake (some models) ............................ 17Setting broil ............................................................ 18Adjusting oven temperature ..................................... 19Operating oven light ................................................. 19
Self-Cleaning .................................................... 20-21Care & Cleaning ............................................... 22=24
Cleaning recommendations table ............................... 22Cleaning the cooktop and surface burners .................. 23Replacing the oven light ........................................... 23Removing & replacing oven door ............................... 24
Before You Call - Solutions to common problems... 25=26Appliance Warranty .............................................. 27
Thank you for choosing Frigidare.
This Use & Care Guide is part of our commitment to customersatisfaction and product quality throughout the service life ofyour new appliance.We view your purchase as the beginningof a relationship. To ensure our ability to continue serving you,please use this page to record important product information.
Need help??Visit the Frigidaire web site at www,frigidaire.comBefore you call for service, there are a few things you cando to help us serve your better.
Read this Use & Care manual,It contains instructions to help you use and maintain yourrange properly.
If you received a damaged range ,,,immediately contact the dealer (or builder) that sold you therange.
Save time and money.Check the section titled "Before you call". This section helpsstep you through some common problems that might occur.If you do need service, help is only a phone call away. A listof toll-free customer service numbers are included in theback of this manual. Or call Frigidaire Customer Services at1=800=944=9044, 24 hours a day, 7 days a week.
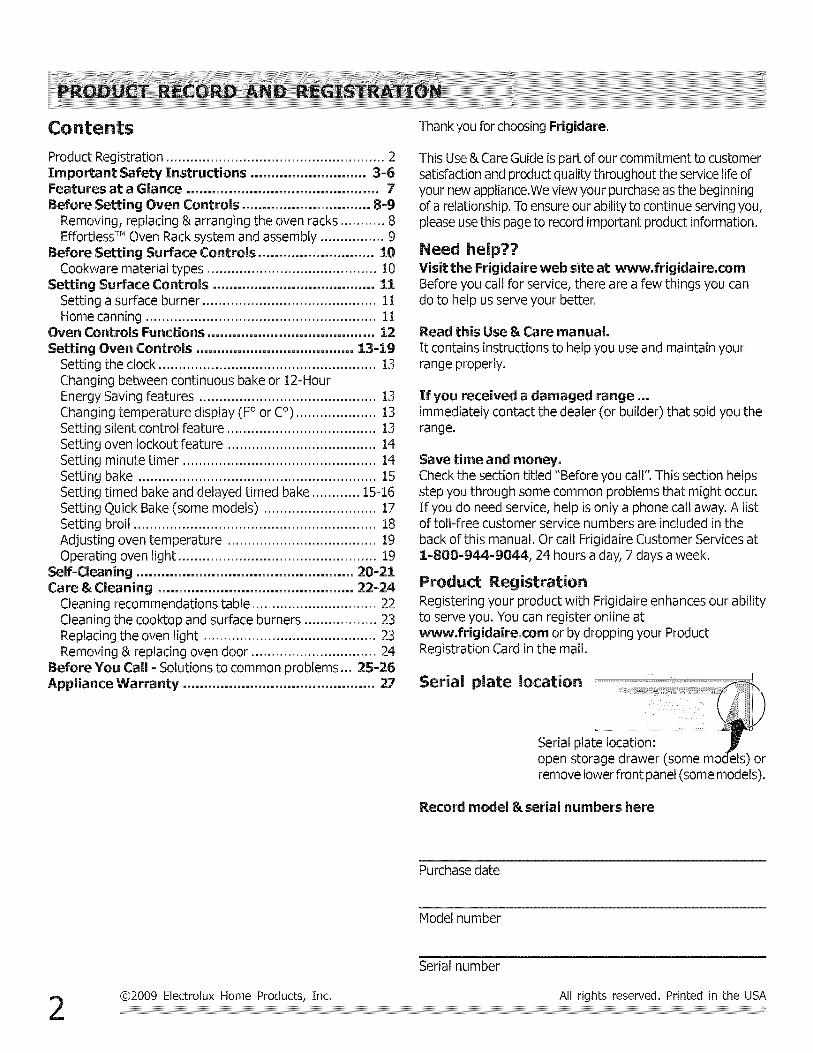
Product RegistrationRegistering your product with Frigidaire enhances our abilityto serve you. You can register online atwww,frigidaire,com or by dropping your ProductRegistration Card in the mail.
Serial
plate location i
L _I_
Serial plate location: JVopen storage drawer (some models) orremove lower front panel (some models).
Record model & serial numbers here
Purchase date
Model number
2
Serial number
@2009 Electrolux Home Products, Inc. All ri0hts reserved. Printed in the USA
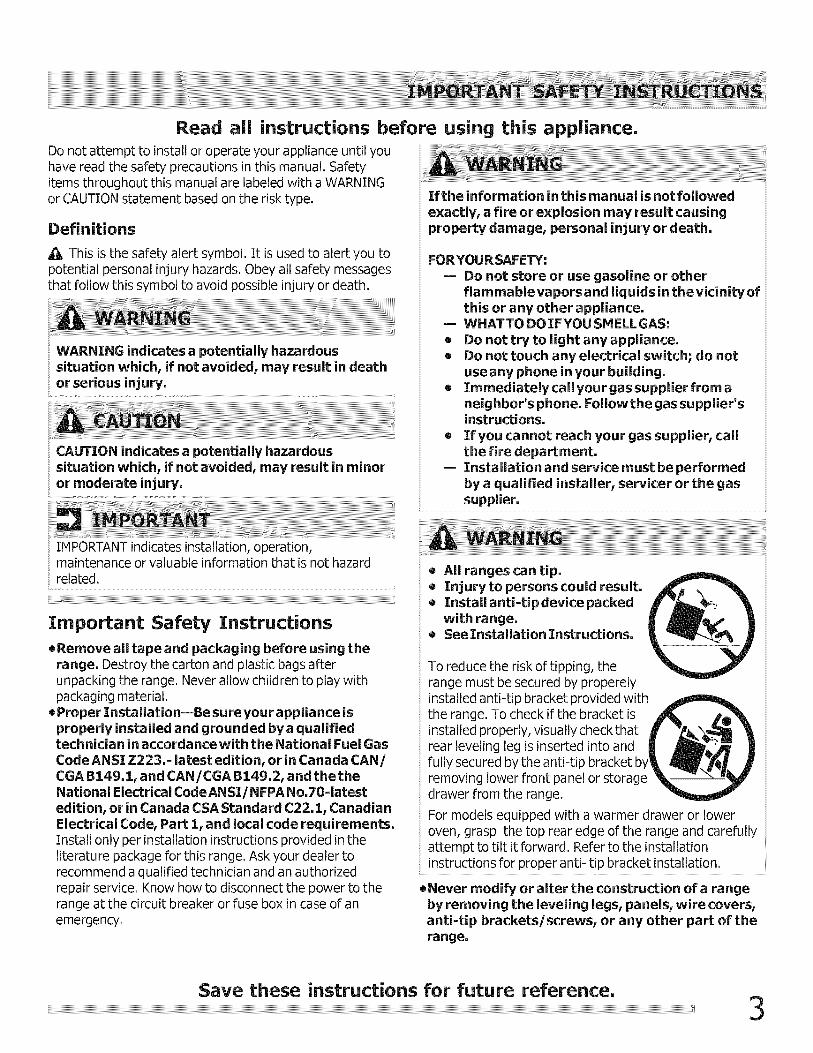
Read all instructions before using this appliance,Do not attempt to install or operate your appliance until youhave read the safety precautions in this manual. Safetyitems throughout this manual are labeled with a WARNINGor CAUTION statement based on the risk type.
Definitions
This is the safety alert symbol. It is used to alert you topotential personal injury hazards. Obey all safety messagesthat follow this symbol to avoid possible injury or death.
[;
WARNING indicates a potentially hazardoussituation which, if not avoided, may result in deathor serious injury.
[;
CAUTION indicates a potentially hazardoussituation which, if not avoided, may result in minor
IMPORTANT indicates installation, operation,maintenance or valuable information that is not hazardrelated.
Important Safety Instructions• Remove all tape and packaging before using the
range, Destroy the carton and plastic bags afterunpacking the range. Never allow children to play withpackaging material.
= Proper Installation--Be sure your appliance isproperly installed and grounded bya qualifiedtechnician in accordance with the National Fuel GasCode ANSI Z223.= latest edition, or in Canada CAN/CGA B:[49.1, and CAN/CGA B 149.2, and the theNational Electrical Code ANSI/NFPA No.70=latestedition, or in Canada CSA Standard C22.1, CanadianElectrical Code, Part 1, and local code requirements.Install only per installation instructions provided in theliterature package for this range. Ask your dealer torecommend a qualified technician and an authorizedrepair service. Know how to disconnect the power to therange at the circuit breaker or fuse box in case of anemergency.
If the information in this manual is not followedexactly, a fire or explosion may result causingproperty damage, personal injury or death.
FORYOU R SAFETY:= Do not store or use gasoline or other
flammable vapors and liquids in the vicinity ofthis or any other appliance.
= WHATTO DO IFYOU SMELL GAS:= Do not try to light any appliance.= Do not touch any electrical switch; do not
use any phone in your building.= Immediatelycallyourgassupplierfrom a
neighbor's phone. Followthe gas supplier'sinstructions.
= If you cannot reach your gas supplier, callthe fire department.
= Installation and service must be performed
by a qualified installer, servicer or the gassupplier.
® All ranges can tip.= Injuryto persons could result.= Install anti=tipdevice packed
with range.= See Installation Instructions.
To reduce the risk of tipping, therange must be secured by properelyinstalled anti-tip bracket provided withthe range. To check if the bracket isinstalled properly, visually checkthatrear leveling leg is inserted into andfully secured by the anti-tip bracket byremoving lower front panel or storagedrawer from the range.
For models equipped with a warmer drawer or loweroven, grasp the top rear edge of the range and carefullyattempt to tilt it forward. Refer to the installationinstructions for proper anti- tip bracket installation.
=Never modify or alter the construction of a rangeby removing the leveling legs, panels, wire covers,anti=tip brackets/screws, or any other part of therange.
Save these instructions for future reference,3
NEVER use this appliance as a space heater toheat or warm the room. Doing so may result incarbon monoxide poisoning.
NEVER cover any slots, holes or passages in theoven bottom or cover an entire rack with materials
such as aluminum foil. Doing so blocks air flowthrough the oven and may cause carbon monoxidepoisoning. Aluminum foil linings may trap heat,causing a fire hazard.
Stepping, leaning or sitting on the door ordrawers of a range can result in serious injuriesand also cause damage to the appliance, DO NOTallow children to climb or play around the range. Theweight of a child on an open oven door may cause therange to tip, resulting in serious burns or other injury.
Storage in oron appliance=flammable materialsshould not be stored in an oven, near surfaceunits or in the storage drawer, warmer drawer orlower oven. This includes paper, plastic and clothitems, such as cookbooks, plasticware and towels, aswell as flammable liquids. Do not store explosives, suchas aerosol cans, on or near the range.
DO NOT LEAVECHILDREN ALONE ==children shouldnot be left alone or unattended in the area where
appliance is in use. They should never be allowed to sitor stand on any part of the appliance, including thestorage drawer, lower broiler drawer, warmer drawer orlower double oven.
Do not store items of interest to children in thecabinets above a range or on the backguard ofthe range. Children climbing on the range to reachitems could be seriously injured.
= Remove the oven door from any unused range if itis to be stored or discarded.
=User servicing=Do not repair or replace any part ofthe appliance u nless specifically recommended inthe manuals. All other servicing should be done only by aqualified technician, This may reduce the risk of personalinjury and damage to the range.
For electric ignition models only" Do not attempt tooperate the range during a power failure. If thepower fails, always turn off the range. If the range is notturned off and the power resumes, the range will beginto operate again. Once the power resumes, reset theclock and oven function.
DO NOTTOUCH SURFACE BURNERS, AREAS NEARTHESE BURNERS, OVEN BURNERSORINTE_ORSURFACES OF THE OVEN. Both surface and ovenburners may be hot even though flames are notvisible. Areas near surface burners may become hotenough to cause burns. During and after use, do nottouch, or let clothing or other flammable materialstouch these areas until they have had sufficient timeto cool. Among these areas are the cook top,surfaces facing the cook top, the oven vent openingsand surfaces near these openings, oven door andwindow.
o
o
o
Wear proper apparel=loose-fitting or hanginggarments should never be worn while using theappliance. Do not let clothing or other flammablematerials contact hot surfaces.
Do not use water or flour on grease fires=smother the fire with a pan lid, or use bakingsoda, a dry chemical or foam=type extinguisher.
When heating fat or grease, watch it closely. Fator grease may catch fire if allowed to become too hot.
Use dry potholders =moist or damp potholderson hot surfaces may result in burns from steam.Do not let potholders touch hot heating elements. Donot use a towel or other bulky cloth instead of apotholder.
= Do not heat unopened food containers =buildupof pressure may cause container to burst andresult in injury.

IMPORTANT INSTRUCTIONS FOR USING
YOUR COOKTOP
Use Proper Flame Size--Adjustflamesizesoitdoes
notextendbeyondtheedge oftheutensil.The use of
undersizedutensilswiliexposea portionoftheburner
flametodirectcontactand may resultinignitionof
clothing.Properrelationshipofutensiltoflamewillalsoimproveefficiency.
• Know which knob controls each surface burner.Place a pan of food on the burner before turning it on,and turn the burner off before removing the pan.
• Always turn knob to the full LITE position whenignitingtop burners,Visually check that burner has lit.Then adjust the flame so it does not extend beyond theedge of the utensil.
• Utensil handles should be turned inward and notextend over adjacent surface burners--To reduce
the risk of burns, ignition of flammable materials, andspillage due to unintentional contact with the utensil, thehandle of the utensil should be positioned so that it isturned inward, and does not extend over adjacentsurface burners.
• Never leave surface burners unattended at highheat settings--Boilovers cause smoking and greasyspillovers that may ignite, or a pan that has boiled drymay melt.
• Glazed cooking utensils--Only certain types of glass,glass/ceramic, ceramic, earthenware, or other glazedutensils are suitable for cook top service without breakingdue to the sudden change in temperature. Check themanufacturer's recommendations for cook top use.
= When flaming foods under a ventilating hood, turnthe fan on.
• Air curtain or other overhead range hoods, whichoperate by blowing a downward air flow on to a range,shall not be used in conjunction with gas ranges otherthan when the hood and range have been designed,tested and listed by an independent test laboratory foruse in combination with each other.
IMPORTANT INSTRUCTIONS FOR USING
YOUR OVEN
• Use care when opening oven door, warmerdrawer or lower oven door--Stand to the side of therange when opening the door of a hot oven. Let hot air orsteam escape before you remove or replace food in theoven.
Keep Oven Vent Ducts Unobstructed. The oven ventis located below the backguard. Touching the surfaces inthis area when the oven is operating may cause severeburns. Also, do not place plastic or heat-sensitive itemson or near the oven vent. These items could melt orignite.
Placement of Oven Racks. Always place oven racks indesired location while oven is cool. If rack must bemoved while oven is hot use extreme caution. Usepotholders and grasp the rack with both hands toreposition. Do not let potholders contact the hot heatingelements in the oven. Remove all utensils from the rackbefore moving.
• Do not use the broiler pan without its insert, Thebroiler pan and its insert allow dripping fat to drain andbe kept away from the high heat of the broiler.
= Do not cover the broiler insert with alurninurn foil,Exposed fat and grease could ignite,
Protective liners--Do not use aluminum foil to line theoven bottom. Only use aluminum foil as recommended inthis manual. Improper installation of these liners mayresult in risk of electric shock, or fire.
IMPORTANT SAFETY NOTICE
The California Safe Drinking Water and Toxic EnforcementAct requires the Governor of California to publish a list ofsubstances known to the state to cause cancer, birthdefects or other reproductive harm, and requiresbusinesses to warn customers of potential exposure to suchsubstances.
SELF-CLEANING OVENS
• Clean in the self=cleaning cycle only the partslisted in this Use &Care Manual. Before self-cleaningthe oven, remove the broiler pan and any utensils orfoods from the oven.
• Do Not Use Oven Cleaners=No commercial ovencleaner or oven liner protective coating of any kind shouldbe used in or around any part of the oven.
• Do Not Clean Door GasketJThe door gasket isessential for a good seal. Care should be taken not torub, damage or move the gasket.
• The health of some birds is extremely sensitive to thefumes given off during the self-cleaning cycle of anyrange. Move birds to another well-ventilated room.
IIvIPORTANTINSTRUCTIONS FOR CLEANINGYOUR RANGE• Clean the range regularly to keep all parts free of
grease that could catch fire, Pay particular attentionto the area around each surface element. Do not allowgrease to accumulate.
• Kitchen cleaners and aerosolsmAIways follow themanufacturer's recommended directions for use.Be aware that excess residue from cleaners and aerosolsmay ignite causing damage and injury.
= Clean ventilating hoods frequently=Grease shouldnot be allowed to accumulate on the hood or filter.Follow the manufacturer's instructions for cleaning hoods.
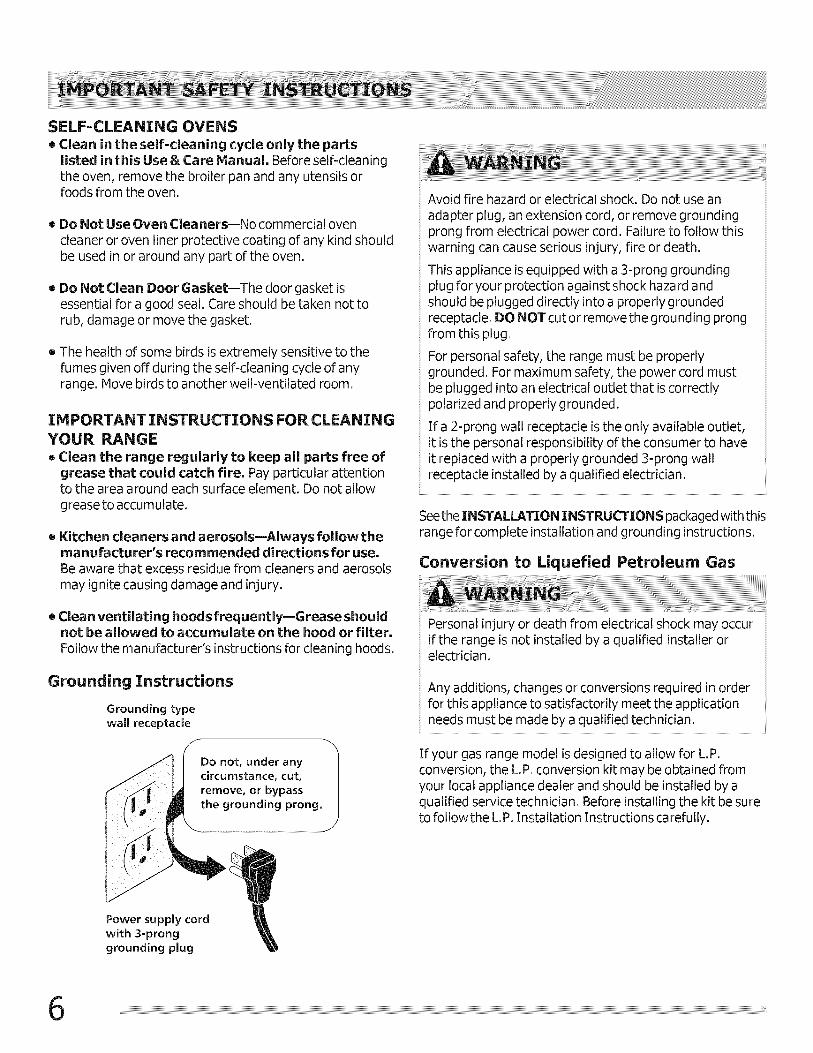
Grounding Instructions
Grounding type
wall receptacle
Do not, under anycircumstance, cut,
remove, or bypassthe grounding prong.
Power supply cordwith 3=pronggrounding plug
Avoid fire hazard or electrical shock. Do not use an
adapter plug, an extension cord, or remove groundingprong from electrical power cord. Failure to follow thiswarning can cause serious injury, fire or death.
This appliance is equipped with a 3-prong groundingplug for your protection against shock hazard andshould be plugged directly into a properly groundedreceptacle. DO NOT cut or remove the grounding prongfrom this plug.
For personal safety, the range must be properlygrounded. For maximum safety, the power cord mustbe plugged into an electrical outlet that is correctlypolarized and properly grounded.
If a 2-prong wall receptacle is the only available outlet,it is the personal responsibility of the consumer to haveit replaced with a properly grounded 3-prong wallreceptacle installed by a qualified electrician.
Seethe INSTALLATION INSTRUCTIONS packaged with thisrange for complete installation and grounding instructions.
Conversion to Liquefied Petroleum Gas
Personal injury or death from electrical shock may occurif the range is not installed by a qualified installer orelectrida n.
Any additions, changes or conversions required in orderfor this appliance to satisfactorily meet the applicationneeds must be made by a qualified technician.
If your gas range model is designed to allow for LP.conversion, the L.P. conversion kit may be obtained fromyour local appliance dealer and should be installed by aqualified service technician. Before installing the kit be sureto followthe LP. Installation Instructions carefully.
© <_ boko ^ •
i
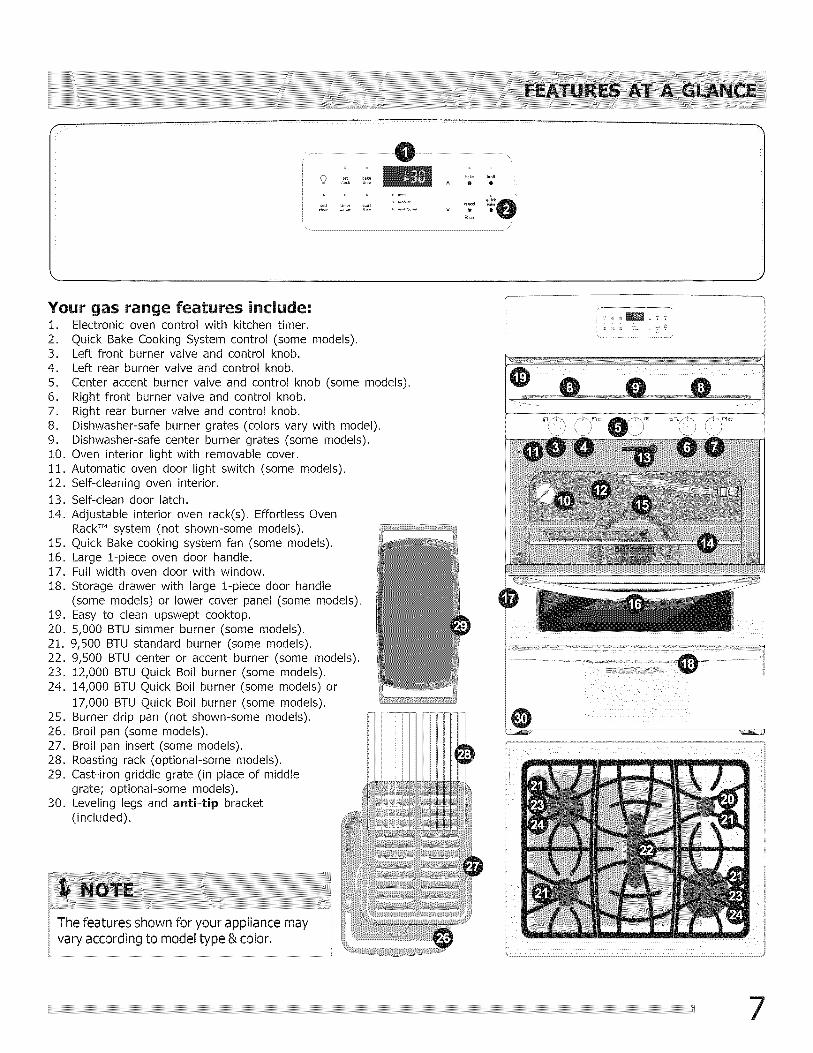
Your gas range features include:1. Electronic oven control with kitchen timer.
2. Quick Bake Cooking System control (some models).3. Left front burner valve and control knob.
4. Left rear burner valve and control knob.
5. Center accent burner valve and control knob (some models).
6. Right front burner valve and control knob.
7. Right rear burner valve and control knob.
8. Dishwasher-safe burner grates (colors vary with model).9. Dishwasher-safe center burner grates (some models).
10. Oven interior light with removable cover.
11. Automatic oven door light switch (some models).
12. Self-cleaning oven interior.
13. Self-clean door latch.
14. Adjustable interior oven rack(s). Effortless Oven
Rack TM system (not shown-some models).
15. Quick Bake cooking system fan (some models).
16. Large 1-piece oven door handle.17. Full width oven door with window.
18. Storage drawer with large 1-piece door handle
(some models) or lower cover panel (some models).
19. Easy to clean upswept cooktop.
20. 5,000 BTU simmer burner (some models).21. 9,500 BTU standard burner (some models).
22. 9,500 BTU center or accent burner (some models).
23. 12,000 BTU Quick Boil burner (some models).
24. 14,000 BTU Quick Boil burner (some models) or
17,000 BTU Quick Boil burner (some models).
25. Burner drip pan (not shown-some models).26. Broil pan (some models).
27. Broil pan insert (some models).
28. Roasting rack (opUonai-some models).
29. Cast-iron griddle grate (in place of middle
grate; optional-some models).30. Leveling legs and anti=tip bracket
(included).
The features shown for your appliance may
vary according to model type & color.
i
iii i i i
_____________{77ii 7
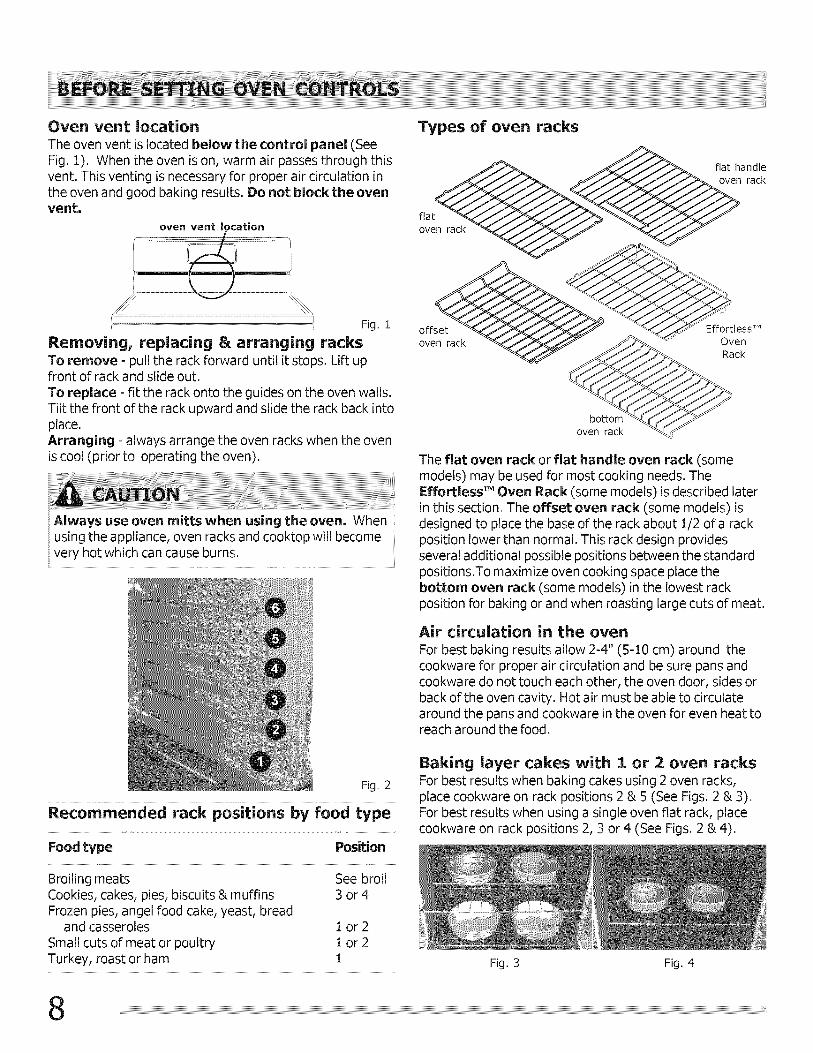
Oven vent locationThe oven vent is located below the control panel (SeeFig. 1). When the oven is on, warm air passes through thisvent. This venting is necessary for proper air circulation inthe oven and good baking results. Do not block the ovenvent.
oven vent location
Types of oven racks
___ flat handleflat_ _ rack
oven rackV_
..........................................................................................................................................................................................................._ Fig. 1
Removing, replacing & arranging racksTo remove - pull the rack forward until it stops. Lift upfront of rack and slide out.To replace - fit the rack onto the guides on the oven walls.Tilt the front of the rack upward and slide the rack back intoplace.Arranging - always arrange the oven racks when the ovenis cool (prior to operating the oven).
Always use oven mitts when using the oven. Whenusing the appliance, oven racks and cooktop will becomevery hot which can cause burns.
offset Effortless TM
oven rack OvenRack
bottomoven rack
The flat oven rack or flat handle oven rack (somemodels) may be used for most cooking needs. TheEffortless'" Oven Rack (some models) is described laterin this section. The offset oven rack (some models) isdesigned to place the base of the rack about 1/2 of a rackposition lower than normal. This rack design providesseveral additional possible positions between the standardpositions.To maximize oven cooking space place thebottom oven rack (some models) in the lowest rackposition for baking or and when roasting large cuts of meat.
Air circulation in the ovenFor best baking results allow 2-4" (5-10 cm) around thecookware for proper air circulation and be sure pans andcookware do not touch each other, the oven door, sides orback of the oven cavity. Hot air must be able to circulatearound the pans and cookware in the oven for even heat toreach around the food.
Fig. 2
Recommended rack positions by food type
Food type Position
Broiling meats See broilCookies, cakes, pies, biscuits & muffins 3 or 4Frozen pies, angel food cake, yeast, bread
and casseroles 1 or 2
Small cuts of meat or poultry 1 or 2Turkey, roast or ham 1
Baking layer cakes with 1 or :2 oven racksFor best results when baking cakes using 2 oven racks,place cookware on rack positions 2 & 5 (See Figs. 2 & 3).For best results when using a single oven flat rack, placecookware on rack positions 2, 3 or 4 (See Figs. 2 & 4).
Fig. 3 Fig. 4
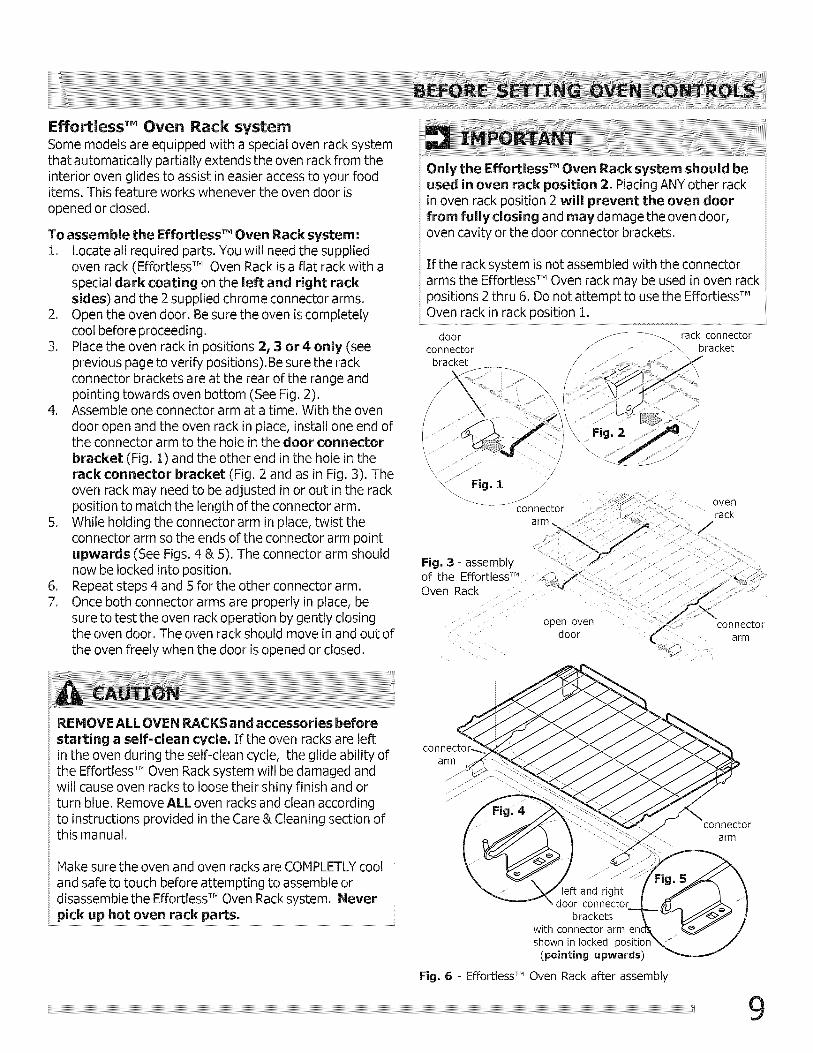
Effortless TM Oven Rack systemSome models are equipped with a special oven rack systemthat automatically partially extends the oven rack from theinterior oven glides to assist in easier access to your fooditems. This feature works whenever the oven door isopened or closed.
To assem ble the Effortless TM Oven Rack system:1. Locate all required parts. You will need the supplied
oven rack (Effortless TM Oven Rack is a flat rack with aspecial dark coating on the left and right racksides) and the 2 supplied chrome connector arms.
2. Open the oven door. Be sure the oven is completelycool before proceeding.
3. Place the oven rack in positions 2, 3 or 4 only (seeprevious page to verify positions).Be sure the rackconnector brackets are at the rear of the range andpointing towards oven bottom (See Fig. 2).
4. Assemble one connector arm at a time. With the ovendoor open and the oven rack in place, install one end ofthe connector arm to the hole in the door connectorbracket (Fig. 1) and the other end in the hole in therack connector bracket (Fig. 2 and as in Fig. 3). Theoven rack may need to be adjusted in or out in the rackposition to match the length of the connector arm.
5. While holding the connector arm in place, twist theconnector arm so the ends of the connector arm pointupwards (See Figs. 4 & 5). The connector arm shouldnow be locked into position.
6. Repeat steps 4 and 5 for the other connector arm.7. Once both connector arms are properly in place, be
sure to test the oven rack operation by gently closingthe oven door. The oven rack should move in and out ofthe oven freely when the door is opened or closed.
Only the Effortless TM Oven Rack system should beused in oven rack position 2. Placing ANY other rackin oven rack position 2 will prevent the oven doorfrom fully closing and may damage the oven door,oven cavity or the door connector brackets.
If the rack system is not assembled with the connectorarms the Effortless TM Oven rack may be used in oven rackpositions 2 thru 6. Do not attempt to use the Effortless TM
Oven rack in rack position 1.
door _---: rack connectorbracketconnector
bracket
Fig. 3 - assemblyof the Effortless TM
Oven Rack
.... open oven: door
connectorarm
iTM]
REMOVE ALL OVEN RACKS and accessories beforestarting a self=clean cycle. If the oven racks are leftin the oven during the self-clean cycle, the glide ability ofthe Effortless TM Oven Rack system will be damaged andwill cause oven racks to loose their shiny finish and orturn blue. Remove ALL oven racks and clean accordingto instructions provided in the Care & Cleaning section ofthis manual.
Make sure the oven and oven racks are COMPLETLY cooland safe to touch before attempting to assemble ordisassemble the Effortless TM Oven Rack system. Neverpick up hot oven rack parts.
arm
bracketswith connector arm en
shown in locked positior(pointing upwards)
Fig. 6 - Effortless TM Oven Rack after assembly
connectorarm
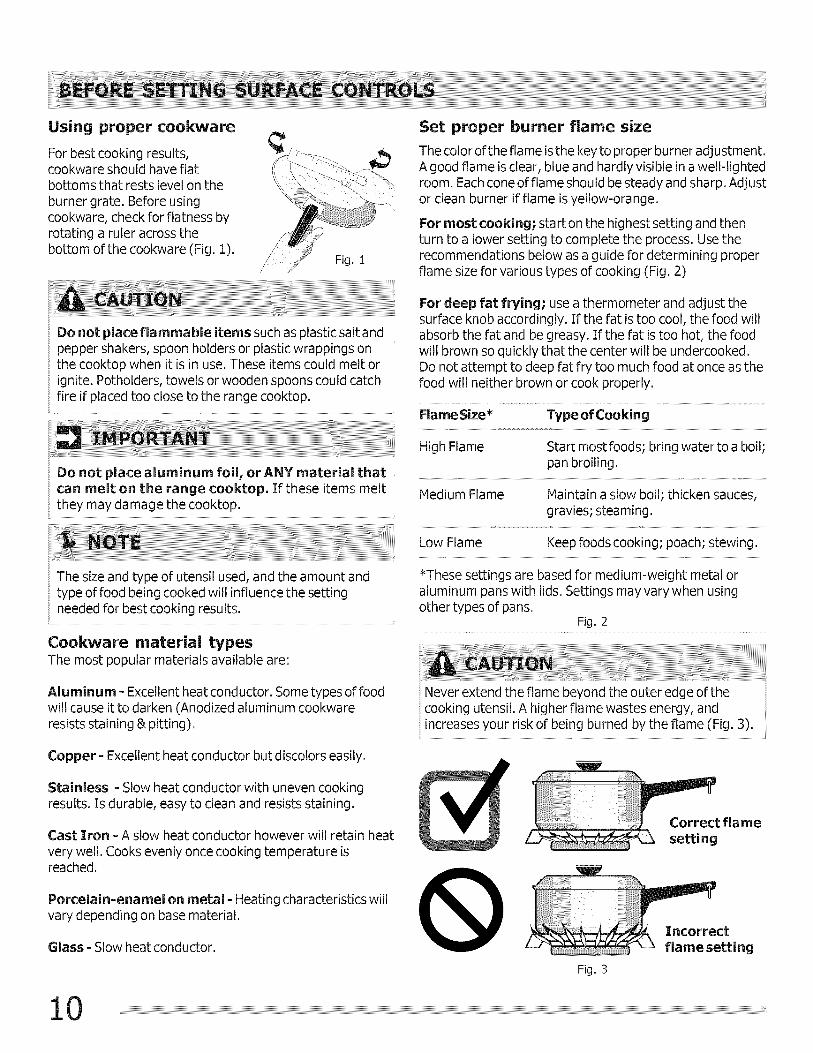
Using proper cookware
For best cooking results,cookware should have flatbottoms that rests level on theburner grate. Before usingcookware, check for flatness byrotating a ruler across thebottom of the cookware (Fig. 1).
Fig. 1
Do not place flammable items such as plastic salt andpepper shakers, spoon holders or plastic wrappings onthe cooktop when it is in use. These items could melt orignite. Potholders, towels or wooden spoons could catch
fire if placed too close to the range cooktop.
Do not place aluminum foil, or ANY material thatcan melt on the range cooktop, If these items melt
they may damage the cooktop:................................................................................................................................................................
The size and type of utensil used, and the amount andtype of food being cooked will influence the setting
needed for best cooking results.
Cookware material typesThe most popular materials available are:
Aluminum = Excellent heat conductor. Some types of foodwill cause it to darken (Anodized aluminum cookwareresists staining & pitting).
Copper =Excellent heat conductor but discolors easily.
Stainless =Slow heat conductor with uneven cookingresults. Is durable, easy to clean and resists staining.
Cast Iron =A slow heat conductor however will retain heatvery well. Cooks evenly once cooking temperature isreached.
Porcelain=enamel on metal =Heating characteristics willvary depending on base material.
Glass - Slow heat conductor.
Set proper burner flame size
The color of the flame is the key to proper burner adjustment.A good flame is clear, blue and hardly visible in a well-lightedroom. Each cone of flame should be steady and sharp. Adjustor clean burner if flame is yellow-orange.
For most cooking; start on the highest setting and thenturn to a lower setting to complete the process. Use therecommendations below as a guide for determining properflame size for various types of cooking (Fig. 2)
For deep fat frying; use a thermometer and adjust thesurface knob accordingly. If the fat is too cool, the food willabsorb the fat and be greasy. If the fat is too hot, the foodwill brown so quickly that the center will be undercooked.Do not attempt to deep fat fry too much food at once as thefood will neither brown or cook properly.
Flame Size* Type of Cooking
High Flame Start most foods; bring water to a boil;pan broiling.
Medium Flame Maintain a slow boil; thicken sauces,gravies; steaming.
Low Flame Keep foods cooking; poach; stewing.
*These settings are based for medium-weight metal oraluminum pans with lids. Settings may vary when usingother types of pans.
Fig. 2
Never extend the flame beyond the outer edge of thecooking utensil. A higher flame wastes energy, and
increases your risk of being burned by the flame (Fig, 3),
tflame
setti ng
Fig. 3
Incorrectflame setting
Setting surface controlsYour gas appliance may be equipped with many differentsized surface burners. The ability to heat food quicker andin larger volumes increases as the burner size increases.
The smaller simmer burner (some models) is best suitedfor simmering delicate sauces, etc.
The standard size (9,000 BTU) burners may be used formost surface cooking needs.
The larger quick boil burner or burners (some models)are best used when bringing large quantities of liquid totemperature and when preparing larger quantities of food.
It is important to select cookware that is suitable for theamount and type of food being prepared. Select a burnerand flame size appropriate for the cookware size.
lite hi 6 5 4 3 2 [o II
OFF
Fig. 1
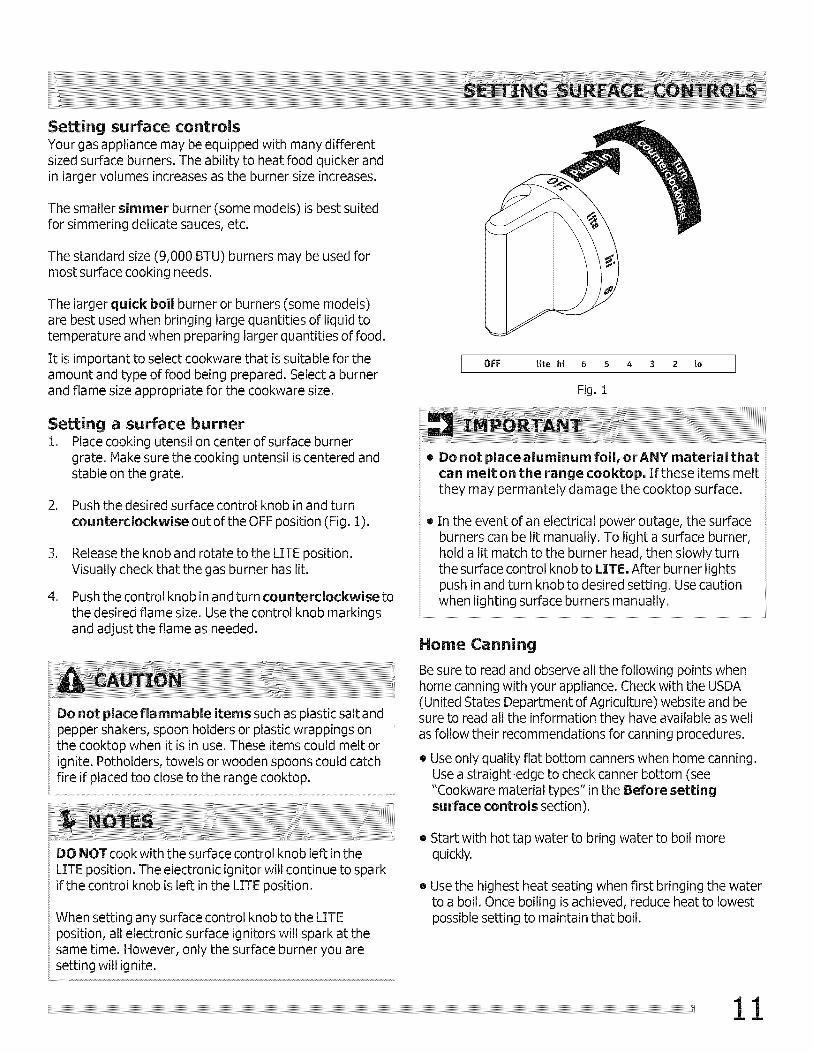
Setting a surface burner1. Place cooking utensil on center of surface burner
grate. Make sure the cooking untensil is centered andstable on the grate.
2. Push the desired surface control knob in and turncounterclockwise out of the OFF position (Fig. 1).
.
.
Release the knob and rotate to the LITE position.Visually check that the gas burner has lit.
Push the control knob in and turn counterclockwise tothe desired flame size. Use the control knob markingsand adjust the flame as needed.
Do not place flammable items such as plastic salt andpepper shakers, spoon holders or plastic wrappings onthe cooktop when it is in use. These items could melt orignite. Potholders, towels or wooden spoons could catch
fire if placed too close to the range cooktop.
= Do not place aluminum foil, orANY material thatcan melt on the range cooktop. If these items meltthey may permantely damage the cooktop surface.
• In the event of an electrical power outage, the surfaceburners can be lit manually. To light a surface burner,hold a lit match to the burner head, then slowly turnthe surface control knob to LITE. After burner lightspush in and turn knob to desired setting. Use cautionwhen lighting surface burners manually.
Home Canning
Be sure to read and observe all the following points whenhome canning with your appliance. Check with the USDA(United States Department of Agriculture) website and besure to read al! the information they have available as wellas follow their recommendations for canning procedures.
• Use only quality flat bottom canners when home canning.Use a straight-edge to check canner bottom (see"Cookware material types" in the Before settingsurface controls section).
[i
DO NOT cook with the surface control knob left in theLITE position. The electronic ignitor will continue to sparkif the control knob is left in the LITE position.
When setting any surface control knob to the LITEposition, all electronic surface ignitors will spark at thesame time. However, only the surface burner you aresetting will ignite.
• Start with hot tap water to bring water to boil morequickly.
• Use the highest heat seating when first bringing the waterto a boil. Once boiling is achieved, reduce heat to lowestpossible setting to maintain that boil.
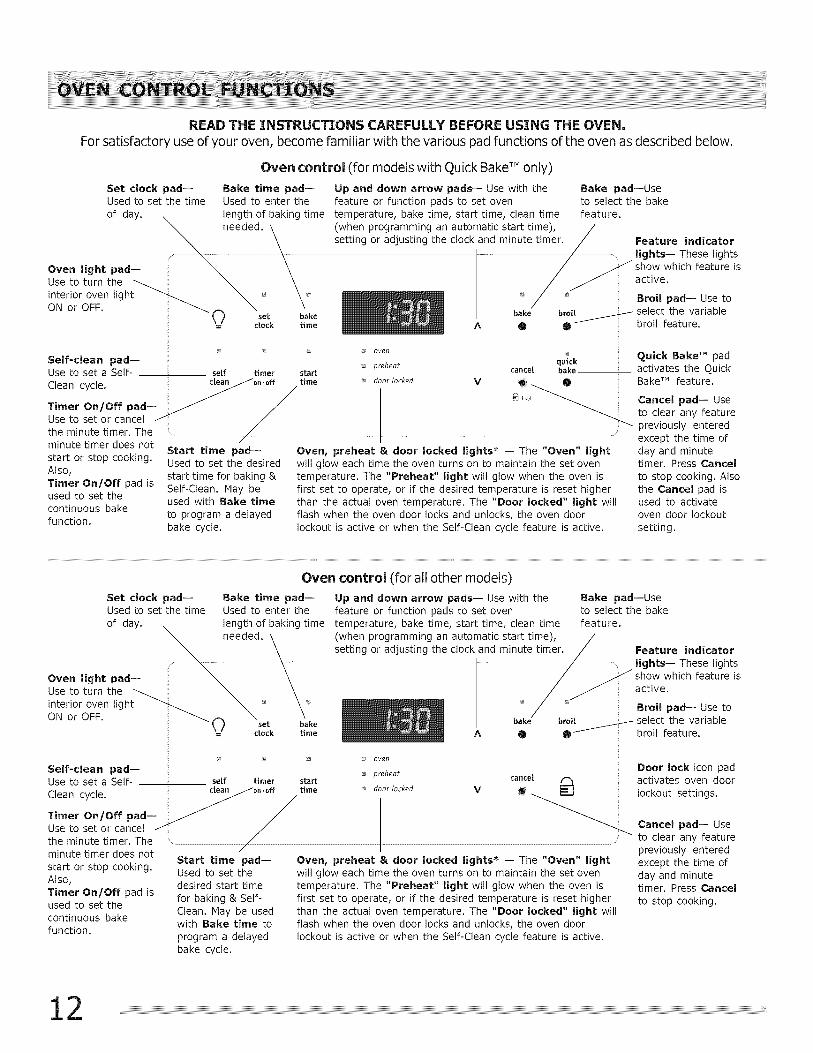
READ THE INSTRUCTIONS CAREFULLY BEFORE USING THE OVEN.For satisfactory use of your oven, become familiar with the various pad functions of the oven as described below.
Oven control (for models with Quick Bake T" only)
Set clock pad-- Bake time pad-- Up and down arrow pads-- Use with the Bake pad--UseUsed to set the time Used to enter the feature or function pads to set oven to select the bakeof day. length of baking time temperature, bake time, start time, clean time feature.
needed. (when programming an automatic start time),setting or adjusting the clock and minute timer.
Oven light pad--Use to turn the
interior oven lightON or OFF.
set bake= dock time
bake
^ ®
broil
Feature indicator
lights-- These lightswhich feature is
active.
Broil pad-- Use toselect the variablebroil feature.
_ _ _, @ oven _,
Self-clean pad-- _ preheat quickUse to set a Self- self timer start cancel bakeClean cycle dean /on,off time _ door locked V _
Timer On/Off pad i //Use to set or cancel / // I _the minute timer. The ............ ./ ......I......................
/ Iminute timer does not
start or stop cooking.Also,Timer On/Off pad isused to set thecontinuous bakefunction.
Start time pad IUsed to set the desired
start time for baking &
Self-Clean. lay beused with Bake time
to program a delayedbake cycle.
Oven, preheat & door locked lights* i The "Oven" lightwill glow each time the oven turns on to maintain the set oventemperature. The "Preheat" light will glow when the oven isfirst set to operate, or if the desired temperature is reset higherthan the actual oven temperature. The "Door locked" light willflash when the oven door locks and unlocks, the oven doorlockout is active or when the Self-Clean cycle feature is active.
Quick Bake TM padactivates the QuickBake TM feature.
Cancel pad-- Useto clear any featurepreviously enteredexcept the time ofday and minutetimer. Press Cancelto stop cooking. Alsothe Cancel pad isused to activateoven door lockout
setting.
Set clock pad--
Used to set the time
of day.
Oven control (for all other models)
Bake time pad-- lip and down arrow pads-- Use with theUsed to enter the feature or function pads to set ovenlength of baking time temperature, bake time, start time, clean timeneeded. (when programming an automatic start time),
setting or adjusting the clock and minute timer.
Oven light pad--
Use to turn theinterior oven light _ON or OFF. i
set bake_- dock time A ®
Self-cleanpaQ--_ preheat
Use to set a Se f- self timer start cancelClean o,cle clean /on,off time _ door locked V _ []
Timer On/Off padUse to set or cancel _ I -_-T'-_the minute timer. The ...... ,/ I.................
/ Iminute timer does not
Bake pad--Useto select the bakefeature.
start or stop cooking.Also,Timer On/Off pad isused to set thecontinuous bakefunction.
Start time pad--Used to set thedesired start time
for baking & Self-Clean. lay be usedwith Bake time to
program a delayedbake cycle.
Feature indicator
lights-- These lights
show which feature is
__ active.Broil pad-- Use to
broil _ select the variablett_ broil feature.
Oven, preheat & door locked lights* i The "Oven" lightwill glow each time the oven turns on to maintain the set oventemperature. The "Preheat" light will glow when the oven isfirst set to operate, or if the desired temperature is reset higherthan the actual oven temperature. The "Door locked" light willflash when the oven door locks and unlocks, the oven doorlockout is active or when the Self-Clean cycle feature is active.
Door lock icon padactivates oven door
lockout settings.
Cancel pad-- Useto clear any featurepreviously enteredexcept the time ofday and minutetimer. Press Cancel
to stop cooking.
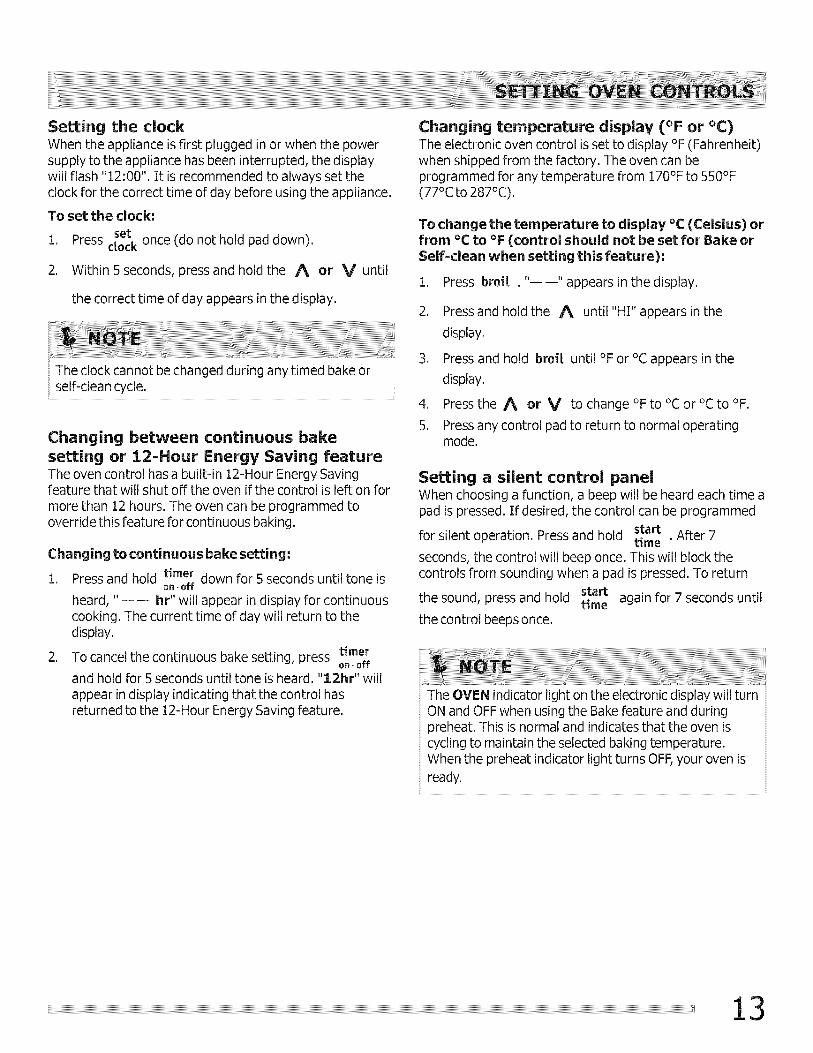
Setting the clockWhen the appliance is first plugged in or when the powersupply to the appliance has been interrupted, the displaywill flash "12:00". It is recommended to always set theclock for the correct time of day before using the appliance.
To set the dock:set
1. Press clock once (do not hold pad down).
2. Within 5 seconds, press and hold the A or V until
the correct time of day appears in the display,
The clock cannot be changed during any timed bake or
self-cleancycle.
Changing between continuous bakesetting or 12-Hour Energy Saving featureThe oven control has a built-in 12-Hour Energy Savingfeature that will shut off the oven if the control is left on formore than 12 hours. The oven can be programmed tooverride this feature for continuous baking.
Changing to continuous bake setting:
1. Press and hold timer down for 5 seconds until tone ison. off
heard, "m m hr" will appear in display for continuouscooking. The current time of day will return to thedisplay.
2. To cancel the continuous bake setting, press timeron. off
and hold for 5 seconds until tone is heard. "12hr" willappear in display indicating that the control hasreturned to the 12-Hour Energy Saving feature.
Changing temperature display (°F or °C)The electronic oven control is set to display °F (Fahrenheit)when shipped from the factory. The oven can beprogrammed for any temperature from 170°F to 550°F(77°C to 287°C).
To change the temperature to display °C (Celsius) orfrom °C to °F (control should not be set for Bake orSelf=clean when setting this feature):
1. Press broil ." "appears in the display.
2. Press and hold the A until "HI" appears in the
display.
3. Press and hold broil, until °F or °C appears in the
display.
4. Press the A or V to change °F to °C or °C to °F.
5. Press any control pad to return to normal operatingmode.
Setting a silent control panelWhen choosing a function, a beep will be heard each time apad is pressed. If desired, the control can be programmed
for silent operation. Press and hold start After 7time "seconds, the control will beep once. This will block thecontrols from sounding when a pad is pressed. To return
the sound, press and hold starttime again for 7 seconds untilthe control beeps once.
The OVEN indicator light on the electronic display will turnON and OFFwhen using the Bake feature and duringpreheat. This is normal and indicates that the oven iscycling to maintain the selected baking temperature.When the preheat indicator light turns OFF,your oven is
ready.
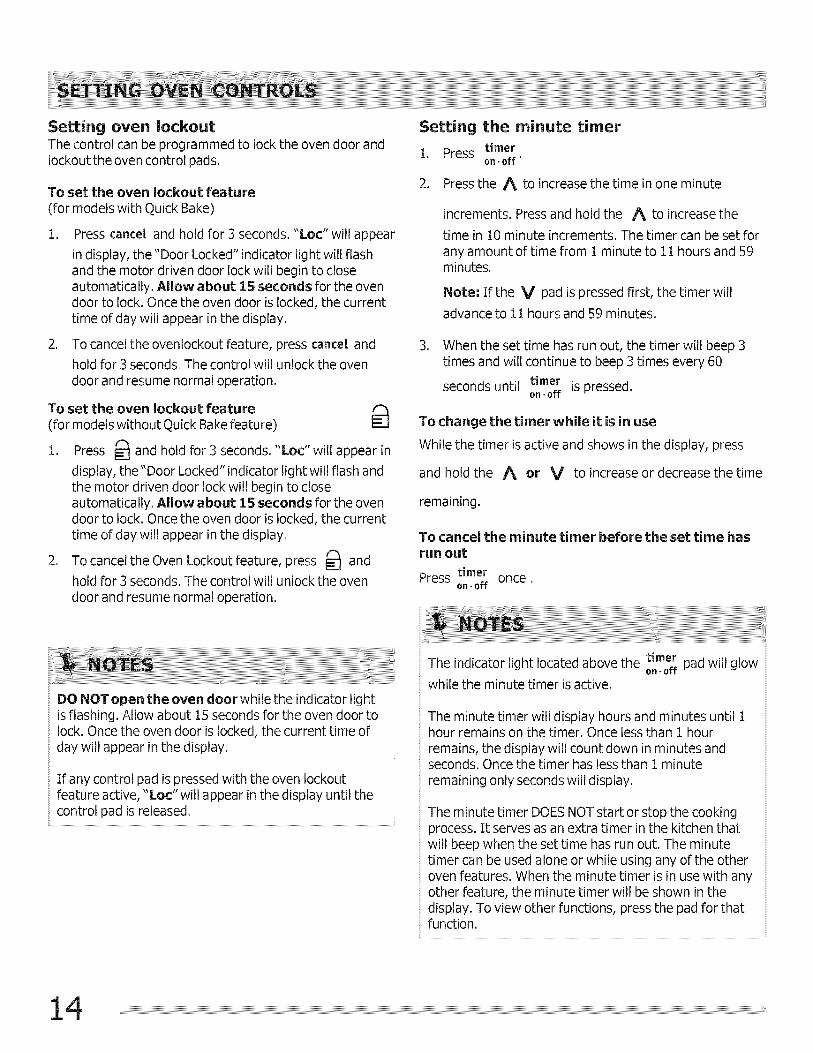
Setting oven lockoutThe control can be programmed to lock the oven door andlockout the oven control pads.
To set the oven lockout feature(for models with Quick Bake)
. Press cancel and hold for 3 seconds. "Loc" will appear
in display, the "Door Locked" indicator light will flashand the motor driven door lock will begin to closeautomatically. Allow about 15 seconds for the ovendoor to lock. Once the oven door is locked, the currenttime of day will appear in the display.
2. To cancel the ovenlockout feature, press cancel and
hold for 3 seconds. The control will unlock the ovendoor and resume normal operation.
To set the oven lockout feature(for models without Quick Bake feature) I=1
1. Press I_ and hold for 3 seconds. "Loc"will appear in
display, the "Door Locked" indicator light will flash andthe motor driven door lock will begin to closeautomatically. Allow about 15 seconds for the ovendoor to lock. Once the oven door is locked, the currenttime of day will appear in the display.
2. To cancel the Oven Lockout feature, press _ andhold for 3 seconds. The control will unlock the oven
door and resume normal operation.
Setting the minute timer
1. Press timeron. off "
2. Press the A to increase the time in one minute
increments. Press and hold the A to increase the
time in 10 minute increments. The timer can be set forany amount of time from 1 minute to 11 hours and 59minutes.
Note =If the V pad is pressed first, the timer will
advance to 11 hours and 59 minutes.
. When the set time has run out, the timer will beep 3times and will continue to beep 3 times every 60
seconds until timer is pressed.on. off
To change the timer while it is in use
While the timer is active and shows in the display, press
and hold the A or V to increase or decrease the time
remaining.
To cancel the minute timer before the set time hasrun out
Press timer onceon. off
DO NOT open the oven door while the indicator lightis flashing. Allow about 15 seconds for the oven door tolock. Once the oven door is locked, the current time ofday will appear in the display.
If any control pad is pressed with the oven lockoutfeature active, "Loc" will appear in the display until the
control pad is released.
The indicator light located above the timer pad will glowon. off
while the minute timer is active.
The minute timer will display hours and minutes until 1hour remains on the timer. Once less than 1 hourremains, the display will count down in minutes andseconds. Once the timer has less than 1 minuteremaining only seconds will display.
The minute timer DOES NOT start or stop the cookingprocess. It serves as an extra timer in the kitchen thatwill beep when the set time has run out. The minutetimer can be used alone or while using any of the otheroven features. When the minute timer is in use with anyother feature, the minute timer will be shown in thedisplay. To view other functions, press the pad for thatfunction.
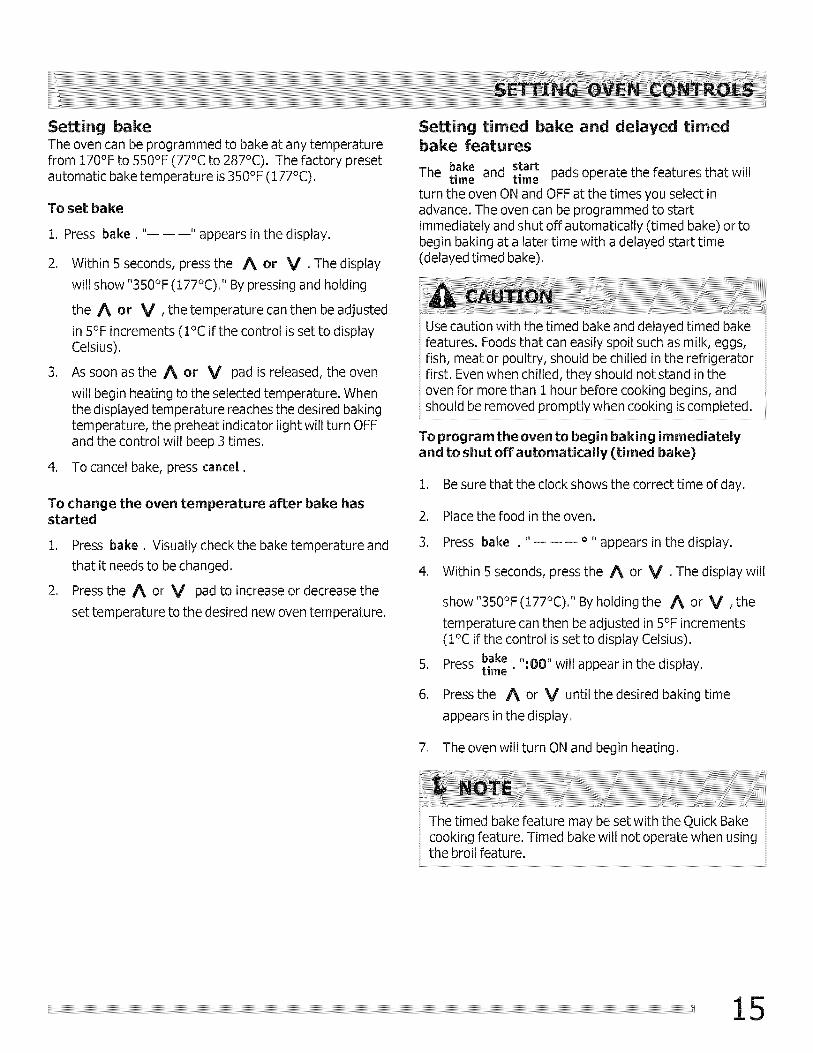
Setting bakeThe oven can be programmed to bake at any temperaturefrom 170°F to 550°F (77°C to 287°C). The factory presetautomatic bake temperature is 350°F (177°C).
To set bake
1. Press bake." "appears in the display.
.
.
Within 5 seconds, press the A or V • The display
will show "350°F (177°C). '' By pressing and holding
the A or V, the temperature can then be adjusted
in 5°F increments (1°C if the control is set to displayCelsius).
As soon as the A or V pad is released, the oven
will begin heating to the selected temperature. Whenthe displayed temperature reaches the desired bakingtemperature, the preheat indicator light will turn OFFand the control will beep 3 times.
4. To cancel bake, press cancel.
To change the oven temperature after bake hasstarted
1. Press bake. Visually checkthe bake temperature and
that it needs to be changed.
2. Press the A or V pad to increase or decrease the
set temperature to the desired new oven temperature.
Setting timed bake and delayed timedbake features
The bake and start pads operate the features that willtime time
turn the oven ON and OFF at the times you select inadvance. The oven can be programmed to startimmediately and shut off automatically (timed bake) or tobegin baking at a later time with a delayed start time(delayed timed bake).
Use caution with the timed bake and delayed timed bakefeatures. Foods that can easily spoil such as milk, eggs,fish, meat or poultry, should be chilled in the refrigeratorfirst. Even when chilled, they should not stand in theoven for more than 1 hour before cooking begins, andshould be removed promptly when cooking is completed.
To program the oven to begin baking immediatelyand to shut off automatically (timed bake)
1. Be sure that the clock shows the correct time of day.
2. Place the food in the oven.
3. Press bake . "m m _ o ,,appears in the display.
4. Within 5 seconds, press the A or V • The display will
.
6.
show "350°F (177°C). '' By holding the A or V, the
temperature can then be adjusted in 5°F increments(1°C if the control is set to display Celsius).
Press bake ":00" will appear in the display.time "
Press the A or V until the desired baking time
appears in the display.
7. The oven will turn ON and begin heating.
The timed bake feature may be set with the Quick Bakecooking feature. Timed bake will not operate when usingthe broil feature.
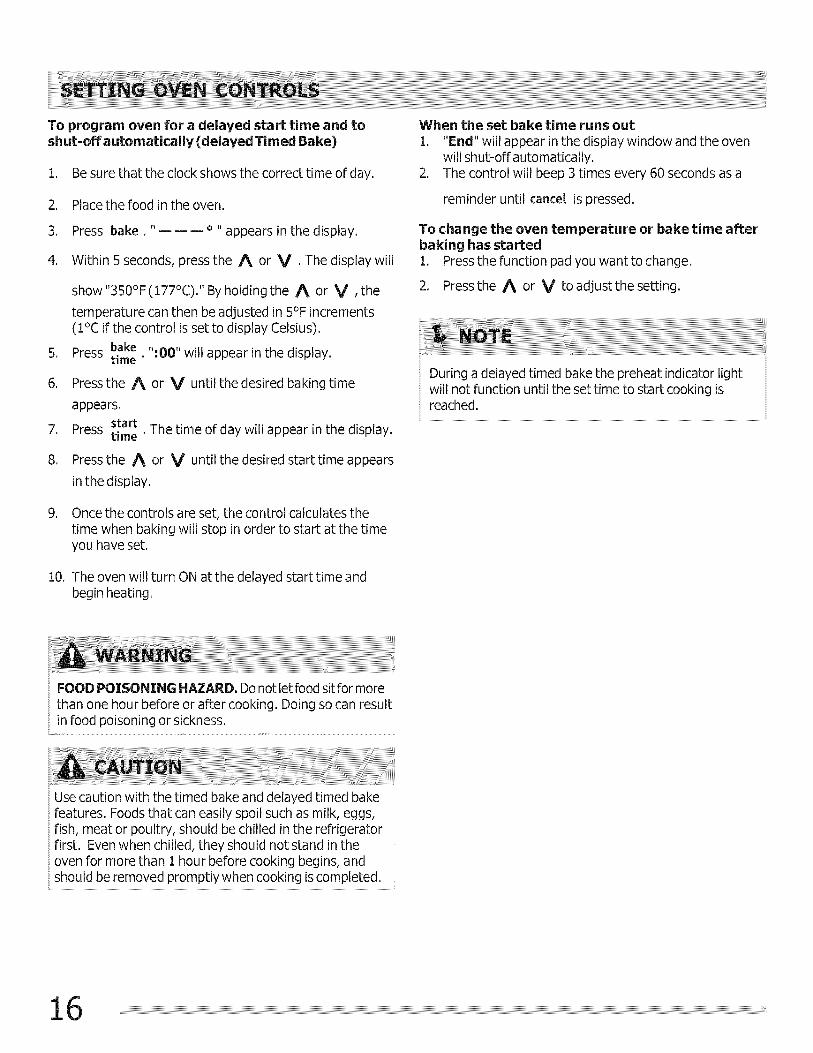
To program oven for a delayed start time and toshut=off automatically (delayed Timed Bake)
1. Be sure that the clock shows the correct time of day.
2. Place the food in the oven.
3. Press bake. "m m _ o ,,appears in the display.
4. Within 5 seconds, press the A or V • The display will
show "350°F (177°C). '' By holding the A or V, the
temperature can then be adjusted in 5°F increments(1% if the control is set to display Celsius).
5. Press bake ":OO" will appear in the display.time "
6. Pressthe A or V until the desired baking time
appears.
start The time of day will appear in the display.7. Press time"
8. Press the A or V until the desired start time appears
in the display.
9. Once the controls are set, the control calculates thetime when baking will stop in order to start at the timeyou have set.
10. The oven will turn ON atthe delayed start time andbegin heating.
When the set bake time runs out1. "End" will appear in the display window and the oven
will shut-offautomatically.2. The control will beep 3 times every 60 seconds as a
reminder until cancel is pressed.
To change the oven temperature or bake time afterbaking has started1. Press the function pad you want to change.
2. Press the A or V to adjust thesetting,
During a delayed timed bake the preheat indicator lightwill not function until the set time to start cooking is
reached.
FOOD POISONING HAZARD, Do not let food sit for morethan one hour before or after cooking. Doing so can resultin food poisoning or sickness.
Use caution with the timed bake and delayed timed bakefeatures. Foods that can easily spoil such as milk, eggs,fish, meat or poultry, should be chilled in the refrigeratorfirst. Even when chilled, they should not stand in theoven for more than 1 hour before cooking begins, and
should be removed promptly when cooking is completed.
Quick Bake (somemodels)Benefits of the Quick Ba ke featu reI Foods may cook up to 25 to 30% faster, saving time and
energy.I Multiple rack baking.I No special pans or bakeware needed.
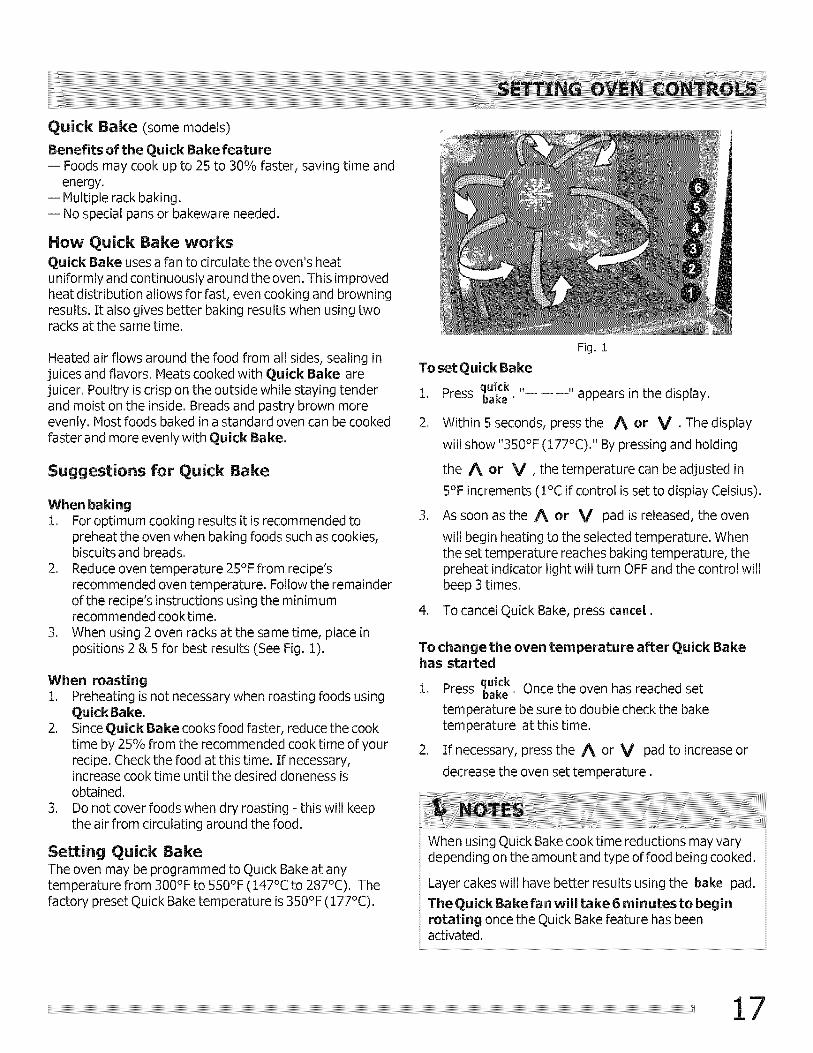
How Quick Bake works
Quick Bake uses a fan to circulate the oven's heatuniformly and continuously around the oven. This improvedheat distribution allows for fast, even cooking and browningresults. It also gives better baking results when using tworacks at the same time.
Heated air flows around the food from all sides, sealing injuices and flavors. Meats cooked with Quick Bake arejuicer. Poultry is crisp on the outside while staying tenderand moist on the inside. Breads and pastry brown moreevenly. Most foods baked in a standard oven can be cookedfaster and more evenly with Quick Bake.
Suggestions for Quick Bake
When baking1. For optimum cooking results it is recommended to
preheat the oven when baking foods such as cookies,biscuits and breads.
2. Reduce oven temperature 2S°F from recipe'srecommended oven temperature. Follow the remainderof the recipe's instructions using the minimumrecommended cooktime.
3. When using 2 oven racks at the same time, place inpositions 2 & 5 for best results (See Fig. 1).
When roasting1. Preheating is not necessary when roasting foods using
QuickBake.2. Since Quick Bake cooks food faster, reduce the cook
time by 25% from the recommended cook time of yourrecipe. Check the food at this time. If necessary,increase cook time until the desired doneness isobtained.
3. Do not cover foods when dry roasting - this will keepthe air from circulating around the food.
Setting Quick BakeThe oven may be programmed to Quick Bake at anytemperature from 300°F to 550°F (147°C to 287°C). Thefactory preset Quick Bake temperature is 350°F (177°C).
Fig. 1
To set Quick Bake
quick ,,1. Press bake " "appears in the display.
2. Within 5 seconds, press the A or V • The display
will show "350°F (177°C). '' By pressing and holding
the A or V, the temperature can be adjusted in
5°F increments (1°C if control is set to display Celsius).
3. As soon as the A or V pad is released, the oven
will begin heating to the selected temperature. Whenthe set temperature reaches baking temperature, thepreheat indicator light will turn OFF and the control willbeep 3 times.
4. To cancel Quick Bake, press cancel.
To change the oven temperature after Quick Bakehas started
quick1. Press bake " Once the oven has reached set
temperature be sure to double check the baketemperature at this time.
2. If necessary, press the A or V pad to increase or
decrease the oven set temperature.
When using Quick Bake cook time reductions may varydepending on the amount and type of food being cooked.
Layer cakes will have better results using the bake pad.
The Quick Bake fan will take 6 minutes to beginrotating once the Quick Bake feature has beenactivated.

Setting broil
Use the broil feature to cook meats that require directexposure to flame heat for optimum browing results.When broiling always remember to arrange the ovenracks while oven is still cool. Position the oven rack assuggested in the broil settings table (See Fig. 3).
To set Broil
1. Arrange the oven rack while oven is still cool.
2. Press broil ."----"will appear in display.
3. Press and hold the A or V until the desired broil
setting level appears in the display. Press the A for HI
broil orthe V for LO broil. Most foods may be broiled
at the HI broil setting. Select the LO broil setting toavoid excess browning or drying of foods that should becooked to the well-done stage.
4. For optimum browning, preheatthe oven for 5minutes before adding food.
5. Place the insert on the broil pan (if equipped), thenplace the food on the broil pan insert (if equipped).
6. Place the broiler pan and insert on the oven rack (ifequipped-See Figs. 1 & 2).
7. Close the oven door.8. Broil on one side until food is browned. Turn and broil
food on 2nd side. For recommended broil settings andtimes refer to Fig. 3.
9. When broiling is finished press cancel.
Always pull the oven rack out to the stop position beforeturning or removing the food.
Fig. 1 Fig. 2
Insert
Broil pan
Should an oven fire occur, close the oven door and turnthe oven OFF. If the fire continues, use a fireextinguisher. DO NOT put water or flour on the fire. Flourmay be explosive.
To insure proper results when broiling use ONLY ElectroluxHome Products, Inc. approved broil pan & insert.
The broiler pan and the insert (some models) allowsgrease to drain and be kept away from the high heat ofthe broiler. DO NOT use the pan without the insert. DONOTcover the insert with foil; the exposed grease couldignite, DO NOT use the broil pan without the insert or
*Use the off=set rack if you choose to use oven rack position 6.Fig, 3
8
Steak 1" thick 5th or 6th* Hi 6 4 MediumSteak 1" thick 5th or 6th* Hi 7 5 Medium-wellSteak 1" thick 5th or 6th* Hi 8 7 WellPork chops 3/4" thick 5th Hi 8 6 WellChicken-bone in 4th Lo 20 10 WellChicken-boneless 5th Lo 8 6 WellFish 5th Hi 13 n/a WellShrimp 4th Hi 5 n/a WellHamburger 1"thick 6th * Hi 9 7 MediumHamburger 1" thick 5th Hi 10 8 Well
Suggested broil settings table
Food Rack position Setting Cook time in minutes1st side 2nd side Doneness
cover the insert with aluminum foil. The exposed fatcould ignite.
Adjusting the oven temperature
Your appliance has been factory calibrated and tested toensure an accurate baking temperature. For the first fewuses, follow your recipe times and temperaturerecommendations carefully. If you thinkthe oven is cookingtoo hot or too cool for your recipe times, you can adjust thecontrol so the oven cooks hotter or cooler than thetemperature displayed.
To adjust oven temperature:
1. Press bake.
2. Set the temperature to 550°F (287°C) by pressing and
holdingthe a •
3. Within 2 seconds, press and hold bake until the 2
digit display appears. Release bake. The display now
indicates the amount of degrees offset between theoriginal factory temperature setting and the currenttemperature setting. If the oven control has the originalfactory calibration, the display will read "0."
. The temperature can now be adjusted up or down 35°F(19°C), in 5°F increments by pressing and holding the
a or V • Adjust until the desired amount of offset
appears in the display. When lowering the oventemperature, a minus sign (-) will appear before thenumber to indicate that the oven will be cooler by thedisplayed amount of degrees.
5. When you have made the desired adjustment, press
cancel, to go back to the time of day display.
Operating the oven light
The interior oven light will automatically turn ON when theoven door is opened.
Press _ to turn the interior oven light ON and OFF
whenever the oven door is closed.
The interior oven light is located at the upper left rear wal!of the oven interior and is covered with a glass shield heldby a wire holder. The glass shield must be in placewhenever the oven is in use.
To change the interior oven light, see "Changing the ovenlight" in the Care &Cleaning section.
Oven temperature adjustments made will not affect thebroil or self<leaning feature temperatures.
If the display is set for Celsius, adjustments made will be in
l°C increments each press of the A or V keys.
DO NOT USE oven thermometers such as those found ingrocery stores to checkthe temperature settings inside youroven. These oven thermometers may vary as much as 20 to40 degrees from actual temperatures.
Self=cleaning
A self-cleaning oven cleans itself with high temperatures(well above normal cooking temperatures) which eliminatesoils completely or reduces them to a fine powdered ashyou can wipe away with a damp cloth.
Adhere to the following self-clean precautions:
• DO NOT use oven cleaners or oven protectivecoatings in or around any part of the oven interior.
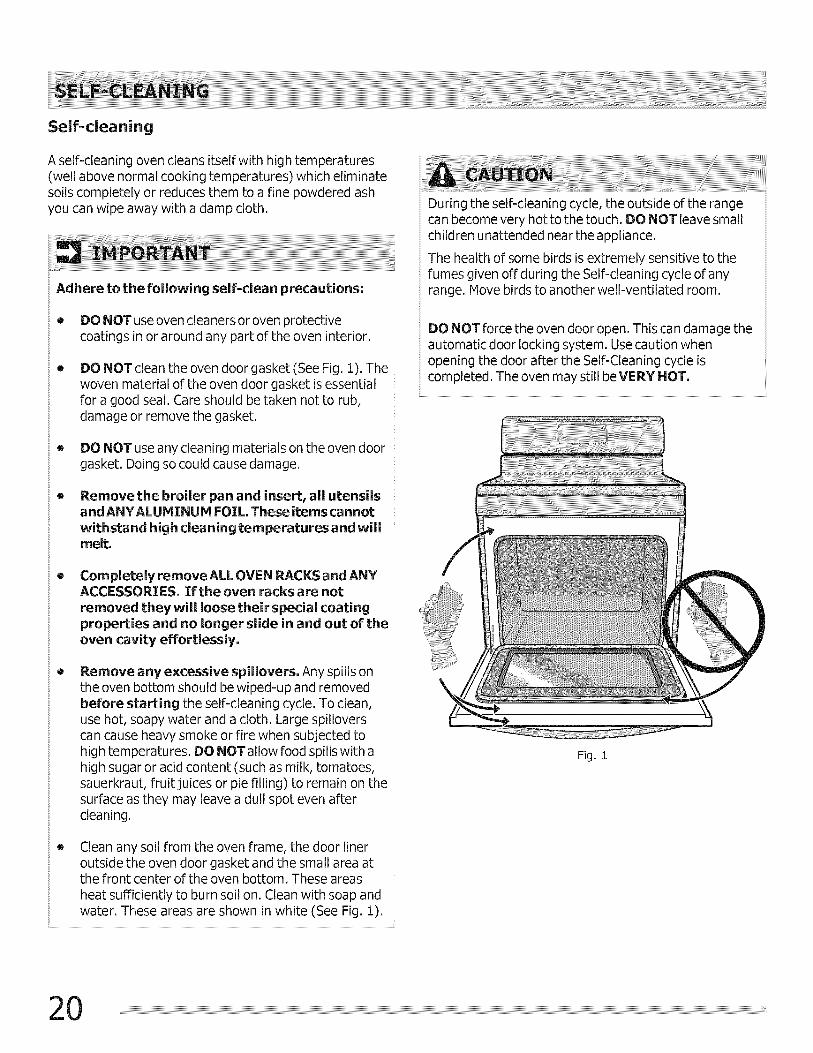
DO NOT clean the oven door gasket (See Fig. 1). Thewoven material of the oven door gasket is essentialfor a good seal. Care should be taken not to rub,damage or remove the gasket.
• DO NOT use any cleaning materials on the oven doorgasket. Doing so could cause damage.
Remove the broiler pan and insert, all utensilsand ANYALUHINUH FOIL. These items cannot
withstand high cleaning temperatures and willmelt.
Corn pletely remove ALL OVEN RACKS and ANYACCESSORIES. If the oven racks are not
removed they will loose their special coatingproperties and no longer slide in and out of theoven cavity effortlessly.
Remove any excessive spillovers. Any spills onthe oven bottom should be wiped-up and removedbefore starting the self-cleaning cycle. To clean,use hot, soapy water and a cloth. Large spilloverscan cause heavy smoke or fire when subjected tohigh temperatures. DO NOTallow food spills with ahigh sugar or acid content (such as milk, tomatoes,sauerkraut, fruit juices or pie filling) to remain on thesurface as they may leave a dull spot even aftercleaning.
Clean any soil from the oven frame, the door lineroutside the oven door gasket and the small area atthe front center of the oven bottom. These areas
heat sufficiently to burn soil on. Clean with soap andwater. These areas are shown in white (See Fig. 1).
During the self-cleaning cycle, the outside of the rangecan become very hot to the touch. DO NOT leave smallchildren unattended near the appliance.
The health of some birds is extremely sensitive to thefumes given off during the Self-cleaning cycle of anyrange. Move birds to another well-ventilated room.
DO NOT force the oven door open. This ca n damage theautomatic door locking system. Use caution whenopening the door after the Self-Cleaning cycle iscompleted. The oven may still be VERY HOT.
Fig. 1
Setting a self-clean cycle or a delayedstart self-dean cycle
To start a self-clean cycle immediately without a delay,
skip steps 2 & 3 in the instructions provided below.
Setting a self=clean cycle
1. Be sure the clock displays the correct time of day.
start2. Press time •The" : " in the time of day will flash.
3. Press and hold the A pad to scroll to the time to start
the delayed Self-Clean cycle. Release the pad when the
desired time is displayed.
4. Press selfclean ""===" appears in the display.
5. Press the A or V pad once. "3:00"will appear in
the display indicating that a 3 hour self-clean time isset. To change to a 2 hour self-clean time press
V once (2:00 appears in the display).
(Some models) To self-clean using a 4 hour clean
time press A once (4:00 appears in display).
. "CLB" will appear in the display during the self-cleancycle and the "LOCK" light will glow until the self-cleaning cycle is complete or cancelled and the oventemperature has cooled.
When the self=clean cycle has completed:1. The time of day will appear in the display window and
the "Clean" and "LOCK" light will continue to glow.2. Once the oven has cooled down for about 1 HOUR and
the "LOCK" light has gone out, the oven door can beopened.
Stopping or interrupting a self-clean cycleIf it becomes necessary to stop or interrupt a self=cleaning cycle once it has been activated:
1. Press cancel.
2.
.
Once the oven has cooled down for about 1 HOUR andthe "LOCK" light has turned off, the oven door can beopened.Restart the selfclea n cycle once all conditions havebeen corrected.
To avoid possible burns use care when opening the ovendoor after the self-cleaning cycle. Stand to the side ofthe oven when opening the door to allow hot air orsteam to escape.
DO NOT force the oven door open. This can damage theautomatic door locking system. Use caution and avoidpossible burns when opening the door after the self-cleaning cycle has completed. The oven may still beVERY HOT.
As soon as the controls are set, the motor driven lockwill begin to close automatically and the "LOCK" indicatorlight will flash. DO NOT open the oven door while thelight is flashing (it takes about 15 seconds for the oven
door to lock).
Whenever the self-clean feature is active you may checkthe amount of time remaining in the self-clean cycle by
pressing the self pad. Remember the range doorcleancannot be opened until the range has cooled sufficiently.You will need to add about 1 hour to the time
displayed before you can use the range for cooking.
When the oven is cool, wipe away any residue orpowdered ash with a damp cloth or paper towel.
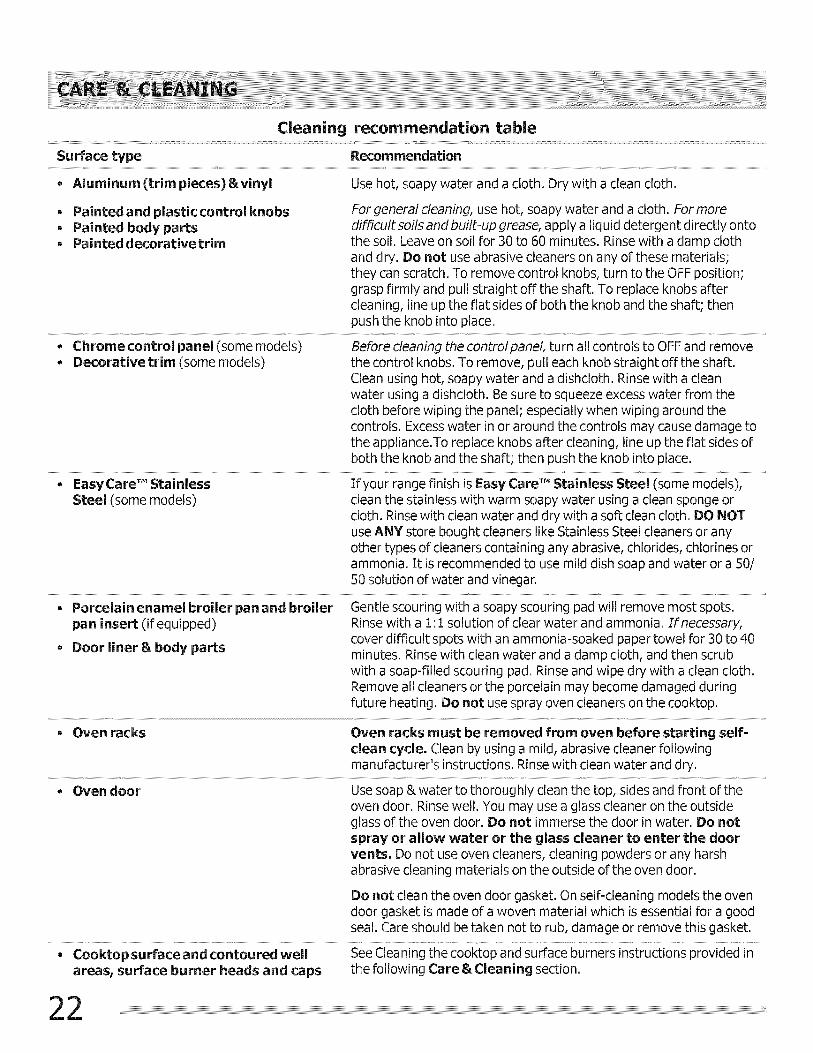
Cleaning recommendation table
Surface type Recommendation
* Aluminum (trim pieces) &vinyl Use hot, soapy water and a cloth. Dry with a clean cloth.
* Painted and plastic control knobs For general cleaning, use hot, soapy water and a cloth. For more* Painted body parts difficult soils and built-up grease, apply a liquid detergent directly onto* Painted decorativetrim the soil. Leave on soil for 30 to 60 minutes. Rinse with a damp cloth
and dry. Do not use abrasive cleaners on any of these materials;they can scratch. To remove control knobs, turn to the OFF position;grasp firmly and pull straight off the shaft. To replace knobs aftercleaning, line up the flat sides of both the knob and the shaft; thenpush the knob into place.
* Chrome control panel (some models) Before cleaning the controlpanel, turn all controls to OFF and remove* Decorative trim (some models) the control knobs. To remove, pull each knob straight off the shaft.
Clean using hot, soapy water and a dishcloth. Rinse with a cleanwater using a dishcloth. Be sure to squeeze excess water from thecloth before wiping the panel; especially when wiping around thecontrols. Excess water in or around the controls may cause damage tothe appliance.To replace knobs after cleaning, line up the flat sides ofboth the knob and the shaft; then push the knob into place.
* EasyCare "MStainless If your range finish is Easy Care "MStainless Steel (some models),Steel (some models) clean the stainless with warm soapy water using a clean sponge or
cloth. Rinse with clean water and dry with a soft clean cloth. DO NOTuse ANY store bought cleaners like Stainless Steel cleaners or anyother types of cleaners containing any abrasive, chlorides, chlorinesorammonia. It is recommended to use mild dish soap and water or a 50/50 solution of water and vinegar.
* Porcelain enamel broiler pan and broiler Gentle scouring with a soapy scouring pad will remove most spots.pan insert (if equipped) Rinse with a 1:1 solution of clear water and ammonia. Zfnecessary,
cover difficult spots with an ammonia-soaked paper towel for 30 to 40* Door liner & body parts minutes. Rinse with clean water and a damp cloth, and then scrub
with a soap-filled scouring pad. Rinse and wipe dry with a clean cloth.Remove all cleaners or the porcelain may become damaged duringfuture heating. Do not use spray oven cleaners on the cooktop.
* Oven racks Oven racks must be removed from oven before starting self=clean cycle. Clean by using a mild, abrasive cleaner followingmanufacturer's instructions. Rinse with clean water and dry.
* Oven door Use soap & water to thoroughly clean the top, sides and front of theoven door. Rinse well. You may use a glass cleaner on the outsideglass of the oven door. Do not immerse the door in water. Do notspray or allow water or the glass cleaner to enter the doorvents, Do not use oven cleaners, cleaning powders or any harshabrasive cleaning materials on the outside of the oven door.
Do not clean the oven door gasket. On self-cleaning models the ovendoor gasket is made of a woven material which is essential for a goodseal. Care should be taken not to rub, damage or remove this gasket.
areas, surface burner heads and caps the following Care &Cleaning section.
Cleaning the cooktop and surface burners
[i
To avoid possible burns use care when cleaning thecooktop. DO NOT attempt to clean the cooktop wheneverthe cooktop or burner heads are still hot.
To avoid possible burns DO NOTattempt any of thecleaning instructions provided below before turning OFF
all of the surface burners and allow them to cool.
The cooktop and surface burners are designed to makecleaning easier. Since cooktop surface burners are sealed,cleanups are easy when spillovers are cleaned upimmediately. Routinely clean the cooktop. Wipe with a clean,damp cloth and wipe dry to avoid scratches. The contouredwell areas and burner drip pans (some models) should befrequently cleaned also.
Keeping the burner head ports and slots clean will preventimproper ignition and an uneven flame. Refer to the followingsections for further instructions.
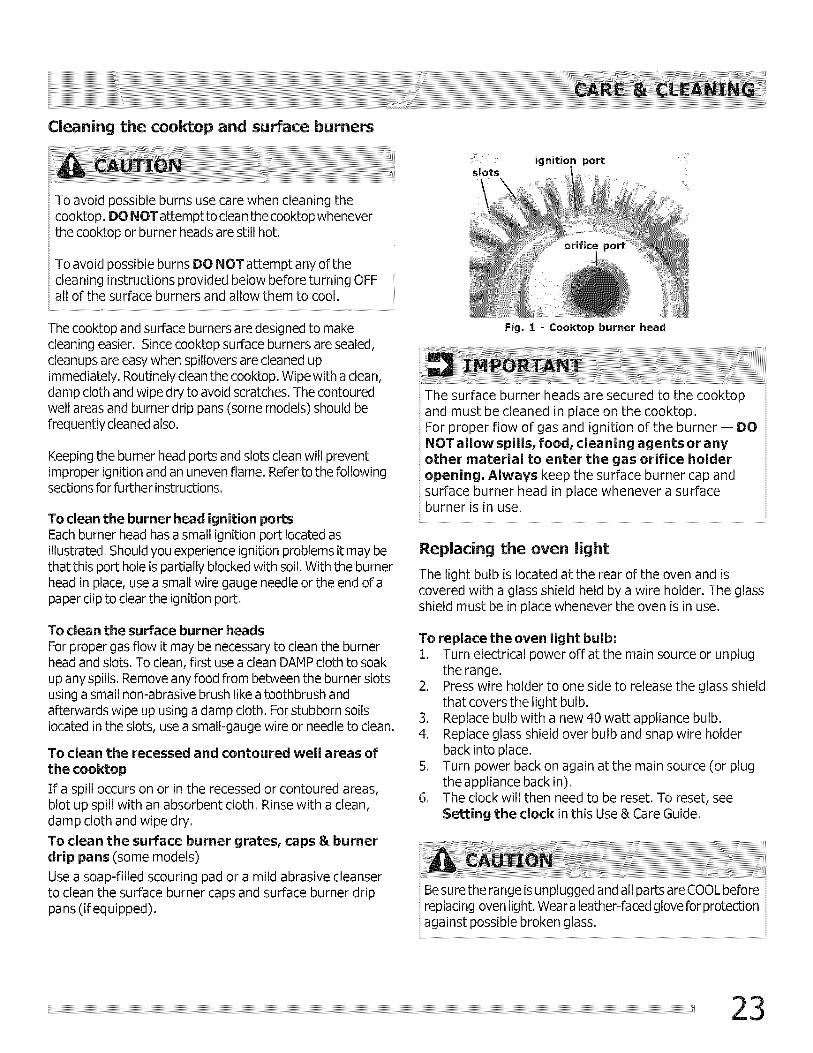
To clean the burner head ignition portsEach burner head has a small ignition port located asillustrated. Should you experience ignition problems it may bethat this port hole is partially blocked with soil. With the burnerhead in place, use a small wire gauge needle or the end of apaper clipto clear the ignition port.
To clean the surface burner headsFor proper gas flow it may be necessary to clean the burnerhead and slots. To clean, first use a clean DAMPcloth to soakup any spills. Remove any food from between the burner slotsusing a small non-abrasive brush like a toothbrush andafterwards wipe up using a damp cloth. For stubborn soilslocated in the slots, use a small-gauge wire or needle to clean.
To clean the recessed and contoured well areas ofthe cooktop
If a spill occurs on or in the recessed or contoured areas,blot up spill with an absorbent cloth. Rinse with a clean,damp cloth and wipe dry.
To clean the surface burner grates, caps & burnerdrip pans (some models)
Use a soap-filled scouring pad or a mild abrasive cleanserto clean the surface burner caps and surface burner drippans (if equipped).
ignitio
Fig, i - Cool(top burner head
The surface burner heads are secured to the cooktopand must be cleaned in place on the cooktop.For proper flow of gas and ignition of the burner J DONOT allow spills, food, cleaning agents or anyother material to enter the gas orifice holderopening. Always keep the surface burner cap andsurface burner head in place whenever a surface
burner is in use.
Replacing the oven light
The light bulb is located atthe rear of the oven and iscovered with a glass shield held by a wire holder. The glassshield must be in place whenever the oven is in use.
To replace the oven light bulb:1. Turn electrical power off at the main source or unplug
the range.2. Press wire holder to one side to release the glass shield
that covers the light bulb.3. Replace bulb with a new 40 watt appliance bulb.4. Replace glass shield over bulb and snap wire holder
back into place.S. Turn power back on again at the main source (or plug
the appliance back in).6. The clock will then need to be reset. To reset, see
Setting the clock in this Use & Care Guide.
Besure the range is unplugged and all parts are COOL beforereplacing oven light. Wear a leather-faced glove for protection
against possible broken glass.

Removing and replacing the lift-off oven door
The door is heavy. For safe, temporary storage, lay the door
flat with the inside of the door facing down.
To remove oven door:1. Open oven door completely (horizontal with floor- See
Fig. 1).2. Pullthedoorhingelockson bothleftand rightdoor
hinges down from the oven frame completely towardsthe oven door (See Fig. 2). A tool such as a small flat-blade screwdriver may be required.
3. Firmly grasp both sides of oven door along the doorsides (Do not use the oven door handle - See Fig. 3).
4. Close the door to the broil stop position (the oven doorwill stop into this position just before fully closing).
5. With the oven door in the broil stop position, lift theoven door hinge arms over the roller pins located oneach side of the oven frame (See Fig. 4).
To replace oven door:1. Firmly grasp both sides of oven door along the door
sides (Do not use the oven door handle - See Fig. 3).2. Holding the oven door at the same angle as the removal
position, seat the hook of the hinge arm over the rollerpins located on each side of the oven door frame (SeeFig. 4). The hook of the hinge arms must be fullyseated onto the roller pins.
3. Fully open the oven door (horizontal with floor - SeeFig.1).
4. Push the door hinge locks up towards and into the ovenframe on both left and right oven door hinges (See Fig.2) to the locked position.
5. Close the oven door.
Special door care instructions = Most oven doorscontain glass that can break.
Read the following recommendations:1. Do not close the oven door until all the oven racks are
fully in place.2. Do not hit the glass with pots, pans, or any other
object.3. Scratching, hitting, jarring or stressing the glass may
weaken its structure causing an increased risk ofbreakage at a later time.
Fig, I
Fig. 2
OvenDoor
DoorHinge
Fig. 3
Fig. 4-
Oven door
hingelocationswith oven doorfully open,
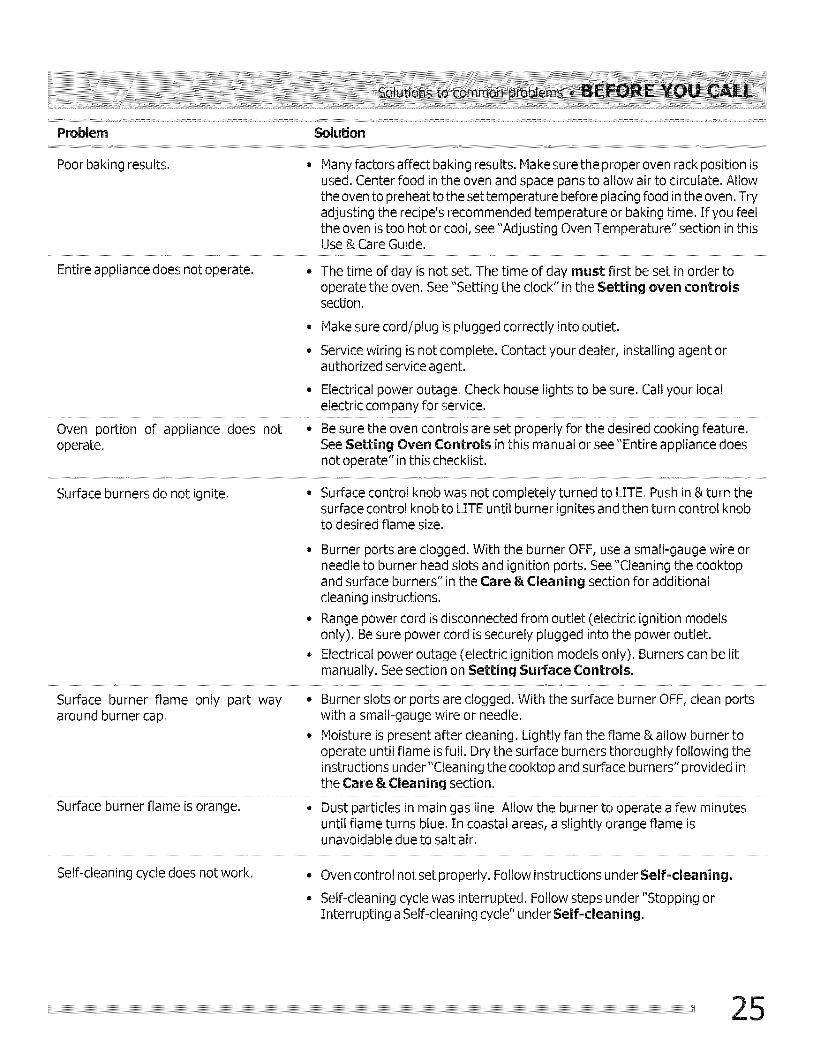
Problem Solution
Poor baking resu Its, o Many factors affect baking resu Its. Make su re the proper oven rack position isused. Center food in the oven and space pans to allow air to circulate. Allowthe oven to preheat to the set temperature before placing food in the oven, Tryadjusting the recipe's recommended temperature or baking time. If you feelthe oven is too hot or cool, see "Adjusting Oven Temperature" section in thisUse & Care Guide.
Entire appliance does not operate, o The time of day is not set. The time of day must first be set in order tooperate the oven, See "Setting the clock" in the Setting oven controlssection.
Make sure cord/plug is plugged correctly into outlet.
- Service wiring is not complete. Contact your dealer, installing agent orauthorized service agent.
Electrical power outage. Check house lights to be sure. Call your localelectric company for service.
Oven portion of appliance does not - Be sure the oven controls are set properly for the desired cooking feature.operate. See Setting Oven Controls in this manual or see "Entire appliance does
not operate" in this checklist.
Surface burners do not ignite, o Surface control knob was not completely turned to LITE. Push in &turn thesurface control knob to LITE until burner ignites and then turn control knobto desired flame size.
Burner ports are clogged. With the burner OFF, use a small-gauge wire orneedle to burner head slots and ignition ports. See"Cleaning the cooktopand surface burners" in the Care &Cleaning section for additionalcleaning instructions.
- Range power cord is disconnected from outlet (electric ignition modelsonly). Be sure power cord is securely plugged into the power outlet.
Electrical power outage (electric ignition models only). Burners can be litmanually. See section on Setting Surface Controls.
Surface burner flame only part way _ Burner slots or ports are clogged. With the surface burner OFF, clean portsaround burner cap. with a small-gauge wire or needle.
Moisture is present after cleaning. Lightly fan the flame & allow burner tooperate until flame is full. Dry the surface burners thoroughly following theinstructions under"Cleaning the cooktop and surface burners" provided inthe Care &Cleaning section.
Surface burner flame is orange. - Dust particles in main gas line. Allow the burner to operate a few minutesuntil flame turns blue. In coastal areas, a slightly orange flame isunavoidable due to salt air.
Self-cleaning cycle does not work. Oven control not set properly. Follow instructions under Self=cleaning.
Self-cleaning cycle was interrupted. Follow steps under "Stopping orInterrupting a Self-cleaning cycle"under Self-cleaning.
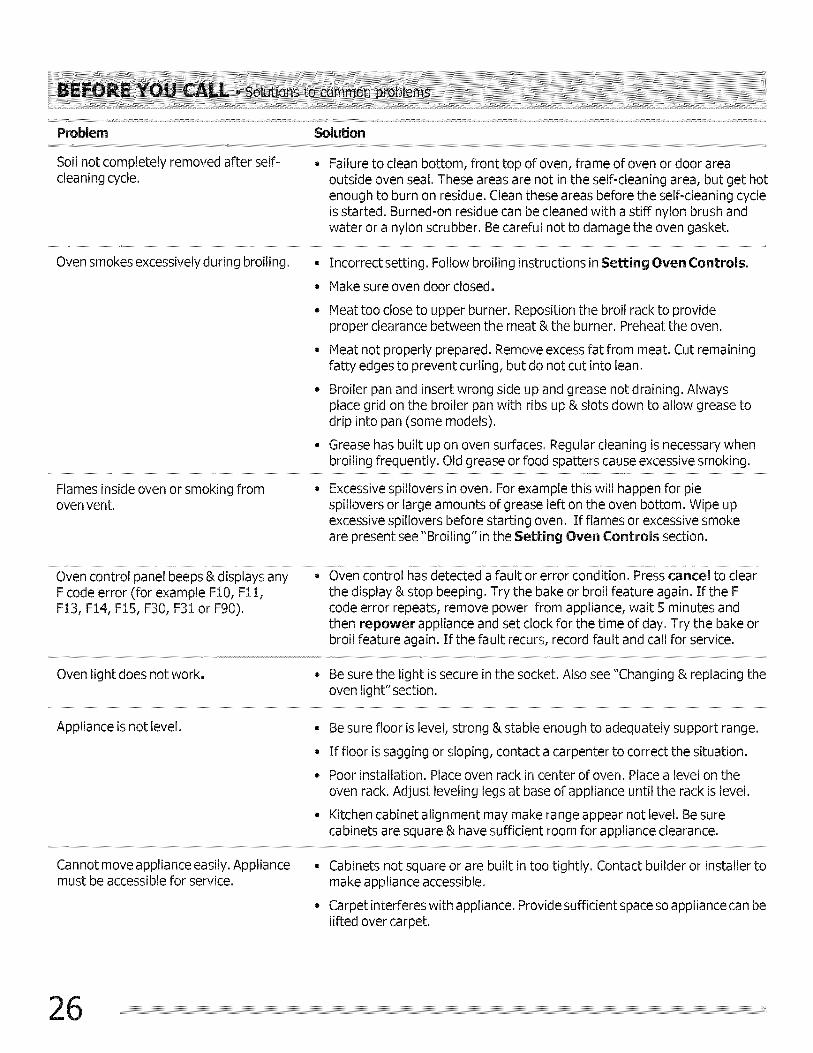
Problem Solution
Soil not completely removed after self-cleaning cycle.
Failure to clean bottom, front top of oven, frame of oven or door areaoutside oven seal. These areas are not in the self-cleaning area, but get hotenough to burn on residue. Clean these areas before the self-cleaning cycleis started. Burned-on residue can be cleaned with a stiff nylon brush andwater or a nylon scrubber. Be careful not to damage the oven gasket.
Oven smokes excessively during broiling, o Incorrect setting. Follow broiling instructions in Setting Oven Controls.
- Hake sure oven door closed.
- Heat too close to upper burner. Reposition the broil rack to provideproper clearance between the meat & the burner. Preheat the oven.
Heat not properly prepared. Remove excess fat from meat. Cut remainingfatty edges to prevent curling, but do not cut into lean.
Broiler pan and insert wrong side up and grease not draining. Alwaysplace grid on the broiler pan with ribs up & slots down to allow grease todrip into pan (some models).
Grease has built up on oven surfaces. Regular cleaning is necessary whenbroiling frequently. Old grease or food spatters cause excessive smoking.
Flames inside oven or smoking from o Excessive spillovers in oven. For example this will happen for pieoven vent. spillovers or large amounts of grease left on the oven bottom. Wipe up
excessive spillovers before starting oven. If flames or excessive smokeare present see "Broiling" in the Setting Oven Controls section.
F code error (for example F10, F11, the display & stop beeping. Try the bake or broil feature again. If the FF13, FI_, F15, F30, F31 or F90). code error repeats, remove power from appliance, wait 5 minutes and
then repower appliance and set clock for the time of day. Try the bake orbroil feature again. If the fault recurs, record fault and call for service.
Oven light does not work. Be sure the light is secure in the socket. Also see "Changing & replacing theoven light" section.
Appliance is not level. _ Be sure floor is level, strong & stable enough to adequately support range.
If floor is sagging or sloping, contact a carpenter to correct the situation.
Poor installation. Place oven rack in center of oven. Place a level on the
oven rack. Adjust leveling legs at base of appliance until the rack is level.
Kitchen cabinet alignment may make range appear not level. Be surecabinets are square & have sufficient room for appliance clearance.
Cannot move appliance easily. Appliance _ Cabinets not square or are built in too tightly. Contact builder or installer tomust be accessible for service, make appliance accessible.
Carpet interferes with appliance. Provide sufficient space so appliance can belifted over carpet.
Yourapplianceis coveredbya oneyearlimitedwarranty.Foroneyearfromyouroriginaldateofpurchase,Electroluxwill payallcostsfor repairingor replacinganypartsof thisappliancethat provetobedefectivein materialsorworkmanshipwhensuchapplianceis installed,usedand maintainedinaccordancewith the providedinstructions.Exclusions This warranty does not cover the following :
1. Products with original serial numbers that have been removed, altered or cannot be readily determined.
2. Product that has been transferred from its original owner to another party or removed outside the USA orCanada.
3. Rust on the interior or exterior of the unit.
4. Products purchased "as-is" are not covered by this warranty.
5. Food loss due to any refrigerator or freezer failures.
6. Products used in a commercial setting.
7. Service calls which do not involve malfunction or defects in materials or workmanship, or for appliancesnot in ordinary household use or used other than in accordance with the provided instructions.
8. Service calls to correct the installation of your appliance or to instruct you how to use your appliance.
9. Expenses for making the appliance accessible for servicing, such as removal of trim, cupboards, shelves,etc., which are not a part of the appliance when it is shipped from the factory.
10. Service calls to repair or replace appliance light bulbs, air filters, water filters, other consumables, orknobs, handles, or other cosmetic parts.
11. Surcharges including, but not limited to, any after hour, weekend, or holiday service calls, tolls, ferry tripcharges, or mileage expense for service calls to remote areas, including the state of Alaska.
12. Damages to the finish of appliance or home incurred during installation, including but not limited to floors,cabinets, walls, etc.
13. Damages caused by: services performed by unauthorized service companies; use of parts other thangenuine Electrolux parts or parts obtained from persons other than authorized service companies; orexternal causes such as abuse, misuse, inadequate power supply, accidents, fires, or acts of God.
DISCLAIMER OF IMPLIED WARRANTIES; LIMITATION OF REMEDIE S
CUSTOMER'S SOLE AND EXCLUSIVE REMEDY UNDER THIS LIMITED WARRANTY SHALL BE PRODUCTREPAIR OR REPLACEMENT AS PROVIDED HEREIN. CLAIMS BASED ON IMPLIED WARRANTIES,INCLUDING WARRANTIES OF MERCHANTABILITY OR FITNESS FOR A PARTICULAR PURPOSE, ARELIMITED TO ONE YEAR OR THE SHORTEST PERIOD ALLOWED BY LAW, BUT NOT LESS THAN ONE YEAR.ELECTROLUX SHALL NOT BE LIABLE FOR CONSEQUENTIAL OR INCIDENTAL DAMAGES SUCH ASPROPERTY DAMAGE AND INCIDENTAL EXPENSES RESULTING FROM ANY BREACH OF THIS WRITTENLIMITED WARRANTY OR ANY IMPLIED WARRANTY. SOME STATES AND PROVINCES DO NOT ALLOW THEEXCLUSION OR LIMITATION OF INCIDENTAL OR CONSEQUENTIAL DAMAGES, OR LIMITATIONS ON THEDURATION OF IMPLIED WARRANTIES, SO THESE LIMITATIONS OR EXCLUSIONS MAY NOT APPLY TOYOU. THIS WRI-i-i-EN WARRANTY GIVES YOU SPECIFIC LEGAL RIGHTS. YOU MAY ALSO HAVE OTHERRIGHTS THAT VARY FROM STATE TO STATE.
If You NeedService
Keep your receipt, delivery slip, or some other appropriate payment record to establish the warranty periodshould service be required. If service is performed, it is in your best interest to obtain and keep all receipts.Service under this warranty must be obtained by contacting Electrolux at the addresses or phonenumbers below.
This warranty only applies in the USA and Canada. In the USA, your appliance is warranted by Electrolux Major AppliancesNorth America, a division of Electrolux Home Products, Inc. In Canada, your appliance is warranted by Electrolux CanadaCorp. Electrolux authorizes no person to change or add to any obligations under this warranty. Obligations for service andparts under this warranty must be performed by Electrolux or an authorized service company. Product features orspecifications as described or illustrated are subject to change without notice.
USA1.800.944.9044
Electrolux Major AppliancesNorth AmericaP.O. Box 212378
Augusta, GA 30907
ElectroluxCanada
1.800.265.8352
Electrolux Canada Corp.
5855 Terry Fox WayMississauga, Ontario, Canada
L5V 3E4