Embed Size (px)
Citation preview

Update February 2018 1
BDI-2 Data Manager™ Guide to Use for the South Dakota Birth-to-Five
Child Outcomes Measurement System
The Data Manager is a product of Riverside Publishing
3800 Golf Road, Suite 100 • Rolling Meadows, IL 60008
Phone: 800.323.9540 • Web: www.riversidepublishing.com
Update February 2018 2
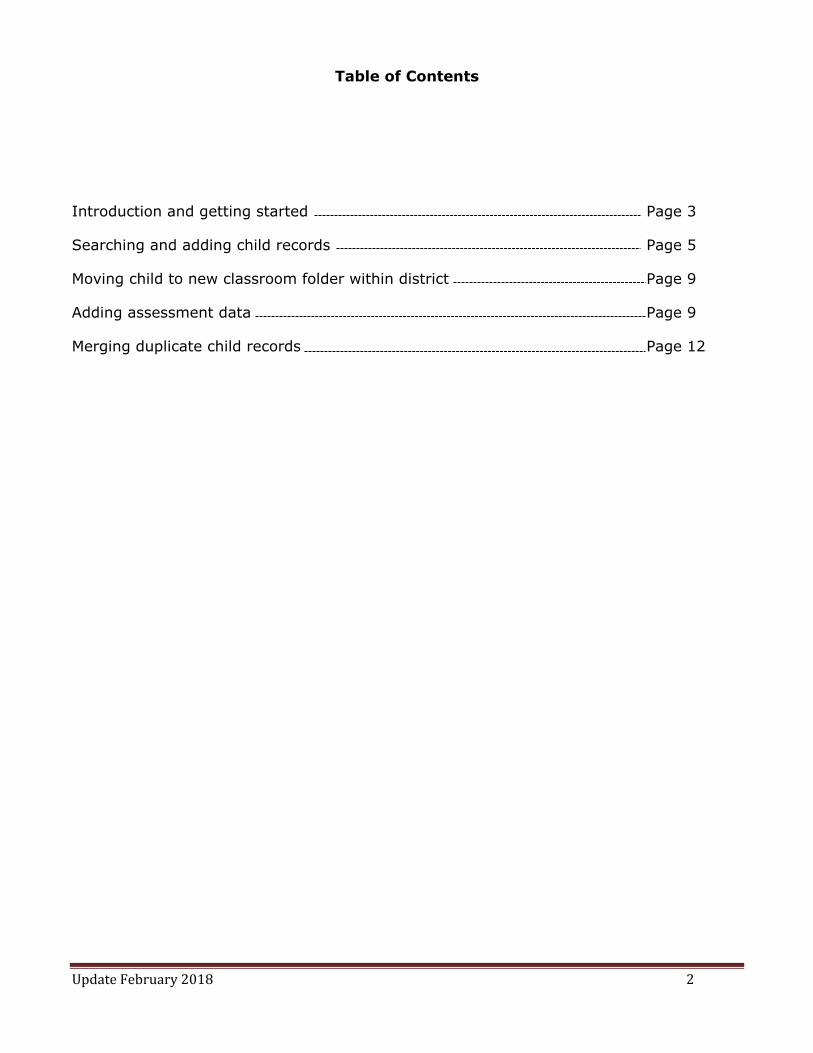
Table of Contents
Introduction and getting started Page 3
Searching and adding child records Page 5
Moving child to new classroom folder within district Page 9
Adding assessment data Page 9
Merging duplicate child records Page 12
Update February 2018 3
Introduction and Getting Started
The Battelle Developmental Inventory™, 2nd Edition, (BDI-2™) is an early childhood
assessment instrument based on the concept of developmental milestones. As a child
develops, he or she typically attains critical skills and behaviors sequentially, from simple
to complex. BDI-2 helps measure a child’s progress along this developmental continuum by both global domains and discrete skill sets in the following areas: Adaptive, Personal-
Social, Communication, Motor, and Cognitive.
This manual is intended for users of the BDI-2 Data Manager in the South Dakota Birth-
to-Five Child Outcomes Measurement System. Data collected will be used to report on
Indicator 3 (Part C) and Indicator 7 (Part B) of the State Performance Plan. These
indicators relate to outcomes for preschool children with disabilities. South Dakota is
required to report on whether preschool children with disabilities are making progress in:
1. Social/emotional skills
2. Skills related to the acquisition and use of knowledge (to include communication and early literacy skills), and
3. The use of appropriate behaviors to meet their needs (adaptive skills).
Each user is assigned a login and password depending on the functions they need to
perform and the data they are entitled to access.
Benefits
New items based on the current best practices in early childhood standards Clear, comprehensive norms, sensitive to the rapid development of children
Clear, comprehensive scripted Interview items with follow-up probes designed to provide complete information of the child’s development
Flexible administration allows for use by a team of professionals
Expanded range of items in all domains to measure development from birth through
7.11 years
CD-Rom and Web-based computer scoring options give a wide range of reports from which to choose
BDI-2 Spanish version also available
Ideal for universal screening in problem-solving models like Response to
Intervention (RTI)
Update February 2018 4
Technical Support
For technical assistance regarding use of the Data Manager, please use the following
contact information:
E-mail: [email protected]
Phone: 800.323.9540 ext 6070
Hours: Monday-Friday 8AM to 6PM CT
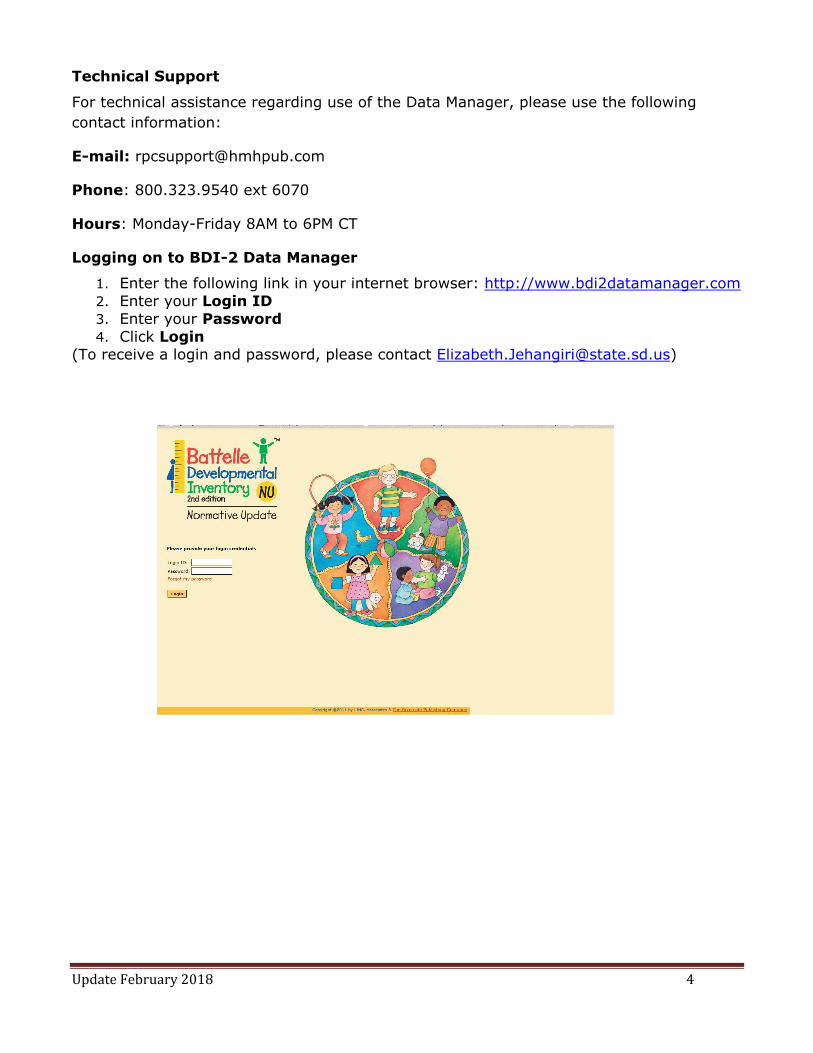
Logging on to BDI-2 Data Manager
1. Enter the following link in your internet browser: http://www.bdi2datamanager.com
2. Enter your Login ID
3. Enter your Password
4. Click Login
(To receive a login and password, please contact [email protected])
Update February 2018 5
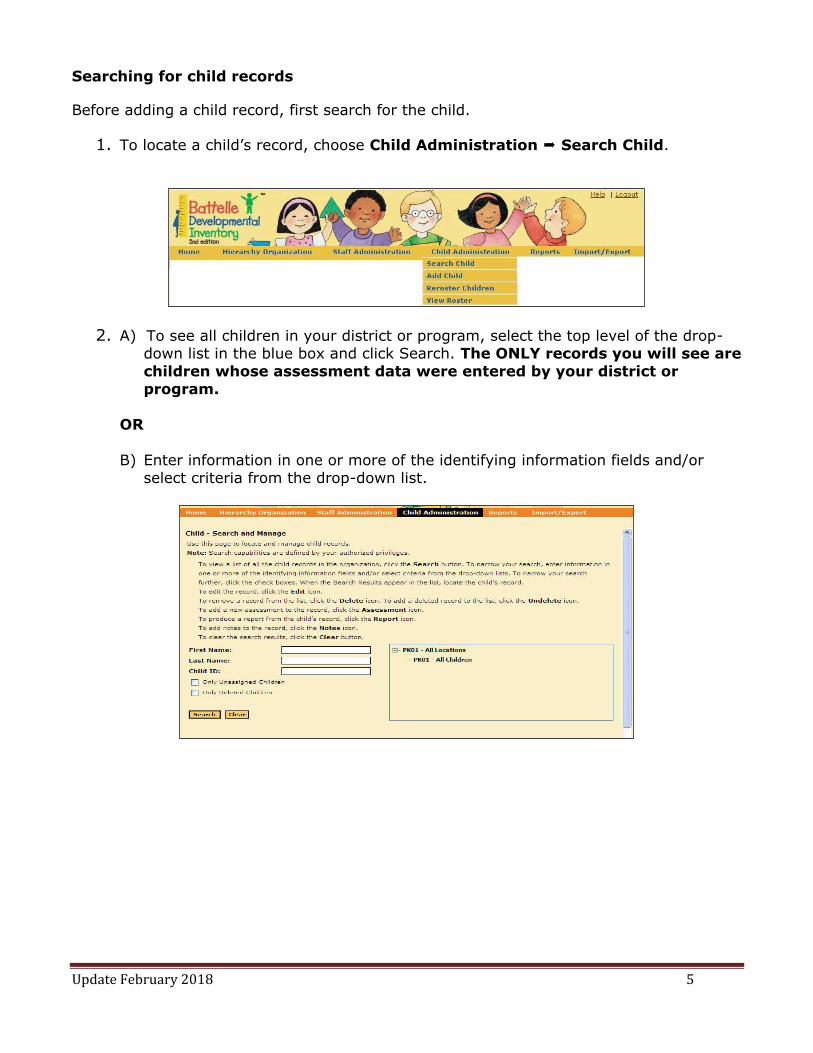
Searching for child records
Before adding a child record, first search for the child.
1. To locate a child’s record, choose Child Administration Search Child.
2. A) To see all children in your district or program, select the top level of the drop-down list in the blue box and click Search. The ONLY records you will see are
children whose assessment data were entered by your district or
program.
OR
B) Enter information in one or more of the identifying information fields and/or
select criteria from the drop-down list.
Update February 2018 6
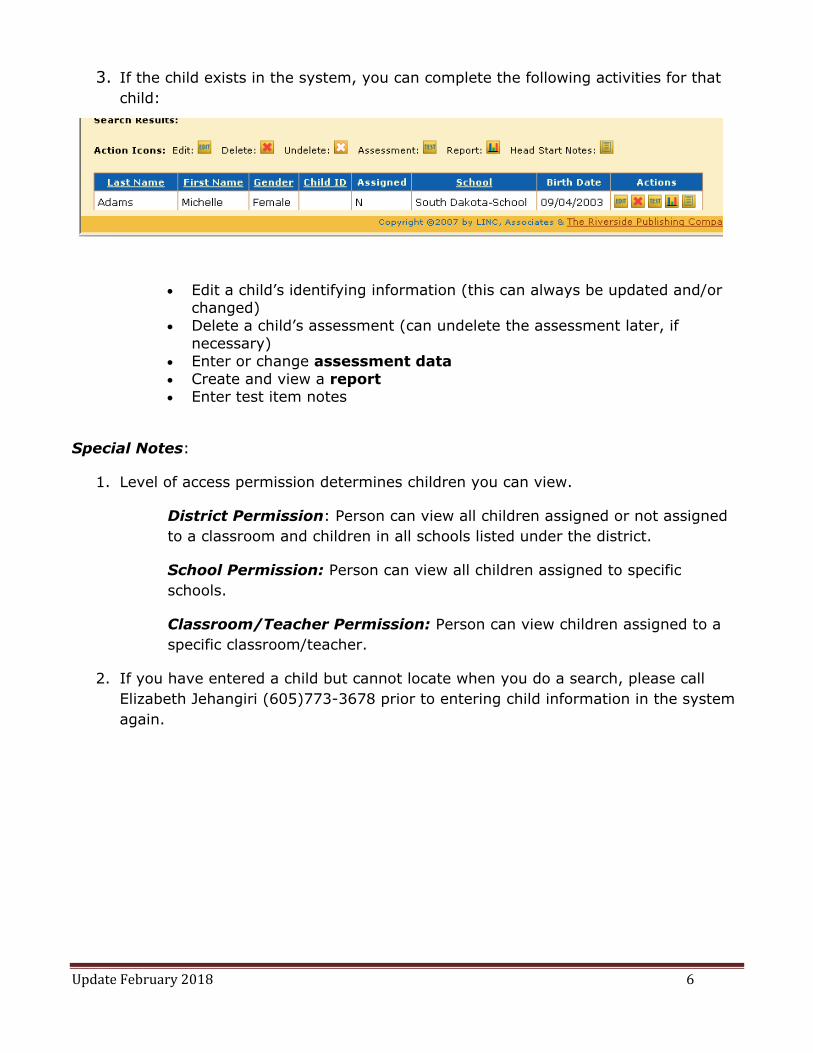
3. If the child exists in the system, you can complete the following activities for that
child:
Edit a child’s identifying information (this can always be updated and/or
changed)
Delete a child’s assessment (can undelete the assessment later, if
necessary)
Enter or change assessment data
Create and view a report Enter test item notes
Special Notes:
1. Level of access permission determines children you can view.
District Permission: Person can view all children assigned or not assigned
to a classroom and children in all schools listed under the district.
School Permission: Person can view all children assigned to specific
schools.
Classroom/Teacher Permission: Person can view children assigned to a
specific classroom/teacher.
2. If you have entered a child but cannot locate when you do a search, please call
Elizabeth Jehangiri (605)773-3678 prior to entering child information in the system
again.
Update February 2018 7
Adding child records
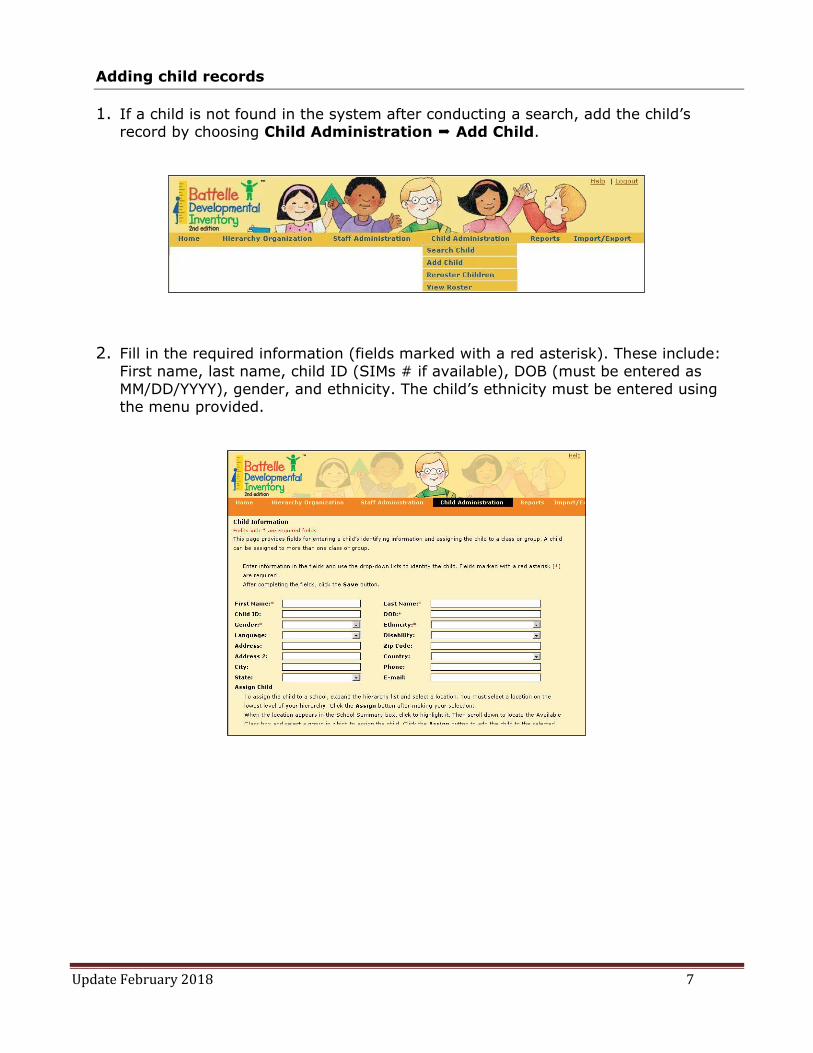
1. If a child is not found in the system after conducting a search, add the child’s record by choosing Child Administration Add Child.
2. Fill in the required information (fields marked with a red asterisk). These include:
First name, last name, child ID (SIMs # if available), DOB (must be entered as
MM/DD/YYYY), gender, and ethnicity. The child’s ethnicity must be entered using the menu provided.
Update February 2018 8
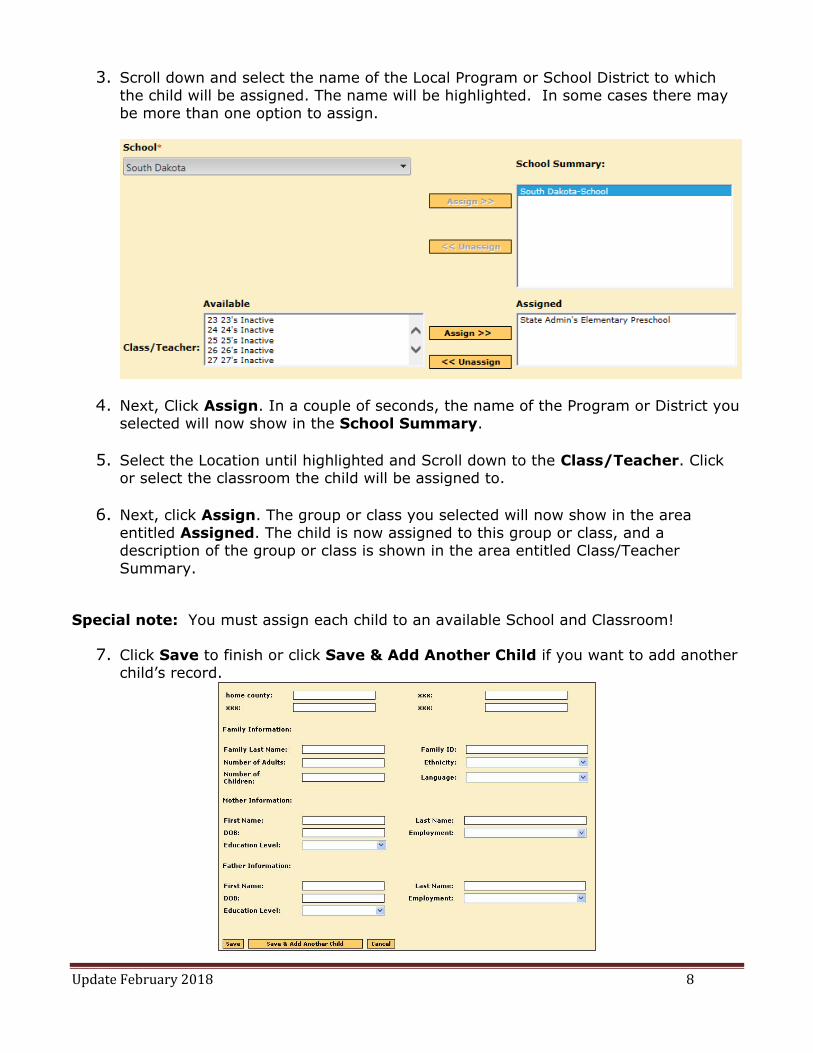
3. Scroll down and select the name of the Local Program or School District to which
the child will be assigned. The name will be highlighted. In some cases there may be more than one option to assign.
4. Next, Click Assign. In a couple of seconds, the name of the Program or District you selected will now show in the School Summary.
5. Select the Location until highlighted and Scroll down to the Class/Teacher. Click or select the classroom the child will be assigned to.
6. Next, click Assign. The group or class you selected will now show in the area
entitled Assigned. The child is now assigned to this group or class, and a description of the group or class is shown in the area entitled Class/Teacher
Summary.
Special note: You must assign each child to an available School and Classroom!
7. Click Save to finish or click Save & Add Another Child if you want to add another child’s record.
Update February 2018 9
Moving a child to a different classroom or school within the district
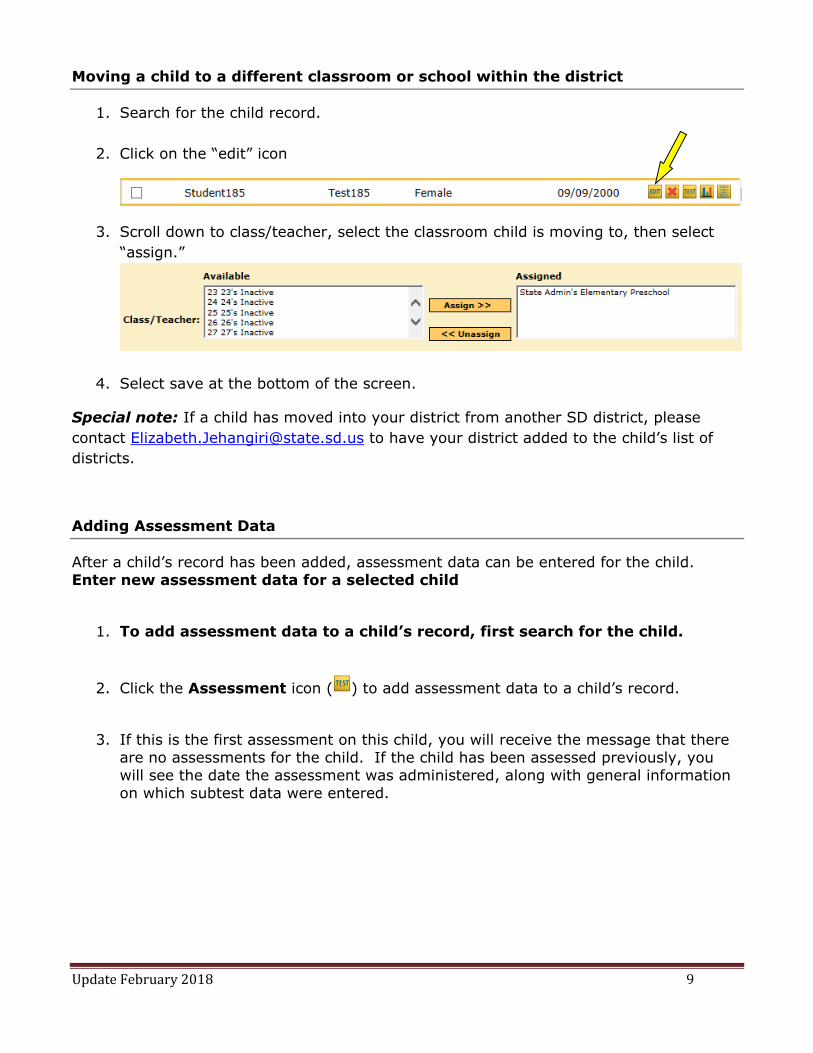
1. Search for the child record.
2. Click on the “edit” icon
3. Scroll down to class/teacher, select the classroom child is moving to, then select
“assign.”
4. Select save at the bottom of the screen.
Special note: If a child has moved into your district from another SD district, please
contact [email protected] to have your district added to the child’s list of
districts.
Adding Assessment Data
After a child’s record has been added, assessment data can be entered for the child.
Enter new assessment data for a selected child
1. To add assessment data to a child’s record, first search for the child.
2. Click the Assessment icon ( ) to add assessment data to a child’s record.
3. If this is the first assessment on this child, you will receive the message that there
are no assessments for the child. If the child has been assessed previously, you
will see the date the assessment was administered, along with general information
on which subtest data were entered.
Update February 2018 10
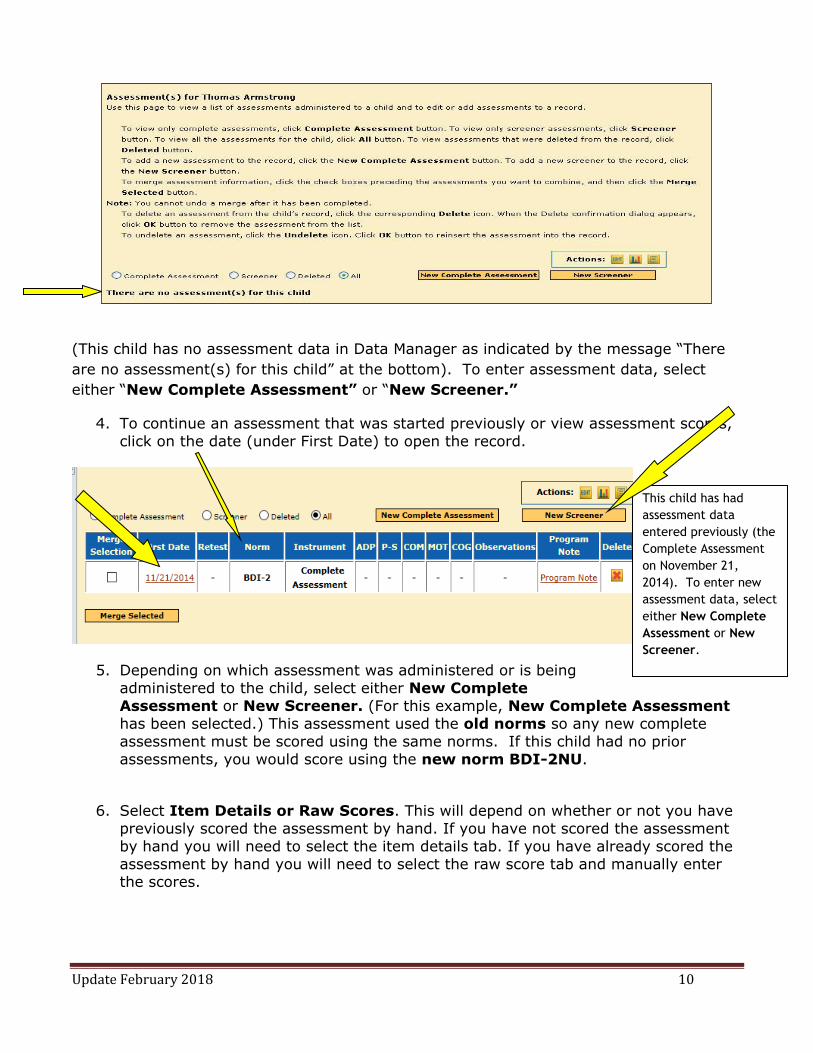
(This child has no assessment data in Data Manager as indicated by the message “There
are no assessment(s) for this child” at the bottom). To enter assessment data, select
either “New Complete Assessment” or “New Screener.”
4. To continue an assessment that was started previously or view assessment scores,
click on the date (under First Date) to open the record.
5. Depending on which assessment was administered or is being
administered to the child, select either New Complete
Assessment or New Screener. (For this example, New Complete Assessment
has been selected.) This assessment used the old norms so any new complete
assessment must be scored using the same norms. If this child had no prior
assessments, you would score using the new norm BDI-2NU.
6. Select Item Details or Raw Scores. This will depend on whether or not you have
previously scored the assessment by hand. If you have not scored the assessment
by hand you will need to select the item details tab. If you have already scored the
assessment by hand you will need to select the raw score tab and manually enter the scores.
This child has had
assessment data
entered previously (the
Complete Assessment
on November 21,
2014). To enter new
assessment data, select
either New Complete
Assessment or New
Screener.
Update February 2018 11
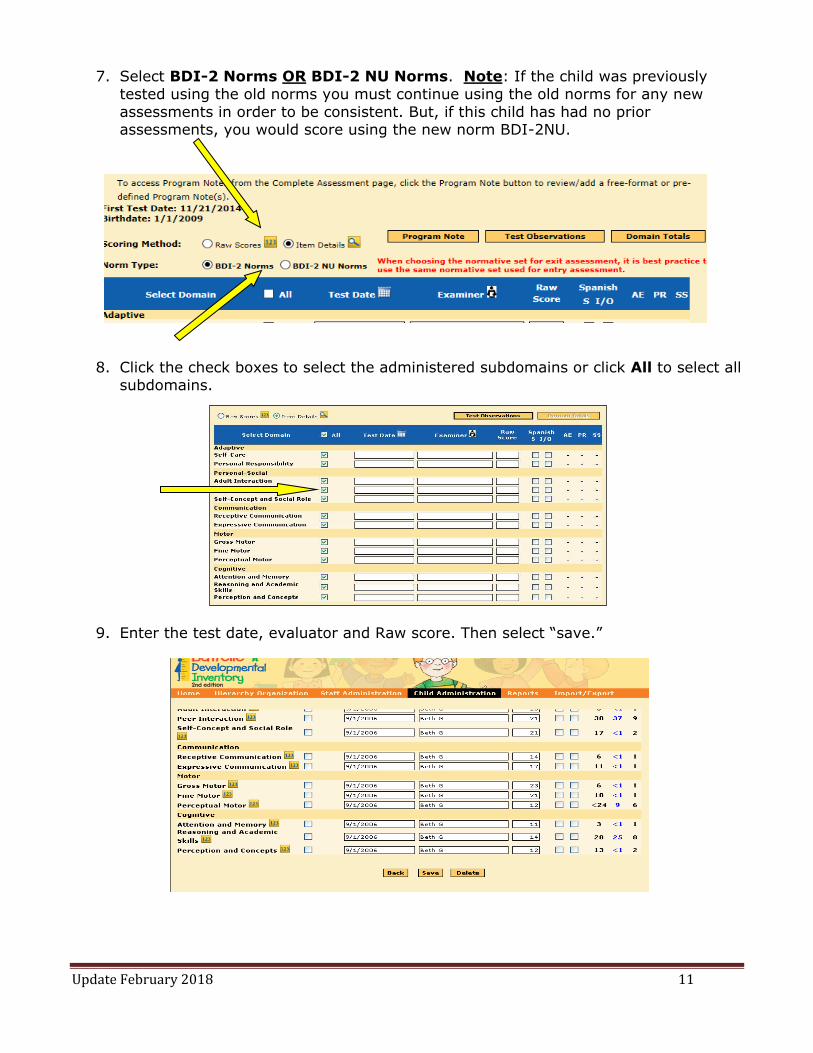
7. Select BDI-2 Norms OR BDI-2 NU Norms. Note: If the child was previously
tested using the old norms you must continue using the old norms for any new
assessments in order to be consistent. But, if this child has had no prior assessments, you would score using the new norm BDI-2NU.
8. Click the check boxes to select the administered subdomains or click All to select all
subdomains.
9. Enter the test date, evaluator and Raw score. Then select “save.”
Update February 2018 12
Entering the Program Note
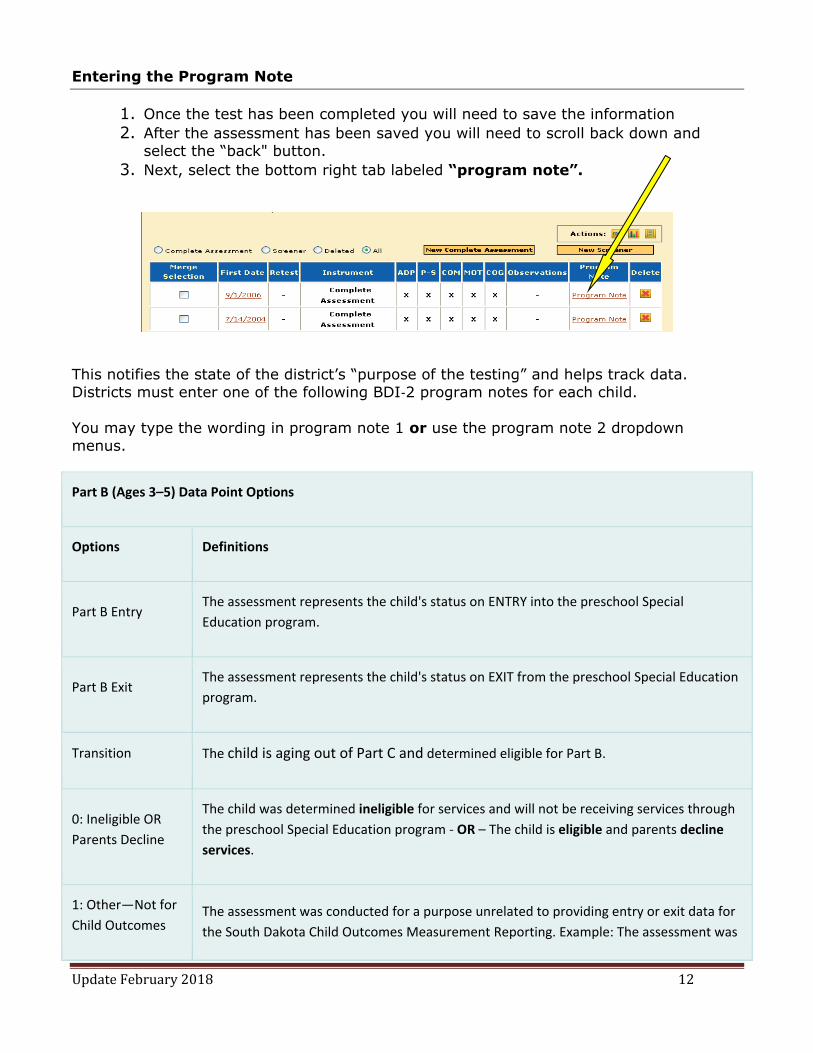
1. Once the test has been completed you will need to save the information
2. After the assessment has been saved you will need to scroll back down and select the “back" button.
3. Next, select the bottom right tab labeled “program note”.
This notifies the state of the district’s “purpose of the testing” and helps track data.
Districts must enter one of the following BDI‐2 program notes for each child.
You may type the wording in program note 1 or use the program note 2 dropdown
menus.
Part B (Ages 3–5) Data Point Options
Options Definitions
Part B Entry The assessment represents the child's status on ENTRY into the preschool Special
Education program.
Part B Exit The assessment represents the child's status on EXIT from the preschool Special Education
program.
Transition The child is aging out of Part C and determined eligible for Part B.
0: Ineligible OR
Parents Decline
The child was determined ineligible for services and will not be receiving services through
the preschool Special Education program - OR – The child is eligible and parents decline
services.
1: Other—Not for
Child Outcomes The assessment was conducted for a purpose unrelated to providing entry or exit data for
the South Dakota Child Outcomes Measurement Reporting. Example: The assessment was

Update February 2018 13
conducted as a part of ongoing progress monitoring.
Program notes must be entered exactly as stated above. No additional words or
word variations will be accepted.
Merging duplicate child records
1. To merge a child’s record you must go to “View Roster”
2. Select the classroom that the duplicate child records are in and a list of children in
that classroom will appear below.
3. Select the two child records you want to merge (only two can be merged at a time)
then select “merge selected.”
Update February 2018 14
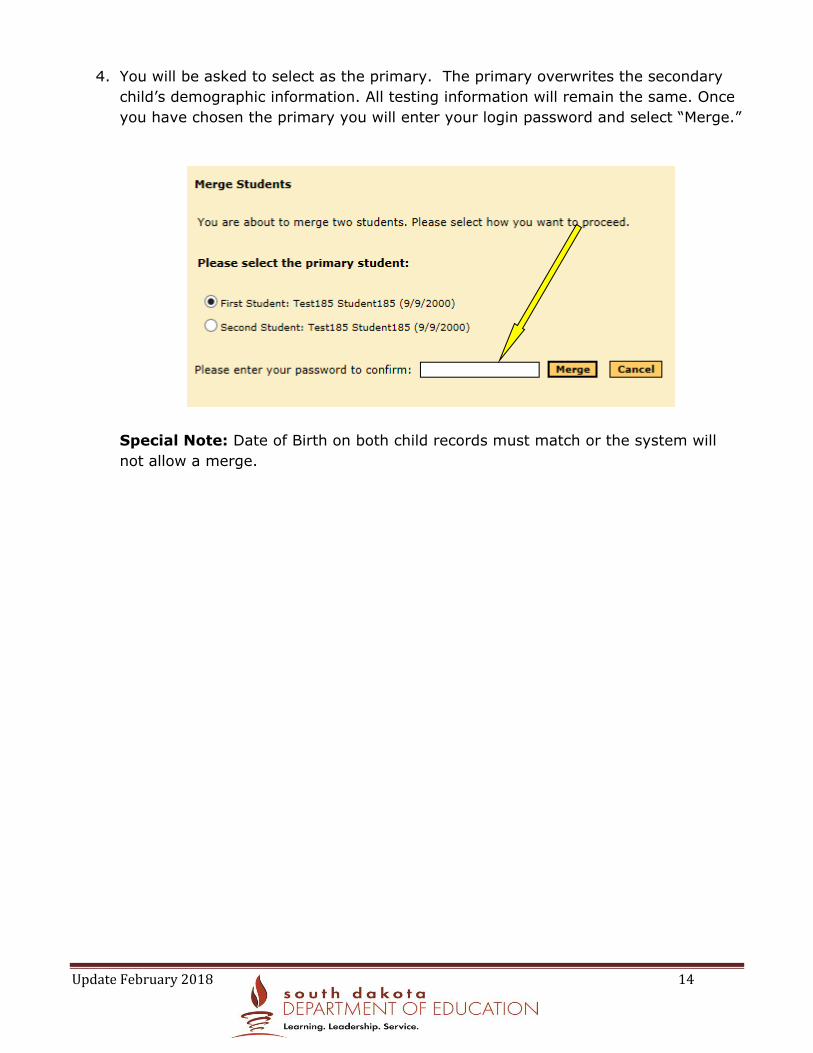
4. You will be asked to select as the primary. The primary overwrites the secondary
child’s demographic information. All testing information will remain the same. Once
you have chosen the primary you will enter your login password and select “Merge.”
Special Note: Date of Birth on both child records must match or the system will
not allow a merge.