Embed Size (px)
Citation preview

Basketball
Practice Plan
3rd to 4th Grade
(Ages 8 to10)
YMCA OF
GREATER HOUSTON
Section 1: Working with Children ages 8 to 10

• Attention span lengthens and they start to show the ability to sequence thoughts and actions
• They start to think ahead and think “If this, then that” • More inclined towards wanting to play soccer rather than being told to play • Demonstrate increased level of self-responsibility • They start to recognize fundamental tactical concepts • Begin to become aware of peer pressure • Players affiliate with their team or their coach • There is a wide continuum of maturity evident on most teams • This is still a crucial age for technical skill development
Section 2: Tips to be Successful
Keep all children constantly moving; all players should be active during every drill at the same time to keep them fully engaged.
When introducing a new drill always demonstrate skill to assure proper technique is shown.
To keep practice interesting and exciting, each drill should last no more than 10 minutes.
When coaching or instructing your team or players individually, get on their level so to create a trusting bond between you and your players.
Always emphasis the child’s positives over negatives to keep every child engaged and willing to continue learning.
Put your players in positions to be successful so that enthusiasm for the game is maintained.
Establish discipline early so that your practices run smooth and uninterrupted.
Stay engaged yourself as the coach; your team and families will follow your attitude and energy at all times.
Section 3: Warm up / Beginning of practice

When you are starting practice, it is important to always welcome each child as this shows appreciation and value of each player to the team as a whole. It is a safe practice to begin with some sort of cardio or stretches so that every child gets loose and prevent injury when transitioning into more complex movements. During this time you can discuss past games or practices as well as foreshadow what you will be doing in your practice.
Warm-up activities (5 to 7 minutes ideal)
WITHOUT BALL • Run 3 to 5 laps around the gym • Jumping Jacks • Jogging “In-Place” (can add high-knees and thigh slap) • Kangaroo Hop, forward, backward, left and right • Skipping • Jumping around using one leg, then the other • “All fall down,” get up as fast as possible, jogging in between. • Quad Stretch
• Toe Touch
• Hurdler Stretch
• Leg Straddle
• Neck roll (Both Directions)
• Arm Circles; Start with small circles then big circles. Go forward then backwards
• Wall Taps (pick a spot on the wall and jump and hit that spot continually for a period of
time.)
Section 4: Conditioning and Coordination

In the game of basketball, constant running and changing direction are a necessity. It is
important as a coach to make sure you are focusing a portion of your practice to this.
Horses or line running (Conditioning)
1. Start your players under one goal on the baseline.
2. When the coach starts the drill the players will run to the closest free throw line then
run back to the baseline.
3. Touch baseline; run to midcourt; run back to starting baseline
4. Run to furthest free throw line; run back to starting baseline
5. Run to the furthest baseline; finish drill at starting baseline
Note that this drill should be continual and finishes when the player runs the
entire drill
Stuck in the Mud Drill (Conditioning)
1. Designate a boundary area on the court where all the action will take place (usually on one half of the court). All players must stay in this area.
2. Designate 1-2 players that are “it”. At the start of this drill, all the players that are not “it” will begin to run and avoid the “it” players.
3. It is the “it” players’ job to tag the other players. When a player is tagged, the player is “stuck in the mud” and must stand still.
4. The stuck player can get unstuck when another player crawls under his/her legs. 5. The game ends after a certain time has elapsed or when all the players are stuck in the
mud. This game can be done with or without using the basketball.
Box Run Relay (Conditioning and Coordination)

1. For this drill, divide your team into equal teams. On the coach’s command the first player from each team will shuffle down the baseline.
2. Once they reach the corner of the court, the players will then back pedal to half court. 3. At half court the players will then shuffle to the jump ball circle. 4. Once they reach the jump ball circle, the players will sprint back to the starting line,
tagging the next player who then continues the relay.
Wrap Ball Rotation Drill (Coordination)
1. When coach instructs have the player move ball around waist in a circular motion. 2. After some time has passed, instruct the player to move the ball in the opposite
direction. 3. Variations to this drill consist of moving the ball around the head, one leg, both legs. 4. To challenge the player try in-between legs in a figure 8 motion. See attached link see
attached link https://www.youtube.com/watch?v=AZCKDsQsxxQ
Hot Potato (Coordination)
1. Have all the kids stand in a circle and have one child start with a basketball. 2. When the coach instructs have the players toss the basketball around to fellow
teammates. 3. Allow the players to pass the ball around at varies speeds. 4. Game will end when the coach says hot potato. 5. To add a level of difficulty introduce another basketball, tennis ball, etc…
Zig Zag Run (Conditioning and Coordination)
1. Similar to horses have the team start on the baseline in the painted area. 2. When coach instructs to start, the player will run to the sideline on one half of the court.

3. Once the player reaches the sideline have them turn and run diagonally to center court. 4. At center court the player will run diagonally to the sideline, before turning directions
and running to the opposite baselines painted area. 5. The player will do the same sequence on the other side of the court until they return to
their starting place. 6. Variations : back pedal, defensive shuffle
Simon Says (Coordination)
1. A coach will take the role of "Simon" and issues instructions (usually physical actions such as "jump in the air" or "jog in place") to the other players, which should only be followed if prefaced with the phrase "Simon says", for example, "Simon says, jump in the air".
2. Players are eliminated from the game by either following instructions that are not immediately preceded by the phrase, or by failing to follow an instruction which does include the phrase "Simon says".
Four Step Drill (Conditioning and Conditioning)
1. Start all players on one sideline. 2. When coach instructs, all players will sprint to the opposite sideline 3. Once the player’s feet hit the opposite sideline they will back pedal to the starting
sideline. 4. To challenge players give a time limit and see how many they can accomplish. (Diagram)

Line Jumps (Conditioning and Coordination)
1. Have all players find a line to start this drill. 2. When coach instructs have players keep both feet together and start jumping back and
forth over the line. Feet should never hit the line. 3. Variations: front to back over the line, split leg one foot at the time. 4. To challenge players give a time limit and see how many they can accomplish.
Four Corners (Conditioning)
1. Have all players begin this drill in the middle of the court. While all players are in the middle of the court label four areas/corners numbers 1 through 4.
2. When all players are set give all players ten seconds to find the designated area they choose for the current round.
3. Coach or a designated player will close their eyes and count to ten. 4. After ten seconds players have to freeze near the closes area or the area they picked. 5. Coach or a designated player will pick a corner randomly; any players in that area will be
out or will lose that current round.
Up in the Air Drill (Coordination)
1. Have all players find a spot on the baseline with their own basketball facing the wall. 2. When coach says go, have players toss their basketball high in the air right above their
head. 3. As ball is in the air have the players turn 180 degrees. 4. Once they turn around have the player catch their ball. 5. Eye/hand coordination is key in this drill so make sure each player learns to control their
ball at all times.

6. To challenge players see if they can catch their ball with one hand or turn a complete 360 degrees before catching their ball.
Hand Clap Drill (Coordination)
1. Have all players find a spot on the baseline with their own basketball facing the wall. 2. When coach says go have players toss their basketball high in the air right above their
head. 3. While ball is in the air, players see how many times they can clap their hands together
before they catch the ball. 4. Claps only count if player is able to catch the ball at the end.
Lane Shuffle (Conditioning and Coordination)
1. Start all players on one sideline. 2. When Coach instructs, all players will side shuffle to the opposite sideline. 3. Once the player’s touches the opposite sideline with their hand they will side shuffle to
the starting sideline. 4. To challenge players give a time limit and see how many they can accomplish.

Section 5: Dribbling
Dribbling is a critical skill that every young basketball player must be introduced to at this age.
Dribbling in the game of basketball is about control of the basketball. When you are looking to
design your practice, make sure to spend enough time on this skill as it takes most children
some time to be comfortable dribbling without traveling.
Stationary Dribbling
1. Before players start performing drills while moving it is important that they learn what is dribbling and how to control the ball.
2. Have all players have a ball when doing this drill. 3. Start by having all players dribbling the ball with their dominant hand. 4. Basketball should bounce no higher than child’s waist or hip.
5. As players dominant hand dribbling get strong, start having your players use their off hand to dribble.
6. As players get comfortable with dribbling with both hands you can use the following ball handling drills to help with each player’s progression. All drills can be used to develop dribbling skills on both hands.
Cross Over: http://youtu.be/hhFR3EyEPoo Front to Back Dribble: http://youtu.be/JjwYbZr-iHc In and Out Dribble: http://youtu.be/QP9IVzM5v24 Through the Legs: http://youtu.be/mUhAGvGA3iM Behind the Back: http://youtu.be/FQiXqe77VyI Figure 8: http://youtu.be/dfGxNOsZGC4 Spider: http://youtu.be/2EGaGjU0kkw
High Low Dribble
1. Start this drill with all players having a basketball in their hand. 2. When coach instructs players to being, all players will dribble the ball as high as they can
(no higher than player’s head). 3. After a few seconds have the players start slowly dribbling the ball lower and lower until
the ball is being dribbled as low as their shoe. 4. Once the players have control of the ball have them slowly begin to build their dribble
back up to their head. 5. This drill helps players learn to control their ball at all time, build coordination, and get
build a feel of the ball.
Full Court Dribble

1. Have all players’ line up under the basket with their own basketball. 2. When coach instructs have the children dribble the length of the court with a continual
dribble. 3. When first introducing this drill, have the player only dribble with their dominant hand.
If players are new, have players perform this drill while walking and then progress to jogging while dribbling.
4. After players are comfortable and need a challenge you can have the child dribble with opposite hand.
One on One Dribbling
1. For this drill, have the player’s pair up. Each pair has 1 basketball. 2. One player from each group starts on the base line with the ball (this group is on
offense). The other group lines up approximately 3 feet away and they are on defense. 3. The object of the game is for the offense to dribble the ball to the half court line. 4. The goal for the defense should be to steal the ball or stop the dribble of the player on
offense.
Cone Dribbling
1. Have all players’ line up under the basket with their own basketball. 2. Coach will set up the cones an equal distance apart the length of the court. 3. When coach instructs have the children weave around the cones with a continual
dribble. 4. When first introducing this drill, have the player only dribble with their dominant hand. 5. After players are comfortable and need a challenge you can have the child dribble with
opposite hand. 6. Variations: Remove cones and replace with a coach or defender. 7. The following drills can be utilized to help a player while they are dribbling against a
defender.
Hesitation Dribble: http://youtu.be/vZQYR2qgY1M Through the legs Zig Zag: http://youtu.be/iaAitgVDWJ4 Crossover Zig Zag: http://youtu.be/0EdjJWsDrgs Behind the Back Zig Zag: http://youtu.be/4pt8m_O9pLk

Sharks & Minnows
1. For this game, designate an area on the court for play (usually half court). All players must stay within this designated area.
2. Start with one player designated as the “Shark”. 3. The rest of the players are the “Minnows”. The object of the “Shark” is to knock the ball
away from the “Minnows” (the ball needs to be knocked out of the designated area of play).
4. Once a “Minnow” has their ball knocked away, they then become “Sharks”, and attempt to take the ball away from the other “Minnows”.
5. At the start of the game the “Minnows” should be on the run trying to avoid the “Sharks” and maintaining ball control.
6. The game ends when there is only 1 “Minnow” remaining.
Red, Yellow, Green, Blue Light
1. This game will help dribbling, coordination and listening skills. 2. Each player has their own ball and dribbles around the court maintaining ball control
and remembering to keep their head up. 3. The coach then calls out a command (“red light”, “green light”, “yellow light”, or “purple
light”) and the players should react accordingly. 4. Red Light – means stop. The players dribble the ball while standing in one place. 5. Green Light – means go. The players move quickly around the court while dribbling
the ball; but in control. 6. Yellow Light – means slow down. The players move slowly with the ball. 7. Blue Light – means stop dribbling the ball, place the ball on the ground, then after the
ball has stopped, the players run around the ball in a circle.
Dribble Knockout
1. For this drill you will need to have all players in a designated area with boundaries. 2. Every player will need a ball for this drill. 3. When coach instructs players to go , all players will start dribbling without stopping 4. The goal of this game is to knock the ball away from other players while keeping
constant control of players own ball. 5. Players are eliminated if their ball is knocked outside of the designated area or if they go
out of bounds. 6. The game will end when you have 1 player left. 7. To challenge players you can try these variations (only dribble with offhand, make the
designated playing area smaller).

Get There
1. Have all players line up with a ball in there hand. 2. Start this drill at the free-throw line and have all players make a layup using one dribble. 3. After all players have made accomplished step 2 move line back to half court where they
have two dribbles before attempting a layup. 4. After all players have made accomplished step 3 move line back to three-quarters where
they have three dribbles before attempting a layup. 5. After all players have made accomplished step 4 move line back to the opposite baseline
where they have four dribbles before attempting a layup. 6. In this drill make sure that players do not travel and keep the ball in front of them under
control.
Dribble Relay
1. To start this drill split your team into at least two lines. 2. The first players in each line will have a basketball. 3. On the whistle, each team will start the relay. 4. The first player dribbles up and down the court as quickly as possible. (Dribble up with
right hand, down with left hand) 5. When 1st player reaches the 2nd player in line, the 2nd player will take the basketball
and dribble as the first player did. 6. The relay will end when all players in line have dribbled the ball up and down the court.
Section 6: Passing

Passing helps teams move the ball around the court shot that everyone on the floor gets
involved. When thinking about passing drills for your team make sure players understand that
without each other getting the ball to the goal will be that more challenging.
Partner Pass 1. Have the player’s pair up with a partner. The pairs should line up approximately 3-5 feet
apart from each other (depending on skill level). 2. Have the player’s facing each other in order for this drill to be affective. 3. It is important to emphasize good passing fundamentals as the player should not pass
the ball to their teammate without them looking. 4. Passes will consist of the following (chest pass, bounce pass, overhead pass).
Monkey in the Middle Drill
1. Have your players get in pairs of 3. 2. Place one player in the middle as the object of the game is for the players situated on
the outside to pass the ball to each other. 3. The object of the game for the person in the middle is to intercept a pass and take
control of the ball. 4. Once the player in the middle steals the ball, choose a new player to go in the middle.
Pass run pass
1. For this drill have your team pair off with one basketball per pair. 2. Coach will need to set up cones at the free throw lines and half court. 3. One player will start with the ball on the baseline and their partner will start at the
closest free throw line to them. 4. On the coach’s command, the player with the ball will make the appropriate pass to
their partner. 5. Once the player has passed the ball they will run to half court to receive a pass from
their partner. 6. Player 2 will pass the ball and run to the opposite free throw line and receive a pass
from Player 1. 7. Player 1 will pass to player 2 and the drill will continue up and down the court until
coach stops the drill. 3 on 3 No Dribble Keep Away
1. Divide your team into groups of 3 for this drill. 2. One team will play defense and the other team will play offense.

3. During this drill the offense is not allowed to dribble. 4. To gain points in this drill the offense must successfully pass the ball to their teammate
within 5 seconds. 5. If the offense cannot make a pass within 5 seconds or if the defense steals the ball,
offense will lose a point. 6. This drill is meant to help offensive players to move without the ball.
50 passes
1. Divide your team into 2 equal teams 2. Each team will need 1 ball to play this game. 3. On the coaches command, the teams will begin passing the ball to each player on the
team. 4. The first team to complete 50 passes win. 5. Only rules to this game is as follows:
a. Only chest or bounce passes are allowed b. A player cannot receive a pass again until every teammate has received a pass. c. Teams must count out every pass completed for passes to count.
Hot Hands
1. For this drill you will need to split your team into two teams. 2. Each team will need 1 ball to start the drill. 3. During this drill, there is no dribbling allowed at any time. 4. When the coach starts the drill, the player that has the ball to begin only has two steps
that they have to count out before they cannot step again. 5. After two steps, the player has to pass the ball to one of their teammates. 6. If a player takes more than two steps the player will be eliminated from the drill. 7. The drill will continue until there is one player left on the team or the coach stops the
drill.

3 Man Weave
1. The players should get into three lines at one end of the court, lined up behind the baseline.
2. The player in the middle starts off with the ball. 3. The rule is to pass the ball and go-behind the receiver. So the player passes the ball to the
player on his left and then runs behind the player. This process is repeated to the other end of the court where the player who is closest to the basket goes up for a layup (it is better to practice going for a layup once you receive the pass without dribbling as this could be useful in a real game situation).
4. One of the player gets the rebound and they do the 3 man weave back down the court where another player goes up for another layup.
5. Then the next 3 players in line go. 6. Please see attached link for drill ran all the way through: http://youtu.be/aYSynGqXsyA

Section 7: Shooting
Shooting fundamentals are key when practicing drills in practice. Start off ensuring that you
teach all players proper technique so that they have a strong foundation to begin with. Please
refer to the video attached as you will learn proper shooting techniques and drills to work on
proper form. https://youtu.be/_GAt9jNsmuE
Jump Shooting
1. Divide your team into 2 groups. Each group lines up in a straight line at half court and the first person in each group has a ball.
2. At the coach’s command, the first person in each group dribbles down court towards the basket stops at the cone and shoots a jump shot.
3. After making the shot (or after 2 attempts at making a shot) the players rebound their basketball and dribble back to half court, passing the ball to the next person in line.
4. The next players in line then repeat the drill, until all have had a turn.
Layup Drill
1. Split the team into two lines. One on the right side at half court and one on the left side. Give each line one ball.
2. The person at the front of the line will sprint down the right side of the court, dribbling the basketball and attempt a fast break lay-up.
3. After attempting the lay-up, the shooter grabs their own rebound, takes two dribbles in the other direction and throws a baseball pass to the next person standing in the opposite line.
4. This person catches the ball, sprints down the right side dribbling, and attempts a lay-up. They then pass the ball to the next person in the opposite line, and so on.
5. Both lines are to work as a team and count how many lay ups are made. 1 on 1

1. Divide the group into four lines that stand at half court. Two on the right side and two on the left side.
2. The inside lines on the right and left sides of the court have one ball each. The first person in the inside line passes the ball to the first person in the outside line, who then dribbles the ball down the right side and attempts a lay-up.
3. After releasing the ball, the passer must sprint to catch the person trying to attempt the lay-up and apply pressure on the player.
4. After the lay-up is attempted, the two players now run to the two lines on the other side of the court and switch sides.
Knockout
1. Line your players up at the free throw line in single file. Give the first two players in the line a basketball.
2. On your whistle, the first player in line will shoot a free throw. If they make it, they will retrieve the ball and pass it to the next person in line without a basketball. If they miss, they must retrieve the ball and make a lay-up.
3. The next player in line is allowed to shoot a free throw as soon as the previous player’s ball hits the rim or goes through the net. If the previous player misses, the next player is attempting to make a free throw (or rebound shot) before that player makes their rebound shot. Avoid rushing too much to prevent ruining your shooting mechanics.
4. If the scenario in step 3 occurs, the previous player has to sit out for the rest of the drill. 5. This process continues until only one player remains.
Around the World
1. For this drill, each player must make a number of shots at various locations around the key (the skill level of your players will determine the distance the players are from the key).

2. Players start from location #1 and when they make the shot go to location # 2. Players continue around the key until they finish at location #11.
Pay the Cost
1. Coach will pick a spot on the court for all players to shoot from 2. Each player has 10 shots each from the designated spot 3. Players will do a push up for every shot they miss out of the 10
Mikan Drill
1. It's just like layups but you stand right near the basket in a stationary position and shoot with your right hand.
2. The player will get their own rebound and go to the left side of the basket and shoot with their left hand.
3. This drill keep going it back and forth for 30 seconds without the ball touching the ground.
Do or Die
1. You have all the kids except one line up on the baseline. 2. The other person shoots a free throw. If he misses the players run to the other end of
the court then run back.
3. The first person back is the next shooter. 4. You keep doing this until a kid makes 2 foul shots in a row or when the whole team has
shot. Superman Drill
1. This is a timed drill that requires two basketballs that are placed on each block underneath the basket.
2. In one minute, reach down and grab the ball on the right block and power up to the basket making a layup, rebounding the ball and replacing back on the right block.
3. Sprint to the left block, pick the basketball up and power up to the basket finishing on the left side. Repeat this as many times as you can before time runs out.
10 points in a minute
1. You put 1 minute on the clock. 2. The ball begins at half court with the one player. 3. At the sound of your whistle, the ball is in play and the clock is started. 4. The entire 5-man unit has 1:00 to score 10 points 5. Rules to the game
All 5 players must score 1 basket (5 players x 2 pts. each = 10pts.)
No 1 player can score more than 1 basket. After a basket is scored, the ball is kicked out to the top of the key and the drill is continued.
If the team does not score 10 points in 1 minute, the entire team runs a full-court sprint.
300
1. All players start at mid court with a ball. 2. When the coach blows the whistle to start the clock, players take off dribbling the ball
towards the basket at either end. 3. They can shoot from anywhere. 4. A player can only take one shot then must go to another basket on the court. 5. They must keep track of the number of shots they make. 6. This drill will last for a minimum of five minutes (depending on the skill level of your
team). 7. They must try to make 300 shots as a team.
Shootout
1. Divide into three groups, if uneven number of players, have one player shoot twice. 2. Designate three shooting spots.

3. On the whistle, the first player from each group attempts one shot. 4. Player will get own rebound (make or miss) and pass to the next player in line. 5. Each basket is one point and the first team to ten points wins. 6. To challenge teams rotate groups to each shooting location. 7. Losing groups will run sprints or whatever coach deems appropriate.
Shoot Till You Make It
1. Separate players into two or three teams with the skill and ability levels equally divided. 2. Each team is to line up on the same baseline of the court. The first player in line for each
team has a ball. 3. On the whistle, the first players from each team are to begin dribbling towards the other
end of the court as fast as they can. 4. When they get to the other end, they are to take a shot at the elbow area of the court
and retrieve their own rebounds. If they missed the first shot, they keep shooting close to the hoop until a shot is made.
5. When a player makes the shot, he then retrieves his rebound and dribbles as fast as he can back to his teammates, handing the ball off to the next player in line, who then executes the same routine.
6. The team that finishes in the fastest time is the winner.
Section 8: Defense/Offensive Drills
Defense is an easy skill to teach but needs emphasis during these ages as the players tend to start playing more aggressive during games. Good defense is played by moving your feet with

hands up or out, while keeping your offensive player in front of you. As a coach it is important to show how this works without fouling.
Please see attached link for further instruction https://youtu.be/VjSQrCxAJpQ
Defense Zig Zag Shuffle
1. This drill will help teach your players how to maintain the proper defensive stance and how to properly move from one part of the court to the other.
2. Divide your team into 2 groups. Each group starts a corner of the court. 3. The first players from each group assume a good defensive stance (feet slightly more than
shoulder length apart, knees bent, back straight, arms up and out).
Similar set up as zig zag running.
Closeout Drill
1. This drill helps players learn how to move quickly from help-side defense back to their man by closing out when their player receives a pass.
2. The offensive player stands out on the wing and the defender starts in the key holding the ball.
3. If a third person is available, he can be the passer on the opposite wing and start the action by passing the ball to the offensive player. (If you only have 2 people, the defender can pass out to the offensive player).
4. Once the pass is made, the defender closes out on his player by running at him full speed for about 2/3 of the distance and then lowering his body to approach with a stutter step.
5. Once the defender is in position the drills continues until the offense scores or defense causes a turnover.
* Please see attached link for further instruction https://youtu.be/3suVMBw6w_Y Box-Out Drill
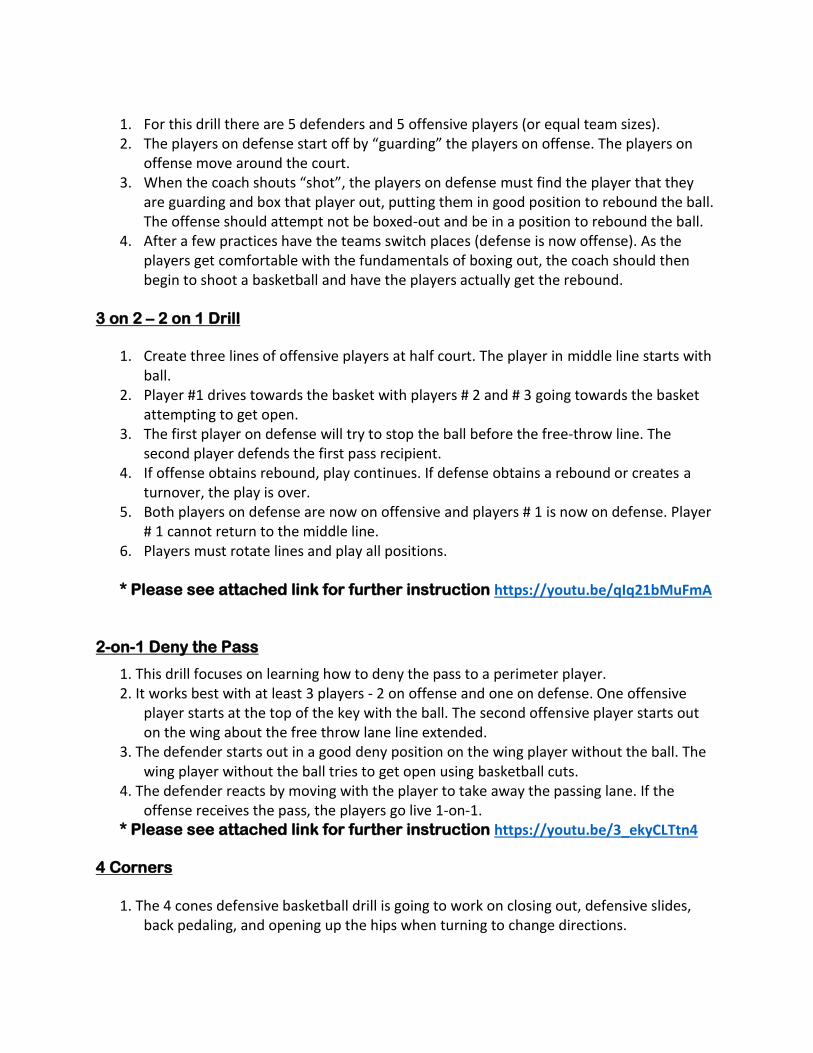
1. For this drill there are 5 defenders and 5 offensive players (or equal team sizes). 2. The players on defense start off by “guarding” the players on offense. The players on
offense move around the court. 3. When the coach shouts “shot”, the players on defense must find the player that they
are guarding and box that player out, putting them in good position to rebound the ball. The offense should attempt not be boxed-out and be in a position to rebound the ball.
4. After a few practices have the teams switch places (defense is now offense). As the players get comfortable with the fundamentals of boxing out, the coach should then begin to shoot a basketball and have the players actually get the rebound.
3 on 2 – 2 on 1 Drill
1. Create three lines of offensive players at half court. The player in middle line starts with ball.
2. Player #1 drives towards the basket with players # 2 and # 3 going towards the basket attempting to get open.
3. The first player on defense will try to stop the ball before the free-throw line. The second player defends the first pass recipient.
4. If offense obtains rebound, play continues. If defense obtains a rebound or creates a turnover, the play is over.
5. Both players on defense are now on offensive and players # 1 is now on defense. Player # 1 cannot return to the middle line.
6. Players must rotate lines and play all positions. * Please see attached link for further instruction https://youtu.be/qIq21bMuFmA
2-on-1 Deny the Pass
1. This drill focuses on learning how to deny the pass to a perimeter player. 2. It works best with at least 3 players - 2 on offense and one on defense. One offensive
player starts at the top of the key with the ball. The second offensive player starts out on the wing about the free throw lane line extended.
3. The defender starts out in a good deny position on the wing player without the ball. The wing player without the ball tries to get open using basketball cuts.
4. The defender reacts by moving with the player to take away the passing lane. If the offense receives the pass, the players go live 1-on-1.
* Please see attached link for further instruction https://youtu.be/3_ekyCLTtn4 4 Corners
1. The 4 cones defensive basketball drill is going to work on closing out, defensive slides, back pedaling, and opening up the hips when turning to change directions.

2. During the course of a game a player is going to have to go from doing one motion like back pedaling or closing out, into another completely different motion, and the quicker and more efficient they can change actions, the better.
Similar set up as ZIG ZAG Running.
Challenge Drill
1. This is a great drill to do that is fun and improves player’s fundamentals on defense. Usually scoring in scrimmages is dictated by the offense.
2. In this drill however, the defense dictates the score as only they can rack up points. Split your team up and have players play 3v3, 4v4 or 5v5.
3. Defenses can score points either by getting a rebound or forcing a turnover. 4. If the defense gets the stop they stay on defense and can continue to score. If the
offense scores a basket then the teams switch and they go on defense where they can earn points.
5. Play to 5 points the first round to see how your team is doing. 6. If one group is struggling on defense then stop the drill and help fix the problem before
resuming the drill.
Scramble Drill 1. The purpose of this drill is to teach both offensive and defensive skills, particularly “boxing
out”. 2. This drill is for use with two players at a time. 3. The coach or parent places the ball on the floor. 4. Instruct the two players to stand a few feet (same distance) from the ball, with their backs
to one another. 5. When the whistle is blown, the players may turn around, and Player #1 must prevent
Player #2 from getting the ball by boxing him out.
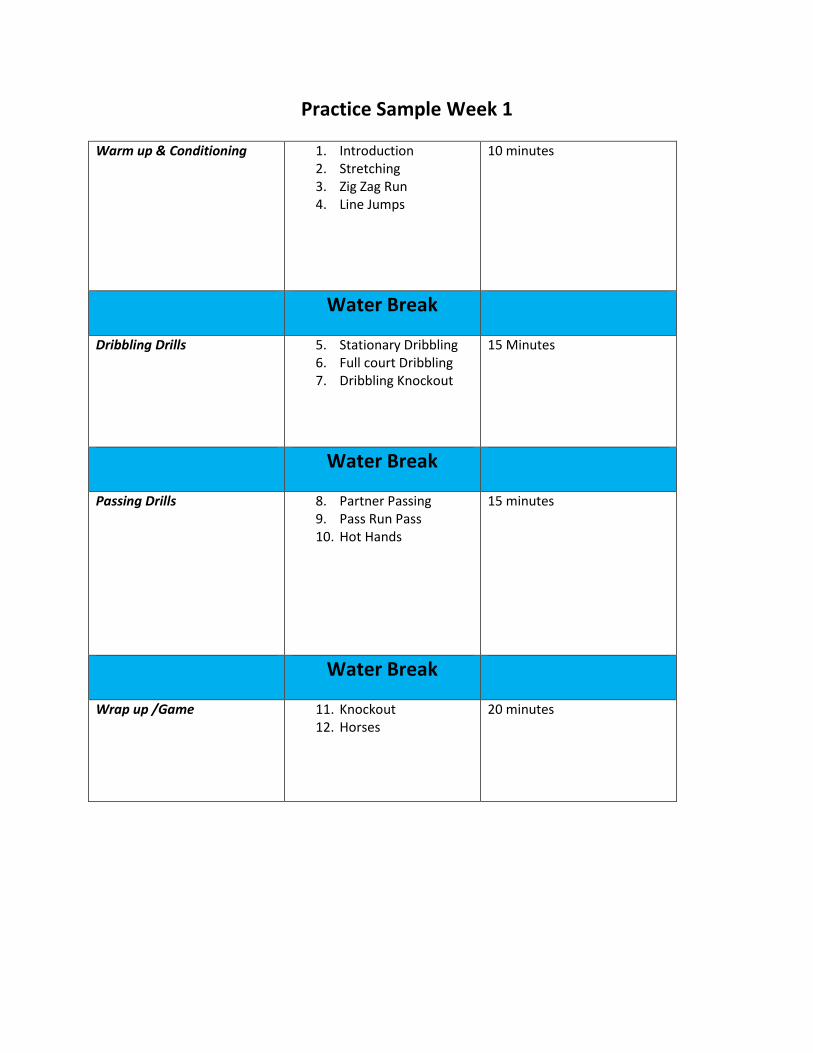
Practice Sample Week 1 Warm up & Conditioning 1. Introduction
2. Stretching 3. Zig Zag Run 4. Line Jumps
10 minutes
Water Break
Dribbling Drills 5. Stationary Dribbling 6. Full court Dribbling 7. Dribbling Knockout
15 Minutes
Water Break
Passing Drills 8. Partner Passing 9. Pass Run Pass 10. Hot Hands
15 minutes
Water Break
Wrap up /Game 11. Knockout 12. Horses
20 minutes

Practice Sample Week 2
Warm up & Conditioning 1. Stretching 2. 4 laps around the gym 3. Box Run Relay
10 minutes
Water Break
Shooting Drills 4. Layup drill 5. Form Shooting
15 Minutes
Water Break
Defensive Drills 6. Defense Zig Zag Shuffle
7. Close out Drill
15 minutes
Water Break
Wrap up /Game 8. Challenge Drill 20 minutes

Practice Sample Week 3
Warm up & Conditioning 1. Stretching 2. 20 Wall Taps 3. 4 step drill
10 minutes
Water Break
Dribbling Drills 4. High Low Dribble 5. Cone Dribbling 6. 1 on 1 Dribbling
15 Minutes
Water Break
Defensive Drills 7. Box out Drill 8. 3 on 2 drill
15 minutes
Water Break
Wrap up /Game 9. Scrimmage 20 minutes

Practice Sample Week 4
Warm up & Conditioning 1. Stretching 2. 10 jumping jack/10
pushups/ 10 sit ups 3. Lane Shuffle
10 minutes
Water Break
Shooting Drills 4. Mikan Drill 5. Pay the Cost
15 Minutes
Water Break
Passing Drills 6. Pass Run Pass 7. 50 passes
15 minutes
Water Break
Wrap up /Game 8. Dribble Knockout 9. Horses
20 minutes

Practice Sample Week 5
Warm up & Conditioning 1. Stretching 2. Stuck in the Mud
10 minutes
Water Break
Dribbling Drills 3. Stationary Dribbling 4. Get there 5. Shark and Minnows
15 Minutes
Water Break
Passing Drills 6. Partner Passing 7. 3 on 3 No Dribble
Keep Away
15 minutes
Water Break
Wrap up /Game 8. 10 minute Scrimmage 9. Do or Die
20 minutes
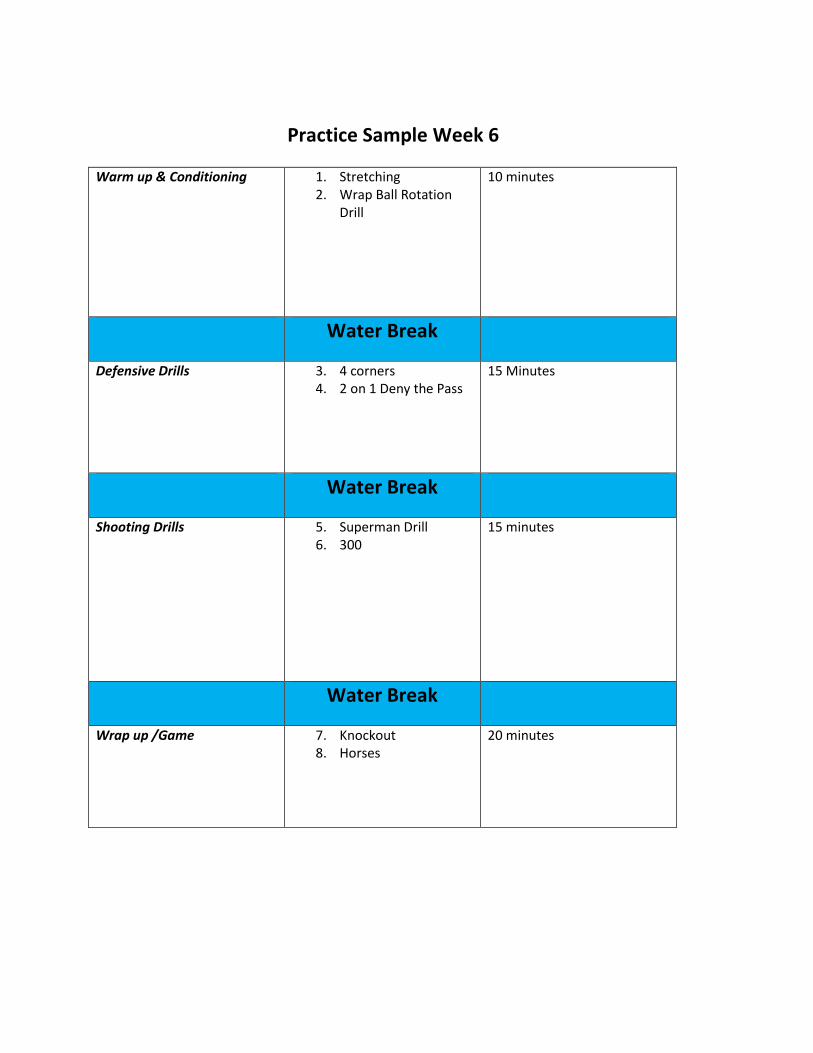
Practice Sample Week 6
Warm up & Conditioning 1. Stretching
2. Wrap Ball Rotation Drill
10 minutes
Water Break
Defensive Drills 3. 4 corners 4. 2 on 1 Deny the Pass
15 Minutes
Water Break
Shooting Drills 5. Superman Drill 6. 300
15 minutes
Water Break
Wrap up /Game 7. Knockout 8. Horses
20 minutes
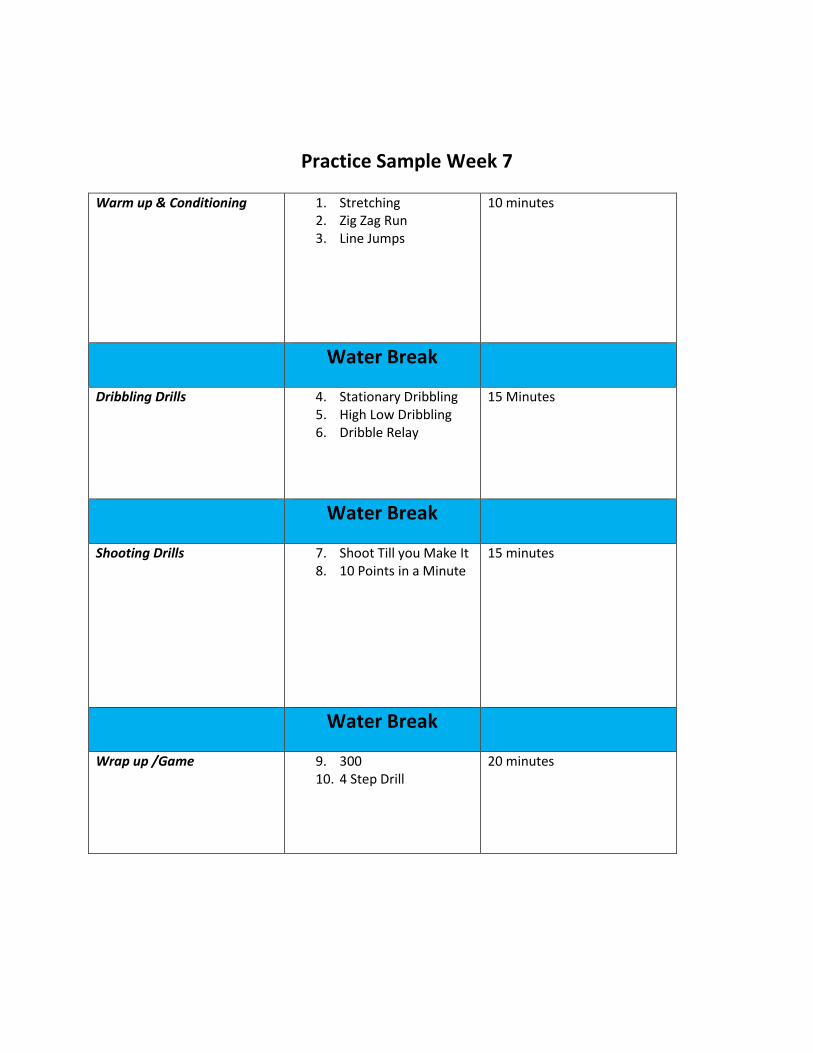
Practice Sample Week 7
Warm up & Conditioning 1. Stretching 2. Zig Zag Run 3. Line Jumps
10 minutes
Water Break
Dribbling Drills 4. Stationary Dribbling 5. High Low Dribbling 6. Dribble Relay
15 Minutes
Water Break
Shooting Drills 7. Shoot Till you Make It 8. 10 Points in a Minute
15 minutes
Water Break
Wrap up /Game 9. 300 10. 4 Step Drill
20 minutes
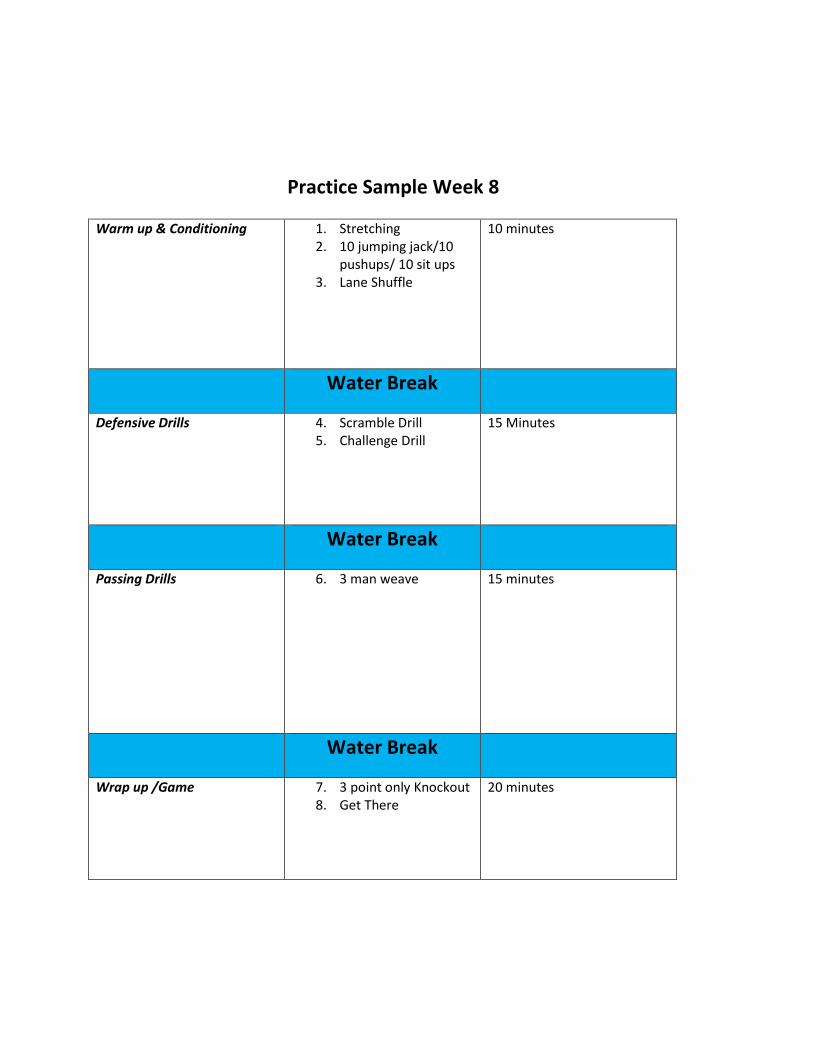
Practice Sample Week 8
Warm up & Conditioning 1. Stretching 2. 10 jumping jack/10
pushups/ 10 sit ups 3. Lane Shuffle
10 minutes
Water Break
Defensive Drills 4. Scramble Drill 5. Challenge Drill
15 Minutes
Water Break
Passing Drills 6. 3 man weave 15 minutes
Water Break
Wrap up /Game 7. 3 point only Knockout 8. Get There
20 minutes
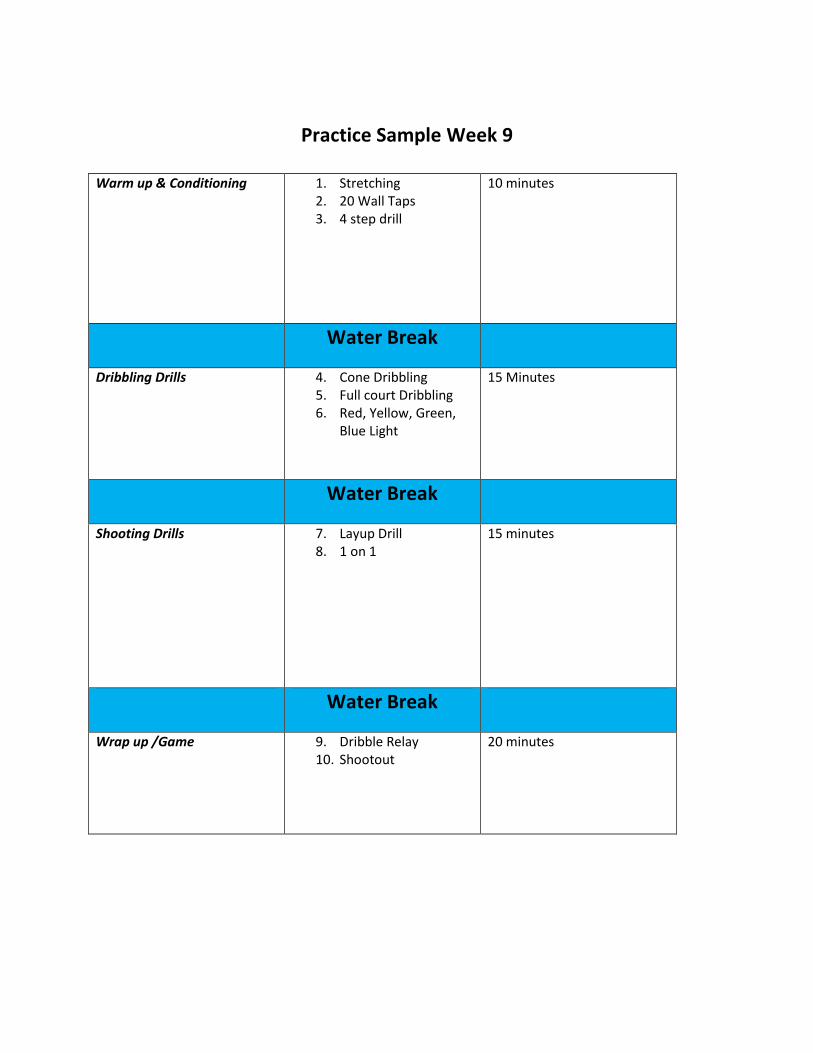
Practice Sample Week 9
Warm up & Conditioning 1. Stretching
2. 20 Wall Taps 3. 4 step drill
10 minutes
Water Break
Dribbling Drills 4. Cone Dribbling 5. Full court Dribbling 6. Red, Yellow, Green,
Blue Light
15 Minutes
Water Break
Shooting Drills 7. Layup Drill 8. 1 on 1
15 minutes
Water Break
Wrap up /Game 9. Dribble Relay 10. Shootout
20 minutes

Practice Sample Week 10
Warm up & Conditioning 1. Stretching 2. 4 laps around the gym 3. Box Run Relay
10 minutes
Water Break
Dribbling Drills 4. Get There 5. Dribbling Knockout
15 Minutes
Water Break
Defensive Drills 6. Close out Drill 7. Scramble Drill
15 minutes
Water Break
Wrap up /Game 8. 10 minute Scrimmage 9. 300
20 minutes