Embed Size (px)
Citation preview

Tuvalu
Technical & Vocational Skills Development Programme
BASIC SEWING SKILLS
STUDENT WORKBOOK

2
Credits
Basic Sewing Skills is a Level 1 course which forms part of the Tuvalu Technical &
Vocational Skills Development Programme. It was especially written and designed
to be offered in schools and communities in Tuvalu, and other Pacific island nations.
The course makes use of OER materials that are freely available for learning and offers
this version as an OER for other people to use.
The TVSD programme was initiated by the Tuvaluan Ministry of Education, Youth and Sports, and supported by the Commonwealth of Learning. The writing team are all
teachers from Nauti Primary School.
Writers Tiesi Filipo Koepke
Salakeima Feleti
Lilivanu Maketi
Kirara Akeimo
Instructional Design Editor Michael Coghlan
Layout Alison Mead Richardson
Commonwealth of Learning
© 2017 Commonwealth of Learning
Unless otherwise specified all material in this publication is made available under a Creative
Commons Attribution-ShareAlike 4.0 Licence (international):
http://creativecommons.org/licenses/by-sa/4.0/

3
Basic Sewing Skills
Contents
Who is this course for? ................................................................................................................... 4
What does the course cover? ......................................................................................................... 4
How does the course work? ........................................................................................................... 5
Student workbook .......................................................................................................................... 5
The role of your teacher ................................................................................................................. 5
Projects ........................................................................................................................................... 6
TOPIC 1: Basic Sewing Equipment ......................................................................................... 7
What equipment do you need for sewing? .................................................................................... 7
Practical Activity 1 ........................................................................................................................ 13
TOPIC 2: HAND STITCHING ................................................................................................. 14
Types of Hand Stitches ................................................................................................................. 14
Topic 2 Review Questions ............................................................................................................. 20
Practical Activity 2 ........................................................................................................................ 21
TOPIC 3: THE SEWING MACHINE ......................................................................................... 22
Choosing the right sewing machine.............................................................................................. 22
Threading the Machine ................................................................................................................. 23
Taking Care of Sewing Machines .................................................................................................. 24
Topic 3 Review Questions ............................................................................................................. 28
Practical Activity 3 ........................................................................................................................ 28
Competency Checklist ........................................................................................................ 29

4
Basic Sewing Skills
Who is this course for?
This course is an introduction to basic sewing skills. It is intended for school leavers and
community groups who have limited knowledge or experience of basic sewing skills.
This course will teach you how to:
identify basic sewing equipment
thread a sewing machine
carry out basic maintenance of a sewing machine
identify and use different kinds of hand stitches
You will work with a sewing machine and sewing kits that are available locally to carry
out a basic sewing project.
When you have finished this course you should be able to work on your own. You also
may still need to work under supervision when using different types of sewing
machines, equipment and materials.
What does the course cover?
Basic sewing skills covers two main topics that are taught as three separate modules.
1) Basic Sewing Equipment
You will learn about sewing equipment and how to use it. You will identify the types of
basic sewing equipment available locally and how to look after them.
2) The Sewing Machine
You will learn how to identify the types of machines available, how to use a sewing
machine safely, and how to clean and maintain them.
3) Hand Stitching
You will learn three types of stitch - run, back, and hemming stitch. You will practice
how to join pieces of materials together using the three types of stitches.
Finally for hands-on practice you will use these hand stitches in producing a sewn item
of your choice.
5
How does the course work?
The course is a basic introduction for people who know little about using a sewing machine or hand stitching. The course must be led by a teacher or experienced person who can show you the correct steps, teach you how to use tools correctly, and guide you with your developing skills. The course will work best with small groups of students who can talk about things and learn from each other.
Student workbook Your workbook has exercises, pictures and explanations as well as space to make your own notes. The modules in your workbook have separate sections for each topic. Your teacher will work through each section with you, talking about the tools and materials and showing you how to use them. There is a Competency Checklist at the back of the workbook for your teacher to tick-off the work you do.
The role of your teacher Your teacher for this course is a competent person with knowledge of stitching and sewing, and skills in using the sewing machine and other tools. They will show you how to work with thread and sewing machines correctly, and tell you how well your skills are developing. Your teacher will:
Have samples of sewing, stitching, material, and tools and equipment for you to work with
Lead you through the course
Explain the written material
Show you o types of stitches and how to work with them o how to use sewing machines o how to use tools correctly and safely
Watch you work and tell you how you are doing
Complete your student checklist to record the work you have done

6
Projects
During the course you will work on a project that uses the skills you have learned. You will get to make something like: • a handkerchief, pillow case, tablecloth OR some other item of your own choosing This course tells you a lot about stitching and sewing and tools, but you need to be able to really stitch and sew and use the tools yourself – not just talk about them. Whenever you can, work with two or three other students. You can watch and give each other feedback on how you are doing.

7
TOPIC 1: Basic Sewing Equipment
Sewing is a skilled activity which you can do just for your own enjoyment and to make
things for yourself, your friends and family or your home. If you develop good skills you
may also be able to use them for income generation to earn a living. Like all skills you
have to first learn what to do and then practice as often as you can. Let’s get started.
At the end of this topic you will be able to:
Identify basic sewing equipment
Explain the usage of basic sewing equipment
Look after sewing equipment
What equipment do you need for sewing?
1. thread 2. needles 3. material
a) If the material has to be cut into
shape we need scissors:
b) If material has to be joined
together we need pins:

8
c) To measure the material or a person
we need a tape measure:
Let’s look at these different tools in more detail.
TYPES OF SCISSORS
There are many different types of scissors. In needlework you will be using three
different types.
1) Large Cutting Out Scissors
These scissors are used only for cutting out cloth.
They should not be used for anything else. If you
cut paper with these special scissors then they
will not stay sharp and it will be difficult to cut
your cloth.
2) Small Trimming Scissors
These are used to cut threads, small pieces of cloth and to trim edges.
3) Paper Cutting Scissors
Old scissors which are too blunt to cut cloth are still sharp enough to cut paper. Remember, if you use cutting out scissors to cut paper they will quickly become blunt.
In needlework we use paper cutting scissors to cut patterns and measuring cards.

9
How to look after scissors
Keep them dry Do not drop them Only use for the correct job
If you live in a place which is near the sea choose scissors which are made of stainless or plated steel or they can quickly rust.
NEEDLES
There are many different kinds of needles. Let’s look at three kinds and what they are used for. Crewel Needles
Crewel needles have a long eye and a sharp point and are used for embroidery.
Sharp Needles
Sharps needles have a sharp point and small eye - they are used for hand sewing and tacking.
Tapestry Needles
Tapestry Needles have long eyes but are blunt. They are used for counted thread work.
REMEMBER: ALL NEEDLES SHOULD BE KEPT IN A DRY PLACE SO THAT THEY WILL NOT RUST

10
MEASURING CARD
It is important that any measurement you make in needle work should be accurate. To help you to measure accurately, you should make a measuring card.
To make a measuring card:
• Take a piece of card 10 cm long and 1 cm wide.
• Measure from each corner and mark the card with the measurement you use most often when sewing.
• Cut out the notches so that your card looks like the card above.
• Keep the card in your work basket and use it when you are making seams or turning up hems.
TAPE MEASURE
Tape measures should be clearly marked in millimetres and centimetres on both sides.
They should not fray or stretch.
It is useful if the ends of the tape measure are made of brass.
Always roll your tape measure up after you have used it.
PINS
Choose pins which are made of metals which do not rust e.g. brass, or stainless steel. Keep your pins in a dry safe place. You can make a pin cushion to keep your pins safe or keep them in a small box.

11
Review Questions:
A. Matching Match the pictures of the following sewing items in column A with their correct name in column B. A B
SCISSORS
TAPE MEASURE
CREWEL
PINS
THREAD
12
B. Answer the following questions 1. Complete the following sentences:
(i) With tape measures you can measure both ________ metres and _________ metres.
(ii) When you have finished with your tape measure you should ______________.
2. What are the following types of needles used for in hand sewing? a) Sharps needle
______________________________________________________________. b) Crewel needle
_____________________________________________________________. 3. What piece of equipment do we need if we wish to:
a) Cut materials into different sizes and shapes ______________________ b) Join materials together _________________________
c) Measure material _________________________
4. Write three things you must do to look after scissors
1. ____________________________________________________
2. ____________________________________________________
3. ____________________________________________________
5. Which kind of scissors would you use for the following tasks:
a) Cutting a large piece of material _____________________________
b) Cutting a small piece of material ____________________________
c) Cutting paper __________________________________

13
Practical Activity 1
Instructions for the teacher
Display all the pieces of basic sewing equipment and ask students to:
Choose one of the items displayed name the chosen sewing item say what it is used for say how to look after it.
Repeat this exercise for other students as often as necessary.

14
TOPIC 2: HAND STITCHING
At the end of this topic you will be able to:
Identify the different types of hand stitches
Demonstrate how to do three different kinds of hand stitches
Explain why particular hand stitches are used
Types of Hand Stitches
Hand stitches can be grouped into three sections: 1. Stitches which hold down hems and neaten the edges of seams are called
PERMANENT STITCHES. 2. Stitches which hold together pieces of material before permanent stitching,
or which are used for gathering are called TEMPORARY STITCHES. 3. Stitches for embroidery are called DECORATIVE STITCHES
TEMPORARY STITCHES
Stiches which are used for holding any pieces of material for a short time, and that can later be easily removed. We sometimes call this tacking.
Uses: 1. To join two or more pieces of material together. 2. As a guide for permanent stitching.
Method:
1. Put a knot on the end of the thread. 2. Work from Right to Left. 3. Stitch, and make the space between stitches equal - about ½ - 1cm 4. Finish with the back stitch.

15
Watch and Try YOUR TEACHER WILL NOW SHOW YOU HOW TO DO THIS. AFTER YOU HAVE WATCHED THE TEACHER DO A TEMPORARY STITCH SEE IF YOU CAN DO IT.
PERMANENT STITCHES
Permanent stitches are stitches that cannot be removed or pulled out. They can hold down hems, and hold pieces of material together for a long time. Two types of permanent stitch are:
1. Running and back stitch 2. Hemming stitch
Running stitch Back stitch
Running Stitch
A running stitch is a simple stitch that can be used for almost anything to hold two pieces of cloth together.
Back stitch
1. Back stitch be used In place of machine stitching for making small articles like handkerchiefs, pillow cases etc.
2. It is stronger than running stitch because it cannot be pulled. Method: 1. Thread a needle and tie a knot in the end of the thread. Poke the needle down into the cloth, over about a quarter inch, and back up again.

16
2. Pull the thread tight so that the knot lies against the cloth.
3. Poke the needle down by knot then over and up a quarter inch to the left of the previous needle up position.
4. Pull thread tight so that thread lies smooth against the cloth.

17
4. Put needle down into the cloth at the left hand end of your previous thread
loop.
6.Slide the needle over to the left, underneath the cloth, through the cloth approximately 5mm to the left of your last "up" position. Pull the thread tight to get the thread to lay smooth against the cloth.
Watch and Try YOUR TEACHER WILL SHOW YOU HOW TO DO THIS. AFTER YOU HAVE WATCHED THE TEACHER SEW RUNNING AND BACK STITCHES, SEE IF YOU CAN DO IT.
Hemming Stitch
Attribution: These steps were taken from WikiHow under a CC-BY -NC-SA licence from:
http://www.wikihow.com/Backstitch

18
1. Fold your hem. Determine your seam allowance, as this is the width of the fold
you will be making; a traditional seam allowance is 1cm. Fold this much of the
fabric up from the edge, and then do it again. This will hide the raw edge under
fold, so that it won’t be seen in the finished hem. Use an iron to flatten this
fabric out.
2. Pin the hem in place. Use a series of straight pins to hold the fabric in place.
Insert the pins so that the blunt/pearl end is on the fabric portion, while the
needle/tip is sticking out towards the edge of the hem.

19
3. Sew the hem. Start at the edge of your fold. Just above the fold, pick up a very
small portion of the fabric. Then go left about 25mm in and pick up a bit of the
fold. Right above that, pick up a very small portion of the fabric again. Continue
until you reach the end of your hem.
4. Finish your hem with a double stitch. Tie and cut off the extra thread, and then
unfold your hem. On the back you should will be able to see th stitches. On the
right side, the stitch should be ‘blind’, as in you’ll only see a tiny dot where the
stitch hooked onto the fabric. Use an iron to flatten out the hem, and complete
your sewing project.
Attribution: These steps were taken from WikiHow under a CC-BY-NC-SA licence from:
https://www.wikihow.com/Sew-a-Hem
20
Watch and Try YOUR TEACHER WILL NOW SHOW YOU HOW TO DO THIS. AFTER YOU HAVE WATCHED THE TEACHER DO A HEMMING STITCH SEE IF YOU CAN DO IT.
Topic 2 Review Questions
Work with a partner or a small group. These questions can be answered in writing or in conversation with your teacher.
A. Answer the following questions. 1. What is a
a) Temporary stitch? _____________________________________________________________
________________________________________________________________
b) Permanent stitch?
_____________________________________________________________ ________________________________________________________________
5. Give an example for each type of stitches below.
a) Temporary stitch: b) ________________________________________________________.
c) Permanent stitch:
________________________________________________________.
6. How do you start and end tacking stitiches?
_______________________________________________________________________
7. How do you start and finish a hem?
_______________________________________________________________________

21
Practical Activity 2
Instructions:
Do some further practice of the 3 types of stitches shown below.
When you are ready you can start work on a simple garment of your own choice using these 3 types of stitches:
running stitch
hemming stitch
back stitch
You could make something like a handkerchief, pillow case or table cloth. Talk with your teacher about what garment or item you’d like to make, and what kind of material you will need.
22
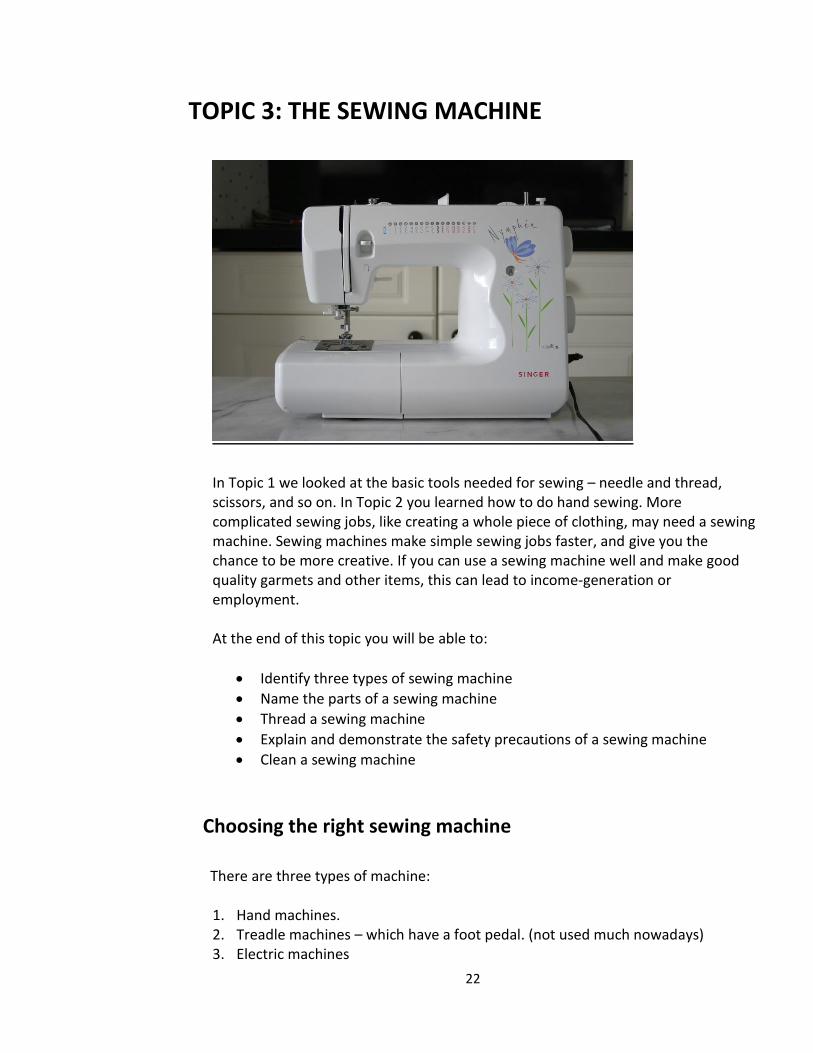
TOPIC 3: THE SEWING MACHINE
In Topic 1 we looked at the basic tools needed for sewing – needle and thread, scissors, and so on. In Topic 2 you learned how to do hand sewing. More complicated sewing jobs, like creating a whole piece of clothing, may need a sewing machine. Sewing machines make simple sewing jobs faster, and give you the chance to be more creative. If you can use a sewing machine well and make good quality garmets and other items, this can lead to income-generation or employment. At the end of this topic you will be able to:
Identify three types of sewing machine
Name the parts of a sewing machine
Thread a sewing machine
Explain and demonstrate the safety precautions of a sewing machine
Clean a sewing machine
Choosing the right sewing machine
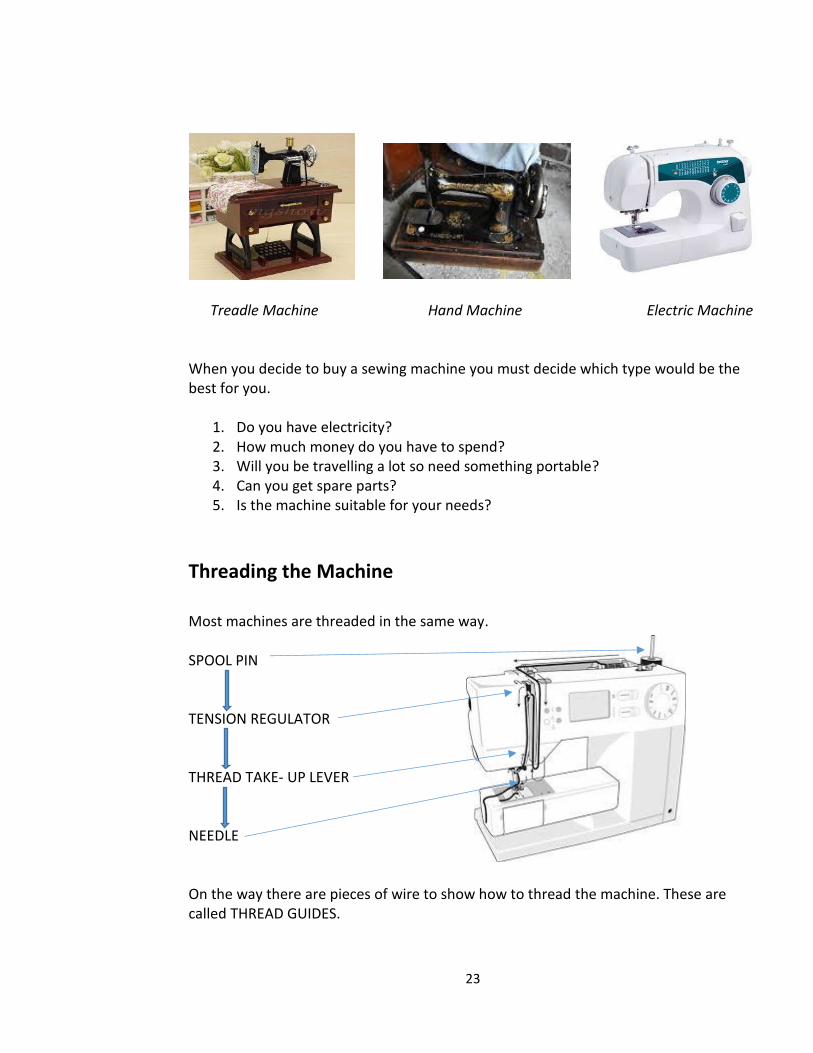
There are three types of machine:
1. Hand machines. 2. Treadle machines – which have a foot pedal. (not used much nowadays) 3. Electric machines
23
Treadle Machine Hand Machine Electric Machine When you decide to buy a sewing machine you must decide which type would be the best for you.
1. Do you have electricity? 2. How much money do you have to spend? 3. Will you be travelling a lot so need something portable? 4. Can you get spare parts? 5. Is the machine suitable for your needs?
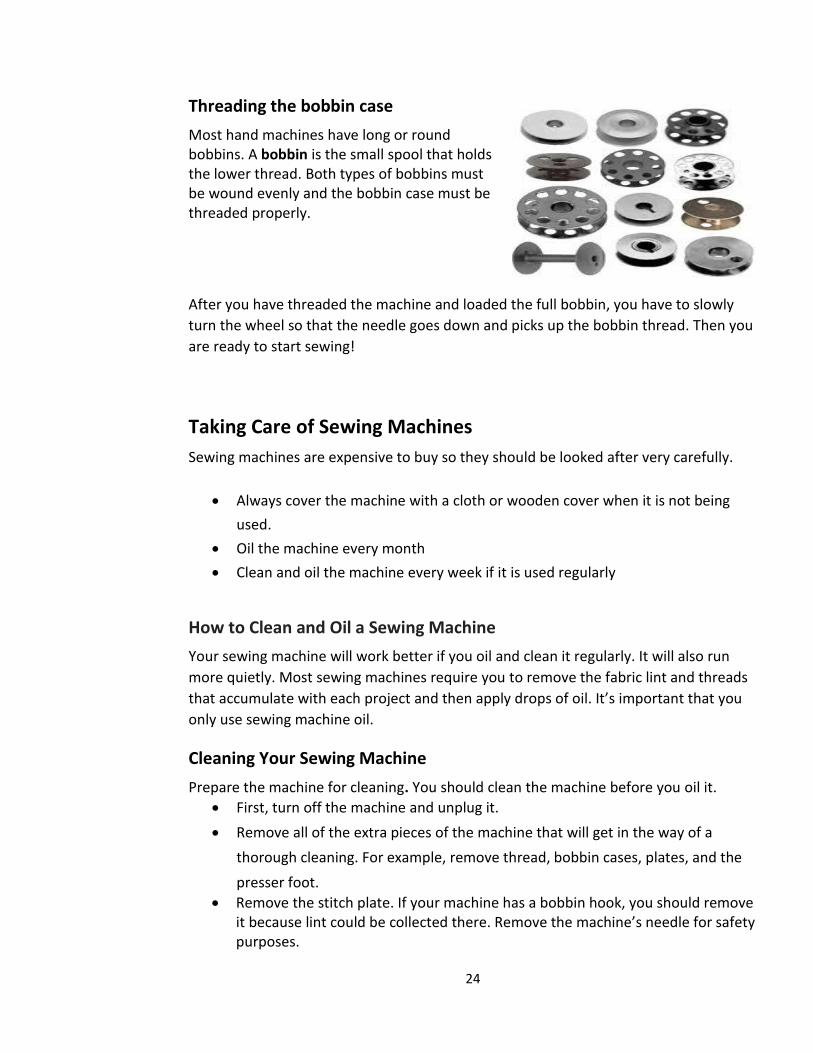
Threading the Machine
Most machines are threaded in the same way. SPOOL PIN TENSION REGULATOR THREAD TAKE- UP LEVER NEEDLE On the way there are pieces of wire to show how to thread the machine. These are called THREAD GUIDES.
24
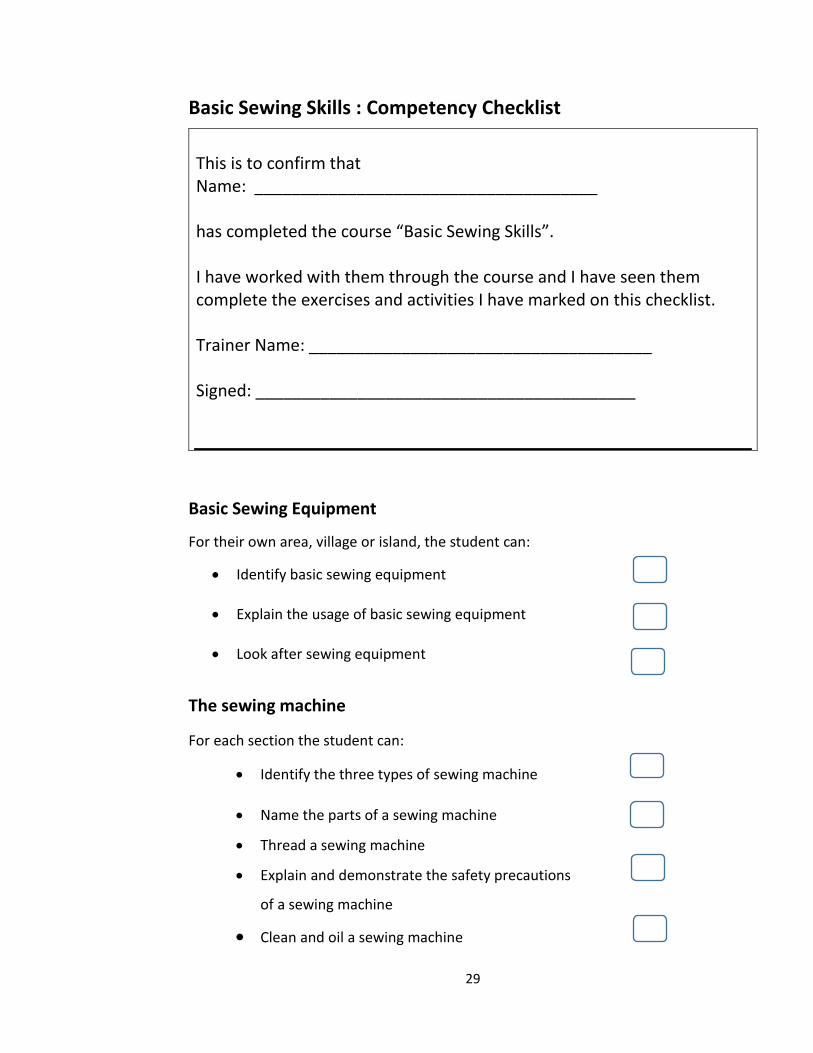
Threading the bobbin case
Most hand machines have long or round bobbins. A bobbin is the small spool that holds the lower thread. Both types of bobbins must be wound evenly and the bobbin case must be threaded properly.
After you have threaded the machine and loaded the full bobbin, you have to slowly
turn the wheel so that the needle goes down and picks up the bobbin thread. Then you
are ready to start sewing!
Taking Care of Sewing Machines
Sewing machines are expensive to buy so they should be looked after very carefully.
Always cover the machine with a cloth or wooden cover when it is not being
used.
Oil the machine every month
Clean and oil the machine every week if it is used regularly
How to Clean and Oil a Sewing Machine
Your sewing machine will work better if you oil and clean it regularly. It will also run
more quietly. Most sewing machines require you to remove the fabric lint and threads
that accumulate with each project and then apply drops of oil. It’s important that you
only use sewing machine oil.
Cleaning Your Sewing Machine
Prepare the machine for cleaning. You should clean the machine before you oil it.
First, turn off the machine and unplug it.
Remove all of the extra pieces of the machine that will get in the way of a
thorough cleaning. For example, remove thread, bobbin cases, plates, and the
presser foot.
Remove the stitch plate. If your machine has a bobbin hook, you should remove it because lint could be collected there. Remove the machine’s needle for safety purposes.

25
Take a small, stiff lint brush. You should be able to brush away the lint with the stiff lint brush. Brush away the lint that you can. Sometimes these small lint brushes and other cleaning materials will come with the sewing machine.
To reach pieces of lint that are hard to sweep away because they are compacted, try using tweezers to remove them. It is important that you thoroughly clean your machine before you apply the oil.
Try using a soft cloth to wipe away any lint or residue on the bobbin hook. Some people also use clean mascara brushes or pipe cleaners for this process.
Use compressed air Another way of cleaning a sewing machine is to use compressed air. You could clean parts of the machine with a can of compressed air. There are some cautions necessary with using compressed air, though.
The problem with canned air is that it could blow lint deeper in the machine. To
reduce this problem, 1) hold the nozzle at least 4 inches (10.2 cm) away from the machine part 2) spray air at an angle into the machine so it blows the lint out of the machine
instead of into it. Use the air to clean the bobbin case area and the bobbin case itself. Clean under the needle plate also. You will have to unscrew the needle plate.
Remove the plate. You will see dust inside of it. Spray the area with the compressed air. Clean any other parts as instructed by
your sewing machine manual.

26
Oiling the Machine
Buy sewing machine oil. You need to buy oil that is specifically for sewing machines. Sewing machine oil is clear and comes in a small bottle.
Your sewing machine may have come
with
a bottle of oil when you buy it. You can
find this oil in sewing and fabric shops.
This cannot be said enough: You cannot
use any other oil than the oil
recommended in your owner’s manual.
Put drops of oil into sewing machine parts. You only need a small amount of oil. Your owner’s manual will tell you where to drop it in the machine. It only takes a couple of drops.
Squeeze the drops of oil on the housing
unit that the bobbin case sits in.
Most machines want you to oil the shuttle hook (which is the thing that spins inside
the bobbin casing). Often you will be told to drop oil inside the hook race and the
housing of the sewing machine. That’s the silver ring that the bobbin hook fits into.
Your machine will perform better and be quieter if you drop oil here because the two
pieces rub together.

27
Wipe away excess oil. You could leave a piece of fabric under the presser foot to soak up any excess oil. You don’t want oil to stain your next project when you start stitching.
Take a cloth, and wipe away
excess oil. Otherwise, it could
end up on your fabric and
thread. Put your parts back
together. Avoid oiling plastic
parts.
If you use too much oil, you can run muslin through the machine, and then wipe the
exterior of the machine. Use a damp, soapy towel. Let it sit. That way the oil will
collect. Then, do it again. You might need to do this a few times over the subsequent
days until all of the extra oil has gone.
Test the machine before you start sewing a new project. Make a few stitches on a piece
of fabric you don’t care about. You want to see if any excess oil remains. When you see
that everything is clean and free of oil screw the needle plate back into the sewing
machine.
Attribution: materials on cleaning and oiling the sewing machine from Wikihow -
http://www.wikihow.com/Oil-a-Sewing-Machine
Well Done!
You have now completed the course on basic sewing skills. Your teacher will fill in the
checklist for you.
We hope you will go on to practice your sewing and learn more about this skill.

28
Topic 3 Review Questions
A. Answer the following questions.
1. Name the three types of sewing machine.
(i) _________________________________ (ii) _________________________________ (iii) _________________________________
2. Identify two ways of how to look after a sewing machine.
(i) ___________________________________________________________ (ii) ___________________________________________________________
3. How do you thread a machine? (You might prefer to tell your teacher the answer to this question, OR demonstrate how you do it.)
_________________________________________________________________
4. You are told to clean your sewing machine regularly. How often is regularly? _________________________________________________________
5. What is the first thing you do before cleaning a sewing machine?
_________________________________________________________
6. You can use any kind of oil when oiling a sewing machine. TRUE or FALSE?
Practical Activity 3
Instructions:
Students to: Thread a machine using a THREAD GUIDE
Clean and oil the sewing machine (group activity)
29
Basic Sewing Skills : Competency Checklist
This is to confirm that Name: _____________________________________ has completed the course “Basic Sewing Skills”. I have worked with them through the course and I have seen them complete the exercises and activities I have marked on this checklist. Trainer Name: _____________________________________ Signed: _________________________________________
Basic Sewing Equipment
For their own area, village or island, the student can:
Identify basic sewing equipment
Explain the usage of basic sewing equipment
Look after sewing equipment
The sewing machine
For each section the student can:
Identify the three types of sewing machine
Name the parts of a sewing machine
Thread a sewing machine
Explain and demonstrate the safety precautions
of a sewing machine
Clean and oil a sewing machine

30
Hand stitches
For each section the student can:
Identify the different types of hand stitches.
Demonstrate how to do three different kinds of hand stitches.
Explain why particular hand stitches are used