Embed Size (px)
Citation preview
Basic PCComponents and Elements
Before you can build a PC properly, it’s important to understand thepieces and parts that go into creating a working personal computer.It’s also important to understand the roles that components play, and
how various factors in one component can impose requirements and trade-offs on selection of other components. In part, you can understand what’sinside a PC (and by extension, what’s needed when putting a PC together)by cracking open the case and inspecting its contents. Though the actualcomponents themselves may vary, here’s a list of the kinds of things you willalways find in or around a PC:
➤ The PC case or enclosure
➤ The PC electrical system, including power supply and cabling
➤ The CPU
➤ Various forms of storage that vary in speed and capacity, including:
■ RAM
■ Hard disks
■ Optical drives, including CD and DVD drives
■ Floppy disk drives (these are uncommon on many PCs nowadays,especially Home Theater PCs)
➤ A motherboard
➤ One or more interface cards that plug into the motherboard (At aminimum this usually includes a graphics card — and at least a TVtuner card — on a Home Theater PC.)
➤ Input devices, such as a keyboard and a mouse
˛ Cracking the PC’scase
˛ Understanding aPC’s innards
˛ User input devices
˛ PC output devices
˛ PC cooling andventilation
˛ The PC bootprocess
chapter
in this chapter
05_755494 ch01.qxp 11/3/05 9:37 PM Page 3
COPYRIG
HTED M
ATERIAL

4 Part I — Meet the Modern Multimedia PC
➤ Output devices — for example, a monitor, speakers for sound, a printer for printed out-put, and so forth
➤ Cooling and ventilation elements
All kinds of other elements appear in many computer systems, but this chapter describes aminimal set of PC components at a basic level of detail. Chapters in Part II of this book coverthese same items in detail and tackle only one or two of them in any given chapter. That’swhere you’ll find the most information, vital statistics, tips, and suggestions for researching,selecting, purchasing, installing, and troubleshooting PC components.
Here, you’re looking at a fairly generic homebrew desktop PC. In other words, it’s stocked withthe basic components that any PC typically includes but not the full complement of compo-nents that some PCs could include. In the next chapter, you’ll see what kinds of componentsmust be added to a generic PC to turn it into a Home Theater PC (HTPC). To facilitate thisprocess, you’ll see photos intended to illuminate the discussion of PC component elements, andto illustrate the current focus.
Before Taking a PC System TourIf you want to take a tour of your own PC, you’re certainly welcome to do so. But before youstart, you’ll want to complete the following steps:
1. Save any work in progress, close all open applications, and then shut down your PC.
2. If the Windows shutdown doesn’t turn off the power to your PC (it will on newer sys-tems, but not on older ones), turn off the power yourself. This means finding the powerswitch for the power supply, which is normally a rocker switch somewhere on the frontor back of the unit.
3. Disconnect all cables attached to the PC. If you’re not sure you can put things backwhere you found them later on, draw a diagram that shows where cables go and thenlabel the cables to match that diagram.
A piece of tape secures a small piece of paper to each cable, if you like (we like 3M invisi-ble tape for this job because it’s easy to remove and leaves no sticky residue). When label-ing lots of cables, however, we like to use Post-It Flags for this purpose — indeed, 3Meven makes Durable Tabs that “are made to last and easy to write on” that are perfect forlabeling cables and leaving those labels attached. You can buy Post-It Flags (includingDurable Tabs) at most office supply stores like Office Depot or OfficeMax.
05_755494 ch01.qxp 11/3/05 9:37 PM Page 4
5Chapter 1 — Basic PC Components and Elements
4. Examine the PC case to determine what kind of tool(s) you’ll need to open it up.Most cases — like the example used in this chapter to illustrate PC components andinternals — use machine screws of some kind. Some require a flat head screwdriver,others a Phillips head screwdriver, and still others are best handled with hex drivers orsmall wrenches. See what you’ve got, and then pick the best tool for the job. Remove the screws that hold the case together (and re-apply the diagramming advice from theprevious step if needed). Slide the case shell off, and you’re ready to tour your own sys-tem while reading about and looking at the one depicted in this book.
Whenever you remove screws or other small items from a case, or other computer assembly,store them temporarily in a paper cup, an envelope, or other small container so you can findthem when you need to put things back together. If you’re taking several things apart (or havesmall parts from several disassembled components to deal with), be sure to label what’s what.
Of course, if you’re an experienced PC veteran and have already seen enough PC innards toidentify what you see and to know what’s where, simply follow along without taking anythingapart. There will be plenty of opportunities to take things apart and put them back togetherlater in this book!
After you’ve cracked the case and removed the shell, don’t be surprised if you find some dustand dirt inside the case along with the components you’re about to survey. If you want to cleanup, you might want to equip yourself with a can of compressed air to blow things clean beforeyou put them back together. You can find single cans and multi-packs at most computer stores(such as Fry’s or CompUSA) for $3 or so and up per can.
Be sure that the power to your PC is completely off before disconnecting any cables. Unplug thepower cable from the wall socket before unplugging it from your computer case, just to makedoubly sure you’re not risking an unpleasant shock or worse. Exercise caution when workinginside your PC; although you’d have to work at it to expose yourself to outright hazard, suchhazards are there and are best avoided. Don’t touch anything you don’t have to or aren’tinstructed to as you follow along in this book.
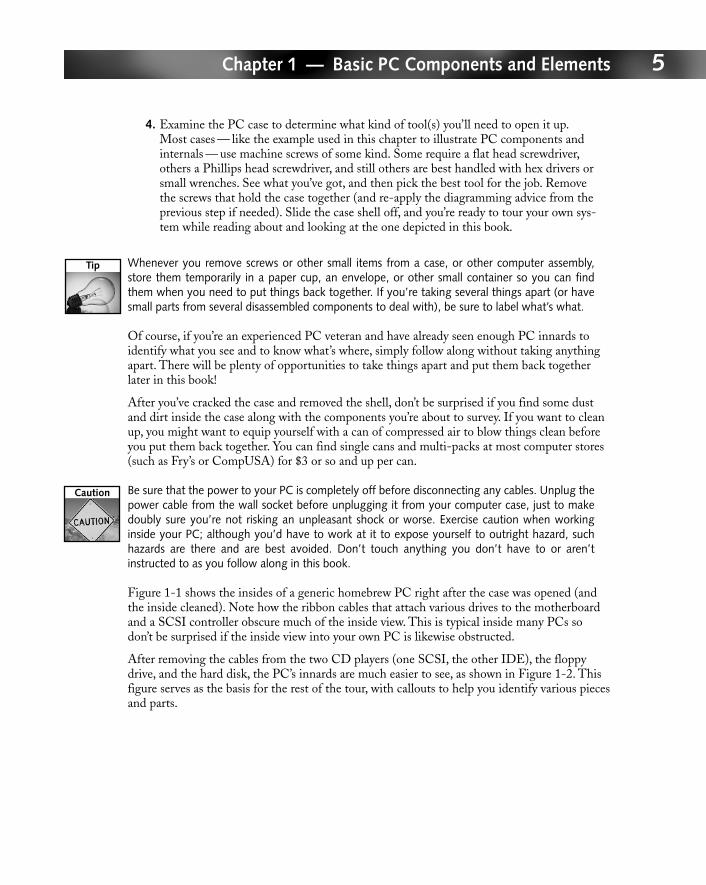
Figure 1-1 shows the insides of a generic homebrew PC right after the case was opened (andthe inside cleaned). Note how the ribbon cables that attach various drives to the motherboardand a SCSI controller obscure much of the inside view. This is typical inside many PCs sodon’t be surprised if the inside view into your own PC is likewise obstructed.
After removing the cables from the two CD players (one SCSI, the other IDE), the floppydrive, and the hard disk, the PC’s innards are much easier to see, as shown in Figure 1-2. Thisfigure serves as the basis for the rest of the tour, with callouts to help you identify various piecesand parts.
05_755494 ch01.qxp 11/3/05 9:37 PM Page 5
6 Part I — Meet the Modern Multimedia PC
FIGURE 1-1: A first look inside the case shows mostly cables, plus glimpses of other odds and ends.
Unless you’re sure you can put things back exactly the way you found them, you might want tolabel your cables as you remove them. Pay attention to how and where they hook up, so you canreplace them correctly. Most drive cable connectors use slots or guides so that connections seatproperly only when inserted with the right orientation. But you must pay attention and be gen-tle when removing or reinserting cable connectors: excess force can damage the connectors on adrive, a controller, or your motherboard. Take our word for it: although it’s easy and cheap toreplace a cable, you don’t want to replace any of those other items (none of them costs less than$25 or $30; some can cost hundreds of dollars).
05_755494 ch01.qxp 11/3/05 9:37 PM Page 6
7Chapter 1 — Basic PC Components and Elements
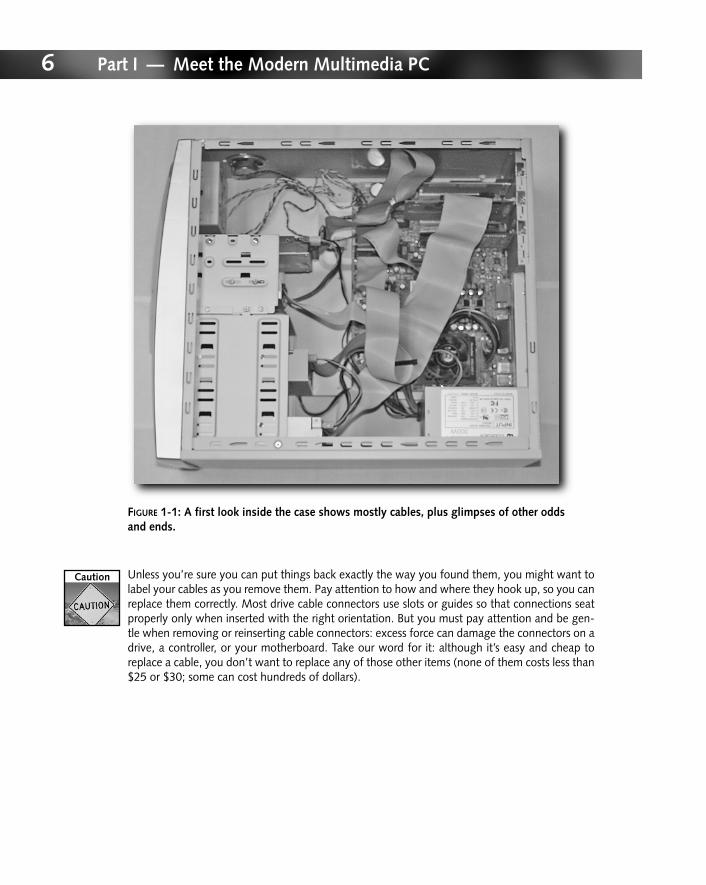
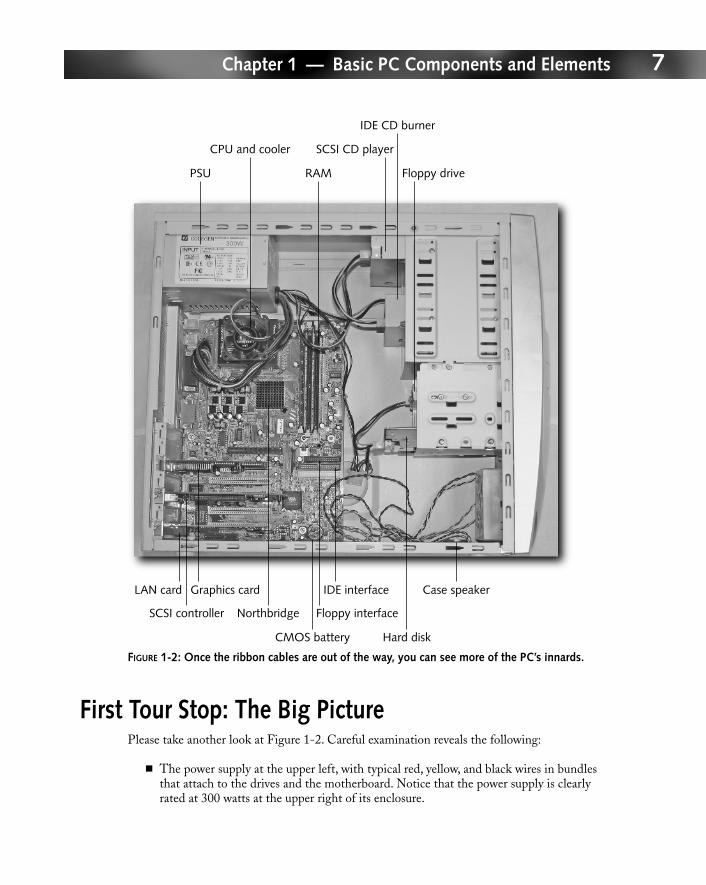
FIGURE 1-2: Once the ribbon cables are out of the way, you can see more of the PC’s innards.
First Tour Stop: The Big PicturePlease take another look at Figure 1-2. Careful examination reveals the following:
� The power supply at the upper left, with typical red, yellow, and black wires in bundlesthat attach to the drives and the motherboard. Notice that the power supply is clearlyrated at 300 watts at the upper right of its enclosure.
PSU
CPU and cooler
Northbridge
Graphics card
SCSI controller
IDE interfaceLAN card
CMOS battery
Case speaker
Hard disk
Floppy interface
Floppy driveRAM
IDE CD burner
SCSI CD player
05_755494 ch01.qxp 11/3/05 9:37 PM Page 7
8 Part I — Meet the Modern Multimedia PC
� The motherboard sits beneath the power supply and extends all the way down to thebottom of the case. A large black plastic fan assembly atop the CPU cooler covers theCPU, and three vertically aligned memory sockets appear to its right. Though you can’tsee one in this view, the power supply also has its own built-in fan.
� A whole series of connectors that service devices built into the motherboard appear in an integrated block at the upper left, immediately to the left of the CPU cooler. Here’swhere you’ll find USB and DIN-9 connectors for keyboard, mouse, and other devices, aswell as serial, parallel, and audio ports.
� The interface cards (and various empty card slots) appear in the lower half of the mother-board, on the left (this lets connectors fit into standard spacers at the back of the case so as to accommodate external cables where needed). There are three interface cardsemplaced. From top to bottom they are: a graphics card, a SCSI controller, and a net-work interface card.
� From the upper-right corner to down below the middle of the case, you see two sets ofdrive bays. On top, there’s room for up to four standard 5.25" devices (of which two slotsare occupied with CD drives: player above, burner below; the other two slots are empty).Underneath, there’s room for two 3.5" devices: the floppy drive is above, a hard diskbelow (no empty 3.5" slots, in other words).
� The drive cables connect into rectangular pin blocks at the motherboard’s right center,just to the right of the topmost interface card (SCSI controller). The shorter block ontop is where the floppy drive’s cable plugs in; the two longer blocks beneath it are IDE(integrated drive electronics) connectors. All three of these sockets can support one ortwo devices, so although this PC uses only one device for each one, the number ofdevices could double were that necessary or desirable. The ribbon cable for the SCSICD-ROM player at the very top of the 5.25" drive bay attaches to the SCSI controllercard at the lower left, as shown in Figure 1-1.
� The various fine wires at the lower right hook up to controls on the front of the case,including an on-off switch and the reset button, but also to a small loudspeaker mountedin the case at the very bottom beneath the (empty) fan housing.
Notice that all items mentioned at the outset of this chapter in the first recitation of PC com-ponents are shown in Figure 1-2, or their presence is indicated by ancillary equipment (as withthe CPU cooler, which indicates the presence of a CPU at the same time it hides the CPUfrom direct view). All of them are also mentioned in one way or another in the preceding listthat calls out various elements of the figure. The sections that follow take a closer look at these various elements and give you a chance to understand what role they play in a PC and its operation.
The Case Is Home BaseA recurring question on quiz shows is “What’s the largest organ in the human body?” Theanswer to that question is “the skin,” and that’s both as obvious and hard to notice as the case isfor a PC. Nevertheless, as the outer shell that protects a PC from dirt and jostling, and its usersfrom the sharp points and shock hazards that PC innards present, the case is a key component
05_755494 ch01.qxp 11/3/05 9:37 PM Page 8
9Chapter 1 — Basic PC Components and Elements
in any computer. If you look very carefully at Figure 1-2 at the area above the motherboardconnector block, you’ll see a series of small holes drilled into the plastic housing. That’s one oftwo air vents on the case depicted. The other is at the lower right, where the empty fan housingis situated. In a hotter running PC, it would be a good idea to install a fan there as well. Thisparticular PC contains few enough components that extra cooling isn’t necessary.
As we cleaned this case to photograph it, the vent near the CPU cooler was covered in dust,indicating strong air intake (and the CPU cooler’s fan is the obvious culprit here). Proper venti-lation and sufficient room for a PC’s components are the only inarguable must-haves in a PCcase. But as you learn in the next chapter (which deals with HTPC requirements) and in Chap-ter 3 (which covers cases and power supplies), aesthetics, form, materials, extras, and layout canall be important when choosing the right case for any PC — but especially for an HTPC.
Power Makes the PC GoMany but not all PC cases are sold with power supplies already installed. The power supply is akey PC component because it converts alternating current from the wall socket into direct cur-rent (using a transformer) and also delivers various voltage levels to PC devices (common volt-age levels inside PCs include 3.3 V, 5 V, and 12 V, among others).
A power supply must be able to provide sufficient power to handle all devices at peak load.Each device on a PC is rated in terms of peak wattage. What’s most desirable is that the sumof all device peaks be less than the peak wattage rating for the power supply. What’s absolutelymandatory for the PC to work properly is that the sum of all device peaks be no more than thepeak wattage rating for the power supply. On the PC depicted in Figures 1-1 and 1-2, totalpeak wattage for all devices is about 180 watts, or 40 percent lower than the peak wattage forthe power supply. That’s a comfortable and workable margin and leaves room to add one ortwo more devices without cause for concern.
When a system vendor or aftermarket system builder puts a PC together, they’ll routinely cre-ate a power budget for all of the devices that the unit includes (and if there are empty bays orunused interface card or memory sockets, devices that the unit could include as well). That’show they make sure the power supply is adequate for the PC they sell. If you build your ownPC, this kind of planning becomes your responsibility. That said, you’ll find plenty of informa-tion in this book to help you plan adequately and to help you stay within your power budgetthrough add-ons and upgrades.
The CPU Does All the Real ComputingA PC’s central processing unit, or CPU, is where actual computation takes place in a PC.Though there are plenty of smart chips elsewhere on the motherboard, on interface cards, andeven built into storage devices, when you run a program on your PC, it loads and executes onthe CPU. That explains why CPU speed and power ratings are so important, and why thosewho build computers often spend hundreds of dollars on such chips. It also explains whythey’re willing to spend between $50 and $100 for the best available chip coolers to keep CPUsworking at optimal performance levels. The laws of physics and solid state devices pretty much
05_755494 ch01.qxp 11/3/05 9:37 PM Page 9
10 Part I — Meet the Modern Multimedia PC
decree that the faster and more powerful a CPU, the more heat it will produce — and hence,the more important cooling becomes.
Beneath the fan and the Thermaltake cooler you can see in Figures 1-1 and 1-2 (it’s hard to miss)you’ll find a 32-bit Socket A Athlon CPU that runs at 1 GHz. Those in the know can recognizea vintage 2002 CPU from this description, one that today is pretty much obsolete and moredeserving of pity than respect. Windows XP Professional requires only a 300 MHz CPU or bet-ter, but even so this relative old-timer pokes along as compared to its more modern brethren.
CPU issues are raised again in the next chapter, when important trade-offs between quiet oper-ation and performance are covered. They also provide a key focus in Chapter 5, which takesCPUs as its primary subject (and keeping them cool as a secondary subject).
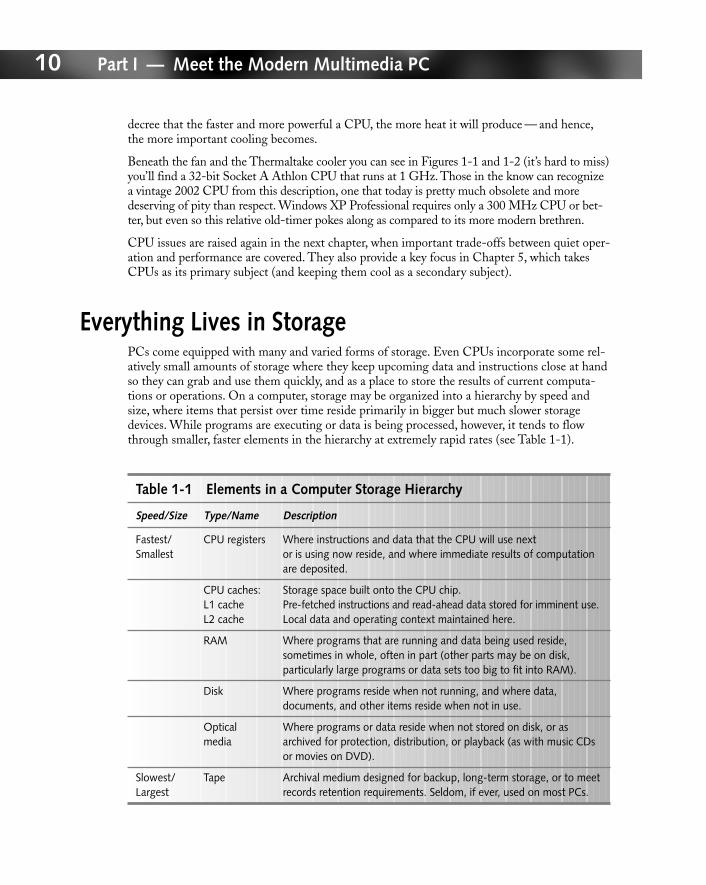
Everything Lives in StoragePCs come equipped with many and varied forms of storage. Even CPUs incorporate some rel-atively small amounts of storage where they keep upcoming data and instructions close at handso they can grab and use them quickly, and as a place to store the results of current computa-tions or operations. On a computer, storage may be organized into a hierarchy by speed andsize, where items that persist over time reside primarily in bigger but much slower storagedevices. While programs are executing or data is being processed, however, it tends to flowthrough smaller, faster elements in the hierarchy at extremely rapid rates (see Table 1-1).
Table 1-1 Elements in a Computer Storage Hierarchy
Speed/Size Type/Name Description
Fastest/ CPU registers Where instructions and data that the CPU will use next Smallest or is using now reside, and where immediate results of computation
are deposited.
CPU caches: Storage space built onto the CPU chip.L1 cache Pre-fetched instructions and read-ahead data stored for imminent use.L2 cache Local data and operating context maintained here.
RAM Where programs that are running and data being used reside,sometimes in whole, often in part (other parts may be on disk,particularly large programs or data sets too big to fit into RAM).
Disk Where programs reside when not running, and where data,documents, and other items reside when not in use.
Optical Where programs or data reside when not stored on disk, or as media archived for protection, distribution, or playback (as with music CDs
or movies on DVD).
Slowest/ Tape Archival medium designed for backup, long-term storage, or to meet Largest records retention requirements. Seldom, if ever, used on most PCs.
05_755494 ch01.qxp 11/3/05 9:37 PM Page 10
11Chapter 1 — Basic PC Components and Elements
Drives also form their own subhierarchy within this larger hierarchy. Disk drives are faster thanoptical or floppy drives, so the former are used for active data storage, whereas the latter tend tobe used for archiving, program or data distribution, and playback of large recorded works (suchas music on CD or movies on DVD).
Storage essentially provides room for computers to work in at the smaller, faster end of thehierarchy and room for computers to store programs and data in at the bigger, slower end ofthe hierarchy. But nearly all elements in the hierarchy are important (the advent of very large,cheap disk and optical drives is slowly but surely pushing tape out of this picture) and hencenearly all of them get significant coverage in this book.
A typical home user Windows XP PC is perfectly adequate with 512MB to 1GB of RAM,80 to 120GB of hard disk space, and a CD or DVD burner or player (note: if you buy a burner,you automatically get a player as well). In the next chaper, you’ll learn more about how theserequirements change in the face of large digital media collections on an HTPC. In Chapters 6,7, and 8 you’ll learn more about what that means for RAM, hard disks, and optical storagedevices, respectively.
Everything Plugs Into the MotherboardIf the CPU is the brains of a PC (as the analogy so often goes) the motherboard is its GrandCentral Station. Everything on its way into or out of the PC travels through the motherboardat some point or another. It’s also where most devices ultimately attach and it provides thesockets or connections where RAM, interface cards, and the CPU all plug themselves in, aswell as home to the connectors for user input devices such as a mouse and keyboard.
These days, more and more functions that used to require interface cards are built into mother-boards. This doesn’t mean you can’t elect to use a higher quality, more capable interface card toperform some task or deliver a specific capability, but it certainly makes it cheaper and easier touse plain-vanilla built-in implementations where quality and performance may not be terriblyimportant.
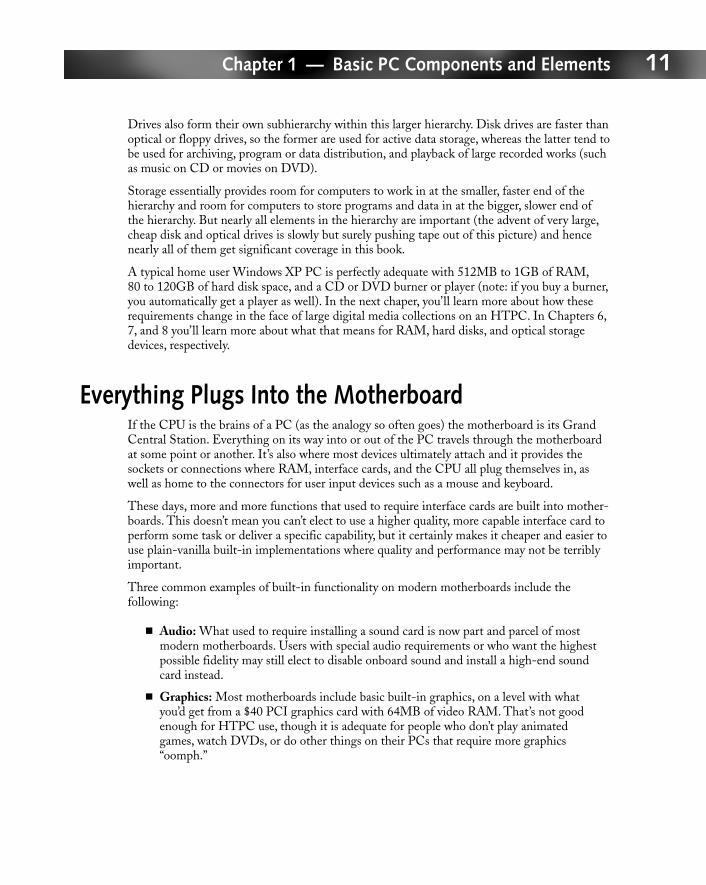
Three common examples of built-in functionality on modern motherboards include the following:
� Audio: What used to require installing a sound card is now part and parcel of mostmodern motherboards. Users with special audio requirements or who want the highestpossible fidelity may still elect to disable onboard sound and install a high-end soundcard instead.
� Graphics: Most motherboards include basic built-in graphics, on a level with what you’d get from a $40 PCI graphics card with 64MB of video RAM. That’s not goodenough for HTPC use, though it is adequate for people who don’t play animated games, watch DVDs, or do other things on their PCs that require more graphics“oomph.”
05_755494 ch01.qxp 11/3/05 9:37 PM Page 11
12 Part I — Meet the Modern Multimedia PC
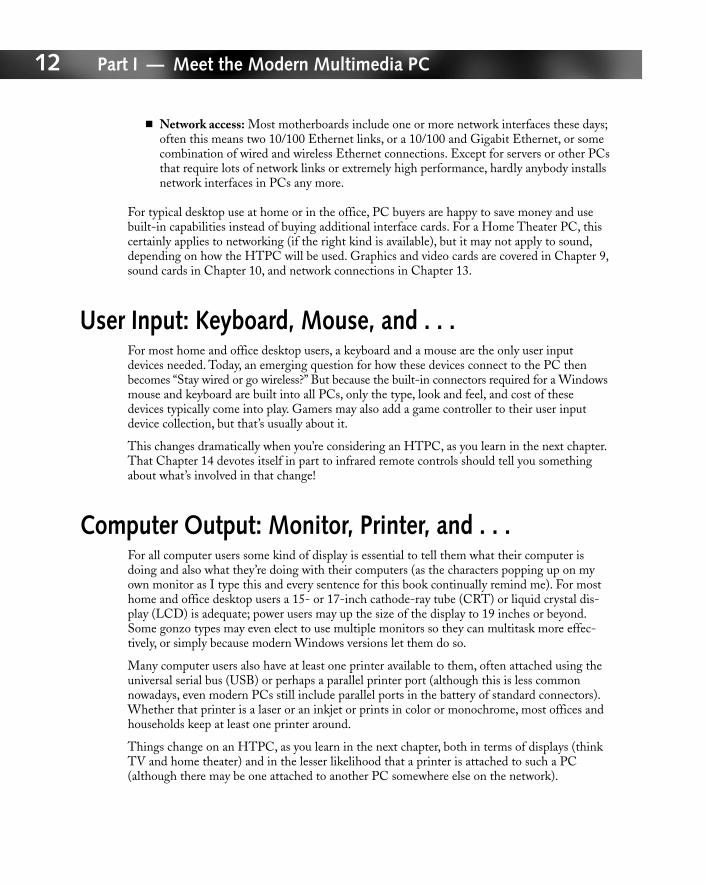
� Network access: Most motherboards include one or more network interfaces these days;often this means two 10/100 Ethernet links, or a 10/100 and Gigabit Ethernet, or somecombination of wired and wireless Ethernet connections. Except for servers or other PCsthat require lots of network links or extremely high performance, hardly anybody installsnetwork interfaces in PCs any more.
For typical desktop use at home or in the office, PC buyers are happy to save money and usebuilt-in capabilities instead of buying additional interface cards. For a Home Theater PC, thiscertainly applies to networking (if the right kind is available), but it may not apply to sound,depending on how the HTPC will be used. Graphics and video cards are covered in Chapter 9,sound cards in Chapter 10, and network connections in Chapter 13.
User Input: Keyboard, Mouse, and . . .For most home and office desktop users, a keyboard and a mouse are the only user inputdevices needed. Today, an emerging question for how these devices connect to the PC thenbecomes “Stay wired or go wireless?” But because the built-in connectors required for a Windowsmouse and keyboard are built into all PCs, only the type, look and feel, and cost of thesedevices typically come into play. Gamers may also add a game controller to their user inputdevice collection, but that’s usually about it.
This changes dramatically when you’re considering an HTPC, as you learn in the next chapter.That Chapter 14 devotes itself in part to infrared remote controls should tell you somethingabout what’s involved in that change!
Computer Output: Monitor, Printer, and . . .For all computer users some kind of display is essential to tell them what their computer isdoing and also what they’re doing with their computers (as the characters popping up on myown monitor as I type this and every sentence for this book continually remind me). For mosthome and office desktop users a 15- or 17-inch cathode-ray tube (CRT) or liquid crystal dis-play (LCD) is adequate; power users may up the size of the display to 19 inches or beyond.Some gonzo types may even elect to use multiple monitors so they can multitask more effec-tively, or simply because modern Windows versions let them do so.
Many computer users also have at least one printer available to them, often attached using theuniversal serial bus (USB) or perhaps a parallel printer port (although this is less commonnowadays, even modern PCs still include parallel ports in the battery of standard connectors).Whether that printer is a laser or an inkjet or prints in color or monochrome, most offices andhouseholds keep at least one printer around.
Things change on an HTPC, as you learn in the next chapter, both in terms of displays (thinkTV and home theater) and in the lesser likelihood that a printer is attached to such a PC(although there may be one attached to another PC somewhere else on the network).
05_755494 ch01.qxp 11/3/05 9:37 PM Page 12
13Chapter 1 — Basic PC Components and Elements
Cool RunningsNo PC will work without some cooling and ventilation. Even the relatively old model pho-tographed for Figures 1-1 and 1-2 requires airflow of 50 cubic feet per minute (cfm) over itspoky CPU. More modern CPUs require even more airflow, as do the bigger power suppliesnecessary to feed them the electricity they consume. The same is true for more powerful graph-ics cards, which now include fans to cool their fast and powerful GPUs (graphics processingunits) as a matter of course.
In general, the more stuff you have inside your PC, the more important cooling becomes. It’snot unthinkable that added ventilation would be needed in the PC depicted earlier in thischapter were it to house an additional hard disk or two, more memory, and a high-end graphicscard, all of which it could accommodate with relative ease.
Cooling deserves even more attention in HTPCs than in ordinary desktops for all kinds of rea-sons. That’s why the topic of cooling is revisited in the next chapter, and covered in Chapters 3(cases and power supplies), 5 (CPUs), and 9 (graphics cards) as well.
Putting All the PC’s Pieces to WorkIn the conclusion to this introductory chapter, we want to follow what happens to the variousparts of a PC as you turn the power on, and the machine starts up. This will allow you tounderstand how and when the various parts of the PC come into play. It will also provide anopportunity to introduce other parts of the system, including some items on the motherboardto which you’ve not yet been introduced. So buckle up, don your hardhat and safety goggles,and let’s walk through what happens during initial startup on a PC.
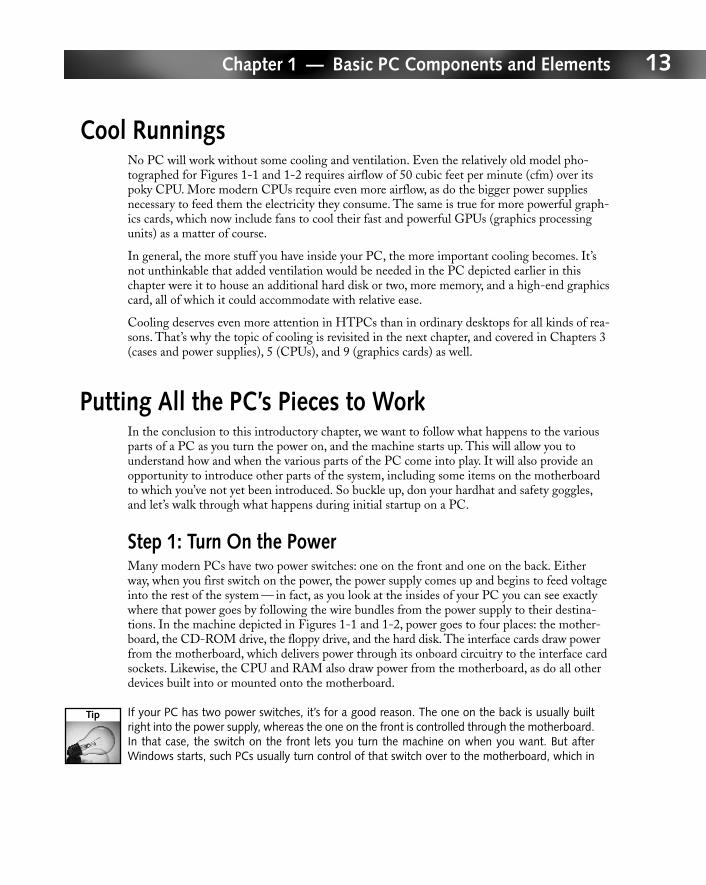
Step 1: Turn On the PowerMany modern PCs have two power switches: one on the front and one on the back. Eitherway, when you first switch on the power, the power supply comes up and begins to feed voltageinto the rest of the system — in fact, as you look at the insides of your PC you can see exactlywhere that power goes by following the wire bundles from the power supply to their destina-tions. In the machine depicted in Figures 1-1 and 1-2, power goes to four places: the mother-board, the CD-ROM drive, the floppy drive, and the hard disk. The interface cards draw powerfrom the motherboard, which delivers power through its onboard circuitry to the interface cardsockets. Likewise, the CPU and RAM also draw power from the motherboard, as do all otherdevices built into or mounted onto the motherboard.
If your PC has two power switches, it’s for a good reason. The one on the back is usually builtright into the power supply, whereas the one on the front is controlled through the motherboard.In that case, the switch on the front lets you turn the machine on when you want. But afterWindows starts, such PCs usually turn control of that switch over to the motherboard, which in
05_755494 ch01.qxp 11/3/05 9:37 PM Page 13
14 Part I — Meet the Modern Multimedia PC
turn grants control to Windows. That explains how and why some machines can power them-selves off when you perform a Windows shutdown. The switch on the back lets you turn the PCoff even when it’s hung or crashed because it basically controls access to A/C power directly.Thus, it’s smart to think of (and use) the switch on the back only in cases of dire emergency,when you’re sure you’ll need to reboot in any case.
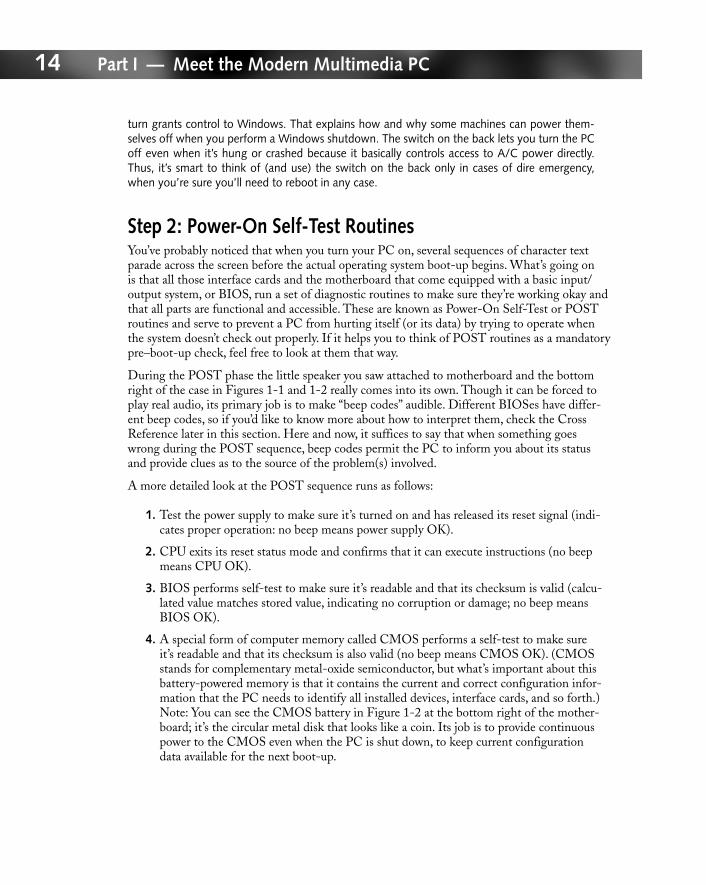
Step 2: Power-On Self-Test RoutinesYou’ve probably noticed that when you turn your PC on, several sequences of character textparade across the screen before the actual operating system boot-up begins. What’s going on is that all those interface cards and the motherboard that come equipped with a basic input/output system, or BIOS, run a set of diagnostic routines to make sure they’re working okay andthat all parts are functional and accessible. These are known as Power-On Self-Test or POSTroutines and serve to prevent a PC from hurting itself (or its data) by trying to operate whenthe system doesn’t check out properly. If it helps you to think of POST routines as a mandatorypre–boot-up check, feel free to look at them that way.
During the POST phase the little speaker you saw attached to motherboard and the bottomright of the case in Figures 1-1 and 1-2 really comes into its own. Though it can be forced toplay real audio, its primary job is to make “beep codes” audible. Different BIOSes have differ-ent beep codes, so if you’d like to know more about how to interpret them, check the CrossReference later in this section. Here and now, it suffices to say that when something goeswrong during the POST sequence, beep codes permit the PC to inform you about its statusand provide clues as to the source of the problem(s) involved.
A more detailed look at the POST sequence runs as follows:
1. Test the power supply to make sure it’s turned on and has released its reset signal (indi-cates proper operation: no beep means power supply OK).
2. CPU exits its reset status mode and confirms that it can execute instructions (no beepmeans CPU OK).
3. BIOS performs self-test to make sure it’s readable and that its checksum is valid (calcu-lated value matches stored value, indicating no corruption or damage; no beep meansBIOS OK).
4. A special form of computer memory called CMOS performs a self-test to make sure it’s readable and that its checksum is also valid (no beep means CMOS OK). (CMOSstands for complementary metal-oxide semiconductor, but what’s important about thisbattery-powered memory is that it contains the current and correct configuration infor-mation that the PC needs to identify all installed devices, interface cards, and so forth.)Note: You can see the CMOS battery in Figure 1-2 at the bottom right of the mother-board; it’s the circular metal disk that looks like a coin. Its job is to provide continuouspower to the CMOS even when the PC is shut down, to keep current configuration data available for the next boot-up.
05_755494 ch01.qxp 11/3/05 9:37 PM Page 14
15Chapter 1 — Basic PC Components and Elements
5. CPU performs a memory check on the motherboard, and checks its memory controller,the memory bus, and all installed memory modules (no beep means memory hardwarechecks out OK).
6. The first 64K of memory is checked for read/write capability; if it checks out OK, it willhave the remaining POST code copied to it, and will run from that memory afterward(no beep means memory read/write check is OK).
7. The I/O bus and controller are checked to make sure they’re accessible and workingproperly. (This is what the computer uses to communicate with other devices in the PC,including interface cards, storage devices, and so forth; no beep means I/O hardwarecheck is OK.)
8. The I/O bus must be able to read/write from the video subsystem and be able to readvideo RAM (this is when the BIOS on a graphic card will perform its own POST, ifapplicable) and when actual screen output during the boot process can begin (no beepmeans video subsystem checks out OK).
Only if your PC reports OK status on all checks mentioned here will it actually begin the bootprocess. But first, if other interface cards have BIOSes on board, their POST routines mustalso complete successfully. Hopefully, it’s also obvious that if you hear no beeps but your PCdoes nothing that something is wrong with delivery of power to the motherboard, makingsome kind of power supply problem the most likely culprit.
Lots of potential sources about POST beep codes are available online. One especially good oneis at www.computerhope.com/beep.htm. You’ll find a complete explanation of the POSTprocess there, plus pointers to beep codes for major varieties of PC BIOS (and the Macintosh).
Step 3: The Boot Load ProcessWhen the POST completes succesfully on any Intel x86-compatible computer (which includespretty much anything that identifies itself as a PC nowadays), the CPU reads the CMOS toidentify a boot drive. The first sector on this drive (cylinder 0, head 0, sector 1) includes twovery special items of information:
� A small but very special program called a boot loader, which seeks the bootable partitionon the boot drive and loads the first sector of that partition into memory to continue theboot process
� The partition table for the boot drive, which indicates how the drive is divided up intoone or more independent group of sectors called partitions
Together, these items comprise the first sector of the boot drive, which is often called theMaster Boot Record, or MBR. It’s one of the most important keys to a successful system booton a PC.
05_755494 ch01.qxp 11/3/05 9:37 PM Page 15
16 Part I — Meet the Modern Multimedia PC
When the boot loader executes, it checks the partition table to look for an entry with the“bootable” or “active” flag set to identify where the next program to control the booting processis located. The boot loader reads the first sector of the boot partition into memory (which isknown as the Boot Sector, not to be confused with the MBR) and then turns control over tothe program that begins there.
The program in the Boot Sector looks for the operating system kernel, loads it into memory,and starts it running. This is the point at which the real software boot process begins, and the boot loader ceases operation. On modern Windows operating systems (Windows NTWorkstation, Windows 2000 or XP Professional, Windows XP Home, and all related Serverversions, plus Windows 2003 Server) a program named NTLDR takes over for the operatingsystem boot.
Step 4: (Windows) Operating System Boot-UpNTLDR reads a special data file called boot.ini. If multiple operating systems are presenton the PC, it offers a menu that allows users to select the operating system they’d like to boot(but defaults to a specific item after a timeout period expires). It’s also possible to forceWindows to boot into one of various modes at this point (Safe mode, Safe mode with net-working, Last Known Good Configuration, and so on) to override normal boot behavior.
After those selections are made or a timeout expires, operating system boot-up begins inearnest. Windows then begins to load and execute operating system kernel files, which makeup the core of the operating system. Next, NTLDR causes a program namedNTDETECT.COM to execute. It probes the system completely to build a list of all installedhardware components found. After this, NTLDR loads the CPU-specific portion of the oper-ating system kernel along with device drivers for all devices marked as boot devices. After theseprocesses complete successfully, NTLDR turns control over to the primary Windows kernelprogram NTOSKRNL.EXE, which in turn completes loading basic services needed for mini-mal operation. At this point, Windows switches from character mode (only text charactersshow on screen, as in the command window) to graphics mode and displays a graphical screenwith a status bar to show load progress.
When the final operating system load completes, Windows displays a login window. Only aftera user logs in to the system successfully is Windows boot-up considered complete. After that,the PC is yours to do whatever you want it to, subject only to the limits of your imagination,the Windows operating system, and the programs at your disposal.
The best and most comprehensive description of the Windows XP boot process resides on the dot-netjunkies Web site at http://dotnetjunkies.com/WebLog/unknownreference/articles/12284.aspx. It’s cited as having been copied from a course handout at QuinebaugValley Community College in Connecticut, but because the original is no longer available, thiscopy will have to suffice. If you want to know more you should definitely read this run-through.
05_755494 ch01.qxp 11/3/05 9:37 PM Page 16
17Chapter 1 — Basic PC Components and Elements
Wrapping UpAlthough Home Theater PCs and more ordinary PCs — like the ones you’ve read about in thischapter — have a lot in common, numerous and important differences exist between an ordi-nary home or office desktop and a Home Theater PC. In this chapter, you learned what kindsof parts and components the two types of PCs share; in the next chapter, you learn how thecomponents in an HTPC can differ from their more ordinary counterparts, as well as whatkinds of parts an HTPC is likely to incorporate that an ordinary PC might not.
05_755494 ch01.qxp 11/3/05 9:37 PM Page 17

05_755494 ch01.qxp 11/3/05 9:37 PM Page 18