Embed Size (px)
Citation preview

Installation of a GMK Cold Air Intake system will not require you to relocate your battery, nor will it require you to relocate your fuse box.
Also, if you do not have an official GMK CAI product. I cannot be held responsible if this how to is not accurate for your intake or if your intake does not fit.
-----------------------------------
Installation tips:
-Warm up your couplers in warm/hot water. This will allow them to strech more easily.
-Always ensure your hands are clean of any grease or dirt before handling your piping if you want it to stay shiny!
-Besure to clean up any metal shavings after you cut your 3.5" hole.
-If you do not have the OEM fender liners. I Highly recommend you purchase a GMK Splash shield to protect your filter from dirt/mud coming from tires.
-Hydrolock is not an issue with official GMK products. The filter will be plenty high enough off the ground so the filter cannot ever become submerged under
water.
-I recommend you rinse the inside of your piping with soft wet towel prior to install to ensure no dust or packing materials will enter the engine. This is especially
important if your intake has been sitting around for a while before install.
-If you ever have any questions about your GMK intake install please dont hesitate to PM me.
-----------------------------------------
Tools needed for install.
-Basic Metric socket set
-Phillips screw driver
-flat head screw driver
-3.5" hole saw for bi-metal
-1 self tapping screw
-pliers or vice
-Hacksaw for bi-metal
-Torx set or allen keys
-beefy CORDED drill. 1/2" drive is ideal.
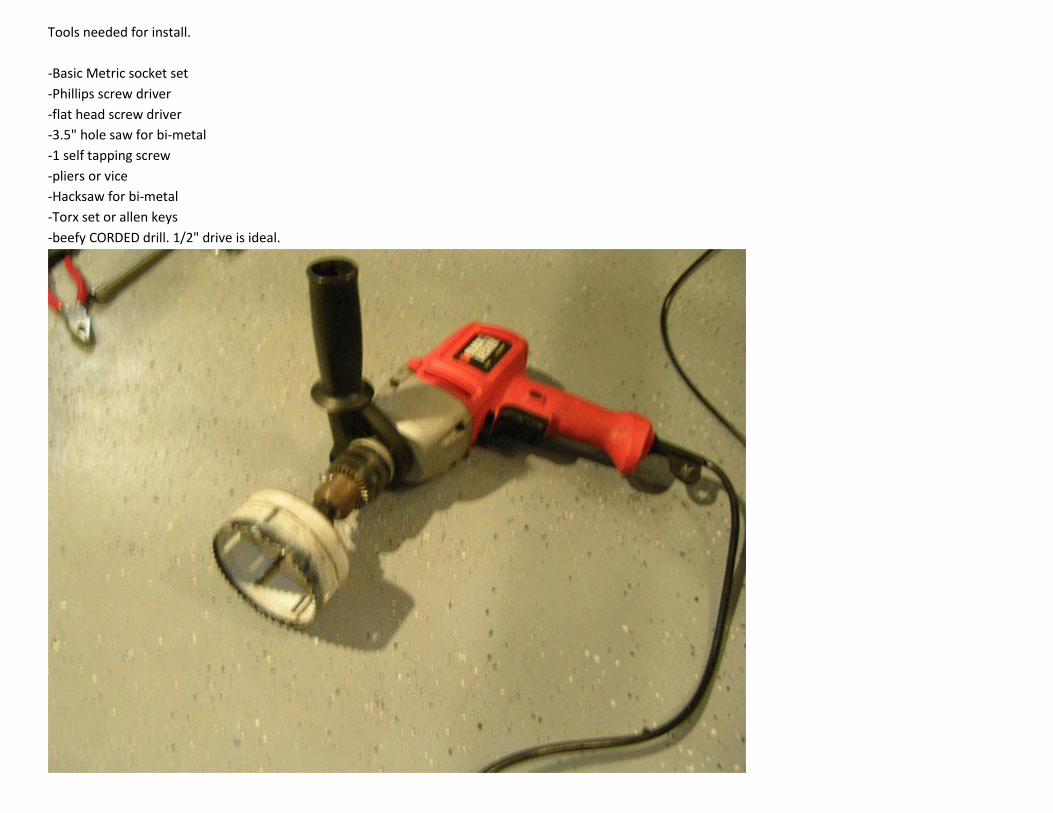
I recommend to have a friend help out. Its always a good idea to budget about 3-4 hours for this project. Always do the work in a garage or driveway with
concrete floor.
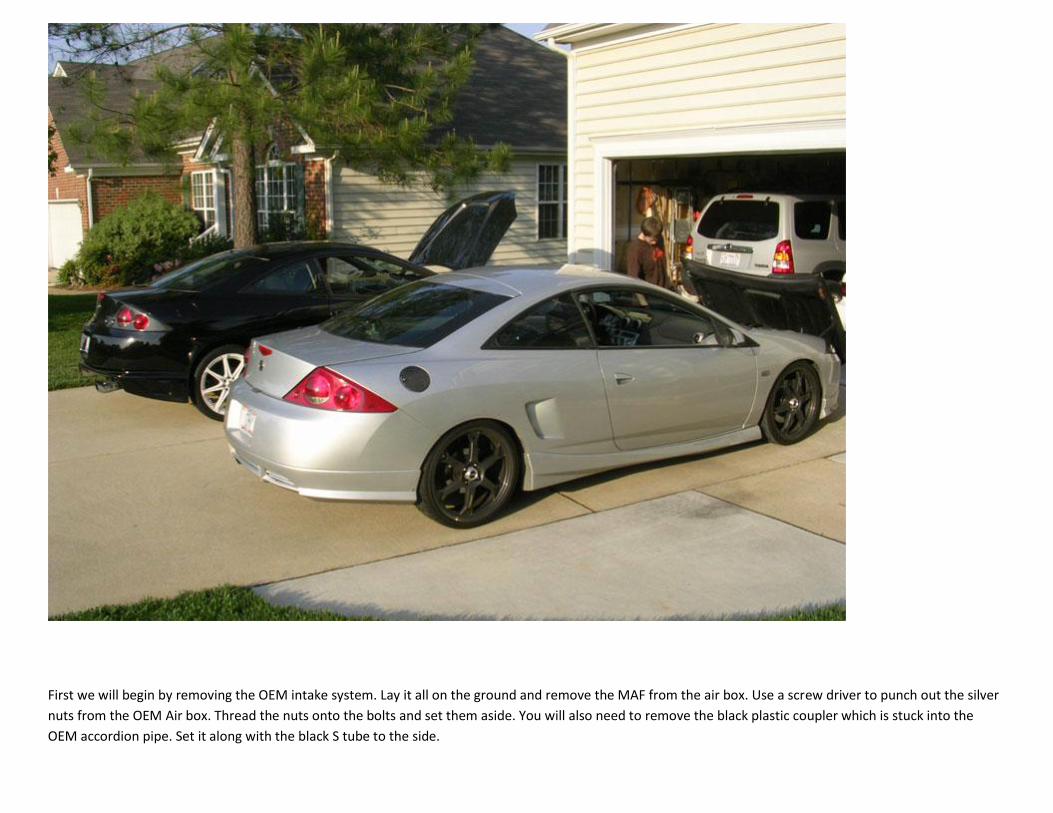
First we will begin by removing the OEM intake system. Lay it all on the ground and remove the MAF from the air box. Use a screw driver to punch out the silver
nuts from the OEM Air box. Thread the nuts onto the bolts and set them aside. You will also need to remove the black plastic coupler which is stuck into the
OEM accordion pipe. Set it along with the black S tube to the side.

Parts to be re-used from the OEM intake system
-MAF
-MAF gasket
-MAF bolts & silver nuts
-Plastic coupler (from accordion pipe)
-Black 's' tube
-valve cover vacuum lines & right angle coupler
You will want to now bolt the MAF to the supplied GMK MAF adaptor. Reuse the OEM gasket and thread the first bolt through. You should be able to thread at
least 2 or 3 bolts without an issue. However the last bolts may seem like they are too short. You should use a pair of pliers (and a friend) or a vice to clamp the
MAF and the MAF adaptor together very tightly. This will create a good seal and allow you to thread the last bolts.
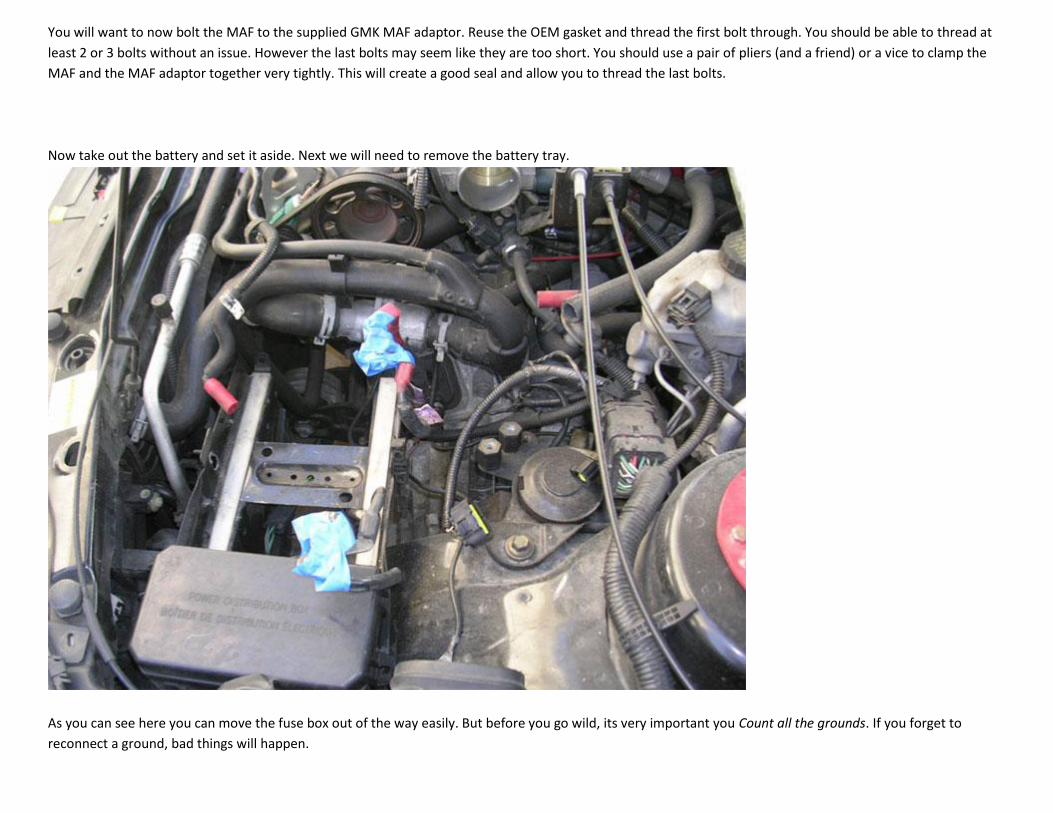
Now take out the battery and set it aside. Next we will need to remove the battery tray.
As you can see here you can move the fuse box out of the way easily. But before you go wild, its very important you Count all the grounds. If you forget to
reconnect a ground, bad things will happen.
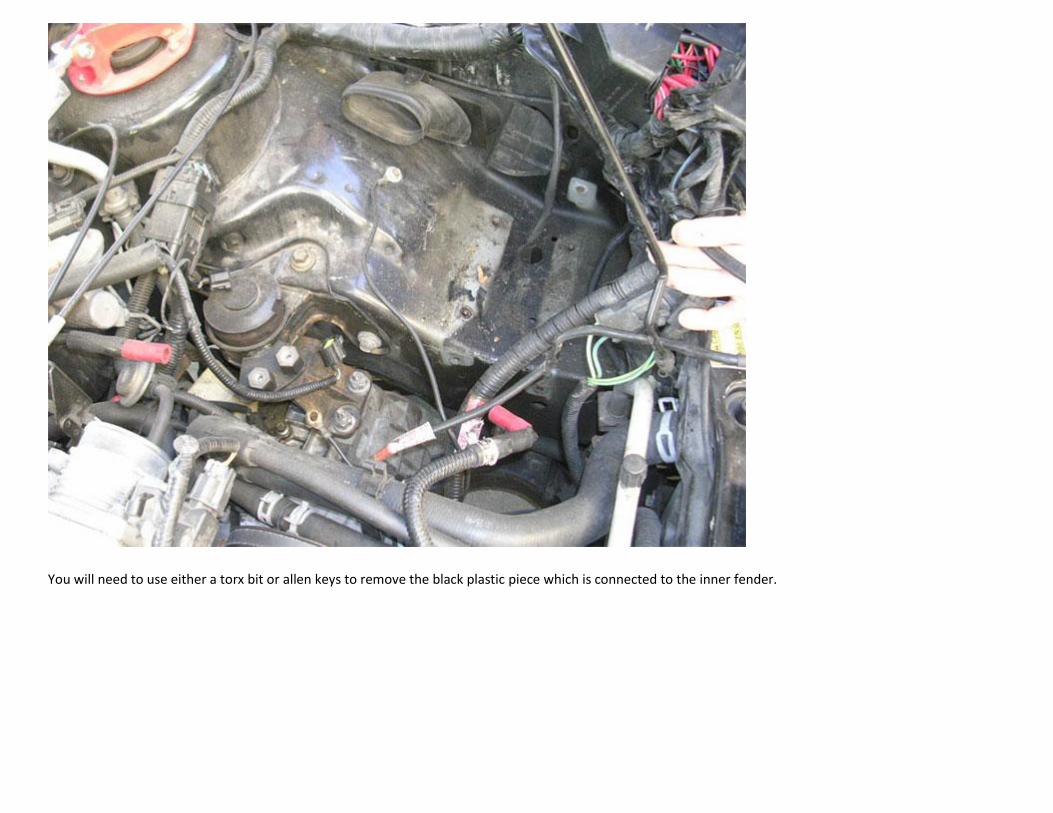
You will need to use either a torx bit or allen keys to remove the black plastic piece which is connected to the inner fender.
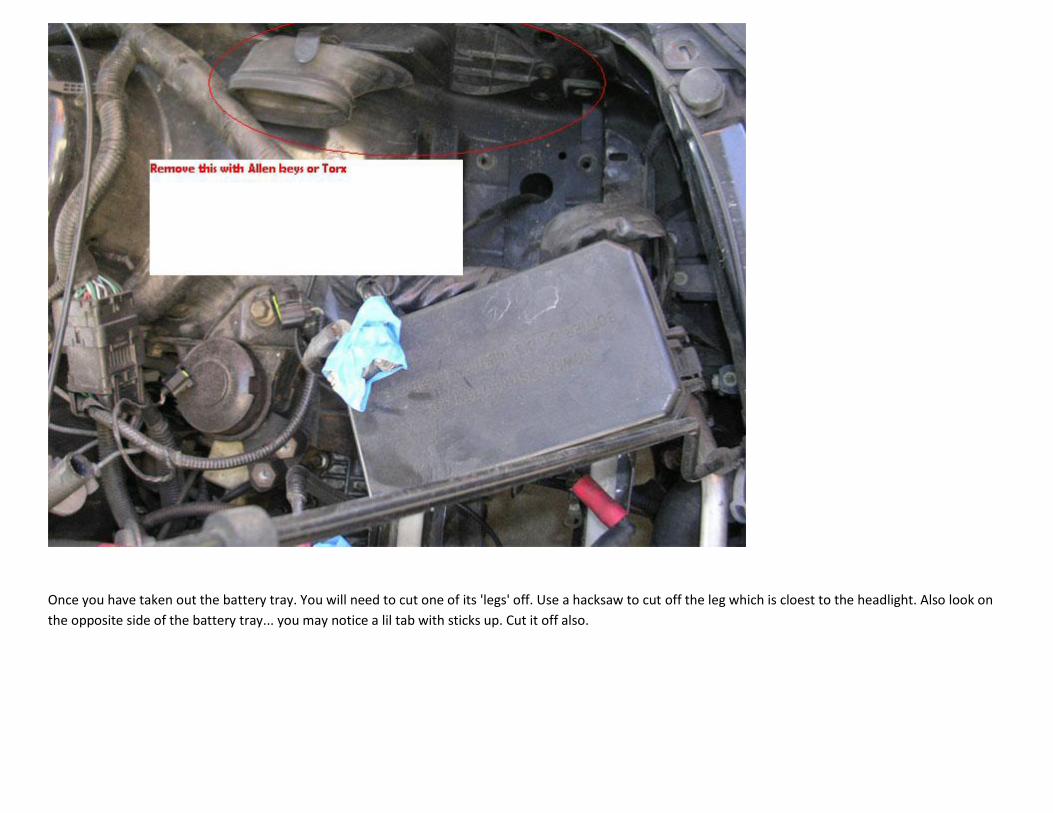
Once you have taken out the battery tray. You will need to cut one of its 'legs' off. Use a hacksaw to cut off the leg which is cloest to the headlight. Also look on
the opposite side of the battery tray... you may notice a lil tab with sticks up. Cut it off also.
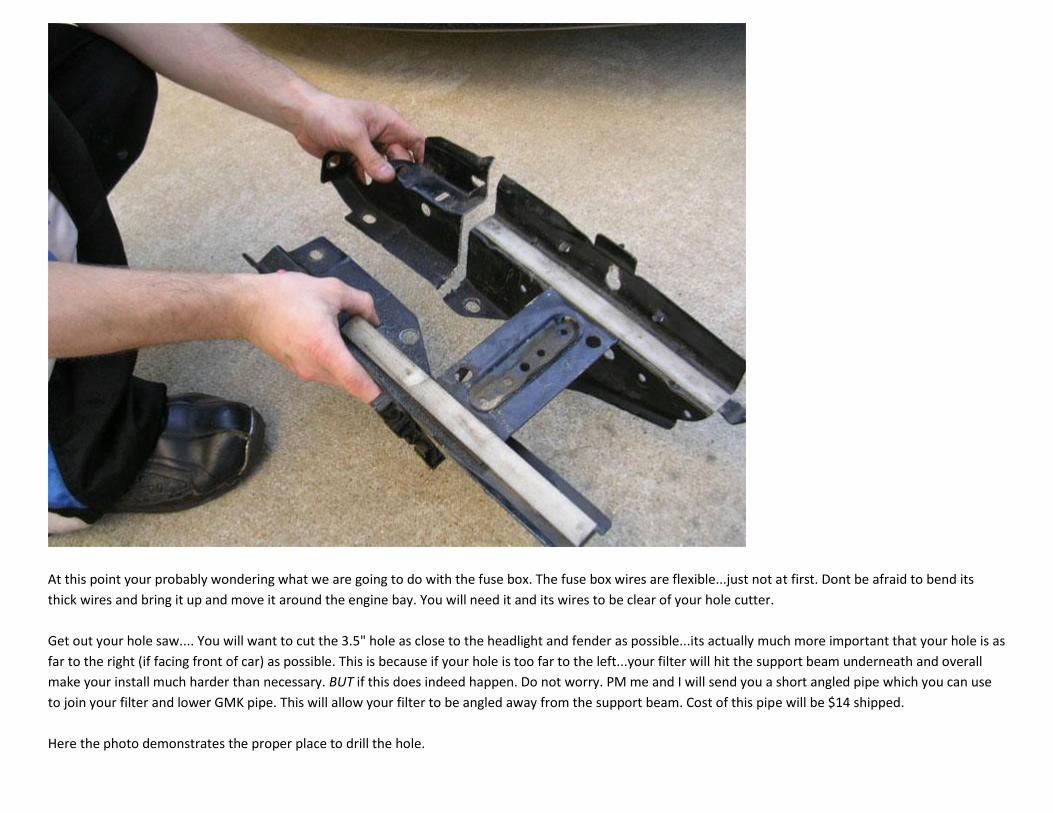
At this point your probably wondering what we are going to do with the fuse box. The fuse box wires are flexible...just not at first. Dont be afraid to bend its
thick wires and bring it up and move it around the engine bay. You will need it and its wires to be clear of your hole cutter.
Get out your hole saw.... You will want to cut the 3.5" hole as close to the headlight and fender as possible...its actually much more important that your hole is as
far to the right (if facing front of car) as possible. This is because if your hole is too far to the left...your filter will hit the support beam underneath and overall
make your install much harder than necessary. BUT if this does indeed happen. Do not worry. PM me and I will send you a short angled pipe which you can use
to join your filter and lower GMK pipe. This will allow your filter to be angled away from the support beam. Cost of this pipe will be $14 shipped.
Here the photo demonstrates the proper place to drill the hole.
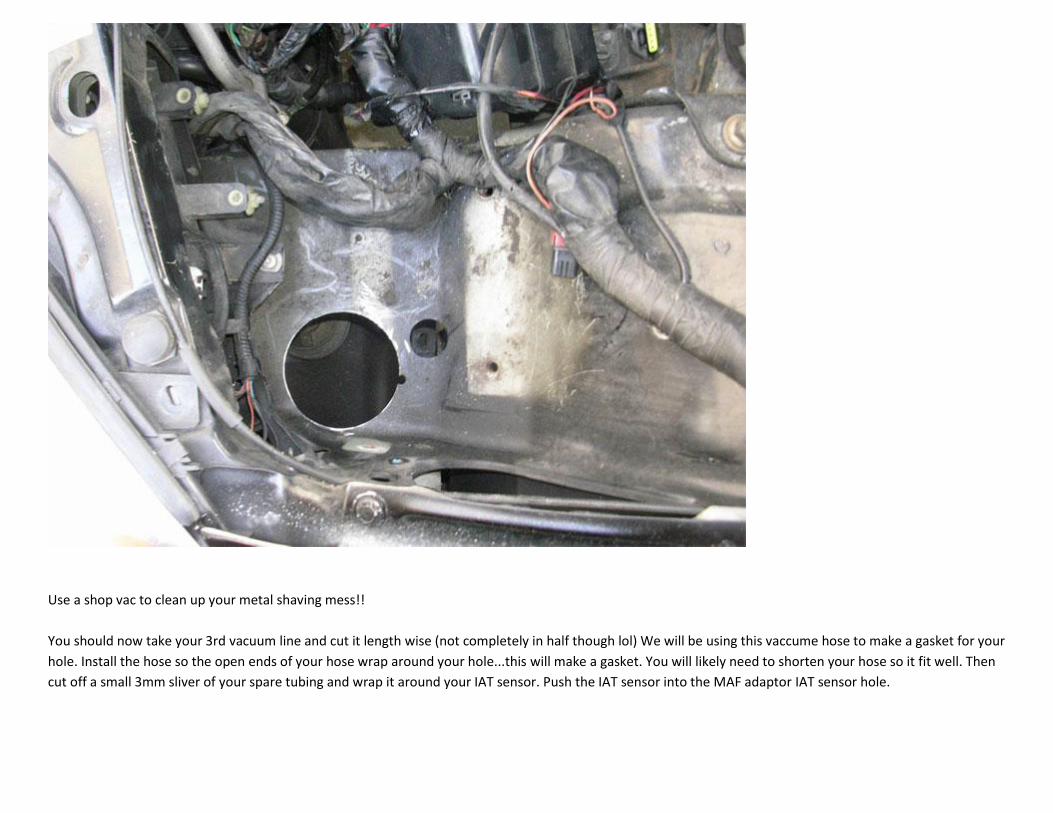
Use a shop vac to clean up your metal shaving mess!!
You should now take your 3rd vacuum line and cut it length wise (not completely in half though lol) We will be using this vaccume hose to make a gasket for your
hole. Install the hose so the open ends of your hose wrap around your hole...this will make a gasket. You will likely need to shorten your hose so it fit well. Then
cut off a small 3mm sliver of your spare tubing and wrap it around your IAT sensor. Push the IAT sensor into the MAF adaptor IAT sensor hole.
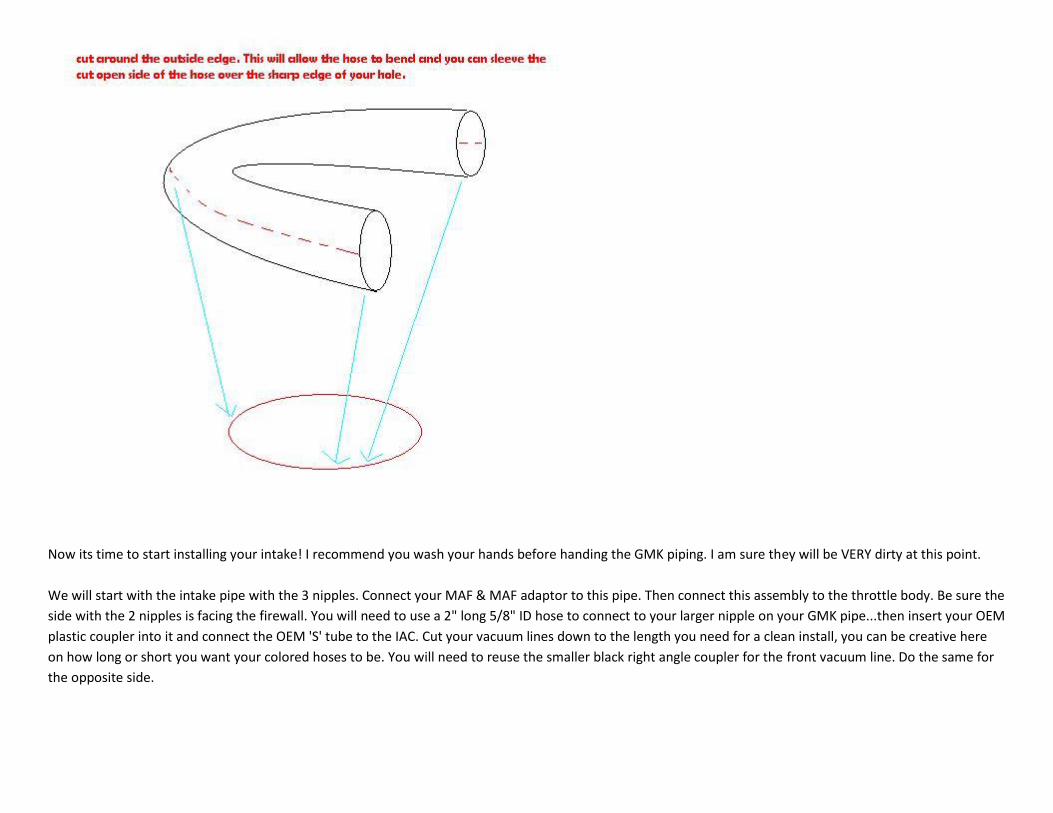
Now its time to start installing your intake! I recommend you wash your hands before handing the GMK piping. I am sure they will be VERY dirty at this point.
We will start with the intake pipe with the 3 nipples. Connect your MAF & MAF adaptor to this pipe. Then connect this assembly to the throttle body. Be sure the
side with the 2 nipples is facing the firewall. You will need to use a 2" long 5/8" ID hose to connect to your larger nipple on your GMK pipe...then insert your OEM
plastic coupler into it and connect the OEM 'S' tube to the IAC. Cut your vacuum lines down to the length you need for a clean install, you can be creative here
on how long or short you want your colored hoses to be. You will need to reuse the smaller black right angle coupler for the front vacuum line. Do the same for
the opposite side.
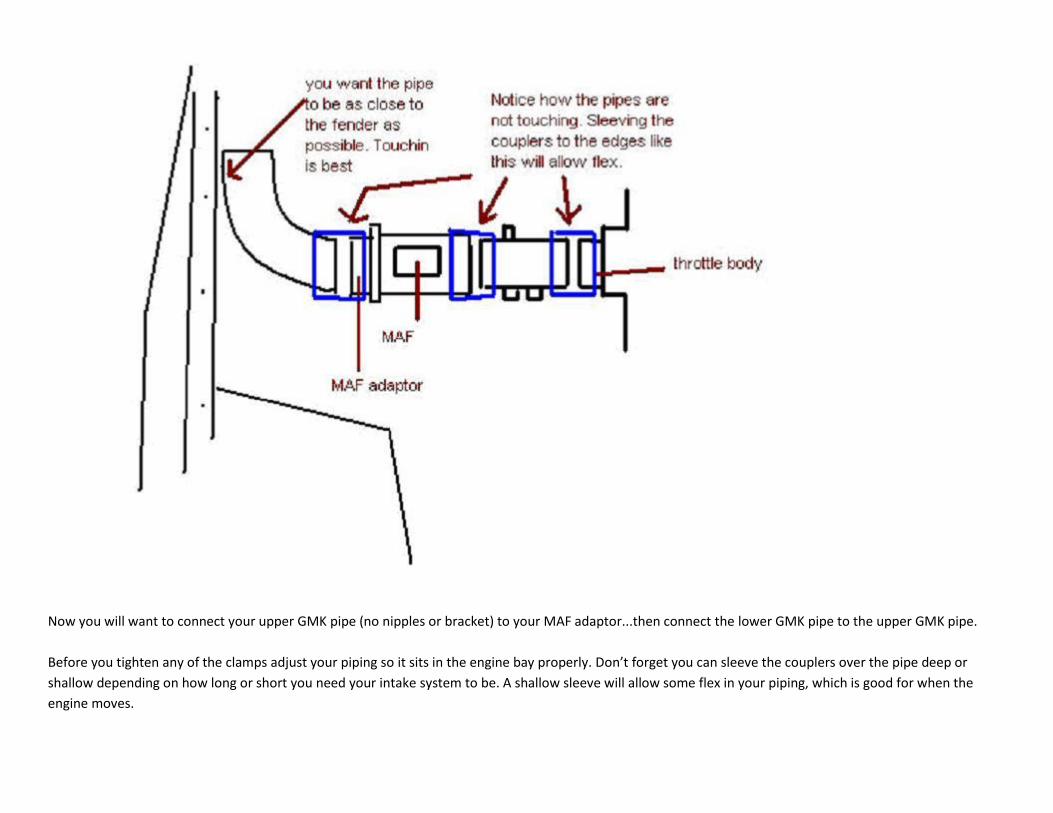
Now you will want to connect your upper GMK pipe (no nipples or bracket) to your MAF adaptor...then connect the lower GMK pipe to the upper GMK pipe.
Before you tighten any of the clamps adjust your piping so it sits in the engine bay properly. Don’t forget you can sleeve the couplers over the pipe deep or
shallow depending on how long or short you need your intake system to be. A shallow sleeve will allow some flex in your piping, which is good for when the
engine moves.
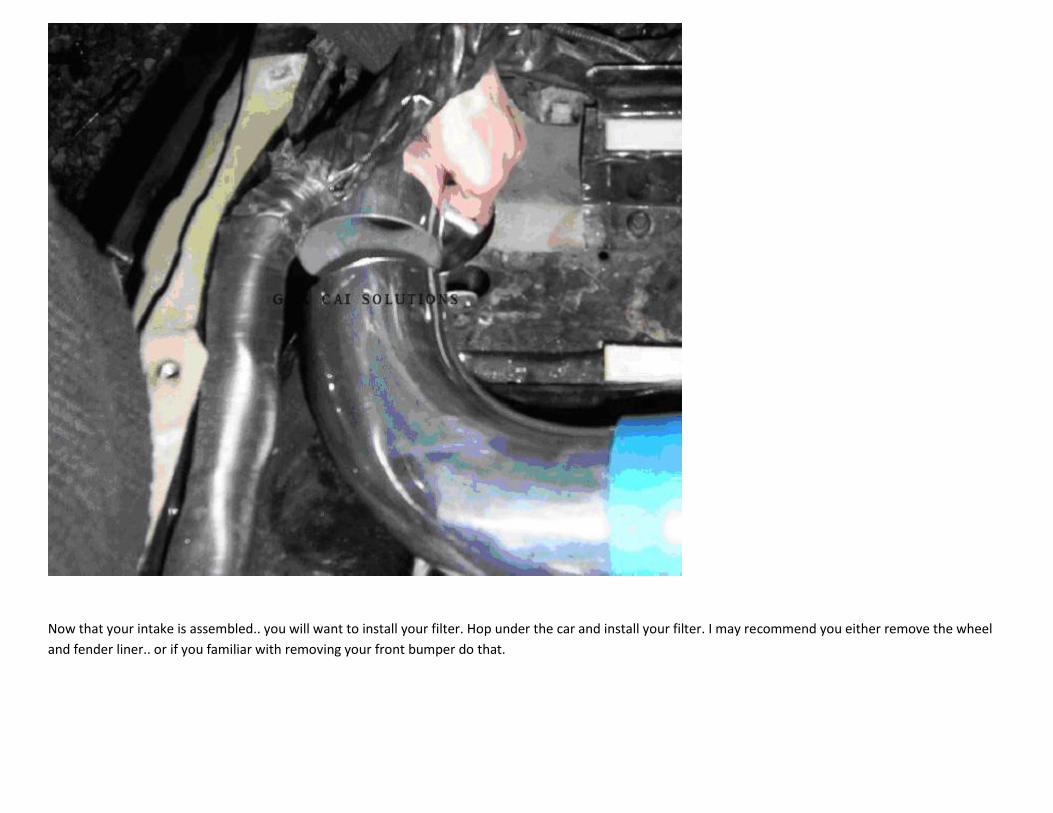
Now that your intake is assembled.. you will want to install your filter. Hop under the car and install your filter. I may recommend you either remove the wheel
and fender liner.. or if you familiar with removing your front bumper do that.
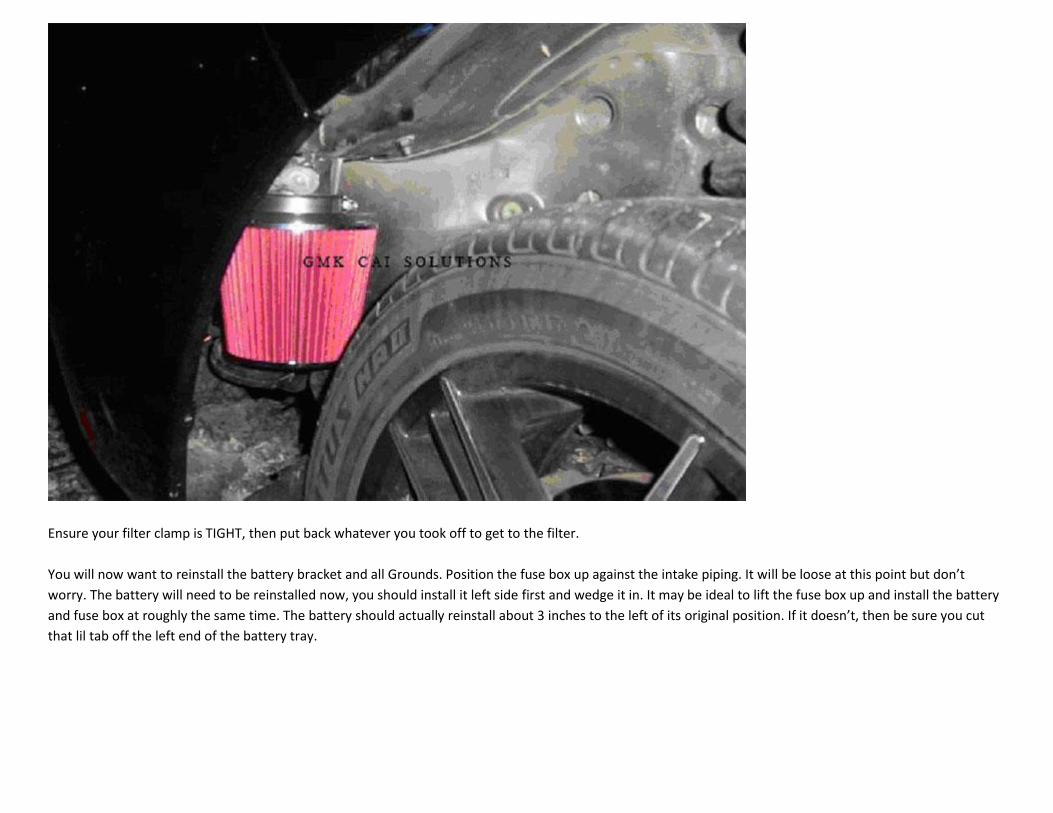
Ensure your filter clamp is TIGHT, then put back whatever you took off to get to the filter.
You will now want to reinstall the battery bracket and all Grounds. Position the fuse box up against the intake piping. It will be loose at this point but don’t
worry. The battery will need to be reinstalled now, you should install it left side first and wedge it in. It may be ideal to lift the fuse box up and install the battery
and fuse box at roughly the same time. The battery should actually reinstall about 3 inches to the left of its original position. If it doesn’t, then be sure you cut
that lil tab off the left end of the battery tray.
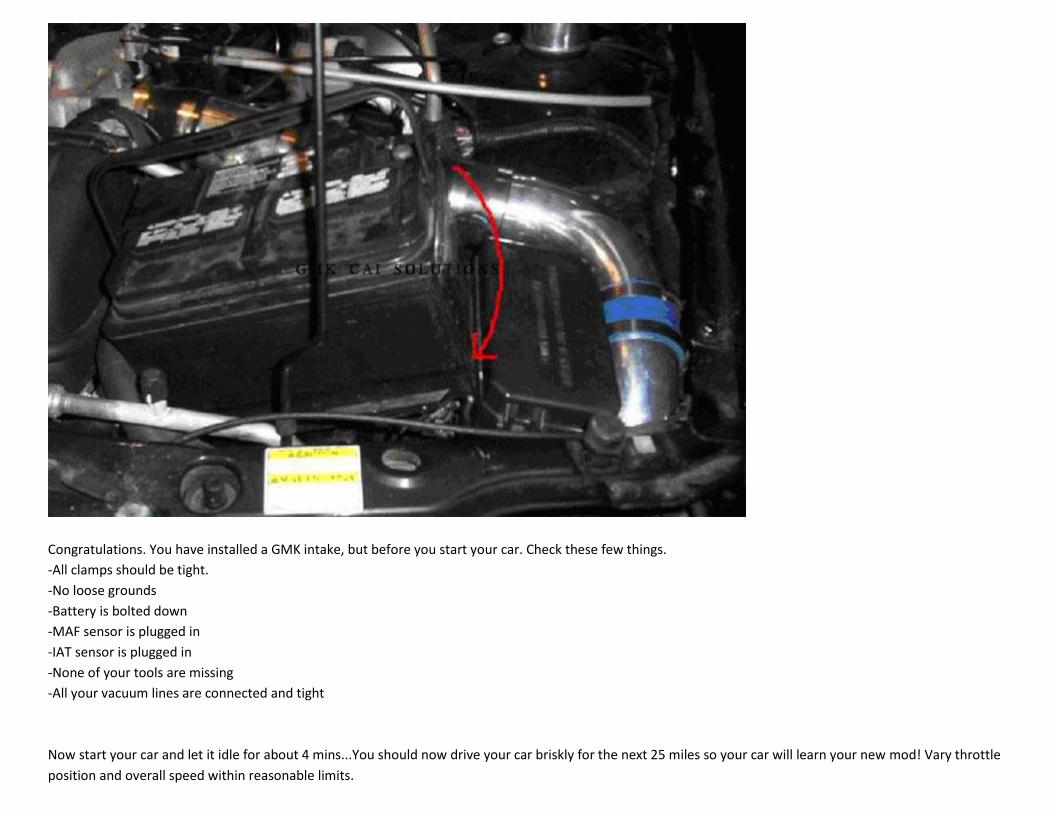
Congratulations. You have installed a GMK intake, but before you start your car. Check these few things.
-All clamps should be tight.
-No loose grounds
-Battery is bolted down
-MAF sensor is plugged in
-IAT sensor is plugged in
-None of your tools are missing
-All your vacuum lines are connected and tight
Now start your car and let it idle for about 4 mins...You should now drive your car briskly for the next 25 miles so your car will learn your new mod! Vary throttle
position and overall speed within reasonable limits.