Embed Size (px)
Citation preview

SECTION 15050 –
BASIC MECHANICAL MATERIALS AND METHODS
PART 1 - GENERAL
1.1 RELATED DOCUMENTS
A. Drawings and general provisions of the Contract, including General and Supplementary Conditions and Division 1 Specification Sections, apply to this Section.
1.2 SUMMARY
A. This Section includes the following:
1. Piping materials and installation instructions common to most piping systems. 2. Transition fittings. 3. Dielectric fittings. 4. Mechanical sleeve seals. 5. Sleeves. 6. Escutcheons. 7. Grout. 8. Mechanical demolition. 9. Equipment installation requirements common to equipment sections. 10. Painting and finishing. 11. Concrete bases. 12. Supports and anchorages.
1.3 DEFINITIONS
A. Finished Spaces: Spaces other than mechanical and electrical equipment rooms, furred spaces, pipe and duct shafts, unheated spaces immediately below roof, spaces above ceilings, unexcavated spaces, crawlspaces, and tunnels.
B. Exposed, Interior Installations: Exposed to view indoors. Examples include finished occupied spaces and mechanical equipment rooms.
C. Exposed, Exterior Installations: Exposed to view outdoors or subject to outdoor ambient temperatures and weather conditions. Examples include rooftop locations.
D. Concealed, Interior Installations: Concealed from view and protected from physical contact by building occupants. Examples include above ceilings and in duct shafts.
E. Concealed, Exterior Installations: Concealed from view and protected from weather conditions and physical contact by building occupants but subject to outdoor ambient temperatures. Examples include installations within unheated shelters.
Odor Control Phase I at Blue River/81000749 15050 Final Doc. 12/08/2015 Page No.-1 Basic Mechanical Materials and Methods
F. The following are industry abbreviations for plastic materials:
1. ABS: Acrylonitrile-butadiene-styrene plastic. 2. CPVC: Chlorinated polyvinyl chloride plastic. 3. PE: Polyethylene plastic. 4. PVC: Polyvinyl chloride plastic.
G. The following are industry abbreviations for rubber materials:
1. EPDM: Ethylene-propylene-diene terpolymer rubber. 2. NBR: Acrylonitrile-butadiene rubber.
1.4 All exposed materials will be installed in a hydrogen sulfide atmosphere. Materials shall be hydrogen sulfide resistant.
1.5 SUBMITTALS
A. Product Data: For the following:
1. Transition fittings. 2. Dielectric fittings. 3. Mechanical sleeve seals. 4. Escutcheons.
B. Welding certificates.
1.6 QUALITY ASSURANCE
A. Steel Support Welding: Qualify processes and operators according to AWS D1.1, "Structural Welding Code--Steel."
B. Steel Pipe Welding: Qualify processes and operators according to ASME Boiler and Pressure Vessel Code: Section IX, "Welding and Brazing Qualifications."
1. Comply with provisions in ASME B31 Series, "Code for Pressure Piping." 2. Certify that each welder has passed AWS qualification tests for welding
processes involved and that certification is current.
C. Electrical Characteristics for Mechanical Equipment: Equipment of higher electrical characteristics may be furnished provided such proposed equipment is approved in writing and connecting electrical services, circuit breakers, and conduit sizes are appropriately modified. If minimum energy ratings or efficiencies are specified, equipment shall comply with requirements.
1.7 DELIVERY, STORAGE, AND HANDLING
Odor Control Phase I at Blue River/81000749 15050 Final Doc. 12/08/2015 Page No.-2 Basic Mechanical Materials and Methods

A. Deliver pipes and tubes with factory-applied end caps. Maintain end caps through shipping, storage, and handling to prevent pipe end damage and to prevent entrance of dirt, debris, and moisture.
B. Store plastic pipes protected from direct sunlight. Support to prevent sagging and bending.
1.8 COORDINATION
A. Arrange for pipe spaces, chases, slots, and openings in building structure during progress of construction, to allow for mechanical installations.
B. Coordinate installation of required supporting devices and set sleeves in poured-in-place concrete and other structural components as they are constructed.
C. Coordinate requirements for access panels and doors for mechanical items requiring access that are concealed behind finished surfaces. Access panels and doors are specified in Division 8 Section "Access Doors and Frames."
1.9 ALL EXPOSED MATERIALS WILL BE INSTALLED IN A HYDROGEN SULFIDE ATMOSPHERE. MATERIALS SHALL BE HYDROGEN SULFIDE RESISTANT
PART 2 - PRODUCTS
2.1 MANUFACTURERS
A. In other Part 2 articles where subparagraph titles below introduce lists, the following requirements apply for product selection:
1. Available Manufacturers: Subject to compliance with requirements, manufacturers offering products that may be incorporated into the Work include, but are not limited to, the manufacturers specified.
2. Manufacturers: Subject to compliance with requirements, provide products by the manufacturers specified.
2.2 PIPE, TUBE, AND FITTINGS
A. Refer to individual Division 15 piping Sections for pipe, tube, and fitting materials and joining methods.
B. Pipe Threads: ASME B1.20.1 for factory-threaded pipe and pipe fittings.
2.3 JOINING MATERIALS
A. Refer to individual Division 15 piping Sections for special joining materials not listed below.
Odor Control Phase I at Blue River/81000749 15050 Final Doc. 12/08/2015 Page No.-3 Basic Mechanical Materials and Methods

B. Pipe-Flange Gasket Materials: Suitable for chemical and thermal conditions of piping system contents.
1. ASME B16.21, nonmetallic, flat, asbestos-free, 1/8-inch (3.2-mm) maximum thickness unless thickness or specific material is indicated.
a. Full-Face Type: For flat-face, Class 125, cast-iron and cast-bronze flanges.
b. Narrow-Face Type: For raised-face, Class 250, cast-iron and steel flanges.
2. AWWA C110, rubber, flat face, 1/8 inch (3.2 mm) thick, unless otherwise indicated; and full-face or ring type, unless otherwise indicated.
C. Flange Bolts and Nuts: ASME B18.2.1, carbon steel, unless otherwise indicated.
D. Plastic, Pipe-Flange Gasket, Bolts, and Nuts: Type and material recommended by piping system manufacturer, unless otherwise indicated.
E. Solder Filler Metals: ASTM B 32, lead-free alloys. Include water-flushable flux according to ASTM B 813.
F. Brazing Filler Metals: AWS A5.8, BCuP Series, copper-phosphorus alloys for general-duty brazing, unless otherwise indicated; and AWS A5.8, BAg1, silver alloy for refrigerant piping, unless otherwise indicated.
G. Welding Filler Metals: Comply with AWS D10.12 for welding materials appropriate for wall thickness and chemical analysis of steel pipe being welded.
H. Solvent Cements for Joining Plastic Piping:
1. ABS Piping: ASTM D 2235. 2. CPVC Piping: ASTM F 493. 3. PVC Piping: ASTM D 2564. Include primer according to ASTM F 656. 4. PVC to ABS Piping Transition: ASTM D 3138.
I. Fiberglass Pipe Adhesive: As furnished or recommended by pipe manufacturer.
2.4 TRANSITION FITTINGS
A. AWWA Transition Couplings: Same size as, and with pressure rating at least equal to and with ends compatible with, piping to be joined.
1. Manufacturers:
a. Cascade Waterworks Mfg. Co. b. Dresser Industries, Inc.; DMD Div. c. Ford Meter Box Company, Incorporated (The); Pipe Products Div. d. JCM Industries. e. Smith-Blair, Inc. f. Viking Johnson.. g. Or Equal
Odor Control Phase I at Blue River/81000749 15050 Final Doc. 12/08/2015 Page No.-4 Basic Mechanical Materials and Methods

2. Underground Piping NPS 1-1/2 (DN 40) and Smaller: Manufactured fitting or coupling.
3. Underground Piping NPS 2 (DN 50) and Larger: AWWA C219, metal sleeve-type coupling.
4. Aboveground Pressure Piping: Pipe fitting.
B. Plastic-to-Metal Transition Fittings: [CPVC] [PVC] [CPVC and PVC] one-piece fitting with manufacturer's Schedule 80 equivalent dimensions; one end with threaded brass insert, and one solvent-cement-joint end.
1. Manufacturers:
a. Eslon Thermoplastics.
b. City Approved Other
C. Plastic-to-Metal Transition Adaptors: One-piece fitting with manufacturer's SDR 11 equivalent dimensions; one end with threaded brass insert, and one solvent-cement-joint end.
1. Manufacturers:
a. Thompson Plastics, Inc. b. Or Equal
D. Plastic-to-Metal Transition Unions: MSS SP-107, [CPVC] [PVC] [CPVC and PVC] four-part union. Include brass end, solvent-cement-joint end, rubber O-ring, and union nut.
1. [Available ]Manufacturers:
a. NIBCO INC. b. NIBCO, Inc.; Chemtrol Div.
c. Or Equal
E. Flexible Transition Couplings for Underground Nonpressure Drainage Piping: ASTM C 1173 with elastomeric sleeve, ends same size as piping to be joined, and corrosion-resistant metal band on each end.
1. Manufacturers:
a. Cascade Waterworks Mfg. Co. b. Fernco, Inc. c. Mission Rubber Company. d. Plastic Oddities, Inc. e. Or Equal
2.5 DIELECTRIC FITTINGS
Odor Control Phase I at Blue River/81000749 15050 Final Doc. 12/08/2015 Page No.-5 Basic Mechanical Materials and Methods
A. Description: Combination fitting of copper alloy and ferrous materials with threaded, solder-joint, plain, or weld-neck end connections that match piping system materials.
B. Insulating Material: Suitable for system fluid, pressure, and temperature.
C. Dielectric Unions: Factory-fabricated, union assembly, for 250-psig (1725-kPa) minimum working pressure at 180 deg F (82 deg C).
1. Manufacturers:
a. Capitol Manufacturing Co. b. Central Plastics Company. c. Eclipse, Inc. d. Epco Sales, Inc. e. Hart Industries, International, Inc. f. Watts Industries, Inc.; Water Products Div. g. Zurn Industries, Inc.; Wilkins Div. h. Or Equal
D. Dielectric Flanges: Factory-fabricated, companion-flange assembly, for 150- or 300-psig (1035- or 2070-kPa) minimum working pressure as required to suit system pressures.
1. Manufacturers:
a. Capitol Manufacturing Co. b. Central Plastics Company. c. Epco Sales, Inc. d. Watts Industries, Inc.; Water Products Div. e. Or Equal
E. Dielectric-Flange Kits: Companion-flange assembly for field assembly. Include flanges, full-face- or ring-type neoprene or phenolic gasket, phenolic or polyethylene bolt sleeves, phenolic washers, and steel backing washers.
1. Manufacturers:
a. Advance Products & Systems, Inc. b. Calpico, Inc. c. Central Plastics Company. d. Pipeline Seal and Insulator, Inc. e. Or Equal
2. Separate companion flanges and steel bolts and nuts shall have 150- or 300-psig (1035- or 2070-kPa) minimum working pressure where required to suit system pressures.
F. Dielectric Couplings: Galvanized-steel coupling with inert and noncorrosive, thermoplastic lining; threaded ends; and 300-psig (2070-kPa) minimum working pressure at 225 deg F (107 deg C).
Odor Control Phase I at Blue River/81000749 15050 Final Doc. 12/08/2015 Page No.-6 Basic Mechanical Materials and Methods

1. Manufacturers:
a. Calpico, Inc. b. Lochinvar Corp. c. Or Equal
G. Dielectric Nipples: Electroplated steel nipple with inert and noncorrosive, thermoplastic lining; plain, threaded, or grooved ends; and 300-psig (2070-kPa) minimum working pressure at 225 deg F (107 deg C).
1. Manufacturers:
a. Perfection Corp. b. Precision Plumbing Products, Inc. c. Sioux Chief Manufacturing Co., Inc. d. Victaulic Co. of America. e. Or Equal
2.6 MECHANICAL SLEEVE SEALS
A. Description: Modular sealing element unit, designed for field assembly, to fill annular space between pipe and sleeve.
1. Manufacturers:
a. Advance Products & Systems, Inc. b. Calpico, Inc. c. Metraflex Co. d. Pipeline Seal and Insulator, Inc. e. Or Equal
2. Sealing Elements: [EPDM] [NBR] interlocking links shaped to fit surface of pipe. Include type and number required for pipe material and size of pipe.
3. Pressure Plates: [Plastic] Include two for each sealing element. 4. Connecting Bolts and Nuts: [Stainless steel] of length required to secure
pressure plates to sealing elements. Include one for each sealing element.
2.7 SLEEVES
A. Galvanized-Steel Sheet: 0.0239-inch (0.6-mm) minimum thickness; round tube closed with welded longitudinal joint.
B. Steel Pipe: ASTM A 53, Type E, Grade B, Schedule 40, galvanized, plain ends.
C. Cast Iron: Cast or fabricated "wall pipe" equivalent to ductile-iron pressure pipe, with plain ends and integral waterstop, unless otherwise indicated.
D. Stack Sleeve Fittings: Manufactured, cast-iron sleeve with integral clamping flange. Include clamping ring and bolts and nuts for membrane flashing.
Odor Control Phase I at Blue River/81000749 15050 Final Doc. 12/08/2015 Page No.-7 Basic Mechanical Materials and Methods

1. Underdeck Clamp: Clamping ring with set screws.
E. Molded PVC: Permanent, with nailing flange for attaching to wooden forms.
F. PVC Pipe: ASTM D 1785, Schedule 40.
G. Molded PE: Reusable, PE, tapered-cup shaped, and smooth-outer surface with nailing flange for attaching to wooden forms.
2.8 ESCUTCHEONS
A. Description: Manufactured wall and ceiling escutcheons and floor plates, with an ID to closely fit around pipe, tube, and insulation of insulated piping and an OD that completely covers opening.
B. One-Piece, Deep-Pattern Type: Deep-drawn, box-shaped with material compatible with high levels of hydrogen sulfide.
2.9 GROUT
A. Description: ASTM C 1107, Grade B, nonshrink and nonmetallic, dry hydraulic-cement grout.
1. Characteristics: Post-hardening, volume-adjusting, nonstaining, noncorrosive, nongaseous, and recommended for interior and exterior applications.
2. Design Mix: 5000-psi (34.5-MPa), 28-day compressive strength. 3. Packaging: Premixed and factory packaged.
PART 3 - EXECUTION
3.1 MECHANICAL DEMOLITION
A. Refer to Division 1 Sections "Cutting and Patching" and "Selective Demolition" for general demolition requirements and procedures.
B. Disconnect, demolish, and remove mechanical systems, equipment, and components indicated to be removed.
1. Piping to Be Removed: Remove portion of piping indicated to be removed and cap or plug remaining piping with same or compatible piping material.
2. Piping to Be Abandoned in Place: Drain piping and cap or plug piping with same or compatible piping material.
3. Ducts to Be Removed: Remove portion of ducts indicated to be removed and plug remaining ducts with same or compatible ductwork material.
4. Ducts to Be Abandoned in Place: Cap or plug ducts with same or compatible ductwork material.
5. Equipment to Be Removed: Disconnect and cap services and remove equipment.
Odor Control Phase I at Blue River/81000749 15050 Final Doc. 12/08/2015 Page No.-8 Basic Mechanical Materials and Methods

6. Equipment to Be Removed and Reinstalled: Disconnect and cap services and remove, clean, and store equipment; when appropriate, reinstall, reconnect, and make equipment operational.
7. Equipment to Be Removed and Salvaged: Disconnect and cap services and remove equipment and deliver to Owner.
C. If pipe, insulation, or equipment to remain is damaged in appearance or is unserviceable, remove damaged or unserviceable portions and replace with new products of equal capacity and quality.
3.2 PIPING SYSTEMS - COMMON REQUIREMENTS
A. Install piping according to the following requirements and Division 15 Sections specifying piping systems.
B. Drawing plans, schematics, and diagrams indicate general location and arrangement of piping systems. Indicated locations and arrangements were used to size pipe and calculate friction loss, expansion, pump sizing, and other design considerations. Install piping as indicated unless deviations to layout are approved on Coordination Drawings.
C. Install piping in concealed locations, unless otherwise indicated and except in equipment rooms and service areas.
D. Install piping indicated to be exposed and piping in equipment rooms and service areas at right angles or parallel to building walls. Diagonal runs are prohibited unless specifically indicated otherwise.
E. Install piping above accessible ceilings to allow sufficient space for ceiling panel removal.
F. Install piping to permit valve servicing.
G. Install piping at indicated slopes.
H. Install piping free of sags and bends.
I. Install fittings for changes in direction and branch connections.
J. Install piping to allow application of insulation.
K. Select system components with pressure rating equal to or greater than system operating pressure.
L. Install escutcheons for penetrations of walls, ceilings, and floors according to the following:
1. New Piping (all material compatible with a high hydrogen sulfide environment):
a. Piping with Fitting or Sleeve Protruding from Wall: One-piece, deep-pattern type.
b. Insulated Piping: One-piece,
Odor Control Phase I at Blue River/81000749 15050 Final Doc. 12/08/2015 Page No.-9 Basic Mechanical Materials and Methods

c. Bare Piping at Wall and Floor Penetrations in Finished Spaces: One-piece, Retain subparagraph above or first subparagraph below.
d. Bare Piping at Wall and Floor Penetrations in Finished Spaces: One-piece, stamped-steel type.
e. Bare Piping at Ceiling Penetrations in Finished Spaces Retain subparagraph above or first subparagraph below.
f. Bare Piping at Ceiling Penetrations in Finished Spaces g. Bare Piping in Unfinished Service Spaces: One-piece, Retain
subparagraph above or first subparagraph below. h. Bare Piping in Unfinished Service Spaces: One-piece, i. Bare Piping in Equipment Rooms: One-piece, j. Bare Piping in Equipment Rooms: One-
M. Sleeves are not required for core-drilled holes.
N. Permanent sleeves are not required for holes formed by removable PE sleeves.
O. Install sleeves for pipes passing through concrete and masonry walls and concrete floor and roof slabs.
P. Install sleeves for pipes passing through concrete and masonry walls, gypsum-board partitions, and concrete floor and roof slabs.
1. Cut sleeves to length for mounting flush with both surfaces.
a. Exception: Extend sleeves installed in floors of mechanical equipment areas or other wet areas 2 inches (50 mm) above finished floor level. Extend cast-iron sleeve fittings below floor slab as required to secure clamping ring if ring is specified.
2. Install sleeves in new walls and slabs as new walls and slabs are constructed. 3. Install sleeves that are large enough to provide 1/4-inch (6.4-mm) annular clear
space between sleeve and pipe or pipe insulation. Use the following sleeve materials:
a. [PVC] Pipe Sleeves: For pipes smaller than NPS 6 (DN 150). b. Steel Sheet Sleeves: For pipes NPS 6 (DN 150) and larger, penetrating
gypsum-board partitions. c. Stack Sleeve Fittings: For pipes penetrating floors with membrane
waterproofing. Secure flashing between clamping flanges. Install section of cast-iron soil pipe to extend sleeve to 2 inches (50 mm) above finished floor level. Refer to Division 7 Section "Sheet Metal Flashing and Trim" for flashing.
1) Seal space outside of sleeve fittings with grout.
4. Except for underground wall penetrations, seal annular space between sleeve and pipe or pipe insulation, using joint sealants appropriate for size, depth, and location of joint. Refer to Division 7 Section "Joint Sealants" for materials and installation.
Odor Control Phase I at Blue River/81000749 15050 Final Doc. 12/08/2015 Page No.-10 Basic Mechanical Materials and Methods

Q. Aboveground, Exterior-Wall Pipe Penetrations: Seal penetrations using sleeves and mechanical sleeve seals. Select sleeve size to allow for 1-inch (25-mm) annular clear space between pipe and sleeve for installing mechanical sleeve seals. 1. Mechanical Sleeve Seal Installation: Select type and number of sealing
elements required for pipe material and size. Position pipe in center of sleeve. Assemble mechanical sleeve seals and install in annular space between pipe and sleeve. Tighten bolts against pressure plates that cause sealing elements to expand and make watertight seal.
R. Underground, Exterior-Wall Pipe Penetrations: Install cast-iron "wall pipes" for sleeves. Seal pipe penetrations using mechanical sleeve seals. Select sleeve size to allow for 1-inch (25-mm) annular clear space between pipe and sleeve for installing mechanical sleeve seals.
1. Mechanical Sleeve Seal Installation: Select type and number of sealing elements required for pipe material and size. Position pipe in center of sleeve. Assemble mechanical sleeve seals and install in annular space between pipe and sleeve. Tighten bolts against pressure plates that cause sealing elements to expand and make watertight seal.
S. Fire-Barrier Penetrations: Maintain indicated fire rating of walls, partitions, ceilings, and floors at pipe penetrations. Seal pipe penetrations with firestop materials. Refer to Division 7 Section "Through-Penetration Firestop Systems" for materials.
T. Verify final equipment locations for roughing-in.
U. Refer to equipment specifications in other Sections of these Specifications for roughing-in requirements.
3.3 PIPING JOINT CONSTRUCTION
A. Join pipe and fittings according to the following requirements and Division 15 Sections specifying piping systems.
B. Ream ends of pipes and tubes and remove burrs. Bevel plain ends of steel pipe.
C. Remove scale, slag, dirt, and debris from inside and outside of pipe and fittings before assembly.
D. Soldered Joints: Apply ASTM B 813, water-flushable flux, unless otherwise indicated, to tube end. Construct joints according to ASTM B 828 or CDA's "Copper Tube Handbook," using lead-free solder alloy complying with ASTM B 32.
E. Brazed Joints: Construct joints according to AWS's "Brazing Handbook," "Pipe and Tube" Chapter, using copper-phosphorus brazing filler metal complying with AWS A5.8.
F. Threaded Joints: Thread pipe with tapered pipe threads according to ASME B1.20.1. Cut threads full and clean using sharp dies. Ream threaded pipe ends to remove burrs and restore full ID. Join pipe fittings and valves as follows:
Odor Control Phase I at Blue River/81000749 15050 Final Doc. 12/08/2015 Page No.-11 Basic Mechanical Materials and Methods

1. Apply appropriate tape or thread compound to external pipe threads unless dry seal threading is specified.
2. Damaged Threads: Do not use pipe or pipe fittings with threads that are corroded or damaged. Do not use pipe sections that have cracked or open welds.
G. Welded Joints: Construct joints according to AWS D10.12, using qualified processes and welding operators according to Part 1 "Quality Assurance" Article.
H. Flanged Joints: Select appropriate gasket material, size, type, and thickness for service application. Install gasket concentrically positioned. Use suitable lubricants on bolt threads.
I. Plastic Piping Solvent-Cement Joints: Clean and dry joining surfaces. Join pipe and fittings according to the following:
1. Comply with ASTM F 402 for safe-handling practice of cleaners, primers, and solvent cements.
2. ABS Piping: Join according to ASTM D 2235 and ASTM D 2661 Appendixes. 3. CPVC Piping: Join according to ASTM D 2846/D 2846M Appendix. 4. PVC Pressure Piping: Join schedule number ASTM D 1785, PVC pipe and PVC
socket fittings according to ASTM D 2672. Join other-than-schedule-number PVC pipe and socket fittings according to ASTM D 2855.
5. PVC Nonpressure Piping: Join according to ASTM D 2855. 6. PVC to ABS Nonpressure Transition Fittings: Join according to ASTM D 3138
Appendix.
J. Plastic Pressure Piping Gasketed Joints: Join according to ASTM D 3139.
K. Plastic Nonpressure Piping Gasketed Joints: Join according to ASTM D 3212.
L. PE Piping Heat-Fusion Joints: Clean and dry joining surfaces by wiping with clean cloth or paper towels. Join according to ASTM D 2657.
1. Plain-End Pipe and Fittings: Use butt fusion. 2. Plain-End Pipe and Socket Fittings: Use socket fusion.
M. Fiberglass Bonded Joints: Prepare pipe ends and fittings, apply adhesive, and join according to pipe manufacturer's written instructions.
3.4 PIPING CONNECTIONS
A. Make connections according to the following, unless otherwise indicated:
1. Install unions, in piping NPS 2 (DN 50) and smaller, adjacent to each valve and at final connection to each piece of equipment.
2. Install flanges, in piping NPS 2-1/2 (DN 65) and larger, adjacent to flanged valves and at final connection to each piece of equipment.
3. Dry Piping Systems: Install dielectric unions and flanges to connect piping materials of dissimilar metals.
Odor Control Phase I at Blue River/81000749 15050 Final Doc. 12/08/2015 Page No.-12 Basic Mechanical Materials and Methods

4. Wet Piping Systems: Install dielectric coupling and nipple fittings to connect piping materials of dissimilar metals.
3.5 EQUIPMENT INSTALLATION - COMMON REQUIREMENTS
A. Install equipment to allow maximum possible headroom unless specific mounting heights are not indicated.
B. Install equipment level and plumb, parallel and perpendicular to other building systems and components in exposed interior spaces, unless otherwise indicated.
C. Install mechanical equipment to facilitate service, maintenance, and repair or replacement of components. Connect equipment for ease of disconnecting, with minimum interference to other installations. Extend grease fittings to accessible locations.
D. Install equipment to allow right of way for piping installed at required slope.
3.6 PAINTING
A. Painting of mechanical systems, equipment, and components is specified in Division 9 Section "[Painting (Consumer Line Products)] [Painting (Professional Line Products)]."
B. Damage and Touchup: Repair marred and damaged factory-painted finishes with materials and procedures to match original factory finish.
3.7 ERECTION OF METAL SUPPORTS AND ANCHORAGES
A. Refer to Division 5 Section "Metal Fabrications" for structural steel.
B. Cut, fit, and place miscellaneous metal supports accurately in location, alignment, and elevation to support and anchor mechanical materials and equipment.
C. Field Welding: Comply with AWS D1.1.
3.8 ERECTION OF WOOD SUPPORTS AND ANCHORAGES
A. Cut, fit, and place wood grounds, nailers, blocking, and anchorages to support, and anchor mechanical materials and equipment.
B. Select fastener sizes that will not penetrate members if opposite side will be exposed to view or will receive finish materials. Tighten connections between members. Install fasteners without splitting wood members.
C. Attach to substrates as required to support applied loads.
Odor Control Phase I at Blue River/81000749 15050 Final Doc. 12/08/2015 Page No.-13 Basic Mechanical Materials and Methods

3.9 GROUTING
A. Mix and install grout for mechanical equipment base bearing surfaces, pump and other equipment base plates, and anchors.
B. Clean surfaces that will come into contact with grout.
C. Provide forms as required for placement of grout.
D. Avoid air entrapment during placement of grout.
E. Place grout, completely filling equipment bases.
F. Place grout on concrete bases and provide smooth bearing surface for equipment.
G. Place grout around anchors.
H. Cure placed grout.
END OF SECTION 15050
Odor Control Phase I at Blue River/81000749 15050 Final Doc. 12/08/2015 Page No.-14 Basic Mechanical Materials and Methods

SECTION 15060
HANGERS AND SUPPORTS
PART 1 - GENERAL
1.1 RELATED DOCUMENTS
A. Drawings and general provisions of the Contract, including General and Supplementary Conditions and Division 1 Specification Sections, apply to this Section.
1.2 All exposed materials will be installed in a hydrogen sulfide atmosphere. Materials shall be hydrogen sulfide resistant.
1.3 SUMMARY
A. This Section includes hangers and supports for mechanical system piping and equipment.
B. Related Sections include the following:
1. Division 5 Section "Metal Fabrications" for materials for attaching hangers and supports to building structure.
2. Division 13 Sections on fire-suppression piping for fire-suppression pipe hangers. 3. Division 15 Section "Mechanical Vibration Controls and Seismic Restraints" for
vibration isolation and seismic restraint devices.
1.4 DEFINITIONS
A. MSS: Manufacturers Standardization Society for the Valve and Fittings Industry.
B. Terminology: As defined in MSS SP-90, "Guidelines on Terminology for Pipe Hangers and Supports."
1.5 PERFORMANCE REQUIREMENTS
A. Design channel support systems for piping to support multiple pipes capable of supporting combined weight of supported systems, system contents, and test water.
B. Design heavy-duty steel trapezes for piping to support multiple pipes capable of supporting combined weight of supported systems, system contents, and test water.
C. Design seismic restraint hangers and supports for piping and equipment.
Odor Control Phase I at Blue River/81000749 15060 Final Doc. 12/08/2015 Page No.-1 Hangers and Pipe Support

D. Design and obtain approval from authorities having jurisdiction for seismic restraint hangers and supports for piping and equipment.
1.6 SUBMITTALS
A. Product Data: For each type of pipe hanger, channel support system component, and thermal-hanger shield insert indicated.
B. Shop Drawings: Signed and sealed by a qualified professional engineer for multiple piping supports and trapeze hangers. Include design calculations and indicate size and characteristics of components and fabrication details.
C. Welding Certificates: Copies of certificates for welding procedures and operators.
1.7 QUALITY ASSURANCE
A. Welding: Qualify processes and operators according to ASME Boiler and Pressure Vessel Code: Section IX, "Welding and Brazing Qualifications."
B. Engineering Responsibility: Design and preparation of Shop Drawings and calculations for each multiple pipe support and trapeze by a qualified professional engineer.
C. Engineering Responsibility: Design and preparation of Shop Drawings and calculations for each multiple pipe support, trapeze, and seismic restraint by a qualified professional engineer.
1. Professional Engineer Qualifications: A professional engineer who is legally qualified to practice in jurisdiction where Project is located and who is experienced in providing engineering services of the kind indicated. Engineering services are defined as those performed for installations of hangers and supports that are similar to those indicated for this Project in material, design, and extent.
1.8 ALL EXPOSED MATERIALS WILL BE INSTALLED IN A HYDROGEN SULFIDE ATMOSPHERE. MATERIALS SHALL BE HYDROGEN SULFIDE RESISTANT
PART 2 - PRODUCTS
2.1 MANUFACTURERS
A. Available Manufacturers: Subject to compliance with requirements, manufacturers offering products that may be incorporated into the Work include, but are not limited to, the following:
B. Manufacturers: Subject to compliance with requirements, provide products by one of the following:
Odor Control Phase I at Blue River/81000749 15060 Final Doc. 12/08/2015 Page No.-2 Hangers and Pipe Support

1. Pipe Hangers:
a. AAA Technology and Specialties Co., Inc. b. B-Line Systems, Inc. c. Carpenter & Patterson, Inc. d. Empire Tool & Manufacturing Co., Inc. e. Globe Pipe Hanger Products, Inc. f. Grinnell Corp. g. GS Metals Corp. h. Michigan Hanger Co., Inc. i. National Pipe Hanger Corp. j. PHD Manufacturing, Inc. k. PHS Industries, Inc. l. Piping Technology & Products, Inc.
2. Channel Support Systems:
a. B-Line Systems, Inc. b. Grinnell Corp.; Power-Strut Unit. c. GS Metals Corp. d. Michigan Hanger Co., Inc.; O-Strut Div. e. National Pipe Hanger Corp. f. Thomas & Betts Corp. g. Unistrut Corp. h. Wesanco, Inc.
3. Thermal-Hanger Shield Inserts:
a. Carpenter & Patterson, Inc. b. Michigan Hanger Co., Inc. c. PHS Industries, Inc. d. Pipe Shields, Inc. e. Rilco Manufacturing Co., Inc. f. Value Engineered Products, Inc.
4. Powder-Actuated Fastener Systems:
a. Gunnebo Fastening Corp. b. Hilti, Inc. c. ITW Ramset/Red Head. d. Masterset Fastening Systems, Inc.
2.2 MANUFACTURED UNITS
A. Pipe Hangers, Supports, and Components: MSS SP-58, factory-fabricated components. Refer to "Hanger and Support Applications" Article in Part 3 for where to use specific hanger and support types.
1. Galvanized, Metallic Coatings: For piping and equipment that will not have field-applied finish.
Odor Control Phase I at Blue River/81000749 15060 Final Doc. 12/08/2015 Page No.-3 Hangers and Pipe Support

2. Nonmetallic Coatings: On attachments for electrolytic protection where attachments are in direct contact with copper tubing.
B. Channel Support Systems: MFMA-2, factory-fabricated components for field assembly.
1. Coatings: Manufacturer's standard finish, unless bare metal surfaces are indicated.
2. Nonmetallic Coatings: On attachments for electrolytic protection where attachments are in direct contact with copper tubing.
C. Thermal-Hanger Shield Inserts: 100-psi (690-kPa) minimum compressive-strength insulation, encased in sheet metal shield.
1. Material for Cold Piping: ASTM C 552, Type I cellular glass or water-repellent-treated, ASTM C 533, Type I calcium silicate with vapor barrier.
2. Material for Cold Piping: ASTM C 552, Type I cellular glass with vapor barrier. 3. Material for Cold Piping: Water-repellent-treated, ASTM C 533, Type I calcium
silicate with vapor barrier. 4. Material for Hot Piping: ASTM C 552, Type I cellular glass or water-repellent-
treated, ASTM C 533, Type I calcium silicate. 5. Material for Hot Piping: ASTM C 552, Type I cellular glass. 6. Material for Hot Piping: Water-repellent-treated, ASTM C 533, Type I calcium
silicate. 7. For Trapeze or Clamped System: Insert and shield cover entire circumference of
pipe. 8. For Clevis or Band Hanger: Insert and shield cover lower 180 degrees of pipe. 9. Insert Length: Extend 2 inches (50 mm) beyond sheet metal shield for piping
operating below ambient air temperature.
2.3 MISCELLANEOUS MATERIALS
A. Powder-Actuated Drive-Pin Fasteners: Powder-actuated-type, drive-pin attachments with pull-out and shear capacities appropriate for supported loads and building materials where used.
B. Mechanical-Anchor Fasteners: Insert-type attachments with pull-out and shear capacities appropriate for supported loads and building materials where used.
C. Structural Steel: ASTM A 36/A 36M, steel plates, shapes, and bars, black and galvanized.
D. Grout: ASTM C 1107, Grade B, factory-mixed and -packaged, nonshrink and nonmetallic, dry, hydraulic-cement grout.
1. Characteristics: Post hardening and volume adjusting; recommended for both interior and exterior applications.
2. Properties: Nonstaining, noncorrosive, and nongaseous. 3. Design Mix: 5000-psi (34.5-MPa), 28-day compressive strength.
Odor Control Phase I at Blue River/81000749 15060 Final Doc. 12/08/2015 Page No.-4 Hangers and Pipe Support

PART 3 - EXECUTION
3.1 HANGER AND SUPPORT APPLICATIONS
A. Specific hanger requirements are specified in Sections specifying equipment and systems.
B. Comply with MSS SP-69 for pipe hanger selections and applications that are not specified in piping system Specification Sections.
C. Horizontal-Piping Hangers and Supports: Unless otherwise indicated and except as specified in piping system Specification Sections, install the following types:
1. Adjustable Steel Clevis Hangers (MSS Type 1): For suspension of noninsulated or insulated stationary pipes, NPS 1/2 to NPS 30 (DN15 to DN750).
2. Yoke-Type Pipe Clamps (MSS Type 2): For suspension of 120 to 450 deg F (49 to 232 deg C) pipes, NPS 4 to NPS 16 (DN100 to DN400), requiring up to 4 inches (100 mm) of insulation.
3. Carbon- or Alloy-Steel, Double-Bolt Pipe Clamps (MSS Type 3): For suspension of pipes, NPS 3/4 to NPS 24 (DN20 to DN600), requiring clamp flexibility and up to 4 inches (100 mm) of insulation.
4. Steel Pipe Clamps (MSS Type 4): For suspension of cold and hot pipes, NPS 1/2 to NPS 24 (DN15 to DN600), if little or no insulation is required.
5. Pipe Hangers (MSS Type 5): For suspension of pipes, NPS 1/2 to NPS 4 (DN15 to DN100), to allow off-center closure for hanger installation before pipe erection.
6. Adjustable Swivel Split- or Solid-Ring Hangers (MSS Type 6): For suspension of noninsulated stationary pipes, NPS 3/4 to NPS 8 (DN20 to DN200).
7. Adjustable Steel Band Hangers (MSS Type 7): For suspension of noninsulated stationary pipes, NPS 1/2 to NPS 8 (DN15 to DN200).
8. Adjustable Band Hangers (MSS Type 9): For suspension of noninsulated stationary pipes, NPS 1/2 to NPS 8 (DN15 to DN200).
9. Adjustable Swivel-Ring Band Hangers (MSS Type 10): For suspension of noninsulated stationary pipes, NPS 1/2 to NPS 2 (DN15 to DN50).
10. Split Pipe-Ring with or without Turnbuckle-Adjustment Hangers (MSS Type 11): For suspension of noninsulated stationary pipes, NPS 3/8 to NPS 8 (DN10 to DN200).
11. Extension Hinged or Two-Bolt Split Pipe Clamps (MSS Type 12): For suspension of noninsulated stationary pipes, NPS 3/8 to NPS 3 (DN10 to DN80).
12. U-Bolts (MSS Type 24): For support of heavy pipe, NPS 1/2 to NPS 30 (DN15 to DN750).
13. Clips (MSS Type 26): For support of insulated pipes not subject to expansion or contraction.
14. Pipe Saddle Supports (MSS Type 36): For support of pipes, NPS 4 to NPS 36 (DN100 to DN900), with steel pipe base stanchion support and cast-iron floor flange.
15. Pipe Stanchion Saddles (MSS Type 37): For support of pipes, NPS 4 to NPS 36 (DN100 to DN900), with steel pipe base stanchion support and cast-iron floor flange and with U-bolt to retain pipe.
Odor Control Phase I at Blue River/81000749 15060 Final Doc. 12/08/2015 Page No.-5 Hangers and Pipe Support
16. Adjustable Pipe Saddle Supports (MSS Type 38): For stanchion-type support for pipes, NPS 2-1/2 to NPS 36 (DN65 to DN900), if vertical adjustment is required, with steel pipe base stanchion support and cast-iron floor flange.
17. Single Pipe Rolls (MSS Type 41): For suspension of pipes, NPS 1 to NPS 30 (DN25 to DN750), from two rods if longitudinal movement caused by expansion and contraction might occur.
18. Adjustable Roller Hangers (MSS Type 43): For suspension of pipes, NPS 2-1/2 to NPS 20 (DN65 to DN500), from single rod if horizontal movement caused by expansion and contraction might occur.
19. Complete Pipe Rolls (MSS Type 44): For support of pipes, NPS 2 to NPS 42 (DN50 to DN1050), if longitudinal movement caused by expansion and contraction might occur but vertical adjustment is not necessary.
20. Pipe Roll and Plate Units (MSS Type 45): For support of pipes, NPS 2 to NPS 24 (DN50 to DN600), if small horizontal movement caused by expansion and contraction might occur and vertical adjustment is not necessary.
21. Adjustable Pipe Roll and Base Units (MSS Type 46): For support of pipes, NPS 2 to NPS 30 (DN50 to DN750), if vertical and lateral adjustment during installation might be required in addition to expansion and contraction.
D. Vertical-Piping Clamps: Unless otherwise indicated and except as specified in piping system Specification Sections, install the following types:
1. Extension Pipe or Riser Clamps (MSS Type 8): For support of pipe risers, NPS 3/4 to NPS 20 (DN20 to DN500).
2. Carbon- or Alloy-Steel Riser Clamps (MSS Type 42): For support of pipe risers, NPS 3/4 to NPS 20 (DN20 to DN500), if longer ends are required for riser clamps.
E. Hanger-Rod Attachments: Unless otherwise indicated and except as specified in piping system Specification Sections, install the following types:
1. Steel Turnbuckles (MSS Type 13): For adjustment up to 6 inches (150 mm) for heavy loads.
2. Steel Clevises (MSS Type 14): For 120 to 450 deg F (49 to 232 deg C) piping installations.
3. Swivel Turnbuckles (MSS Type 15): For use with MSS Type 11, split pipe rings. 4. Malleable-Iron Sockets (MSS Type 16): For attaching hanger rods to various
types of building attachments. 5. Steel Weldless Eye Nuts (MSS Type 17): For 120 to 450 deg F (49 to
232 deg C) piping installations.
F. Building Attachments: Unless otherwise indicated and except as specified in piping system Specification Sections, install the following types:
1. Steel or Malleable Concrete Inserts (MSS Type 18): For upper attachment to suspend pipe hangers from concrete ceiling.
2. Top-Beam C-Clamps (MSS Type 19): For use under roof installations with bar-joist construction to attach to top flange of structural shape.
3. Side-Beam or Channel Clamps (MSS Type 20): For attaching to bottom flange of beams, channels, or angles.
Odor Control Phase I at Blue River/81000749 15060 Final Doc. 12/08/2015 Page No.-6 Hangers and Pipe Support

4. Center-Beam Clamps (MSS Type 21): For attaching to center of bottom flange of beams.
5. Welded Beam Attachments (MSS Type 22): For attaching to bottom of beams if loads are considerable and rod sizes are large.
6. C-Clamps (MSS Type 23): For structural shapes. 7. Top-Beam Clamps (MSS Type 25): For top of beams if hanger rod is required
tangent to flange edge. 8. Side-Beam Clamps (MSS Type 27): For bottom of steel I-beams. 9. Steel-Beam Clamps with Eye Nuts (MSS Type 28): For attaching to bottom of
steel I-beams for heavy loads. 10. Linked-Steel Clamps with Eye Nuts (MSS Type 29): For attaching to bottom of
steel I-beams for heavy loads, with link extensions. 11. Malleable Beam Clamps with Extension Pieces (MSS Type 30): For attaching to
structural steel. 12. Welded-Steel Brackets: For support of pipes from below or for suspending from
above by using clip and rod. Use one of the following for indicated loads:
a. Light (MSS Type 31): 750 lb (340 kg). b. Medium (MSS Type 32): 1500 lb (675 kg). c. Heavy (MSS Type 33): 3000 lb (1350 kg).
13. Side-Beam Brackets (MSS Type 34): For sides of steel or wooden beams. 14. Plate Lugs (MSS Type 57): For attaching to steel beams if flexibility at beam is
required. 15. Horizontal Travelers (MSS Type 58): For supporting piping systems subject to
linear horizontal movement where head room is limited.
G. Saddles and Shields: Unless otherwise indicated and except as specified in piping system Specification Sections, install the following types:
1. Steel Pipe-Covering Protection Saddles (MSS Type 39): To fill interior voids with insulation that matches adjoining insulation.
2. Protection Shields (MSS Type 40): Of length recommended by manufacturer to prevent crushing insulation.
3. Thermal-Hanger Shield Inserts: For supporting insulated pipe, 360-degree insert of high-density, 100-psi (690-kPa) minimum compressive-strength, water-repellent-treated calcium silicate or cellular-glass pipe insulation, same thickness as adjoining insulation with vapor barrier and encased in 360-degree sheet metal shield.
H. Spring Hangers and Supports: Unless otherwise indicated and except as specified in piping system Specification Sections, install the following types:
1. Restraint-Control Devices (MSS Type 47): Where indicated to control piping movement.
2. Spring Cushions (MSS Type 48): For light loads if vertical movement does not exceed 1-1/4 inches (32 mm).
3. Spring-Cushion Roll Hangers (MSS Type 49): For equipping Type 41 roll hanger with springs.
4. Spring Sway Braces (MSS Type 50): To retard sway, shock, vibration, or thermal expansion in piping systems.
Odor Control Phase I at Blue River/81000749 15060 Final Doc. 12/08/2015 Page No.-7 Hangers and Pipe Support

5. Variable-Spring Hangers (MSS Type 51): Preset to indicated load and limit variability factor to 25 percent to absorb expansion and contraction of piping system from hanger.
6. Variable-Spring Base Supports (MSS Type 52): Preset to indicated load and limit variability factor to 25 percent to absorb expansion and contraction of piping system from base support.
7. Variable-Spring Trapeze Hangers (MSS Type 53): Preset to indicated load and limit variability factor to 25 percent to absorb expansion and contraction of piping system from trapeze support.
8. Constant Supports: For critical piping stress and if necessary to avoid transfer of stress from one support to another support, critical terminal, or connected equipment. Include auxiliary stops for erection, hydrostatic test, and load-adjustment capability. These supports include the following types:
a. Horizontal (MSS Type 54): Mounted horizontally. b. Vertical (MSS Type 55): Mounted vertically. c. Trapeze (MSS Type 56): Two vertical-type supports and one trapeze
member.
3.2 HANGER AND SUPPORT INSTALLATION
A. Pipe Hanger and Support Installation: Comply with MSS SP-69 and MSS SP-89. Install hangers, supports, clamps, and attachments as required to properly support piping from building structure.
B. Channel Support System Installation: Arrange for grouping of parallel runs of piping and support together on field-assembled channel systems.
1. Field assemble and install according to manufacturer's written instructions.
C. Heavy-Duty Steel Trapeze Installation: Arrange for grouping of parallel runs of horizontal piping and support together on field-fabricated, heavy-duty trapezes.
1. Pipes of Various Sizes: Support together and space trapezes for smallest pipe size or install intermediate supports for smaller diameter pipes as specified above for individual pipe hangers.
2. Field fabricate from ASTM A 36/A 36M, steel shapes selected for loads being supported. Weld steel according to AWS D-1.1.
D. Install building attachments within concrete slabs or attach to structural steel. Space attachments within maximum piping span length indicated in MSS SP-69. Install additional attachments at concentrated loads, including valves, flanges, guides, strainers, and expansion joints, and at changes in direction of piping. Install concrete inserts before concrete is placed; fasten inserts to forms and install reinforcing bars through openings at top of inserts.
E. Install powder-actuated drive-pin fasteners in concrete after concrete is placed and completely cured. Use operators that are licensed by powder-actuated tool manufacturer. Install fasteners according to powder-actuated tool manufacturer's operating manual.
Odor Control Phase I at Blue River/81000749 15060 Final Doc. 12/08/2015 Page No.-8 Hangers and Pipe Support

F. Install mechanical-anchor fasteners in concrete after concrete is placed and completely cured. Install fasteners according to manufacturer's written instructions.
G. Install hangers and supports complete with necessary inserts, bolts, rods, nuts, washers, and other accessories.
H. Install hangers and supports to allow controlled thermal and seismic movement of piping systems, to permit freedom of movement between pipe anchors, and to facilitate action of expansion joints, expansion loops, expansion bends, and similar units.
I. Load Distribution: Install hangers and supports so that piping live and dead loads and stresses from movement will not be transmitted to connected equipment.
J. Pipe Slopes: Install hangers and supports to provide indicated pipe slopes and so maximum pipe deflections allowed by ASME B31.9, "Building Services Piping," is not exceeded.
K. Insulated Piping: Comply with the following:
1. Attach clamps and spacers to piping.
a. Piping Operating above Ambient Air Temperature: Clamp may project through insulation.
b. Piping Operating below Ambient Air Temperature: Use thermal-hanger shield insert with clamp sized to match OD of insert.
c. Do not exceed pipe stress limits according to ASME B31.9.
2. Install MSS SP-58, Type 39 protection saddles, if insulation without vapor barrier is indicated. Fill interior voids with insulation that matches adjoining insulation.
a. Option: Thermal-hanger shield inserts may be used. Include steel weight-distribution plate for pipe NPS 4 (DN100) and larger if pipe is installed on rollers.
3. Install MSS SP-58, Type 40 protective shields on cold piping with vapor barrier. Shields shall span arc of 180 degrees.
a. Option: Thermal-hanger shield inserts may be used. Include steel weight-distribution plate for pipe NPS 4 (DN100) and larger if pipe is installed on rollers.
4. Shield Dimensions for Pipe: Not less than the following:
a. NPS 1/4 to NPS 3-1/2 (DN8 to DN90): 12 inches (305 mm) long and 0.048 inch (1.22 mm) thick.
b. NPS 4 (DN100): 12 inches (305 mm) long and 0.06 inch (1.52 mm) thick. c. NPS 5 and NPS 6 (DN125 and DN150): 18 inches (457 mm) long and
0.06 inch (1.52 mm) thick. d. NPS 8 to NPS 14 (DN200 to DN350): 24 inches (610 mm) long and 0.075
inch (1.91 mm) thick.
Odor Control Phase I at Blue River/81000749 15060 Final Doc. 12/08/2015 Page No.-9 Hangers and Pipe Support

e. NPS 16 to NPS 24 (DN400 to DN600): 24 inches (610 mm) long and 0.105 inch (2.67 mm) thick.
5. Pipes NPS 8 (DN200) and Larger: Include wood inserts. 6. Insert Material: Length at least as long as protective shield. 7. Thermal-Hanger Shields: Install with insulation same thickness as piping
insulation.
3.3 EQUIPMENT SUPPORTS
A. Fabricate structural-steel stands to suspend equipment from structure above or to support equipment above floor.
B. Grouting: Place grout under supports for equipment and make smooth bearing surface.
3.4 METAL FABRICATION
A. Cut, drill, and fit miscellaneous metal fabrications for heavy-duty steel trapezes and equipment supports.
B. Fit exposed connections together to form hairline joints. Field-weld connections that cannot be shop-welded because of shipping size limitations.
C. Field Welding: Comply with AWS D1.1 procedures for shielded metal arc welding, appearance and quality of welds, and methods used in correcting welding work, and with the following:
1. Use materials and methods that minimize distortion and develop strength and corrosion resistance of base metals.
2. Obtain fusion without undercut or overlap. 3. Remove welding flux immediately. 4. Finish welds at exposed connections so no roughness shows after finishing and
contours of welded surfaces match adjacent contours.
3.5 ADJUSTING
A. Hanger Adjustment: Adjust hangers to distribute loads equally on attachments and to achieve indicated slope of pipe.
3.6 PAINTING
A. Touching Up: Clean field welds and abraded areas of shop paint. Paint exposed areas immediately after erecting hangers and supports. Use same materials as used for shop painting. Comply with SSPC-PA 1 requirements for touching up field-painted surfaces.
Odor Control Phase I at Blue River/81000749 15060 Final Doc. 12/08/2015 Page No.-10 Hangers and Pipe Support

1. Apply paint by brush or spray to provide a minimum dry film thickness of 2.0 mils (0.05 mm).
B. Touching Up: Cleaning and touchup painting of field welds, bolted connections, and abraded areas of shop paint on miscellaneous metal are specified in Division 9 Section "Painting."
C. Galvanized Surfaces: Clean welds, bolted connections, and abraded areas and apply galvanizing-repair paint to comply with ASTM A 780.
END OF SECTION 15060
Odor Control Phase I at Blue River/81000749 15060 Final Doc. 12/08/2015 Page No.-11 Hangers and Pipe Support

SECTION 15075
MECHANICAL IDENTIFICATION
PART 1 - GENERAL
1.1 RELATED DOCUMENTS
A. Drawings and general provisions of the Contract, including General and Supplementary Conditions and Division 1 Specification Sections, apply to this Section.
1.2 SUMMARY
A. This Section includes the following mechanical identification materials and their installation:
1. Equipment nameplates. 2. Equipment markers. 3. Equipment signs. 4. Access panel and door markers. 5. Pipe markers. 6. Duct markers. 7. Stencils. 8. Valve tags. 9. Valve schedules. 10. Warning tags.
1.3 SUBMITTALS
A. Product Data: For each type of product indicated.
B. Samples: For color, letter style, and graphic representation required for each identification material and device.
C. Valve numbering scheme.
D. Valve Schedules: For each piping system. Furnish extra copies (in addition to mounted copies) to include in maintenance manuals.
1.4 QUALITY ASSURANCE
A. ASME Compliance: Comply with ASME A13.1, "Scheme for the Identification of Piping Systems," for letter size, length of color field, colors, and viewing angles of identification devices for piping.
Odor Control Phase I at Blue River/81000749 15075 Final Doc. 12/08/2015 Page No.-1 Identification

1.5 COORDINATION
A. Coordinate installation of identifying devices with completion of covering and painting of surfaces where devices are to be applied.
B. Coordinate installation of identifying devices with location of access panels and doors.
C. Install identifying devices before installing acoustical ceilings and similar concealment.
1.6 ALL EXPOSED MATERIALS WILL BE INSTALLED IN A HYDROGEN SULFIDE ATMOSPHERE. MATERIALS SHALL BE HYDROGEN SULFIDE RESISTANT
PART 2 - PRODUCTS
2.1 EQUIPMENT IDENTIFICATION DEVICES
A. Equipment Nameplates: Metal, with data engraved or stamped, for permanent attachment on equipment.
1. Data:
a. Manufacturer, product name, model number, and serial number. b. Capacity, operating and power characteristics, and essential data. c. Labels of tested compliances.
2. Location: Accessible and visible. 3. Fasteners: As required to mount on equipment.
B. Equipment Markers: Engraved, color-coded laminated plastic. Include contact-type, permanent adhesive.
1. Terminology: Match schedules as closely as possible. 2. Data:
a. Name and plan number. b. Equipment service. c. Design capacity. d. Other design parameters such as pressure drop, entering and leaving
conditions, and speed.
3. Size: 2-1/2 by 4 inches (64 by 100 mm) for control devices, dampers, and valves; 4-1/2 by 6 inches (115 by 150 mm) for equipment.
C. Equipment Signs: ASTM D 709, Type I, cellulose, paper-base, phenolic-resin-laminate engraving stock; Grade ES-2, black surface, black phenolic core, with white melamine subcore, unless otherwise indicated. Fabricate in sizes required for message. Provide holes for mechanical fastening.
1. Data: Instructions for operation of equipment and for safety procedures.
Odor Control Phase I at Blue River/81000749 15075 Final Doc. 12/08/2015 Page No.-2 Identification

2. Engraving: Manufacturer's standard letter style, of sizes and with terms to match equipment identification.
3. Thickness: [1/16 inch (1.6 mm)] [1/8 inch (3.2 mm)], unless otherwise indicated.
4. Thickness: 1/16 inch (1.6 mm) for units up to 20 sq. in. (130 sq. cm) or 8 inches (200 mm) in length, and 1/8 inch (3.2 mm) for larger units.
5. Fasteners: Self-tapping, stainless-steel screws or contact-type, permanent adhesive.
D. Access Panel and Door Markers: 1/16-inch- (1.6-mm-) thick, engraved laminated plastic, with abbreviated terms and numbers corresponding to identification. Provide 1/8-inch (3.2-mm) center hole for attachment.
1. Fasteners: Self-tapping, stainless-steel screws or contact-type, permanent adhesive.
2.2 PIPING IDENTIFICATION DEVICES
A. Manufactured Pipe Markers, General: Preprinted, color-coded, with lettering indicating service, and showing direction of flow.
1. Colors: Comply with ASME A13.1, unless otherwise indicated. 2. Lettering: Use piping system terms indicated and abbreviate only as necessary
for each application length. 3. Pipes with OD, Including Insulation, Less Than 6 Inches (150 mm): Full-band
pipe markers extending 360 degrees around pipe at each location. 4. Pipes with OD, Including Insulation, 6 Inches (150 mm) and Larger: Either full-
band or strip-type pipe markers at least three times letter height and of length required for label.
5. Arrows: Integral with piping system service lettering to accommodate both directions; or as separate unit on each pipe marker to indicate direction of flow.
B. Pretensioned Pipe Markers: Precoiled semirigid plastic formed to cover full circumference of pipe and to attach to pipe without adhesive.
C. Shaped Pipe Markers: Preformed semirigid plastic formed to partially cover circumference of pipe and to attach to pipe with mechanical fasteners that do not penetrate insulation vapor barrier.
D. Self-Adhesive Pipe Markers: Plastic with pressure-sensitive, permanent-type, self-adhesive back.
E. Plastic Tape: Continuously printed, vinyl tape at least 3 mils (0.08 mm) thick with pressure-sensitive, permanent-type, self-adhesive back.
1. Width for Markers on Pipes with OD, Including Insulation, Less Than 6 Inches (150 mm): 3/4 inch (19 mm) minimum.
2. Width for Markers on Pipes with OD, Including Insulation, 6 Inches (150 mm) or Larger: 1-1/2 inches (38 mm) minimum.
Odor Control Phase I at Blue River/81000749 15075 Final Doc. 12/08/2015 Page No.-3 Identification

2.3 DUCT IDENTIFICATION DEVICES
A. Duct Markers: Engraved, color-coded laminated plastic. Include direction and quantity of airflow and duct service (such as supply, return, and exhaust). Include contact-type, permanent adhesive.
2.4 STENCILS
A. Stencils: Prepared with letter sizes according to ASME A13.1 for piping; minimum letter height of 1-1/4 inches (32 mm) for ducts; and minimum letter height of 3/4 inch (19 mm) for access panel and door markers, equipment markers, equipment signs, and similar operational instructions.
1. Stencil Material: [Aluminum 2. Stencil Paint: Exterior, gloss, [alkyd enamel] [acrylic enamel] black, unless
otherwise indicated. Paint may be in pressurized spray-can form. 3. Identification Paint: Exterior, [alkyd enamel] [acrylic enamel] in colors
according to ASME A13.1, unless otherwise indicated.
2.5 VALVE TAGS
A. Valve Tags: Stamped or engraved with 1/4-inch (6.4-mm) letters for piping system abbreviation and 1/2-inch (13-mm) numbers, with numbering scheme approved by the City . Provide 5/32-inch (4-mm) hole for fastener.
1. Material: 0.032-inch- (0.8-mm-) thick [aluminum. 2. Material: 0.0375-inch- (1-mm-) thick stainless steel. 3. Material: 3/32-inch- (2.4-mm-) thick laminated plastic with 2 black surfaces and
white inner layer. 4. Valve-Tag Fasteners: material compatible with Hydrogen Sulfide.
2.6 VALVE SCHEDULES
A. Valve Schedules: For each piping system, on standard-size bond paper. Tabulate valve number, piping system, system abbreviation (as shown on valve tag), location of valve (room or space), normal-operating position (open, closed, or modulating), and variations for identification. Mark valves for emergency shutoff and similar special uses.
1. Valve-Schedule Frames: Glazed display frame for removable mounting on masonry walls for each page of valve schedule. Include mounting screws.
2. Frame: Extruded aluminum. 3. Glazing: ASTM C 1036, Type I, Class 1, Glazing Quality B, 2.5-mm, single-
thickness glass.
2.7 WARNING TAGS
Odor Control Phase I at Blue River/81000749 15075 Final Doc. 12/08/2015 Page No.-4 Identification

A. Warning Tags: Preprinted or partially preprinted, accident-prevention tags; of plasticized card stock with matte finish suitable for writing.
1. Size: [3 by 5-1/4 inches (75 by 133 mm) minimum] 2. Fasteners: [Reinforced grommet and wire or string]. 3. Nomenclature: Large-size primary caption such as DANGER, CAUTION, or DO
NOT OPERATE. 4. Color: Yellow background with black lettering.
PART 3 - EXECUTION
3.1 APPLICATIONS, GENERAL
A. Products specified are for applications referenced in other Division 15 Sections. If more than single-type material, device, or label is specified for listed applications, selection is Installer's option.
3.2 EQUIPMENT IDENTIFICATION
A. Install and permanently fasten equipment nameplates on each major item of mechanical equipment that does not have nameplate or has nameplate that is damaged or located where not easily visible. Locate nameplates where accessible and visible. Include nameplates for the following general categories of equipment:
1. Fuel-burning units, including boilers, furnaces, heaters, stills, and absorption units.
2. Pumps, compressors, chillers, condensers, and similar motor-driven units. 3. Heat exchangers, coils, evaporators, cooling towers, heat recovery units, and
similar equipment. 4. Fans, blowers, primary balancing dampers, and mixing boxes. 5. Packaged HVAC central-station and zone-type units.
B. Install equipment markers with permanent adhesive on or near each major item of mechanical equipment. Data required for markers may be included on signs, and markers may be omitted if both are indicated.
1. Letter Size: Minimum 1/4 inch (6.4 mm) for name of units if viewing distance is less than 24 inches (600 mm), 1/2 inch (13 mm) for viewing distances up to 72 inches (1830 mm), and proportionately larger lettering for greater viewing distances. Include secondary lettering two-thirds to three-fourths the size of principal lettering.
2. Data: Distinguish among multiple units, indicate operational requirements, indicate safety and emergency precautions, warn of hazards and improper operations, and identify units.
3. Locate markers where accessible and visible. Include markers for the following general categories of equipment:
Odor Control Phase I at Blue River/81000749 15075 Final Doc. 12/08/2015 Page No.-5 Identification
a. Main control and operating valves, including safety devices and hazardous units such as gas outlets.
b. Fire department hose valves and hose stations. c. Meters, gages, thermometers, and similar units. d. Fuel-burning units, including boilers, furnaces, heaters, stills, and
absorption units. e. Pumps, compressors, chillers, condensers, and similar motor-driven units. f. Heat exchangers, coils, evaporators, cooling towers, heat recovery units,
and similar equipment. g. Fans, blowers, primary balancing dampers, and mixing boxes. h. Packaged HVAC central-station and zone-type units. i. Tanks and pressure vessels. j. Strainers, filters, humidifiers, water-treatment systems, and similar
equipment.
C. Stenciled Equipment Marker Option: Stenciled markers may be provided instead of laminated-plastic equipment markers, at Installer's option, if lettering larger than 1 inch (25 mm) high is needed for proper identification because of distance from normal location of required identification.
D. Install equipment signs with screws or permanent adhesive on or near each major item of mechanical equipment. Locate signs where accessible and visible.
1. Identify mechanical equipment with equipment markers in the coding system used at the Blue River WWTP:
2. Letter Size: Minimum 1/4 inch (6.4 mm) for name of units if viewing distance is less than 24 inches (600 mm), 1/2 inch (13 mm) for viewing distances up to 72 inches (1830 mm), and proportionately larger lettering for greater viewing distances. Include secondary lettering two-thirds to three-fourths the size of principal lettering.
3. Data: Distinguish among multiple units, indicate operational requirements, indicate safety and emergency precautions, warn of hazards and improper operations, and identify units.
4. Include signs for the following general categories of equipment:
a. Main control and operating valves, including safety devices and hazardous units such as gas outlets.
b. Fuel-burning units, including boilers, furnaces, heaters, stills, and absorption units.
c. Pumps, compressors, chillers, condensers, and similar motor-driven units. d. Heat exchangers, coils, evaporators, cooling towers, heat recovery units,
and similar equipment. e. Fans, blowers, primary balancing dampers, and mixing boxes. f. Packaged HVAC central-station and zone-type units. g. Tanks and pressure vessels. h. Strainers, filters, humidifiers, water-treatment systems, and similar
equipment.
E. Stenciled Equipment Sign Option: Stenciled signs may be provided instead of laminated-plastic equipment signs, at Installer's option, if lettering larger than 1 inch (25
Odor Control Phase I at Blue River/81000749 15075 Final Doc. 12/08/2015 Page No.-6 Identification

mm) high is needed for proper identification because of distance from normal location of required identification.
F. Install access panel markers with screws on equipment access panels.
3.3 PIPING IDENTIFICATION
A. Install manufactured pipe markers indicating service on each piping system. Install with flow indication arrows showing direction of flow.
1. Pipes with OD, Including Insulation, Less Than 6 Inches (150 mm): Pretensioned pipe markers. Use size to ensure a tight fit.
2. Pipes with OD, Including Insulation, Less Than 6 Inches (150 mm): Self-adhesive pipe markers. Use color-coded, self-adhesive plastic tape, [at least 3/4 inch (19 mm)] [1-1/2 inches (38 mm)] wide, lapped at least 1-1/2 inches (38 mm) at both ends of pipe marker, and covering full circumference of pipe.
3. Pipes with OD, Including Insulation, 6 Inches (150 mm) and Larger: Shaped pipe markers. Use size to match pipe and secure with fasteners.
4. Pipes with OD, Including Insulation, 6 Inches (150 mm) and Larger: Self-adhesive pipe markers. Use color-coded, self-adhesive plastic tape, at least 1-1/2 inches (38 mm) wide, lapped at least 3 inches (75 mm) at both ends of pipe marker, and covering full circumference of pipe.
B. Stenciled Pipe Marker Option: Stenciled markers may be provided instead of manufactured pipe markers, at Installer's option. Install stenciled pipe markers [complying with ASME A13.1] on each piping system.
1. Identification Paint: Use for contrasting background. 2. Stencil Paint: Use for pipe marking.
C. Locate pipe markers and color bands where piping is exposed in finished spaces; machine rooms; accessible maintenance spaces such as shafts, tunnels, and plenums; and exterior nonconcealed locations as follows:
1. Near each valve and control device. 2. Near each branch connection, excluding short takeoffs for fixtures and terminal
units. Where flow pattern is not obvious, mark each pipe at branch. 3. Near penetrations through walls, floors, ceilings, and nonaccessible enclosures. 4. At access doors, manholes, and similar access points that permit view of
concealed piping. 5. Near major equipment items and other points of origination and termination. 6. Spaced at maximum intervals of 50 feet (15 m) along each run. Reduce intervals
to 25 feet (7.6 m) in areas of congested piping and equipment. 7. On piping above removable acoustical ceilings. Omit intermediately spaced
markers.
3.4 DUCT IDENTIFICATION
Odor Control Phase I at Blue River/81000749 15075 Final Doc. 12/08/2015 Page No.-7 Identification

A. Install duct markers with permanent adhesive on air ducts in the standard Blue River WWTP color codes: 1. ASME A13.1 Colors and Designs: For hazardous material exhaust. 2. Letter Size: Minimum 1/4 inch (6.4 mm) for name of units if viewing distance is
less than 24 inches (600 mm), 1/2 inch (13 mm) for viewing distances up to 72 inches (1830 mm), and proportionately larger lettering for greater viewing distances. Include secondary lettering two-thirds to three-fourths the size of principal lettering.
B. Stenciled Duct Marker Option: Stenciled markers, showing service and direction of flow, may be provided instead of laminated-plastic duct markers, at Installer's option, if lettering larger than 1 inch (25 mm) high is needed for proper identification because of distance from normal location of required identification.
C. Locate markers near points where ducts enter into concealed spaces and at maximum intervals of 50 feet (15 m) in each space where ducts are exposed or concealed by removable ceiling system.
3.5 VALVE-TAG INSTALLATION
A. Install tags on valves and control devices in piping systems, except check valves; valves within factory-fabricated equipment units; plumbing fixture supply stops; shutoff valves; faucets; convenience and lawn-watering hose connections; and HVAC terminal devices and similar roughing-in connections of end-use fixtures and units. List tagged valves in a valve schedule.
B. Valve-Tag Application Schedule: Tag valves according to size, shape, and color scheme and with captions similar to those indicated in the following:
1. Valve-Tag Size and Shape:
a. Cold Water: [1-1/2 inches (38 mm)] [2 inches (50 mm)], [round] [square].
b. Hot Water: [1-1/2 inches (38 mm)] [2 inches (50 mm)], [round] [square]. c. Fire Protection: [1-1/2 inches (38 mm)] [2 inches (50 mm)], [round]
[square]. d. Gas: [1-1/2 inches (38 mm)] [2 inches (50 mm)], [round] [square]. e. Steam: [1-1/2 inches (38 mm)] [2 inches (50 mm)], [round] [square].
2. Valve-Tag Color Use the Standards Colors at the Blue River WWTP
3. Letter Color: Use the Standards Colors at the Blue River WWTP
3.6 VALVE-SCHEDULE INSTALLATION
A. Mount valve schedule on wall in accessible location in each major equipment room.
3.7 WARNING-TAG INSTALLATION
Odor Control Phase I at Blue River/81000749 15075 Final Doc. 12/08/2015 Page No.-8 Identification

A. Write required message on, and attach warning tags to, equipment and other items where required.
3.8 ADJUSTING
A. Relocate mechanical identification materials and devices that have become visually blocked by other work.
3.9 CLEANING
A. Clean faces of mechanical identification devices.
END OF SECTION 15075
Odor Control Phase I at Blue River/81000749 15075 Final Doc. 12/08/2015 Page No.-9 Identification

SECTION 15081
DUCT INSULATION
PART 1 - GENERAL
1.1 RELATED DOCUMENTS
A. Drawings and general provisions of the Contract, including General and Supplementary Conditions and Division 1 Specification Sections, apply to this Section.
1.2 All exposed materials will be installed in a hydrogen sulfide atmosphere. Materials shall be hydrogen sulfide resistant.
1.3 SUMMARY
A. This Section includes semirigid and flexible duct, plenum, and breeching insulation; insulating cements; field-applied jackets; accessories and attachments; and sealing compounds.
B. Related Sections include the following:
1. Division 7 Section "Firestopping" for firestopping materials and requirements for penetrations through fire and smoke barriers.
2. Division 15 Section "Equipment Insulation" for insulation materials and application for pumps, tanks, hydronic specialties, and other equipment.
3. Division 15 Section "Pipe Insulation" for insulation for piping systems. 4. Division 15 Section "Metal Ducts" for duct liner. 5. Division 15 Section “Fibrous-Glass Ducts”
1.4 SUBMITTALS
A. Product Data: Identify thermal conductivity, thickness, and jackets (both factory and field applied, if any), for each type of product indicated.
B. Shop Drawings: Show fabrication and installation details for the following:
1. Removable insulation sections at access panels. 2. Application of field-applied jackets. 3. Applications at linkages for control devices.
C. Samples: For each type of insulation and field-applied jacket. Identify each Sample, describing product and intended use. Submit 12-inch- (300-mm-) square sections of each sample material.
Odor Control Phase I at Blue River/81000749 15081 Final Doc. 12/08/2015 Page No.-1 Duct Insulation
1. Manufacturer's Color Charts: Show the full range of colors available for each type of field-applied finish material indicated.
D. Material Test Reports: From a qualified testing agency acceptable to authorities having jurisdiction indicating, interpreting, and certifying test results for compliance of insulation materials, sealers, attachments, cements, and jackets with requirements indicated. Include dates of tests.
E. Installer Certificates: Signed by the Contractor certifying that installers comply with requirements.
1.5 QUALITY ASSURANCE
A. Installer Qualifications: Skilled mechanics who have successfully completed an apprenticeship program or another craft training program certified by the U.S. Department of Labor, Bureau of Apprenticeship and Training.
B. Fire-Test-Response Characteristics: As determined by testing materials identical to those specified in this Section according to ASTM E 84, by a testing and inspecting agency acceptable to authorities having jurisdiction. Factory label insulation and jacket materials and sealer and cement material containers with appropriate markings of applicable testing and inspecting agency.
1. Insulation Installed Indoors: Flame-spread rating of 25 or less, and smoke-developed rating of 50 or less.
2. Insulation Installed Outdoors: Flame-spread rating of 75 or less, and smoke-developed rating of 150 or less.
C. Mockups: Before installing insulation, build mockups for each type of insulation and finish listed below to demonstrate quality of insulation application and finishes. Build mockups according to the following requirements, using materials indicated for the completed Work:
1. Include the following mockups:
a. One 10-foot (3-m) section of rectangular straight duct. b. One 90-degree square elbow and one 90-degree radius elbow. c. One branch takeoff. d. One transition fitting. e. Four support hangers.
2. Build mockups with cutaway sections to allow observation of application details for insulation materials, mastics, attachments, and jackets.
3. Build mockups in the location indicated or, if not indicated, as directed by City. 4. Notify City seven days in advance of dates and times when mockups will be
constructed. 5. Obtain City's approval of mockups before starting insulation application. 6. Maintain mockups during construction in an undisturbed condition as a standard
for judging the completed Work. 7. Demolish and remove mockups when directed.
Odor Control Phase I at Blue River/81000749 15081 Final Doc. 12/08/2015 Page No.-2 Duct Insulation

8. Approved mockups may become part of the completed Work if undisturbed at time of Substantial Completion.
1.6 DELIVERY, STORAGE, AND HANDLING
A. Packaging: Ship insulation materials in containers marked by manufacturer with appropriate ASTM specification designation, type and grade, and maximum use temperature.
1.7 COORDINATION
A. Coordinate clearance requirements with duct Installer for insulation application.
1.8 SCHEDULING
A. Schedule insulation application after testing duct systems. Insulation application may begin on segments of ducts that have satisfactory test results.
1.9 ALL EXPOSED MATERIALS WILL BE INSTALLED IN A HYDROGEN SULFIDE ATMOSPHERE. MATERIALS SHALL BE HYDROGEN SULFIDE RESISTANT
PART 2 - PRODUCTS
2.1 MANUFACTURERS
A. Available Manufacturers: Subject to compliance with requirements, manufacturers offering products that may be incorporated into the Work include, but are not limited to, the following:
B. Manufacturers: Subject to compliance with requirements, provide products by one of the following:
1. Mineral-Fiber Insulation:
a. CertainTeed Manson. b. Knauf FiberGlass GmbH. c. Owens-Corning Fiberglas Corp. d. Schuller International, Inc.
2. Flexible Elastomeric Thermal Insulation:
a. Armstrong World Industries, Inc. b. Rubatex Corp.
3. Closed-Cell Phenolic-Foam Insulation:
Odor Control Phase I at Blue River/81000749 15081 Final Doc. 12/08/2015 Page No.-3 Duct Insulation
a. Kooltherm Insulation Products, Ltd.
4. Calcium Silicate Insulation:
a. Owens-Corning Fiberglas Corp. b. Pabco. c. Schuller International, Inc.
2.2 INSULATION MATERIALS
A. Mineral-Fiber Board Thermal Insulation: Glass fibers bonded with a thermosetting resin. Comply with ASTM C 612, Type IB, without facing and with all-service jacket manufactured from kraft paper, reinforcing scrim, aluminum foil, and vinyl film.
B. Mineral-Fiber Blanket Thermal Insulation: Glass fibers bonded with a thermosetting resin. Comply with ASTM C 553, Type II, without facing and with all-service jacket manufactured from kraft paper, reinforcing scrim, aluminum foil, and vinyl film.
C. Flexible Elastomeric Thermal Insulation: Closed-cell, sponge- or expanded-rubber materials. Comply with ASTM C 534, Type II for sheet materials.
1. Adhesive: As recommended by insulation material manufacturer. 2. Ultraviolet-Protective Coating: As recommended by insulation manufacturer.
D. Closed-Cell Phenolic-Foam Insulation: Block insulation of rigid, expanded, closed-cell structure. Comply with ASTM C 1126, Type II, Grade 1.
E. Calcium Silicate Insulation: Flat-, curved-, and grooved-block sections of noncombustible, inorganic, hydrous calcium silicate with a nonasbestos fibrous reinforcement. Comply with ASTM C 533, Type I.
2.3 FIELD-APPLIED JACKETS
A. General: ASTM C 921, Type 1, unless otherwise indicated.
B. Foil and Paper Jacket: Laminated, glass-fiber-reinforced, flame-retardant kraft paper and aluminum foil.
C. PVC Jacket: High-impact, ultraviolet-resistant PVC; 20 mils (0.5 mm) thick; roll stock ready for shop or field cutting and forming.
1. Adhesive: As recommended by insulation material manufacturer. 2. PVC Jacket Color: White or gray. 3. PVC Jacket Color: Custom color selected by the City.
D. Aluminum Jacket: Deep corrugated sheets manufactured from aluminum alloy complying with ASTM B 209 (ASTM B 209M), and having an integrally bonded moisture barrier over entire surface in contact with insulation. Metal thickness and corrugation dimensions are scheduled at the end of this Section.
Odor Control Phase I at Blue River/81000749 15081 Final Doc. 12/08/2015 Page No.-4 Duct Insulation

1. Finish: Smooth finish. 2. Finish: Cross-crimp corrugated finish. 3. Finish: Stucco-embossed finish. 4. Finish: Factory-painted finish. 5. Moisture Barrier: 1-mil- (0.025-mm-) thick, heat-bonded polyethylene and kraft
paper.
E. Stainless-Steel Jacket: Deep corrugated sheets of stainless steel complying with ASTM A 666, Type 304 or 316; 0.10 inch (2.5 mm) thick; and roll stock ready for shop or field cutting and forming to indicated sizes.
1. Moisture Barrier: 1-mil- (0.025-mm-) thick, heat-bonded polyethylene and kraft paper.
2. Moisture Barrier: 3-mil- (0.075-mm-) thick, heat-bonded polyethylene and kraft paper.
3. Jacket Bands: Stainless steel, Type 304, 3/4 inch (19 mm) wide.
2.4 ACCESSORIES AND ATTACHMENTS
A. Glass Cloth and Tape: Comply with MIL-C-20079H, Type I for cloth and Type II for tape. Woven glass-fiber fabrics, plain weave, presized a minimum of 8 oz./sq. yd. (270 g/sq. m).
1. Tape Width: 4 inches (100 mm).
B. Bands: 3/4 inch (19 mm) wide, in one of the following materials compatible with jacket:
1. Stainless Steel: ASTM A 666, Type 304; 0.020 inch (0.5 mm) thick. 2. Galvanized Steel: 0.005 inch (0.13 mm) thick. 3. Aluminum: 0.007 inch (0.18 mm) thick. 4. Brass: 0.010 inch (0.25 mm) thick. 5. Nickel-Copper Alloy: 0.005 inch (0.13 mm) thick.
C. Wire: 0.080-inch (2.0-mm), nickel-copper alloy; 0.062-inch (1.6-mm), soft-annealed, stainless steel; or 0.062-inch (1.6-mm), soft-annealed, galvanized steel.
D. Weld-Attached Anchor Pins and Washers: Copper-coated steel pin for capacitor-discharge welding and galvanized speed washer. Pin length sufficient for insulation thickness indicated.
1. Welded Pin Holding Capacity: 100 lb (45 kg) for direct pull perpendicular to the attached surface.
E. Adhesive-Attached Anchor Pins and Speed Washers: Galvanized steel plate, pin, and washer manufactured for attachment to duct and plenum with adhesive. Pin length sufficient for insulation thickness indicated.
1. Adhesive: Recommended by the anchor pin manufacturer as appropriate for surface temperatures of ducts, plenums, and breechings; and to achieve a
Odor Control Phase I at Blue River/81000749 15081 Final Doc. 12/08/2015 Page No.-5 Duct Insulation

holding capacity of 100 lb (45 kg) for direct pull perpendicular to the adhered surface.
F. Self-Adhesive Anchor Pins and Speed Washers: Galvanized steel plate, pin, and washer manufactured for attachment to duct and plenum with adhesive. Pin length sufficient for insulation thickness indicated.
2.5 VAPOR RETARDERS
A. Mastics: Materials recommended by insulation material manufacturer that are compatible with insulation materials, jackets, and substrates.
PART 3 - EXECUTION
3.1 EXAMINATION
A. Examine substrates and conditions for compliance with requirements for installation and other conditions affecting performance of insulation application.
B. Proceed with installation only after unsatisfactory conditions have been corrected.
3.2 PREPARATION
A. Surface Preparation: Clean and dry surfaces to receive insulation. Remove materials that will adversely affect insulation application.
3.3 GENERAL APPLICATION REQUIREMENTS
A. Apply insulation materials, accessories, and finishes according to the manufacturer's written instructions; with smooth, straight, and even surfaces; and free of voids throughout the length of ducts and fittings.
B. Refer to schedules at the end of this Section for materials, forms, jackets, and thicknesses required for each duct system.
C. Use accessories compatible with insulation materials and suitable for the service. Use accessories that do not corrode, soften, or otherwise attack insulation or jacket in either wet or dry state.
D. Apply multiple layers of insulation with longitudinal and end seams staggered.
E. Seal joints and seams with vapor-retarder mastic on insulation indicated to receive a vapor retarder.
F. Keep insulation materials dry during application and finishing.
Odor Control Phase I at Blue River/81000749 15081 Final Doc. 12/08/2015 Page No.-6 Duct Insulation
G. Apply insulation with tight longitudinal seams and end joints. Bond seams and joints with adhesive recommended by the insulation material manufacturer.
H. Apply insulation with the least number of joints practical.
I. Apply insulation over fittings and specialties, with continuous thermal and vapor-retarder integrity, unless otherwise indicated.
J. Hangers and Anchors: Where vapor retarder is indicated, seal penetrations in insulation at hangers, supports, anchors, and other projections with vapor-retarder mastic. Apply insulation continuously through hangers and around anchor attachments.
K. Insulation Terminations: For insulation application where vapor retarders are indicated, seal ends with a compound recommended by the insulation material manufacturer to maintain vapor retarder.
L. Apply insulation with integral jackets as follows:
1. Pull jacket tight and smooth. 2. Joints and Seams: Cover with tape and vapor retarder as recommended by
insulation material manufacturer to maintain vapor seal. 3. Vapor-Retarder Mastics: Where vapor retarders are indicated, apply mastic on
seams and joints and at ends adjacent to duct flanges and fittings.
M. Cut insulation according to manufacturer's written instructions to prevent compressing insulation to less than 75 percent of its nominal thickness.
N. Install vapor-retarder mastic on ducts and plenums scheduled to receive vapor retarders.
1. Ducts with Vapor Retarders: Overlap insulation facing at seams and seal with vapor-retarder mastic and pressure-sensitive tape having same facing as insulation. Repair punctures, tears, and penetrations with tape or mastic to maintain vapor-retarder seal.
2. Ducts without Vapor Retarders: Overlap insulation facing at seams and secure with outward clinching staples and pressure-sensitive tape having same facing as insulation.
O. Roof Penetrations: Apply insulation for interior applications to a point even with top of roof flashing.
1. Seal penetrations with vapor-retarder mastic. 2. Apply insulation for exterior applications tightly joined to interior insulation ends. 3. Seal insulation to roof flashing with vapor-retarder mastic.
P. Interior Wall and Partition Penetrations: Apply insulation continuously through walls and partitions, except fire-rated walls and partitions.
Q. Fire-Rated Wall and Partition Penetrations: Terminate insulation at fire/smoke damper sleeves for fire-rated wall and partition penetrations.
Odor Control Phase I at Blue River/81000749 15081 Final Doc. 12/08/2015 Page No.-7 Duct Insulation

R. Floor Penetrations: Terminate insulation at underside of floor assembly and at floor support at top of floor.
1. For insulation indicated to have vapor retarders, taper termination and seal insulation ends with vapor-retarder mastic.
3.4 MINERAL-FIBER INSULATION APPLICATION
A. Blanket Applications for Ducts and Plenums: Secure blanket insulation with adhesive and anchor pins and speed washers.
1. Apply adhesives according to manufacturer's recommended coverage rates per square foot, for 100 percent coverage of duct and plenum surfaces.
2. Apply adhesive to entire circumference of ducts and to all surfaces of fittings and transitions.
3. Install anchor pins and speed washers on sides and bottom of horizontal ducts and sides of vertical ducts as follows:
a. On duct sides with dimensions 18 inches (450 mm) and smaller, along longitudinal centerline of duct. Space 3 inches (75 mm) maximum from insulation end joints, and 16 inches (400 mm) o.c.
b. On duct sides with dimensions larger than 18 inches (450 mm). Space 16 inches (400 mm) o.c. each way, and 3 inches (75 mm) maximum from insulation joints. Apply additional pins and clips to hold insulation tightly against surface at cross bracing.
c. Anchor pins may be omitted from top surface of horizontal, rectangular ducts and plenums.
d. Do not overcompress insulation during installation.
4. Impale insulation over anchors and attach speed washers. 5. Cut excess portion of pins extending beyond speed washers or bend parallel with
insulation surface. Cover exposed pins and washers with tape matching insulation facing.
6. Create a facing lap for longitudinal seams and end joints with insulation by removing 2 inches (50 mm) from one edge and one end of insulation segment. Secure laps to adjacent insulation segment with 1/2-inch (13-mm) staples, 1 inch (25 mm) o.c., and cover with pressure-sensitive tape having same facing as insulation.
7. Overlap unfaced blankets a minimum of 2 inches (50 mm) on longitudinal seams and end joints. Secure with steel band at end joints and spaced a maximum of 18 inches (450 mm) o.c.
8. Apply insulation on rectangular duct elbows and transitions with a full insulation segment for each surface. Apply insulation on round and flat-oval duct elbows with individually mitered gores cut to fit the elbow.
9. Insulate duct stiffeners, hangers, and flanges that protrude beyond the insulation surface with 6-inch- (150-mm-) wide strips of the same material used to insulate duct. Secure on alternating sides of stiffener, hanger, and flange with anchor pins spaced 6 inches (150 mm) o.c.
10. Apply vapor-retarder mastic to open joints, breaks, and punctures for insulation indicated to receive vapor retarder.
Odor Control Phase I at Blue River/81000749 15081 Final Doc. 12/08/2015 Page No.-8 Duct Insulation

B. Board Applications for Ducts and Plenums: Secure board insulation with adhesive and anchor pins and speed washers.
1. Apply adhesives according to manufacturer's recommended coverage rates per square foot, for 100 percent coverage of duct and plenum surfaces.
2. Apply adhesive to entire circumference of ducts and to all surfaces of fittings and transitions.
3. Space anchor pins as follows:
a. On duct sides with dimensions 18 inches (450 mm) and smaller, along longitudinal centerline of duct. Space 3 inches (75 mm) maximum from insulation end joints, and 16 inches (400 mm) o.c.
b. On duct sides with dimensions larger than 18 inches (450 mm). Space 16 inches (400 mm) o.c. each way, and 3 inches (75 mm) maximum from insulation joints. Apply additional pins and clips to hold insulation tightly against surface at cross bracing.
c. Anchor pins may be omitted from top surface of horizontal, rectangular ducts and plenums.
d. Do not overcompress insulation during installation.
4. Cut excess portion of pins extending beyond speed washers or bend parallel with insulation surface. Cover exposed pins and washers with tape matching insulation facing.
5. Create a facing lap for longitudinal seams and end joints with insulation by removing 2 inches (50 mm) from one edge and one end of insulation segment. Secure laps to adjacent insulation segment with 1/2-inch (13-mm) staples, 1 inch (25 mm) o.c., and cover with pressure-sensitive tape having same facing as insulation.
6. Apply insulation on rectangular duct elbows and transitions with a full insulation segment for each surface. Groove and score insulation to fit as closely as possible to outside and inside radius of elbows. Apply insulation on round and flat-oval duct elbows with individually mitered gores cut to fit the elbow.
7. Insulate duct stiffeners, hangers, and flanges that protrude beyond the insulation surface with 6-inch- (150-mm-) wide strips of the same material used to insulate duct. Secure on alternating sides of stiffener, hanger, and flange with anchor pins spaced 6 inches (150 mm) o.c.
8. Apply vapor-retarder mastic to open joints, breaks, and punctures for insulation indicated to receive vapor retarder.
3.5 FLEXIBLE ELASTOMERIC THERMAL INSULATION APPLICATION
A. Apply insulation to ducts and plenums as follows:
1. Follow the manufacturer's written instructions for applying insulation. 2. Seal longitudinal seams and end joints with manufacturer's recommended
adhesive. Cement to avoid openings in insulation that will allow passage of air to the duct and plenum surface.
3.6 CLOSED-CELL PHENOLIC-FOAM INSULATION APPLICATION
Odor Control Phase I at Blue River/81000749 15081 Final Doc. 12/08/2015 Page No.-9 Duct Insulation

A. Apply insulation as follows:
1. Secure each layer of insulation to duct with stainless-steel bands at 12-inch (300-mm) intervals and tighten without deforming the insulation materials.
2. Apply two-layer insulation with joints tightly butted and staggered at least 3 inches (75 mm). Secure inner layer with 0.062-inch (1.6-mm), soft-annealed, stainless-steel wire spaced at 12-inch (300-mm) intervals. Secure outer layer with stainless-steel bands at 12-inch (300-mm) intervals.
3. On exposed applications, finish insulation with a skim coat of mineral-fiber, hydraulic-setting cement to surface of installed insulation. When dry, apply flood coat of lagging adhesive and press on one layer of glass cloth or tape. Overlap edges at least 1 inch (25 mm). Apply finish coat of lagging adhesive over glass cloth or tape. Thin the finish coat to achieve smooth finish.
3.7 CALCIUM SILICATE INSULATION APPLICATION
A. Apply insulation according to the manufacturer's written instructions and as follows:
1. Secure single layer of insulation to duct with stainless-steel bands. Tighten bands without deforming the insulation material.
2. Apply two-layer insulation with joints tightly butted and staggered at least 3 inches (75 mm). Secure inner layer with 0.062-inch (1.6-mm), soft-annealed, stainless-steel wire. Secure outer layer with stainless-steel bands.
3. On exposed applications, without metal jacket, finish insulation with a skim coat of mineral-fiber, hydraulic-setting cement to surface of installed insulation. When dry, apply flood coat of lagging adhesive and press on one layer of glass cloth or tape. Overlap edges at least 1 inch (25 mm). Apply finish coat of lagging adhesive over glass cloth or tape. Thin the finish coat to achieve smooth finish.
3.8 FIELD-APPLIED JACKET APPLICATION
A. Apply glass-cloth jacket, where indicated, directly over bare insulation or insulation with factory-applied jackets.
1. Apply jacket smooth and tight to surface with 2-inch (50-mm) overlap at seams and joints.
2. Embed glass cloth between two 0.062-inch- (1.6-mm-) thick coats of jacket manufacturer's recommended adhesive.
3. Completely encapsulate insulation with jacket, leaving no exposed raw insulation.
3.9 FINISHES
A. Glass-Cloth Jacketed Insulation: Paint insulation finished with glass-cloth jacket as specified in Division 9 Section "Painting."
B. Flexible Elastomeric Thermal Insulation: After adhesive has fully cured, apply two coats of insulation manufacturer's recommended protective coating.
Odor Control Phase I at Blue River/81000749 15081 Final Doc. 12/08/2015 Page No.-10 Duct Insulation
C. Color: Final color as selected by City. Vary first and second coats to allow visual inspection of the completed Work.
3.10 DUCT SYSTEM APPLICATIONS
A. Insulation materials and thicknesses are specified in schedules at the end of this Section.
B. Materials and thicknesses for systems listed below are specified in schedules at the end of this Section.
C. Insulate the following plenums and duct systems:
1. Indoor concealed supply-, return-, and outside-air ductwork. 2. Indoor exposed supply-, return-, and outside-air ductwork. 3. Outdoor exposed supply and return ductwork. 4. .
D. Items Not Insulated: Unless otherwise indicated, do not apply insulation to the following systems, materials, and equipment:
1. Fibrous-glass ducts. 2. Metal ducts with duct liner. 3. Factory-insulated flexible ducts. 4. Factory-insulated plenums, casings, terminal boxes, and filter boxes and
sections. 5. Flexible connectors. 6. Vibration-control devices. 7. Testing agency labels and stamps. 8. Nameplates and data plates. 9. Access panels and doors in air-distribution systems.
END OF SECTION 15081
Odor Control Phase I at Blue River/81000749 15081 Final Doc. 12/08/2015 Page No.-11 Duct Insulation

SECTION 15121
PIPE EXPANSION FITTINGS AND LOOPS
PART 1 - GENERAL
1.1 RELATED DOCUMENTS
A. Drawings and general provisions of the Contract, including General and Supplementary Conditions and Division 1 Specification Sections, apply to this Section.
1.2 All exposed materials will be installed in a hydrogen sulfide atmosphere. Materials shall be hydrogen sulfide resistant.
1.3 SUMMARY
A. This Section includes pipe expansion fittings and loops for mechanical piping systems, and the following:
1. Metal-bellows expansion joints. 2. Expansion compensators. 3. Rubber expansion joints. 4. Flexible-hose expansion joints. 5. Slip expansion joints. 6. Flexible ball joints. 7. Pipe bends and loops. 8. Guides and anchors.
1.4 PERFORMANCE REQUIREMENTS
A. Compatibility: Products suitable for piping system fluids, materials, working pressures, and temperatures.
B. Capability: Absorb 200 percent of maximum piping expansion between anchors.
1.5 SUBMITTALS
A. Product Data: For each type of expansion fitting indicated.
B. Shop Drawings: Signed and sealed by a qualified professional engineer.
1. Design Calculations: For thermal expansion of piping systems and selection and design of expansion fittings and loops.
2. Anchor Details: Detail fabrication of each indicated. Show dimensions and methods of assembly.
Odor Control Phase I at Blue River/81000749 15121 Final Doc. 12/08/2015 Page No.-1 Pipe Expansion Fittings and Loops

3. Alignment Guide Details: Detail field assembly and anchorage.
C. Welding Certificates: Copies of certificates for welding procedures and personnel.
D. Schedule: Indicate manufacturer's number, size, location, and features for each expansion fitting and loop.
1.6 QUALITY ASSURANCE
A. Engineering Responsibility: Design and preparation of Shop Drawings and calculations for expansion fittings and loops by a qualified professional engineer.
1. Professional Engineer Qualifications: A professional engineer who is legally qualified to practice in jurisdiction where Project is located and who is experienced in providing engineering services of the kind indicated. Engineering services are defined as those performed for installations of expansion fittings and loops that are similar to those indicated for this Project in material, design, and extent.
B. Welding: Qualify processes and operators according to ASME Boiler and Pressure Vessel Code: Section IX, "Welding and Brazing Qualifications."
1.7 ALL EXPOSED MATERIALS WILL BE INSTALLED IN A HYDROGEN SULFIDE ATMOSPHERE. MATERIALS SHALL BE HYDROGEN SULFIDE RESISTANT
PART 2 - PRODUCTS
2.1 MANUFACTURERS
A. Available Manufacturers: Subject to compliance with requirements, manufacturers offering products that may be incorporated into the Work include, but are not limited to, the following:
B. Manufacturers: Subject to compliance with requirements, provide products by one of the following:
1. Metal-Bellows Expansion Joints:
a. Adsco Manufacturing Corp. b. Anamet, Inc. c. Badger Industries, Inc. d. Expansion Joint Systems, Inc. e. Flexicraft Industries. f. Flex-Weld, Inc. g. Hyspan Precision Products, Inc. h. Metraflex Co. i. Pathway Bellows, Inc.
Odor Control Phase I at Blue River/81000749 15121 Final Doc. 12/08/2015 Page No.-2 Pipe Expansion Fittings and Loops

j. Piping Technology & Products, Inc. k. Proco Products, Inc. l. Senior Flexonics, Inc.; Expansion Joint Div. m. Wahlco Engineered Products, Inc.
2. Expansion Compensators:
a. Adsco Manufacturing Corp. b. Flexicraft Industries. c. Flex-Weld, Inc. d. Hyspan Precision Products, Inc. e. Metraflex Co. f. Senior Flexonics, Inc.; Expansion Joint Div.
3. Rubber Expansion Joints:
a. Flexicraft Industries. b. Flex-Weld, Inc. c. Garlock, Inc. d. General Rubber Corp. e. Mercer Rubber Co. f. Metraflex Co. g. MG Piping Products Co. h. Proco Products, Inc. i. Senior Flexonics, Inc.; Expansion Joint Div. j. Vibration Mountings & Controls, Inc.
4. Flexible-Hose Expansion Joints:
a. Flexicraft Industries. b. Metraflex Co.
5. Slip Expansion Joints:
a. Adsco Manufacturing Corp. b. Advanced Thermal Systems, Inc. c. Hyspan Precision Products, Inc.
6. Flexible Ball Joints:
a. Advanced Thermal Systems, Inc. b. Hyspan Precision Products, Inc.
7. Guides:
a. Adsco Manufacturing Corp. b. Advanced Thermal Systems, Inc. c. B-Line Systems, Inc. d. Flex-Weld, Inc. e. Grinnell Corp. f. Hyspan Precision Products, Inc.
Odor Control Phase I at Blue River/81000749 15121 Final Doc. 12/08/2015 Page No.-3 Pipe Expansion Fittings and Loops

g. Metraflex Co.
2.2 PACKLESS EXPANSION JOINTS
A. Metal-Bellows Expansion Joints: 175-psig (1200-kPa) minimum pressure rating, with end fittings and external tie rods for limiting maximum travel, and flanged-end connections, unless otherwise indicated.
1. Configuration: Single-bellows type. 2. Configuration: Double-bellows type, with base. 3. Configuration: Single- and double-bellows type, with base, unless otherwise
indicated. 4. Joints for Copper Piping: Two-ply, phosphor-bronze bellows and brass shrouds. 5. Joints for Copper Piping: Single-ply, phosphor-bronze bellows and brass shroud. 6. Joints for Copper Piping: Single- and two-ply, phosphor-bronze bellows and
brass shroud. 7. Joints for Stainless-Steel Waterway: Single-ply stainless-steel bellows, stainless-
steel-pipe end connections, and steel shroud. 8. Joints for Steel Piping: Two-ply, stainless-steel bellows and carbon-steel shroud. 9. Joints for Steel Piping: Single-ply, stainless-steel bellows and carbon-steel
shroud. 10. Joints for Steel Piping: Single- and two-ply, stainless-steel bellows and carbon-
steel shroud.
B. Expansion Compensators: 175-psig (1200-kPa) minimum pressure rating, with internal guides, antitorque device, and removable end clip for positioning.
1. End Connections for NPS 2 (DN50) and Smaller: Threaded. 2. End Connections for NPS 2-1/2 (DN65) and Larger: Flanged. 3. Joints for Copper Piping: Two-ply, phosphor-bronze bellows and brass shroud. 4. Joints for Steel Piping: Two-ply, stainless-steel bellows and carbon-steel shroud.
C. Rubber Expansion Joints: ASTM F 1123, fabric-reinforced butyl rubber, and pressure rated for 175 psig at 240 deg F (1200 kPa at 116 deg C) minimum.
1. Configuration: Full-faced, integral, steel-flanged-end connections; external control rods; and steel retaining rings drilled to match flange bolt holes.
2. Type: Single sphere. 3. Type: Double sphere.
D. Flexible-Hose Expansion Joints: Manufactured assembly with two flexible-metal-hose legs joined by long-radius 180-degree return bend with inlet and outlet elbow fittings, corrugated-metal inner hoses, and braided outer sheaths.
1. Joints for Copper Piping: Copper fittings with solder-joint end connections.
a. NPS 2 (DN50) and Smaller: Bronze hoses and single-braid bronze sheaths with 450 psig at 70 deg F (3100 kPa at 21 deg C) and 340 psig at 450 deg F (2340 kPa at 232 deg C) minimum pressure ratings.
Odor Control Phase I at Blue River/81000749 15121 Final Doc. 12/08/2015 Page No.-4 Pipe Expansion Fittings and Loops

b. NPS 2-1/2 to NPS 4 (DN65 to DN100): Stainless-steel hoses and single-braid, stainless-steel sheaths with 300 psig at 70 deg F (2060 kPa at 21 deg C) and 225 psig at 450 deg F (1550 kPa at 232 deg C) minimum pressure ratings.
c. NPS 2 (DN50) and Smaller: Bronze hoses and double-braid bronze sheaths with 700 psig at 70 deg F (4800 kPa at 21 deg C) and 500 psig at 450 deg F (3450 kPa at 232 deg C) minimum pressure ratings.
d. NPS 2-1/2 to NPS 4 (DN65 to DN100): Stainless-steel hoses and double-braid, stainless-steel sheaths with 420 psig at 70 deg F (2890 kPa at 21 deg C) and 315 psig at 450 deg F (2170 kPa at 232 deg C) minimum pressure ratings.
2. Joints for Steel Piping: Carbon-steel fittings.
a. End Connections for NPS 2 (DN50) and Smaller: Threaded. b. End Connections for NPS 2-1/2 (DN65) and Larger: Flanged. c. Joints for NPS 2 (DN50) and Smaller: Stainless-steel hoses and single-
braid, stainless-steel sheaths with 450 psig at 70 deg F (3100 kPa at 21 deg C) and 325 psig at 600 deg F (2250 kPa at 315 deg C) minimum pressure ratings.
d. Joints for NPS 2-1/2 to NPS 6 (DN65 to DN150): Stainless-steel hoses and single-braid, stainless-steel sheaths with 200 psig at 70 deg F (1380 kPa at 21 deg C) and 145 psig at 600 deg F (1000 kPa at 315 deg C) minimum pressure ratings.
e. Joints for NPS 8 to NPS 12 (DN200 to DN300): Stainless-steel hoses and single-braid, stainless-steel sheaths with 125 psig at 70 deg F (860 kPa at 21 deg C) and 90 psig at 600 deg F (625 kPa at 315 deg C) minimum pressure ratings.
f. Joints for NPS 2 (DN50) and Smaller: Stainless-steel hoses and double-braid, stainless-steel sheaths with 700 psig at 70 deg F (4800 kPa at 21 deg C) and 515 psig at 600 deg F (3550 kPa at 315 deg C) minimum pressure ratings.
g. Joints for NPS 2-1/2 to NPS 6 (DN65 to DN150): Stainless-steel hoses and double-braid, stainless-steel sheaths with 275 psig at 70 deg F (1900 kPa at 21 deg C) and 200 psig at 600 deg F (1380 kPa at 315 deg C) minimum pressure ratings.
h. Joints for NPS 8 (DN200) and Larger: Stainless-steel hoses and double-braid, stainless-steel sheaths with 165 psig at 70 deg F (1130 kPa at 21 deg C) and 120 psig at 600 deg F (830 kPa at 315 deg C) minimum pressure ratings.
2.3 PACKED EXPANSION JOINTS
A. Slip Expansion Joints: Carbon-steel, packing-type pipe expansion joint designed for repacking under pressure and pressure rated for 250 psig at 400 deg F (1725 kPa at 204 deg C) minimum with compound limit stops, flanged or weld ends to match piping system, drip connection if used for steam piping systems, and flanged-end connections, unless otherwise indicated.
1. Packing: Asbestos-free polytetrafluoroethylene. Odor Control Phase I at Blue River/81000749 15121 Final Doc. 12/08/2015 Page No.-5 Pipe Expansion Fittings and Loops
2. Single-Slip Type: With base, if indicated. 3. Double-Slip Type: With base.
B. Flexible Ball Joints: Carbon-steel assembly with asbestos-free composition packing, designed for 360-degree rotation and angular deflection, and 250 psig at 400 deg F (1725 kPa at 204 deg C) minimum pressure rating; comply with ASME Boiler and Pressure Vessel Code: Section II, "Materials Specifications," and with ASME B31.9, "Building Services Piping," for materials and design of pressure-containing parts and bolting.
1. End Connections for NPS 2 (DN50) and Smaller: Threaded. 2. End Connections for NPS 2-1/2 (DN65) and Larger: Flanged. 3. Joints for NPS 6 (DN150) and Smaller: 30-degree angular deflection minimum. 4. Joints for NPS 8 (DN200) and Larger: 15-degree angular deflection minimum.
2.4 GUIDES
A. Steel, factory fabricated, with bolted two-section outer cylinder and base for alignment of piping and two-section guiding spider for bolting to pipe.
2.5 MISCELLANEOUS MATERIALS
A. Structural Steel: ASTM A 36/A 36M.
B. Bolts and Nuts: ASME B18.10 or ASTM A 183, steel, hex head.
C. Washers: ASTM F 844, steel, plain, flat washers.
D. Mechanical Fasteners: Insert-wedge-type stud with expansion plug anchor for use in hardened portland cement concrete, and tension and shear capacities appropriate for application.
1. Stud: Threaded, zinc-coated carbon steel. 2. Expansion Plug: Zinc-coated steel. 3. Washer and Nut: Zinc-coated steel.
E. Chemical Fasteners: Insert-type-stud bonding system anchor for use with hardened portland cement concrete, and tension and shear capacities appropriate for application.
1. Bonding Material: ASTM C 881, Type IV, Grade 3, two-component epoxy resin suitable for surface temperature of hardened concrete where fastener is to be installed.
2. Stud: ASTM A 307, zinc-coated carbon steel with continuous thread on stud, unless otherwise indicated.
3. Washer and Nut: Zinc-coated steel.
F. Concrete: Portland cement mix, 3000 psi (20.7 MPa) minimum. Refer to Division 3 Section "Cast-in-Place Concrete" for formwork, reinforcement, and concrete.
Odor Control Phase I at Blue River/81000749 15121 Final Doc. 12/08/2015 Page No.-6 Pipe Expansion Fittings and Loops

G. Grout: ASTM C 1107, Grade B, factory-mixed and -packaged nonshrink and nonmetallic grout; suitable for interior and exterior applications.
1. Characteristics: Post-hardening, volume-adjusting, dry, hydraulic-cement grout. 2. Properties: Nonstaining, noncorrosive, and nongaseous. 3. Design Mix: 5000-psi (34.5-MPa), 28-day compressive strength.
PART 3 - EXECUTION
3.1 EXPANSION FITTING INSTALLATION
A. Install expansion fittings according to manufacturer's written instructions.
B. Install expansion fittings in sizes matching pipe size in which they are installed.
C. Align expansion fittings to avoid end-loading and torsional stress.
3.2 PIPE BEND AND LOOP INSTALLATION
A. Install pipe bends and loops cold-sprung in tension or compression as required to partly absorb tension or compression produced during anticipated change in temperature.
B. Attach pipe bends and loops to anchors.
1. Steel Anchors: Attach by welding. Comply with ASME B31.9 and ASME Boiler and Pressure Vessel Code: Section IX, "Welding and Brazing Qualifications."
2. Concrete Anchors: Attach by fasteners. Follow fastener manufacturer's written instructions.
3.3 SWING CONNECTIONS
A. Connect risers and branch connections to mains with at least five pipe fittings, including tee in main.
B. Connect risers and branch connections to terminal units with at least four pipe fittings, including tee in riser.
C. Connect mains and branch connections to terminal units with at least four pipe fittings, including tee in main.
3.4 GUIDE INSTALLATION
A. Install guides on piping adjoining expansion fittings and loops.
B. Attach guides to pipe and secure to building structure.
Odor Control Phase I at Blue River/81000749 15121 Final Doc. 12/08/2015 Page No.-7 Pipe Expansion Fittings and Loops
3.5 ANCHOR INSTALLATION
A. Install anchors at locations to prevent stresses from exceeding those permitted by ASME B31.9 and to prevent transfer of loading and stresses to connected equipment.
B. Fabricate and install steel anchors by welding steel shapes, plates, and bars to piping and to structure. Comply with ASME B31.9 and AWS D1.1.
C. Construct concrete anchors of poured-in-place concrete of dimensions indicated and include embedded fasteners.
D. Install pipe anchors according to expansion fitting manufacturer's written instructions if expansion fittings are indicated.
E. Use grout to form flat bearing surfaces for expansion fittings, guides, and anchors installed on or in concrete.
3.6 PAINTING
A. Touching Up: Clean field welds and abraded areas of shop paint. Paint exposed areas immediately after erecting hangers and supports. Use same materials as used for shop painting. Comply with SSPC-PA 1 requirements for touching up field-painted surfaces.
1. Apply paint by brush or spray to provide a minimum dry film thickness of 2.0 mils (0.05 mm).
B. Touching Up: Cleaning and touchup painting of field welds, bolted connections, and abraded areas of shop paint on miscellaneous metal are specified in Division 9 Section "Painting."
C. Galvanized Surfaces: Clean welds, bolted connections, and abraded areas and apply galvanizing-repair paint to comply with ASTM A 780.
END OF SECTION 15121
Odor Control Phase I at Blue River/81000749 15121 Final Doc. 12/08/2015 Page No.-8 Pipe Expansion Fittings and Loops
SECTION 15150
SANITARY WASTE AND VENT PIPING
PART 1 - GENERAL
1.1 RELATED DOCUMENTS
A. Drawings and general provisions of the Contract, including General and Supplementary Conditions and Division 1 Specification Sections, apply to this Section.
1.2 SUMMARY
A. This Section includes soil and waste, sanitary drainage and vent piping inside the building and to locations indicated.
B. Related Sections include the following:
1. Division 15 Section "Chemical-Waste Piping" for chemical-waste and vent piping systems.
2. Division 15 Section "Plumbing Specialties" for soil, waste, and vent piping systems specialties.
3. Division 15 Section "Sewage Pumps" for drainage connections for effluent pumps.
1.3 DEFINITIONS
A. The following are industry abbreviations for [plastic] [and] [rubber] piping materials:
1. ABS: Acrylonitrile-butadiene-styrene plastic. 2. EPDM: Ethylene-propylene-diene terpolymer. 3. NBR: Acrylonitrile-butadiene rubber. 4. PE: Polyethylene plastic. 5. PVC: Polyvinyl chloride plastic.
1.4 PERFORMANCE REQUIREMENTS
A. Provide components and installation capable of producing piping systems with the following minimum working-pressure ratings, unless otherwise indicated:
1. Soil, Waste, and Vent Piping: [10-foot head of water (30 kPa)] 2. Sanitary Sewer, Force-Main Piping: [50 psig (345 kPa)]
1.5 SUBMITTALS
Odor Control Phase I at Blue River/81000749 15150 Final Doc. 12/08/2015 Page No.-1 Sanitary Piping

A. Product Data: For pipe, tube, fittings, and couplings.
B. Shop Drawings: For sovent drainage system, include plans, elevations, sections, and details.
C. Field Test Reports: Indicate and interpret test results for compliance with performance requirements.
1.6 QUALITY ASSURANCE
A. Piping materials shall bear label, stamp, or other markings of specified testing agency.
B. Comply with NSF 14, "Plastics Piping Systems Components and Related Materials," for plastic piping components. Include marking with "NSF-dwv" for plastic drain, waste, and vent piping; "NSF-drain" for plastic drain piping; "NSF-tubular" for plastic continuous waste piping; and "NSF-sewer" for plastic sewer piping.
1.7 ALL EXPOSED MATERIALS WILL BE INSTALLED IN A HYDROGEN SULFIDE ATMOSPHERE. MATERIALS SHALL BE HYDROGEN SULFIDE RESISTANT
PART 2 - PRODUCTS
2.1 PIPING MATERIALS
A. Refer to Part 3 "Piping Applications" Article for applications of pipe, tube, fitting, and joining materials.
B. Flexible Transition Couplings for Underground Nonpressure Piping: ASTM C 1173 with elastomeric sleeve. Include ends of same sizes as piping to be joined and include corrosion-resistant metal band on each end.
C. Transition Couplings for Underground Pressure Piping: AWWA C219 metal, sleeve-type coupling or other manufactured fitting same size as, with pressure rating at least equal to and ends compatible with, piping to be joined.
2.2 CAST-IRON SOIL PIPING
A. Hub-and-Spigot Pipe and Fittings: ASTM A 74, [Service] [and] [Extra-Heavy] class[es].
1. Gaskets: ASTM C 564, rubber.
B. Hubless Pipe and Fittings: ASTM A 888 or CISPI 301.
1. Couplings: ASTM C 1277 assembly of metal housing, corrosion-resistant fasteners, and ASTM C 564 rubber sleeve with integral, center pipe stop.
Odor Control Phase I at Blue River/81000749 15150 Final Doc. 12/08/2015 Page No.-2 Sanitary Piping
a. Heavy-Duty, Type 304, Stainless-Steel Couplings: ASTM A 666, Type 304, stainless-steel shield; stainless-steel bands; and sleeve.
1) NPS 1-1/2 to NPS 4 (DN 40 to DN 100): 3-inch- (76-mm-) wide shield with 4 bands.
2) NPS 5 to NPS 10 (DN 125 to DN 250): 4-inch- (102-mm-) wide shield with 6 bands.
b. Heavy-Duty, FM-Approved Couplings: ASTM A 666, Type 304, stainless-steel housing; stainless-steel bands; and sleeve.
1) NPS 1-1/2 to NPS 4 (DN 40 to DN 100): 3-inch- (76-mm-) wide housing with 2 bands.
2) NPS 5 to NPS 10 (DN 125 to DN 250): 4-inch- (102-mm-) wide housing with 2 bands.
c. Heavy-Duty, Type 301, Stainless-Steel Couplings: ASTM A 666, Type 301, stainless-steel shield; stainless-steel bands; and sleeve.
1) NPS 1-1/2 to NPS 4 (DN 40 to DN 100): 3-inch- (76-mm-) wide shield with 4 bands.
2) NPS 5 to NPS 10 (DN 125 to DN 250): 4-inch- (102-mm-) wide shield with 6 bands.
d. Compact, Stainless-Steel Couplings: CISPI 310 with ASTM A 167, Type 301, or ASTM A 666, Type 301, stainless-steel corrugated shield; stainless-steel bands; and sleeve.
1) NPS 1-1/2 to NPS 4 (DN 40 to DN 100): 2-1/8-inch- (54-mm-) wide shield with 2 bands.
2) NPS 5 and NPS 6 (DN 125 and DN 150): 3-inch- (76-mm-) wide shield with 4 bands.
3) NPS 8 and NPS 10 (DN 200 and DN 250): 4-inch- (102-mm-) wide shield with 4 bands.
4) NPS 12 and NPS 15 (DN 300 and DN 375): 5-1/2-inch- (140-mm-) wide shield with 6 bands.
2. Sovent Fittings: ASME B16.45 or ASSE 1043, hubless, aerator and deaerator.
2.3 STAINLESS-STEEL PIPING
A. Stainless-Steel Piping: ASME A112.3.1, stainless-steel, drainage pipe and fittings with socket and spigot ends.
1. Gaskets for NPS 3 to NPS 6 (DN 80 to DN 150): Lip seals shaped to fit socket groove, with plastic backup ring.
a. General Applications: EPDM, unless otherwise indicated. b. Fluids Containing Gasoline or Oil: NBR, unless otherwise indicated.
Odor Control Phase I at Blue River/81000749 15150 Final Doc. 12/08/2015 Page No.-3 Sanitary Piping

2. Couplings for NPS 8 to NPS 12 (DN 200 to DN 300): Stainless-steel, mechanical type, with seal.
a. General Applications: EPDM, unless otherwise indicated. b. Fluids Containing Gasoline or Oil: NBR, unless otherwise indicated.
2.4 DUCTILE-IRON PIPING
A. Mechanical-Joint, Ductile-Iron Pipe: AWWA C151, with mechanical-joint bell and plain spigot end, unless grooved or flanged ends are indicated.
1. Mechanical-Joint, Ductile-Iron Fittings: AWWA C110, ductile- or gray-iron standard pattern or AWWA C153, ductile-iron compact pattern.
a. Glands, Gaskets, and Bolts: AWWA C111, ductile- or gray-iron glands, rubber gaskets, and steel bolts.
2. Ductile-Iron Piping, Grooved-End Fittings: ASTM A 47 (ASTM A 47M), malleable-iron castings or ASTM A 536, ductile-iron castings with dimensions matching pipe.
a. Ductile-Iron-Piping, Keyed Couplings: AWWA C606, for ductile-iron-pipe dimensions. Include ferrous housing sections, gasket suitable for water, and bolts and nuts.
B. Push-on-Joint, Ductile-Iron Pipe: AWWA C151, with push-on-joint bell and plain spigot end, unless grooved or flanged ends are indicated.
1. Push-on-Joint, Ductile-Iron Fittings: AWWA C110, ductile- or gray-iron standard pattern or AWWA C153, ductile-iron compact pattern.
a. Gaskets: AWWA C111, rubber.
2. Ductile-Iron, Grooved-End Fittings: ASTM A 47 (ASTM A 47M), malleable-iron castings or ASTM A 536, ductile-iron castings with dimensions matching pipe.
a. Ductile-Iron-Piping, Keyed Couplings: AWWA C606, for ductile-iron-pipe dimensions. Include ferrous housing sections, gasket suitable for water, and bolts and nuts.
3. Ductile-Iron, Flexible Expansion Joints: Compound, ductile-iron fitting with combination of flanged and mechanical-joint ends complying with AWWA C110 or AWWA C153. Include two gasketed ball-joint sections and one or more gasketed sleeve sections. Assemble components for offset and expansion indicated. Include AWWA C111, ductile-iron glands, rubber gaskets, and steel bolts.
4. Ductile-Iron, Deflection Fittings: Compound, ductile-iron coupling fitting with sleeve and flexing sections for up to 20-degree deflection, gaskets, and restrained-joint ends complying with AWWA C110 or AWWA C153. Include AWWA C111, ductile-iron glands, rubber gaskets, and steel bolts.
Odor Control Phase I at Blue River/81000749 15150 Final Doc. 12/08/2015 Page No.-4 Sanitary Piping
5. Ductile-Iron, Expansion Joints: Three-piece, ductile-iron assembly consisting of telescoping sleeve with gaskets and restrained-type, ductile-iron, bell-and-spigot end sections complying with AWWA C110 or AWWA C153. Select and assemble components for expansion indicated. Include AWWA C111, ductile-iron glands, rubber gaskets, and steel bolts.
2.5 PVC PIPING
A. PVC Pipe: ASTM D 2665, solid-wall drain, waste, and vent.
1. PVC Socket Fittings: ASTM D 2665, socket type, made to ASTM D 3311, drain, waste, and vent patterns.
B. Cellular-Core, Schedule 40, PVC Pipe: ASTM F 891, Schedule 40.
1. PVC Socket Fittings: ASTM D 2665, made to ASTM D 3311, drain, waste, and vent patterns and to fit Schedule 40 pipe.
C. Cellular-Core, Sewer and Drain Series, PVC Pipe: ASTM F 891, Series PS 100.
1. PVC Socket Fittings: ASTM D 2665, made to ASTM D 3311, drain, waste, and vent patterns and to fit Series PS 100 sewer and drain pipe.
D. PVC Special Fittings: ASTM F 409, drainage-pattern tube and tubular fittings with ends as required for application.
2.6 PE ENCASEMENT
A. PE Encasement for Underground Metal Piping: ASTM A 674 or AWWA C105, PE film, 0.008-inch (0.20-mm) minimum thickness, tube or sheet.
PART 3 - EXECUTION
3.1 EXCAVATION
A. Refer to Division 2 Section "Earthwork" for excavating, trenching, and backfilling.
3.2 PIPING APPLICATIONS
A. Transition and special fittings with pressure ratings at least equal to piping pressure ratings may be used in applications below, unless otherwise indicated.
B. Flanges may be used on aboveground pressure piping, unless otherwise indicated.
C. Aboveground, Soil, Waste, and Vent Piping: Use any of the following piping materials for each size range:
Odor Control Phase I at Blue River/81000749 15150 Final Doc. 12/08/2015 Page No.-5 Sanitary Piping
1. Sovent Fittings: NPS 3 to NPS 8 (DN 80 to DN 200).
2. fittings; and threaded joints. 3. NPS 1-1/4 and NPS 1-1/2 (DN 32 and DN 40): PVC pipe, PVC socket fittings,
and solvent-cemented joints. 4. NPS 1-1/4 and NPS 1-1/2 (DN 32 and DN 40): Cellular-core, Schedule 40, PVC
pipe; PVC socket fittings; and solvent-cemented joints. 5. following:
a. Couplings: Heavy-duty, Type [301] [304], stainless steel. b. Couplings: Compact, stainless steel.
6. NPS 2 to NPS 4 (DN 50 to DN 100): Stainless-steel piping, gaskets, and gasketed joints.
7. NPS 2 to NPS 4 (DN 50 to DN 100): Copper DWV tube, copper drainage fittings, and soldered joints.
8. NPS 2 to NPS 4 (DN 50 to DN 100): PVC pipe, PVC socket fittings, and solvent-cemented joints.
9. NPS 2 to NPS 4 (DN 50 to DN 100): Cellular-core, Schedule 40, PVC pipe; PVC socket fittings; and solvent-cemented joints.
10. NPS 5 and NPS 6 (DN 125 and DN 150): Use NPS 6 (DN 150) stainless-steel piping, gaskets, and gasketed joints.
11. NPS 5 and NPS 6 (DN 125 and DN 150): Use NPS 6 (DN 150) PVC pipe, PVC socket fittings, and solvent-cemented joints.
12. NPS 5 and NPS 6 (DN 125 and DN 150): Cellular-core, Schedule 40, PVC pipe; PVC socket fittings; and solvent-cemented joints.
13. NPS 8 (DN 200): Stainless-steel piping, couplings, and coupled joints. 14. NPS 10 (DN 250): Stainless-steel piping, couplings, and coupled joints. 15. NPS 10 (DN 250): PVC pipe, PVC socket fittings, and solvent-cemented joints. 16. NPS 12 (DN 300): Stainless-steel piping, couplings, and coupled joints. 17. NPS 12 (DN 300): PVC pipe, PVC socket fittings, and solvent-cemented joints. 18.
D. Underground, Soil, Waste, and Vent Piping: Use [any of] the following piping materials for each size range: 1. NPS 1-1/2 (DN 40): PVC pipe, PVC socket fittings, and solvent-cemented joints. 2. NPS 1-1/2 (DN 40): Cellular-core, PVC pipe; PVC socket fittings; and solvent-
cemented joints. 3. Retain one or more of first nine subparagraphs and associated subparagraphs
below. If more than one type of material and joining method is used, identify various materials on Drawings and show points of transition from one material to another.
4. NPS 2 to NPS 4 (DN 50 to DN 100): Stainless-steel piping, gaskets, and gasketed joints.
5. NPS 2 to NPS 4 (DN 50 to DN 100): PVC pipe, PVC socket fittings, and solvent-cemented joints.
6. NPS 2 to NPS 4 (DN 50 to DN 100): Use NPS 3 and NPS 4 (DN 80 and DN 100) cellular-core, Sewer and Drain Series, PVC pipe; PVC socket fittings; and solvent-cemented joints.
Odor Control Phase I at Blue River/81000749 15150 Final Doc. 12/08/2015 Page No.-6 Sanitary Piping

7. NPS 5 and NPS 6 (DN 125 and DN 150): Use NPS 6 (DN 150) stainless-steel piping, gaskets, and gasketed joints.
8. NPS 5 and NPS 6 (DN 125 and DN 150): PVC pipe, PVC socket fittings, and solvent-cemented joints.
9. NPS 8 and NPS 10 (DN 200 and DN 250): Stainless-steel pipe, stainless-steel fittings, and mechanical coupling joint.
10. NPS 8 and NPS 10 (DN 200 and DN 250): PVC pipe, PVC socket fittings, and solvent-cemented joints.
11. NPS 12 (DN 300): Stainless-steel pipe, stainless-steel fittings, and mechanical coupling joint.
12. NPS 12 (DN 300): PVC pipe, PVC socket fittings, and solvent-cemented joints.
E. Underground Sanitary-Sewage Force Mains: Use [any of] the following piping materials for each size range: 1. NPS 2 to NPS 4 (DN 50 to DN 100): Use NPS 3 and NPS 4 (DN 80 and
DN 100) mechanical- or push-on-joint, ductile-iron pipe and fittings. 2. NPS 5 and NPS 6 (DN 125 and DN 150): Use NPS 6 (DN 150) [mechanical- or
push-on]-joint, ductile-iron pipe and fittings.
3.3 PIPING INSTALLATION
A. Refer to Division 2 Section "Sanitary Sewerage" for Project-site sanitary sewer piping.
B. Refer to Division 15 Section "Basic Mechanical Materials and Methods" for basic piping installation.
C. Install cleanouts at grade and extend to where building sanitary drains connect to building sanitary sewers.
D. Install cleanout fitting with closure plug inside the building in sanitary force-main piping.
E. Underground, Ductile-Iron, Force-Main Piping: Comply with AWWA C600. Install buried piping inside the building between wall and floor penetrations and connection to sanitary sewer piping outside the building with restrained joints. Anchor pipe to wall or floor. Install thrust-block supports at vertical and horizontal offsets.
1. Encase piping with PE film according to ASTM A 674 or AWWA C105.
F. Install cast-iron sleeve with water stop and mechanical sleeve seal at each service pipe penetration through foundation wall. Select number of interlocking rubber links required to make installation watertight. Refer to Division 15 Section "Basic Mechanical Materials and Methods" for sleeves and mechanical sleeve seals.
G. Install wall penetration system at each service pipe penetration through foundation wall. Make installation watertight. Refer to Division 15 Section "Basic Mechanical Materials and Methods" for wall penetration systems.
Odor Control Phase I at Blue River/81000749 15150 Final Doc. 12/08/2015 Page No.-7 Sanitary Piping

H. Install cast-iron soil piping according to CISPI's "Cast Iron Soil Pipe and Fittings Handbook," Chapter IV, "Installation of Cast Iron Soil Pipe and Fittings."
1. Encase underground piping with PE film according to ASTM A 674 or AWWA C105.
I. Make changes in direction for soil and waste drainage and vent piping using appropriate branches, bends, and long-sweep bends. Sanitary tees and short-sweep 1/4 bends may be used on vertical stacks if change in direction of flow is from horizontal to vertical. Use long-turn, double Y-branch and 1/8-bend fittings if 2 fixtures are installed back to back or side by side with common drain pipe. Straight tees, elbows, and crosses may be used on vent lines. Do not change direction of flow more than 90 degrees. Use proper size of standard increasers and reducers if pipes of different sizes are connected. Reducing size of drainage piping in direction of flow is prohibited.
J. Lay buried building drainage piping beginning at low point of each system. Install true to grades and alignment indicated, with unbroken continuity of invert. Place hub ends of piping upstream. Install required gaskets according to manufacturer's written instructions for use of lubricants, cements, and other installation requirements. Maintain swab in piping and pull past each joint as completed.
K. Install soil and waste drainage and vent piping at the following minimum slopes, unless otherwise indicated:
1. Building Sanitary Drain: 2 percent downward in direction of flow for piping NPS 3 (DN 80) and smaller; 1 percent downward in direction of flow for piping NPS 4 (DN 100) and larger.
2. Horizontal Sanitary Drainage Piping: 2 percent downward in direction of flow. 3. Vent Piping: 1 percent down toward vertical fixture vent or toward vent stack.
L. Install force mains at elevations indicated.
M. Install engineered soil and waste drainage and vent piping systems in locations indicated and as follows:
1. Combination Waste and Vent: Comply with standards of authorities having jurisdiction.
2. Cast-Iron, Sovent, Single Stack: Comply with ASSE 1043 and sovent fitting manufacturer's written installation instructions.
3. Reduced-Size Venting: Comply with standards of authorities having jurisdiction.
N. Sleeves are not required for cast-iron soil piping passing through concrete slabs-on-grade if slab is without membrane waterproofing.
O. Install ABS soil and waste drainage and vent piping according to ASTM D 2661.
P. Install PVC soil and waste drainage and vent piping according to ASTM D 2665.
Q. Install underground [PVC] soil and waste drainage piping according to ASTM D 2321.
Odor Control Phase I at Blue River/81000749 15150 Final Doc. 12/08/2015 Page No.-8 Sanitary Piping

R. Do not enclose, cover, or put piping into operation until it is inspected and approved by authorities having jurisdiction.
3.4 JOINT CONSTRUCTION
A. Refer to Division 15 Section "Basic Mechanical Materials and Methods" for basic piping joint construction.
B. Cast-Iron, Soil-Piping Joints: Make joints according to CISPI's "Cast Iron Soil Pipe and Fittings Handbook," Chapter IV, "Installation of Cast Iron Soil Pipe and Fittings."
1. Gasketed Joints: Make with rubber gasket matching class of pipe and fittings. 2. Hubless Joints: Make with rubber gasket and sleeve or clamp.
C. Soldered Joints: Use ASTM B 813, water-flushable, lead-free flux; ASTM B 32, lead-free-alloy solder; and ASTM B 828 procedure, unless otherwise indicated.
D. Grooved Joints: Assemble joint with keyed coupling, gasket, lubricant, and bolts according to coupling and fitting manufacturer's written instructions.
E. PVC Nonpressure Piping Joints: Join piping according to ASTM D 2665.
3.5 VALVE INSTALLATION
A. Refer to Division 15 Section "Valves" for general-duty valves.
B. Shutoff Valves: Install shutoff valve on each sewage pump discharge.
1. Use gate or full-port ball valve for piping NPS 2 (DN 50) and smaller. 2. Use gate valve for piping NPS 2-1/2 (DN 65) and larger.
C. Check Valves: Install swing check valve, downstream from shutoff valve, on each sewage pump discharge.
D. Backwater Valves: Install backwater valves in piping subject to sewage backflow.
1. Horizontal Piping: Horizontal backwater valves. [Use normally closed type, unless otherwise indicated.]
2. Floor Drains: Drain outlet backwater valves, unless drain has integral backwater valve.
3. Install backwater valves in accessible locations. 4. Refer to Division 15 Section "Plumbing Specialties" for backwater valves.
3.6 HANGER AND SUPPORT INSTALLATION
A. Refer to Division 15 Section "Mechanical Vibration Controls and Seismic Restraints" for seismic-restraint devices.
Odor Control Phase I at Blue River/81000749 15150 Final Doc. 12/08/2015 Page No.-9 Sanitary Piping

B. Refer to Division 15 Section "Hangers and Supports" for pipe hanger and support devices. Install the following:
1. Vertical Piping: MSS Type 8 or Type 42, clamps. 2. Individual, Straight, Horizontal Piping Runs: According to the following:
a. 100 Feet (30 m) and Less: MSS Type 1, adjustable, steel clevis hangers. b. Longer Than 100 Feet (30 m): MSS Type 43, adjustable roller hangers. c. Longer Than 100 Feet (30 m), if Indicated: MSS Type 49, spring cushion
rolls.
3. Multiple, Straight, Horizontal Piping Runs 100 Feet (30 m) or Longer: MSS Type 44, pipe rolls. Support pipe rolls on trapeze.
4. Base of Vertical Piping: MSS Type 52, spring hangers.
C. Install supports according to Division 15 Section "Hangers and Supports."
D. Support vertical piping and tubing at base and at each floor.
E. Rod diameter may be reduced 1 size for double-rod hangers, with 3/8-inch (10-mm) minimum rods.
F. Install hangers for cast-iron soil piping with the following maximum horizontal spacing and minimum rod diameters:
1. NPS 1-1/2 and NPS 2 (DN 40 and DN 50): 60 inches (1500 mm) with 3/8-inch (10-mm) rod.
2. NPS 3 (DN 80): 60 inches (1500 mm) with 1/2-inch (13-mm) rod. 3. NPS 4 and NPS 5 (DN 100 and DN 125): 60 inches (1500 mm) with 5/8-inch
(16-mm) rod. 4. NPS 6 (DN 150): 60 inches (1500 mm) with 3/4-inch (19-mm) rod. 5. NPS 8 to NPS 12 (DN 200 to DN 300): 60 inches (1500 mm) with 7/8-inch (22-
mm) rod. 6. NPS 15 (DN 375): 60 inches (1500 mm) with 1-inch (25-mm) rod. 7. Spacing for 10-foot (3-m) lengths may be increased to 10 feet (3 m). Spacing for
fittings is limited to 60 inches (1500 mm).
G. Install supports for vertical cast-iron soil piping every 15 feet (4.5 m).
H. Install hangers for steel piping with the following maximum horizontal spacing and minimum rod diameters:
1. NPS 1-1/4 (DN 32): 84 inches (2100 mm) with 3/8-inch (10-mm) rod. 2. NPS 1-1/2 (DN 40): 108 inches (2700 mm) with 3/8-inch (10-mm) rod. 3. NPS 2 (DN 50): 10 feet (3 m) with 3/8-inch (10-mm) rod. 4. NPS 2-1/2 (DN 65): 11 feet (3.4 m) with 1/2-inch (13-mm) rod. 5. NPS 3 (DN 80): 12 feet (3.7 m) with 1/2-inch (13-mm) rod. 6. NPS 4 and NPS 5 (DN 100 and DN 125): 12 feet (3.7 m) with 5/8-inch (16-mm)
rod. 7. NPS 6 (DN 150): 12 feet (3.7 m) with 3/4-inch (19-mm) rod.
Odor Control Phase I at Blue River/81000749 15150 Final Doc. 12/08/2015 Page No.-10 Sanitary Piping

8. NPS 8 to NPS 12 (DN 200 to DN 300): 12 feet (3.7 m) with 7/8-inch (22-mm) rod.
I. Install supports for vertical steel piping every 15 feet (4.5 m).
J. Install hangers for stainless-steel piping with the following maximum horizontal spacing and minimum rod diameters:
1. NPS 2 (DN 50): 84 inches (2100 mm) with 3/8-inch (10-mm) rod. 2. NPS 3 (DN 80): 96 inches (2400 mm) with 1/2-inch (13-mm) rod. 3. NPS 4 (DN 100): 108 inches (2700 mm) with 1/2-inch (13-mm) rod. 4. NPS 6 (DN 150): 10 feet (3 m) with 5/8-inch (16-mm) rod. 5. NPS 8 to NPS 12 (DN 200 to DN 300): 10 feet (3 m) with 7/8-inch (22-mm) rod.
K. Install supports for vertical stainless-steel piping every 10 feet (3 m).
L. Install hangers for copper tubing with the following maximum horizontal spacing and minimum rod diameters:
1. NPS 1-1/4 (DN 32): 72 inches (1800 mm) with 3/8-inch (10-mm) rod. 2. NPS 1-1/2 and NPS 2 (DN 40 and DN 50): 96 inches (2400 mm) with 3/8-inch
(10-mm) rod. 3. NPS 2-1/2 (DN 65): 108 inches (2700 mm) with 1/2-inch (13-mm) rod. 4. NPS 3 to NPS 5 (DN 80 to DN 125): 10 feet (3 m) with 1/2-inch (13-mm) rod. 5. NPS 6 (DN 150): 10 feet (3 m) with 5/8-inch (16-mm) rod. 6. NPS 8 (DN 200): 10 feet (3 m) with 3/4-inch (19-mm) rod.
M. Install supports for vertical copper tubing every 10 feet (3 m).
N. Install hangers for [ABS] [and] [PVC] piping with the following maximum horizontal spacing and minimum rod diameters:
1. NPS 1-1/2 and NPS 2 (DN 40 and DN 50): 48 inches (1200 mm) with 3/8-inch (10-mm) rod.
2. NPS 3 (DN 80): 48 inches (1200 mm) with 1/2-inch (13-mm) rod. 3. NPS 4 and NPS 5 (DN 100 and DN 125): 48 inches (1200 mm) with 5/8-inch
(16-mm) rod. 4. NPS 6 (DN 150): 48 inches (1200 mm) with 3/4-inch (19-mm) rod. 5. NPS 8 to NPS 12 (DN 200 to DN 300): 48 inches (1200 mm) with 7/8-inch (22-
mm) rod.
O. Install supports for vertical [ABS] [and] [PVC] piping every 48 inches (1200 mm).
P. Support piping and tubing not listed above according to MSS SP-69 and manufacturer's written instructions.
3.7 CONNECTIONS
A. Drawings indicate general arrangement of piping, fittings, and specialties.
Odor Control Phase I at Blue River/81000749 15150 Final Doc. 12/08/2015 Page No.-11 Sanitary Piping

B. Connect soil and waste piping to exterior sanitary sewerage piping. Use transition fitting to join dissimilar piping materials.
C. Connect drainage and vent piping to the following:
1. Plumbing Fixtures: Connect drainage piping in sizes indicated, but not smaller than required by plumbing code. Refer to Division 15 Section "Plumbing Fixtures."
2. Plumbing Fixtures and Equipment: Connect atmospheric vent piping in sizes indicated, but not smaller than required by authorities having jurisdiction.
3. Plumbing Specialties: Connect drainage and vent piping in sizes indicated, but not smaller than required by plumbing code. Refer to Division 15 Section "Plumbing Specialties."
4. Equipment: Connect drainage piping as indicated. Provide shutoff valve, if indicated, and union for each connection. Use flanges instead of unions for connections NPS 2-1/2 (DN 65) and larger.
D. Connect force-main piping to the following:
1. Sanitary Sewer: To exterior force main or sanitary manhole. 2. Sewage Pumps: To sewage pump discharge.
3.8 FIELD QUALITY CONTROL
A. During installation, notify authorities having jurisdiction at least 24 hours before inspection must be made. Perform tests specified below in presence of authorities having jurisdiction.
1. Roughing-in Inspection: Arrange for inspection of piping before concealing or closing-in after roughing-in and before setting fixtures.
2. Final Inspection: Arrange for final inspection by authorities having jurisdiction to observe tests specified below and to ensure compliance with requirements.
B. Reinspection: If authorities having jurisdiction find that piping will not pass test or inspection, make required corrections and arrange for reinspection.
C. Reports: Prepare inspection reports and have them signed by authorities having jurisdiction.
D. Test sanitary drainage and vent piping according to procedures of authorities having jurisdiction or, in absence of published procedures, as follows:
1. Test for leaks and defects in new piping and parts of existing piping that have been altered, extended, or repaired. If testing is performed in segments, submit separate report for each test, complete with diagram of portion of piping tested.
2. Leave uncovered and unconcealed new, altered, extended, or replaced drainage and vent piping until it has been tested and approved. Expose work that was covered or concealed before it was tested.
3. Roughing-in Plumbing Test Procedure: Test drainage and vent piping, except outside leaders, on completion of roughing-in. Close openings in piping system
Odor Control Phase I at Blue River/81000749 15150 Final Doc. 12/08/2015 Page No.-12 Sanitary Piping

and fill with water to point of overflow, but not less than 10-foot head of water (30 kPa). From 15 minutes before inspection starts to completion of inspection, water level must not drop. Inspect joints for leaks.
4. Finished Plumbing Test Procedure: After plumbing fixtures have been set and traps filled with water, test connections and prove they are gastight and watertight. Plug vent-stack openings on roof and building drains where they leave building. Introduce air into piping system equal to pressure of 1-inch wg (250 Pa). Use U-tube or manometer inserted in trap of water closet to measure this pressure. Air pressure must remain constant without introducing additional air throughout period of inspection. Inspect plumbing fixture connections for gas and water leaks.
5. Repair leaks and defects with new materials and retest piping, or portion thereof, until satisfactory results are obtained.
6. Prepare reports for tests and required corrective action.
E. Test force-main piping according to procedures of authorities having jurisdiction or, in absence of published procedures, as follows:
1. Leave uncovered and unconcealed new, altered, extended, or replaced force-main piping until it has been tested and approved. Expose work that was covered or concealed before it was tested.
2. Cap and subject piping to static-water pressure of 50 psig (345 kPa) above operating pressure, without exceeding pressure rating of piping system materials. Isolate test source and allow to stand for four hours. Leaks and loss in test pressure constitute defects that must be repaired.
3. Repair leaks and defects with new materials and retest piping, or portion thereof, until satisfactory results are obtained.
4. Prepare reports for tests and required corrective action.
3.9 CLEANING
A. Clean interior of piping. Remove dirt and debris as work progresses.
B. Protect drains during remainder of construction period to avoid clogging with dirt and debris and to prevent damage from traffic and construction work.
C. Place plugs in ends of uncompleted piping at end of day and when work stops.
3.10 PROTECTION
A. Exposed [PVC] Piping: Protect plumbing vents exposed to sunlight with two coats of water-based latex paint.
END OF SECTION 15150
Odor Control Phase I at Blue River/81000749 15150 Final Doc. 12/08/2015 Page No.-13 Sanitary Piping
SECTION 15441
WATER DISTRIBUTION PUMPS
PART 1 - GENERAL
1.1 RELATED DOCUMENTS
A. Drawings and general provisions of the Contract, including General and Supplementary Conditions and Division 1 Specification Sections, apply to this Section.
1.2 SUMMARY
A. This Section includes pumps for the building potable-water systems.
B. Related Sections include the following:
1. Division 2 Section "Water Wells" for well pumps. 2. Division 15 Section "Packaged Booster Pumps" for booster systems. 3. Division 15 Section "HVAC Pumps" for hydronic system pumps. 4. Division 16 Sections for power-supply wiring, field-installed disconnects,
electrical devices, and motor controllers.
1.3 SUBMITTALS
A. Product Data: Include certified performance curves and rated capacities of selected models; shipping, installed, and operating weights; furnished specialties; and accessories for each type and size of pump specified. Indicate pumps' operating point on curves.
B. Shop Drawings: Show layout and connections for pumps. Include setting drawings with templates, directions for installation of foundation and anchor bolts, and other anchorages.
1. Wiring Diagrams: Detail wiring for power, signal, and control systems and differentiate between manufacturer-installed and field-installed wiring.
C. Maintenance Data: For each pump specified to include in maintenance manuals specified in Division 1.
1.4 QUALITY ASSURANCE
A. Source Limitations: Obtain same type of pumps through one source from a single manufacturer.
Odor Control Phase I at Blue River/81000749 15441 Final Doc. 12/08/2015 Page No.-1 Water Distribution Pump

B. Product Options: Drawings indicate size, profiles, connections, and dimensional requirements of pumps and are based on specific manufacturer types and models indicated. Other manufacturers' pumps with equal performance characteristics may be considered. Refer to Division 1 Section "Substitutions."
C. Electrical Components, Devices, and Accessories: Listed and labeled as defined in NFPA 70, Article 100, by a testing agency acceptable to authorities having jurisdiction.
1.5 DELIVERY, STORAGE, AND HANDLING
A. Retain shipping flange protective covers and protective coatings during storage.
B. Protect bearings and couplings against damage.
1.6 ALL EXPOSED MATERIALS WILL BE INSTALLED IN A HYDROGEN SULFIDE ATMOSPHERE. MATERIALS SHALL BE HYDROGEN SULFIDE RESISTANT
PART 2 - PRODUCTS
2.1 MANUFACTURERS
A. Available Manufacturers: Subject to compliance with requirements, manufacturers offering products that may be incorporated into the Work include, but are not limited to, the following:
B. Manufacturers: Subject to compliance with requirements, provide products by one of the following:
1. Compact Circulators:
a. Armstrong Pumps, Inc. b. Grundfos Pumps Corp. c. ITT Fluid Technology Corp.; ITT Bell & Gossett Div. d. Taco, Inc.
2. In-Line Circulators:
a. Amtrol, Inc. b. Armstrong Pumps, Inc. c. Crane Pumps & Systems, Inc.; Weinman Div. d. ITT Fluid Technology Corp.; ITT Bell & Gossett Div. e. Taco, Inc.
3. Horizontal In-Line Pumps:
a. Amtrol, Inc. b. Armstrong Pumps, Inc. c. ITT Fluid Technology Corp.; ITT Bell & Gossett Div.
Odor Control Phase I at Blue River/81000749 15441 Final Doc. 12/08/2015 Page No.-2 Water Distribution Pump

d. Marshall Engineered Products Co. e. Taco, Inc.
4. Vertical In-Line Pumps:
a. Armstrong Pumps, Inc. b. Crane Pumps & Systems, Inc.; Weinman Div. c. ITT Fluid Technology Corp.; ITT Bell & Gossett Div.
2.2 PUMPS, GENERAL
A. Description: Factory-assembled and -tested, single-stage, centrifugal pump units; complying with UL 778; suitable for potable-water service; with all-bronze or stainless-steel construction and components in contact with water made of corrosion-resistant materials.
B. Motors: Comply with requirements in Division 15 Section "Motors" with built-in thermal-overload protection appropriate for motor size and duty.
C. End Connections for NPS 2 (DN50) and Smaller: Threaded. Pumps available only with flanged ends may be furnished with threaded companion flanges.
D. End Connections for NPS 2-1/2 (DN65) and Larger: Flanged.
E. Finish: Manufacturer's standard paint applied to factory-assembled and -tested units before shipping.
F. Manufacturer's Preparation for Shipping: Clean flanges and exposed machined metal surfaces and treat with anticorrosion compound after assembly and testing. Protect flanges, pipe openings, and nozzles.
2.3 COMPACT CIRCULATORS
A. Description: Horizontal, in-line, replaceable-cartridge-design circulator; rated for 125-psig (860-kPa) minimum working pressure and minimum continuous water temperature of 225 deg F (107 deg C).
1. Pump and Motor Assembly: On common shaft in hermetically sealed unit without stuffing box or mechanical seal, and with manufacturer's standard cooling and lubrication system.
2. Impeller: Corrosion-resistant material. 3. Motor: Single speed, unless otherwise indicated.
2.4 IN-LINE CIRCULATORS
A. Description: Horizontal in-line circulator, rated for 125-psig (860-kPa) minimum working pressure and minimum continuous water temperature of 225 deg F (107 deg C).
Odor Control Phase I at Blue River/81000749 15441 Final Doc. 12/08/2015 Page No.-3 Water Distribution Pump

1. Construction: Radially split, all-bronze casing. 2. Impeller: ASTM B 36/B 36M, rolled brass; or ASTM B 584, cast bronze;
overhung, single suction, and keyed to shaft. 3. Seal: Mechanical. 4. Shaft and Sleeve: Steel shaft, with oil-lubricated copper sleeve. 5. Pump Bearings: Oil-lubricated, bronze-journal or thrust type. 6. Shaft Coupling: Flexible, capable of absorbing torsional vibration and shaft
misalignment. 7. Motor: Single speed, with oil-lubricated bearings, unless otherwise indicated;
and resiliently mounted to pump casing.
a. Motor Size: For motors larger than 1/2 hp, select motor size that will not overload through full range of pump performance curve.
2.5 HORIZONTAL IN-LINE PUMPS
A. Description: Horizontal, in-line, separately coupled pump; rated for 175-psig (1200-kPa) minimum working pressure and minimum continuous water temperature of 225 deg F (107 deg C); and complying with HI 1.1-1.5 for in-line centrifugal pumps.
1. Construction: Radially split, all-bronze casing. 2. Impeller: ASTM B 584, cast bronze; statically and dynamically balanced, closed,
overhung, single suction, and keyed to shaft. 3. Shaft and Sleeve: Steel shaft, with oil-lubricated copper sleeve. 4. Shaft and Sleeve: Stainless-steel shaft, with oil-lubricated copper sleeve. 5. Mechanical Seal: Carbon-steel rotating ring, stainless-steel spring, ceramic seat,
and rubber bellows and gasket. Include water slinger on shaft between motor and seal.
6. Pump Bearings: Oil-lubricated, bronze-journal or ball type. 7. Shaft Coupling: Flexible, capable of absorbing torsional vibration and shaft
misalignment. 8. Motor: Single speed, with built-in thermal-overload protection; grease-lubricated
ball bearings; and resiliently mounted to pump casing. 9. Motor: Energy-efficient design; single speed, with built-in thermal-overload
protection; grease-lubricated ball bearings; and resiliently mounted to pump casing.
a. Motor Size: For motors larger than 1/2 hp, select motor size that will not overload through full range of pump performance curve.
2.6 VERTICAL IN-LINE PUMPS
A. Description: Vertical, in-line, separately coupled pump; rated for 175-psig (1200-kPa) minimum working pressure and minimum continuous water temperature of 225 deg F (107 deg C); and complying with HI 1.1-1.5 for in-line centrifugal pumps.
1. Construction: Radially split, all-bronze casing. 2. Impeller: ASTM B 584, cast bronze; statically and dynamically balanced, closed,
overhung, single suction, and keyed to shaft.
Odor Control Phase I at Blue River/81000749 15441 Final Doc. 12/08/2015 Page No.-4 Water Distribution Pump

3. Shaft and Sleeve: Steel shaft, with oil-lubricated copper sleeve. 4. Shaft and Sleeve: Stainless-steel shaft, with oil-lubricated copper sleeve. 5. Mechanical Seal: Carbon-steel rotating ring, stainless-steel spring, ceramic seat,
and rubber bellows and gasket. Include water slinger on shaft between motor and seal.
6. Pump Bearings: Oil-lubricated, bronze-journal or ball type. 7. Shaft Coupling: Flexible, capable of absorbing torsional vibration and shaft
misalignment. 8. Motor: Single speed, with built-in thermal-overload protection; grease-lubricated
ball bearings; and directly mounted to pump casing. 9. Motor: Energy-efficient design; single speed, with built-in thermal-overload
protection; grease-lubricated ball bearings; and directly mounted to pump casing.
a. Motor Size: For motors larger than 1/2 hp, select motor size that will not overload through full range of pump performance curve.
b. Lifting and Supporting Lug: Directly mounted in top of motor enclosure.
PART 3 - EXECUTION
3.1 EXAMINATION
A. Examine roughing-in of water distribution piping to verify actual locations of connections before pump installation.
3.2 INSTALLATION
A. Install pumps according to manufacturer's written instructions and with access for periodic maintenance, including removing motors, impellers, couplings, and accessories.
B. Support pumps and piping so weight of piping is not supported by pumps.
C. Suspend horizontal in-line pumps independent of piping. Use continuous-thread hanger rods and vibration isolation hangers of sufficient size to support pump weight. Fabricate brackets or supports as required. Refer to Division 15 Section "Hangers and Supports" for materials.
D. Suspend vertical in-line pumps independent of piping. Use continuous-thread hanger rods and vibration isolation hangers of sufficient size to support pump weight. Refer to Division 15 Section "Hangers and Supports" for materials.
3.3 CONNECTIONS
A. Piping installation requirements are specified in other Division 15 Sections. Drawings indicate general arrangement of piping and specialties. The following are specific connection requirements:
Odor Control Phase I at Blue River/81000749 15441 Final Doc. 12/08/2015 Page No.-5 Water Distribution Pump
1. Connect water distribution piping to pumps. Install suction and discharge pipe equal to or greater than size of pump nozzles. Refer to Division 15 Section "Water Distribution Piping."
2. Install shutoff valve and strainer on suction side of pumps, and check valve and throttling valve on discharge side of pumps. Install valves same size as connected piping. Refer to Division 15 Section "Valves" for general-duty valves and Division 15 Section "Plumbing Specialties" for strainers.
3. Install pressure gages at suction and discharge of pumps. Install at integral pressure-gage tappings where provided or install pressure-gage connectors in suction and discharge piping around pumps. Refer to Division 15 Section "Meters and Gages" for pressure gages and gage connectors.
B. Electrical wiring and connections are specified in Division 16 Sections.
C. Ground equipment.
1. Tighten electrical connectors and terminals according to manufacturer's published torque-tightening values. If manufacturer's torque values are not indicated, use those specified in UL 486A and UL 486B.
3.4 COMMISSIONING
A. Check suction piping connections for tightness.
B. Clean strainers on suction piping.
C. Controls: Set for automatic starting and stopping operation.
D. Final Checks before Starting: Perform the following preventive maintenance operations:
1. Lubricate oil-lubricated-type bearings. 2. Verify that pump is free to rotate by hand and that pump for handling hot liquids
is free to rotate with pump hot and cold. Do not operate pump if it is bound or drags, until cause of trouble is determined and corrected.
3. Verify that pump controls are correct for required application.
E. Starting procedure for pumps is as follows:
1. Prime pump by opening suction valves and closing drains, and prepare pump for operation.
2. Open circulating line valve if pump should not be operated against dead shutoff. 3. Start motor. 4. Open discharge valve slowly. 5. Check general mechanical operation of pump and motor. 6. Close circulating line valve once there is sufficient flow through pump to prevent
overheating.
3.5 DEMONSTRATION
Odor Control Phase I at Blue River/81000749 15441 Final Doc. 12/08/2015 Page No.-6 Water Distribution Pump

A. Engage a factory-authorized service representative to train Owner's maintenance personnel to adjust, operate, and maintain pumps as specified below:
1. Train Owner's maintenance personnel on procedures and schedules for starting and stopping, troubleshooting, servicing, and maintaining pumps.
2. Review data in maintenance manuals. Refer to Division 1 Section "Contract Closeout."
3. Review data in maintenance manuals. Refer to Division 1 Section "Operation and Maintenance Data."
4. Schedule training with Owner with at least seven days' advance notice.
END OF SECTION 15441
Odor Control Phase I at Blue River/81000749 15441 Final Doc. 12/08/2015 Page No.-7 Water Distribution Pump
SECTION 15561
DIRECT-FIRED, MAKEUP AIR UNITS
PART 1 - GENERAL
1.1 RELATED DOCUMENTS
A. Drawings and general provisions of the Contract, including General and Supplementary Conditions and Division 1 Specification Sections, apply to this Section.
1.2 SUMMARY
A. This Section includes direct-fired, makeup air units and accessories.
B. Related Sections include the following:
1. Division 15 Section "Hangers and Supports" for methods and equipment to support units.
2. Division 15 Section "Mechanical Vibration Controls and Seismic Restraints" for vibration-control devices.
1.3 SUBMITTALS
A. Product Data: Include rated capacities; shipping, installed, and operating weights; furnished specialties; and accessories for each unit.
B. Shop Drawings: Certified by a qualified professional engineer responsible for their preparation.
1. Detail equipment assemblies and indicate dimensions, weights, loads, required clearances, method of field assembly, components, and location and size of each field connection.
2. Design Calculations: Calculate requirements for selecting vibration isolators and seismic restraints and for designing vibration isolation bases.
3. Vibration Isolation Base Details: Detail fabrication, including anchorages and attachments to structure and to supported equipment. Include auxiliary motor slides and rails, and base weights.
4. For installed products indicated to comply with design loads, include structural analysis.
5. Wiring Diagrams: Detail wiring for power, signal, and control systems and differentiate between manufacturer-installed and field-installed wiring.
C. Maintenance Data: For direct-fired, makeup air units to include in maintenance manuals specified in Division 1.
D. Warranties: Special warranties specified in this Section.
Odor Control Phase I at Blue River/81000749 15561 Final Doc. 12/08/2015 Page No.-1 Direct-Fired, Makeup Air Unit

1.4 QUALITY ASSURANCE
A. Professional Engineer Qualifications: A professional engineer who is legally qualified to practice in jurisdiction where Project is located and who is experienced in providing engineering services of the kind indicated. Engineering services are defined as those performed for installations of direct-fired, makeup air units that are similar to those indicated for this Project in material, design, and extent.
B. Product Options: Drawings indicate size, profiles, and dimensional requirements of direct-fired, makeup air units and are based on the specific system indicated. Other manufacturers' systems with equal performance characteristics may be considered. Refer to Division 1 Section "Substitutions."
C. AGA Certification: Gas-fired units shall be certified and labeled.
1.5 COORDINATION
A. Coordinate size and location of concrete bases. Cast anchor-bolt inserts into bases. Concrete, reinforcement, and formwork requirements are specified in Division 3 Section "Cast-in-Place Concrete."
B. Coordinate installation of roof curbs, equipment supports, and roof penetrations. These items are specified in Division 7 Section "Roof Accessories."
1.6 WARRANTY
A. General Warranty: Special warranty specified in this Article shall not deprive Owner of other rights Owner may have under other provisions of the Contract Documents and shall be in addition to, and run concurrent with, other warranties made by Contractor under requirements of the Contract Documents.
B. Special Warranty: Written warranty, executed by manufacturer agreeing to replace components of direct-fired, makeup air units that fail in materials or workmanship within specified warranty period.
C. Warranty Period: Two years from date of Substantial Completion.
1.7 EXTRA MATERIALS
A. Furnish extra materials described below that match products installed and that are packaged with protective covering for storage and identified with labels describing contents.
1. Filters: One set for each unit. 2. Fan Belts: One set for each unit.
1.8 ALL EXPOSED MATERIALS WILL BE INSTALLED IN A HYDROGEN SULFIDE ATMOSPHERE. MATERIALS SHALL BE HYDROGEN SULFIDE RESISTANT
Odor Control Phase I at Blue River/81000749 15561 Final Doc. 12/08/2015 Page No.-2 Direct-Fired, Makeup Air Unit

PART 2 - PRODUCTS
2.1 MANUFACTURERS
A. Available Manufacturers: Subject to compliance with requirements, manufacturers offering products that may be incorporated into the Work include, but are not limited to, the following:
B. Manufacturers: Subject to compliance with requirements, provide products by one of the following:
1. Applied Air; a Mestek Company. 2. Bessam-Aire, Inc. 3. Captive-Air Systems, Inc. 4. Engineered Air. 5. Greenheck. 6. Hastings Industries; Division of Eric, Inc. 7. Jackson & Church; Div. of Donlee Technologies Inc. 8. Modine Mfg. Co.; Heating Div. 9. Rapid Engineering, Inc. 10. Reznor/Thomas & Betts.
2.2 PACKAGED UNITS
A. Factory-assembled, prewired, self-contained unit consisting of casing, supply fan, controls, filters, and gas burner with profile plate.
1. General Construction: Outdoor unit. 2. General Construction: Indoor unit.
B. Refrigeration Component Construction and Ratings: Comply with ARI 210/240, ASHRAE 37, UL 207, and UL 303.
2.3 CASING AND COMPONENTS
A. Casing: Minimum 0.052-inch- (1.3-mm-) thick, galvanized-steel panels, formed to ensure rigidity and fastened with sheet metal screws or pop rivets; supported by galvanized-steel channels or structural channel supports; with access panels for burner and fan motor assemblies from both sides of unit; and with lifting lugs.
B. Access Panels: Lift-out with cam-lock fasteners.
C. Access Panels: Piano hinged with cam-lock fasteners.
D. Access Panels: Piano hinged with vent-lock handles operable from both sides.
E. Insulation: Factory-applied, neoprene-faced, glass-fiber insulation, 1 inch (25 mm) thick, applied on inlet components to burner profile plate.
Odor Control Phase I at Blue River/81000749 15561 Final Doc. 12/08/2015 Page No.-3 Direct-Fired, Makeup Air Unit
F. Insulation: Factory-applied, neoprene-faced, glass-fiber insulation, 1 inch (25 mm) thick, applied on complete unit.
G. Finish: Heat-resistant, baked enamel.
H. Weatherproofing: Factory applied to casing.
I. Filters: Removable 1-inch- (25-mm-) thick, high-velocity, permanent filters in metal frames.
J. Filters: Removable 1-inch- (25-mm-) thick, glass-fiber, disposable filters in metal frames.
K. Filters: Removable 2-inch- (50-mm-) thick, glass-fiber, disposable filters in metal frames.
L. Service Platform: Factory fabricated, minimum 42 inches (1060 mm) wide, of expanded metal with angle iron siderails and kick plates, handrails, and access ladder.
M. Discharge Head: Galvanized-steel assembly with diffusers incorporating individually adjustable vanes.
1. Four-way pattern. 2. Four-way pattern with filters. 3. Horizontal pattern.
N. Roof Curb: Full-perimeter curb of sheet metal, minimum 12 inches (300 mm) high, with wood nailer, neoprene sealing strip, and welded Z-bar flashing.
2.4 FUEL BURNING SYSTEM
A. Burners: Capable of modulating turndown ratio of 25:1, including electric-modulating main gas valve, motorized shutdown valve, main and pilot gas regulators, pilot electric gas valve, manual shutoff valve, and pilot adjustment valve.
B. Fuel: Natural gas.
C. Fuel: Propane gas.
D. Fuel: Butane gas.
E. Pilot: Electrically ignited by spark rod through high-voltage-ignition transformer.
F. Safety Controls: Factory-installed sensors verify correct airflow before energizing pilot and sense pilot ignition before activating main gas valve.
G. Manual-Reset, Low- and High-Limit Controls: Maintain supply-air temperature between set points, and shut fan down if temperatures are exceeded.
H. Purge-Period Timer: Automatically delays burner ignition and bypasses low-limit control.
Odor Control Phase I at Blue River/81000749 15561 Final Doc. 12/08/2015 Page No.-4 Direct-Fired, Makeup Air Unit

I. Inlet Damper: Motorized, with end switch to prove position before burner will fire.
1. Two-position damper to open when unit is operating. 2. Three-position damper to open to fully open or to preset throttling position when
unit is operating.
2.5 FAN
A. Description: Rated according to AMCA 210; statically and dynamically balanced, galvanized-steel, centrifugal fan mounted on solid-steel shaft with heavy-duty, self-aligning, prelubricated ball bearings and V-belt drive with matching motor sheaves and belts.
1. Fan Type: Forward curved. 2. Fan Type: Backward inclined.
2.6 REFRIGERATION PACKAGE
A. Evaporator Coil: Comply with ARI 410; copper-tube, aluminum-fin coil assembly with alternate-row circuiting, galvanized-steel drain pan, and thermostatic expansion valve.
B. Compressor: Comply with ARI 520; hermetically sealed, 3600 rpm maximum, resiliently mounted; with positive lubrication, crankcase heater, high-pressure control, low-pressure control, motor overload protection, service valves, and drier.
1. Number of Compressors: One. 2. Number of Compressors: Two.
C. Condenser: Comply with ARI 520; aluminum-fin and copper-tube coil, direct-drive axial fan, resiliently mounted; with galvanized-steel fan guard.
D. Operating Controls: Low-voltage, adjustable, room thermostat control compressor and condenser fan to maintain room temperature setting. Provide hot-gas bypass on one compressor circuit.
E. Source Quality Control: Test and inspect refrigeration package according to ARI 210/240, ASHRAE 37, UL 207, and UL 303.
2.7 EVAPORATIVE COOLING PACKAGE
A. Evaporative Cooler: Factory-assembled and -wired unit with intake grilles; bituminous-coated sump; and individually removable, aspen wood-fiber media pads.
1. Water Circulation System: Sump pump with strainer; water distribution troughs at top of media pads; float-operated, makeup water valve; and overflow and drain connections.
2. Automatic Drain System: Two-way, normally open drain valve; three-way, makeup water valve; and ambient thermostat.
Odor Control Phase I at Blue River/81000749 15561 Final Doc. 12/08/2015 Page No.-5 Direct-Fired, Makeup Air Unit

B. Evaporative Cooler: Factory-assembled and -wired unit integrally mounted to makeup air unit, with bituminous-coated sump and individually removable media pads.
1. Water Circulation System: Sump pump with strainer and water-level switch; copper-tube water distribution to top of media pads; float-operated, makeup water valve; and overflow and drain connections.
2. Media: Glass-fiber pads with UL 900 (Class 2) saturants.
a. Depth: 6 inches (150 mm). b. Depth: 8 inches (200 mm). c. Depth: 12 inches (300 mm).
2.8 VARIABLE-AIR-VOLUME PACKAGE
A. Dampers: Outside-air dampers with damper operator and control package to automatically vary outside-air quantity from 0 to 80 percent. 20 percent of air shall constantly flow through burner section.
B. Gaskets: Fit dampers with edge gaskets to achieve a maximum leakage of 5 percent at 2-inch wg (500-Pa) pressure differential.
C. Damper Operator: Direct coupled, 24 V, with spring return.
2.9 MIXING DAMPER PACKAGE
A. Dampers: Outside- and return-air dampers with damper operator and control package to automatically vary outside-air quantity from 0 to 80 percent. 20 percent of air shall constantly flow through burner section.
B. Gaskets: Fit dampers with edge gaskets to achieve a maximum leakage of 5 percent at 2-inch wg (500-Pa) pressure differential.
C. Damper Operator: Direct coupled, 24 V, with spring return.
2.10 CONTROLS
A. Factory-wire connection for power supply and field-wire unit to remote control panel.
B. Remote control panel shall have the following features:
1. On-off switch. 2. On-off-auto switch. 3. Summer-winter switch. 4. Heat-off-cool switch. 5. Supply-fan indicating light. 6. Exhaust-fan indicating light. 7. Pilot-operation indicating light. 8. Burner-operation indicating light. 9. Clogged-filter indicating light.
Odor Control Phase I at Blue River/81000749 15561 Final Doc. 12/08/2015 Page No.-6 Direct-Fired, Makeup Air Unit

10. Safety-lockout indicating light.
C. Interlocks: Start unit when exhaust fan is running. Operate burner when flow switch located in exhaust duct proves airflow.
1. Exhaust-fan speed control operates with inlet damper and burner profile damper to provide dual-volume air capacity.
2. Exhaust fans operate with inlet damper and burner profile damper to provide dual-volume operation.
D. Fan Discharge Thermostat: Controls modulating gas valve to maintain supply-air temperature.
1. Remote Discharge Thermostat: Adjustment within 20 feet (6 m) of unit. 2. Remote Discharge Thermostat: Adjustment in excess of 20 feet (6 m) of unit. 3. Room Thermostat: To reset discharge thermostat a minimum of three
temperature levels.
E. Timer: Electronic clock timer turns fan system off at night.
F. Timer: Electronic clock timer operates fan system on low volume at night.
G. Remote Override Thermostat: Adjustable room thermostat selected by timer, set at 50 deg F (10 deg C), energizes system on low temperature.
PART 3 - EXECUTION
3.1 INSTALLATION
A. Install units according to manufacturer's written instructions.
B. Install gas-fired units according to AGA Z223.1.
C. Install suspended units from spring hangers with minimum 1-inch (25-mm) static deflection; refer to Division 15 Section "Mechanical Vibration Controls and Seismic Restraints."
D. Install floor- or roof-mounted units on spring isolators with minimum 1-inch (25-mm) static deflection; refer to Division 15 Section "Mechanical Vibration Controls and Seismic Restraints."
E. Install roof-mounted units on curbs complying with requirements in Division 7 Section "Roof Accessories."
F. Mount condensing units on roof on curbs complying with requirements in Division 7 Section "Roof Accessories."
3.2 CONNECTIONS
Odor Control Phase I at Blue River/81000749 15561 Final Doc. 12/08/2015 Page No.-7 Direct-Fired, Makeup Air Unit

A. Piping installation requirements are specified in other Division 15 Sections. Drawings indicate general arrangement of piping, fittings, and specialties. The following are specific connection requirements:
1. Install piping adjacent to machine to allow service and maintenance. 2. Gas Piping: Comply with applicable requirements in Division 15 Section "Natural
Gas Piping." Connect gas piping with shutoff valve and union and with sufficient clearance for burner removal and service. Provide AGA-approved flexible connectors.
3. Makeup Water Connection: Comply with applicable requirements in Division 15 Section "Water Distribution Piping" for valves and accessories on piping connections to water-cooled units.
4. Refrigerant Piping Connections: Comply with applicable requirements in Division 15 Section "Refrigerant Piping" for valves and accessories on piping connections to units.
5. Duct Connections: Comply with applicable requirements in Division 15 Section "Duct Accessories" for flexible connectors.
B. Ground equipment.
1. Tighten electrical connectors and terminals according to manufacturer's published torque-tightening values. If manufacturer's torque values are not indicated, use those specified in UL 486A and UL 486B.
3.3 COMMISSIONING
A. Engage a factory-authorized service representative to perform startup service.
1. Verify that equipment is installed and connected according to manufacturer's written instructions.
B. Complete installation and startup checks according to manufacturer's written instructions.
C. Operational Test: After electrical circuitry has been energized, start units to confirm proper motor rotation and unit operation. Remove malfunctioning units, replace with new units, and retest.
D. Test and adjust controls and safeties. Replace damaged and malfunctioning controls and equipment.
3.4 DEMONSTRATION
A. Engage a factory-authorized service representative to train Owner's maintenance personnel to adjust, operate, and maintain direct-fired, makeup air units.
1. Train Owner's maintenance personnel on procedures and schedules for starting and stopping, troubleshooting, servicing, and maintaining equipment and schedules.
Odor Control Phase I at Blue River/81000749 15561 Final Doc. 12/08/2015 Page No.-8 Direct-Fired, Makeup Air Unit

2. Review data in maintenance manuals. Refer to Division 1 Section "Contract Closeout."
3. Review data in maintenance manuals. Refer to Division 1 Section "Operation and Maintenance Data."
4. Schedule training with Owner, through Architect, with at least seven days' advance notice.
END OF SECTION 15561
Odor Control Phase I at Blue River/81000749 15561 Final Doc. 12/08/2015 Page No.-9 Direct-Fired, Makeup Air Unit

SECTION 15562
INDIRECT-FIRED, PACKAGED H&V UNITS
PART 1 - GENERAL
1.1 RELATED DOCUMENTS
A. Drawings and general provisions of the Contract, including General and Supplementary Conditions and Division 1 Specification Sections, apply to this Section.
1.2 SUMMARY
A. This Section includes indirect-fired, packaged H&V units and accessories.
B. Related Sections include the following:
1. Division 15 Section "Hangers and Supports" for methods and equipment to support units.
2. Division 15 Section "Mechanical Vibration Controls and Seismic Restraints" for vibration-control devices.
1.3 SUBMITTALS
A. Product Data: Include rated capacities; shipping, installed, and operating weights; furnished specialties; and accessories for each unit.
B. Shop Drawings: Certified by a qualified professional engineer responsible for their preparation.
1. Detail equipment assemblies and indicate dimensions, weights, loads, required clearances, method of field assembly, components, and location and size of each field connection.
2. Design Calculations: Calculate requirements for selecting vibration isolators and seismic restraints and for designing vibration isolation bases.
3. Vibration Isolation Base Details: Detail fabrication, including anchorages and attachments to structure and to supported equipment. Include auxiliary motor slides and rails, and base weights.
4. For installed products indicated to comply with design loads, include structural analysis.
5. Wiring Diagrams: Detail wiring for power, signal, and control systems and differentiate between manufacturer-installed and field-installed wiring.
C. Maintenance Data: For indirect-fired, packaged H&V units to include in maintenance manuals specified in Division 1.
D. Warranties: Special warranties specified in this Section.
Odor Control Phase I at Blue River/81000749 15562 Final Doc. 12/08/2015 Page No.-1 Indirect-Fired, Packaged, H&V Units

1.4 QUALITY ASSURANCE
A. Professional Engineer Qualifications: A professional engineer who is legally qualified to practice in jurisdiction where Project is located and who is experienced in providing engineering services of the kind indicated. Engineering services are defined as those performed for installations of indirect-fired, packaged H&V units that are similar to those indicated for this Project in material, design, and extent.
B. Product Options: Drawings indicate size, profiles, and dimensional requirements of indirect-fired, packaged H&V units and are based on the specific system indicated. Other manufacturers' systems with equal performance characteristics may be considered. Refer to Division 1 Section "Substitutions."
C. AGA Certification: Gas-fired units shall be certified and labeled.
1.5 COORDINATION
A. Coordinate size and location of concrete bases. Cast anchor-bolt inserts into bases. Concrete, reinforcement, and formwork requirements are specified in Division 3 Section "Cast-in-Place Concrete."
B. Coordinate installation of roof curbs, equipment supports, and roof penetrations. These items are specified in Division 7 Section "Roof Accessories."
1.6 WARRANTY
A. General Warranty: Special warranty specified in this Article shall not deprive Owner of other rights Owner may have under other provisions of the Contract Documents and shall be in addition to, and run concurrent with, other warranties made by Contractor under requirements of the Contract Documents.
B. Special Warranty: Written warranty, executed by manufacturer agreeing to replace components of indirect-fired, packaged H&V units that fail in materials or workmanship within specified warranty period.
C. Warranty Period: Two years from date of Substantial Completion.
1.7 EXTRA MATERIALS
A. Furnish extra materials described below that match products installed and that are packaged with protective covering for storage and identified with labels describing contents.
1. Filters: One set for each unit. 2. Fan Belts: One set for each unit.
1.8 ALL EXPOSED MATERIALS WILL BE INSTALLED IN A HYDROGEN SULFIDE ATMOSPHERE. MATERIALS SHALL BE HYDROGEN SULFIDE RESISTANT
Odor Control Phase I at Blue River/81000749 15562 Final Doc. 12/08/2015 Page No.-2 Indirect-Fired, Packaged, H&V Units

PART 2 - PRODUCTS
2.1 MANUFACTURERS
A. Available Manufacturers: Subject to compliance with requirements, manufacturers offering products that may be incorporated into the Work include, but are not limited to, the following:
B. Manufacturers: Subject to compliance with requirements, provide products by one of the following:
1. Applied Air; a Mestek Company. 2. Engineered Air. 3. Hastings Industries; Division of Eric, Inc. 4. Jackson & Church; Div. of Donlee Technologies Inc. 5. Modine Mfg. Co.; Heating Div. 6. Rapid Engineering, Inc. 7. Reznor/Thomas & Betts. 8. Sterling Heating Equipment; a Mestek Company.
2.2 PACKAGED UNITS
A. Factory-assembled, prewired, self-contained unit consisting of casing, supply fan, duct furnaces, controls, filters, and accessories.
1. General Construction: Outdoor unit. 2. General Construction: Indoor unit.
2.3 CASING AND COMPONENTS
A. Casing: Minimum 0.052-inch- (1.3-mm-) thick, galvanized-steel panels, formed to ensure rigidity and fastened with sheet metal screws or pop rivets; supported by galvanized-steel channels or structural channel supports; with access panels for burner and fan motor assemblies from both sides of unit; and with lifting lugs.
B. Access Panels: Lift-out with cam-lock fasteners.
C. Access Panels: Piano hinged with cam-lock fasteners.
D. Access Panels: Piano hinged with vent-lock handles operable from both sides.
E. Insulation: Factory-applied, neoprene-faced, glass-fiber insulation, 1 inch (25 mm) thick, applied on inlet components to heat exchanger.
F. Finish: Heat-resistant, baked enamel.
G. Weatherproofing: Factory applied to casing.
Odor Control Phase I at Blue River/81000749 15562 Final Doc. 12/08/2015 Page No.-3 Indirect-Fired, Packaged, H&V Units

H. Filters: Removable 1-inch- (25-mm-) thick, glass-fiber, disposable filters in metal frames.
I. Filters: Removable 2-inch- (50-mm-) thick, glass-fiber, disposable filters in metal frames.
J. Cooling Coil Frame: Before supply fan.
2.4 GAS-FIRED DUCT FURNACES
A. Cabinet: Galvanized steel with baked-enamel finish, access doors, glass-fiber insulation, and reflective liner.
B. Fuel: Natural gas.
C. Fuel: Propane gas.
D. Heat Exchanger: Welded aluminized steel.
E. Heat Exchanger: Welded stainless steel.
F. Gas Burner: Atmospheric type with adjustable, combustion-air supply.
1. Gas Valve: Two-stage, 100 percent, safety gas shutoff; 24-V, combining-pressure regulation; safety pilot; manual set (on-off); pilot filtration; and automatic electric valve.
2. Gas Valve: Modulating, 100 percent, safety gas shutoff; 24-V, combining-pressure regulation; safety pilot; manual set (on-off); pilot filtration; and automatic electric valve.
3. Electronic pilot ignition with electric-spark or hot-surface igniter. 4. Thermocouple Sensor: Prevents opening of gas valve until pilot flame is proven,
and stops gas flow on ignition failure. 5. Flame-Rollout Switch: Installed on burner box, and prevents operation. 6. Vent Safety Shutoff Sensor: Temperature sensor installed on draft hood
prevents operation; with manual reset. 7. High-Limit Control: Fixed stop at maximum permissible temperature setting to
de-energize burner on excessive bonnet temperature; with automatic reset. 8. Vent Blower: Noncorrosive fan and scroll with permanently lubricated motor and
airflow-proving switch.
2.5 OIL-FIRED DUCT FURNACES
A. Cabinet: Galvanized steel with baked-enamel finish, access doors, glass-fiber insulation, and reflective liner.
B. Fuel: No. 1 fuel oil.
C. Fuel: No. 2 fuel oil.
D. Combustion Chamber: Welded stainless steel.
Odor Control Phase I at Blue River/81000749 15562 Final Doc. 12/08/2015 Page No.-4 Indirect-Fired, Packaged, H&V Units

E. Combustion Chamber: Welded steel with precast refractory.
F. Oil Burner: High-pressure, flame-retention type with rubber-mounted, adjustable, combustion-air blower; integrated fuel pump; hinged flame-inspection port; cadmium-sulfide flame sensor; electrodes; ignition transformer; and oil nozzle.
1. Time-delay relay limits time for establishing main flame. 2. Flame sensor monitors flame continuously during burner operation and stops
burner on flame failure; with manual reset. 3. Solenoid-operated, oil-delay valve opens after burner motor is energized and
closes instantly when burner motor is de-energized. 4. High-Limit Control: Fixed stop at maximum permissible temperature setting to
de-energize burner on excessive bonnet temperature; with automatic reset.
G. Draft Regulator: Barometric type, for installation in flue.
H. Combustion-Air Blower: Noncorrosive with permanently lubricated motor.
2.6 FAN
A. Description: Rated according to AMCA 210; statically and dynamically balanced, galvanized-steel, centrifugal fan mounted on solid-steel shaft with heavy-duty, self-aligning, prelubricated ball bearings and V-belt drive with matching motor sheaves and belts.
1. Fan Type: Forward curved. 2. Fan Type: Backward inclined.
2.7 EVAPORATIVE COOLING PACKAGE
A. Evaporative Cooler: Factory-assembled and -wired unit integrally mounted to H&V unit, with bituminous-coated sump and individually removable media pads.
1. Water Circulation System: Sump pump with strainer and water-level switch; copper-tube water distribution to top of media pads; float-operated, makeup water valve; and overflow and drain connections.
2. Media: Glass-fiber pads with UL 900 (Class 2) saturants.
a. Depth: 6 inches (150 mm). b. Depth: 8 inches (200 mm). c. Depth: 12 inches (300 mm).
2.8 MIXING DAMPER PACKAGE
A. Dampers: Outside- and return-air dampers with damper operator and control package to automatically vary outside-air quantity. Arrange outside-air damper to fail in the closed position.
Odor Control Phase I at Blue River/81000749 15562 Final Doc. 12/08/2015 Page No.-5 Indirect-Fired, Packaged, H&V Units

B. Gaskets: Fit dampers with edge gaskets to achieve a maximum leakage of 5 percent at 2-inch wg (500-Pa) pressure differential.
C. Damper Operator: Direct coupled, 24 V, with spring return.
D. Mixed-Air Control Sequence: Sequence outside-air dampers open and return-air dampers closed to maintain selected mixed-air temperature. Return outside-air dampers to minimum position during heating operation.
2.9 CONTROLS
A. Factory-wire connection for power supply and field-wire unit to remote control panel.
B. Fan Discharge Thermostat: Controls modulating gas valve to maintain supply-air temperature.
1. Remote Discharge Thermostat: Adjustment within 20 feet (6 m) of unit. 2. Remote Discharge Thermostat: Adjustment in excess of 20 feet (6 m) of unit. 3. Room Thermostat: To reset discharge thermostat a minimum of three
temperature levels.
C. Timer: Electronic clock timer turns fan system off at night.
D. Remote Override Thermostat: Adjustable room thermostat selected by timer, set at 50 deg F (10 deg C), energizes system on low temperature.
E. Room Thermostat: Adjustable, low voltage, to control burner and supply fan to maintain temperature setting.
1. System Selector Switch: Heat-off-cool. 2. Fan Control Switch: Auto-on.
F. Room Thermostat: Electric, solid state, microcomputer based with remote sensor.
1. Automatic switching from heating to cooling. 2. Preferential rate control to minimize overshoot and deviation from set point. 3. Four separate temperature settings per day. 4. Instant override of set point for continuous or timed period from 1 hour to 31
days. 5. Short-cycle protection. 6. Five-day programming with separate weekend settings. 7. Seven-day programming. 8. Selection features including deg F or deg C display, 12- or 24-hour clock,
keyboard disable, remote sensor, and fan auto-on. 9. Battery replacement without program loss. 10. Thermostat display as follows:
a. Time of day. b. Actual room temperature. c. Programmed temperature.
Odor Control Phase I at Blue River/81000749 15562 Final Doc. 12/08/2015 Page No.-6 Indirect-Fired, Packaged, H&V Units

d. Programmed time. e. Duration of timed override. f. Day of week. g. System mode indication including heating, off, and fan auto-on.
PART 3 - EXECUTION
3.1 INSTALLATION
A. Install units according to manufacturer's written instructions.
B. Install gas-fired units according to AGA Z223.1.
C. Install oil-fired units according to UL 727 or UL 729.
D. Install suspended units from spring hangers with minimum 1-inch (25-mm) static deflection; refer to Division 15 Section "Mechanical Vibration Controls and Seismic Restraints."
E. Install floor- or roof-mounted units on spring isolators with minimum 1-inch (25-mm) static deflection; refer to Division 15 Section "Mechanical Vibration Controls and Seismic Restraints."
F. Install roof-mounted units on curbs complying with requirements in Division 7 Section "Roof Accessories."
3.2 CONNECTIONS
A. Piping installation requirements are specified in other Division 15 Sections. Drawings indicate general arrangement of piping, fittings, and specialties. The following are specific connection requirements:
1. Install piping adjacent to machine to allow service and maintenance. 2. Gas Piping: Comply with applicable requirements in Division 15 Section "Natural
Gas Piping." Connect gas piping with shutoff valve and union and with sufficient clearance for burner removal and service. Provide AGA-approved flexible connectors.
3. Fuel Oil Piping: Comply with applicable requirements in Division 15 Section "Fuel Oil Piping." Connect fuel-oil piping to unit. Connect fuel-oil supply and return piping with shutoff valve and union at each connection.
4. Makeup Water Connection: Comply with applicable requirements in Division 15 Section "Water Distribution Piping" for valves and accessories on piping connections to water-cooled units.
B. Breeching: Comply with applicable requirements in Division 15 Section "Breechings, Chimneys, and Stacks." Connect breeching to full size of flue outlet.
C. Ground equipment.
Odor Control Phase I at Blue River/81000749 15562 Final Doc. 12/08/2015 Page No.-7 Indirect-Fired, Packaged, H&V Units

1. Tighten electrical connectors and terminals according to manufacturer's published torque-tightening values. If manufacturer's torque values are not indicated, use those specified in UL 486A and UL 486B.
3.3 COMMISSIONING
A. Engage a factory-authorized service representative to perform startup service.
1. Verify that equipment is installed and connected according to manufacturer's written instructions.
B. Complete installation and startup checks according to manufacturer's written instructions.
C. Operational Test: After electrical circuitry has been energized, start units to confirm proper motor rotation and unit operation. Remove malfunctioning units, replace with new units, and retest.
D. Test and adjust controls and safeties. Replace damaged and malfunctioning controls and equipment.
3.4 DEMONSTRATION
A. Engage a factory-authorized service representative to train Owner's maintenance personnel to adjust, operate, and maintain indirect-fired, packaged H&V units.
1. Train Owner's maintenance personnel on procedures and schedules for starting and stopping, troubleshooting, servicing, and maintaining equipment and schedules.
2. Review data in maintenance manuals. Refer to Division 1 Section "Contract Closeout."
3. Review data in maintenance manuals. Refer to Division 1 Section "Operation and Maintenance Data."
4. Schedule training with Owner, through Architect, with at least seven days' advance notice.
END OF SECTION 15562
Odor Control Phase I at Blue River/81000749 15562 Final Doc. 12/08/2015 Page No.-8 Indirect-Fired, Packaged, H&V Units

SECTION 15812
FIBROUS-GLASS DUCTS
PART 1 - GENERAL
1.1 RELATED DOCUMENTS
A. Drawings and general provisions of the Contract, including General and Supplementary Conditions and Division 1 Specification Sections, apply to this Section.
1.2 SUMMARY
A. This Section includes rectangular and round fibrous-glass ducts for heating, ventilating, and air-conditioning systems.
B. Related Sections include the following:
1. Division 7 Section "Joint Sealants" for fire-resistant sealants for use around duct penetrations and fire-damper installations in fire-rated floors, partitions, and walls.
2. Division 8 Section "Access Doors" for wall- and ceiling-mounted access doors for access to concealed ducts.
3. Division 10 Section "Louvers and Vents" for intake and relief louvers and vents connected to ducts and installed in exterior walls.
4. Division 15 Section "Duct Accessories" for dampers, duct-mounted access doors and panels, turning vanes, and flexible ducts.
5. Division 15 Section "Air Terminals" for constant-volume and variable-air-volume control boxes, and reheat boxes.
6. Division 15 Section "Diffusers, Registers, and Grilles." 7. Division 15 Section "Control Systems Equipment" for automatic volume-control
dampers and operators. 8. Division 15 Section "Testing, Adjusting, and Balancing" for air balancing and final
adjusting of manual-volume dampers.
1.3 DEFINITIONS
A. Thermal Conductivity and Apparent Thermal Conductivity (k-Value): As defined in ASTM C 168. In this Section, these values are the result of the formula Btu x in./h x sq. ft. x deg F or W/m x K at the temperature differences specified. Values are expressed as Btu or W.
1. Example: Apparent Thermal Conductivity (k-Value): 0.26 or 0.037.
1.4 SYSTEM DESCRIPTION
Odor Control Phase I at Blue River/81000749 15812 Final Doc. 12/08/2015 Page No.-1 Fibrous-Glass Ducts

A. Duct system design shall include engineering calculations used to select and size air-moving and -distribution equipment and other components of air system.
1.5 SUBMITTALS
A. Product Data: For fibrous-glass duct materials.
B. Shop Drawings: Show details of the following:
1. Fabrication, assembly, and installation, including plans, elevations, sections, components, and attachments to other work.
2. Duct layout indicating sizes on plans. 3. Fittings. 4. Reinforcement and spacing. 5. Seam and joint construction. 6. Penetrations through fire-rated and other partitions. 7. Terminal unit, coil, and humidifier installations. 8. Hangers and supports, including methods for building attachment, vibration
isolation, and duct attachment.
C. Coordination Drawings: Reflected ceiling plans drawn to scale and coordinating penetrations and ceiling-mounted items. Show the following:
1. Ceiling suspension assembly members. 2. Other systems installed in same space as ducts. 3. Ceiling- and wall-mounted access doors and panels required to provide access
to dampers and other operating devices. 4. Coordination with ceiling-mounted items, including light fixtures, diffusers, grilles,
speakers, sprinkler heads, access panels, and special moldings.
1.6 QUALITY ASSURANCE
A. NFPA Compliance: Comply with the following NFPA standards:
1. NFPA 90A, "Installation of Air Conditioning and Ventilating Systems." 2. NFPA 90B, "Installation of Warm Air Heating and Air Conditioning Systems."
B. UL Compliance: UL listed and labeled as complying with UL 181, Class 1.
C. Field-Constructed Mockups: Before installing duct systems, erect mockups of fibrous ducts to demonstrate quality of materials and installation. Build mockups to comply with the following requirements, using materials indicated for completed Work. Include at least one joint, branch takeoff with volume-control damper, 90-degree turn with turning vanes, fire damper, and air-outlet and -inlet connections.
1. Locate mockups in the location and of the size indicated or, if not indicated, as directed by Architect.
2. Notify Architect seven days in advance of the dates and times when mockups are installed.
Odor Control Phase I at Blue River/81000749 15812 Final Doc. 12/08/2015 Page No.-2 Fibrous-Glass Ducts

3. Obtain Architect's approval of mockups before starting Work. 4. Maintain mockups during construction in an undisturbed condition as a standard
for judging the completed Work. 5. When directed, demolish and remove mockups from Project site. 6. Approved mockups in an undisturbed condition at the time of Substantial
Completion may become part of the completed Work.
1.7 ALL EXPOSED MATERIALS WILL BE INSTALLED IN A HYDROGEN SULFIDE ATMOSPHERE. MATERIALS SHALL BE HYDROGEN SULFIDE RESISTANT
PART 2 - PRODUCTS
2.1 MANUFACTURERS
A. Available Manufacturers: Subject to compliance with requirements, manufacturers offering fibrous-glass ducts that may be incorporated into the Work include, but are not limited to, the following:
B. Manufacturers: Subject to compliance with requirements, provide products by one of the following:
1. CertainTeed Corp.; HVAC Insulation Group. 2. Knauf Fiber Glass GmbH. 3. Owens Corning. 4. Schuller International, Inc.
2.2 FIBROUS-GLASS DUCT, GENERAL
A. Glass fibers, bonded with a thermosetting resin.
B. Facing: Fire-resistant, reinforced, foil-scrim-kraft barrier.
C. Air-Side Surface: Treated to prevent erosion of fibers by air movement.
D. Thermal Conductivity (k-Value): 0.26 at 75 deg F (0.037 at 24 deg C) mean temperature.
E. Required Markings: EI-rating, UL label, and other markings required by UL 181 on each full sheet of duct board; UL ratings for closure materials.
F. Moisture Absorption: Not exceeding 5 percent, by weight, at 120 deg F (49 deg C), 95 percent relative humidity for 96 hours when tested according to ASTM C 1104/C 1104M.
G. Vapor-Barrier Permeability: 0.02 perms (1.2 ng/Pa x s x sq. m) maximum, when tested according to ASTM E 96, Procedure A.
Odor Control Phase I at Blue River/81000749 15812 Final Doc. 12/08/2015 Page No.-3 Fibrous-Glass Ducts
H. Noise-Reduction Coefficient: 0.65 minimum, when tested according to ASTM C 423, Mounting A.
I. Temperature Limits: 250 deg F (121 deg C) inside duct; 150 deg F (66 deg C) ambient temperature surrounding duct.
J. Fabrication: Fabricate and assemble ducts according to NAIMA's "Fibrous Glass Duct Construction Standards" or SMACNA's "Fibrous Glass Duct Construction Standards."
2.3 DUCT BOARD
A. Description: Rigid, rectangular glass-fiber boards with edge treatment; factory molded and faced on one side with a fire-retardant, reinforced, foil-scrim-kraft barrier.
B. Flexural Rigidity (EI): 475, standard duty.
C. Flexural Rigidity (EI): 800, heavy duty.
D. Thickness: 1 inch (25 mm).
E. Thickness: 1-1/2 inches (38 mm).
2.4 RIGID ROUND DUCT
A. Description: Rigid, cylindrically molded sections of fibrous-glass duct board fabricated with 10 sides to form a near-round duct. A fire-retardant, reinforced, foil-scrim-kraft facing on the outside.
B. Thickness: 1 inch (25 mm).
C. End Treatment, Factory-Molded Round Duct: Premolded, high-density slip joint. Facing extends on end with external portion of joint to form stapling tab.
2.5 REINFORCEMENT
A. Channel Reinforcement for Ducts with a Maximum ID of 60 Inches (1525 mm) or Less: Channels formed from 0.034-inch- (0.85-mm-) thick, galvanized, sheet metal with ASTM A 653/A 653M, G60 (Z180) coating designation.
B. Channel Reinforcement for Ducts with a Maximum ID Larger Than 60 Inches (1525 mm): Channels formed from 0.052-inch- (1.3-mm-) thick, galvanized, sheet metal with ASTM A 653/A 653M, G60 (Z180) coating designation.
C. Tie-Rod Reinforcement: 0.108-inch (2.7-mm) galvanized steel wire, length to suit termination method.
D. Reinforcing Rod Washers: 2-1/2-inch- (65-mm-) square by 0.028-inch- (0.7-mm-) thick, galvanized steel washer with turned edges and volcano-type center hole.
Odor Control Phase I at Blue River/81000749 15812 Final Doc. 12/08/2015 Page No.-4 Fibrous-Glass Ducts

E. Sag-Control Supports: 1/2-inch (16-GRC) galvanized steel conduit.
2.6 CLOSURE
A. Materials: Select one of the following closure materials as recommended by fibrous-glass duct manufacturer:
1. Pressure-Sensitive Tape: A minimum of 2-1/2-inch- (65-mm-) wide, glass-fiber-reinforced, aluminum-foil tape complying with UL 181A, Part P, and imprinted with the required information.
2. Heat-Activated Tape: A minimum of 2-1/2-inch- (65-mm-) wide, glass-fiber-reinforced, foil-scrim tape complying with UL 181A, Part H, and imprinted with the required information.
3. Mastic and Glass Fabric: A minimum of 3-inch- (75-mm-) wide glass fabric and duct manufacturer's recommended mastic that complies with UL 181.
2.7 HANGERS AND SUPPORTS
A. Building Attachments: Concrete inserts, powder-actuated fasteners, or structural-steel fasteners appropriate for building materials.
1. Use powder-actuated concrete fasteners for standard-weight aggregate concretes or for slabs more than 4 inches (100 mm) thick.
2. Exception: Do not use powder-actuated concrete fasteners for lightweight-aggregate concretes or for slabs less than 4 inches (100 mm) thick.
B. Hanger Materials: Galvanized, sheet steel; galvanized steel hanger wire; and galvanized steel channels.
2.8 SHOP FABRICATION
A. Shop fabricate according to NAIMA's "Fibrous Glass Duct Construction Standards" or SMACNA's "Fibrous Glass Duct Construction Standards."
B. Fabricate rectangular and 10-sided ducts and fittings from duct board.
C. Fabricate mitered elbows with turning vanes.
D. Fabricate 90-degree branch connections from supply ducts with volume-control dampers in branch duct.
E. Attach metal components to fibrous-glass duct with galvanized steel washers on opposite surface of duct wall.
PART 3 - EXECUTION
3.1 INSTALLATION
Odor Control Phase I at Blue River/81000749 15812 Final Doc. 12/08/2015 Page No.-5 Fibrous-Glass Ducts

A. Install ducts and fittings according to NAIMA's "Fibrous Glass Duct Construction Standards" or SMACNA's "Fibrous Glass Duct Construction Standards" and according to conditions of ducts' and fittings' UL listing.
B. Install ducts with fewest possible joints.
C. Install ducts, unless otherwise indicated, vertically and horizontally, parallel and perpendicular to building lines; avoid diagonal runs.
D. Install ducts close to walls, overhead construction, columns, and other structural and permanent enclosure elements of building.
E. Install ducts with a clearance of 1 inch (25 mm).
F. Conceal ducts from view in finished spaces. Do not encase horizontal runs in solid partitions, unless specifically indicated.
G. Non-Fire-Rated Partition Penetrations: Where ducts pass through interior partitions and exterior walls, and are exposed to view, conceal space between construction opening and duct with sheet metal flanges of same metal thickness as duct. Overlap opening on four sides by at least 1-1/2 inches (38 mm).
H. Fire-Rated Partition Penetrations: Where ducts pass through interior partitions and exterior walls, install appropriately rated fire damper, sleeve, and firestopping sealant. Fire and smoke dampers are specified in Division 15 Section "Duct Accessories." Firestopping materials and installation methods are specified in Division 7 Section "Firestopping."
3.2 MOUNTING ACCESSORIES
A. Mount accessories according to NAIMA's "Fibrous Glass Duct Construction Standards" or SMACNA's "Fibrous Glass Duct Construction Standards."
B. Reinforce and support equipment and duct accessories for additional weight without damage to duct.
C. Install volume-control dampers and operators on same sleeve or mounting plate and allow full 90-degree quadrant movement.
D. Connect duct to equipment using sheet metal washers and screws or mechanical fasteners attached to flange extensions.
3.3 FIELD FABRICATION
A. Field fabricate according to NAIMA's "Fibrous Glass Duct Construction Standards" or SMACNA's "Fibrous Glass Duct Construction Standards."
B. Fabricate rectangular and 10-sided ducts and fittings from duct board.
C. Fabricate mitered elbows with turning vanes.
Odor Control Phase I at Blue River/81000749 15812 Final Doc. 12/08/2015 Page No.-6 Fibrous-Glass Ducts
D. Fabricate 90-degree branch connections from supply ducts with volume-control dampers in branch duct.
E. Attach metal components to fibrous-glass duct with galvanized steel washers on opposite surface of duct wall.
F. Closure: Construct seams and joints according to NAIMA's "Fibrous Glass Duct Construction Standards."
3.4 REINFORCEMENT
A. Install reinforcement according to NAIMA's "Fibrous Glass Duct Construction Standards" or SMACNA's "Fibrous Glass Duct Construction Standards."
3.5 HANGING AND SUPPORTING
A. Support rigid round and rectangular duct according to NAIMA's "Fibrous Glass Duct Construction Standards" or SMACNA's "Fibrous Glass Duct Construction Standards."
B. Install upper attachments to structures with an allowable load not exceeding one-fourth of failure (proof-test) load.
C. Install concrete inserts before placing concrete.
D. Building Attachment: Install powder-actuated concrete fasteners after concrete is placed and completely cured.
E. Duct Attachment: Support horizontal ducts with trapeze-type hangers.
F. Hanger: Suspend duct attachment from building attachment with one of the following hanger types: 1. Galvanized steel rod, 1/4 inch (6 mm) in diameter, threaded its entire length.
Coated to withstand 100 ppm hydrogen sulfide.
G. Attach hangers to joint and reinforcing channels that occur within required hanger spacing. Attach hangers to transmit load to sides and bottom channels and no more than 6 inches (150 mm) from sides of duct.
H. Support equipment and metal duct components and accessories independent of duct.
I. Support terminal components separately.
J. Install sheet metal sleeve to support dampers. Extend sleeve for motorized dampers to support operator.
3.6 FIELD QUALITY CONTROL
Odor Control Phase I at Blue River/81000749 15812 Final Doc. 12/08/2015 Page No.-7 Fibrous-Glass Ducts
A. Inspection: Inspect duct system according to the "Inspection Checklist for Fibrous Glass Duct System Installation" in NAIMA's "Fibrous Glass Duct Construction Standards." Prepare a written report using the format of this checklist.
3.7 ADJUSTING
A. Adjust volume-control dampers in ducts, outlets, and inlets to achieve design airflow.
B. Refer to Division 15 Section "Testing, Adjusting, and Balancing" for detailed procedures.
3.8 CLEANING
A. Clean ducts according to NAIMA's "Cleaning Fibrous Glass Insulated Air Duct Systems."
END OF SECTION 15812
Odor Control Phase I at Blue River/81000749 15812 Final Doc. 12/08/2015 Page No.-8 Fibrous-Glass Ducts

SECTION 15815
METAL DUCTS
PART 1 - GENERAL
1.1 RELATED DOCUMENTS
A. Drawings and general provisions of the Contract, including General and Supplementary Conditions and Division 1 Specification Sections, apply to this Section.
1.2 All exposed materials will be installed in a hydrogen sulfide atmosphere. Materials shall be hydrogen sulfide resistant.
1.3 SUMMARY
A. This Section includes rectangular, round, and flat-oval metal ducts and plenums for heating, ventilating, and air-conditioning systems in pressure classes from minus 2- to plus 10-inch wg (minus 500 to plus 2490 Pa).
B. Related Sections include the following:
1. Division 7 Section "Joint Sealants" for fire-resistant sealants for use around duct penetrations and fire-damper installations in fire-rated floors, partitions, and walls.
2. Division 8 Section "Access Doors" for wall- and ceiling-mounted access doors for access to concealed ducts.
3. Division 10 Section "Louvers and Vents" for intake and relief louvers and vents connected to ducts and installed in exterior walls.
4. Division 15 Section "Mechanical Insulation" for duct insulation. 5. Division 15 Section "Fibrous-Glass Ducts." 6. Division 15 Section "HVAC Casings" for factory- and field-fabricated casings for
mechanical equipment. 7. Division 15 Section "Duct Accessories" for dampers, sound-control devices, duct-
mounted access doors and panels, turning vanes, and flexible ducts. 8. Division 15 Section "Air Terminals" for constant-volume and variable-air-volume
control boxes, and reheat boxes. 9. Division 15 Section "Diffusers, Registers, and Grilles." 10. Division 15 Section "Control Systems Equipment" for automatic volume-control
dampers and operators. 11. Division 15 Section "Testing, Adjusting, and Balancing" for air balancing and final
adjusting of manual-volume dampers.
1.4 DEFINITIONS
Odor Control Phase I at Blue River/81000749 15815 Final Doc. 12/08/2015 Page No.-1 Metal Ducts

A. Thermal Conductivity and Apparent Thermal Conductivity (k-Value): As defined in ASTM C 168. In this Section, these values are the result of the formula Btu x in./h x sq. ft. x deg F or W/m x K at the temperature differences specified. Values are expressed as Btu or W.
1. Example: Apparent Thermal Conductivity (k-Value): 0.26 or 0.037.
1.5 SYSTEM DESCRIPTION
A. Duct system design, as indicated, has been used to select and size air-moving and -distribution equipment and other components of air system. Changes to layout or configuration of duct system must be specifically approved in writing by Architect. Accompany requests for layout modifications with calculations showing that proposed layout will provide original design results without increasing system total pressure.
1.6 SUBMITTALS
A. Product Data: For duct liner and sealing materials.
B. Shop Drawings: Show details of the following:
1. Fabrication, assembly, and installation, including plans, elevations, sections, components, and attachments to other work.
2. Duct layout indicating pressure classifications and sizes on plans. 3. Fittings. 4. Reinforcement and spacing. 5. Seam and joint construction. 6. Penetrations through fire-rated and other partitions. 7. Terminal unit, coil, and humidifier installations. 8. Hangers and supports, including methods for building attachment, vibration
isolation, seismic restraints, and duct attachment.
C. Coordination Drawings: Reflected ceiling plans drawn to scale and coordinating penetrations and ceiling-mounted items. Show the following:
1. Ceiling suspension assembly members. 2. Other systems installed in same space as ducts. 3. Ceiling- and wall-mounted access doors and panels required to provide access
to dampers and other operating devices. 4. Coordination with ceiling-mounted items, including lighting fixtures, diffusers,
grilles, speakers, sprinkler heads, access panels, and special moldings.
D. Welding Certificates: Copies of certificates indicating welding procedures and personnel comply with requirements in "Quality Assurance" Article.
E. Field Test Reports: Indicate and interpret test results for compliance with performance requirements.
Odor Control Phase I at Blue River/81000749 15815 Final Doc. 12/08/2015 Page No.-2 Metal Ducts

F. Record Drawings: Indicate actual routing, fitting details, reinforcement, support, and installed accessories and devices.
1.7 QUALITY ASSURANCE
A. Welding Standards: Qualify welding procedures and welding personnel to perform welding processes for this Project according to AWS D1.1, "Structural Welding Code--Steel," for hangers and supports; AWS D1.2, "Structural Welding Code--Aluminum," for aluminum supporting members; and AWS D9.1, "Sheet Metal Welding Code," for duct joint and seam welding.
B. Comply with NFPA 90A, "Installation of Air Conditioning and Ventilating Systems," unless otherwise indicated.
C. Comply with NFPA 90B, "Installation of Warm Air Heating and Air Conditioning Systems," unless otherwise indicated.
D. Comply with NFPA 96, "Ventilation Control and Fire Protection of Commercial Cooking Operations," Chapter 3, "Duct System," for range hood ducts, unless otherwise indicated.
E. Mockups: Before installing duct systems, erect mockups representing system pressure classifications higher than 2-inch wg (500 Pa). Build mockups to comply with the following requirements, using materials indicated for completed Work:
1. Locate mockups in the locations and of the size indicated or, if not indicated, as directed by Architect. Mockup may be a representative section of the actual duct system.
2. Include the minimum number of each of the following features and fittings:
a. Five transverse joints. b. One access door. c. Two typical branch connections, each with at least one elbow. d. Two typical flexible duct or flexible connector connections for each duct
and apparatus.
3. Perform tests specified in "Field Quality Control" Article. Modify mockup construction and perform additional tests as required to achieve specified minimum acceptable results.
4. Obtain Architect's approval of mockups before starting Work. 5. Maintain mockups during construction in an undisturbed condition as a standard
for judging the completed Work. 6. When directed, demolish and remove mockups from Project site. 7. Approved mockups in an undisturbed condition at the time of Substantial
Completion may become part of the completed Work.
1.8 DELIVERY, STORAGE, AND HANDLING
Odor Control Phase I at Blue River/81000749 15815 Final Doc. 12/08/2015 Page No.-3 Metal Ducts

A. Deliver sealant and firestopping materials to site in original unopened containers or bundles with labels indicating manufacturer, product name and designation, color, expiration period for use, pot life, curing time, and mixing instructions for multicomponent materials.
B. Store and handle sealant and firestopping materials according to manufacturer's written recommendations.
C. Deliver and store stainless-steel sheets with mill-applied adhesive protective paper maintained through fabrication and installation.
1.9 ALL EXPOSED MATERIALS WILL BE INSTALLED IN A HYDROGEN SULFIDE ATMOSPHERE. MATERIALS SHALL BE HYDROGEN SULFIDE RESISTANT
PART 2 - PRODUCTS
2.1 SHEET METAL MATERIALS
A. Stainless Steel: ASTM A 480/A 480M, Type 316, sheet form with No. 4 finish for surfaces of ducts exposed to view; and Type 304, sheet form with No. 1 finish for concealed ducts.
B. Aluminum Sheets: ASTM B 209 (ASTM B 209M), Alloy 3003, Temper H14, sheet form with standard, one-side bright finish for ducts exposed to view and with mill finish for concealed ducts.
C. Reinforcement Shapes and Plates: compatible materials for aluminum and stainless-steel ducts.
D. Tie Rods: Galvanized steel, 1/4-inch (6-mm) minimum diameter for 36-inch (900-mm) length or less; 3/8-inch (10-mm) minimum diameter for lengths longer than 36 inches (900 mm).
2.2 DUCT LINER
A. General: Comply with NFPA 90A or NFPA 90B and NAIMA's "Fibrous Glass Duct Liner Standard."
B. Materials: ASTM C 1071 with coated surface exposed to airstream to prevent erosion of glass fibers.
1. Thickness: 1/2 inch (13 mm). 2. Thickness: 1 inch (25 mm). 3. Thickness: 1-1/2 inches (38 mm). 4. Thermal Conductivity (k-Value): 0.26 at 75 deg F (0.037 at 24 deg C) mean
temperature. 5. Fire-Hazard Classification: Maximum flame-spread rating of 25 and smoke-
developed rating of 50, when tested according to ASTM C 411.
Odor Control Phase I at Blue River/81000749 15815 Final Doc. 12/08/2015 Page No.-4 Metal Ducts

6. Liner Adhesive: Comply with NFPA 90A or NFPA 90B and ASTM C 916. 7. Mechanical Fasteners: Galvanized steel, suitable for adhesive attachment,
mechanical attachment, or welding attachment to duct without damaging liner when applied as recommended by manufacturer and without causing leakage in duct.
a. Tensile Strength: Indefinitely sustain a 50-lb- (23-kg-) tensile, dead-load test perpendicular to duct wall.
b. Fastener Pin Length: As required for thickness of insulation and without projecting more than 1/8 inch (3 mm) into airstream.
c. Adhesive for Attaching Mechanical Fasteners: Comply with fire-hazard classification of duct liner system.
2.3 SEALANT MATERIALS
A. Joint and Seam Sealants, General: The term "sealant" is not limited to materials of adhesive or mastic nature but includes tapes and combinations of open-weave fabric strips and mastics.
1. Joint and Seam Tape: 2 inches (50 mm) wide; glass-fiber fabric reinforced. 2. Tape Sealing System: Woven-fiber tape impregnated with a gypsum mineral
compound and a modified acrylic/silicone activator to react exothermically with tape to form a hard, durable, airtight seal.
3. Joint and Seam Sealant: One-part, nonsag, solvent-release-curing, polymerized butyl sealant, formulated with a minimum of 75 percent solids.
4. Flanged Joint Mastics: One-part, acid-curing, silicone, elastomeric joint sealants, complying with ASTM C 920, Type S, Grade NS, Class 25, Use O.
2.4 HANGERS AND SUPPORTS
A. Building Attachments: Concrete inserts, powder-actuated fasteners, or structural-steel fasteners appropriate for building materials.
1. Use powder-actuated concrete fasteners for standard-weight aggregate concretes or for slabs more than 4 inches (100 mm) thick.
2. Exception: Do not use powder-actuated concrete fasteners for lightweight-aggregate concretes or for slabs less than 4 inches (100 mm) thick.
B. Hanger Materials: Galvanized, sheet steel or round, threaded steel rod.
1. Hangers Installed in Corrosive Atmospheres: Electrogalvanized, all-thread rod 2. Straps and Rod Sizes: Comply with SMACNA's "HVAC Duct Construction
Standards--Metal and Flexible" for sheet steel width and thickness and for steel rod diameters.
C. Duct Attachments: Sheet metal screws, blind rivets, or self-tapping metal screws; compatible with duct materials.
D. Trapeze and Riser Supports: Steel shapes complying with ASTM A 36/A 36M.
Odor Control Phase I at Blue River/81000749 15815 Final Doc. 12/08/2015 Page No.-5 Metal Ducts

1. Supports for Stainless-Steel Ducts: Stainless-steel support materials. 2. Supports for Aluminum Ducts: Aluminum support materials, unless materials are
electrolytically separated from ductwork.
2.5 RECTANGULAR DUCT FABRICATION
A. General: Fabricate ducts, elbows, transitions, offsets, branch connections, and other construction with galvanized, sheet steel, according to SMACNA's "HVAC Duct Construction Standards--Metal and Flexible." Comply with requirements for metal thickness, reinforcing types and intervals, tie-rod applications, and joint types and intervals.
1. Lengths: Fabricate rectangular ducts in lengths appropriate to reinforcement and rigidity class required for pressure classification.
2. Materials: Free from visual imperfections such as pitting, seam marks, roller marks, stains, and discolorations.
B. Fabricate range hood exhaust ducts with 0.0598-inch- (1.5-mm-) thick, carbon-steel sheet for concealed ducts and 0.0500-inch- (1.3-mm-) thick stainless steel for exposed ducts. Weld and flange seams and joints. Comply with NFPA 96.
C. Fabricate dishwasher hood exhaust ducts with 0.0500-inch- (1.3-mm-) thick stainless steel. Weld and flange seams and joints.
D. Static-Pressure Classifications: Unless otherwise indicated, construct ducts to the following:
1. Supply Ducts: 3-inch wg (750 Pa). 2. Return Ducts: 2-inch wg (500 Pa), negative pressure. 3. Exhaust Ducts: 2-inch wg (500 Pa), negative pressure.
E. Cross Breaking or Cross Beading: Cross break or cross bead duct sides 19 inches (480 mm) and larger and 0.0359 inch (0.9 mm) thick or less, with more than 10 sq. ft. (0.93 sq. m) of unbraced panel area, unless ducts are lined.
2.6 SHOP APPLICATION OF LINER IN RECTANGULAR DUCTS
A. Adhere a single layer of indicated thickness of duct liner with 90 percent coverage of adhesive at liner contact surface area. Multiple layers of insulation to achieve indicated thickness are prohibited.
B. Apply adhesive to liner facing in direction of airflow not receiving metal nosing.
C. Butt transverse joints without gaps and coat joint with adhesive.
D. Fold and compress liner in corners of rectangular ducts or cut and fit to ensure butted-edge overlapping.
Odor Control Phase I at Blue River/81000749 15815 Final Doc. 12/08/2015 Page No.-6 Metal Ducts

E. Do not apply liners in rectangular ducts with longitudinal joints, except at corners of ducts, unless duct size and standard liner product dimensions make longitudinal joints necessary.
F. Apply adhesive coating on longitudinal seams in ducts with air velocity of 2500 fpm (12.7 m/s).
G. Secure liner with mechanical fasteners 4 inches (100 mm) from corners and at intervals not exceeding 12 inches (300 mm) transversely around perimeter; at 3 inches (75 mm) from transverse joints and at intervals not exceeding 18 inches (450 mm) longitudinally.
H. Secure transversely oriented liner edges facing the airstream with metal nosings that have either channel or "Z" profile or are integrally formed from duct wall. Fabricate edge facings at the following locations:
1. Fan discharge. 2. Intervals of lined duct preceding unlined duct. 3. Upstream edges of transverse joints in ducts.
I. Secure insulation liner with perforated sheet metal liner of same metal thickness as specified for duct, secured to ducts with mechanical fasteners that maintain metal liner distance from duct without compressing insulation.
1. Sheet Metal Liner Perforations: 3/32-inch (2.4-mm) diameter, with an overall open area of 23 percent.
J. Terminate liner with duct buildouts installed in ducts to attach dampers, turning vane assemblies, and other devices. Fabricated buildouts (metal hat sections) or other buildout means are optional; when used, secure buildouts to duct wall with bolts, screws, rivets, or welds. Terminate liner at fire dampers at connection to fire-damper sleeve.
2.7 ROUND AND FLAT-OVAL DUCT FABRICATION
A. General: Diameter as applied to flat-oval ducts in this Article is the diameter of the size of round duct that has a circumference equal to perimeter of a given size of flat-oval duct.
B. Round Ducts: Fabricate supply ducts of galvanized steel according to SMACNA's "HVAC Duct Construction Standards--Metal and Flexible."
C. Flat-Oval Ducts: Fabricate supply ducts with standard spiral lock seams or with butt-welded longitudinal seams according to SMACNA's "HVAC Duct Construction Standards--Metal and Flexible."
D. Double-Wall (Insulated) Ducts: Fabricate double-wall (insulated) ducts with an outer shell and an inner liner. Dimensions indicated on internally insulated ducts are inside dimensions.
Odor Control Phase I at Blue River/81000749 15815 Final Doc. 12/08/2015 Page No.-7 Metal Ducts

1. Thermal Conductivity (k-Value): 0.26 at 75 deg F (0.037 at 24 deg C) mean temperature.
2. Outer Shell: Base outer-shell metal thickness on actual outer-shell dimensions. Fabricate outer-shell lengths 2 inches (50 mm) longer than inner shell and insulation, and in metal thickness specified for single-wall duct.
3. Insulation: 1-inch- (25-mm-) thick fibrous-glass insulation, unless otherwise indicated. Terminate insulation where internally insulated duct connects to single-wall duct or uninsulated components. Terminate insulation and reduce outer duct diameter to inner liner diameter.
4. Solid Inner Liner: Fabricate round and flat-oval inner liners with solid sheet metal of thickness listed below:
5. Perforated Inner Liner: Fabricate round and flat-oval inner liners with sheet metal having 3/32-inch- (2.4-mm-) diameter perforations, with an overall open area of 23 percent. Use the following sheet metal thicknesses and seam construction:
a. Ducts 3 to 8 Inches (75 to 200 mm) in Diameter: 0.019 inch (0.5 mm) with standard spiral seam construction.
b. Ducts 9 to 42 Inches (225 to 1070 mm) in Diameter: 0.019 inch (0.5 mm) with single-rib spiral seam construction.
c. Ducts 44 to 60 Inches (1120 to 1525 mm) in Diameter: 0.022 inch (0.55 mm) with single-rib spiral seam construction.
d. Ducts 62 to 88 Inches (1575 to 2235 mm) in Diameter: 0.034 inch (0.85 mm) with standard spiral seam construction.
6. Maintain concentricity of liner to outer shell by mechanical means. Retain insulation from dislocation by mechanical means.
2.8 ROUND AND FLAT-OVAL SUPPLY AND EXHAUST FITTING FABRICATION
A. 90-Degree Tees and Laterals and Conical Tees: Fabricate to comply with SMACNA's "HVAC Duct Construction Standards--Metal and Flexible," with metal thicknesses specified for longitudinal seam straight duct.
B. Diverging-Flow Fittings: Fabricate with a reduced entrance to branch taps with no excess material projecting from body onto branch tap entrance.
C. Elbows: Fabricate in die-formed, gored, pleated, or mitered construction. Fabricate bend radius of die-formed, gored, and pleated elbows one and one-half times elbow diameter. Unless elbow construction type is indicated, fabricate elbows as follows:
1. Mitered-Elbow Radius and Number of Pieces: Welded construction complying with SMACNA's "HVAC Duct Construction Standards--Metal and Flexible," unless otherwise indicated.
2. Round Mitered Elbows: Welded construction with the following metal thickness for pressure classes from minus 2- to plus 2-inch wg (minus 500 to plus 500 Pa):
a. Ducts 3 to 26 Inches (75 to 660 mm) in Diameter: 0.028 inch (0.7 mm). b. Ducts 27 to 36 Inches (685 to 915 mm) in Diameter: 0.034 inch (0.85 mm). c. Ducts 37 to 50 Inches (940 to 1270 mm) in Diameter: 0.040 inch (1.0 mm).
Odor Control Phase I at Blue River/81000749 15815 Final Doc. 12/08/2015 Page No.-8 Metal Ducts

d. Ducts 52 to 60 Inches (1320 to 1525 mm) in Diameter: 0.052 inch (1.3 mm).
e. Ducts 62 to 84 Inches (1575 to 2130 mm) in Diameter: 0.064 inch (1.6 mm).
3. Round Mitered Elbows: Welded construction with the following metal thickness for pressure classes from 2- to 10-inch wg (500 to 2490 Pa):
a. Ducts 3 to 14 Inches (75 to 355 mm) in Diameter: 0.028 inch (0.7 mm). b. Ducts 15 to 26 Inches (380 to 660 mm) in Diameter: 0.034 inch (0.85 mm). c. Ducts 27 to 50 Inches (685 to 1270 mm) in Diameter: 0.040 inch (1.0 mm). d. Ducts 52 to 60 Inches (1320 to 1525 mm) in Diameter: 0.052 inch (1.3
mm). e. Ducts 62 to 84 Inches (1575 to 2130 mm) in Diameter: 0.064 inch (1.6
mm).
4. Flat-Oval Mitered Elbows: Welded construction with same metal thickness as longitudinal seam flat-oval duct.
5. 90-Degree, Two-Piece, Mitered Elbows: Use only for supply systems, or exhaust systems for material-handling classes A and B; and only where space restrictions do not permit using 1.5 bend radius elbows. Fabricate with single-thickness turning vanes.
6. Round Elbows, 8 Inches (200 mm) and Smaller: Fabricate die-formed elbows for 45- and 90-degree elbows and pleated elbows for 30, 45, 60, and 90 degrees only. Fabricate nonstandard bend-angle configuration or nonstandard diameter elbows with gored construction.
7. Round Elbows, 9 through 14 Inches (225 through 355 mm): Fabricate gored or pleated elbows for 30, 45, 60, and 90 degrees, unless space restrictions require a mitered elbow. Fabricate nonstandard bend-angle configuration or nonstandard diameter elbows with gored construction.
8. Round Elbows, Larger Than 14 Inches (355 mm), and All Flat-Oval Elbows: Fabricate gored elbows, unless space restrictions require a mitered elbow.
9. Die-Formed Elbows for Sizes through 8 Inches (200 mm) and All Pressures: 0.040 inch (1.0 mm) thick with two-piece welded construction.
10. Round Gored-Elbow Metal Thickness: Same as non-elbow fittings specified above.
11. Flat-Oval Elbow Metal Thickness: Same as longitudinal seam flat-oval duct specified above.
12. Pleated Elbows for Sizes through 14 Inches (355 mm) and Pressures through 10-Inch wg (2490 Pa): 0.022 inch (0.55 mm).
D. Double-Wall (Insulated) Fittings: Fabricate double-wall (insulated) fittings with an outer shell and an inner liner. Dimensions indicated on internally insulated ducts are inside dimensions.
1. Thermal Conductivity (k-Value): 0.26 at 75 deg F (0.037 at 24 deg C) mean temperature.
2. Outer Shell: Base outer-shell metal thickness on actual outer-shell dimensions. Fabricate outer-shell lengths 2 inches (50 mm) longer than inner shell and insulation. Use the same metal thicknesses for outer duct as for uninsulated fittings.
Odor Control Phase I at Blue River/81000749 15815 Final Doc. 12/08/2015 Page No.-9 Metal Ducts

3. Insulation: 1-inch- (25-mm-) thick fibrous-glass insulation, unless otherwise indicated. Terminate insulation where internally insulated duct connects to single-wall duct or uninsulated components. Terminate insulation and reduce outer duct diameter to nominal single-wall size.
4. Solid Inner Liner: Fabricate round and flat-oval inner liners with solid sheet metal of thickness listed below:
5. Perforated Inner Liner: Fabricate round and flat-oval inner liners with sheet metal having 3/32-inch- (2.4-mm-) diameter perforations, with an overall open area of 23 percent. Use the following sheet metal thicknesses:
a. Ducts 3 to 34 Inches (75 to 865 mm) in Diameter: 0.028 inch (0.7 mm). b. Ducts 35 to 58 Inches (890 to 1475 mm) in Diameter: 0.034 inch (0.85
mm). c. Ducts 60 to 88 Inches (1525 to 2235 mm) in Diameter: 0.040 inch (1.0
mm).
6. Maintain concentricity of liner to outer shell by mechanical means. Retain insulation from dislocation by mechanical means.
E. PVC-Coated Elbows and Fittings: Fabricate elbows and fittings as follows:
1. Round Elbows 4 to 8 Inches (100 to 200 mm) in Diameter: Two piece, die stamped, with longitudinal seams spot welded, bonded, and painted with a PVC aerosol spray.
2. Round Elbows 9 to 26 Inches (230 to 660 mm) in Diameter: Standing seam construction.
3. Round Elbows 28 to 60 Inches (710 to 1525 mm) in Diameter: Standard gore construction, riveted and bonded.
4. Other Fittings: Riveted and bonded joints. 5. Couplings: Slip-joint construction with a minimum 2-inch (50-mm) insertion
length.
PART 3 - EXECUTION
3.1 DUCT INSTALLATION, GENERAL
A. Duct installation requirements are specified in other Division 15 Sections. Drawings indicate general arrangement of ducts, fittings, and accessories.
B. Construct and install each duct system for the specific duct pressure classification indicated.
C. Install round and flat-oval ducts in lengths not less than 12 feet (3.7 m), unless interrupted by fittings.
D. Install ducts with fewest possible joints.
E. Install fabricated fittings for changes in directions, changes in size and shape, and connections.
Odor Control Phase I at Blue River/81000749 15815 Final Doc. 12/08/2015 Page No.-10 Metal Ducts

F. Install couplings tight to duct wall surface with a minimum of projections into duct.
G. Install ducts, unless otherwise indicated, vertically and horizontally, parallel and perpendicular to building lines; avoid diagonal runs.
H. Install ducts close to walls, overhead construction, columns, and other structural and permanent enclosure elements of building.
I. Install ducts with a clearance of 1 inch (25 mm), plus allowance for insulation thickness.
J. Conceal ducts from view in finished spaces. Do not encase horizontal runs in solid partitions, unless specifically indicated.
K. Coordinate layout with suspended ceiling, fire- and smoke-control dampers, lighting layouts, and similar finished work.
L. Electrical Equipment Spaces: Route ductwork to avoid passing through transformer vaults and electrical equipment spaces and enclosures.
M. Non-Fire-Rated Partition Penetrations: Where ducts pass through interior partitions and exterior walls, and are exposed to view, conceal space between construction opening and duct or duct insulation with sheet metal flanges of same metal thickness as duct. Overlap opening on four sides by at least 1-1/2 inches (38 mm).
N. Fire-Rated Partition Penetrations: Where ducts pass through interior partitions and exterior walls, install appropriately rated fire damper, sleeve, and firestopping sealant. Fire and smoke dampers are specified in Division 15 Section "Duct Accessories." Firestopping materials and installation methods are specified in Division 7 Section "Firestopping."
3.2 PVC-COATED DUCT INSTALLATION
A. Install PVC-coated duct and fittings according to manufacturer's written instructions.
B. Seal all joints and seams. Apply sealer to male end connectors before insertion, and afterward to cover entire joint and sheet metal screws.
C. Secure couplings with sheet metal screws. Install screws at an interval of 12 inches (300 mm), with a minimum of three screws in each coupling.
D. Repair damage to PVC coating with manufacturer's recommended materials.
3.3 UNDERSLAB DUCT INSTALLATIONS
A. Verify undamaged conditions of duct before enclosure with fill or encasement.
B. Install underslab ducts according to SMACNA's "HVAC Duct Construction Standards--Metal and Flexible" and as indicated.
Odor Control Phase I at Blue River/81000749 15815 Final Doc. 12/08/2015 Page No.-11 Metal Ducts

C. Protect ducts from damage by equipment used in placing concrete on or around ducts.
D. Protect duct openings.
3.4 RANGE HOOD EXHAUST DUCT INSTALLATIONS
A. Install ducts to allow for thermal expansion of ductwork through 2000 deg F (1100 deg C) temperature range.
B. Install ducts without dips or traps that may collect residues, unless traps have continuous or automatic residue removal.
C. Install access openings at each change in direction and at 50-foot (15-m) intervals; locate on sides of duct a minimum of 1-1/2 inches (38 mm) from bottom; and fit with grease-tight covers of same material as duct.
D. Do not penetrate fire-rated assemblies.
3.5 DISHWASHER EXHAUST DUCT INSTALLATIONS
A. Install dishwasher exhaust ducts according to SMACNA's "HVAC Duct Construction Standards--Metal and Flexible."
3.6 SEAM AND JOINT SEALING
A. General: Seal duct seams and joints according to the duct pressure class indicated and as described in SMACNA's "HVAC Duct Construction Standards--Metal and Flexible."
B. Pressure Classification Less Than 2-Inch wg (500 Pa): Transverse joints.
C. Seal externally insulated ducts before insulation installation.
3.7 HANGING AND SUPPORTING
A. Install rigid round, rectangular, and flat-oval metal duct with support systems indicated in SMACNA's "HVAC Duct Construction Standards--Metal and Flexible."
B. Support horizontal ducts within 24 inches (600 mm) of each elbow and within 48 inches (1200 mm) of each branch intersection.
C. Support vertical ducts at a maximum interval of 16 feet (5 m) and at each floor.
D. Install upper attachments to structures with an allowable load not exceeding one-fourth of failure (proof-test) load.
E. Install concrete inserts before placing concrete.
Odor Control Phase I at Blue River/81000749 15815 Final Doc. 12/08/2015 Page No.-12 Metal Ducts

F. Install powder-actuated concrete fasteners after concrete is placed and completely cured.
3.8 CONNECTIONS
A. Connect equipment with flexible connectors according to Division 15 Section "Duct Accessories."
B. For branch, outlet and inlet, and terminal unit connections, comply with SMACNA's "HVAC Duct Construction Standards--Metal and Flexible."
3.9 FIELD QUALITY CONTROL
A. Disassemble, reassemble, and seal segments of systems as required to accommodate leakage testing and as required for compliance with test requirements.
B. Conduct tests, in presence of Architect, at static pressures equal to maximum design pressure of system or section being tested. If pressure classifications are not indicated, test entire system at maximum system design pressure. Do not pressurize systems above maximum design operating pressure. Give seven days' advance notice for testing.
C. Determine leakage from entire system or section of system by relating leakage to surface area of test section.
D. Maximum Allowable Leakage: Comply with requirements for Leakage Classification 3 for round and flat-oval ducts, Leakage Classification 12 for rectangular ducts in pressure classifications less than and equal to 2-inch wg (500 Pa) (both positive and negative pressures), and Leakage Classification 6 for pressure classifications from 2- to 10-inch wg (500 to 2490 Pa).
E. Remake leaking joints and retest until leakage is less than maximum allowable.
F. Leakage Test: Perform tests according to SMACNA's "HVAC Air Duct Leakage Test Manual."
3.10 ADJUSTING
A. Adjust volume-control dampers in ducts, outlets, and inlets to achieve design airflow.
B. Refer to Division 15 Section "Testing, Adjusting, and Balancing" for detailed procedures.
3.11 CLEANING
A. After completing system installation, including outlet fittings and devices, inspect the system. Vacuum ducts before final acceptance to remove dust and debris.
Odor Control Phase I at Blue River/81000749 15815 Final Doc. 12/08/2015 Page No.-13 Metal Ducts

END OF SECTION 15815
Odor Control Phase I at Blue River/81000749 15815 Final Doc. 12/08/2015 Page No.-14 Metal Ducts

SECTION 15816
HVAC CASINGS
PART 1 - GENERAL
1.1 RELATED DOCUMENTS
A. Drawings and general provisions of the Contract, including General and Supplementary Conditions and Division 1 Specification Sections, apply to this Section.
1.2 SUMMARY
A. This Section includes HVAC casings for field-erected, air-handling systems and for housing mechanical equipment.
B. Related Sections include the following:
1. Division 15 Section "Mechanical Insulation" for external insulation for HVAC casings. 2. Division 16 Section "Interior Lighting" for lighting within HVAC casings.
1.3 DEFINITIONS
A. Thermal Conductivity and Apparent Thermal Conductivity (k-Value): As defined in ASTM C 168. In this Section, these values are the result of the formula Btu x in./h x sq. ft. x deg F or W/m x K at the temperature differences specified. Values are expressed as Btu or W.
1. Example: Apparent Thermal Conductivity (k-Value): 0.26 or 0.037.
1.4 SUBMITTALS
A. Product Data: For factory-fabricated casings, sealing materials, and acoustic liner materials.
B. Shop Drawings: Show details of the following:
1. Fabrication, assembly, and installation, including plans, elevations, sections, components, and attachments to other work.
2. Reinforcement and spacing. 3. Seam and joint construction. 4. Access doors, including frames, hinges, and latches. 5. Filter, coil, humidifier, and other apparatus installation. 6. Hangers and supports, including methods for building attachment, vibration isolation,
seismic restraints, and casing attachment. 7. Interior lighting.
Odor Control Phase I at Blue River/81000749 15816 Final Doc. 12/08/2015 Page No.-1 HVAC Casing

C. Product Certificates: Signed by manufacturers of casings certifying that the acoustic performance of factory-fabricated casings complies with requirements.
1. Show sound-absorption coefficients in each octave band lower than those scheduled, when tested according to ASTM C 423.
2. Show airborne sound transmission losses lower than those scheduled, when tested according to ASTM E 90.
D. Welding Certificates: Copies of certificates indicating welding procedures and personnel comply with requirements in "Quality Assurance" Article.
E. Record Drawings: Indicate actual fabrication and installation details of HVAC casings and accessories.
1.5 QUALITY ASSURANCE
A. Welding Standards: Qualify welding procedures and welding personnel to perform welding processes for this Project according to AWS D1.1, "Structural Welding Code--Steel," for hangers and supports; AWS D1.2, "Structural Welding Code--Aluminum," for aluminum supporting members; and AWS D9.1, "Sheet Metal Welding Code," for duct joint and seam welding.
1.6 COORDINATION
A. Coordinate size and location of concrete bases. Cast anchor-bolt inserts into base. Concrete, reinforcement, and formwork requirements are specified in Division 3 Section "Cast-in-Place Concrete."
B. Coordinate installation of roof curbs, equipment supports, and roof penetrations. Roof specialties are specified in Division 7 Section "Roof Accessories."
1.7 ALL EXPOSED MATERIALS WILL BE INSTALLED IN A HYDROGEN SULFIDE ATMOSPHERE. MATERIALS SHALL BE HYDROGEN SULFIDE RESISTANT
PART 2 - PRODUCTS
2.1 SHEET METAL MATERIALS
A. Galvanized, Sheet Steel: Lock-forming quality; ASTM A 653/A 653M, G90 (Z275) coating designation; mill-phosphatized finish for surfaces of ducts exposed to view.
B. Reinforcement Shapes and Plates: Galvanized steel reinforcement where installed on galvanized, sheet metal ducts; compatible materials for aluminum and stainless-steel ducts.
C. Tie Rods: Galvanized steel, 1/4-inch (6-mm) minimum diameter for 36-inch (900-mm) length or less; 3/8-inch (10-mm) minimum diameter for lengths longer than 36 inches (900 mm).
Odor Control Phase I at Blue River/81000749 15816 Final Doc. 12/08/2015 Page No.-2 HVAC Casing

2.2 DUCT LINER
A. General: Comply with NFPA 90A and NAIMA's "Fibrous Glass Duct Liner Standard."
B. Materials: ASTM C 1071 with coated surface exposed to airstream to prevent erosion of glass fibers.
1. Thickness: 1/2 inch (13 mm). 2. Thickness: 1 inch (25 mm). 3. Thickness: 1-1/2 inches (38 mm). 4. Thermal Conductivity (k-Value): 0.26 at 75 deg F (0.037 at 24 deg C) mean temperature. 5. Fire-Hazard Classification: Maximum flame-spread rating of 25 and smoke-developed
rating of 50, when tested according to ASTM C 411. 6. Liner Adhesive: Comply with NFPA 90A and ASTM C 916. 7. Mechanical Fasteners: Galvanized steel, suitable for adhesive attachment, mechanical
attachment, or welding attachment to duct without damaging liner when applied as recommended by manufacturer and without causing leakage in duct.
a. Tensile Strength: Indefinitely sustain a 50-lb- (23-kg-) tensile, dead-load test perpendicular to duct wall.
b. Fastener Pin Length: As required for thickness of insulation and without projecting more than 1/8 inch (3 mm) into airstream.
c. Adhesive for Attaching Mechanical Fasteners: Comply with fire-hazard classification of duct liner system.
2.3 SEALANT MATERIALS
A. Joint and Seam Sealants, General: The term "sealant" is not limited to materials of adhesive or mastic nature but includes tapes and combinations of open-weave fabric strips and mastics.
1. Joint and Seam Sealant: One-part, nonsag, solvent-release-curing, polymerized butyl sealant, formulated with a minimum of 75 percent solids.
2. Flanged Joint Mastics: One-part, acid-curing, silicone elastomeric joint sealants, complying with ASTM C 920, Type S, Grade NS, Class 25, Use O.
2.4 SHOP- AND FIELD-FABRICATED CASINGS
A. Shop fabricate casings to greatest extent possible with a minimum of joints and to minimize field fabrication and assembly.
B. Fabricate casings with standing seam construction and angle reinforcement. Fabricate close-off sheets from casing sides, top, and bottom to damper, coil, and filter frames. Fabricate close-off sheets at joints between stacked coils. Bolt close-off sheets to frame flanges and housings. Support coils on stands fabricated from galvanized steel angles or channels.
C. Reinforce casings with galvanized or painted steel angles.
D. Seal joints with liquid-type, high-pressure duct sealant to eliminate air leakage.
Odor Control Phase I at Blue River/81000749 15816 Final Doc. 12/08/2015 Page No.-3 HVAC Casing

E. Fabricate drain pans for cooling coils, humidifiers, and eliminator blade sections in casings with external connection and vented deep-seal trap for drainage piping with a 3/4-inch (20-mm) pipe connection. Fabricate and reinforce drain pans of same material and thickness as housing, 2 inches (50 mm) deep with rolled edges. Solder seams.
F. Fabricate casings with reinforced openings for access doors at least 20 inches (500 mm) wide by 48 inches (1200 mm) high and located for access to each item of equipment housed. Refer to Division 15 Section "Duct Accessories" for access doors.
G. Fabricate casings to receive flexible or outlet connectors for fans. Refer to Division 15 Section "Duct Accessories" for flexible connectors.
H. Static-Pressure Classifications: Unless otherwise indicated, fabricate HVAC casings to the following:
1. Before Fans: 2-inch wg (500 Pa). 2. After Fans: 3-inch wg (750 Pa).
2.5 FACTORY-FABRICATED CASINGS
A. Description: Double-wall, insulated, pressurized equipment casings.
B. Panel Construction: Solid, galvanized, sheet steel exterior shell; and solid or perforated, galvanized, sheet steel interior shell; with a 2- or 4-inch (50- or 100-mm) space, as indicated.
1. Fabricate with a minimum number of joints. 2. Weld exterior and interior shells to perimeter, to interior longitudinal galvanized steel
channels, and to box-end internal closures. Paint welds. 3. Exterior Shell Thickness: 0.040 inch (1.0 mm) minimum. 4. Interior Shell Thickness: 0.034 inch (0.85 mm) minimum. 5. Interior Shell Thickness: 0.034 inch (0.85 mm) minimum, with 3/32-inch (2.4-mm)
perforations at 3/16-inch (5-mm) staggered spacing for 23 percent open area. 6. Fabricate perimeter and interior longitudinal channel members with galvanized steel
shapes. 7. Fill each panel assembly with insulating material that is noncombustible, inert, mildew
resistant, and vermin proof, and that complies with NFPA 90A. 8. Fabricate panels with tongue-and-groove construction, with continuous self-locking
joints effective inside and outside each panel joint interface.
C. Trim Items: Fabricate from a minimum of 0.052-inch (1.3-mm) galvanized, sheet steel, furnished in standard lengths for field cutting.
D. Access Doors: Fabricate personnel access doors at least 24 inches (600 mm) by 60 inches (1500 mm) in size, and other access doors in size indicated.
1. Fabricate doors of same thickness as panels, with a minimum 0.040-inch (1.0-mm) solid interior and exterior galvanized, sheet steel shell.
2. Install a minimum of two ball-bearing hinges and two wedge-lever-type latches, operable from inside and outside. Install doors to open against air pressure differential. Install neoprene gasket around entire perimeter of door frame.
Odor Control Phase I at Blue River/81000749 15816 Final Doc. 12/08/2015 Page No.-4 HVAC Casing

3. Fabricate windows in doors consisting of double-glazed wire-reinforced safety glass with an air space between and sealed with interior and exterior rubber seals.
E. Structural Performance: Design entire plenum installation to be self-supporting and capable of withstanding internal static pressures as scheduled, without exceeding deflection of any panel joint of L/200 where "L" is the unsupported span length within completed casing structure.
1. Design outdoor casings for wind loading of 15 lbf/sq. ft. (720 N/sq. m) and snow loading of 30 lbf/sq. ft. (1440 N/sq. m).
2. Acoustic Performance: Certified testing data from independent acoustic agency listing sound-absorption and transmission-loss characteristics of panel assembly.
3. Thermal Conductivity (k-Value): 0.26 at 75 deg F (0.037 at 24 deg C) mean temperature.
F. Static-Pressure Classifications: Unless otherwise indicated, fabricate HVAC casings to the following:
1. Before Fans: 2-inch wg (500 Pa). 2. After Fans: 3-inch wg (750 Pa).
2.6 MISCELLANEOUS HVAC CASING MATERIALS
A. General: Miscellaneous materials and products of types and sizes required to comply with HVAC casing system requirements, including proper connection of ducts and equipment.
2.7 SHOP-APPLIED LINER
A. Adhere a single layer of indicated thickness of duct liner with 90 percent coverage of adhesive at liner contact surface area. Multiple layers of insulation to achieve indicated thickness are prohibited.
B. Apply adhesive to liner facing in direction of airflow not receiving metal nosing.
C. Butt transverse joints without gaps and coat joint with adhesive.
D. Fold and compress liner in corners of casings or cut and fit to ensure butted-edge overlapping.
E. Do not apply liners with longitudinal joints, except at corners of casings, unless casing size and standard liner product dimensions make longitudinal joints necessary.
F. Apply adhesive coating on longitudinal seams in casings.
G. Secure liner with mechanical fasteners 4 inches (100 mm) from corners and at intervals not exceeding 12 inches (300 mm) transversely around perimeter; at 3 inches (80 mm) from transverse joints; and at intervals not exceeding 18 inches (450 mm) longitudinally.
H. Secure transversely oriented liner edges facing the airstream with metal nosings that have either channel or "Z" profile or are integrally formed from casing wall. Fabricate edge facings at the following locations:
1. Fan discharge.
Odor Control Phase I at Blue River/81000749 15816 Final Doc. 12/08/2015 Page No.-5 HVAC Casing

2. Intervals of lined casing preceding unlined casing. 3. Upstream edges of transverse joints in casings.
PART 3 - EXECUTION
3.1 EXAMINATION
A. Examine equipment bases and roof curbs for compliance with requirements for conditions affecting installation and performance of HVAC casings. Do not proceed with installation until unsatisfactory conditions have been corrected.
3.2 SHOP-FABRICATED HVAC CASING INSTALLATION
A. Support casings on floor or foundation system. Secure and seal to base.
B. Support components rigidly with ties, braces, brackets, seismic restraints, and anchors of types that will maintain housing shape and prevent buckling.
C. Align casings accurately at connections, with 1/8-inch (3-mm) misalignment tolerance and with interior surfaces smooth.
D. Maintain duct seal class integrity throughout casing.
3.3 CASING INSTALLATION
A. Install casings according to SMACNA's "HVAC Duct Construction Standards--Metal and Flexible." Follow recommended spacing of sheet metal screws, duct sealer placement, and trim positioning requirements.
B. Apply sealer to joints, connections, and mountings.
C. Field-cut openings for pipe and conduit penetrations; insulate and seal according to SMACNA's "HVAC Duct Construction Standards--Metal and Flexible."
3.4 FIELD QUALITY CONTROL
A. Conduct tests, in presence of Architect, at static pressures equal to maximum design pressure of system or section being tested. If pressure classifications are not indicated, test entire system at maximum system design pressure. Do not pressurize systems above maximum design operating pressure. Give seven days' advance notice for testing.
B. Determine leakage from entire system or section of system by relating leakage to surface area of test section.
C. Maximum Allowable Leakage: Comply with requirements for leakage classification of ducts connected to casing.
Odor Control Phase I at Blue River/81000749 15816 Final Doc. 12/08/2015 Page No.-6 HVAC Casing

D. Remake leaking joints and retest until leakage is less than maximum allowable.
E. Leakage Test: Perform tests according to SMACNA's "HVAC Air Duct Leakage Test Manual."
3.5 CLEANING
A. Clean dust and debris from each casing section as it is installed. Clean external surfaces of foreign substances that might deteriorate metal or interfere with painting or insulating of casings.
END OF SECTION 15816
Odor Control Phase I at Blue River/81000749 15816 Final Doc. 12/08/2015 Page No.-7 HVAC Casing

SECTION 15820
DUCT ACCESSORIES
PART 1 - GENERAL
1.1 RELATED DOCUMENTS
A. Drawings and general provisions of the Contract, including General and Supplementary Conditions and Division 1 Specification Sections, apply to this Section.
1.2 SUMMARY
A. This Section includes the following:
1. Backdraft dampers. 2. Manual-volume dampers. 3. Fire and smoke dampers. 4. Duct silencers. 5. Turning vanes. 6. Duct-mounted access doors and panels. 7. Flexible ducts. 8. Flexible connectors. 9. Duct accessory hardware.
B. Related Sections include the following:
1. Division 8 Section "Access Doors" for wall- and ceiling-mounted access doors and panels.
2. Division 10 Section "Louvers and Vents" for intake and relief louvers and vents connected to ducts and installed in exterior walls.
3. Division 15 Section "Air Terminals" for constant-volume and variable-air-volume control boxes, and reheat boxes.
4. Division 15 Section "Diffusers, Registers, and Grilles." 5. Division 15 Section "Control Systems Equipment" for electric and pneumatic damper
actuators. 6. Division 16 Section "Fire Alarm Systems" for duct-mounted fire and smoke detectors.
1.3 SUBMITTALS
A. Product Data: For the following:
1. Backdraft dampers. 2. Manual-volume dampers. 3. Fire and smoke dampers. 4. Duct silencers. 5. Duct-mounted access doors and panels.
Odor Control Phase I at Blue River/81000749 15820 Final Doc. 12/08/2015 Page No.-1 Duct Accessories
6. Flexible ducts.
B. Shop Drawings: Detail equipment assemblies and indicate dimensions, weights, loadings, required clearances, method of field assembly, components, location, and size of each field connection. Detail the following:
1. Special fittings and manual- and automatic-volume-damper installations. 2. Fire- and smoke-damper installations, including sleeves and duct-mounted access doors
and panels.
C. Product Certificates: Submit certified test data on dynamic insertion loss; self-noise power levels; and airflow performance data, static-pressure loss, dimensions, and weights.
1.4 QUALITY ASSURANCE
A. NFPA Compliance: Comply with the following NFPA standards:
1. NFPA 90A, "Installation of Air Conditioning and Ventilating Systems." 2. NFPA 90B, "Installation of Warm Air Heating and Air Conditioning Systems."
1.5 EXTRA MATERIALS
A. Furnish extra materials described below that match products installed, are packaged with protective covering for storage, and are identified with labels describing contents.
1. Fusible Links: Furnish quantity equal to 10 percent of amount installed.
1.6 ALL EXPOSED MATERIALS WILL BE INSTALLED IN A HYDROGEN SULFIDE ATMOSPHERE. MATERIALS SHALL BE HYDROGEN SULFIDE RESISTANT
PART 2 - PRODUCTS
2.1 SHEET METAL MATERIALS
A. Galvanized, Sheet Steel: Lock-forming quality; ASTM A 653/A 653M, G90 (Z275) coating designation; mill-phosphatized finish for surfaces of ducts exposed to view.
B. Carbon-Steel Sheets: ASTM A 366/A 366M, cold-rolled sheets, commercial quality, with oiled, exposed matte finish.
C. Aluminum Sheets: ASTM B 209 (ASTM B 209M), Alloy 3003, Temper H14, sheet form; with standard, one-side bright finish for ducts exposed to view and mill finish for concealed ducts.
D. Extruded Aluminum: ASTM B 221 (ASTM B 221M), Alloy 6063, Temper T6.
E. Reinforcement Shapes and Plates: Galvanized steel reinforcement where installed on galvanized, sheet metal ducts; compatible materials for aluminum and stainless-steel ducts.
Odor Control Phase I at Blue River/81000749 15820 Final Doc. 12/08/2015 Page No.-2 Duct Accessories

F. Tie Rods: Galvanized steel, 1/4-inch (6-mm) minimum diameter for 36-inch (900-mm) length or less; 3/8-inch (10-mm) minimum diameter for lengths longer than 36 inches (900 mm).
2.2 BACKDRAFT DAMPERS
A. Description: Suitable for horizontal or vertical installations.
B. Frame: 0.052-inch- (1.3-mm-) thick, galvanized, sheet steel, with welded corners and mounting flange.
C. Frame: 0.052-inch- (1.3-mm-) thick, galvanized, sheet steel, with welded corners.
D. Frame: 0.063-inch- (1.6-mm-) thick extruded aluminum, with mounting flange.
E. Frame: 0.063-inch- (1.6-mm-) thick extruded aluminum.
F. Blades: 0.025-inch- (0.6-mm-) thick, roll-formed aluminum.
G. Blades: 0.050-inch- (1.2-mm-) thick aluminum sheet.
H. Blade Seals: Felt.
I. Blade Seals: Vinyl.
J. Blade Seals: Neoprene.
K. Blade Axles: Nonferrous.
L. Blade Axles: Galvanized steel.
M. Tie Bars and Brackets: Aluminum.
N. Tie Bars and Brackets: Galvanized steel.
O. Return Spring: Adjustable tension.
2.3 MANUAL-VOLUME DAMPERS
A. General: Factory fabricated with required hardware and accessories. Stiffen damper blades for stability. Include locking device to hold single-blade dampers in a fixed position without vibration. Close duct penetrations for damper components to seal duct consistent with pressure class.
1. Pressure Classifications of 3-Inch wg (750 Pa) or Higher: End bearings or other seals for ducts with axles full length of damper blades and bearings at both ends of operating shaft.
B. Standard Volume Dampers: Multiple- or single-blade, parallel- or opposed-blade design as indicated, standard leakage rating, with linkage outside airstream, and suitable for horizontal or vertical applications.
Odor Control Phase I at Blue River/81000749 15820 Final Doc. 12/08/2015 Page No.-3 Duct Accessories

C. Standard Volume Dampers: Multiple- or single-blade, parallel- or opposed-blade design as indicated, standard leakage rating, and suitable for horizontal or vertical applications.
1. Steel Frames: Hat-shaped, galvanized, sheet steel channels, minimum of 0.064 inch (1.62 mm) thick, with mitered and welded corners; frames with flanges where indicated for attaching to walls; and flangeless frames where indicated for installing in ducts.
2. Aluminum Frames: Hat-shaped, 0.10-inch- (2.5-mm-) thick, aluminum sheet channels; frames with flanges where indicated for attaching to walls; and flangeless frames where indicated for installing in ducts.
3. Roll-Formed Steel Blades: 0.064-inch- (1.62-mm-) thick, galvanized, sheet steel. 4. Roll-Formed Aluminum Blades: 0.10-inch- (2.5-mm-) thick aluminum sheet. 5. Extruded-Aluminum Blades: 0.050-inch- (1.2-mm-) thick extruded aluminum. 6. Blade Axles: Nonferrous. 7. Blade Axles: Galvanized steel. 8. Tie Bars and Brackets: Aluminum. 9. Tie Bars and Brackets: Galvanized steel.
D. Low-Leakage Volume Dampers: Multiple- or single-blade, parallel- or opposed-blade design as indicated, low-leakage rating, with linkage outside airstream, and suitable for horizontal or vertical applications.
E. Low-Leakage Volume Dampers: Multiple- or single-blade, parallel- or opposed-blade design as indicated, low-leakage rating, and suitable for horizontal or vertical applications.
1. Steel Frames: Hat-shaped, galvanized, sheet steel channels, minimum of 0.064 inch (1.62 mm) thick, with mitered and welded corners; frames with flanges where indicated for attaching to walls; and flangeless frames where indicated for installing in ducts.
2. Aluminum Frames: Hat-shaped, 0.063-inch- (1.6-mm-) thick, extruded-aluminum channels; frames with flanges where indicated for attaching to walls; and flangeless frames where indicated for installing in ducts.
3. Roll-Formed Steel Blades: 0.064-inch- (1.62-mm-) thick, galvanized, sheet steel. 4. Roll-Formed Aluminum Blades: 0.10-inch- (2.5-mm-) thick aluminum sheet. 5. Extruded-Aluminum Blades: 0.050-inch- (1.2-mm-) thick extruded aluminum. 6. Blade Seals: Felt. 7. Blade Seals: Vinyl. 8. Blade Seals: Neoprene. 9. Blade Axles: Nonferrous. 10. Blade Axles: Galvanized steel. 11. Tie Bars and Brackets: Aluminum. 12. Tie Bars and Brackets: Galvanized steel.
F. High-Performance Volume Dampers: Multiple- or single-blade, parallel- or opposed-blade design as indicated, low-leakage rating, with linkage outside airstream, and suitable for horizontal or vertical applications.
1. Steel Frames: Hat-shaped, galvanized steel channels, minimum of 0.064 inch (1.62 mm) thick, with mitered and welded corners; frames with flanges where indicated for attaching to walls; and flangeless frames where indicated for installing in ducts.
2. Aluminum Frames: Hat-shaped, 0.125-inch- (3-mm-) thick, extruded-aluminum channels; frames with flanges where indicated for attaching to walls; and flangeless frames where indicated for installing in ducts.
Odor Control Phase I at Blue River/81000749 15820 Final Doc. 12/08/2015 Page No.-4 Duct Accessories

3. Steel Blades: 0.052-inch- (1.3-mm-) thick, galvanized, sheet steel; airfoil shaped. 4. Extruded-Aluminum Blades: Minimum of 0.081-inch- (2-mm-) thick, 6063T extruded
aluminum. 5. Blade Seals: Dual-durometer vinyl on blade edges; metallic compression on jambs. 6. Blade Axles: Nonferrous. 7. Blade Axles: Galvanized steel. 8. Tie Bars and Brackets: Aluminum. 9. Tie Bars and Brackets: Galvanized steel.
G. Jackshaft: 1-inch- (25-mm-) diameter, galvanized steel pipe rotating within a pipe-bearing assembly mounted on supports at each mullion and at each end of multiple-damper assemblies.
1. Length and Number of Mountings: Appropriate to connect linkage of each damper of a multiple-damper assembly.
H. Damper Hardware: Zinc-plated, die-cast core with dial and handle made of 3/32-inch- (2.4-mm-) thick zinc-plated steel, and a 3/4-inch (19-mm) hexagon locking nut. Include center hole to suit damper operating-rod size. Include elevated platform for insulated duct mounting.
2.4 FIRE DAMPERS
A. General: Labeled to UL 555.
B. Fire Rating: One and one-half hours.
C. Fire Rating: One and one-half and three hours.
D. Frame: SMACNA Type A with blades in airstream; fabricated with roll-formed, 0.034-inch- (0.85-mm-) thick galvanized steel; with mitered and interlocking corners.
E. Frame: SMACNA Type B with blades out of airstream; fabricated with roll-formed, 0.034-inch- (0.85-mm-) thick galvanized steel; with mitered and interlocking corners.
F. Mounting Sleeve: Factory- or field-installed galvanized, sheet steel.
1. Minimum Thickness: 0.052 inch (1.3 mm) or 0.138 inch (3.5 mm) thick as indicated, and length to suit application.
2. Exceptions: Omit sleeve where damper frame width permits direct attachment of perimeter mounting angles on each side of wall or floor, and thickness of damper frame complies with sleeve requirements.
G. Mounting Orientation: Vertical or horizontal as indicated.
H. Blades: Roll-formed, interlocking, 0.034-inch- (0.85-mm-) thick, galvanized, sheet steel. In place of interlocking blades, use full-length, 0.034-inch- (0.85-mm-) thick, galvanized steel blade connectors.
I. Horizontal Dampers: Include a blade lock and stainless-steel negator closure spring.
J. Fusible Link: Replaceable, 165 or 212 deg F (74 or 100 deg C) rated as indicated.
Odor Control Phase I at Blue River/81000749 15820 Final Doc. 12/08/2015 Page No.-5 Duct Accessories

2.5 CEILING FIRE DAMPERS
A. General: Labeled to UL 555C; comply with construction details for tested floor- and roof-ceiling assemblies as indicated in UL's "Fire Resistance Directory."
B. Frame: 0.040-inch- (1.0-mm-) thick, galvanized, sheet steel; round or rectangular; style to suit ceiling construction.
C. Blades: 0.034-inch- (0.85-mm-) thick, galvanized, sheet steel with nonasbestos refractory insulation.
D. Volume Adjustment: UL-labeled, fusible volume-control adjustment.
E. Fusible Link: Replaceable, 165 deg F (74 deg C) rated.
F. Fusible Link: Replaceable, 212 deg F (100 deg C) rated.
G. Fusible Link: Replaceable, 285 deg F (141 deg C) rated.
2.6 SMOKE DAMPERS
A. General: Labeled to UL 555S. Combination fire and smoke dampers shall be labeled for one-and-one-half-hour rating to UL 555.
B. Fusible Link: Replaceable, 165 or 212 deg F (74 or 100 deg C) rated as indicated.
C. Frame and Blades: 0.064-inch- (1.62-mm-) thick, galvanized, sheet steel.
D. Mounting Sleeve: Factory-installed, 0.052-inch- (1.3-mm-) thick, galvanized, sheet steel; length to suit wall or floor application.
E. Damper Motors: Provide for modulating or two-position action.
1. Permanent-Split-Capacitor or Shaded-Pole Motors: With oil-immersed and sealed gear trains.
2. Spring-Return Motors: Equip with an integral spiral-spring mechanism where indicated. Enclose entire spring mechanism in a removable housing designed for service or adjustments. Size for running torque rating of 150 in. x lbf (17 N x m) and breakaway torque rating of 150 in. x lbf (17 N x m).
3. Outdoor Motors and Motors in Outside-Air Intakes: Equip with O-ring gaskets designed to make motors weatherproof. Equip motors with internal heaters to permit normal operation at minus 40 deg F (minus 40 deg C).
4. Nonspring-Return Motors: For dampers larger than 25 sq. ft. (2.3 sq. m), size motor for running torque rating of 150 in. x lbf (17 N x m) and breakaway torque rating of 300 in. x lbf (34 N x m).
5. Two-Position Motor: 115 V, single phase, 60 Hz. 6. Two-Position Motor: 230 V, single phase, 60 Hz. 7. Two-Position Motor: 230 V, 3 phase, 60 Hz. 8. Two-Position Motor: 460 V, 3 phase, 60 Hz. 9. Modulating, Spring-Return Motor: 115 V, single phase, 60 Hz.
Odor Control Phase I at Blue River/81000749 15820 Final Doc. 12/08/2015 Page No.-6 Duct Accessories

10. Modulating, Spring-Return Motor: 230 V, single phase, 60 Hz. 11. Modulating, Spring-Return Motor: 230 V, 3 phase, 60 Hz. 12. Modulating, Spring-Return Motor: 460 V, 3 phase, 60 Hz.
2.7 DUCT SILENCERS
A. General: Factory-fabricated and -tested, round or rectangular silencer with performance characteristics and physical requirements as indicated.
B. Fire Performance: Adhesives, sealers, packing materials, and accessory materials shall have fire ratings not exceeding 25 for flame spread and 50 for smoke developed when tested according to ASTM E 84.
C. Rectangular Units: Fabricate casings with a minimum of 0.034-inch- (0.85-mm-) thick, solid sheet metal for outer casing and 0.022-inch- (0.55-mm-) thick, perforated sheet metal for inner casing.
D. Round Units: Casings with sheet metal thicknesses for diameters listed below:
1. Up to 24 Inches (600 mm): 0.034 inch (0.85 mm). 2. 26 through 40 Inches (660 through 1000 mm): 0.040 inch (1.0 mm). 3. 42 through 52 Inches (1060 through 1300 mm): 0.052 inch (1.3 mm). 4. 54 through 60 Inches (1370 through 1500 mm): 0.064 inch (1.62 mm). 5. Casings fabricated of spiral lock-seam duct may be one size thinner than that indicated. 6. Interior Partitions and Baffles: At least 0.034 inch (0.85 mm) and designed for minimum
aerodynamic losses.
E. Sheet Metal Perforations: 1/8-inch (3-mm) diameter for inner casing and baffle sheet metal.
F. Fibrous Acoustic-Fill Material: Inert and vermin-proof fibrous material, packed under not less than 5 percent compression.
G. Nonfibrous Acoustic-Fill Material: Moisture-proof nonfibrous material.
H. Fabricate silencers to form rigid units that will not pulsate, vibrate, rattle, or otherwise react to system pressure variations.
1. Do not use nuts, bolts, and sheet metal screws for unit assemblies. 2. Lock form and seal or continuously weld joints. 3. Suspended Units: Factory-installed suspension hooks or lugs attached to frame in
quantities and spaced to prevent deflection or distortion. 4. Reinforcement: Cross or trapeze angles for rigid suspension.
I. Source Quality Control: Perform the following factory tests:
1. Acoustic Performance: Test according to ASTM E 477, with airflow in both directions through silencer.
2. Record acoustic ratings, including dynamic insertion loss and self-noise power levels, for both forward flow (air and noise in same direction) and reverse flow (air and noise in opposite directions) with an airflow of at least 2000-fpm (10-m/s) face velocity.
Odor Control Phase I at Blue River/81000749 15820 Final Doc. 12/08/2015 Page No.-7 Duct Accessories

3. Leak Test: Test units for airtightness at 200 percent of associated fan static pressure or 6-inch wg (1500-Pa) static pressure, whichever is greater.
2.8 TURNING VANES
A. Fabricate to comply with SMACNA's "HVAC Duct Construction Standards--Metal and Flexible."
B. Manufactured Turning Vanes: Fabricate of 1-1/2-inch- (38-mm-) wide, curved blades set 3/4 inch (19 mm) o.c.; support with bars perpendicular to blades set 2 inches (50 mm) o.c.; and set into side strips suitable for mounting in ducts.
C. Acoustic Turning Vanes: Fabricate of airfoil-shaped aluminum extrusions with perforated faces and fibrous-glass fill.
2.9 DUCT-MOUNTED ACCESS DOORS AND PANELS
A. General: Fabricate doors and panels airtight and suitable for duct pressure class.
B. Frame: Galvanized, sheet steel, with bend-over tabs and foam gaskets.
C. Door: Double-wall, galvanized, sheet metal construction with insulation fill and thickness, and number of hinges and locks as indicated for duct pressure class. Include vision panel where indicated. Include 1-by-1-inch (25-by-25-mm) butt or piano hinge and cam latches.
D. Seal around frame attachment to duct and door to frame with neoprene or foam rubber.
E. Insulation: 1-inch- (25-mm-) thick, fibrous-glass or polystyrene-foam board.
2.10 FLEXIBLE CONNECTORS
A. General: Flame-retarded or noncombustible fabrics, coatings, and adhesives complying with UL 181, Class 1.
B. Standard Metal-Edged Connectors: Factory fabricated with a strip of fabric 3-1/2 inches (89 mm) wide attached to two strips of 2-3/4-inch- (70-mm-) wide, 0.028-inch- (0.7-mm-) thick, galvanized, sheet steel or 0.032-inch (0.8-mm) aluminum sheets. Select metal compatible with connected ducts.
C. Extra-Wide Metal-Edged Connectors: Factory fabricated with a strip of fabric 5-3/4 inches (146 mm) wide attached to two strips of 2-3/4-inch- (70-mm-) wide, 0.028-inch- (0.7-mm-) thick, galvanized, sheet steel or 0.032-inch (0.8-mm) aluminum sheets. Select metal compatible with connected ducts.
D. Transverse Metal-Edged Connectors: Factory fabricated with a strip of fabric 3-1/2 inches (89 mm) wide attached to two strips of 4-3/8-inch- (111-mm-) wide, 0.028-inch- (0.7-mm-) thick, galvanized, sheet steel or 0.032-inch (0.8-mm) aluminum sheets. Select metal compatible with connected ducts.
Odor Control Phase I at Blue River/81000749 15820 Final Doc. 12/08/2015 Page No.-8 Duct Accessories
E. Conventional, Indoor System Flexible Connector Fabric: Glass fabric double coated with polychloroprene.
1. Minimum Weight: 26 oz./sq. yd. (880 g/sq. m). 2. Tensile Strength: 480 lbf/inch (84 N/mm) in the warp, and 360 lbf/inch (63 N/mm) in the
filling.
F. Conventional, Outdoor System Flexible Connector Fabric: Glass fabric double coated with a synthetic-rubber, weatherproof coating resistant to the sun's ultraviolet rays and ozone environment.
1. Minimum Weight: 26 oz./sq. yd. (880 g/sq. m). 2. Tensile Strength: 530 lbf/inch (93 N/mm) in the warp, and 440 lbf/inch (77 N/mm) in the
filling.
G. High-Temperature System Flexible Connectors: Glass fabric coated with silicone rubber and having a minimum weight of 16 oz./sq. yd. (542 g/sq. m) and tensile strength of 285 lbf/inch (50 N/mm) in the warp, and 185 lbf/inch (32 N/mm) in the filling.
H. High-Corrosive-Environment System Flexible Connectors: Glass fabric coated with a chemical-resistant coating.
1. Minimum Weight: 14 oz./sq. yd. (474 g/sq. m). 2. Tensile Strength: 450 lbf/inch (79 N/mm) in the warp, and 340 lbf/inch (60 N/mm) in the
filling.
2.11 FLEXIBLE DUCTS
A. General: Comply with UL 181, Class 1.
B. Flexible Ducts, Uninsulated: Spiral-wound steel spring with flameproof vinyl sheathing.
C. Flexible Ducts, Uninsulated: Corrugated aluminum.
D. Flexible Ducts, Insulated: Factory-fabricated, insulated, round duct, with an outer jacket enclosing 1-1/2-inch- (38-mm-) thick, glass-fiber insulation around a continuous inner liner.
1. Reinforcement: Steel-wire helix encapsulated in inner liner. 2. Outer Jacket: Glass-reinforced, silver Mylar with a continuous hanging tab, integral
fibrous-glass tape, and nylon hanging cord. 3. Outer Jacket: Polyethylene film. 4. Inner Liner: Polyethylene film.
E. Pressure Rating: 6-inch wg (1500 Pa) positive, 1/2-inch wg (125 Pa) negative.
2.12 ACCESSORY HARDWARE
A. Instrument Test Holes: Cast iron or cast aluminum to suit duct material, including screw cap and gasket. Size to allow insertion of pitot tube and other testing instruments, and length to suit duct insulation thickness.
Odor Control Phase I at Blue River/81000749 15820 Final Doc. 12/08/2015 Page No.-9 Duct Accessories

B. Splitter Damper Accessories: Zinc-plated damper blade bracket; 1/4-inch (6-mm), zinc-plated operating rod; and a duct-mounted, ball-joint bracket with flat rubber gasket and square-head set screw.
C. Flexible Duct Clamps: Stainless-steel band with cadmium-plated hex screw to tighten band with a worm-gear action, in sizes 3 to 18 inches (75 to 450 mm) to suit duct size.
D. Adhesives: High strength, quick setting, neoprene based, waterproof, and resistant to gasoline and grease.
PART 3 - EXECUTION
3.1 INSTALLATION
A. Install duct accessories according to applicable details shown in SMACNA's "HVAC Duct Construction Standards--Metal and Flexible" for metal ducts and NAIMA's "Fibrous Glass Duct Construction Standards" for fibrous-glass ducts.
B. Install volume dampers in lined duct; avoid damage to and erosion of duct liner.
C. Provide test holes at fan inlet and outlet and elsewhere as indicated.
D. Install fire and smoke dampers according to manufacturer's UL-approved written instructions.
1. Install fusible links in fire dampers.
E. Install duct access panels for access to both sides of duct coils. Install duct access panels downstream from volume dampers, fire dampers, turning vanes, and equipment.
1. Install duct access panels to allow access to interior of ducts for cleaning, inspecting, adjusting, and maintaining accessories and terminal units.
2. Install access panels on side of duct where adequate clearance is available.
F. Label access doors according to Division 15 Section "Mechanical Identification."
3.2 ADJUSTING
A. Adjust duct accessories for proper settings.
B. Adjust fire and smoke dampers for proper action.
C. Final positioning of manual-volume dampers is specified in Division 15 Section "Testing, Adjusting, and Balancing."
END OF SECTION 15820
Odor Control Phase I at Blue River/81000749 15820 Final Doc. 12/08/2015 Page No.-10 Duct Accessories
SECTION 15836
AXIAL FANS
PART 1 - GENERAL
1.1 RELATED DOCUMENTS
A. Drawings and general provisions of the Contract, including General and Supplementary Conditions and Division 1 Specification Sections, apply to this Section.
1.2 All exposed materials will be installed in a hydrogen sulfide atmosphere. Materials shall be hydrogen sulfide resistant.
1.3 SUMMARY
A. This Section includes the following:
1. Tubeaxial fans. 2. Vaneaxial fans.
1.4 PERFORMANCE REQUIREMENTS
A. Project Altitude: Base air ratings on actual site elevations .
B. Operating Limits: Classify according to AMCA 99.
1.5 SUBMITTALS
A. Product Data: Include rated capacities, furnished specialties, and accessories for each type of product indicated and include the following:
1. Certified fan performance curves with system operating conditions indicated. 2. Certified fan sound-power ratings. 3. Motor ratings and electrical characteristics, plus motor and electrical accessories. 4. Material gages and finishes, including color charts. 5. Dampers, including housings, linkages, and operators.
B. Shop Drawings: Detail equipment assemblies and indicate dimensions, weights, loads, required clearances, method of field assembly, components, and location and size of each field connection.
1. Wiring Diagrams: Power, signal, and control wiring. Differentiate between manufacturer-installed and field-installed wiring.
Odor Control Phase I at Blue River/81000749 15836 Final Doc. 12/08/2015 Page No.-1 Axial Fans

2. Design Calculations: Calculate requirements for selecting vibration isolators and seismic restraints and for designing vibration isolation bases.
3. Vibration Isolation Base Details: Detail fabrication, including anchorages and attachments to structure and to supported equipment. Include auxiliary motor slides and rails, and base weights.
C. Coordination Drawings: Show fan room layout and relationships between components and adjacent structural and mechanical elements. Show support locations, type of support, and weight on each support. Indicate and certify field measurements.
D. Maintenance Data: For axial fans to include in maintenance manuals specified in Division 1.
1.6 QUALITY ASSURANCE
A. Electrical Components, Devices, and Accessories: Listed and labeled as defined in NFPA 70, Article 100, by a testing agency acceptable to authorities having jurisdiction, and marked for intended use.
B. AMCA Compliance: Products shall comply with performance requirements and shall be licensed to use the AMCA-Certified Ratings Seal.
C. NEMA Compliance: Motors and electrical accessories shall comply with NEMA standards.
1.7 DELIVERY, STORAGE, AND HANDLING
A. Deliver fans as factory-assembled units, to the extent allowable by shipping limitations, with protective crating and covering.
B. Disassemble and reassemble units, as required for moving to final locations, according to manufacturer's written instructions.
C. Lift and support units with manufacturer's designated lifting or supporting points.
1.8 COORDINATION
A. Coordinate size and location of structural-steel support members.
B. Coordinate size and location of concrete bases. Cast anchor-bolt inserts into bases. Concrete, reinforcement, and formwork requirements are specified in Division 3 Section "Cast-in-Place Concrete."
C. Coordinate installation of roof curbs, equipment supports, and roof penetrations. These items are specified in Division 7 Section "Roof Accessories."
1.9 EXTRA MATERIALS
Odor Control Phase I at Blue River/81000749 15836 Final Doc. 12/08/2015 Page No.-2 Axial Fans

A. Furnish extra materials described below that match products installed and that are packaged with protective covering for storage and identified with labels describing contents.
1. Belts: One set for each belt-driven unit.
1.10 ALL EXPOSED MATERIALS WILL BE INSTALLED IN A HYDROGEN SULFIDE ATMOSPHERE. MATERIALS SHALL BE HYDROGEN SULFIDE RESISTANT
PART 2 - PRODUCTS
2.1 MANUFACTURERS
A. Available Manufacturers: Subject to compliance with requirements, manufacturers offering products that may be incorporated into the Work include, but are not limited to, the following:
B. Manufacturers: Subject to compliance with requirements, provide products by one of the following:
1. Acme Engineering & Mfg. Corp. 2. Aerovent; a Twin City Fan Company. 3. Airmaster Fan Co. 4. Ammerman Company, Inc./General Resource Corp. 5. Barry Blower Div./Penn Ventilation Companies, Inc. 6. Bayley Fans, Lau Commercial Industrial Fans/Lau Industries. 7. Buffalo Forge Co./Howden Fan Co. 8. Carnes Company HVAC. 9. Chicago Blower Corp. 10. Cincinnati Fan & Ventilator Co. 11. CML Northern Blower, Inc. 12. Cook, Loren Company. 13. Greenheck Fan Corp. 14. Hartzell Fan, Inc. 15. ILG Industries, Inc./American Coolair Corp. 16. Industrial Air Division, Lau Commercial Industrial Fans/Lau Industries. 17. Madison Manufacturing/Peerless-Winsmith, Inc. 18. New Philadelphia Fan Co. 19. New York Blower Company (The). 20. Stanley Fans; Div. of Breidert Air Products, Inc. 21. Strobic Air Corp./Metpro Corp. 22. Trane Co. (The).
2.2 MANUFACTURED UNITS
A. Description: Fan wheel and housing, factory-mounted motor with belt drive or direct drive, an inlet cone section, and accessories.
Odor Control Phase I at Blue River/81000749 15836 Final Doc. 12/08/2015 Page No.-3 Axial Fans

1. Variable-Pitch Fans: Internally mounted pneumatic actuator, externally mounted positive positioner, and mechanical-blade-pitch indicator.
B. Housings: Aluminum with inlet bell and diffuser sections.
1. Inlet and Outlet Connections: Outer mounting frame and companion flanges; inlet cone shall be welded to fan raceway.
2. Guide Vane Section: Integral guide vanes downstream from fan wheel designed to straighten airflow.
3. Mixed-Flow Outlet Connection: [One] flanged discharge perpendicular to fan inlet.
C. Wheels: Cast-aluminum, axial-flow type, with airfoil-shaped blades mounted on cast-iron wheel plate keyed to shaft with solid-steel key.
D. Fan Hub and Blade-Bearing Assemblies: Cast aluminum, machined and fitted with threaded bearing wells to receive blade-bearing assemblies.
1. Blades: Replaceable, cast aluminum; factory mounted and balanced to hub assembly.
2. Fan Shaft: Turned, ground, and polished steel designed to operate at no more than 70 percent of first critical speed at top of fan's speed range.
E. Shaft Bearings: Radial, self-aligning ball or roller bearings.
1. Ball-Bearing Rating Life: ABMA 9, L10 of 100,000 hours. 2. Roller-Bearing Rating Life: ABMA 11, L10 of 100,000 hours. 3. Extend lubrication lines to outside of casing and terminate with grease fittings.
F. Direct-Driven Units: Motor encased in housing, outside of airstream, factory wired to disconnect switch located on outside of fan housing.
G. Belt Drives: Factory mounted, with final alignment and belt adjustment made after installation.
1. Service Factor Based on Fan Motor: 1.4. 2. Fan Pulleys: Cast iron with split, tapered bushing; dynamically balanced at
factory. 3. Motor Pulleys: Adjustable pitch for use with motors through 5 hp; fixed pitch for
use with motors larger than 5 hp. Select pulley so pitch adjustment is at the middle of adjustment range at fan design conditions.
4. Belts: Oil resistant, nonsparking, and nonstatic; matched sets for multiple belt drives.
5. Belt Guards: Fabricate of steel for motors mounted on outside of fan cabinet. 6. Motor Mount: Adjustable base.
H. Accessories:
1. Companion Flanges: Rolled-steel flanges. 2. Inlet and Outlet Screens: Wire-mesh screen on fans not connected to ductwork.
Odor Control Phase I at Blue River/81000749 15836 Final Doc. 12/08/2015 Page No.-4 Axial Fans
3. Backdraft Dampers: Butterfly style, for mounting with flexible connection to the discharge of fan or direct mounted to the discharge diffuser section.
4. Stall Alarm Probe: Sensing probe capable of detecting fan operation in stall and signaling control devices. Control devices and sequence of operation are specified in Division 15 Sections "HVAC Instrumentation and Controls" and "Sequence of Operation."
5. Flow Measurement Port: Pressure measurement taps installed in the inlet of fan to detect and signal airflow readings to temperature-control systems. Control devices and sequence of operation are specified in Division 15 Sections "HVAC Instrumentation and Controls" and "Sequence of Operation."
6. Inlet Vanes: Adjustable; with peripheral control linkage operated from outside of airstream, bronze sleeve bearings on each end of vane support, and provision for manual or automatic operation.
2.3 MOTORS
A. Refer to Division 15 Section "Motors" for general requirements for factory-installed motors.
B. Motor Construction: NEMA MG 1, general purpose, continuous duty, high efficiency, Design B.
C. Enclosure Type: Totally enclosed, fan cooled.
2.4 FACTORY FINISHES
A. Sheet Metal Parts: Prime coat before final assembly.
B. Exterior Surfaces: Baked-enamel finish coat after assembly. Coatings: [Thermoplastic vinyl] [Epoxy] [Zinc] [Synthetic resin] [Phenolic] [Color-match enamel] [Polytetrafluoroethylene] [Vinyl ester] [Hot-dip galvanized] [Powder-baked enamel]
2.5 SOURCE QUALITY CONTROL
A. Sound-Power Level Ratings: Comply with AMCA 301, "Methods for Calculating Fan Sound Ratings from Laboratory Test Data." Factory test fans according to AMCA 300, "Reverberant Room Method for Sound Testing of Fans." Label fans with the AMCA-Certified Ratings Seal.
B. Fan Performance Ratings: Establish flow rate, pressure, power, air density, speed of rotation, and efficiency by factory tests and ratings according to AMCA 210, "Laboratory Methods of Testing Fans for Rating."
PART 3 - EXECUTION
3.1 INSTALLATION
Odor Control Phase I at Blue River/81000749 15836 Final Doc. 12/08/2015 Page No.-5 Axial Fans

A. Install axial fans level and plumb.
B. Support floor-mounting units using [spring isolators] [restrained spring isolators] <Insert other device> having a static deflection of [1 inch (25 mm)] <Insert other deflection>. Vibration- and seismic-control devices are specified in Division 15 Section "Mechanical Vibration Controls and Seismic Restraints."
1. Secure vibration and seismic controls to concrete bases using anchor bolts cast in concrete base.
C. Install floor-mounting units on concrete bases. Concrete, reinforcement, and formwork requirements are specified in Division 3 Section "Cast-in-Place Concrete."
D. Install floor-mounting units on concrete bases designed to withstand, without damage to equipment, the seismic force required by authorities having jurisdiction. Concrete, reinforcement, and formwork requirements are specified in Division 3 Section "Cast-in-Place Concrete."
E. Support suspended units from structure using threaded steel rods and spring hangers. Vibration-control devices are specified in Division 15 Section "Mechanical Vibration Controls and Seismic Restraints."
1. In seismic zones, restrain support units.
F. Install units with clearances for service and maintenance.
G. Label fans according to requirements specified in Division 15 Section "Mechanical Identification."
3.2 CONNECTIONS
A. Duct installation and connection requirements are specified in other Division 15 Sections. Drawings indicate general arrangement of ducts and duct accessories. Make final duct connections with flexible connectors. Flexible connectors are specified in Division 15 Section "Duct Accessories."
B. Ground equipment.
C. Tighten electrical connectors and terminals according to manufacturer's published torque-tightening values. If manufacturer's torque values are not indicated, use those specified in UL 486A and UL 486B.
3.3 FIELD QUALITY CONTROL
A. Equipment Startup Checks:
1. Verify that shipping, blocking, and bracing are removed. 2. Verify that unit is secure on mountings and supporting devices and that
connections to ducts and electrical components are complete. Verify that proper
Odor Control Phase I at Blue River/81000749 15836 Final Doc. 12/08/2015 Page No.-6 Axial Fans

thermal-overload protection is installed in motors, starters, and disconnect switches.
3. Verify that cleaning and adjusting are complete. 4. Disconnect fan drive from motor, verify proper motor rotation direction, and verify
fan wheel free rotation and smooth bearing operation. Reconnect fan drive system, align and adjust belts, and install belt guards.
5. Verify lubrication for bearings and other moving parts. 6. Verify that manual and automatic volume control and fire and smoke dampers in
connected ductwork systems are in fully open position.
B. Starting Procedures:
1. Energize motor and adjust fan to indicated rpm. 2. Measure and record motor voltage and amperage.
C. Operational Test: After electrical circuitry has been energized, start units to confirm proper motor rotation and unit operation. Remove malfunctioning units, replace with new units, and retest.
D. Test and adjust controls and safeties. Replace damaged and malfunctioning controls and equipment.
E. Shut unit down and reconnect automatic temperature-control operators.
F. Refer to Division 15 Section "Testing, Adjusting, and Balancing" for testing, adjusting, and balancing procedures.
G. Replace fan and motor pulleys as required to achieve design airflow.
H. Repair or replace malfunctioning units. Retest as specified above after repairs or replacements are made.
3.4 ADJUSTING
A. Adjust damper linkages for proper damper operation.
B. Adjust belt tension.
C. Lubricate bearings.
3.5 CLEANING
A. On completion of installation, internally clean fans according to manufacturer's written instructions. Remove foreign material and construction debris. Vacuum fan wheel and cabinet.
B. After completing system installation, including outlet fitting and devices, inspect exposed finish. Remove burrs, dirt, and construction debris and repair damaged finishes.
Odor Control Phase I at Blue River/81000749 15836 Final Doc. 12/08/2015 Page No.-7 Axial Fans

3.6 DEMONSTRATION
A. Engage a factory-authorized service representative to train Owner's maintenance personnel to adjust, operate, and maintain axial fans.
1. Train Owner's maintenance personnel on procedures and schedules for starting and stopping, troubleshooting, servicing, and maintaining equipment and schedules.
2. Review data in maintenance manuals. Refer to Division 1 Section "Closeout Procedures."
3. Review data in maintenance manuals. Refer to Division 1 Section "Operation and Maintenance Data."
4. Schedule training with Owner, through Architect, with at least seven days' advance notice.
END OF SECTION 15836
Odor Control Phase I at Blue River/81000749 15836 Final Doc. 12/08/2015 Page No.-8 Axial Fans

SECTION 15837
CENTRIFUGAL FANS
PART 1 - GENERAL
1.1 RELATED DOCUMENTS
A. Drawings and general provisions of the Contract, including General and Supplementary Conditions and Division 1 Specification Sections, apply to this Section.
1.2 All exposed materials will be installed in a hydrogen sulfide atmosphere. Materials shall be hydrogen sulfide resistant.
1.3 SUMMARY
A. This Section includes centrifugal fans and vent sets.
1.4 PERFORMANCE REQUIREMENTS
A. Project Altitude: Base air ratings on actual site elevations.
B. Operating Limits: Classify according to AMCA 99.
1.5 SUBMITTALS
A. Product Data: Include rated capacities, furnished specialties, and accessories for each type of product indicated and include the following:
1. Certified fan performance curves with system operating conditions indicated. 2. Certified fan sound-power ratings. 3. Motor ratings and electrical characteristics, plus motor and electrical accessories. 4. Material gages and finishes, including color charts. 5. Dampers, including housings, linkages, and operators.
B. Shop Drawings: Detail equipment assemblies and indicate dimensions, weights, loads, required clearances, method of field assembly, components, and location and size of each field connection.
1. Wiring Diagrams: Power, signal, and control wiring. Differentiate between manufacturer-installed and field-installed wiring.
2. Design Calculations: Calculate requirements for selecting vibration isolators and seismic restraints and for designing vibration isolation bases.
Odor Control Phase I at Blue River/81000749 15837 Final Doc. 12/08/2015 Page No.-1 Centrifugal Fans

3. Vibration Isolation Base Details: Detail fabrication, including anchorages and attachments to structure and to supported equipment. Include auxiliary motor slides and rails, and base weights.
C. Coordination Drawings: Show fan room layout and relationships between components and adjacent structural and mechanical elements. Show support locations, type of support, and weight on each support. Indicate and certify field measurements.
D. Maintenance Data: For centrifugal fans to include in maintenance manuals specified in Division 1.
1.6 QUALITY ASSURANCE
A. Electrical Components, Devices, and Accessories: Listed and labeled as defined in NFPA 70, Article 100, by a testing agency acceptable to authorities having jurisdiction, and marked for intended use.
B. AMCA Compliance: Products shall comply with performance requirements and shall be licensed to use the AMCA-Certified Ratings Seal.
C. NEMA Compliance: Motors and electrical accessories shall comply with NEMA standards.
1.7 DELIVERY, STORAGE, AND HANDLING
A. Deliver fans as factory-assembled units, to the extent allowable by shipping limitations, with protective crating and covering.
B. Disassemble and reassemble units, as required for moving to the final location, according to manufacturer's written instructions.
C. Lift and support units with manufacturer's designated lifting or supporting points.
1.8 COORDINATION
A. Coordinate size and location of structural-steel support members.
B. Coordinate size and location of concrete bases. Cast anchor-bolt inserts into bases. Concrete, reinforcement, and formwork requirements are specified in Division 3 Section "Cast-in-Place Concrete."
C. Coordinate installation of roof curbs, equipment supports, and roof penetrations. These items are specified in Division 7 Section "Roof Accessories."
1.9 EXTRA MATERIALS
Odor Control Phase I at Blue River/81000749 15837 Final Doc. 12/08/2015 Page No.-2 Centrifugal Fans
A. Furnish extra materials described below that match products installed and that are packaged with protective covering for storage and identified with labels describing contents.
1. Belts: One set for each belt-driven unit.
1.10 ALL EXPOSED MATERIALS WILL BE INSTALLED IN A HYDROGEN SULFIDE ATMOSPHERE. MATERIALS SHALL BE HYDROGEN SULFIDE RESISTANT
PART 2 - PRODUCTS
2.1 MANUFACTURERS
A. Available Manufacturers: Subject to compliance with requirements, manufacturers offering products that may be incorporated into the Work include, but are not limited to, the following:
B. Manufacturers: Subject to compliance with requirements, provide products by one of the following:
1. ABB Garden City Fan Company. 2. Acme Engineering & Mfg. Corp. 3. Aerovent; a Twin City Fan Company. 4. Airmaster Fan Co. 5. Ammerman Company, Inc./General Resource Corp. 6. Bayley Fans, Lau Commercial Industrial Fans/Lau Industries. 7. Buffalo Forge Co./Howden Fan Co. 8. Carrier Corp. 9. Central Blower Co. 10. Chicago Blower Corp. 11. Cincinnati Fan & Ventilator Co. 12. CML Northern Blower, Inc. 13. Cook, Loren Company. 14. Industrial Air Division, Lau Commercial Industrial Fans/Lau Industries. 15. Madison Manufacturing/Peerless-Winsmith, Inc. 16. New Philadelphia Fan Co. 17. New York Blower Company (The). 18. Strobic Air Corp./Metpro Corp. 19. Trane Co. (The).
2.2 MANUFACTURED UNITS
A. Description: Factory-fabricated, -assembled, -tested, and -finished, belt-driven centrifugal fans consisting of housing, wheel, fan shaft, bearings, motor and disconnect switch, drive assembly, and support structure.
Odor Control Phase I at Blue River/81000749 15837 Final Doc. 12/08/2015 Page No.-3 Centrifugal Fans
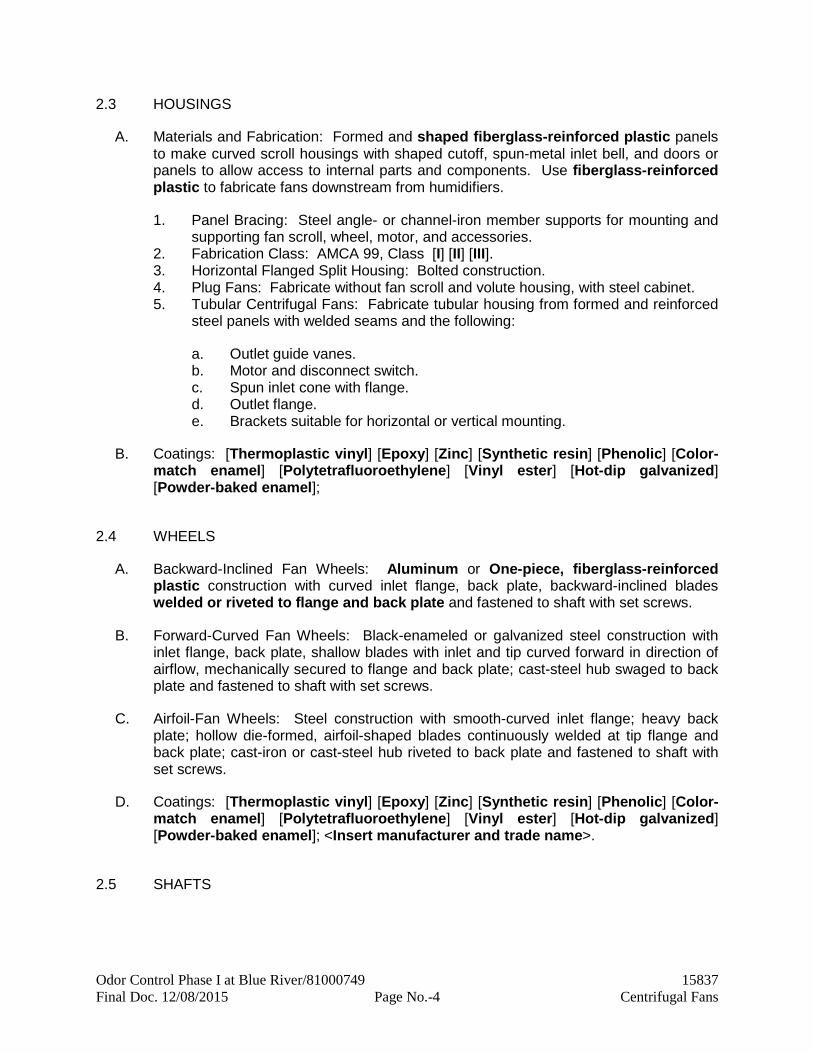
2.3 HOUSINGS
A. Materials and Fabrication: Formed and shaped fiberglass-reinforced plastic panels to make curved scroll housings with shaped cutoff, spun-metal inlet bell, and doors or panels to allow access to internal parts and components. Use fiberglass-reinforced plastic to fabricate fans downstream from humidifiers.
1. Panel Bracing: Steel angle- or channel-iron member supports for mounting and supporting fan scroll, wheel, motor, and accessories.
2. Fabrication Class: AMCA 99, Class [I] [II] [III]. 3. Horizontal Flanged Split Housing: Bolted construction. 4. Plug Fans: Fabricate without fan scroll and volute housing, with steel cabinet. 5. Tubular Centrifugal Fans: Fabricate tubular housing from formed and reinforced
steel panels with welded seams and the following:
a. Outlet guide vanes. b. Motor and disconnect switch. c. Spun inlet cone with flange. d. Outlet flange. e. Brackets suitable for horizontal or vertical mounting.
B. Coatings: [Thermoplastic vinyl] [Epoxy] [Zinc] [Synthetic resin] [Phenolic] [Color-match enamel] [Polytetrafluoroethylene] [Vinyl ester] [Hot-dip galvanized] [Powder-baked enamel];
2.4 WHEELS
A. Backward-Inclined Fan Wheels: Aluminum or One-piece, fiberglass-reinforced plastic construction with curved inlet flange, back plate, backward-inclined blades welded or riveted to flange and back plate and fastened to shaft with set screws.
B. Forward-Curved Fan Wheels: Black-enameled or galvanized steel construction with inlet flange, back plate, shallow blades with inlet and tip curved forward in direction of airflow, mechanically secured to flange and back plate; cast-steel hub swaged to back plate and fastened to shaft with set screws.
C. Airfoil-Fan Wheels: Steel construction with smooth-curved inlet flange; heavy back plate; hollow die-formed, airfoil-shaped blades continuously welded at tip flange and back plate; cast-iron or cast-steel hub riveted to back plate and fastened to shaft with set screws.
D. Coatings: [Thermoplastic vinyl] [Epoxy] [Zinc] [Synthetic resin] [Phenolic] [Color-match enamel] [Polytetrafluoroethylene] [Vinyl ester] [Hot-dip galvanized] [Powder-baked enamel]; <Insert manufacturer and trade name>.
2.5 SHAFTS
Odor Control Phase I at Blue River/81000749 15837 Final Doc. 12/08/2015 Page No.-4 Centrifugal Fans

A. Statically and dynamically balanced and selected for continuous operation at maximum rated fan speed and motor horsepower, with final alignment and belt adjustment made after installation.
B. Turned, ground, and polished hot-rolled steel with keyway. Ship with a protective coating of lubricating oil.
C. Designed to operate at no more than 70 percent of first critical speed at top of fan's speed range.
2.6 BEARINGS
A. Prelubricated and Sealed Shaft Bearings: Self-aligning, pillow-block-type ball bearings.
1. Ball-Bearing Rating Life: ABMA 9, L100 of 120,000 hours. 2. Roller-Bearing Rating Life: ABMA 11, L10 of 120,000 hours.
B. Grease-Lubricated Shaft Bearings: Self-aligning, pillow-block-type, tapered roller bearings with double-locking collars and two-piece, cast-iron housing.
1. Ball-Bearing Rating Life: ABMA 9, L10 of 120,000 hours. 2. Roller-Bearing Rating Life: ABMA 11, L10 of 120,000 hours.
C. Grease-Lubricated Shaft Bearings: Self-aligning, pillow-block-type, ball or roller bearings with adapter mount and two-piece, cast-iron housing.
1. Ball-Bearing Rating Life: ABMA 9, L10 of 120,000 hours. 2. Roller-Bearing Rating Life: ABMA 11, L10 of 120,000 hours.
2.7 BELT DRIVES
A. Description: Factory mounted, with final alignment and belt adjustment made after installation.
1. Service Factor Based on Fan Motor: 1.5
B. Fan Pulleys: Cast iron or cast steel with split, tapered bushing; dynamically balanced at factory.
C. Motor Pulleys: Adjustable pitch for use with motors through 5 hp; fixed pitch for use with motors larger than 5 hp. Select pulley so pitch adjustment is at the middle of adjustment range at fan design conditions.
D. Belts: Oil resistant, nonsparking, and nonstatic; matched sets for multiple belt drives.
1. Belt Guards: Fabricate to comply with OSHA and SMACNA requirements; 0.1046-inch- (2.7-mm-) thick, 3/4-inch (20-mm) diamond-mesh wire screen welded to steel angle frame or equivalent, prime coated. Secure to fan or fan supports without short circuiting vibration isolation. Include provisions for adjustment of belt tension, lubrication, and use of tachometer with guard in place.
Odor Control Phase I at Blue River/81000749 15837 Final Doc. 12/08/2015 Page No.-5 Centrifugal Fans

E. Motor Mount: Adjustable for belt tensioning.
2.8 ACCESSORIES
A. Scroll Access Doors: Shaped to conform to scroll, with quick-opening latches and gaskets.
B. Companion Flanges: Galvanized steel, for duct connections.
C. Variable Inlet Vanes: Steel, with blades supported at both ends with two permanently lubricated bearings. Variable mechanism terminating in single control lever with control shaft for double-width fans.
D. Discharge Dampers: Heavy-duty steel assembly with [parallel] [opposed] blades constructed of two plates formed around and welded to shaft, channel frame, sealed ball bearings, with blades linked outside of airstream to single control lever.
E. Inlet Screens: Galvanized steel welded grid screen.
F. Scroll Drain Connection: NPS 1 (DN 25) steel pipe coupling welded to low point of fan scroll.
G. Shaft Cooler: Metal disk between bearings and fan wheel, designed to dissipate heat from shaft.
H. Spark-Resistant Construction: AMCA 99.
I. Shaft Seals: Airtight seals installed around shaft on drive side of single-width fans.
J. Weather Cover: Enameled-steel sheet with ventilation slots, bolted to housing.
2.9 MOTORS
A. Refer to Division 15 Section "Motors" for general requirements for factory-installed motors.
B. Motor Construction: NEMA MG 1, general purpose, continuous duty, high efficiency, Design B.
C. Enclosure Type: Totally enclosed, fan cooled.
2.10 SOURCE QUALITY CONTROL
A. Sound-Power Level Ratings: Comply with AMCA 301, "Methods for Calculating Fan Sound Ratings from Laboratory Test Data." Factory test fans according to AMCA 300, "Reverberant Room Method for Sound Testing of Fans." Label fans with the AMCA-Certified Ratings Seal.
Odor Control Phase I at Blue River/81000749 15837 Final Doc. 12/08/2015 Page No.-6 Centrifugal Fans

B. Fan Performance Ratings: Establish flow rate, pressure, power, air density, speed of rotation, and efficiency by factory tests and ratings according to AMCA 210, "Laboratory Methods of Testing Fans for Rating."
PART 3 - EXECUTION
3.1 INSTALLATION
A. Install centrifugal fans level and plumb.
B. Support floor-mounting units using [spring isolators] [restrained spring isolators] having a static deflection of [1 inch (25 mm)] <Insert other deflection>. Vibration- and seismic-control devices are specified in Division 15 Section "Mechanical Vibration Controls and Seismic Restraints."
1. Secure vibration and seismic controls to concrete bases using anchor bolts cast in concrete base.
C. Install floor-mounting units on concrete bases. Concrete, reinforcement, and formwork requirements are specified in Division 3 Section "Cast-in-Place Concrete."
D. Install floor-mounting units on concrete bases designed to withstand, without damage to equipment, the seismic force required by authorities having jurisdiction. Concrete, reinforcement, and formwork requirements are specified in Division 3 Section "Cast-in-Place Concrete."
E. Support suspended units from structure using threaded steel rods and spring hangers. Vibration-control devices are specified in Division 15 Section "Mechanical Vibration Controls and Seismic Restraints."
1. In seismic zones, restrain support units.
F. Install units with clearances for service and maintenance.
G. Label fans according to requirements specified in Division 15 Section "Mechanical Identification."
3.2 CONNECTIONS
A. Duct installation and connection requirements are specified in other Division 15 Sections. Drawings indicate general arrangement of ducts and duct accessories. Make final duct connections with flexible connectors. Flexible connectors are specified in Division 15 Section "Duct Accessories."
B. Install ducts adjacent to fans to allow service and maintenance.
C. Ground equipment.
Odor Control Phase I at Blue River/81000749 15837 Final Doc. 12/08/2015 Page No.-7 Centrifugal Fans

D. Tighten electrical connectors and terminals according to manufacturer's published torque-tightening values. If manufacturer's torque values are not indicated, use those specified in UL 486A and UL 486B.
3.3 FIELD QUALITY CONTROL
A. Equipment Startup Checks:
1. Verify that shipping, blocking, and bracing are removed. 2. Verify that unit is secure on mountings and supporting devices and that
connections to ducts and electrical components are complete. Verify that proper thermal-overload protection is installed in motors, starters, and disconnect switches.
3. Verify that cleaning and adjusting are complete. 4. Disconnect fan drive from motor, verify proper motor rotation direction, and verify
fan wheel free rotation and smooth bearing operation. Reconnect fan drive system, align and adjust belts, and install belt guards.
5. Verify lubrication for bearings and other moving parts. 6. Verify that manual and automatic volume control and fire and smoke dampers in
connected ductwork systems are in fully open position.
B. Starting Procedures:
1. Energize motor and adjust fan to indicated rpm. 2. Measure and record motor voltage and amperage.
C. Operational Test: After electrical circuitry has been energized, start units to confirm proper motor rotation and unit operation. Remove malfunctioning units, replace with new units, and retest.
D. Test and adjust controls and safeties. Replace damaged and malfunctioning controls and equipment.
E. Shut unit down and reconnect automatic temperature-control operators.
F. Refer to Division 15 Section "Testing, Adjusting, and Balancing" for testing, adjusting, and balancing procedures.
G. Replace fan and motor pulleys as required to achieve design airflow.
H. Repair or replace malfunctioning units. Retest as specified above after repairs or replacements are made.
3.4 ADJUSTING
A. Adjust damper linkages for proper damper operation.
B. Adjust belt tension.
C. Lubricate bearings.
Odor Control Phase I at Blue River/81000749 15837 Final Doc. 12/08/2015 Page No.-8 Centrifugal Fans

3.5 CLEANING
A. On completion of installation, internally clean fans according to manufacturer's written instructions. Remove foreign material and construction debris. Vacuum fan wheel and cabinet.
B. After completing system installation, including outlet fitting and devices, inspect exposed finish. Remove burrs, dirt, and construction debris and repair damaged finishes.
3.6 DEMONSTRATION
A. Engage a factory-authorized service representative to train Owner's maintenance personnel to adjust, operate, and maintain centrifugal fans.
1. Train Owner's maintenance personnel on procedures and schedules for starting and stopping, troubleshooting, servicing, and maintaining equipment and schedules.
2. Review data in maintenance manuals. Refer to Division 1 Section "Closeout Procedures."
3. Review data in maintenance manuals. Refer to Division 1 Section "Operation and Maintenance Data."
4. Schedule training with Owner, through Architect, with at least seven days' advance notice.
END OF SECTION 15837
Odor Control Phase I at Blue River/81000749 15837 Final Doc. 12/08/2015 Page No.-9 Centrifugal Fans

SECTION 15855
DIFFUSERS, REGISTERS, AND GRILLES
PART 1 - GENERAL
1.1 RELATED DOCUMENTS
A. Drawings and general provisions of the Contract, including General and Supplementary Conditions and Division 1 Specification Sections, apply to this Section.
1.2 All exposed materials will be installed in a hydrogen sulfide atmosphere. Materials shall be hydrogen sulfide resistant.
1.3 SUMMARY
A. This Section includes ceiling- and wall-mounted diffusers, registers, and grilles.
B. Related Sections include the following:
1. Division 10 Section "Louvers and Vents" for fixed and adjustable louvers and wall vents, whether or not they are connected to ducts.
2. Division 15 Section "Duct Accessories" for fire and smoke dampers and volume-control dampers not integral to diffusers, registers, and grilles.
3. Division 15 Section "Testing, Adjusting, and Balancing" for balancing diffusers, registers, and grilles.
1.4 DEFINITIONS
A. Diffuser: Circular, square, or rectangular air distribution outlet, generally located in the ceiling and comprised of deflecting members discharging supply air in various directions and planes and arranged to promote mixing of primary air with secondary room air.
B. Grille: A louvered or perforated covering for an opening in an air passage, which can be located in a sidewall, ceiling, or floor.
C. Register: A combination grille and damper assembly over an air opening.
1.5 SUBMITTALS
A. Product Data: For each model indicated, include the following:
1. Data Sheet: For each type of air outlet and inlet, and accessory furnished; indicate construction, finish, and mounting details.
Odor Control Phase I at Blue River/81000749 15855 Final Doc. 12/08/2015 Page No.-1 Diffusers,Registers, and Grilles
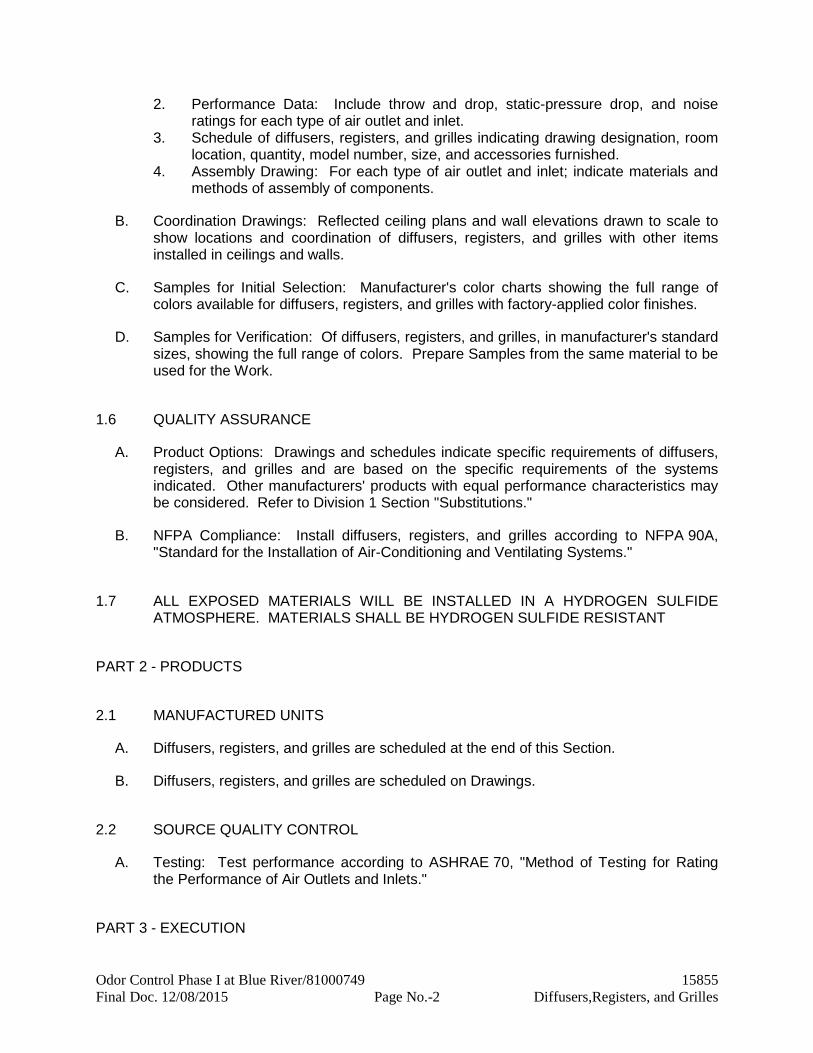
2. Performance Data: Include throw and drop, static-pressure drop, and noise ratings for each type of air outlet and inlet.
3. Schedule of diffusers, registers, and grilles indicating drawing designation, room location, quantity, model number, size, and accessories furnished.
4. Assembly Drawing: For each type of air outlet and inlet; indicate materials and methods of assembly of components.
B. Coordination Drawings: Reflected ceiling plans and wall elevations drawn to scale to show locations and coordination of diffusers, registers, and grilles with other items installed in ceilings and walls.
C. Samples for Initial Selection: Manufacturer's color charts showing the full range of colors available for diffusers, registers, and grilles with factory-applied color finishes.
D. Samples for Verification: Of diffusers, registers, and grilles, in manufacturer's standard sizes, showing the full range of colors. Prepare Samples from the same material to be used for the Work.
1.6 QUALITY ASSURANCE
A. Product Options: Drawings and schedules indicate specific requirements of diffusers, registers, and grilles and are based on the specific requirements of the systems indicated. Other manufacturers' products with equal performance characteristics may be considered. Refer to Division 1 Section "Substitutions."
B. NFPA Compliance: Install diffusers, registers, and grilles according to NFPA 90A, "Standard for the Installation of Air-Conditioning and Ventilating Systems."
1.7 ALL EXPOSED MATERIALS WILL BE INSTALLED IN A HYDROGEN SULFIDE ATMOSPHERE. MATERIALS SHALL BE HYDROGEN SULFIDE RESISTANT
PART 2 - PRODUCTS
2.1 MANUFACTURED UNITS
A. Diffusers, registers, and grilles are scheduled at the end of this Section.
B. Diffusers, registers, and grilles are scheduled on Drawings.
2.2 SOURCE QUALITY CONTROL
A. Testing: Test performance according to ASHRAE 70, "Method of Testing for Rating the Performance of Air Outlets and Inlets."
PART 3 - EXECUTION
Odor Control Phase I at Blue River/81000749 15855 Final Doc. 12/08/2015 Page No.-2 Diffusers,Registers, and Grilles

3.1 EXAMINATION
A. Examine areas where diffusers, registers, and grilles are to be installed for compliance with requirements for installation tolerances and other conditions affecting performance of equipment. Do not proceed with installation until unsatisfactory conditions have been corrected.
3.2 INSTALLATION
A. Install diffusers, registers, and grilles level and plumb, according to manufacturer's written instructions, Coordination Drawings, original design, and referenced standards.
B. Ceiling-Mounted Outlets and Inlets: Drawings indicate general arrangement of ducts, fittings, and accessories. Air outlet and inlet locations have been indicated to achieve design requirements for air volume, noise criteria, airflow pattern, throw, and pressure drop. Make final locations where indicated, as much as practicable. For units installed in lay-in ceiling panels, locate units in the center of the panel. Where architectural features or other items conflict with installation, notify Architect for a determination of final location.
C. Install diffusers, registers, and grilles with airtight connection to ducts and to allow service and maintenance of dampers, air extractors, and fire dampers.
3.3 ADJUSTING
A. After installation, adjust diffusers, registers, and grilles to air patterns indicated, or as directed, before starting air balancing.
3.4 CLEANING
A. After installation of diffusers, registers, and grilles, inspect exposed finish. Clean exposed surfaces to remove burrs, dirt, and smudges. Replace diffusers, registers, and grilles that have damaged finishes.
3.5 DIFFUSER SCHEDULE
END OF SECTION 15855
Odor Control Phase I at Blue River/81000749 15855 Final Doc. 12/08/2015 Page No.-3 Diffusers,Registers, and Grilles

SECTION 15861
AIR FILTERS
PART 1 - GENERAL
1.1 RELATED DOCUMENTS
A. Drawings and general provisions of the Contract, including General and Supplementary Conditions and Division 1 Specification Sections, apply to this Section.
1.2 SUMMARY
A. This Section includes factory-fabricated air-filter devices and media used to remove particulate matter from air for HVAC applications.
1.3 All exposed materials will be installed in a hydrogen sulfide atmosphere. Materials shall be hydrogen sulfide resistant.
1.4 DEFINITIONS
A. HEPA: High-efficiency particulate air.
1.5 SUBMITTALS
A. Product Data: Include dimensions; shipping, installed, and operating weights; required clearances and access; rated flow capacity, including initial and final pressure drop at rated airflow; efficiency and test method; fire classification; furnished specialties; and accessories for each model indicated.
B. Shop Drawings: Include plans, elevations, sections, and details to illustrate component assemblies and attachments.
1. Show filter rack assembly, dimensions, materials, and methods of assembly of components.
2. Include setting drawings, templates, and requirements for installing anchor bolts and anchorages.
3. Wiring Diagrams: Detail wiring for power, signal, and control systems and differentiate between manufacturer-installed and field-installed wiring.
C. Maintenance Data: For each type of filter and rack to include in maintenance manuals specified in Division 1.
1.6 QUALITY ASSURANCE
Odor Control Phase I at Blue River/81000749 15861 Final Doc. 12/08/2015 Page No.-1 Air Filters

A. Product Options: Drawings indicate size, profiles, and dimensional requirements of air filters and are based on the specific system indicated. Other manufacturers systems with equal performance characteristics may be considered. Refer to Division 1 Section "Substitutions."
B. Electronic Air Cleaners and Electrical Devices and Accessories: Listed and labeled as defined in NFPA 70, Article 100 by a testing agency acceptable to authorities having jurisdiction.
C. Comply with NFPA 90A and NFPA 90B.
D. ASHRAE Compliance: Comply with provisions of ASHRAE 52.1 for method of testing and rating air-filter units.
E. Comply with ARI 850.
F. Comply with NFPA 70 for installing electrical components.
1.7 COORDINATION
A. Coordinate size and location of concrete bases. Cast anchor-bolt inserts into bases. Concrete, reinforcement, and formwork requirements are specified in Division 3 Section "Cast-in-Place Concrete."
1.8 EXTRA MATERIALS
A. Furnish extra materials described below that match products installed and that are packaged with protective covering for storage and identified with labels describing contents.
1. Provide one complete set of filters for each filter bank. If system includes prefilters, provide only prefilters.
2. Provide one container of red oil for inclined manometer filter gage.
1.9 ALL EXPOSED MATERIALS WILL BE INSTALLED IN A HYDROGEN SULFIDE ATMOSPHERE. MATERIALS SHALL BE HYDROGEN SULFIDE RESISTANT
PART 2 - PRODUCTS
2.1 MANUFACTURERS
A. Available Manufacturers: Subject to compliance with requirements, manufacturers offering products that may be incorporated into the Work include, but are not limited to, the following:
B. Manufacturers: Subject to compliance with requirements, provide products by one of the following:
Odor Control Phase I at Blue River/81000749 15861 Final Doc. 12/08/2015 Page No.-2 Air Filters

1. Air Filters, Electrostatic Air Cleaners, and Filter-Holding Systems:
a. AAF International. b. Airguard Industries, Inc. c. Barnebey & Sutcliffe Corp. d. Columbus Industries, Inc. e. Continental Air Filter Div.; NiCon Filter Corp. f. Farr Co. g. Flanders Filters, Inc. h. International Air Filter, Inc. i. Koch Filter Corp. j. Research Products Corp.
2. Filter Gages:
a. Airguard Industries, Inc. b. Dwyer Instruments Inc.
2.2 DISPOSABLE PANEL FILTERS
A. Description: Factory-fabricated, viscous-coated, flat-panel type, disposable air filters with holding frames.
B. Media: Interlaced glass fibers sprayed with nonflammable adhesive.
C. Frame: Cardboard frame with perforated metal retainer.
D. Frame: Galvanized steel with metal grid on outlet side, steel rod grid on inlet side, hinged, and with pull and retaining handles.
E. Duct-Mounting Frames: Welded, galvanized steel with gaskets and fasteners and suitable for bolting together into built-up filter banks.
2.3 EXTENDED-SURFACE, DISPOSABLE PANEL FILTERS
A. Description: Factory-fabricated, dry, extended-surface filters with holding frames.
B. Media: Fibrous material formed into deep-V-shaped pleats and held by self-supporting wire grid.
C. Media and Media-Grid Frame: Nonflammable cardboard.
D. Media and Media-Grid Frame: Galvanized steel.
E. Media and Media-Grid Frame: Fire-retardant, 3/4-inch (19-mm) particleboard with gaskets.
F. Duct-Mounting Frames: Welded, galvanized steel with gaskets and fasteners, and suitable for bolting together into built-up filter banks.
Odor Control Phase I at Blue River/81000749 15861 Final Doc. 12/08/2015 Page No.-3 Air Filters

2.4 EXTENDED-SURFACE, NONSUPPORTED-MEDIA FILTERS
A. Description: Factory-fabricated, dry, extended-surface, self-supporting filters with holding frames.
B. Media: Fibrous material constructed so individual pleats are maintained in tapered form by flexible internal supports under rated-airflow conditions.
C. Filter-Media Frame: Galvanized steel.
D. Filter-Media Frame: Hard polyurethane foam.
E. Duct-Mounting Frames: Welded galvanized steel with gaskets and fasteners, and suitable for bolting together into built-up filter banks.
2.5 AUTOMATIC ROLL FILTERS
A. Description: Factory-fabricated, automatic, motor-driven, roll-type filter with holding casing.
1. Arrangement: Horizontal. 2. Arrangement: Vertical.
B. Media: Compressed and rolled, viscous-coated, fibrous-glass material.
C. Holding Frame: Galvanized steel with enclosed, clean media roll arranged to allow upstream replacement of filter media.
1. Auxiliary Frame: Locate on downstream side of unit with downstream access. 2. Auxiliary Frame: Locate on downstream side of unit with side access. 3. Final Filter: Extended-surface, retained-media filters. 4. Final Filter: Extended-surface, nonsupported-media filters. 5. Final Filter: Extended-surface, HEPA filters.
D. Control and Drive: Electric, gear-reducer, motor-driven, feed-control mechanism equipped with manual media advance and runout switches for stopping media movement of filter bank and operating remote warning signal lights.
1. Manual Control: Manual switch to advance media and wired to override automatic controls.
2. Automatic Control: Prewired control package to advance media when filter resistance exceeds preselected high limit.
3. Automatic Control: Prewired control package to advance media after preselected operating time.
2.6 ACTIVATED-CARBON PANEL FILTERS
A. Description: Factory-fabricated unit with activated-carbon media.
Odor Control Phase I at Blue River/81000749 15861 Final Doc. 12/08/2015 Page No.-4 Air Filters

B. Media: Flat-panel, multilayer filter with inlet layer of polyester fibers, layer of activated-carbon granules bonded to fibers, layer of polyurethane foam, and housed in cardboard frame.
C. Media: Pleated, multilayer filter with inlet layer of cotton and synthetic fibers and layer of activated-carbon granules bonded to synthetic fibers, formed into deep-V-shaped pleats and held by self-wire grid, and housed in nonflammable cardboard frame.
D. Duct-Mounting Frames: Welded galvanized steel with polyurethane gaskets and fasteners, capable of holding media and media frame in place and suitable for bolting together into built-up filter banks.
2.7 ACTIVATED-CARBON FILTERS
A. Description: Factory-fabricated unit with activated-carbon trays in deep-V arrangement with disposable panel prefilter.
B. Media: Activated carbon and mounted in removable carbon-cell trays of epoxy-coated steel.
1. Activated-Carbon Capacity: 12 lb (5.4 kg) of activated carbon per 500 cfm (236 L/s) of airflow.
2. Activated-Carbon Capacity: 8.8 lb (4.0 kg) of activated carbon per 2000 cfm (944 L/s) of airflow.
C. Housing: 0.064-inch- (1.6-mm-) thick, galvanized steel, for side servicing through gasketed access doors on both sides. Equip housings with metal slide channel tracks to hold activated-carbon trays.
2.8 HEPA FILTERS
A. Description: Factory-fabricated HEPA filters with holding casing.
B. Media: UL 586, fibrous glass, constructed of continuous sheets with closely spaced pleats with aluminum separators.
C. Media: UL 586, fibrous glass, constructed of continuous sheets with closely spaced pleats with vinyl-coated aluminum separators.
D. Media: UL 586, fibrous glass, constructed of continuous sheets with closely spaced pleats with separators of ribbons of filter media.
E. Frame Material: 3/4-inch- (19-mm-) thick, fire-retardant plywood.
F. Frame Material: 3/4-inch- (19-mm-) thick, fire-retardant particleboard.
G. Frame Material: 3/4-inch- (19-mm-) thick plywood.
H. Frame Material: 3/4-inch- (19-mm-) thick particleboard.
Odor Control Phase I at Blue River/81000749 15861 Final Doc. 12/08/2015 Page No.-5 Air Filters

I. Frame Material: Galvanized steel.
J. Frame Material: Aluminized steel.
K. Frame Material: Cadmium-plated steel.
L. Frame Material: Stainless steel.
M. Frame Material: Aluminum.
N. Media to Frame Side Bond: Polyurethane foam.
O. Media to Frame Side Bond: Silicone.
P. Media to Frame Side Bond: Neoprene adhesive.
Q. Media to Frame Side Bond: Fiberglass-mat packing.
R. Media to Frame Side Bond: Thermosetting sealant.
S. Face Gasket: Neoprene expanded rubber.
T. Face Gasket: Ceramic fiber.
U. Face Gasket: Silicone.
V. Duct-Mounting Frames: Construct downstream corners of holding device with cushion pads to protect media. Provide bolted filter-sealing mechanism to mount and continuously seal each individual filter.
2.9 ELECTRONIC AIR CLEANERS
A. Description: Galvanized-steel assembly containing electronic agglomerator and prefilters.
B. Media: Independently supported and nested aluminum collection cells.
1. Ionizing Section: Alternately spaced grounded struts and charged ionizing wires. 2. Collecting Section: Alternately grounded and charged plates, with insulators
located out of airstream.
C. Power Pack: Self-contained, prewired rectifying unit to convert 120-V, single-phase, 60-Hz ac power to approximately 12,000-V dc for ionizer and 6000-V dc for collector; include overload protection, on-off switch, and pilot light showing operating status.
D. Safety Accessories: Manual-reset safety switches and warning lights for filter plenum access doors, signal lights and safety switching upstream and downstream from unit within duct, and enameled high-voltage warning signs.
2.10 FRONT- AND REAR-ACCESS FILTER FRAMES
Odor Control Phase I at Blue River/81000749 15861 Final Doc. 12/08/2015 Page No.-6 Air Filters

A. Framing System: Aluminum framing members with access for either upstream (front) or downstream (rear) filter servicing, cut to size and prepunched for assembly into modules. Vertically support filters prevent deflection of horizontal members without interfering with either filter installation or operation.
B. Prefilters: Incorporate a separate track, removable from front or back.
C. Sealing: Factory-installed, positive-sealing device for each row of filters to ensure seal between gasketed filter elements to prevent bypass of unfiltered air.
2.11 SIDE-SERVICE HOUSINGS
A. Description: Factory-assembled, side-service housings, constructed of galvanized steel, with flanges to connect to duct system.
B. Prefilters: Integral tracks to accommodate 2-inch (50-mm) disposable or washable filters.
C. Access Doors: Continuous gaskets on perimeter and positive-locking devices. Arrange so filter cartridges can be loaded from either access door.
D. Sealing: Incorporate positive-sealing gasket material on channels to seal top and bottom of filter cartridge frames to prevent bypass of unfiltered air.
2.12 FILTER GAGES
A. Description: Diaphragm type with dial and pointer in metal case, vent valves, black figures on white background, and front recalibration adjustment.
1. Diameter: 4-1/2 inches (115 mm). 2. Diameter: 2 inches (50 mm). 3. Range: 0- to 0.5-inch wg (0 to 125 Pa). 4. Range: 0- to 1.0-inch wg (0 to 250 Pa). 5. Range: 0- to 2.0-inch wg (0 to 500 Pa). 6. Range: 0- to 3.0-inch wg (0 to 750 Pa). 7. Range: 0- to 4.0-inch wg (0 to 1000 Pa).
B. Manometer-Type Filter Gage: Molded plastic with epoxy-coated aluminum scale, logarithmic-curve tube gage with integral leveling gage, graduated to read from 0- to 3.0-inch wg (0 to 750 Pa), and accurate within 3 percent of full scale range.
C. Accessories: Static-pressure tips, tubing, gage connections, and mounting bracket.
PART 3 - EXECUTION
3.1 INSTALLATION
A. Install filter frames according to manufacturer's written instructions.
Odor Control Phase I at Blue River/81000749 15861 Final Doc. 12/08/2015 Page No.-7 Air Filters
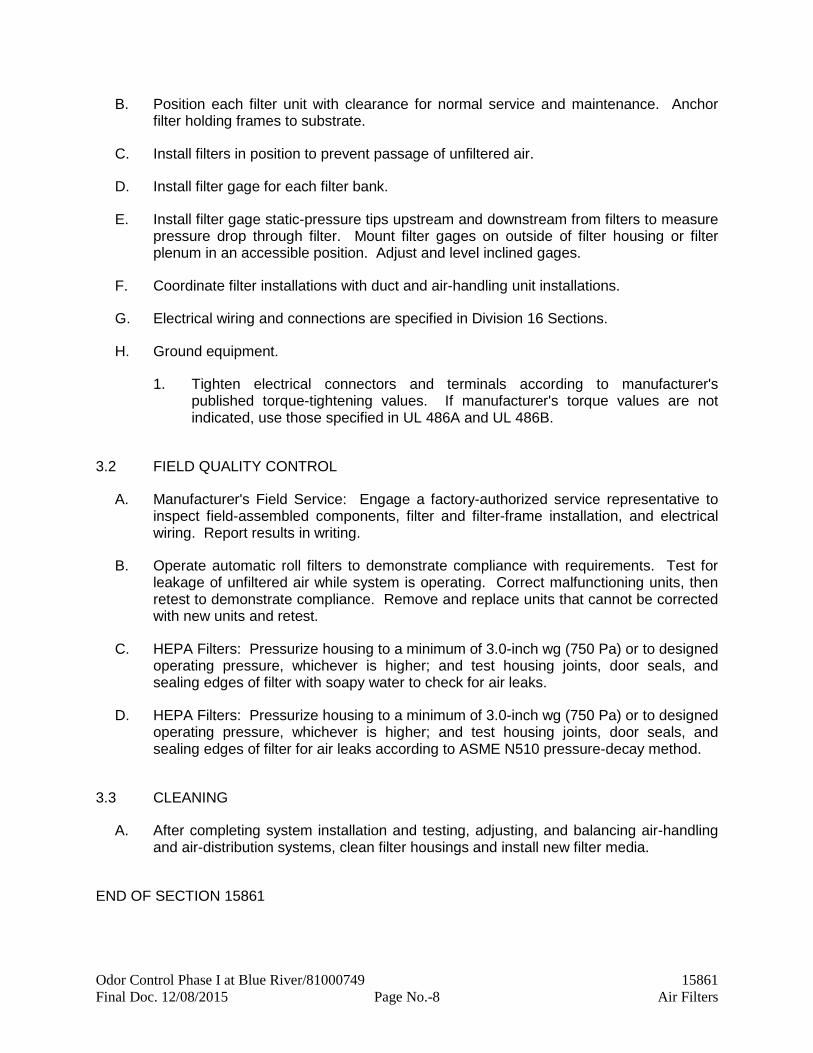
B. Position each filter unit with clearance for normal service and maintenance. Anchor filter holding frames to substrate.
C. Install filters in position to prevent passage of unfiltered air.
D. Install filter gage for each filter bank.
E. Install filter gage static-pressure tips upstream and downstream from filters to measure pressure drop through filter. Mount filter gages on outside of filter housing or filter plenum in an accessible position. Adjust and level inclined gages.
F. Coordinate filter installations with duct and air-handling unit installations.
G. Electrical wiring and connections are specified in Division 16 Sections.
H. Ground equipment.
1. Tighten electrical connectors and terminals according to manufacturer's published torque-tightening values. If manufacturer's torque values are not indicated, use those specified in UL 486A and UL 486B.
3.2 FIELD QUALITY CONTROL
A. Manufacturer's Field Service: Engage a factory-authorized service representative to inspect field-assembled components, filter and filter-frame installation, and electrical wiring. Report results in writing.
B. Operate automatic roll filters to demonstrate compliance with requirements. Test for leakage of unfiltered air while system is operating. Correct malfunctioning units, then retest to demonstrate compliance. Remove and replace units that cannot be corrected with new units and retest.
C. HEPA Filters: Pressurize housing to a minimum of 3.0-inch wg (750 Pa) or to designed operating pressure, whichever is higher; and test housing joints, door seals, and sealing edges of filter with soapy water to check for air leaks.
D. HEPA Filters: Pressurize housing to a minimum of 3.0-inch wg (750 Pa) or to designed operating pressure, whichever is higher; and test housing joints, door seals, and sealing edges of filter for air leaks according to ASME N510 pressure-decay method.
3.3 CLEANING
A. After completing system installation and testing, adjusting, and balancing air-handling and air-distribution systems, clean filter housings and install new filter media.
END OF SECTION 15861
Odor Control Phase I at Blue River/81000749 15861 Final Doc. 12/08/2015 Page No.-8 Air Filters

SECTION 15900
HVAC INSTRUMENTATION AND CONTROLS
PART 1 - GENERAL
1.1 RELATED DOCUMENTS
A. Drawings and general provisions of the Contract, including General and Supplementary Conditions and Division 1 Specification Sections, apply to this Section.
1.2 SUMMARY
A. This Section includes control equipment for HVAC systems and components, including control components for terminal heating and cooling units not supplied with factory-wired controls.
B. Related Sections include the following:
1. Division 13 Section "Intrusion Detection" for building intrusion detection system. 2. Division 13 Section "Clock Control" for building clock control system. 3. Division 13 Section "Lighting Controls" for building lighting control system. 4. Division 13 Section "Fire Alarm" for fire and smoke detectors mounted in HVAC
systems and equipment. 5. Division 15 Section "Sequence of Operation" for requirements that relate to this
Section. 6. Division 16 Section "Electrical Power Monitoring and Control."
1.3 DEFINITIONS
A. DDC: Direct-digital controls.
B. LAN: Local area network.
C. MS/TP: Master-slave/token-passing.
D. PICS: Protocol Implementation Conformance Statement.
1.4 SYSTEM DESCRIPTION
A. Control system consists of sensors, indicators, actuators, final control elements, interface equipment, other apparatus, and accessories to control mechanical systems.
B. Control system consists of sensors, indicators, actuators, final control elements, interface equipment, other apparatus, accessories, and software connected to
Odor Control Phase I at Blue River/81000749 15900 Final Doc. 12/08/2015 Page No.-1 HVAC Instrumentation and Controls

distributed controllers operating in multiuser, multitasking environment on token-passing network and programmed to control mechanical systems.
C. Control system includes the following:
1. Building intrusion detection system specified in Division 13 Section "Intrusion Detection."
2. Building clock control system specified in Division 13 Section "Clock Control." 3. Building lighting control system specified in Division 13 Section "Lighting
Controls." 4. Fire alarm system specified in Division 13 Section "Fire Alarm."
1.5 SEQUENCE OF OPERATION
1.6 SUBMITTALS
A. Product Data: Include manufacturer's technical literature for each control device. Indicate dimensions, capacities, performance characteristics, electrical characteristics, finishes for materials, and installation and startup instructions for each type of product indicated.
1. Each control device labeled with setting or adjustable range of control.
B. Shop Drawings: Detail equipment assemblies and indicate dimensions, weights, loads, required clearances, method of field assembly, components, and location and size of each field connection.
1. Schematic flow diagrams showing fans, pumps, coils, dampers, valves, and control devices.
2. Wiring Diagrams: Power, signal, and control wiring. Differentiate between manufacturer-installed and field-installed wiring.
3. Details of control panel faces, including controls, instruments, and labeling. 4. Written description of sequence of operation. 5. Schedule of dampers including size, leakage, and flow characteristics. 6. Schedule of valves including leakage and flow characteristics. 7. Trunk cable schematic showing programmable control unit locations and trunk
data conductors. 8. Listing of connected data points, including connected control unit and input
device. 9. System graphics indicating monitored systems, data (connected and calculated)
point addresses, and operator notations. 10. System configuration showing peripheral devices, batteries, power supplies,
diagrams, modems, and interconnections.
C. ASHRAE BACnet Statement: PICS for each DDC system component (panel, zone controller, field devices, and operator workstation) proposed.
D. Samples: For each color required, of each type of thermostat cover.
Odor Control Phase I at Blue River/81000749 15900 Final Doc. 12/08/2015 Page No.-2 HVAC Instrumentation and Controls

E. Software and Firmware Operational Documentation: Include the following:
1. Software operating and upgrade manuals. 2. Program Software Backup: On a magnetic media or compact disc, complete with
data files. 3. Device address list. 4. Printout of software application and graphic screens. 5. Software license required by and installed for DDC workstations and control
systems.
F. Software Upgrade Kit: For Owner to use in modifying software to suit future power system revisions or monitoring and control revisions.
G. Field Test Reports: Indicate and interpret test results for compliance with performance requirements.
H. Maintenance Data: For systems to include in maintenance manuals specified in Division 1. Include the following:
1. Maintenance instructions and lists of spare parts for each type of control device and compressed-air station.
2. Interconnection wiring diagrams with identified and numbered system components and devices.
3. Keyboard illustrations and step-by-step procedures indexed for each operator function.
4. Inspection period, cleaning methods, cleaning materials recommended, and calibration tolerances.
5. Calibration records and list of set points.
I. Qualification Data: For firms and persons specified in "Quality Assurance" Article.
J. Project Record Documents: Record actual locations of control components, including control units, thermostats, and sensors. Revise Shop Drawings to reflect actual installation and operating sequences.
1.7 QUALITY ASSURANCE
A. Installer Qualifications: An experienced installer who is [an authorized representative] [a certified installer] [an approved installer] of the automatic control system manufacturer for both installation and maintenance of units required for this Project.
B. Manufacturer Qualifications: A firm experienced in manufacturing automatic temperature-control systems similar to those indicated for this Project and with a record of successful in-service performance.
C. Electrical Components, Devices, and Accessories: Listed and labeled as defined in NFPA 70, Article 100, by a testing agency acceptable to authorities having jurisdiction, and marked for intended use.
Odor Control Phase I at Blue River/81000749 15900 Final Doc. 12/08/2015 Page No.-3 HVAC Instrumentation and Controls

D. Comply with NFPA 90A, "Installation of Air Conditioning and Ventilation Systems."
E. Comply with ASHRAE 135 for DDC system control components.
F. Year-2000 Compliant: Computer hardware and software shall be capable of accurately processing, providing, and receiving date data from, into, and between the twentieth and twenty-first centuries, including leap-year calculations.
1.8 DELIVERY, STORAGE, AND HANDLING
A. Factory-Mounted Components: Where control devices specified in this Section are indicated to be factory mounted on equipment, arrange for shipping of control devices to unit manufacturer.
1.9 COORDINATION
A. Coordinate location of thermostats, humidistats, and other exposed control sensors with plans and room details before installation.
B. Coordinate equipment with Division 13 Section "Intrusion Detection" to achieve compatibility with equipment that interfaces with that system.
C. Coordinate equipment with Division 13 Section "Clock Control" to achieve compatibility with equipment that interfaces with that system.
D. Coordinate equipment with Division 13 Section "Lighting Controls" to achieve compatibility with equipment that interfaces with that system.
E. Coordinate equipment with Division 13 Section "Fire Alarm" to achieve compatibility with equipment that interfaces with that system.
F. Coordinate supply of conditioned electrical circuits for control units and operator workstation.
G. Coordinate equipment with Division 16 Section "Panelboards" to achieve compatibility with starter coils and annunciation devices.
H. Coordinate equipment with Division 16 Section "Motor-Control Centers" to achieve compatibility with motor starters and annunciation devices.
I. Coordinate size and location of concrete bases. Cast anchor-bolt inserts into bases. Concrete, reinforcement, and formwork requirements are specified in Division 3 Section "Cast-in-Place Concrete."
1.10 EXTRA MATERIALS
A. Furnish extra materials described below that match products installed and that are packaged with protective covering for storage and identified with labels describing contents.
Odor Control Phase I at Blue River/81000749 15900 Final Doc. 12/08/2015 Page No.-4 HVAC Instrumentation and Controls
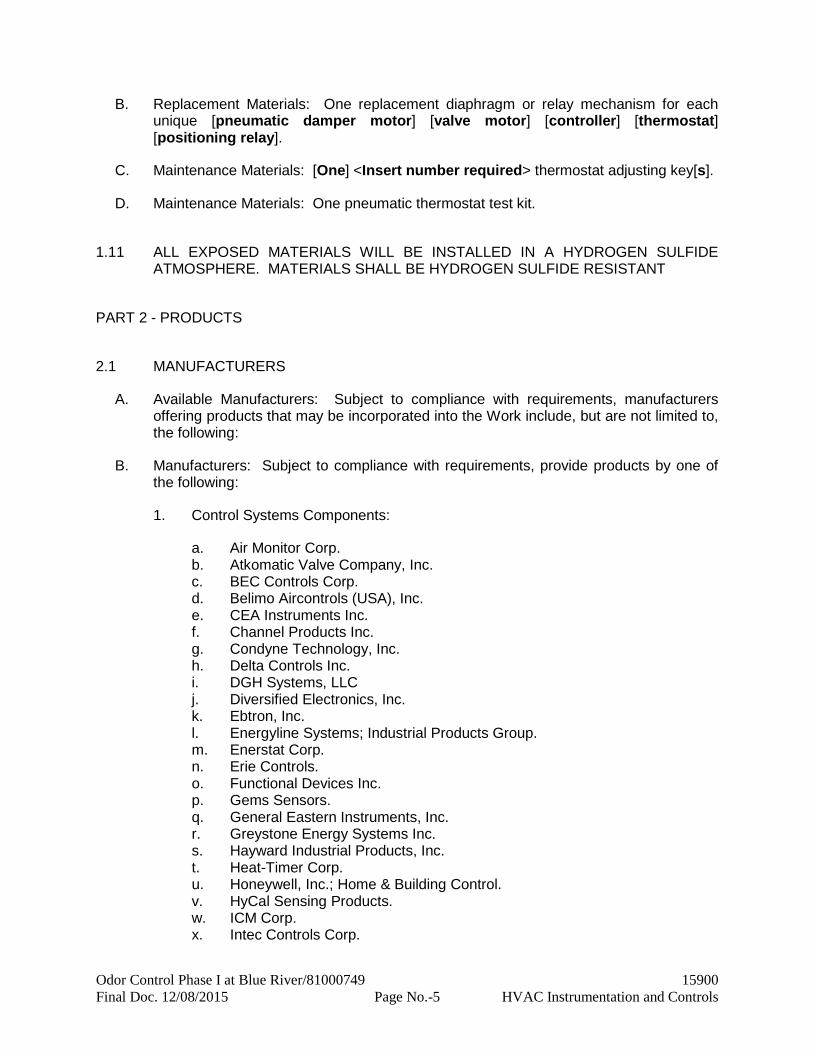
B. Replacement Materials: One replacement diaphragm or relay mechanism for each unique [pneumatic damper motor] [valve motor] [controller] [thermostat] [positioning relay].
C. Maintenance Materials: [One] <Insert number required> thermostat adjusting key[s].
D. Maintenance Materials: One pneumatic thermostat test kit.
1.11 ALL EXPOSED MATERIALS WILL BE INSTALLED IN A HYDROGEN SULFIDE ATMOSPHERE. MATERIALS SHALL BE HYDROGEN SULFIDE RESISTANT
PART 2 - PRODUCTS
2.1 MANUFACTURERS
A. Available Manufacturers: Subject to compliance with requirements, manufacturers offering products that may be incorporated into the Work include, but are not limited to, the following:
B. Manufacturers: Subject to compliance with requirements, provide products by one of the following:
1. Control Systems Components:
a. Air Monitor Corp. b. Atkomatic Valve Company, Inc. c. BEC Controls Corp. d. Belimo Aircontrols (USA), Inc. e. CEA Instruments Inc. f. Channel Products Inc. g. Condyne Technology, Inc. h. Delta Controls Inc. i. DGH Systems, LLC j. Diversified Electronics, Inc. k. Ebtron, Inc. l. Energyline Systems; Industrial Products Group. m. Enerstat Corp. n. Erie Controls. o. Functional Devices Inc. p. Gems Sensors. q. General Eastern Instruments, Inc. r. Greystone Energy Systems Inc. s. Hayward Industrial Products, Inc. t. Heat-Timer Corp. u. Honeywell, Inc.; Home & Building Control. v. HyCal Sensing Products. w. ICM Corp. x. Intec Controls Corp.
Odor Control Phase I at Blue River/81000749 15900 Final Doc. 12/08/2015 Page No.-5 HVAC Instrumentation and Controls

y. Johnson Controls, Inc.; Controls Group. z. KMC Controls/Kreuter Manufacturing Company. aa. Landis & Staefa, Inc. bb. Leslie Controls, Inc. cc. Magnatrol Valve Corporation. dd. Mamac Systems. ee. Paragon Electric Co., Inc. ff. Parker Hannifin Corp.; Skinner Valve Division. gg. RAM Electronics Corp. hh. RDF Corporation. ii. Sauter Controls Corporation. jj. Sensidyne, Inc. kk. Sherwood Products, Inc. ll. Spence Engineering Co., Inc. mm. SSAC Inc. nn. TCS/BASYS Controls; HVAC Sensors & Transducers Division. oo. Texas Instruments, Inc.; Commercial Sensors & Controls. pp. Thunder Scientific Corporation. qq. Time Mark Corporation. rr. Tour & Andersson Control, Inc.; HVAC Sensors & Transducers Div. ss. TSI Inc.; Environmental Measurements & Controls Div. tt. Uni-Line North America; Robertshaw Division. uu. Vaisala, Inc. vv. Valvcon Corporation. ww. Vent Products Co., Inc.
2. Electric, Electronic, and DDC Systems:
a. Alerton Technologies, Inc. b. Andover Controls Corp. c. Automated Logic Corporation. d. Auto-Matrix, Inc.; Auto-Flow Division. e. CSI Control Systems International, Inc. f. Danfoss Automatic Controls. g. Delta Controls Inc. h. EDA Controls Corp. i. Electronic Systems USA, Inc. j. G C Controls, Inc. k. Honeywell, Inc.; Home & Building Control. l. Impact Energy Controls Corp. m. Johnson Controls, Inc.; Controls Group. n. KMC Controls/Kreuter Manufacturing Company. o. Landis & Staefa, Inc. p. Luwa Bahnson Inc. q. McQuay International. r. Neles-Jamesbury. s. Pneuline Controls Co.; National Energy Controls Corp. t. Scientific-Atlanta, Inc.; Control Systems Div. u. Siebe Environmental Controls; Barber-Coleman/Robertshaw Products. v. Solidyne Corp. w. TCS/BASYS Controls; HVAC Sensors & Transducers Division.
Odor Control Phase I at Blue River/81000749 15900 Final Doc. 12/08/2015 Page No.-6 HVAC Instrumentation and Controls

x. Teletrol Systems Inc. y. Trane Co. (The); North American Commercial Group. z. Triangle MicroSystems, Inc. aa. Uni-Line North America; Robertshaw Division.
2.2 DDC EQUIPMENT
A. Operator Station: Microcomputer station with printer.
B. Workstation: IBM-compatible microcomputer with minimum configuration as follows:
1. Processor: Intel Pentium MMX, <Insert clock speed> MHz. 2. Random-Access Memory: 32 MB. 3. Cache Memory: 256 kB. 4. Graphics: Super video graphic adapter (SVGA), minimum 1280 x 1024 pixels,
2.0-MB EDO video memory. 5. Monitor: 17 inches (432 mm), noninterlaced, color, with maximum 0.28-mm dot
pitch. 6. Keyboard: QWERTY, 105 keys in ergonomic shape. 7. Floppy-Disk Drives: 1.44 MB. 8. Hard-Disk Drive: 4.0 GB. 9. CD-ROM Drive: 24x. 10. Mouse: Three button. 11. Modem: Autodial, internal, minimum 56 kBaud. 12. Tape Backup: [Internal, 56 kBps] [External Zip-drive, 100 MB] [Internal Zip-
drive, 100 MB] <Insert backup type>. 13. Operating System: Microsoft Windows 95 or later. 14. BACnet Conformance: Workstation shall support BACnet device and have
minimum capabilities defined in PICS for the following areas:
a. Network. b. Functional groups. c. Standard application services supported. d. Standard objects supported.
C. Printer: Dot-matrix type as follows:
1. Print Head: 24 pin, 360 x 360 dpi resolution. 2. Carriage: Wide, 132 characters per line of paper. 3. Paper Handling: Fan-fold paper, with 2 cartons containing minimum of 2500
sheets each. 4. Print Speed: Minimum of 120 characters per second.
D. Printer: Color, ink-jet type as follows:
1. Print Head: 1440 x 1440 dpi photoquality color resolution. 2. Internal Memory Buffer: 32 kB. 3. Paper Handling: Minimum of 100 sheets. 4. Print Speed: Minimum of 8 ppm in black and 4 ppm in color.
Odor Control Phase I at Blue River/81000749 15900 Final Doc. 12/08/2015 Page No.-7 HVAC Instrumentation and Controls

E. Application Software: Include the following:
1. Input/output capability from operator station. 2. Operator system access levels via software password. 3. Database creation and support. 4. Dynamic color graphic displays. 5. Alarm processing. 6. Event processing. 7. Automatic restart of field equipment on restoration of power. 8. Data collection. 9. Graphic development on workstation. 10. Maintenance management.
F. Control Units: Modular, comprising processor board with programmable, nonvolatile, random-access memory; local operator access and display panel; integral interface equipment; and backup power source.
1. Units monitor or control each input/output point; process information; execute commands from other control units, devices, and operator stations; and download from or upload to operator station.
2. Stand-alone mode control functions operate regardless of network status. Functions include the following:
a. Global communications. b. Discrete/digital, analog, and pulse input/output. c. Monitoring, controlling, or addressing data points. d. Testing and developing control algorithms without disrupting field hardware
and controlled environment.
3. Local operator interface provides for download from or upload to mobile operator station.
4. BACnet Conformance: Reside on BACnet LAN in Ethernet IEEE 802.3, Class 3, minimum, with routers between LAN and other panels, with at least one communication port, and have minimum capabilities defined in PICS for the following areas:
a. Network. b. Functional groups. c. Standard application services supported. d. Standard objects supported.
G. Local Control Units: Modular, comprising processor board with electronically programmable, nonvolatile, read-only memory; and backup power source.
1. Units monitor or control each input/output point; process information; and download from or upload to operator station.
2. Stand-alone mode control functions operate regardless of network status. Functions include the following:
a. Global communications. b. Discrete/digital, analog, and pulse input/output.
Odor Control Phase I at Blue River/81000749 15900 Final Doc. 12/08/2015 Page No.-8 HVAC Instrumentation and Controls

c. Monitoring, controlling, or addressing data points.
3. Local operator interface provides for download from or upload to mobile operator station.
4. BACnet Conformance: Reside on BACnet LAN using MS/TP, Class 2, minimum, with at least one communication port, and have minimum capabilities defined in PICS for the following areas:
a. Network. b. Functional groups. c. Standard application services supported. d. Standard objects supported.
H. LANs: Capacity for a minimum of 10 workstations connected to multiuser, multitasking environment with concurrent capability to access DDC network or control units.
1. Media: Ethernet, peer-to-peer CMA/CD, operating at 10 MBps. 2. Media: ARCNET (attached resources computer network), peer to peer,
operating at 2.5 MBps. 3. Media: MS/TP, EIA 485, operating at [9.6] [19.2] [38.4] [76.8] kBps.
I. Software: Update to latest version of software at Project completion. Include and implement the following capabilities from the control units:
1. Units of Measure: Inch-pound and SI (metric). 2. Load Control Programs: Demand limiting, duty cycling, automatic time
scheduling, start/stop time optimization, night setback/setup, DDC with fine tuning, and trend logging.
3. HVAC Control Programs: Optimal run time, supply-air reset, and enthalpy switchover.
4. Chiller Control Programs: Control function of condenser water reset, chilled-water reset, and equipment sequencing.
5. Programming Application Features: Include trend point, alarm messages, weekly scheduling, and interlocking.
2.3 CONTROL PANELS
A. Central (Master) Control Panels: Fully enclosed, steel-rack-type cabinet with locking doors or locking removable backs. Match finish of panels and provide multicolor graphic displays, schematically showing system being controlled.
B. Local Control Panels: Unitized cabinet with suitable brackets for wall or floor mounting, located adjacent to each system under automatic control. Provide common keying for all panels.
1. Fabricate panels of 0.06-inch- (1.5-mm-) thick, furniture-quality steel, or extruded-aluminum alloy, totally enclosed, with hinged doors and keyed lock and with manufacturer's standard shop-painted finish.
Odor Control Phase I at Blue River/81000749 15900 Final Doc. 12/08/2015 Page No.-9 HVAC Instrumentation and Controls

2. Panel-Mounted Equipment: Temperature and humidity controllers, relays, and automatic switches; except safety devices. Mount devices with adjustments accessible through front of panel.
3. Door-Mounted Equipment: Flush-mount (on hinged door) manual switches, including damper-positioning switches, changeover switches, thermometers, and gages.
4. Graphics: Color-coded graphic, laminated-plastic displays on doors, schematically showing system being controlled, with protective, clear plastic sheet bonded to entire door.
C. Alarm Panels: Indicating light for each alarm point, single horn, acknowledge switch, and test switch, mounted in hinged-cover enclosure.
1. Alarm Condition: Indicating light flashes and horn sounds. 2. Acknowledge Switch: Horn is silent and indicating light is steady. 3. Second Alarm: Horn sounds and indicating light is steady. 4. Alarm Condition Cleared: System is reset and indicating light is extinguished. 5. Contacts in alarm panel allow remote monitoring by independent alarm company.
2.4 ANALOG CONTROLLERS
A. Step Controllers: Six- or 10-stage type, with heavy-duty switching rated to handle loads and operated by electric motor.
B. Electric, Outdoor-Reset Controllers: Remote-bulb or bimetal rod-and-tube type, proportioning action with adjustable throttling range, adjustable set point, scale range minus 10 to plus 70 deg F (minus 23 to plus 21 deg C), and single- or double-pole contacts.
C. Electronic Controllers: Wheatstone-bridge-amplifier type, in steel enclosure with provision for remote-resistance readjustment. Identify adjustments on controllers, including proportional band and authority.
1. Single controllers can be integral with control motor if provided with accessible control readjustment potentiometer.
D. Fan-Speed Controllers: Solid-state model providing field-adjustable proportional control of motor speed from maximum to minimum of 55 percent and on-off action below minimum fan speed. Controller shall briefly apply full voltage, when motor is started, to rapidly bring motor up to minimum speed. Equip with filtered circuit to eliminate radio interference.
E. Receiver Controllers: Single- or multiple-input models with control-point adjustment, direct or reverse acting with mechanical set-point adjustment with locking device, proportional band adjustment, authority adjustment, and proportional control mode.
1. Remote-control-point adjustment shall be plus or minus 20 percent of sensor span, input signal of 3 to 13 psig (21 to 90 kPa).
2. Proportional band shall extend from 2 to 20 percent for 5 psig (34 kPa). 3. Authority shall be 20 to 200 percent.
Odor Control Phase I at Blue River/81000749 15900 Final Doc. 12/08/2015 Page No.-10 HVAC Instrumentation and Controls

4. Air-supply pressure of 18 psig (124 kPa), input signal of 3 to 15 psig (21 to 103 kPa), and output signal 0 to supply pressure.
5. Gages: [1-1/2 inches (38 mm)] [2-1/2 inches (64 mm)] [3-1/2 inches (89 mm)] in diameter, 2.5 percent wide-scale accuracy, and range to match transmitter input or output pressure.
2.5 TIME CLOCKS
A. Seven-day, programming-switch timer with synchronous-timing motor and seven-day dial; continuously charged, nickel-cadmium-battery-driven, eight-hour, power-failure carryover; multiple-switch trippers; minimum of two and maximum of eight signals per day with two normally open and two normally closed output contacts.
B. Solid-state, programmable time control with 4 separate programs; 24-hour battery carryover; individual on-off-auto switches for each program; 365-day calendar with 20 programmable holidays; choice of fail-safe operation for each program; and system fault alarm.
2.6 SENSORS
A. Electronic Sensors: Vibration and corrosion resistant; for wall, immersion, or duct mounting as required.
1. Thermistor temperature sensors as follows:
a. Accuracy: Plus or minus [0.5 deg F (0.3 deg C)] [0.36 deg F (0.2 deg C)] at calibration point.
b. Wire: Twisted, shielded-pair cable. c. Insertion Elements in Ducts: Single point, [8 inches (20 cm)] [18 inches
(46 cm)] long; use where not affected by temperature stratification or where ducts are smaller than 9 sq. ft. (1 sq. m).
d. Averaging Elements in Ducts: [36 inches (91 cm) long, flexible] [72 inches (183 cm) long, flexible] [18 inches (46 cm) long, rigid]; use where prone to temperature stratification or where ducts are larger than 9 sq. ft. (1 sq. m); length as required.
e. Insertion Elements for Liquids: Brass socket with minimum insertion length of 2-1/2 inches (64 mm).
f. Room Sensors: Match room thermostats, locking cover. g. Outside-Air Sensors: Watertight inlet fitting, shielded from direct sunlight. h. Room Security Sensors: Stainless-steel cover plate with insulated back
and security screws.
2. Resistance Temperature Detectors: Platinum.
a. Accuracy: Plus or minus 0.2 percent at calibration point. b. Wire: Twisted, shielded-pair cable. c. Insertion Elements in Ducts: Single point, [8 inches (20 cm)] [18 inches
(46 cm)] long; use where not affected by temperature stratification or where ducts are smaller than 9 sq. ft. (1 sq. m).
Odor Control Phase I at Blue River/81000749 15900 Final Doc. 12/08/2015 Page No.-11 HVAC Instrumentation and Controls

d. Averaging Elements in Ducts: [36 inches (91 cm) long, flexible] [72 inches (183 cm) long, flexible] [18 inches (46 cm) long, rigid]; use where prone to temperature stratification or where ducts are larger than 9 sq. ft. (1 sq. m); length as required.
e. Insertion Elements for Liquids: Brass socket with minimum insertion length of 2-1/2 inches (64 mm).
f. Room Sensors: Match room thermostats, locking cover. g. Outside-Air Sensors: Watertight inlet fitting, shielded from direct sunlight. h. Room Security Sensors: Stainless-steel cover plate with insulated back
and security screws.
3. Humidity Sensors: Bulk polymer sensor element.
a. Accuracy: 5 percent full range with linear output. b. Room Sensors: With locking cover matching room thermostats, span of 25
to 90 percent relative humidity. c. Duct and Outside-Air Sensors: With element guard and mounting plate,
range of 0 to 100 percent relative humidity.
4. Static-Pressure Transmitter: Nondirectional sensor with suitable range for expected input, and temperature compensated.
a. Accuracy: 2 percent of full scale with repeatability of 0.5 percent. b. Output: 4 to 20 mA. c. Building Static-Pressure Range: 0 to 0.25 inch wg (0 to 62 Pa). d. Duct Static-Pressure Range: 0 to 5 inches wg (0 to 1243 Pa).
5. Pressure Transmitters: Direct acting for gas, liquid, or steam service; range suitable for system; proportional output 4 to 20 mA.
B. Pneumatic Transmitters: Vibration and corrosion resistant.
1. Space-Temperature Sensors: Linear-output type, 50 to 100 deg F (10 to 38 deg C) range, with blank locking covers matching room thermostats.
2. Room Return-Air Temperature Sensors: Linear-output type with bimetal sensing element and corrosion-proof construction, 50 to 100 deg F (10 to 38 deg C) range, designed to be mounted in light troffers.
3. Duct-Mounted or Immersion-Type Temperature Sensors: Range as required for 3- to 15-psig (21- to 103-kPa) output signal.
4. Temperature Transmitters: Rigid-stem type with bimetal sensing elements, unless averaging is required, 3- to 15-psig (21- to 103-kPa) output signal.
a. Averaging-Element Sensors: Single- or multiple-unit capillary elements. b. Tamperproof Sensors: Corrosion-resistant construction, suitable for
mounting on vibrating surface with exposed capillary protected with temperature-compensated armor or protective tubing.
c. Pipe-Mounted Temperature-Sensing Elements: Rod-and-tube type, with separable wells filled with heat-conductive compound, mounting bracket.
d. Outdoors: Provide bulb shield with mounting bracket.
Odor Control Phase I at Blue River/81000749 15900 Final Doc. 12/08/2015 Page No.-12 HVAC Instrumentation and Controls
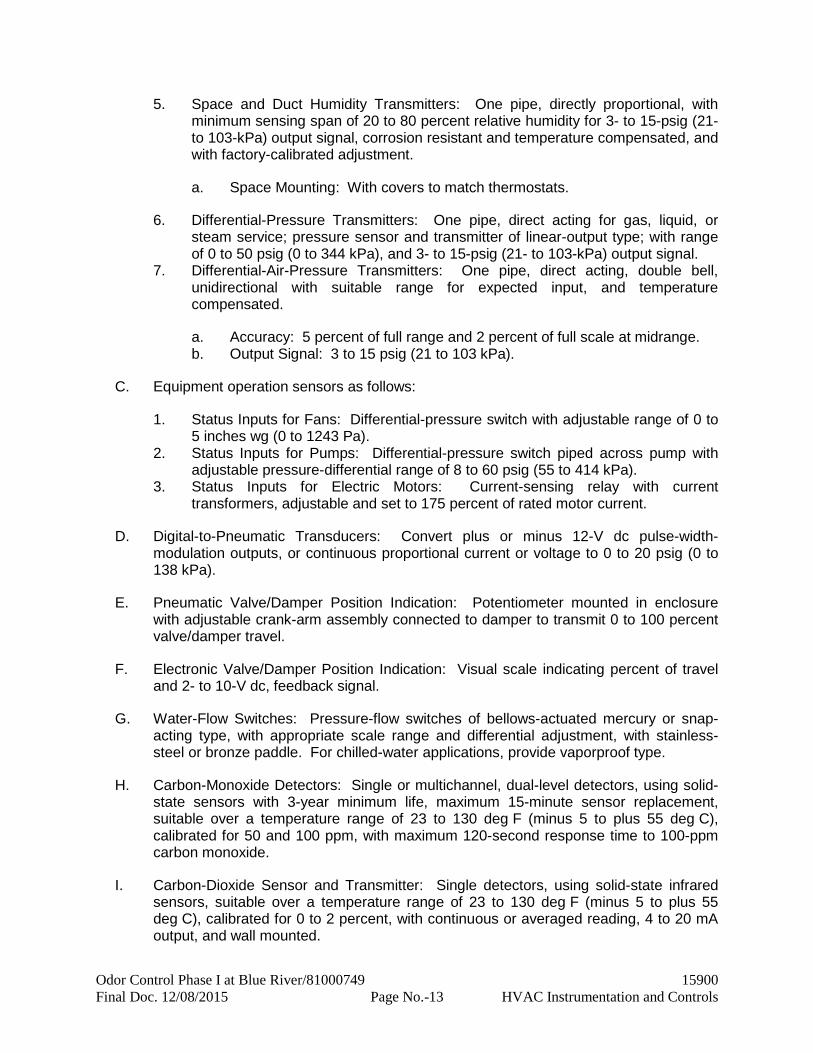
5. Space and Duct Humidity Transmitters: One pipe, directly proportional, with minimum sensing span of 20 to 80 percent relative humidity for 3- to 15-psig (21- to 103-kPa) output signal, corrosion resistant and temperature compensated, and with factory-calibrated adjustment.
a. Space Mounting: With covers to match thermostats.
6. Differential-Pressure Transmitters: One pipe, direct acting for gas, liquid, or steam service; pressure sensor and transmitter of linear-output type; with range of 0 to 50 psig (0 to 344 kPa), and 3- to 15-psig (21- to 103-kPa) output signal.
7. Differential-Air-Pressure Transmitters: One pipe, direct acting, double bell, unidirectional with suitable range for expected input, and temperature compensated.
a. Accuracy: 5 percent of full range and 2 percent of full scale at midrange. b. Output Signal: 3 to 15 psig (21 to 103 kPa).
C. Equipment operation sensors as follows:
1. Status Inputs for Fans: Differential-pressure switch with adjustable range of 0 to 5 inches wg (0 to 1243 Pa).
2. Status Inputs for Pumps: Differential-pressure switch piped across pump with adjustable pressure-differential range of 8 to 60 psig (55 to 414 kPa).
3. Status Inputs for Electric Motors: Current-sensing relay with current transformers, adjustable and set to 175 percent of rated motor current.
D. Digital-to-Pneumatic Transducers: Convert plus or minus 12-V dc pulse-width-modulation outputs, or continuous proportional current or voltage to 0 to 20 psig (0 to 138 kPa).
E. Pneumatic Valve/Damper Position Indication: Potentiometer mounted in enclosure with adjustable crank-arm assembly connected to damper to transmit 0 to 100 percent valve/damper travel.
F. Electronic Valve/Damper Position Indication: Visual scale indicating percent of travel and 2- to 10-V dc, feedback signal.
G. Water-Flow Switches: Pressure-flow switches of bellows-actuated mercury or snap-acting type, with appropriate scale range and differential adjustment, with stainless-steel or bronze paddle. For chilled-water applications, provide vaporproof type.
H. Carbon-Monoxide Detectors: Single or multichannel, dual-level detectors, using solid-state sensors with 3-year minimum life, maximum 15-minute sensor replacement, suitable over a temperature range of 23 to 130 deg F (minus 5 to plus 55 deg C), calibrated for 50 and 100 ppm, with maximum 120-second response time to 100-ppm carbon monoxide.
I. Carbon-Dioxide Sensor and Transmitter: Single detectors, using solid-state infrared sensors, suitable over a temperature range of 23 to 130 deg F (minus 5 to plus 55 deg C), calibrated for 0 to 2 percent, with continuous or averaged reading, 4 to 20 mA output, and wall mounted.
Odor Control Phase I at Blue River/81000749 15900 Final Doc. 12/08/2015 Page No.-13 HVAC Instrumentation and Controls

J. Oxygen Sensor and Transmitter: Single detectors, using solid-state zircon cell sensing, suitable over a temperature range of minus 32 to plus 1100 deg F (0 to 593 deg C), calibrated for 0 to 5 percent, with continuous or averaged reading, 4 to 20 mA output, and wall mounted.
K. Refrigerant Detectors: Dual-level detectors, using solid-state sensors, with alarm preset for 300 ppm, alarm indicator light, alarm silence light and button, alarm test light and button, and trouble light. Provide auxiliary relay preset for 150 ppm.
L. Occupancy Sensor: Passive infrared, with time delay, daylight sensor lockout, sensitivity control, and 180-degree field of view with vertical sensing adjustment, for flush mounting.
2.7 THERMOSTATS
A. Combination Thermostat and Fan Switches: Line-voltage thermostat with two-, three-, or four-position, push-button or lever-operated fan switch.
1. Label switches "FAN ON-OFF," "FAN HIGH-LOW-OFF," "FAN HIGH-MED-LOW-OFF." Provide unit for mounting on two-gang switch box.
B. Electric solid-state, microcomputer-based room thermostat with remote sensor.
1. Automatic switching from heating to cooling. 2. Preferential rate control to minimize overshoot and deviation from set point. 3. Set up for four separate temperatures per day. 4. Instant override of set point for continuous or timed period from 1 hour to 31
days. 5. Short-cycle protection. 6. Programming based on [weekdays, Saturdays and Sundays] [every day of
week]. 7. Selection features include deg F or deg C display, 12- or 24-hour clock, keyboard
disable, remote sensor, fan on-auto. 8. Battery replacement without program loss. 9. Thermostat display features include the following:
a. Time of day. b. Actual room temperature. c. Programmed temperature. d. Programmed time. e. Duration of timed override. f. Day of week. g. System mode indications include "heating," "off," "fan auto," and "fan on."
C. Low-Voltage, On-Off Thermostats: NEMA DC 3, 24-V, bimetal-operated, mercury-switch type, with adjustable or fixed anticipation heater.
D. Line-Voltage, On-Off Thermostats: Bimetal-actuated, open contact or bellows-actuated, enclosed, snap-switch type, or equivalent solid-state type, with heat anticipator, integral manual on-off-auto selector switch.
Odor Control Phase I at Blue River/81000749 15900 Final Doc. 12/08/2015 Page No.-14 HVAC Instrumentation and Controls

1. Equip thermostats, which control electric heating loads directly, with off position on dial wired to break ungrounded conductors.
2. Dead Band: Maximum 2 deg F (1 deg C).
E. Remote-Bulb Thermostats: On-off or modulating type, liquid filled to compensate for changes in ambient temperature, with copper capillary and bulb, unless otherwise indicated.
1. Bulbs in water lines with separate wells of same material as bulb. 2. Bulbs in air ducts with flanges and shields. 3. Averaging Elements: Copper tubing with either single- or multiple-unit elements,
extended to cover full width of duct or unit, adequately supported. 4. Scale settings and differential settings are clearly visible and adjustable from
front of instrument. 5. On-Off Thermostat: With precision snap switches, with electrical ratings required
by application. 6. Modulating Thermostats: Construct so complete potentiometer coil and wiper
assembly is removable for inspection or replacement without disturbing calibration of instrument.
F. Fire-Protection Thermostats: UL listed with fixed or adjustable settings to operate at not less than 75 deg F (24 deg C) above normal maximum operating temperature, with the following:
1. Reset: [Manual] [Automatic with control circuit arranged to require manual reset at central control panel, with pilot light and reset switch on panel labeled to indicate operation].
G. Pneumatic Room Thermostats: [One] [Two] [Three] pipe[s], fully proportional with adjustable throttling range and tamperproof locking settings, direct or reverse acting as required. Factory calibrated at 2.5 psig/deg F (17.2 kPa/deg C).
1. Factory Calibration: 2.5 psig/deg F (17.2 kPa/deg C). 2. Range: 45 to 85 deg F (7.2 to 29.4 deg C). 3. Sensitivity Adjustment Range: 1 to 4 psig/deg F (7 to 27.6 kPa/deg C). 4. Dual-Temperature Thermostats: Automatic changeover from normal setting to
lower unoccupied setting, with manual-reset lever to permit return to normal temperatures during unoccupied cycles, with automatic reset to normal during next cycle of operation.
5. Limits: Field adjustable, to limit setting cooling set point below 75 deg F (24 deg C), and heating set point above 75 deg F (24 deg C).
H. Room Thermostat Cover Construction: Manufacturer's standard locking covers.
1. Set-Point Adjustment: [Concealed] [Exposed]. 2. Set-Point Indication: [Concealed] [Keyed] [Exposed]. 3. Thermometer: [Concealed] [Exposed] [Red-reading glass] [Spiral bimetal]. 4. Color: <Insert color from manufacturer's standard colors>. 5. Orientation: [Vertical] [Horizontal].
I. Room thermostat accessories include the following:
Odor Control Phase I at Blue River/81000749 15900 Final Doc. 12/08/2015 Page No.-15 HVAC Instrumentation and Controls
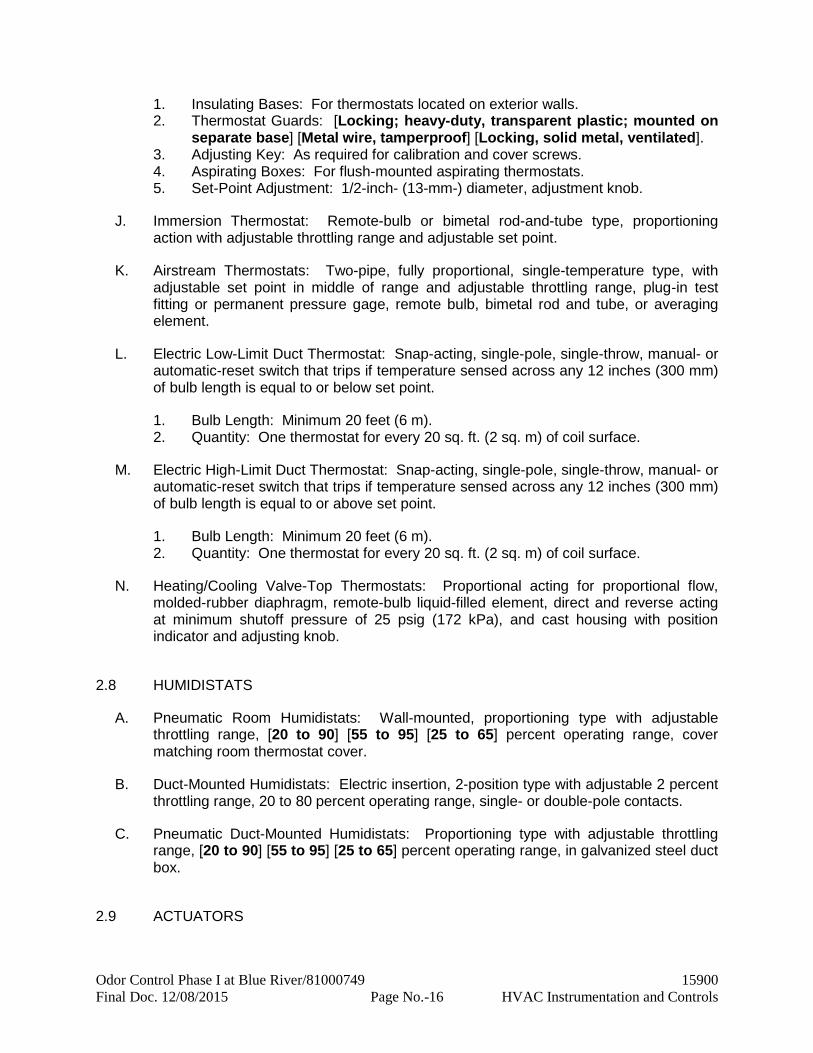
1. Insulating Bases: For thermostats located on exterior walls. 2. Thermostat Guards: [Locking; heavy-duty, transparent plastic; mounted on
separate base] [Metal wire, tamperproof] [Locking, solid metal, ventilated]. 3. Adjusting Key: As required for calibration and cover screws. 4. Aspirating Boxes: For flush-mounted aspirating thermostats. 5. Set-Point Adjustment: 1/2-inch- (13-mm-) diameter, adjustment knob.
J. Immersion Thermostat: Remote-bulb or bimetal rod-and-tube type, proportioning action with adjustable throttling range and adjustable set point.
K. Airstream Thermostats: Two-pipe, fully proportional, single-temperature type, with adjustable set point in middle of range and adjustable throttling range, plug-in test fitting or permanent pressure gage, remote bulb, bimetal rod and tube, or averaging element.
L. Electric Low-Limit Duct Thermostat: Snap-acting, single-pole, single-throw, manual- or automatic-reset switch that trips if temperature sensed across any 12 inches (300 mm) of bulb length is equal to or below set point.
1. Bulb Length: Minimum 20 feet (6 m). 2. Quantity: One thermostat for every 20 sq. ft. (2 sq. m) of coil surface.
M. Electric High-Limit Duct Thermostat: Snap-acting, single-pole, single-throw, manual- or automatic-reset switch that trips if temperature sensed across any 12 inches (300 mm) of bulb length is equal to or above set point.
1. Bulb Length: Minimum 20 feet (6 m). 2. Quantity: One thermostat for every 20 sq. ft. (2 sq. m) of coil surface.
N. Heating/Cooling Valve-Top Thermostats: Proportional acting for proportional flow, molded-rubber diaphragm, remote-bulb liquid-filled element, direct and reverse acting at minimum shutoff pressure of 25 psig (172 kPa), and cast housing with position indicator and adjusting knob.
2.8 HUMIDISTATS
A. Pneumatic Room Humidistats: Wall-mounted, proportioning type with adjustable throttling range, [20 to 90] [55 to 95] [25 to 65] percent operating range, cover matching room thermostat cover.
B. Duct-Mounted Humidistats: Electric insertion, 2-position type with adjustable 2 percent throttling range, 20 to 80 percent operating range, single- or double-pole contacts.
C. Pneumatic Duct-Mounted Humidistats: Proportioning type with adjustable throttling range, [20 to 90] [55 to 95] [25 to 65] percent operating range, in galvanized steel duct box.
2.9 ACTUATORS
Odor Control Phase I at Blue River/81000749 15900 Final Doc. 12/08/2015 Page No.-16 HVAC Instrumentation and Controls

A. Electric Motors: Size to operate with sufficient reserve power to provide smooth modulating action or two-position action.
1. Permanent Split-Capacitor or Shaded-Pole Type: Gear trains completely oil immersed and sealed. Equip spring-return motors with integral spiral-spring mechanism in housings designed for easy removal for service or adjustment of limit switches, auxiliary switches, or feedback potentiometer.
2. Nonspring-Return Motors for Valves Larger Than NPS 2-1/2 (DN 65): Size for running torque of 150 in. x lbf (16.9 N x m) and breakaway torque of 300 in. x lbf (33.9 N x m).
3. Spring-Return Motors for Valves Larger Than NPS 2-1/2 (DN 65): Size for running and breakaway torque of 150 in. x lbf (16.9 N x m).
4. Nonspring-Return Motors for Dampers Larger Than 25 Sq. Ft. (2.3 sq. m): Size for running torque of 150 in. x lbf (16.9 N x m) and breakaway torque of 300 in. x lbf (33.9 N x m).
5. Spring-Return Motors for Dampers Larger Than 25 Sq. Ft. (2.3 sq. m): Size for running and breakaway torque of 150 in. x lbf (16.9 N x m).
B. Electronic [Damper] [Large-Valve] Actuators: Direct-coupled type designed for minimum 60,000 full-stroke cycles at rated torque.
1. Valves: Size for torque required for valve close-off at maximum pump differential pressure.
2. Dampers: Size for running torque calculated as follows:
a. Parallel-Blade Damper with Edge Seals: 7 inch-pounds/sq. ft. (86.8 kg-cm/sq. m) of damper.
b. Opposed-Blade Damper with Edge Seals: 5 inch-pounds/sq. ft. (62 kg-cm/sq. m) of damper.
c. Parallel-Blade Damper without Edge Seals: 4 inch-pounds/sq. ft (49.6 kg-cm/sq. m) of damper.
d. Opposed-Blade Damper without Edge Seals: 3 inch-pounds/sq. ft. (37.2 kg-cm/sq. m) of damper.
e. Dampers with 2 to 3 Inches wg (500 to 750 Pa) of Pressure Drop or Face Velocities of 1000 to 2500 FPM (5 to 13 m/s): Multiply the minimum full-stroke cycles above by 1.5.
f. Dampers with 3 to 4 Inches wg (750 to 1000 Pa) of Pressure Drop or Face Velocities of 2500 to 3000 FPM (13 to 15 m/s): Multiply the minimum full-stroke cycles above by 2.0.
3. Coupling: V-bolt and V-shaped, toothed cradle. 4. Overload Protection: Electronic overload or digital rotation-sensing circuitry. 5. Fail-Safe Operation: Mechanical, spring-return mechanism. Provide external,
manual gear release on non-spring-return actuators. 6. Power Requirements (Two-Position Spring Return): [24] [120] [230]-V ac. 7. Power Requirements (Modulating): Maximum 10 VA at 24-V ac or 8 W at 24-V
dc. 8. Proportional Signal: 2- to 10-V dc or 4 to 20 mA, and 2- to 10-V dc position
feedback signal. 9. Temperature Rating: [Minus 22 to plus 122 deg F (minus 30 to plus 50
deg C)] [40 to 104 deg F (4 to 40 deg C)].
Odor Control Phase I at Blue River/81000749 15900 Final Doc. 12/08/2015 Page No.-17 HVAC Instrumentation and Controls

10. Temperature Rating (Smoke Dampers): Minus 22 to plus 250 deg F (minus 30 to plus 121 deg C).
11. Run Time: [12 seconds open, 5 seconds closed] [30 seconds] [60 seconds] [120 seconds].
C. Pneumatic Valve Operators: Rolling-diaphragm, spring-loaded, piston type with spring range as required and start-point adjustment [and positioning relay]. Operator shall maintain full shutoff at maximum pump differential pressure.
D. Pneumatic Damper Operators: Rolling-diaphragm, piston type with adjustable stops and spring return, sized to operate with sufficient reserve power to provide smooth modulating action or two-position action. Where actuators operate in sequence, provide pilot positioners.
1. Pilot Positioners: Start point adjustable from 2 to 12 psig (14 to 83 kPa), and operating span adjustable from 5 to 13 psig (35 to 90 kPa).
2. Inlet-Vane Operators: High pressure with pilot positioners.
2.10 CONTROL VALVES
A. Control Valves: Factory fabricated, of type, body material, and pressure class based on maximum pressure and temperature rating of piping system, unless otherwise indicated.
B. Globe Valves NPS 2 (DN 50) and Smaller: Bronze body, bronze trim, rising stem, renewable composition disc, and screwed ends with backseating capacity repackable under pressure.
C. Globe Valves NPS 2-1/2 (DN 65) and Larger: Iron body, bronze trim, rising stem, plug-type disc, flanged ends, and renewable seat and disc.
D. Hydronic system globe valves shall have the following characteristics:
1. Rating: Class 125 for service at 125 psig (862 kPa) and 250 deg F (121 deg C) operating conditions.
2. Internal Construction: Replaceable plugs and seats of stainless steel or brass.
a. Single-Seated Valves: Cage trim provides seating and guiding surfaces for plug on top and bottom of guided plugs.
b. Double-Seated Valves: Balanced plug; cage trim provides seating and guiding surfaces for plugs on top and bottom of guided plugs.
3. Sizing: 3-psig (21-kPa) maximum pressure drop at design flow rate. 4. Flow Characteristics: Two-way valves shall have equal percentage
characteristics; three-way valves shall have linear characteristics. Operators shall close valves against pump shutoff head.
E. Steam system globe valves shall have the following characteristics:
Odor Control Phase I at Blue River/81000749 15900 Final Doc. 12/08/2015 Page No.-18 HVAC Instrumentation and Controls

1. Rating: Class 125 for service at 125 psig (862 kPa) and 250 deg F (121 deg C) operating conditions.
2. Internal Construction: Replaceable plugs and seats of stainless steel.
a. Single-Seated Valves: Cage trim provides seating and guiding surfaces for plug on top and bottom of guided plugs.
b. Double-Seated Valves: Balanced plug; cage trim provides seating and guiding surfaces for plugs on top and bottom of guided plugs.
3. Sizing: 10-psig (69-kPa) inlet pressure and 5-psig (35-kPa) pressure drop. 4. Sizing: Pressure drop across steam valve at a maximum flow of 80 percent of
inlet pressure for low-pressure systems and 42 percent for high-pressure systems.
5. Flow Characteristics: Modified linear characteristics.
F. Butterfly Valves: 200-psig (1380-kPa), 150-psig (1035-kPa) maximum pressure differential, ASTM A 126 cast-iron or ASTM A 536 ductile-iron body and bonnet, extended neck, stainless-steel stem, field-replaceable EPDM or Buna N sleeve and stem seals.
1. Body Style: [Wafer] [Lug] [Grooved]. 2. Disc Type: [Nickel-plated ductile iron] [Aluminum bronze] [Elastomer-coated
ductile iron] [Epoxy-coated ductile iron]. 3. Sizing: 1-psig (7-kPa) maximum pressure drop at design flow rate.
G. Terminal Unit Control Valves: Bronze body, bronze trim, two- or three-port as indicated, replaceable plugs and seats, union and threaded ends.
1. Rating: Class 125 for service at 125 psig (862 kPa) and 250 deg F (121 deg C) operating conditions.
2. Sizing: 3-psig (21-kPa) maximum pressure drop at design flow rate, to close against pump shutoff head.
3. Flow Characteristics: Two-way valves shall have equal percentage characteristics; three-way valves shall have linear characteristics.
2.11 DAMPERS
A. Dampers: AMCA-rated, [parallel] [opposed]-blade design; 0.1084-inch (2.8-mm) minimum, galvanized-steel frames with holes for duct mounting; damper blades shall not be less than 0.0635-inch (1.6-mm) galvanized steel with maximum blade width of 8 inches (203 mm).
1. Blades shall be secured to 1/2-inch- (13-mm-) diameter, zinc-plated axles using zinc-plated hardware, with nylon blade bearings, blade-linkage hardware of zinc-plated steel and brass, ends sealed against spring-stainless-steel blade bearings, and thrust bearings at each end of every blade.
2. Operating Temperature Range: From minus 40 to plus 200 deg F (minus 40 to plus 93 deg C).
3. For standard applications, include optional closed-cell neoprene edging.
Odor Control Phase I at Blue River/81000749 15900 Final Doc. 12/08/2015 Page No.-19 HVAC Instrumentation and Controls

4. For low-leakage applications, use parallel- or opposed-blade design with inflatable seal blade edging, or replaceable rubber seals, rated for leakage at less than 10 cfm per sq. ft. (51 L/s per sq. m) of damper area, at differential pressure of 4 inches wg (995 Pa) when damper is being held by torque of 50 in. x lbf (5.6 N x m); when tested according to AMCA 500D.
2.12 AIR SUPPLY
A. Control and Instrumentation Tubing: Type K, seamless copper tubing complying with ASTM B 88 (ASTM B 88M) or Type ACR, copper tubing complying with ASTM B 280.
1. Fittings: Cast-bronze solder fittings complying with ASME B16.18; or wrought-copper solder fittings complying with ASME B16.22, except forged-brass compression-type fittings at connections to equipment.
2. Joining Method: Soldered or brazed.
B. Control and Instrumentation Tubing: Virgin-polyethylene, flame-retardant, nonmetallic tubing complying with ASTM D 2737 with flame-retardant harness for multiple tubing.
1. Fittings: Compression or push-on polyethylene fittings.
C. Tank: ASME storage tank with drain test cock, automatic moisture removal trap, tank relief valve, and rubber-cork vibration isolation mounting pads.
D. Duplex Air Compressor: Capacity to supply compressed air to temperature-control system.
1. Adjustable electric contacts pressure control, set to start and stop both compressors at different pressures.
2. Electrical alternation set with motor starters and disconnect to operate compressors alternately or on time schedule.
E. Simplex Air Compressor: Tank-mounted compressor with capacity to supply compressed air to temperature-control system, with starter and disconnect.
1. Adjustable electric contacts pressure control, set to start and stop compressor.
F. Compressor Type: [Reciprocating] [Scroll].
G. Size compressor and tank to operate compressor not more than [20] [30] minutes during a 60-minute period.
H. Compressor Accessories: Low-resistance intake-air filter, and belt guards.
I. System Accessories: Air filter rated for 97 percent efficiency at rated airflow, and combination filter/pressure-reducing station or separate filter and pressure-reducing station.
J. Refrigerated Air Dryer: Self-contained, refrigerated air dryer complete with heat exchangers, moisture separator, internal wiring and piping, and with manual bypass valve.
Odor Control Phase I at Blue River/81000749 15900 Final Doc. 12/08/2015 Page No.-20 HVAC Instrumentation and Controls

1. Heat Exchangers: Air-to-refrigerant coils with centrifugal-type moisture separator and automatic trap assembly.
2. Refrigeration Unit: Hermetically sealed, operating to maintain dew point of 13 deg F (minus 11 deg C) at 20 psig (138 kPa), housed in steel cabinet with access door and panel.
3. Accessories: Air-inlet temperature gage, air-inlet pressure gage, on-off switch, high-temperature light, power-on light, refrigerant gage on back, air-outlet temperature gage, air-outlet pressure gage, and with contacts for remote indication of power status and high-temperature alarm.
K. Desiccant Dryer: Obtains dew point in pneumatic air piping between compressor and tank at least 15 deg F (minus 9 deg C) below inlet-air dew point at design conditions.
L. Pressure Gages: Black letters on white background, 2-1/2-inch (64-mm) diameter, flush or surface mounted, with front calibration screw to match sensor, in appropriate units.
M. Instrument Pressure Gages: Black letters on white background, 1-1/2-inch (38-mm) diameter, stem mounted, with suitable dial range.
N. Diaphragm Control and Instrument Valves: 1/4-inch (6-mm) forged-brass body with reinforced polytetrafluoroethylene diaphragm, stainless-steel spring, and color-coded phenolic handle.
O. Gage Cocks: Tee or level handle, bronze, rated for 125 psig (862 kPa).
P. Relays: For summing, reversing, amplifying, highest or lowest pressure selection, with adjustable input/output ratio.
Q. Switches: With indicating plates, accessible adjustment, calibrated and marked.
R. Pressure Regulators: Zinc or aluminum castings with elastomeric diaphragm, balanced construction to automatically prevent pressure build-up, and producing flat reduced-pressure curve.
S. Particle Filters: Zinc or aluminum castings with 97 percent filtration efficiency at rated airflow, quick-disconnect service devices, and aluminum or plastic bowl with metal guard and manual drain cock.
T. Combination Filter/Regulators: Zinc or aluminum castings with elastomeric diaphragm, balanced construction to automatically prevent pressure build-up, and producing flat reduced-pressure curve; with threaded pipe connections, quick-disconnect service devices, and aluminum or plastic bowl with metal guard and manual drain cock.
U. Airborne Oil Filter: Filtration efficiency of 99.9 percent for particles of 0.025 micrometer or larger particles of airborne lubricating oil.
V. Pressure Relief Valves: ASME rated and labeled.
1. High Pressure: Size for installed capacity.
Odor Control Phase I at Blue River/81000749 15900 Final Doc. 12/08/2015 Page No.-21 HVAC Instrumentation and Controls

2. Low Pressure: Size for installed capacity of pressure regulators and set at 20 percent above low pressure.
W. Pressure-Reducing Stations: Two parallel pressure regulators.
2.13 CONTROL CABLE
A. Electronic and Fiber-Optic Cable for Control Wiring: As specified in Division 16 Section "Control/Signal Transmission Media."
PART 3 - EXECUTION
3.1 EXAMINATION
A. Verify that conditioned power supply is available to control units and operator workstation.
B. Verify that duct-, pipe-, and equipment-mounted devices and wiring and pneumatic piping are installed before proceeding with installation.
3.2 INSTALLATION
A. Install equipment level and plumb.
B. Install software in control units and operator workstation. Implement all features of programs to specified requirements and as appropriate to sequence of operation.
C. Connect and configure equipment and software to achieve sequence of operation specified.
D. Mount compressor and tank unit on [rubber-in-shear vibration isolation] [spring vibration isolators with 1-inch (25 mm) static deflection] [restrained spring vibration isolators with 1-inch (25-mm) static deflection] according to Division 15 Section "Mechanical Vibration Controls and Seismic Restraints." Isolate air supply with wire-braid-reinforced rubber hose. Secure and anchor according to manufacturer's written instructions and seismic control requirements.
1. Pipe manual and automatic drains to nearest floor drain. 2. Supply instrument air from compressor units through filter, pressure-reducing
valve, and pressure relief valve, with pressure gages and shutoff and bypass valves.
E. Verify location of thermostats, humidistats, and other exposed control sensors with plans and room details before installation. Locate all 60 inches (1524 mm) above the floor.
1. Install averaging elements in ducts and plenums in crossing or zigzag pattern.
Odor Control Phase I at Blue River/81000749 15900 Final Doc. 12/08/2015 Page No.-22 HVAC Instrumentation and Controls

F. Install guards on thermostats in the following locations:
1. Entrances. 2. Public areas. 3. Where indicated.
G. Install automatic dampers according to Division 15 Section "Duct Accessories."
H. Install damper motors on outside of duct in warm areas, not in locations exposed to outdoor temperatures.
I. Install labels and nameplates to identify control components according to Division 15 Section "Basic Mechanical Materials and Methods."
J. Install labels and nameplates to identify control components according to Division 15 Section "Mechanical Identification."
K. Install hydronic instrument wells, valves, and other accessories according to Division 15 Section "Hydronic Piping."
L. Install steam and condensate instrument wells, valves, and other accessories according to Division 15 Section "Steam and Condensate Piping."
M. Install refrigerant instrument wells, valves, and other accessories according to Division 15 Section "Refrigerant Piping."
N. Install duct volume-control dampers according to Division 15 Sections specifying air ducts.
O. Install electronic and fiber-optic cables according to Division 16 Section "Control/Signal Transmission Media."
3.3 PNEUMATIC PIPING INSTALLATION
A. Install piping in mechanical equipment rooms inside mechanical equipment enclosures, in pipe chases, or suspended ceilings with easy access.
1. Install copper tubing with maximum unsupported length of 36 inches (914 mm), for tubing exposed to view.
2. Install polyethylene tubing in metallic raceways or electrical metallic tubing. Electrical metallic tubing materials and installation requirements are specified in Division 16 Section "Raceways and Boxes."
B. Install terminal single-line connections, less than 18 inches (450 mm) in length, with copper or polyethylene tubing run inside flexible steel protection.
C. In concealed locations, such as pipe chases and suspended ceilings with easy access, install [copper] [polyethylene bundled and sheathed] [polyethylene tubing in electrical metallic] tubing. Electrical metallic tubing materials and installation requirements are specified in Division 16 Section "Raceways and Boxes."
Odor Control Phase I at Blue River/81000749 15900 Final Doc. 12/08/2015 Page No.-23 HVAC Instrumentation and Controls

D. In concrete slabs, furred walls, or ceilings with no access, install copper or polyethylene tubing in electrical metallic tubing or vinyl-jacketed polyethylene tubing.
1. Protect embedded-copper and vinyl-jacketed polyethylene tubing with electrical metallic tubing extending 6 inches (150 mm) above finished slab and 6 inches (150 mm) into slab. Pressure test tubing before and after pour for leak and pinch.
2. Install polyethylene tubing in electrical metallic tubing extending 6 inches (150 mm) above floor line; pull tubing into electrical metallic tubing after pour.
E. Purge tubing with dry, oil-free compressed air before connecting control instruments.
1. Bridge cabinets and doors with flexible connections fastened along hinge side; protect against abrasion. Tie and support tubing.
F. Number-code or color-code control air piping for future identification and service of control system, except local individual room control tubing.
G. Pressure Gages or Test Plugs: Install on branch lines at each receiver controller and on signal lines at each transmitter, except individual room controllers.
3.4 ELECTRICAL WIRING AND CONNECTION INSTALLATION
A. Install raceways, boxes, and cabinets according to Division 16 Section "Raceways and Boxes."
B. Install building wire and cable according to Division 16 Section "Conductors and Cables."
C. Install signal and communication cable according to Division 16 Section "Control/Signal Transmission Media."
1. Conceal cable, except in mechanical rooms and areas where other conduit and piping are exposed.
2. Install exposed cable in raceway. 3. Install concealed cable in raceway. 4. Bundle and harness multiconductor instrument cable in place of single cables
where several cables follow a common path. 5. Fasten flexible conductors, bridging cabinets and doors, along hinge side; protect
against abrasion. Tie and support conductors. 6. Number-code or color-code conductors for future identification and service of
control system, except local individual room control cables.
D. Connect manual-reset limit controls independent of manual-control switch positions. Automatic duct heater resets may be connected in interlock circuit of power controllers.
E. Connect hand-off-auto selector switches to override automatic interlock controls when switch is in hand position.
Odor Control Phase I at Blue River/81000749 15900 Final Doc. 12/08/2015 Page No.-24 HVAC Instrumentation and Controls

3.5 CONNECTIONS
A. Piping installation requirements are specified in other Division 15 Sections. Drawings indicate general arrangement of piping, fittings, and specialties.
1. Install piping adjacent to machine to allow service and maintenance.
B. Ground equipment.
1. Tighten electrical connectors and terminals according to manufacturer's published torque-tightening values. If manufacturer's torque values are not indicated, use those specified in UL 486A and UL 486B.
3.6 FIELD QUALITY CONTROL
A. Manufacturer's Field Service: Engage a factory-authorized service representative to inspect field-assembled components and equipment installation, including piping and electrical connections. Report results in writing.
1. Leak Test: After installation, charge system and test for leaks. Repair leaks and retest until no leaks exist.
2. Operational Test: After electrical circuitry has been energized, start units to confirm proper unit operation. Remove malfunctioning units, replace with new units, and retest.
3. Test and adjust controls and safeties. Replace damaged and malfunctioning controls and equipment, and retest.
4. Pressure test control air piping at 30 psig (207 kPa) or 1.5 times the operating pressure for 24 hours, with maximum 5-psig (35-kPa) loss.
5. Pressure test high-pressure control air piping at 150 psig (1034 kPa) and low-pressure control air piping at 30 psig (207 kPa) for 2 hours, with maximum 1-psig (7-kPa) loss.
6. Calibration test [pneumatic] [electronic] controllers by disconnecting input sensors and stimulating operation with compatible signal generator.
B. Engage a factory-authorized service representative to perform startup service.
C. Replace damaged or malfunctioning controls and equipment.
1. Start, test, and adjust control systems. 2. Demonstrate compliance with requirements, including calibration and testing, and
control sequences. 3. Adjust, calibrate, and fine tune circuits and equipment to achieve sequence of
operation specified.
D. Verify DDC as follows:
1. Verify software including automatic restart, control sequences, scheduling, reset controls, and occupied/unoccupied cycles.
2. Verify operation of operator workstation. 3. Verify local control units including self-diagnostics.
Odor Control Phase I at Blue River/81000749 15900 Final Doc. 12/08/2015 Page No.-25 HVAC Instrumentation and Controls

3.7 DEMONSTRATION
A. Engage a factory-authorized service representative to train Owner's maintenance personnel to adjust, operate, and maintain control systems and components.
1. Train Owner's maintenance personnel on procedures and schedules for starting and stopping, troubleshooting, servicing, and maintaining equipment and schedules.
2. Provide operator training on data display, alarm and status descriptors, requesting data, executing commands, calibrating and adjusting devices, resetting default values, and requesting logs. Include a minimum of 40 hours' dedicated instructor time on-site.
3. Review data in maintenance manuals. Refer to Division 1 Section "Contract Closeout."
4. Review data in maintenance manuals. Refer to Division 1 Section "Operation and Maintenance Data."
5. Schedule training with Owner, through Architect, with at least seven days' advance notice.
3.8 ON-SITE ASSISTANCE
A. Occupancy Adjustments: Within one year of date of Substantial Completion, provide up to three Project site visits, when requested by Owner, to adjust and calibrate components and to assist Owner's personnel in making program changes and in adjusting sensors and controls to suit actual conditions.
END OF SECTION 15900
Odor Control Phase I at Blue River/81000749 15900 Final Doc. 12/08/2015 Page No.-26 HVAC Instrumentation and Controls

SECTION 15990
TESTING, ADJUSTING, AND BALANCING
PART 1 - GENERAL
1.1 RELATED DOCUMENTS
A. Drawings and general provisions of the Contract, including General and Supplementary Conditions and Division 1 Specification Sections, apply to this Section.
1.2 SUMMARY
A. This Section includes testing, adjusting, and balancing HVAC systems to produce design objectives, including the following:
1. Balancing airflow and water flow within distribution systems, including submains, branches, and terminals, to indicated quantities according to specified tolerances.
2. Adjusting total HVAC systems to provide indicated quantities. 3. Measuring electrical performance of HVAC equipment. 4. Setting quantitative performance of HVAC equipment. 5. Verifying that automatic control devices are functioning properly. 6. Measuring sound and vibration. 7. Reporting results of the activities and procedures specified in this Section.
B. Related Sections include the following:
1. Testing and adjusting requirements unique to particular systems and equipment are included in the Sections that specify those systems and equipment.
2. Field quality-control testing to verify that workmanship quality for system and equipment installation is specified in system and equipment Sections.
1.3 DEFINITIONS
A. Adjust: To regulate fluid flow rate and air patterns at the terminal equipment, such as to reduce fan speed or adjust a damper.
B. Balance: To proportion flows within the distribution system, including submains, branches, and terminals, according to design quantities.
C. Draft: A current of air, when referring to localized effect caused by one or more factors of high air velocity, low ambient temperature, or direction of airflow, whereby more heat is withdrawn from a person's skin than is normally dissipated.
D. Procedure: An approach to and execution of a sequence of work operations to yield repeatable results.
Odor Control Phase I at Blue River/81000749 15990 Final Doc. 12/08/2015 Page No.-1 Testing, Adjusting, and Balancing

E. Report Forms: Test data sheets for recording test data in logical order.
F. Static Head: The pressure due to the weight of the fluid above the point of measurement. In a closed system, static head is equal on both sides of the pump.
G. Suction Head: The height of fluid surface above the centerline of the pump on the suction side.
H. System Effect: A phenomenon that can create undesired or unpredicted conditions that cause reduced capacities in all or part of a system.
I. System Effect Factors: Allowances used to calculate a reduction of the performance ratings of a fan when installed under conditions different from those presented when the fan was performance tested.
J. Terminal: A point where the controlled medium, such as fluid or energy, enters or leaves the distribution system.
K. Test: A procedure to determine quantitative performance of a system or equipment.
L. Testing, Adjusting, and Balancing Agent: The entity responsible for performing and reporting the testing, adjusting, and balancing procedures.
M. AABC: Associated Air Balance Council.
N. AMCA: Air Movement and Control Association.
O. CTI: Cooling Tower Institute.
P. NEBB: National Environmental Balancing Bureau.
Q. SMACNA: Sheet Metal and Air Conditioning Contractors' National Association.
1.4 SUBMITTALS
A. Quality-Assurance Submittals: Within 30 days from the Contractor's Notice to Proceed, submit 2 copies of evidence that the testing, adjusting, and balancing Agent and this Project's testing, adjusting, and balancing team members meet the qualifications specified in the "Quality Assurance" Article below.
B. Contract Documents Examination Report: Within 45 days from the Contractor's Notice to Proceed, submit 2 copies of the Contract Documents review report as specified in Part 3 of this Section.
C. Strategies and Procedures Plan: Within 60 days from the Contractor's Notice to Proceed, submit 2 copies of the testing, adjusting, and balancing strategies and step-by-step procedures as specified in Part 3 "Preparation" Article below. Include a complete set of report forms intended for use on this Project.
Odor Control Phase I at Blue River/81000749 15990 Final Doc. 12/08/2015 Page No.-2 Testing, Adjusting, and Balancing

D. Certified Testing, Adjusting, and Balancing Reports: Submit 2 copies of reports prepared, as specified in this Section, on approved forms certified by the testing, adjusting, and balancing Agent.
E. Sample Report Forms: Submit 2 sets of sample testing, adjusting, and balancing report forms.
F. Warranty: Submit 2 copies of special warranty specified in the "Warranty" Article below.
1.5 QUALITY ASSURANCE
A. Agent Qualifications: Engage a testing, adjusting, and balancing agent certified by AABC.
B. Agent Qualifications: Engage a testing, adjusting, and balancing agent certified by NEBB.
C. Agent Qualifications: Engage a testing, adjusting, and balancing agent certified by either AABC or NEBB.
D. Testing, Adjusting, and Balancing Conference: Meet with the Owner's and the Architect's representatives on approval of the testing, adjusting, and balancing strategies and procedures plan to develop a mutual understanding of the details. Ensure the participation of testing, adjusting, and balancing team members, equipment manufacturers' authorized service representatives, HVAC controls Installer, and other support personnel. Provide 7 days' advance notice of scheduled meeting time and location.
1. Agenda Items: Include at least the following:
a. Submittal distribution requirements. b. Contract Documents examination report. c. Testing, adjusting, and balancing plan. d. Work schedule and Project site access requirements. e. Coordination and cooperation of trades and subcontractors. f. Coordination of documentation and communication flow.
E. Certification of Testing, Adjusting, and Balancing Reports: Certify the testing, adjusting, and balancing field data reports. This certification includes the following:
1. Review field data reports to validate accuracy of data and to prepare certified testing, adjusting, and balancing reports.
2. Certify that the testing, adjusting, and balancing team complied with the approved testing, adjusting, and balancing plan and the procedures specified and referenced in this Specification.
F. Testing, Adjusting, and Balancing Reports: Use standard forms from AABC's "National Standards for Testing, Adjusting, and Balancing."
Odor Control Phase I at Blue River/81000749 15990 Final Doc. 12/08/2015 Page No.-3 Testing, Adjusting, and Balancing

G. Testing, Adjusting, and Balancing Reports: Use standard forms from NEBB's "Procedural Standards for Testing, Adjusting, and Balancing of Environmental Systems."
H. Testing, Adjusting, and Balancing Reports: Use standard forms from SMACNA's "HVAC Systems--Testing, Adjusting, and Balancing."
I. Testing, Adjusting, and Balancing Reports: Use testing, adjusting, and balancing Agent's standard forms approved by the Architect.
J. Instrumentation Type, Quantity, and Accuracy: As described in AABC national standards.
K. Instrumentation Type, Quantity, and Accuracy: As described in NEBB's "Procedural Standards for Testing, Adjusting, and Balancing of Environmental Systems," Section II, "Required Instrumentation for NEBB Certification."
L. Instrumentation Calibration: Calibrate instruments at least every 6 months or more frequently if required by the instrument manufacturer.
1.6 PROJECT CONDITIONS
A. Full Owner Occupancy: The Owner will occupy the site and existing building during the entire testing, adjusting, and balancing period. Cooperate with the Owner during testing, adjusting, and balancing operations to minimize conflicts with the Owner's operations.
B. Partial Owner Occupancy: The Owner may occupy completed areas of the building before Substantial Completion. Cooperate with the Owner during testing, adjusting, and balancing operations to minimize conflicts with the Owner's operations.
1.7 COORDINATION
A. Coordinate the efforts of factory-authorized service representatives for systems and equipment, HVAC controls installers, and other mechanics to operate HVAC systems and equipment to support and assist testing, adjusting, and balancing activities.
B. Notice: Provide 7 days' advance notice for each test. Include scheduled test dates and times.
C. Perform testing, adjusting, and balancing after leakage and pressure tests on air and water distribution systems have been satisfactorily completed.
1.8 WARRANTY
A. General Warranty: The national project performance guarantee specified in this Article shall not deprive the Owner of other rights the Owner may have under other provisions of the Contract Documents and shall be in addition to, and run concurrent with, other warranties made by the Contractor under requirements of the Contract Documents.
Odor Control Phase I at Blue River/81000749 15990 Final Doc. 12/08/2015 Page No.-4 Testing, Adjusting, and Balancing

B. National Project Performance Guarantee: Provide a guarantee on AABC'S "National Standards" forms stating that AABC will assist in completing the requirements of the Contract Documents if the testing, adjusting, and balancing Agent fails to comply with the Contract Documents. Guarantee includes the following provisions:
C. Special Guarantee: Provide a guarantee on NEBB forms stating that NEBB will assist in completing the requirements of the Contract Documents if the testing, adjusting, and balancing Agent fails to comply with the Contract Documents. Guarantee includes the following provisions:
1. The certified Agent has tested and balanced systems according to the Contract Documents.
2. Systems are balanced to optimum performance capabilities within design and installation limits.
1.9 ALL EXPOSED MATERIALS WILL BE INSTALLED IN A HYDROGEN SULFIDE ATMOSPHERE. MATERIALS SHALL BE HYDROGEN SULFIDE RESISTANT
PART 2 - PRODUCTS (Not Applicable)
PART 3 - EXECUTION
3.1 EXAMINATION
A. Examine Contract Documents to become familiar with project requirements and to discover conditions in systems' designs that may preclude proper testing, adjusting, and balancing of systems and equipment.
1. Contract Documents are defined in the General and Supplementary Conditions of the Contract.
2. Verify that balancing devices, such as test ports, gage cocks, thermometer wells, flow-control devices, balancing valves and fittings, and manual volume dampers, are required by the Contract Documents. Verify that quantities and locations of these balancing devices are accessible and appropriate for effective balancing and for efficient system and equipment operation.
B. Examine approved submittal data of HVAC systems and equipment.
C. Examine project record documents described in Division 1 Section "Project Record Documents."
D. Examine Architect's and Engineer's design data, including HVAC system descriptions, statements of design assumptions for environmental conditions and systems' output, and statements of philosophies and assumptions about HVAC system and equipment controls.
E. Examine equipment performance data, including fan and pump curves. Relate performance data to project conditions and requirements, including system effects that
Odor Control Phase I at Blue River/81000749 15990 Final Doc. 12/08/2015 Page No.-5 Testing, Adjusting, and Balancing

can create undesired or unpredicted conditions that cause reduced capacities in all or part of a system. Calculate system effect factors to reduce the performance ratings of HVAC equipment when installed under conditions different from those presented when the equipment was performance tested at the factory. To calculate system effects for air systems, use tables and charts found in AMCA 201, "Fans and Systems," Sections 7 through 10; or in SMACNA's "HVAC Systems--Duct Design," Sections 5 and 6. Compare this data with the design data and installed conditions.
F. Examine system and equipment installations to verify that they are complete and that testing, cleaning, adjusting, and commissioning specified in individual Specification Sections have been performed.
G. Examine system and equipment test reports.
H. Examine HVAC system and equipment installations to verify that indicated balancing devices, such as test ports, gage cocks, thermometer wells, flow-control devices, balancing valves and fittings, and manual volume dampers, are properly installed, and their locations are accessible and appropriate for effective balancing and for efficient system and equipment operation.
I. Examine systems for functional deficiencies that cannot be corrected by adjusting and balancing.
J. Examine air-handling equipment to ensure clean filters have been installed, bearings are greased, belts are aligned and tight, and equipment with functioning controls is ready for operation.
K. Examine terminal units, such as variable-air-volume boxes and mixing boxes, to verify that they are accessible and their controls are connected and functioning.
L. Examine plenum ceilings, utilized for supply air, to verify that they are airtight. Verify that pipe penetrations and other holes are sealed.
M. Examine strainers for clean screens and proper perforations.
N. Examine 3-way valves for proper installation for their intended function of diverting or mixing fluid flows.
O. Examine heat-transfer coils for correct piping connections and for clean and straight fins.
P. Examine open-piping-system pumps to ensure absence of entrained air in the suction piping.
Q. Examine equipment for installation and for properly operating safety interlocks and controls.
R. Examine automatic temperature system components to verify the following:
1. Dampers, valves, and other controlled devices operate by the intended controller. 2. Dampers and valves are in the position indicated by the controller.
Odor Control Phase I at Blue River/81000749 15990 Final Doc. 12/08/2015 Page No.-6 Testing, Adjusting, and Balancing

3. Integrity of valves and dampers for free and full operation and for tightness of fully closed and fully open positions. This includes dampers in multizone units, mixing boxes, and variable-air-volume terminals.
4. Automatic modulating and shutoff valves, including 2-way valves and 3-way mixing and diverting valves, are properly connected.
5. Thermostats and humidistats are located to avoid adverse effects of sunlight, drafts, and cold walls.
6. Sensors are located to sense only the intended conditions. 7. Sequence of operation for control modes is according to the Contract
Documents. 8. Controller set points are set at design values. Observe and record system
reactions to changes in conditions. Record default set points if different from design values.
9. Interlocked systems are operating. 10. Changeover from heating to cooling mode occurs according to design values.
S. Report deficiencies discovered before and during performance of testing, adjusting, and balancing procedures.
3.2 PREPARATION
A. Prepare a testing, adjusting, and balancing plan that includes strategies and step-by-step procedures.
B. Complete system readiness checks and prepare system readiness reports. Verify the following:
1. Permanent electrical power wiring is complete. 2. Hydronic systems are filled, clean, and free of air. 3. Automatic temperature-control systems are operational. 4. Equipment and duct access doors are securely closed. 5. Balance, smoke, and fire dampers are open. 6. Isolating and balancing valves are open and control valves are operational. 7. Ceilings are installed in critical areas where air-pattern adjustments are required
and access to balancing devices is provided. 8. Windows and doors can be closed so design conditions for system operations
can be met.
3.3 GENERAL TESTING AND BALANCING PROCEDURES
A. Perform testing and balancing procedures on each system according to the procedures contained in AABC national standards and this Section.
B. Perform testing and balancing procedures on each system according to the procedures contained in NEBB's "Procedural Standards for Testing, Adjusting, and Balancing of Environmental Systems" and this Section.
Odor Control Phase I at Blue River/81000749 15990 Final Doc. 12/08/2015 Page No.-7 Testing, Adjusting, and Balancing

C. Perform testing and balancing procedures on each system according to the procedures contained in SMACNA's "HVAC Systems--Testing, Adjusting, and Balancing" and this Section.
D. Cut insulation, ducts, pipes, and equipment cabinets for installation of test probes to the minimum extent necessary to allow adequate performance of procedures. After testing and balancing, close probe holes and patch insulation with new materials identical to those removed. Restore vapor barrier and finish according to the insulation Specifications for this Project.
E. Mark equipment settings with paint or other suitable, permanent identification material, including damper-control positions, valve indicators, fan-speed-control levers, and similar controls and devices, to show final settings.
3.4 FUNDAMENTAL AIR SYSTEMS' BALANCING PROCEDURES
A. Prepare test reports for both fans and outlets. Obtain manufacturer's outlet factors and recommended testing procedures. Crosscheck the summation of required outlet volumes with required fan volumes.
B. Prepare schematic diagrams of systems' "as-built" duct layouts.
C. For variable-air-volume systems, develop a plan to simulate diversity.
D. Determine the best locations in main and branch ducts for accurate duct airflow measurements.
E. Check the airflow patterns from the outside-air louvers and dampers and the return- and exhaust-air dampers, through the supply-fan discharge and mixing dampers.
F. Locate start-stop and disconnect switches, electrical interlocks, and motor starters.
G. Verify that motor starters are equipped with properly sized thermal protection.
H. Check dampers for proper position to achieve desired airflow path.
I. Check for airflow blockages.
J. Check condensate drains for proper connections and functioning.
K. Check for proper sealing of air-handling unit components.
3.5 CONSTANT-VOLUME AIR SYSTEMS' BALANCING PROCEDURES
A. The procedures in this Article apply to constant-volume supply-, return-, and exhaust-air systems. Additional procedures are required for variable-air-volume, multizone, dual-duct, induction-unit supply-air systems and process exhaust-air systems. These additional procedures are specified in other articles in this Section.
Odor Control Phase I at Blue River/81000749 15990 Final Doc. 12/08/2015 Page No.-8 Testing, Adjusting, and Balancing

B. Adjust fans to deliver total design airflows within the maximum allowable rpm listed by the fan manufacturer.
1. Measure fan static pressures to determine actual static pressure as follows:
a. Measure outlet static pressure as far downstream from the fan as practicable and upstream from restrictions in ducts such as elbows and transitions.
b. Measure static pressure directly at the fan outlet or through the flexible connection.
c. Measure inlet static pressure of single-inlet fans in the inlet duct as near the fan as possible, upstream from flexible connection and downstream from duct restrictions.
d. Measure inlet static pressure of double-inlet fans through the wall of the plenum that houses the fan.
2. Measure static pressure across each air-handling unit component.
a. Simulate dirty filter operation and record the point at which maintenance personnel must change filters.
3. Measure static pressures entering and leaving other devices such as sound traps, heat recovery equipment, and air washers under final balanced conditions.
4. Compare design data with installed conditions to determine variations in design static pressures versus actual static pressures. Compare actual system effect factors with calculated system effect factors to identify where variations occur. Recommend corrective action to align design and actual conditions.
5. Adjust fan speed higher or lower than design with the approval of the Architect. Make required adjustments to pulley sizes, motor sizes, and electrical connections to accommodate fan-speed changes.
6. Do not make fan-speed adjustments that result in motor overload. Consult equipment manufacturers about fan-speed safety factors. Modulate dampers and measure fan-motor amperage to ensure no overload will occur. Measure amperage in full cooling, full heating, and economizer modes to determine the maximum required brake horsepower.
C. Adjust volume dampers for main duct, submain ducts, and major branch ducts to design airflows within specified tolerances.
1. Measure static pressure at a point downstream from the balancing damper and adjust volume dampers until the proper static pressure is achieved.
a. Where sufficient space in submains and branch ducts is unavailable for Pitot-tube traverse measurements, measure airflow at terminal outlets and inlets and calculate the total airflow for that zone.
2. Remeasure each submain and branch duct after all have been adjusted. Continue to adjust submains and branch ducts to design airflows within specified tolerances.
D. Measure terminal outlets and inlets without making adjustments.
Odor Control Phase I at Blue River/81000749 15990 Final Doc. 12/08/2015 Page No.-9 Testing, Adjusting, and Balancing

1. Measure terminal outlets using a direct-reading hood or the outlet manufacturer's written instructions and calculating factors.
E. Adjust terminal outlets and inlets for each space to design airflows within specified tolerances of design values. Make adjustments using volume dampers rather than extractors and the dampers at the air terminals.
1. Adjust each outlet in the same room or space to within specified tolerances of design quantities without generating noise levels above the limitations prescribed by the Contract Documents.
2. Adjust patterns of adjustable outlets for proper distribution without drafts.
3.6 DUAL-DUCT SYSTEMS' ADDITIONAL PROCEDURES
A. Set mixing boxes at full-cold airflow position for setting the fan volume, after verifying that the cooling coil is capable of full-system airflow.
B. Measure static pressure in both hot and cold ducts at the end of the longest duct run to determine that sufficient static pressure exists to operate mixing-box controls and to overcome resistance in the ducts and outlets downstream from mixing box.
1. If insufficient static pressure exists, increase the airflow at the fan.
C. Test and adjust the constant-volume mixing boxes as follows:
1. Verify both hot and cold operations by adjusting the thermostat and observing the air temperature and volume changes.
2. Verify sufficient inlet static pressure before making volume adjustments. 3. Adjust mixing box to design airflows within specified tolerances. Measure the
airflow by Pitot-tube traverse readings, totaling the airflow of the outlets; or by measuring static pressure at mixing-box taps if provided by the box manufacturer.
D. Remeasure static pressure in both hot and cold ducts at the end of the longest duct run to determine that sufficient static pressure exists to operate mixing-box controls and to overcome resistance in the ducts and outlets downstream from mixing box.
E. Adjust variable-air-volume, dual-duct systems in the same way as constant-volume dual-duct systems, and adjust each mixing-box maximum- and minimum-airflow settings.
3.7 VARIABLE-AIR-VOLUME SYSTEMS' ADDITIONAL PROCEDURES
A. Compensating for Diversity: When the total airflow of all terminal units is more than the fan design airflow volume, place a selected number of terminal units at a maximum set-point airflow condition until the total airflow of the terminal units equals the design airflow of the fan. Select the reduced airflow terminal units so they are distributed evenly among the branch ducts.
Odor Control Phase I at Blue River/81000749 15990 Final Doc. 12/08/2015 Page No.-10 Testing, Adjusting, and Balancing
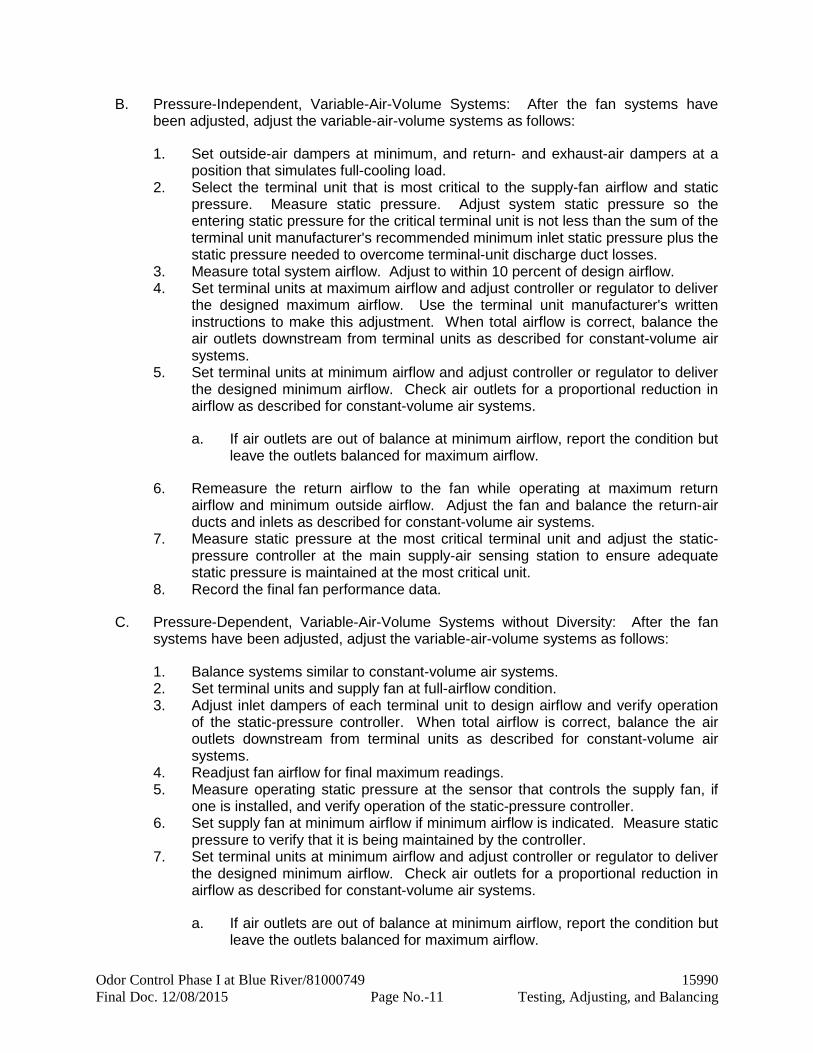
B. Pressure-Independent, Variable-Air-Volume Systems: After the fan systems have been adjusted, adjust the variable-air-volume systems as follows:
1. Set outside-air dampers at minimum, and return- and exhaust-air dampers at a position that simulates full-cooling load.
2. Select the terminal unit that is most critical to the supply-fan airflow and static pressure. Measure static pressure. Adjust system static pressure so the entering static pressure for the critical terminal unit is not less than the sum of the terminal unit manufacturer's recommended minimum inlet static pressure plus the static pressure needed to overcome terminal-unit discharge duct losses.
3. Measure total system airflow. Adjust to within 10 percent of design airflow. 4. Set terminal units at maximum airflow and adjust controller or regulator to deliver
the designed maximum airflow. Use the terminal unit manufacturer's written instructions to make this adjustment. When total airflow is correct, balance the air outlets downstream from terminal units as described for constant-volume air systems.
5. Set terminal units at minimum airflow and adjust controller or regulator to deliver the designed minimum airflow. Check air outlets for a proportional reduction in airflow as described for constant-volume air systems.
a. If air outlets are out of balance at minimum airflow, report the condition but leave the outlets balanced for maximum airflow.
6. Remeasure the return airflow to the fan while operating at maximum return airflow and minimum outside airflow. Adjust the fan and balance the return-air ducts and inlets as described for constant-volume air systems.
7. Measure static pressure at the most critical terminal unit and adjust the static-pressure controller at the main supply-air sensing station to ensure adequate static pressure is maintained at the most critical unit.
8. Record the final fan performance data.
C. Pressure-Dependent, Variable-Air-Volume Systems without Diversity: After the fan systems have been adjusted, adjust the variable-air-volume systems as follows:
1. Balance systems similar to constant-volume air systems. 2. Set terminal units and supply fan at full-airflow condition. 3. Adjust inlet dampers of each terminal unit to design airflow and verify operation
of the static-pressure controller. When total airflow is correct, balance the air outlets downstream from terminal units as described for constant-volume air systems.
4. Readjust fan airflow for final maximum readings. 5. Measure operating static pressure at the sensor that controls the supply fan, if
one is installed, and verify operation of the static-pressure controller. 6. Set supply fan at minimum airflow if minimum airflow is indicated. Measure static
pressure to verify that it is being maintained by the controller. 7. Set terminal units at minimum airflow and adjust controller or regulator to deliver
the designed minimum airflow. Check air outlets for a proportional reduction in airflow as described for constant-volume air systems.
a. If air outlets are out of balance at minimum airflow, report the condition but leave the outlets balanced for maximum airflow.
Odor Control Phase I at Blue River/81000749 15990 Final Doc. 12/08/2015 Page No.-11 Testing, Adjusting, and Balancing

8. Measure the return airflow to the fan while operating at maximum return airflow and minimum outside airflow. Adjust the fan and balance the return-air ducts and inlets as described for constant-volume air systems.
D. Pressure-Dependent, Variable-Air-Volume Systems with Diversity: After the fan systems have been adjusted, adjust the variable-air-volume systems as follows:
1. Set system at maximum design airflow by setting the required number of terminal units at minimum airflow. Select the reduced airflow terminal units so they are distributed evenly among the branch ducts.
2. Adjust supply fan to maximum design airflow with the variable-airflow controller set at maximum airflow.
3. Set terminal units being tested at full-airflow condition. 4. Adjust terminal units starting at the supply-fan end of the system and continuing
progressively to the end of the system. Adjust inlet dampers of each terminal unit to design airflow. When total airflow is correct, balance the air outlets downstream from terminal units as described for constant-volume air systems.
5. Adjust terminal units for minimum airflow. 6. Measure static pressure at the sensor. 7. Measure the return airflow to the fan while operating at maximum return airflow
and minimum outside airflow. Adjust the fan and balance the return-air ducts and inlets as described for constant-volume air systems.
3.8 MULTIZONE SYSTEMS' ADDITIONAL PROCEDURES
A. Set unit at full flow through the cooling coil if coil has that capacity.
B. Adjust each zone damper to design airflow.
3.9 INDUCTION-UNIT SYSTEMS' ADDITIONAL PROCEDURES
A. Balance primary-air risers by measuring static pressure at the nozzles of the top and bottom units of each riser to determine which risers must be throttled. Adjust risers to design airflow within specified tolerances.
B. Adjust each induction unit.
3.10 FUNDAMENTAL PROCEDURES FOR HYDRONIC SYSTEMS
A. Prepare test reports with pertinent design data and number in sequence starting at pump to end of system. Check the sum of branch-circuit flows against approved pump flow rate. Correct variations that exceed plus or minus 5 percent.
B. Prepare schematic diagrams of systems' "as-built" piping layouts.
C. Prepare hydronic systems for testing and balancing according to the following, in addition to the general preparation procedures specified above:
1. Open all manual valves for maximum flow.
Odor Control Phase I at Blue River/81000749 15990 Final Doc. 12/08/2015 Page No.-12 Testing, Adjusting, and Balancing

2. Check expansion tank liquid level. 3. Check makeup-water-station pressure gage for adequate pressure for highest
vent. 4. Check flow-control valves for specified sequence of operation and set at design
flow. 5. Set differential-pressure control valves at the specified differential pressure. Do
not set at fully closed position when pump is positive-displacement type, unless several terminal valves are kept open.
6. Set system controls so automatic valves are wide open to heat exchangers. 7. Check pump-motor load. If motor is overloaded, throttle main flow-balancing
device so motor nameplate rating is not exceeded. 8. Check air vents for a forceful liquid flow exiting from vents when manually
operated.
3.11 HYDRONIC SYSTEMS' BALANCING PROCEDURES
A. Determine water flow at pumps. Use the following procedures, except for positive-displacement pumps:
1. Verify impeller size by operating the pump with the discharge valve closed. Verify with the pump manufacturer that this will not damage pump. Read pressure differential across the pump. Convert pressure to head and correct for differences in gage heights. Note the point on the manufacturer's pump curve at zero flow and confirm that the pump has the intended impeller size.
2. Check system resistance. With all valves open, read pressure differential across the pump and mark the pump manufacturer's head-capacity curve. Adjust pump discharge valve until design water flow is achieved.
3. Verify pump-motor brake horsepower. Calculate the intended brake horsepower for the system based on the pump manufacturer's performance data. Compare calculated brake horsepower with nameplate data on the pump motor. Report conditions where actual amperage exceeds motor nameplate amperage.
4. Report flow rates that are not within plus or minus 5 percent of design.
B. Set calibrated balancing valves, if installed, at calculated presettings.
C. Measure flow at all stations and adjust, where necessary, to obtain first balance.
1. System components that have Cv rating or an accurately cataloged flow-pressure-drop relationship may be used as a flow-indicating device.
D. Measure flow at main balancing station and set main balancing device to achieve flow that is 5 percent greater than design flow.
E. Adjust balancing stations to within specified tolerances of design flow rate as follows:
1. Determine the balancing station with the highest percentage over design flow. 2. Adjust each station in turn, beginning with the station with the highest percentage
over design flow and proceeding to the station with the lowest percentage over design flow.
3. Record settings and mark balancing devices.
Odor Control Phase I at Blue River/81000749 15990 Final Doc. 12/08/2015 Page No.-13 Testing, Adjusting, and Balancing

F. Measure pump flow rate and make final measurements of pump amperage, voltage, rpm, pump heads, and systems' pressures and temperatures, including outdoor-air temperature.
G. Measure the differential-pressure control valve settings existing at the conclusions of balancing.
3.12 VARIABLE-FLOW HYDRONIC SYSTEMS' ADDITIONAL PROCEDURES
A. Balance systems with automatic 2- and 3-way control valves by setting systems at maximum flow through heat-exchange terminals and proceed as specified above for hydronic systems.
3.13 PRIMARY-SECONDARY-FLOW HYDRONIC SYSTEMS' ADDITIONAL PROCEDURES
A. Balance the primary system crossover flow first, then balance the secondary system.
3.14 HEAT EXCHANGERS
A. Measure water flow through all circuits.
B. Adjust water flow to within specified tolerances.
C. Measure inlet and outlet water temperatures.
D. Measure inlet steam pressure. Check the setting and operation of automatic temperature-control valves, self-contained control valves, and pressure-reducing valves.
E. Record safety valve settings.
F. Verify operation of steam traps.
3.15 MOTORS
A. Motors, 1/2 HP and Larger: Test at final balanced conditions and record the following data:
1. Manufacturer, model, and serial numbers. 2. Motor horsepower rating. 3. Motor rpm. 4. Efficiency rating if high-efficiency motor. 5. Nameplate and measured voltage, each phase. 6. Nameplate and measured amperage, each phase. 7. Starter thermal-protection-element rating.
Odor Control Phase I at Blue River/81000749 15990 Final Doc. 12/08/2015 Page No.-14 Testing, Adjusting, and Balancing

B. Motors Driven by Variable-Frequency Controllers: Test for proper operation at speeds varying from minimum to maximum. Test the manual bypass for the controller to prove proper operation. Record observations, including controller manufacturer, model and serial numbers, and nameplate data.
3.16 CHILLERS
A. Balance water flow through each evaporator and condenser to within specified tolerances of design flow with all pumps operating. With only one chiller operating in a multiple chiller installation, do not exceed the flow for the maximum tube velocity recommended by the chiller manufacturer. Measure and record the following data with each chiller operating at design conditions:
1. Evaporator water entering and leaving temperatures, pressure drop, and water flow.
2. Condenser water entering and leaving temperatures, pressure drop, and water flow.
3. Evaporator and condenser refrigerant temperatures and pressures, using instruments furnished by the chiller manufacturer.
4. Power factor if factory-installed instrumentation is furnished for measuring kW. 5. The kW input if factory-installed instrumentation is furnished for measuring kW. 6. Capacity: Calculate in tons of cooling. 7. Air-Cooled Chillers: Verify condenser-fan rotation and record fan data, including
number of fans and entering- and leaving-air temperatures.
3.17 COOLING TOWERS
A. Shut off makeup water for the duration of the test, and then make sure the makeup and blow-down systems are fully operational after tests and before leaving the equipment. Perform the following tests and record the results:
1. Measure condenser water flow to each cell of the cooling tower. 2. Measure entering- and leaving-water temperatures. 3. Measure wet- and dry-bulb temperatures of entering air. 4. Measure wet- and dry-bulb temperatures of leaving air. 5. Measure condenser water flow rate recirculating through the cooling tower. 6. Measure cooling tower pump discharge pressure. 7. Adjust water level and feed rate of makeup-water system.
3.18 CONDENSING UNITS
A. Verify proper rotation of fans and measure entering- and leaving-air temperatures. Record compressor data.
3.19 BOILERS
A. Measure entering- and leaving-water temperatures and water flow.
Odor Control Phase I at Blue River/81000749 15990 Final Doc. 12/08/2015 Page No.-15 Testing, Adjusting, and Balancing
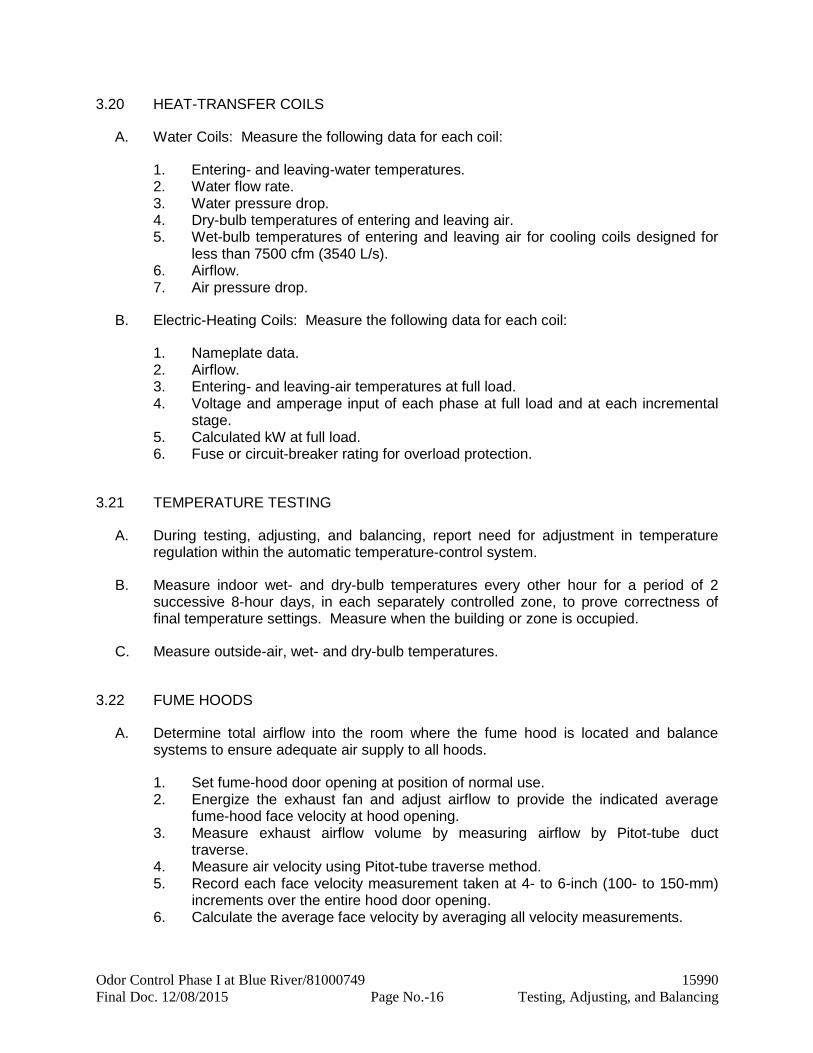
3.20 HEAT-TRANSFER COILS
A. Water Coils: Measure the following data for each coil:
1. Entering- and leaving-water temperatures. 2. Water flow rate. 3. Water pressure drop. 4. Dry-bulb temperatures of entering and leaving air. 5. Wet-bulb temperatures of entering and leaving air for cooling coils designed for
less than 7500 cfm (3540 L/s). 6. Airflow. 7. Air pressure drop.
B. Electric-Heating Coils: Measure the following data for each coil:
1. Nameplate data. 2. Airflow. 3. Entering- and leaving-air temperatures at full load. 4. Voltage and amperage input of each phase at full load and at each incremental
stage. 5. Calculated kW at full load. 6. Fuse or circuit-breaker rating for overload protection.
3.21 TEMPERATURE TESTING
A. During testing, adjusting, and balancing, report need for adjustment in temperature regulation within the automatic temperature-control system.
B. Measure indoor wet- and dry-bulb temperatures every other hour for a period of 2 successive 8-hour days, in each separately controlled zone, to prove correctness of final temperature settings. Measure when the building or zone is occupied.
C. Measure outside-air, wet- and dry-bulb temperatures.
3.22 FUME HOODS
A. Determine total airflow into the room where the fume hood is located and balance systems to ensure adequate air supply to all hoods.
1. Set fume-hood door opening at position of normal use. 2. Energize the exhaust fan and adjust airflow to provide the indicated average
fume-hood face velocity at hood opening. 3. Measure exhaust airflow volume by measuring airflow by Pitot-tube duct
traverse. 4. Measure air velocity using Pitot-tube traverse method. 5. Record each face velocity measurement taken at 4- to 6-inch (100- to 150-mm)
increments over the entire hood door opening. 6. Calculate the average face velocity by averaging all velocity measurements.
Odor Control Phase I at Blue River/81000749 15990 Final Doc. 12/08/2015 Page No.-16 Testing, Adjusting, and Balancing

7. Calculate the airflow volume of exhaust-hood face velocity by multiplying the calculated average face velocity by the opening area. Compare this quantity with exhaust volume at exhaust fan and report duct leakage.
8. Measure airflow volume supplied by makeup fan. Verify that the makeup system supplies the proper amount of air to keep the space at the indicated pressure with the exhaust systems in all operating conditions.
9. Retest for average face velocity. Adjust hood baffles, fan drives, and other parts of the system to provide the indicated average face velocity and the indicated auxiliary air-supply percentages.
10. Retest and adjust the systems until fume-hood performance complies with Contract Documents.
3.23 TEMPERATURE-CONTROL VERIFICATION
A. Verify that controllers are calibrated and commissioned.
B. Check transmitter and controller locations and note conditions that would adversely affect control functions.
C. Record controller settings and note variances between set points and actual measurements.
D. Verify operation of limiting controllers (i.e., high- and low-temperature controllers).
E. Verify free travel and proper operation of control devices such as damper and valve operators.
F. Verify sequence of operation of control devices. Note air pressures and device positions and correlate with airflow and water-flow measurements. Note the speed of response to input changes.
G. Confirm interaction of electrically operated switch transducers.
H. Confirm interaction of interlock and lockout systems.
I. Verify main control supply-air pressure and observe compressor and dryer operations.
J. Record voltages of power supply and controller output. Determine if the system operates on a grounded or nongrounded power supply.
K. Note operation of electric actuators using spring return for proper fail-safe operations.
3.24 TOLERANCES
A. Set HVAC system airflow and water flow rates within the following tolerances:
1. Supply, Return, and Exhaust Fans: Plus 5 to plus 10 percent. 2. Air Outlets and Inlets: 0 to minus 10 percent. 3. Heating-Water Flow Rate: 0 to minus 10 percent. 4. Cooling-Water Flow Rate: 0 to minus 5 percent.
Odor Control Phase I at Blue River/81000749 15990 Final Doc. 12/08/2015 Page No.-17 Testing, Adjusting, and Balancing

3.25 REPORTING
A. Initial Construction-Phase Report: Based on examination of the Contract Documents as specified in "Examination" Article above, prepare a report on the adequacy of design for systems' balancing devices. Recommend changes and additions to systems' balancing devices to facilitate proper performance measuring and balancing. Recommend changes and additions to HVAC systems and general construction to allow access for performance measuring and balancing devices.
B. Status Reports: As Work progresses, prepare reports to describe completed procedures, procedures in progress, and scheduled procedures. Include a list of deficiencies and problems found in systems being tested and balanced. Prepare a separate report for each system and each building floor for systems serving multiple floors.
3.26 FINAL REPORT
A. General: Typewritten, or computer printout in letter-quality font, on standard bond paper, in 3-ring binder, tabulated and divided into sections by tested and balanced systems.
B. Include a certification sheet in front of binder signed and sealed by the certified testing and balancing engineer.
1. Include a list of the instruments used for procedures, along with proof of calibration.
C. Final Report Contents: In addition to the certified field report data, include the following:
1. Pump curves. 2. Fan curves. 3. Manufacturers' test data. 4. Field test reports prepared by system and equipment installers. 5. Other information relative to equipment performance, but do not include
approved Shop Drawings and Product Data.
D. General Report Data: In addition to the form titles and entries, include the following data in the final report, as applicable:
1. Title page. 2. Name and address of testing, adjusting, and balancing Agent. 3. Project name. 4. Project location. 5. Architect's name and address. 6. Engineer's name and address. 7. Contractor's name and address. 8. Report date. 9. Signature of testing, adjusting, and balancing Agent who certifies the report. 10. Summary of contents, including the following:
Odor Control Phase I at Blue River/81000749 15990 Final Doc. 12/08/2015 Page No.-18 Testing, Adjusting, and Balancing
a. Design versus final performance. b. Notable characteristics of systems. c. Description of system operation sequence if it varies from the Contract
Documents.
11. Nomenclature sheets for each item of equipment. 12. Data for terminal units, including manufacturer, type size, and fittings. 13. Notes to explain why certain final data in the body of reports vary from design
values. 14. Test conditions for fans and pump performance forms, including the following:
a. Settings for outside-, return-, and exhaust-air dampers. b. Conditions of filters. c. Cooling coil, wet- and dry-bulb conditions. d. Face and bypass damper settings at coils. e. Fan drive settings, including settings and percentage of maximum pitch
diameter. f. Inlet vane settings for variable-air-volume systems. g. Settings for supply-air, static-pressure controller. h. Other system operating conditions that affect performance.
E. System Diagrams: Include schematic layouts of air and hydronic distribution systems. Present with single-line diagrams and include the following:
1. Quantities of outside, supply, return, and exhaust airflows. 2. Water and steam flow rates. 3. Duct, outlet, and inlet sizes. 4. Pipe and valve sizes and locations. 5. Terminal units. 6. Balancing stations.
F. Air-Handling Unit Test Reports: For air-handling units with coils, include the following:
1. Unit Data: Include the following:
a. Unit identification. b. Location. c. Make and type. d. Model number and unit size. e. Manufacturer's serial number. f. Unit arrangement and class. g. Discharge arrangement. h. Sheave make, size in inches (mm), and bore. i. Sheave dimensions, center-to-center and amount of adjustments in inches
(mm). j. Number of belts, make, and size. k. Number of filters, type, and size.
2. Motor Data: Include the following:
a. Make and frame type and size.
Odor Control Phase I at Blue River/81000749 15990 Final Doc. 12/08/2015 Page No.-19 Testing, Adjusting, and Balancing
b. Horsepower and rpm. c. Volts, phase, and hertz. d. Full-load amperage and service factor. e. Sheave make, size in inches (mm), and bore. f. Sheave dimensions, center-to-center and amount of adjustments in inches
(mm).
3. Test Data: Include design and actual values for the following:
a. Total airflow rate in cfm (L/s). b. Total system static pressure in inches wg (Pa). c. Fan rpm. d. Discharge static pressure in inches wg (Pa). e. Filter static-pressure differential in inches wg (Pa). f. Preheat coil static-pressure differential in inches wg (Pa). g. Cooling coil static-pressure differential in inches wg (Pa). h. Heating coil static-pressure differential in inches wg (Pa). i. Outside airflow in cfm (L/s). j. Return airflow in cfm (L/s). k. Outside-air damper position. l. Return-air damper position. m. Vortex damper position.
G. Apparatus-Coil Test Reports: For apparatus coils, include the following:
1. Coil Data: Include the following:
a. System identification. b. Location. c. Coil type. d. Number of rows. e. Fin spacing in fins per inch (mm o.c.). f. Make and model number. g. Face area in sq. ft. (sq. m). h. Tube size in NPS (DN). i. Tube and fin materials. j. Circuiting arrangement.
2. Test Data: Include design and actual values for the following:
a. Airflow rate in cfm (L/s). b. Average face velocity in fpm (m/s). c. Air pressure drop in inches wg (Pa). d. Outside-air, wet- and dry-bulb temperatures in deg F (deg C). e. Return-air, wet- and dry-bulb temperatures in deg F (deg C). f. Entering-air, wet- and dry-bulb temperatures in deg F (deg C). g. Leaving-air, wet- and dry-bulb temperatures in deg F (deg C). h. Water flow rate in gpm (L/s). i. Water pressure differential in feet of head or psig (kPa). j. Entering-water temperature in deg F (deg C). k. Leaving-water temperature in deg F (deg C).
Odor Control Phase I at Blue River/81000749 15990 Final Doc. 12/08/2015 Page No.-20 Testing, Adjusting, and Balancing

l. Refrigerant expansion valve and refrigerant types. m. Refrigerant suction pressure in psig (kPa). n. Refrigerant suction temperature in deg F (deg C). o. Inlet steam pressure in psig (kPa).
H. Gas- and Oil-Fired Heat Apparatus Test Reports: In addition to the manufacturer's factory startup equipment reports, include the following:
1. Unit Data: Include the following:
a. System identification. b. Location. c. Make and type. d. Model number and unit size. e. Manufacturer's serial number. f. Fuel type in input data. g. Output capacity in Btuh (kW). h. Ignition type. i. Burner-control types. j. Motor horsepower and rpm. k. Motor volts, phase, and hertz. l. Motor full-load amperage and service factor. m. Sheave make, size in inches (mm), and bore. n. Sheave dimensions, center-to-center and amount of adjustments in inches
(mm).
2. Test Data: Include design and actual values for the following:
a. Total airflow rate in cfm (L/s). b. Entering-air temperature in deg F (deg C). c. Leaving-air temperature in deg F (deg C). d. Air temperature differential in deg F (deg C). e. Entering-air static pressure in inches wg (Pa). f. Leaving-air static pressure in inches wg (Pa). g. Air static-pressure differential in inches wg (Pa). h. Low-fire fuel input in Btuh (kW). i. High-fire fuel input in Btuh (kW). j. Manifold pressure in psig (kPa). k. High-temperature-limit setting in deg F (deg C). l. Operating set point in Btuh (kW). m. Motor voltage at each connection. n. Motor amperage for each phase. o. Heating value of fuel in Btuh (kW).
I. Electric-Coil Test Reports: For electric furnaces, duct coils, and electric coils installed in central-station air-handling units, include the following:
1. Unit Data: Include the following:
a. System identification. b. Location.
Odor Control Phase I at Blue River/81000749 15990 Final Doc. 12/08/2015 Page No.-21 Testing, Adjusting, and Balancing

c. Coil identification. d. Capacity in Btuh (kW). e. Number of stages. f. Connected volts, phase, and hertz. g. Rated amperage. h. Airflow rate in cfm (L/s). i. Face area in sq. ft. (sq. m). j. Minimum face velocity in fpm (m/s).
2. Test Data: Include design and actual values for the following:
a. Heat output in Btuh (kW). b. Airflow rate in cfm (L/s). c. Air velocity in fpm (m/s). d. Entering-air temperature in deg F (deg C). e. Leaving-air temperature in deg F (deg C). f. Voltage at each connection. g. Amperage for each phase.
J. Fan Test Reports: For supply, return, and exhaust fans, include the following:
1. Fan Data: Include the following:
a. System identification. b. Location. c. Make and type. d. Model number and size. e. Manufacturer's serial number. f. Arrangement and class. g. Sheave make, size in inches (mm), and bore. h. Sheave dimensions, center-to-center and amount of adjustments in inches
(mm).
2. Motor Data: Include the following:
a. Make and frame type and size. b. Horsepower and rpm. c. Volts, phase, and hertz. d. Full-load amperage and service factor. e. Sheave make, size in inches (mm), and bore. f. Sheave dimensions, center-to-center and amount of adjustments in inches
(mm). g. Number of belts, make, and size.
3. Test Data: Include design and actual values for the following:
a. Total airflow rate in cfm (L/s). b. Total system static pressure in inches wg (Pa). c. Fan rpm. d. Discharge static pressure in inches wg (Pa). e. Suction static pressure in inches wg (Pa).
Odor Control Phase I at Blue River/81000749 15990 Final Doc. 12/08/2015 Page No.-22 Testing, Adjusting, and Balancing
K. Round, Flat-Oval, and Rectangular Duct Traverse Reports: Include a diagram with a grid representing the duct cross-section and record the following:
1. Report Data: Include the following:
a. System and air-handling unit number. b. Location and zone. c. Traverse air temperature in deg F (deg C). d. Duct static pressure in inches wg (Pa). e. Duct size in inches (mm). f. Duct area in sq. ft. ( (sq. m)). g. Design airflow rate in cfm (L/s). h. Design velocity in fpm (m/s). i. Actual airflow rate in cfm (L/s). j. Actual average velocity in fpm (m/s). k. Barometric pressure in psig (Pa).
L. Air-Terminal-Device Reports: For terminal units, include the following:
1. Unit Data: Include the following:
a. System and air-handling unit identification. b. Location and zone. c. Test apparatus used. d. Area served. e. Air-terminal-device make. f. Air-terminal-device number from system diagram. g. Air-terminal-device type and model number. h. Air-terminal-device size. i. Air-terminal-device effective area in sq. ft. ( (sq. m)).
2. Test Data: Include design and actual values for the following:
a. Airflow rate in cfm (L/s). b. Air velocity in fpm (m/s). c. Preliminary airflow rate as needed in cfm (L/s). d. Preliminary velocity as needed in fpm (m/s). e. Final airflow rate in cfm (L/s). f. Final velocity in fpm (m/s). g. Space temperature in deg F (deg C).
M. System-Coil Reports: For reheat coils and water coils of terminal units, include the following:
1. Unit Data: Include the following:
a. System and air-handling unit identification. b. Location and zone. c. Room or riser served. d. Coil make and size. e. Flowmeter type.
Odor Control Phase I at Blue River/81000749 15990 Final Doc. 12/08/2015 Page No.-23 Testing, Adjusting, and Balancing
2. Test Data: Include design and actual values for the following:
a. Airflow rate in cfm (L/s). b. Entering-water temperature in deg F (deg C). c. Leaving-water temperature in deg F (deg C). d. Water pressure drop in feet of head or psig (kPa). e. Entering-air temperature in deg F (deg C). f. Leaving-air temperature in deg F (deg C).
N. Packaged Chiller Reports: For each chiller, include the following:
1. Unit Data: Include the following:
a. Unit identification. b. Make and model number. c. Manufacturer's serial number. d. Refrigerant type and capacity in gal. (L). e. Starter type and size. f. Starter thermal protection size.
2. Condenser Test Data: Include design and actual values for the following:
a. Refrigerant pressure in psig (kPa). b. Refrigerant temperature in deg F (deg C). c. Entering-water temperature in deg F (deg C). d. Leaving-water temperature in deg F (deg C). e. Entering-water pressure in feet of head or psig (kPa). f. Water pressure differential in feet of head or psig (kPa).
3. Evaporator Test Reports: Include design and actual values for the following:
a. Refrigerant pressure in psig (kPa). b. Refrigerant temperature in deg F (deg C). c. Entering-water temperature in deg F (deg C). d. Leaving-water temperature in deg F (deg C). e. Entering-water pressure in feet of head or psig (kPa). f. Water pressure differential in feet of head or psig (kPa).
4. Compressor Test Data: Include design and actual values for the following:
a. Make and model number. b. Manufacturer's serial number. c. Suction pressure in psig (kPa). d. Suction temperature in deg F (deg C). e. Discharge pressure in psig (kPa). f. Discharge temperature in deg F (deg C). g. Oil pressure in psig (kPa). h. Oil temperature in deg F (deg C). i. Voltage at each connection. j. Amperage for each phase. k. The kW input.
Odor Control Phase I at Blue River/81000749 15990 Final Doc. 12/08/2015 Page No.-24 Testing, Adjusting, and Balancing

l. Crankcase heater kW. m. Chilled water control set point in deg F (deg C). n. Condenser water control set point in deg F (deg C). o. Refrigerant low-pressure-cutoff set point in psig (kPa). p. Refrigerant high-pressure-cutoff set point in psig (kPa).
5. Refrigerant Test Data: Include design and actual values for the following:
a. Oil level. b. Refrigerant level. c. Relief valve setting in psig (kPa). d. Unloader set points in psig (kPa). e. Percentage of cylinders unloaded. f. Bearing temperatures in deg F (deg C). g. Vane position. h. Low-temperature-cutoff set point in deg F (deg C).
O. Compressor and Condenser Reports: For refrigerant side of unitary systems, stand-alone refrigerant compressors, air-cooled condensing units, or water-cooled condensing units, include the following:
1. Unit Data: Include the following:
a. Unit identification. b. Location. c. Unit make and model number. d. Manufacturer's compressor serial numbers. e. Compressor make. f. Compressor model and serial numbers. g. Refrigerant weight in lb (kg). h. Low ambient temperature cutoff in deg F (deg C).
2. Test Data: Include design and actual values for the following:
a. Inlet-duct static pressure in inches wg (Pa). b. Outlet-duct static pressure in inches wg (Pa). c. Entering-air, dry-bulb temperature in deg F (deg C). d. Leaving-air, dry-bulb temperature in deg F (deg C). e. Condenser entering-water temperature in deg F (deg C). f. Condenser leaving-water temperature in deg F (deg C). g. Condenser water temperature differential in deg F (deg C). h. Condenser entering-water pressure in feet of head or psig (kPa). i. Condenser leaving-water pressure in feet of head or psig (kPa). j. Condenser water pressure differential in feet of head or psig (kPa). k. Control settings. l. Unloader set points. m. Low-pressure-cutout set point in psig (kPa). n. High-pressure-cutout set point in psig (kPa). o. Suction pressure in psig (kPa). p. Suction temperature in deg F (deg C). q. Condenser refrigerant pressure in psig (kPa).
Odor Control Phase I at Blue River/81000749 15990 Final Doc. 12/08/2015 Page No.-25 Testing, Adjusting, and Balancing

r. Condenser refrigerant temperature in deg F (deg C). s. Oil pressure in psig (kPa). t. Oil temperature in deg F (deg C). u. Voltage at each connection. v. Amperage for each phase. w. The kW input. x. Crankcase heater kW. y. Number of fans. z. Condenser fan rpm. aa. Condenser fan airflow rate in cfm (L/s). bb. Condenser fan motor make, frame size, rpm, and horsepower. cc. Condenser fan motor voltage at each connection. dd. Condenser fan motor amperage for each phase.
P. Cooling Tower or Condenser Test Reports: For cooling towers or condensers, include the following:
1. Unit Data: Include the following:
a. Unit identification. b. Make and type. c. Model and serial numbers. d. Nominal cooling capacity in tons (kW). e. Refrigerant type and weight in lb (kg). f. Water-treatment chemical feeder and chemical. g. Number and type of fans. h. Fan motor make, frame size, rpm, and horsepower. i. Fan motor voltage at each connection. j. Sheave make, size in inches (mm), and bore. k. Sheave dimensions, center-to-center and amount of adjustments in inches
(mm). l. Number of belts, make, and size.
2. Pump Test Data: Include design and actual values for the following:
a. Make and model number. b. Manufacturer's serial number. c. Motor make and frame size. d. Motor horsepower and rpm. e. Voltage at each connection. f. Amperage for each phase. g. Water flow rate in gpm (L/s).
3. Water Test Data: Include design and actual values for the following:
a. Entering-water temperature in deg F (deg C). b. Leaving-water temperature in deg F (deg C). c. Water temperature differential in deg F (deg C). d. Entering-water pressure in feet of head or psig (kPa). e. Leaving-water pressure in feet of head or psig (kPa). f. Water pressure differential in feet of head or psig (kPa).
Odor Control Phase I at Blue River/81000749 15990 Final Doc. 12/08/2015 Page No.-26 Testing, Adjusting, and Balancing

g. Water flow rate in gpm (L/s). h. Bleed water flow rate in gpm (L/s).
4. Air Data: Include design and actual values for the following:
a. Duct airflow rate in cfm (L/s). b. Inlet-duct static pressure in inches wg (Pa). c. Outlet-duct static pressure in inches wg (Pa). d. Average entering-air, wet-bulb temperature in deg F (deg C). e. Average leaving-air, wet-bulb temperature in deg F (deg C). f. Ambient wet-bulb temperature in deg F (deg C).
Q. Heat-Exchanger/Converter Test Reports: For steam and hot-water heat exchangers, include the following:
1. Unit Data: Include the following:
a. Unit identification. b. Location. c. Service. d. Make and type. e. Model and serial numbers. f. Ratings.
2. Steam Test Data: Include design and actual values for the following:
a. Inlet pressure in psig (kPa). b. Condensate flow rate in lb/h (kW).
3. Primary Water Test Data: Include design and actual values for the following:
a. Entering-water temperature in deg F (deg C). b. Leaving-water temperature in deg F (deg C). c. Entering-water pressure in feet of head or psig (kPa). d. Water pressure differential in feet of head or psig (kPa). e. Water flow rate in gpm (L/s).
4. Secondary Water Test Data: Include design and actual values for the following:
a. Entering-water temperature in deg F (deg C). b. Leaving-water temperature in deg F (deg C). c. Entering-water pressure in feet of head or psig (kPa). d. Water pressure differential in feet of head or psig (kPa). e. Water flow rate in gpm (L/s).
R. Pump Test Reports: For pumps, include the following data. Calculate impeller size by plotting the shutoff head on pump curves.
1. Unit Data: Include the following:
a. Unit identification.
Odor Control Phase I at Blue River/81000749 15990 Final Doc. 12/08/2015 Page No.-27 Testing, Adjusting, and Balancing
b. Location. c. Service. d. Make and size. e. Model and serial numbers. f. Water flow rate in gpm (L/s). g. Water pressure differential in feet of head or psig (kPa). h. Required net positive suction head in feet of head or psig (kPa). i. Pump rpm. j. Impeller diameter in inches (mm). k. Motor make and frame size. l. Motor horsepower and rpm. m. Voltage at each connection. n. Amperage for each phase. o. Full-load amperage and service factor. p. Seal type.
2. Test Data: Include design and actual values for the following:
a. Static head in feet of head or psig (kPa). b. Pump shutoff pressure in feet of head or psig (kPa). c. Actual impeller size in inches (mm). d. Full-open flow rate in gpm (L/s). e. Full-open pressure in feet of head or psig (kPa). f. Final discharge pressure in feet of head or psig (kPa). g. Final suction pressure in feet of head or psig (kPa). h. Final total pressure in feet of head or psig (kPa). i. Final water flow rate in gpm (L/s). j. Voltage at each connection. k. Amperage for each phase.
S. Boiler Test Reports: For boilers, include the following:
1. Unit Data: Include the following:
a. Unit identification. b. Location. c. Service. d. Make and type. e. Model and serial numbers. f. Fuel type and input in Btuh (kW). g. Number of passes. h. Ignition type. i. Burner-control types. j. Voltage at each connection. k. Amperage for each phase.
2. Test Data: Include design and actual values for the following:
a. Operating pressure in psig (kPa). b. Operating temperature in deg F (deg C). c. Entering-water temperature in deg F (deg C).
Odor Control Phase I at Blue River/81000749 15990 Final Doc. 12/08/2015 Page No.-28 Testing, Adjusting, and Balancing

d. Leaving-water temperature in deg F (deg C). e. Number of safety valves and sizes in NPS (DN). f. Safety valve settings in psig (kPa). g. High-limit setting in psig (kPa). h. Operating-control setting. i. High-fire set point. j. Low-fire set point. k. Voltage at each connection. l. Amperage for each phase. m. Draft fan voltage at each connection. n. Draft fan amperage for each phase. o. Manifold pressure in psig (kPa).
T. Instrument Calibration Reports: For instrument calibration, include the following:
1. Report Data: Include the following:
a. Instrument type and make. b. Serial number. c. Application. d. Dates of use. e. Dates of calibration.
3.27 ADDITIONAL TESTS
A. Within 90 days of completing testing, adjusting, and balancing, perform additional testing and balancing to verify that balanced conditions are being maintained throughout and to correct unusual conditions.
B. Seasonal Periods: If initial testing, adjusting, and balancing procedures were not performed during near-peak summer and winter conditions, perform additional inspections, testing, and adjusting during near-peak summer and winter conditions.
END OF SECTION 15990
Odor Control Phase I at Blue River/81000749 15990 Final Doc. 12/08/2015 Page No.-29 Testing, Adjusting, and Balancing