Embed Size (px)
Citation preview
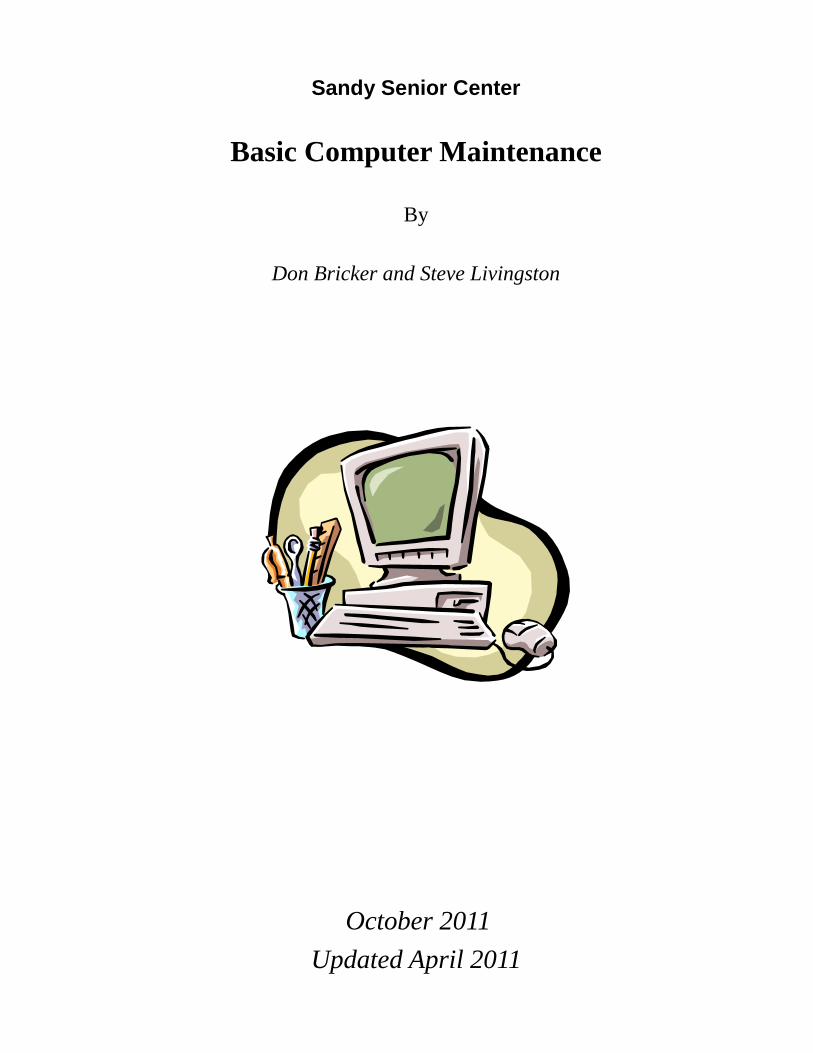
Sandy Senior Center
Basic Computer Maintenance
By
Don Bricker and Steve Livingston
October 2011
Updated April 2011
1
Table of Contents
CLASS 1 .................................................................................................................................................... 2
Hardware ............................................................................................................................................... 3 Tools you will need .......................................................................................................................... 3
External PC maintenance ...................................................................................................................... 3 Before you start ................................................................................................................................ 3
Cleaning the keyboard ...................................................................................................................... 3 Cleaning the mouse .......................................................................................................................... 3 Cleaning the monitor ........................................................................................................................ 4
Internal PC Maintenance ....................................................................................................................... 4 Vacuum the outside air vents for the PC .......................................................................................... 4
Remove the access panels ................................................................................................................ 4 Vacuum dust from inside the PC ...................................................................................................... 4 Replace the covers ............................................................................................................................ 4
Surge protectors ................................................................................................................................ 4 Check fans to verify they are operating ............................................................................................ 4
Software Maintenance ........................................................................................................................... 5 Determining what software is installed and running ........................................................................ 5 Selecting software products to remove............................................................................................. 5 Clean files and registry – CCleaner .................................................................................................. 6
Review and clean up auto-start menu – CCleaner ............................................................................ 7 CLASS 2 .................................................................................................................................................... 8
Keep software updated .......................................................................................................................... 9 Computer manufacturers BIOS or driver updates ............................................................................ 9 Windows updates .............................................................................................................................. 9
Vendor updates ............................................................................................................................... 10 Major release updates ..................................................................................................................... 10
Updates maintenance tool – PSI Secunia ....................................................................................... 10 Managing the Disk .............................................................................................................................. 11
Managing disk fragmentation ......................................................................................................... 11 Wipe free space .............................................................................................................................. 11
CLASS 3 .................................................................................................................................................. 13 Backups ............................................................................................................................................... 14
Data only ........................................................................................................................................ 14 Windows 7 backup ......................................................................................................................... 14
Disk image backup ......................................................................................................................... 15 Cloud backup .................................................................................................................................. 15
Malware protection ............................................................................................................................. 16 Anti-malware programs .................................................................................................................. 16
Chart of relative strengths of anti-malware products ..................................................................... 17 List of free products........................................................................................................................ 18 Other malware defenses ................................................................................................................. 18
CLASS 4 .................................................................................................................................................. 19 Additional Tools .................................................................................................................................. 20
Parental Controls ............................................................................................................................ 20 Encrypting Files.............................................................................................................................. 21 Managing Passwords ...................................................................................................................... 21
2
CLASS 1 Class 1 objectives
Terms:
PC Monitor Keyboard Mouse Optical mouse Surge protectors Background tasks System task bar Add/remove programs / Uninstall programs Registry
Be able to:
Shutdown and power off a PC Clean a keyboard Clean a mouse Clean a PC, outside and inside Install a surge protector Determine what programs are installed on your PC Windows SlimCleaner Uninstall a program Windows Revo Uninstaller Remove temporary files and registry items Windows CCleaner Remove unneeded entries in the auto-start menu CCleaner
Understand: The importance of keeping your PC clean What can happen if fans and vents become clogged The importance of preventing static and surges The effect of having a large number of programs running in the background has on performance The difference between programs installed on your PC but not running, vs. the programs that are running in the background The need to keep the file systems and registry free of unused, temporary items The need to keep the background tasks to a minimum
3
Hardware
Tools you will need
All of the tools you will need are usually found around the house, and most of the time nothing
will need to be purchased.
Screw driver, either a Phillips or a slot.
Static and lint free cleaning cloth.
Commercially produced screen cleaner or distilled water.
Vacuum with hose attachment and crevice tool.
Can of compressed air.
An anti static wrist strap. They wrap around your wrist and attach to the PC cabinet to ground you.
Check your PC manufacturers guide for cleaning instructions, and follow them if different.
External PC maintenance
Before you start
Shut down Windows if the PC is running.
Power off the PC.
Remove the power cords from the PC and the monitor.
Cleaning the keyboard
Turn the keyboard upside down and shake anything loose out of the keys.
Take the can of compressed air and blow between the keys to remove any dust or dirt not yet dislodged.
If you need to, pry off a key to remove large items.
Take a damp static and lint free cloth and wipe the keyboard. Wipe the keyboard dry.
Cleaning the mouse
With a damp static and lint free cloth, wipe, then dry the top and bottom of the mouse.
If the mouse is an optical mouse, gently wipe and dry the optical light area.
If the mouse has a ball: 1. Remove the ball from the mouse by twisting the ring holding the ball. 2. Turn the mouse upright and remove the ball. 3. Wipe the ball with a damp static and lint free cloth. Dry the ball. 4. Inside the ball cavity there are 2 rollers. Clean any foreign matter off with a
small flat bladed screwdriver or the back side of a small bladed knife. Be careful not to scrape the plastic roller material off.
5. Wipe the rollers with a dry static and lint free cloth then dry the rollers. 6. If you see any loose matter in the mouse roller cavity, blow the cavity out
with the can of compressed air.
4
7. Drop the cleaned ball into the ball cavity and lock it in by twisting the ring.
Cleaning the monitor
Do not put liquid on the monitor screen if it is hot. Take the damp static and lint free cloth and gently wipe the screen on the monitor. On, laptops, LCD and LED monitors use eyeglass cleaning solution for the liquid.
Take a dry static and lint free cloth and dry the monitor screen.
Internal PC Maintenance
Vacuum the outside air vents for the PC
Vacuum all external air vents.
Remove the access panels
If the front panel is removable, do so and vacuum under it.
Remove the access door, normally a side panel. Refer to the manufacturer’s manual if you are not familiar with doing this.
Vacuum dust from inside the PC
Vacuum the dust and lint from the inside of the computer. Do not touch the vacuum head to any of the internal electronic components.
Using the compressed air with an extension tube, blow air into all the crevices and behind the components.
Use the vacuum to collect any disturbed dust or lint.
Replace the covers
Replace the front and side covers according to manufacturer’s directions.
Surge protectors
Surge protectors help filter out power surges which can burn out your PC. Never run a PC unless it is connected through one.
Plug the power cord back into the PC. Attach any other wires that have been removed
Check fans to verify they are operating
Power up the PC.
Check that all the fans work. There will be one on the back of the power supply, next to where the power cord plugs in. There may be additional fans on the back and front of the case and power supply
5
Software Maintenance
Determining what software is installed and running
Computer performance is largely influenced by the number of programs that are running at any
one time. The operator (you) may have elected to run a program, such as Internet
Explorer or a word processor, but many programs run automatically in the
“background.” These programs have been designated to start up whenever you start up
your computer and run continuously thereafter.
Some of these programs are required or desirable, such as the virus scan programs. Other
programs can be optional or be downright detrimental to performance. The first place to
look for programs running in the background is in the “System Task Bar.” That is the
section of the task bar on the lower right of your screen adjacent to where the time is
displayed. If you hover your mouse over each icon, you will see a short description of
the program. If you see this icon there, click on it. Note those that you know you do
not want running.
Programs that have been installed on your computer which do NOT run in the background
affect performance to a lesser degree, but take up space on your hard drive. Many of
these were placed on your computer by the manufacturer or were loaded in addition to
programs which you DID want to load. You may notice icons placed on your desk top
that you don’t want or with which you are unfamiliar. Another place to look would be by
running “Control Panel” and the “Add/Remove Programs” option (XP) or the “Uninstall a
Program” option (VISTA or WIN 7). The latter is also displayed as “Programs and
Features” on the alternate display of the Control Panel.
Selecting software products to remove
Download, install and run the program named “SlimCleaner.” When you run it, select the
Software button on the left side. The screen will show all the programs that are installed
on your computer along with a Community rating and a “MORE INFO” button for each.
Clicking this button connects with a database on the internet that should describe what
the program does and if other people who have rated this program suggest that you
should keep it or not. If you choose the uninstall any program, click the name to select it
and click the Uninstall button. Or you may elect to do one of the following.
You may find the download site at: https://www.slimwareutilities.com/ .
Once you have determined the programs you want to remove there are several ways to do
that.
The Microsoft Way
Control Panel / Add/Remove Programs (XP) or Control Panel (Uninstall a Program”:
select the program and select “Uninstall.” This uses the uninstall program file
6
provided by the software vendor. Unfortunately, many software vendors only
uninstall enough to remove the program from the menus. This leaves entries in
the registry, shortcut icons and other files. This is why we recommend an
alternate way.
An Alternate Way
Download, install and run the program named “Revo Uninstaller.” This displays a list of
installed programs and you can select one and uninstall it. The advantage of
Revo is that after running the vendor’s uninstall process, it searches the registry
and file system for any references to the selected program and allows you to
remove those references as well. This latter feature is not supported by the
Microsoft uninstaller process.
When running Revo Uninstaller, select the program to be removed, click the Uninstall
icon at the top, confirm the action by clicking Yes, select the mode – we
recommend the third one (“Moderate”, defaulted) – click Next, wait while the
vendors uninstall process completes then click Next. Revo Uninstaller then
scans the registry and the disk for items left over from the uninstall. If it finds any,
it will display a list of them for you. You can Select All and Delete to clear these
items.
Revo Uninstaller can also be configured to automatically run the Junk File Cleaner
mode whenever you restart your computer.
You may find the download site at: http://www.revouninstaller.com/
Clean files and registry – CCleaner
As computers are used, some data files are left on the system which are no longer needed.
Temporary files may contain, for instance, web pages you looked at many months ago,
backups of data that was saved during a successful installation/upgrade, or system log
files that are out of date. These temporary files can clog the system and cause the
computer to take more time trying to retrieve current data.
Once again, there are several ways to remove temporary or unwanted files:
The Microsoft Way
Select the disk drive you want to clean up from the My Computer window. Select
Properties, either from the File menu or the Right-Click menu. Click on the Disk
Cleanup button. This will take some time to calculate how much disk space you
can regain and display an option screen where you can select which type of files
should be removed. Once you select the file types and proceed, these files will
be permanently removed. This clean up does not save copies to the Recycle
Bin.
7
An Alternate Way
Download, install and run the program named “CCleaner.” This program allows a much
expanded list of types of files to be selected for removal, both Windows files as
well as some application files. It also allows you to specify individual files to
include or exclude. You may set it to run whenever you start up your machine, or
on demand.
When running CCleaner, Cleaner option, the program presents you with a check list of
items it can remove. Carefully review this list (both Windows and Applications)
and check only those items you are comfortable having removed. You may NOT
want to remove such items as Saved Passwords or Start Menu and Desktop
Shortcuts. In addition, if you elect to have Cookies removed, you can identify
certain cookies you wish not to be removed on the Options screen.
Review and clean up auto-start menu – CCleaner
Some programs, when they are installed on a computer, insert themselves into the
auto startup menu so that they will start running when you start or reboot your
system and will continue to run in the background. Some of these are desirable,
such as your antivirus full time scanning program, but others were inserted by the
software installation to facilitate their own uses. These may not be necessary for
the operation of that software, but make their software open faster or look better.
If the software to which these background tasks are attached are not often run,
the background tasks are just wasting system resources and making other
programs run more slowly.
To determine what programs are set to automatically start running, run the “CCleaner”
program. Select the Tool menu and the Startup window. Those programs with
the “Enable” value set to “Yes” will run. You can select one (or more) programs
and click “Disable” to prevent them from starting up the next time your machine is
started up.
During class we will show these options, as wells as other features of CCleaner.
You may find the download site at: http://www.piriform.com/
8
CLASS 2 Class 2 objectives
Terms: Software updates BIOS or driver updates Windows updates Vendor updates Major vs. minor updates Disk management Fragmentation Free space
Be able to: Execute a Windows update Execute a vendor update Check for current updates on all your programs
PSI Secunia Defrag a disk Wipe free space
Understand: The risks of performing a BIOS or driver update The importance of keeping your software current The typical software numbering scheme, major vs. minor updates The effects of a highly defragmented disk The security ramifications of “deleting” a file without cleaning the free space
9
Keep software updated
Almost all computer software is continually enhanced by their authors to fix bugs that have
been discovered and to add new features. Many changes involve protecting your
computer from hackers and invaders. To do your part in protecting your computer, we
highly recommend that you install all upgrades as they are made available to you.
The vendor will create an upgrade process that the end user (you) can use to incorporate
these changes.
NOTE: All of the upgrades referenced below are accessed through the internet. They all
require internet access to function.
Computer manufacturers BIOS or driver updates
The form that these upgrades com in will vary widely by manufacturer. Most often they will
come in the form of an executable file that you can download to some known location
on your computer and then execute. Just follow the instructions supplied by your
manufacturer. NEVER INTERUPT THESE UPGRADES – YOU COULD MAKE YOUR
MACHINE UNBOOTABLE.
CAUTION: It is very important to perform a full system backup
before executing any of these driver or BIOS upgrades.
Windows updates
The Microsoft Windows operating system contains a system to continually keep your system
current. Microsoft will typically make upgrades available on each Tuesday morning. It is
your option to have your computer automatically detect these, download and install
them without your intervention. Or you may elect to be notified of each upgrade before
they are installed, and to have the option to select specific upgrades to not install. You
may also turn off the automatic notification entirely. The latter option would require that
you have to manually detect, download and install the upgrades. We recommend,
unless you are an advanced user, that you set the automatic upgrades on.
To manually install Microsoft Upgrades or to see if there are upgrades that have not been
installed, run Start / Control Panel / (System and Security /) Windows Update
(Vista/Win 7) or Start / Control Panel / Windows Update (left side) (XP).
For Windows XP or earlier OSs, you should perform a full system backup prior to any
operating system upgrade. For VISTA and WIN 7 OSs, the upgrade process will create
a restore point in case the upgrade process fails. See Backup below.
10
Vendor updates
Almost all manufacturers of software will have an upgrade process available somewhere.
Often you will find it after opening their software, on their Help menu. Look for “Check
for Updates” or something similar. If it is not immediately apparent, check on the
vendor’s web site. Some software offers an option to automatically detect pending
upgrades and to automatically download and/or install these upgrades without your
intervention.
Generally, upgrades within a major release number will be free of charge. A new major
release may occur each year and MAY require a fee. You can normally determine the
major release number from the first number of the product release number. For
instance, if the product release number is “3.08.523”, the major release number is “3”. A
release of “3.10.12” should be free, but release “4.01.1453” might require a fee.
As with the operating system upgrades, many application software upgrades contain fixes to
security holes that might have been exploited to gain access to a computer. Therefore,
to keep your computer as safe as possible, we recommend that you keep all your
installed applications up to date.
Major release updates
When a major software upgrade is released, such as a new operating system (XP to VISTA or
WIN 7 to WIN 8), it may be offered to you for an upgrade fee. This level of upgrade is
not required to maintain bug fixes or security but it will usually contain new or highly
enhanced features, hence the major release. The older release will often be supported
by the vendor of a period of time and you might be able to get updates for it for that
time. Eventually the software company will “end-of-life” a product saying that they will no
longer support or fix the older version. It will be your choice at this point to “bite the
bullet” and buy the upgrade or continue to use the unsupported and perhaps insecure
older product.
Updates maintenance tool – PSI Secunia
One way to control the problem of multiple products with multiple upgrades is to use a tool that
checks these for you. You can download, install and run the program named “Personal
Software Inspector – by Secunia.” Rather than your having to manually check for
updates for each application you run, you can have PSI run a scan of your system,
finding all the applications programs you have installed, check their database on the
web and tell you which applications are up to date and which need upgrading. This
search also includes all Microsoft operating systems and applications. After receiving
this report, you can have PSI automatically, or you can manually upgrade those that
need it. PSI can be configured to automatically detect and update out of date
applications.
PSI can also be configured to automatically run whenever you restart your computer.
11
Managing the Disk
Managing disk fragmentation
Hard disk drive file systems can often get “fragmented” as data is removed and added to the
disk. Decreasingly smaller contiguous disk segments force the system to split up files
across different physical locations as they are written to the disk. As you can imagine,
this causes the disk accessing process to have increasing difficulty finding and collating
files as they read the data into memory. This results in a general slowdown and loss of
performance. If your hard drive is small and almost full this is critical. Newer computer
have very large hard drives and many people do not approach filling them making
defragging unlikely. By default, Windows 7 performs this function automatically once a
week.
Fortunately, there is a tool which can help us here too. Microsoft supplies a Defragger. Select
the disk drive you want to clean from the My Computer window. Select Properties,
either from the File menu or the Right-Click menu. Select the Tools tab and click on the
Defragment Now… button. Select the disk you want to defrag (again) and click on
Defragment. This process may take a few minutes to several hours depending on the
size of the disk and the extent of fragmentation. If your hard drive is near full, you
should first do a disk clean up to remove all unnecessary or unwanted files before you
defrag. This will reduce the time required to do the defrag and make use of the new
space.
You may want to run the Analyze option first to see if defragmentation is needed at all.
You should perform a disk backup prior to any disk defragmentation process. See Backup
below.
Wipe free space
For those of you who are concerned about data security, if you want to make sure no one can
extract any information by recovering data from deleted files, we have a tool for that too.
Using the CCleaner tool referenced above, we can select the option to “Wipe Free
Space” after clearing temporary data files. This process writes blank data to ALL the
designated “free” space on a drive. CCleaner has options to perform this write once or
multiple times depending on the level of security you want to achieve.
Another easy way to securely erase files individually may be found if you have installed
SlimCleaner as described above. With SlimCleaner open; select the Disk Tools
button, select Shredder button, select the level of security desired, select Add File or
Add Folder, select one or more files and/or folders and add them to the list, click the
Shred button.
An alternate way is accessed while viewing the files in Windows Explorer. Select the file or
files AND folder or folders you want to securely erase. Right click on the selected item,

12
click on SlimCleaner from the context menu, click on Shred. You will be asked to
confirm and then the program will securely overwrite the contents of the desired file(s)
and folder(s). These SlimCleaner options are quicker than the CCleaner option
because they overwrite the data in specified files only rather than all the unused “free”
space on the drive.
13
CLASS 3 Class 3 objectives
Terms:
Backups Data only backup Windows OS backup Disk image backup Cloud backup Malware Computer virus Computer worms Trojan horses Spyware Spam Scareware Adware Anti-malware Antivirus Search engine
Be able to: Execute a data only backup Execute a disk image and file back using Windows 7 backup Execute a disk image backup, previous OSs Define what malware software is Find anti-malware software Install and run anti-malware software
Understand: The importance of backups The difference between an image backup and a data backup The importance of preventing malware infections in your PC Which internet sites might put your PC at risk
14
Backups
As much as we would like to think otherwise, bad things do happen to our computers. These
include, but are not limited to: hardware failure (hard drive, CPU, motherboard, power
failure or spikes), software failure (OS or program crashes, programming bugs, virus
attacks), environment factors (fire, flood, theft) and operations errors (accidental
deletion or overwrite).
Much of what you have on your computer COULD be reproduced. You may have access to
operating system disks to reinstall it if needed. On newer computers the vendor does
not provide these disks and you may need to create recovery disks. Most vendors now
put the recovery disk or program on a hidden hard drive partition that you can get to by
pressing a function key on boot up. This does you no good if the hard drive fails before
you make a backup or generate recovery disks. Or many of the applications you have
downloaded could be downloaded again if they are lost. But some of what you have is
what we call “single source”. Think of those pictures you have downloaded from your
camera and then cleared from the camera. Or maybe you have written letters or
documents critical to your family. If you were to lose these, there would be no way to
reproduce them.
A Kabooza Global Backup Survey of 2009 reported:
82% of home PC users don't do regular backups.
66% have lost pictures and files on their home PC, 42% within the last year.
71% are most worried about losing their digital pictures on their home PC.
There a number of ways to backup data and a number of products to help you do it. You just
have to decide that you will do something.
Data only
A quick and easy way to save those critical and single source items is to copy them to a
different location. Insert a writable CD, DVD or a flash drive. Locate your Documents or
Pictures folders (Start / [My] Documents), select them, click Edit and Copy. Navigate
to the external media and Paste the files there.
After the initial copy, you would probably want to establish a regular procedure to keep your
backups current.
Windows OS backup
For users of Microsoft VISTA Business edition or any Windows 7 edition a full function
system and file, easy to use backup utility is now included. It will require that you
designate a destination location for the backup. You may not use the same location as
the OS, so you will have to use a different partition, different internal hard drive, external
hard drive, DVD or USB flash drive. DVD's or even USB flash drives are good for data
15
backups but an external or internal removable hard drive should be used for system
backups. The free space required on the destination device will vary depending on the
amount of data to be backed up and the type of backup selected. To fully utilize the
multiple backup capability of this utility, we recommend you get an external USB disk
drive with at least twice your C: drive capacity.
Once the destination device is attached, run the “Backup and Restore” utility. As you configure
the backup, you will have the option to “Let Windows choose” or “Let me choose” which
drives and/or which individual folders will be backed up. You can also elect to include a
“system image” or not. If you include the system image, you can restore your system,
including the OS and all installed applications, completely to the state it was in when
backed up without having to manually install the OS and applications. This is highly
recommended.
This backup can be scheduled to run automatically on a periodic basis. Just remember that the
computer must be left running at the scheduled times and the remote device must be
plugged in.
Disk image backup
For users of older Microsoft OSs, like XP, the best option might be to use one of the numerous
and free backup utilities available on the web. ((Paragon Backup & Recovery,
Macrium Reflect)) These products will allow you to burn a boot-able CD or DVD so that
in case of a catastrophic disk crash you can boot from this disk and reload your
machine with your system backup. Make sure you boot with this disk before you have a
disaster to make sure it will boot and find your recovery device. Some free programs
also include an automated scheduler
Cloud backup
A recent option is the backup to an internet location, aka “The Cloud.” There are several
vendors offering to store your backups on their servers. A few of these offer a minimal
service for free, usually only 2 Gb of online storage. More vendors offer additional space
for higher fees. The advantage of online storage is the ease of access and the security
of keeping you data away from the threat of fire, flood or theft. The disadvantages are
the cost, the throughput (the time it takes to upload data to their server) and concerns
over having your data in someone else’s hands. In most cases, all the other types of
backups mentioned above can be configured to use an internet location to receive the
backup.
But, whatever you do, please backup your critical data somewhere.
16
Malware protection
Malware refers to any sort of program or process that negatively affects your PC. It includes,
but is not limited to computer viruses, computer worms, Trojan horses, spyware,
scareware and adware. Some of these are relatively innocuous, such as adware that
places targeted ads on certain web pages. Other malware is particularly malicious,
crashing your system, deleting files, stealing your identity or taking over your computer
to make it perform illegal acts. All of us are susceptible, even if we do not connect to the
internet. Any time ANY external device is plugged into your computer or you install
ANYTHING, there is the possibility of contracting malware.
Anti-malware programs
Our first line of defense is a current anti-malware program. Typically, these programs can
search your entire PC for existing malware and can scan any incoming programs or files
for malware as they are loaded into your machine. Most incorporate a “fix” option which
will delete or isolate the detected malware so it cannot continue to infect your machine
or replicate itself to other’s machines. To be effective an anti-malware program should
be continually updated as new threats are discovered. Your machine, with its anti-
malware program operating, requires access to the internet to get the latest updated to
the malware database.
There are many competent anti-malware programs on the market. Most will charge a 6-month
or annual fee, but there are some good ones that are freeware. Of the better ones, each
will have areas in which they do better than or not as good as others. It may take some
research to decide which is for you.
There are several sites that rate malware (or antivirus programs). You can access these by
Googling “anti-malware reviews” or “antivirus reviews.” Do, however, be cautions of
sites that advertise particular products – they may be biased. One particular favorite of
the instructors at SSC is: http://www.virusbtn.com/ . Look for “VB100.” This will lead you
to the most current comparison chart such as that below. This plots the results of tests
of dozens of products. The “best” will be those that plot closest to the upper right corner.

17
Chart of relative strengths of anti-malware products
Whichever anti-malware product you have already installed or plan to install should be
configured to automatically update its database and to periodically run a full system
scan. This implies that you leave your computer running during those times of updates
and scans. It should also be set to scan full time for malware as files and email are
downloaded. These are the normal default settings, but as you install and setup your
anti-malware look for these settings. Be aware that you can have ONLY ONE antivirus
program running at one time. To change to a different program, the existing one has to
be uninstalled before the new one is installed.

18
List of free products
A partial list of competent and FREE anti-malware products follows: (in alphabetic order)
avast! http://www.avast.com/en-us/index
AVG http://free.avg.com/us-en/homepage
Avira http://www.avira.com/en/avira-free-antivirus
Comodo http://antivirus.comodo.com/
Microsoft Security Essentials http://www.microsoft.com/en-
us/security_essentials/default.aspx
PC Tools http://www.pctools.com/free-antivirus/index/d/2/
Other malware defenses
Your second line of defense against malware is your own behavior when dealing with the
internet and email. You should be suspicious about opening emails from people or
businesses you don’t know. A spam filter in your email program should help prevent
some of the obvious scams. Don’t open an attachment to an email unless you know the
source and trust that they know the file is not infected. Likewise, don’t click on links
within an email unless your trust the sender and the link.
Secondly, be aware as you surf the web. Use a reputable search engine such as Google,
Yahoo or Bing (Microsoft). When you enter a search subject and receive a page of
possible links, review the links before selecting one. Don’t use the PAID links unless
you know that is where you want to go. Those will be placed on the right side of the
page under the “Ads” or “Sponsored” column AND at the top of the list highlighted in a
color and marked as “Ads” or “Sponsored.” Read the blue, underlined links and the web
page extract in black to see if it is what you want, and finally look at the actual web
address (URL) in green to which you will be sent if you click the link. If any of these
does not “look right,” don’t click on the link.
In addition to the antivirus programs, there are other OPTIONAL programs that CAN run
simultaneously with your selected antivirus. These are:
Spam filters: These are normally included in your mail server.
Adware filters: Such as Ad-Aware
Spyware filters: Prevents infections from spyware
19
CLASS 4 Class 4 objectives
Terms: Parental controls Content filters Usage controls Computer usage management tools Parental monitoring Router-based filtering Stealth monitoring programs Alternate boot media from the BIOS File encryption Encryption key or password Password management
Be able to: Install and run parental control software Install and run file encryption software Install and run password management software
Understand: The importance of parental controls The importance of file encryption The importance of password management
20
Additional Tools
Parental Controls
Parental Control is a general name for a set of restrictions that can be placed on a computer or
on a computer user to restrict access and to log activity. As Wikipedia says “Parental
controls fall into roughly four categories, content filters, which limit access to age
appropriate content, usage controls, which constrain the usage of these devices such
as placing time-limits on usage or forbidding certain types of usage, computer usage
management tools, which allow parents to enforce learning time into child computing
time, and monitoring, which can track location and activity when using the devices.”
As with other products, there are some products that incorporate all these features and others
that do not. When evaluating the various offerings, keep in mind the following:
Look for user-selectable access levels and customizable website lists.
Look for filtering of instant messaging and social networking sites.
Look for a package that's easy to maintain and update.
The following is a partial list of some of the products available:
Windows 7 Parental Controls included http://windows.microsoft.com/en-US/windows-
vista/Set-up-Parental-Controls
Parental Control Bar free http://parentalcontrolbar.org/
Windows Live Family Safety free http://explore.live.com/windows-live-family-
safety-xp not well rated
Norton Online Family free
https://onlinefamily.norton.com/familysafety/loginStart.fs
Net Nanny $30 (1), $60 (3) http://www.netnanny.com
highest rating
While looking at software solutions, also investigate these two hardware based ADDITIONS
which will make your protection system even more secure.
Router-based filtering and stealth monitoring programs. If you use a router to
connect to the internet, look at the router setup program to see if you can set access
restrictions there. This will preclude the use of alternate users or browsers to bypass
software restrictions.
Restrict alternate boot media from the BIOS. If your teenager is savvy enough,
he/she might be able to use an operating system on a CD or flash drive to boot up
21
and thus bypass the restrictions you set in Windows. You may want to run the BIOS
setup program and restrict alternate boot sources. If you do this, be sure to
password the setup program.
Some of these “solutions” see rather extreme, and they probably will not be effective for some
dependents. The more computer sophisticated the individual, the less likely any of the
above will be effective. At that point, your best bet is to allow them to use the computer
only in a public part of the house and to physically monitor what they are doing.
Encrypting Files
It may someday happen that you develop one or more files that you feel need more security
than is provided by a username and password logon to your computer. Those might
include a list of all your passwords, a list of all your assets with account numbers, a file
generated by your banking software such as Quicken, or medical records. This might be
particularly true if other people have access to your computer, such as kids and
grandkids.
To handle this case you might want to use encryption. Encryption involves rewriting the file
using an algorithm that uses a key or password and translates each character in the file
into another character. The resultant file cannot be read by any person or program
unless they decrypt it using the key. There are a number of free products out there that
will allow you to encrypt individual files or whole folders of files. One recommendation
would be TrueCrypt. It is available at: http://www.truecrypt.org/ and is free of charge
(donations are taken). This tool allows you to create a virtual disk into which you place
all the files you want. While it is open it looks like any other disk or USB device. You can
create, read and write to any file in it. Once you close it, the entire contents are
encrypted and no one can read or write to the data. Thereafter, it requires a key or
password to open it again. The product uses a very high level of encryption, and can be
set for extremely high levels. See a SSC instructor for more details and help setting this
up.
Managing Passwords
If you are like many computer users you may have accumulated a large number of user (or
logon) names and passwords. Remembering them all is quite a task so you either use
the same password for everything, or you write out a list which you leave on your desk
with the computer. Neither of these ways is really secure. Think of your having
established an encrypted virtual disk (as described above) and then putting the key to it
on a piece of paper where other people can easily find it.
What you need is a way to securely manage your user names and passwords. Again, there
are several tools available free of charge, but the one I recommend is named Keepass.
It can be downloaded and installed from http://keepass.info/ . Several of the really
helpful features of the tool are;
22
You can attach the web page URL to each record so a simple double click will
open your browser directly to the appropriate web page.
You can type a key sequence which will cause KeePass to automatically
paste the user name and password directly into the entry boxes on most web
pages.
If this does not work, you can “drag and drop” these fields from KeePass
directly to the entry boxes on the web site.
You can have Keepass generate random passwords of any length and
complexity so you’re not using the same one for all your accounts.
It can be installed into a USB flash drive so you can carry it with you and you
can have access to your passwords while using any computer.
The database that holds all these passwords is highly encrypted itself and
can only be opened with its own password or password phrase. But this
password is the only one you will have to remember.
See a SSC instructor at one of the computer labs for more details and help setting this up.