Embed Size (px)
Citation preview
ISSUE # 4 (1015260515)
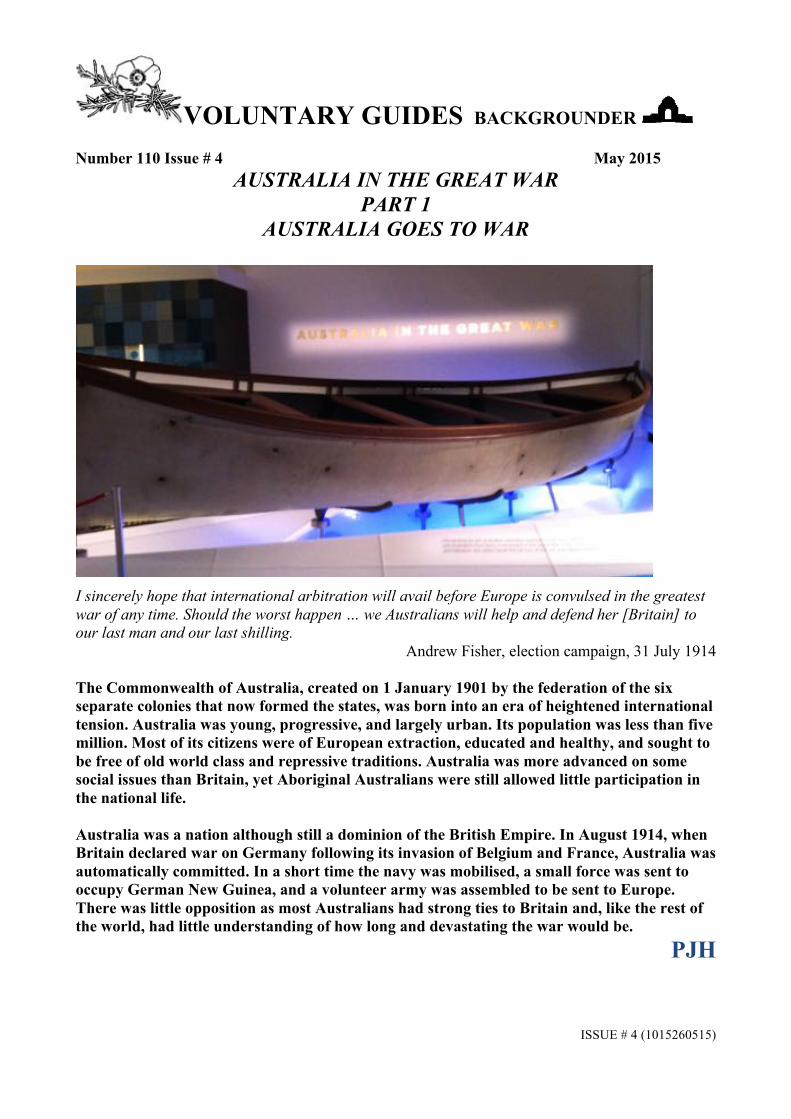
VOLUNTARY GUIDES BACKGROUNDER Number 110 Issue # 4 May 2015
AUSTRALIA IN THE GREAT WAR PART 1
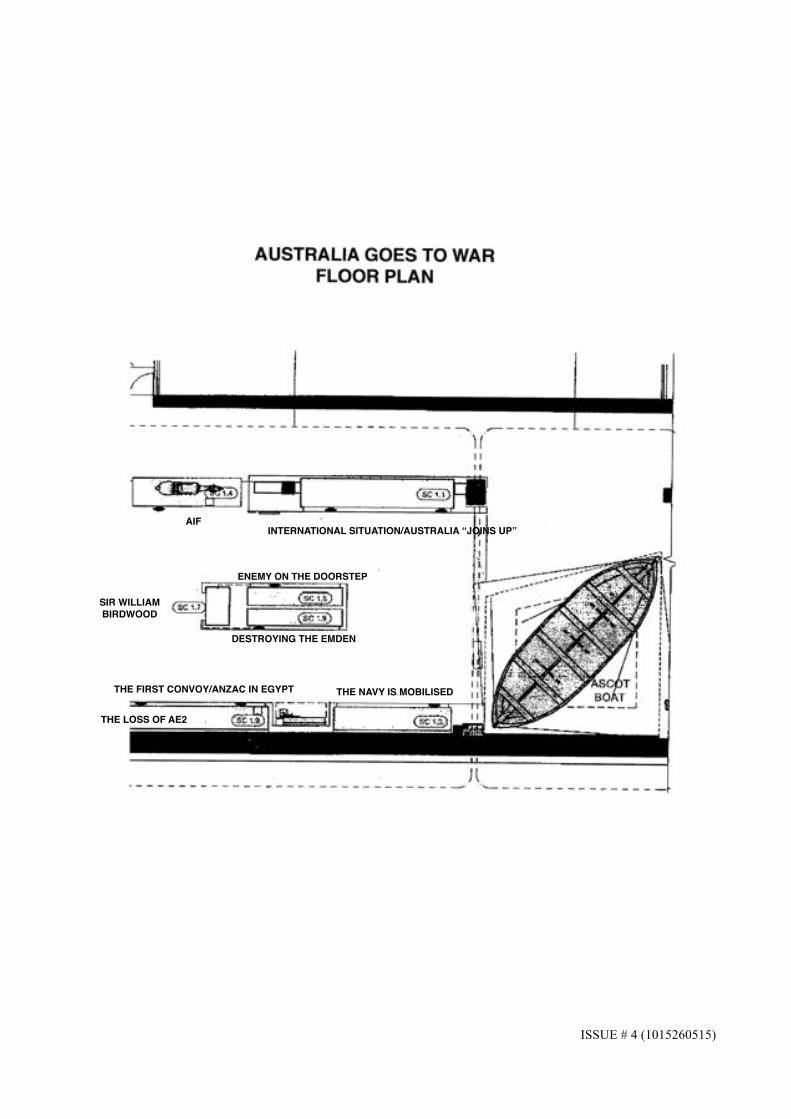
AUSTRALIA GOES TO WAR
I sincerely hope that international arbitration will avail before Europe is convulsed in the greatest war of any time. Should the worst happen … we Australians will help and defend her [Britain] to our last man and our last shilling.
Andrew Fisher, election campaign, 31 July 1914 The Commonwealth of Australia, created on 1 January 1901 by the federation of the six separate colonies that now formed the states, was born into an era of heightened international tension. Australia was young, progressive, and largely urban. Its population was less than five million. Most of its citizens were of European extraction, educated and healthy, and sought to be free of old world class and repressive traditions. Australia was more advanced on some social issues than Britain, yet Aboriginal Australians were still allowed little participation in the national life. Australia was a nation although still a dominion of the British Empire. In August 1914, when Britain declared war on Germany following its invasion of Belgium and France, Australia was automatically committed. In a short time the navy was mobilised, a small force was sent to occupy German New Guinea, and a volunteer army was assembled to be sent to Europe. There was little opposition as most Australians had strong ties to Britain and, like the rest of the world, had little understanding of how long and devastating the war would be.
PJH
ISSUE # 4 (1015260515)
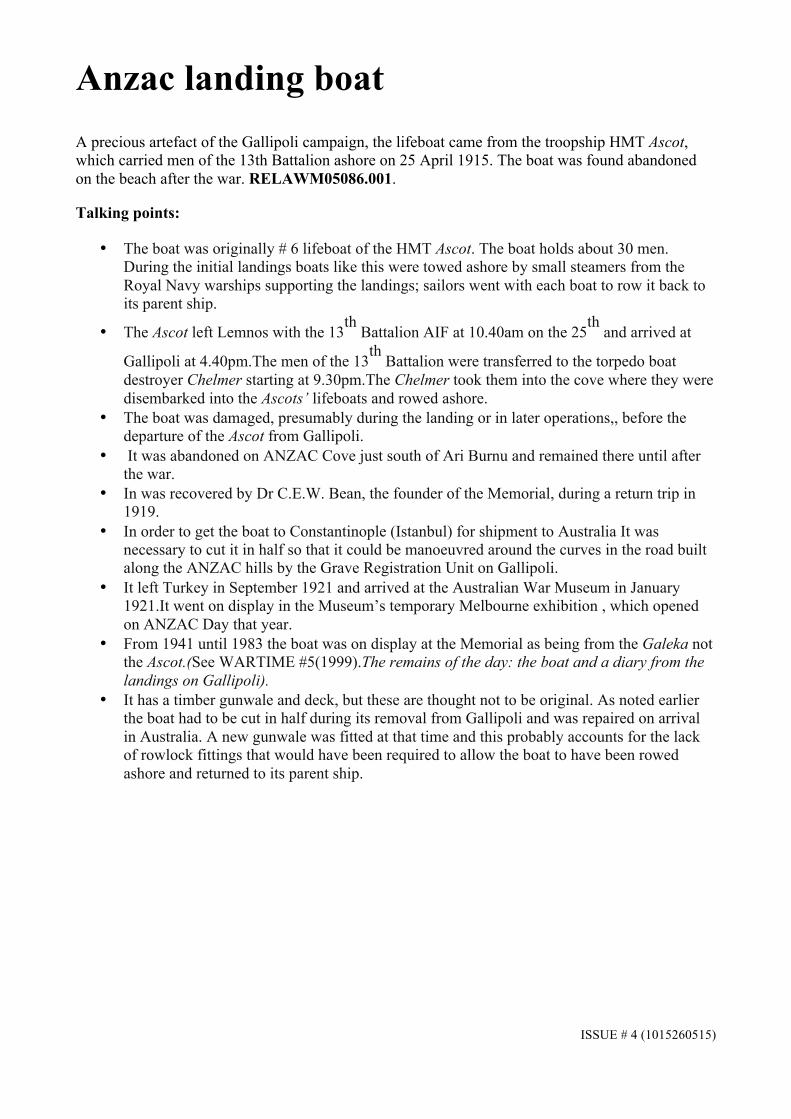
Anzac landing boat
A precious artefact of the Gallipoli campaign, the lifeboat came from the troopship HMT Ascot, which carried men of the 13th Battalion ashore on 25 April 1915. The boat was found abandoned on the beach after the war. RELAWM05086.001.
Talking points:
• The boat was originally # 6 lifeboat of the HMT Ascot. The boat holds about 30 men. During the initial landings boats like this were towed ashore by small steamers from the Royal Navy warships supporting the landings; sailors went with each boat to row it back to its parent ship.
• The Ascot left Lemnos with the 13th
Battalion AIF at 10.40am on the 25th
and arrived at
Gallipoli at 4.40pm.The men of the 13th
Battalion were transferred to the torpedo boat destroyer Chelmer starting at 9.30pm.The Chelmer took them into the cove where they were disembarked into the Ascots’ lifeboats and rowed ashore.
• The boat was damaged, presumably during the landing or in later operations,, before the departure of the Ascot from Gallipoli.
• It was abandoned on ANZAC Cove just south of Ari Burnu and remained there until after the war.
• In was recovered by Dr C.E.W. Bean, the founder of the Memorial, during a return trip in 1919.
• In order to get the boat to Constantinople (Istanbul) for shipment to Australia It was necessary to cut it in half so that it could be manoeuvred around the curves in the road built along the ANZAC hills by the Grave Registration Unit on Gallipoli.
• It left Turkey in September 1921 and arrived at the Australian War Museum in January 1921.It went on display in the Museum’s temporary Melbourne exhibition , which opened on ANZAC Day that year.
• From 1941 until 1983 the boat was on display at the Memorial as being from the Galeka not the Ascot.(See WARTIME #5(1999).The remains of the day: the boat and a diary from the landings on Gallipoli).
• It has a timber gunwale and deck, but these are thought not to be original. As noted earlier the boat had to be cut in half during its removal from Gallipoli and was repaired on arrival in Australia. A new gunwale was fitted at that time and this probably accounts for the lack of rowlock fittings that would have been required to allow the boat to have been rowed ashore and returned to its parent ship.
ISSUE # 4 (1015260515)
INTERNATIONAL SITUATION/AUSTRALIA “JOINS UP”AIF
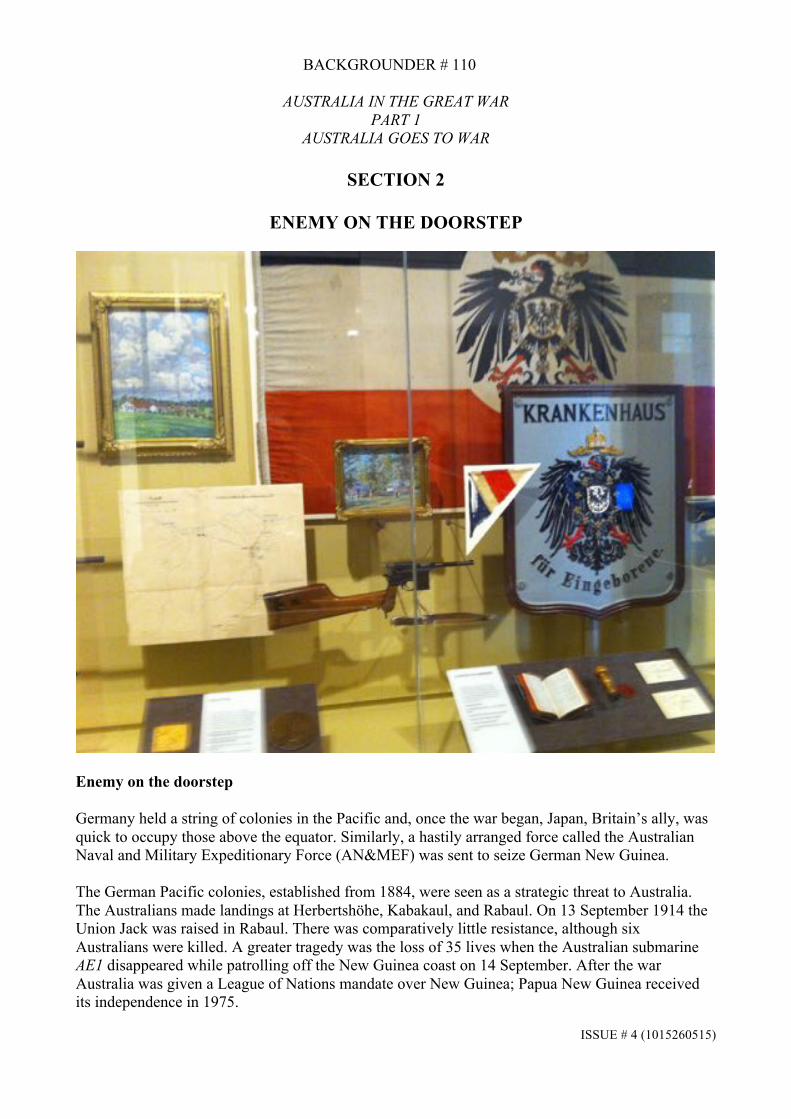
ENEMY ON THE DOORSTEP
DESTROYING THE EMDEN
SIR WILLIAM BIRDWOOD
THE NAVY IS MOBILISEDTHE FIRST CONVOY/ANZAC IN EGYPT
THE LOSS OF AE2

ISSUE # 4 (1015260515)
ISSUE # 4 (1015260515)
BACKGROUNDER # 110
AUSTRALIA IN THE GREAT WAR
PART 1 AUSTRALIA GOES TO WAR
FOREWORD
BACKGROUNDER # 110 Issue # 3 December 2014 has been rescoped as Issue # in the series covering the 2013-2014 redevelopment of the Australia in the Great War Galleries :
# 110 PART 1 - AUSTRALIA IN THE GREAT WAR - AUSTRALIA GOES TO WAR # 111 PART 2 - AUSTRALIA IN THE GREAT WAR -THE ANZAC STORY- GALLIPOLI # 112 PART 3 - AUSTRALIA IN THE GREAT WAR - WESTERN FRONT 1916 # 113 PART 4 - AUSTRALIA IN THE GREAT WAR - WESTERN FRONT 1917 -THE WORST YEAR # 114 PART 5 - AUSTRALIA IN THE GREAT WAR - WESTERN FRONT 1918 # 115 PART 6 - AUSTRALIA IN THE GREAT WAR - SINAI PALESTINE # 116 PART 7- AUSTRALIA IN THE GREAT WAR – LEGACIES OF THE WAR
The variations in Issue #4 are as follows:
• All Sections have now been sequenced to provide what might be considered a better guiding regime;
• The previous Section 3 - The Loss of the AE 2, has been removed noting that it has since
been incorporated in BACKGROUNDER# 111;
• Section 2 –Enemy on the Doorstep now contains:
o Notes on the Loss of AE 1 on 14 September 1914; o Battle of Bita Paka :Article by Peter Judge VGAWM .Originally published in the
Guide Post September 2014; and o First Australian Killed in WW1: Precis of Cameo Talk by Michael Dowsett
VGAWM. Originally published in the Guide Post April 2015.
• Section 6 – Destroying the Emden, incorporates notes on the SMS EMDEN’s Ship’s Bell : Hope this helps. Peter Hugonnet Voluntary Guide May 2015

ISSUE # 4 (1015260515)
ISSUE # 4 (1015260515)
BACKGROUNDER # 110
AUSTRALIA IN THE GREAT WAR PART 1
AUSTRALIA GOES TO WAR
CONTENTS
ANZAC LANDING BOAT
FOREWORD
GALLERY FLOOR PLAN
SECTION 1 INTERNATIONAL SITUATION & AUSTRALIA ” JOINS UP” SECTION 2 ENEMY ON THE DOORSTEP SECTION 3 THE AIF SECTION 4 SIR WILLIAM BIRDWOOD SECTION 5 THE NAVY IS MOBILISED SECTION 6 DESTROYING THE EMDEN SECTION 7 THE FIRST CONVOY & ANZAC IN EGYPT

ISSUE # 4 (1015260515)
ISSUE # 4 (1015260515)
BACKGROUNDER # 110
AUSTRALIA IN THE GREAT WAR PART 1
AUSTRALIA GOES TO WAR
SECTION 1
INTERNATIONAL SITUATION / AUSTRALIA “JOINS UP”
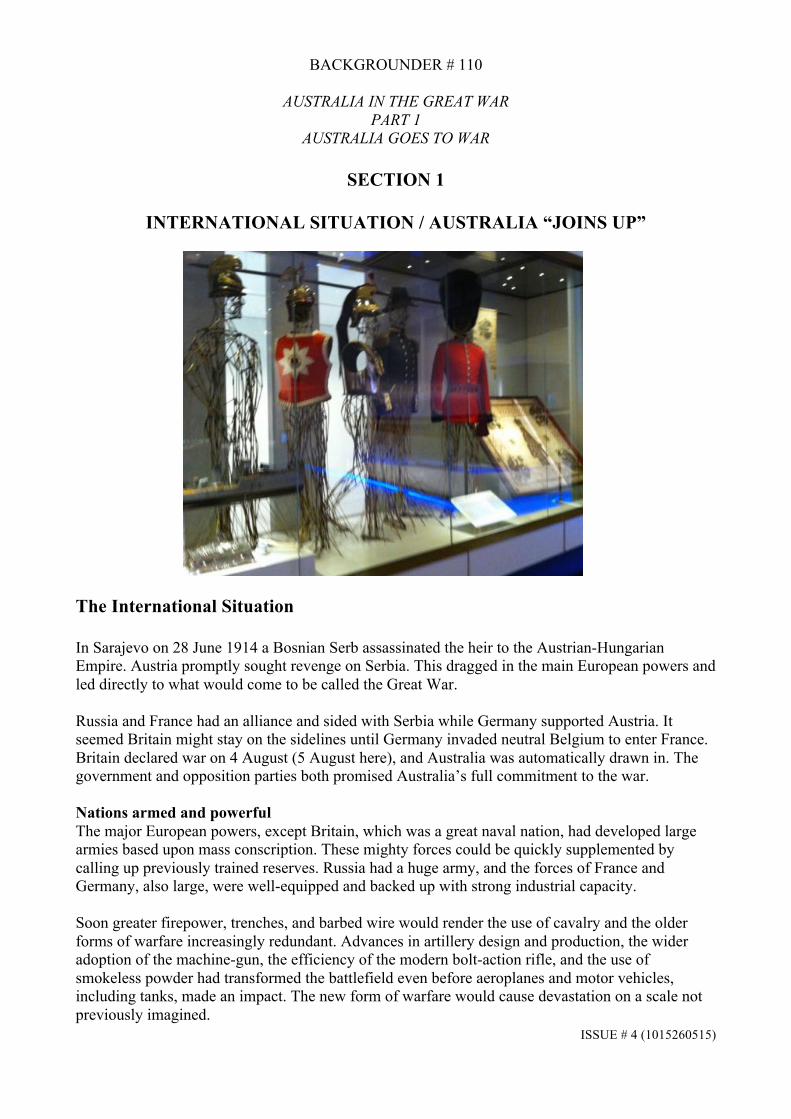
The International Situation In Sarajevo on 28 June 1914 a Bosnian Serb assassinated the heir to the Austrian-Hungarian Empire. Austria promptly sought revenge on Serbia. This dragged in the main European powers and led directly to what would come to be called the Great War. Russia and France had an alliance and sided with Serbia while Germany supported Austria. It seemed Britain might stay on the sidelines until Germany invaded neutral Belgium to enter France. Britain declared war on 4 August (5 August here), and Australia was automatically drawn in. The government and opposition parties both promised Australia’s full commitment to the war. Nations armed and powerful The major European powers, except Britain, which was a great naval nation, had developed large armies based upon mass conscription. These mighty forces could be quickly supplemented by calling up previously trained reserves. Russia had a huge army, and the forces of France and Germany, also large, were well-equipped and backed up with strong industrial capacity. Soon greater firepower, trenches, and barbed wire would render the use of cavalry and the older forms of warfare increasingly redundant. Advances in artillery design and production, the wider adoption of the machine-gun, the efficiency of the modern bolt-action rifle, and the use of smokeless powder had transformed the battlefield even before aeroplanes and motor vehicles, including tanks, made an impact. The new form of warfare would cause devastation on a scale not previously imagined.
ISSUE # 4 (1015260515)
Imperial Russian standard In 1914 the Russian army was the largest in the world, and despite having performed poorly in the Russo-Japanese War of 1904–05, it was greatly feared by Germany. The “Russian Steamroller” was expected to overwhelm any opposition by sheer weight of numbers, but poor communications, equipment, and leadership severely hampered it. The imperial standard of the 161st Infantry Regiment, raised in the city of Alexandropol (now Gyumri, in Armenia), was presented by Czar Alexander III in 1882. REL/03303.002 REL_03303-AT-1-FRONT.jpg
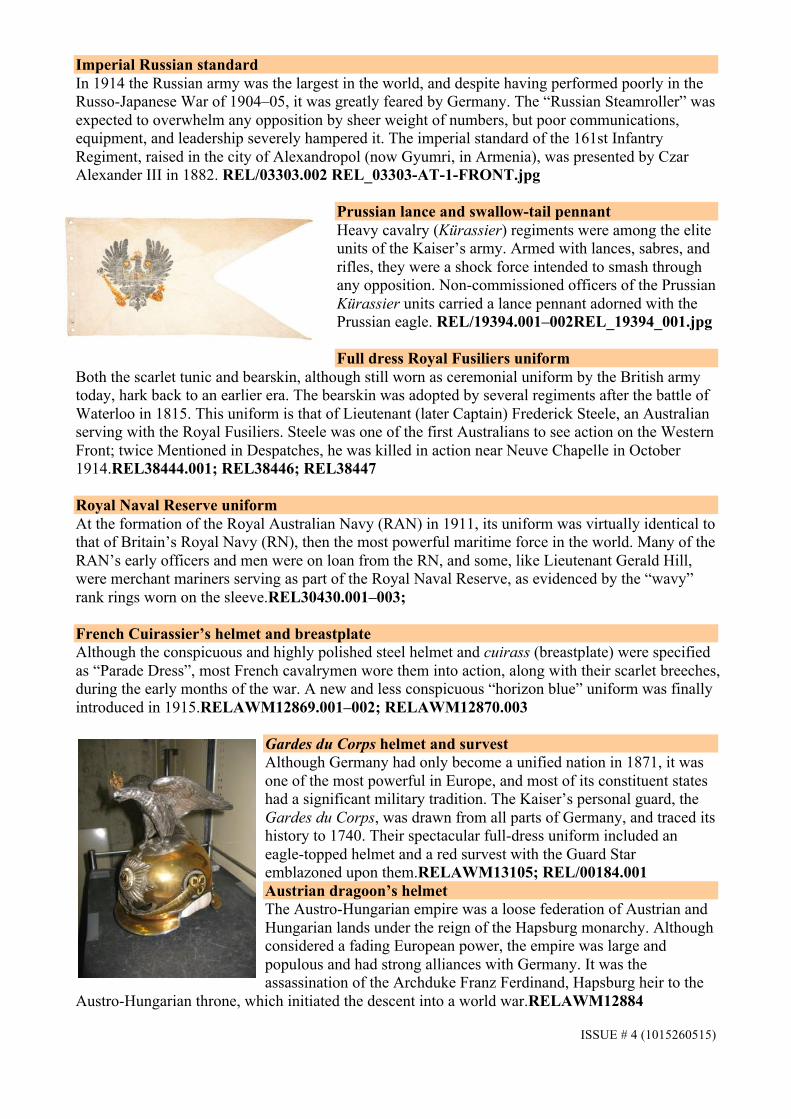
Prussian lance and swallow-tail pennant Heavy cavalry (Kürassier) regiments were among the elite units of the Kaiser’s army. Armed with lances, sabres, and rifles, they were a shock force intended to smash through any opposition. Non-commissioned officers of the Prussian Kürassier units carried a lance pennant adorned with the Prussian eagle. REL/19394.001–002REL_19394_001.jpg Full dress Royal Fusiliers uniform
Both the scarlet tunic and bearskin, although still worn as ceremonial uniform by the British army today, hark back to an earlier era. The bearskin was adopted by several regiments after the battle of Waterloo in 1815. This uniform is that of Lieutenant (later Captain) Frederick Steele, an Australian serving with the Royal Fusiliers. Steele was one of the first Australians to see action on the Western Front; twice Mentioned in Despatches, he was killed in action near Neuve Chapelle in October 1914.REL38444.001; REL38446; REL38447 Royal Naval Reserve uniform At the formation of the Royal Australian Navy (RAN) in 1911, its uniform was virtually identical to that of Britain’s Royal Navy (RN), then the most powerful maritime force in the world. Many of the RAN’s early officers and men were on loan from the RN, and some, like Lieutenant Gerald Hill, were merchant mariners serving as part of the Royal Naval Reserve, as evidenced by the “wavy” rank rings worn on the sleeve.REL30430.001–003; French Cuirassier’s helmet and breastplate Although the conspicuous and highly polished steel helmet and cuirass (breastplate) were specified as “Parade Dress”, most French cavalrymen wore them into action, along with their scarlet breeches, during the early months of the war. A new and less conspicuous “horizon blue” uniform was finally introduced in 1915.RELAWM12869.001–002; RELAWM12870.003
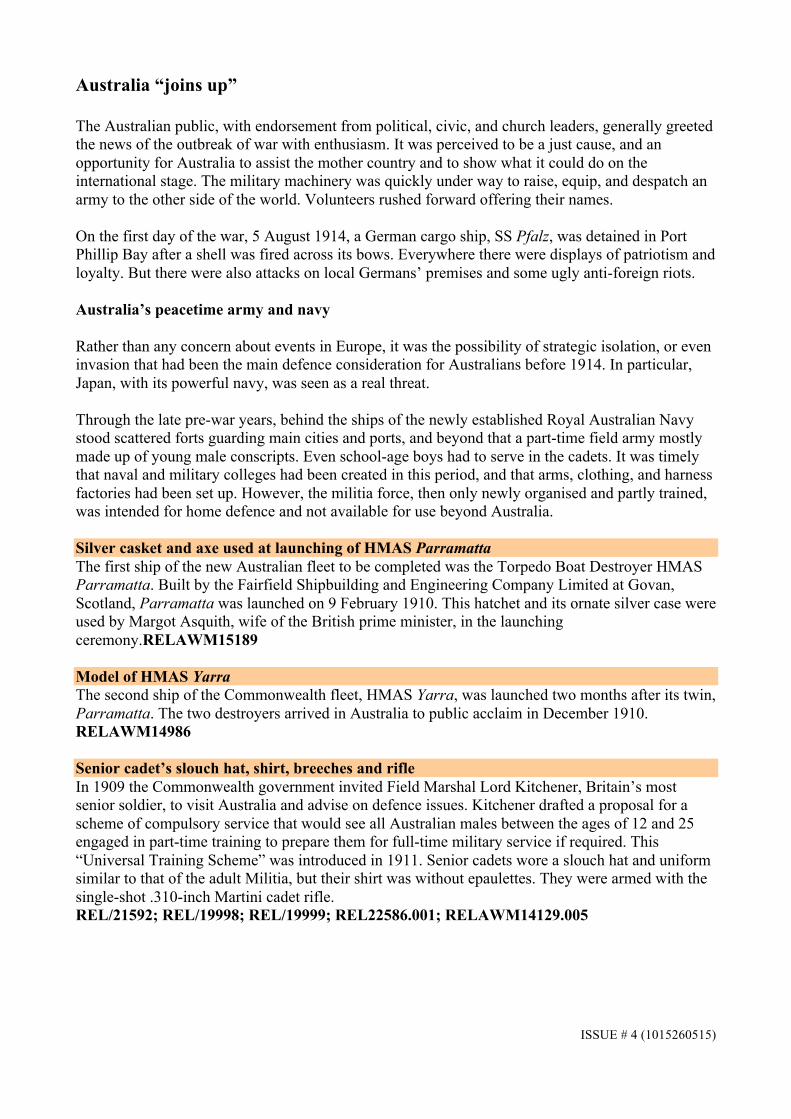
Gardes du Corps helmet and survest Although Germany had only become a unified nation in 1871, it was one of the most powerful in Europe, and most of its constituent states had a significant military tradition. The Kaiser’s personal guard, the Gardes du Corps, was drawn from all parts of Germany, and traced its history to 1740. Their spectacular full-dress uniform included an eagle-topped helmet and a red survest with the Guard Star emblazoned upon them.RELAWM13105; REL/00184.001 Austrian dragoon’s helmet The Austro-Hungarian empire was a loose federation of Austrian and Hungarian lands under the reign of the Hapsburg monarchy. Although considered a fading European power, the empire was large and populous and had strong alliances with Germany. It was the assassination of the Archduke Franz Ferdinand, Hapsburg heir to the
Austro-Hungarian throne, which initiated the descent into a world war.RELAWM12884
ISSUE # 4 (1015260515)
Australia “joins up” The Australian public, with endorsement from political, civic, and church leaders, generally greeted the news of the outbreak of war with enthusiasm. It was perceived to be a just cause, and an opportunity for Australia to assist the mother country and to show what it could do on the international stage. The military machinery was quickly under way to raise, equip, and despatch an army to the other side of the world. Volunteers rushed forward offering their names. On the first day of the war, 5 August 1914, a German cargo ship, SS Pfalz, was detained in Port Phillip Bay after a shell was fired across its bows. Everywhere there were displays of patriotism and loyalty. But there were also attacks on local Germans’ premises and some ugly anti-foreign riots. Australia’s peacetime army and navy Rather than any concern about events in Europe, it was the possibility of strategic isolation, or even invasion that had been the main defence consideration for Australians before 1914. In particular, Japan, with its powerful navy, was seen as a real threat. Through the late pre-war years, behind the ships of the newly established Royal Australian Navy stood scattered forts guarding main cities and ports, and beyond that a part-time field army mostly made up of young male conscripts. Even school-age boys had to serve in the cadets. It was timely that naval and military colleges had been created in this period, and that arms, clothing, and harness factories had been set up. However, the militia force, then only newly organised and partly trained, was intended for home defence and not available for use beyond Australia. Silver casket and axe used at launching of HMAS Parramatta The first ship of the new Australian fleet to be completed was the Torpedo Boat Destroyer HMAS Parramatta. Built by the Fairfield Shipbuilding and Engineering Company Limited at Govan, Scotland, Parramatta was launched on 9 February 1910. This hatchet and its ornate silver case were used by Margot Asquith, wife of the British prime minister, in the launching ceremony.RELAWM15189 Model of HMAS Yarra The second ship of the Commonwealth fleet, HMAS Yarra, was launched two months after its twin, Parramatta. The two destroyers arrived in Australia to public acclaim in December 1910. RELAWM14986 Senior cadet’s slouch hat, shirt, breeches and rifle In 1909 the Commonwealth government invited Field Marshal Lord Kitchener, Britain’s most senior soldier, to visit Australia and advise on defence issues. Kitchener drafted a proposal for a scheme of compulsory service that would see all Australian males between the ages of 12 and 25 engaged in part-time training to prepare them for full-time military service if required. This “Universal Training Scheme” was introduced in 1911. Senior cadets wore a slouch hat and uniform similar to that of the adult Militia, but their shirt was without epaulettes. They were armed with the single-shot .310-inch Martini cadet rifle. REL/21592; REL/19998; REL/19999; REL22586.001; RELAWM14129.005
ISSUE # 4 (1015260515)
The governor-general and prime ministers No sooner had Australia entered the war than the Liberals lost government to the Labor Party in a federal election, and Andrew Fisher became prime minister. The new Labor government had an agenda of social reform but the war was a priority. To strengthen its wartime authority and enable it to deal with matters such as national security and censorship, the government quickly passed the War Precautions Act 1914. Fisher did not stay long, resigning after a year and handing over to the energetic, irascible, and wily Billy Hughes. Hughes had little in common with the wartime governor-general, Sir Ronald Munro-Ferguson, who was a privileged Scottish gentleman, a former officer of the Grenadier Guards and Liberal politician, and a polished statesman. Still, a partnership developed between the two men that ensured Australia’s full commitment to the war. Governor-general’s uniform Australia’s sixth governor-general, Sir Ronald Munro Ferguson, had assumed the role only in May 1914. Within months, the nation was at war, and Ferguson threw himself wholeheartedly into the conflict, both militarily (as commander-in-chief of the armed forces) and politically. Munro Ferguson’s wife, Lady Helen, was a tireless worker and fund-raiser for the British Red Cross throughout the war, and the couple, though imperious and sometimes overbearing, were immensely popular with the Australian public. REL/00120.001, 003–004; REL/01108.001–005; RELAWM14175L Cablegram announcing outbreak of war This cablegram, sent from London to the governor-general on 5 August 1914, drew Australia into the world conflict. As the king’s representative in Australia, the governor-general received the first notification of Britain’s declaration of war, which he immediately passed on to the prime minister, the minister for defence and the state governors. The coded message reads, “Please inform your ministers that war has broken out with Germany.”EXDOC059 German wreath So confident of success were the Germans when war broke out, that they sent a number of these wreaths to the German Club in Melbourne, in anticipation of victory celebrations. All were impounded by the censor. In 1915, German clubs and associations in Australia were compulsorily shut down for the duration of the war.RELAWM04624.001
Olave Anderson, Sergeant John Hooke’s tent at Broadmeadows Broadmeadows Camp, located just north of Melbourne, was created when war broke out to provide an accommodation and training base for the large numbers of Victorians volunteering for AIF service. The camp comprised mainly tents, and conditions for the inhabitants were spartan, particularly in wet weather. Sergeant John Huon Hooke, whose tent is portrayed here, was an original member of the 6th Battalion, and died of wounds received at the Gallipoli
landings.ART 00007
ISSUE # 4 (1015260515)
BACKGROUNDER # 110
AUSTRALIA IN THE GREAT WAR PART 1
AUSTRALIA GOES TO WAR
SECTION 2
ENEMY ON THE DOORSTEP
Enemy on the doorstep Germany held a string of colonies in the Pacific and, once the war began, Japan, Britain’s ally, was quick to occupy those above the equator. Similarly, a hastily arranged force called the Australian Naval and Military Expeditionary Force (AN&MEF) was sent to seize German New Guinea. The German Pacific colonies, established from 1884, were seen as a strategic threat to Australia. The Australians made landings at Herbertshöhe, Kabakaul, and Rabaul. On 13 September 1914 the Union Jack was raised in Rabaul. There was comparatively little resistance, although six Australians were killed. A greater tragedy was the loss of 35 lives when the Australian submarine AE1 disappeared while patrolling off the New Guinea coast on 14 September. After the war Australia was given a League of Nations mandate over New Guinea; Papua New Guinea received its independence in 1975.
ISSUE # 4 (1015260515)
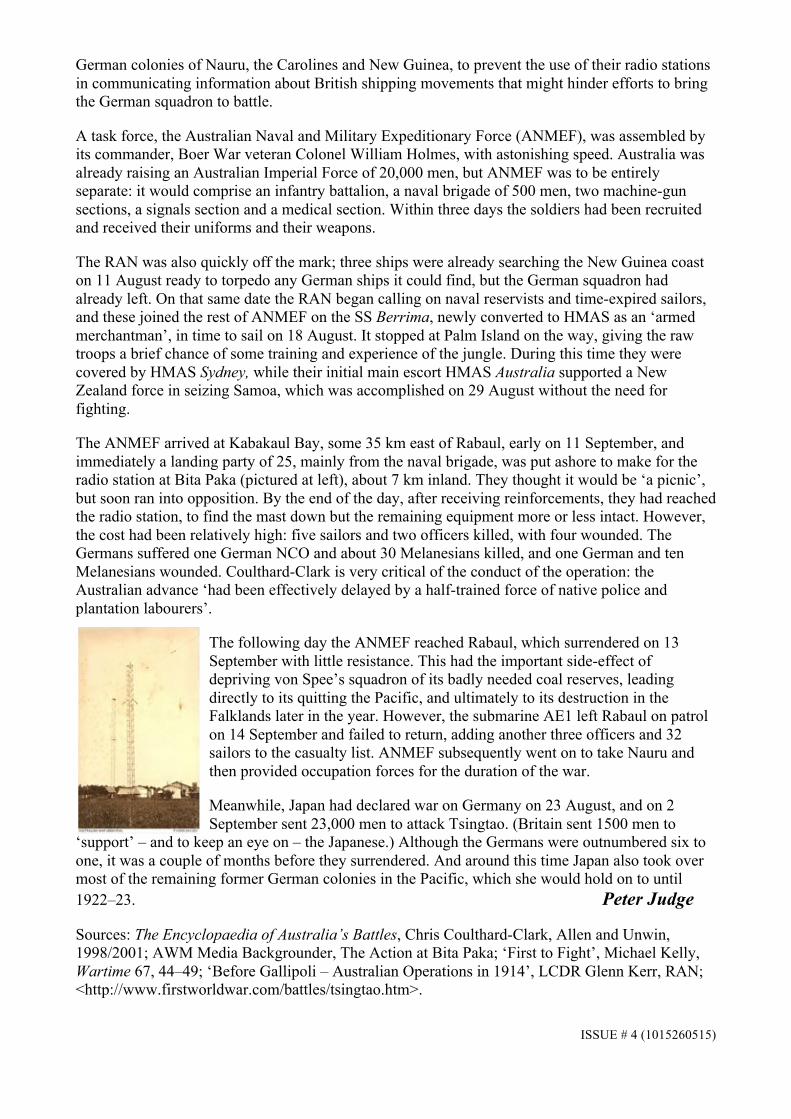
First action On 11 September 1914 men of the AN&MEF captured a wireless station on New Britain that had transmitted the movements of the Australian Fleet to the German Pacific Squadron. Six Australians were killed, and five wounded, in a skirmish with German troops and Melenessan police. They were the first Australian battle casualties of the war. Iron spikes Although the Germans’ resources were limited, they had made some preparations for an Australian attempt to capture the wireless station at Bita Paka. Several defensive trenches had been dug along the approach road, and two mines laid. A combination of ropes and these iron spikes driven into the trunk gave access to a tall “lookout tree” which overlooked the road.RELAWM07859 Charles Bryant, Wireless station, Bita Paka The primary objective of the Australian landing at Herbertshöhe, on the island of New Britain, was to capture the wireless station at Bitapaka, about 15 kilometres inland. Completed only a month earlier, this transmitter was well-situated to keep Admiral von Spee’s German Pacific Squadron informed of the Australian Fleet’s movements, and silencing it was the AN&MEF’s top priority.ART03639 Hand-drawn map This map shows the scene of Australia’s first combat operation of the war. After landing at Herbertshöhe unopposed on the morning of 11 September 1914, a force of naval reservists moved inland from Kabakaul. Generally avoiding the road for fear of ambush by the defending German forces, they were nevertheless engaged in a number of skirmishes, with both sides suffering casualties, before the wireless station at Bita Paka was captured in the early evening.AWM255 [66] Next-of-kin plaque Able Seaman Signaller Robert Moffatt was shot and wounded in the advance along the Bita Paka Road; he died on board HMAS Australia the following morning. Buried at sea later the same day, Moffatt was one of the first Australians to die in the Great War. REL/13706 Papuan government ration biscuit Mainstay of the soldiers’ diet during the First World War was the ubiquitous tinned corned beef (“bully beef”) and biscuits. The biscuit was completely devoid of moisture, and incredibly hard, features which helped to give it a very long life. Both were viewed with distaste by soldiers, and Lieutenant Patrick Quinn of the AN&MEF sent this biscuit home in October 1914 as a souvenir of Rabaul. REL/00913.001 Pistol and sheath knife Hauptmann Hans Wuchert, German commander of the Bita Paka garrison, was captured early in the action, and surrendered his Mauser C96 pistol to Lieutenant Rowland Bowen, RAN, who was in charge of the Australian force. Wuchert attempted to conceal a large sheath knife but it was discovered when he was searched. RELAWM15019.001–002; RELAWM15713.001 Charles Bryant, Hoisting the Union Jack, Rabaul At 3 o’clock on the afternoon of Sunday 13 September 1914, the British flag was raised for the first time in Rabaul, and the proclamation of military occupation read. The band of HMAS Australia played “God save the King”, and the warships in harbour fired a 21-gun salute. The acting German governor, Dr Eduard Haber, however, responded that he had no authority to surrender any territory, and a period of intensive negotiation followed. ART03618
ISSUE # 4 (1015260515)
Accepting the surrender In September 1914, Australian troops of the AN&MEF landed at Herbertshöhe, Kabakaul, and Rabaul, where they met little resistance. After several days, the administration of German New Guinea formally surrendered. The colony was under Australian occupation for the remainder of the war “No more ’Um Kaiser. God save ’Um King” This small fragment is all that remains of the first Union Jack raised by Australian forces in German New Guinea. The flag was carried by Signal Boatswain (later Lieutenant Commander) William Hunter, RAN, and was hoisted at Herbertshöhe on 12 September 1914, a day before the official flag-raising ceremony at Rabaul. REL/02529
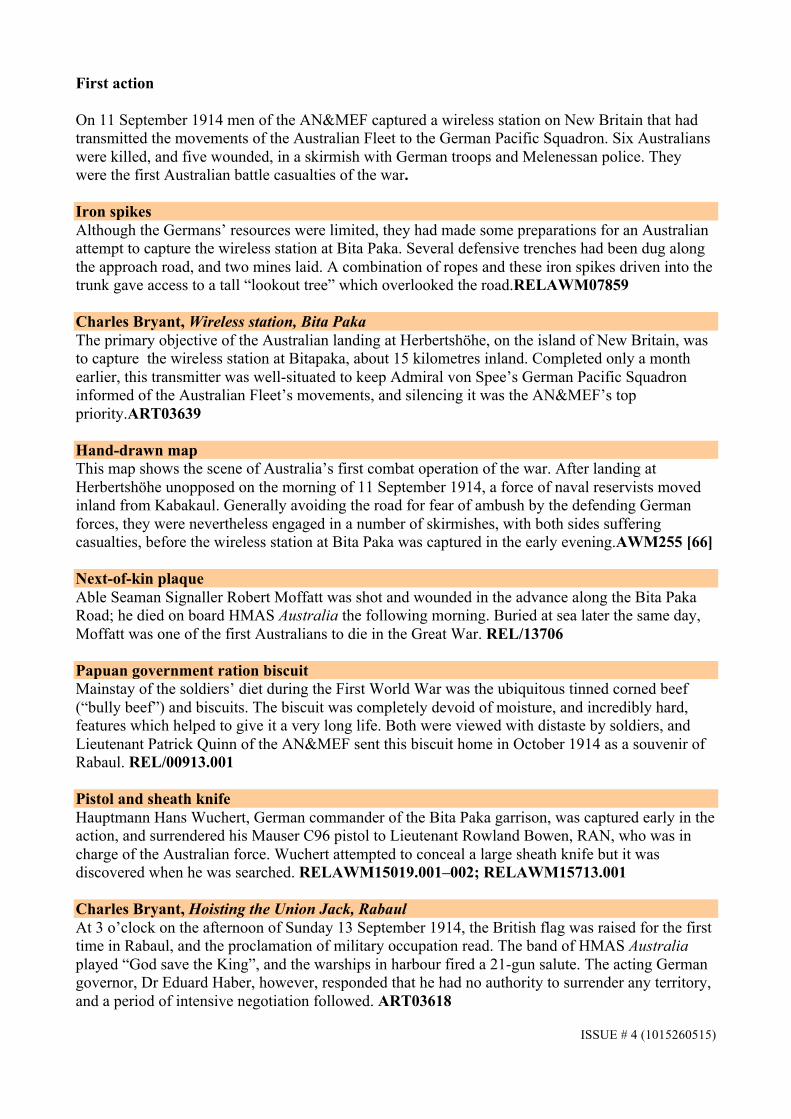
German flag In October a small Australian force was sent Kavieng, the administrative capital of New Ireland, to occupy the island and secure the release of the British consul, who had been interned there. No resistance was met, and Lieutenant Basil Holmes, who was the son of – and aide-de-camp to – AN&MEF commander Colonel William Holmes, souvenired the German flag when it was lowered in the settlement.REL/18150
German stamp seal German New Guinea was formally surrendered to the Australian forces by Dr Haber on 17 September 1914, and this seal from the Imperial District Court (Kaiserliches Bezirks Gericht) at Rabaul was used on the deed of capitulation. REL/00682
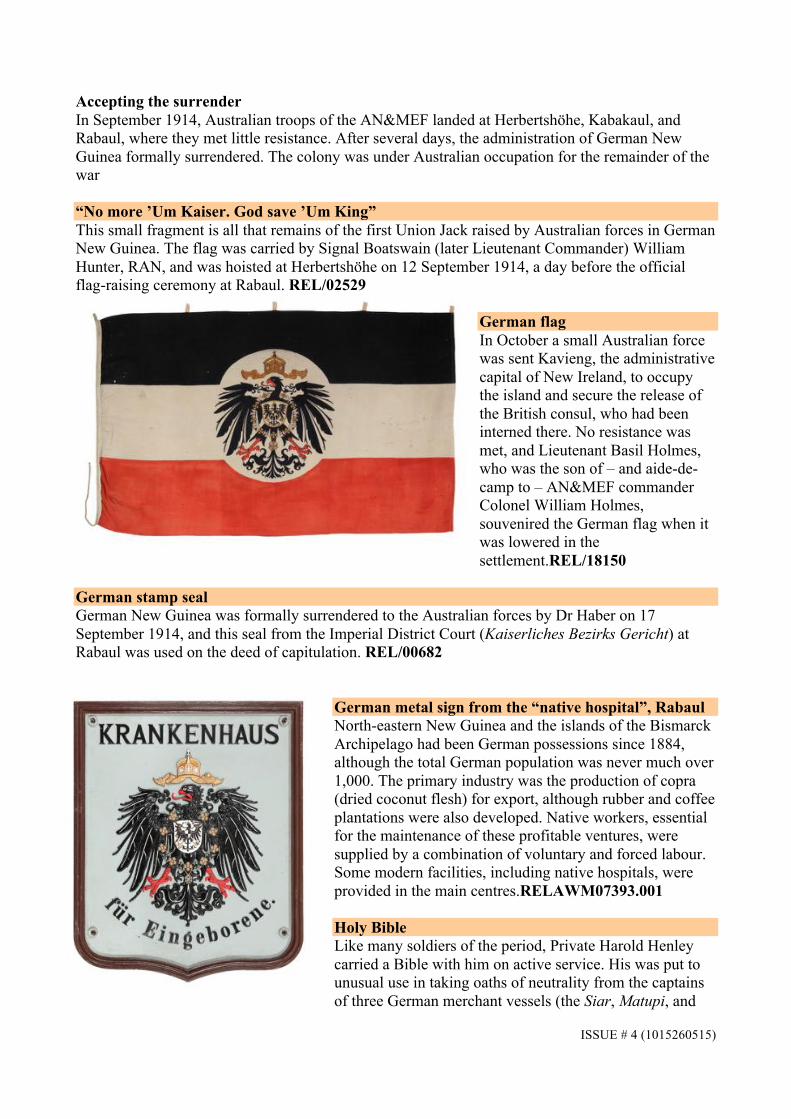
German metal sign from the “native hospital”, Rabaul North-eastern New Guinea and the islands of the Bismarck Archipelago had been German possessions since 1884, although the total German population was never much over 1,000. The primary industry was the production of copra (dried coconut flesh) for export, although rubber and coffee plantations were also developed. Native workers, essential for the maintenance of these profitable ventures, were supplied by a combination of voluntary and forced labour. Some modern facilities, including native hospitals, were provided in the main centres.RELAWM07393.001 Holy Bible Like many soldiers of the period, Private Harold Henley carried a Bible with him on active service. His was put to unusual use in taking oaths of neutrality from the captains of three German merchant vessels (the Siar, Matupi, and
ISSUE # 4 (1015260515)
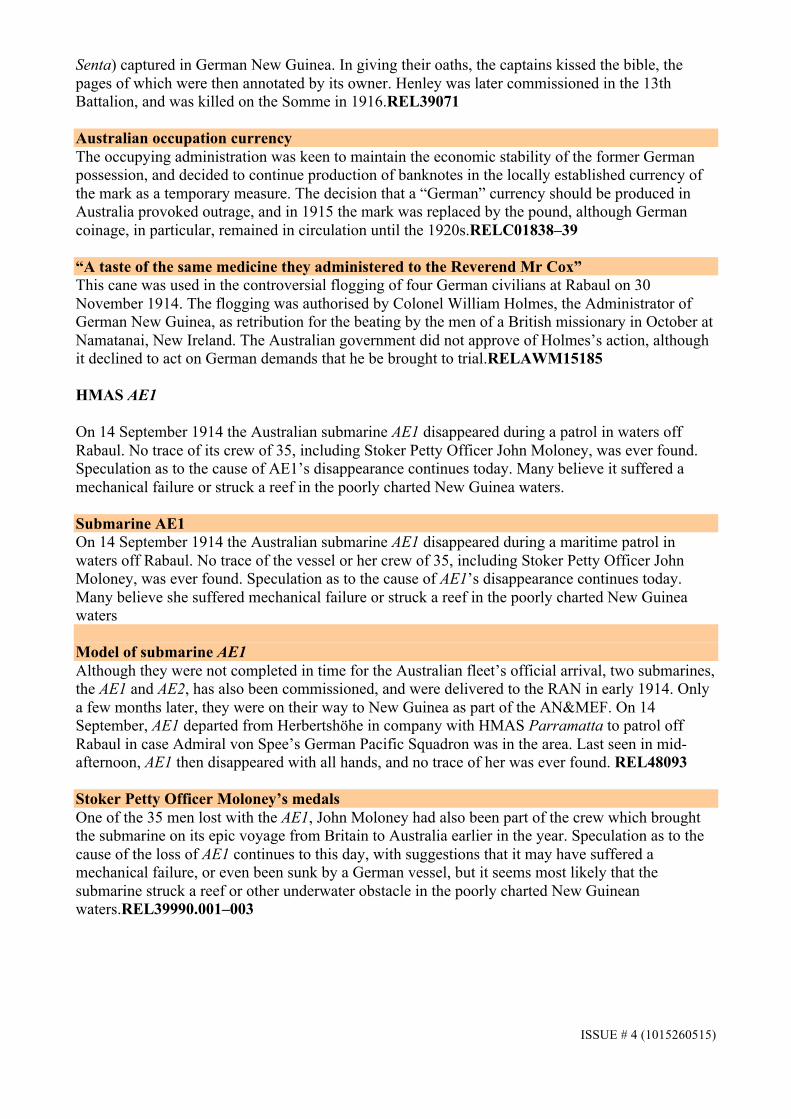
Senta) captured in German New Guinea. In giving their oaths, the captains kissed the bible, the pages of which were then annotated by its owner. Henley was later commissioned in the 13th Battalion, and was killed on the Somme in 1916.REL39071 Australian occupation currency The occupying administration was keen to maintain the economic stability of the former German possession, and decided to continue production of banknotes in the locally established currency of the mark as a temporary measure. The decision that a “German” currency should be produced in Australia provoked outrage, and in 1915 the mark was replaced by the pound, although German coinage, in particular, remained in circulation until the 1920s.RELC01838–39 “A taste of the same medicine they administered to the Reverend Mr Cox” This cane was used in the controversial flogging of four German civilians at Rabaul on 30 November 1914. The flogging was authorised by Colonel William Holmes, the Administrator of German New Guinea, as retribution for the beating by the men of a British missionary in October at Namatanai, New Ireland. The Australian government did not approve of Holmes’s action, although it declined to act on German demands that he be brought to trial.RELAWM15185 HMAS AE1 On 14 September 1914 the Australian submarine AE1 disappeared during a patrol in waters off Rabaul. No trace of its crew of 35, including Stoker Petty Officer John Moloney, was ever found. Speculation as to the cause of AE1’s disappearance continues today. Many believe it suffered a mechanical failure or struck a reef in the poorly charted New Guinea waters. Submarine AE1 On 14 September 1914 the Australian submarine AE1 disappeared during a maritime patrol in waters off Rabaul. No trace of the vessel or her crew of 35, including Stoker Petty Officer John Moloney, was ever found. Speculation as to the cause of AE1’s disappearance continues today. Many believe she suffered mechanical failure or struck a reef in the poorly charted New Guinea waters Model of submarine AE1 Although they were not completed in time for the Australian fleet’s official arrival, two submarines, the AE1 and AE2, has also been commissioned, and were delivered to the RAN in early 1914. Only a few months later, they were on their way to New Guinea as part of the AN&MEF. On 14 September, AE1 departed from Herbertshöhe in company with HMAS Parramatta to patrol off Rabaul in case Admiral von Spee’s German Pacific Squadron was in the area. Last seen in mid-afternoon, AE1 then disappeared with all hands, and no trace of her was ever found. REL48093 Stoker Petty Officer Moloney’s medals One of the 35 men lost with the AE1, John Moloney had also been part of the crew which brought the submarine on its epic voyage from Britain to Australia earlier in the year. Speculation as to the cause of the loss of AE1 continues to this day, with suggestions that it may have suffered a mechanical failure, or even been sunk by a German vessel, but it seems most likely that the submarine struck a reef or other underwater obstacle in the poorly charted New Guinean waters.REL39990.001–003
ISSUE # 4 (1015260515)
Notes 1. The Loss of AE 1 14 September 1914 Extract from BACKGROUNDER # 72 (3) September 2010 – Gallipoli. Section 2.
When Australia declared war on Germany on 5 August 1914 the Australian Naval Board regarded the destruction of the German Pacific Fleet under Admiral L.C. von Spee, as the primary task. The German ships suspected by the Admiralty of being in the Pacific area at the time were
Gneisenau and Scharnhorst (armoured cruisers); Emden, Nurnberg and Leipzig (light protected cruisers); Geier (unprotected cruiser); and Planet (survey ship). In fact Geier had not arrived in the Pacific from Europe. She was mistaken for her sister ship Kormoran, which had arrived. Wireless intelligence indicated that Scharnhorst may have been in the New Guinea area. This news, plus the existence of the German coaling facilities and wireless station at Rabaul-Simpson Harbour, made a concentration of the Australian fleet in that area a high priority. To this end, the Australian surface ships made a rendezvous south of New Guinea and proceeded north in full expectation of meeting the enemy fleet but the enemy was elsewhere. On 9 September the main naval force consisting of Australia, Sydney, Encounter, Warrego, Yarra, Parramatta, Berrima carrying the Australian Naval and Military Expeditionary Force {ANMEF}, store ship Aorangi, AE1 and AE2, plus three colliers assembled off the Louisiades. They proceeded to St George’s Channel and on 11 September they searched the whole area off Rabaul without sighting the German Fleet. Intelligence available to Admiral Patey indicated two wireless stations operating in the area. The expedition then aimed at destroying the station while eliminating enemy land resistance in the Rabaul area. During the first few days in the area the major fleet units were concerned with the landing operations at Rabaul Harbour and Herbertshohe as there was a requirement to guard against an attack from seaward, no definite knowledge of the whereabouts of the German ships being available. On 13 September AE2 performed this task, accompanied by a destroyer, and then returned to harbour at dusk. The next day AE1 was given the duty in conjunction with Parramatta. AE1 left Rabaul Harbour with orders to patrol east of Cape Gazelle, in company with keeping a lookout for any enemy and return to harbour by dark. AE1 was last seen about 3:20pm 2 about 2 miles south-south-east of Bernard Point, off the eastern tip of the Duke of York Islands. No trace of AE1 has ever been found. Only conjecture can be offered as to the cause of this first loss to the Australian Fleet. The submarine was certainly not lost be enemy action. A study of German records revealed that no enemy units were in the area at the time. Nor is there any evidence indicating she was lost as a
ISSUE # 4 (1015260515)
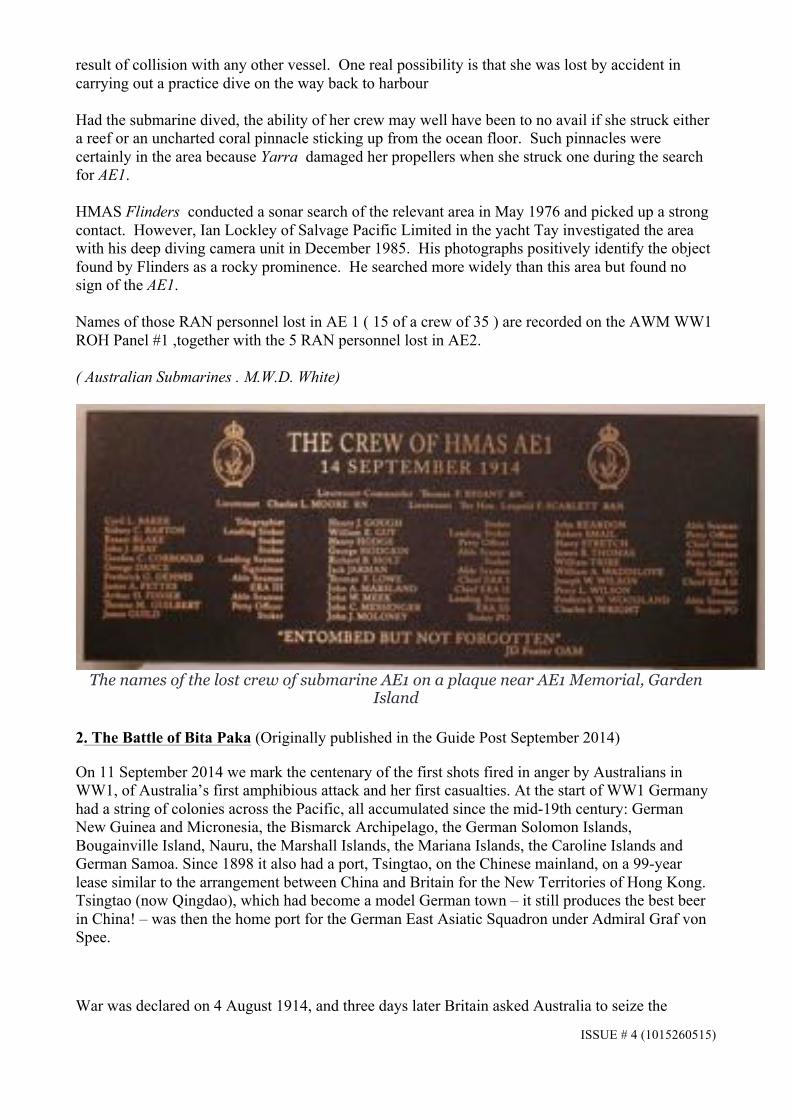
result of collision with any other vessel. One real possibility is that she was lost by accident in carrying out a practice dive on the way back to harbour Had the submarine dived, the ability of her crew may well have been to no avail if she struck either a reef or an uncharted coral pinnacle sticking up from the ocean floor. Such pinnacles were certainly in the area because Yarra damaged her propellers when she struck one during the search for AE1. HMAS Flinders conducted a sonar search of the relevant area in May 1976 and picked up a strong contact. However, Ian Lockley of Salvage Pacific Limited in the yacht Tay investigated the area with his deep diving camera unit in December 1985. His photographs positively identify the object found by Flinders as a rocky prominence. He searched more widely than this area but found no sign of the AE1. Names of those RAN personnel lost in AE 1 ( 15 of a crew of 35 ) are recorded on the AWM WW1 ROH Panel #1 ,together with the 5 RAN personnel lost in AE2. ( Australian Submarines . M.W.D. White)
The names of the lost crew of submarine AE1 on a plaque near AE1 Memorial, Garden
Island
2. The Battle of Bita Paka (Originally published in the Guide Post September 2014)
On 11 September 2014 we mark the centenary of the first shots fired in anger by Australians in WW1, of Australia’s first amphibious attack and her first casualties. At the start of WW1 Germany had a string of colonies across the Pacific, all accumulated since the mid-19th century: German New Guinea and Micronesia, the Bismarck Archipelago, the German Solomon Islands, Bougainville Island, Nauru, the Marshall Islands, the Mariana Islands, the Caroline Islands and German Samoa. Since 1898 it also had a port, Tsingtao, on the Chinese mainland, on a 99-year lease similar to the arrangement between China and Britain for the New Territories of Hong Kong. Tsingtao (now Qingdao), which had become a model German town – it still produces the best beer in China! – was then the home port for the German East Asiatic Squadron under Admiral Graf von Spee.
War was declared on 4 August 1914, and three days later Britain asked Australia to seize the
ISSUE # 4 (1015260515)
German colonies of Nauru, the Carolines and New Guinea, to prevent the use of their radio stations in communicating information about British shipping movements that might hinder efforts to bring the German squadron to battle.
A task force, the Australian Naval and Military Expeditionary Force (ANMEF), was assembled by its commander, Boer War veteran Colonel William Holmes, with astonishing speed. Australia was already raising an Australian Imperial Force of 20,000 men, but ANMEF was to be entirely separate: it would comprise an infantry battalion, a naval brigade of 500 men, two machine-gun sections, a signals section and a medical section. Within three days the soldiers had been recruited and received their uniforms and their weapons.
The RAN was also quickly off the mark; three ships were already searching the New Guinea coast on 11 August ready to torpedo any German ships it could find, but the German squadron had already left. On that same date the RAN began calling on naval reservists and time-expired sailors, and these joined the rest of ANMEF on the SS Berrima, newly converted to HMAS as an ‘armed merchantman’, in time to sail on 18 August. It stopped at Palm Island on the way, giving the raw troops a brief chance of some training and experience of the jungle. During this time they were covered by HMAS Sydney, while their initial main escort HMAS Australia supported a New Zealand force in seizing Samoa, which was accomplished on 29 August without the need for fighting.
The ANMEF arrived at Kabakaul Bay, some 35 km east of Rabaul, early on 11 September, and immediately a landing party of 25, mainly from the naval brigade, was put ashore to make for the radio station at Bita Paka (pictured at left), about 7 km inland. They thought it would be ‘a picnic’, but soon ran into opposition. By the end of the day, after receiving reinforcements, they had reached the radio station, to find the mast down but the remaining equipment more or less intact. However, the cost had been relatively high: five sailors and two officers killed, with four wounded. The Germans suffered one German NCO and about 30 Melanesians killed, and one German and ten Melanesians wounded. Coulthard-Clark is very critical of the conduct of the operation: the Australian advance ‘had been effectively delayed by a half-trained force of native police and plantation labourers’.
The following day the ANMEF reached Rabaul, which surrendered on 13 September with little resistance. This had the important side-effect of depriving von Spee’s squadron of its badly needed coal reserves, leading directly to its quitting the Pacific, and ultimately to its destruction in the Falklands later in the year. However, the submarine AE1 left Rabaul on patrol on 14 September and failed to return, adding another three officers and 32 sailors to the casualty list. ANMEF subsequently went on to take Nauru and then provided occupation forces for the duration of the war.
Meanwhile, Japan had declared war on Germany on 23 August, and on 2 September sent 23,000 men to attack Tsingtao. (Britain sent 1500 men to
‘support’ – and to keep an eye on – the Japanese.) Although the Germans were outnumbered six to one, it was a couple of months before they surrendered. And around this time Japan also took over most of the remaining former German colonies in the Pacific, which she would hold on to until 1922–23. Peter Judge
Sources: The Encyclopaedia of Australia’s Battles, Chris Coulthard-Clark, Allen and Unwin, 1998/2001; AWM Media Backgrounder, The Action at Bita Paka; ‘First to Fight’, Michael Kelly, Wartime 67, 44–49; ‘Before Gallipoli – Australian Operations in 1914’, LCDR Glenn Kerr, RAN; <http://www.firstworldwar.com/battles/tsingtao.htm>.
ISSUE # 4 (1015260515)
3. First Australian Killed in WW1 (Precis of Cameo talk by Michael Dowsett VGAWM originally published in the Guide Post April 2015)
. Michael Dowsett, discussed the identity of the first Australian serviceman to die in WW1.
. If the question is, ‘Who was the first Australian to die serving in any uniform?’, the answer would be Lieutenant William Malcolm Chisholm, an officer in the East Lancashire Regiment who was mortally wounded in France on 27 August 1914. Chisholm was born in Sydney in 1892 and educated at Sydney Grammar School. He moved to England with his parents in 1910 and then entered RMC Sandhurst. His name was entered on the Commemorative Roll last year following research by a French historian who discovered his grave in a French village. However, that discovery had been preempted by the Reverend J. Ferguson, who conducted a memorial service for Chisholm in Sydney in March 1915, suggesting at that time that Chisholm was ‘the first Australian officer to fall in the war’.
. However, if we ask who was the first Australian to die wearing an Australian uniform, it would be Able Seaman J.E. Walker, who was killed instantly between 11.00 am and 1.00 pm at the Battle of Bita Paka in German New Guinea on 11 September 1914. At the time of his death he was known as Courtney, the name under which he enlisted but his correct surname is found on the Roll of Honour and on the tombstone at Bita Paka (shown at right). His name together with the four other Australian sailors who died on that day can be found on Panel 1 on the Roll of Honour, although for some reason three of them are listed as serving on HMAS Una, a ship that was not in commission at the time of their death. The other two Australians who died in that battle are correctly recorded – A.B. Moffat under HMAS Australia and Captain B.C.A. Pockley, an officer listed under Australian Army Medical Corps.
. The caption on the photograph of AB Billy Williams in the First World War Gallery correctly describes him as the first Australian ‘casualty’ of the war, but contemporary records note that Williams died after Pockley on board HMAS Berrima shortly after 1.45 pm on that day, thus later than Walker. Another who died shortly after Walker was Lt Cdr Elwell, but his name is properly not on the Roll of Honour, as he was a Royal Navy officer attached to the RAN at the time. His name is found on the Royal Navy Memorial at Plymouth in England.
. The mistake on panel 1 concerning the parent ship of both Walker and Williams was rectified on panel 188 in a section on that panel which reads in part ‘those Australians whose names do not appear or are not correctly shown on the adjacent roll’. On the lowest section of the last panel (188) they are listed under the Naval and Military Expeditionary Force, resulting in their names being recorded twice on the Roll of Honour.
ISSUE # 4 (1015260515)
BACKGROUNDER # 110
AUSTRALIA IN THE GREAT WAR PART 1
AUSTRALIA GOES TO WAR
SECTION 3
THE AIF
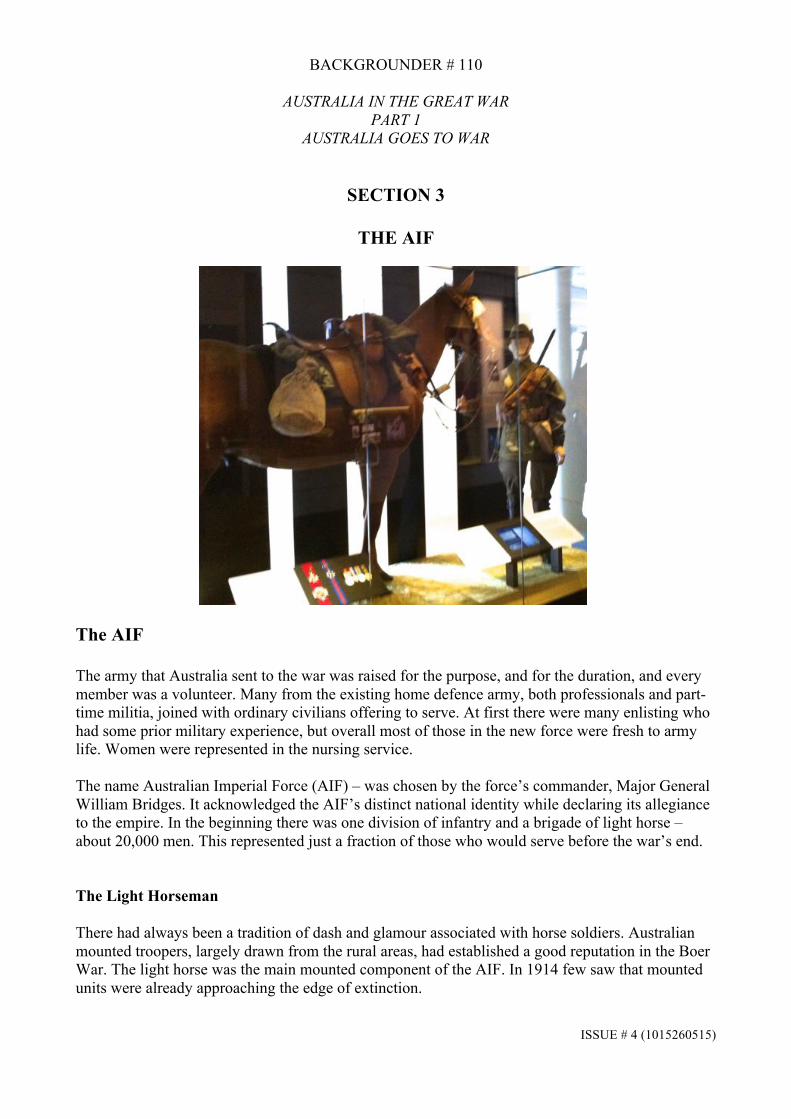
The AIF The army that Australia sent to the war was raised for the purpose, and for the duration, and every member was a volunteer. Many from the existing home defence army, both professionals and part-time militia, joined with ordinary civilians offering to serve. At first there were many enlisting who had some prior military experience, but overall most of those in the new force were fresh to army life. Women were represented in the nursing service. The name Australian Imperial Force (AIF) – was chosen by the force’s commander, Major General William Bridges. It acknowledged the AIF’s distinct national identity while declaring its allegiance to the empire. In the beginning there was one division of infantry and a brigade of light horse – about 20,000 men. This represented just a fraction of those who would serve before the war’s end. The Light Horseman There had always been a tradition of dash and glamour associated with horse soldiers. Australian mounted troopers, largely drawn from the rural areas, had established a good reputation in the Boer War. The light horse was the main mounted component of the AIF. In 1914 few saw that mounted units were already approaching the edge of extinction.
ISSUE # 4 (1015260515)
A regiment of light horse – horsemen who could undertake many of the former functions of cavalry and yet fight dismounted – consisted of 25 officers, 511 men, and 563 horses. Three regiments formed a brigade. Although each regiment had two Maxim machine-guns, the light horseman was primarily equipped with the .303-inch Short, Magazine Lee-Enfield rifle. During the war the light horse undertook its traditional role, but was also used as infantry on Gallipoli in 1915 and as cavalry, issued with swords, in 1918. The canvas cities To meet the initial rush of volunteers, recruiting centres were established in drill halls, barracks and town halls, while showgrounds and racecourses were turned into temporary camps. From here men were fed into the large camps set up mostly on the edge of the cities. In an effort to decentralise, there were camps in several large towns, but these closed when volunteering dropped off. The first camps were dreary places, with men dressed in ill-fitting blue dungaree work suits, sleeping on the ground in tents and having few comforts or entertainments. Improvements came slowly. Once units were formed, and rifles and full uniforms were issued, they would soon sail off to complete their training in Egypt or Britain. Sir William Bridges Scottish-born William Bridges joined the New South Wales permanent artillery in 1885, and later served in the Boer War. In 1910 he was made first commandant of the Royal Military College at Duntroon, a post he held until appointed Inspector-General of the army in May 1914. As a military officer, Bridges displayed outstanding efficiency, professionalism, and administrative capacity that took him to the highest levels of the army in Australia. When war broke out, Bridges was given the job of raising the AIF. He led the 1st Australian Division at the Gallipoli landing in April 1915, but on the morning of 15 May he was shot by a Turkish sniper. Evacuated to a hospital ship, he died three days later. In a unique tribute, his body was returned to Australia for burial. A shy man, Bridges had an aloof and abrupt manner. His early death makes it impossible to judge whether he would have become a great leader.
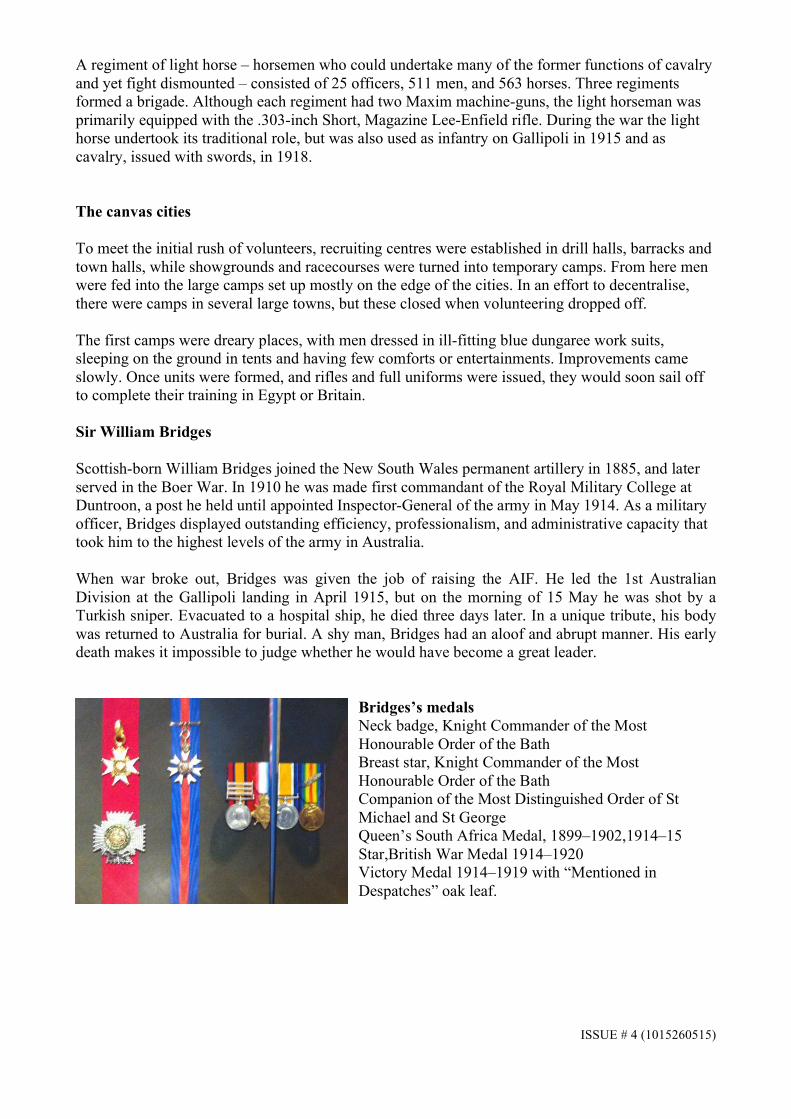
Bridges’s medals Neck badge, Knight Commander of the Most Honourable Order of the Bath Breast star, Knight Commander of the Most Honourable Order of the Bath Companion of the Most Distinguished Order of St Michael and St George Queen’s South Africa Medal, 1899–1902,1914–15 Star,British War Medal 1914–1920 Victory Medal 1914–1919 with “Mentioned in Despatches” oak leaf.
ISSUE # 4 (1015260515)
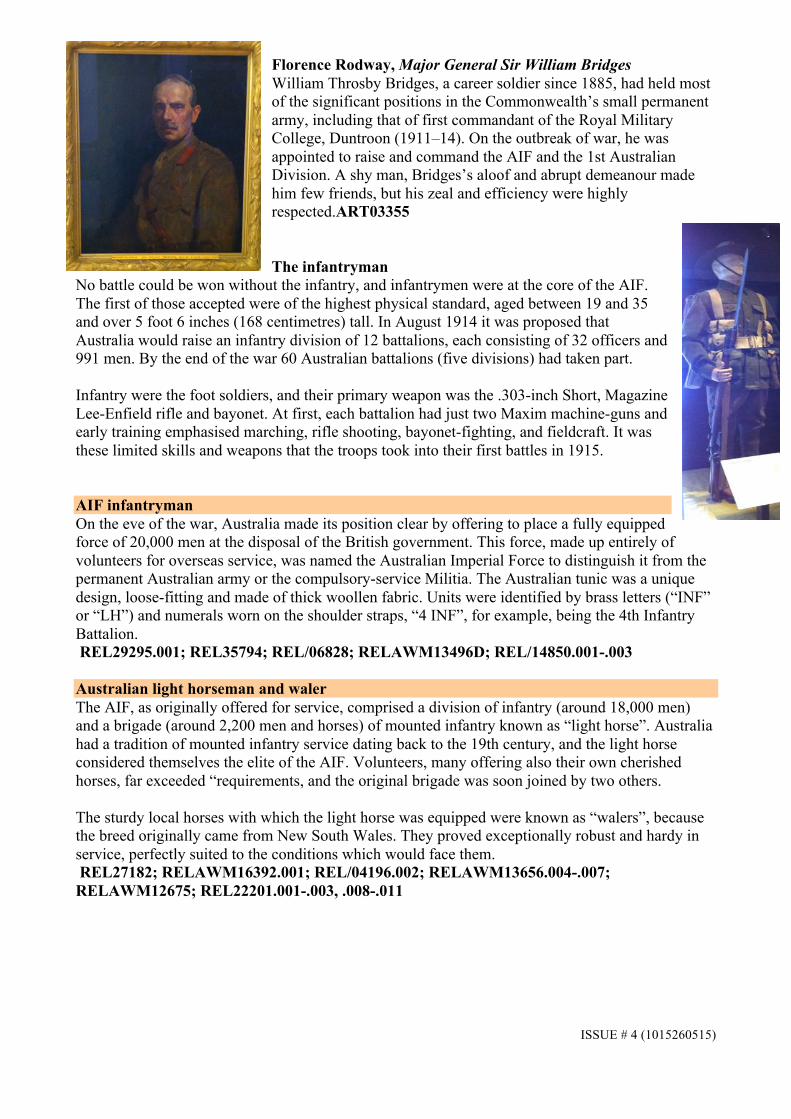
Florence Rodway, Major General Sir William Bridges William Throsby Bridges, a career soldier since 1885, had held most of the significant positions in the Commonwealth’s small permanent army, including that of first commandant of the Royal Military College, Duntroon (1911–14). On the outbreak of war, he was appointed to raise and command the AIF and the 1st Australian Division. A shy man, Bridges’s aloof and abrupt demeanour made him few friends, but his zeal and efficiency were highly respected.ART03355 The infantryman
No battle could be won without the infantry, and infantrymen were at the core of the AIF. The first of those accepted were of the highest physical standard, aged between 19 and 35 and over 5 foot 6 inches (168 centimetres) tall. In August 1914 it was proposed that Australia would raise an infantry division of 12 battalions, each consisting of 32 officers and 991 men. By the end of the war 60 Australian battalions (five divisions) had taken part. Infantry were the foot soldiers, and their primary weapon was the .303-inch Short, Magazine Lee-Enfield rifle and bayonet. At first, each battalion had just two Maxim machine-guns and early training emphasised marching, rifle shooting, bayonet-fighting, and fieldcraft. It was these limited skills and weapons that the troops took into their first battles in 1915. AIF infantryman On the eve of the war, Australia made its position clear by offering to place a fully equipped force of 20,000 men at the disposal of the British government. This force, made up entirely of volunteers for overseas service, was named the Australian Imperial Force to distinguish it from the permanent Australian army or the compulsory-service Militia. The Australian tunic was a unique design, loose-fitting and made of thick woollen fabric. Units were identified by brass letters (“INF” or “LH”) and numerals worn on the shoulder straps, “4 INF”, for example, being the 4th Infantry Battalion. REL29295.001; REL35794; REL/06828; RELAWM13496D; REL/14850.001-.003 Australian light horseman and waler The AIF, as originally offered for service, comprised a division of infantry (around 18,000 men) and a brigade (around 2,200 men and horses) of mounted infantry known as “light horse”. Australia had a tradition of mounted infantry service dating back to the 19th century, and the light horse considered themselves the elite of the AIF. Volunteers, many offering also their own cherished horses, far exceeded “requirements, and the original brigade was soon joined by two others. The sturdy local horses with which the light horse was equipped were known as “walers”, because the breed originally came from New South Wales. They proved exceptionally robust and hardy in service, perfectly suited to the conditions which would face them. REL27182; RELAWM16392.001; REL/04196.002; RELAWM13656.004-.007; RELAWM12675; REL22201.001-.003, .008-.011

ISSUE # 4 (1015260515)
ISSUE # 4 (1015260515)
BACKGROUNDER # 110
AUSTRALIA IN THE GREAT WAR PART 1
AUSTRALIA GOES TO WAR
SECTION 4
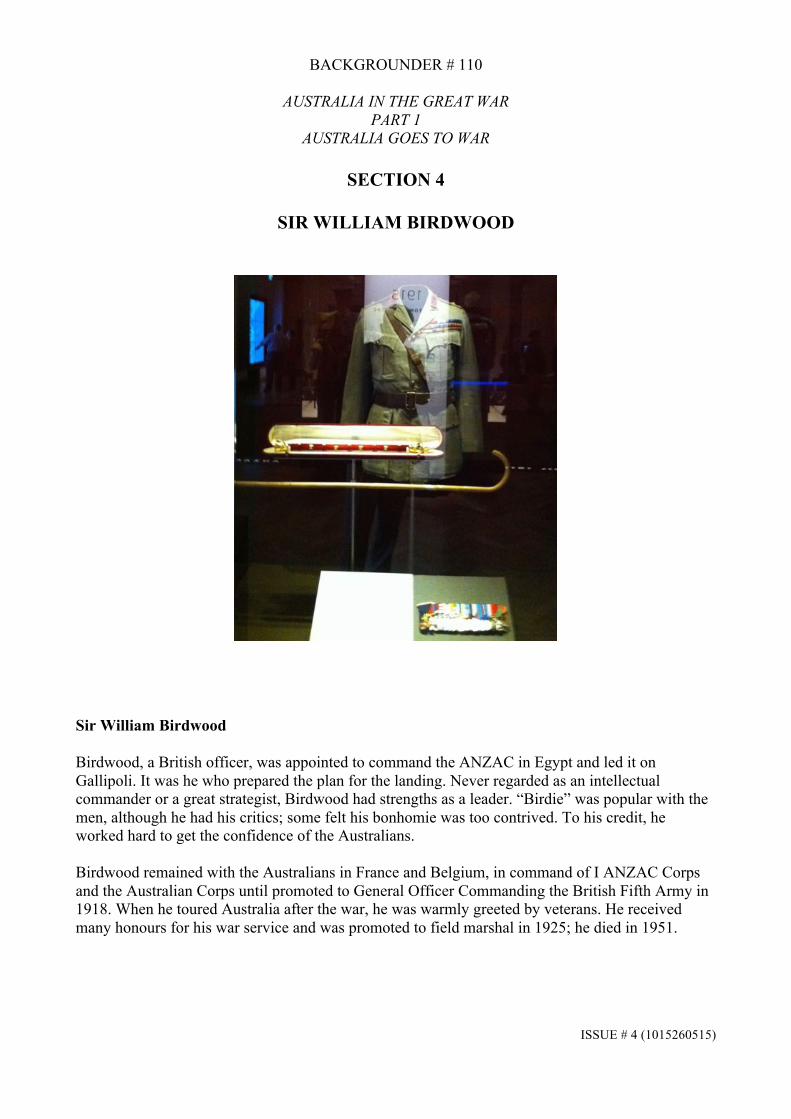
SIR WILLIAM BIRDWOOD
Sir William Birdwood Birdwood, a British officer, was appointed to command the ANZAC in Egypt and led it on Gallipoli. It was he who prepared the plan for the landing. Never regarded as an intellectual commander or a great strategist, Birdwood had strengths as a leader. “Birdie” was popular with the men, although he had his critics; some felt his bonhomie was too contrived. To his credit, he worked hard to get the confidence of the Australians. Birdwood remained with the Australians in France and Belgium, in command of I ANZAC Corps and the Australian Corps until promoted to General Officer Commanding the British Fifth Army in 1918. When he toured Australia after the war, he was warmly greeted by veterans. He received many honours for his war service and was promoted to field marshal in 1925; he died in 1951.
ISSUE # 4 (1015260515)
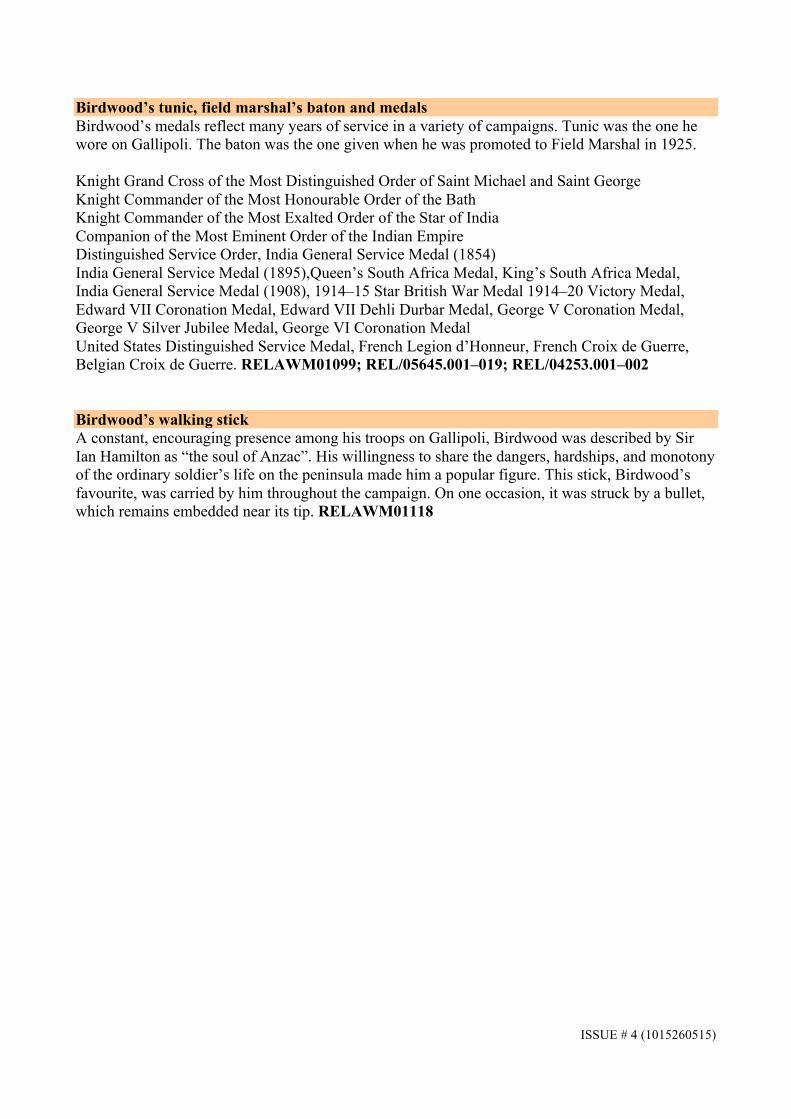
Birdwood’s tunic, field marshal’s baton and medals Birdwood’s medals reflect many years of service in a variety of campaigns. Tunic was the one he wore on Gallipoli. The baton was the one given when he was promoted to Field Marshal in 1925. Knight Grand Cross of the Most Distinguished Order of Saint Michael and Saint George Knight Commander of the Most Honourable Order of the Bath Knight Commander of the Most Exalted Order of the Star of India Companion of the Most Eminent Order of the Indian Empire Distinguished Service Order, India General Service Medal (1854) India General Service Medal (1895),Queen’s South Africa Medal, King’s South Africa Medal, India General Service Medal (1908), 1914–15 Star British War Medal 1914–20 Victory Medal, Edward VII Coronation Medal, Edward VII Dehli Durbar Medal, George V Coronation Medal, George V Silver Jubilee Medal, George VI Coronation Medal United States Distinguished Service Medal, French Legion d’Honneur, French Croix de Guerre, Belgian Croix de Guerre. RELAWM01099; REL/05645.001–019; REL/04253.001–002 Birdwood’s walking stick A constant, encouraging presence among his troops on Gallipoli, Birdwood was described by Sir Ian Hamilton as “the soul of Anzac”. His willingness to share the dangers, hardships, and monotony of the ordinary soldier’s life on the peninsula made him a popular figure. This stick, Birdwood’s favourite, was carried by him throughout the campaign. On one occasion, it was struck by a bullet, which remains embedded near its tip. RELAWM01118
ISSUE # 4 (1015260515)
BACKGROUNDER # 110
AUSTRALIA IN THE GREAT WAR PART 1
AUSTRALIA GOES TO WAR
SECTION 5
THE NAVY IS MOBILISED
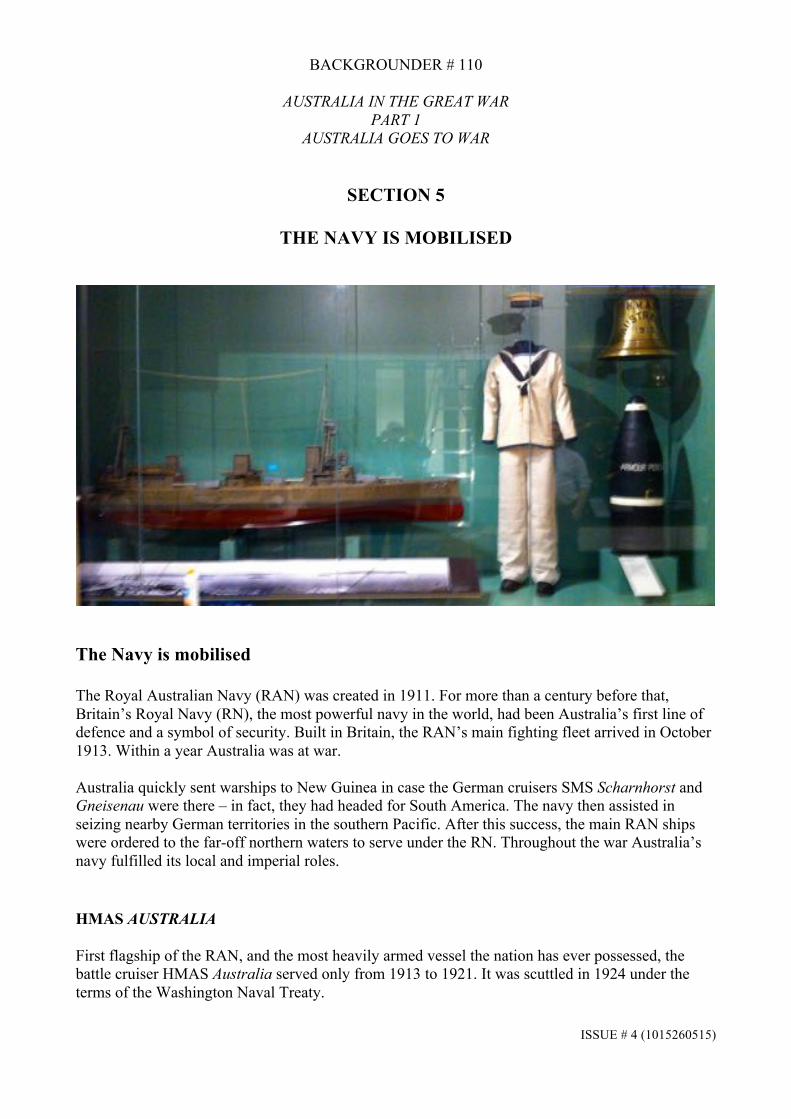
The Navy is mobilised The Royal Australian Navy (RAN) was created in 1911. For more than a century before that, Britain’s Royal Navy (RN), the most powerful navy in the world, had been Australia’s first line of defence and a symbol of security. Built in Britain, the RAN’s main fighting fleet arrived in October 1913. Within a year Australia was at war. Australia quickly sent warships to New Guinea in case the German cruisers SMS Scharnhorst and Gneisenau were there – in fact, they had headed for South America. The navy then assisted in seizing nearby German territories in the southern Pacific. After this success, the main RAN ships were ordered to the far-off northern waters to serve under the RN. Throughout the war Australia’s navy fulfilled its local and imperial roles. HMAS AUSTRALIA First flagship of the RAN, and the most heavily armed vessel the nation has ever possessed, the battle cruiser HMAS Australia served only from 1913 to 1921. It was scuttled in 1924 under the terms of the Washington Naval Treaty.
ISSUE # 4 (1015260515)
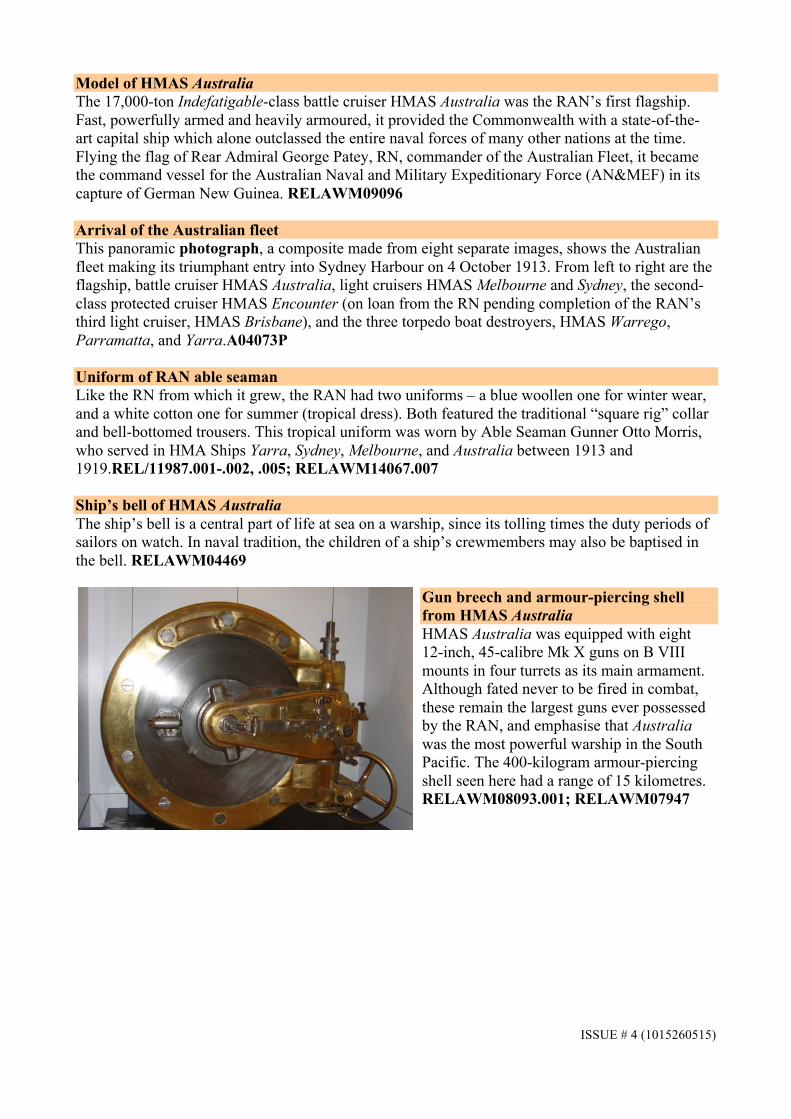
Model of HMAS Australia The 17,000-ton Indefatigable-class battle cruiser HMAS Australia was the RAN’s first flagship. Fast, powerfully armed and heavily armoured, it provided the Commonwealth with a state-of-the-art capital ship which alone outclassed the entire naval forces of many other nations at the time. Flying the flag of Rear Admiral George Patey, RN, commander of the Australian Fleet, it became the command vessel for the Australian Naval and Military Expeditionary Force (AN&MEF) in its capture of German New Guinea. RELAWM09096 Arrival of the Australian fleet This panoramic photograph, a composite made from eight separate images, shows the Australian fleet making its triumphant entry into Sydney Harbour on 4 October 1913. From left to right are the flagship, battle cruiser HMAS Australia, light cruisers HMAS Melbourne and Sydney, the second-class protected cruiser HMAS Encounter (on loan from the RN pending completion of the RAN’s third light cruiser, HMAS Brisbane), and the three torpedo boat destroyers, HMAS Warrego, Parramatta, and Yarra.A04073P Uniform of RAN able seaman Like the RN from which it grew, the RAN had two uniforms – a blue woollen one for winter wear, and a white cotton one for summer (tropical dress). Both featured the traditional “square rig” collar and bell-bottomed trousers. This tropical uniform was worn by Able Seaman Gunner Otto Morris, who served in HMA Ships Yarra, Sydney, Melbourne, and Australia between 1913 and 1919.REL/11987.001-.002, .005; RELAWM14067.007 Ship’s bell of HMAS Australia The ship’s bell is a central part of life at sea on a warship, since its tolling times the duty periods of sailors on watch. In naval tradition, the children of a ship’s crewmembers may also be baptised in the bell. RELAWM04469
Gun breech and armour-piercing shell from HMAS Australia HMAS Australia was equipped with eight 12-inch, 45-calibre Mk X guns on B VIII mounts in four turrets as its main armament. Although fated never to be fired in combat, these remain the largest guns ever possessed by the RAN, and emphasise that Australia was the most powerful warship in the South Pacific. The 400-kilogram armour-piercing shell seen here had a range of 15 kilometres. RELAWM08093.001; RELAWM07947
ISSUE # 4 (1015260515)
BACKGROUNDER # 110
AUSTRALIA IN THE GREAT WAR PART 1
AUSTRALIA GOES TO WAR
SECTION 6
DESTROYING THE EMDEN
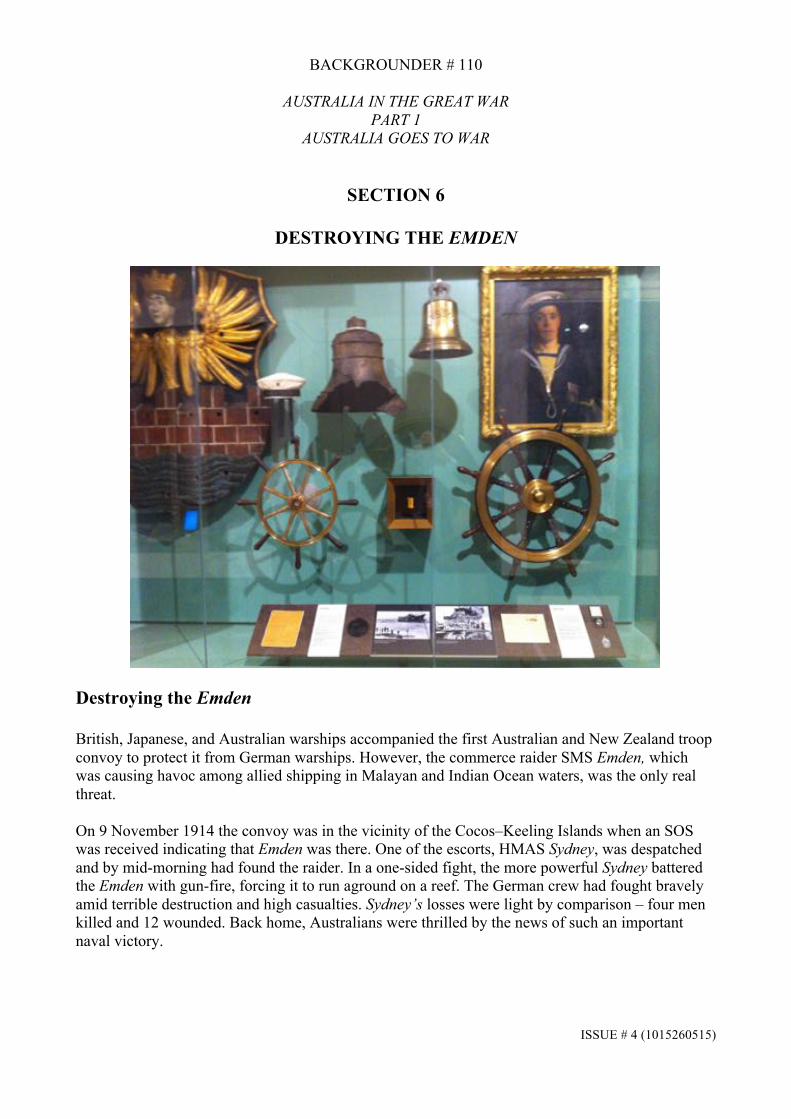
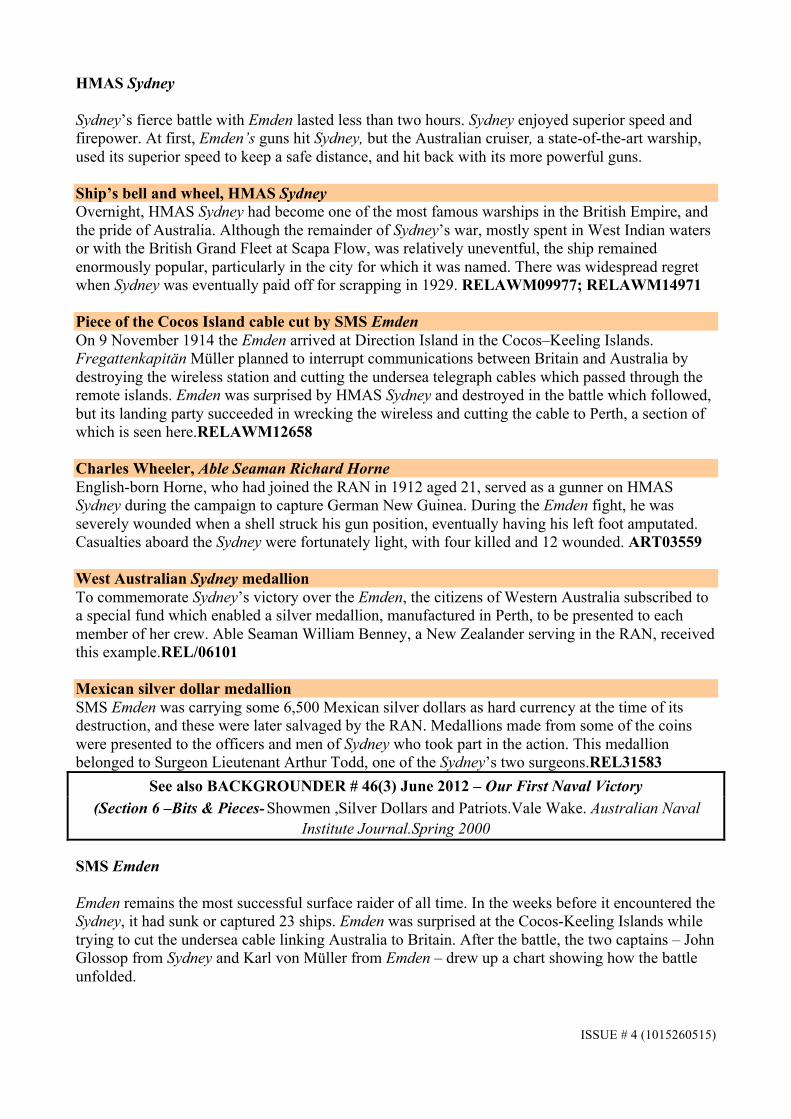
Destroying the Emden British, Japanese, and Australian warships accompanied the first Australian and New Zealand troop convoy to protect it from German warships. However, the commerce raider SMS Emden, which was causing havoc among allied shipping in Malayan and Indian Ocean waters, was the only real threat. On 9 November 1914 the convoy was in the vicinity of the Cocos–Keeling Islands when an SOS was received indicating that Emden was there. One of the escorts, HMAS Sydney, was despatched and by mid-morning had found the raider. In a one-sided fight, the more powerful Sydney battered the Emden with gun-fire, forcing it to run aground on a reef. The German crew had fought bravely amid terrible destruction and high casualties. Sydney’s losses were light by comparison – four men killed and 12 wounded. Back home, Australians were thrilled by the news of such an important naval victory.
ISSUE # 4 (1015260515)
HMAS Sydney Sydney’s fierce battle with Emden lasted less than two hours. Sydney enjoyed superior speed and firepower. At first, Emden’s guns hit Sydney, but the Australian cruiser, a state-of-the-art warship, used its superior speed to keep a safe distance, and hit back with its more powerful guns. Ship’s bell and wheel, HMAS Sydney Overnight, HMAS Sydney had become one of the most famous warships in the British Empire, and the pride of Australia. Although the remainder of Sydney’s war, mostly spent in West Indian waters or with the British Grand Fleet at Scapa Flow, was relatively uneventful, the ship remained enormously popular, particularly in the city for which it was named. There was widespread regret when Sydney was eventually paid off for scrapping in 1929. RELAWM09977; RELAWM14971 Piece of the Cocos Island cable cut by SMS Emden On 9 November 1914 the Emden arrived at Direction Island in the Cocos–Keeling Islands. Fregattenkapitän Müller planned to interrupt communications between Britain and Australia by destroying the wireless station and cutting the undersea telegraph cables which passed through the remote islands. Emden was surprised by HMAS Sydney and destroyed in the battle which followed, but its landing party succeeded in wrecking the wireless and cutting the cable to Perth, a section of which is seen here.RELAWM12658 Charles Wheeler, Able Seaman Richard Horne English-born Horne, who had joined the RAN in 1912 aged 21, served as a gunner on HMAS Sydney during the campaign to capture German New Guinea. During the Emden fight, he was severely wounded when a shell struck his gun position, eventually having his left foot amputated. Casualties aboard the Sydney were fortunately light, with four killed and 12 wounded. ART03559 West Australian Sydney medallion To commemorate Sydney’s victory over the Emden, the citizens of Western Australia subscribed to a special fund which enabled a silver medallion, manufactured in Perth, to be presented to each member of her crew. Able Seaman William Benney, a New Zealander serving in the RAN, received this example.REL/06101 Mexican silver dollar medallion SMS Emden was carrying some 6,500 Mexican silver dollars as hard currency at the time of its destruction, and these were later salvaged by the RAN. Medallions made from some of the coins were presented to the officers and men of Sydney who took part in the action. This medallion belonged to Surgeon Lieutenant Arthur Todd, one of the Sydney’s two surgeons.REL31583
See also BACKGROUNDER # 46(3) June 2012 – Our First Naval Victory (Section 6 –Bits & Pieces-Showmen ,Silver Dollars and Patriots.Vale Wake. Australian Naval
Institute Journal.Spring 2000
SMS Emden Emden remains the most successful surface raider of all time. In the weeks before it encountered the Sydney, it had sunk or captured 23 ships. Emden was surprised at the Cocos-Keeling Islands while trying to cut the undersea cable linking Australia to Britain. After the battle, the two captains – John Glossop from Sydney and Karl von Müller from Emden – drew up a chart showing how the battle unfolded.
ISSUE # 4 (1015260515)
Emden’s coat of arms Emden carried on each side of its bow the coat of arms of its namesake city, a seaport in north-western Germany. Known locally as the “Engelke up de Muer” (little angel on the wall), the coats of arms portrays the castellated city walls with the waves of the river Ems below, and the “harpy of Ostfriesland” above. RELAWM05093 Emden’s crewman’s cap The letters “SMS” stand for “Seiner Majestät Schiff”, the German equivalent of “His Majesty’s Ship”. RELAWM07993.002 Ship’s wheel (helm) of SMS Emden In the months following its destruction, Emden’s wreck was visited by parties from a number of Australian ships, and many items and parts were removed as souvenirs. Among them were several 10.5-centimetre guns, the coat-of-arms, and the ship’s wheel.RELAWM15656 Ship’s bell from SMS Emden Immediately recognised as an historic relic, the Emden’s bell, badly damaged during the battle with Sydney, was one of the first items salvaged for return to Australia. It was displayed at the RAN’s Garden Island base until stolen in 1932 by Charles Kaolmel, a German nationalist and petty criminal. Recovered and transferred to the Australian War Memorial (then in Sydney) early in 1933, it was again stolen by Kaolmel in April, and finally found buried in Royal Park, Melbourne, in December. So great were concerns for the bell’s security that for many years afterwards a replica was displayed.RELAWM12275 “Emden beached and done for” The famous signal sent by Captain Glossop, commander of HMAS Sydney, at 11.10 am on 9 November 1914, after the engagement with SMS Emden off the Cocos–Keeling Islands. Emden was driven ashore on the remote North Keeling Island.1DRL/0660 Emden medallion The Emden’s highly successful career as commerce raider made both the ship and its commander, Fregattenkapitän Karl von Müller, famous throughout Germany. After the ship’s destruction, this iron commemorative medallion was struck, vowing that a “new, stronger, Emden” would emerge. True to the claim, in 1916 the new Emden, a Königsberg Class cruiser, was launched for service with the High Seas Fleet. REL/07669 Chart of the Sydney–Emden action After the battle, the opposing captains, Glossop and von Müller, collaborated on this chart which plots their respective ships’ courses and positions between 9.15 and 11 am. This copy was signed by the victor, Captain John Glossop.RC10009
See also BACKGROUNDER # 46(3) June 2012 – Our First Naval Victory and link to ANZAC Hall Object Theatre
ISSUE # 4 (1015260515)
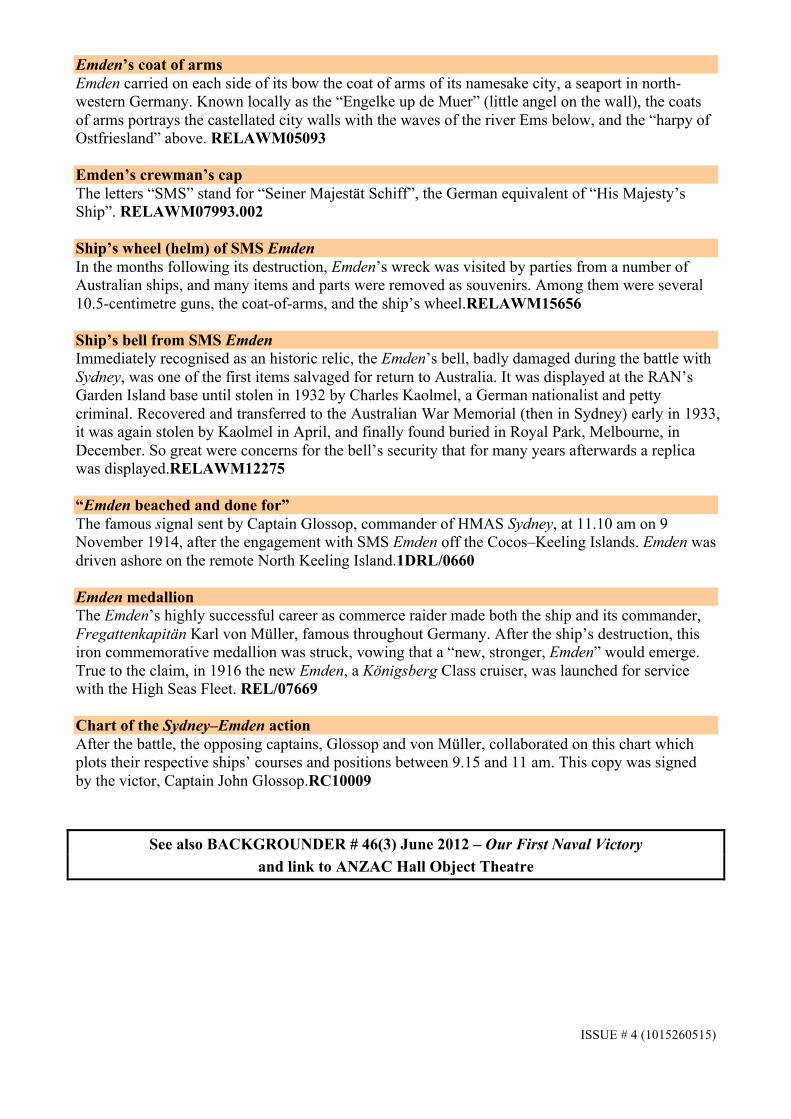
Notes: 1.The SMS EMDEN’s Ship’s Bell (AWM website February 2015)
SMS Emden was a German cruiser which was launched in 1908. At the start of the First World War, she was a member of the German East Asiatic Squadron. Emden was detached to stalk the shipping routes across the Indian Ocean and quickly became the scourge of the Allied navies. Between August and October 1914, Emden captured or sank 21 vessels. In Novmber 1914, nine Allied vessels were involved in the unt for Emden; the threat she posed led to a particularly heavy escort of four warships
being allocated to the first Australian and New Zealand troop convoy travelling between Western Australia and Egypt. Surprised by one of these escorts, HMAS Sydney (I), while in the process of destroying the British radio station on the Cocos (Keeling) Islands, Emden was destroyed in the fight between the two ships on 9 November 1914. Emden's bell was one of the many relics removed from the beached wreck by the Royal Australian Navy and was retained as a war trophy. The bell had been cast in the nineteenth century for a wooden boat, but was later presented by the city of Emden, a German sea port, to SMS Emden when she was commissioned in 1909. The bell was displayed at the naval base at Garden Island in Sydney, NSW from 1917 until it was stolen in August 1932. In February 1933 it was found buried in the Domain by authorities, across the water from where it was taken. The bell was then donated to the Australian War Memorial and exhibited in Sydney. It was wired to a plinth, which was bolted to the ground for additional security. However, in late April 1933, two months after it was recovered, it was stolen again. The suspect for the second theft was Charles Kaolmel, a 30 year old German immigrant, who had arrived in Australia in 1925. Kaolmel had been involved in the recovery of the bell the first time. In that instance he claimed he had bought the bell from another man for 150 pounds, not realising it was stolen. He also claimed he intended to take the bell to Germany, where he thought he could sell it for a high price. He told the police that when he discovered it was stolen he panicked, concerned that it would be found in his possession and be accused of its theft, and buried it in the Domain. In the second theft, Kaolmel used a pair of pliers to cut the wire with which the bell had been fastened to its pedestal. He then placed a bag over the bell and carried it, unobserved, to the fire escape where he then placed it in a truck he purchased for the theft. After Kaolmel stole the bell the second time he moved to Melbourne. Kaolmel had a number of aliases, including the surnames King, Kohnnel and Watts and the given names Carl, Karl and Otto. The Memorial's director, John Treloar maintained the investigation, including hiring private investigators and following up leads. Months after the second theft Kaolmel was arrested and found guilty of both thefts. After months of speculation in the press as to its location, including stories that the bell had been shipped to America or Germany, the bell was located on 29 December 1933. Again Kaolmel had buried it in a park, this time in Royal Park in Melbourne. The bell returned to the exhibition in Sydney. There were fears it was not the real bell, so tests were done which determined it was. John Treloar became so concerned about the bell being stolen again that a replica was made, which was displayed until the late 1970s, when the original was returned to display for the first time in forty years. Bells have several important uses in the world's navies and merchant fleets. They are used for signalling, keeping time and sounding alarms, which maintain a ship's routine and readiness. As well as this functional use they are used in ceremonial occasion.
ISSUE # 4 (1015260515)
BACKGROUNDER # 110
AUSTRALIA IN THE GREAT WAR
PART 1 AUSTRALIA GOES TO WAR
SECTION 7
THE FIRST CONVOY / ANZAC IN EGYPT
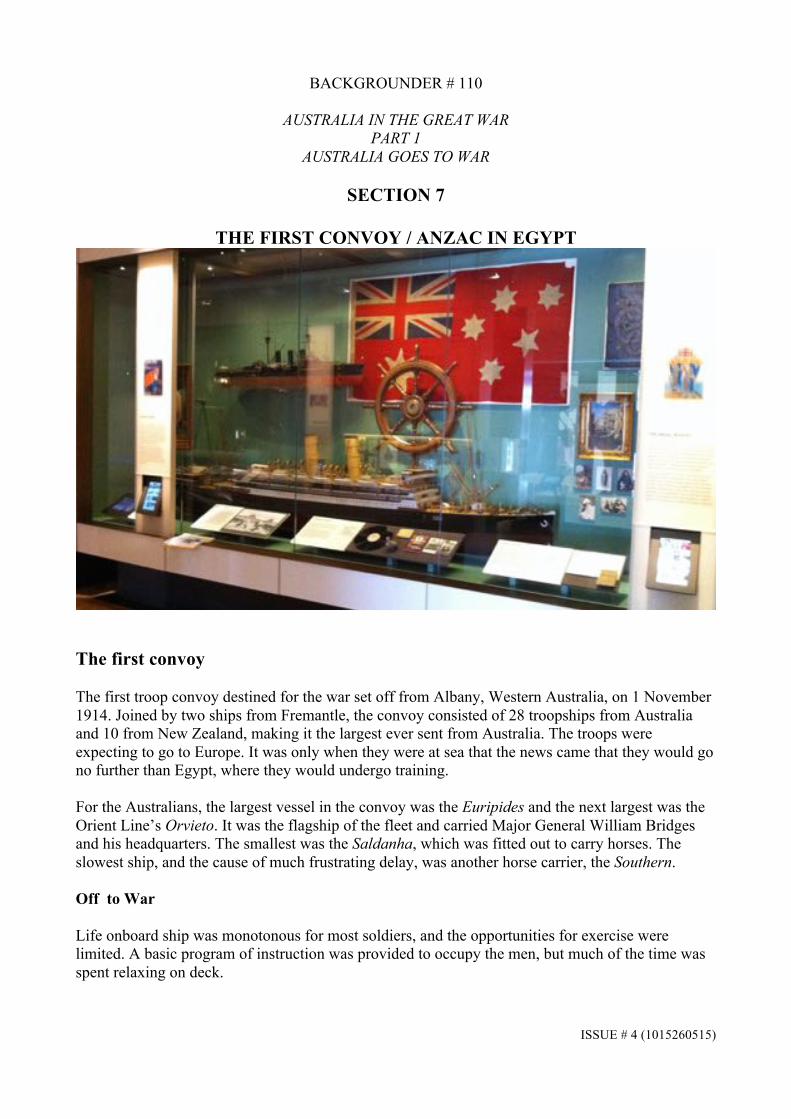
The first convoy The first troop convoy destined for the war set off from Albany, Western Australia, on 1 November 1914. Joined by two ships from Fremantle, the convoy consisted of 28 troopships from Australia and 10 from New Zealand, making it the largest ever sent from Australia. The troops were expecting to go to Europe. It was only when they were at sea that the news came that they would go no further than Egypt, where they would undergo training. For the Australians, the largest vessel in the convoy was the Euripides and the next largest was the Orient Line’s Orvieto. It was the flagship of the fleet and carried Major General William Bridges and his headquarters. The smallest was the Saldanha, which was fitted out to carry horses. The slowest ship, and the cause of much frustrating delay, was another horse carrier, the Southern. Off to War Life onboard ship was monotonous for most soldiers, and the opportunities for exercise were limited. A basic program of instruction was provided to occupy the men, but much of the time was spent relaxing on deck.
ISSUE # 4 (1015260515)
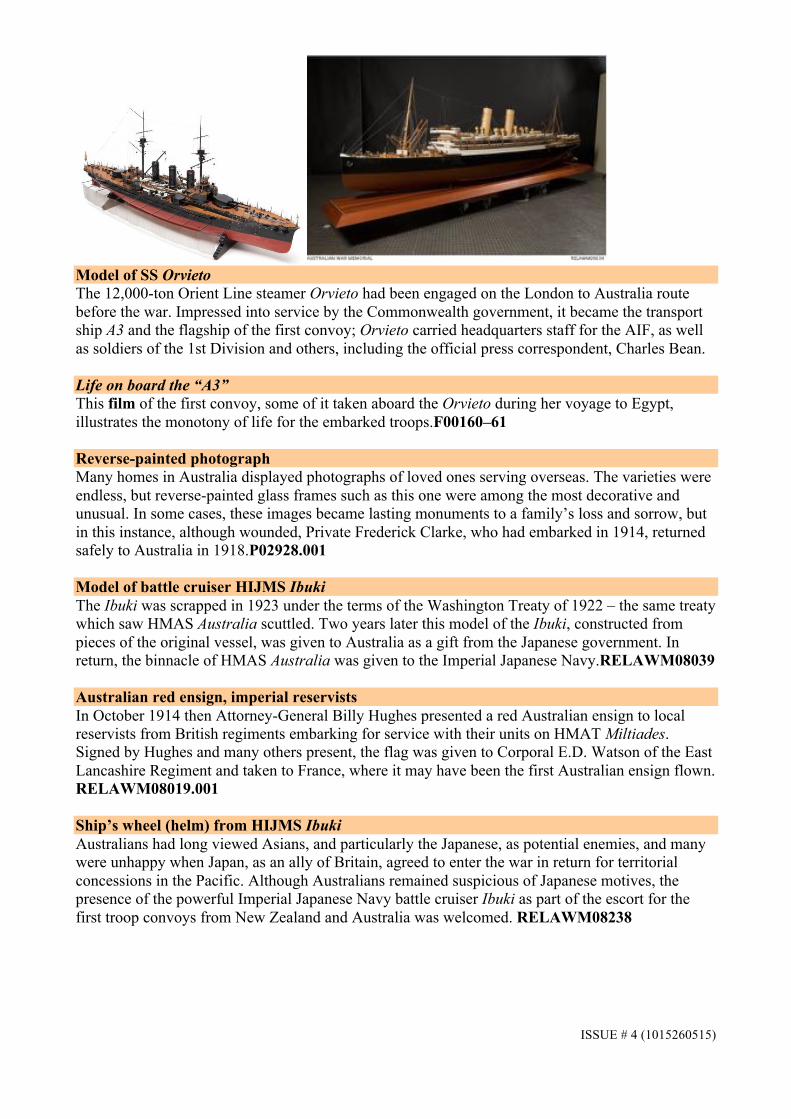
Model of SS Orvieto The 12,000-ton Orient Line steamer Orvieto had been engaged on the London to Australia route before the war. Impressed into service by the Commonwealth government, it became the transport ship A3 and the flagship of the first convoy; Orvieto carried headquarters staff for the AIF, as well as soldiers of the 1st Division and others, including the official press correspondent, Charles Bean. Life on board the “A3” This film of the first convoy, some of it taken aboard the Orvieto during her voyage to Egypt, illustrates the monotony of life for the embarked troops.F00160–61 Reverse-painted photograph Many homes in Australia displayed photographs of loved ones serving overseas. The varieties were endless, but reverse-painted glass frames such as this one were among the most decorative and unusual. In some cases, these images became lasting monuments to a family’s loss and sorrow, but in this instance, although wounded, Private Frederick Clarke, who had embarked in 1914, returned safely to Australia in 1918.P02928.001 Model of battle cruiser HIJMS Ibuki The Ibuki was scrapped in 1923 under the terms of the Washington Treaty of 1922 – the same treaty which saw HMAS Australia scuttled. Two years later this model of the Ibuki, constructed from pieces of the original vessel, was given to Australia as a gift from the Japanese government. In return, the binnacle of HMAS Australia was given to the Imperial Japanese Navy.RELAWM08039 Australian red ensign, imperial reservists In October 1914 then Attorney-General Billy Hughes presented a red Australian ensign to local reservists from British regiments embarking for service with their units on HMAT Miltiades. Signed by Hughes and many others present, the flag was given to Corporal E.D. Watson of the East Lancashire Regiment and taken to France, where it may have been the first Australian ensign flown. RELAWM08019.001 Ship’s wheel (helm) from HIJMS Ibuki Australians had long viewed Asians, and particularly the Japanese, as potential enemies, and many were unhappy when Japan, as an ally of Britain, agreed to enter the war in return for territorial concessions in the Pacific. Although Australians remained suspicious of Japanese motives, the presence of the powerful Imperial Japanese Navy battle cruiser Ibuki as part of the escort for the first troop convoys from New Zealand and Australia was welcomed. RELAWM08238
ISSUE # 4 (1015260515)
The ANZAC in Egypt The first AIF troops were at sea when news came that they were to land in Egypt. Turkey had just joined the war on Germany’s side and was threatening the allies’ interests in the Middle East, including the vital Suez Canal. The Australians set up a large tented camp and training facilities outside Cairo near the pyramids. They were soon joined by further contingents. There were sufficient Australians and New Zealanders in Egypt to make two divisions – the 1st Australian Division and a composite New Zealand and Australian Division. These were placed together as the Australian and New Zealand Army Corps. The name was quickly shortened, as a telegraphic code, to form the acronym ANZAC. Command of the corps was given to a British officer of the Indian army, General Sir William Birdwood. Training in Egypt Arriving in Egypt, the early Australian volunteers underwent months of training that extended the basic skills they had learned while in camps at home. Their physical fitness developed with the rigorous work. For the old soldiers among them, the training was familiar as it was drawn from British textbooks that had not yet caught up with the changes and developments prompted by the recent fighting in Europe. There was the standard rifle and bayonet drill, signalling with flags, exercises by bugle calls, and digging field entrenchments in the sand. Little was seen of machine-guns, and nothing was learned of grenades, mortars, or periscopes. There were field exercises, sometimes at brigade level. While most officers considered the force to be well-trained, they and their men knew little of the nature of the battles and the hellish fate that awaited them. Soldiers as tourists It was observed of the Australian soldier in Egypt that when “off parade he was a civilian bent upon seeing the world”. In no time the troops had inspected the pyramids near the camps, and soon they became regular visitors to the delights and temptations of Cairo, only a tram-ride away. With a good rate of pay, the soldiers looked for articles and amusements beyond those sold in the shabby stalls or by the shabby vendors who gathered around the camps. Some men were satisfied to see the zoological gardens and ancient sites or to buy gifts, such as embroidery and brassware, for loved ones at homes. Others sought wilder diversions and it was not long before stern measures became necessary to restrict activities that went far beyond high-spirited pranks. Army biscuit with message This biscuit letter, sent in 1915 from an Australian at Heliopolis training camp to his sister, expresses typical soldiers’ views of the Egyptian summer weather, and offers a comment on the ubiquitous army biscuit.REL/17337 Christmas greetings from Mena camp, 1914 A novel way of communicating with loved ones at home was this recorded letter, a Christmas message sent by Private Henry Miller Lanser, 1st Battalion, AIF, to his family in Sydney. Lanser was 24 years old when he recorded the message at Mena Camp, near Cairo. He later took part in the landing on Gallipoli, and was twice wounded during the campaign. Commissioned in 1916, he was killed in action at Flers in November that year. S00104
ISSUE # 4 (1015260515)
Soldier tourists Relatively few of the Anzacs had travelled overseas before the war, and Egypt was considered an exotic and mysterious destination. Many soldiers commented upon the contrasts between the monuments of the ancient civilisation around them and the youth of their own nations. Souvenir booklets such as those shown were avidly collected.RC09268 Souvenir sphinx/scarab paperweight Typical of the newly manufactured “historical antiquities” offered to tourists as souvenirs by Egyptian vendors, this one was purchased by Private David Roberts of the 17th Battalion in 1915. Roberts survived Gallipoli and was awarded a Military Medal for gallantry at Passchendaele, but as a veteran sergeant he was killed in action in August 1918, aged just 21.REL/15229 Embroidered souvenir table-runner Embroidered souvenirs such as this proved enormously popular with soldiers based in the Cairo area. Relatively cheap to purchase, they could also be personalised to suit the buyer’s wishes. This example, featuring the pyramids and the flags of Russia, Great Britain, Australia, and France, was sent home as a wedding gift.REL31184 Souvenir portrait Members of the Australian Infantry Signal School photographed in front of the Sphinx. This was a popular spot for soldiers to have their portraits taken: in March 1915 the Sydney Mail estimated that “not one of the 20,000 Australian soldiers now in Egypt will leave the country without being photographed in this fashion – seated on a camel at the base of the mysterious Sphinx”. Portraits such as these were often reproduced as postcards and sent to friends and families at home. “Not one of the 20,000 Australian soldiers now in Egypt will leave the country without being photographed in this fashion – seated on a camel at the base of the mysterious Sphinx”, Sydney Mail, March 1915A03356 Four sisters of the Australian Army Nursing Service pose for a souvenir snapshot. A05410 Private Sydney Clunes, 2nd Light Horse Regiment, photographed in the “usual spot”.P00346.001 Troops’ discipline In Egypt many troops became restless during the long period of training, and the authorities were slow to provide facilities and diversions. Trouble developed among some bored soldiers. Drunkenness, and incidents of theft and assault, threatened the Anzacs’ good name. A weeding out of bad characters began and they were sent home. A newspaper report of these events was published in Australia and was greatly resented by the troops. Even so, “absent without leave” still remained an all-too-common offence. Matters reached a low point in early April when some Anzacs rioted in Cairo’s brothel district; they caused much damage and injury, and resisted attempts by military and civilian police, and other troops, to bring order to the ugly scenes. “Keep yourself fit” Egypt also offered new temptations to the thousands of young male visitors. Despite the blandishments of publications such as this, many, far from the controlling influence of family and starved of female company, were willing to take risks in pursuit of sexual adventure.RC10192 (616.95105 a789K)
ISSUE # 4 (1015260515)
“What to know in Egypt” Australia’s official press correspondent, Charles Bean, worried by the increasing rate of disease and misbehaviour among the troops in Egypt, wrote this pocket guide for Australasian soldiers, outlining the culture and attractions, but also emphasising the various perils and risks to be found in Cairo.RC01894 “Warning to soldiers respecting venereal disease” Official warnings to soldiers such as this one seem to have had little effect upon the high-spirited Anzacs. Chafing under unaccustomed army discipline and the daily routine of training in the hot and dusty Egyptian desert, they were impatient to engage the enemy. Increasing numbers of men sought release from their frustrations in the bars and brothels of Cairo. RC10076 “Exotic postcards “ There were concerns in Australia and New Zealand about the moral hazards and temptations being placed before the young men of the AIF and NZEF in Egypt. The ready availability of saucy postcards such as these was considered proof of the depravity of Eastern cultures. They appear tame to modern eyes, but others in circulation were much more explicit. For many soldiers, they were just another memorable souvenir of Egypt – sometimes used to decorate tents and dug-outs. P02307.028; P02307.030–033 George Lambert, The Wassah, Cairo The Haret el Wasser was the heart of Cairo’s notorious red-light district, which attracted many Australians and New Zealanders during their stay in Egypt. Crime and sexual disease were rife, and led to the two so-called “Battles of the Wozzer” (April and July 1915) in which buildings were burnt and property destroyed. Although the area was placed off-limits for military personnel, policing of this order was not practical, and it remained one of the prime attractions for soldiers throughout the war. ART02755
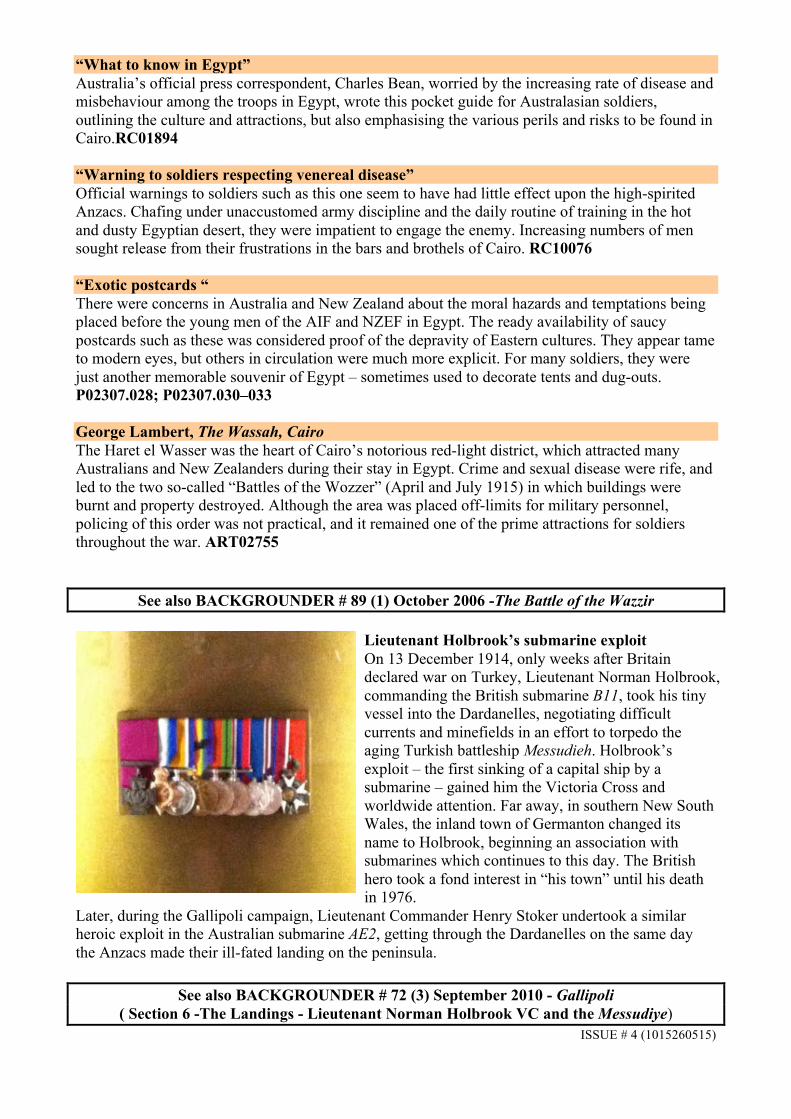
See also BACKGROUNDER # 89 (1) October 2006 -The Battle of the Wazzir Lieutenant Holbrook’s submarine exploit On 13 December 1914, only weeks after Britain declared war on Turkey, Lieutenant Norman Holbrook, commanding the British submarine B11, took his tiny vessel into the Dardanelles, negotiating difficult currents and minefields in an effort to torpedo the aging Turkish battleship Messudieh. Holbrook’s exploit – the first sinking of a capital ship by a submarine – gained him the Victoria Cross and worldwide attention. Far away, in southern New South Wales, the inland town of Germanton changed its name to Holbrook, beginning an association with submarines which continues to this day. The British hero took a fond interest in “his town” until his death in 1976.
Later, during the Gallipoli campaign, Lieutenant Commander Henry Stoker undertook a similar heroic exploit in the Australian submarine AE2, getting through the Dardanelles on the same day the Anzacs made their ill-fated landing on the peninsula.
See also BACKGROUNDER # 72 (3) September 2010 - Gallipoli ( Section 6 -The Landings - Lieutenant Norman Holbrook VC and the Messudiye)