Embed Size (px)
Citation preview

Autonomous Vehicle ControlDocumentation
Release 0.0.1-rc1
Huckleberry Febbo
Jan 09, 2019


Contents
1 Software 31.1 ROS . . . . . . . . . . . . . . . . . . . . . . . . . . . . . . . . . . . . . . . . . . . . . . . . . . . 31.2 Gazebo . . . . . . . . . . . . . . . . . . . . . . . . . . . . . . . . . . . . . . . . . . . . . . . . . . 141.3 ROS and Gazebo . . . . . . . . . . . . . . . . . . . . . . . . . . . . . . . . . . . . . . . . . . . . . 171.4 Project Chrono . . . . . . . . . . . . . . . . . . . . . . . . . . . . . . . . . . . . . . . . . . . . . . 221.5 Polysync . . . . . . . . . . . . . . . . . . . . . . . . . . . . . . . . . . . . . . . . . . . . . . . . . 251.6 julia . . . . . . . . . . . . . . . . . . . . . . . . . . . . . . . . . . . . . . . . . . . . . . . . . . . . 261.7 git . . . . . . . . . . . . . . . . . . . . . . . . . . . . . . . . . . . . . . . . . . . . . . . . . . . . . 401.8 Documentation . . . . . . . . . . . . . . . . . . . . . . . . . . . . . . . . . . . . . . . . . . . . . . 481.9 LaTeX . . . . . . . . . . . . . . . . . . . . . . . . . . . . . . . . . . . . . . . . . . . . . . . . . . 541.10 C . . . . . . . . . . . . . . . . . . . . . . . . . . . . . . . . . . . . . . . . . . . . . . . . . . . . . 581.11 Operating Systems . . . . . . . . . . . . . . . . . . . . . . . . . . . . . . . . . . . . . . . . . . . . 581.12 misc . . . . . . . . . . . . . . . . . . . . . . . . . . . . . . . . . . . . . . . . . . . . . . . . . . . . 60
2 Hardware 672.1 LiDAR Devices . . . . . . . . . . . . . . . . . . . . . . . . . . . . . . . . . . . . . . . . . . . . . 67
3 Huck’s notes 713.1 Navigation and Guidance of Aerospace Vehicles (AERO 584) . . . . . . . . . . . . . . . . . . . . . 71
i

ii

Autonomous Vehicle Control Documentation, Release 0.0.1-rc1
My PhD project involves using model predictive control to avoid moving obstacles.
Contents:
Contents 1

Autonomous Vehicle Control Documentation, Release 0.0.1-rc1
2 Contents

CHAPTER 1
Software
1.1 ROS
1.1.1 Installing ROS
From Pre-Built Debians
For ROS kinetic:
sudo apt-get install ros-kinetic-desktop-full
From source
Additional steps/notes to the link above.
1. Remove any sourced files from the bash.bashrc files.
2. 2.1: after making the catkin_ws
Run:
catkin init
Note: make sure that there are no other external workspaces that you are building on
3. Resolve Dependencies
Before you build the catkin_ws make sure that you have the required dependencies!
rosdep install --from-paths src --ignore-src --rosdistro kinetic -y
3

Autonomous Vehicle Control Documentation, Release 0.0.1-rc1
Potential Issues:
Using the second option (Desktop Install) for kinetic, the following issues may occur:
Note: potential error:
/home/febbo/ros_catkin_ws/src/opencv3/opencv_contrib/rgbd/src/odometry.cpp:41:45:→˓fatal error: unsupported/Eigen/MatrixFunctions: No such file or directory→˓compilation terminated.
The fix is to changed line 41 in odometry.cpp to (or where eigen3 is):
#include <eigen3/unsupported/Eigen/MatrixFunctions>
Note:
potential error:
c++: error: /home/febbo/ros_catkin_ws/build_isolated/qt_gui_cpp/src/qt_gui_→˓cpp_shiboken/libqt_gui_cpp_shiboken/qt_gui_cpp_recursivepluginprovider_→˓wrapper.cpp: No such file or directoryc++: fatal error: no input filescompilation terminated.
<== Failed to process package 'qt_gui_cpp':
After posting an issue here. The fix was identified to be removing shiboken with:
sudo apt-get remove libshiboken*
An issue with the above fix is that if you try updating your ros dependencies and it installs shiboken.So, installing Qt 5 with:
sudo apt-get install qt5-default
Note: potential error <https://github.com/ros-planning/navigation/issues/579>:
-- Found Bullet: /usr/lib/x86_64-linux-gnu/libBulletDynamics.soCMake Error at /usr/share/cmake-3.5/Modules/FindPackageHandleStandardArgs.cmake:148→˓(message):Could NOT find SDL (missing: SDL_LIBRARY SDL_INCLUDE_DIR)
Call Stack (most recent call first):
Note: potential error
CMake Error at /usr/local/lib/cmake/gazebo/gazebo-config.cmake:172 (find_package):By not providing "Findignition-math3.cmake" in CMAKE_MODULE_PATH this
4 Chapter 1. Software
Autonomous Vehicle Control Documentation, Release 0.0.1-rc1
Installing missing Dependencies
Note: This is a truly magical command that works well (even when doing a source build)!!
Go to the catkin_workspace and type:
rosdep install --from-paths src --ignore-src -r -y
Uninstalling ROS
From Pre-Built Debians:
If you’re running Ubuntu, and installed ROS with apt-get, the first step would be:
sudo apt-get remove ros-*
Remove configuration files:
sudo apt-get purge ros-*
Remove packages that are no longer required:
sudo apt autoremove
From Source
TODO
1.1.2 Resources and Tutorials
Tutorials and Resources
• Node Tutorial Python
• Writing a Publisher Subscriber
• Publishing the State Info
• Navigation Tutorials
• Turn your package into a python module
• MIT stuff
• basic ROS concepts
• best practices
• Installing Packages
• Navigating the File System
Other packages:
1.1. ROS 5

Autonomous Vehicle Control Documentation, Release 0.0.1-rc1
sudo apt-get install libfcl-dev
Great Commands
To check for any missing dependencies:
rosdep check --from-paths . --ignore-src --rosdistro kinetic
To automatically install missing dependencies:
rosdep install --from-paths . --ignore-src --rosdistro kinetic -y
Potential Issues
permission denied: .gvfs
Fix unmount Gnome virtual file system and delete the mounting point:
sudo umount /home/febbo/.gvfssudo rm -rf .gvfs/
Useful Questions
• good path following code
• https://github.com/osrf/homebrew-simulation/issues/167
1.1.3 Useful ROS Packages
tf2
This package uses geometry_msgs for some of the messages.
Useful functions
Warning: use tf2 not tf
Commands
Check tf tree:
roswtfrosrun tf tf_monitorrosrun tf view_frames
to print a particular transformation:
6 Chapter 1. Software

Autonomous Vehicle Control Documentation, Release 0.0.1-rc1
rosrun tf tf_echo /map /odom
Joint States
Terminology
1) Quaternions: a way to describe rotations that does not have singularities. It has four numbers, the first threedescribe an axis and the third is the amount of rotation about that axis.
The first three components are imaginary:
q=xi+yj+zk+w
The magnitude of a quaternion is:
magnitude=sqrt(x^2+y*2+z^2+w^2)
where:
x = x / magnitudey = y / magnitudez = z / magnitudew = w / magnitude
http://www.euclideanspace.com/maths/geometry/rotations/conversions/quaternionToEuler/
• Almost never have to set these manually in ROS!
• Programming Quaternions
• ‘ a calculator <http://quat.zachbennett.com/>‘_
• ‘ a Gazebo example <http://gazebosim.org/tutorials?tut=drcsim_atlas_siminterface&cat=>‘_
Tutorials and Resources
• tutorials
• FAQ
• docs
• setting up the frames: for SLAM
• setting up your robot using tf
Example Resources
• python omniaxbot
Issues
• quaternions
• using tf
1.1. ROS 7
Autonomous Vehicle Control Documentation, Release 0.0.1-rc1
• joint states
Potential Errors
Note: potential error:
fatal error: tf/transform_broadcaster.h: No such file or directorycompilation terminated.
Use tf2! The new version of tf.
RViz
Official visualization tool for ROS
http://wiki.ros.org/rviz/Troubleshooting
obstacle_detector
To use this package you must install Armadillo C++.
Installing Armadillo C++
Put these programs in the /opt folder
First you need OpenBlas
To get it type:
sudo git clone https://github.com/xianyi/OpenBLAS.git
Then go into the OpenBlas folder and type:
sudo make
Get devel files from Debian repos as per:
sudo apt updateapt search openblassudo apt install libopenblas-devsudo update-alternatives --config libblas.so.3sudo apt install cmake liblapack-devapt search arpacksudo apt install libarpack2-dev
8 Chapter 1. Software

Autonomous Vehicle Control Documentation, Release 0.0.1-rc1
Then you need LAPACK
To get it type:
sudo git clone https://github.com/Reference-LAPACK/lapack-release.git
Then go into the lapack-release folder and type:
sudo mv make.inc.example make.incsudo make
Warning: Then you may run into this issue:
./liblapack.a ../../librefblas.amake[2]: Leaving directory '/opt/lapack-release/TESTING/LIN'Testing COMPLEX16 LAPACK linear equation routines./LIN/xlintstz < ztest.in > ztest.out 2>&1SEP: Testing Symmetric Eigenvalue Problem routines./EIG/xeigtstz < sep.in > zsep.out 2>&1Makefile:467: recipe for target 'zsep.out' failedmake[1]: *** [zsep.out] Error 139make[1]: Leaving directory '/opt/lapack-release/TESTING'Makefile:42: recipe for target 'lapack_testing' failedmake: *** [lapack_testing] Error 2
As per this site the stack size can be increased with:
ulimit -s 100000
Then run:sudo make
And it should compile fine!
Note: can also install SuperLU and ARPACK etc. ‘as per<https://github.com/conradsnicta/armadillo-code/tree/8.300.x>‘_
Now we can get Armadillo C++
To get it type:
sudo git clone https://github.com/conradsnicta/armadillo-code.git
Then go into the armadillo-code folder and type:
sudo cmake .sudo make
Eigen
a C++ library that I use for quaternion transformations, to get started
1.1. ROS 9

Autonomous Vehicle Control Documentation, Release 0.0.1-rc1
Note: when going to use it with ROS there is no FindEigen.cmake on Ubuntu, so you need to include it in yourpackage by default.
http://wiki.ros.org/jade/Migration#Eigen_CMake_Module_in_cmake_modules
roscpp
A C++ implementation of ROS that allows users to quickly interact with ROS.
rospy
Common Messages
a meta package for common messages
message_filters
Make the decision to use data based off of the time stamp. Basically sequence the data
PCL
Point cloud library
Ackermann Group
Group that supports Ackermann steering geometry.
navigation
install with:
sudo apt-get install ros-kinetic-navigation
hector_localization
install with:
sudo apt-get install ros-kinetic-hector-localization
ros_control
install with:
sudo apt-get install ros-kinetic-ros-control ros-kinetic-ros-controllers
10 Chapter 1. Software

Autonomous Vehicle Control Documentation, Release 0.0.1-rc1
pointcloud_to_laserscan
install with:
sudo apt-get install ros-kinetic-pointcloud-to-laserscan
teleop_twist_keyboard
Cartographer
A Google map builder
laser_pipeline
Meta-package for laser data processing
robot_localization
Provide state estimates given sensor data
robot_state_publisher
• turorial
• load new parameters on the server
• Troubleshooting
• messages being blocked
• use_sim_time = false
Requires:
• joint_state_publisher
clock
For a ROS node to use the /clock topic set the /use_sim_time parameter before node is started
ControllIt!
MoveIT
Install
ROS Kinetic on Ubuntu:
sudo apt-get install ros-kinetic-moveit
1.1. ROS 11

Autonomous Vehicle Control Documentation, Release 0.0.1-rc1
Using With Kinetic
Go to this link and download the PDF for instructions.
URDF
Unified Robot Description Format (URDF), an Extensible Markup Language (XML) format (a markup language (candocument revisions) that is both machine and human readable)
catkin-tools
Lots of useful info on setting up workspaces.
1.1.4 Useful Examples
ADAS
Great example for controlling autonomous vehicles.
ROS tutorial for Autonomous Cars
http://www.robotigniteacademy.com/en/
IPA320
Very useful resource for using ROS with Gazebo
• https://github.com/ipa320
• https://github.com/ipa320/srs_public/blob/master/srs_user_tests/ros/scripts/move_robot_sim.py
Potential Vehicle Models
• robots.ros.org
• http://wiki.ros.org/Robots/Husky
• http://wiki.ros.org/Robots/Grizzly
• http://wiki.ros.org/Robots/Jackal
NVIDIA’s Driveworks
https://developer.nvidia.com/driveworks
12 Chapter 1. Software

Autonomous Vehicle Control Documentation, Release 0.0.1-rc1
1.1.5 My Personal Build
Packages required for MAVS
as of 8/22/2017 on top of ros-kinetic-full:
sudo apt-get install ros-kinetic-controller-managersudo apt-get install ros-kinetic-joint-state-controllersudo apt-get install ros-kinetic-effort-controllerssudo apt-get install ros-kinetic-teleop-twist-keyboardsudo apt-get install ros-kinetic-pointcloud-to-laserscansudo apt-get install ros-kinetic-velodyne-description
Packages used in my catkin_ws
as of 8/22/2017 on top of ros-kinetic-full:
sudo apt-get install ros-kinetic-move-basesudo apt-get install ros-kinetic-gmappingsudo apt-get install ros-kinetic-amclsudo apt-get install ros-kinetic-ackermann-msgssudo apt-get install ros-kinetic-transmission-interfacesudo apt-get install ros-kinetic-moveit-ros-move-groupsudo apt-get install ros-kinetic-robotnik-sensorssudo apt-get install ros-kinetic-robot-pose-ekfsudo apt-get install ros-kinetic-moveit-kinematicssudo apt-get install ros-kinetic-moveit-ros-visualizationsudo apt-get install ros-kinetic-moveit-planners-omplsudo apt-get install ros-kinetic-teb-local-plannersudo apt-get install ros-kinetic-joint-limits-interfacesudo apt-get install ros-kinetic-map-serversudo apt-get install ros-kinetic-robot-state-publishersudo apt install ros-kinetic-rqt
To use Autoware
added:
sudo apt-get install ros-kinetic-nmea-msgs ros-kinetic-nmea-navsat-driver ros-kinetic-→˓sound-play ros-kinetic-jsk-visualization ros-kinetic-grid-map ros-kinetic-gps-commonsudo apt-get install ros-kinetic-controller-manager ros-kinetic-ros-control ros-→˓kinetic-ros-controllers ros-kinetic-gazebo-ros-control ros-kinetic-joystick-driverssudo apt-get install libnlopt-dev freeglut3-dev qtbase5-dev libqt5opengl5-dev libssh2-→˓1-dev libarmadillo-dev libpcap-dev gksu libgl1-mesa-dev libglew-dev python-wxgtk3.0
sudo apt install ros-kinetic-roslintsudo apt-get install ros-kinetic-joint-state-publishersudo apt-get install ros-kinetic-controller-manager
my .bashrc
sourced:
1.1. ROS 13

Autonomous Vehicle Control Documentation, Release 0.0.1-rc1
source /opt/ros/kinetic/setup.bashsource /home/febbo/Documents/workspace/tutorials/catographer_ws/install_isolated/→˓setup.bashsource /home/febbo/Documents/workspace/tutorials/velodyne_simulator/devel/setup.bashsource /home/febbo/Documents/workspace/tutorials/kobuki_desktop/devel/setup.bashsource /home/febbo/.julia/v0.6/MAVs/catkin_ws/devel/setup.bashsource /home/febbo/Documents/workspace/tutorials/mastering_ros/chapter_3_codes/devel/→˓setup.bashsource /home/febbo/catkin_ws/devel/setup.bashalias tf='cd /var/tmp && rosrun tf view_frames && evince frames.pdf &'. ~/.bash_profilesource /home/febbo/ros_catkin_ws/install_isolated/setup.bash
1.1.6 Potential Errors
Warning: Potential Error:
fatal error: tf2/LinearMath/Quaternion.h: No such file or directory compilation→˓terminated.
It is trying to find some file and it cannot. The problem may be that the header files where not specified! To fix:
include_directories(${catkin_INCLUDE_DIRS}
)
1.2 Gazebo
1.2.1 Installation
Automatically installed after following the ROS installation instructions.
Make sure after you install it you source the setup.sh file in the .bashrc script:
source /usr/share/gazebo-7/setup.sh
Also source any setup.bash scripts that are in your projects:
source /home/febbo/.julia/v0.6/MAVs/workspace/devel/setup.bash
Also in the setup.sh file in the usr/share/gazebo-7/ directory, add to the resource path if you need to as:
export GAZEBO_RESOURCE_PATH=/usr/share/gazebo-7:/usr/share/gazebo_models:/usr/share/→˓gazebo-7/worlds${GAZEBO_RESOURCE_PATH}
In the above example we also added the /worlds folder.
Note: Using the gui to create models is limited because the default full version of ros kinetic does not let you edit themodels after you save them. So, then I started to learn how to make the models directly using XML. The only way toget around this is to build from source but then you won;t be able to use any ROS Ubuntu package related to Gazebofrom the ROS deb repo.
14 Chapter 1. Software

Autonomous Vehicle Control Documentation, Release 0.0.1-rc1
From source (option A)
Follow these instructions
Additional notes:
• Step 1:
To get the Gazebo-8 stable branch:
/opt$ sudo hg clone https://bitbucket.org/osrf/gazebo /opt/gazebo -b gazebo8
To get the Gazebo-7 stable branch:
/opt$ sudo hg clone https://bitbucket.org/osrf/gazebo /opt/gazebo -b gazebo7
sudo hg clone https://bitbucket.org/osrf/gazebo /tmp/gazebo -b gazebo7
• Step 3:
Configure Gazebo:
sudo mkdir buildcd buildsudo cmake ../
Build Gazebo:
/opt/gazebo/build$ sudo make -j4
Install Gazebo:
sudo make install
• Step 4:
Set up environmental variables and
From source (option B) -preferred for Gazebo-7
http://gazebosim.org/tutorials?tut=install_dependencies_from_source
Potential Issue
Note: If not sourced properly:
febbo@febbo-HP-ZBook-17-G2:~$ gazebogazebo: error while loading shared libraries: libgazebo_common.so.7: cannot open→˓shared object file: No such file or directory
Then try:
febbo@febbo-HP-ZBook-17-G2:~$ find / -name 'libgazebo_common.so.7' 2>/dev/null/usr/local/lib/libgazebo_common.so.7/tmp/gazebo/build/gazebo/common/libgazebo_common.so.7
1.2. Gazebo 15
Autonomous Vehicle Control Documentation, Release 0.0.1-rc1
And updated the /etc/bash.bashrc file appropriately:
gksu gedit /etc/bash.bashrc
By adding (in this case):
export LD_LIBRARY_PATH=/usr/local/lib:$LD_LIBRARY_PATH
Note: when trying to start Gazebo from the command line:
gazebo: error while loading shared libraries: libsdformat.so.5: cannot open shared object file: No such file or directory
1.2.2 Terminology
1) Xacro:
(Xaxro) (XML macros) an XML macro language useful for shorter robot descriptions.
• xacro:include: import content from another file
• property: define constants ${property_name}
• xacro:macro: include the file where the macro is and call it using the macro’s name and filling in therequired values
2) SDFormat
An XML format that describes environments for robot simulators visualizations and controls. Originallypart of Gazebo but now is stable enough that it stands alone.
1.2.3 Basics
Model Structure
Make sure that the model is structured correctly. An issue that was ran into is described here where I tried to put amodel in a lower level directory. Models need to go just below catkin/src/, then setup.sh must be modifedas:
export GAZEBO_MODEL_PATH=/usr/share/gazebo-7/models:/home/febbo/catkin_ws/src/:$→˓{GAZEBO_MODEL_PATH}
Model State Info
Using rospy to get the model states.
World Files
Note: When saving a world file, put it into the folder with the other world files!
16 Chapter 1. Software

Autonomous Vehicle Control Documentation, Release 0.0.1-rc1
1.2.4 Tutorials:
• Add Sensor to A Robot
• Gazebo Plugins
• Getting SDF information for a model
• Control Plugin
• 3D models
1.2.5 Resources:
• 3D Warehouse: a place to grab CAD models
• Possible Model for HMMWV
• simplify a .dae file
• 3Delicious
• Free 3D
1.2.6 Useful Software
• Blender
1.2.7 Issues
• importing Collada files
1.3 ROS and Gazebo
1.3.1 Installation of gazebo_ros_pkgs
From Pre-Built Debians:
For ROS Kinetic
sudo apt-get install ros-kinetic-gazebo-ros-pkgs ros-kinetic-gazebo-ros-control
Gazebo 8 and ROS kinetic (preferred)
remove all Gazebo and ros binaries:
sudo apt-get remove --purge '.*gazebo.*' '.*sdformat.*' '.*ignition-math.*' '.→˓*ignition-msgs.*' '.*ignition-transport.*'sudo apt-get remove ros-*sudo apt-get purge ros-*sudo apt autoremove
1.3. ROS and Gazebo 17
Autonomous Vehicle Control Documentation, Release 0.0.1-rc1
install dependencies:
sudo apt-get updatesudo apt-get install python-rosinstall python-rosinstall-generator python-wstool→˓build-essentialsudo apt-get install -y wgetsudo apt-get install -y lsb-releasesudo apt-get install -y sudosudo apt-get install -y mesa-utilssudo apt-get clean
Get gazebo and ROS binaries:
sudo sh -c 'echo "deb http://packages.ros.org/ros/ubuntu $(lsb_release -sc) main" > /→˓etc/apt/sources.list.d/ros-latest.list'sudo apt-key adv --keyserver hkp://ha.pool.sks-keyservers.net:80 --recv-key→˓421C365BD9FF1F717815A3895523BAEEB01FA116sudo sh -c 'echo "deb http://packages.osrfoundation.org/gazebo/ubuntu-stable `lsb_→˓release -cs` main" > /etc/apt/sources.list.d/gazebo-stable.list'wget http://packages.osrfoundation.org/gazebo.key -O - | sudo apt-key add -sudo apt-get updatesudo apt-get install ros-kinetic-ros-basesudo apt-get install -y gazebo8sudo apt-get install -y ros-kinetic-gazebo8-ros-pkgssudo apt-get install -y ros-kinetic-fake-localizationsudo apt-get install -y ros-kinetic-joysudo apt-get install -y ros-kinetic-robot-state-publishersudo apt-get install -y ros-kinetic-rvizsudo apt-get cleansudo apt autoremove
Other packages (I am currently using. . . updated):
sudo apt install rosbashsudo apt-get install ros-kinetic-ros-coresudo apt-get install ros-kinetic-turtlesimsudo apt-get install ros-kinetic-xacrosudo apt install ros-kinetic-teleop-twist-keyboardsudo apt install ros-kinetic-velodyne-descriptionsudo apt install ros-kinetic-controller-managersudo apt install ros-kinetic-joint-state-controllersudo apt install ros-kinetic-rqt-guisudo apt install ros-kinetic-effort-controllerssudo apt install ros-kinetic-pcl-rossudo apt install ros-kinetic-pointcloud-to-laserscan
http://wiki.ros.org/velo2cam_gazebo
Initialize rosdep:
sudo rosdep initrosdep update
From Source
After installing ROS from source with the Desktop Install you will also need to put the following packages intothe /ros_catkin_ws/src folder:
18 Chapter 1. Software

Autonomous Vehicle Control Documentation, Release 0.0.1-rc1
git clone https://github.com/ros-simulation/gazebo_ros_pkgs -b kinetic-develgit clone https://github.com/ros-perception/image_common -b hydro-develgit clone https://github.com/ros-controls/control_toolbox -b kinetic-develgit clone https://github.com/ros-controls/ros_control -b kinetic-develgit clone https://github.com/ros-controls/realtime_tools -b kinetic-devel
Then rebuild the workspace:
./src/catkin/bin/catkin_make_isolated --install
To test installation, run:
roscore &rosrun gazebo_ros gazebo
1.3.2 Resources
Examples of using ROS and Gazebo
Get the position of a model:
gazebo::math::Pose pose = this->model->gazebo::physics::ModelState::GetPose();
Pose to initialize the model to:
msgs::Set(msg.mutable_pose(),math::Pose(math::Vector3(1, -2, 0), math::Quaternion(0, 0, 0)));
Writing Publisher Subscriber
Messages
Example Resources
• gazebo_and_ros_control: with a tutorial
• srs: a very useful example of using python for control
Tutorials
• ROS and Gazebo: using roslaunch
• a blog post to help get started
• A helpful resource lots of questions answered
• Gazebo ROS API for C-Turtle
• ROS Plugins
• a blog post
• another blog post
• JointTrajectory: good for controlling a robot when you don’t care about the physics
1.3. ROS and Gazebo 19

Autonomous Vehicle Control Documentation, Release 0.0.1-rc1
Tools
• gazebo_ros_pkgs or the look at the source code
• pygazebo: a python interface to Gazebo
• gazebo_ros_p3d : Ground Truth Pose and Rates Interface
Potential Packages to Fork for Closing the Loop
• ADAS
• Georgia Tech
• https://github.com/CPFL/Autoware
car_demo
A recent package by Tully Foote with a Gazebo model of Mcity using ROS Kinetic and Gazebo 8.
Additional Install Notes
Required Packaged (on top of Desktop Install)
(for a source build) clone into the src directory:
git clone https://github.com/ros-planning/navigation.gitgit clone https://github.com/ros-drivers/joystick_drivers.git
Joystick
Usually when you plug in the Joysick it automatically sends that can be viewed with either:
cat /dev/input/js0
Or:
cat /dev/input/js1
Note: potential error: libusb is not installed on the machine. I ran into this issue, where the ps3joy packagefailed with this error:
CMake Error at /usr/share/cmake-3.5/Modules/FindPkgConfig.cmake:578 (message):None of the required 'libusb' found
Call Stack (most recent call first):CMakeLists.txt:6 (pkg_search_module)
The fix is to install libusb:
sudo apt-get install libusb-dev
20 Chapter 1. Software

Autonomous Vehicle Control Documentation, Release 0.0.1-rc1
Additional Info (not needed)
install a program to test and calibrate:
sudo apt-get install joystick
to test:
jscal /dev/input/js0jstest /dev/input/js0
NVIDIA-DOCKER
To show the current architecture, type:
dpkg --print-architecture
type:
wget -P /tmp https://github.com/NVIDIA/nvidia-docker/releases/download/v1.0.1/nvidia-→˓docker_1.0.1-1_amd64.debsudo dpkg -i /tmp/nvidia-docker*.deb && rm /tmp/nvidia-docker*.deb
install nvidia-modprobe:
sudo apt install nvidia-modprobe
Note: potential error:
Error response from daemon: create nvidia_driver_375.66: error looking up volume→˓plugin nvidia-docker: plugin "nvidia-docker" not found.See 'docker run --help'.
the fix is:
journalctl -n -u nvidia-docker
Warning: Restart computer after installing GPU software
1.3.3 Issues
Helpful Questions
• Using python to set ModelState in Gazebo
• publisher and subscriber in C code
• set position in gazebo
• Using python as a node
1.3. ROS and Gazebo 21

Autonomous Vehicle Control Documentation, Release 0.0.1-rc1
My Questions
• Increasing Model Fidelity <http://answers.gazebosim.org/question/17599/increasing-model-fidelity-ex-modeling-surface-forces-pacejka-tire-model/>
1.4 Project Chrono
1.4.1 Background
Physics simulator organized as a set of modules that has a high-fidelity HMWWV model validated using Adams.
1.4.2 Install
Get the IRRlicht engine
Make sure that you have the required files:
sudo apt-get install cmake-extras cmake-qt-gui build-essential xorg-dev freeglut3-dev
After ‘downloading <http://irrlicht.sourceforge.net/?page_id=10‘_ unzip:
sudo unzip /home/febbo/Downloads/irrlicht-1.8.4.zip -d /opt/irrlicht
Compile the Irrlicht Engine 1.8.4 as a shared lib:
/opt/irrlicht/irrlicht-1.8.4/source/Irrlicht$ sudo make sharedlib/opt/irrlicht/irrlicht-1.8.4/source/Irrlicht$ sudo make install
Chrono
Install instructions
Go into /opt folder:
sudo mkdir chronocd chronosudo mkdir chrono_sourcesudo mkdir chrono_buildcd chrono_source
Clone the develop branch into the /opt/chrono/chrono_source directory:
sudo git clone -b develop https://github.com/projectchrono/chrono.gitcd chrono
To configure:
sudo cmake-gui
22 Chapter 1. Software

Autonomous Vehicle Control Documentation, Release 0.0.1-rc1
Then to build (assuming ninja was used) go into the build directory and type:
1.4. Project Chrono 23

Autonomous Vehicle Control Documentation, Release 0.0.1-rc1
chrono/chrono_build$ sudo ninja
Then you can modify permissions if desired:
sudo chmod -R 777 chrono_build/
The rest is old. . . .
VEHICLE Module
Connecting to Gazebo
A repo was developed to connect Gazebo to Chrono.
Install
1) Install Gazebo 7 from source
2) run:
sudo apt-get install libogre-1.9-dev
1.4.3 Potential Fixes
Try updating glib with:
sudo apt-get update && sudo apt-get upgrade
1.4.4 Issues:
• https://groups.google.com/forum/#!topic/projectchrono/ETBnyS18MNM
• https://groups.google.com/forum/#!topic/projectchrono/1GI3RiZI-2A
• https://stackoverflow.com/questions/13978692/strcpy-sse2-unaligned-s-not-found
• https://sourceforge.net/p/irrlicht/bugs/375/
Issue might look something like:
/build$ ninja[1/2] Building CXX object demo_Steerin....dir/demo_VEH_SteeringController.cpp.oFAILED: /usr/bin/c++ -MMD -MT demo_SteeringController/CMakeFiles/demo_→˓SteeringController.dir/demo_VEH_SteeringController.cpp.o -MF demo_→˓SteeringController/CMakeFiles/demo_SteeringController.dir/demo_VEH_→˓SteeringController.cpp.o.d -o demo_SteeringController/CMakeFiles/demo_→˓SteeringController.dir/demo_VEH_SteeringController.cpp.o -c /home/febbo/Documents/→˓workspace/tutorials/chrono_tutorials/source/demo_SteeringController/demo_VEH_→˓SteeringController.cpp/home/febbo/Documents/workspace/tutorials/chrono_tutorials/source/demo_→˓SteeringController/demo_VEH_SteeringController.cpp:22:37: fatal error: chrono/core/→˓ChFileutils.h: No such file or directory
(continues on next page)
24 Chapter 1. Software

Autonomous Vehicle Control Documentation, Release 0.0.1-rc1
(continued from previous page)
compilation terminated.ninja: build stopped: subcommand failed.
https://github.com/projectchrono/chrono/issues/79
In this case, copy the Resources ==========
• https://vimeo.com/uwsbel
• http://sbel.wisc.edu/Animations/
1.4.5 OLD
NOT NEEDED:
make a build directory:
src/Chrono_Gazebo/gazonoVehicle$ sudo mkdir build
set up build environment:
src/Chrono_Gazebo/gazonoVehicle$ sudo cmake CMakeLists.txt
make:
git clone git://git.code.sf.net/p/libosmscout/code libosmscout-code
1.4.6 Shared Pointers
http://api.projectchrono.org/shared_pointers.html
1.4.7 TEMP
gazonoVehicle.cc
//gazebo_ros includes NOTE because ros is not in usr/include/ there are sourcing issues #include<ros/callback_queue.h> #include <ros/subscribe_options.h> #include <ros/ros.h> #include “boost/thread/mutex.hpp”#include <std_msgs/Float64.h>
Issue:
/usr/bin/ld: cannot find -lpthreads
https://stackoverflow.com/questions/30600978/cpp-usr-bin-ld-cannot-find-lnameofthelibrary
1.5 Polysync
Polysync does play with ROS
http://docs.polysync.io/flows/getting-started/
It talks to MATLAB http://docs.polysync.io/articles/development/ecosystem-tools/matlab-and-simulink-toolbox/
Also, it looks like it supports the Puck (along with many other sensors)
http://docs.polysync.io/sensors/velodyne-vlp-16-puck/
1.5. Polysync 25

Autonomous Vehicle Control Documentation, Release 0.0.1-rc1
All in all it looks like the documentation was well made and it is yet another very useful tool and they claim if wefollow their tutorial we can build a self-driving Kia Soul for under $10,000 ( I think this excludes LiDAR and gps etc.)! Looking through the wiki a bit it looks like the vehicle needs to only slightly be modified.
1.6 julia
1.6.1 Getting Started with julia
Extensive julia documentation is available here.
Building julia release 0.5 - current
Recently a new version of julia was released and it will be tested. The following directions also assume that julia waspreviously installed on the machine. If it was not, skip to step 3.
Remove current version of julia
1. get a graphical file manager with ROOT ACCESS:
gksu nautilus
Also, may need to:
sudo apt install gksu
• NOTE: be very careful in here!!
2. Type ctrl+l to type into location bar
• now navigate to where julia is and delete the binaries (or bin), ie. it might be in /usr/local/begin
Add new version current version of julia
3. unzip the .gz into the \opt folder (the place where by convention you’d put “optional” packages )
for instance:
sudo tar -xvf /home/febbo/Downloads/julia-0.5.0-linux-x86_64.tar.gz -C /opt
4. Check it:
febbo@febbo-HP-ZBook-17-G2:/opt/julia-3c9d75391c/bin$ ./juliaORfebbo@febbo-HP-ZBook-17-G2:/opt/julia-3c9d75391c/bin$ /opt/julia-3c9d75391c/bin/julia
__ _ _(_)_ | A fresh approach to technical computing(_) | (_) (_) | Documentation: http://docs.julialang.org_ _ _| |_ __ _ | Type "?help" for help.| | | | | | |/ _` | || | |_| | | | (_| | | Version 0.5.0 (2016-09-19 18:14 UTC)
_/ |\__'_|_|_|\__'_| | Official http://julialang.org/ release|__/ | x86_64-pc-linux-gnu
julia>
5. Now we need to create a symbolic link so that we can just type julia in the command line. There are threeways to do this (just do the third option; it is permanent):
26 Chapter 1. Software

Autonomous Vehicle Control Documentation, Release 0.0.1-rc1
1. create an “alias”
• create an alias using the following command..
type:
alias julia='/opt/julia-3c9d75391c/bin/julia'
2. add /opt/julia-3c9d75391c/bin to your PATH
• all directories contained in the PATH are accessible from ANYWHERE
• you can see the current PATH variable by typing in your terminal..
type:
echo $PATH
• you can redefine a variable in bash e.g. by doing..
type:
PATH=new definition here
* (no spaces----> this is important)
• add your julia path to the existing path, you can do that by saying. . .
type:
PATH=/opt/julia-3c9d75391c/bin:$PATH
* the $PATH contains the old value, so you're basically adding→˓your folder and a colon and then all the rest, into a new PATH→˓variable
The Problem with The Above Two Options is that:
With both adding to the path or creating an alias, is that these changes are TEMPORARY theminute you close your terminal and open it again, you’ll see that these changes have disap-peared try it and see!
• so to make it permanent, you actually have to do option 3
3. change a file called bashrc which is run every time a terminal starts
• the file you need to edit should be /etc/bash.bashrc
so type:
gksu gedit /etc/bash.bashrc
If it exists and it’s the right file, you should see its contents inside gedit
• go to the very end of that file
– add the alias line. . .
type:
alias julia='/opt/julia-3c9d75391c/bin/julia'
and press enter!!
1.6. julia 27
Autonomous Vehicle Control Documentation, Release 0.0.1-rc1
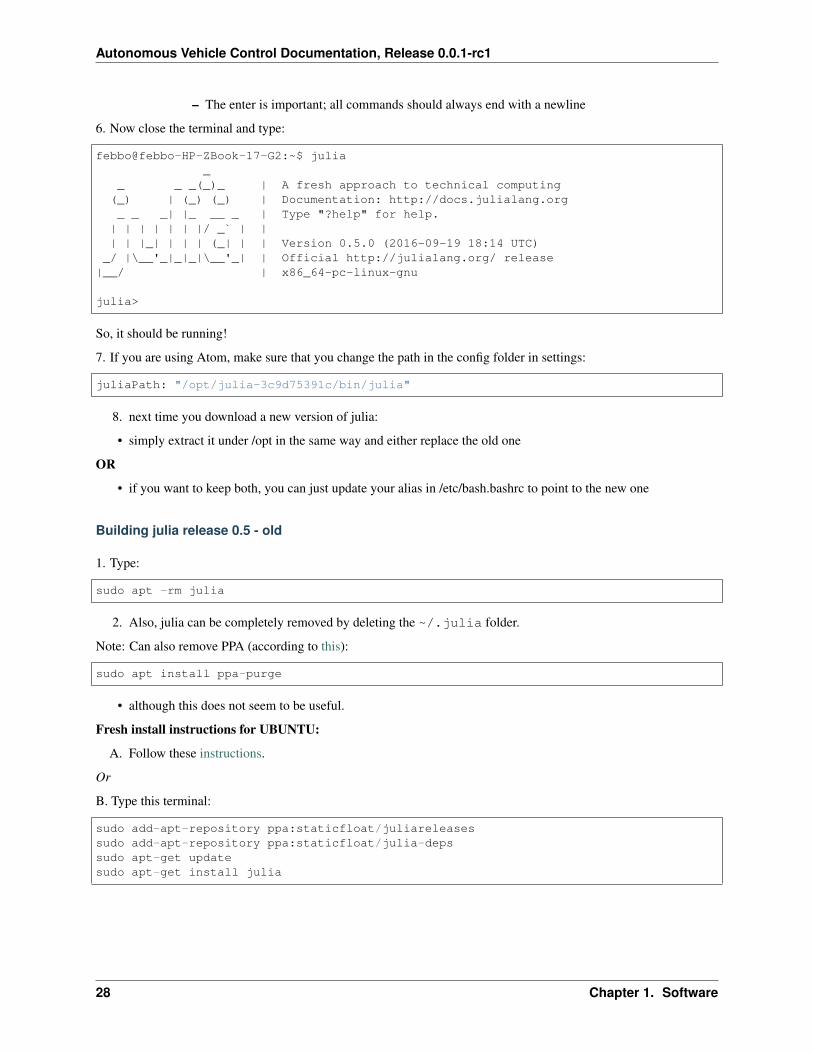
– The enter is important; all commands should always end with a newline
6. Now close the terminal and type:
febbo@febbo-HP-ZBook-17-G2:~$ julia_
_ _ _(_)_ | A fresh approach to technical computing(_) | (_) (_) | Documentation: http://docs.julialang.org_ _ _| |_ __ _ | Type "?help" for help.| | | | | | |/ _` | || | |_| | | | (_| | | Version 0.5.0 (2016-09-19 18:14 UTC)
_/ |\__'_|_|_|\__'_| | Official http://julialang.org/ release|__/ | x86_64-pc-linux-gnu
julia>
So, it should be running!
7. If you are using Atom, make sure that you change the path in the config folder in settings:
juliaPath: "/opt/julia-3c9d75391c/bin/julia"
8. next time you download a new version of julia:
• simply extract it under /opt in the same way and either replace the old one
OR
• if you want to keep both, you can just update your alias in /etc/bash.bashrc to point to the new one
Building julia release 0.5 - old
1. Type:
sudo apt -rm julia
2. Also, julia can be completely removed by deleting the ~/.julia folder.
Note: Can also remove PPA (according to this):
sudo apt install ppa-purge
• although this does not seem to be useful.
Fresh install instructions for UBUNTU:
A. Follow these instructions.
Or
B. Type this terminal:
sudo add-apt-repository ppa:staticfloat/juliareleasessudo add-apt-repository ppa:staticfloat/julia-depssudo apt-get updatesudo apt-get install julia
28 Chapter 1. Software

Autonomous Vehicle Control Documentation, Release 0.0.1-rc1
Bleeding Edge Version - previously used
I found that julia is constantly being developed and that most of the developers do not make sure that every versionis maintained, this can create issues when using particular packages. So, if you want to use the latest and greatestfeatures, you might consider the bleeding edge version of julia.
Fresh install instructions for UBUNTU:
A. Follow these instructions.
Or
B. Type this terminal:
sudo apt-add-repository ppa:staticfloat/julianightliessudo apt-add-repository ppa:staticfloat/julia-depssudo apt-get updatesudo apt-get install julia
Warnings
If you are getting warnings like this:
WARNING: Deserialization checks failed while attempting to load cache from /home/→˓febbo/.julia/lib/v0.6/JuMP.ji.WARNING: Module Lazy uuid did not match cache file.INFO: Recompiling stale cache file /home/febbo/.julia/lib/v0.6/JuMP.ji for module→˓JuMP.WARNING: Deserialization checks failed while attempting to load cache from /home/→˓febbo/.julia/lib/v0.6/ReverseDiffSparse.ji.WARNING: Module Lazy uuid did not match cache file.INFO: Recompiling stale cache file /home/febbo/.julia/lib/v0.6/PyPlot.ji for module→˓PyPlot.WARNING: Deserialization checks failed while attempting to load cache from /home/→˓febbo/.julia/lib/v0.6/PyCall.ji.WARNING: Module Conda uuid did not match cache file.
It is a precompilation failure; restart Julia
1.6.2 Useful Packages and Programs
This page includes details of the packages and programs that I am using in OCP.
Adding and Removing Packages in julia
A useful description of the syntax for adding and remove packages in julia can be found here.
All packages that I have on julia
I have many packages and to configure them all can be tricky, so I include a list of commands that you can copy andpast into julia to get started. Make sure that you are restarting the both julia and the terminal after things are installed.
1.6. julia 29
Autonomous Vehicle Control Documentation, Release 0.0.1-rc1
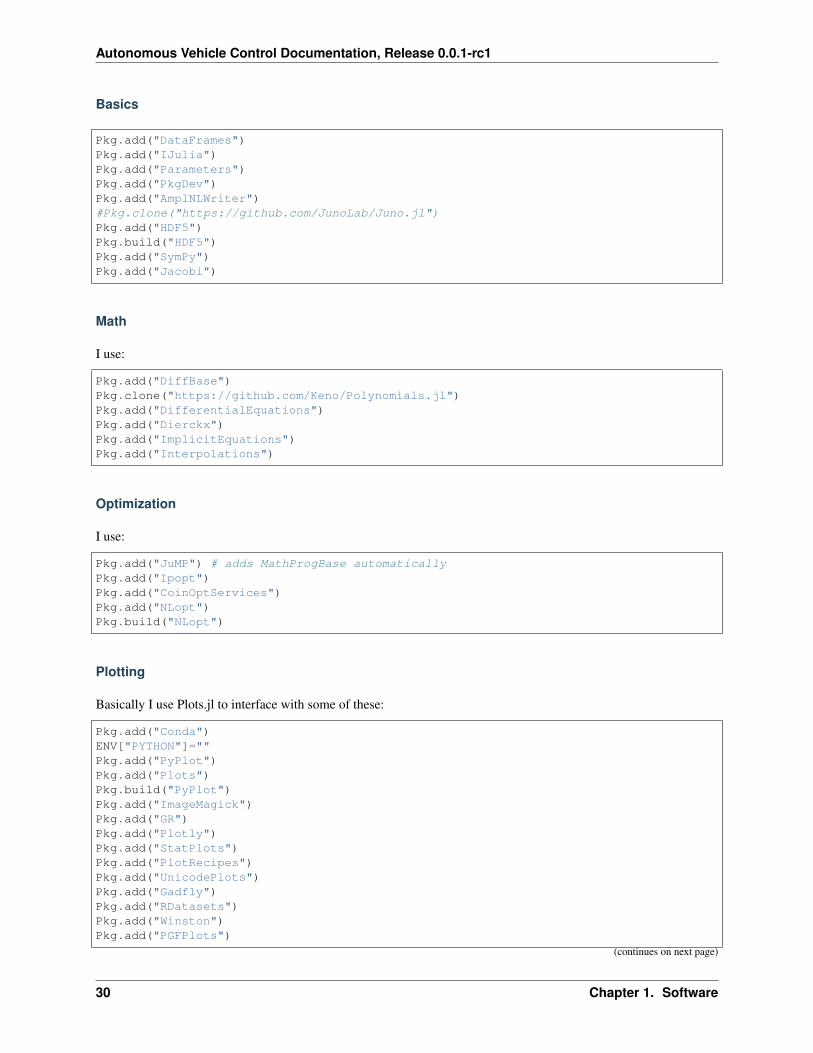
Basics
Pkg.add("DataFrames")Pkg.add("IJulia")Pkg.add("Parameters")Pkg.add("PkgDev")Pkg.add("AmplNLWriter")#Pkg.clone("https://github.com/JunoLab/Juno.jl")Pkg.add("HDF5")Pkg.build("HDF5")Pkg.add("SymPy")Pkg.add("Jacobi")
Math
I use:
Pkg.add("DiffBase")Pkg.clone("https://github.com/Keno/Polynomials.jl")Pkg.add("DifferentialEquations")Pkg.add("Dierckx")Pkg.add("ImplicitEquations")Pkg.add("Interpolations")
Optimization
I use:
Pkg.add("JuMP") # adds MathProgBase automaticallyPkg.add("Ipopt")Pkg.add("CoinOptServices")Pkg.add("NLopt")Pkg.build("NLopt")
Plotting
Basically I use Plots.jl to interface with some of these:
Pkg.add("Conda")ENV["PYTHON"]=""Pkg.add("PyPlot")Pkg.add("Plots")Pkg.build("PyPlot")Pkg.add("ImageMagick")Pkg.add("GR")Pkg.add("Plotly")Pkg.add("StatPlots")Pkg.add("PlotRecipes")Pkg.add("UnicodePlots")Pkg.add("Gadfly")Pkg.add("RDatasets")Pkg.add("Winston")Pkg.add("PGFPlots")
(continues on next page)
30 Chapter 1. Software

Autonomous Vehicle Control Documentation, Release 0.0.1-rc1
(continued from previous page)
Pkg.build("PGFPlots")Blink.AtomShell.install()import Conda # to fix pyplot!!!Conda.add("qt=4.8.5")
My Packages
I started these:
Pkg.clone("https://github.com/huckl3b3rry87/VehicleModels.jl")Pkg.clone("https://github.com/huckl3b3rry87/NLOptControl.jl")
Miscellaneous
probably do not need:
Pkg.clone("https://github.com/pwl/MovcolN.jl")Pkg.add("Devectorize")Pkg.add("FactCheck")
Useful Command After Installing Packages
Type:
Pkg.update()
Customizing Keybindings and Tab Completion
Info here
type:
import Base: LineEdit, REPL
const mykeys = Dict{Any,Any}(# Up Arrow"\e[A" => (s,o...)->(LineEdit.edit_move_up(s) || LineEdit.history_prev(s, LineEdit.
→˓mode(s).hist)),# Down Arrow"\e[B" => (s,o...)->(LineEdit.edit_move_up(s) || LineEdit.history_next(s, LineEdit.
→˓mode(s).hist)))
function customize_keys(repl)repl.interface = REPL.setup_interface(repl; extra_repl_keymap = mykeys)
end
atreplinit(customize_keys)
1.6. julia 31

Autonomous Vehicle Control Documentation, Release 0.0.1-rc1
1.6.3 Basic Pkg. Usage Notes
Optimization
Currently the only optimization tool that is being tested it IPOPT.
1. IPOPT
It is very easy to get going using IPOPT in julia using IPOPT.jl.
Derivatives
JuMP.jl is one of the most useful packages for solving the OCP because it takes very fast automatic derivatives and itallows the user to easily set up optimization problems. So, with this tool there is no need to write out the complicatedJacobian and Hessian functions.
The documentation for this package can be found JuMP docs.
Some useful Methods are found by clicking.
Some useful commands Query upper and lower bounds of all constraints in the model:
JuMP.constraintbound(m::Model)
MathProgBase.jl
MathProgBase.jl.
Polynomial Division
There was an issue when JuMP was sent a term with polynomial division. This section deals with the attempt to usethe Polynomials.jl to take care of the polynomial division on the front end, before the expressions are sent to JuMP.
Basic Functionality:
using PloynomialsPoly([1,0,3,4])Poly(1 + 3x^2 + 4x^3)
Division Functionality:
P1 = Poly([1,2,3,5,7])P2 = Poly([1,0,3])P3 = div(P1,P2)Poly(0.22222222222222218 + 1.6666666666666667x + 2.3333333333333335x^2)
Plots.jl
A very powerful plotting tool is Plots.jl. It took some time to get everything working because I was not using the sameversions of the packages as the developers, but in the end it was work the time. It you run the code that I have listedbelow you should not have to deal with the setup issues that I had.
With PGFPlots:
32 Chapter 1. Software

Autonomous Vehicle Control Documentation, Release 0.0.1-rc1
sudo apt-get install pdf2svg
http://nbviewer.jupyter.org/github/sisl/PGFPlots.jl/blob/master/doc/PGFPlots.ipynb
Problem 1
I wasted a bunch if my time, could not recreate in a simpler example, but basically, when plot() should have workedit failed and when I changed the order of the terms in plot() it works.
Solution 1
EX:
for i in 1:k# plot!(dfs[i][:t],dfs[i][:SA]*180/pi,w=w2,label=label_string[i])
plot!(dfs[i][:t],dfs[i][:SA]*180/pi,label=label_string[i],w=w2)end
Problem 2
Segfault when attempting to plot after Conda update to Segfault with qt >=4.8.6 on ubuntu
I was running into an issue with Plots.jl after doing a Pkg.update():
_ _ _(_)_ | A fresh approach to technical computing(_) | (_) (_) | Documentation: http://docs.julialang.org_ _ _| |_ __ _ | Type "?help" for help.| | | | | | |/ _` | || | |_| | | | (_| | | Version 0.6.0-dev.508 (2016-09-06 20:36 UTC)
_/ |\__'_|_|_|\__'_| | Commit b1f1525 (26 days old master)|__/ | x86_64-linux-gnu
julia> using Plotsjulia> plot(rand(4,100))signal (11): Segmentation faultwhile loading no file, in expression starting on line 0unknown function (ip: 0x32735)Allocations: 14606607 (Pool: 14605017; Big: 1590); GC: 25Segmentation fault (core dumped)
Solution 2
Change back to old Conda:
import CondaConda.add("qt=4.8.5")using PyPlotplot(rand(10))
Check out this link.
DifferentialEquations.jl
Useful Commands
all of the timepoints:
sol[:]
Many times you might want to use a good interpolation. For example, the plots use something like:
1.6. julia 33

Autonomous Vehicle Control Documentation, Release 0.0.1-rc1
[sol(t) for t in linspace(t0,tend,100)]
To get 100 points from time t0 to tend for the first component:
[sol(t)[1] for t in linspace(t0,tend,100)]
The array of timepoints for component j:
[sol[i][j] for i in 1:length(sol)]
Parameters.jl
Great package for working with parameters. More info can be found at this link.
1.6.4 Making Your Own Packages
To create packages and modules click this to get started.
Or type:
using PkgDevPkgDev.generate("VehicleModles","MIT")
Possible Next Steps:
• Make a github repository with this name (plus a .jl at the end of the name) github.com
– Don’t add a README.MD automatically using github, there will be a conflict if you will make one fromthe using sphinx-quickstart
* Or just pick one, don’t do both!
• Make some documentation getting_started_with_docs
– Or, if everything is setup, type:
sphinx-quickstart
– Then:
git remote add origin [email protected]:huckl3b3rry87/new_repo.jl
To tag:
using PkgDevPkgDev.tag("VehicleModles")
To view the package:
$ cd ~/.julia/v0.6/VehicleModles && git show --stat
To recompile a package:
Pkg.test()
To go into the package directory:
34 Chapter 1. Software

Autonomous Vehicle Control Documentation, Release 0.0.1-rc1
cd(Pkg.dir("LiDAR"))
In Juno, the workflow for building a package, you can do a Ctrl+J Ctrl+k to quit the current process and then useusing PKG again.
it’ll be in your lib folder and all setup to be used with using:
Pkg.testPkg.diretc
Then in order to run Pkg.update() without getting this error:
ERROR: Update finished with errors.=> Package NLOptControl cannot be updated.GitError(Code:ERROR, Class:Merge, There is no tracking information for the current→˓branch.)etc....
Which is talked about here, you have to:
julia> Pkg.checkout("NLOptControl")INFO: Checking out NLOptControl master...INFO: Pulling NLOptControl latest master...INFO: No packages to install, update or remove
Making Modules
look here
Directories
Try:
@__FILE__
link
1.6.5 Macros
Detailed information on macros in julia is found here.
@def
Given some parameters:
using Parameters
@with_kw immutable Vpara @deftype Float64m = 2.6887e+03
endpa = Vpara(); # initialize parameter set
1.6. julia 35

Autonomous Vehicle Control Documentation, Release 0.0.1-rc1
Instead of unpackaging the same parameters each time in a nested function like this:
function outer_f(pa::Vpara)num = zeros(Float64, (10,1))for i in 1:10num[i] = inner_f(pa::Vpara,i)endreturn num
end
with:
function inner_f(pa::Vpara,i)@unpack_Vpara pam + i + 0.1
end
We define a macro as:
macro def(name, definition)return quotemacro $name()
esc($(Expr(:quote, definition)))end
endend
then redefine inner_f1() as:
@def inner_f2 beginm + i + 0.1
end
We also need to modify the outer_f() as:
function outer_f(pa::Vpara)@unpack_Vpara panum = zeros(Float64, (10,1))for i in 1:10num[i] = @inner_f2
endreturn num
end
The @def macro is functionally equivalent to copying and pasting the contents of inner_f() into outer_f().
Parallel Computing
http://docs.julialang.org/en/stable/stdlib/parallel/#Base.addprocs https://www.youtube.com/watch?v=JoRn4ryMclccontainer:
rr=RemoteChannel()# stores a value -> like a container that you can put something in and take something→˓out
adding something to the container:
36 Chapter 1. Software

Autonomous Vehicle Control Documentation, Release 0.0.1-rc1
put(rr,0)
to add some processors:
addprocs()
calling a processor:
remotecall(function, proc,data)# don't use this all of the time -> sort of low level
Example:
addprocs(1)rc=remotecall(rand,2,100,100)# then later...f=fetch(rc)
An easier way to do this example is using @span:
r=@spawn rand(100,100)# it picks a processor and sets this up for us
When you are typing you are typing to processor #1.
Number of processors:
nprocs()
Be able to run something everywhere:
@everywhere println(myid())
Also try:
fetch(@spawn myid())
Another useful macro:
@parallel# works with ``for`` loops#a=zeros(20) # wrong --> returns all 0'sa = SharedArray(Float64,20)@parallel for i=1:20
a[i]=i;end
1.6.6 JuliaBox and Jupyter Notebooks
A way to run julia online without installing anything is to use JuliaBox with Jupyter notebooks.
The examples will be demonstrated using this tool.
Jupyter Notebooks
If you have IJulia installed you can run the examples using the following commands in julia:
1.6. julia 37

Autonomous Vehicle Control Documentation, Release 0.0.1-rc1
using IJulia
# a few examples of changing the pathnotebook(dir = Pkg.dir("VehicleModels")*"/examples")notebook(dir="/home/febbo/Documents/workspace/OCP/examples")
More information can be found ‘ here <https://github.com/JuliaLang/IJulia.jl>‘_.
1.6.7 julia notes
Using kwargs. . .
function:
function test(A; kwargs...)
kw = Dict(kwargs)
# if there was nothing passed -> set defaultif !haskey(kw,:mode); kw = Dict(:mode => :default) endmode = get(kw, :mode, 0);
if mode == :defaultB = 10
elseif mode == :LGRMB = A
elseprint("pick a mode","\n")
endreturn B
end
B=test(2)B=test(2;(:mode=>:LGRM))
Making Variables Programatically
https://docs.julialang.org/en/latest/manual/metaprogramming.html
code:
ex=Array(Expr,4,1);for i in 1:4ex[i]=Expr(:(=),Symbol("x",i),i)eval(ex[i])
end
vector case:
A=[1 2 3 4]ex=Array(Expr,4,1);for i in 1:4ex[i]=Expr(:(=),Symbol("x",i),A)eval(ex[i])
(continues on next page)
38 Chapter 1. Software

Autonomous Vehicle Control Documentation, Release 0.0.1-rc1
(continued from previous page)
endx1
Using JuMP to make a @NLexpression
making nlexps:
function test(n,exp,x)@eval beginx1=$x[1,1]x1=eval(x1);eq=@NLexpression($n,$exp)
endreturn eq
end
to test:
using JuMP, Ipoptn = Model(solver=IpoptSolver(print_level=0))@variable(n,x[1:4,1:4])exp=test(n,:(sin(x1)),x)@NLconstraint(n,exp==0)@NLobjective(n,Min,x[1,2])solve(n)
making nlexps withough @eval to work with exp_arrs:
function test(n,exp_arr,x)code=quotex1=$x[1,1:4]x1=eval(x1);@NLexpression($n,$exp_arr[1])end
return eval(code)end
to test:
using JuMP, Ipoptn = Model(solver=IpoptSolver(print_level=0))@variable(n,x[1,1])exp_arr=[:(sin(x1)),:(sin(x1))]exp=test(n,exp_arr,x)@NLconstraint(n,exp==0)@NLobjective(n,Min,x[1,2])solve(n)
example in REPL
function EX(A)code=quotetemp=$A[1]solution=$temp
end
(continues on next page)
1.6. julia 39

Autonomous Vehicle Control Documentation, Release 0.0.1-rc1
(continued from previous page)
return eval(code)end
A=[:(2+4);:(9-8)]EX(A)
1.6.8 Problems and Solutions
python ENV with PyCall
Fix:
_ _ _(_)_ | A fresh approach to technical computing(_) | (_) (_) | Documentation: https://docs.julialang.org_ _ _| |_ __ _ | Type "?help" for help.| | | | | | |/ _` | || | |_| | | | (_| | | Version 0.6.0 (2017-06-19 13:05 UTC)_/ |\__'_|_|_|\__'_| | Official http://julialang.org/ release|__/ | x86_64-pc-linux-gnu
julia> ENV["PYTHON"]="/usr/bin/python""/usr/bin/python"
julia> Pkg.build("PyCall")INFO: Building CondaINFO: Building PyCallINFO: PyCall is using /usr/bin/python (Python 2.7.12) at /usr/bin/python, libpython =→˓libpython2.7INFO: /home/febbo/.julia/v0.6/PyCall/deps/deps.jl has been updatedINFO: /home/febbo/.julia/v0.6/PyCall/deps/PYTHON has been updated
julia> using PyCallINFO: Recompiling stale cache file /home/febbo/.julia/lib/v0.6/PyCall.ji for module→˓PyCall.
julia> @PyCall.pyimport yaml
julia>
1.7 git
1.7.1 Website links
• https://github.com/
• The Pro Git book is available here!
1.7.2 Useful Commands
add everything to the commit (including new file and files that were deleted):
40 Chapter 1. Software

Autonomous Vehicle Control Documentation, Release 0.0.1-rc1
git add -A
commit all of the changes:
git commit -m "some message about what you did"
push to remote account:
git push origin master
view current tags:
git tag
making a new tag:
git tag -a V0.0.1 -m " new version 0.0.1"
committing a tag:
git push origin master --tags
checkout a tag:
git checkout -b [branchname] [tagname]
see which branch you are on:
git branch
to make a new branch:
git checkout -b [name_of_your_new_branch]
to change the working branch:
git checkout [name_of_your_new_branch]
to push the branch to github:
git push origin [name_of_your_new_branch]
delete a local branch:
git branch -d the_local_branch
delete a remote branch:
git push origin --delete the_remote_branch
remove a large file from a commit that has not been pushed to master yet:
git filter-branch --index-filter 'git rm -r --cached --ignore-unmatch papers/MO3/→˓results/laptop/demoZ/D/videos/Final.mp4' HEAD
or remove a large folder from a commit that has not been pushed to master yet:
1.7. git 41

Autonomous Vehicle Control Documentation, Release 0.0.1-rc1
git filter-branch --index-filter 'git rm -r --cached --ignore-unmatch papers/MO3/→˓results/laptop/demoZ/D/videos/*' -f HEAD
connecting to github:
git remote add origin [email protected]:username/new_repo
• making a branch look here
Then make a new repository using the interweb
• Check out this link for more info.
Caching your github password:
git config --global credential.helper 'cache --timeout=3600'# Set the cache to timeout after 1 hour (setting is in seconds)
Working with Remote Repositories
To clone a repo:
git clone https://github.com/CPFL/Autoware
To view the remote:
febbo@febbo-HP-ZBook-17-G2:~/Documents/workspace/Autoware$ git remote -vorigin https://github.com/huckl3b3rry87/Autoware (fetch)origin https://github.com/huckl3b3rry87/Autoware (push)upstream https://github.com/CPFL/Autoware.git (fetch)upstream https://github.com/CPFL/Autoware.git (push)
Removing a remote origin:
git remote rm origin
Setting an origin:
git remote set-url origin "https://..."
• Source is this
Revert to an old commit:
git push -f origin $old_commit_id:master
Make sure that you commit changes before moving from one branch to another the changes that you make do notbelong to any particular branch!
remove files that where previously cached that are now in .gitignore:
git rm -r --cached .git add .git commit -am "Removed ignored files"
Update your fork from the from the upstrean remo:
42 Chapter 1. Software

Autonomous Vehicle Control Documentation, Release 0.0.1-rc1
git fetch [name _of_remote]git fetch https://github.com/CPFL/Autoware
More info here
To automatically fetch and merge from a remote:
git pull upstream master
Remove submodule:
git rm --cached the_submodule_path
<<<<<<< HEAD Merging development branch with master ————————————————————————————————————————————Merge master into develpment to see if there are any conflicts, so master remains clean:
Merge master into development to see if there are any conflicts, so master remains clean:
(on branch development)$ git merge master(resolve any merge conflicts if there are any)git checkout mastergit merge development (there won't be any conflicts now)
<https://stackoverflow.com/questions/27828404/why-does-git-status-show-branch-is-up-to-date-when-changes-exist-upstream>‘_Resolving mere conflicts ———————————————————————————————————————-======= Basics of Collaborating on git =========================================== This is abeginners guide to collaborating on git. Several examples will be provided assuming TulgaErsal is collaboratingwith huckl3b3rry87 on the PhD repo.
Getting started
This tutorial assumes that you are using a command line interface to git, for Windows consider using cmder and makesure that you download the full version that has git for Windows. Additionally, Atom is a useful tool for resolvingmerge issues visually.
Fork a Repository
1) Go to github.com and login. If it is a private repo that you will be collaborating on, then accept any invitationsto collaborate.
2) Navigate to the repo that you will be collaberating on i.e.:
https://github.com/huckl3b3rry87/PhD
3) In the top right conner of the page click Fork
4) open terminal and navigate to a folder where you will be working i.e.
cd Documents\workspace\
5) in the terminal, clone the forked repo that you will be collaborating on:
git clone https://github.com/TulgaErsal/PhD
6) To see the current remote repo, type:
1.7. git 43

Autonomous Vehicle Control Documentation, Release 0.0.1-rc1
git remote -v
This should say:
origin https://github.com/TulgaErsal/PhD.git (fetch)origin https://github.com/TulgaErsal/PhD.git (push)
7) To add the original repo as the upstream type:
git remote add upstream https://github.com/huckl3b3rry87/PhD.git
8) make sure that the upstream was added:
git remote -v
Which should say:
origin https://github.com/TulgaErsal/PhD.git (fetch)origin https://github.com/TulgaErsal/PhD.git (push)upstream https://github.com/huckl3b3rry87/PhD.git (fetch)upstream https://github.com/huckl3b3rry87/PhD.git (push)
Example 1
To make sure that you are using the most recent version of the upstream (or original repo) you need to get the latestcode and merge it into your repo. Use the terminal to navigate to the git folder with the repo that you are working on.Then type:
git merge upstream/master
Note: The above command attempts to automatically merge, and if there are merge issues they can easily be resolvedusing the Atom text editor.
Note: If you run this example just after setting everything up there should be no differences in the upstream repo.
Example 2
Each day that you make changes you can push them to your local repository.
Option 1 (using Atom)
If you are using the Atom text editor, this is very easy to do.
1) open the Packages tab and scroll down to Github and click Toggle Git Tab.
2) Click Stage All to stage the changes
3) Write a commit message and click Commit
4) Under the Commit button push the up arrow then click Push
5) Put in your git user info
44 Chapter 1. Software

Autonomous Vehicle Control Documentation, Release 0.0.1-rc1
Option 2 (using terminal)
1) add changes:
git add -A
2) commit changes
git commit -m "updated docs"
3) push changes
git push origin master
Example 3
This example is for when you are ready to commit to the upstream repo, this example shows you how to make a pullrequest.
Assuming that, your local changes have all been committed to the local repo you can easily make a pull request at::
https://github.com/TulgaErsal/PhD.git
Just click the New Pull Request button.
This will then alert the original repo owner and they can then merge your changes.
>>>>>>> 583ccf8843b87e3b5ba41467af531075812f8d41
1.7.3 Create a disconnected git branch
1) start with a fresh copy of the repo
2) Create a new disconnected branch:
git checkout --orphan gh-pages
3) hop onto that branch:
git checkout -b gh-pages
4) At this point there are no commits but lots of files from whatever branch you were on. Have git remove those files:
git rm -rf .
then follow the rest here:
https://coderwall.com/p/0n3soa/create-a-disconnected-git-branch
julia> Pkg.clone("https://github.com/JuliaMPC/MPCDocs.jl")INFO: Cloning MPCDocs from https://github.com/JuliaMPC/MPCDocs.jlINFO: Computing changes...INFO: No packages to install, update or remove
julia>febbo@febbo-HP-ZBook-17-G2:~/.julia/v0.5/MPCDocs$ git checkout --orphan gh-→˓pagesSwitched to a new branch 'gh-pages'
(continues on next page)
1.7. git 45
Autonomous Vehicle Control Documentation, Release 0.0.1-rc1
(continued from previous page)
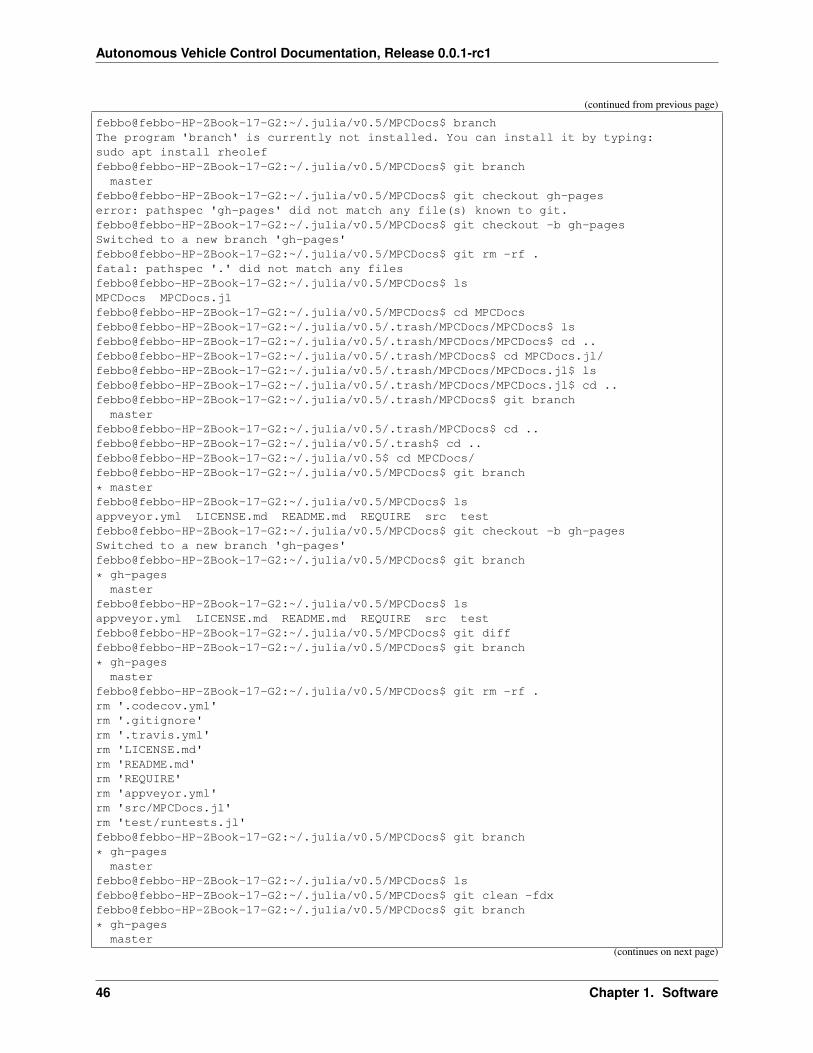
febbo@febbo-HP-ZBook-17-G2:~/.julia/v0.5/MPCDocs$ branchThe program 'branch' is currently not installed. You can install it by typing:sudo apt install rheoleffebbo@febbo-HP-ZBook-17-G2:~/.julia/v0.5/MPCDocs$ git branch
masterfebbo@febbo-HP-ZBook-17-G2:~/.julia/v0.5/MPCDocs$ git checkout gh-pageserror: pathspec 'gh-pages' did not match any file(s) known to git.febbo@febbo-HP-ZBook-17-G2:~/.julia/v0.5/MPCDocs$ git checkout -b gh-pagesSwitched to a new branch 'gh-pages'febbo@febbo-HP-ZBook-17-G2:~/.julia/v0.5/MPCDocs$ git rm -rf .fatal: pathspec '.' did not match any filesfebbo@febbo-HP-ZBook-17-G2:~/.julia/v0.5/MPCDocs$ lsMPCDocs MPCDocs.jlfebbo@febbo-HP-ZBook-17-G2:~/.julia/v0.5/MPCDocs$ cd MPCDocsfebbo@febbo-HP-ZBook-17-G2:~/.julia/v0.5/.trash/MPCDocs/MPCDocs$ lsfebbo@febbo-HP-ZBook-17-G2:~/.julia/v0.5/.trash/MPCDocs/MPCDocs$ cd ..febbo@febbo-HP-ZBook-17-G2:~/.julia/v0.5/.trash/MPCDocs$ cd MPCDocs.jl/febbo@febbo-HP-ZBook-17-G2:~/.julia/v0.5/.trash/MPCDocs/MPCDocs.jl$ lsfebbo@febbo-HP-ZBook-17-G2:~/.julia/v0.5/.trash/MPCDocs/MPCDocs.jl$ cd ..febbo@febbo-HP-ZBook-17-G2:~/.julia/v0.5/.trash/MPCDocs$ git branch
masterfebbo@febbo-HP-ZBook-17-G2:~/.julia/v0.5/.trash/MPCDocs$ cd ..febbo@febbo-HP-ZBook-17-G2:~/.julia/v0.5/.trash$ cd ..febbo@febbo-HP-ZBook-17-G2:~/.julia/v0.5$ cd MPCDocs/febbo@febbo-HP-ZBook-17-G2:~/.julia/v0.5/MPCDocs$ git branch
* masterfebbo@febbo-HP-ZBook-17-G2:~/.julia/v0.5/MPCDocs$ lsappveyor.yml LICENSE.md README.md REQUIRE src testfebbo@febbo-HP-ZBook-17-G2:~/.julia/v0.5/MPCDocs$ git checkout -b gh-pagesSwitched to a new branch 'gh-pages'febbo@febbo-HP-ZBook-17-G2:~/.julia/v0.5/MPCDocs$ git branch
* gh-pagesmaster
febbo@febbo-HP-ZBook-17-G2:~/.julia/v0.5/MPCDocs$ lsappveyor.yml LICENSE.md README.md REQUIRE src testfebbo@febbo-HP-ZBook-17-G2:~/.julia/v0.5/MPCDocs$ git difffebbo@febbo-HP-ZBook-17-G2:~/.julia/v0.5/MPCDocs$ git branch
* gh-pagesmaster
febbo@febbo-HP-ZBook-17-G2:~/.julia/v0.5/MPCDocs$ git rm -rf .rm '.codecov.yml'rm '.gitignore'rm '.travis.yml'rm 'LICENSE.md'rm 'README.md'rm 'REQUIRE'rm 'appveyor.yml'rm 'src/MPCDocs.jl'rm 'test/runtests.jl'febbo@febbo-HP-ZBook-17-G2:~/.julia/v0.5/MPCDocs$ git branch
* gh-pagesmaster
febbo@febbo-HP-ZBook-17-G2:~/.julia/v0.5/MPCDocs$ lsfebbo@febbo-HP-ZBook-17-G2:~/.julia/v0.5/MPCDocs$ git clean -fdxfebbo@febbo-HP-ZBook-17-G2:~/.julia/v0.5/MPCDocs$ git branch
* gh-pagesmaster
(continues on next page)
46 Chapter 1. Software

Autonomous Vehicle Control Documentation, Release 0.0.1-rc1
(continued from previous page)
febbo@febbo-HP-ZBook-17-G2:~/.julia/v0.5/MPCDocs$ git push origin masterEverything up-to-datefebbo@febbo-HP-ZBook-17-G2:~/.julia/v0.5/MPCDocs$ git push origin gh-pagesTotal 0 (delta 0), reused 0 (delta 0)To [email protected]:JuliaMPC/MPCDocs.jl.git
* [new branch] gh-pages -> gh-pagesfebbo@febbo-HP-ZBook-17-G2:~/.julia/v0.5/MPCDocs$ git branch
* gh-pagesmaster
febbo@febbo-HP-ZBook-17-G2:~/.julia/v0.5/MPCDocs$
1.7.4 Forking a Repository
Follow what this page talks about
also if you are doing this in julia see Another way to connect to github it using ssh
do a:
git branch
Initially the error was:
febbo@febbo-HP-ZBook-17-G2:~/.julia/v0.5/VehicleModels$ git push origin masterPermission denied (publickey).fatal: Could not read from remote repository.
Please make sure you have the correct access rightsand the repository exists.
• This was obtained when initially setting up the git repositories in julia after cloning a package and trying to pushmodifications back up to the remote repository.
• Information on this can be founds at , or by following the two steps a fix may be obtained:
FOLLOW:
https://help.github.com/articles/generating-a-new-ssh-key-and-adding-it-to-the-ssh-agent/
NOTE: just hit enter, don’t change the default location!!! THEN:
https://help.github.com/articles/adding-a-new-ssh-key-to-your-github-account/
1. Make an ssh key and add it to github, following.
2. Check out this, or use the following commands:
• A program to hold private keys for public authentication.
type:
ssh-agent
• Initially the agent does not hold any private keys.
So run:
ssh-add
1.7. git 47

Autonomous Vehicle Control Documentation, Release 0.0.1-rc1
1.7.5 Mistakes I Made
• Make sure that you are working on the master branch!
– Do not check out a tag and start making changes only to realize that you are not on the master branch!
• Trying to connect to github using ssh
1) Create a github repository, with the name ( for example: huckl3b3rry87/LiDAR.jl )
2) Then
Type this in the terminal:
febbo@febbo-HP-ZBook-17-G2:~/.julia/v0.5/LiDAR$ git remote add origin git@github.→˓com:huckl3b3rry87/LiDAR.jl
3) Then
Try this:
febbo@febbo-HP-ZBook-17-G2:~/.julia/v0.5/LiDAR$ git pull master
4) Next
Get this:
fatal: 'master' does not appear to be a git repositoryfatal: Could not read from remote repository.
Please make sure you have the correct access rightsand the repository exists.
Next we are going to test the ssh connection
5) Attempt to ssh to GitHub By typing:
febbo@febbo-HP-ZBook-17-G2:~/.julia/v0.5/LiDAR$ ssh -T [email protected] huckl3b3rry87! You've successfully authenticated, but GitHub does not provide→˓shell access.
6) realize that you messed up by typing:
git pull master
and not:
git pull origin master
1.8 Documentation
1.8.1 Creating Documentation
Sphinx
Installation
In the terminal run:
48 Chapter 1. Software

Autonomous Vehicle Control Documentation, Release 0.0.1-rc1
pip install sphinx
* `Uninstall <https://pip.pypa.io/en/stable/reference/pip_uninstall/>`_
Useful Resources
• an awesome video introduction
• toctree
• basic commands and syntax
• useful resource
• making sections
Common Commands
To start documenting:
sphinx-quickstart
To manually build documentation:
make html
To clean out an old build folder when things have changed significantly:
make clean
Images:
.. image:: gnu.png
To make a comment:
.. Comment here
Something
To make a warning
Type:
.. warning:: this is a warning
Which looks like this:
Warning: this is a warning
1.8. Documentation 49

Autonomous Vehicle Control Documentation, Release 0.0.1-rc1
To make a note
Type:
.. note:: please be careful with spacing!
Which looks like this:
Note: please be careful with spacing!
To make a todo box
Type:
.. todo:: testing
Which looks like this:
Todo: testing
changing the themes
• In conf.py change:
html_theme = 'haiku'
• Or a main one:
import sphinx_rtd_themehtml_theme = "sphinx_rtd_theme"html_theme_path = [sphinx_rtd_theme.get_html_theme_path()]
• An awesome theme
Manging References
Properly managing references is a critical habit and these are some of the useful software tool that I use to manage myreferences.
Using Sphinx BibTex extension
Sphinx BibTex extension
• To install
Do this:
pip install sphinxcontrib-bibtex
50 Chapter 1. Software

Autonomous Vehicle Control Documentation, Release 0.0.1-rc1
In conf.py add:
extensions = ['sphinxcontrib.bibtex']
Warning: that it is added to the rest of extensions!! Not just at the top, or it will be removed!!!
Like this:
extensions = ['sphinx.ext.autodoc','sphinx.ext.doctest','sphinx.ext.intersphinx','sphinx.ext.todo','sphinx.ext.coverage','sphinx.ext.mathjax','sphinx.ext.ifconfig','sphinxcontrib.bibtex',]
Also, you can avoid these errors on readthedocs.com:
python /home/docs/checkouts/readthedocs.org/user_builds/nloptcontroljl/envs/latest/→˓bin/pip install --exists-action=w --cache-dir /home/docs/checkouts/readthedocs.org/→˓user_builds/nloptcontroljl/.cache/pip -rpip install sphinxcontrib-bibtexCould not open requirements file: [Errno 2] No such file or directory: 'pip install→˓sphinxcontrib-bibtex'You are using pip version 8.1.2, however version 9.0.1 is available.You should consider upgrading via the 'pip install --upgrade pip' command.Command time: 0s Return: 1
By typing:
requirements.txt
Into the Advanced Settings Page and making a requirements.txt file with:
pip install --upgrade pippip install sphinxcontrib-bibtex
Example: To cite:
according to :cite:`someone` yada yada..
Then, at the end of the document include:
.. bibliography:: references.bib
Useful Work-flow Technique
Setting up a server to build the documentation when a change is detected.
Installation:
1.8. Documentation 51

Autonomous Vehicle Control Documentation, Release 0.0.1-rc1
pip install sphinx-autobuild
Then go into your main directory and type:
sphinx-autobuild docs docs/_build/html
Or the directory that contains conf.py and type:
sphinx-autobuild . _build_html
Then visit the website: http://127.0.0.1:8000/
• This will show you the live changes (after each save!!)
More information can be found using this resource.
Useful Software
Read The Docs
To get it:
pip install sphinx_rtd_theme
Read the Docs is useful resource to host the webpage.
Some Issues:
• The git repository for OCP is private and this website only hosts public repositories.
• Had to remove the last line here in conf.py for the code to work with ReadtheDocs.
like this:
extensions = ['sphinx.ext.autodoc','sphinx.ext.doctest','sphinx.ext.intersphinx','sphinx.ext.todo','sphinx.ext.coverage','sphinx.ext.mathjax','sphinx.ext.ifconfig','sphinx.ext.viewcode','sphinxcontrib.bibtex',
]# 'sphinx.ext.githubpages',
• Had to make sure that the name of the project was correct
• Had to make sure that the webhook was activated on github
52 Chapter 1. Software

Autonomous Vehicle Control Documentation, Release 0.0.1-rc1
MkDocs
Potential Issues
1. Make sure that the “toctree” is indented by 3 space characters. I listed the .rst files by 4 space characters andthis created an issue. To resolve the issue, you need to have the same indentation level.
2. When cross referencing things in the document make sure you skip a space when you define the ref.
• like this
works:
.. _ploy_div:
Polynomial Division-------------------
• not like this
fails:
.. _ploy_div:Polynomial Division-------------------
3. Trying to uninstall sphinx so that I could get a newer version without bugs:
febbo@febbo-HP-ZBook-17-G2:~/Desktop/useful downloads$ pip uninstall sphinxCannot remove entries from nonexistent file /home/febbo/anaconda3/lib/python3.5/site-→˓packages/easy-install.pth
The problem: This probably won’t work:
conda update setuptools
The fix, was to download ez_setup.py from this link and run it in the terminal:
febbo@febbo-HP-ZBook-17-G2:~$ python ez_setup.py
Then I could uninstall Sphinx-1.4.1:
febbo@febbo-HP-ZBook-17-G2:~$ pip uninstall sphinxUninstalling Sphinx-1.4.1:/home/febbo/anaconda3/bin/sphinx-apidoc/home/febbo/anaconda3/bin/sphinx-autogen/home/febbo/anaconda3/bin/sphinx-build/home/febbo/anaconda3/bin/sphinx-quickstart/home/febbo/anaconda3/lib/python3.5/site-packages/Sphinx-1.4.1-py3.5.eggProceed (y/n)? ySuccessfully uninstalled Sphinx-1.4.1
There was reason I needed to uninstall this version of Sphinx was because the citations where not working.
Finally I installed Sphinx-1.5.2:
#Install from newest dev version in stable branch::pip install git+https://github.com/sphinx-doc/sphinx@stable
1.8. Documentation 53

Autonomous Vehicle Control Documentation, Release 0.0.1-rc1
Markdown
Tools
• Documentor.jl.
• plugin for Atom
• GitBook Toolchain Documentation
1.8.2 Miscellaneous
Pandoc
Software used to convert documentation from one format to another.
1.9 LaTeX
1.9.1 Install
Use Texmaker and when you change the build directory, make sure that you add build/ before the % to all the com-mands in configure.
Install on Ubuntu:
sudo apt-get install texlive-full
Other packages:
sudo apt-get install texlive-latex-extrasudo apt-get install texlive-bibtex-extra bibersudo apt-get install texlive-fonts-recommendedsudo apt-get install texlive-publishers
misc:
sudo apt-get install pdflatex
1.9.2 Beemer
Adobe Reader
http://www.ubuntugeek.com/install-adobe-reader-in-ubuntu-16-04.html
Convert to Individual Files
https://tex.stackexchange.com/questions/240243/getting-gif-and-or-moving-images-into-a-latex-presentation
type:
54 Chapter 1. Software

Autonomous Vehicle Control Documentation, Release 0.0.1-rc1
convert -coalesce something.gif something.png
Syntax Highlighting: listings
http://users.ecs.soton.ac.uk/srg/softwaretools/document/start/listings.pdf
Syntax Highlighting: minted
usepackage{minted}
which needs:
sudo apt-get install python-pygments
OLD
http://heather.cs.ucdavis.edu/~matloff/beamer.html
FFmpeg
https://trac.ffmpeg.org/wiki/CompilationGuide/Ubuntu
https://stackoverflow.com/questions/10225403/how-can-i-extract-a-good-quality-jpeg-image-from-an-h264-video-file-with-ffmpeg
Change quality:
ffmpeg -i input.mp4 -qscale:v 2 output_%03d.jpg
Embedding movies1:
https://tex.stackexchange.com/questions/252348/how-to-embed-a-video-in-beamer-and-reproduce-it-by-using-okular
code:
\usepackage[loop,controls,buttonsize=0.24cm,buttonbg=0.8,autoplay]{animate}%% normal frame\begin{frame}{Why julia?}
\begin{figure}\centering\animategraphics[loop,width=\textwidth,every=1]{100}{videos/v1/out_}{1}
→˓{1199}\caption{Our Algorithms where not Solving in Real-Time!}
\end{figure}\end{frame}
Embedding movies2:
https://tex.stackexchange.com/questions/240243/getting-gif-and-or-moving-images-into-a-latex-presentation
1.9. LaTeX 55

Autonomous Vehicle Control Documentation, Release 0.0.1-rc1
Embedding movies3:
https://tex.stackexchange.com/questions/429/animation-in-pdf-presentations-without-adobe-reader
animate package
http://mirror.hmc.edu/ctan/macros/latex/contrib/animate/animate.pdf
Viewing slides
Okular:
sudo apt-get install okular
xPDF
install:
sudo apt-get updatesudo apt-get install xpdf
1.9.3 Software Tools
Texmaker
A useful program to use LaTeX on Ubuntu.
Warning: make sure that you play with the build option if it is saying that the references where not found.
For instance, after a while this worked:
Then, the above option did not work and this worked:
To insert .svg files automatically
Useful links:
• svg package
56 Chapter 1. Software
Autonomous Vehicle Control Documentation, Release 0.0.1-rc1
• shell-escape command
Convert SVG to PDF
sudo apt-get install inkscape
https://tex.stackexchange.com/questions/194148/how-to-make-latex-automatically-call-inkscape-to-export-figure-to-pdf-tex
https://tex.stackexchange.com/questions/99475/how-to-invoke-latex-with-the-shell-escape-flag-in-texmakerx/99476#99476
Making Figures With LaTeX
http://www.texample.net/tikz/examples/tag/diagrams/
1.9.4 Plotting
PGFPlots
Documented here
TikZ and PGF
Documentation is here
With julia
• a recent package is PGFPlotsX
• the original package is PGFPlots
Miscellaneous
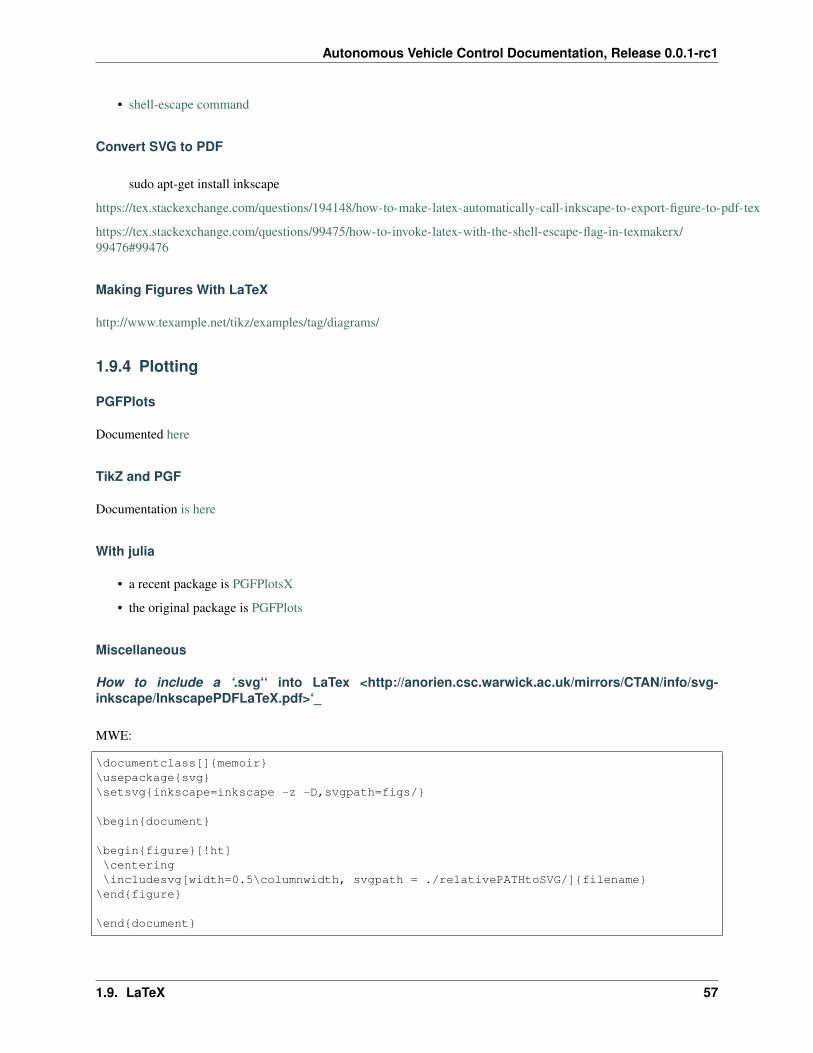
How to include a ‘.svg‘‘ into LaTex <http://anorien.csc.warwick.ac.uk/mirrors/CTAN/info/svg-inkscape/InkscapePDFLaTeX.pdf>‘_
MWE:
\documentclass[]{memoir}\usepackage{svg}\setsvg{inkscape=inkscape -z -D,svgpath=figs/}
\begin{document}
\begin{figure}[!ht]\centering\includesvg[width=0.5\columnwidth, svgpath = ./relativePATHtoSVG/]{filename}
\end{figure}
\end{document}
1.9. LaTeX 57

Autonomous Vehicle Control Documentation, Release 0.0.1-rc1
1.10 C
1.10.1 Including files
There are 2 kinds of include directives:
• double quoted ones (#include “xyz.h”)
– the working directory
• angle bracket ones (#include <xyz.h>)
– usually /usr/include/.
Other Notes
• Place the header file in the same directory as your .c file and use -I. when compiling
• You shouldn’t place your header files in /usr/include that is meant for the system headers.
Useful resources
• https://stackoverflow.com/questions/27660713/including-header-file-from-static-library
1.11 Operating Systems
1.11.1 Linux
Useful Programs
In the terminal:
sudo dpkg --install atom-amd64.debsudo apt install ffmpegsudo apt-get install cmake bar time binutils make libssl-dev gfortran libunwind8-dev→˓gcc g++ #clang curl perl wget m4 patch pkg-configsudo apt-get install gsfonts-x11sudo apt-get install notepadqqsudo apt-get updatesudo apt-get install gfortransudo apt-get install libnlopt0sudo apt-get install openssh-serversudo apt install ipmiutilsudo apt-get install hdf5-toolsapm install latex # Atom package manager for latex!sudo apt-get install pdf2svg # for PGFPlotspip install sphinxcontrib-bibtexsudo apt-get install texlive-luatexsudo apt install aptitudesudo apt-get install freecadsudo apt install blendersudo apt install rpmapm install latexsudo apt autoremove
58 Chapter 1. Software

Autonomous Vehicle Control Documentation, Release 0.0.1-rc1
Basic Linux Commands
Never run an executable in root!
Some more info can be found on ‘ this page <https://www.cyberciti.biz/faq/tar-extract-linux/>‘.
To move a folder an all of its contents:
mv /path/sourcefolder/* /path/destinationfolder/
To unpack a tar file:
tar -xvf file.tar
To extract a .tar.gz:
tar -xzvf file.tar.gz
Note: Modern tar can recognize the format automatically:
sudo tar xf armadillo-8.300.3.tar.xz -C /opt
Unzip:
unzip stuff.zip -d /destination/folder
directory comment:
$HOME = /home/febbo
Run a jar file: java -jar lad
Useful Tools
• Synaptic Package Manager
/etc/bash.bashrc vs. $HOME/.bashrc
Be careful there are two files that configure the terminal!
http://unix.stackexchange.com/questions/140207/messed-up-bash-bashrc-file-commands-not-working-anymore
in my $HOME/.bashrc:
alias blender='/opt/blender/blender'alias julia='/opt/julia-6445c82d00/bin/julia'alias docs='sphinx-autobuild . _build_html'export DYLD_LIBRARY_PATH="$HOME/knitro/lib:$DYLD_LIBRARY_PATH"export LD_LIBRARY_PATH="$HOME/knitro/lib:$LD_LIBRARY_PATH"export PYTHONPATH=$PYTHONPATH:/usr/lib/python2.7/dist-packagesexport GAZEBO_PLUGIN_PATH=/home/febbo/.julia/v0.5/OCP/MAVs/workspace/src/velodyne_→˓plugin/build/:${GAZEBO_PLUGIN_PATH}source /opt/ros/kinetic/setup.bashexport ROS_PACKAGE_PATH=/home/febbo/.julia/v0.5/OCP/MAVs/workspace:$ROS_PACKAGE_PATH
1.11. Operating Systems 59

Autonomous Vehicle Control Documentation, Release 0.0.1-rc1
Ubuntu package manager
https://launchpad.net/ubuntu/+source/matplotlib
Video Stuff
to converte to MP4
Type:
ffmpeg -f gif -i mainSimPath.gif RESULT.mp4
Quickly convert to .gif files:
Following this link
Add this to your ~/bash_profile file:
# Convert video to gif file.# Usage: video2gif video_file (scale) (fps)video2gif() {
ffmpeg -y -i "${1}" -vf fps=${3:-30},scale=${2:-320}:-1:flags=lanczos,palettegen "$→˓{1}.png"ffmpeg -i "${1}" -i "${1}.png" -filter_complex "fps=${3:-10},scale=${2:-320}:-
→˓1:flags=lanczos[x];[x][1:v]paletteuse" "${1}".gifrm "${1}.png"
}
Then load it in the .bashrc file:
. ~/.bash_profile
1.11.2 Setting up a machine for Dual Boot
Todo: transcribe notes from black book on this
1.12 misc
1.12.1 MPT3
• MPT3 is a MATLAB based optimization tool that comes out of The Automatic Controls Laboratory at ETH.
• Lots of other useful software that come out out ETH in Zurich, Switzerland and can be found aqui
• Additionally, I worked with Michal Kvasnica ( a former memeber of The Automatic Controls Laboratory atETH) developing Moving Obstacle avoidance code using MPT3.
– The result of this work is a tool named OptiPlan and the code can be found here.
60 Chapter 1. Software

Autonomous Vehicle Control Documentation, Release 0.0.1-rc1
1.12.2 BARC
http://www.barc-project.com/
1.12.3 AUTORALLY
http://autorally.github.io/
Georgia tech
https://collab.cc.gatech.edu/borg/home?destination=home
GTSAM
Visual-Inertial-Aided Navigation for High-Dynamic Motion in Built Environments Without Initial Conditions
https://bitbucket.org/gtborg/gtsam/src/8b0c2ecaf4060965eca355bdd907d239b5124de6/GTSAM-Concepts.md?fileviewer=file-view-default
https://www.youtube.com/watch?v=CsJkci5lfco&feature=youtu.be
1.12.4 Different Text Editors
I tried a few different text editors, but this one I really like and it is very similar to coding in MATLAB. It is a toolcalled JUNO that basically links a nice text editor called Atom to julia, so that you can run julia interactively.
Atom
Atom Flight Manual
Useful things:
spell check <https://github.com/atom/spell-check>:
ctrl+shift+;
Markdown Preview Package:
ctr+shift+m
https://github.com/atom/markdown-preview
Subscripts:
variable\_1+tab
Using /LaTeX with Atom. It was suggested to use Tex Live <https://www.tug.org/texlive/acquire-netinstall.html>Where the quick install instructions are here<https://www.tug.org/texlive/quickinstall.html> https://atom.io/packages/latex
1.12. misc 61

Autonomous Vehicle Control Documentation, Release 0.0.1-rc1
TeX Live
I use this with Atom.
https://www.tug.org/texlive/ https://atom.io/packages/latex
After installing TeX Live: * Add /usr/local/texlive/2016/texmf-dist/doc/info to INFOPATH. * Add/usr/local/texlive/2016/texmf-dist/doc/man to MANPATH (if not dynamically found). * Most importantly, add/usr/local/texlive/2016/bin/x86_64-linux to your PATH for current and future sessions.
To do this change the bashrc file:
gksu gedit /etc/bash.bashrc
Paste this at the end:
PATH=/usr/local/texlive/2016/bin/x86_64-linux:$PATH; export PATH # make sure that→˓there are NO spacesMANPATH=/usr/local/texlive/2016/texmf-dist/doc/man:$MANPATH; export MANPATHINFOPATH=/usr/local/texlive/2016/texmf-dist/doc/info:$INFOPATH; export INFOPATH
Then in Atom, go to settings and add the path to the texlive:
/usr/local/texlive/2016/bin/x86_64-linux
Potential Issues
• If the julia binary is not where it belongs ( for instance I put it in my /opt/. . . folder)
– Change the julia .config file (in Atom) to the proper folder (where julia binaries are)
• Otherwise
– leave it as : juliaPath: “julia”
I had to:
Pkg.clone("https://github.com/JunoLab/Juno.jl")Pkg.update()
Make sure you close both atom and julia after installation. Now you should be able to run julia from Atom!
1.12.5 Transferring Files To A Website
http://www.umich.edu/~umweb/how-to/homepage.html
https://docs.oracle.com/cd/E26502_01/html/E29001/remotehowtoaccess-14.html
type:
sftp sftp.itd.umich.edu
Or just do:
scp -r /home/febbo/Documents/workspace/PhD/docs/_build/html sftp.itd.umich.edu:/afs/→˓umich.edu/user/f/e/febbo/Private/html
62 Chapter 1. Software
Autonomous Vehicle Control Documentation, Release 0.0.1-rc1
Setting Permissions:
https://mfile.umich.edu/?path=/afs/umich.edu/user/f/e/febbo/Private/html
1.12.6 Community Help
There is a tremendous community of people online that will help you with your projects. I have helped when I can,but largely other more experienced people usually help me. Below I have listed a few of the communities that I havebeen involved with.
Stackoverflow
A more general venue for asking questions to the online community of experts in various feilds.
GitHub
If you have issues with peoples software, you can submit an issue.
Gitter
Basicaly an instant message service for developers. I have used it for julia, plots.jl, and juno.jl.
1.12.7 Making A Thesis
https://github.com/jterrace/sphinxtr
1.12.8 Miscellaneous
Making the Screen Brighter with an Apple Monitor on Ubuntu
Ubuntu Freezing and not Booting with Monitors Plugged in
Blender
3D modeling tool
chmod
changes permissions. For instance:
chmod + x filename
Allows the file to be executed.
1.12.9 MATLAB
I used MATLAB to develop the work in my 2016 ASME paper. Great software, but julia is faster, free and just plainbetter:)
1.12. misc 63

Autonomous Vehicle Control Documentation, Release 0.0.1-rc1
1.12.10 Build Tools
catkin
This is the official build system of ROS, it uses the CMake macros and Python to add functionality to Cmake.
Installation Instructions
catkin-tools
These tools are used to facilitate a merged build process. That is several inter-dependent but separately developedCMake projects
Installation:
sudo sh -c 'echo "deb http://packages.ros.org/ros/ubuntu `lsb_release -sc` main" > /→˓etc/apt/sources.list.d/ros-latest.list'wget http://packages.ros.org/ros.key -O - | sudo apt-key add -sudo apt-get updatesudo apt-get install python-catkin-tools
Warning: If you this was built on an old machine or paths got updated (e.g. a new version of julia) then it maybe necessary to clean out the build:
to clean out an old build:
rm -rf build
If you move a package, delete the build and the devel folders then do a catkin_make
CMake
Ninja
a small build system:
sudo apt-get install ninja-build
Linuxbrew
For working with Linux and Mac install:
sudo apt install linuxbrew-wrapper
then:
brew install libyaml
64 Chapter 1. Software

Autonomous Vehicle Control Documentation, Release 0.0.1-rc1
1.12.11 Reference Management
JabRef
BibTex files can be managed with a free software called JabRef
First I tried a few things including:
sudo apt-get install default-jresudo apt-get update
And:
sudo add-apt-repository ppa:openjdk-r/ppasudo apt-get updatesudo apt-get install openjdk-7-jre
This messed stuff up and then I deleted all of my old java versions using:
sudo natilus
Ended up needing to follow this advice <http://askubuntu.com/questions/251213/unable-to-install-default-jdk >:
sudo add-apt-repository ppa:webupd8team/javasudo apt-get updatesudo apt-get install oracle-java8-installerjava -versionsudo apt-get install oracle-java8-set-default
This finally worked and I was able to run JabRef with no problem using:
java -jar JabRef-3.8.jar
If something is broken:
sudo apt-get -f install
Using JabRef with LibreOffice
http://help.jabref.org/en/OpenOfficeIntegration http://homepage.usys.ethz.ch/eugsterw/knowhow/jabref-libreoffice/ls $(which soffice) ls $(which soffice) -l locate libreoffice https://onetransistor.blogspot.com/2015/04/libreoffice-bibliography-jabref.html
http://homepage.usys.ethz.ch/eugsterw/knowhow/jabref-libreoffice/
cd /usr/lib/openoffice/program/soffice
febbo@febbo-HP-ZBook-17-G2:/usr/lib/libreoffice/program$ locate unoil.jar /usr/lib/libreoffice/program/classes/unoil.jar/usr/share/java/unoil.jar /usr/share/libreoffice/program/classes/unoil.jar
febbo@febbo-HP-ZBook-17-G2:/usr/lib/libreoffice/program$ locate jurt.jar /usr/lib/libreoffice/program/classes/jurt.jar/usr/share/java/jurt.jar
Need to make symbolic links to the following java files:
febbo@febbo-HP-ZBook-17-G2:/usr/share/libreoffice/ure-link/share/java$ sudo ln -s/usr/lib/libreoffice/program/classes/jurt.jar febbo@febbo-HP-ZBook-17-G2:/usr/share/libreoffice/ure-link/share/java$
1.12. misc 65

Autonomous Vehicle Control Documentation, Release 0.0.1-rc1
sudo ln -s /usr/lib/libreoffice/program/classes/juh.jar febbo@febbo-HP-ZBook-17-G2:/usr/share/libreoffice/ure-link/share/java$ sudo ln -s /usr/lib/libreoffice/program/classes/ridl.jar
EndNote
I still use this tool, but it costs money and I do not have it on Ubuntu.
66 Chapter 1. Software
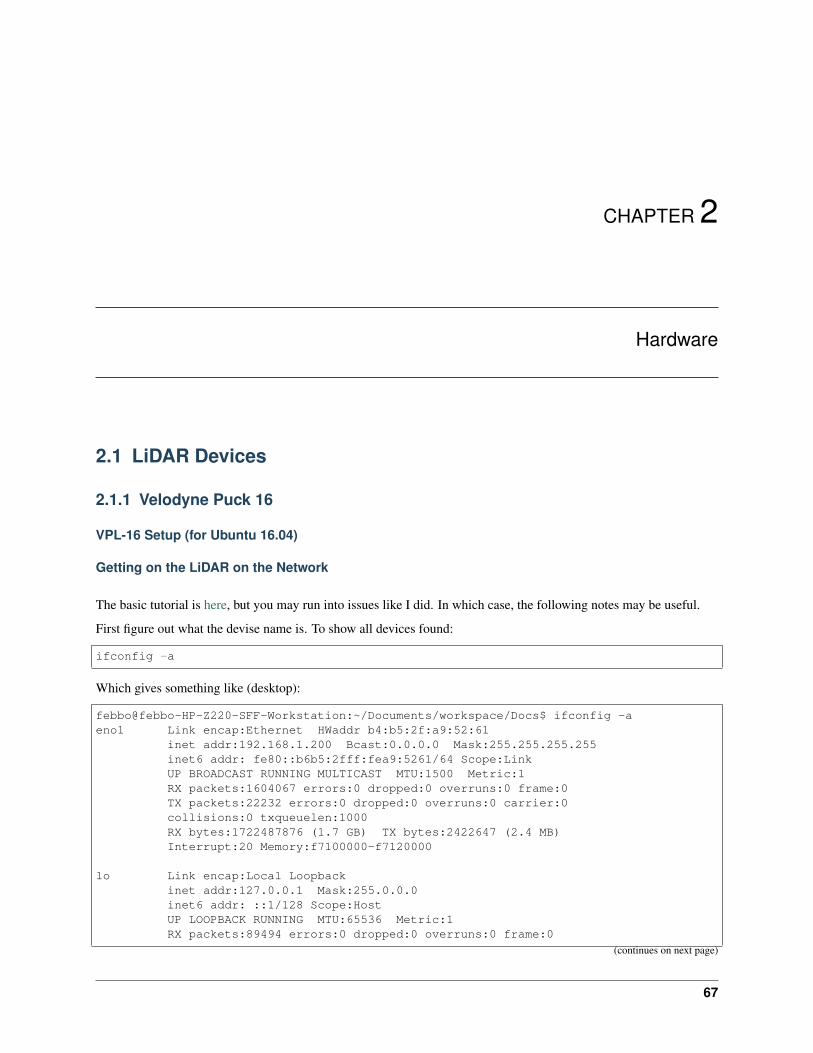
CHAPTER 2
Hardware
2.1 LiDAR Devices
2.1.1 Velodyne Puck 16
VPL-16 Setup (for Ubuntu 16.04)
Getting on the LiDAR on the Network
The basic tutorial is here, but you may run into issues like I did. In which case, the following notes may be useful.
First figure out what the devise name is. To show all devices found:
ifconfig -a
Which gives something like (desktop):
febbo@febbo-HP-Z220-SFF-Workstation:~/Documents/workspace/Docs$ ifconfig -aeno1 Link encap:Ethernet HWaddr b4:b5:2f:a9:52:61
inet addr:192.168.1.200 Bcast:0.0.0.0 Mask:255.255.255.255inet6 addr: fe80::b6b5:2fff:fea9:5261/64 Scope:LinkUP BROADCAST RUNNING MULTICAST MTU:1500 Metric:1RX packets:1604067 errors:0 dropped:0 overruns:0 frame:0TX packets:22232 errors:0 dropped:0 overruns:0 carrier:0collisions:0 txqueuelen:1000RX bytes:1722487876 (1.7 GB) TX bytes:2422647 (2.4 MB)Interrupt:20 Memory:f7100000-f7120000
lo Link encap:Local Loopbackinet addr:127.0.0.1 Mask:255.0.0.0inet6 addr: ::1/128 Scope:HostUP LOOPBACK RUNNING MTU:65536 Metric:1RX packets:89494 errors:0 dropped:0 overruns:0 frame:0
(continues on next page)
67

Autonomous Vehicle Control Documentation, Release 0.0.1-rc1
(continued from previous page)
TX packets:89494 errors:0 dropped:0 overruns:0 carrier:0collisions:0 txqueuelen:1RX bytes:145501992 (145.5 MB) TX bytes:145501992 (145.5 MB)
Warning: Note that the device is eno1, not eth0. Also, on my laptop the device name is enp0s25, so it isdifferent depending on the machine.
Then do (desktop):
sudo ifconfig eno1 upsudo ip addr add 192.168.1.200 dev eno1sudo route add -net 192.168.1.0 netmask 255.255.255.0 dev eno1
Then do (laptop):
sudo ifconfig enp0s25 upsudo ip addr add 192.168.1.200 dev enp0s25sudo route add -net 192.168.1.0 netmask 255.255.255.0 dev enp0s25
Next got to: Network -> Options... and click Ethernet Settings
Ethernet Settings
Type the LiDAR’s cloned MAC address in the box.
Note: To find the cloned MAC address for the LiDAR; look at the bottom of the device. For me it is:
60:76:88:10:47:F9
Note:
• Now you can change the name of the network to something, perhaps LiDAR in Edit Connections...
• To see information about the connection check out Connection Information.
Testing the LiDAR
First clone the Velodyne LiDAR ros package into a catkin_ws:
git clone http://wiki.ros.org/velodyne
To run it:
roslaunch velodyne_pointcloud VLP16_points.launch
To view data run:
68 Chapter 2. Hardware

Autonomous Vehicle Control Documentation, Release 0.0.1-rc1
rosrun rviz rviz -f velodyne
Then add try adding LaserScan and PointCloud2 and their topics /velodyne_points and /scan, respec-tively.
If you have trouble these instructions will help you display the data in rviz.
Getting on the Computer back on the Internet
Note: If you accidentally deleted the Internet connection or messed it up somehow
On the top right of your screen highlight the Network icon and click Edit Connections. Then click Add addback the Internet with the following steps.
Warning: Make sure that you name the LiDAR connection and the Internet connection.
First go to: Network -> Options...
Ethernet Settings
Note: If you are trying to get the Internet back delete the MAC address in the box.
IPv4 Settings
Note: If you are trying to get the Internet back, select the Method to be:
Automatic (DHCP)
Network Commands
random commands:
route -n
2.1.2 SLAMTEC
360 degree 2D LiDAR for $500 well documented and comes with plenty of ROS support
2.1. LiDAR Devices 69

Autonomous Vehicle Control Documentation, Release 0.0.1-rc1
70 Chapter 2. Hardware

CHAPTER 3
Huck’s notes
These are some notes that I took for classes etc.
Contents:
3.1 Navigation and Guidance of Aerospace Vehicles (AERO 584)
Contents:
3.1.1 Cheat Sheet
not well formated. . . ..look at source!
(𝑎2 − 𝑏2) = (𝑎− 𝑏)(𝑎 + 𝑏)
(𝑎3 − 𝑏3) = (𝑎− 𝑏)(𝑎2 + 𝑎𝑏 + 𝑏2)
(𝑎4 − 𝑏4) = (𝑎− 𝑏)(𝑎 + 𝑏)(𝑎2 + 𝑏2)
𝑒𝑎𝑒𝑏 = 𝑒𝑎+𝑏
(𝑒𝑥)𝑛 = 𝑒2𝑥
(𝐴 + 𝐵)𝑇 = 𝐴𝑇 + 𝐵𝑇
(𝐴𝐵)𝑇 = 𝐵𝑇𝐴𝑇
𝐴𝐵𝑇 = 𝐵𝐴𝑇
(𝐴𝑇 )−1 = (𝐴−1)𝑇
𝑑𝑒𝑡(𝐴𝑇 ) = 𝑑𝑒𝑡(𝐴)
71

Autonomous Vehicle Control Documentation, Release 0.0.1-rc1
Also, if A is square, then its eigenvalues are equal to the eigenvalues of its transpose. Additionally, if the matrix is alsodifferentiable and nonsingular
𝑑
𝑑𝑡(𝑃−1(𝑡) = −𝑃−1(𝑡)�� (𝑡)𝑃−1(𝑡)
𝑤ℎ𝑖𝑐ℎ𝑐𝑎𝑛𝑏𝑒𝑓𝑜𝑢𝑛𝑑𝑤𝑖𝑡ℎ;
d𝑑𝑡(𝑃 (𝑡)𝑃−1(𝑡))= 𝑑
𝑑𝑡 (𝐼)=0
𝐴𝑇 = −𝐴
𝐴 =
[𝑎11 𝑎12𝑎21 𝑎22
]
𝐴−1 =1
|𝐴|[𝑟]𝑎22 − 𝑎12
−𝑎21𝑎11
𝑎11
.
|𝐵| = 𝑑𝑒𝑡(𝐵) =
𝑎 𝑏 𝑐𝑑 𝑒 𝑓𝑔 ℎ 𝑖
= 𝑎
𝑒 𝑓ℎ 𝑖
− 𝑏
𝑑 𝑓𝑔 𝑖
+ 𝑐
𝑑 𝑒𝑔 ℎ
𝑠𝑖𝑛(2𝑎) = 2𝑐𝑜𝑠(𝑎)𝑠𝑖𝑛(𝑎)
𝑐𝑜𝑠(2𝑎) = 1 − 2𝑠𝑖𝑛2(𝑎) = 2𝑐𝑜𝑠2(𝑎) − 1
States that the derivative of the integral is (for constant limits of integration):
𝑑
𝑑𝑡(
∫ 𝑏
𝑎
𝑓(𝑥, 𝑡) 𝑑𝑡) =
∫ 𝑏
𝑎
𝜕
𝜕𝑥𝑓(𝑥, 𝑡) 𝑑𝑡
𝑆𝑡𝑎𝑡𝑒𝑠𝑡ℎ𝑎𝑡𝑡ℎ𝑒𝑑𝑒𝑟𝑖𝑣𝑎𝑡𝑖𝑣𝑒𝑜𝑓𝑡ℎ𝑒𝑖𝑛𝑡𝑒𝑔𝑟𝑎𝑙𝑖𝑠(𝑓𝑜𝑟𝑙𝑖𝑚𝑖𝑡𝑠𝑜𝑓
integration that are not constant)
𝑑
𝑑𝑡(
∫ 𝑓(𝑏)
𝑓(𝑎)
𝑓(𝑥, 𝑡) 𝑑𝑡) =
= 𝑓(𝑥, 𝑏(𝑥))𝑑
𝑑𝑥𝑏(𝑥) − 𝑓(𝑥, 𝑎(𝑥))
𝑑
𝑑𝑥𝑎(𝑥) +
∫ 𝑓(𝑏)
𝑓(𝑎)
𝜕
𝜕𝑥𝑓(𝑥, 𝑡) 𝑑𝑡
𝑁𝑜𝑡𝑒 :: 𝑚𝑎𝑡ℎ : ‘𝑡‘𝑖𝑠𝑎𝑣𝑎𝑟𝑖𝑎𝑏𝑙𝑒𝑖𝑛𝑡ℎ𝑒𝑖𝑛𝑡𝑒𝑔𝑟𝑎𝑡𝑖𝑜𝑛𝑙𝑖𝑚𝑖𝑡, 𝑠𝑜𝑡ℎ𝑒𝑎𝑏𝑜𝑣𝑒
72 Chapter 3. Huck’s notes

Autonomous Vehicle Control Documentation, Release 0.0.1-rc1
formula must be used to derive (t). ∫𝑥𝑛 𝑑𝑥 =
1
𝑛 + 1𝑥𝑛+1∫
1
𝑥𝑑𝑥 = ln |𝑥|∫
𝑢�� 𝑑𝑥 = 𝑢𝑣 −∫
𝑣𝑑𝑢∫𝑒𝑥 𝑑𝑥 = 𝑒𝑥∫𝑎𝑥 𝑑𝑥 =
1
ln 𝑎𝑎𝑥∫
ln𝑥 𝑑𝑥 = 𝑥 ln𝑥− 𝑥∫sin𝑥 𝑑𝑥 = − cos𝑥∫cos𝑥 𝑑𝑥 = sin𝑥∫tan𝑥 𝑑𝑥 = ln | sec𝑥|∫sec𝑥 𝑑𝑥 = ln | sec𝑥 + tan𝑥|∫
sec2 𝑥 𝑑𝑥 = tan𝑥∫sec(𝑥) tan(𝑥) 𝑑𝑥 = sec𝑥
𝑑𝑥𝑑𝑦 = 𝑟𝑑𝑟𝑑𝜃
don’t forget to change the limits of integration!
𝑑
𝑑𝑡(𝑡𝑎𝑛−1(𝑥)) =
1
1 + 𝑥2
3.1. Navigation and Guidance of Aerospace Vehicles (AERO 584) 73

Autonomous Vehicle Control Documentation, Release 0.0.1-rc1
𝑓(𝑡) = ℒ[𝑓(𝑡)] = 𝐹 (𝑠)
1 =1
𝑠𝛿(𝑡) = 1
𝛿(𝑡− 𝑡0) = 𝑒−𝑠𝑡0
𝑓 ′(𝑡) = 𝑠𝐹 (𝑠) − 𝑓(0)
𝑓𝑛(𝑡) = 𝑠𝑛𝐹 (𝑠) − 𝑠(𝑛−1)𝑓(0) − · · · − 𝑓 (𝑛−1)(0)
𝑡𝑛(𝑛 = 0, 1, 2, . . . ) =𝑛!
𝑠𝑛+1
sin 𝑘𝑡 =𝑘
𝑠2 + 𝑘2
cos 𝑘𝑡 =𝑠
𝑠2 + 𝑘2
𝑒𝑎𝑡 =1
𝑠− 𝑎
𝑡𝑛𝑒𝑎𝑡 =𝑛!
(𝑠− 𝑎)𝑛+1
𝑒𝑎𝑡 sin 𝑘𝑡 =𝑘
(𝑠− 𝑎)2 + 𝑘2
𝑒𝑎𝑡 cos 𝑘𝑡 =𝑠− 𝑎
(𝑠− 𝑎)2 + 𝑘2
𝑡 sin 𝑘𝑡 =2𝑘𝑠
(𝑠2 + 𝑘2)2
𝑡 cos 𝑘𝑡 =𝑠2 − 𝑘2
(𝑠2 + 𝑘2)2
First translation theorom:
ℒ[𝑒𝑎𝑡𝑓(𝑡)
]= 𝐹 (𝑠− 𝑎)∫ ∞
−∞𝑓(𝑥)𝛿(𝑥− 𝑎) 𝑑𝑥 = 𝑓(𝑎)∫ ∞+𝜖
−∞+𝜖
𝑓(𝑥)𝛿(𝑥− 𝑎) 𝑑𝑥 = 𝑓(𝑎), 𝜖 > 0
𝛿(𝑥− 𝑎) = 0
Given some nonlinear system of the form:
��(𝑡) = 𝑓(𝑥(𝑡), 𝑢(𝑡), 𝑡)
𝑦(𝑡) = 𝑔(𝑥(𝑡), 𝑡)
𝐴𝑙𝑖𝑛𝑒𝑎𝑟𝑖𝑧𝑎𝑡𝑖𝑜𝑛𝑐𝑎𝑛𝑏𝑒𝑝𝑒𝑟𝑓𝑜𝑟𝑚𝑒𝑑𝑎𝑏𝑜𝑢𝑡𝑛𝑜𝑚𝑖𝑛𝑎𝑙𝑡𝑟𝑎𝑗𝑒𝑐𝑡𝑜𝑟𝑖𝑒𝑠
x0(𝑡), 𝑢0(𝑡), 𝑎𝑛𝑑𝑢0(𝑡)(𝑠ℎ𝑜𝑟𝑡ℎ𝑎𝑛𝑑𝑖𝑠0)𝑏𝑦𝑑𝑒𝑓𝑖𝑛𝑖𝑛𝑔𝑡ℎ𝑒𝑗𝑎𝑐𝑜𝑏𝑖𝑎𝑛𝑜𝑓𝑤.𝑟.𝑡.𝑡ℎ𝑒𝑠𝑡𝑎𝑡𝑒𝑠𝑒𝑣𝑎𝑙𝑢𝑎𝑡𝑒𝑑𝑎𝑡𝑡ℎ𝑒𝑛𝑜𝑚𝑖𝑛𝑎𝑙𝑡𝑟𝑎𝑗𝑒𝑐𝑡𝑜𝑟𝑖𝑒𝑠(0)𝑎𝑠 :𝑡𝑟𝑎𝑗𝑒𝑐𝑡𝑜𝑟𝑖𝑒𝑠(0)𝑎𝑠 :
Finally, the output equation may need to be linearized about 0 as well
𝐶(𝑡) =𝜕𝑔
𝜕𝑥
0
=
⎡⎢⎢⎢⎢⎣𝜕𝑔1𝜕𝑥1
𝜕𝑔1𝜕𝑥2
. . . 𝜕𝑔1𝜕𝑥𝑛
𝜕𝑔2𝜕𝑥1
𝜕𝑔2𝜕𝑥2
. . . 𝜕𝑔2𝜕𝑥𝑛
......
. . ....
𝜕𝑓𝑛𝜕𝑥1
𝜕𝑔𝑛𝜕𝑥2
. . . 𝜕𝑔𝑛𝜕𝑥𝑛
⎤⎥⎥⎥⎥⎦0
74 Chapter 3. Huck’s notes

Autonomous Vehicle Control Documentation, Release 0.0.1-rc1
Then the perterbation variables are defined as:
𝛿𝑥(𝑡) = 𝑥(𝑡) − 𝑥0(𝑡)
𝛿𝑢(𝑡) = 𝑢(𝑡) − 𝑢0(𝑡)
𝛿𝑦(𝑡) = 𝑦(𝑡) − 𝑦0(𝑡)
The final linearized system is:
𝛿��(𝑡) = 𝐴(𝑡)𝛿𝑥(𝑡) + 𝐵(𝑡)𝛿𝑢(𝑡)
𝛿𝑦(𝑡) = 𝐶(𝑡)𝛿𝑥(𝑡)
��(𝑡) = 𝐴(𝑡)𝑥(𝑡)
𝑥(𝑡) = Φ(𝑡, 𝑡0)𝑥0
Φ(𝑡, 𝑡0) = 𝑥(𝑡)𝑥(𝑡0)−1
The system is
��(𝑡) = 𝐴(𝑡)𝑥(𝑡) + 𝐵(𝑡)𝑢(𝑡)
𝑦(𝑡) = 𝐶(𝑡)𝑥(𝑡)
𝑥(𝑡0) = 𝑥0
𝑤ℎ𝑒𝑟𝑒𝑡ℎ𝑒𝑠𝑜𝑙𝑢𝑡𝑖𝑜𝑛𝑖𝑠,
𝑥(𝑡) = Φ(𝑡, 𝑡0)𝑥0 +
∫ 𝑡
𝑡0
Φ(𝑡, 𝜏)𝐵(𝜏)𝑢(𝜏) 𝑑𝜏
𝑦(𝑡) = 𝐶(𝑡)Φ(𝑡, 𝑡0)𝑥0 +
∫ 𝑡
𝑡0
𝐶(𝑡)Φ(𝑡, 𝜏)𝐵(𝜏)⏟ ⏞ (𝐺(𝑡,𝜏))
𝑢(𝜏) 𝑑𝜏
The above two equations are called the variation of constants formulas. Theycontain two terms, the first term is the free response which is due tox0𝑎𝑛𝑑𝑡ℎ𝑒𝑠𝑒𝑐𝑜𝑛𝑑𝑡𝑒𝑟𝑚𝑖𝑠𝑡ℎ𝑒forced resonse𝑑𝑢𝑒𝑡𝑜𝑡ℎ𝑒𝑖𝑛𝑝𝑢𝑡𝑢(𝑡).𝐴𝑑𝑑𝑖𝑡𝑖𝑜𝑛𝑎𝑙𝑙𝑦, 𝑡ℎ𝑒impulse response is𝑑𝑒𝑓𝑖𝑛𝑒𝑑𝑎𝑠
The basic equation is:
Φ(𝑡, 𝜏) = 𝑒𝐴(𝑡−𝜏)
𝑊ℎ𝑖𝑐ℎ𝑐𝑎𝑛𝑏𝑒𝑐𝑎𝑙𝑐𝑢𝑙𝑎𝑡𝑒𝑑𝑢𝑠𝑖𝑛𝑔 :
ℒ−1[(𝑠𝐼 −𝐴)−1
]= 𝑒𝐴𝑡
𝐴𝑓𝑡𝑒𝑟𝑡ℎ𝑖𝑠, : 𝑚𝑎𝑡ℎ : ‘𝜏 ‘𝑚𝑢𝑠𝑡𝑏𝑒𝑎𝑑𝑑𝑒𝑑𝑖𝑛, 𝑤ℎ𝑖𝑐ℎ𝑐𝑎𝑛𝑏𝑒𝑑𝑜𝑛𝑒𝑤𝑖𝑡ℎ𝑏𝑦
taking the inverse of Φ(𝜏, 0)𝑡𝑜𝑔𝑒𝑡Φ(0, 𝜏)𝑎𝑛𝑑𝑡ℎ𝑒𝑛𝑚𝑢𝑙𝑡𝑖𝑝𝑙𝑦𝑖𝑛𝑔𝑏𝑦Φ(𝑡, 0)𝑎𝑠 :
The STM is the unique solution to
𝜕
𝜕𝑡(Φ(𝑡, 𝑡0)) = 𝐴(𝑡)Φ(𝑡, 𝑡0)
𝑤𝑖𝑡ℎ𝑖𝑛𝑖𝑡𝑎𝑙𝑐𝑜𝑛𝑑𝑖𝑡𝑖𝑜𝑛𝑠 : 𝑚𝑎𝑡ℎ : ‘Φ(𝑡0, 𝑡0) = 𝐼‘.
To solve:
3.1. Navigation and Guidance of Aerospace Vehicles (AERO 584) 75

Autonomous Vehicle Control Documentation, Release 0.0.1-rc1
• multiply the above matrices out
• take the Laplace Transform of each element in the matrix
• solve the algebreic equation for each Φ𝑖,𝑖(𝑠)
• take the inverse Laplace transfrom to find Φ𝑖,𝑖(𝑡)
Φ(𝑡0, 𝑡0) = 𝐼
Φ(𝑡, 𝑡0)−1 = Φ(𝑡0, 𝑡)
Φ(𝑡, 𝑡0) = Φ(𝑡, 𝑡1)Φ(𝑡1, 𝑡0)
The system Eqn. [eq:sys1] is stable if, given x(t0) = 𝑥0, 𝑥(𝑡)(𝐸𝑞𝑛.[𝑒𝑞 : 𝑠𝑜𝑙1])𝑖𝑠𝑏𝑜𝑢𝑛𝑑𝑒𝑑𝑖𝑠𝑏𝑜𝑢𝑛𝑑𝑒𝑑∀𝑡 ≥𝑡0.𝐼𝑛𝑡ℎ𝑖𝑠𝑐𝑎𝑠𝑒,
may not go to zero. Stability can also be determined by looking at each (i,j) component of the STM as:
|Φ𝑖𝑗(𝑡, 𝑡0)| ≤ 𝑘 < ∞,∀𝑡0 ≤ 𝑡
The system Eqn. [eq:sys1] is asymtotically stable if, given x(t0) = 𝑥0𝑥(𝑡), 𝑥(𝑡)(𝐸𝑞𝑛.[𝑒𝑞 :𝑠𝑜𝑙1])𝑑𝑒𝑐𝑎𝑦𝑠𝑡𝑜𝑧𝑒𝑟𝑜, 𝑡ℎ𝑎𝑡𝑖𝑠 :
The system, Eqn. [eq:sys1], is BIBO stable if when x0 = 0, 𝑡ℎ𝑒𝑓𝑜𝑟𝑐𝑒𝑑𝑜𝑢𝑡𝑝𝑢𝑡𝑟𝑒𝑠𝑝𝑜𝑛𝑠𝑒𝑦(𝑦)𝑡𝑜𝑒𝑣𝑒𝑟𝑦𝑏𝑜𝑢𝑛𝑑𝑒𝑑𝑖𝑛𝑝𝑢𝑡𝑢(𝑡)𝑖𝑠𝑏𝑜𝑢𝑛𝑑𝑒𝑑.𝑇ℎ𝑖𝑠𝑐𝑎𝑛𝑏𝑒𝑑𝑒𝑡𝑒𝑟𝑚𝑖𝑛𝑒𝑑𝑎𝑠 :𝑡ℎ𝑒𝑎𝑏𝑜𝑣𝑒𝑒𝑞𝑢𝑎𝑡𝑖𝑜𝑛𝑟𝑒𝑞𝑢𝑖𝑟𝑒𝑠𝑡ℎ𝑎𝑡𝐺(𝑡, 𝜏)𝑖𝑠ı𝑎𝑏𝑠𝑜𝑙𝑢𝑡𝑒𝑙𝑦𝑖𝑛𝑡𝑒𝑔𝑟𝑎𝑏𝑙𝑒.
Can we estimate a unique x(t0) = 𝑥0, 𝑔𝑖𝑣𝑒𝑛𝑢(𝑡)𝑎𝑛𝑑𝑦(𝑡)𝑜𝑣𝑒𝑟𝑡ℎ𝑒𝑡𝑖𝑚𝑒𝑖𝑛𝑡𝑒𝑟𝑣𝑎𝑙[𝑡0, 𝑡1]?𝐼𝑓𝑤𝑒ℎ𝑎𝑣𝑒𝑥0𝑤𝑒𝑐𝑎𝑛𝑠𝑜𝑙𝑣𝑒
The observability matrix for a LTI system is:
𝒪 =
⎡⎢⎢⎢⎣𝐶𝐶𝐴
...𝐶𝐴𝑛−1
⎤⎥⎥⎥⎦𝑖𝑓𝑡ℎ𝑒 : 𝑚𝑎𝑡ℎ : ‘𝑟𝑎𝑛𝑘(𝒪) = 𝑛‘𝑡ℎ𝑒𝑛𝑡ℎ𝑒𝑠𝑦𝑠𝑡𝑒𝑚𝑖𝑠𝑜𝑏𝑠𝑒𝑟𝑣𝑎𝑏𝑙𝑒.𝑇ℎ𝑒
unobservable states are in the null space of the observability matrix, i.e. Ox0 = 0
Observability Gramian
𝑀(𝑡0, 𝑡1) =
∫ 𝑡1
𝑡0
Φ𝑇 (𝑡, 𝑡0)𝐶𝑇 (𝑡)𝐶(𝑡)Φ𝑇 (𝑡0, 𝑡)𝑑𝑡
𝑎𝑠𝑡𝑎𝑡𝑒 : 𝑚𝑎𝑡ℎ : ‘𝑥0 = 𝑥(𝑡0)‘𝑢𝑛𝑜𝑏𝑠𝑒𝑟𝑣𝑎𝑏𝑙𝑒𝑎𝑡𝑡𝑖𝑚𝑒 : 𝑚𝑎𝑡ℎ : ‘𝑡0‘𝑖𝑓𝑓
𝑀(𝑡0, 𝑡1)𝑥0 = 0,∀𝑡1 > 𝑡0
𝑠𝑜, 𝑡ℎ𝑒𝑢𝑛𝑜𝑏𝑠𝑒𝑟𝑣𝑎𝑏𝑙𝑒𝑠𝑡𝑎𝑡𝑒𝑠𝑎𝑟𝑒𝑖𝑛𝑡ℎ𝑒𝑛𝑢𝑙𝑙 − 𝑠𝑝𝑎𝑐𝑒𝑜𝑓𝑡ℎ𝑒𝑂𝑏𝑠𝑒𝑟𝑣𝑎𝑏𝑖𝑙𝑖𝑡𝑦
Gramian. If the only solution that lives in the null-space is the zero vector x(t0) =0, 𝑡ℎ𝑒𝑛𝑡ℎ𝑒𝑠𝑦𝑠𝑡𝑒𝑚𝑖𝑠𝑐𝑜𝑚𝑝𝑙𝑒𝑡𝑒𝑙𝑦𝑜𝑏𝑠𝑒𝑟𝑣𝑎𝑏𝑙𝑒.𝐴𝑙𝑠𝑜, 𝑛𝑜𝑡𝑒𝑡ℎ𝑎𝑡𝑡ℎ𝑒𝑟𝑖𝑠𝑛𝑜𝑛𝑒𝑒𝑑𝑡𝑜𝑐𝑎𝑟𝑟𝑦𝑜𝑢𝑡𝑡ℎ𝑒𝑐𝑜𝑚𝑝𝑙𝑒𝑡𝑒𝑖𝑛𝑡𝑒𝑔𝑟𝑎𝑙𝑡𝑜𝑠𝑒𝑒𝑡ℎ𝑎𝑡𝑡ℎ𝑒𝑂𝑏𝑠𝑒𝑟𝑣𝑎𝑏𝑖𝑙𝑖𝑡𝑦𝐺𝑟𝑎𝑚𝑖𝑎𝑛𝑤𝑖𝑙𝑙ℎ𝑎𝑣𝑒𝑢𝑛𝑜𝑏𝑠𝑒𝑟𝑣𝑎𝑏𝑙𝑒𝑠𝑡𝑎𝑡𝑒𝑠𝑖𝑛𝑖𝑡𝑠𝑛𝑢𝑙𝑙𝑠𝑝𝑎𝑐𝑒, 𝑖.𝑒.𝑖𝑛𝑡𝑒𝑔𝑟𝑎𝑡𝑖𝑜𝑛𝑑𝑜𝑒𝑠𝑛𝑜𝑡𝑐ℎ𝑎𝑛𝑔𝑒𝑡ℎ𝑒𝑓𝑜𝑟𝑚𝑜𝑓𝑡ℎ𝑒𝑚𝑎𝑡𝑟𝑖𝑥.
A system is controllable if we can find a u(t) that drives the state x(t) from x0𝑖𝑛𝑓𝑖𝑛𝑖𝑡𝑒𝑡𝑖𝑚𝑒𝑡𝑓 .
76 Chapter 3. Huck’s notes

Autonomous Vehicle Control Documentation, Release 0.0.1-rc1
The observability matrix for a LTI system is:
𝒞 =[𝐵 𝐵𝐴 . . . 𝐵𝐴𝑛−1
]𝑖𝑓𝑡ℎ𝑒 : 𝑚𝑎𝑡ℎ : ‘𝑟𝑎𝑛𝑘(𝒞) = 𝑛‘𝑡ℎ𝑒𝑛𝑡ℎ𝑒𝑠𝑦𝑠𝑡𝑒𝑚𝑖𝑠𝑐𝑜𝑛𝑡𝑟𝑜𝑙𝑙𝑎𝑏𝑙𝑒.
Recall that the rank of a matrix is the number of linearly independent columns.
Controllability Gramian
𝑊 (𝑡0, 𝑡1) =
∫ 𝑡1
𝑡0
Φ𝑇 (𝑡, 𝑡0)𝐵(𝑡)𝐵𝑇 (𝑡)Φ𝑇 (𝑡0, 𝑡)𝑑𝑡
𝑡ℎ𝑖𝑠𝑚𝑎𝑡𝑟𝑖𝑥𝑖𝑠𝑎𝑙𝑤𝑎𝑦𝑠𝑠𝑦𝑚𝑒𝑡𝑟𝑖𝑐𝑎𝑛𝑑𝑝𝑜𝑠𝑖𝑡𝑖𝑣𝑒𝑑𝑒𝑓𝑖𝑛𝑖𝑡𝑒.𝑇ℎ𝑒𝑠𝑦𝑠𝑡𝑒𝑚𝑖𝑠
completly controllable if there exists t1 > 𝑡0 : 𝑊 (𝑡0, 𝑡1) > 0.𝐼𝑓𝑡ℎ𝑒𝑠𝑦𝑠𝑡𝑒𝑚𝑖𝑠𝑐𝑜𝑛𝑡𝑟𝑜𝑙𝑙𝑎𝑏𝑙𝑒𝑎𝑡𝑡0, 𝑡ℎ𝑒𝑛𝑜𝑛𝑒𝑐𝑜𝑛𝑡𝑟𝑜𝑙𝑡ℎ𝑎𝑡𝑑𝑟𝑖𝑣𝑒𝑠𝑡ℎ𝑒𝑠𝑡𝑎𝑡𝑒𝑡𝑜𝑡ℎ𝑒𝑜𝑟𝑖𝑔𝑖𝑛𝑖𝑠 :
Given a LTV system as
��(𝑡) = 𝐴(𝑡)𝑥(𝑡) + 𝐵(𝑡)𝑢(𝑡)
𝑦(𝑡) = 𝐶(𝑡)𝑥(𝑡)
𝑖𝑡𝑠𝑑𝑢𝑎𝑙𝑠𝑦𝑠𝑡𝑒𝑚𝑖𝑠
��(𝑡) = −𝐴𝑇 (𝑡)𝑥(𝑡) + 𝐶𝑇 (𝑡)𝑢(𝑡)
𝑦(𝑡) = 𝐵𝑇 (𝑡)𝑥(𝑡)
𝑇ℎ𝑒𝑐𝑜𝑛𝑡𝑟𝑜𝑙𝑙𝑎𝑏𝑙𝑒(𝑜𝑟𝑢𝑛𝑐𝑜𝑛𝑡𝑟𝑜𝑙𝑙𝑎𝑏𝑙𝑒)𝑠𝑡𝑎𝑡𝑒𝑠𝑜𝑓𝑜𝑛𝑒𝑠𝑦𝑠𝑡𝑒𝑚𝑎𝑟𝑒𝑡ℎ𝑒
observable (or unobservable) states of the other system.
If x is a random vector with a PDF f(x) and g:R𝑛 → R𝑚𝑖𝑠𝑎𝑓𝑢𝑛𝑐𝑡𝑖𝑜𝑛𝑜𝑓𝑥
�� = 𝐸[𝑥] =
∫R𝑛
𝑥𝑓(𝑥) 𝑑𝑥 ∈ R𝑛
𝑃𝑥𝑥 = 𝐸[(𝑥− ��)(𝑥− ��)𝑇 ]
=
∫R𝑛
(𝑥− ��)(𝑥− ��)𝑇 𝑓(𝑥) 𝑑𝑥 ∈ R𝑛𝑥𝑛
Note: the covariance matrix is symmetric as well as positive semidefinite, so
∀𝑣 ∈ R𝑛, 𝑣𝑇𝑃𝑥𝑣 ≥ 0
𝑇ℎ𝑢𝑠,
𝑣𝑇𝑃𝑥𝑣 =
∫𝑅𝑛
𝑣𝑇 (𝑥− ��)(𝑥− ��)𝑇 𝑣𝑓(𝑥) 𝑑𝑥
=
∫𝑅𝑛
(𝑥− ��)2𝑓(𝑥) 𝑑𝑥 ≥ 0
If x1 and x2 are subvectors of x
𝑃𝑥1𝑥2= 𝐸[(𝑥1 − 𝑥1)(𝑥2 − 𝑥2)𝑇 ]
=
∫R𝑛
(𝑥1 − 𝑥1)(𝑥2 − 𝑥2)𝑇 𝑓(𝑥) 𝑑𝑥 ∈ R𝑛1𝑥𝑛2
3.1. Navigation and Guidance of Aerospace Vehicles (AERO 584) 77

Autonomous Vehicle Control Documentation, Release 0.0.1-rc1
𝑃+ = ((𝑃−)−1 + 𝐶𝑇𝑅−1𝐶)−1
The relative likelyhood that a random variable x will take on vaules on a given interval.
𝐴𝑟𝑒𝑎 = 𝑃 (𝑎 ≤ 𝑥 ≤ 𝑏) =
∫ 𝑏
𝑎
𝑓𝑥(𝑥)𝑑𝑥
If you integrate over the PDF over the entire range then it must equal 1 and the PDF must always be greater than 0.∫R𝑓𝑥𝑑𝑥 = 1∀𝑥, 𝑓𝑥(𝑥) ≥ 0
For a PDF uniformly distributed over [a,b], f(x)=constant=c. c can then be determined by∫ 𝑏
𝑎𝑐𝑑𝑥 =
1𝑤ℎ𝑖𝑐ℎ𝑟𝑒𝑠𝑢𝑙𝑡𝑠𝑖𝑛𝑓(𝑥) = 1𝑏−𝑎 .
Given the joint PDF f𝑥(𝑥) = 𝑓𝑥(𝑥1, 𝑥2), 𝑡ℎ𝑒𝑚𝑎𝑟𝑔𝑖𝑛𝑎𝑙𝑃𝐷𝐹𝑜𝑓𝑥1𝑖𝑠 :
𝜑𝑥(𝑠)𝑖𝑠𝑢𝑠𝑒𝑓𝑢𝑙𝑡𝑜𝑐𝑜𝑚𝑝𝑢𝑡𝑒𝑡ℎ𝑒𝑃𝐷𝐹𝑓𝑜𝑟𝑥𝑎𝑛𝑑𝑡ℎ𝑒𝐺𝑎𝑢𝑠𝑠𝑖𝑎𝑛𝑑𝑖𝑠𝑡𝑟𝑖𝑏𝑢𝑡𝑖𝑜𝑛.𝑇ℎ𝑒𝑒𝑥𝑝𝑒𝑐𝑡𝑒𝑑𝑣𝑎𝑙𝑢𝑒𝑐𝑎𝑛𝑏𝑒𝑢𝑠𝑒𝑑𝑡𝑜𝑐𝑎𝑙𝑐𝑢𝑙𝑎𝑡𝑒𝑡ℎ𝑒𝑐ℎ𝑎𝑟𝑎𝑐𝑡𝑒𝑟𝑖𝑠𝑡𝑖𝑐𝑓𝑢𝑛𝑐𝑡𝑖𝑜𝑛𝑎𝑠 :𝑛
The statistal properties of x are equivalently specified by PDF f(x) or by the characteristic function 𝜑𝑥(𝑠).
Similar to a Fourier Transform 𝜑𝑥(𝑠)𝑐𝑎𝑛𝑏𝑒𝑝𝑢𝑡𝑏𝑎𝑐𝑘𝑖𝑛𝑡𝑜𝑡ℎ𝑒𝑡𝑖𝑚𝑒𝑑𝑜𝑚𝑎𝑖𝑛𝑤𝑖𝑡ℎ :
If the following equations are true, then the PDF’s are independent.
𝑓(𝑥, 𝑦) = 𝑓𝑥(𝑥)𝑓𝑦(𝑦)
𝜑𝑥𝑦(𝑠, 𝑟) = 𝜑𝑥(𝑠)𝜑𝑦(𝑟)
If x and y are independent, the conditional density function and conditional mean satisfy:
𝑓(𝑥|𝑦) =𝑓(𝑥, 𝑦)
𝑓𝑦(𝑦)=
𝑓𝑥(𝑥)𝑓𝑦(𝑦)
𝑓𝑦(𝑦)= 𝑓𝑥(𝑥)
𝐸[𝑥|𝑦] =
∫R𝑛
𝑥𝑓𝑥(𝑥) 𝑑𝑥 = 𝐸[𝑥] = ��
If x and y are independent, then they are uncorrelated. But, if they are uncorrelated, they may not be independent!If x and y are uncorrelated, then they satisfy:
𝐸[𝑥𝑦𝑇 ] = 𝐸[𝑥]𝐸[𝑦𝑇 ]
If x and y are uncorrelated, the cross-covariances must be zero:
𝑃𝑥𝑦 = 𝐸[(𝑥− ��)(𝑦 − 𝑦)𝑡]
= 𝐸[𝑥𝑦𝑇 − 𝑥𝑦𝑇 − ��𝑦 + ��𝑦𝑇 ]
= 𝐸[𝑥𝑦𝑇 ] − 𝐸[𝑥]𝑦𝑇 − ��𝐸[𝑦𝑇 ] + ��𝑦𝑇
= 𝐸[𝑥𝑦𝑇 ] − ��𝑦𝑇 − ��𝑦𝑇 + ��𝑦𝑇
= 𝐸[𝑥𝑦𝑇 ] − ��𝑦𝑇 = 0
Why model the probablity densit function as a Gaussian (or normal) distribution:
78 Chapter 3. Huck’s notes

Autonomous Vehicle Control Documentation, Release 0.0.1-rc1
• provides a good statistical model for many natural phenomina
• computationally tractable because the statistical properties are described completely by first (mean, ) and second(variance, P) moments
• normality is preserved through linear transforms (both static and dynamic)
A random vector x ∈ R𝑛𝑖𝑠𝐺𝑎𝑢𝑠𝑠𝑖𝑎𝑛𝑑𝑖𝑠𝑡𝑟𝑖𝑏𝑢𝑡𝑒𝑑𝑜𝑟𝑛𝑜𝑟𝑚𝑎𝑙𝑖𝑓𝑡ℎ𝑒𝑐ℎ𝑎𝑟𝑎𝑐𝑡𝑒𝑟𝑖𝑠𝑡𝑖𝑐𝑓𝑢𝑛𝑐𝑡𝑖𝑜𝑛ℎ𝑎𝑠𝑡ℎ𝑒𝑓𝑜𝑟𝑚 : 𝑃 = [(𝑥−��)(𝑥− ��)𝑇 ].
For such a random vector, we use the notation x=N(,P).
Two vectors x and y are jointly Gaussian distributed if (x𝑇 , 𝑦𝑇 )𝑖𝑠𝐺𝑎𝑢𝑠𝑠𝑖𝑎𝑛.
When a random vector x is Gaussian and it’s covariance matrix P𝑥𝑖𝑠𝑛𝑜𝑛𝑠𝑖𝑛𝑔𝑢𝑙𝑎𝑟, 𝑖𝑡′𝑠𝑃𝐷𝐹𝑐𝑎𝑛𝑏𝑒𝑒𝑣𝑎𝑙𝑢𝑎𝑡𝑒𝑑𝑤𝑖𝑡ℎ :
If P𝑥𝑖𝑠𝑠𝑖𝑛𝑔𝑢𝑙𝑎𝑟, 𝑡ℎ𝑒𝑛𝑡ℎ𝑒𝑎𝑏𝑜𝑣𝑒𝑒𝑞𝑢𝑎𝑡𝑖𝑜𝑛𝑤𝑖𝑙𝑙𝑛𝑜𝑡𝑤𝑜𝑟𝑘, 𝑏𝑢𝑡𝑡ℎ𝑒𝑐ℎ𝑎𝑟𝑎𝑐𝑡𝑒𝑟𝑖𝑠𝑡𝑖𝑐𝑓𝑢𝑛𝑐𝑡𝑖𝑜𝑛𝑐𝑎𝑛𝑑𝑒𝑓𝑖𝑛𝑒𝑡ℎ𝑒𝐺𝑎𝑢𝑠𝑠𝑖𝑎𝑛𝑑𝑖𝑠𝑡𝑟𝑖𝑏𝑢𝑡𝑖𝑜𝑛𝑖𝑛𝑑𝑖𝑟𝑒𝑐𝑡𝑙𝑦.
In a random process, we are looking at a family of random vectors (x(t),t∈ 𝐼)𝑖𝑛𝑑𝑒𝑥𝑒𝑑𝑏𝑦𝑡𝑖𝑚𝑒.
𝑃 (𝑡, 𝜏) = 𝐸[(𝑥(𝑡) − ��(𝑡))(𝑥(𝑡) − ��(𝑡))𝑇 ], 𝑡 ∈ 𝐼
For two random processes x(t) and y(t)
𝑃𝑥𝑦(𝑡, 𝜏) = 𝐸[(𝑥(𝑡) − ��(𝑡))(𝑦(𝑡) − 𝑦(𝑡))𝑇 ], 𝑡 ∈ 𝐼
Which satisfies:
𝑃 (𝑡) = 𝐸[𝑥(𝑡)𝑥𝑇 (𝑡)] − ��(𝑡)��𝑇 (𝑡)
Which satisfies:
𝑃𝑥𝑦(𝑡) = 𝐸[𝑥(𝑡)𝑦𝑇 (𝑡)] − ��(𝑡)𝑦𝑇 (𝑡)
todo..
todo..
This section combines the ideas of Gaussian distribution and random process
• a random process is x(t) is Gaussian if all of the vectors x1(𝑡), . . . 𝑥𝑛(𝑡)𝑎𝑟𝑒𝑗𝑜𝑖𝑛𝑡𝑙𝑦𝐺𝑎𝑢𝑠𝑠𝑖𝑎𝑛
• a Gaussian random process is white if the vectors x(t1), . . . 𝑥(𝑡𝑚)𝑎𝑟𝑒𝑖𝑛𝑑𝑒𝑝𝑒𝑛𝑑𝑒𝑛𝑡, 𝑜𝑡ℎ𝑒𝑟𝑤𝑖𝑠𝑒𝑖𝑡𝑖𝑠colored
• for a Gaussian and white process, the covariance kernal satisfies
𝑃 (𝑡, 𝜏) = 0, 𝑡 = 𝜏
𝑃 (𝑡, 𝜏) = 𝑄(𝑡)𝛿(𝑡− 𝜏)
• a random process is Markov if
𝑓(𝑥(𝑡𝑚)|𝑥(𝑡𝑚−1), ..., 𝑥(𝑡1)) = 𝑓(𝑥(𝑡𝑚)|𝑥(𝑡𝑚−1))
• a random process is Gauss-Markov if it is both Gauss and Markov
3.1. Navigation and Guidance of Aerospace Vehicles (AERO 584) 79

Autonomous Vehicle Control Documentation, Release 0.0.1-rc1
The standard model is:
��(𝑡) = 𝐴(𝑡)𝑥(𝑡) + 𝐵(𝑡)𝑢(𝑡) + 𝑤(𝑡), 𝑡 ≥ 𝑡0
𝑦(𝑡) = 𝐶(𝑡)𝑥(𝑡) + 𝑣(𝑡)
1. the intial condition x(t0)𝑖𝑠𝐺𝑎𝑢𝑠𝑠𝑖𝑎𝑛
the disturbance w(t) is a zero-mean, Gaussian, white process that is independent ofx(t0)𝑐𝑜𝑣𝑎𝑟𝑖𝑎𝑛𝑐𝑒𝜎𝑤𝑔𝑖𝑣𝑒𝑛𝑓𝑜𝑟𝑡ℎ𝑒𝑠𝑒𝑐𝑜𝑛𝑑𝑠𝑡𝑎𝑡𝑒𝑣𝑎𝑟𝑖𝑎𝑏𝑙𝑒𝑡ℎ𝑒𝑛
the measurment noinse v(t) is a zero-mean, Gaussian, white process that is independent of x(t0)
the processes v(t) and w(t) are uncorrelated
𝐸[𝑤(𝑡)𝑣𝑇 (𝑡)] = 0
With the standard model and assumptions, the process x(t) is Markov.
Recall the variation of consants formula:
𝑥(𝑡) = Φ(𝑡, 𝑡0)𝑥(𝑡0) +
∫ 𝑡
𝑡0
Φ(𝑡, 𝜏)𝐵(𝜏)𝑢(𝜏)𝑑𝜏 + ...
+
∫ 𝑡
𝑡0
Φ(𝑡, 𝜏)𝑤(𝜏)𝑑𝜏
𝑇ℎ𝑒𝑛,
𝑥(𝑡𝑚) = Φ(𝑡𝑚, 𝑡𝑚−1)𝑥(𝑡𝑚−1) + ...
+
∫ 𝑡𝑚
𝑡𝑚−1
Φ(𝑡𝑚, 𝜏)(𝐵(𝜏)𝑢(𝜏) + 𝑤(𝜏))𝑑𝜏
𝑁𝑜𝑡𝑖𝑐𝑒𝑡ℎ𝑎𝑡𝑡ℎ𝑒𝑟𝑒𝑠𝑢𝑙𝑡𝑠𝑑𝑜𝑒𝑠𝑛𝑜𝑡𝑑𝑒𝑝𝑒𝑛𝑑𝑜𝑛 : 𝑚𝑎𝑡ℎ : ‘𝑥(𝜏)‘,
𝜏 < 𝑡𝑚−1.
Also refered to as the expected value.
��(𝑡) = Φ(𝑡, 𝑡0)��(𝑡0) +
∫ 𝑡
𝑡0
Φ(𝑡, 𝜏)𝐵(𝜏)𝑢(𝜏)𝑑𝜏
𝑦(𝑡) = 𝐸[𝐶(𝑡)𝑥(𝑡) + 𝑣(𝑡)] = 𝐶(𝑡)��(𝑡)
Using x(t)-(t) we can define:
𝑃 (𝑡) = Φ(𝑡, 𝑡0)𝑃 (𝑡0)Φ𝑇 (𝑡, 𝑡0) +
∫ 𝑡
𝑡0
Φ(𝑡, 𝜏)𝑅𝑤(𝜏)Φ𝑇 (𝑡, 𝜏)𝑑𝜏
𝑇ℎ𝑒𝑎𝑏𝑜𝑣𝑒𝑒𝑞𝑢𝑎𝑡𝑖𝑜𝑛𝑎𝑙𝑠𝑜𝑠𝑎𝑡𝑖𝑠𝑓𝑖𝑒𝑠𝑡ℎ𝑒𝐿𝑦𝑎𝑝𝑢𝑛𝑜𝑣𝐸𝑞𝑢𝑎𝑡𝑖𝑜𝑛.
80 Chapter 3. Huck’s notes

Autonomous Vehicle Control Documentation, Release 0.0.1-rc1
For the output y(t):
𝑃𝑦(𝑡) = 𝐶(𝑡)𝑃 (𝑡)𝐶𝑇 (𝑡) + 𝑅𝑣(𝑡)
with the standard model and assumptions, the covariance matrix satisfies:
�� (𝑡) = 𝐴(𝑡)𝑃 (𝑡) + 𝑃 (𝑡)𝐴𝑇 (𝑡) + 𝑅𝑤(𝑡)
𝑊ℎ𝑖𝑐ℎ𝑐𝑎𝑛𝑏𝑒𝑑𝑒𝑟𝑖𝑣𝑒𝑑𝑢𝑠𝑖𝑛𝑔𝑡ℎ𝑒 * *𝐿𝑒𝑖𝑏𝑛𝑖𝑧𝐼𝑛𝑡𝑒𝑔𝑟𝑎𝑙𝑅𝑢𝑙𝑒 * *.
To find the steady state covariance matrix:
• set (t)=0
• then solve for P𝑠𝑠
• this will require a computer!
For the state x(t):
𝑃𝑥(𝑡, 𝜏) = Φ(𝑡, 𝑡0)𝑃 (𝑡0)Φ𝑇 (𝑡, 𝑡0) +
∫ 𝑡
𝑡0
Φ(𝑡, 𝜎)𝑅𝑤(𝜎)Φ𝑇 (𝑡, 𝜎)𝑑𝜎
For the output y(t):
𝑃𝑦(𝑡, 𝜏) = 𝐶(𝑡)Φ(𝑡, 𝑡0)𝑃 (𝑡0)Φ𝑇 (𝑡, 𝑡0)𝐶𝑇 (𝜏)+∫ 𝑡
𝑡0
𝐶(𝑡)Φ(𝑡, 𝜎)𝑅𝑤(𝜎)Φ𝑇 (𝑡, 𝜎)𝐶𝑇 (𝜏)𝑑𝜎 + 𝑅𝑣(𝑡)𝛿(𝑡− 𝜏)
After evaluating f(x,y) 𝑓𝑦(𝑦),𝑡ℎ𝑒𝑟𝑒𝑠𝑢𝑙𝑡𝑖𝑠𝑃𝐷𝐹𝑜𝑓𝑎𝐺𝑢𝑎𝑠𝑠𝑖𝑎𝑛𝑣𝑒𝑐𝑡𝑜𝑟𝑑𝑒𝑓𝑖𝑛𝑒𝑑𝑎𝑠:
𝑃𝑥|𝑦 = 𝑃𝑥 + 𝑃𝑥𝑦𝑃−1𝑦 𝑃𝑦𝑥
Basic estimation procedure is:
1. determine − = ��𝑤ℎ𝑖𝑐ℎ𝑖𝑠𝑎𝑛𝑒𝑠𝑡𝑖𝑚𝑎𝑡𝑒𝑜𝑓𝑡ℎ𝑒𝑠𝑡𝑎𝑡𝑒
2. based off of state equations
3. affected by state uncertainty, w(t)
collect measurments from output equation y(t)
update estimate of state (−)𝑏𝑎𝑠𝑒𝑑𝑜𝑓𝑓𝑜𝑓𝑛𝑒𝑤𝑖𝑛𝑓𝑜𝑓𝑟𝑜𝑚𝑦(𝑡)
based off of output equation
affected by sensor uncertainty, v(t)
Measurments are incorporated simultaneously.
��+ = ��− + 𝑘(𝑧 − 𝐶��−)
𝑃+ = 𝑃−𝐶𝑇 (𝐶𝑃−𝐶𝑇 + 𝑅)−1
𝑤ℎ𝑒𝑟𝑒, : 𝑚𝑎𝑡ℎ : ‘𝑘 = 𝑃−𝐶𝑇 (𝐶𝑃−𝐶𝑇 + 𝑅)−1‘𝑜𝑟𝑖𝑛𝑎𝑛𝑎𝑙𝑔𝑒𝑏𝑟𝑎𝑖𝑐𝑎𝑙𝑙𝑦
equivalent form,
��+ = (𝑃+(𝑃−)−1)��− + (𝑃+𝐶𝑇𝑅−1)𝑧
𝑃+ = ((𝑃−)−1 + 𝐶𝑇𝑅−1𝐶)−1
𝑤ℎ𝑒𝑟𝑒 : 𝑚𝑎𝑡ℎ : ‘𝑅‘𝑖𝑠𝑡ℎ𝑒𝑐𝑜𝑣𝑎𝑟𝑖𝑎𝑛𝑐𝑒𝑜𝑓𝑡ℎ𝑒𝑠𝑒𝑛𝑠𝑜𝑟𝑚𝑒𝑎𝑠𝑢𝑟𝑚𝑒𝑛𝑡𝑓𝑟𝑜𝑚
3.1. Navigation and Guidance of Aerospace Vehicles (AERO 584) 81

Autonomous Vehicle Control Documentation, Release 0.0.1-rc1
y(t)
also note: z=y
Measurments are incorporated recursively.
82 Chapter 3. Huck’s notes